Copyright 2010 by Ruthann Logsdon Zaroff for Mirkwood Designs.This project is for personal use only and may not be sold or otherwise distributed without this copyright information.
MirkwoodDesigns.com
Washi Egg (Page 1 of 2)
This is a really easy traditional Japanese craft.
Display your washi
eggs on decorative stands,or fill a bowl or large vase
with as many as you can make!
Copyright 2010 by Ruthann Logsdon Zaroff for Mirkwood Designs.This project is for personal use only and may not be sold or otherwise distributed without this copyright information.
MirkwoodDesigns.com
Washi Egg (Page 2 of 2)Supplies• 1 egg (or you can use a wooden egg)• Small drill or large needle (to make holes in
the egg)• 1 6-inch square of washi paper (or you can
use wrapping paper) Note: Washi is a fibrous origami paper traditionally made from the bark of the paper mulberry.
• Scissors• Pencil• Ruler• Soft measuring tape (or you can use a piece
of string or ribbon to measure)• Decoupage medium (I like Mod Podge gloss)• Brush
Directions
1. Wash the egg with soap. Make small holes in either end of the egg. Use the needle to poke around inside the egg to break the yolk. Blow the inside of the egg into a small bowl and refrigerate for later use.
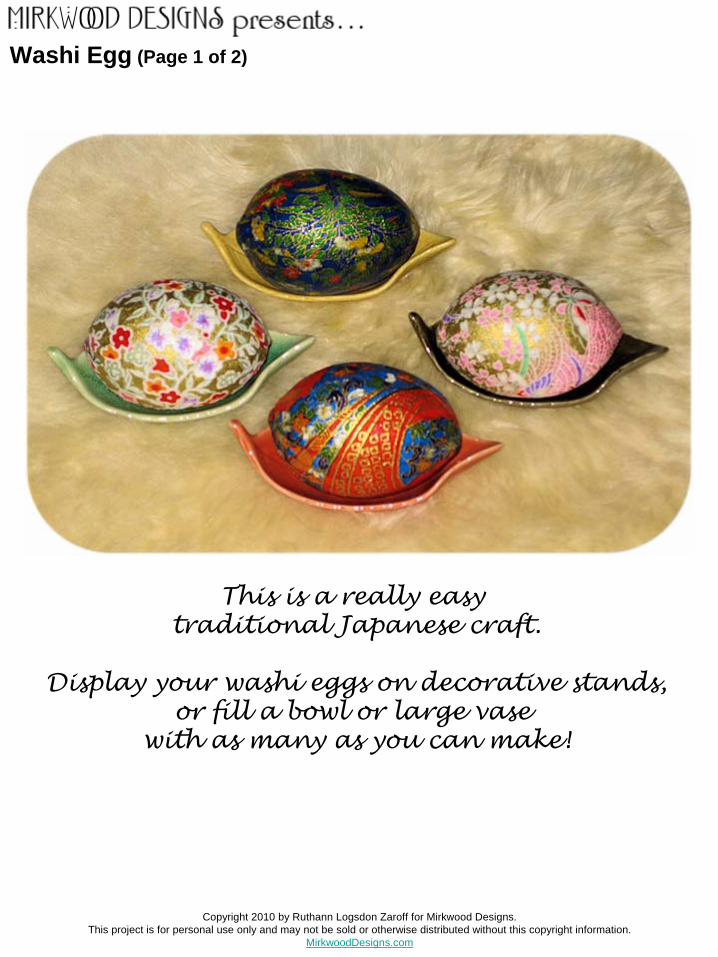
2. Measure the egg from north pole to south pole (a) and around the equator (b) and cut the washi paper that measurement. (Figure 1.) (My eggs measured about 3.25 x 5.75 inches.)
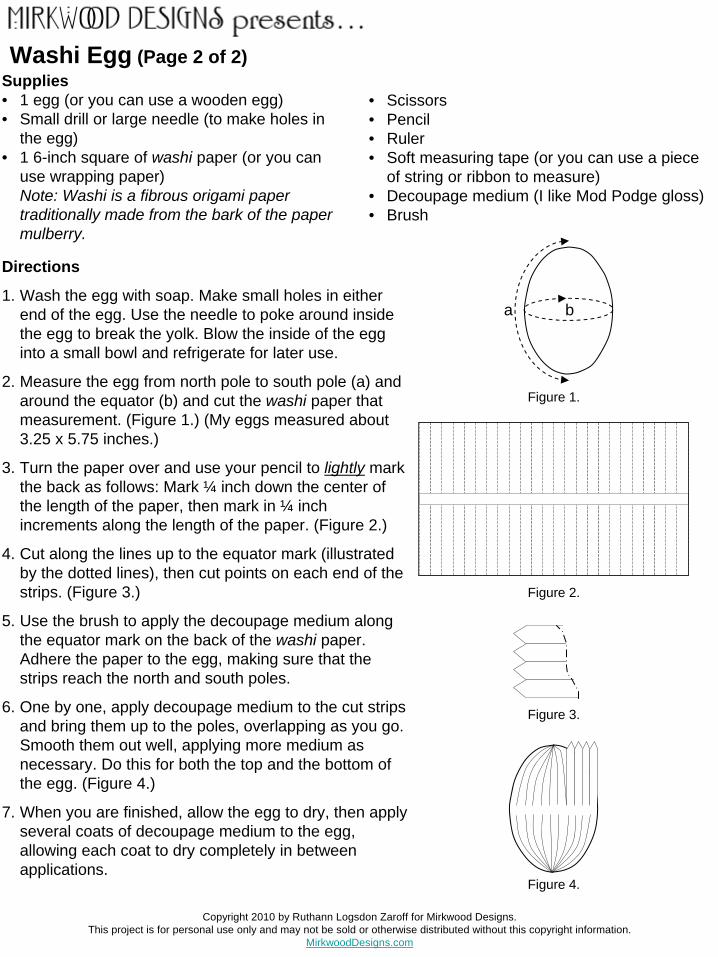
3. Turn the paper over and use your pencil to lightly mark the back as follows: Mark ¼ inch down the center of the length of the paper, then mark in ¼ inch increments along the length of the paper. (Figure 2.)
4. Cut along the lines up to the equator mark (illustrated by the dotted lines), then cut points on each end of the strips. (Figure 3.)
5. Use the brush to apply the decoupage medium along the equator mark on the back of the washi paper. Adhere the paper to the egg, making sure that the strips reach the north and south poles.
6. One by one, apply decoupage medium to the cut strips and bring them up to the poles, overlapping as you go. Smooth them out well, applying more medium as necessary. Do this for both the top and the bottom of the egg. (Figure 4.)
7. When you are finished, allow the egg to dry, then apply several coats of decoupage medium to the egg, allowing each coat to dry completely in between applications.
a b
Figure 1.
Figure 2.
Figure 3.
Figure 4.
Recommended