Hanthana 21 Installation Guide
Introduction
This guide helps you to get started with installing Hanthana Linux 21.
System requirements
Following minimum requirements should be full flled to install Hanthana
Linux 21.
• CD or DVD drive
• 1 GHz processor
• 1GB RAM
• 20GB free hard disk space
Getting a Hanthana Linux 21 copy
You can either download a copy from www . hanthana . org or can get a copy
from a volunteer distributor for free by visiting http :// www . hanthana . org / get -
dvd . php .
Data backup
Before the installation, please backup your data.
Confgure your computer to boot from wither CD/DVD drive or
from a bootable USB drive.
Enter to your computer's BIOS settings and from the Boot Device, choose
the CD/DVD drive or USB Drive (depending on the media you use to
install Hanthana Linux) as the First Boot Device.
Now you are ready to install Hanthana Linux 21 (Sinharaja).
Since the installation is from a DVD, it will take some time (time
taken to read the DVD and based on the performance of the
computer) to proceed from one step to the other. Please be patient
until the next step loads so that you will be able to continue with the
installation without any issues.
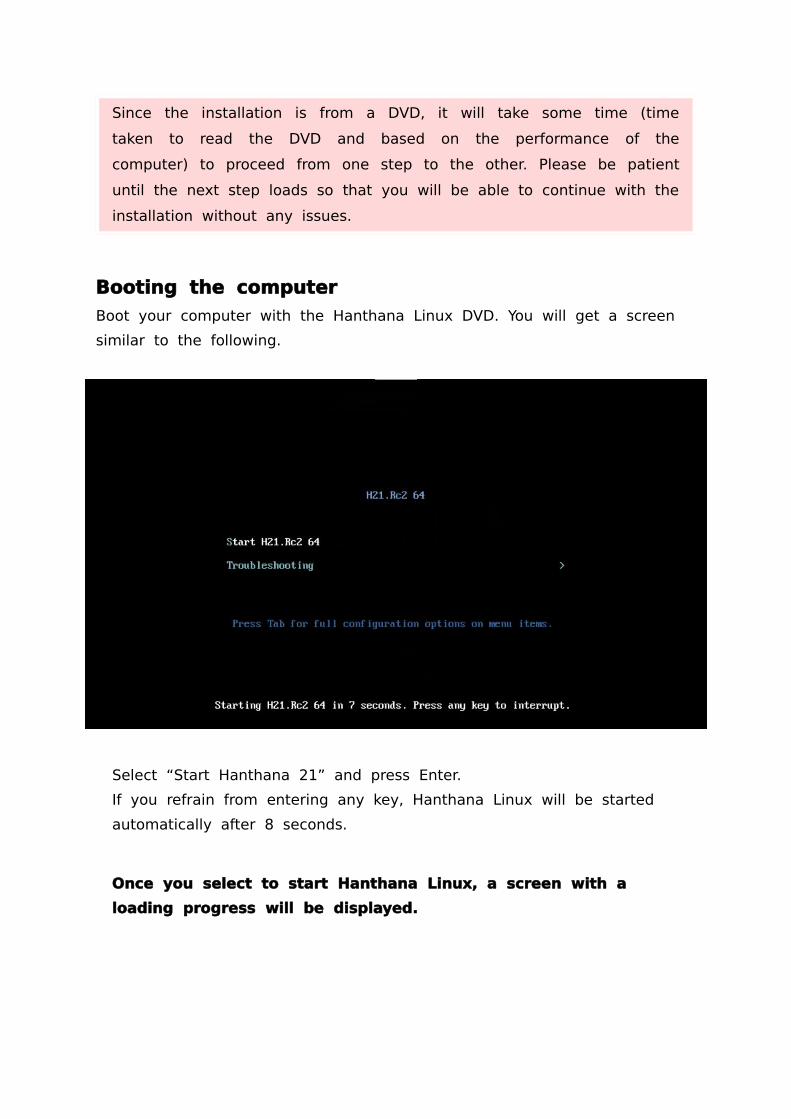
Booting the computer
Boot your computer with the Hanthana Linux DVD. You will get a screen
similar to the following.
Select “Start Hanthana 21” and press Enter.
If you refrain from entering any key, Hanthana Linux will be started
automatically after 8 seconds.
Once you select to start Hanthana Linux, a screen with a
loading progress will be displayed.
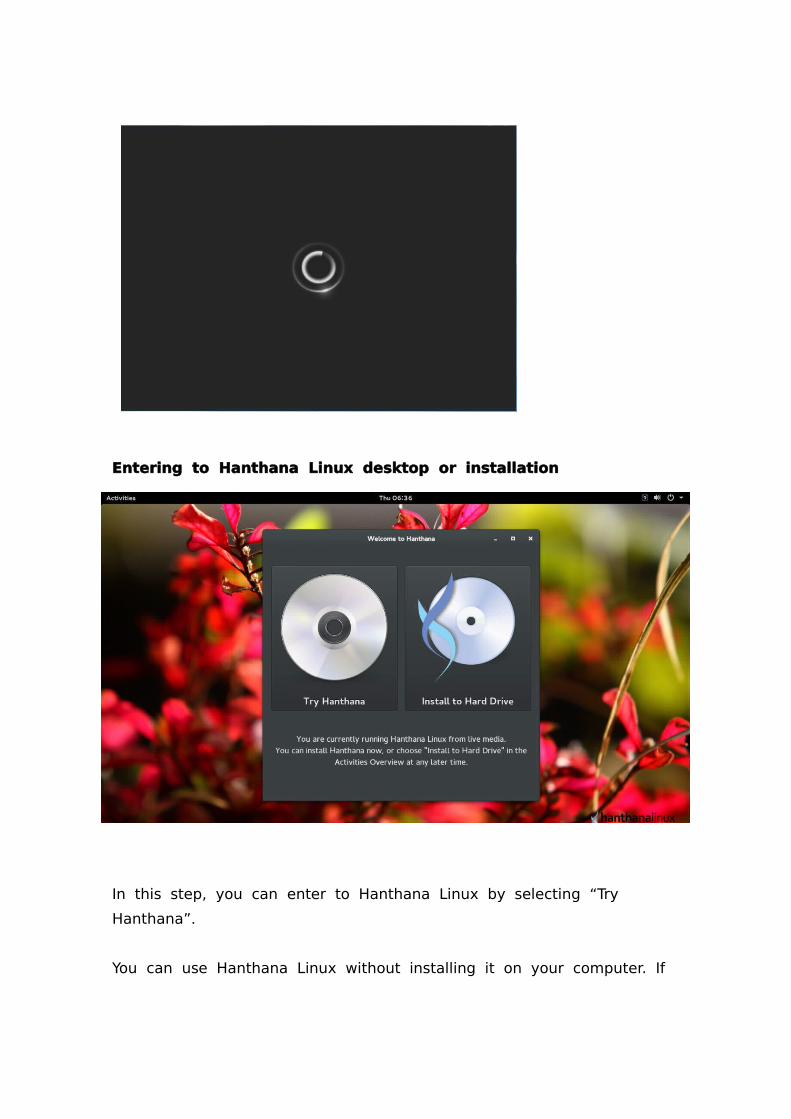
Entering to Hanthana Linux desktop or installation
In this step, you can enter to Hanthana Linux by selecting “Try
Hanthana”.
You can use Hanthana Linux without installing it on your computer. If
you are new to Linux operating systems, it is recommended that frst
you try the operating system in live CD.
If you wish to install the system, select “Install to Hard Drive”.
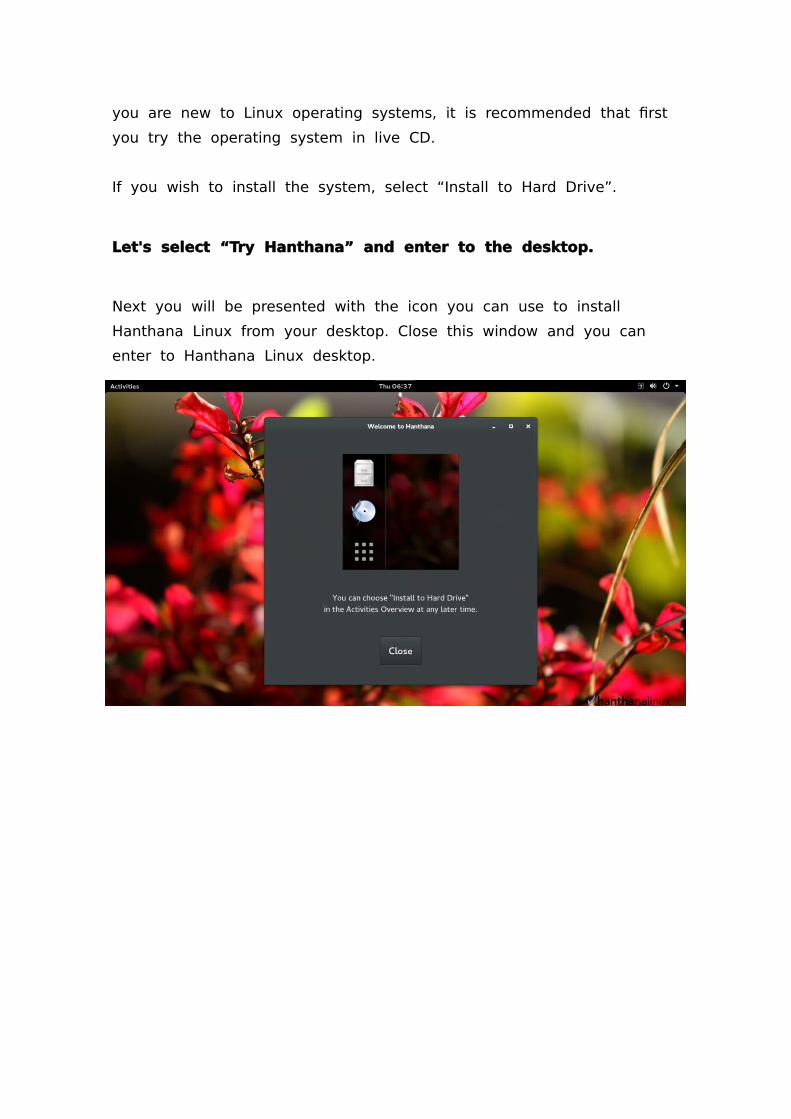
Let's select “Try Hanthana” and enter to the desktop.
Next you will be presented with the icon you can use to install
Hanthana Linux from your desktop. Close this window and you can
enter to Hanthana Linux desktop.
Entering Hanthana Linux
By entering to Hanthana Linux desktop, you have the opportunity to
use the operating system.
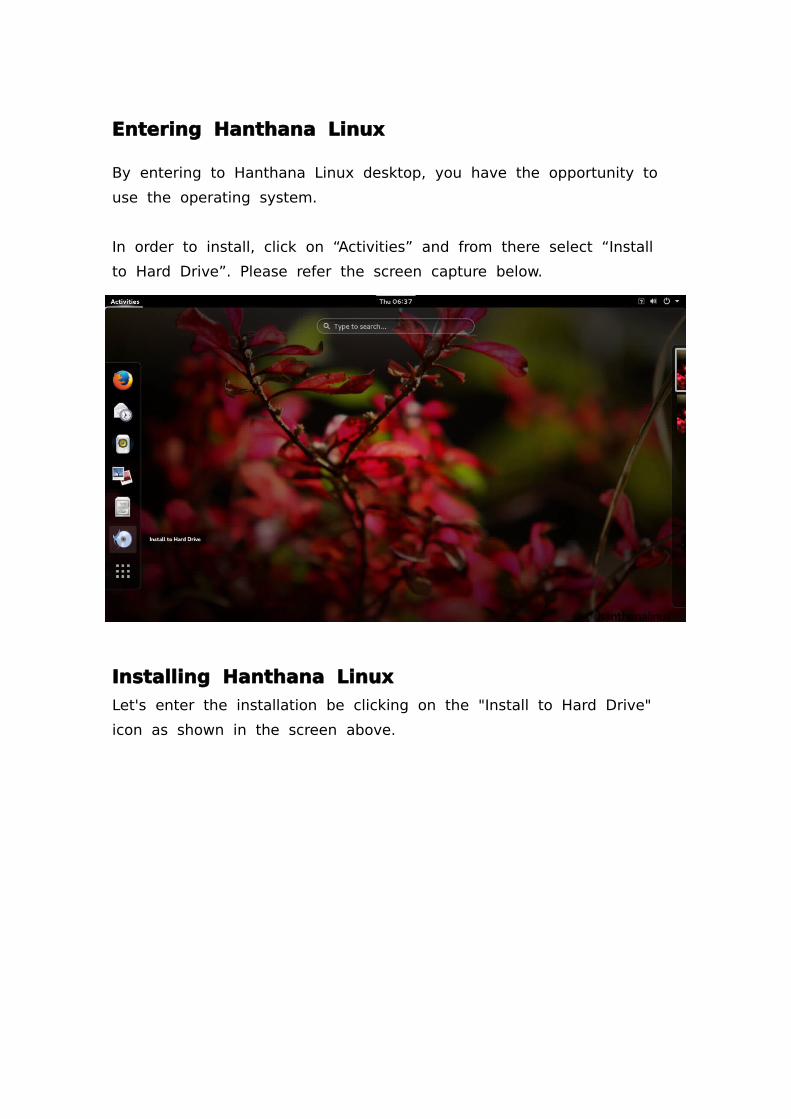
In order to install, click on “Activities” and from there select “Install
to Hard Drive”. Please refer the screen capture below.
Installing Hanthana Linux
Let's enter the installation be clicking on the "Install to Hard Drive"
icon as shown in the screen above.
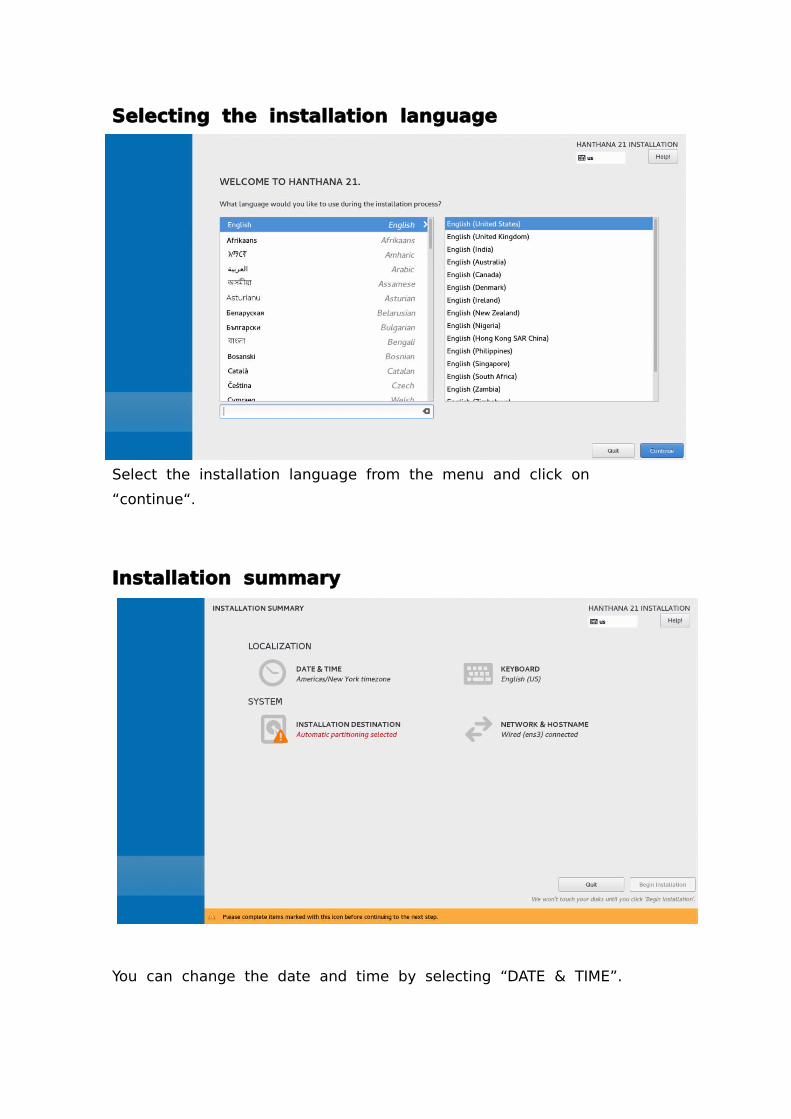
Selecting the installation language
Select the installation language from the menu and click on
“continue“.
Installation summary
You can change the date and time by selecting “DATE & TIME”.
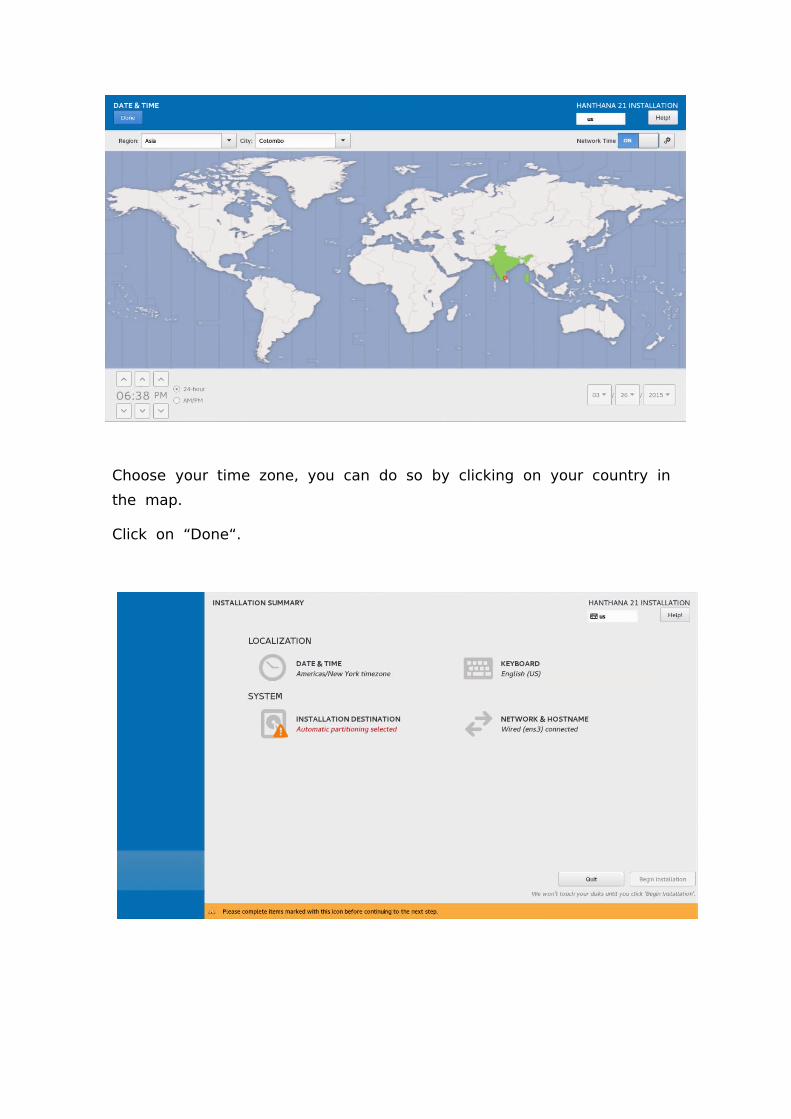
Choose your time zone, you can do so by clicking on your country in
the map.
Click on “Done“.
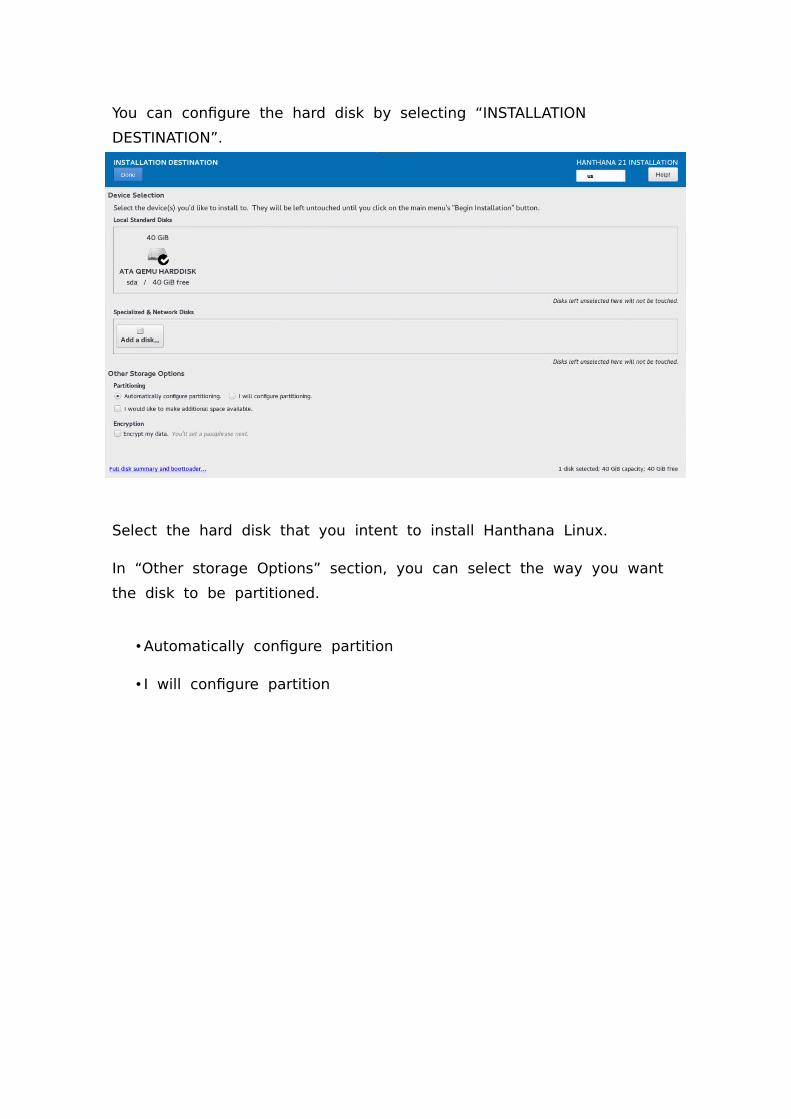
You can confgure the hard disk by selecting “INSTALLATION
DESTINATION”.
Select the hard disk that you intent to install Hanthana Linux.
In “Other storage Options” section, you can select the way you want
the disk to be partitioned.
• Automatically confgure partition
• I will confgure partition
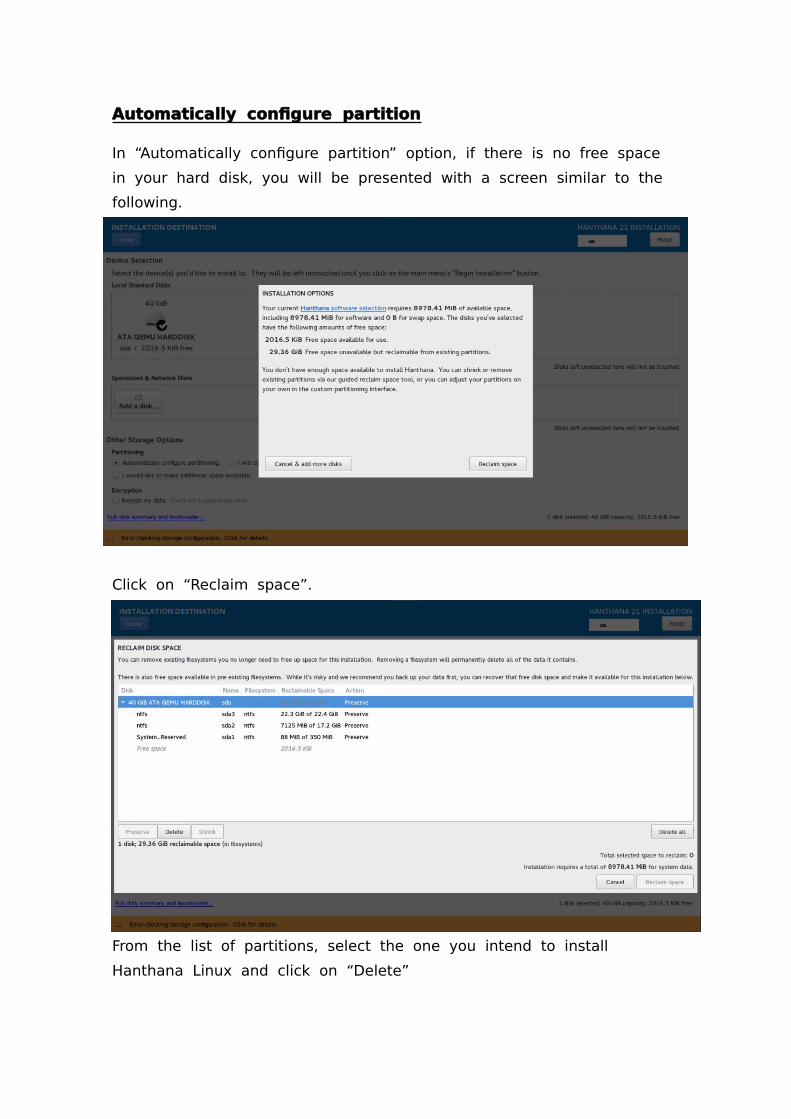
Automatically confgure partition
In “Automatically confgure partition” option, if there is no free space
in your hard disk, you will be presented with a screen similar to the
following.
Click on “Reclaim space”.
From the list of partitions, select the one you intend to install
Hanthana Linux and click on “Delete”
Next, click on “Reclaim space”.
I will confgure partition
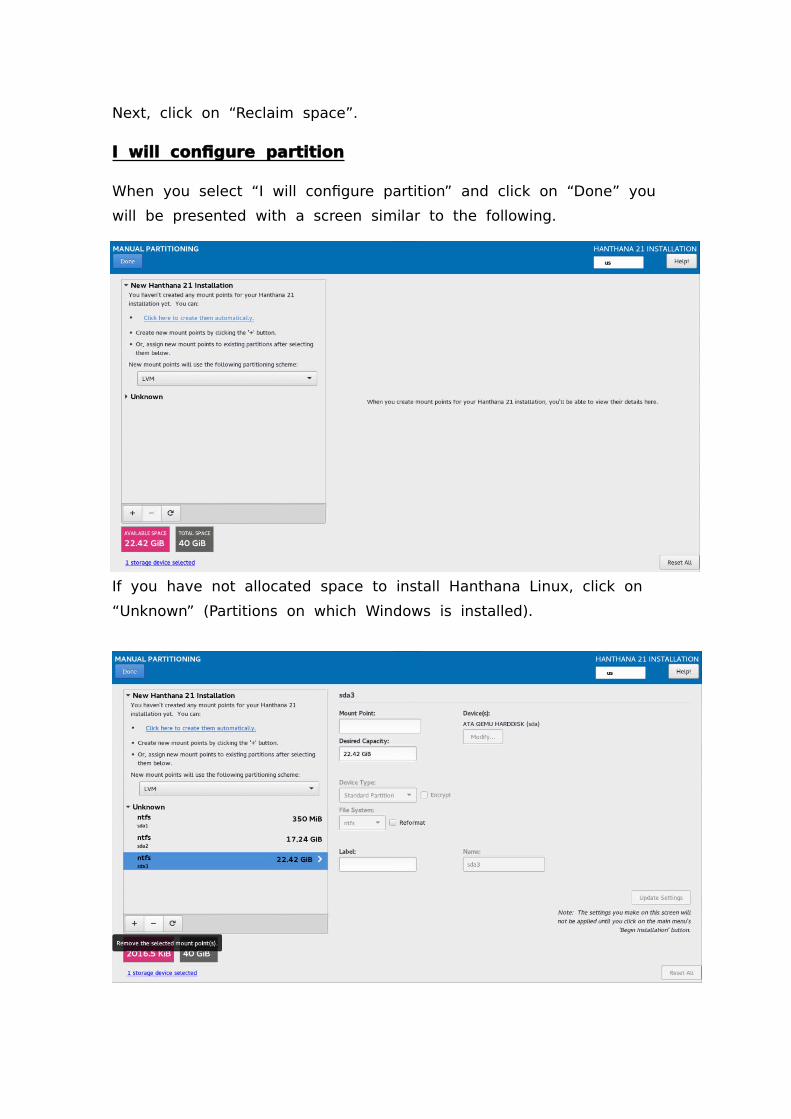
When you select “I will confgure partition” and click on “Done” you
will be presented with a screen similar to the following.
If you have not allocated space to install Hanthana Linux, click on
“Unknown” (Partitions on which Windows is installed).
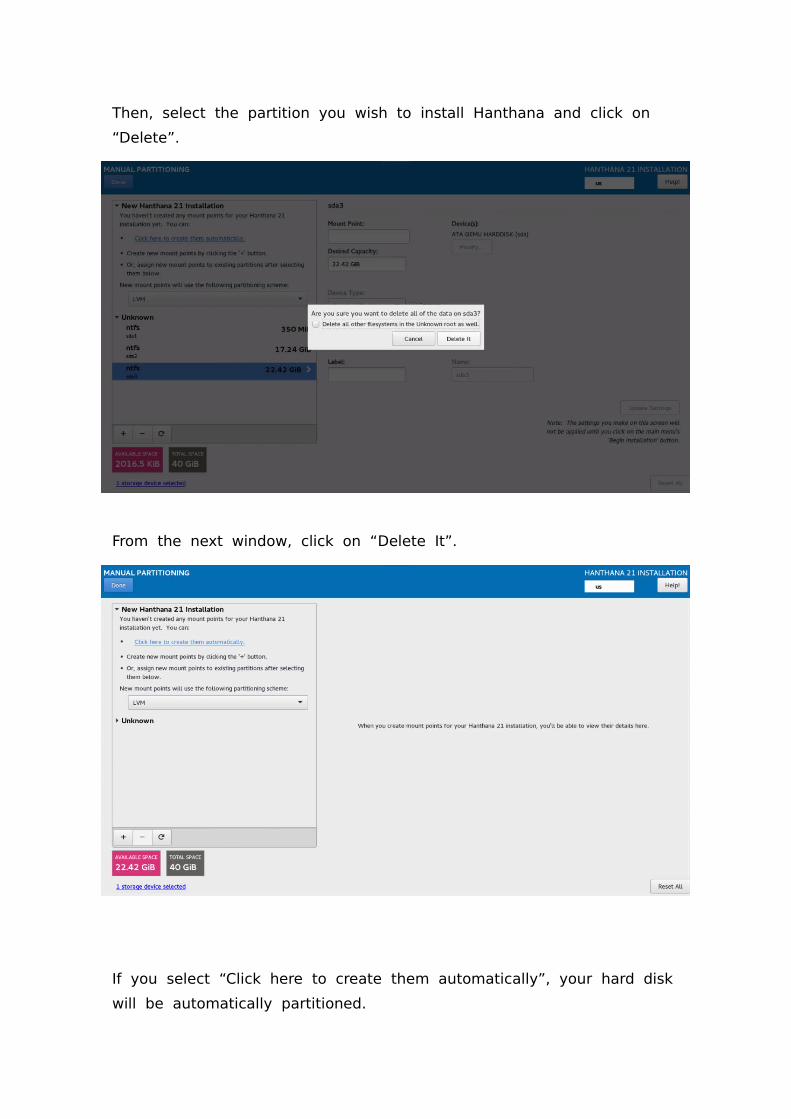
Then, select the partition you wish to install Hanthana and click on
“Delete”.
From the next window, click on “ Delete It”.
If you select “Click here to create them automatically”, your hard disk
will be automatically partitioned.
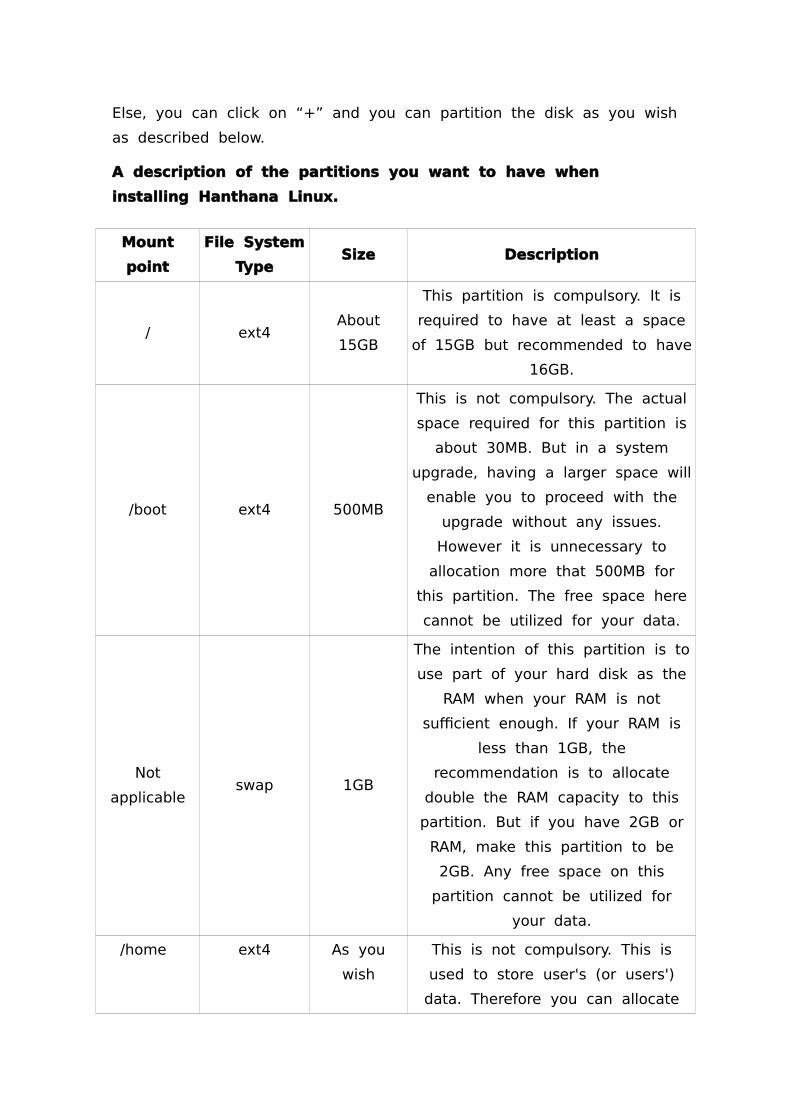
Else, you can click on “+” and you can partition the disk as you wish
as described below.
A description of the partitions you want to have when
installing Hanthana Linux.
Mount
point
File System
TypeSize Description
/ ext4About
15GB
This partition is compulsory. It is
required to have at least a space
of 15GB but recommended to have
16GB.
/boot ext4 500MB
This is not compulsory. The actual
space required for this partition is
about 30MB. But in a system
upgrade, having a larger space will
enable you to proceed with the
upgrade without any issues.
However it is unnecessary to
allocation more that 500MB for
this partition. The free space here
cannot be utilized for your data.
Not
applicableswap 1GB
The intention of this partition is to
use part of your hard disk as the
RAM when your RAM is not
sufcient enough. If your RAM is
less than 1GB, the
recommendation is to allocate
double the RAM capacity to this
partition. But if you have 2GB or
RAM, make this partition to be
2GB. Any free space on this
partition cannot be utilized for
your data.
/home ext4 As you
wish
This is not compulsory. This is
used to store user's (or users')
data. Therefore you can allocate
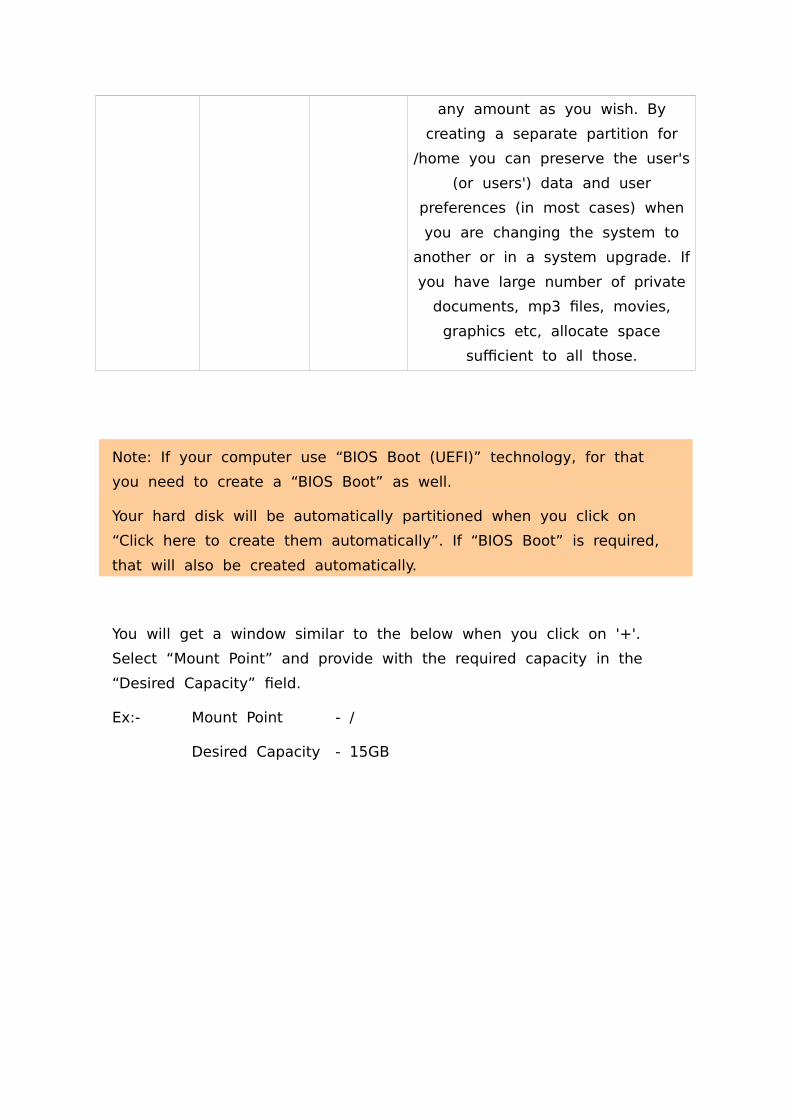
any amount as you wish. By
creating a separate partition for
/home you can preserve the user's
(or users') data and user
preferences (in most cases) when
you are changing the system to
another or in a system upgrade. If
you have large number of private
documents, mp3 fles, movies,
graphics etc, allocate space
sufcient to all those.
Note: If your computer use “BIOS Boot (UEFI)” technology, for that
you need to create a “BIOS Boot” as well.
Your hard disk will be automatically partitioned when you click on
“Click here to create them automatically”. If “BIOS Boot” is required,
that will also be created automatically.
You will get a window similar to the below when you click on '+'.
Select “Mount Point” and provide with the required capacity in the
“Desired Capacity” feld.
Ex:- Mount Point - /
Desired Capacity - 15GB
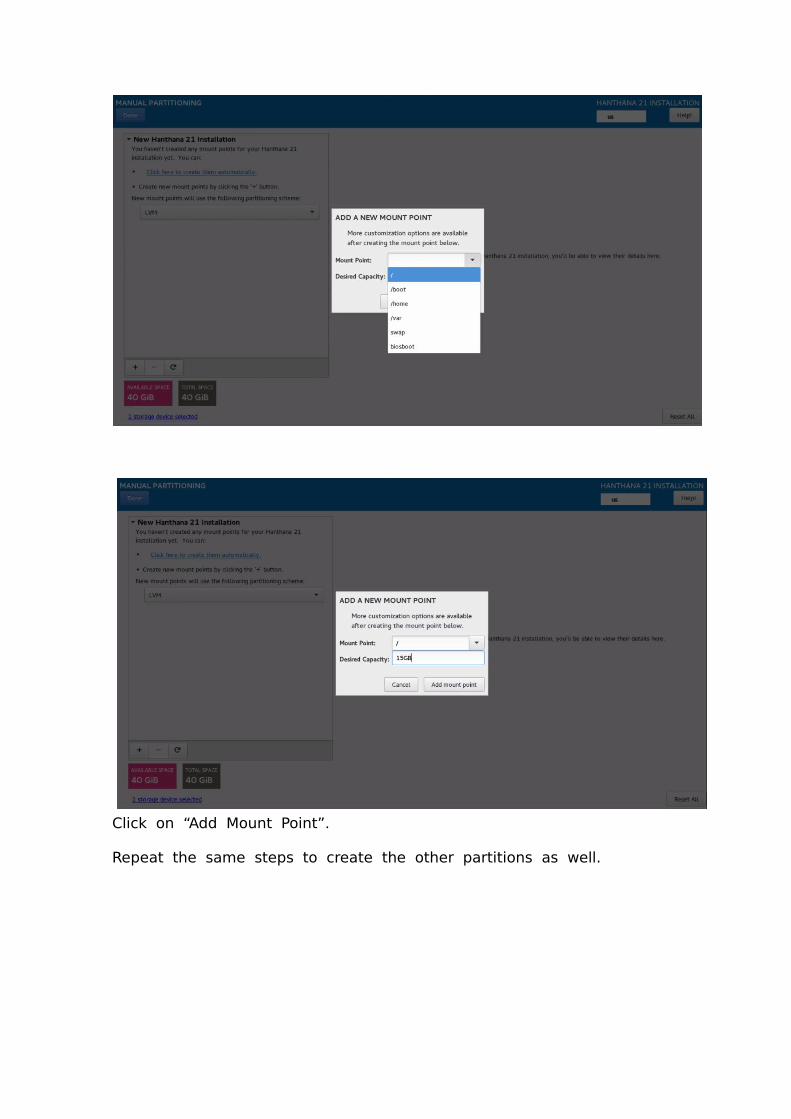
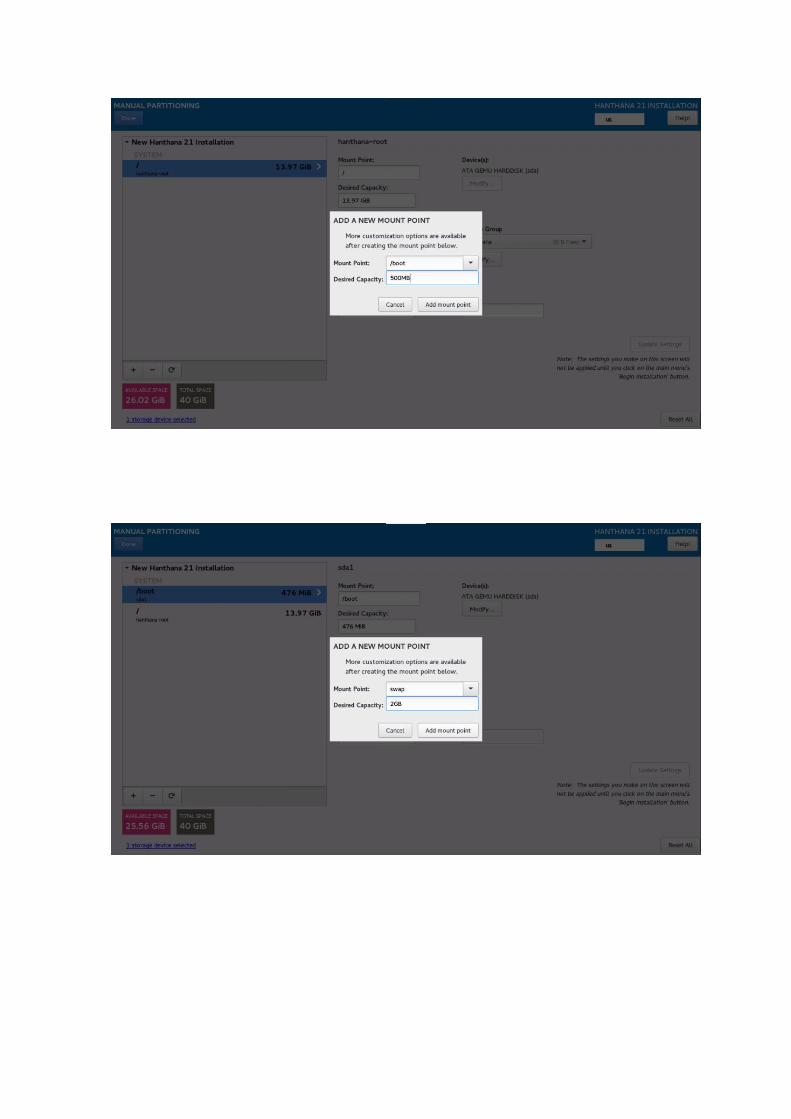
Click on “Add Mount Point”.
Repeat the same steps to create the other partitions as well.
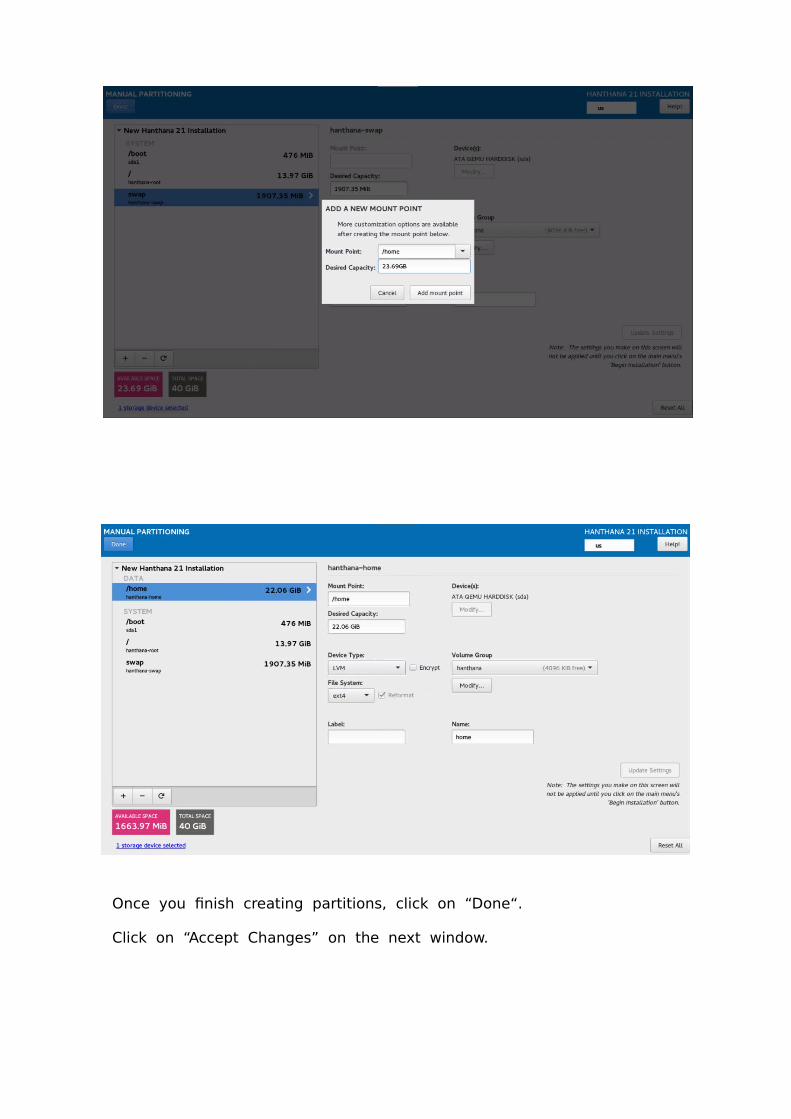
Once you fnish creating partitions, click on “Done“.
Click on “Accept Changes” on the next window.
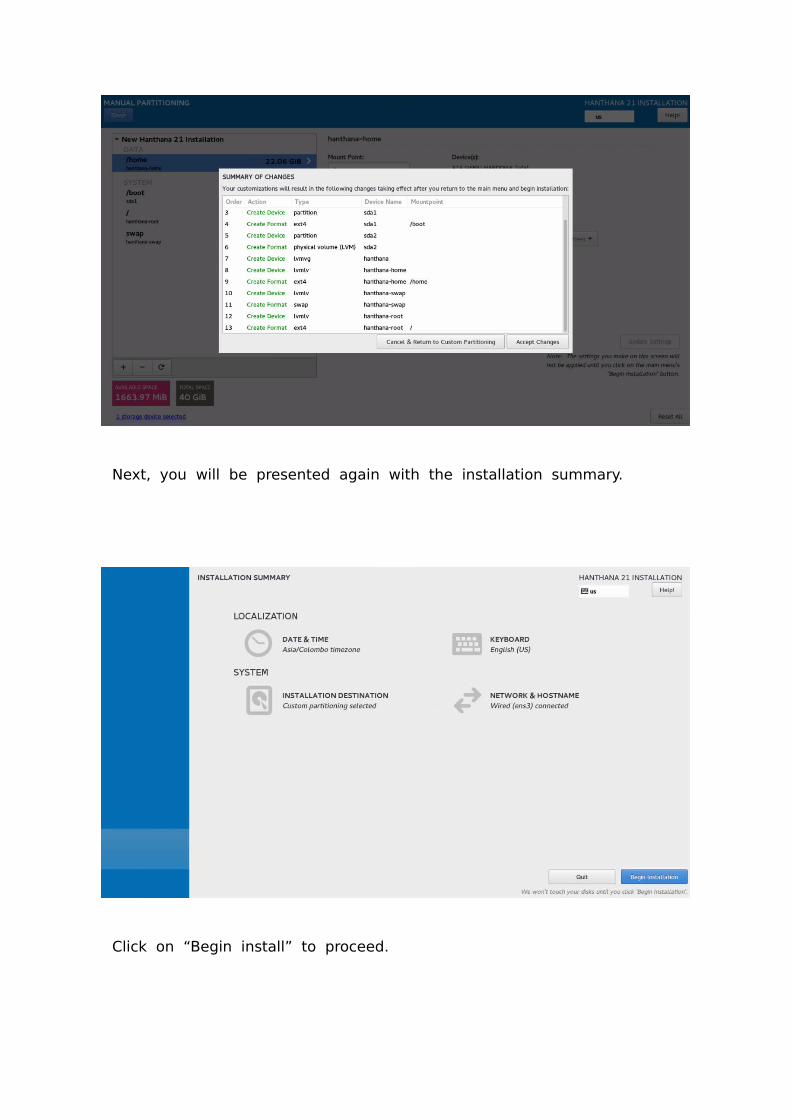
Next, you will be presented again with the installation summary.
Click on “Begin install” to proceed.
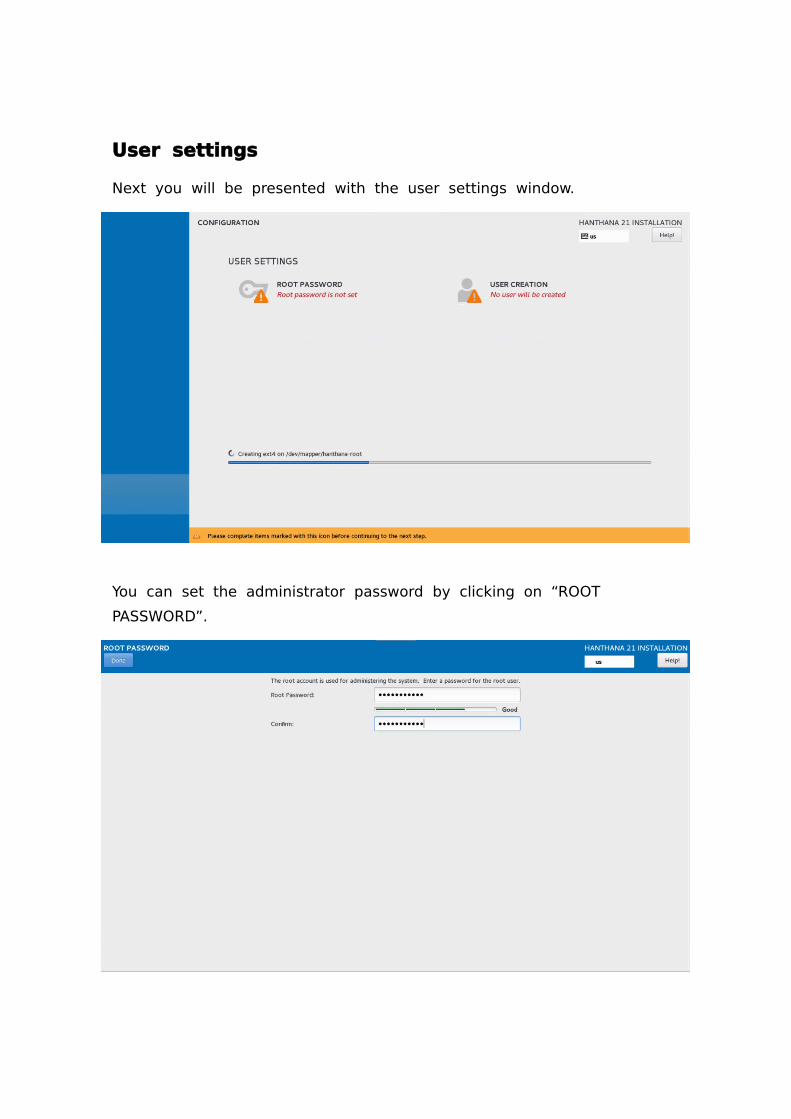
User settings
Next you will be presented with the user settings window.
You can set the administrator password by clicking on “ROOT
PASSWORD”.
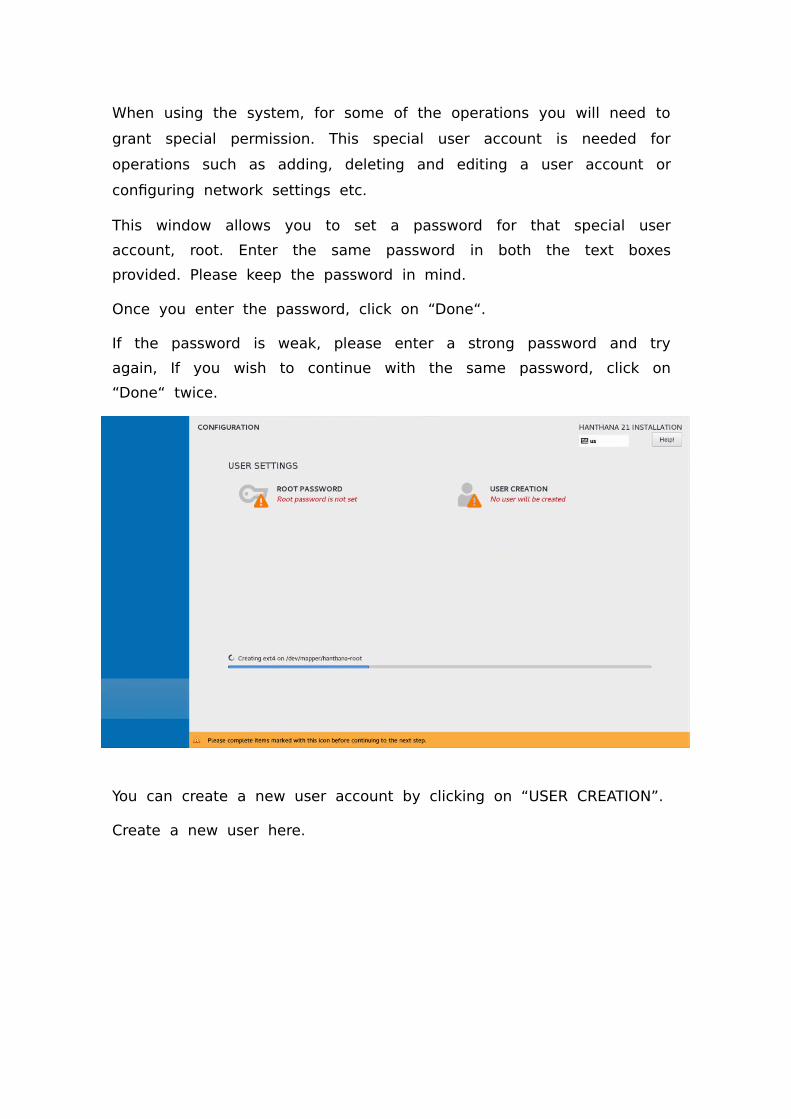
When using the system, for some of the operations you will need to
grant special permission. This special user account is needed for
operations such as adding, deleting and editing a user account or
confguring network settings etc.
This window allows you to set a password for that special user
account, root. Enter the same password in both the text boxes
provided. Please keep the password in mind.
Once you enter the password, click on “Done“.
If the password is weak, please enter a strong password and try
again, If you wish to continue with the same password, click on
“Done“ twice.
You can create a new user account by clicking on “USER CREATION”.
Create a new user here.
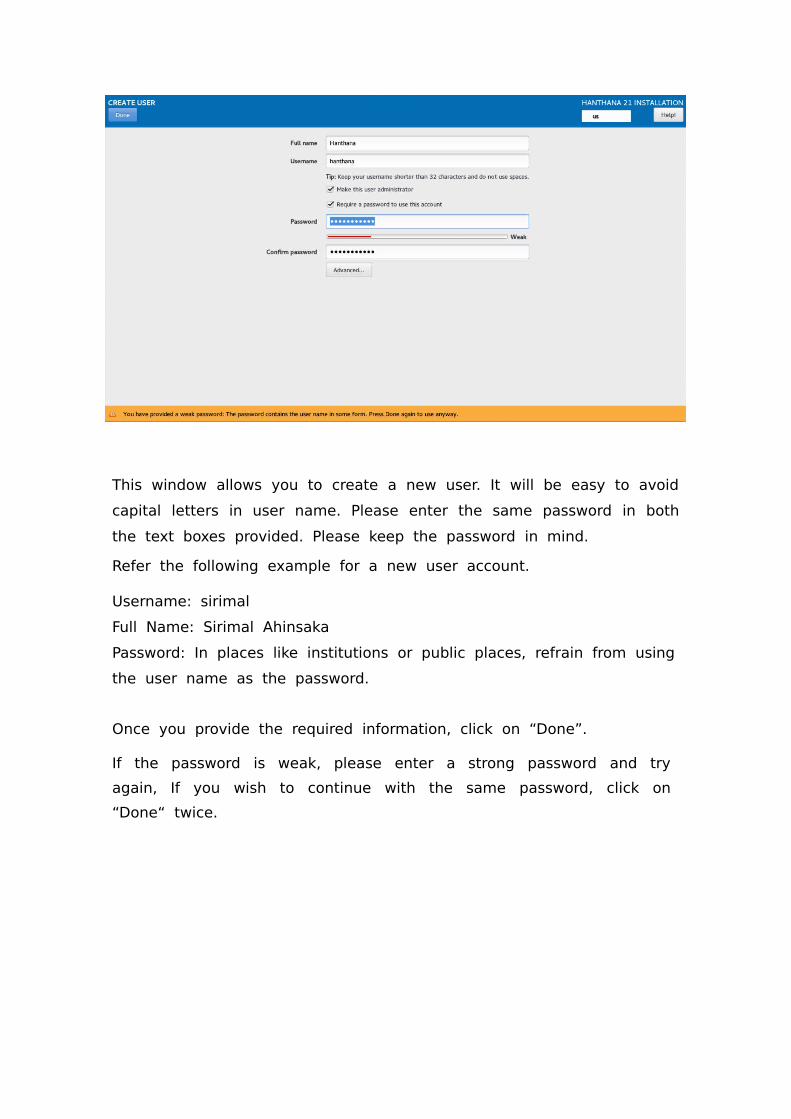
This window allows you to create a new user. It will be easy to avoid
capital letters in user name. Please enter the same password in both
the text boxes provided. Please keep the password in mind.
Refer the following example for a new user account.
Username: sirimal
Full Name: Sirimal Ahinsaka
Password: In places like institutions or public places, refrain from using
the user name as the password.
Once you provide the required information, click on “Done”.
If the password is weak, please enter a strong password and try
again, If you wish to continue with the same password, click on
“Done“ twice.

Next you will be presented with the progress of the Hanthana Linux
installation. This may take some time (this time depends on the
performance of your computer). Therefore please be patient. In most
cases this will take 30 minutes or less.
Once Hanthana Linux is successfully installed, click on “Quit”.
Congratulations !
You have successfully installed Hanthana Linux in your computer.
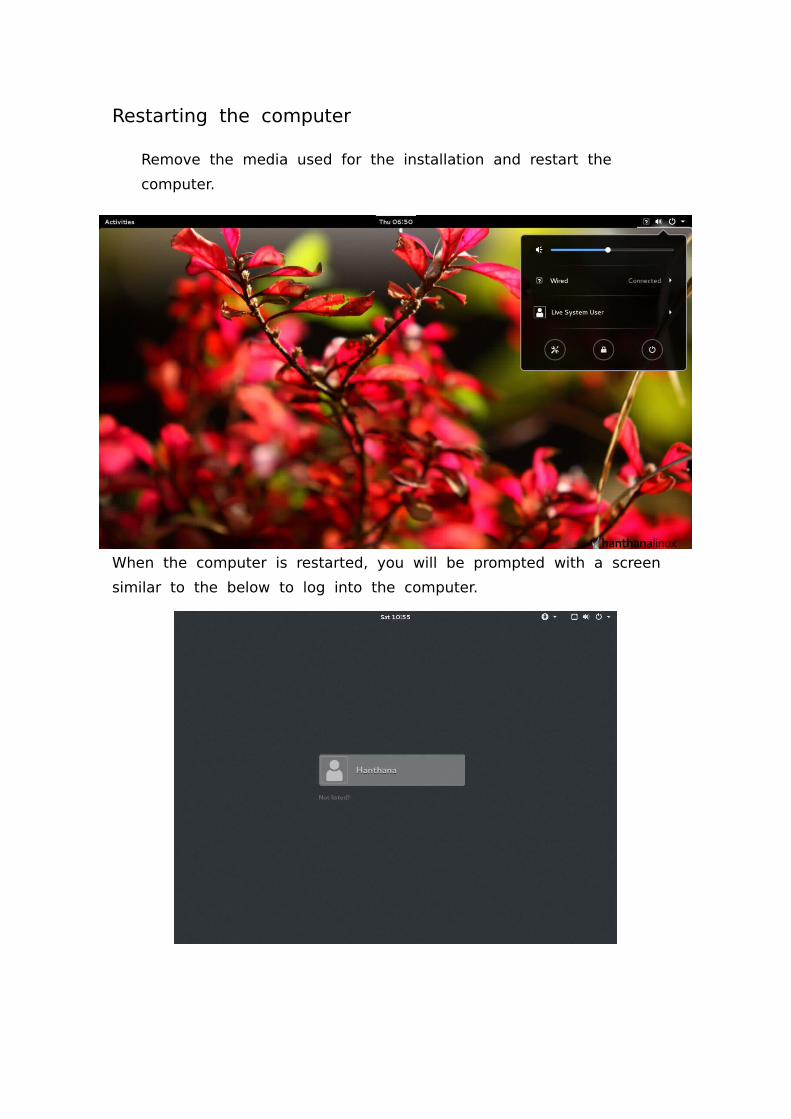
Restarting the computer
Remove the media used for the installation and restart the
computer.
When the computer is restarted, you will be prompted with a screen
similar to the below to log into the computer.
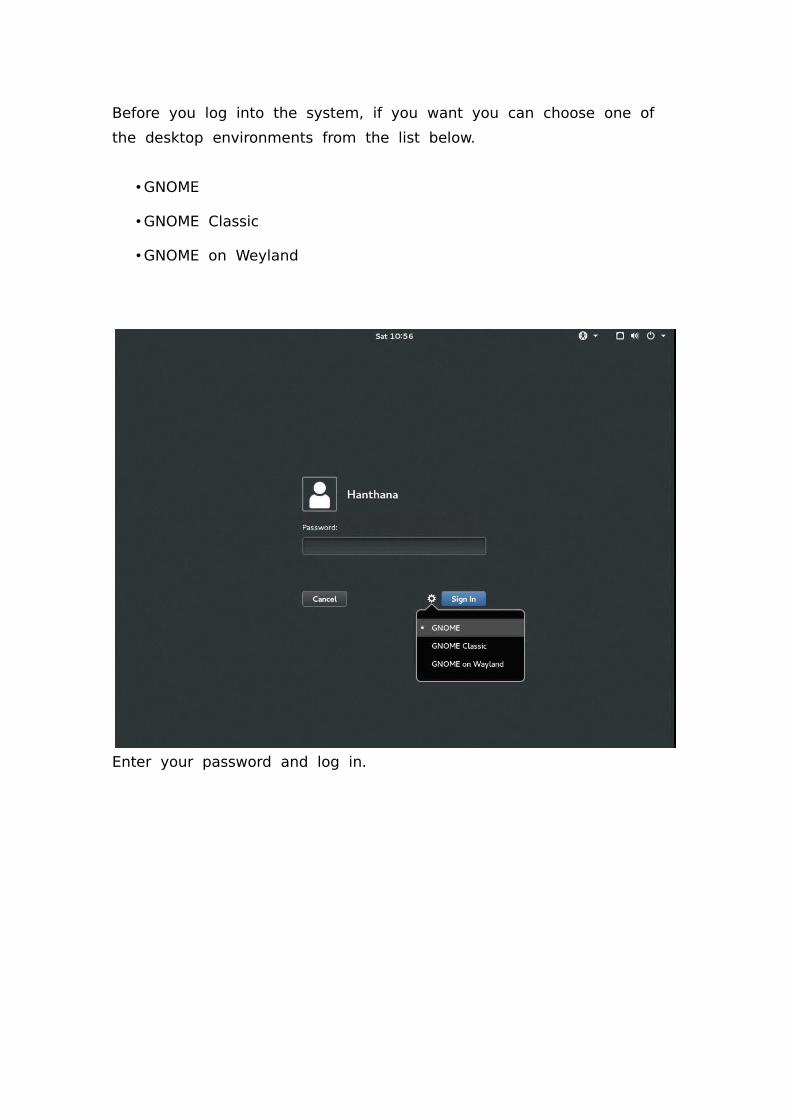
Before you log into the system, if you want you can choose one of
the desktop environments from the list below.
•GNOME
• GNOME Classic
• GNOME on Weyland
Enter your password and log in.
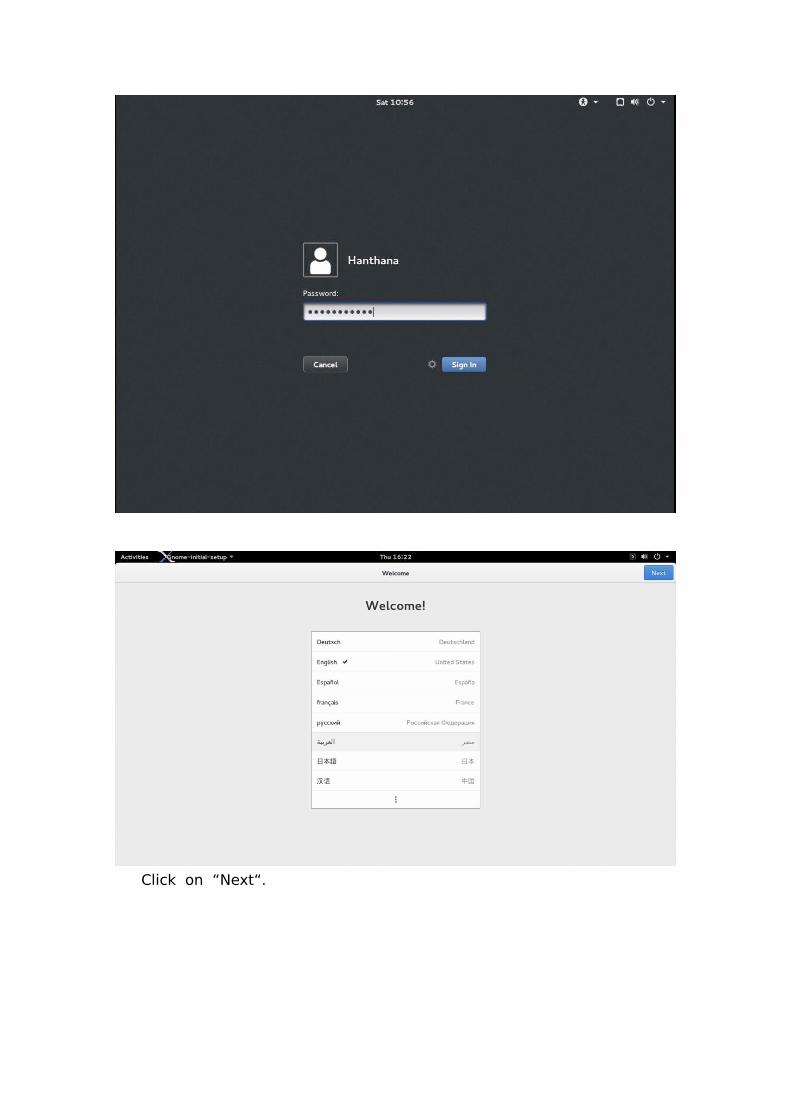
Click on “Next“.
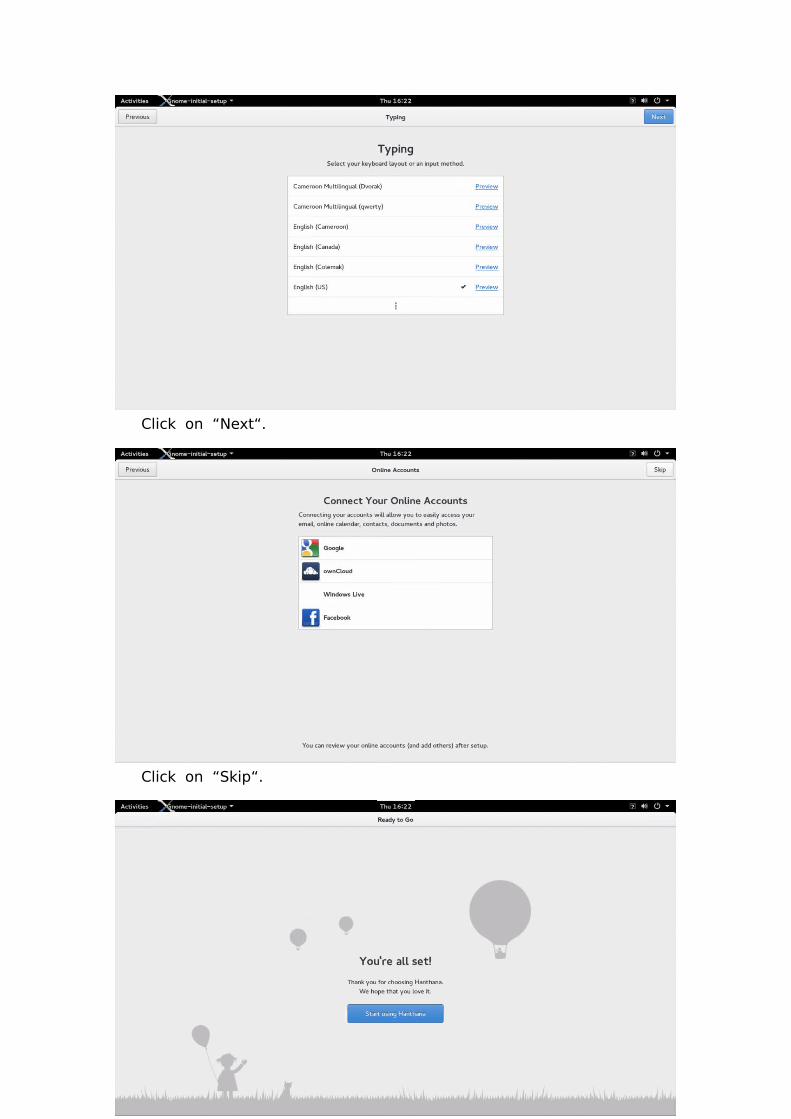
Click on “Next“.
Click on “Skip“.
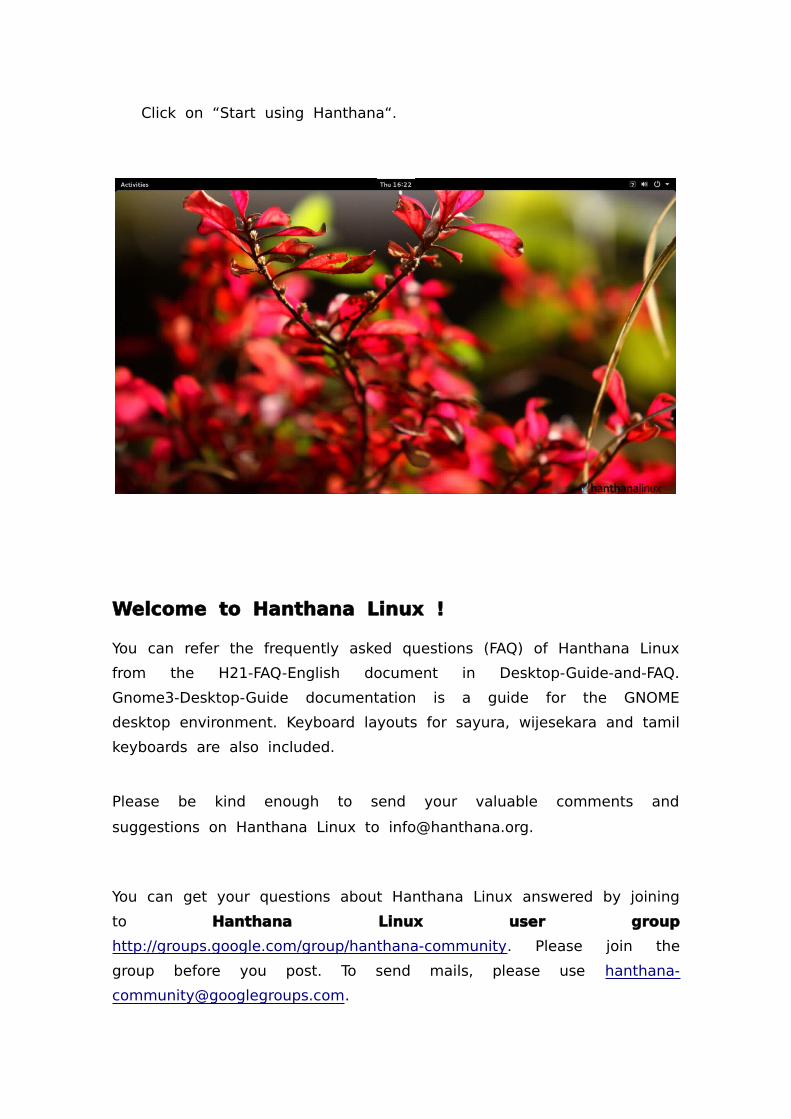
Click on “Start using Hanthana“.
Welcome to Hanthana Linux !
You can refer the frequently asked questions (FAQ) of Hanthana Linux
from the H21-FAQ-English document in Desktop-Guide-and-FAQ.
Gnome3-Desktop-Guide documentation is a guide for the GNOME
desktop environment. Keyboard layouts for sayura, wijesekara and tamil
keyboards are also included.
Please be kind enough to send your valuable comments and
suggestions on Hanthana Linux to [email protected].
You can get your questions about Hanthana Linux answered by joining
to Hanthana Linux user group
http://groups.google.com/group/hanthana-community . Please join the
group before you post. To send mails, please use hanthana-
Recommended