Entire contents © Megatech 2005
FlightManualManual
www.megatech.com
2
Congratulations. You have just purchased a radio controlled A7 Tornado that incorporates some of the most technically advanced electronics available. All of this technology combines to make the A7 Tornado incredibly stable and one of the easiest R/C airplanes to fl y in the world.
READ ENTIRE MANUAL FIRSTBEFORE ATTEMPTING TO FLY
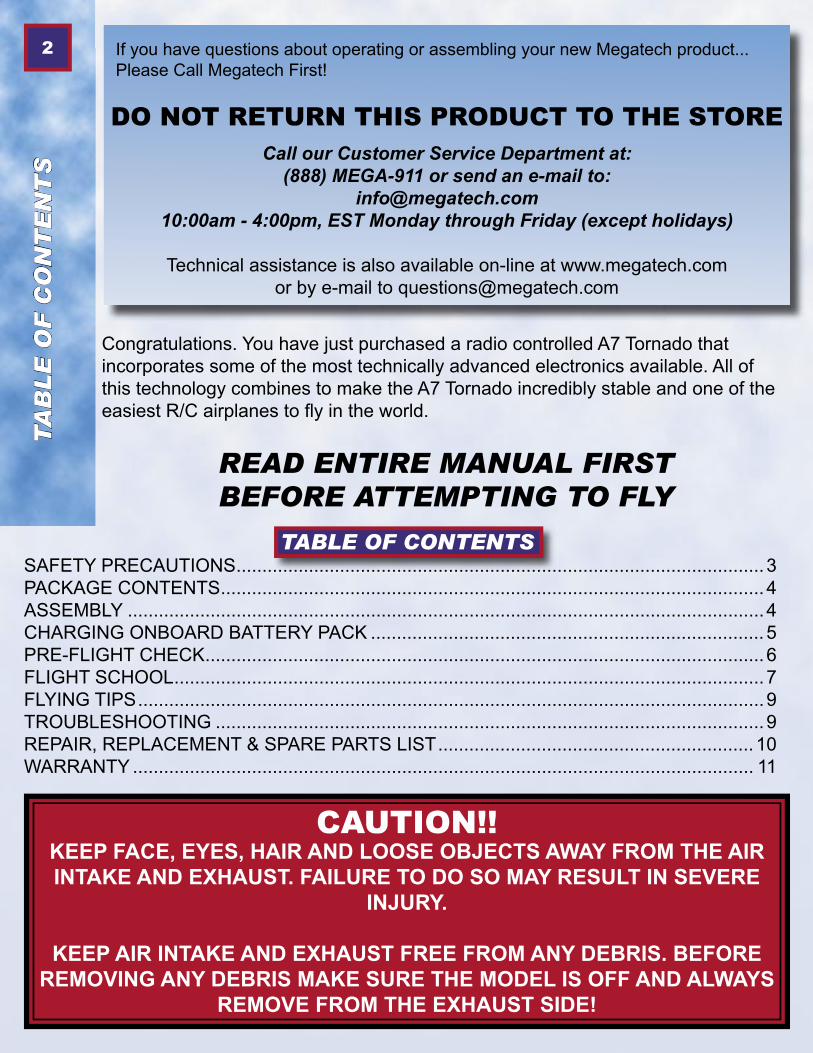
If you have questions about operating or assembling your new Megatech product... Please Call Megatech First!
DO NOT RETURN THIS PRODUCT TO THE STORECall our Customer Service Department at:
(888) MEGA-911 or send an e-mail to: [email protected]
10:00am - 4:00pm, EST Monday through Friday (except holidays)
Technical assistance is also available on-line at www.megatech.comor by e-mail to [email protected]
TABLE OF CONTENTSSAFETY PRECAUTIONS ......................................................................................................3PACKAGE CONTENTS .........................................................................................................4ASSEMBLY ...........................................................................................................................4CHARGING ONBOARD BATTERY PACK ............................................................................ 5PRE-FLIGHT CHECK ............................................................................................................6FLIGHT SCHOOL ..................................................................................................................7FLYING TIPS .........................................................................................................................9TROUBLESHOOTING ..........................................................................................................9REPAIR, REPLACEMENT & SPARE PARTS LIST ............................................................. 10WARRANTY ........................................................................................................................ 11
CAUTION!!KEEP FACE, EYES, HAIR AND LOOSE OBJECTS AWAY FROM THE AIR INTAKE AND EXHAUST. FAILURE TO DO SO MAY RESULT IN SEVERE
INJURY.
KEEP AIR INTAKE AND EXHAUST FREE FROM ANY DEBRIS. BEFORE REMOVING ANY DEBRIS MAKE SURE THE MODEL IS OFF AND ALWAYS
REMOVE FROM THE EXHAUST SIDE!
TA
BL
E O
F C
ON
TE
NT
S

3Important! Before you begin, please read all safety precautions and warnings. Failure to comply with any of the following could lead to bodily harm or injury. The Megatech A7 Tornado is not intended for those under 12 years of age without proper adult supervision.
SAFETY PRECAUTIONS
TRANSMITTER SAFETYThis devise complies with part 15 of FCC rules.Operation subject to the following two conditions:(1)This device may not cause harmful interference and (2)This device must accept any interference received,Including interference that may cause undesired operation.
SAFETY GUIDELINES• Before you begin to fl y, look at the frequency sticker on the back of your transmitter & make
sure no one in the area is on the same frequency.• You alone are responsible for operating your model in a safe manner. When fl ying, you are
responsible for your own safety and the safety of others around you. Follow these basic safety guidelines at all times.
• When operating always be aware of the spinning impeller. Be careful not to let them come close to your person, others and/or loose clothing.
• Always fl y your airplane in a wide-open area. You’ll need at least two football fi elds worth of area that is free from obstructions such as buildings, electric power lines, trees, roads, other people and vehicles. Do not fl y around people who are unaware that you are fl ying a model airplane, and never fl y over people’s heads.
• Do not fl y your model if other models are being operated in the area on the same frequency.• Do not attempt to disassemble any of the model’s components or allow them to get wet. Electrical damage
may occur.• Never fl y your model from roadways or after dark.• Keep spectators behind you when fl ying.• Before fl ying, make sure you perform a range check to be sure you can maintain control at least 25-feet
from transmitter to model with the transmitter antenna extended.• Since your model is controlled by a radio link it is very important to always keep a fresh alkaline battery in
the transmitter. • Never use solvents or liquid cleaners to clean this model. Doing so may damage the unit or electronics.
Only use a dry, soft cloth for cleaning.
RECHARGEABLE BATTERY WARNINGS AND PRECAUTIONS• ALLOW BATTERY TO COOL COMPLETELY BEFORE ATTEMPTING TO CHARGE• Never have the vehicle engine running during charging process. This may cause overcharging and a
possible fi re. • Never leave battery unattended while charging.• Never attempt to charge a battery that appears damaged.• Never charge longer than 10 minutes.• Never place a charging battery on your cars seats or console, but rather a fl ame & heat resistant material
such as an oven mitt.
Nickel-metal hydride batteries must be disposed of properly. For current regulations in your area and proper disposal sites please call 1-800-822-8837 or visit www.rbrc.org
If you have questions about operating or assembling your new Megatech product... Please Call Megatech First!
DO NOT RETURN THIS PRODUCT TO THE STORECall our Customer Service Department at:
(888) MEGA-911 or send an e-mail to: [email protected]
10:00am - 4:00pm, EST Monday through Friday (except holidays)
Technical assistance is also available on-line at www.megatech.comor by e-mail to [email protected]
SA
FE
TY
PR
EC
AU
TIO
NS

4PACKAGE CONTENTS
Before getting started you will need:8 ‘AA’ Alkaline batteries (sold separately), Screwdriver (sold spearately), Scotch® Tape (Optional)
Use the following picture to get acquainted with the parts of your plane included in this package
A. FuselageB. TransmitterC. Transmitter AntennaD. Battery Flight PackE. Quick ChargerF. Right Wing Half (2)G. Left Wing Half (2)H. Mounting Screws
ASSEMBLY
ATTACHING THE WINGS1) Locate a left and right wing half. Carefully remove protective paper from the double sided
tape on each.2) Push one of the mounting screws through the screw hole on each wing half so the bottom
of the screw comes through the tape3) Before pressing the wing half into place, align the wing edge to the fuselage and start
screwing the mounting screw just until you feel it pull down to make sure it is lined up correctly.
4) Push the wing edge onto the fuselage until secure5) Finish tightening the mounting screw. DO NOT over tighten.6) Repeat for both right and left wing pieces
TIP: For extra reinforcement, apply a piece of Scotch® tape over the secured wing as shown.
A.
B.
C.D.
E.
F.G.H.
PA
CK
AG
E C
ON
TE
NT
S / A
SS
EM
BLY
Double-SidedTape
Right Wing
LeftWing
PhillipsScrewdriver
MountingScrew
Scotch Tape
* Screwdriver & Scotch®
Tape Sold SeparatelyScotch is a registered trademark of 3M

5PREPARING TRANSMITTER Transmitter requires 8-’AA’ Alkaline batteries (sold seperately)a) Remove the battery compartment cover
located on the back of the transmitter by sliding it down.
b) Insert 8 “AA” Alkaline batteries. Be sure to match the ‘+’ and ‘-’ polarity symbols in the transmitter with each battery.
c) Replace battery hatch cover. d) Locate transmitter antenna, insert and screw
into the top of the transmitter.DO NOT over tighten!
e) Turn the transmitter ‘Power’ switch to ‘ON’ position. The red and green LED lights will illuminate.
NOTE: If the LED does NOT illuminate, do NOT attempt to fl y your A7. Make sure you are using all fresh alkaline batteries and check the batteries for correct polarity placement. If LED still fails, contactMegatech at 1-888-634-2911.
CHARGING ONBOARD BATTERY PACK
MAKE SURE BATTERY IS COMPLETELY COOL BEFORE ATTEMPTING TO CHARGE. FAILURE TO DO SO WILL CAUSE PERMANENT DAMAGE TO THE BATTERY AND POSSIBLE BODILY HARM
1) Remove battery from airplane. (Do NOT leave battery inside airplane while charging)2) Plug battery into charger.3) Make sure car is not running and plug charger into vehicle cigarette lighter.4) Rotate timer dial to the 10 minute mark. The LED will illuminate. NOTE: If LED does NOT illuminate fi rst check the battery and cigarette lighter connections. If it still does not illuminate call Megatech at 1-888-634-29115) Once the LED goes out, the battery will be warm to the touch and is completely charged. Disconnect at once.
CAUTION!!DO NOT CHARGE BATTERY MORE THAN 10 MINUTES.
CHARGING LONGER MAY DAMAGE THE BATTERYAND REDUCE PERFORMANCE.
AS
SE
MB
LY / C
HA
RG
ING
BA
TT
ER
Y
+ + + +
+ + + +- - - -
- - - -
Twistto
Attatch
DCSource
BatteryPack
QuickCharger
LED
TURN

6CYCLING BATTERY PACK
For peak performance and optimum fl ight duration, it is important to cycle the rechargeable fl ight battery pack 3 times before fl ying.
1) Charge the battery pack according to manual2) Make sure airplane & transmitter are switch to ‘OFF’ &
connect battery to airplane.3) Securely hold the airplane’s fuselage underneath the wings
with the nose facing away from you. Be sure it is as far away as possible from your person and any loose clothing or jewelry.
4) Turn the transmitter to the ‘ON’ position.5) Switch the plane to the ‘ON’ position.6) Push the left hand stick of the transmitter (the throttle stick)
completely forward until the battery runs out7) Allow battery to cool COMPLETELY8) Recharge the battery and repeat process 2 more times
PRE-FLIGHT CHECK
Important Tip: Always perform the motor-check and radio-range check with the help of a friend or parent. Doing so alone may cause the model to get away from you and cause damage.
RADIO RANGE CHECK 1) Make sure both the airplane and transmitter are in the ‘OFF’ position and plug a charged battery into the airplane battery hatch.2)Turn the switch on the transmitter to the ‘ON’ position and extend the antenna fully
3) Switch the power switch on the airplane to the ‘ON’ position. Note: The transmitter is always the fi rst thing on, and the last thing off.
4) Have a friend/parent hold the airplane’s fuselage under the wings with the nose pointing away from him/her and away from their person and loose clothing.
5) Walk 25-ft away from airplane.
MOTOR CHECK• Move the left-hand stick forward—the motor should run.• Release the left-hand stick—the motor should stop.
RUDDER CONTROL CHECK• Move the right-hand stick to the right—the rudder should move to the right• Move the right-stick to the
left—the rudder should move to the left.
If your airplane does not respond from 25 feet away
do NOT attempt to fl y.Contact Megatech at
1-888-634-2911 forfurther assistance
25 FEET
MOTOR CHECK
MoveThrottleUp
������������������������������������
����������������������������������
PR
E-F
LIG
HT
CH
EC
K

7FLIGHT SCHOOL
If you are under the age of 12, be sure to fl y with adult supervision.
1) Choose a Flying Site & Weather Conditions• Choose a large soft grassy open area to fl y in such as a football or soccer
fi eld. Do not fl y in a street or parking lot.• Never fl y near cars, people, pets, power lines, trees, houses, buildings or
water.• Be sure to keep your hands, eyes and face away from air intake, exhaust and jet impeller blades.• Choose a day with little or no wind. Do
not fl y in wind greater than 5mph.• Humidity and temperature must be
comfortable (around 55F-85F degrees) so that the air is fairly dense.
• Your altitude should be less than 2,000-feet above sea level.
2) Pre-Flight Checklist (Perform in order listed)• Fully extend transmitter antenna• Install fully charged battery pack into fuselage• Turn transmitter ‘ON’• Switch airplane ‘ON’
REMEMBER: Your transmitter is always the fi rst thing on and the last thing off.• Holding the plane away from you, move the right transmitter stick to ensure that the rudder
moves left and right accordingly.
3) Launching Airplane• Always launch your airplane INTO the wind, so
begin with the wind blowing into your face.• Hold plane’s fuselage directly under the wings• Start with plane above your shoulders.• Push left hand control stick all the way forward• Using the horizon as a 0-degree point of
reference, take about 5 steps and toss the plane at a 5 degree upward angle into the wind. Use about the same force it take to throw a dart at a dart board.
• Once you have let go of the plane continue to hold the left hand control stick up/forward. DO NOT TOUCH THE RIGHT CONTROL STICK OR PLANE WILL CRASH. Allow the plane to reach suffi cient altitude before attempting to turn (about 50 feet)
WIND0-5 MPH
TEMP55˚F to
85˚F
CORRECT
WRONG
WRONGUse only throttle until reaching 50 ft.
Do not touch the right control stick!
WIND
FL
IGH
T S
CH
OO
L
Proper way to hold airplane

8 4) Turning• Once your airplane has reached 50 feet above the ground you are ready to
begin turning. You want to keep the model within 100 feet of you at all times. Beginners: Start with large oval circle patterns while learning.
Left Turn: Keep the throttle/left hand stick forward. Gently pulse/tap the right hand stick to the LEFT 1-2 times, allowing it to return to the center.
Right Turn: Keep the throttle/left hand stick forward. Gently pulse/tap the right hand stick to the RIGHT 1-2 times, allowing it to return to the center
WARNING: Holding right control stick to the right or left for more than 1-2 seconds at a time will cause the airplane to crash
• Flying toward you can be very tricky because the airplane will appear to be turning in the wrong direction. To regain orientation, imagine you are sitting in the pilot seat of the airplane.
• If the airplane gains too much altitude, try releasing the throttle and continue gliding and turning until you reach a more comfortable altitude.
5) LandingWhen you notice the nose of the airplane drop slightly or it is unable to climb, it is time to land. You will still have enough power over the controls to set the airplane up for a landing.• Always land with the airplane nose going into the wind• Set your plane up to face into the wind by making very gentle shallow turns. • IMPORTANT: DO NOT ATTEMPT TO MAKE ANY TURNS WHEN THE PLANE IS
UNDER 25 FEET FROM THE GROUND, THIS WILL RESULT IN A CRASH.• Once you are on the fi nal landing approach and your plane is facing into the wind, gently
let the airplane glide to the ground on it’s own. Only use minor controls to keep the wingtips level until the plane touches down.
• AS YOU NEAR THE GROUND, RELEASE THE THROTTLE COMPLETELY TO PREVENT DEBRIS FROM BEING SUCKED INTO THE AIR INTAKES AND GETTING CAUGHT IN THE IMPELLER.
LEFT TURN RIGHT TURN
TAP TAP
FL
IGH
T S
CH
OO
L
9
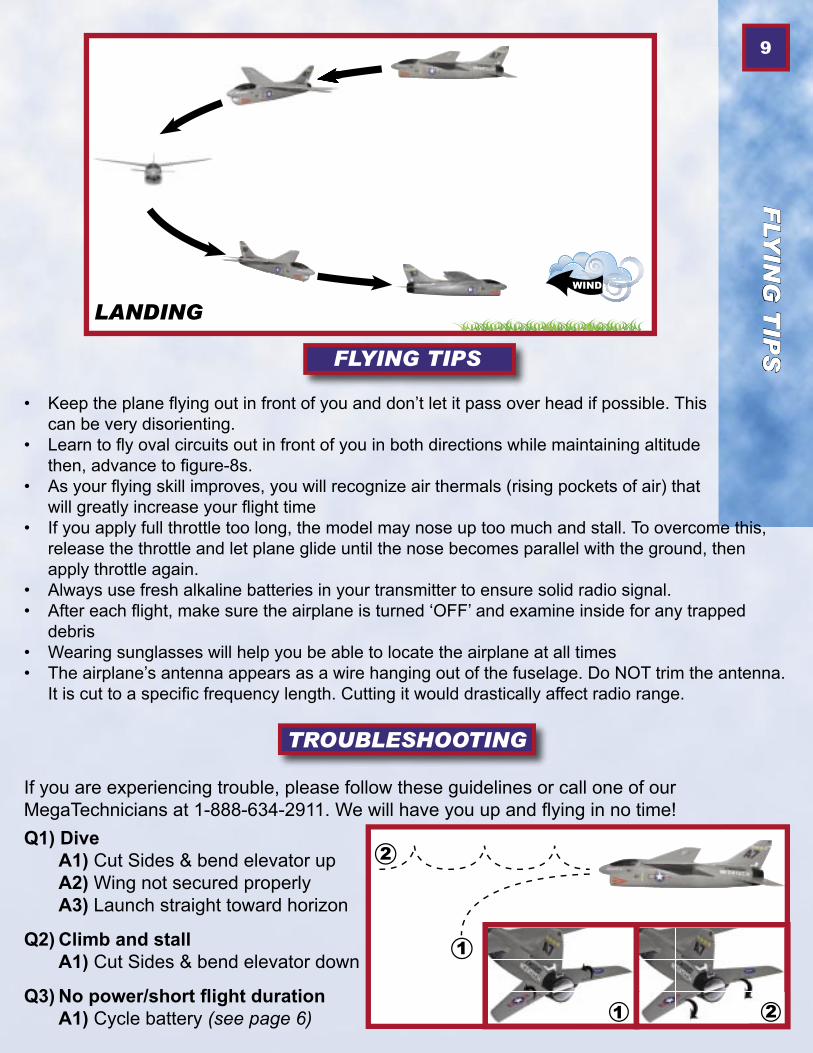
FLYING TIPS
• Keep the plane fl ying out in front of you and don’t let it pass over head if possible. This can be very disorienting.
• Learn to fl y oval circuits out in front of you in both directions while maintaining altitude then, advance to fi gure-8s.
• As your fl ying skill improves, you will recognize air thermals (rising pockets of air) that will greatly increase your fl ight time
• If you apply full throttle too long, the model may nose up too much and stall. To overcome this, release the throttle and let plane glide until the nose becomes parallel with the ground, then apply throttle again.
• Always use fresh alkaline batteries in your transmitter to ensure solid radio signal.• After each fl ight, make sure the airplane is turned ‘OFF’ and examine inside for any trapped
debris• Wearing sunglasses will help you be able to locate the airplane at all times• The airplane’s antenna appears as a wire hanging out of the fuselage. Do NOT trim the antenna.
It is cut to a specifi c frequency length. Cutting it would drastically affect radio range.
TROUBLESHOOTING
If you are experiencing trouble, please follow these guidelines or call one of our MegaTechnicians at 1-888-634-2911. We will have you up and fl ying in no time!Q1) Dive
A1) Cut Sides & bend elevator upA2) Wing not secured properlyA3) Launch straight toward horizon
Q2) Climb and stallA1) Cut Sides & bend elevator down
Q3) No power/short fl ight durationA1) Cycle battery (see page 6)
WIND
LANDING
2
1
FLY
ING
TIP
S
1 2
10REPAIR, REPLACEMENT & SPARE PARTS LIST
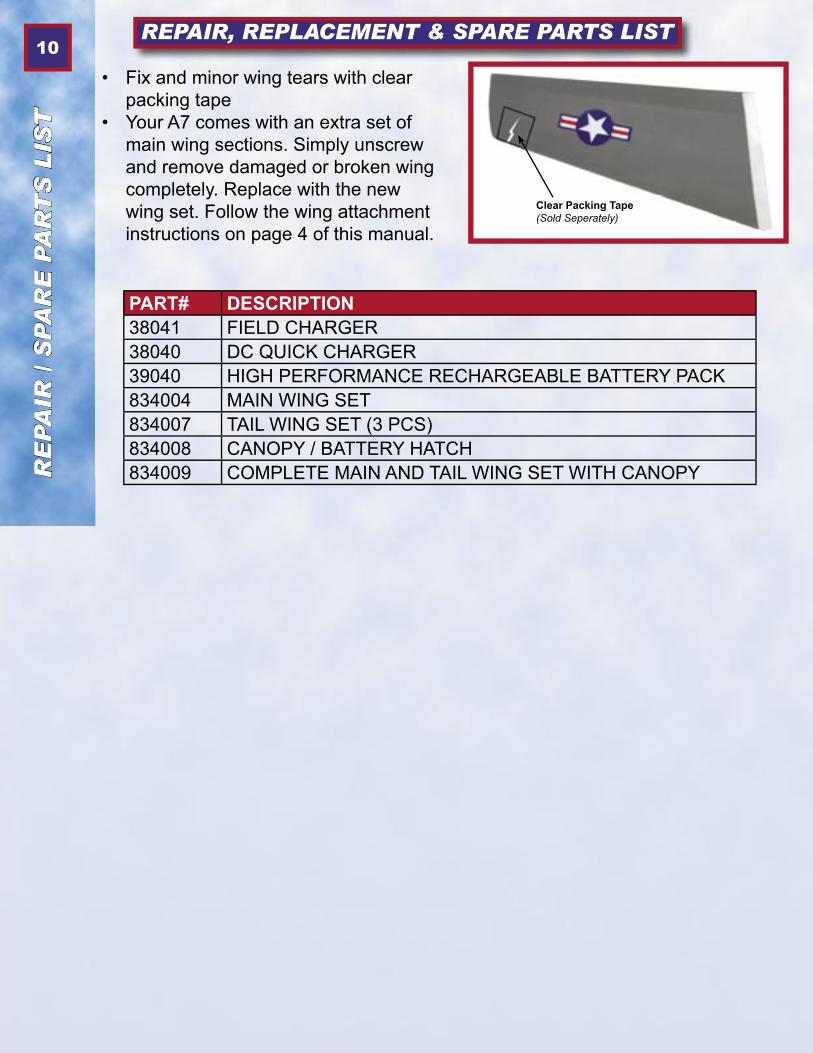
• Fix and minor wing tears with clear packing tape
• Your A7 comes with an extra set of main wing sections. Simply unscrew and remove damaged or broken wing completely. Replace with the new wing set. Follow the wing attachment instructions on page 4 of this manual.
PART# DESCRIPTION38041 FIELD CHARGER38040 DC QUICK CHARGER39040 HIGH PERFORMANCE RECHARGEABLE BATTERY PACK834004 MAIN WING SET834007 TAIL WING SET (3 PCS)834008 CANOPY / BATTERY HATCH834009 COMPLETE MAIN AND TAIL WING SET WITH CANOPYR
EPA
IR / S
PA
RE
PA
RT
S L
IST
Clear Packing Tape(Sold Seperately)

11WARRANTY
Megatech® Limited Warranty
Megatech® International guarantees this item to be free from defects for a period of 90 days from date of purchase. This warranty does not extend beyond the initial prefl ight testing. Carefully check parts and operation BEFORE your fi rst fl ight. Damage incurred during fl ying, landing, crashing or modifi cation is not covered under the warranty.
If you discover defects during the very fi rst prefl ight testing (pg. 6 of this manual) during this 90 day period, please call our Support Team toll free at 1-888-634-2911 for Return Authorization. If in our opinion after inspecting the product, we determine it to be defective; we will repair or replace it at our discretion.
Contact the Megatech® International Service Department before returning any item that is defective according to the limitations listed above. If you are issued return authorization and asked to send the item to our Service Department please follow these steps:• Remove the battery pack from the airplane and the alkaline batteries from the transmitter.• Pack the returned item(s) carefully and place in a sturdy shipping carton • Return the product along with proof of purchase• Include a letter describing the problem• Include your address and telephone number
Megatech InternationalATTN: Service Department
8300 Tonnelle AvenueNorth Bergen, NJ 07047
(201) 662-2800
This warranty does not cover any damage caused by use, misuse, alteration, accident, or neglect, nor does it cover normal wear and tear of the product. Product returned to us which falls under this category will be submitted to our service department for repair. We reserve the right to charge any service and parts fees incurred when repairing the item.
Although this warranty does not cover and damage caused to the plane after the initial prefl ight testing, spare parts and service are available. Please see pg. 10 of this manual.
Under no circumstances will Megatech® International or any of its representatives be held liable for injury to persons or property damage resulting from assembly or use of the product. Megatech® is not liable if any outside radio frequencies interfere with the product’s frequency causing loss of control. Megatech® International will not be held liable for any personal injury or property damage resulting from an out-of-control model caused by use or misuse of the product.
This warranty is void if the product in question has been altered or repaired by anyone other than Megatech International or an authorized agent.
WA
RR
AN
TY

Megatech® International8300 Tonnelle Avenue
North Bergen, NJ 07047(201) 662-2800
www.megatech.com
Recommended