4/26/2016
1
External insulation
without glue
Andrea Sangalli, eERG group Politecnico di Milano
22.4.2016
Aachen
2
Why we choose an exterior
insulation system
MAIN FEATURES
1. The insulating layer is continuous
2. The portion of "cold" wall is absent
3. The entire wall is "hot"
4. The structure is totally placed on theexterior side of the wall
5. The intervention is outside
of the façade
ADVANTAGES
1. No thermal bridges, surface condensation and molds
2. Limit the risk of interstitial condensation
3. Ideal for residential buildings
4. No reduction of the usable area of the rooms
5. Possibility to intervene on the aesthetics of the façade
4/26/2016
2
3
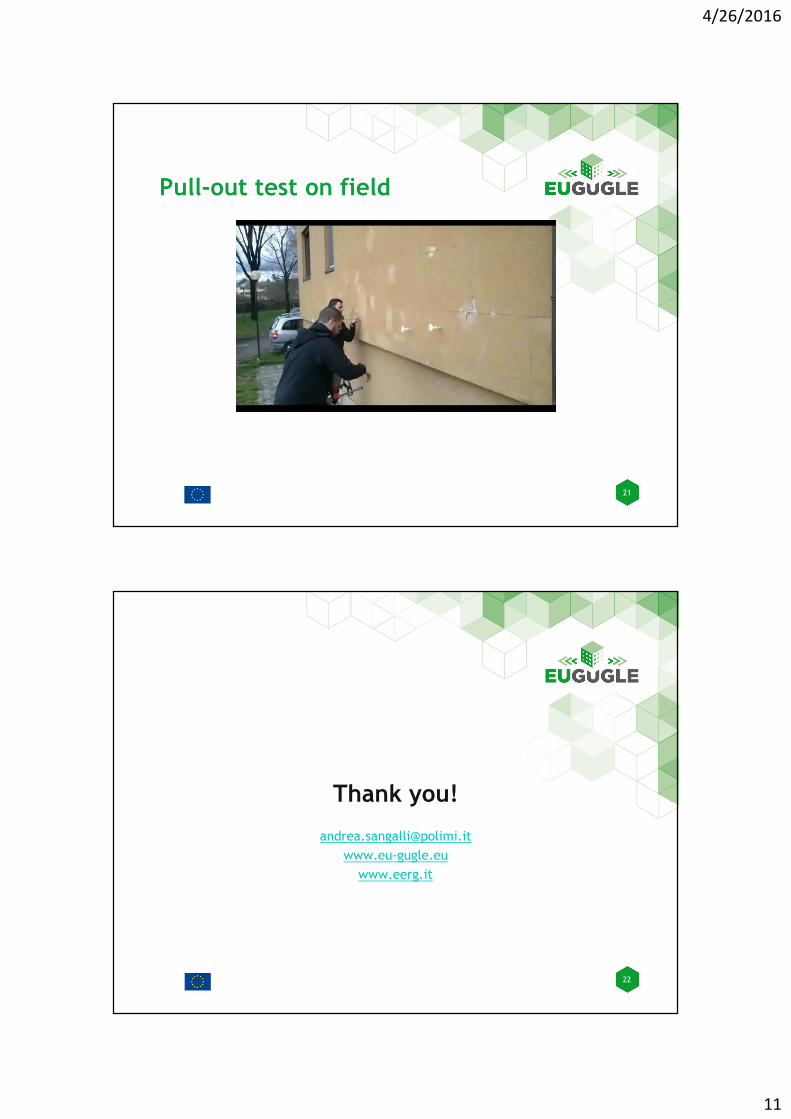
Limits of application of standard
external insulation technology
MAIN FEATURES
1. The insulation panel is adherent to the substrate and the layer of reinforcedsmoothing
2. The insulating panel and the reinforced smoothing are subject to microdeformations due to thermal stress
LIMITS
1. It is advisable to avoid excessively heavy coatings
2. The colored coating must necessarily have a thickness and be synthetic, and also it must have a light colour
4
Advantages of the proposed
system
MAIN FEATURES
1. The insulation panel is adherent to the substrate and the layer of reinforcedsmoothing
1. The panel is desolidarised both from the substrate and the overlying coating
2. The insulating panel and the reinforced smoothing are subject to microdeformations
due to thermal stress
2. The reinforced plaster is less subject to thermal expansion
LIMITS
1. It is advisable to avoid excessively heavy
coatings
1. It is possible to use stone, brick, grès coatings
2. The colored coating must necessarily have a thickness and be synthetic
2. It’s possible to use mineral (lime or silicates)paints or finishings. Colour choice is no morelimited to light ones

4/26/2016
3
5
APPLICATION STAGES
1. Apply the base panel (made of extruded foam polystyrene - XPS) up to at least 15 cm above thefinished walking floor area, using proper insulation fasteners.
2. Apply the desired insulation panels using insulation fasteners.
Insulationfastener
6
APPLICATION STAGES
3. Position the spacer crowns on the installed panels, according to the scheduled geometric arrangement of the anchor bolts; ensure the entire length of the shank penetrates the insulation panel.
Spacer crown in polyamide
4/26/2016
4
7
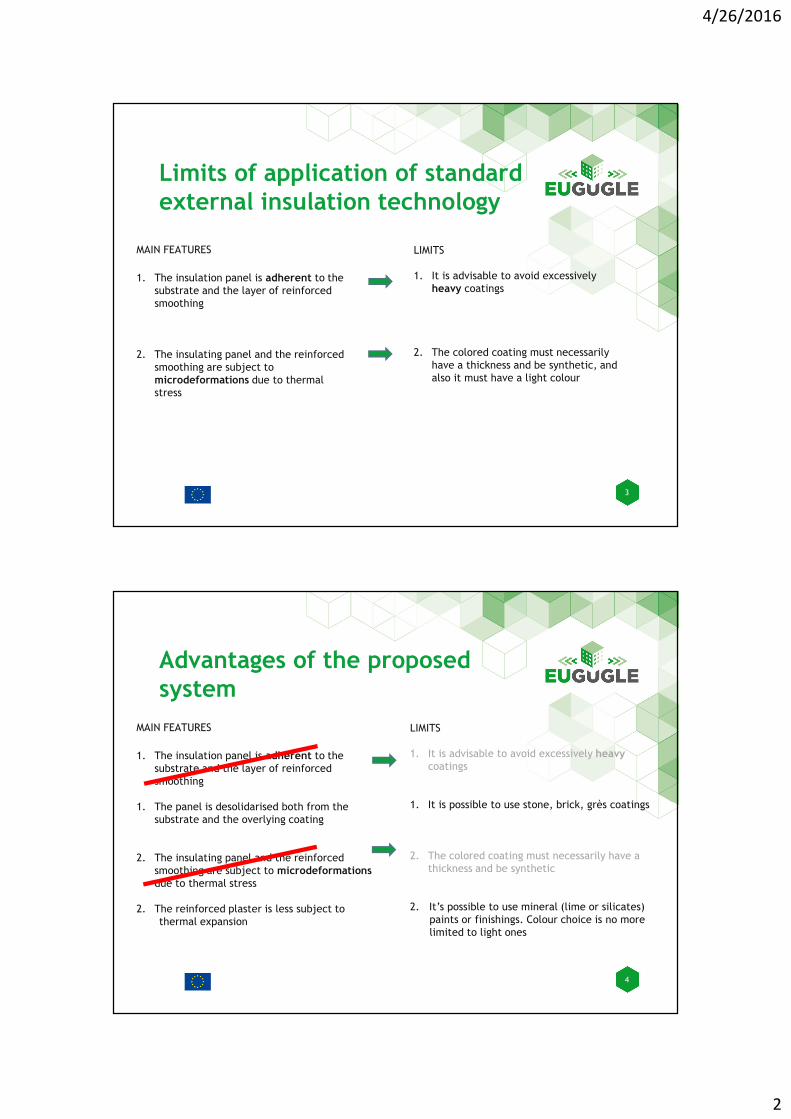
APPLICATION STAGES
4. Drill a hole in the substrate at the center of the spacer crown
(for non-compact substrates it is advisable to use the drill in "rotation" mode and not in “percussion"mode; in the case of wooden substrates, there is no need to drill a hole: proceed to point 5).
8
APPLICATION STAGES
5. Position mesh starting from the bottom upwards, taking care to overlap the sheets by at least 10 cm both horizontally and vertically and insert the proper insulation fasteners in the previously drilled hole.

4/26/2016
5
9
APPLICATION STAGES
6. Tighten the screws making sure that the mesh abuts against the spacer crown and it’s firmly blocked between the spacer crown and the head of the insulation fastener; check that the mesh is not loose and that it is properly secured.
10
APPLICATION STAGES
7. Insert the cap on the insulation fastener head.
4/26/2016
6
11
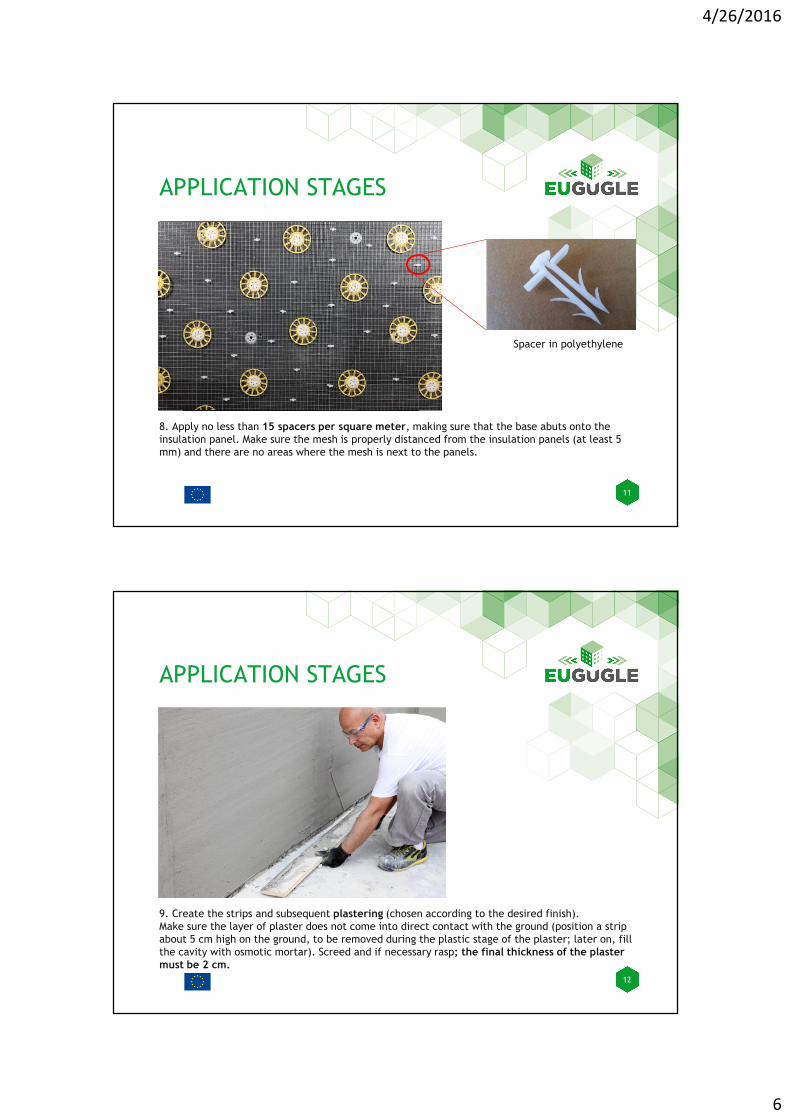
APPLICATION STAGES
8. Apply no less than 15 spacers per square meter, making sure that the base abuts onto the insulation panel. Make sure the mesh is properly distanced from the insulation panels (at least 5 mm) and there are no areas where the mesh is next to the panels.
Spacer in polyethylene
12
APPLICATION STAGES
9. Create the strips and subsequent plastering (chosen according to the desired finish). Make sure the layer of plaster does not come into direct contact with the ground (position a strip about 5 cm high on the ground, to be removed during the plastic stage of the plaster; later on, fill the cavity with osmotic mortar). Screed and if necessary rasp; the final thickness of the plaster
must be 2 cm.

4/26/2016
7
13
APPLICATION STAGES
10a. Apply the finishing layer (levelling/smoothing): in the case of modern and tradition cycles, both can be subsequently finished with colored finishes.
14
APPLICATION STAGES
10b. In the case of stone cycles, directly apply the selected glue and grout the joints with suitable sealants mixed with latex.
4/26/2016
8
15
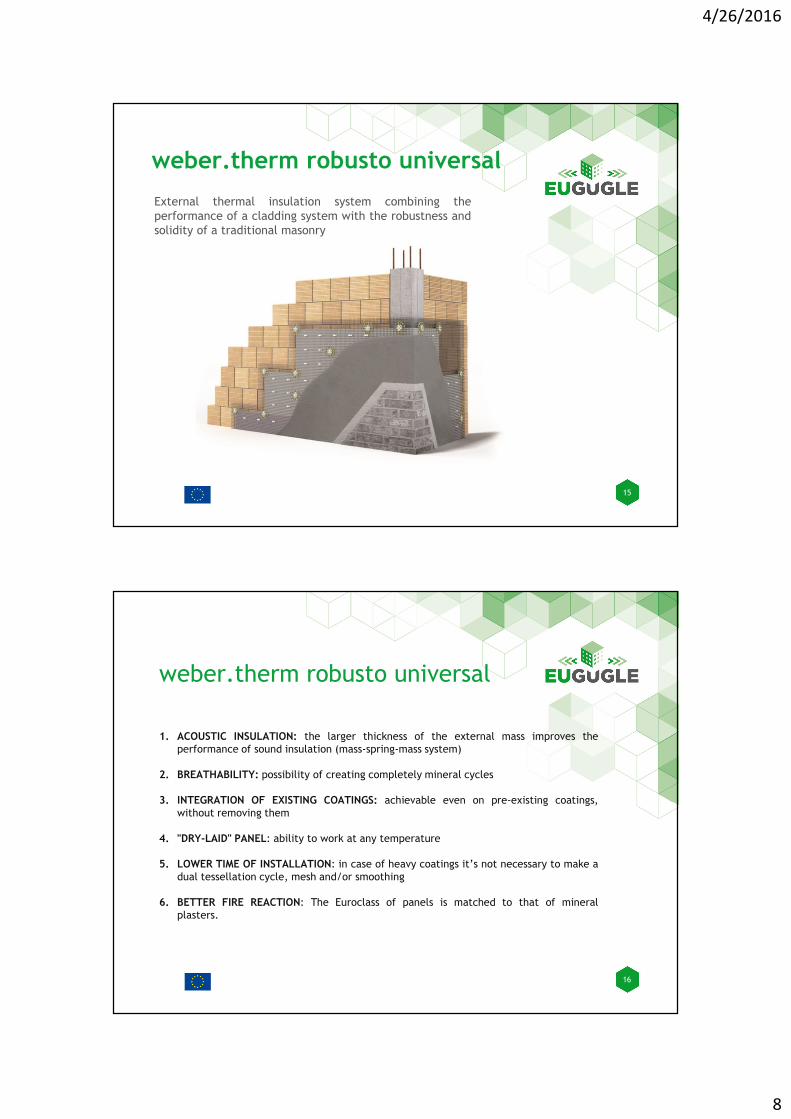
External thermal insulation system combining theperformance of a cladding system with the robustness andsolidity of a traditional masonry
weber.therm robusto universal
16
weber.therm robusto universal
1. ACOUSTIC INSULATION: the larger thickness of the external mass improves theperformance of sound insulation (mass-spring-mass system)
2. BREATHABILITY: possibility of creating completely mineral cycles
3. INTEGRATION OF EXISTING COATINGS: achievable even on pre-existing coatings,without removing them
4. "DRY-LAID" PANEL: ability to work at any temperature
5. LOWER TIME OF INSTALLATION: in case of heavy coatings it’s not necessary to make adual tessellation cycle, mesh and/or smoothing
6. BETTER FIRE REACTION: The Euroclass of panels is matched to that of mineralplasters.

4/26/2016
9
17
Composition of the system:Insulating panels
Synthetic panels: EPS, graphite EPS, XPS
Mineral panels: glasswool and rockwool
High thermal performance panels: phenolic resin
Natural panels: cork
18
Case study:
Retrofit in Milan
Buildings S.Bernardo 48-50
• 2 buildings, 4 floors each
• Substrate walls made of prefabricated concrete panels
• Existing external insulation on SB50 (4 cm thickness)
4/26/2016
10
19
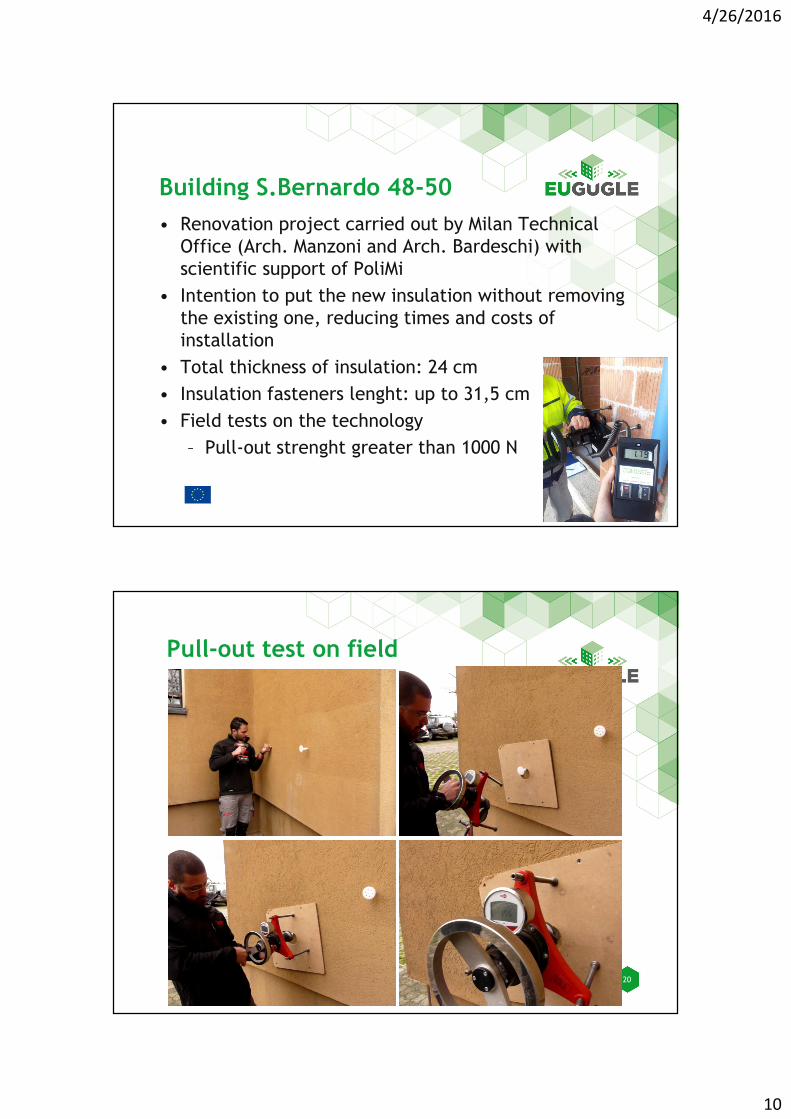
Building S.Bernardo 48-50
• Renovation project carried out by Milan Technical Office (Arch. Manzoni and Arch. Bardeschi) with scientific support of PoliMi
• Intention to put the new insulation without removing the existing one, reducing times and costs of installation
• Total thickness of insulation: 24 cm
• Insulation fasteners lenght: up to 31,5 cm
• Field tests on the technology
– Pull-out strenght greater than 1000 N
20
Pull-out test on field
Recommended