Integrating with Facebook
using Mule ESB Facebook
Connector
Prepared By: Rupesh Sinha
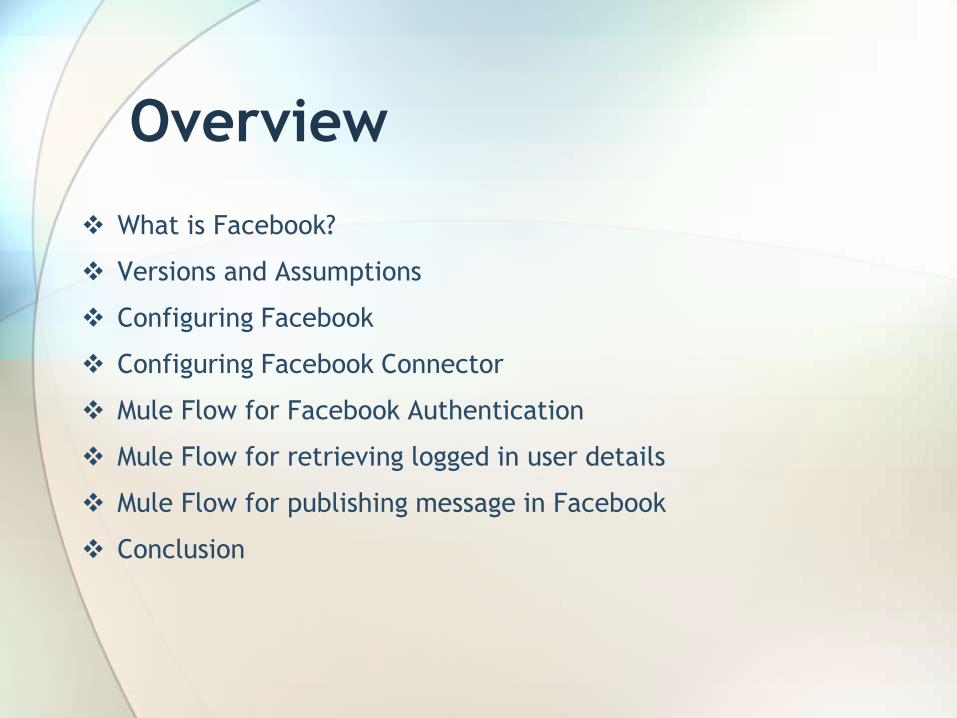
Overview
What is Facebook?
Versions and Assumptions
Configuring Facebook
Configuring Facebook Connector
Mule Flow for Facebook Authentication
Mule Flow for retrieving logged in user details
Mule Flow for publishing message in Facebook
Conclusion
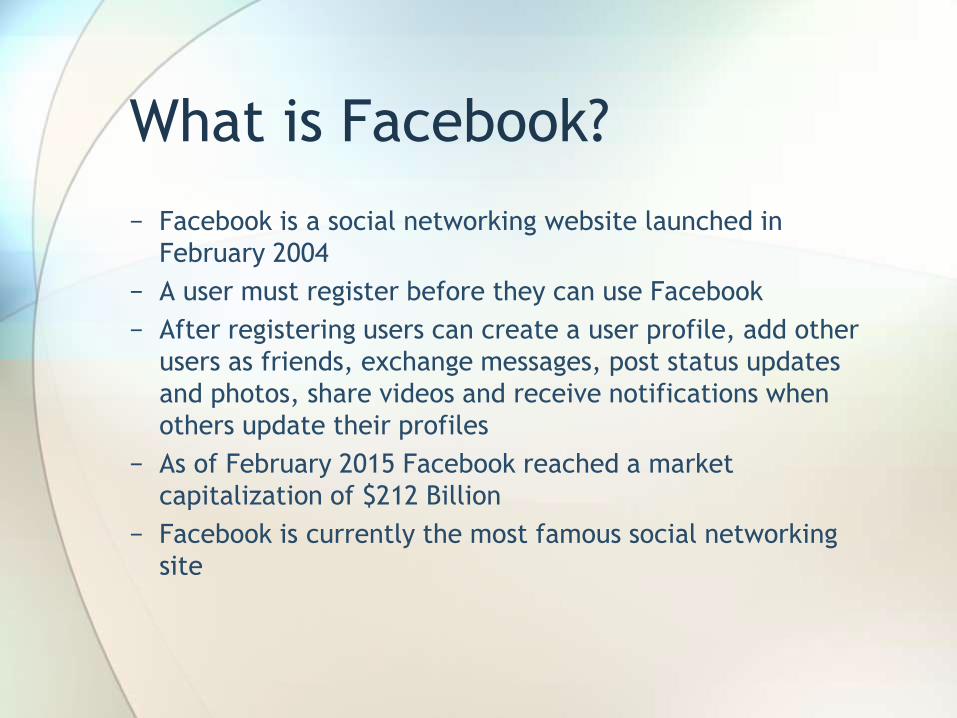
What is Facebook?
− Facebook is a social networking website launched in
February 2004
− A user must register before they can use Facebook
− After registering users can create a user profile, add other
users as friends, exchange messages, post status updates
and photos, share videos and receive notifications when
others update their profiles
− As of February 2015 Facebook reached a market
capitalization of $212 Billion
− Facebook is currently the most famous social networking
site
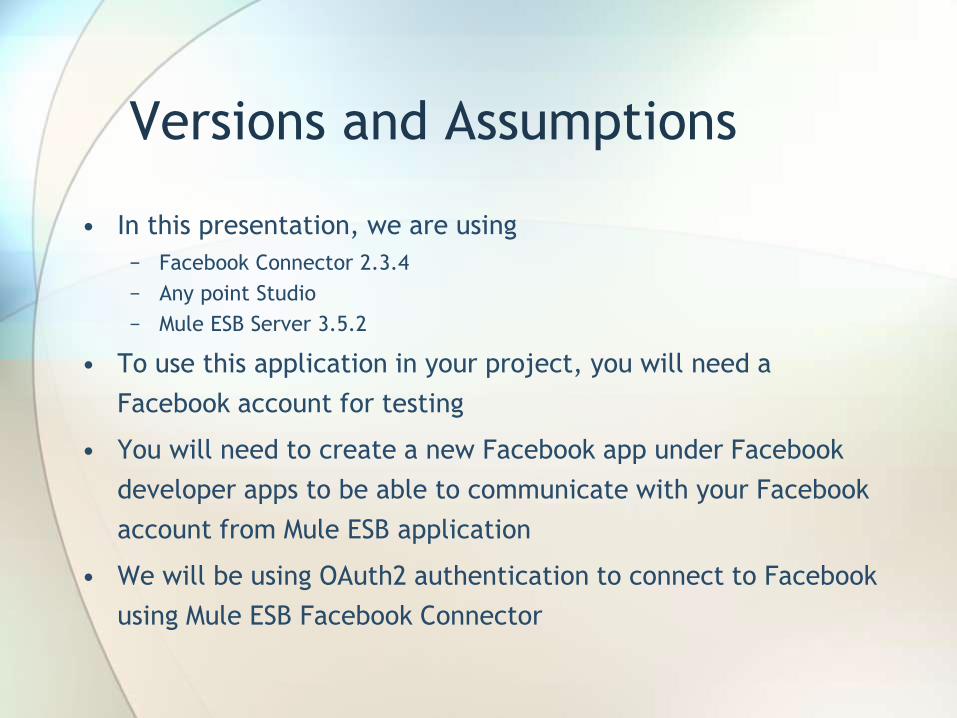
Versions and Assumptions
• In this presentation, we are using
− Facebook Connector 2.3.4
− Any point Studio
− Mule ESB Server 3.5.2
• To use this application in your project, you will need a
Facebook account for testing
• You will need to create a new Facebook app under Facebook
developer apps to be able to communicate with your Facebook
account from Mule ESB application
• We will be using OAuth2 authentication to connect to Facebook
using Mule ESB Facebook Connector
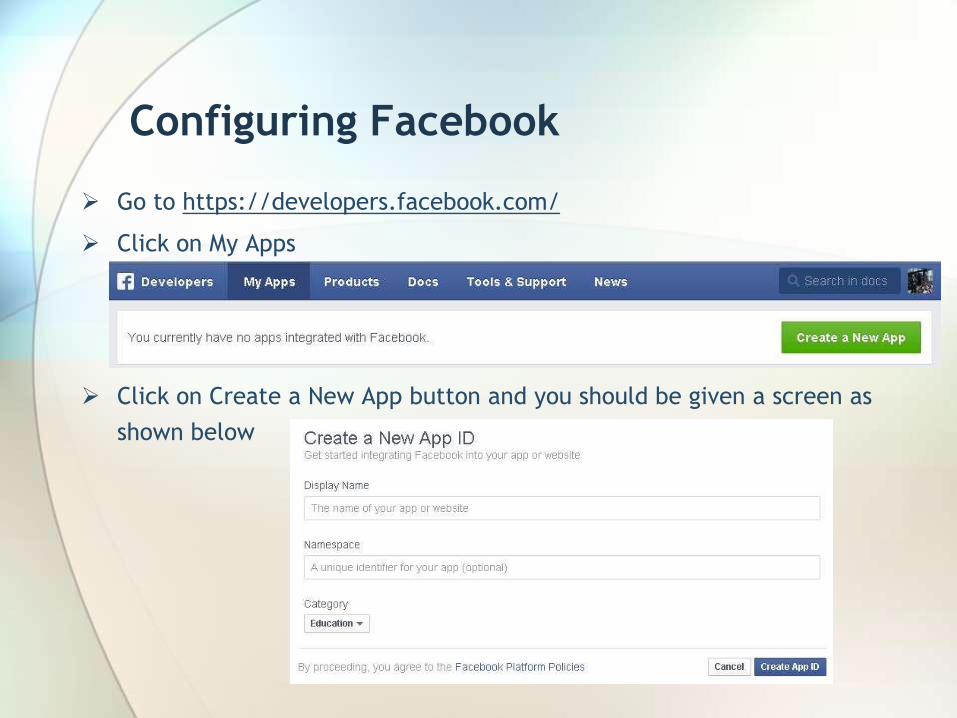
Configuring Facebook
Go to https://developers.facebook.com/
Click on My Apps
Click on Create a New App button and you should be given a screen as
shown below
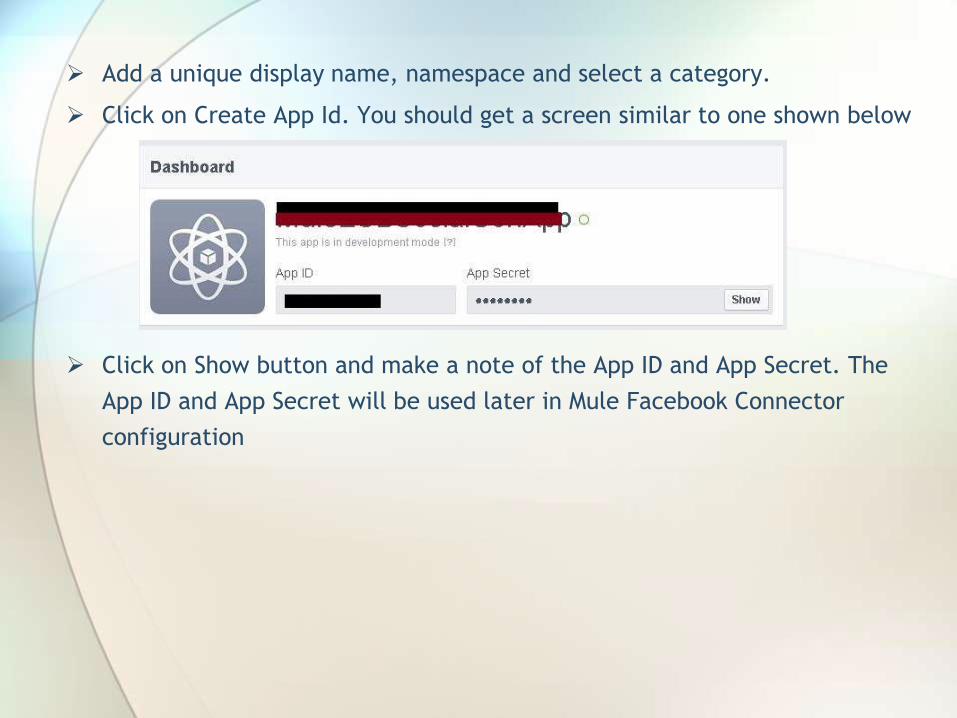
Add a unique display name, namespace and select a category.
Click on Create App Id. You should get a screen similar to one shown below
Click on Show button and make a note of the App ID and App Secret. The
App ID and App Secret will be used later in Mule Facebook Connector
configuration

Configuring Facebook Connector
Create a new Mule Application
Click on Global Elements tab in your main flow
Click on Create Button
Select Facebook under Connector Configuration group
Add your Facebook App ID value to Consumer Key text box
Add your Facebook Secret Key value to Consumer Secret text box
Leave the scope text box empty. The default value for scope is
“email,read_stream,publish_stream” which covers most of the access
permissions
Click on Oauth tab and specify domain, local port and remote port
values.
A screen shot and sample XML configuration is shown in the next slide

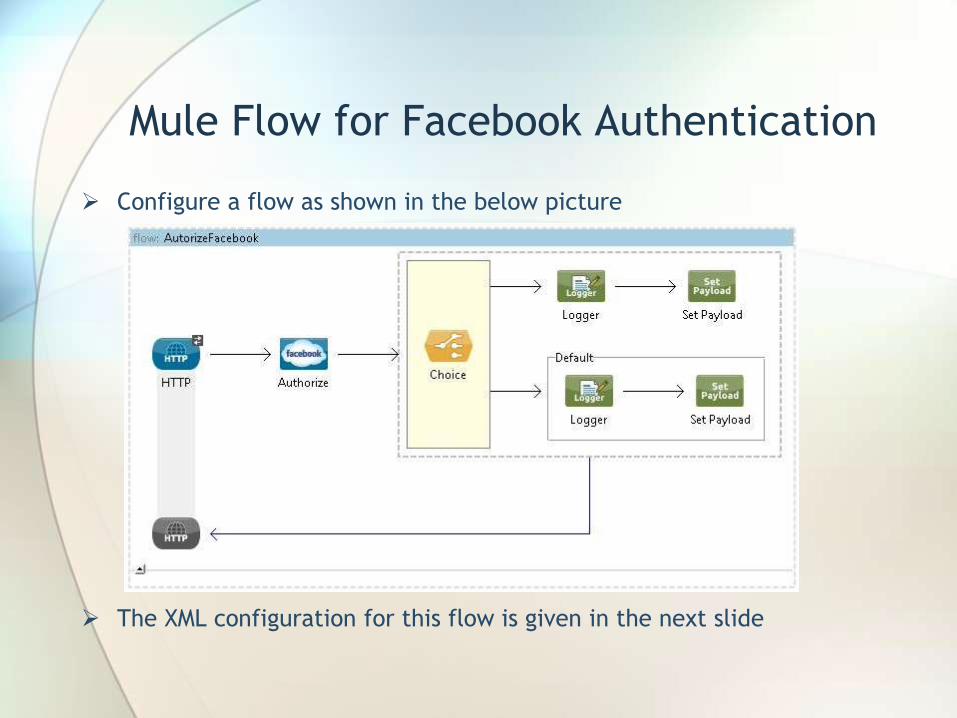
Mule Flow for Facebook Authentication
Configure a flow as shown in the below picture
The XML configuration for this flow is given in the next slide
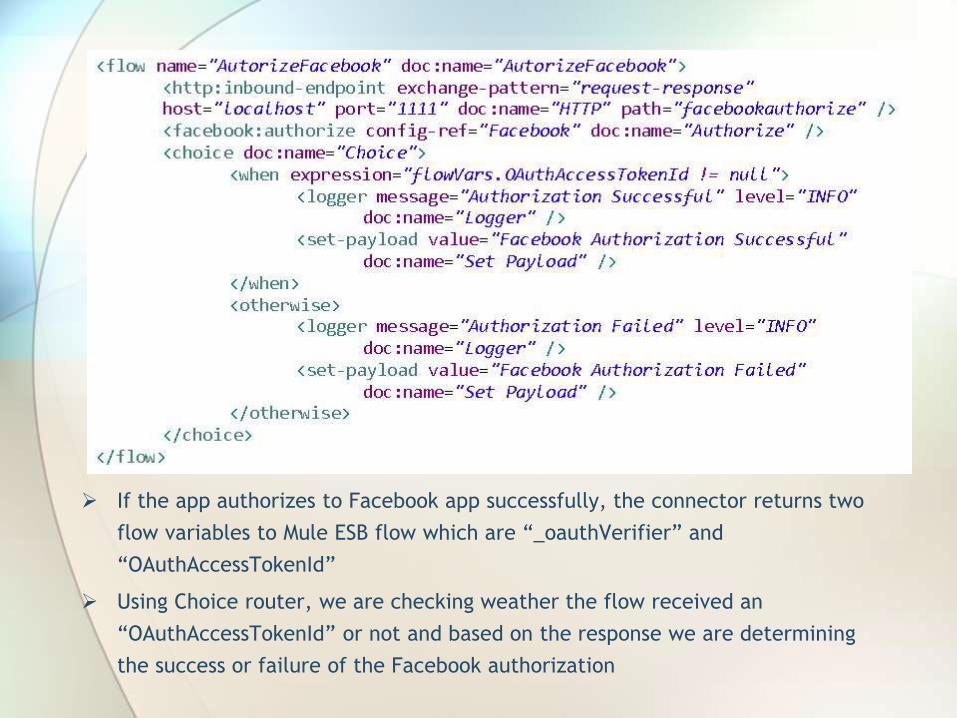
If the app authorizes to Facebook app successfully, the connector returns two
flow variables to Mule ESB flow which are “_oauthVerifier” and
“OAuthAccessTokenId”
Using Choice router, we are checking weather the flow received an
“OAuthAccessTokenId” or not and based on the response we are determining
the success or failure of the Facebook authorization
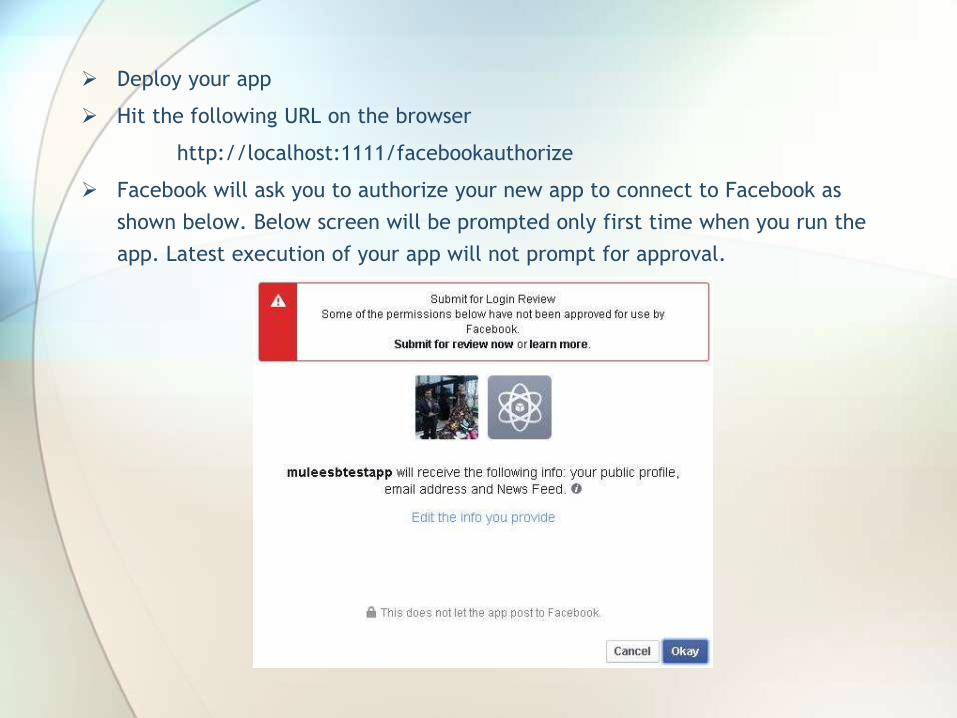
Deploy your app
Hit the following URL on the browser
http://localhost:1111/facebookauthorize
Facebook will ask you to authorize your new app to connect to Facebook as
shown below. Below screen will be prompted only first time when you run the
app. Latest execution of your app will not prompt for approval.
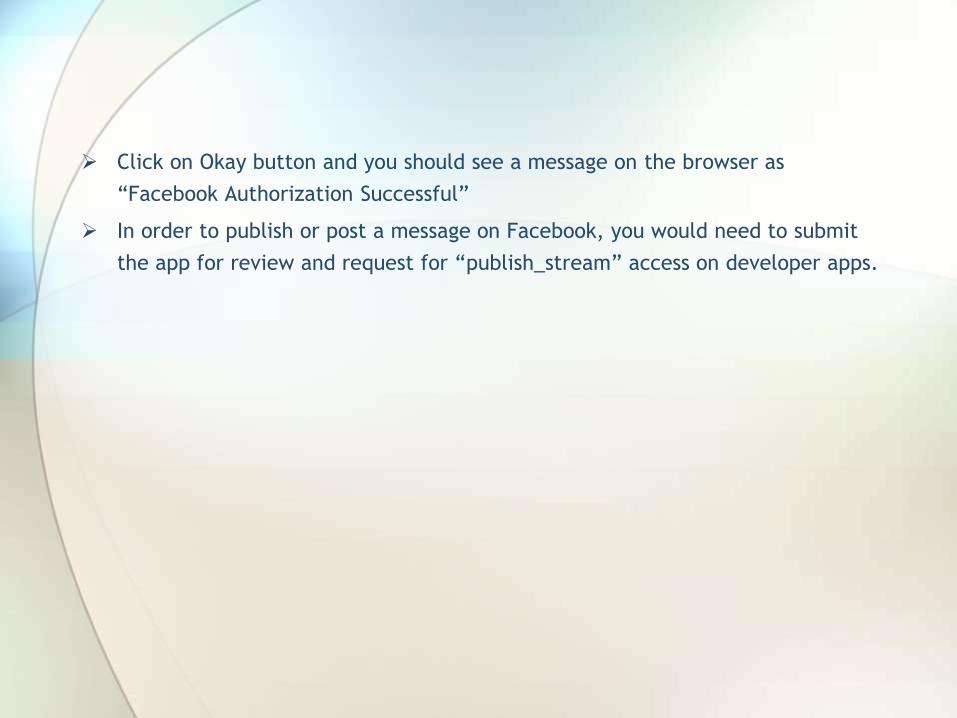
Click on Okay button and you should see a message on the browser as
“Facebook Authorization Successful”
In order to publish or post a message on Facebook, you would need to submit
the app for review and request for “publish_stream” access on developer apps.
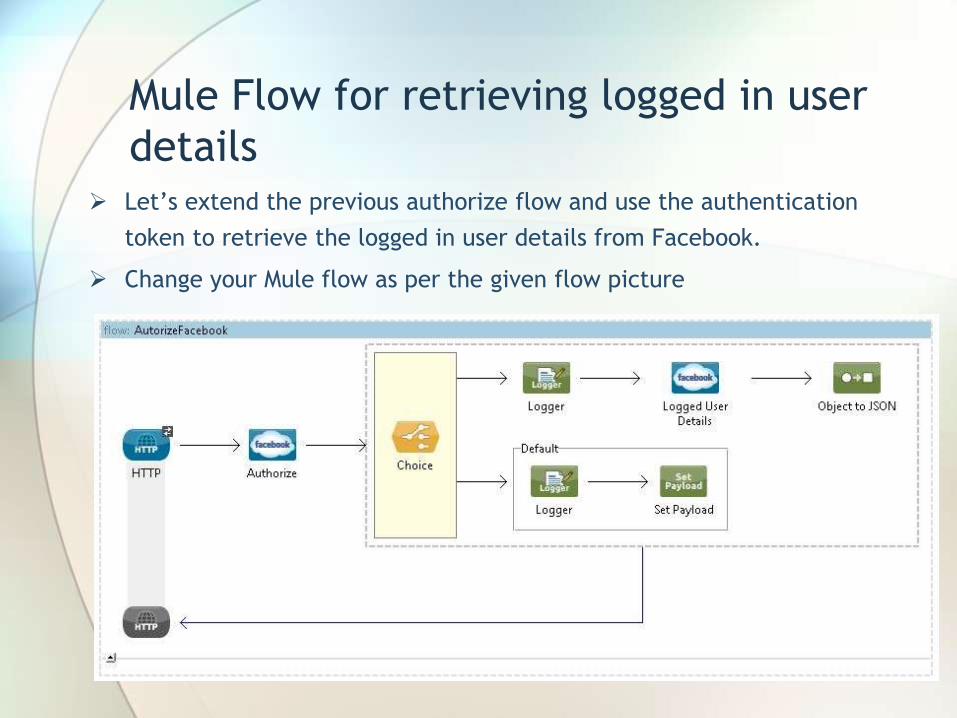
Mule Flow for retrieving logged in user
details Let’s extend the previous authorize flow and use the authentication
token to retrieve the logged in user details from Facebook.
Change your Mule flow as per the given flow picture
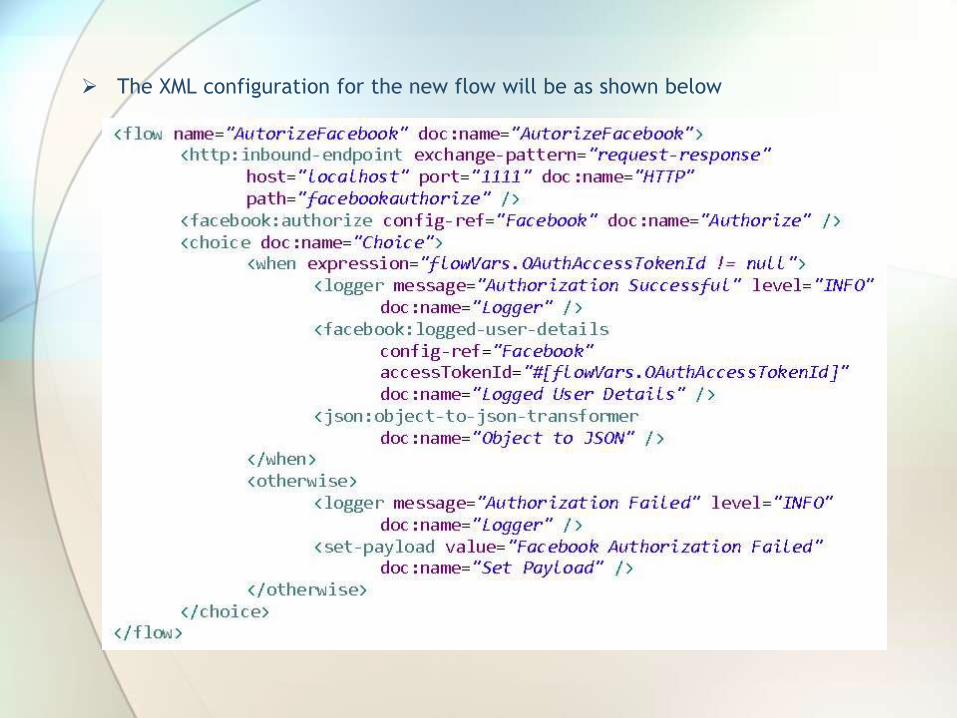
The XML configuration for the new flow will be as shown below
In this flow, we have used another operation on Facebook connector to
retrieve the logged in user details and print them on the browser using Object
to JSON transformer
Deploy your app
Hit the following URL on the browser
http://localhost:1111/facebookauthorize
You should now see the logged in user details printed on your browser in JSON
format
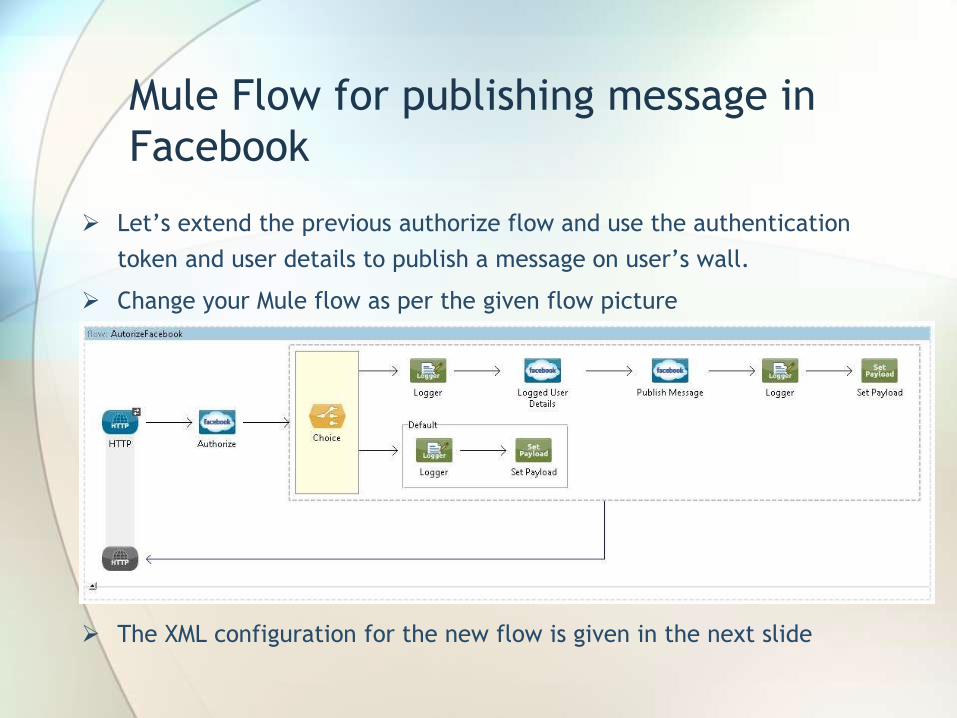
Mule Flow for publishing message in
Let’s extend the previous authorize flow and use the authentication
token and user details to publish a message on user’s wall.
Change your Mule flow as per the given flow picture
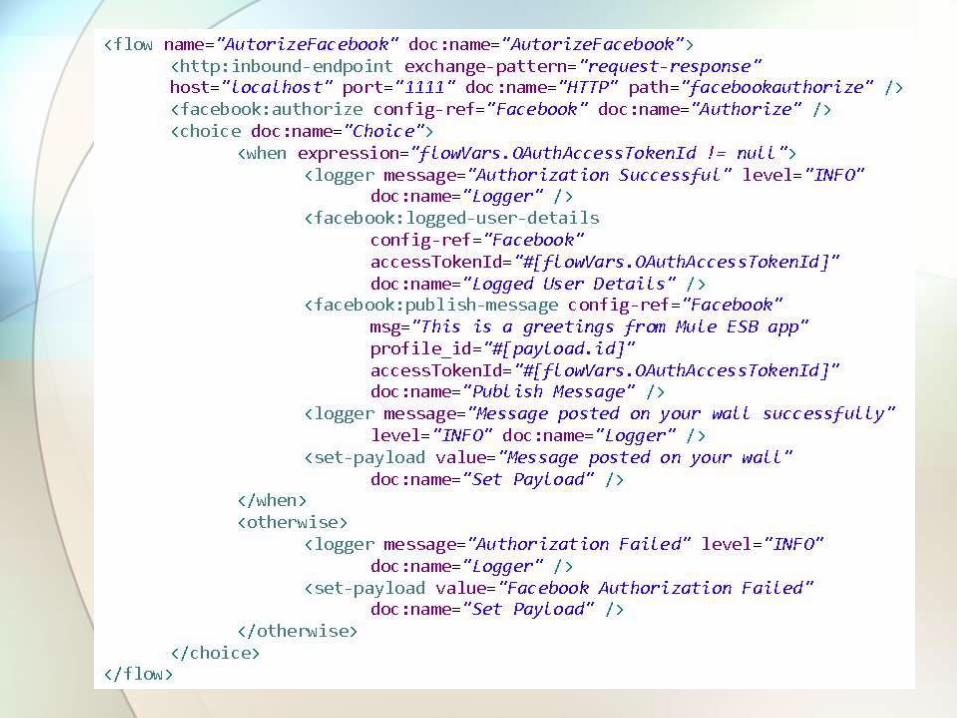
The XML configuration for the new flow is given in the next slide
Deploy your app
Hit the following URL on the browser
http://localhost:1111/facebookauthorize
You should now see a message on your browser as “Message posted on your
wall.”
Check your Facebook wall and you should see a message published on your wall
as “This is a greetings from Mule ESB app”
Please note that Facebook does not allow spam. Therefore, if you try posting
same message twice in a short period of time, an exception will be thrown.
Conclusion
• Mule ESB Facebook connector provides an easy way to connect
to Facebook using Facebook OAuth2 authentication and allows
performing several operations
• The latest Facebook connector is simpler to use compared to
the previous version of Facebook connectors
• Facebook Connector is available for Mule ESB community
edition

Thanks for watching
Recommended