Sonya Nicholl
Senior Policy Analyst
Immunisation Unit – Health Protection NSW
Primary Health Network Conference
Dubbo/Orange 3rd & 4th May 2017
Cold Chain

What is the cold chain?
The ‘cold chain’ is the system of transporting and storing
vaccines within the temperature range of +2°C and +8°C.
The cold chain begins from the time the vaccine is
manufactured, continues through storage at the NSW State
Vaccine Centre and ends when the vaccine is administered.
What is a cold chain breach?
A breach occurs when the vaccines are stored outside of +2°C
and +8°C. Excursions of up to +12°C for no longer than 15
minutes, may occur whilst restocking the refrigerator and are
acceptable
Refer to Strive for 5
for vaccine
management and
cold chain
recommendations
Principles of Safe Vaccine Storage
Management
• All vaccines should be stored and managed according to National
Vaccine Storage Guidelines Strive for 5 2nd Edition
• Vaccines should be stored in a purpose-built vaccine refrigerator (bar
or cyclic defrost refrigerators MUST NOT BE USED)
• Nominate a person (and delegate) to be responsible for vaccine and
cold chain management
• Monitor fridge temperatures twice daily and report any temperature
breaches outside +2°C to +8°C to the Public Health Unit (PHU) on
1300 066 055
• All fridges must be continuously data logged, with the report
downloaded weekly
• Develop cold chain management policies and procedures
• Ensure all staff are trained in cold chain management as required
• Perform annual checks of all vaccine storage
equipment

Receiving a vaccine delivery

Receiving a delivery In metropolitan areas: In rural areas:
Refrigerated transport Coolers with ice-bricks in non-refrigerated transport

Receiving a delivery
1. Check the heat and cold monitors
2. Check the refrigerator temperature is between +2oC and
+8oC before adding new stock
3. For refrigerated transport, place in fridge immediately as
the vaccines are not packed with ice/gel packs
4. Rotate the stock
5. Check that the delivery received matches the order placed

Checking the delivery (heat)
Immediately upon opening the vaccine delivery, check the
heat monitor
If the heat monitor has
been activated, contact
the State Vaccine Centre
on 1300 656 132
immediately.
Place the vaccines in the
fridge until advice
provided
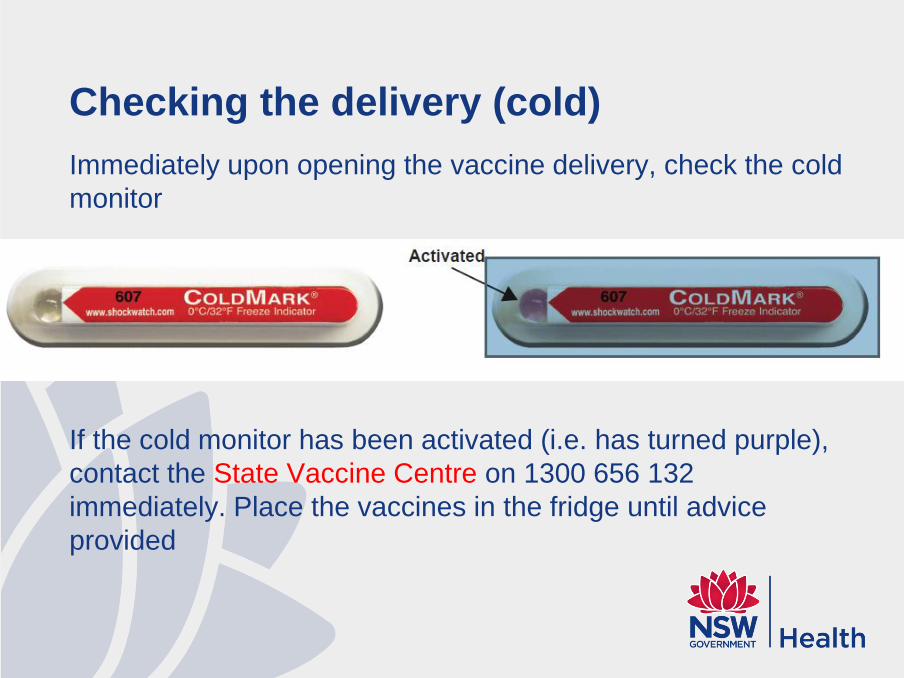
Checking the delivery (cold)
Immediately upon opening the vaccine delivery, check the cold
monitor
If the cold monitor has been activated (i.e. has turned purple),
contact the State Vaccine Centre on 1300 656 132
immediately. Place the vaccines in the fridge until advice
provided

Stocking the fridge
Document the new delivery of vaccines (and time) on
the fridge monitoring chart so all staff are aware
Ensure stock is rotated in the fridge. i.e. old stock is
moved to the front and used first and new stock is
placed behind
Keep the vaccines in the original packaging. DO NOT
EXPOSE TO LIGHT
Reset min/max thermometer once fridge is within
+2oC to +8oC


Steps when a cold chain breach is detected
1. Quarantine the vaccines in the fridge and label ‘do not use’
2. Notify the practice manager/principal/relevant staff member
3. Download the data logging report for the past week, including
the cold chain breach
4. Contact the PHU on 1300 066 055 as soon as possible
during business hours and forward data logging report
5. DO NOT discard vaccines until advice from PHU is provided
6. You may be required to have the fridge serviced and provide
3 days of data logging before restocking

Recent weather events
Power outages
To salvage vaccines:
1. Immediately isolate the vaccines, keep the fridge door
closed and attach a sign stating ‘Power out. Do not use
vaccines. Keep fridge door closed.’
2. Closely monitor fridge temperature with battery powered
min/max thermometer
3. If the temperatures gradually progress towards 8°C, make
arrangements to transfer to a cooler.
4. Pack vaccines in a cooler (as per Strive for 5)
5. Return vaccines to fridge when power has returned and
fridge is stable, between +2°C to +8°C degrees

Salvage equipment
Cooler (types include Esky®, Willow®, Coolman®)
Ice/gel packs
Polystyrene chips/bubble wrap
Battery powered min/max thermometer
(NSW Health does not endorse any particular brand of cooler)
Coolers:
• Are a solid-walled insulated container with a tightly fitting
lid
• Should be selected based on your needs
• Generally have limited cold life and are not adequate for
vaccine storage over prolonged periods (more than
8hrs) or in extreme conditions (eg. very hot or very cold
weather)
• Minimum size cooler for storing vaccines is 10L
• Polystyrene coolers are only suitable for storing
vaccines for up to 4 hours

How many ice/gel packs are required?
This will depend on:
• The ambient temperature
• Type and size of cooler
• Number of vaccines
• Cooler capacity
• Size and type of ice/gel packs

- Are filled with water and can be removed from the freezer at a
temperature as low as -18°C
Conditioning ice packs:
• Remove ice packs from freezer
• To condition the ice packs, lay them in a single row on their side with
5cm space between packs to allow maximum air exposure.
• Wait until ice packs begin to sweat (can take 1 hour @ +20°C)
• An ice pack is conditioned as soon as water begins to ‘slosh’ about
slightly inside ice pack
Ice packs

Gel packs
Gel packs contain chemicals that depress the freezing point of the pack
and ensures the gel remains < 0°C for longer than water-filled packs
(check with manufacturer before purchasing)
Conditioning gel packs:
Gel packs usually take longer to condition than ice packs. It is
recommended that the manufacturer’s instructions are followed to
condition gel packs, however below is a guide to conditioning gel packs
Gel Pack Size Ambient
Temperature
Conditioning
Time
Gel Packs <750g Temp >+15°C 45mins
Temp <+15°C 1 hour
Gel Packs >750g Temp >+15°C 1 hour
Temp <+15°C 1½ hours
How to pack a cooler
Freezing is the greatest risk to vaccines when packed in a
cooler.
There are two storage options available - depending on how
long the vaccines need to be stored for and the ambient
temperature
• OPTION ONE – can be used for storing vaccines for up to
8 hours (see slide 20)
• OPTION TWO – packing vaccines into a polystyrene
container which is then placed into a larger cooler (see
slide 23)
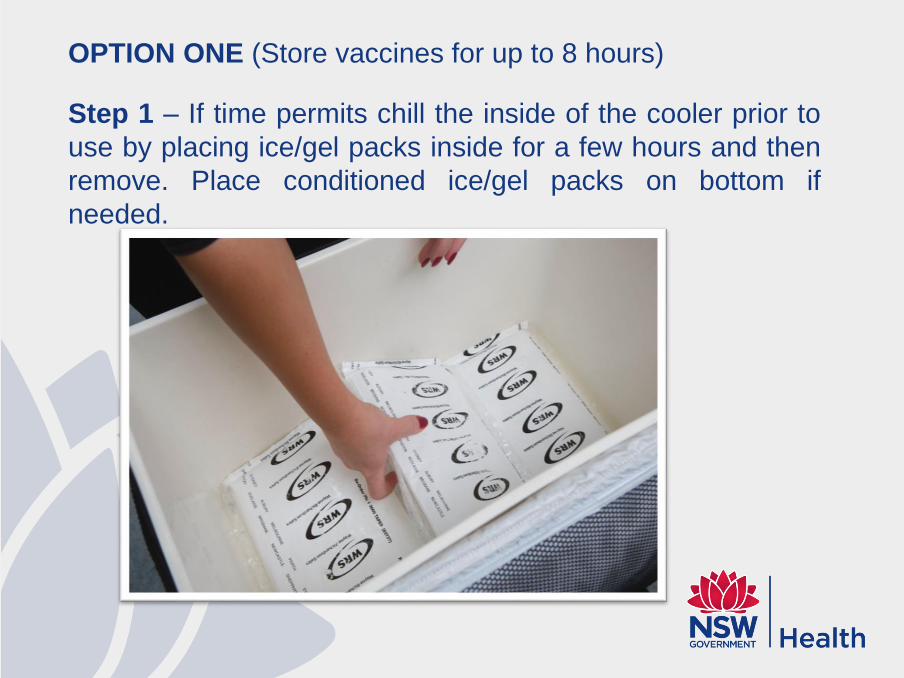
OPTION ONE (Store vaccines for up to 8 hours)
Step 1 – If time permits chill the inside of the cooler prior to
use by placing ice/gel packs inside for a few hours and then
remove. Place conditioned ice/gel packs on bottom if
needed.

Step 2 – Place polystyrene
chips, bubble wrap or other
suitable insulating material at
the bottom of the cooler. This
eliminates ‘hot and cold spots’.
Polystyrene chips are preferred
as it promotes air circulation. If
using bubble-wrap, avoid
wrapping vaccines tightly.
Step 3 – Place vaccines in
cooler with a battery
powered min/max
thermometer probe in the
centre of the vaccine stock.
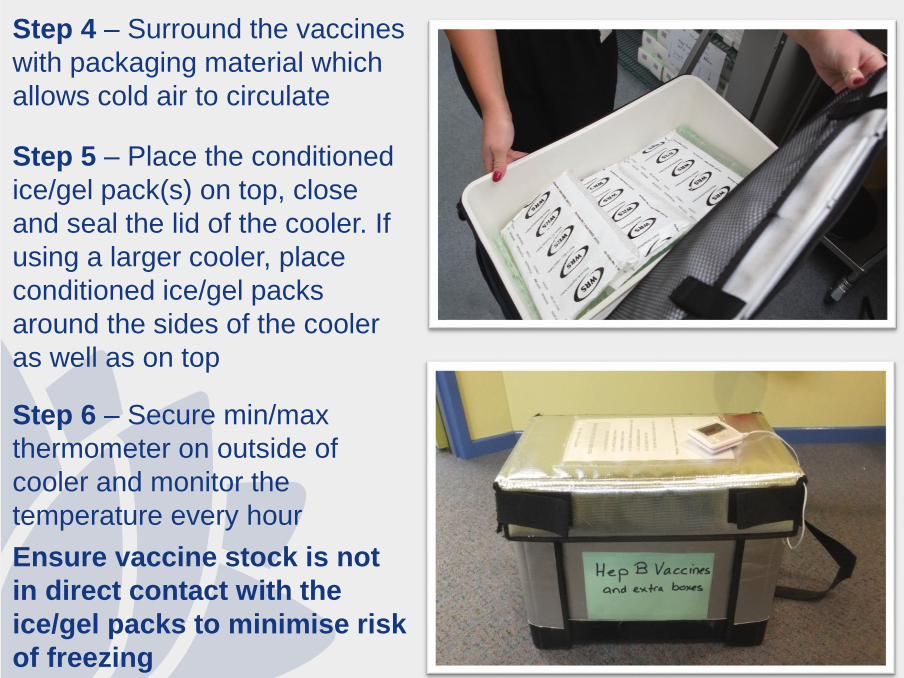
Step 4 – Surround the vaccines
with packaging material which
allows cold air to circulate
Step 5 – Place the conditioned
ice/gel pack(s) on top, close
and seal the lid of the cooler. If
using a larger cooler, place
conditioned ice/gel packs
around the sides of the cooler
as well as on top
Step 6 – Secure min/max
thermometer on outside of
cooler and monitor the
temperature every hour
Ensure vaccine stock is not
in direct contact with the
ice/gel packs to minimise risk
of freezing

OPTION TWO
Pack vaccines into a polystyrene container then into a larger
cooler.
Steps:
1. Collect polystyrene container and chill inside by placing ice/gel
packs inside for a few hours
2. Place vaccines and a battery powered minimum/maximum
thermometer (in centre of vaccines) inside polystyrene cooler and
secure lid
3. Pack polystyrene container inside a larger cooler and surround it
with ice/gel packs and secure lid
4. Monitor the temperature every hour
Ensure vaccine stock is not in direct contact with the ice/gel
packs to minimise risk of freezing

Monitoring temperature of vaccines in a
coolerTemperatures must be recorded hourly to ensure it is
maintained between +2°C to +8°C. Ensure temperature is
monitored closely in the first 2 hours (due to increased risk of
freezing)
Ice/gel packs may need to be added or removed, depending
on how long vaccines are in the cooler and the external
ambient temperature
Reset min/max thermometer
after each reading

All vaccines that have been continuously stored between
+2°C to +8°C can be returned to the fridge when the
power resumes and the fridge temperature has been
stable for one hour (between +2°C and +8°C)
Remember to reset the fridge min/max thermometer
after fridge has been restocked and the temperature has
returned to +2°C and +8°C. Document all activity on the
Fridge Temperature chart/graph
When the power returns

Example data logging graph of a cold chain breach
If a breach occurs, contact your Public
Health Unit on 1300 066 055
Start of
breach
End of
breach
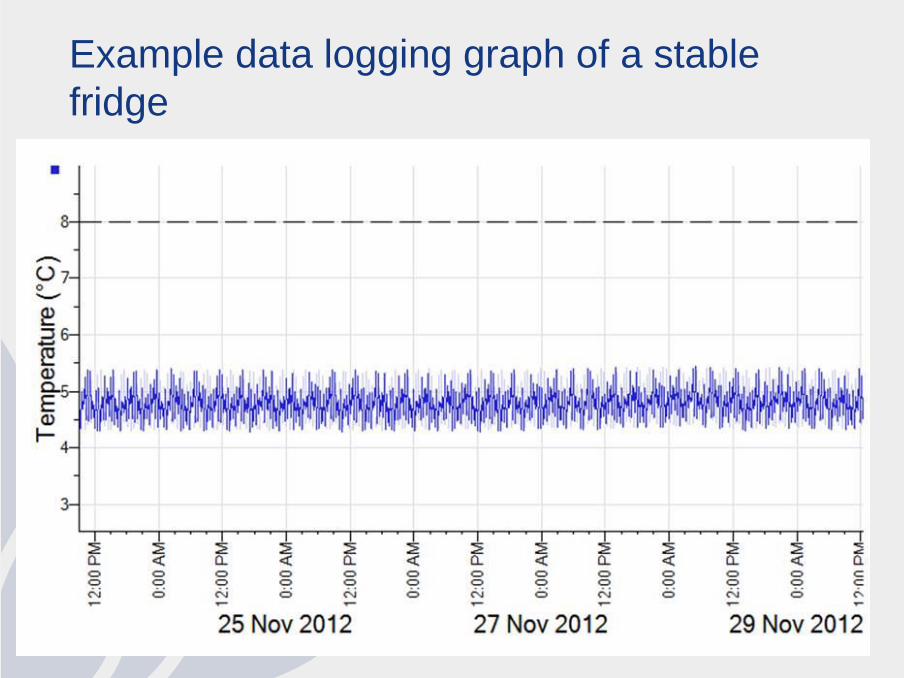
Example data logging graph of a stable
fridge

Types of vaccine storage
Purpose-built vaccine refrigerators are best practice and
are the recommended vaccine storage option.
Domestic refrigerators are not recommended for vaccine
storage, however if a domestic refrigerator is the only
vaccine storage option, refer to Appendix 4 in the National
Vaccine Storage Guidelines Strive for 5 2nd Edition
Bar and cyclic defrost domestic refrigerators MUST NOT
be used to store vaccines.

Fridge monitoring
ALL PROVIDERS MUST HAVE:
Min/max thermometer A battery powered min/max
thermometer must be available during a power outage to
continue to monitor the fridge temperature or cooler if long
term storage is required
Data logger Each fridge must be continuously monitored
using either an in-built or external data logger. Data loggers
should be downloaded once per week to check for excursions
outside +2oC to +8oC (known as a cold chain breach). Refer
to the cold chain breach presentation for detailed information
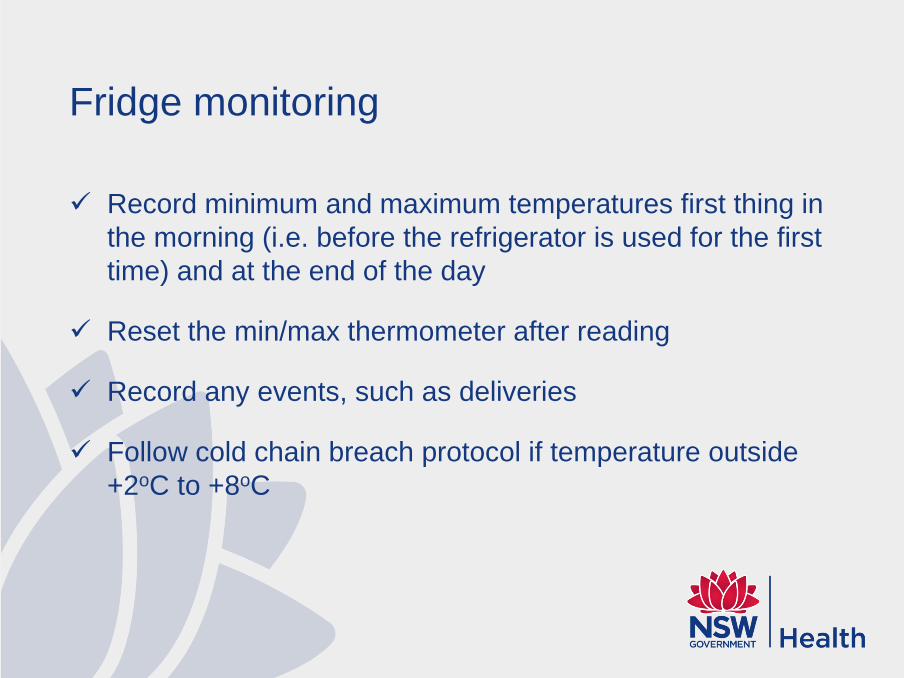
Fridge monitoring
Record minimum and maximum temperatures first thing in
the morning (i.e. before the refrigerator is used for the first
time) and at the end of the day
Reset the min/max thermometer after reading
Record any events, such as deliveries
Follow cold chain breach protocol if temperature outside
+2oC to +8oC
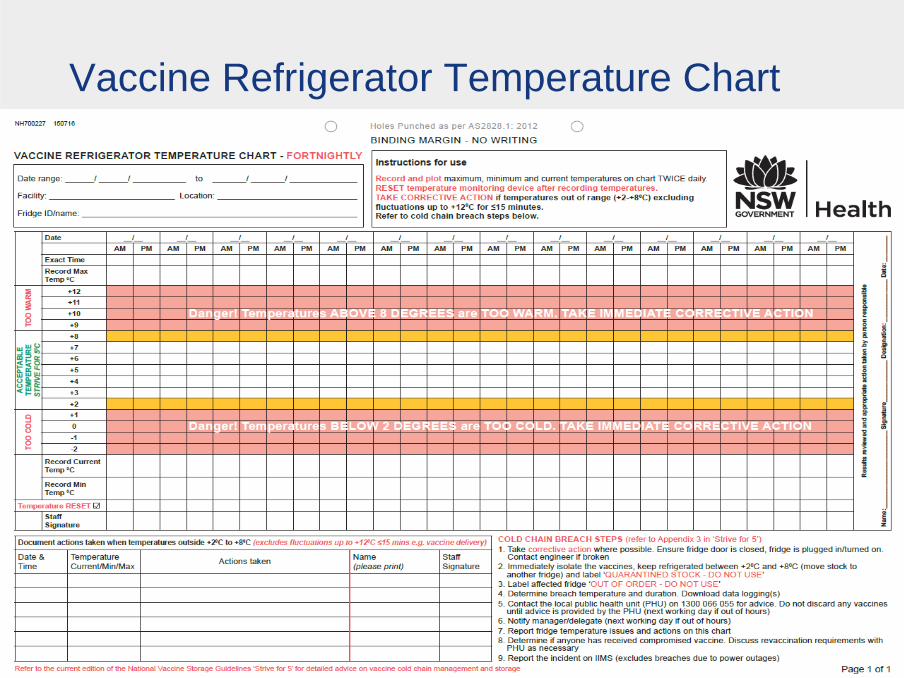
Vaccine Refrigerator Temperature Chart
.

Data loggers
What is a data logger?
Temperature data loggers are small electronic devices that
measure temperatures at pre-set time intervals and record the
results over a period of time. Data loggers should be set to
record temperatures at 10-15 minute intervals.
Why is it useful?
It provides information on the duration of and temperatures
during a cold chain breach. This helps to determine the
efficacy of the vaccines after the cold chain breach
Data loggers
There are a range of data loggers available for Windows
based computers
Mac computer users will require a wireless data logger as it
is more compatible
Some popular brands are: – Tinytag – HOBO – Enlake –
Logtag
(NSW Health does not endorse any particular brand of data
logger)

Min/max thermometer
A battery operated minimum/maximum thermometer is essential
for monitoring the temperature of the fridge, particularly in a power
outage. It must be reset after each reading
New min/max thermometers – Remove the plastic tab from the
back of the min/max thermometer to ensure the battery is
activated

Min/max thermometer – battery change
This is the Main Body Slide.
This slide is based on the SLIDE MASTER.
To TURN OFF THE BULLETS - click on the
Bullet Button in the Menu.
To insert a NEW BODY SLIDE - choose
Insert in the Menu - click New Slide –
BODY SLIDE is the second layout across.
Min/max thermometer – ice slurry test
This is the Main Body Slide.
This slide is based on the SLIDE MASTER.
To TURN OFF THE BULLETS - click on the
Bullet Button in the Menu.
To insert a NEW BODY SLIDE - choose
Insert in the Menu - click New Slide –
BODY SLIDE is the second layout across.

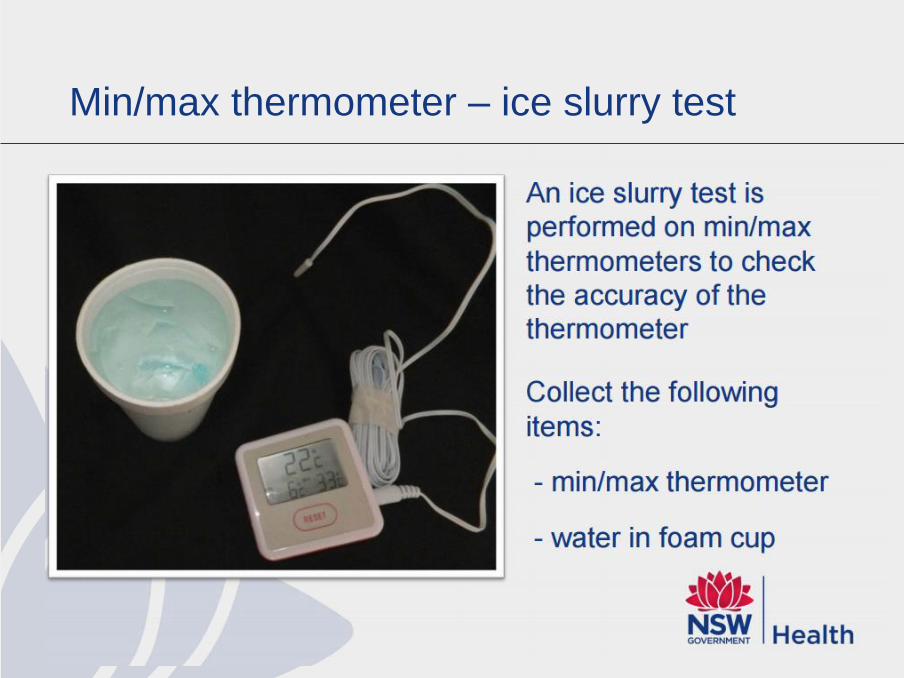
Min/max thermometer – ice slurry test

Min/max thermometer – ice slurry test
This is the Main Body Slide.
This slide is based on the SLIDE MASTER.
To TURN OFF THE BULLETS - click on the
Bullet Button in the Menu.
To insert a NEW BODY SLIDE - choose
Insert in the Menu - click New Slide –
BODY SLIDE is the second layout across.

Min/max thermometer – ice slurry test
This is the Main Body Slide.
This slide is based on the SLIDE MASTER.
To TURN OFF THE BULLETS - click on the
Bullet Button in the Menu.
To insert a NEW BODY SLIDE - choose
Insert in the Menu - click New Slide –
BODY SLIDE is the second layout across.

Min/max thermometer – ice slurry test
This is the Main Body Slide.
This slide is based on the SLIDE MASTER.
To TURN OFF THE BULLETS - click on the
Bullet Button in the Menu.
To insert a NEW BODY SLIDE - choose
Insert in the Menu - click New Slide –
BODY SLIDE is the second layout across.

Completion of ice slurry test
This is the Main Body Slide.
This slide is based on the SLIDE MASTER.
To TURN OFF THE BULLETS - click on the
Bullet Button in the Menu.
To insert a NEW BODY SLIDE - choose
Insert in the Menu - click New Slide –
BODY SLIDE is the second layout across.

Min/max thermometer – frequency of
checks Batteries must be replaced:
- Every 12 months
- If thermometer is flashing
An ice slurry test must be performed:
- Annually
- After every battery change
- In the event of cold chain problems (see page 25 Strive for 5)
Min/max thermometers must be replaced:
- If the min/max thermometer or probe or wire is damaged
- - If the min/max thermometer is malfunctioning
and/or not calibrating
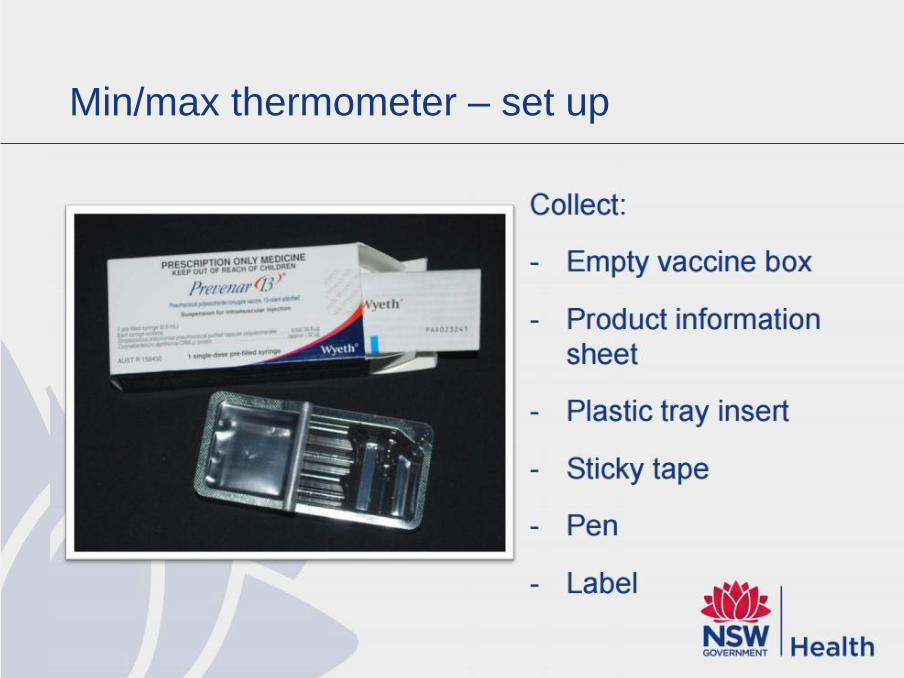
Min/max thermometer – set up
This is the Main Body Slide.
This slide is based on the SLIDE MASTER.
To TURN OFF THE BULLETS - click on the
Bullet Button in the Menu.
To insert a NEW BODY SLIDE - choose
Insert in the Menu - click New Slide –
BODY SLIDE is the second layout across.
Min/max thermometer – set up

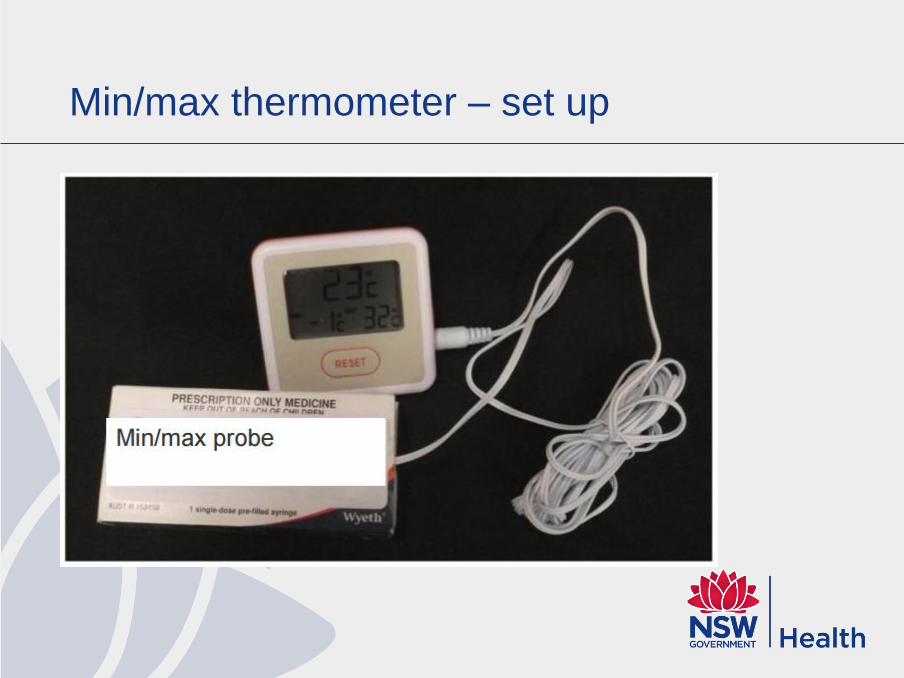
Min/max thermometer – set up
Prior to use, allow the
current fridge temperature
to return to +2°C to +8°C,
then: Press RESET
Document battery change
and ice slurry test in the
‘comments’ section of the
daily fridge temperature
chart
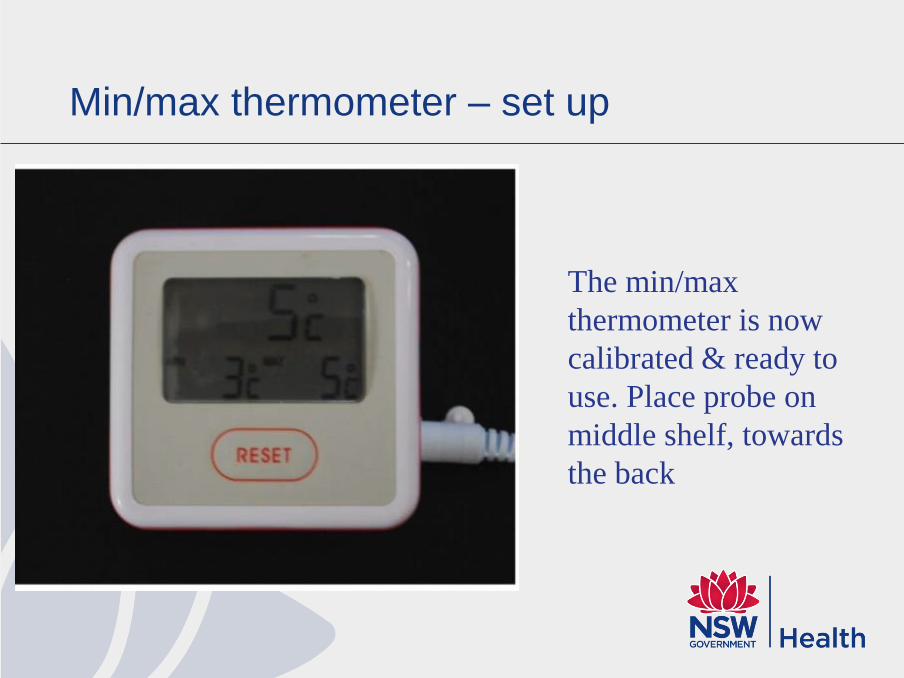
Min/max thermometer – set up
The min/max
thermometer is now
calibrated & ready to
use. Place probe on
middle shelf, towards
the back
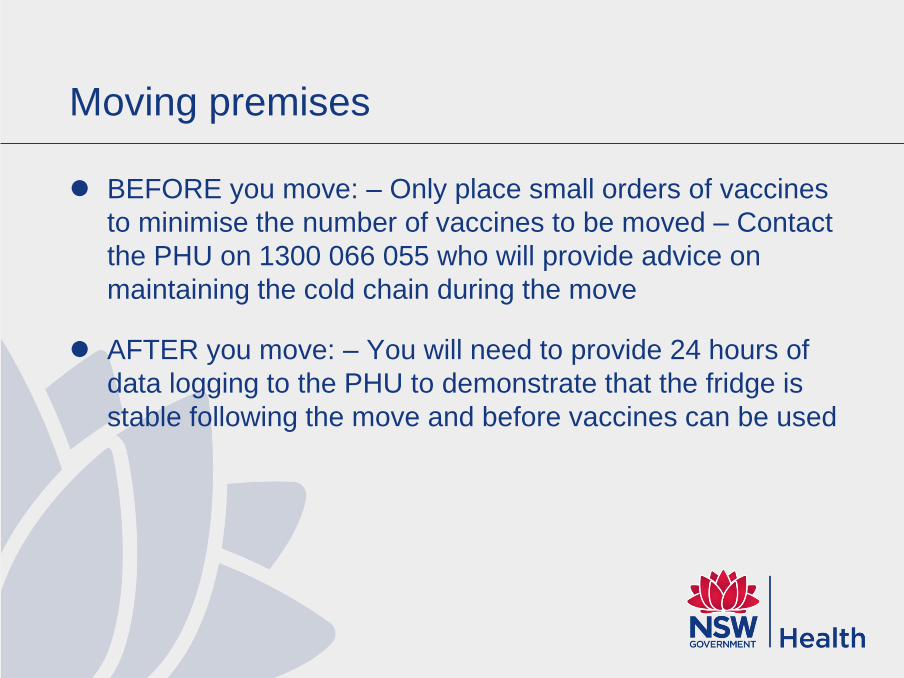
Moving premises
BEFORE you move: – Only place small orders of vaccines
to minimise the number of vaccines to be moved – Contact
the PHU on 1300 066 055 who will provide advice on
maintaining the cold chain during the move
AFTER you move: – You will need to provide 24 hours of
data logging to the PHU to demonstrate that the fridge is
stable following the move and before vaccines can be used

Remember to:
Protect vaccines from ultraviolet light by leaving in original
packaging
Distribute stock evenly throughout the fridge
Rotate stock to bring shortest expiry date to the front to use first
Ensure stock is not placed against evaporation plate at back of
the fridge
Leave space to allow for air to circulate between vaccines (i.e.
do not overstock)
Ensure plastic trays are used to allow for air to circulate

Requirements for Auditing
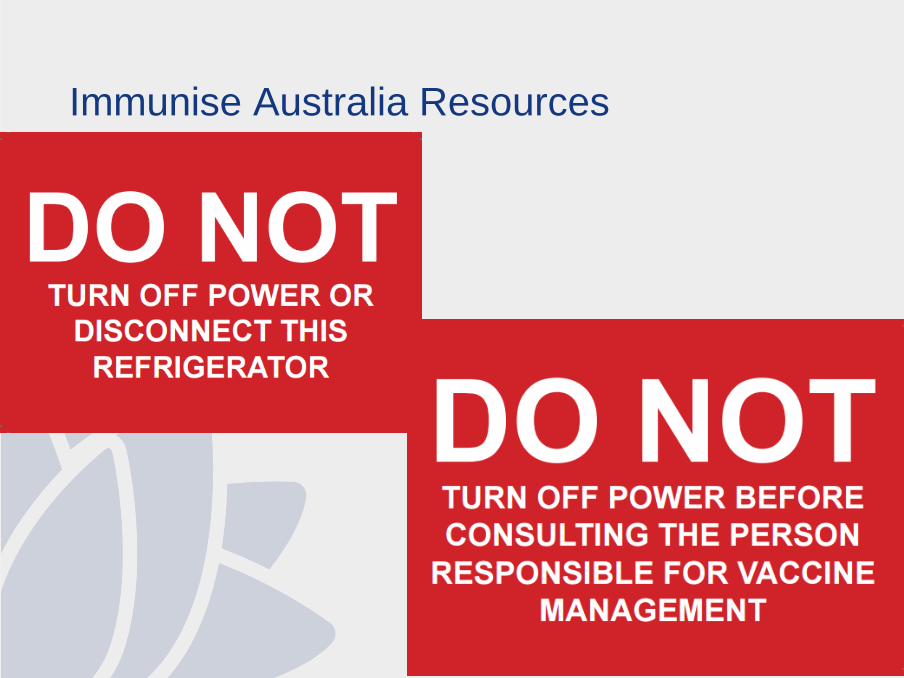
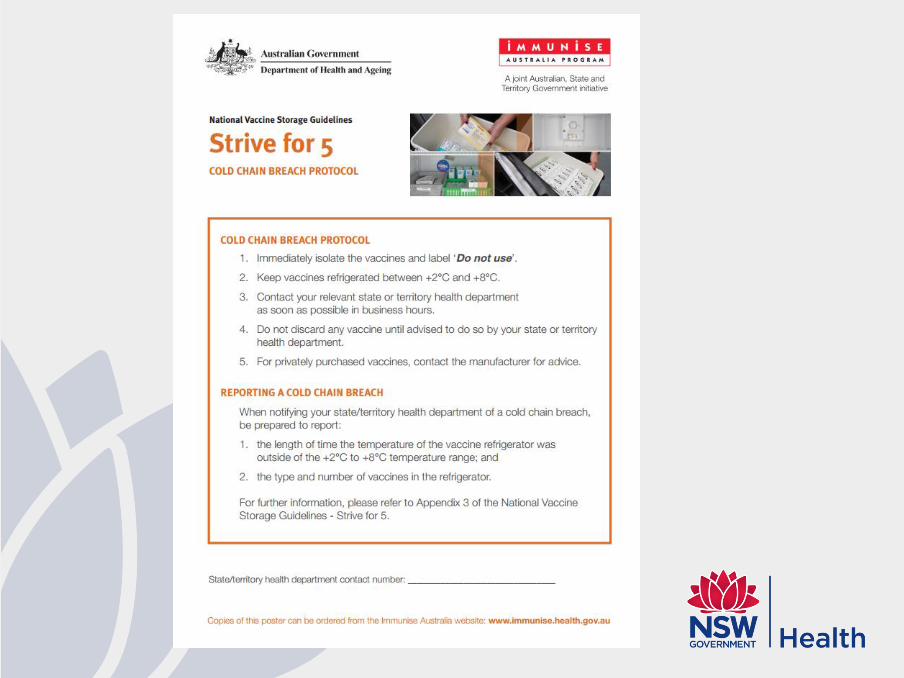
Immunise Australia Resources


Where to in the future… Thermostability data and proposed cold chain pilot
HETI vaccine storage and cold chain management module
– available mid-May 2017
New Policy Directive

Managing a cold chain breach
< >
Screen ID: s08p01
Click Next to continue.
?

Acknowledgements
Barbara Wilson, Immunisation Coordinator, Albury Public
Health Unit, for providing cold chain information and images
Louise Baker development of presentation

Questions...
Recommended