do not resort this list 3-Sep
character names facebook name kind of player
officer {msa}karensa karen rogers hybridofficer Anthony ♦§yn£rgy ƒir§T♦ anthony lenz hybridmaster Benson benson ang hybrid
0 iksan Susanto hybrid0 Ken taro Ken taro pvp
officer ----julie… julie strickland hybridofficer richard richard thies hybrid
0 abster jane maddison hybridofficer KingKaos-♦§yn£rgy ƒir§T� waz roberts monster hunterofficer a Ðiva o§♔ℒ ℜ jane curtis hybrid
0 peter (pvg) peter von gunten hybrid0 jacco jacco van beekum hybrid
officer sue sue douglas hybrid0 ingrid ingrid andersson hybrid
officer teresa teresa hedley hybrid0 sh ang ang seng heng hybrid0 chronos Bjørn Kæmpegaard Rasmussen hybrid0 david david sears hybrid0 endless delirium lisa padron hybrid- - - -0 suzanne suzanne klein-overmeer hybrid
officer wim wim van den munckhof hybrid0 ronny ronny andersson hybrid0 {msca}muttley Lauren bolt pure pvp0 (*)(*){siky} craig worland pvp- - - -0 georgia georgia mata hybrid0 myagi333 ivo schrijn hybrid0 king wonderbread of azria erik klein-overmeer hybrid0 mac tavish guilaume paget hybrid
officer monyc monique bartelds hybrid0 amores amores douglas pvp0 merlina merlina mara pvp
officer shamaeso rick thompson hybrid0 zoe zoe mataranga pure pvp0 tom tom hedley hybrid0 linda linda conley monster hunter0 隆期 monster hunter0 aliantha aliantha castle pvp
officer tara tara jones pvp0 yasmine yasmine bartelds hybrid0 gryphon dave noble hybrid0 vane vane hsia hybrid0 nelly nelly hsia hybrid0 robert robert north monster hunter0 sate sate babi hybrid0 glen glen gray monster hunter
ℜonin {力}{MW}
陳隆期 (chroharp chen)

0 nicksen nicksen chrismason mangkey power lvler0 scum mick gill power lvler0 fren fren amie power lvler0 derick derrick danforth power lvler0 dominic dominc thies power lvler0 eric john toliongco eric toliongco power lvler0 truth hunter christopher truthhunter robin power lvler0 士禎 power lvler0 condo condo sys power lvler0 mario mario herrera power lvler0 jeremy jeremy howell power lvler0 cicca Christine Lerbæk power lvler0 bubble sandra mccleland power lvler0 =k*n=g.k graham truthhunter roberts power lvler- - - -- - - -- - - -- - - -- - - -- - - -- - - -- - - -- - - -- - - -- - - -- - - -- - - -- - - -
黎士禎 ( Li shi chen)
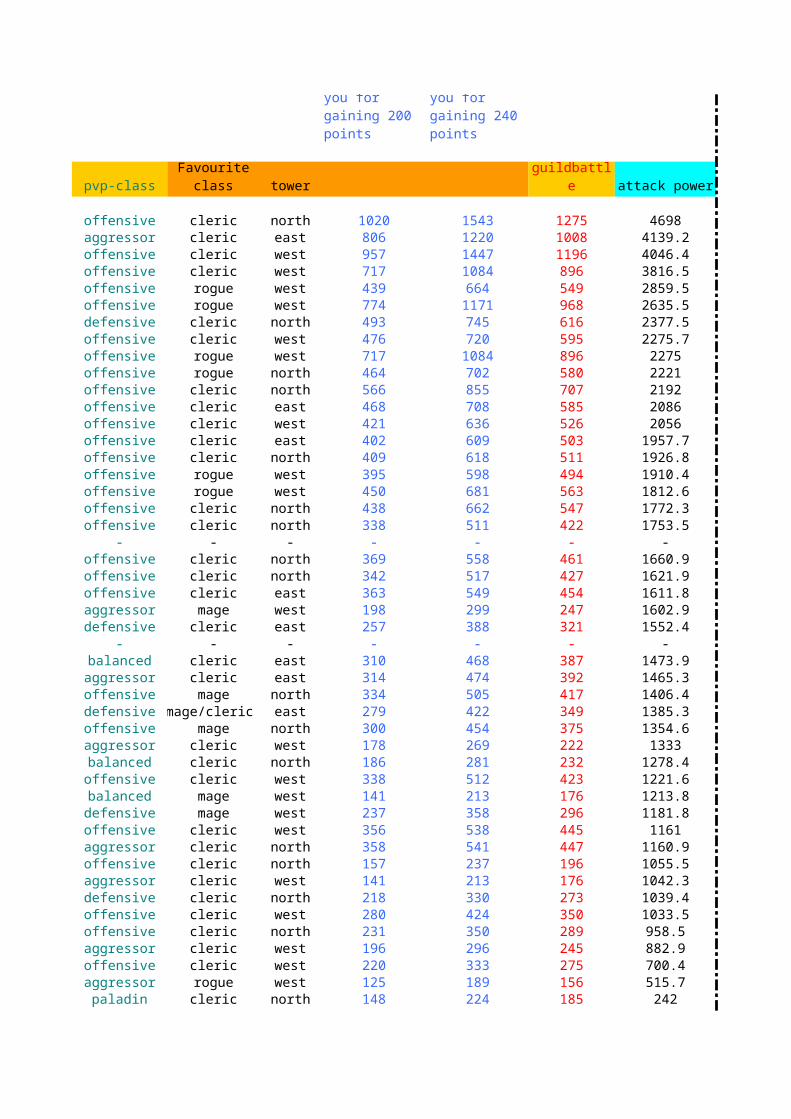
pvp-class tower attack power
offensive cleric north 1020 1543 1275 4698aggressor cleric east 806 1220 1008 4139.2offensive cleric west 957 1447 1196 4046.4offensive cleric west 717 1084 896 3816.5offensive rogue west 439 664 549 2859.5offensive rogue west 774 1171 968 2635.5defensive cleric north 493 745 616 2377.5offensive cleric west 476 720 595 2275.7offensive rogue west 717 1084 896 2275offensive rogue north 464 702 580 2221offensive cleric north 566 855 707 2192offensive cleric east 468 708 585 2086offensive cleric west 421 636 526 2056offensive cleric east 402 609 503 1957.7offensive cleric north 409 618 511 1926.8offensive rogue west 395 598 494 1910.4offensive rogue west 450 681 563 1812.6offensive cleric north 438 662 547 1772.3offensive cleric north 338 511 422 1753.5
- - - - - - -offensive cleric north 369 558 461 1660.9offensive cleric north 342 517 427 1621.9offensive cleric east 363 549 454 1611.8aggressor mage west 198 299 247 1602.9defensive cleric east 257 388 321 1552.4
- - - - - - -balanced cleric east 310 468 387 1473.9aggressor cleric east 314 474 392 1465.3offensive mage north 334 505 417 1406.4defensive mage/cleric east 279 422 349 1385.3offensive mage north 300 454 375 1354.6aggressor cleric west 178 269 222 1333balanced cleric north 186 281 232 1278.4offensive cleric west 338 512 423 1221.6balanced mage west 141 213 176 1213.8defensive mage west 237 358 296 1181.8offensive cleric west 356 538 445 1161aggressor cleric north 358 541 447 1160.9offensive cleric north 157 237 196 1055.5aggressor cleric west 141 213 176 1042.3defensive cleric north 218 330 273 1039.4offensive cleric west 280 424 350 1033.5offensive cleric north 231 350 289 958.5aggressor cleric west 196 296 245 882.9offensive cleric west 220 333 275 700.4aggressor rogue west 125 189 156 515.7
paladin cleric north 148 224 185 242
minimal lvl you for gaining 200 points
minimal lvl you for gaining 240 points
Favourite class
level within guildbattle

balanced cleric west 138 208 172 1.7balanced cleric west 159 241 199 1.7balanced cleric north 160 242 200 1.7balanced cleric north 182 276 228 1.7balanced cleric west 210 317 262 1.7balanced cleric north 214 324 268 1.7balanced cleric north 226 341 282 1.7balanced cleric north 226 342 283 1.7balanced rogue north 258 390 322 1.7balanced cleric west 304 460 380 1.7balanced rogue east 348 526 435 1.7balanced mage west 350 529 437 1.7balanced cleric north 394 595 492 1.7balanced cleric east 435 658 544 1.7
- - - - - - -- - - - - - -- - - - - - -- - - - - - -- - - - - - -- - - - - - -- - - - - - -- - - - - - -- - - - - - -- - - - - - -- - - - - - -- - - - - - -- - - - - - -- - - - - - -
0 1 2 3 4 5 6 7 8 9 10 110
1
2
3
4
5
6
7
8
9
10
11Kind of player
BSI
LS
I
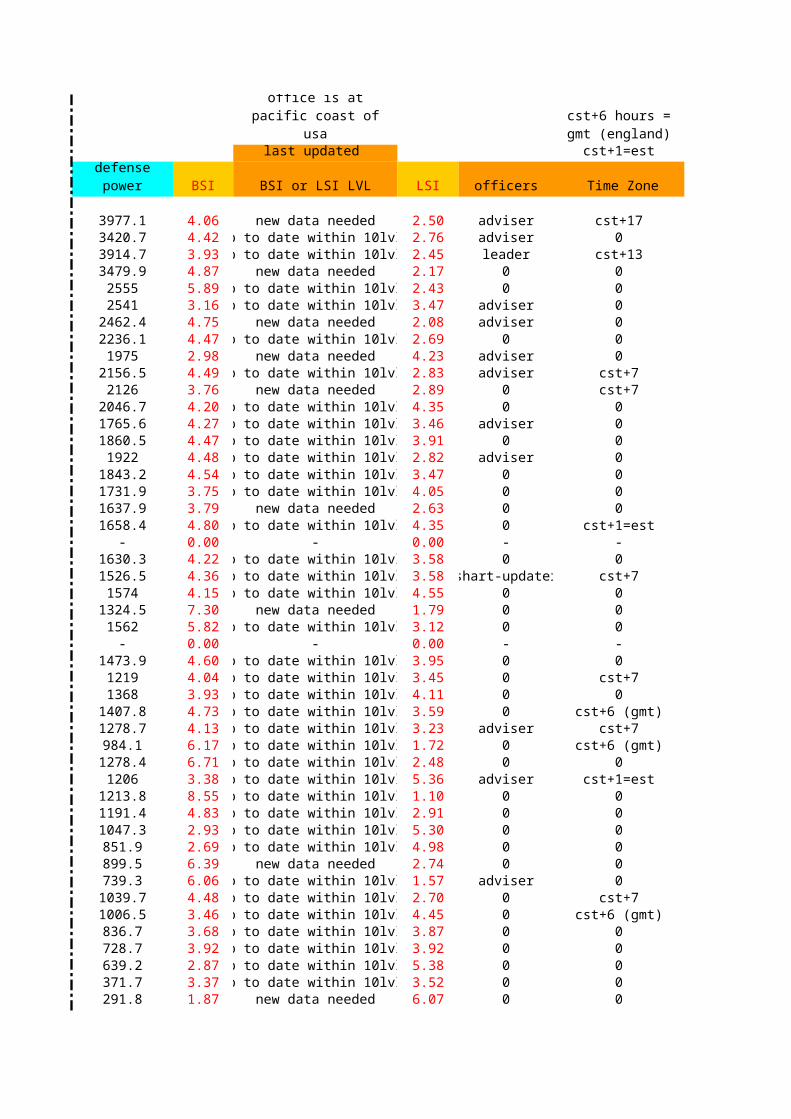
last updated cst+1=est
defense power BSI BSI or LSI LVL LSI officers Time Zone
3977.1 4.06 new data needed 2.50 adviser cst+173420.7 4.42 up to date within 10lvls 2.76 adviser 03914.7 3.93 up to date within 10lvls 2.45 leader cst+133479.9 4.87 new data needed 2.17 0 02555 5.89 up to date within 10lvls 2.43 0 02541 3.16 up to date within 10lvls 3.47 adviser 0
2462.4 4.75 new data needed 2.08 adviser 02236.1 4.47 up to date within 10lvls 2.69 0 01975 2.98 new data needed 4.23 adviser 0
2156.5 4.49 up to date within 10lvls 2.83 adviser cst+72126 3.76 new data needed 2.89 0 cst+7
2046.7 4.20 up to date within 10lvls 4.35 0 01765.6 4.27 up to date within 10lvls 3.46 adviser 01860.5 4.47 up to date within 10lvls 3.91 0 01922 4.48 up to date within 10lvls 2.82 adviser 0
1843.2 4.54 up to date within 10lvls 3.47 0 01731.9 3.75 up to date within 10lvls 4.05 0 01637.9 3.79 new data needed 2.63 0 01658.4 4.80 up to date within 10lvls 4.35 0 cst+1=est
- 0.00 - 0.00 - -1630.3 4.22 up to date within 10lvls 3.58 0 01526.5 4.36 up to date within 10lvls 3.58 shart-updater cst+71574 4.15 up to date within 10lvls 4.55 0 0
1324.5 7.30 new data needed 1.79 0 01562 5.82 up to date within 10lvls 3.12 0 0
- 0.00 - 0.00 - -1473.9 4.60 up to date within 10lvls 3.95 0 01219 4.04 up to date within 10lvls 3.45 0 cst+71368 3.93 up to date within 10lvls 4.11 0 0
1407.8 4.73 up to date within 10lvls 3.59 0 cst+6 (gmt)1278.7 4.13 up to date within 10lvls 3.23 adviser cst+7984.1 6.17 up to date within 10lvls 1.72 0 cst+6 (gmt)
1278.4 6.71 up to date within 10lvls 2.48 0 01206 3.38 up to date within 10lvls 5.36 adviser cst+1=est
1213.8 8.55 up to date within 10lvls 1.10 0 01191.4 4.83 up to date within 10lvls 2.91 0 01047.3 2.93 up to date within 10lvls 5.30 0 0851.9 2.69 up to date within 10lvls 4.98 0 0899.5 6.39 new data needed 2.74 0 0739.3 6.06 up to date within 10lvls 1.57 adviser 0
1039.7 4.48 up to date within 10lvls 2.70 0 cst+71006.5 3.46 up to date within 10lvls 4.45 0 cst+6 (gmt)836.7 3.68 up to date within 10lvls 3.87 0 0728.7 3.92 up to date within 10lvls 3.92 0 0639.2 2.87 up to date within 10lvls 5.38 0 0371.7 3.37 up to date within 10lvls 3.52 0 0291.8 1.87 new data needed 6.07 0 0
castle age home office is at pacific coast of usa
cst+6 hours = gmt (england)

1.7 0.01 up to date within 10lvls 0.02 0 01.7 0.01 new data needed 0.02 0 01.7 0.01 new data needed 0.02 0 01.7 0.01 up to date within 10lvls 0.01 0 01.7 0.01 up to date within 10lvls 0.01 0 01.7 0.01 new data needed 0.01 0 01.7 0.01 up to date within 10lvls 0.01 0 cst+6 (gmt)1.7 0.01 new data needed 0.01 0 01.7 0.01 up to date within 10lvls 0.01 0 01.7 0.01 up to date within 10lvls 0.01 0 01.7 0.00 new data needed 0.01 0 01.7 0.00 up to date within 10lvls 0.01 0 01.7 0.00 new data needed 0.01 0 01.7 0.00 up to date within 10lvls 0.01 0 cst+6 (gmt)- 0.00 - 0.00 - -- 0.00 - 0.00 - -- 0.00 - 0.00 - -- 0.00 - 0.00 - -- 0.00 - 0.00 - -- 0.00 - 0.00 - -- 0.00 - 0.00 - -- 0.00 - 0.00 - -- 0.00 - 0.00 - -- 0.00 - 0.00 - -- 0.00 - 0.00 - -- 0.00 - 0.00 - -- 0.00 - 0.00 - -- 0.00 - 0.00 - -
0 1 2 3 4 5 6 7 8 9 10 110
1
2
3
4
5
6
7
8
9
10
11Kind of player
BSI
LS
I

utc=gmtpst= cst -2 ?
best time for an guild battle x y0 5
- 1 4 - 2 3 - 3 2 - 4 1 - 5 0 - - - 0 11 - 1 10 - 2 9 - 3 8 - 4 7 - 5 6 - 6 5 - 7 4 - 8 3 - 9 2 - 10 1 - 11 0- -
saterday & Sunday - - 0 8 - 1 7- 2 6 - 3 5 - 4 4 - 5 3 - 6 2 - 7 1 - 8 0 - - - - - 0 0 - 8.4 2.1 - - - - 0 0 - 7 4 - - - 0 0 - 6.2 4.8

- - - 0 0 - 5 6.4 - - - - 0 0 - 4 7 - - - 0 0 - 2.4 9.2 ---------------

ca name facebook name
officer {msa}karensa karen rogers
officer anthony lenz
master Benson benson ang
iksan SusantoKen taro Ken taro
officer ----julie… julie stricklandofficer richard richard thies
abster jane maddisonofficer waz robertsofficer jane curtis
peter (pvg) peter von guntenjacco jacco van beekum
officer sue sue douglasingrid ingrid andersson
officer teresa teresa hedley
sh ang ang seng heng
chronos Bjørn Kæmpegaard Rasmussen
david david sears
endless delirium lisa padronsato choketo sato
suzanne suzanne klein-overmeer
officer wim wim van den munckhof
ronny ronny andersson{msca}muttley Lauren bolt
(*)(*){siky} craig worland
officer §to mℜ janet curtis
georgia georgia matamyagi333 ivo schrijn
king wonderbread of azria erik klein-overmeermac tavish guilaume paget
officer monyc monique barteldsamores amores douglasmerlina merlina mara
Anthony ♦§yn£rgy ƒir§T♦
onin {力}{MW}ℜ
KingKaos-♦§yn£rgy ƒir§T�a Ðiva o§♔ℒ ℜ

officer shamaeso rick thompsonzoe zoe matarangatom tom hedleylinda linda conley隆期
aliantha aliantha castleofficer tara tara jones
yasmine yasmine barteldsgryphon dave noble
vane vane hsianelly nelly hsia
robert robert northsate sate babi
glen glen gray
nicksen nicksen chrismason mangkeyscum mick gillfren fren amie
derick derrick danforthdominic dominc thies
eric john toliongco eric toliongcotruth hunter christopher truthhunter robin
士禎condo condo sysmario mario herrerajeremy jeremy howellcicca Christine Lerbæk
bubble sandra mccleland =k*n=g.k graham truthhunter roberts
陳隆期 (chroharp chen)
黎士禎 ( Li shi chen)
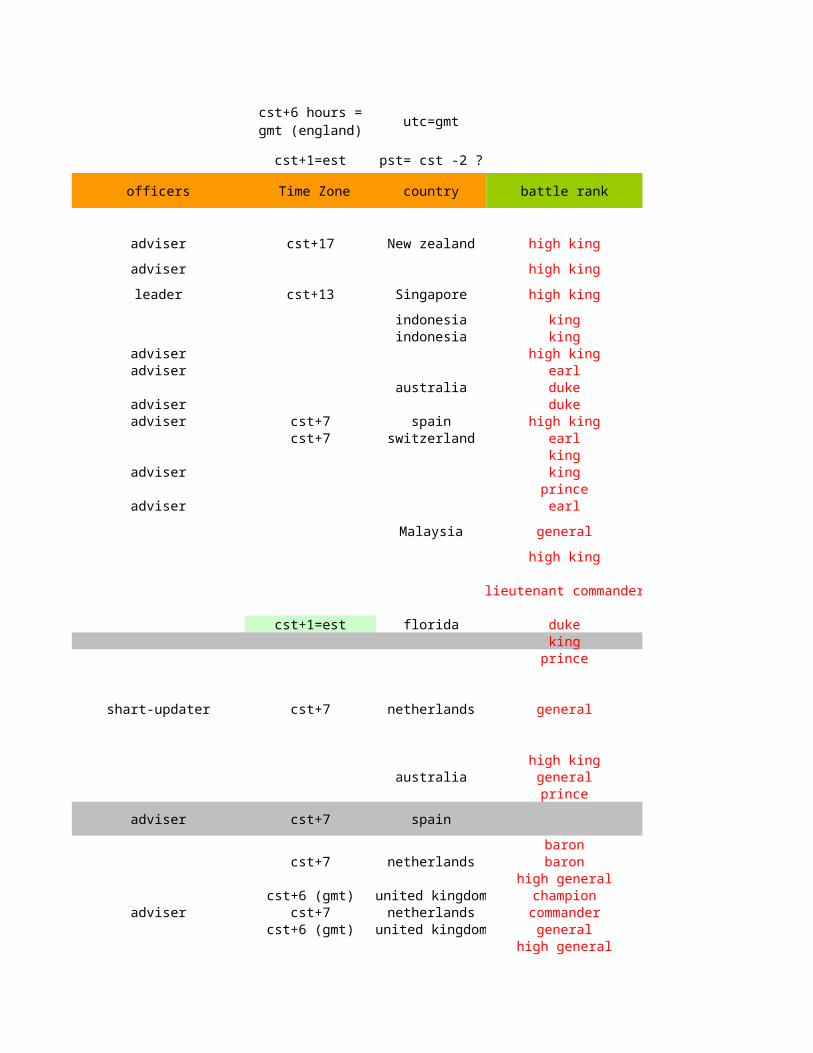
utc=gmt
cst+1=est pst= cst -2 ?
officers Time Zone country battle rank war rank
adviser cst+17 New zealand high king lieutenant colonel
adviser high king master warguard
leader cst+13 Singapore high king ltc war chief
indonesia king colonelindonesia king
adviser high king warguardadviser earl
australia dukeadviser dukeadviser cst+7 spain high king
cst+7 switzerland earlking
adviser kingprince
adviser earl
Malaysia general first captain
high king
lieutenant commander
cst+1=est florida duke warguardking
prince
shart-updater cst+7 netherlands general warguard
high kingaustralia general
prince master warguard
adviser cst+7 spain
baroncst+7 netherlands baron
high generalcst+6 (gmt) united kingdom champion
adviser cst+7 netherlands commander footmancst+6 (gmt) united kingdom general
high general
cst+6 hours = gmt (england)

adviser cst+1=est barongeneral
lieutenant commandergeneralgeneral
New zealand general corporaladviser commander
cst+7 netherlands legionaire corporalcst+6 (gmt) united kingdom centurion
taiwan commanderlieutenant commander
championlegionaire
soldier
commanderlieutenant commander
championgeneral
commandercommander
cst+6 (gmt) united kingdom princelegionaire
princegeneral
dukelieutenant commander
high kingcst+6 (gmt) united kingdom high king
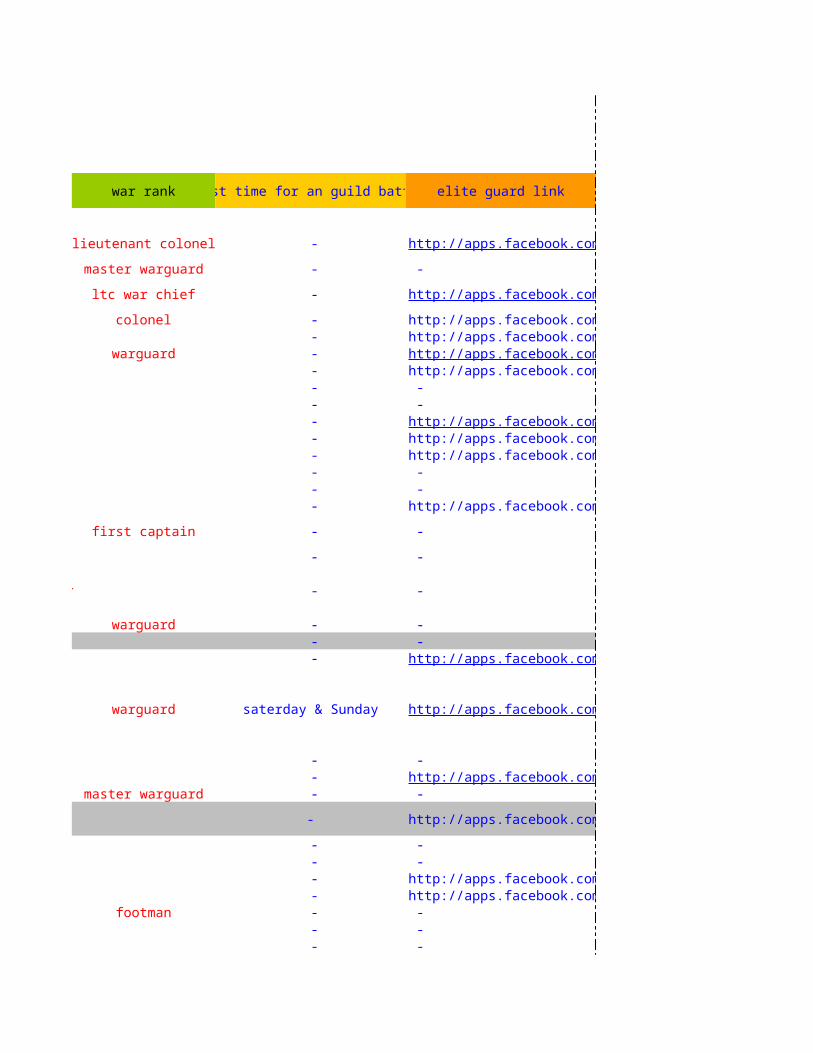
best time for an guild battle elite guard link keep link
- keep.php?casuser=1811259193
- - keep.php?casuser=1082285279
- keep.php?casuser=1444280319
- http://apps.facebook.com/cakeep.php?casuser=1101174972 - http://apps.facebook.com/ckeep.php?casuser=1660286334 - hp?casuser=100000602780733 - http://apps.facebook.com/chp?casuser=100000595834112 - - keep.php?casuser=1434626118 - - keep.php?casuser=1312737891 - keep.php?casuser=1636153989 - http://apps.facebook.com/ckeep.php?casuser=1001980783 - http://apps.facebook.com/ckeep.php?casuser=1275081301 - - /keep.php?casuser=728848276 - - hp?casuser=100001017936234 - http://apps.facebook.com/c/keep.php?casuser=697014797
- - keep.php?casuser=1806572056
- - /keep.php?casuser=609782220
- - hp?casuser=100000816811182
- - /keep.php?casuser=702556812 - - hp?casuser=100001266360302 - 41626&lka=1335541626&etw=4
saterday & Sunday hp?casuser=100000339235097
- - keep.php?casuser=1717921450 - hp?casuser=100001863541917 - - /keep.php?casuser=589543604
- http://apps.facebook.com/c -
- - /keep.php?casuser=673040992 - - /keep.php?casuser=680075944 - http://apps.facebook.com/ckeep.php?casuser=1335541626 - http://apps.facebook.com/c/keep.php?casuser=764548082 - - /keep.php?casuser=826709889 - - hp?casuser=100001832575153 - - hp?casuser=100001340999090
http://apps.facebook.com/castle_age/party.php?twt=jneg&jneg=true&user=1811259193&lka=1811259193&etw=6&ref=nf
http://apps.facebook.com/castle_age/party.php?twt=jneg&jneg=true&casuser=1444280319&lka=1444280319&etw=4&ref=nf
http://apps.facebook.com/castle_age/party.php?twt=jneg&jneg=true&casuser=100000602780733&lka=100000602780733&etw=12
http://apps.facebook.com/castle_age/party.php?twt=jneg&jneg=true&casuser=1636153989&lka=1636153989&etw=2&ref=nf
http://apps.facebook.com/castle_age/party.php?twt=jneg&jneg=true&casuser=765869523&lka=765869523&etw=11&ref=nf
http://apps.facebook.com/castle_age/party.php?twt=jneg&jneg=true&casuser=100000339235097&lka=100000339235097&etw=2&ref=nf
http://apps.facebook.com/castle_age/party.php?twt=jneg&jneg=true&user=100001863541917&lka=100001863541917&etw=6&ref=nf

- - /keep.php?casuser=673040992 - http://apps.facebook.com/chp?casuser=100000807963134 - - keep.php?casuser=1098255222 - - keep.php?casuser=1782780816 - - keep.php?casuser=1810063677 - hp?casuser=100002142137378 - hp?casuser=100002073016830 - - hp?casuser=100000238448338 - - /keep.php?casuser=724225166 - hp?casuser=100000029343021 - hp?casuser=100001879386885 - - hp?casuser=100000420123046 - - hp?casuser=100001061109951
- hp?casuser=100001348293652
- - hp?casuser=100000234228535 - keep.php?casuser=1618681018 - - hp?casuser=100000187453526 - - hp?casuser=100000170913127 - - keep.php?casuser=1580915886 - - hp?casuser=100000279728641 - - hp?casuser=100000581834077 - - /keep.php?casuser=822579859 - - keep.php?casuser=1283209312 - - keep.php?casuser=1457283374 - http://apps.facebook.com/chp?casuser=100000481275341 - - /keep.php?casuser=673040992 - http://apps.facebook.com/c/keep.php?casuser=717993931 - - /keep.php?casuser=520781993 - - - - - - - - - - - - - - - - - - - - - - - - - - - - - - - - - - - - - - - - - -
http://apps.facebook.com/castle_age/party.php?twt=jneg&jneg=true&casuser=100002142137378&lka=100002142137378&etw=5&ref=nfhttp://apps.facebook.com/castle_age/party.php?twt=jneg&jneg=true&casuser=100002073016830&lka=100002073016830&etw=2
http://apps.facebook.com/castle_age/party.php?twt=jneg&jneg=true&casuser=100000029343021&lka=100000029343021&etw=6&ref=nfhttp://apps.facebook.com/castle_age/party.php?twt=jneg&jneg=true&casuser=100001879386885&lka=100001879386885&etw=11&ref=nf
http://apps.facebook.com/castle_age/party.php?twt=jneg&jneg=true&casuser=100001348293652&lka=100001348293652&etw=11&ref=nf
http://apps.facebook.com/castle_age/party.php?twt=jneg&jneg=true&casuser=1618681018&lka=1618681018&etw=5

in case of not being online
extra info can play as: left guild at up to date?
- new data needed
- up to date within 10lvls
- up to date within 10lvls
- Ken Taro new data needed - Iksan Susanto up to date within 10lvls - wim van den munckhof up to date within 10lvls - new data needed - up to date within 10lvls - new data needed - janet curtis up to date within 10lvls - new data needed - up to date within 10lvls - up to date within 10lvls - up to date within 10lvls - up to date within 10lvls
- up to date within 10lvls
- up to date within 10lvls
- new data needed
- wim van den munckhof up to date within 10lvls - 2-sep-11 up to date within 10lvls - erik klein-overmeer up to date within 10lvls
- julie strickland up to date within 10lvls
- up to date within 10lvls - new data needed - up to date within 10lvls
- jane curtis 21-jul-11 up to date within 10lvls
- zoe mataranga/ merlina mara up to date within 10lvls - up to date within 10lvls - suzanne klein overmeer up to date within 10lvls - up to date within 10lvls - yasmine bartelds/ rick thompson up to date within 10lvls - up to date within 10lvls - georgia mata / zoe mataranga up to date within 10lvls
aliantha castle/ ang seng heng/ glen gray
glen gray/ ang seng heng / anthony lenz
benson ang/ glen gray / anthony lenz

- monique bartelds up to date within 10lvls - georgia mata/ merlina mara up to date within 10lvls - up to date within 10lvls - up to date within 10lvls - up to date within 10lvls - karen rogers new data needed - up to date within 10lvls - monique bartelds up to date within 10lvls - up to date within 10lvls - nelly hsia up to date within 10lvls - vane hsia up to date within 10lvls - up to date within 10lvls - up to date within 10lvls
- new data needed
- up to date within 10lvls - new data needed - new data needed - up to date within 10lvls - up to date within 10lvls - new data needed - up to date within 10lvls
difficult speaking english new data needed - up to date within 10lvls - up to date within 10lvls - new data needed - up to date within 10lvls - new data needed - up to date within 10lvls - up to date within 10lvls - up to date within 10lvls - up to date within 10lvls - up to date within 10lvls - up to date within 10lvls - up to date within 10lvls - up to date within 10lvls - up to date within 10lvls - up to date within 10lvls - up to date within 10lvls - up to date within 10lvls - up to date within 10lvls - up to date within 10lvls - up to date within 10lvls
benson ang/ amg seng heng/ anthony lenz

last time checked
3-sep-11 tower
tower level within guildbattle north west east
1020 1543 north 1275 1
806 1220 east 1008 1
957 1447 west 1196 1
717 1084 west 896 1439 664 west 549 1774 1171 west 968 1493 745 north 616 1476 720 west 595 1717 1084 west 896 1464 702 north 580 1566 855 north 707 1468 708 east 585 1421 636 west 526 1402 609 east 503 1409 618 north 511 1
395 598 west 494 1
450 681 west 563 1
438 662 north 547 1
338 511 north 422 1199 301 out of guild 249369 558 north 461 1
342 517 north 427 1
363 549 east 454 1198 299 west 247 1257 388 east 321 1
215 325 out of guild 269
310 468 east 387 1314 474 east 392 1334 505 north 417 1279 422 east 349 1300 454 north 375 1178 269 west 222 1186 281 north 232 1
minimal lvl you for gaining 200 points
minimal lvl you for gaining 240 points
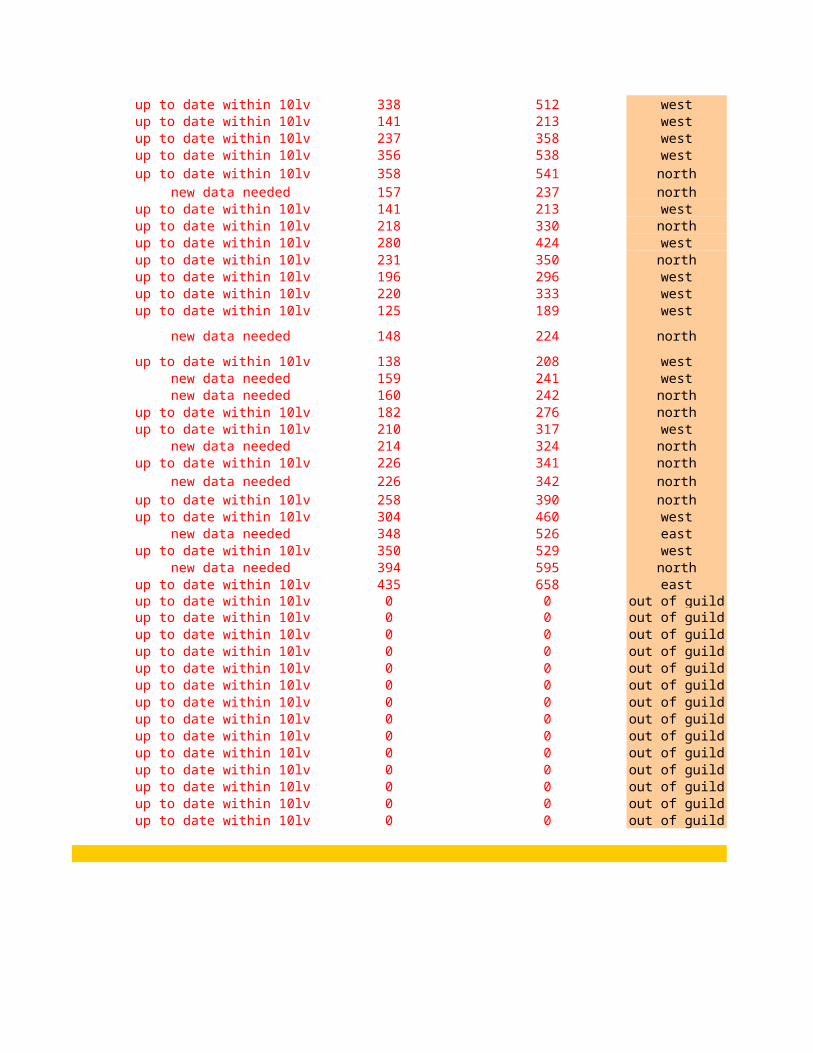
338 512 west 423 1141 213 west 176 1237 358 west 296 1356 538 west 445 1358 541 north 447 1157 237 north 196 1141 213 west 176 1218 330 north 273 1280 424 west 350 1231 350 north 289 1196 296 west 245 1220 333 west 275 1125 189 west 156 1
148 224 north 185 1
138 208 west 172 1159 241 west 199 1160 242 north 200 1182 276 north 228 1210 317 west 262 1214 324 north 268 1226 341 north 282 1226 342 north 283 1258 390 north 322 1304 460 west 380 1348 526 east 435 1350 529 west 437 1394 595 north 492 1435 658 east 544 1
0 0 out of guild0 0 out of guild0 0 out of guild0 0 out of guild0 0 out of guild0 0 out of guild0 0 out of guild0 0 out of guild0 0 out of guild0 0 out of guild0 0 out of guild0 0 out of guild0 0 out of guild0 0 out of guild
totaal north west east59 24 25 10
members
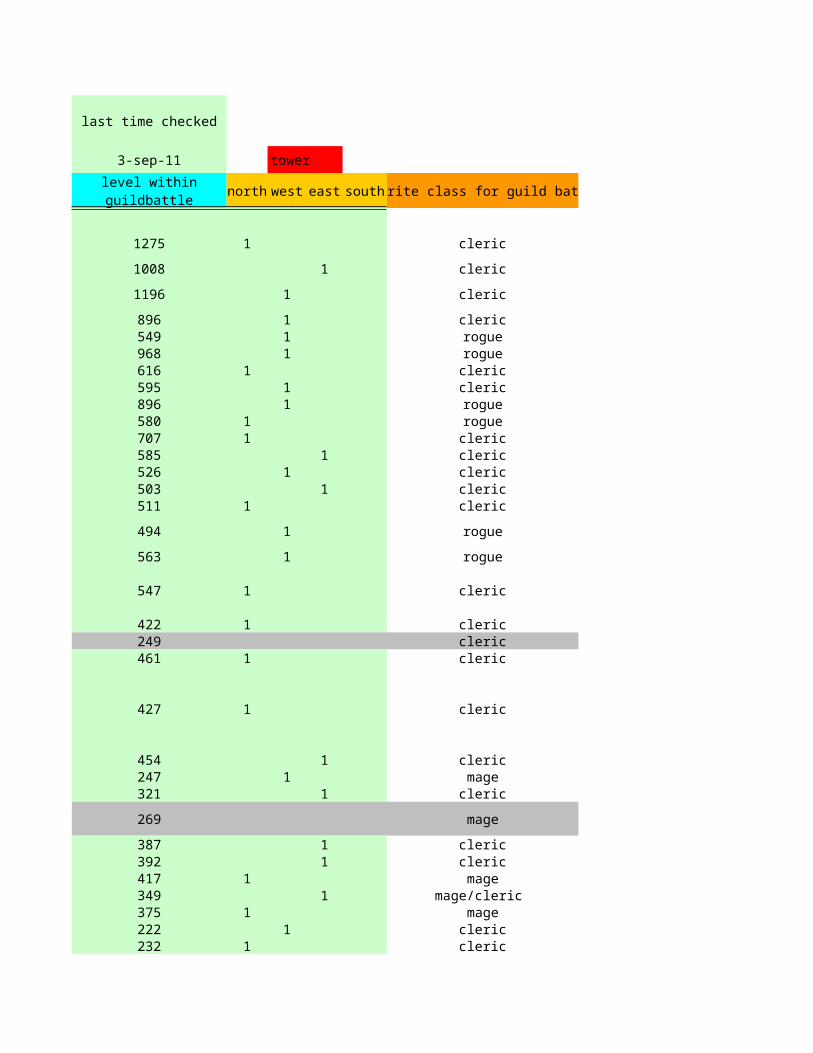
south favorite class for guild battle last update member info max energy max stamina
cleric 1 September, 2011 1258 1001 1075
cleric 13 August, 2011 1006 736 1021
cleric 1 September, 2011 1191 906 1007
cleric 21 August, 2011 881 580 666rogue 21 August, 2011 541 426 444rogue 1 September, 2011 964 1391 975cleric 11 August, 2011 600 363 442cleric 21 August, 2011 594 557 520rogue 25 July, 2011 838 1707 920rogue 26 August, 2011 574 370 627cleric 7 August, 2011 675 506 723cleric 13 August, 2011 579 1130 695cleric 31 August, 2011 526 349 735cleric 31 August, 2011 502 1320 322cleric 7 August, 2011 505 471 476
rogue 13 August, 2011 486 663 511
rogue 30 July, 2011 556 750 750
cleric 8 August, 2011 529 477 456
cleric 8 August, 2011 418 612 603cleric 20 August, 2011 245 79 142cleric 28 August, 2011 459 565 538
cleric 27 August, 2011 425 480 520
cleric 31 August, 2011 452 1320 368mage 10 August, 2011 236 162 130cleric 7 August, 2011 315 323 330
mage 8 August, 2011 266 196 190
cleric 7 August, 2011 377 560 465cleric 31 August, 2011 391 345 501mage 28 August, 2011 415 1027 340
mage/cleric 28 August, 2011 347 437 405mage 2 September, 2011 375 407 403cleric 31 August, 2011 221 90 145cleric 7 August, 2011 224 264 146
last updated members lvl

cleric 31 August, 2011 422 1140 561mage 7 August, 2011 167 104 40mage 7 August, 2011 289 252 295cleric 31 August, 2011 444 571 890cleric 12 August, 2011 440 255 968cleric 8 August, 2011 180 161 166cleric 28 August, 2011 173 41 115cleric 2 September, 2011 273 238 250cleric 19 April, 2011 347 510 517cleric 28 August, 2011 287 218 447cleric 28 August, 2011 242 209 370cleric 1 September, 2011 275 374 553rogue 30 August, 2011 155 125 210
cleric 13 August, 2011 168 328 346
cleric 31 August, 2011 171 1 1cleric 30 July, 2011 187 1 1cleric 30 July, 2011 185 1 1cleric 30 July, 2011 226 1 1cleric 30 July, 2011 256 1 1cleric 30 July, 2011 254 1 1cleric 30 July, 2011 272 1 1cleric 30 July, 2011 267 1 1rogue 30 July, 2011 316 1 1cleric 30 July, 2011 372 1 1rogue 30 July, 2011 419 1 1mage 30 July, 2011 429 1 1cleric 30 July, 2011 479 1 1cleric 30 July, 2011 536 1 1
1 1 11 1 11 1 11 1 11 1 11 1 11 1 11 1 11 1 11 1 11 1 11 1 11 1 11 1 1
south0

attack defense max health army size starting general
3753 1350 575 1 vincent
3421 1026 514 1
2561 2122 538 1446
2707 1585 232 14602100 1085 147 12851680 1365 620 1534 vincent1282 1565 5860 11393 1261 310 11750 750 400 41651395 1180 210 11380 1160 386 5911281 1150 305 11608 640 286 11285 961 161 11140 1124 510 1
1216 992 277 581
1177 908 750 1
1227 779 483 741
1162 845 162 2198850 1212 145 1
1019 917 375 1
1085 767 269 1185 deianira
1000 874 176 11325 397 159 567900 932 157 386
1050 643 186 1 vincent
867 867 156 13261200 379 450 1544880 752 265 1784 859 303 1 darius901 648 232 869 deianira
1263 100 235 1752 752 103 1500
general which you got equiped before the battle is
started

740 688 360 635714 714 102 1623682 714 340 1839 460 206 889
1107 77 142 1835 315 170 1
1029 19 236 1611 612 229 175645 555 271 832731 325 171 1731 217 152 1496 292 175 205501 21 333 1
74 240 210 218
1 1 100 11 1 100 11 1 100 11 1 100 11 1 100 11 1 100 11 1 100 11 1 100 11 1 100 11 1 100 11 1 100 11 1 100 11 1 100 11 1 100 11 1 100 11 1 100 11 1 100 11 1 100 11 1 100 11 1 100 11 1 100 11 1 100 11 1 100 11 1 100 11 1 100 11 1 100 11 1 100 11 1 100 1

normal general using in guild battle SPAEQ MHBEQ average points per lvl attack power
6.94 4.69 6.92 4698
7.59 5.43 7.57 4139.2
6.75 3.84 6.73 4046.4
7.19 4.58 7.17 3816.58.40 5.52 8.36 2859.5
deshara/daphne/shivak/anya/zurran/sanna 7.16 3.77 7.14 2635.516.42 3.61 16.39 2377.57.51 4.10 7.47 2275.77.57 4.28 7.55 22757.51 4.61 7.47 22217.08 4.19 7.05 21928.91 4.61 8.87 20868.09 5.85 8.04 20568.51 3.84 8.46 1957.7
corvintheus 8.11 4.14 8.07 1926.8
8.37 4.60 8.33 1910.4
8.97 4.81 8.93 1812.6
7.14 4.04 7.10 1772.3
deianira/deshara/aethyx/persephone 9.30 5.67 9.25 1753.5xira/celesta/deinira 10.08 4.63 9.99 1698.4
8.39 4.56 8.34 1660.9
8.33 5.00 8.28 1621.9
8.86 3.84 8.81 1611.8deianira 9.33 6.72 9.24 1602.9
9.12 4.95 9.05 1552.4
8.85 5.38 8.77 1500.1
8.70 4.77 8.64 1473.98.38 5.63 8.32 1465.38.44 3.76 8.39 1406.48.91 4.59 8.85 1385.3
deianira 7.72 4.55 7.66 1354.68.50 7.03 8.40 13339.21 4.66 9.11 1278.4
sanna/anya/deishara,aethyx/syren/shivak/ daphne/alexandria/ephtaline/deianira
mage:Zurran, Alexandria, ephraline cleric: Deianira,Elaida,Sanna, kothas Rogue:
Raziel,Deshara
sanna/elaida/shivak/kothas as cleric zurran/felyzia/syren/jaelle as mage
raziel_the_silent/ deshara/aethyx as rogue oberon/meekah/ameron/tyranth as warrior
daphne/deinanira as defense
vincent/deianira/deshara/meekah/txyeros/daphne/alexandria

9.36 4.41 9.31 1221.69.66 4.75 9.53 1213.88.57 4.40 8.50 1181.88.46 5.90 8.41 11617.77 6.92 7.72 1160.9
sanna / aethyx / deshara 9.52 6.48 9.39 1055.5persephone/raziel_the_silent/elaida 8.41 7.28 8.28 1042.3
sanna 7.66 4.07 7.58 1039.4sanna 8.40 4.84 8.34 1033.5
7.80 5.66 7.72 958.58.05 6.08 7.96 882.98.52 5.83 8.44 700.4
sanna 8.39 5.94 8.25 515.7
8.60 4.56 8.46 242
0.03 0.02 -0.10 1.70.03 0.02 -0.09 1.70.03 0.02 -0.09 1.70.02 0.01 -0.08 1.70.02 0.01 -0.07 1.70.02 0.01 -0.07 1.70.02 0.01 -0.06 1.70.02 0.01 -0.06 1.70.02 0.01 -0.05 1.70.01 0.01 -0.05 1.70.01 0.01 -0.04 1.70.01 0.01 -0.04 1.70.01 0.01 -0.04 1.70.01 0.01 -0.03 1.75.00 3.00 -17.00 1.75.00 3.00 -17.00 1.75.00 3.00 -17.00 1.75.00 3.00 -17.00 1.75.00 3.00 -17.00 1.75.00 3.00 -17.00 1.75.00 3.00 -17.00 1.75.00 3.00 -17.00 1.75.00 3.00 -17.00 1.75.00 3.00 -17.00 1.75.00 3.00 -17.00 1.75.00 3.00 -17.00 1.75.00 3.00 -17.00 1.75.00 3.00 -17.00 1.7

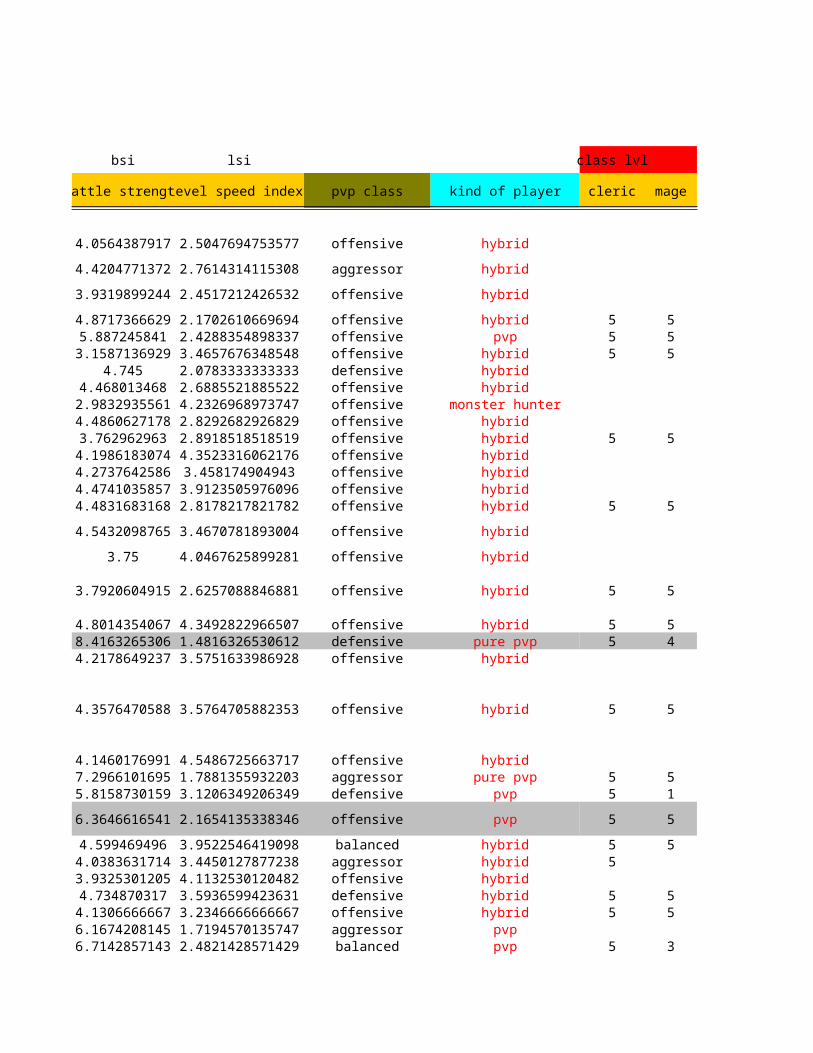
bsi lsi
defense power battle strength level speed indexs pvp class
3977.1 4337.55 4.0564387917 2.5047694753577 offensive
3420.7 3779.95 4.4204771372 2.7614314115308 aggressor
3914.7 3980.55 3.9319899244 2.4517212426532 offensive
3479.9 3648.2 4.8717366629 2.1702610669694 offensive2555 2707.25 5.887245841 2.4288354898336 offensive2541 2588.25 3.1587136929 3.4657676348548 offensive
2462.4 2419.95 4.745 2.0783333333333 defensive2236.1 2255.9 4.468013468 2.6885521885522 offensive1975 2125 2.9832935561 4.2326968973747 offensive
2156.5 2188.75 4.4860627178 2.8292682926829 offensive2126 2159 3.762962963 2.8918518518519 offensive
2046.7 2066.35 4.1986183074 4.3523316062176 offensive1765.6 1910.8 4.2737642586 3.458174904943 offensive1860.5 1909.1 4.4741035857 3.9123505976096 offensive1922 1924.4 4.4831683168 2.8178217821782 offensive
1843.2 1876.8 4.5432098765 3.4670781893004 offensive
1731.9 1772.25 3.75 4.0467625899281 offensive
1637.9 1705.1 3.7920604915 2.6257088846881 offensive
1658.4 1705.95 4.8014354067 4.3492822966507 offensive1807 1752.7 8.4163265306 1.4816326530612 defensive
1630.3 1645.6 4.2178649237 3.5751633986928 offensive
1526.5 1574.2 4.3576470588 3.5764705882353 offensive
1574 1592.9 4.1460176991 4.5486725663717 offensive1324.5 1463.7 7.2966101695 1.7881355932203 aggressor1562 1557.2 5.8158730159 3.1206349206349 defensive
1378 1439.05 6.3646616541 2.1654135338346 offensive
1473.9 1473.9 4.599469496 3.9522546419098 balanced1219 1342.15 4.0383631714 3.4450127877238 aggressor1368 1387.2 3.9325301205 4.1132530120482 offensive
1407.8 1396.55 4.734870317 3.5936599423631 defensive1278.7 1316.65 4.1306666667 3.2346666666667 offensive984.1 1158.55 6.1674208145 1.7194570135747 aggressor
1278.4 1278.4 6.7142857143 2.4821428571429 balanced
attack /defense average power

1206 1213.8 3.3838862559 5.3601895734597 offensive1213.8 1213.8 8.5508982036 1.1017964071856 balanced1191.4 1186.6 4.830449827 2.9134948096886 defensive1047.3 1104.15 2.9256756757 5.295045045045 offensive851.9 1006.4 2.6909090909 4.9795454545455 aggressor899.5 977.5 6.3888888889 2.7388888888889 offensive739.3 890.8 6.0578034682 1.5664739884393 aggressor
1039.7 1039.55 4.4798534799 2.7032967032967 defensive1006.5 1020 3.4582132565 4.4495677233429 offensive836.7 897.6 3.6794425087 3.8745644599303 offensive728.7 805.8 3.9173553719 3.9214876033058 aggressor639.2 669.8 2.8654545455 5.3818181818182 offensive371.7 443.7 3.3677419355 3.5161290322581 aggressor
291.8 266.9 1.869047619 6.0714285714286 paladin
1.7 1.7 0.0116959064 0.0175438596491 balanced1.7 1.7 0.0106951872 0.0160427807487 balanced1.7 1.7 0.0108108108 0.0162162162162 balanced1.7 1.7 0.0088495575 0.0132743362832 balanced1.7 1.7 0.0078125 0.01171875 balanced1.7 1.7 0.0078740157 0.011811023622 balanced1.7 1.7 0.0073529412 0.0110294117647 balanced1.7 1.7 0.0074906367 0.0112359550562 balanced1.7 1.7 0.0063291139 0.0094936708861 balanced1.7 1.7 0.0053763441 0.008064516129 balanced1.7 1.7 0.0047732697 0.0071599045346 balanced1.7 1.7 0.0046620047 0.006993006993 balanced1.7 1.7 0.0041753653 0.0062630480167 balanced1.7 1.7 0.0037313433 0.0055970149254 balanced1.7 1.7 2 3 balanced1.7 1.7 2 3 balanced1.7 1.7 2 3 balanced1.7 1.7 2 3 balanced1.7 1.7 2 3 balanced1.7 1.7 2 3 balanced1.7 1.7 2 3 balanced1.7 1.7 2 3 balanced1.7 1.7 2 3 balanced1.7 1.7 2 3 balanced1.7 1.7 2 3 balanced1.7 1.7 2 3 balanced1.7 1.7 2 3 balanced1.7 1.7 2 3 balanced
class powers
class lvl warrior
kind of player cleric mage warrior rogue warlock ranger leadership 1 leadership 2
hybrid
hybrid
hybrid
hybrid 5 5 5 5 3 3pvp 5 5 5 5 3 3
hybrid 5 5 5 5 3 3hybridhybrid
monster hunterhybridhybrid 5 5 5 5hybridhybridhybridhybrid 5 5 5 5
hybrid
hybrid
hybrid 5 5 5 5
hybrid 5 5 5 5pure pvp 5 4 4 1
hybrid
hybrid 5 5 5 5 3 3
hybridpure pvp 5 5 1 3
pvp 5 1 5 5
pvp 5 5 3 5
hybrid 5 5 4 5hybrid 5 5hybridhybrid 5 5 3 4 1hybrid 5 5 3 5 3 1
pvppvp 5 3 1 1

hybrid 5 3 5 5pure pvp 5 3 1 3
hybrid 5 5 4 3monster huntermonster hunter 5 5 5 5
pvp 5 3 1 5pvp
hybrid 5 5 3 3 2 1hybrid 5 5 3 5hybridhybrid
monster hunterhybrid 2 5
monster hunter
power lvlerpower lvlerpower lvlerpower lvlerpower lvlerpower lvlerpower lvlerpower lvlerpower lvlerpower lvlerpower lvlerpower lvlerpower lvlerpower lvler
monster huntermonster huntermonster huntermonster huntermonster huntermonster huntermonster huntermonster huntermonster huntermonster huntermonster huntermonster huntermonster huntermonster hunter
leadership 1 leadership 20 1

1187 3800 4750 7125
leadership 3 leadership 4 whirlwind shout confidence guardian sentinel 1 sentinel 2 sentinel 3
1
1 1
1
1 1
1
1 1
1 1

1
leadership 3 leadership 4 whirlwind shout confidence guardian sentinel 1 sentinel 2 sentinel 33 2 3 0 1 0 0 1 2

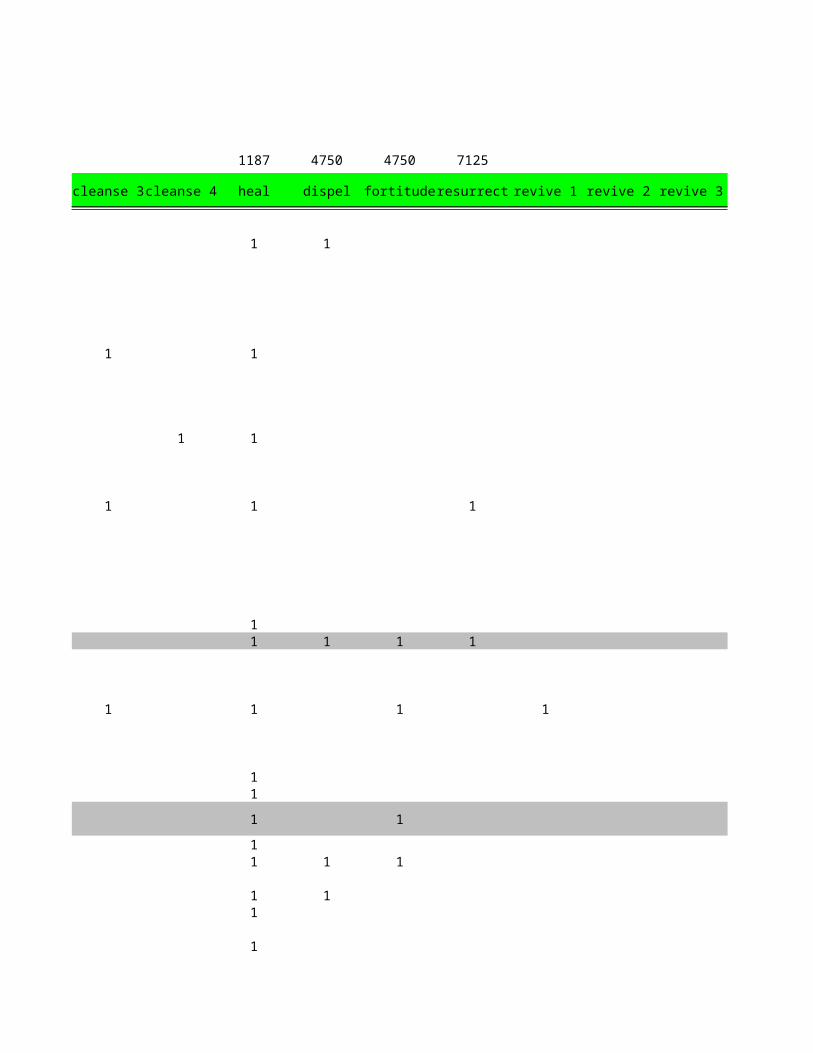
cleric 1187 4750 4750 7125
cleanse 1 cleanse 2 cleanse 3 cleanse 4 heal dispel fortitude resurrect revive 1
1 1 1
1 1
1 1
1 1 1
1
11 1 1 1
1 1 1 1
11
1 1 1
11 1 1
1 11
1

111
1 1
1 11
1
cleanse 1 cleanse 2 cleanse 3 cleanse 4 heal dispel fortitude resurrect revive 12 1 3 1 22 6 4 2 1
rogue 1187 4750 4750
revive 2 revive 3 backstab 1 backstab 2 backstab 3 backstab 4 evade ambush poison
1 1
1
1
1
1 1
1 11
1 1
1
1 1 1
11

111
1
1
revive 2 revive 3 backstab 1 backstab 2 backstab 3 backstab 4 evade ambush poison0 0 1 0 1 3 15 1 2

7125 mage
lacerate wound 1 wound 2 wound 3 mana shield 1 mana shield 2 mana shield 3 mana shield 4
1
1 1
1
1 1
1 1
1
1

lacerate wound 1 wound 2 wound 3 mana shield 1 mana shield 2 mana shield 3 mana shield 40 0 2 1 1 2 0 4

1187 4750 4750 7125 all
polymorph magic barrier confuse mirror image illusion 1 illusion 2 illusion 3 resistance 1 resistance 2
1 1
1
1
1 1
1
1 1 11
1 1
1
1 1
1 1
11 1
1

11 1
1
1
polymorph magic barrier confuse mirror image illusion 1 illusion 2 illusion 3 resistance 1 resistance 216 1 7 0 0 2 0 0 1

resistance 3 resistance 4 might 1 might 2 might 3 might 4 0 0
1 1
1 1
1
1 1
1
1 11 1
1 1
1 1
1 1
1 11 1
1 11
1

1 111 1
11
11 1
1
resistance 3 resistance 4 might 1 might 2 might 3 might 4 0 00 22 0 3 6 6 0 0

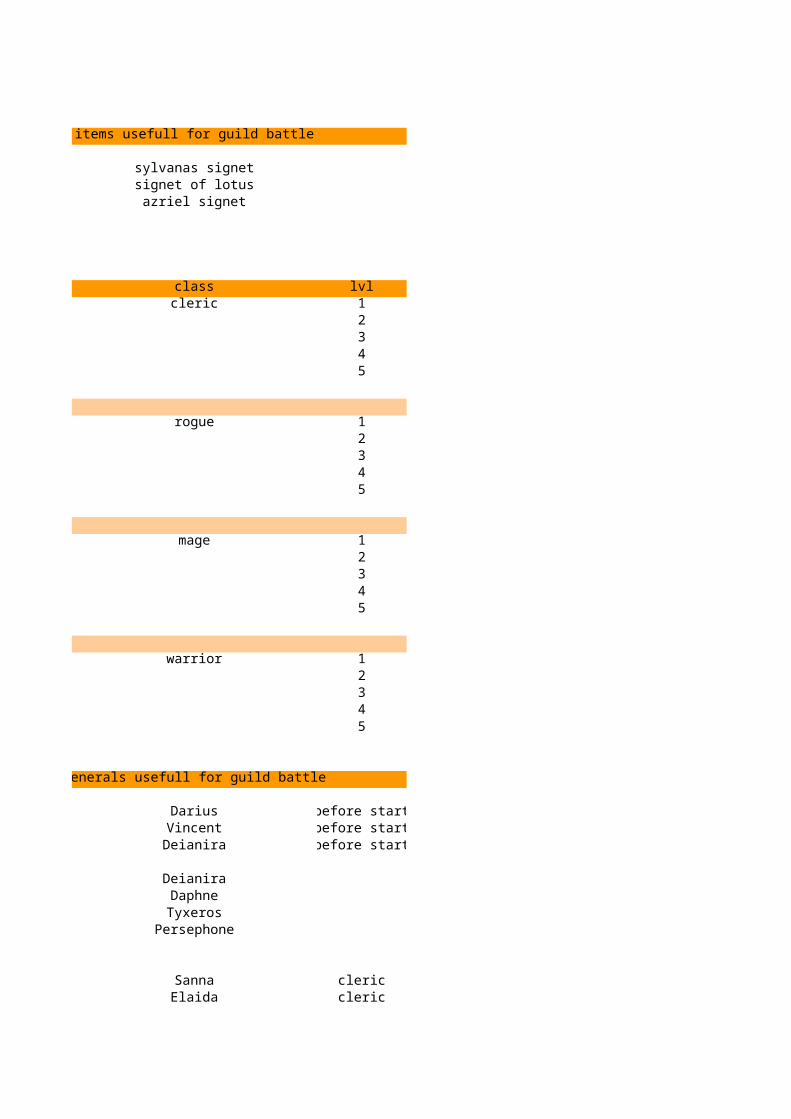
items usefull for guild battle
sylvanas signetsignet of lotusazriel signet
class lvlcleric 1
2345
rogue 12345
mage 12345
warrior 12345
generals usefull for guild battle
Darius before startVincent before startDeianira before start
DeianiraDaphneTyxeros
Persephone
Sanna clericElaida cleric

shivak clerickothas cleric
Deshara rogueRaziel the Silent rogue
aethyx rogueesmeralda rogue
rafaria rogue
Ameron warriorOberon warriormeekah warriortyrant warrior
Zurran magesyren mageanya mage
alexandria mageephraline mage
felizia magejaelle mage
class powers
warriorleadership 1leadership 2leadership 3leadership 4
whirlwindshout
confidenceguardiansentinel 1sentinel 2sentinel 3
clericcleanse 1cleanse 2cleanse 3cleanse 4
healdispel
fortituderesurrectrevive 1revive 2revive 3

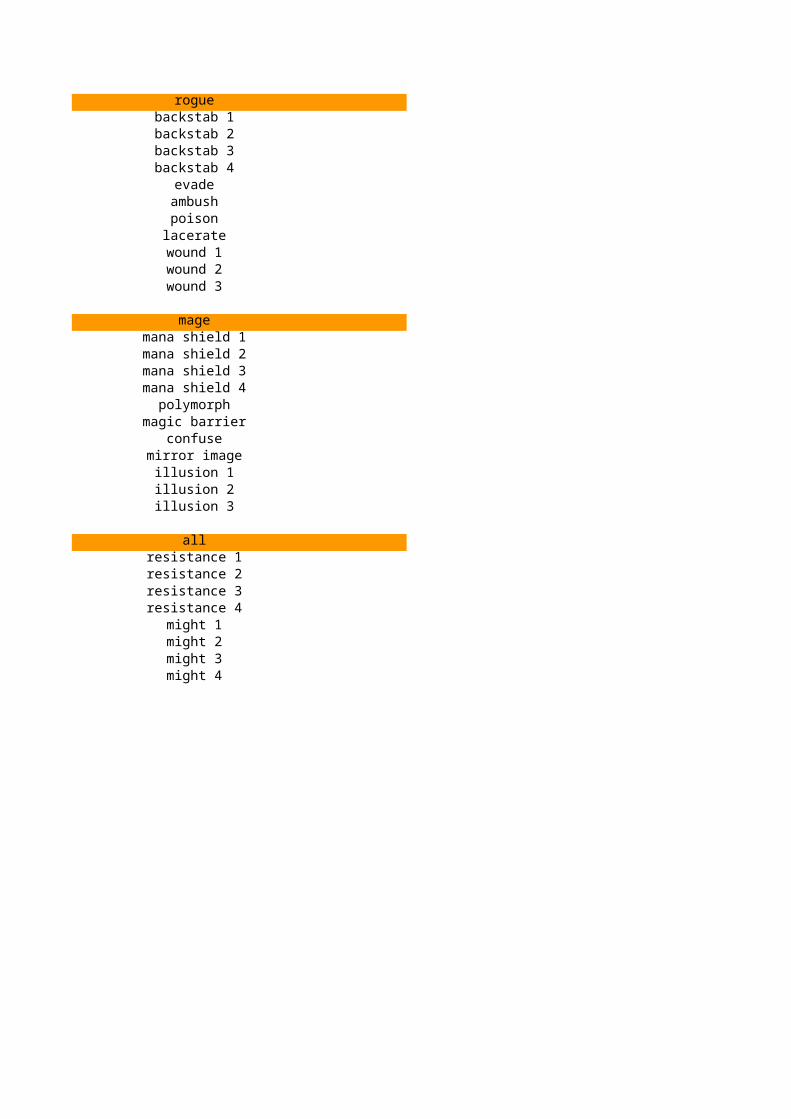
roguebackstab 1backstab 2backstab 3backstab 4
evadeambushpoison
laceratewound 1wound 2wound 3
magemana shield 1mana shield 2mana shield 3mana shield 4
polymorphmagic barrier
confusemirror image
illusion 1illusion 2illusion 3
allresistance 1resistance 2resistance 3resistance 4
might 1might 2might 3might 4

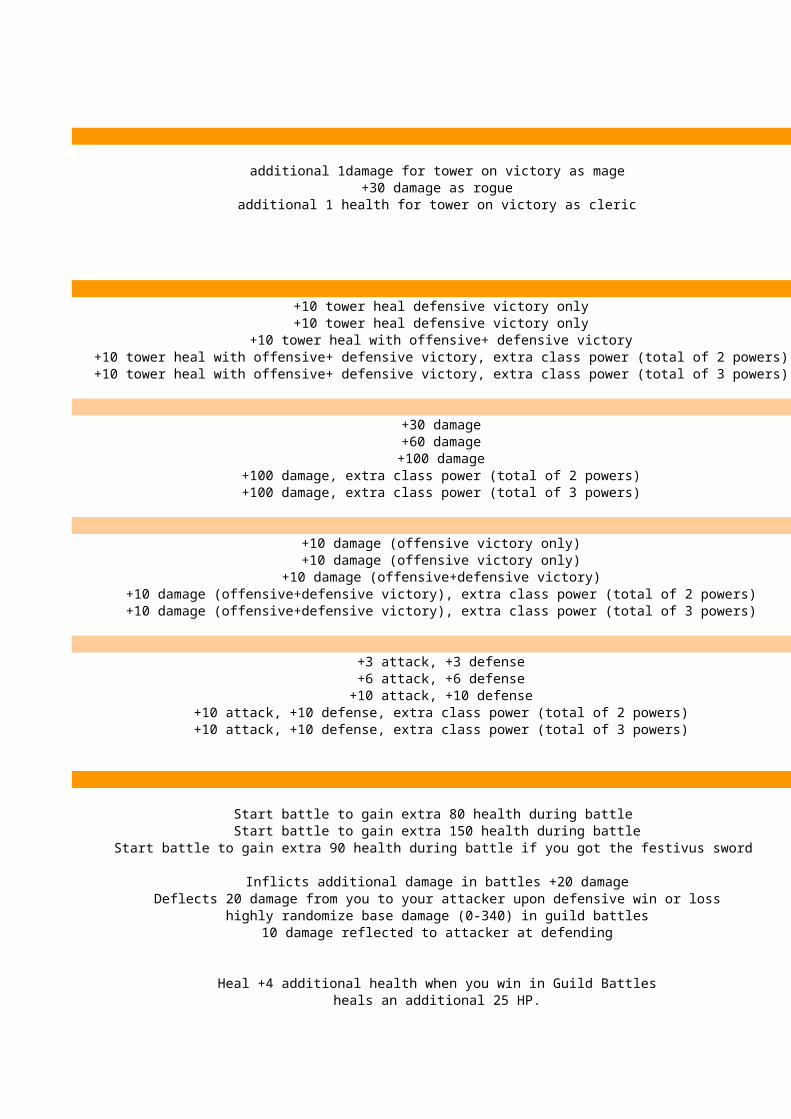
additional 1damage for tower on victory as mage +30 damage as rogue
additional 1 health for tower on victory as cleric
+10 tower heal defensive victory only +10 tower heal defensive victory only
+10 tower heal with offensive+ defensive victory +10 tower heal with offensive+ defensive victory, extra class power (total of 2 powers) +10 tower heal with offensive+ defensive victory, extra class power (total of 3 powers)
+30 damage +60 damage
+100 damage +100 damage, extra class power (total of 2 powers) +100 damage, extra class power (total of 3 powers)
+10 damage (offensive victory only) +10 damage (offensive victory only)
+10 damage (offensive+defensive victory) +10 damage (offensive+defensive victory), extra class power (total of 2 powers) +10 damage (offensive+defensive victory), extra class power (total of 3 powers)
+3 attack, +3 defense +6 attack, +6 defense
+10 attack, +10 defense +10 attack, +10 defense, extra class power (total of 2 powers) +10 attack, +10 defense, extra class power (total of 3 powers)
Start battle to gain extra 80 health during battle Start battle to gain extra 150 health during battle
Start battle to gain extra 90 health during battle if you got the festivus sword
Inflicts additional damage in battles +20 damageDeflects 20 damage from you to your attacker upon defensive win or loss
highly randomize base damage (0-340) in guild battles10 damage reflected to attacker at defending
Heal +4 additional health when you win in Guild Battles heals an additional 25 HP.
fortitude + 60% health +50 health with revive/resurrection
Inflicts +40 damage upon victory Improves Evade by 6%.
+10 poison damage for 2 rounds +50 extra health reduction with wound/lacerate effect +25 extra health reduction with wound/lacerate effect
Improves Whirlwind by +15% damage to surrounding enemies.Gives +250 Health (+25 at your stats)
confidence +40 damage +100 extra health protection and +10 more damage resist on sentinal/guardian effect
deals an additional +8 indirect damage to the whole tower upon win (defensive or offensive)(passive) +10% to confuse target to attack themselves
+10% change to polymorph opponent +4 damage passive abelity
+5% confuse and +2 damage passive (the solo 1s are better Zurran and syren) +12% chance of polymorph
+20 less likely to be dispeld effect of mirror/illusion effect
on victory +8 bonus for next attack surrounding allies gets +3 bonuson victory +12 bonus for next attack surrounding allies gets +6 bonus
on victory +20 bonus for next attack surrounding allies gets +12 bonuson victory +?? bonus for next attack surrounding allies gets +?? bonus
Able to hit adjacent enemies of the same gate for reduced damageon victory +16 bonus for next attack surrounding allies gets +9 bonus (not stackeble)
Bonus damage dealt with each victory (+50 damage max)!
protect ally for 200 health with resistance of 15 damage per hitprotect ally for 100 health with resistance of 5 damage per hit
protect ally for 150 health with resistance of 10 damage per hitprotect ally for 250 health with resistance of 20 damage per hit
removes a Debuff and heals 0 HPremoves a Debuff and heals 15 HPremoves a Debuff and heals 35 HPremoves a Debuff and heals 50 HP
Heal an ally regardless of Tower assignment.removes a Debuff and heals 20 HP
Raises current and max health of target for battle. Does not stack.
can raise an ally with 0 health to 250 healthcan raise an ally with 0 health to 200 healthcan raise an ally with 0 health to ?? healthcan raise an ally with 0 health to ?? health

+20 damage to enemy with full health +40 damage to enemy with full health +60 damage to enemy with full health +85 damage to enemy with full healthEvade Chance to avoid taking damage +50 damage to enemy with full health
Target takes an additional 35 damage for the next 5 battles, offensive or defensive
with victory decrease max health of unwounded target by 100with victory decrease max health of unwounded target by 50with victory decrease max health of unwounded target by 75with victory decrease max health of unwounded target by ??
absorb 60 damage in guild battle last 1 hourabsorb 80 damage in guild battle last 1 hour
absorb 120 damage in guild battle last 1 hourabsorb 135 damage in guild battle last 1 hour
Temporarily binds target enemy and gain auto victory next attack and reduce damage receivedabsorb 100 damage in guild battle last 1 hour
20 percent chance confused target attacks themselves, lasts for 5 rounds
copy appearance of ally, 80% chance dispelled when defeatedcopy appearance of ally, 100% chance dispelled when defeatedcopy appearance of ally, 90% chance dispelled when defeatedcopy appearance of ally, ??% chance dispelled when defeated
Resistance Level 1 Take 10 less damage to health in Guild Battle duels.Resistance Level 2 Take 20 less damage to health in Guild Battle duels.Resistance Level 3 Take 30 less damage to health in Guild Battle duels. Resistance Level 4 Take 40 less damage to health in Guild Battle duels.
boost to your ATK/DEF stats+1/+1boost to your ATK/DEF stats+2/+2boost to your ATK/DEF stats+3/+3boost to your ATK/DEF stats+4/+4
BSI
0 - 1 1 - 3 3 - 5
5 - 7 >7
if you got alexandria aswell you do additonal 2 damage
points you get when using
160-200-240 depends on lvl160-200-240 depends on lvl160-200-240 depends on lvl160-200-240 depends on lvl160-200-240 depends on lvl160-200-240 depends on lvl
?????
135 points135 points135 points135 points135 points135 points135 points135 points apply before he is at 0 health can be used more than1s135 points apply before he is at 0 health can be used more than1s135 points apply before he is at 0 health can be used more than1s135 points apply before he is at 0 health can be used more than1s

160-200-240 depends on lvl automaticly selected if enemy has full health160-200-240 depends on lvl automaticly selected if enemy has full health160-200-240 depends on lvl automaticly selected if enemy has full health160-200-240 depends on lvl automaticly selected if enemy has full health
passive160-200-240 depends on lvl automaticly selected if enemy has full health
?passivepassivepassivepassive
135 points135 points135 points135 points
160-200-240 depends on lvl135 points
?135 points135 points135 points135 points
passivepassivepassivepassivepassivepassivepassivepassive

build type leveling speed battle strength
power lvler extreem fast very weakmonster hunter very fast weak
hybrid fast strong
pvp slow very strongpure pvp very slow extreem strong

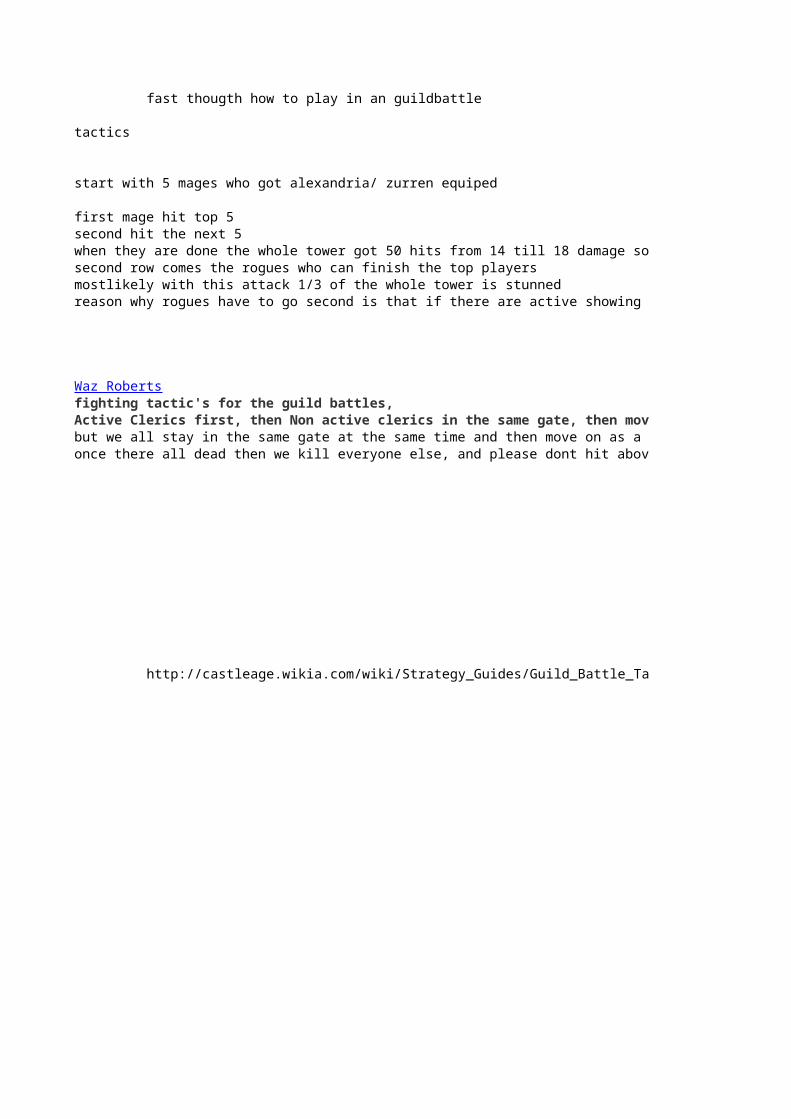
fast thougth how to play in an guildbattle
tactics
start with 5 mages who got alexandria/ zurren equiped
first mage hit top 5second hit the next 5 when they are done the whole tower got 50 hits from 14 till 18 damage so near 700 damgesecond row comes the rogues who can finish the top playersmostlikely with this attack 1/3 of the whole tower is stunnedreason why rogues have to go second is that if there are active showing up they have to go for those quickly
fighting tactic's for the guild battles,Active Clerics first, then Non active clerics in the same gate, then move on the the next gate, active clerics first then non active clerics.but we all stay in the same gate at the same time and then move on as a team to the next gate, once all clerics are dead then we move on to mages that are active to stop them from poisoning us, once there all dead then we kill everyone else, and please dont hit above your AV as that will raise the dead and we will have to start over again cleaning up, thanks
http://castleage.wikia.com/wiki/Strategy_Guides/Guild_Battle_Tactics
Waz Roberts

reason why rogues have to go second is that if there are active showing up they have to go for those quickly
Active Clerics first, then Non active clerics in the same gate, then move on the the next gate, active clerics first then non active clerics.but we all stay in the same gate at the same time and then move on as a team to the next gate, once all clerics are dead then we move on to mages that are active to stop them from poisoning us, once there all dead then we kill everyone else, and please dont hit above your AV as that will raise the dead and we will have to start over again cleaning up, thanks

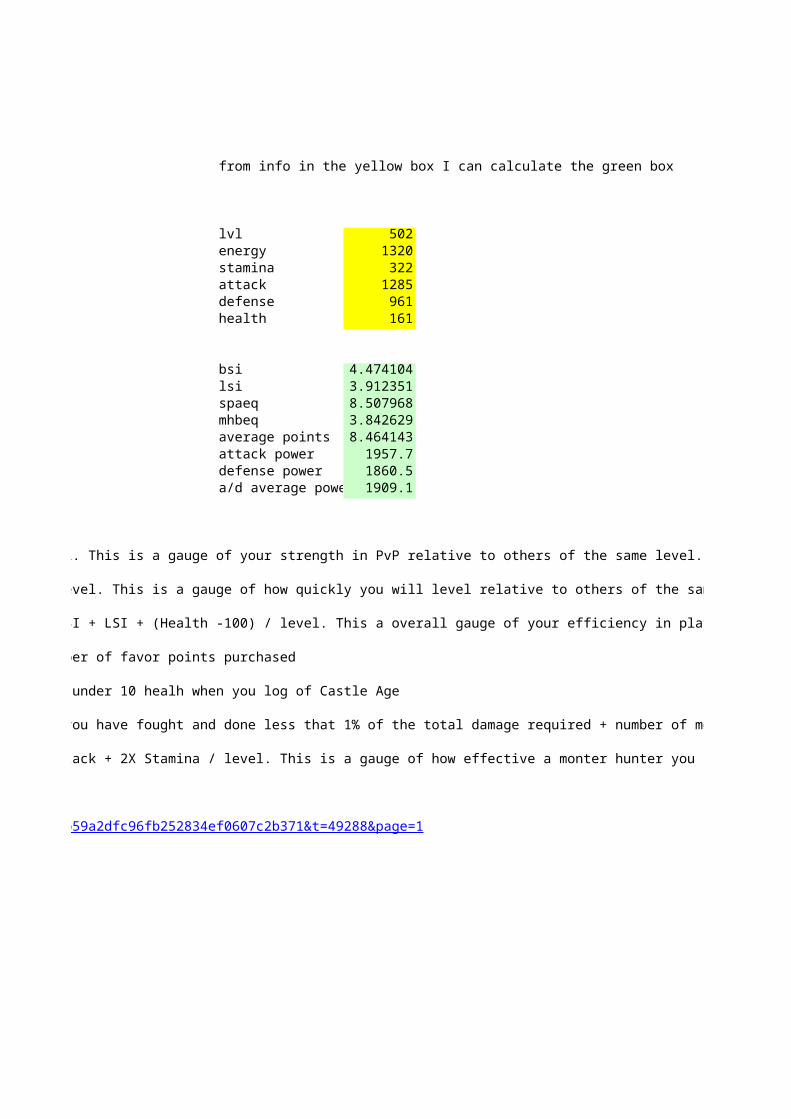
) BSI (Battle Strength Index) Attack + defense / level. This is a gauge of your strength in PvP relative to others of the same level. Often seems to be regarded as the length of your CA [censored] given the importance many people regard it with.
2) LSI (Leveling Speed Index) 2X Stamina + energy / level. This is a gauge of how quickly you will level relative to others of the same level.
3) SPAEQ (Skill Point Aquistion Efficiency Quotent) BSI + LSI + (Health -100) / level. This a overall gauge of your efficiency in playing Castle Age
4) CLQ (Chest Luck Quotent) Epic generals owned / number of favor points purchased
5) CF (Coward Factor) The percentage of times you are under 10 healh when you log of Castle Age
6) PPQ (Parasitic player quotent) Number of monsters you have fought and done less that 1% of the total damage required + number of monsters you have attacked but not defended / total number of monsters fought.
7) MHBEQ (Monster Hunting Build Effective Quotent) Attack + 2X Stamina / level. This is a gauge of how effective a monter hunter you are relative to others of the same level
http://castleageforums.com/cforum/showthread.php?s=dfb59a2dfc96fb252834ef0607c2b371&t=49288&page=1

from info in the yellow box I can calculate the green box
lvl 502energy 1320stamina 322attack 1285defense 961health 161
bsi 4.474104lsi 3.912351spaeq 8.507968mhbeq 3.842629average points 8.464143attack power 1957.7defense power 1860.5a/d average power 1909.1
) BSI (Battle Strength Index) Attack + defense / level. This is a gauge of your strength in PvP relative to others of the same level. Often seems to be regarded as the length of your CA [censored] given the importance many people regard it with.
2) LSI (Leveling Speed Index) 2X Stamina + energy / level. This is a gauge of how quickly you will level relative to others of the same level.
3) SPAEQ (Skill Point Aquistion Efficiency Quotent) BSI + LSI + (Health -100) / level. This a overall gauge of your efficiency in playing Castle Age
4) CLQ (Chest Luck Quotent) Epic generals owned / number of favor points purchased
5) CF (Coward Factor) The percentage of times you are under 10 healh when you log of Castle Age
6) PPQ (Parasitic player quotent) Number of monsters you have fought and done less that 1% of the total damage required + number of monsters you have attacked but not defended / total number of monsters fought.
7) MHBEQ (Monster Hunting Build Effective Quotent) Attack + 2X Stamina / level. This is a gauge of how effective a monter hunter you are relative to others of the same level
http://castleageforums.com/cforum/showthread.php?s=dfb59a2dfc96fb252834ef0607c2b371&t=49288&page=1
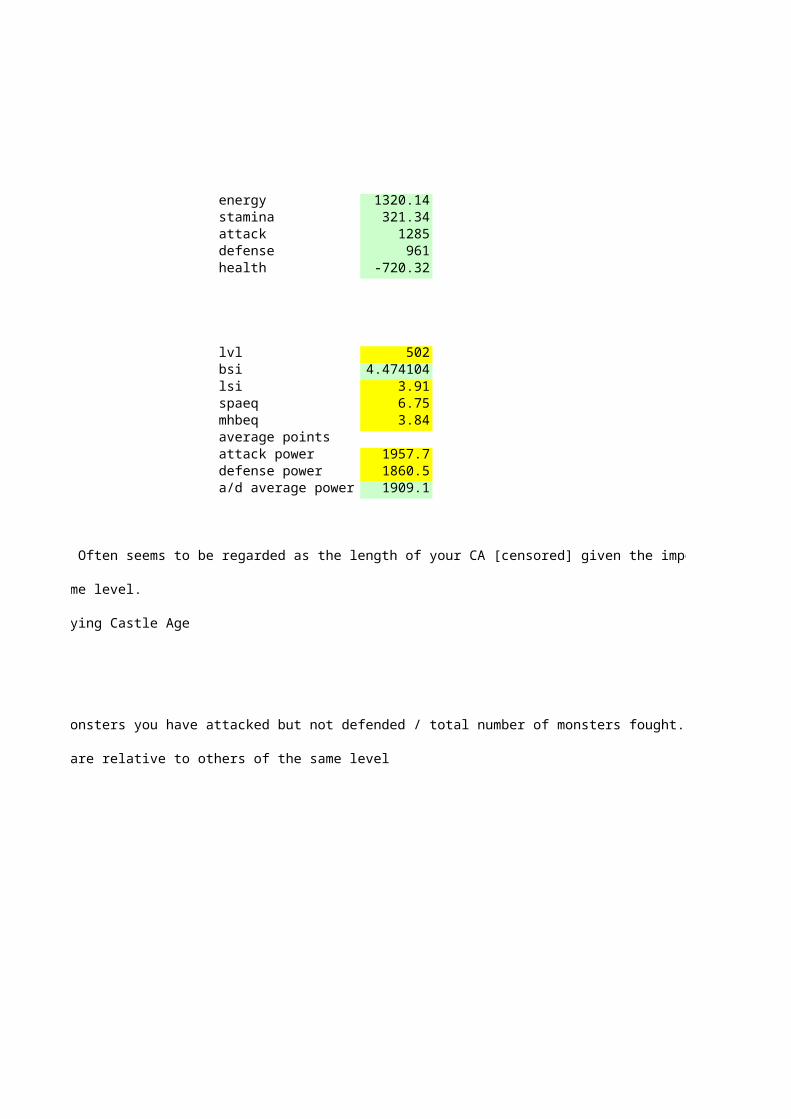
energy 1320.14stamina 321.34attack 1285defense 961health -720.32
lvl 502bsi 4.474104lsi 3.91spaeq 6.75mhbeq 3.84average pointsattack power 1957.7defense power 1860.5a/d average power 1909.1
) BSI (Battle Strength Index) Attack + defense / level. This is a gauge of your strength in PvP relative to others of the same level. Often seems to be regarded as the length of your CA [censored] given the importance many people regard it with.
6) PPQ (Parasitic player quotent) Number of monsters you have fought and done less that 1% of the total damage required + number of monsters you have attacked but not defended / total number of monsters fought.
7) MHBEQ (Monster Hunting Build Effective Quotent) Attack + 2X Stamina / level. This is a gauge of how effective a monter hunter you are relative to others of the same level

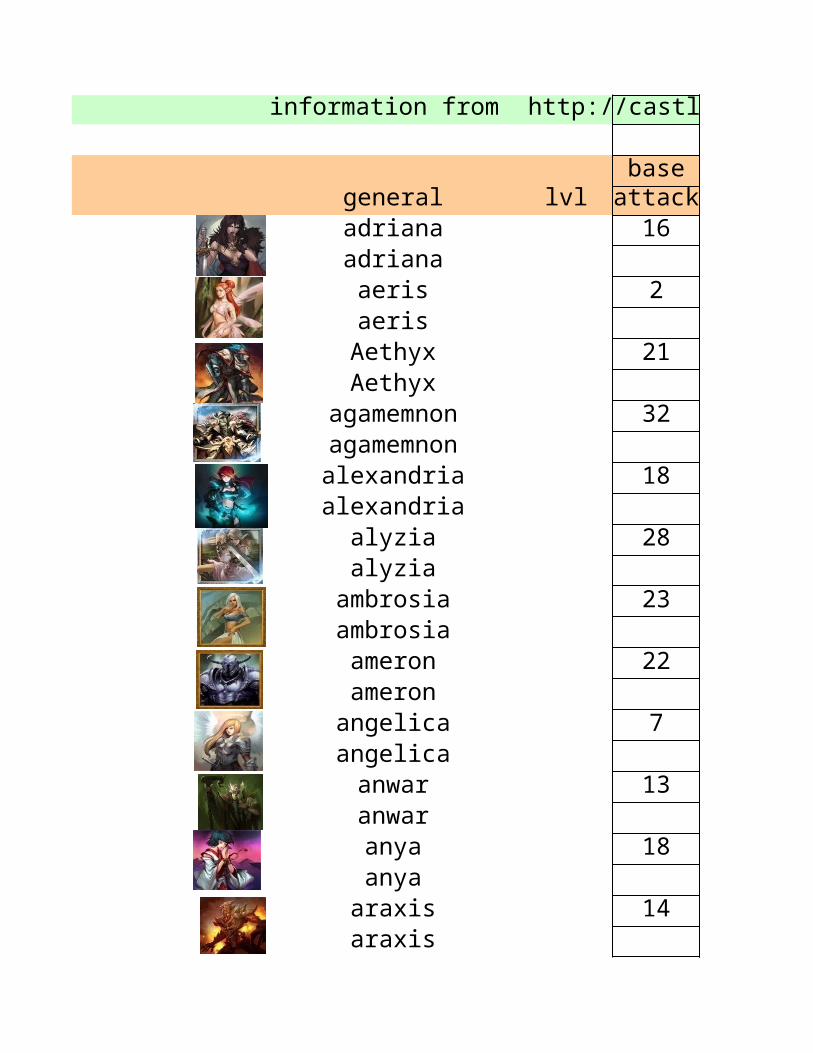
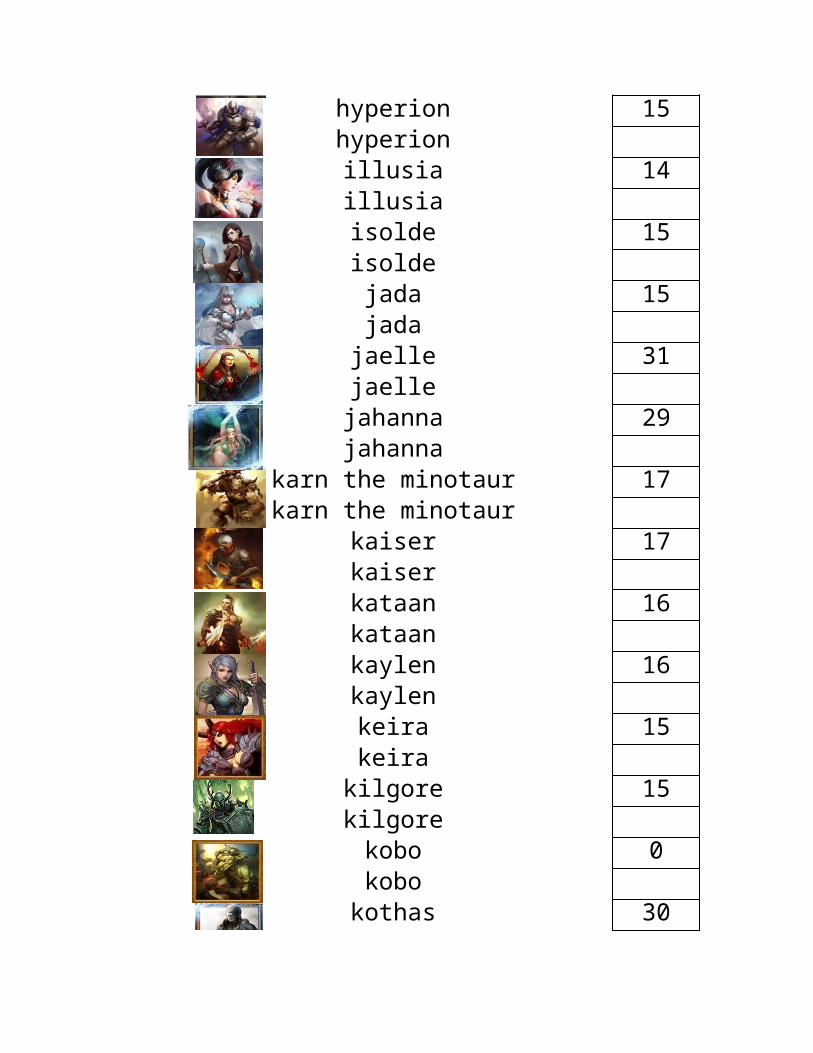
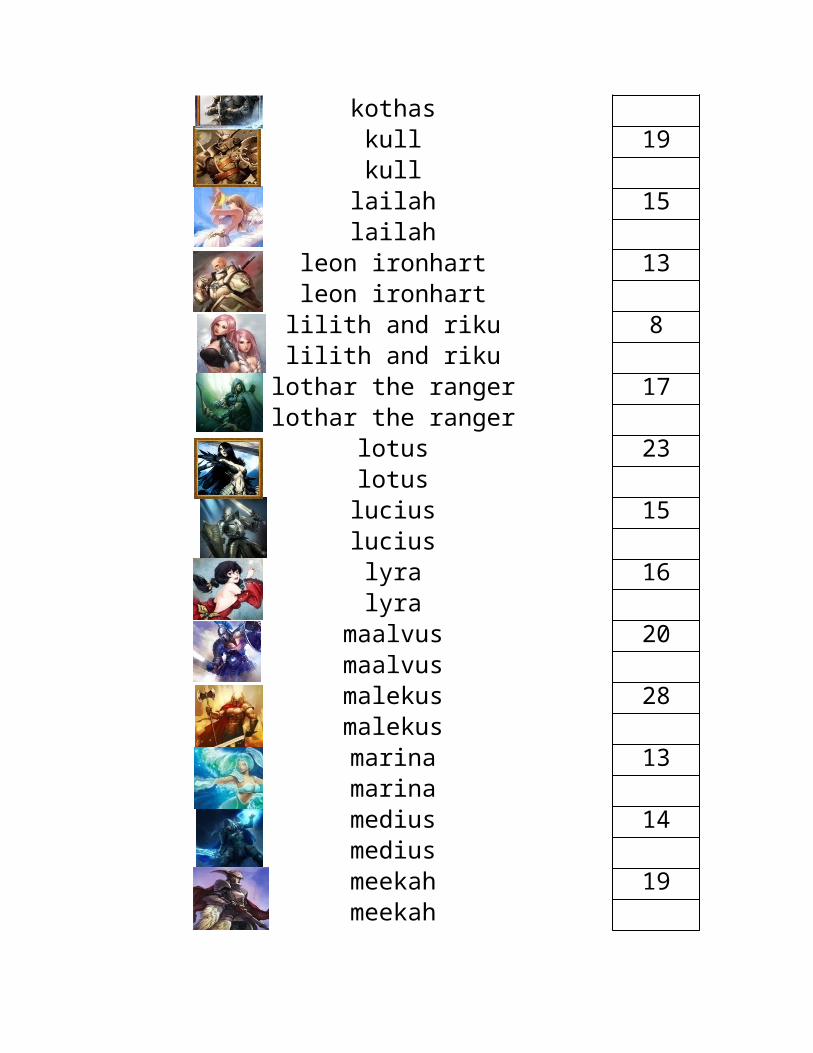
information from http://castleage.wikia.com/wiki/Heroes/Handy_Hero_Tables
basegeneral lvl attackadriana 16adriana
aeris 2aeris
Aethyx 21Aethyx
agamemnon 32agamemnonalexandria 18alexandria
alyzia 28alyzia
ambrosia 23ambrosiaameron 22ameronangelica 7angelicaanwar 13anwaranya 18anyaaraxis 14araxis

aria 13aria
arielle 12arielleartanis 13artanisathenia 21atheniaaurelius 27aureliusaurora 23auroraazalia 18azaliaazeron 25azeronazriel 25azrielazul 17azul
banthus archfiend 21banthus archfiend
barbarus 18barbarus
bjorin 24bjorincalista 18

calistacaine 19caine
cartigan 16cartigancelesta 12celestachase 17chase
chimerus 15chimerus
cid 2cid
corvintheus 25corvintheus
crissana 19crissana
crom 14cromdante 12dante
daphne 14daphnedarius 16darius
deianira 17deianira
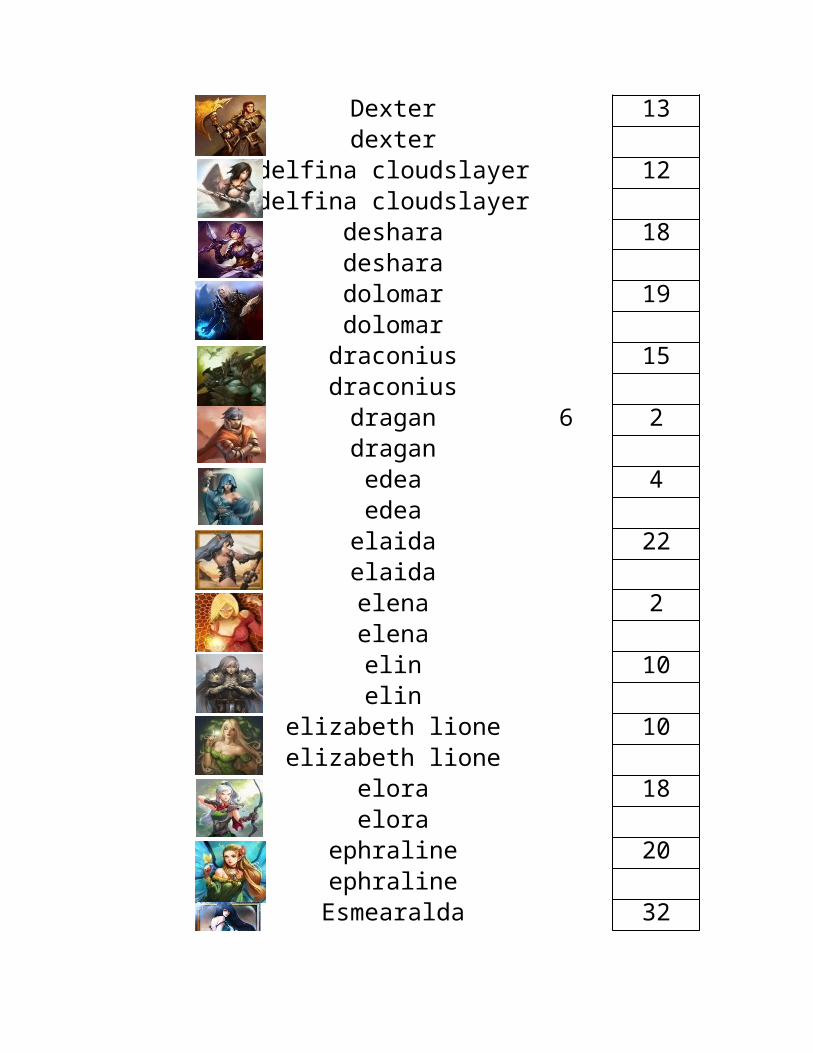
Dexter 13dexter
delfina cloudslayer 12delfina cloudslayer
deshara 18desharadolomar 19dolomar
draconius 15draconius
dragan 6 2draganedea 4edeaelaida 22elaidaelena 2elenaelin 10elin
elizabeth lione 10elizabeth lione
elora 18elora
ephraline 20ephraline
Esmearalda 32
Esmearaldaevalice 20evaliceFenris 16Fenrisfelizia 24felizia
flaminius 20flaminiusgallador 10galladorgarlan 4garlangawain 15gawain
gildamesh orc king 19gildamesh orc king
godric 17godricGorlac 15Gorlachalcyon 15halcyonhelena 15helena
hyacinth 14hyacinth

hyperion 15hyperion
illusia 14illusiaisolde 15isoldejada 15jadajaelle 31jaelle
jahanna 29jahanna
karn the minotaur 17karn the minotaur
kaiser 17kaiserkataan 16kataankaylen 16kaylenkeira 15keira
kilgore 15kilgorekobo 0kobo
kothas 30
kothaskull 19kull
lailah 15lailah
leon ironhart 13leon ironhartlilith and riku 8lilith and riku
lothar the ranger 17lothar the ranger
lotus 23lotuslucius 15luciuslyra 16lyra
maalvus 20maalvusmalekus 28malekusmarina 13marinamedius 14mediusmeekah 19meekah

Memnon 16Memnon
mephistopeles 24mephistopeles
mercedes 5mercedesminerva 17minerva
miri bladebourne 16miri bladebourne
misa 16misa
morrigan 6morrigannautica 16nauticanoktar 12noktaroberon 15oberonophelia 15ophelia
penelope 6 0penelopepercival 15percival
persephone 7

persephonephaethor 20phaethor
rafaria 21rafaria
raziel the silent 26raziel the silent
sanna 17sannasano 3sano
savannah 11savannah
scarlett 17scarlettscourge 15scourgesephora 5sephora
serra silverlight 10serra silverlight
Sereme 20Sereneseverin 18severinserylius 14serylius
shino 4shinoshinoshivak 16shivakskaar 19skaarslayer 16slayersofira 16sofirasolara 17solarasophia 6 1sophia
stone guardian 17stone guardian
Strider 6 3Strider
suri 18suri
sylvanas 20sylvanas
syren 20syrenterra 4terra

theorin 19theorintherian 20theriantifanna 17tifannatitania 7titania
tristram 20tristramtyrant 33tyrant
tyxeros 18tyxerosvaliant 8valiant
vanquish 15vanquishvincent 22vincentvorenus 14vorenusvulcan 12vulcan
xira 24xira
zarevok 3
zarevokzeventis 22zeventis
zin 17zin
zurran 25zurran
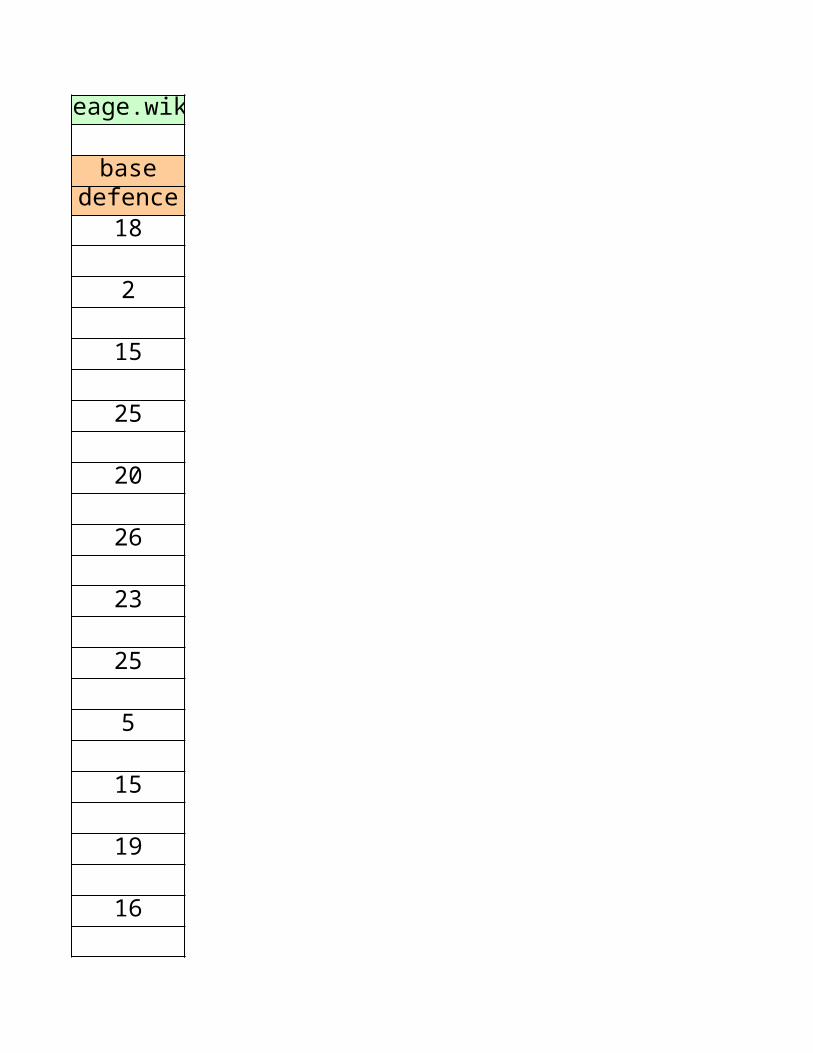
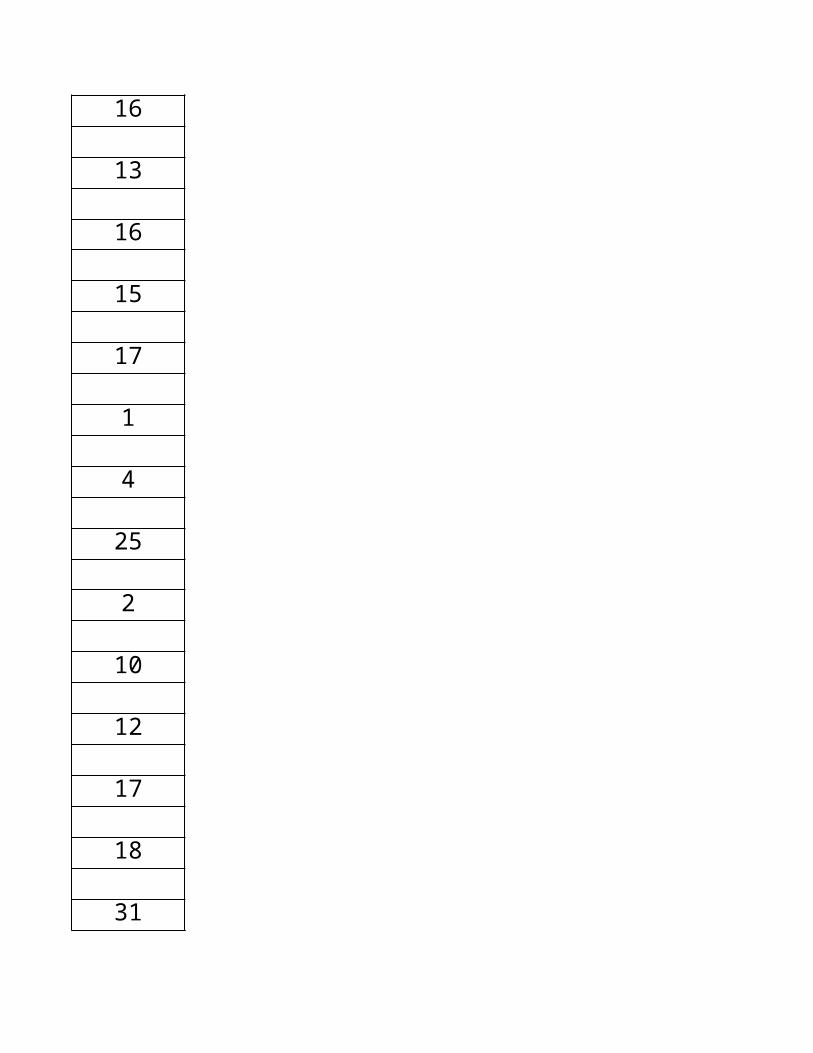
information from http://castleage.wikia.com/wiki/Heroes/Handy_Hero_Tables
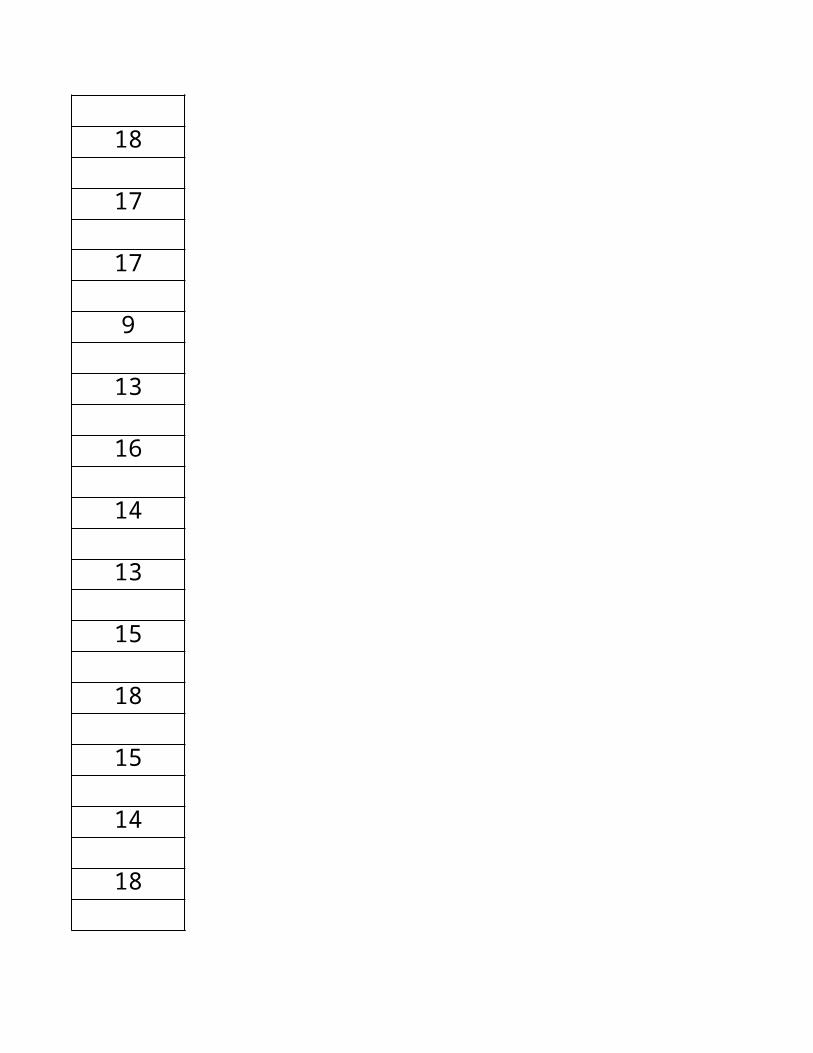
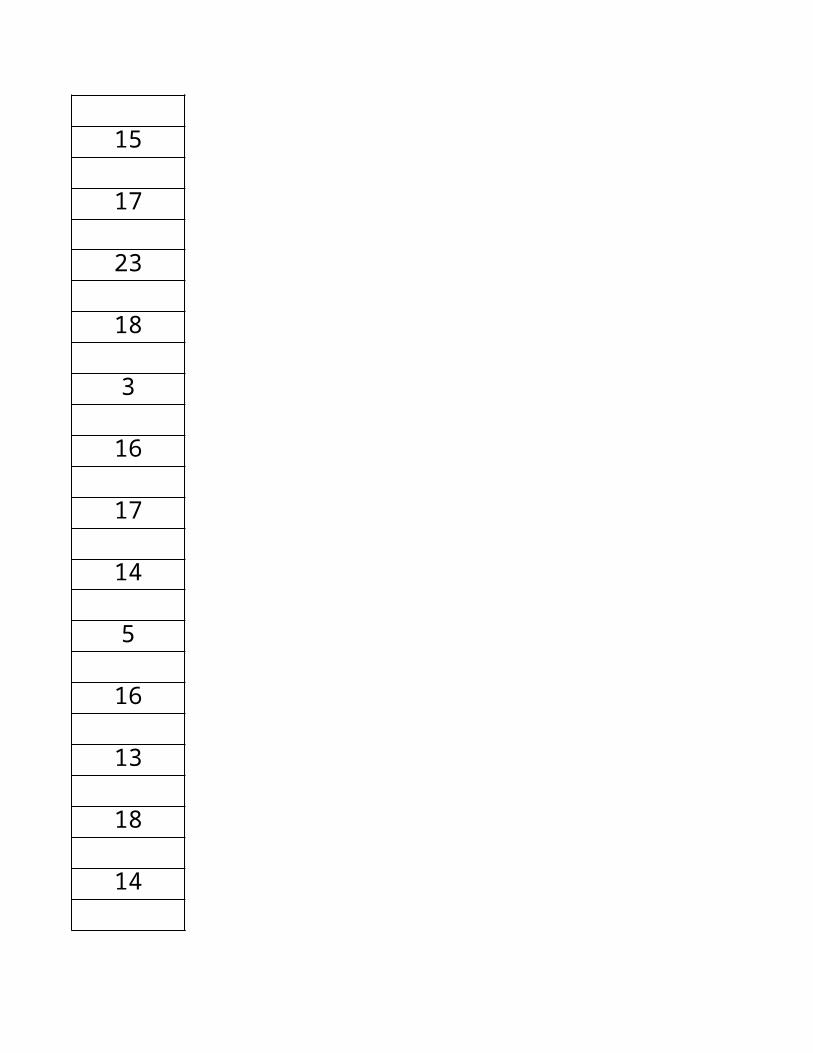
basedefence
18
2
15
25
20
26
23
25
5
15
19
16

16
10
14
20
30
23
16
21
19
17
19
15
22
16

19
15
12
13
12
3
25
15
14
10
20
16
14

16
13
16
15
17
1
4
25
2
10
12
17
18
31

19
16
24
18
12
3
19
19
17
15
24
13
15

15
15
22
11
31
29
19
16
16
18
23
13
1
33
18
17
17
9
13
16
14
13
15
18
15
14
18

12
20
4
15
18
16
7
11
10
19
10
3
13
7

15
17
23
18
3
16
17
14
5
16
13
18
14
5
20
17
15
21
19
2
19
0
16
20
16
6

20
14
8
6
15
29
17
8
14
16
14
15
21
2

24
17
25
information from http://castleage.wikia.com/wiki/Heroes/Handy_Hero_Tables
abelity -3 defense for opposing war counsil
no bank fee
rogue guild battle increase poison damage +10 and duration 2 rounds
+30 attack vs monsters+3% criticaldivine power+20
+4 damage mage passive abelity
+2 defense for every guardion of alyzia (max 50)divine power+5
player defense increased by 0.45 for every hero owns
warrior +15% wirlwind damage
+6% chance for extra demi points from battles and monster battles
+1 defense for every wolf spirits owned (max10)
+10% change to polymorph opponent
+10 stamina -25 energy

+6 player attack
+3 general attack and defence
army limit to 521
+1 attack per 50 royal seals (max10)
+1,1 defense for every 3 healthdivine power+20
player attack increased by 1 for every 4 health
+5 attack on second postion war counsel
+0.21 stamina for every hero owned
+1 attack for every 50 archangels (max 40)
+5 player attack and defence
12 hour cooldown +50% critical next attack (soulsteal)
power attack use 3x stamina and damage is 3x as much
+2 attack per valdonian mystic mage
0.5 attack for every vampire lord owned (max 12)
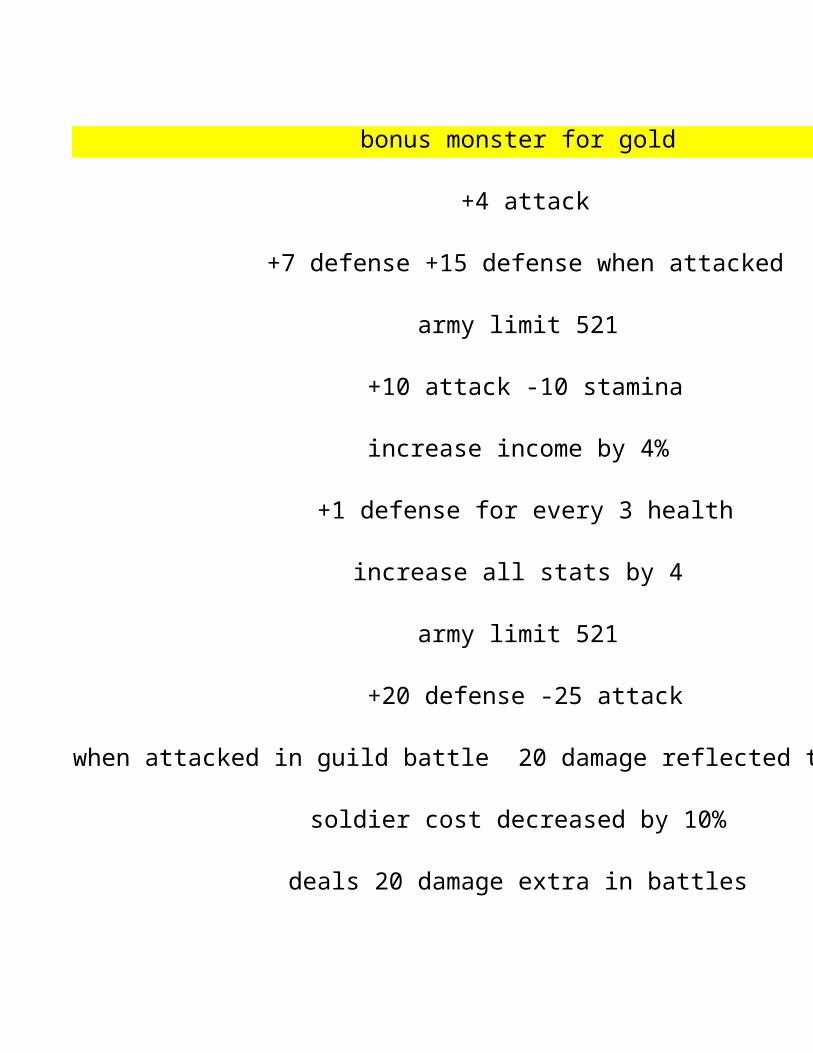
bonus monster for gold
+4 attack
+7 defense +15 defense when attacked
army limit 521
+10 attack -10 stamina
increase income by 4%
+1 defense for every 3 health
increase all stats by 4
army limit 521
+20 defense -25 attack
when attacked in guild battle 20 damage reflected to attacker
soldier cost decreased by 10%
deals 20 damage extra in battles

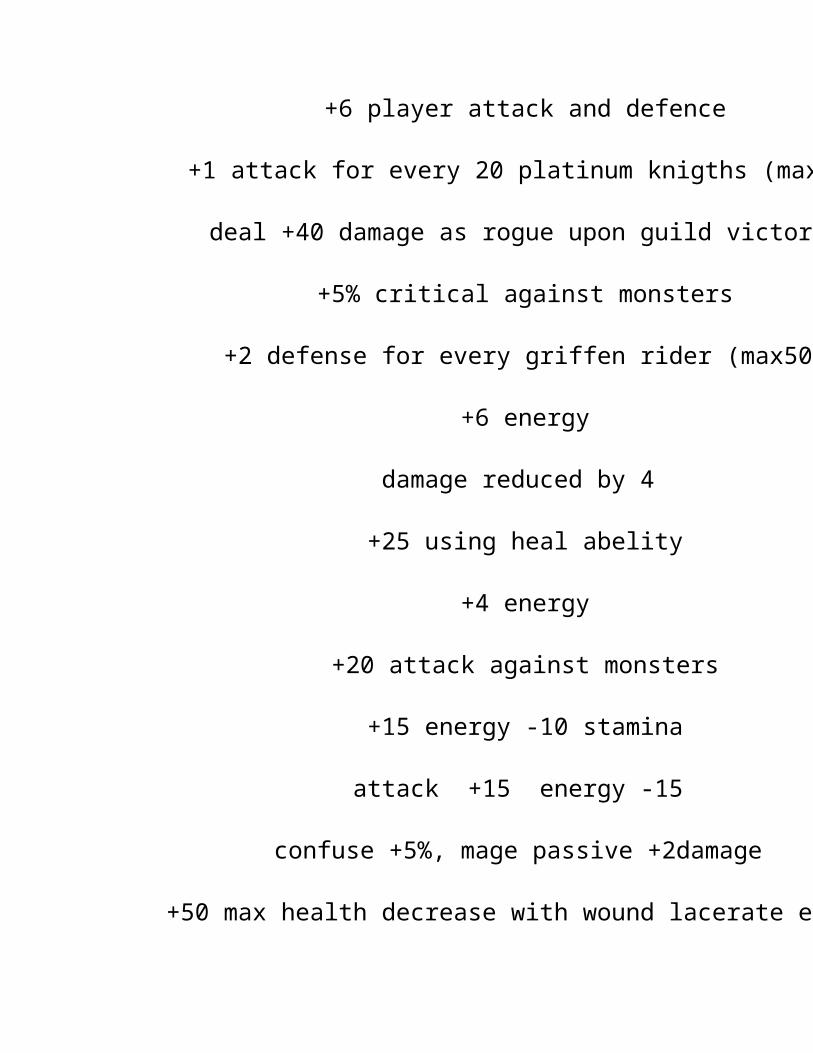
+6 player attack and defence
+1 attack for every 20 platinum knigths (max10)
deal +40 damage as rogue upon guild victory
+5% critical against monsters
+2 defense for every griffen rider (max50)
+6 energy
damage reduced by 4
+25 using heal abelity
+4 energy
+20 attack against monsters
+15 energy -10 stamina
attack +15 energy -15
confuse +5%, mage passive +2damage
+50 max health decrease with wound lacerate effect

divine power+??transfer +30% defense to attack
player attack +6
+12% chance of polymorph
+2 attack for every flamewaker (max 50 attack)
+1 defense for every 50 valor knigths (max10)
soldier cost decreased by 6%
+10 player attack on the nect 4 attacks 6hour cooldown
power attack use 5x stamina and damage is 5x as much
+20 energy
+2attack +2 stamina
transfer 25 % attack to defense
+ 12 attack -14 energy
transfer 20 % stamina to energy

none
attack +12 max energy -14
+7 defense if you own Tristram
+1 attack for every arcane blasts (max 10 )
+20%less likely to despelled illusin/mirror effectdivine power+20
attack +1.1 every 4 healthdivine power+20
+50 attack on next attack 10 hour cooldown
critical chance +3%
+3 general attack and defence
player attack increased 0.15 for every hero owns
player attack increased by 8 when attacked
max stamina of 4
2 less item needed by goblin emporium + general defense +40
+50 health with revive/resurrection

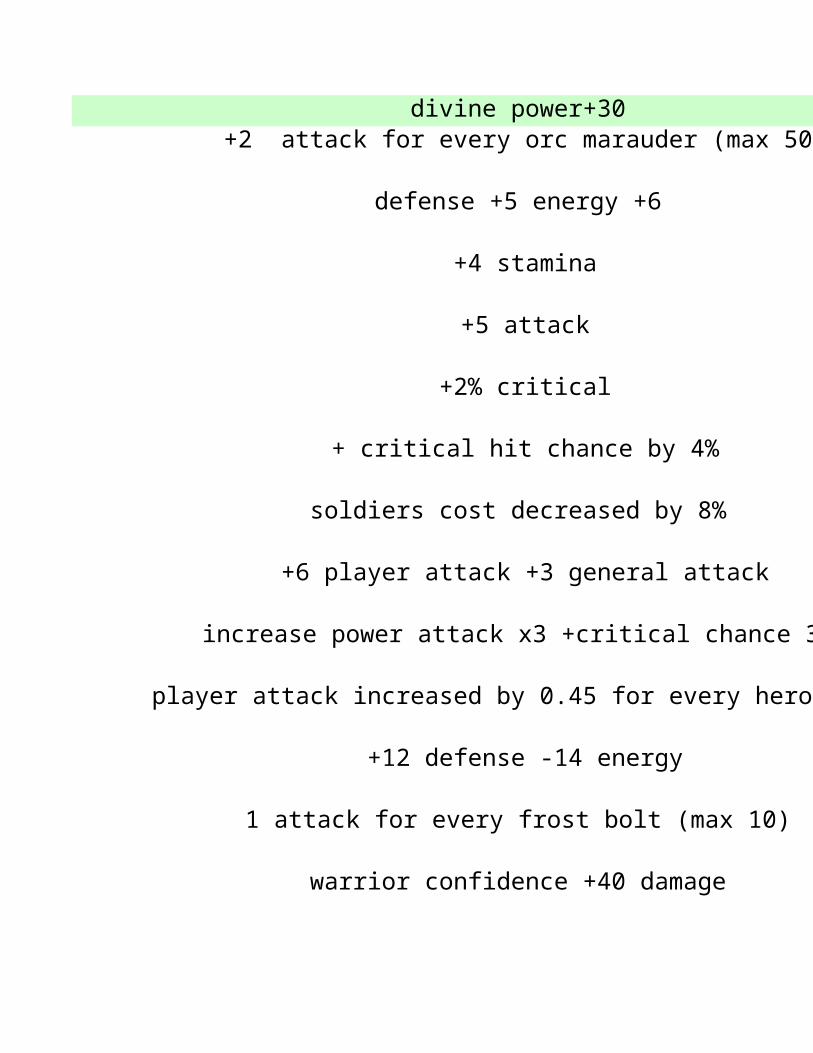
divine power+30 +2 attack for every orc marauder (max 50)
defense +5 energy +6
+4 stamina
+5 attack
+2% critical
+ critical hit chance by 4%
soldiers cost decreased by 8%
+6 player attack +3 general attack
increase power attack x3 +critical chance 3%
player attack increased by 0.45 for every hero owns
+12 defense -14 energy
1 attack for every frost bolt (max 10)
warrior confidence +40 damage

+12 attack -14 energy
army limit 541
increase income by 5%
max stamina +6
4 hours cooldown +10% critical on next attack
+30 energy up at next attack23 hour cooldown
5% extra demi points
+6 attack
1 attack for every 40 barbarian captains (max 10)
as warrior +25 health
+25 attack -25 defense
soldier cost decreased by 6%
-4 damage reduced +4 player defense
guild battle 10 damage reflected to attacker
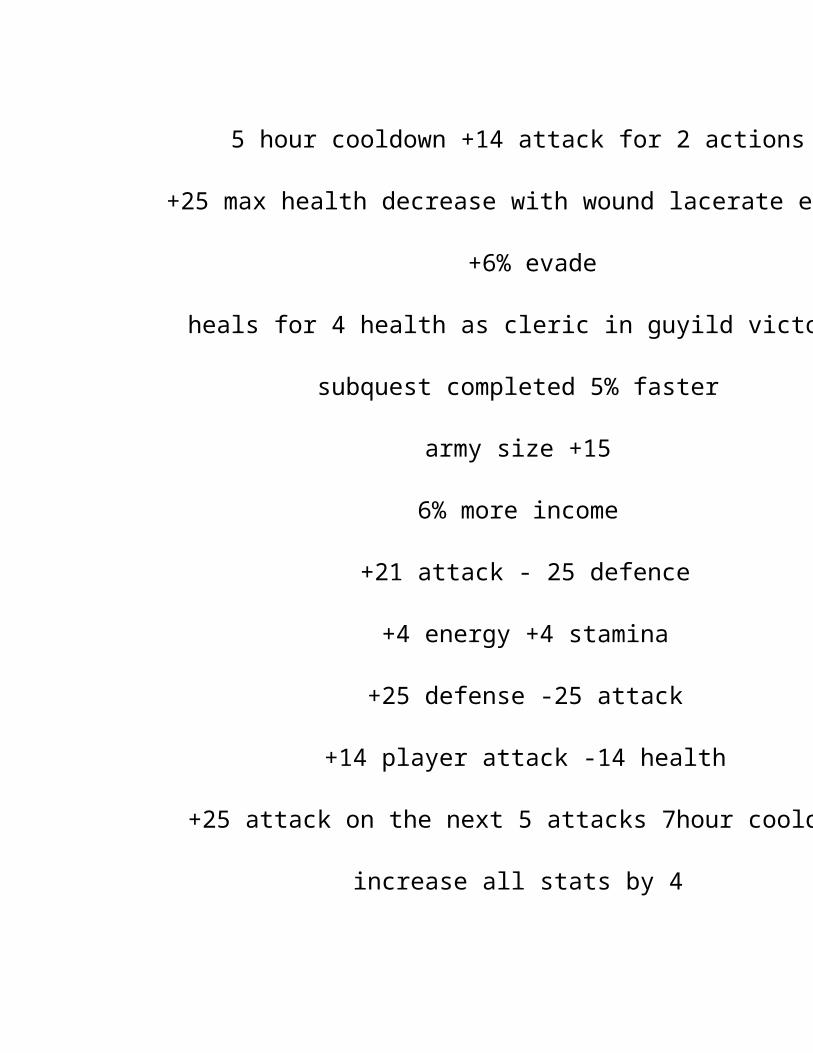
5 hour cooldown +14 attack for 2 actions
+25 max health decrease with wound lacerate effect
+6% evade
heals for 4 health as cleric in guyild victory
subquest completed 5% faster
army size +15
6% more income
+21 attack - 25 defence
+4 energy +4 stamina
+25 defense -25 attack
+14 player attack -14 health
+25 attack on the next 5 attacks 7hour cooldown
increase all stats by 4
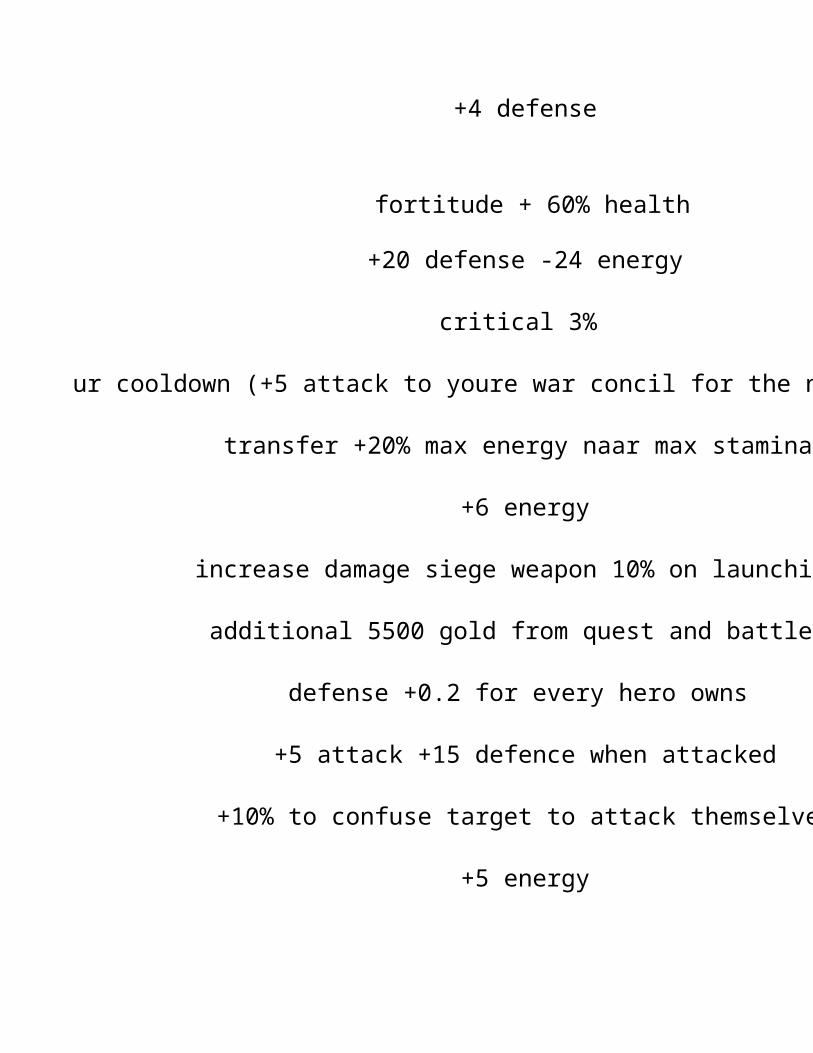
+4 defense
fortitude + 60% health
+20 defense -24 energy
critical 3%
8 hour cooldown (+5 attack to youre war concil for the next 5 attacks)
transfer +20% max energy naar max stamina
+6 energy
increase damage siege weapon 10% on launching
additional 5500 gold from quest and battles
defense +0.2 for every hero owns
+5 attack +15 defence when attacked
+10% to confuse target to attack themselves
+5 energy

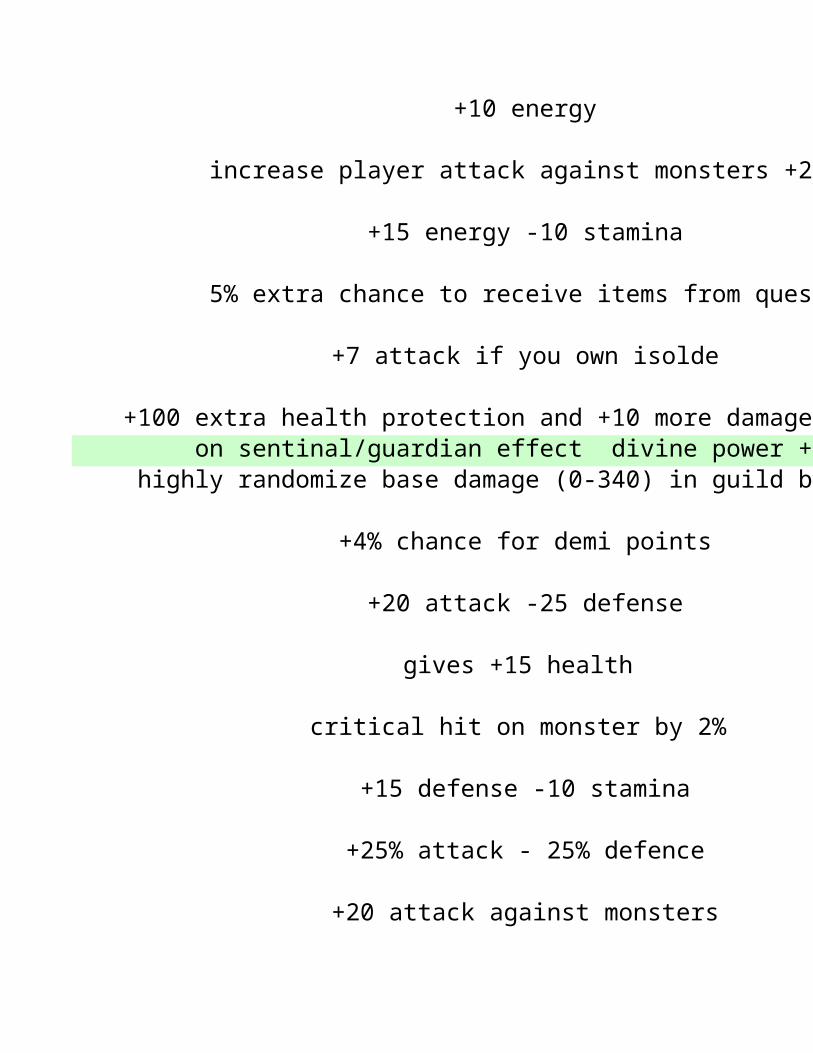
+10 energy
increase player attack against monsters +25
+15 energy -10 stamina
5% extra chance to receive items from quests
+7 attack if you own isolde
+100 extra health protection and +10 more damage resist on sentinal/guardian effect divine power +30
highly randomize base damage (0-340) in guild battles
+4% chance for demi points
+20 attack -25 defense
gives +15 health
critical hit on monster by 2%
+15 defense -10 stamina
+25% attack - 25% defence
+20 attack against monsters

+1 attack per 10 obsidian swords (max50)
23 hours cooldown +15 stamina on youre next attack
+8 damage as mage on guild battle
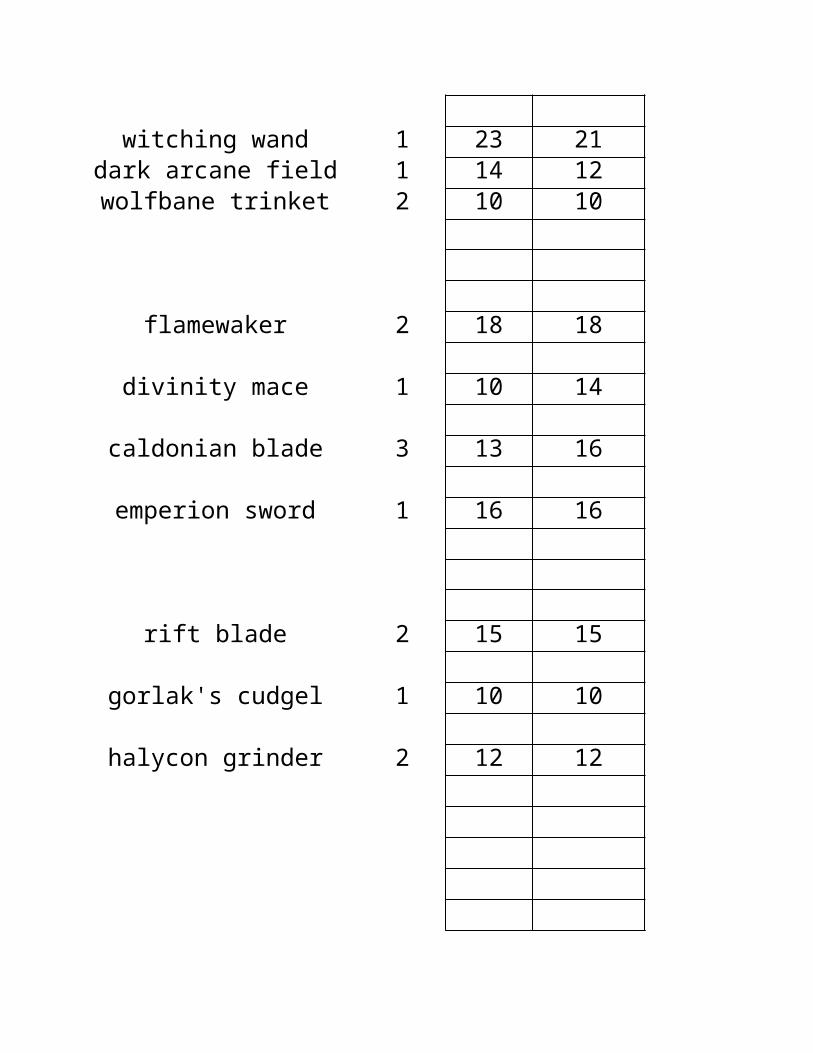
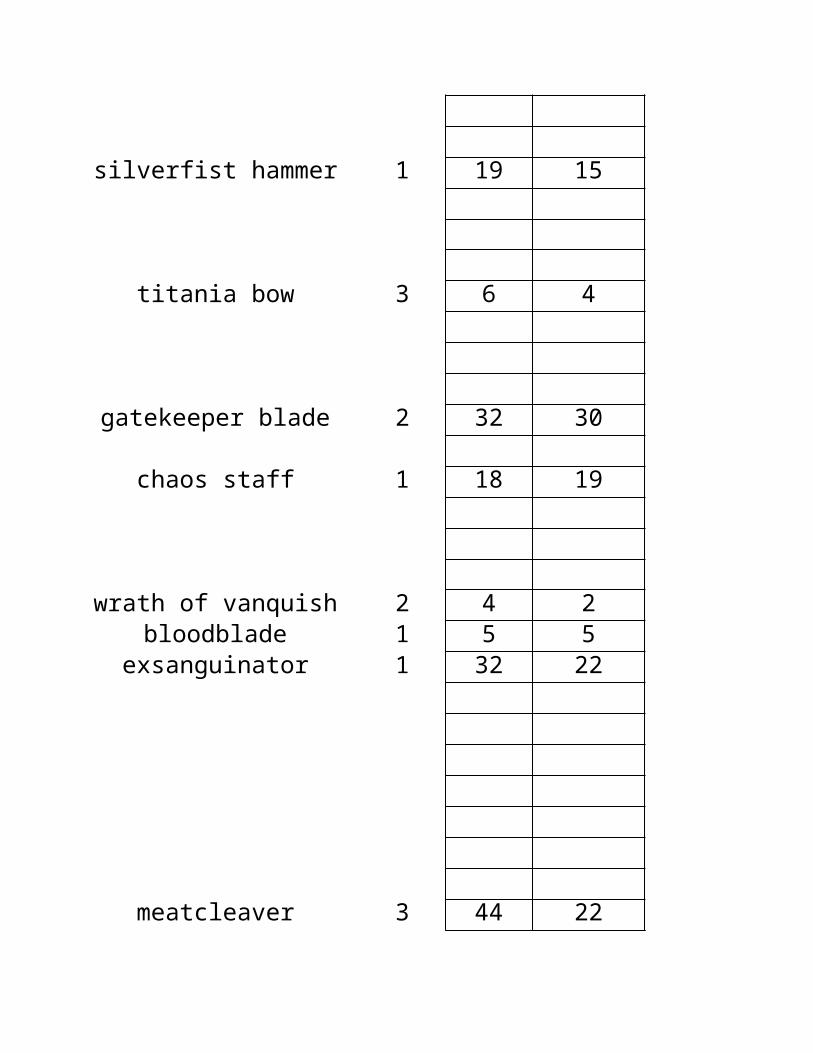
items attack defenceattack
lifebane 2 14 16death ward 2 12 14
aeris dagger 5 4 10
inoculator 1 21 17poisons touch 1 11 9
flamewave tomb 1 16 16
alyzias greatsword 1 17 17
transfiguration 2 7 12
araxin blade 1 7 8armegeddan pendant 2 23 18

emerald saber 1 9 10
blade of arielle 3 9 9
prissmatic staff 1 17 14
angels rebirth 2
atonement 1 14 18
deathbellow 2 19 9warmonger shield 2 12 10
skullseeker 2 25 20
the terrible 1 20 19
hellblade 5 30 20
cid saber 2 6 5
sytheblade 1 18 14
belt of abaddon 2 13 14
breath of fire 1 15 10fiery blade 2 6 3
lightguard rapier 1 17 20
crushing blade 1 6 6
gorlaks's axe 1 11 8
cloudslayer blade 2 15 15
shadowfel katara 1 18 15
arcane vortex 1 15 15forsaken tome 1 13 11drakkan blade 3 12 12
dragonblade 3 7 3
mystical dagger 3 5 5
sword of migth 1 3 1
golden horn bow 2 17 15
mystical illusion 1 15 18conjurers wand 1 19 22
vanishing dagger 2 26 23
witching wand 1 23 21dark arcane field 1 14 12wolfbane trinket 2 10 10
flamewaker 2 18 18
divinity mace 1 10 14
caldonian blade 3 13 16
emperion sword 1 16 16
rift blade 2 15 15
gorlak's cudgel 1 10 10
halycon grinder 2 12 12

virtue of justice 1 25 25
jadan wand 1 10 14
blood drinker 1 21 16
staff of jahanna 2 26 30
skullcrush mace 1 5 2
deathdealer 2 18 10ornate dagger 2 16 12disembowler 2 17 12
stormwind saber 2 11 16
demon strength 2 8 2signet of keira 3
lightward greatsword 2

incarnation 1 11 11
frost edge 2 17 10
deatch touch gautlet 5
rune blade 1 10 9
blade of ursus 2 20 17
genesis sword 1 20 30
judicators wrath 1 20 18conclave armor 1 16 19

rigtheousniss 2 14 11
bladebourne saber 1 12 11
crimsonguard halberd 1 18 16
shadow blast 3 5 1
nautical trident 2 9 5
oberon's might 1 20 17

shadow slicer 1 23 18
the galvanizer 2 27 23
staff of the martyr 1 15 19
bonecrusher 2 18 21
truthseeker blade 1 15 22

warrior gauntlet 8 9 9frostwolf axe 1 10 5
whirlwind 3 28 17prophetic wand 1 17 21
deathrune signet 4 9 6
vampiric blade 1 10 12
solstice blade 2 15 17
arcade bow 6cursed bow -5
assassins blade 3 7 4amulet of despair 2 6 5windthorn wand 2 16 14
syrens call 1 20 18discimbobulate 1 13 17
terra's blade 3 10 9
silverfist hammer 1 19 15
titania bow 3 6 4
gatekeeper blade 2 32 30
chaos staff 1 18 19
wrath of vanquish 2 4 2bloodblade 1 5 5
exsanguinator 1 32 22
meatcleaver 3 44 22

claymore of zeventis 2 28 28
serenity blade 1 16 16
soul siphon 1 10 18necronic blast 2 18 18

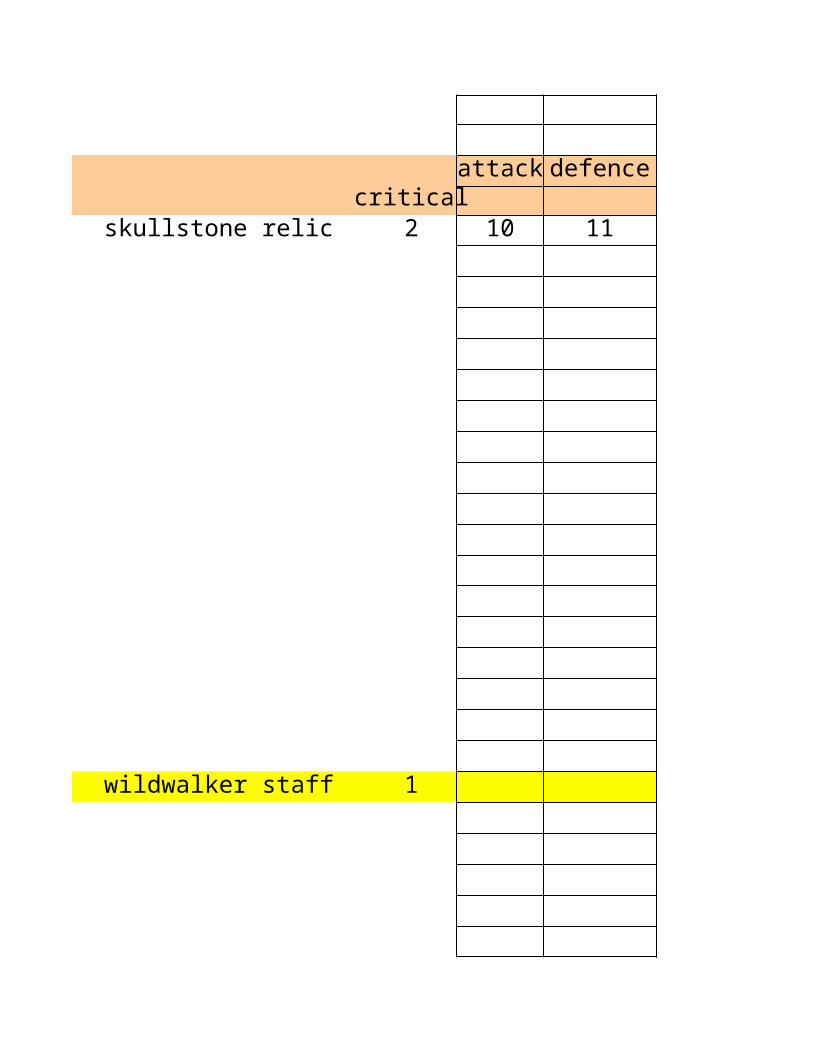
attack defencecritical
skullstone relic 2 10 11
wildwalker staff 1

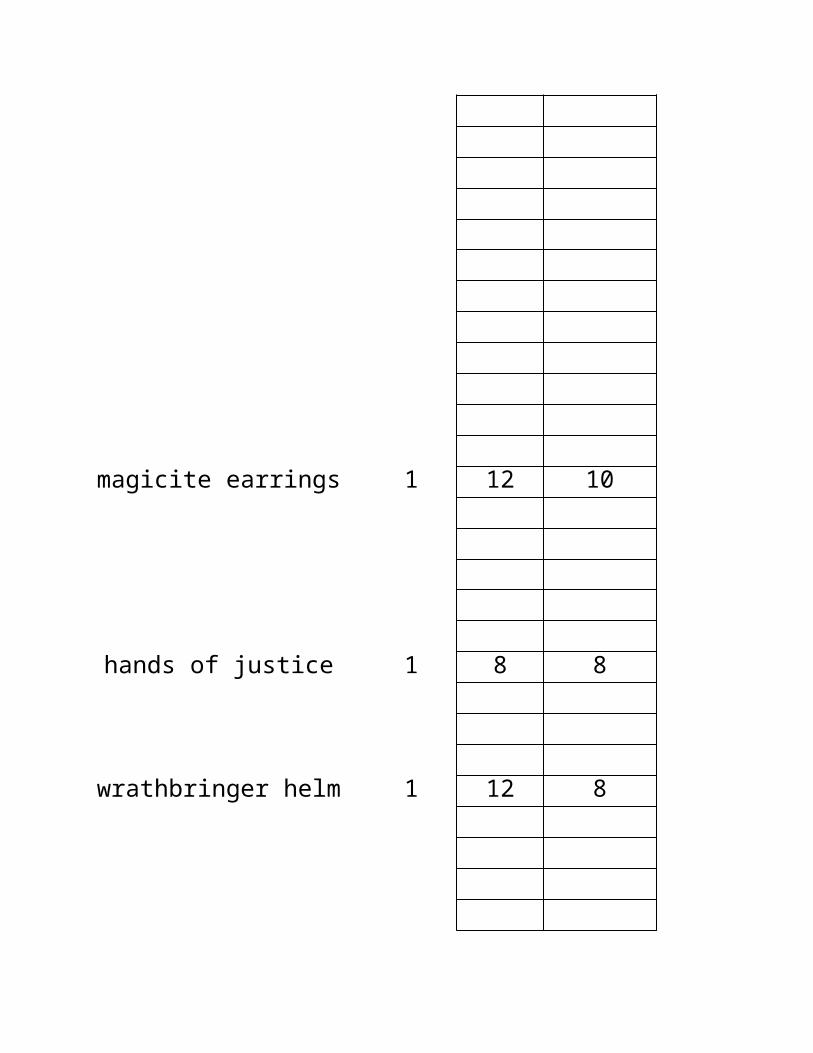
magicite earrings 1 12 10
hands of justice 1 8 8
wrathbringer helm 1 12 8

celestas devotion 3
wolfwood amulet 1 13 7

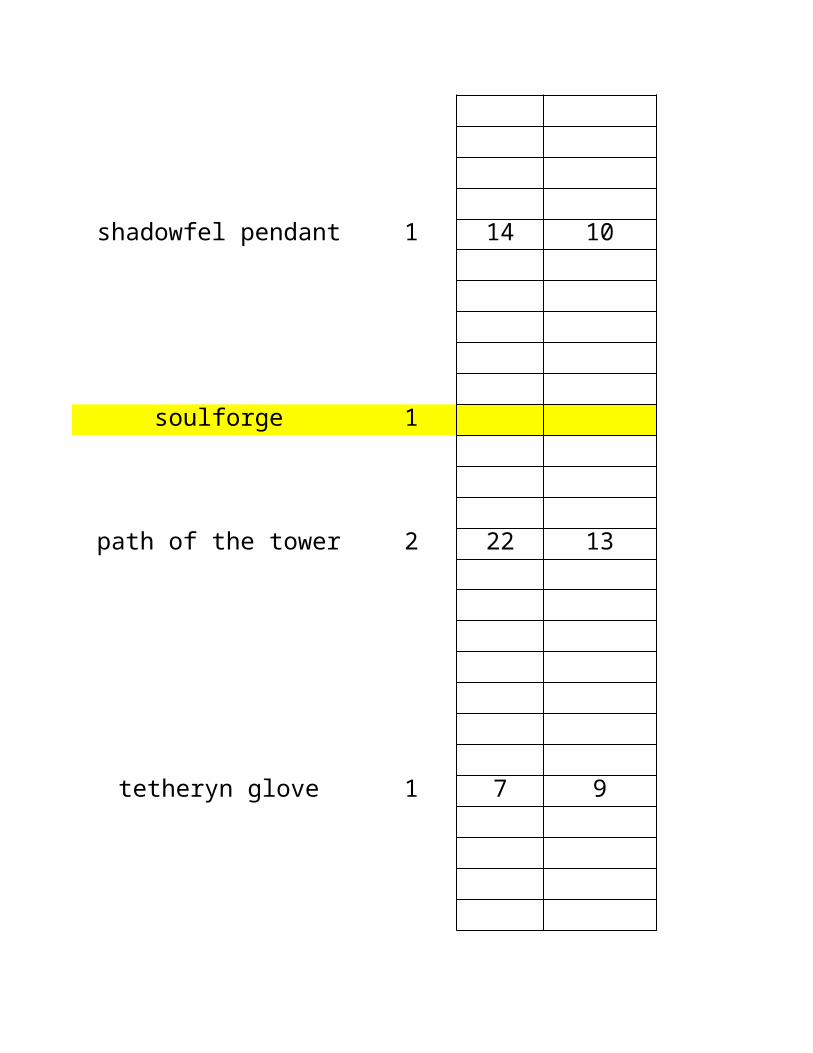
shadowfel pendant 1 14 10
soulforge 1
path of the tower 2 22 13
tetheryn glove 1 7 9
moonclaw 0.5 12 12lycan amrguard 0.5 11 11

virtue of temperance 1 6 14
backdraft 1 12 7
tribel crest 1 11 9
windswept crown 1 8 12
bladebourne gauntlet 1 10 12
soulforge 1

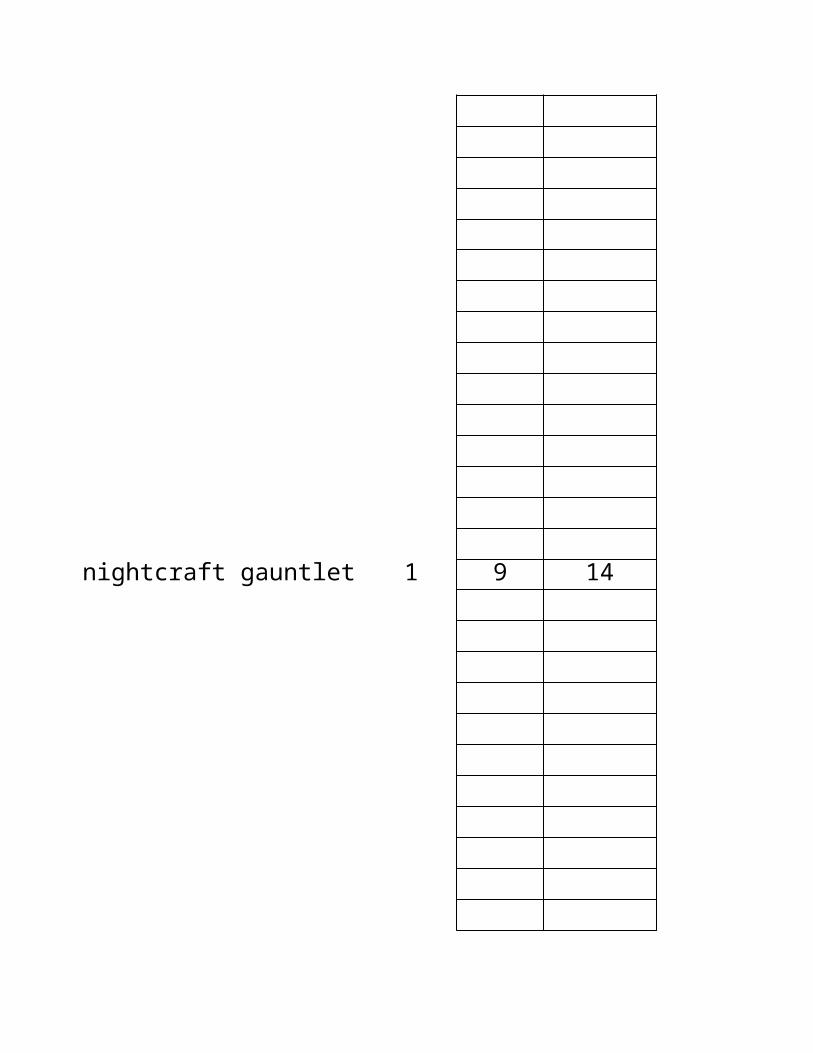
nightcraft gauntlet 1 9 14
gladiator plate 1 28 14
deathrune hellplate 1 18 27
soulforge 1
soulforge 1
terra's heart 1 6 8


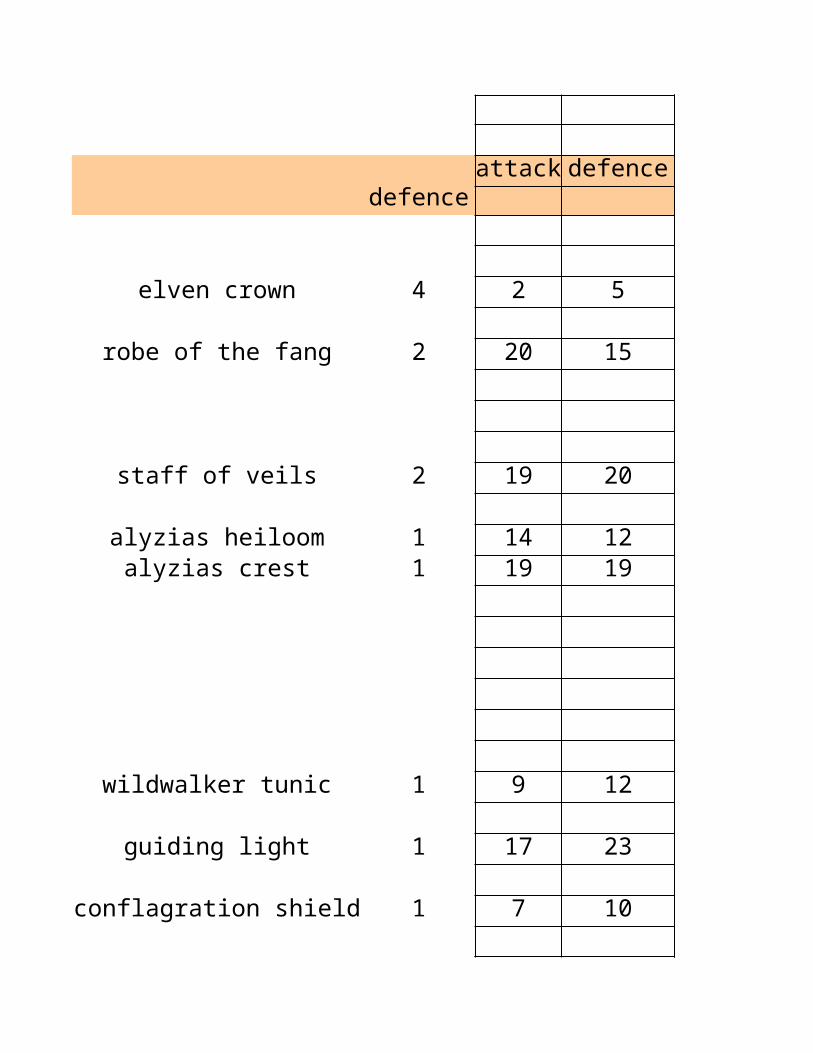
attack defencedefence
elven crown 4 2 5
robe of the fang 2 20 15
staff of veils 2 19 20
alyzias heiloom 1 14 12alyzias crest 1 19 19
wildwalker tunic 1 9 12
guiding light 1 17 23
conflagration shield 1 7 10

mind control 1 9 8
shield of arielle 1 7 7armor of arielle 2 66
lion scar plate 1
archmage robes 2 14 12
angels crusade 5 6 10
absolution 2 13 11
valdonian war armor 1 19 16valdonian war helm 1 30 20
diamondsoul plate 1 18 18remnant shield 1 15 18
chase family heirloom 2 5 5
cid helm 3 3 7
vindicator shield 1 11 13
shield of dante 3 4 7
innocence 1 14 22
aegis of earth 1 9 7

retribution plate 1 8 11
cloudslayer gauntlet 1 7 8
shadowfel cloak 2 16 12
magus plate 1 15 15
drakkan plate 2 10 10
dragan protector 5 5 9
mystic robe 3 7 7
crown of deliverance 1 13 9ivory tower insignia 1 13 8
shield of migth 1 1 3
silverligth tome 3 3 8
phantsmal brooch 2 16 13

deathwatch amulet 1 15 10
divinity plate 3 12 11
garlans battlegear 5 4 7galvanized helm 2 11 13emperion plate 2 12 16
spellweaver cloak 2 13 13
ogre raiments 1 11 8

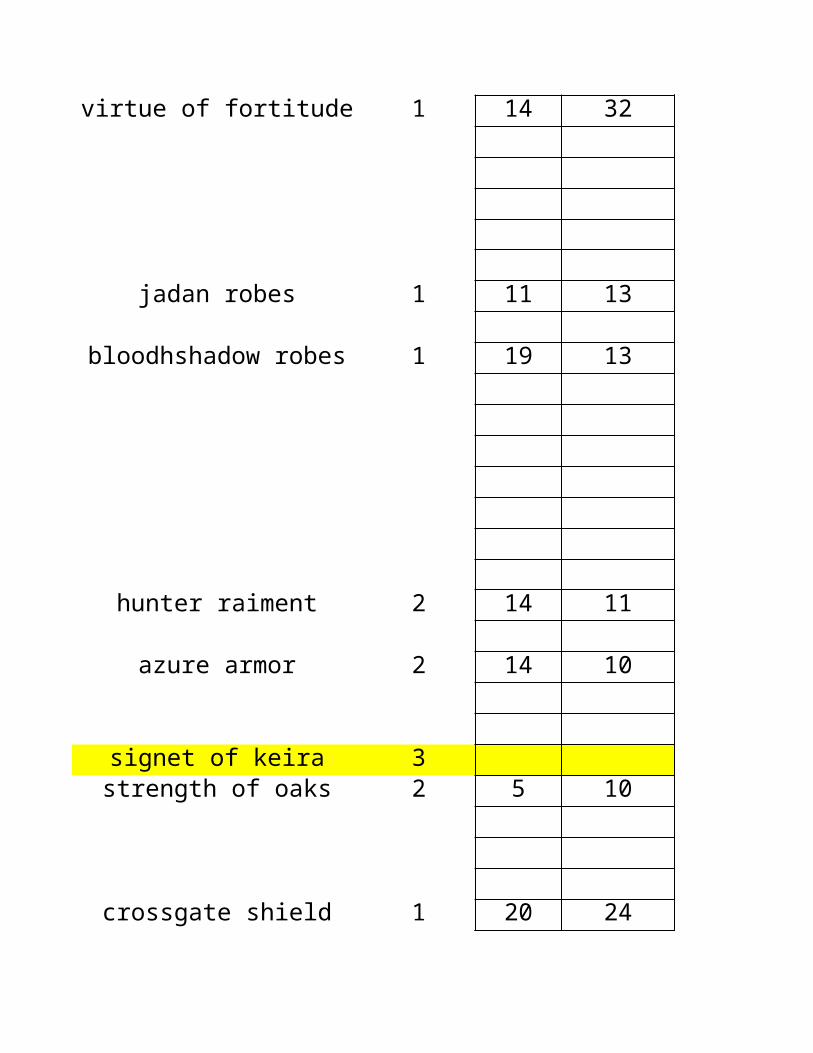
virtue of fortitude 1 14 32
jadan robes 1 11 13
bloodhshadow robes 1 19 13
hunter raiment 2 14 11
azure armor 2 14 10
signet of keira 3strength of oaks 2 5 10
crossgate shield 1 20 24
lightward gautlet 1 8 10
platinus armor 1 9 11
thowing star 2 18 17
ancient tome 1 7 12
mane of maalvus 1 15 10gladiator raiments 1 20 14
frost bolt 1 12 25
judicators will 2 14 18

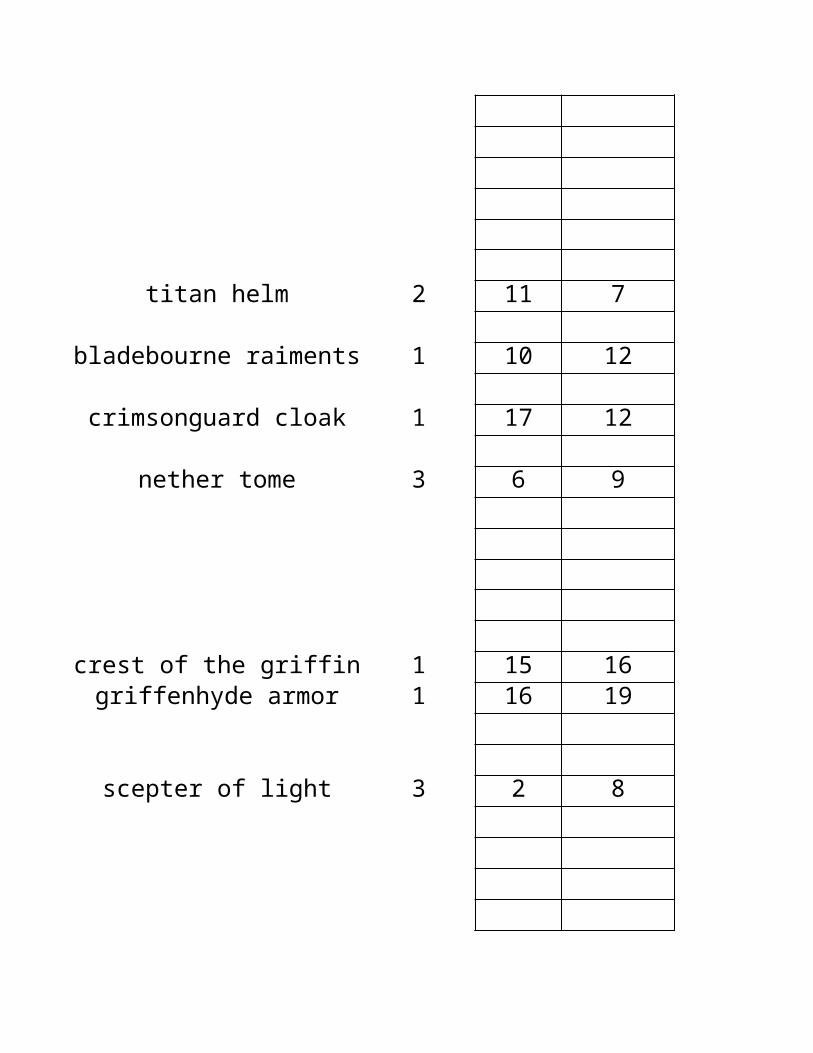
titan helm 2 11 7
bladebourne raiments 1 10 12
crimsonguard cloak 1 17 12
nether tome 3 6 9
crest of the griffin 1 15 16griffenhyde armor 1 16 19
scepter of light 3 2 8

terror pendant 1 17 13shadowclasp cloak 1 19 22terrorshard armor 1 15 13
amulet of shadows 1 17 20crusaders cross 2 14 14
lava plate 2 15 24
crystalline rod 2 14 14carmine robes 2 11 14nightcraft plate 1 11 10
devout helm 1 11 12

hero's insignia 8 20 15whirlwind 3 28 17
ring of prophets 2 11 15
blood vestment 1 10 10
seramphin shield 2 11 13
assasins cloak 5 7 7
gilded riara 2 10 10
temptations lure 2 15 11
terra's guard 3 10 10

silverfist plate 2 13 17
demonguard plate 1 20 25demon helm 1 30 30chaos armor 2 17 17
bloodlord plate 1 26 14
meatcleaver 3 44 22
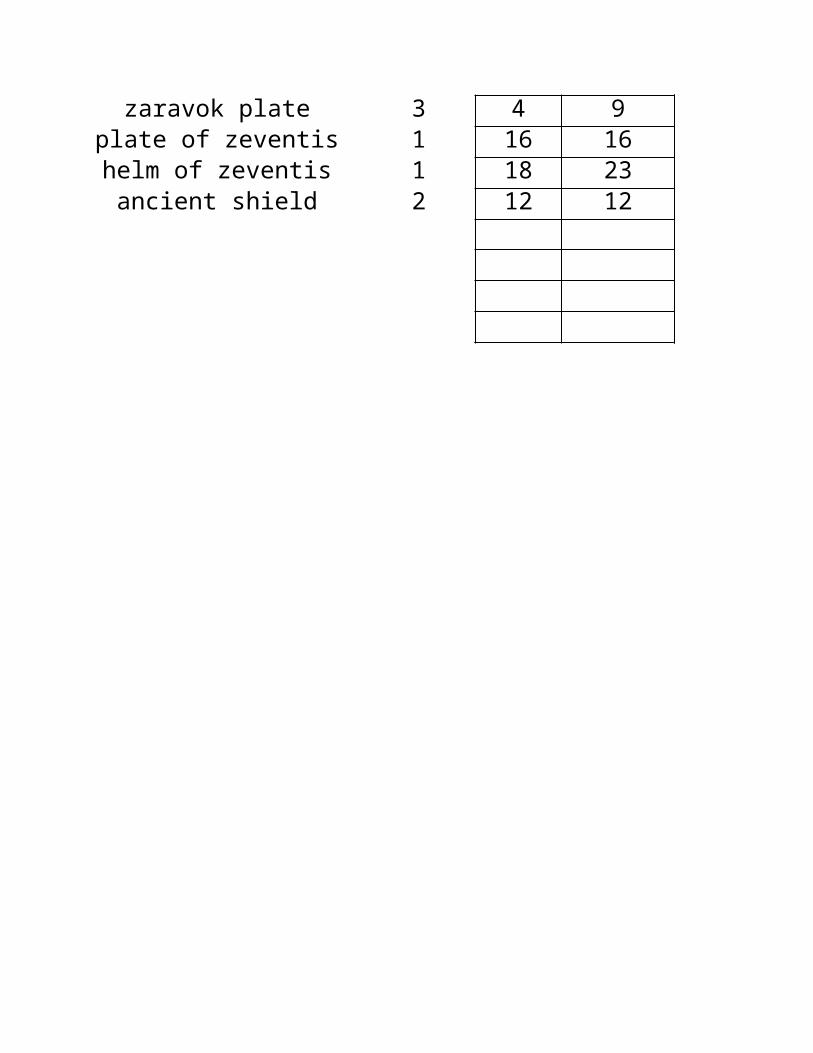
zaravok plate 3 4 9plate of zeventis 1 16 16helm of zeventis 1 18 23
ancient shield 2 12 12

attack defencehealth

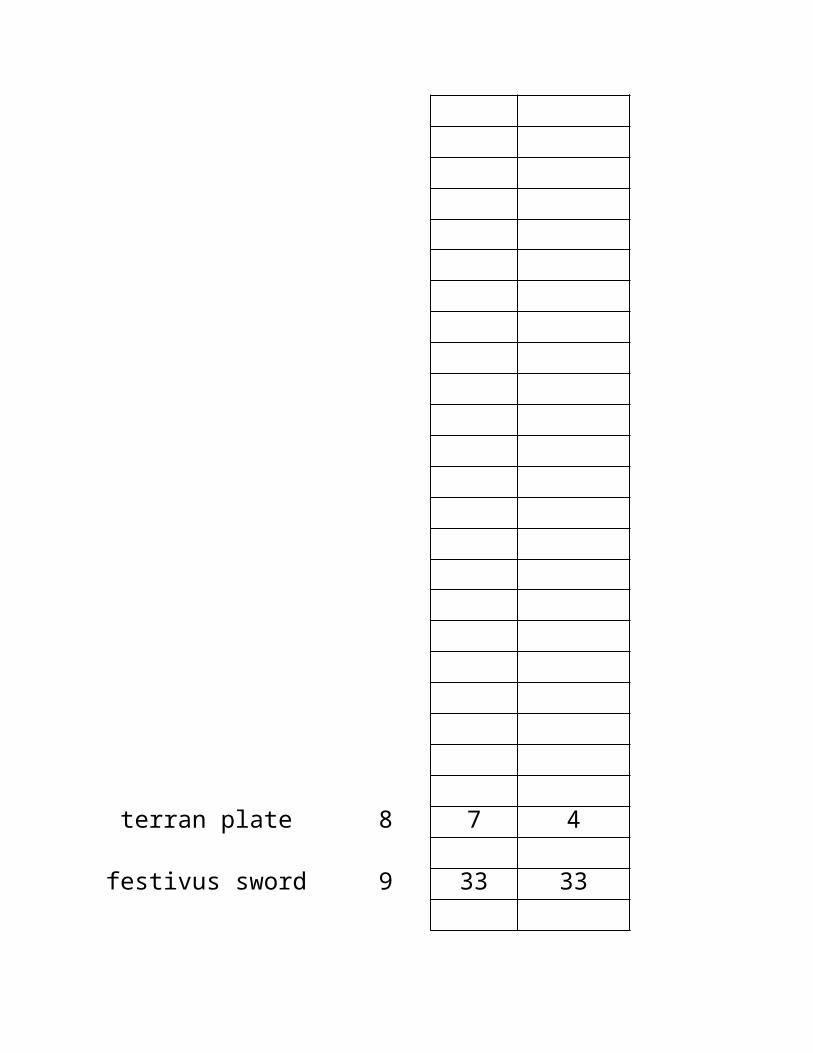
terran plate 8 7 4
festivus sword 9 33 33


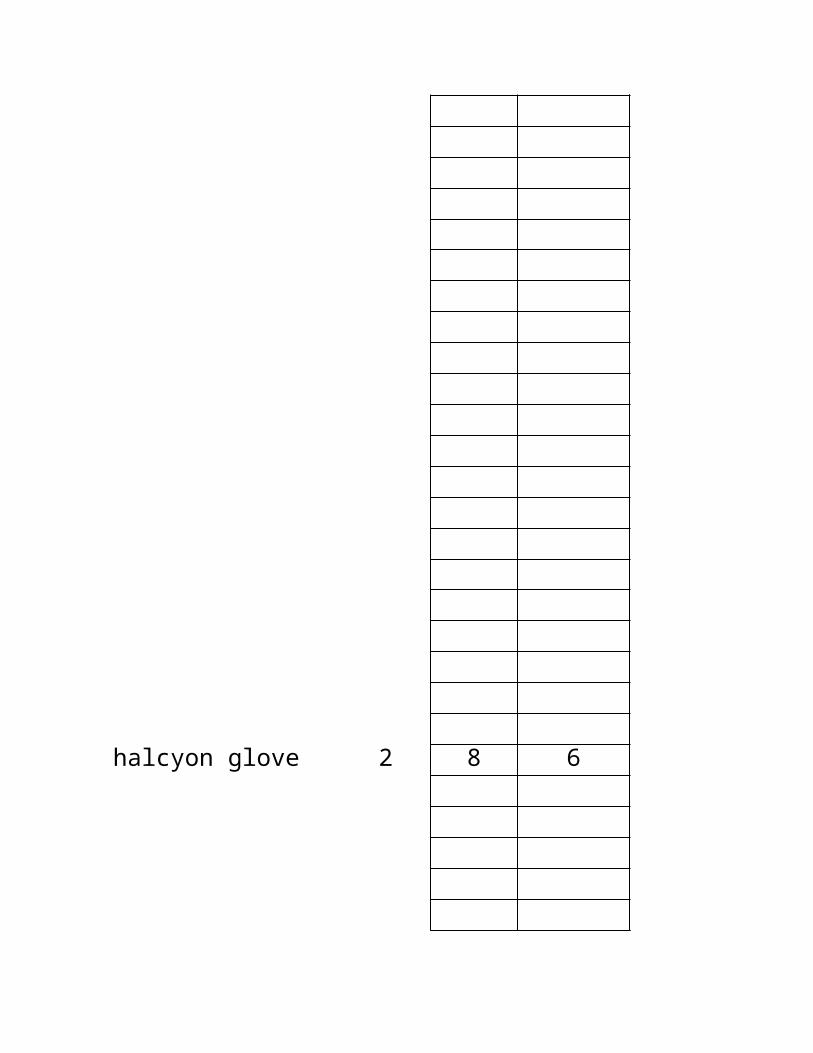
halcyon glove 2 8 6


saintly robes 3 12 12
truthseeker pendant 5 8 14


attack defencestamina
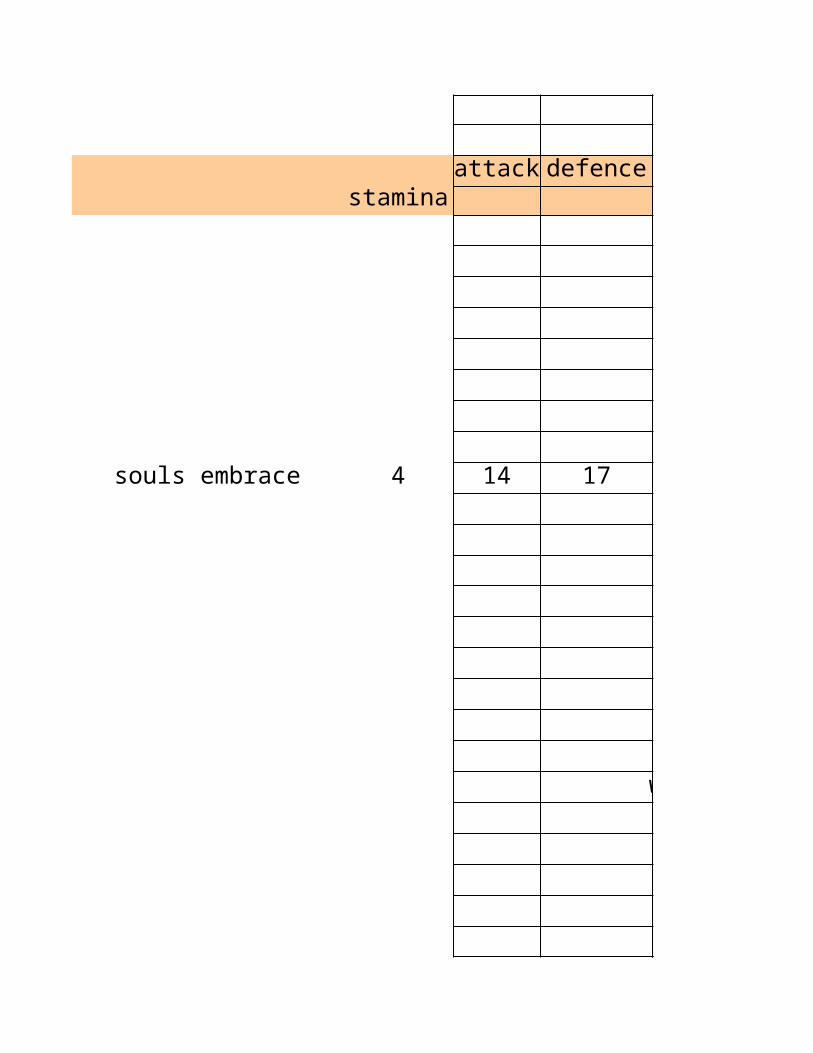
souls embrace 4 14 17


trigun necklace 4 13 11
gauntlet of fire 2 13 9
crown of darius 2 8 7

cloudslayer pendant 2 9 10
gauntlets of migth 1 2 2
staff of vigor 4 8 5
sharpwind amulet 3 11 13
pendant of aska 5 21 24

divinity helm 2 9 10
caldonian band 3
emperion helm 3 12 10
time shift 2 9 10
all seeing eye 1 11 8
halcyon necklace 2 12 7

pendant of the bull 3 1 2
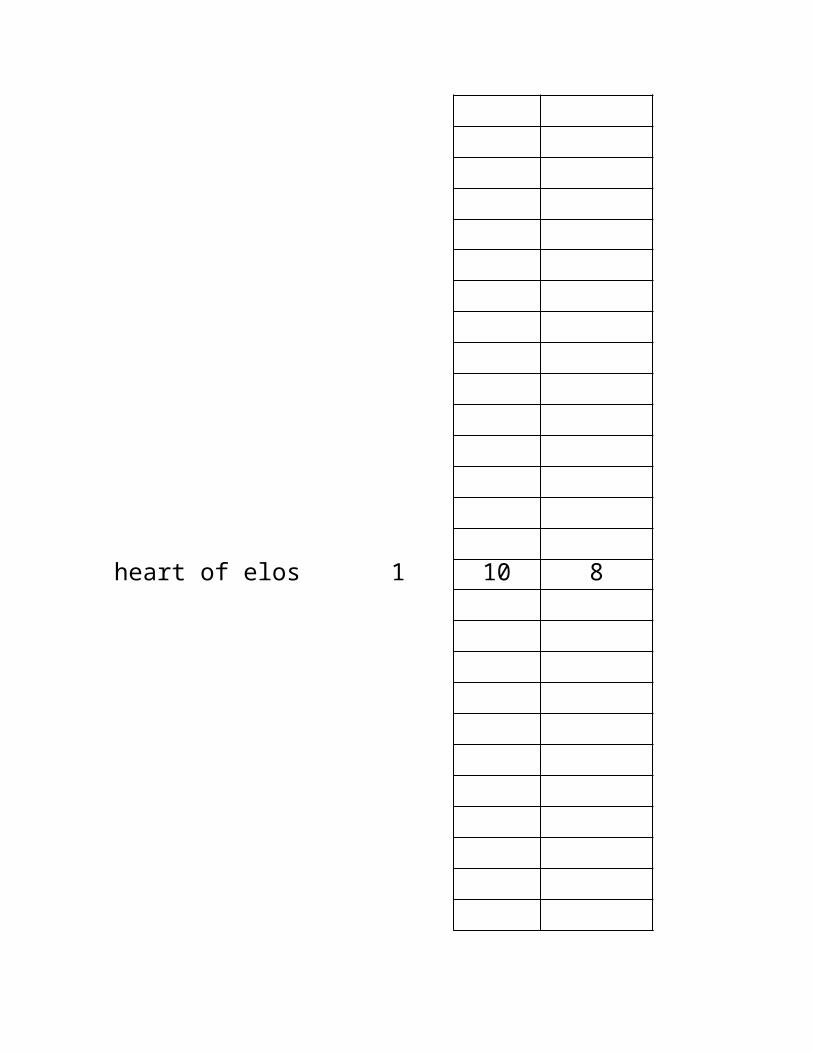
heart of elos 1 10 8

fist of abaddon 1
ilvansan crest 2 10 12
battlefield pendant 3 10 15
blood flask 2 20 20
faith amulet 6 silver light trainin manual

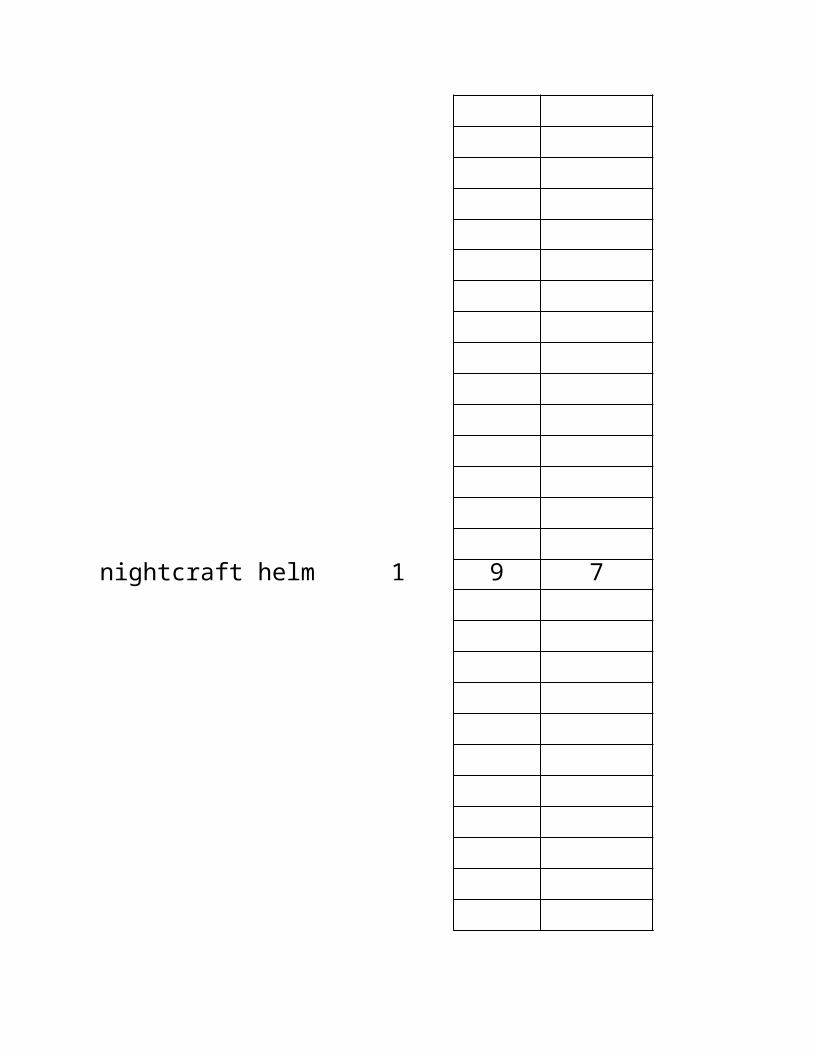
nightcraft helm 1 9 7

swordsman helm 3 15 15
binding will 5 14 15
deathshield 2 24 24
sunstone crest 2 11 10
enchanted lantern 3

silverfist helm 4 11 13
timewarp gauntlet 4 9 9
crimson cloak 3 8 20
zarevok defender 2 5 9

attack defenceenergy
faerie band 5 6 7
wildwalker necklace 2 10 8
heartfire pendant 4 12 16

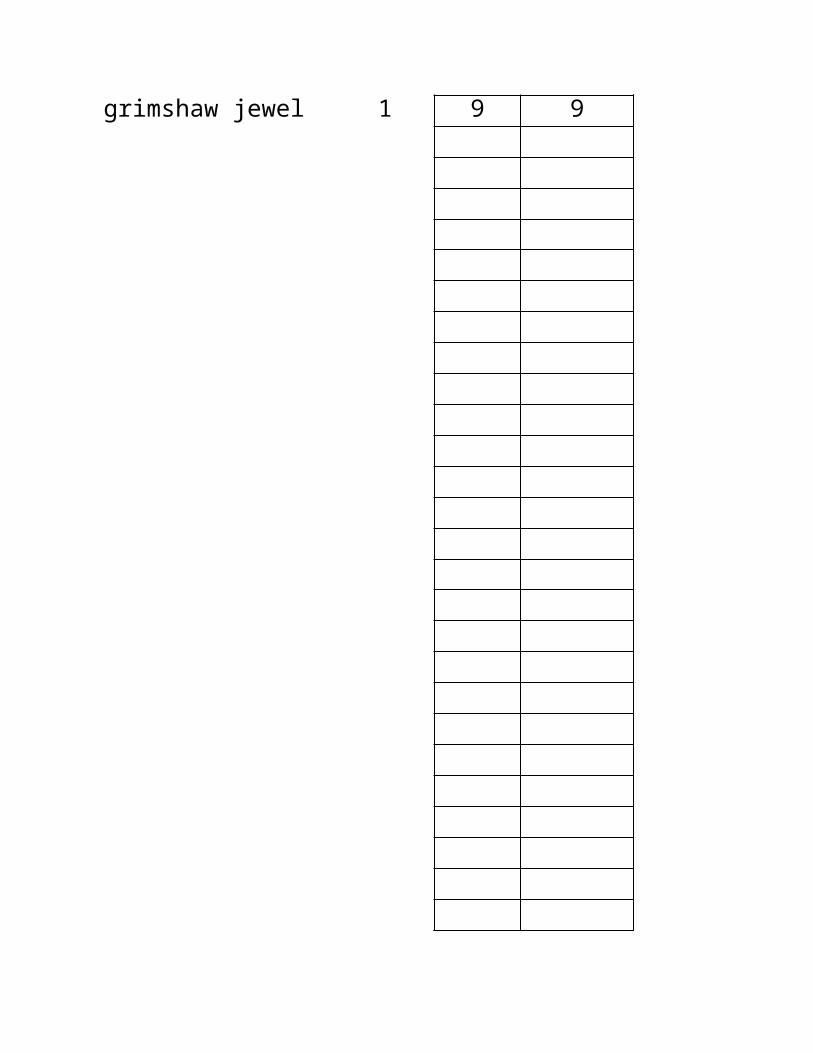
grimshaw jewel 1 9 9
guardion helm 5 10 15
mark of the wolf 2 6 8mithril fist 3 9 10

drakkan helm 3
crimson dagger 3 3 7
ring of life 3 4 5

ring of necrosis 5 12 14

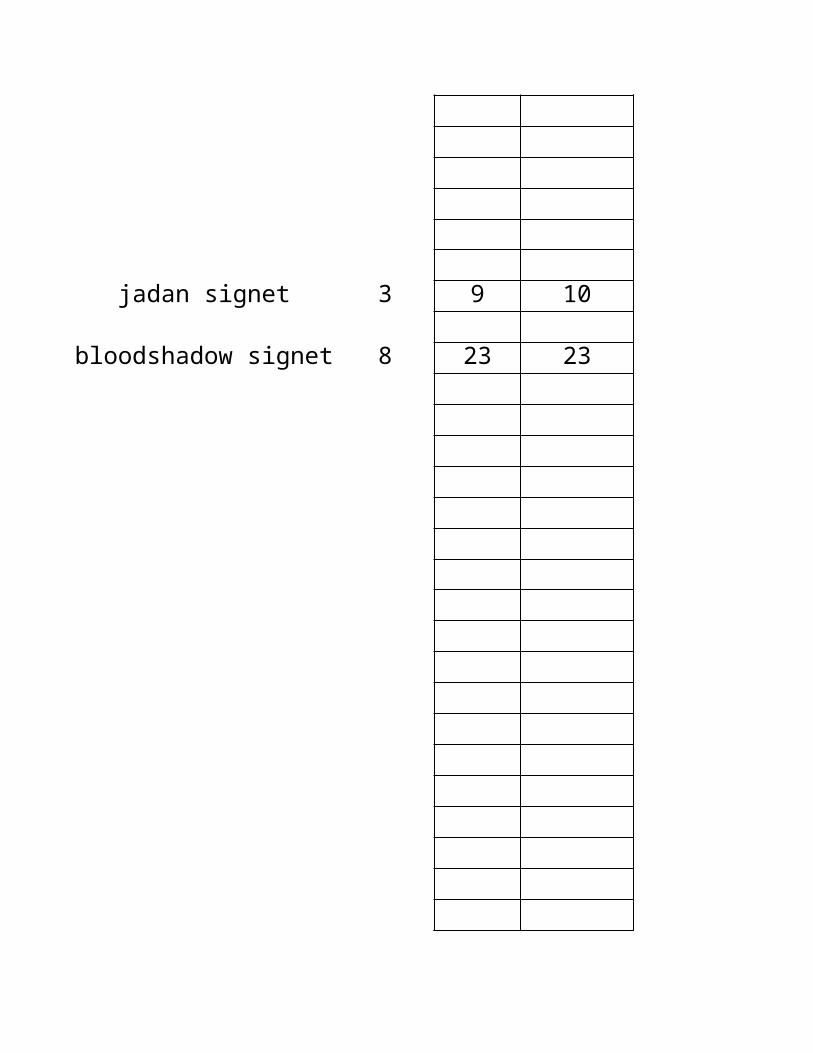
jadan signet 3 9 10
bloodshadow signet 8 23 23

glacial helm 3 10 9
witch locket 3 6 4
silver light trainin manual 2

magicite locket 2 12 8

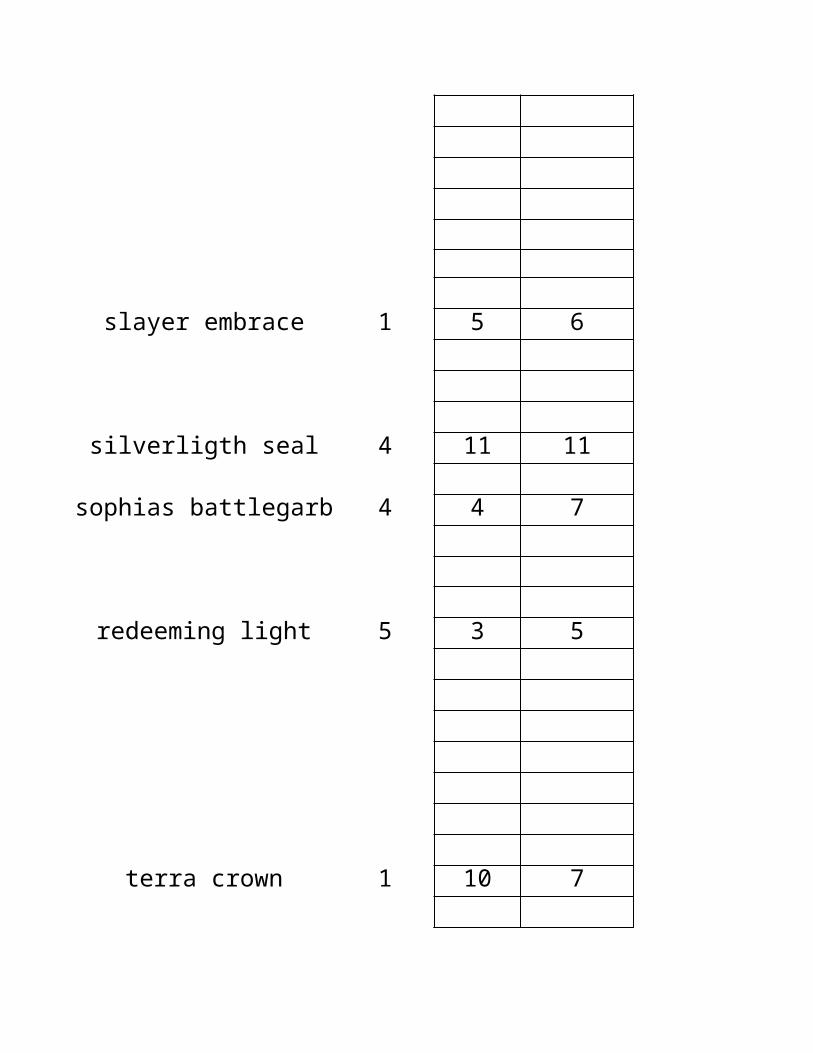
slayer embrace 1 5 6
silverligth seal 4 11 11
sophias battlegarb 4 4 7
redeeming light 5 3 5
terra crown 1 10 7

flamestrike amulet 4 8 4
bloodwell pendant 4 28 28
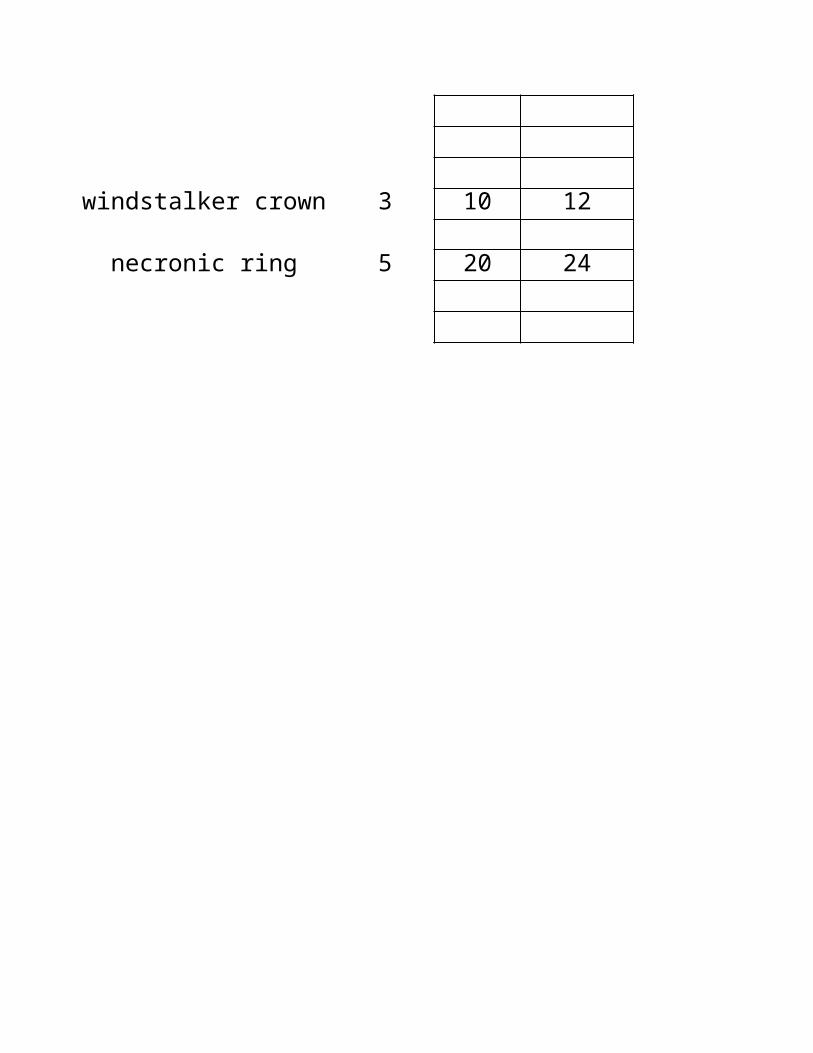
windstalker crown 3 10 12
necronic ring 5 20 24

damage received attack defencereduced


retribuiton helm 1 9 8


harmony 1 8 11


specials

azriel signet

signet of lotus

sylvanas signet

alexandria

addiotional 1 health for tower on victory as cleric

+30 damage as rogue

addiotional 1damage for tower on victory as mage
additional 2 damage to tower on victory

link for fast login with less chance for blue ball spinninghttp://web3.castleagegame.com/castle_ws/index.php
best general for
quests titania
subquests Sano
battle group mephistopeles
battle dual corventheos
war attacks adriana
arena ??
siege weapon stone guardian
guild monster malukus
guild battle see tab guild battle info
monster attack malukus
monster defense corvintheos
banking aeris
buying equipment none
buying land none
buying soldiers darius
when lvling much stamina solarismuch energy hyacinthmost of all energy and stamina azeron
when youre offline scarlett
Basics of Dueling for the Beginner
Dueling is a type of PvP where you fight someone one-on-one (as opposed to Invading where you fight with your army).
When Dueling, you may have of one of each of the following:

* A General* A Weapon* A Shield (also known as "Off-hand")* A Helmet* An Armor* A Gauntlet* An Amulet* A Magic Spell
As for the specific pieces of equipment/magic, the game will automatically pick the strongest kind that you have available (these are the best dueling Attacking items and Defending items currently obtainable in the game). The general that accompanies you is always your Active General. When attacking, the game uses their Stat attack.png Attack stats, and 70% of their Stat defense.png Defense stats. When defending, the game uses their defense stats, and 70% of their attack stats.
As well as the above, the game also factors in your natural Attack and Defense stats (which are improved by spending skill points). When either attacking or defending, the game will always use both your attack and defense stats... mostly. While attacking, the game only counts two-thirds of your defense stat. While defending, the game only counts two-thirds of your attack stat.
After each duel, you will take a small amount of damage to your Stat health.png Health if you win and a larger amount if you lose.FormulaeEdit Formulae sectionEdit
All in all, the attack formula for dueling is as follows:
(Attack+(Defense*2/3)) + (Item Attack Power + Item Defense Power * .7)) + (Magic Attack Power + (Magic Defense Power * .7)) + (General Attack Power + (General Defense Power * .7)) = Battle Power
The defense formula for dueling is:
((Attack*2/3)+Defense)) + ((Item Attack Power * .7) + Item Defense Power) + ((Magic Attack Power * .7) + Magic Defense Power) + ((General Attack Power * .7) + General Defense Power) = Battle Power
Assuming that you have good equipment (Helm of Dragon Power (30/30), Lionheart Plate (10/25), Berserker Axe (20/13), Sword of Redemption (50/30), Moonfall Amulet (40/40)), Good Magic (Tempest Storm (17/10)), a good general (Vanquish (15/14)), an attack stat of 100 and defense stat of 200.
When attacking, your battle power will be:
(100 + (200 * 2/3)) + (30 + (30 * .7)) + (10 + (25 * .7)) + (20 + (13 * .7)) + (50 + (30 * .7)) + (40 + (40 * .7)) + (17 + (10 * .7)) + (15 + (14 * .7)) = Battle Power (wiki calculated: 528.733)
233 + 51 + 27.5 + 29.1 + 71 + 68 + 24 + 24.8 = 528.4 Battle Power
When defending against an attack, your battle power will be:
((100 * 2/3) + 200 ) + ((30 * .7) + 30 ) + ((10 * .7) + 25) + ((20 * .7) + 13) + ((50 * .7) + 30) + ((40 * .7) + 40) + ((17 * .7) + 10) + ((15 * .7) + 14) = Battle Power (wiki calculated: 556.067)
266.7 + 51 + 32 + 27 + 65 + 68 + 21.9 + 24.5 = 556.1 Battle Power
And while attacking with an army of 501, your battle power will be: (100 + (200 * 2/3)) + (30 + (30 * .7)) + (10 + (25 * .7)) + (20 + (13 * .7)) + (50 + (30 * .7)) + (40 + (40 * .7)) + (17 + (10 * .7)) + (15 + (14 * .7)) = Battle Power (wiki calculated: 528.733)
233 + 51 + 27.5 + 29.1 + 71 + 68 + 24 + 24.8 = 528.4 Battle Power
(Because army members don't help in dueling at all)
A more accurate formula is:

When attacking: Attack stat + 70% defense stat + (total attack of general and items) + 70% (totaldefense of general and items) + % luck factor
When defending: 70% attack stat + defense stat + 70% (total attack of general and items) + (totaldefense of general and items) + % luck factor
Notes Edit Notes sectionEdit
* The Sword of Redemption is an off-hand (used in shield slot), and NOT a weapon. The game treats the Sword of Redemption as if you are dual-wielding, and the sword is placed in your off-hand (where your shield would normally be).* When dueling, you will train yourself to become a better fighter. In the Training Grounds, whenever you fight a duel, you will earn training points in dueling. As you train in dueling, you will earn 1 Stat attack.png Attack for every training level you earn. The max training level for dueling is level 5.
The Quick Guide to PvP
Lightbulb The Quick Guide to PvP (Updated with NEW CHAPTER!)[SIZE="5"]The Quick Guide to PvP[/SIZE]Written by avsquare
VERSION HISTORYVer 1.00 - Published on 8th Jan, 2010Ver 1.01 - Updated on 8th Jan, 2010 with a new chapter on "Easy Skill Points Farming" NEW!
[SIZE="4"]PREFACE[/SIZE]
The intention of this guide is to discuss the various builds for different styles of PvP. I will talk about the pros and cons of the various PvP builds and it's functionality to assist those who are lost in finding their preferred build. Various mathematical ratios and their implications will be discussed here.
It is also hoped to assist the newbies who don't know how they hell they die on the battlefield to understand PvP better, and hopefully by reading this guide they will not make more of those "WHY?!" thread that has been answered a googolplex times. (ATTN NEWBIES: Go check at the bottom of this guide, I have a FAQ. If your question is listed then you should very well read this guide).
[SIZE="4"]CONTENTS[/SIZE]
* Chapter 1 - Assumptions* Chapter 2 - The Battle Strength Index* Chapter 3 - The Stat Ratios* Chapter 4 - Easy Skill Points Farming* Chapter 5 - The Most Common PvP Questions/FAQ* Chapter 6 - Conclusions & Further Reading

[SIZE="4"]CHAPTER 1 - ASSUMPTIONS[/SIZE]
* It is assumed that you have GOOD knowledge on the mechanics of PvP. If you don't, either read other guides first or check out my FAQ at the last, later.* To facilitate easy mathematical comparisons, the different builds are assumed on the ground of 1,000 total stat points in attack & defense.* It is assumed that both parties in comparison discussions have the exact gears and army composition.* The comparison of BSI is supposed to be used for comparison of near level peers. Extreme level differences beyond the gauntlet may not be fully applicable, due to the sheer amount of stat point difference. Using your BSI to estimate your strength against players who are much over-leveled than you would thus not be effective.* Win and Defeat mentioned in this guide are mutual. It refers to both offensive and defensive battles. (ie. wining offensively and defensively)* The ratios used are assumed to be in the order of Attack : Defense.
[SIZE="4"]CHAPTER 2 - THE BATTLE STRENGTH INDEX[/SIZE]
The BSI, is a moderated indicator of your battle strength based on your current level. The formula for this index "(attack + defense)/level" is widely used and accepted to evaluate one's PvP power based on his/her level, and used to compare him/her with their close level peers to see how they fair in the battlefield.
For yourself to be considered a build majored for PvP, I would say you would need a BSI of 5.0. To me, it's a fair number to be considered ready for PvP action and subsequently, improving on it. Anything below that, you are just food to those who are PvP oriented, as simple as that.
Now, let me discuss this indicator, and what the numbers mean.
* The Beginner - 5.00 to 5.49: Welcome to the PvP scene. This is where you begin. At 5.0, you are just a mediocre PvP player, so do not expect much. At this ratio, you are only strong enough to fend off players whose BSI are generaly below 4.5 to around 5.5, depending his attack:defense ratio. These group of people are generally monster hunters who just started PvP or taking PvP as "part-time job". Your preys are generally from monster hunters to players with a BSI under 6.0 with negligible defense, depending on your build's ratios.
* The Intermediate - 5.50 to 5.99: You are of intermediate strength. What you are able to attack and defend from are dependent on your build's rations again. However, you should be able to do well against about 50% of your peers. What you cannot handle is those who's BSI are 6.0 and above, they are the "full-time" PvP players
* The Serious - 6.00 to 6.99: You are of superior strength in PvP. A good majority of your peers should not be your match in most circumstances, which depends on your build's ratio. Of course, I would assume that at this stage you know what you are doing and what you want from PvP. I assume that you know who to hunt, who are your competitors and who are the top dogs around your range. You are able to stand and fight on your own with ease.
* The Hardcore - 7.00 and above: You are basically a monster within your peers. Not much people should be able to defeat you. You are ready to have a shot at hitting beyond your level range, and you should do so, because the higher you go, the more tasty food you find, although the dangers get higher. HOWEVER, you are clearly limiting your ability to slay monsters and gather loots compared to the lower BSI builds. It's the major trade-off for such massive PvP strength.
From time to time, you should use the above Index to evaluate your strength against the general strength of your peers. The BSI is a very relative index and you need not follow it to the T to be a top notch PvP player. You can easily adjust your BSI to your needs and your surroundings. For example, at a very high level of 600+, you need not have even 5.0 to win against most players. Being at the top levels means you can fairly weaken your BSI and invest your SPs on other aspects instead. Why? For a level 600, having a BSI of 3.33 is rather powerful enough. That could well mean 1,000 attack and 1,000 defense which is a challenge to most CA players.
Venture it out and see what lies in front of you, and decide what BSI you should go for.
[SIZE="4"]CHAPTER 3 - THE STAT RATIOS[/SIZE]
Now, you've heard all the stuffs about the BSI, and now you wonder, what kind of ratio build you should go for? Now, I'll discuss the various build for your consideration. I will move from the extreme offense to the extreme defense.
* The Destroyer - ALL Attack, 1 Defense: Yes you know it. You are the ultimate destroyer, you crush almost anything in your path. The only one within your peers who could stop you is "The Wall (pure defense)". However, it is not your concern at wall because Walls are rare in nature, I'll tell you why later on. Lots of foods lies around, so, move on if you hit a wall. You deal massive damage on monsters too, compared to your peer. But defensively, you are going to suck big time. Even if you are a "Destroyer" with a hardcore 7.0 BSI, in defenses your defense score is amounted to 4.9x your level. You can take it as good as a 4.9 BSI in defense. Any "The Beginner" of this "Destroyer" build will crush you biscuits, and they love it. Everyone loves it, BTW. As such, this build is clearly not viable in the long run; at high ranks it's difficult to get good BP per fight, and if you continue to be a "Destroyer" you are going to lose more than you gain.
* The Aggressor - 5 : 1.5: This build is for those who wish to be aggressive, and at the same time, being able to defend well against the weak to mediocre attacks. Why? Let's take the ratio and use the numbers as factors to your level. That means, you have 5x level Attack, and 1.5x level Defense. Offensively, you have 6.05x level attack score, and defensively, you have 5x level in defense score. It's pretty good I'd say.
* The Offensive - 2 : 1: This build is for those who plan to be offensive but at the same time, being balanced. Why so? At 2 : 1, during the offensive you are have a total attack score of equating to 90% of your total attack + defense stats, and during the defensive, a defensive score of equating to 80% of your total attack + defensive stats. Fairly balanced, I'd say.
* The Balanced - 1 : 1: This build is basic enough. One to one, the perfectly balanced ratio. It's basically the jack of all trades, master of none. You don't shine particularly in either department. The good thing is you can do fairly well against most players except the mid-extreme to extreme ratio builds.
* The Defensive - 1 : 2: It's just the vice-versa of "The Offensive", with the downside of weakening your powers in the monster hunting department.
* The Paladin - 1.5 : 5: It's the vice-versa of "The Aggressor", which a significant downside of your powers in the general monster hunting department. However, you are valued in 2 monster battles: Serpents and the Orc Horde for fortifications.
* The Wall - 1 Attack : ALL Defense: The vice-versa of "The Destroyer". Just that you do horrendously poor against non-fortification monster battles. You sucked absolutely at them except for the Serpents and the Orc Horde, which you will be greatly welcomed and loved.

Now that you read about the builds and it's strengths and weaknesses, we shall look at how it fairs against each other:
It has come clear that the offensive builds are the ones being initiative, and the defenders passive players. Both has it's pros and cons on PvP, but on multiple aspects on CA, defenders tends to lose out on the monster battle department, resulting in lesser ability to get the alchemy gears faster, and in larger quantity.
Also, assumed that the comparison above is based on 1,000 total stats in attack and defense, you will realize that pure defenders lose out totally on the offensive, which limits their ability to retaliate players of similar level or total attack + defense stat. This is the reason why offensive builds are preferred over defensive builds by the general CA community, and the fact that after reaching the gauntlet, you are susceptible to all attacks makes the "Wall" build and the "Paladin" build fairly unattractive, resulting in most players picking on an offensive or balanced build.
link for fast login with less chance for blue ball spinninghttp://web3.castleagegame.com/castle_ws/index.php
buying generals
BUY URL:
BE SURE YOU WANT TO BUY BEFORE DOING THIS!
and
bsi-lsi calculatorhttp://mysticsaga.com/CADSU/index.php?page=blsicalc
castle age monster spreadsheet for loot tables how much damage you have to do to get legendary/ epic itemshttps://spreadsheets.google.com/pub?key=0Aro5WgWKHR6JdDhPcnBydUoxSFZnR3ZERmNsQTVQY3c&hl=en&gid=134
(first time back online +6% money)
Dueling is a type of PvP where you fight someone one-on-one (as opposed to Invading where you fight with your army).
http://apps.facebook.com/castle_age/oracle.php?buychoice=##
http://castleage.wikia.com/wiki/Oracle/Monthly_Specials

As for the specific pieces of equipment/magic, the game will automatically pick the strongest kind that you have available (these are the best dueling Attacking items and Defending items currently obtainable in the game). The general that accompanies you is always your Active General. When attacking, the game uses their Stat attack.png Attack stats, and 70% of their Stat defense.png Defense stats. When defending, the game uses their defense stats, and 70% of their attack stats.
As well as the above, the game also factors in your natural Attack and Defense stats (which are improved by spending skill points). When either attacking or defending, the game will always use both your attack and defense stats... mostly. While attacking, the game only counts two-thirds of your defense stat. While defending, the game only counts two-thirds of your attack stat.
After each duel, you will take a small amount of damage to your Stat health.png Health if you win and a larger amount if you lose.
(Attack+(Defense*2/3)) + (Item Attack Power + Item Defense Power * .7)) + (Magic Attack Power + (Magic Defense Power * .7)) + (General Attack Power + (General Defense Power * .7)) = Battle Power
((Attack*2/3)+Defense)) + ((Item Attack Power * .7) + Item Defense Power) + ((Magic Attack Power * .7) + Magic Defense Power) + ((General Attack Power * .7) + General Defense Power) = Battle Power
Assuming that you have good equipment (Helm of Dragon Power (30/30), Lionheart Plate (10/25), Berserker Axe (20/13), Sword of Redemption (50/30), Moonfall Amulet (40/40)), Good Magic (Tempest Storm (17/10)), a good general (Vanquish (15/14)), an attack stat of 100 and defense stat of 200.
(100 + (200 * 2/3)) + (30 + (30 * .7)) + (10 + (25 * .7)) + (20 + (13 * .7)) + (50 + (30 * .7)) + (40 + (40 * .7)) + (17 + (10 * .7)) + (15 + (14 * .7)) = Battle Power (wiki calculated: 528.733)
233 + 51 + 27.5 + 29.1 + 71 + 68 + 24 + 24.8 = 528.4 Battle Power
When defending against an attack, your battle power will be:
((100 * 2/3) + 200 ) + ((30 * .7) + 30 ) + ((10 * .7) + 25) + ((20 * .7) + 13) + ((50 * .7) + 30) + ((40 * .7) + 40) + ((17 * .7) + 10) + ((15 * .7) + 14) = Battle Power (wiki calculated: 556.067)
266.7 + 51 + 32 + 27 + 65 + 68 + 21.9 + 24.5 = 556.1 Battle Power
And while attacking with an army of 501, your battle power will be: (100 + (200 * 2/3)) + (30 + (30 * .7)) + (10 + (25 * .7)) + (20 + (13 * .7)) + (50 + (30 * .7)) + (40 + (40 * .7)) + (17 + (10 * .7)) + (15 + (14 * .7)) = Battle Power (wiki calculated: 528.733)
233 + 51 + 27.5 + 29.1 + 71 + 68 + 24 + 24.8 = 528.4 Battle Power

When attacking: Attack stat + 70% defense stat + (total attack of general and items) + 70% (totaldefense of general and items) + % luck factor
When defending: 70% attack stat + defense stat + 70% (total attack of general and items) + (totaldefense of general and items) + % luck factor
* The Sword of Redemption is an off-hand (used in shield slot), and NOT a weapon. The game treats the Sword of Redemption as if you are dual-wielding, and the sword is placed in your off-hand (where your shield would normally be).* When dueling, you will train yourself to become a better fighter. In the Training Grounds, whenever you fight a duel, you will earn training points in dueling. As you train in dueling, you will earn 1 Stat attack.png Attack for every training level you earn. The max training level for dueling is level 5.
Lightbulb The Quick Guide to PvP (Updated with NEW CHAPTER!)
Ver 1.01 - Updated on 8th Jan, 2010 with a new chapter on "Easy Skill Points Farming" NEW!
The intention of this guide is to discuss the various builds for different styles of PvP. I will talk about the pros and cons of the various PvP builds and it's functionality to assist those who are lost in finding their preferred build. Various mathematical ratios and their implications will be discussed here.
It is also hoped to assist the newbies who don't know how they hell they die on the battlefield to understand PvP better, and hopefully by reading this guide they will not make more of those "WHY?!" thread that has been answered a googolplex times. (ATTN NEWBIES: Go check at the bottom of this guide, I have a FAQ. If your question is listed then you should very well read this guide).
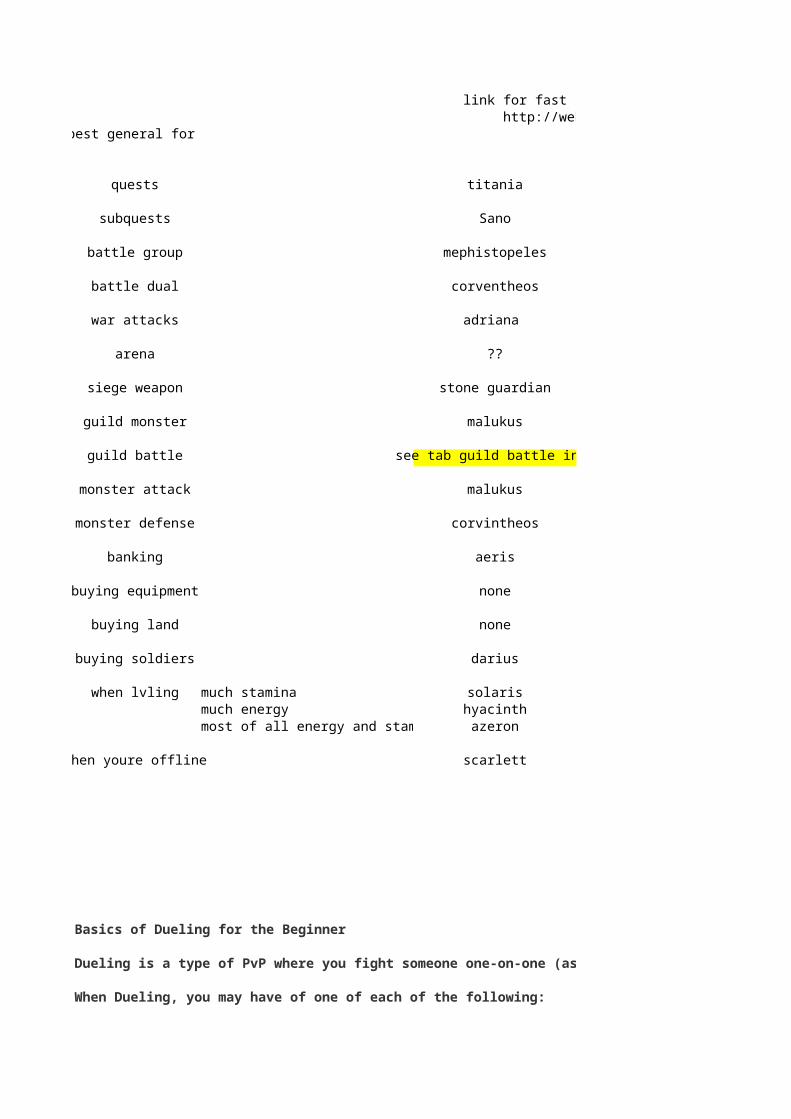
* It is assumed that you have GOOD knowledge on the mechanics of PvP. If you don't, either read other guides first or check out my FAQ at the last, later.* To facilitate easy mathematical comparisons, the different builds are assumed on the ground of 1,000 total stat points in attack & defense.* It is assumed that both parties in comparison discussions have the exact gears and army composition.* The comparison of BSI is supposed to be used for comparison of near level peers. Extreme level differences beyond the gauntlet may not be fully applicable, due to the sheer amount of stat point difference. Using your BSI to estimate your strength against players who are much over-leveled than you would thus not be effective.* Win and Defeat mentioned in this guide are mutual. It refers to both offensive and defensive battles. (ie. wining offensively and defensively)* The ratios used are assumed to be in the order of Attack : Defense.
The BSI, is a moderated indicator of your battle strength based on your current level. The formula for this index "(attack + defense)/level" is widely used and accepted to evaluate one's PvP power based on his/her level, and used to compare him/her with their close level peers to see how they fair in the battlefield.
For yourself to be considered a build majored for PvP, I would say you would need a BSI of 5.0. To me, it's a fair number to be considered ready for PvP action and subsequently, improving on it. Anything below that, you are just food to those who are PvP oriented, as simple as that.
Now, let me discuss this indicator, and what the numbers mean.
* The Beginner - 5.00 to 5.49: Welcome to the PvP scene. This is where you begin. At 5.0, you are just a mediocre PvP player, so do not expect much. At this ratio, you are only strong enough to fend off players whose BSI are generaly below 4.5 to around 5.5, depending his attack:defense ratio. These group of people are generally monster hunters who just started PvP or taking PvP as "part-time job". Your preys are generally from monster hunters to players with a BSI under 6.0 with negligible defense, depending on your build's ratios.
* The Intermediate - 5.50 to 5.99: You are of intermediate strength. What you are able to attack and defend from are dependent on your build's rations again. However, you should be able to do well against about 50% of your peers. What you cannot handle is those who's BSI are 6.0 and above, they are the "full-time" PvP players
* The Serious - 6.00 to 6.99: You are of superior strength in PvP. A good majority of your peers should not be your match in most circumstances, which depends on your build's ratio. Of course, I would assume that at this stage you know what you are doing and what you want from PvP. I assume that you know who to hunt, who are your competitors and who are the top dogs around your range. You are able to stand and fight on your own with ease.
* The Hardcore - 7.00 and above: You are basically a monster within your peers. Not much people should be able to defeat you. You are ready to have a shot at hitting beyond your level range, and you should do so, because the higher you go, the more tasty food you find, although the dangers get higher. HOWEVER, you are clearly limiting your ability to slay monsters and gather loots compared to the lower BSI builds. It's the major trade-off for such massive PvP strength.
From time to time, you should use the above Index to evaluate your strength against the general strength of your peers. The BSI is a very relative index and you need not follow it to the T to be a top notch PvP player. You can easily adjust your BSI to your needs and your surroundings. For example, at a very high level of 600+, you need not have even 5.0 to win against most players. Being at the top levels means you can fairly weaken your BSI and invest your SPs on other aspects instead. Why? For a level 600, having a BSI of 3.33 is rather powerful enough. That could well mean 1,000 attack and 1,000 defense which is a challenge to most CA players.
Venture it out and see what lies in front of you, and decide what BSI you should go for.
Now, you've heard all the stuffs about the BSI, and now you wonder, what kind of ratio build you should go for? Now, I'll discuss the various build for your consideration. I will move from the extreme offense to the extreme defense.
* The Destroyer - ALL Attack, 1 Defense: Yes you know it. You are the ultimate destroyer, you crush almost anything in your path. The only one within your peers who could stop you is "The Wall (pure defense)". However, it is not your concern at wall because Walls are rare in nature, I'll tell you why later on. Lots of foods lies around, so, move on if you hit a wall. You deal massive damage on monsters too, compared to your peer. But defensively, you are going to suck big time. Even if you are a "Destroyer" with a hardcore 7.0 BSI, in defenses your defense score is amounted to 4.9x your level. You can take it as good as a 4.9 BSI in defense. Any "The Beginner" of this "Destroyer" build will crush you biscuits, and they love it. Everyone loves it, BTW. As such, this build is clearly not viable in the long run; at high ranks it's difficult to get good BP per fight, and if you continue to be a "Destroyer" you are going to lose more than you gain.
* The Aggressor - 5 : 1.5: This build is for those who wish to be aggressive, and at the same time, being able to defend well against the weak to mediocre attacks. Why? Let's take the ratio and use the numbers as factors to your level. That means, you have 5x level Attack, and 1.5x level Defense. Offensively, you have 6.05x level attack score, and defensively, you have 5x level in defense score. It's pretty good I'd say.
* The Offensive - 2 : 1: This build is for those who plan to be offensive but at the same time, being balanced. Why so? At 2 : 1, during the offensive you are have a total attack score of equating to 90% of your total attack + defense stats, and during the defensive, a defensive score of equating to 80% of your total attack + defensive stats. Fairly balanced, I'd say.
* The Balanced - 1 : 1: This build is basic enough. One to one, the perfectly balanced ratio. It's basically the jack of all trades, master of none. You don't shine particularly in either department. The good thing is you can do fairly well against most players except the mid-extreme to extreme ratio builds.
* The Defensive - 1 : 2: It's just the vice-versa of "The Offensive", with the downside of weakening your powers in the monster hunting department.
* The Paladin - 1.5 : 5: It's the vice-versa of "The Aggressor", which a significant downside of your powers in the general monster hunting department. However, you are valued in 2 monster battles: Serpents and the Orc Horde for fortifications.
* The Wall - 1 Attack : ALL Defense: The vice-versa of "The Destroyer". Just that you do horrendously poor against non-fortification monster battles. You sucked absolutely at them except for the Serpents and the Orc Horde, which you will be greatly welcomed and loved.

Now that you read about the builds and it's strengths and weaknesses, we shall look at how it fairs against each other:
It has come clear that the offensive builds are the ones being initiative, and the defenders passive players. Both has it's pros and cons on PvP, but on multiple aspects on CA, defenders tends to lose out on the monster battle department, resulting in lesser ability to get the alchemy gears faster, and in larger quantity.
Also, assumed that the comparison above is based on 1,000 total stats in attack and defense, you will realize that pure defenders lose out totally on the offensive, which limits their ability to retaliate players of similar level or total attack + defense stat. This is the reason why offensive builds are preferred over defensive builds by the general CA community, and the fact that after reaching the gauntlet, you are susceptible to all attacks makes the "Wall" build and the "Paladin" build fairly unattractive, resulting in most players picking on an offensive or balanced build.

how much damage you have to do to get legendary/ epic itemshttps://spreadsheets.google.com/pub?key=0Aro5WgWKHR6JdDhPcnBydUoxSFZnR3ZERmNsQTVQY3c&hl=en&gid=134
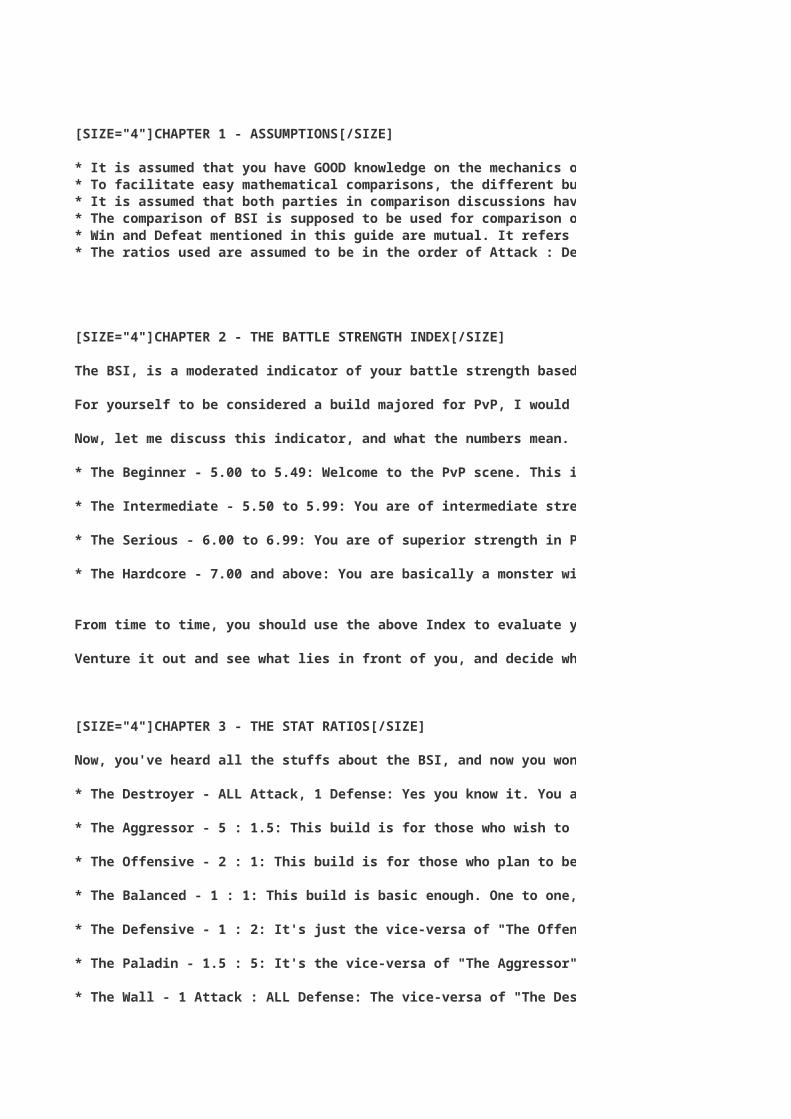
As for the specific pieces of equipment/magic, the game will automatically pick the strongest kind that you have available (these are the best dueling Attacking items and Defending items currently obtainable in the game). The general that accompanies you is always your Active General. When attacking, the game uses their Stat attack.png Attack stats, and 70% of their Stat defense.png Defense stats. When defending, the game uses their defense stats, and 70% of their attack stats.
As well as the above, the game also factors in your natural Attack and Defense stats (which are improved by spending skill points). When either attacking or defending, the game will always use both your attack and defense stats... mostly. While attacking, the game only counts two-thirds of your defense stat. While defending, the game only counts two-thirds of your attack stat.
(Attack+(Defense*2/3)) + (Item Attack Power + Item Defense Power * .7)) + (Magic Attack Power + (Magic Defense Power * .7)) + (General Attack Power + (General Defense Power * .7)) = Battle Power
((Attack*2/3)+Defense)) + ((Item Attack Power * .7) + Item Defense Power) + ((Magic Attack Power * .7) + Magic Defense Power) + ((General Attack Power * .7) + General Defense Power) = Battle Power
Assuming that you have good equipment (Helm of Dragon Power (30/30), Lionheart Plate (10/25), Berserker Axe (20/13), Sword of Redemption (50/30), Moonfall Amulet (40/40)), Good Magic (Tempest Storm (17/10)), a good general (Vanquish (15/14)), an attack stat of 100 and defense stat of 200.
(100 + (200 * 2/3)) + (30 + (30 * .7)) + (10 + (25 * .7)) + (20 + (13 * .7)) + (50 + (30 * .7)) + (40 + (40 * .7)) + (17 + (10 * .7)) + (15 + (14 * .7)) = Battle Power (wiki calculated: 528.733)
((100 * 2/3) + 200 ) + ((30 * .7) + 30 ) + ((10 * .7) + 25) + ((20 * .7) + 13) + ((50 * .7) + 30) + ((40 * .7) + 40) + ((17 * .7) + 10) + ((15 * .7) + 14) = Battle Power (wiki calculated: 556.067)
And while attacking with an army of 501, your battle power will be: (100 + (200 * 2/3)) + (30 + (30 * .7)) + (10 + (25 * .7)) + (20 + (13 * .7)) + (50 + (30 * .7)) + (40 + (40 * .7)) + (17 + (10 * .7)) + (15 + (14 * .7)) = Battle Power (wiki calculated: 528.733)

When attacking: Attack stat + 70% defense stat + (total attack of general and items) + 70% (totaldefense of general and items) + % luck factor
When defending: 70% attack stat + defense stat + 70% (total attack of general and items) + (totaldefense of general and items) + % luck factor
* The Sword of Redemption is an off-hand (used in shield slot), and NOT a weapon. The game treats the Sword of Redemption as if you are dual-wielding, and the sword is placed in your off-hand (where your shield would normally be).* When dueling, you will train yourself to become a better fighter. In the Training Grounds, whenever you fight a duel, you will earn training points in dueling. As you train in dueling, you will earn 1 Stat attack.png Attack for every training level you earn. The max training level for dueling is level 5.
The intention of this guide is to discuss the various builds for different styles of PvP. I will talk about the pros and cons of the various PvP builds and it's functionality to assist those who are lost in finding their preferred build. Various mathematical ratios and their implications will be discussed here.
It is also hoped to assist the newbies who don't know how they hell they die on the battlefield to understand PvP better, and hopefully by reading this guide they will not make more of those "WHY?!" thread that has been answered a googolplex times. (ATTN NEWBIES: Go check at the bottom of this guide, I have a FAQ. If your question is listed then you should very well read this guide).

* It is assumed that you have GOOD knowledge on the mechanics of PvP. If you don't, either read other guides first or check out my FAQ at the last, later.
* The comparison of BSI is supposed to be used for comparison of near level peers. Extreme level differences beyond the gauntlet may not be fully applicable, due to the sheer amount of stat point difference. Using your BSI to estimate your strength against players who are much over-leveled than you would thus not be effective.
The BSI, is a moderated indicator of your battle strength based on your current level. The formula for this index "(attack + defense)/level" is widely used and accepted to evaluate one's PvP power based on his/her level, and used to compare him/her with their close level peers to see how they fair in the battlefield.
For yourself to be considered a build majored for PvP, I would say you would need a BSI of 5.0. To me, it's a fair number to be considered ready for PvP action and subsequently, improving on it. Anything below that, you are just food to those who are PvP oriented, as simple as that.
* The Beginner - 5.00 to 5.49: Welcome to the PvP scene. This is where you begin. At 5.0, you are just a mediocre PvP player, so do not expect much. At this ratio, you are only strong enough to fend off players whose BSI are generaly below 4.5 to around 5.5, depending his attack:defense ratio. These group of people are generally monster hunters who just started PvP or taking PvP as "part-time job". Your preys are generally from monster hunters to players with a BSI under 6.0 with negligible defense, depending on your build's ratios.
* The Intermediate - 5.50 to 5.99: You are of intermediate strength. What you are able to attack and defend from are dependent on your build's rations again. However, you should be able to do well against about 50% of your peers. What you cannot handle is those who's BSI are 6.0 and above, they are the "full-time" PvP players
* The Serious - 6.00 to 6.99: You are of superior strength in PvP. A good majority of your peers should not be your match in most circumstances, which depends on your build's ratio. Of course, I would assume that at this stage you know what you are doing and what you want from PvP. I assume that you know who to hunt, who are your competitors and who are the top dogs around your range. You are able to stand and fight on your own with ease.
* The Hardcore - 7.00 and above: You are basically a monster within your peers. Not much people should be able to defeat you. You are ready to have a shot at hitting beyond your level range, and you should do so, because the higher you go, the more tasty food you find, although the dangers get higher. HOWEVER, you are clearly limiting your ability to slay monsters and gather loots compared to the lower BSI builds. It's the major trade-off for such massive PvP strength.
From time to time, you should use the above Index to evaluate your strength against the general strength of your peers. The BSI is a very relative index and you need not follow it to the T to be a top notch PvP player. You can easily adjust your BSI to your needs and your surroundings. For example, at a very high level of 600+, you need not have even 5.0 to win against most players. Being at the top levels means you can fairly weaken your BSI and invest your SPs on other aspects instead. Why? For a level 600, having a BSI of 3.33 is rather powerful enough. That could well mean 1,000 attack and 1,000 defense which is a challenge to most CA players.
Now, you've heard all the stuffs about the BSI, and now you wonder, what kind of ratio build you should go for? Now, I'll discuss the various build for your consideration. I will move from the extreme offense to the extreme defense.
* The Destroyer - ALL Attack, 1 Defense: Yes you know it. You are the ultimate destroyer, you crush almost anything in your path. The only one within your peers who could stop you is "The Wall (pure defense)". However, it is not your concern at wall because Walls are rare in nature, I'll tell you why later on. Lots of foods lies around, so, move on if you hit a wall. You deal massive damage on monsters too, compared to your peer. But defensively, you are going to suck big time. Even if you are a "Destroyer" with a hardcore 7.0 BSI, in defenses your defense score is amounted to 4.9x your level. You can take it as good as a 4.9 BSI in defense. Any "The Beginner" of this "Destroyer" build will crush you biscuits, and they love it. Everyone loves it, BTW. As such, this build is clearly not viable in the long run; at high ranks it's difficult to get good BP per fight, and if you continue to be a "Destroyer" you are going to lose more than you gain.
* The Aggressor - 5 : 1.5: This build is for those who wish to be aggressive, and at the same time, being able to defend well against the weak to mediocre attacks. Why? Let's take the ratio and use the numbers as factors to your level. That means, you have 5x level Attack, and 1.5x level Defense. Offensively, you have 6.05x level attack score, and defensively, you have 5x level in defense score. It's pretty good I'd say.
* The Offensive - 2 : 1: This build is for those who plan to be offensive but at the same time, being balanced. Why so? At 2 : 1, during the offensive you are have a total attack score of equating to 90% of your total attack + defense stats, and during the defensive, a defensive score of equating to 80% of your total attack + defensive stats. Fairly balanced, I'd say.
* The Balanced - 1 : 1: This build is basic enough. One to one, the perfectly balanced ratio. It's basically the jack of all trades, master of none. You don't shine particularly in either department. The good thing is you can do fairly well against most players except the mid-extreme to extreme ratio builds.
* The Defensive - 1 : 2: It's just the vice-versa of "The Offensive", with the downside of weakening your powers in the monster hunting department.
* The Paladin - 1.5 : 5: It's the vice-versa of "The Aggressor", which a significant downside of your powers in the general monster hunting department. However, you are valued in 2 monster battles: Serpents and the Orc Horde for fortifications.
* The Wall - 1 Attack : ALL Defense: The vice-versa of "The Destroyer". Just that you do horrendously poor against non-fortification monster battles. You sucked absolutely at them except for the Serpents and the Orc Horde, which you will be greatly welcomed and loved.

It has come clear that the offensive builds are the ones being initiative, and the defenders passive players. Both has it's pros and cons on PvP, but on multiple aspects on CA, defenders tends to lose out on the monster battle department, resulting in lesser ability to get the alchemy gears faster, and in larger quantity.
Also, assumed that the comparison above is based on 1,000 total stats in attack and defense, you will realize that pure defenders lose out totally on the offensive, which limits their ability to retaliate players of similar level or total attack + defense stat. This is the reason why offensive builds are preferred over defensive builds by the general CA community, and the fact that after reaching the gauntlet, you are susceptible to all attacks makes the "Wall" build and the "Paladin" build fairly unattractive, resulting in most players picking on an offensive or balanced build.

As for the specific pieces of equipment/magic, the game will automatically pick the strongest kind that you have available (these are the best dueling Attacking items and Defending items currently obtainable in the game). The general that accompanies you is always your Active General. When attacking, the game uses their Stat attack.png Attack stats, and 70% of their Stat defense.png Defense stats. When defending, the game uses their defense stats, and 70% of their attack stats.
As well as the above, the game also factors in your natural Attack and Defense stats (which are improved by spending skill points). When either attacking or defending, the game will always use both your attack and defense stats... mostly. While attacking, the game only counts two-thirds of your defense stat. While defending, the game only counts two-thirds of your attack stat.
Assuming that you have good equipment (Helm of Dragon Power (30/30), Lionheart Plate (10/25), Berserker Axe (20/13), Sword of Redemption (50/30), Moonfall Amulet (40/40)), Good Magic (Tempest Storm (17/10)), a good general (Vanquish (15/14)), an attack stat of 100 and defense stat of 200.
And while attacking with an army of 501, your battle power will be: (100 + (200 * 2/3)) + (30 + (30 * .7)) + (10 + (25 * .7)) + (20 + (13 * .7)) + (50 + (30 * .7)) + (40 + (40 * .7)) + (17 + (10 * .7)) + (15 + (14 * .7)) = Battle Power (wiki calculated: 528.733)

* The Sword of Redemption is an off-hand (used in shield slot), and NOT a weapon. The game treats the Sword of Redemption as if you are dual-wielding, and the sword is placed in your off-hand (where your shield would normally be).* When dueling, you will train yourself to become a better fighter. In the Training Grounds, whenever you fight a duel, you will earn training points in dueling. As you train in dueling, you will earn 1 Stat attack.png Attack for every training level you earn. The max training level for dueling is level 5.
The intention of this guide is to discuss the various builds for different styles of PvP. I will talk about the pros and cons of the various PvP builds and it's functionality to assist those who are lost in finding their preferred build. Various mathematical ratios and their implications will be discussed here.
It is also hoped to assist the newbies who don't know how they hell they die on the battlefield to understand PvP better, and hopefully by reading this guide they will not make more of those "WHY?!" thread that has been answered a googolplex times. (ATTN NEWBIES: Go check at the bottom of this guide, I have a FAQ. If your question is listed then you should very well read this guide).

* The comparison of BSI is supposed to be used for comparison of near level peers. Extreme level differences beyond the gauntlet may not be fully applicable, due to the sheer amount of stat point difference. Using your BSI to estimate your strength against players who are much over-leveled than you would thus not be effective.
The BSI, is a moderated indicator of your battle strength based on your current level. The formula for this index "(attack + defense)/level" is widely used and accepted to evaluate one's PvP power based on his/her level, and used to compare him/her with their close level peers to see how they fair in the battlefield.
For yourself to be considered a build majored for PvP, I would say you would need a BSI of 5.0. To me, it's a fair number to be considered ready for PvP action and subsequently, improving on it. Anything below that, you are just food to those who are PvP oriented, as simple as that.
* The Beginner - 5.00 to 5.49: Welcome to the PvP scene. This is where you begin. At 5.0, you are just a mediocre PvP player, so do not expect much. At this ratio, you are only strong enough to fend off players whose BSI are generaly below 4.5 to around 5.5, depending his attack:defense ratio. These group of people are generally monster hunters who just started PvP or taking PvP as "part-time job". Your preys are generally from monster hunters to players with a BSI under 6.0 with negligible defense, depending on your build's ratios.
* The Intermediate - 5.50 to 5.99: You are of intermediate strength. What you are able to attack and defend from are dependent on your build's rations again. However, you should be able to do well against about 50% of your peers. What you cannot handle is those who's BSI are 6.0 and above, they are the "full-time" PvP players
* The Serious - 6.00 to 6.99: You are of superior strength in PvP. A good majority of your peers should not be your match in most circumstances, which depends on your build's ratio. Of course, I would assume that at this stage you know what you are doing and what you want from PvP. I assume that you know who to hunt, who are your competitors and who are the top dogs around your range. You are able to stand and fight on your own with ease.
* The Hardcore - 7.00 and above: You are basically a monster within your peers. Not much people should be able to defeat you. You are ready to have a shot at hitting beyond your level range, and you should do so, because the higher you go, the more tasty food you find, although the dangers get higher. HOWEVER, you are clearly limiting your ability to slay monsters and gather loots compared to the lower BSI builds. It's the major trade-off for such massive PvP strength.
From time to time, you should use the above Index to evaluate your strength against the general strength of your peers. The BSI is a very relative index and you need not follow it to the T to be a top notch PvP player. You can easily adjust your BSI to your needs and your surroundings. For example, at a very high level of 600+, you need not have even 5.0 to win against most players. Being at the top levels means you can fairly weaken your BSI and invest your SPs on other aspects instead. Why? For a level 600, having a BSI of 3.33 is rather powerful enough. That could well mean 1,000 attack and 1,000 defense which is a challenge to most CA players.
Now, you've heard all the stuffs about the BSI, and now you wonder, what kind of ratio build you should go for? Now, I'll discuss the various build for your consideration. I will move from the extreme offense to the extreme defense.
* The Destroyer - ALL Attack, 1 Defense: Yes you know it. You are the ultimate destroyer, you crush almost anything in your path. The only one within your peers who could stop you is "The Wall (pure defense)". However, it is not your concern at wall because Walls are rare in nature, I'll tell you why later on. Lots of foods lies around, so, move on if you hit a wall. You deal massive damage on monsters too, compared to your peer. But defensively, you are going to suck big time. Even if you are a "Destroyer" with a hardcore 7.0 BSI, in defenses your defense score is amounted to 4.9x your level. You can take it as good as a 4.9 BSI in defense. Any "The Beginner" of this "Destroyer" build will crush you biscuits, and they love it. Everyone loves it, BTW. As such, this build is clearly not viable in the long run; at high ranks it's difficult to get good BP per fight, and if you continue to be a "Destroyer" you are going to lose more than you gain.
* The Aggressor - 5 : 1.5: This build is for those who wish to be aggressive, and at the same time, being able to defend well against the weak to mediocre attacks. Why? Let's take the ratio and use the numbers as factors to your level. That means, you have 5x level Attack, and 1.5x level Defense. Offensively, you have 6.05x level attack score, and defensively, you have 5x level in defense score. It's pretty good I'd say.
* The Offensive - 2 : 1: This build is for those who plan to be offensive but at the same time, being balanced. Why so? At 2 : 1, during the offensive you are have a total attack score of equating to 90% of your total attack + defense stats, and during the defensive, a defensive score of equating to 80% of your total attack + defensive stats. Fairly balanced, I'd say.
* The Balanced - 1 : 1: This build is basic enough. One to one, the perfectly balanced ratio. It's basically the jack of all trades, master of none. You don't shine particularly in either department. The good thing is you can do fairly well against most players except the mid-extreme to extreme ratio builds.
* The Paladin - 1.5 : 5: It's the vice-versa of "The Aggressor", which a significant downside of your powers in the general monster hunting department. However, you are valued in 2 monster battles: Serpents and the Orc Horde for fortifications.
* The Wall - 1 Attack : ALL Defense: The vice-versa of "The Destroyer". Just that you do horrendously poor against non-fortification monster battles. You sucked absolutely at them except for the Serpents and the Orc Horde, which you will be greatly welcomed and loved.
It has come clear that the offensive builds are the ones being initiative, and the defenders passive players. Both has it's pros and cons on PvP, but on multiple aspects on CA, defenders tends to lose out on the monster battle department, resulting in lesser ability to get the alchemy gears faster, and in larger quantity.
Also, assumed that the comparison above is based on 1,000 total stats in attack and defense, you will realize that pure defenders lose out totally on the offensive, which limits their ability to retaliate players of similar level or total attack + defense stat. This is the reason why offensive builds are preferred over defensive builds by the general CA community, and the fact that after reaching the gauntlet, you are susceptible to all attacks makes the "Wall" build and the "Paladin" build fairly unattractive, resulting in most players picking on an offensive or balanced build.

As for the specific pieces of equipment/magic, the game will automatically pick the strongest kind that you have available (these are the best dueling Attacking items and Defending items currently obtainable in the game). The general that accompanies you is always your Active General. When attacking, the game uses their Stat attack.png Attack stats, and 70% of their Stat defense.png Defense stats. When defending, the game uses their defense stats, and 70% of their attack stats.
As well as the above, the game also factors in your natural Attack and Defense stats (which are improved by spending skill points). When either attacking or defending, the game will always use both your attack and defense stats... mostly. While attacking, the game only counts two-thirds of your defense stat. While defending, the game only counts two-thirds of your attack stat.

It is also hoped to assist the newbies who don't know how they hell they die on the battlefield to understand PvP better, and hopefully by reading this guide they will not make more of those "WHY?!" thread that has been answered a googolplex times. (ATTN NEWBIES: Go check at the bottom of this guide, I have a FAQ. If your question is listed then you should very well read this guide).
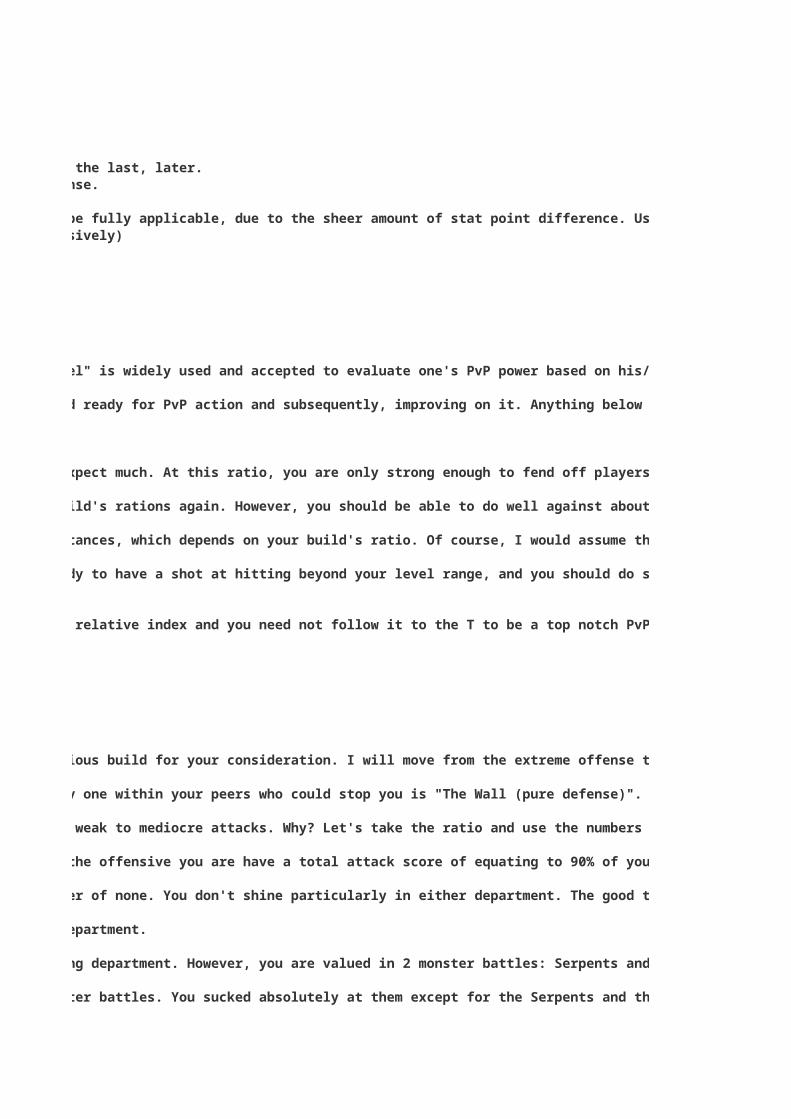
* The comparison of BSI is supposed to be used for comparison of near level peers. Extreme level differences beyond the gauntlet may not be fully applicable, due to the sheer amount of stat point difference. Using your BSI to estimate your strength against players who are much over-leveled than you would thus not be effective.
The BSI, is a moderated indicator of your battle strength based on your current level. The formula for this index "(attack + defense)/level" is widely used and accepted to evaluate one's PvP power based on his/her level, and used to compare him/her with their close level peers to see how they fair in the battlefield.
* The Beginner - 5.00 to 5.49: Welcome to the PvP scene. This is where you begin. At 5.0, you are just a mediocre PvP player, so do not expect much. At this ratio, you are only strong enough to fend off players whose BSI are generaly below 4.5 to around 5.5, depending his attack:defense ratio. These group of people are generally monster hunters who just started PvP or taking PvP as "part-time job". Your preys are generally from monster hunters to players with a BSI under 6.0 with negligible defense, depending on your build's ratios.
* The Intermediate - 5.50 to 5.99: You are of intermediate strength. What you are able to attack and defend from are dependent on your build's rations again. However, you should be able to do well against about 50% of your peers. What you cannot handle is those who's BSI are 6.0 and above, they are the "full-time" PvP players
* The Serious - 6.00 to 6.99: You are of superior strength in PvP. A good majority of your peers should not be your match in most circumstances, which depends on your build's ratio. Of course, I would assume that at this stage you know what you are doing and what you want from PvP. I assume that you know who to hunt, who are your competitors and who are the top dogs around your range. You are able to stand and fight on your own with ease.
* The Hardcore - 7.00 and above: You are basically a monster within your peers. Not much people should be able to defeat you. You are ready to have a shot at hitting beyond your level range, and you should do so, because the higher you go, the more tasty food you find, although the dangers get higher. HOWEVER, you are clearly limiting your ability to slay monsters and gather loots compared to the lower BSI builds. It's the major trade-off for such massive PvP strength.
From time to time, you should use the above Index to evaluate your strength against the general strength of your peers. The BSI is a very relative index and you need not follow it to the T to be a top notch PvP player. You can easily adjust your BSI to your needs and your surroundings. For example, at a very high level of 600+, you need not have even 5.0 to win against most players. Being at the top levels means you can fairly weaken your BSI and invest your SPs on other aspects instead. Why? For a level 600, having a BSI of 3.33 is rather powerful enough. That could well mean 1,000 attack and 1,000 defense which is a challenge to most CA players.
* The Destroyer - ALL Attack, 1 Defense: Yes you know it. You are the ultimate destroyer, you crush almost anything in your path. The only one within your peers who could stop you is "The Wall (pure defense)". However, it is not your concern at wall because Walls are rare in nature, I'll tell you why later on. Lots of foods lies around, so, move on if you hit a wall. You deal massive damage on monsters too, compared to your peer. But defensively, you are going to suck big time. Even if you are a "Destroyer" with a hardcore 7.0 BSI, in defenses your defense score is amounted to 4.9x your level. You can take it as good as a 4.9 BSI in defense. Any "The Beginner" of this "Destroyer" build will crush you biscuits, and they love it. Everyone loves it, BTW. As such, this build is clearly not viable in the long run; at high ranks it's difficult to get good BP per fight, and if you continue to be a "Destroyer" you are going to lose more than you gain.
* The Aggressor - 5 : 1.5: This build is for those who wish to be aggressive, and at the same time, being able to defend well against the weak to mediocre attacks. Why? Let's take the ratio and use the numbers as factors to your level. That means, you have 5x level Attack, and 1.5x level Defense. Offensively, you have 6.05x level attack score, and defensively, you have 5x level in defense score. It's pretty good I'd say.
* The Offensive - 2 : 1: This build is for those who plan to be offensive but at the same time, being balanced. Why so? At 2 : 1, during the offensive you are have a total attack score of equating to 90% of your total attack + defense stats, and during the defensive, a defensive score of equating to 80% of your total attack + defensive stats. Fairly balanced, I'd say.

It has come clear that the offensive builds are the ones being initiative, and the defenders passive players. Both has it's pros and cons on PvP, but on multiple aspects on CA, defenders tends to lose out on the monster battle department, resulting in lesser ability to get the alchemy gears faster, and in larger quantity.
Also, assumed that the comparison above is based on 1,000 total stats in attack and defense, you will realize that pure defenders lose out totally on the offensive, which limits their ability to retaliate players of similar level or total attack + defense stat. This is the reason why offensive builds are preferred over defensive builds by the general CA community, and the fact that after reaching the gauntlet, you are susceptible to all attacks makes the "Wall" build and the "Paladin" build fairly unattractive, resulting in most players picking on an offensive or balanced build.
As for the specific pieces of equipment/magic, the game will automatically pick the strongest kind that you have available (these are the best dueling Attacking items and Defending items currently obtainable in the game). The general that accompanies you is always your Active General. When attacking, the game uses their Stat attack.png Attack stats, and 70% of their Stat defense.png Defense stats. When defending, the game uses their defense stats, and 70% of their attack stats.

It is also hoped to assist the newbies who don't know how they hell they die on the battlefield to understand PvP better, and hopefully by reading this guide they will not make more of those "WHY?!" thread that has been answered a googolplex times. (ATTN NEWBIES: Go check at the bottom of this guide, I have a FAQ. If your question is listed then you should very well read this guide).
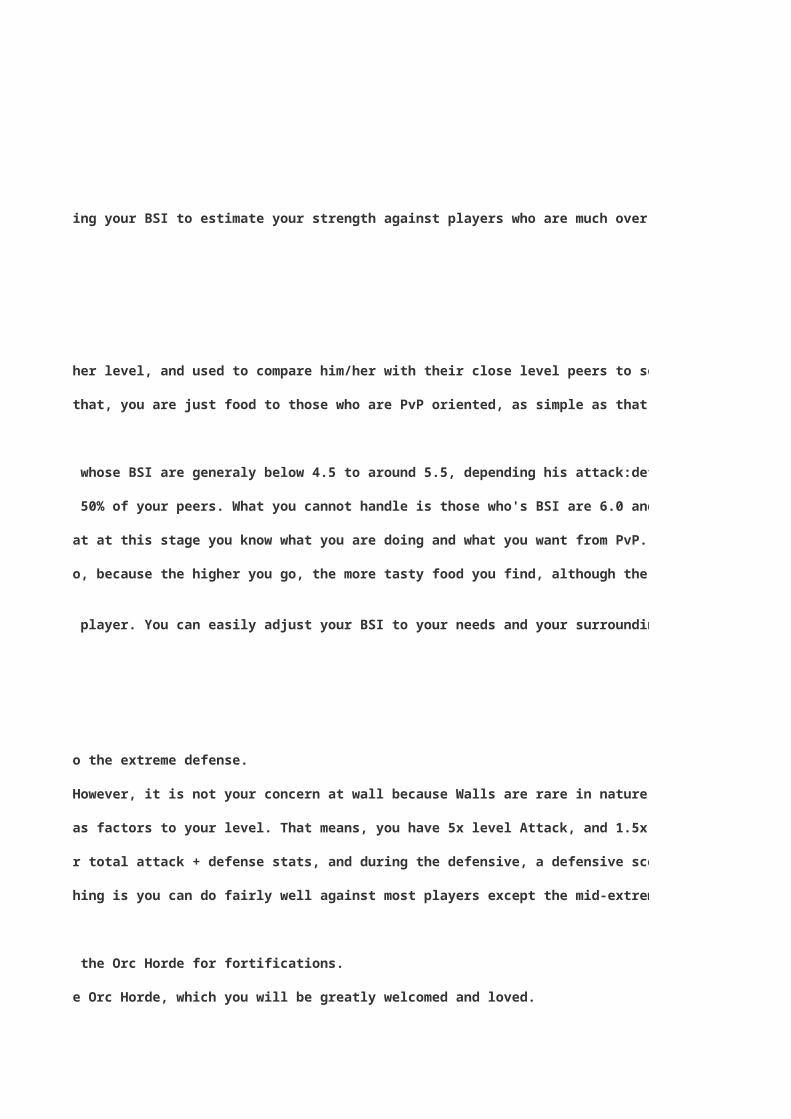
* The Beginner - 5.00 to 5.49: Welcome to the PvP scene. This is where you begin. At 5.0, you are just a mediocre PvP player, so do not expect much. At this ratio, you are only strong enough to fend off players whose BSI are generaly below 4.5 to around 5.5, depending his attack:defense ratio. These group of people are generally monster hunters who just started PvP or taking PvP as "part-time job". Your preys are generally from monster hunters to players with a BSI under 6.0 with negligible defense, depending on your build's ratios.
* The Serious - 6.00 to 6.99: You are of superior strength in PvP. A good majority of your peers should not be your match in most circumstances, which depends on your build's ratio. Of course, I would assume that at this stage you know what you are doing and what you want from PvP. I assume that you know who to hunt, who are your competitors and who are the top dogs around your range. You are able to stand and fight on your own with ease.
* The Hardcore - 7.00 and above: You are basically a monster within your peers. Not much people should be able to defeat you. You are ready to have a shot at hitting beyond your level range, and you should do so, because the higher you go, the more tasty food you find, although the dangers get higher. HOWEVER, you are clearly limiting your ability to slay monsters and gather loots compared to the lower BSI builds. It's the major trade-off for such massive PvP strength.
From time to time, you should use the above Index to evaluate your strength against the general strength of your peers. The BSI is a very relative index and you need not follow it to the T to be a top notch PvP player. You can easily adjust your BSI to your needs and your surroundings. For example, at a very high level of 600+, you need not have even 5.0 to win against most players. Being at the top levels means you can fairly weaken your BSI and invest your SPs on other aspects instead. Why? For a level 600, having a BSI of 3.33 is rather powerful enough. That could well mean 1,000 attack and 1,000 defense which is a challenge to most CA players.
* The Destroyer - ALL Attack, 1 Defense: Yes you know it. You are the ultimate destroyer, you crush almost anything in your path. The only one within your peers who could stop you is "The Wall (pure defense)". However, it is not your concern at wall because Walls are rare in nature, I'll tell you why later on. Lots of foods lies around, so, move on if you hit a wall. You deal massive damage on monsters too, compared to your peer. But defensively, you are going to suck big time. Even if you are a "Destroyer" with a hardcore 7.0 BSI, in defenses your defense score is amounted to 4.9x your level. You can take it as good as a 4.9 BSI in defense. Any "The Beginner" of this "Destroyer" build will crush you biscuits, and they love it. Everyone loves it, BTW. As such, this build is clearly not viable in the long run; at high ranks it's difficult to get good BP per fight, and if you continue to be a "Destroyer" you are going to lose more than you gain.
* The Aggressor - 5 : 1.5: This build is for those who wish to be aggressive, and at the same time, being able to defend well against the weak to mediocre attacks. Why? Let's take the ratio and use the numbers as factors to your level. That means, you have 5x level Attack, and 1.5x level Defense. Offensively, you have 6.05x level attack score, and defensively, you have 5x level in defense score. It's pretty good I'd say.

Also, assumed that the comparison above is based on 1,000 total stats in attack and defense, you will realize that pure defenders lose out totally on the offensive, which limits their ability to retaliate players of similar level or total attack + defense stat. This is the reason why offensive builds are preferred over defensive builds by the general CA community, and the fact that after reaching the gauntlet, you are susceptible to all attacks makes the "Wall" build and the "Paladin" build fairly unattractive, resulting in most players picking on an offensive or balanced build.

As for the specific pieces of equipment/magic, the game will automatically pick the strongest kind that you have available (these are the best dueling Attacking items and Defending items currently obtainable in the game). The general that accompanies you is always your Active General. When attacking, the game uses their Stat attack.png Attack stats, and 70% of their Stat defense.png Defense stats. When defending, the game uses their defense stats, and 70% of their attack stats.

* The Beginner - 5.00 to 5.49: Welcome to the PvP scene. This is where you begin. At 5.0, you are just a mediocre PvP player, so do not expect much. At this ratio, you are only strong enough to fend off players whose BSI are generaly below 4.5 to around 5.5, depending his attack:defense ratio. These group of people are generally monster hunters who just started PvP or taking PvP as "part-time job". Your preys are generally from monster hunters to players with a BSI under 6.0 with negligible defense, depending on your build's ratios.
* The Hardcore - 7.00 and above: You are basically a monster within your peers. Not much people should be able to defeat you. You are ready to have a shot at hitting beyond your level range, and you should do so, because the higher you go, the more tasty food you find, although the dangers get higher. HOWEVER, you are clearly limiting your ability to slay monsters and gather loots compared to the lower BSI builds. It's the major trade-off for such massive PvP strength.
From time to time, you should use the above Index to evaluate your strength against the general strength of your peers. The BSI is a very relative index and you need not follow it to the T to be a top notch PvP player. You can easily adjust your BSI to your needs and your surroundings. For example, at a very high level of 600+, you need not have even 5.0 to win against most players. Being at the top levels means you can fairly weaken your BSI and invest your SPs on other aspects instead. Why? For a level 600, having a BSI of 3.33 is rather powerful enough. That could well mean 1,000 attack and 1,000 defense which is a challenge to most CA players.
* The Destroyer - ALL Attack, 1 Defense: Yes you know it. You are the ultimate destroyer, you crush almost anything in your path. The only one within your peers who could stop you is "The Wall (pure defense)". However, it is not your concern at wall because Walls are rare in nature, I'll tell you why later on. Lots of foods lies around, so, move on if you hit a wall. You deal massive damage on monsters too, compared to your peer. But defensively, you are going to suck big time. Even if you are a "Destroyer" with a hardcore 7.0 BSI, in defenses your defense score is amounted to 4.9x your level. You can take it as good as a 4.9 BSI in defense. Any "The Beginner" of this "Destroyer" build will crush you biscuits, and they love it. Everyone loves it, BTW. As such, this build is clearly not viable in the long run; at high ranks it's difficult to get good BP per fight, and if you continue to be a "Destroyer" you are going to lose more than you gain.
Also, assumed that the comparison above is based on 1,000 total stats in attack and defense, you will realize that pure defenders lose out totally on the offensive, which limits their ability to retaliate players of similar level or total attack + defense stat. This is the reason why offensive builds are preferred over defensive builds by the general CA community, and the fact that after reaching the gauntlet, you are susceptible to all attacks makes the "Wall" build and the "Paladin" build fairly unattractive, resulting in most players picking on an offensive or balanced build.

From time to time, you should use the above Index to evaluate your strength against the general strength of your peers. The BSI is a very relative index and you need not follow it to the T to be a top notch PvP player. You can easily adjust your BSI to your needs and your surroundings. For example, at a very high level of 600+, you need not have even 5.0 to win against most players. Being at the top levels means you can fairly weaken your BSI and invest your SPs on other aspects instead. Why? For a level 600, having a BSI of 3.33 is rather powerful enough. That could well mean 1,000 attack and 1,000 defense which is a challenge to most CA players.
* The Destroyer - ALL Attack, 1 Defense: Yes you know it. You are the ultimate destroyer, you crush almost anything in your path. The only one within your peers who could stop you is "The Wall (pure defense)". However, it is not your concern at wall because Walls are rare in nature, I'll tell you why later on. Lots of foods lies around, so, move on if you hit a wall. You deal massive damage on monsters too, compared to your peer. But defensively, you are going to suck big time. Even if you are a "Destroyer" with a hardcore 7.0 BSI, in defenses your defense score is amounted to 4.9x your level. You can take it as good as a 4.9 BSI in defense. Any "The Beginner" of this "Destroyer" build will crush you biscuits, and they love it. Everyone loves it, BTW. As such, this build is clearly not viable in the long run; at high ranks it's difficult to get good BP per fight, and if you continue to be a "Destroyer" you are going to lose more than you gain.
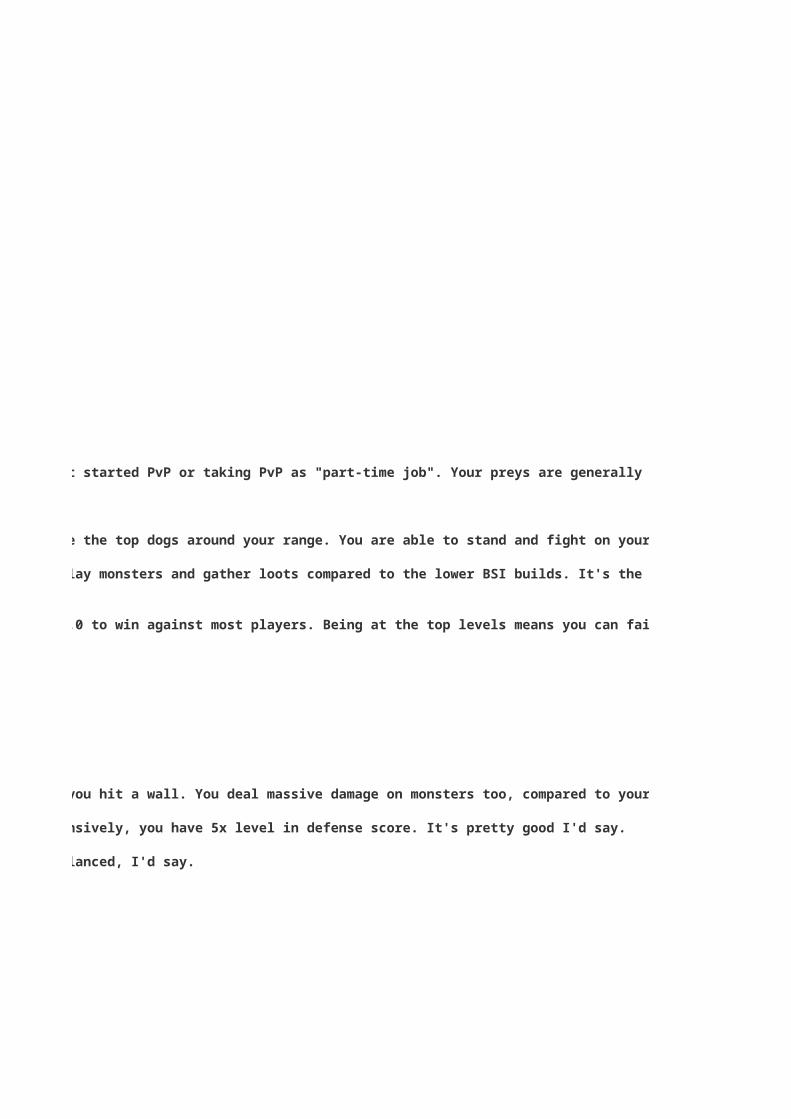
* The Destroyer - ALL Attack, 1 Defense: Yes you know it. You are the ultimate destroyer, you crush almost anything in your path. The only one within your peers who could stop you is "The Wall (pure defense)". However, it is not your concern at wall because Walls are rare in nature, I'll tell you why later on. Lots of foods lies around, so, move on if you hit a wall. You deal massive damage on monsters too, compared to your peer. But defensively, you are going to suck big time. Even if you are a "Destroyer" with a hardcore 7.0 BSI, in defenses your defense score is amounted to 4.9x your level. You can take it as good as a 4.9 BSI in defense. Any "The Beginner" of this "Destroyer" build will crush you biscuits, and they love it. Everyone loves it, BTW. As such, this build is clearly not viable in the long run; at high ranks it's difficult to get good BP per fight, and if you continue to be a "Destroyer" you are going to lose more than you gain.

* The Destroyer - ALL Attack, 1 Defense: Yes you know it. You are the ultimate destroyer, you crush almost anything in your path. The only one within your peers who could stop you is "The Wall (pure defense)". However, it is not your concern at wall because Walls are rare in nature, I'll tell you why later on. Lots of foods lies around, so, move on if you hit a wall. You deal massive damage on monsters too, compared to your peer. But defensively, you are going to suck big time. Even if you are a "Destroyer" with a hardcore 7.0 BSI, in defenses your defense score is amounted to 4.9x your level. You can take it as good as a 4.9 BSI in defense. Any "The Beginner" of this "Destroyer" build will crush you biscuits, and they love it. Everyone loves it, BTW. As such, this build is clearly not viable in the long run; at high ranks it's difficult to get good BP per fight, and if you continue to be a "Destroyer" you are going to lose more than you gain.

* The Destroyer - ALL Attack, 1 Defense: Yes you know it. You are the ultimate destroyer, you crush almost anything in your path. The only one within your peers who could stop you is "The Wall (pure defense)". However, it is not your concern at wall because Walls are rare in nature, I'll tell you why later on. Lots of foods lies around, so, move on if you hit a wall. You deal massive damage on monsters too, compared to your peer. But defensively, you are going to suck big time. Even if you are a "Destroyer" with a hardcore 7.0 BSI, in defenses your defense score is amounted to 4.9x your level. You can take it as good as a 4.9 BSI in defense. Any "The Beginner" of this "Destroyer" build will crush you biscuits, and they love it. Everyone loves it, BTW. As such, this build is clearly not viable in the long run; at high ranks it's difficult to get good BP per fight, and if you continue to be a "Destroyer" you are going to lose more than you gain.
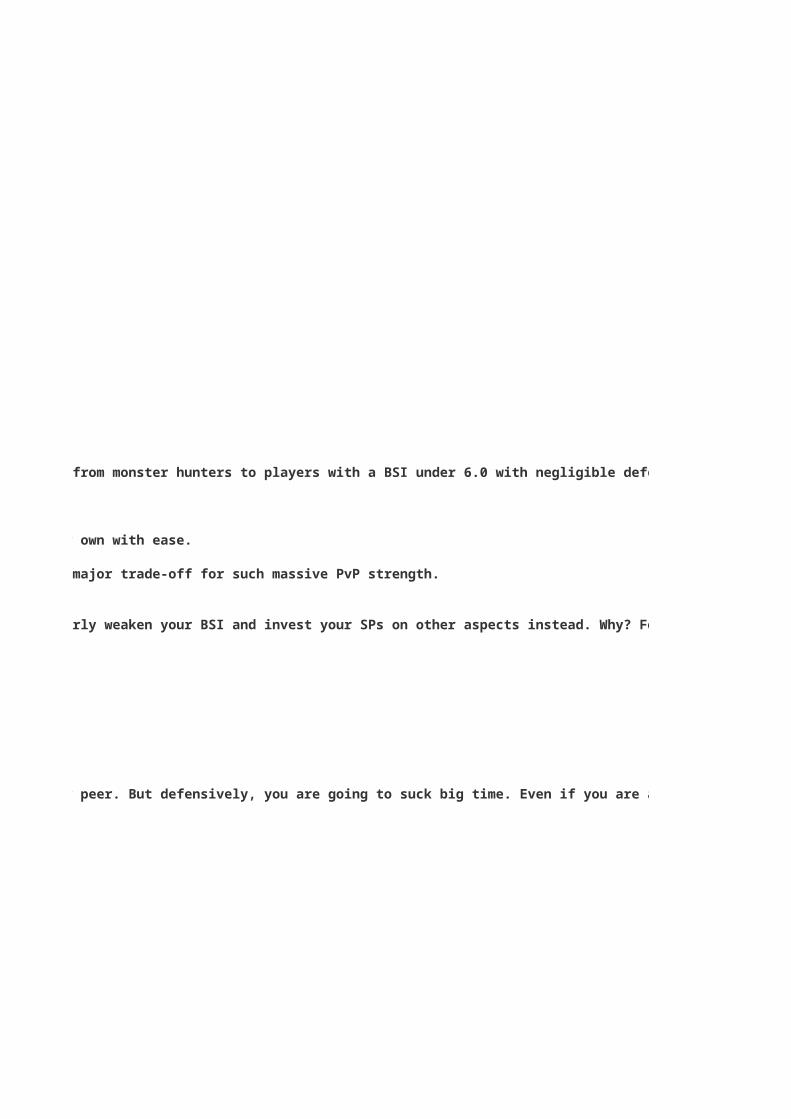
* The Destroyer - ALL Attack, 1 Defense: Yes you know it. You are the ultimate destroyer, you crush almost anything in your path. The only one within your peers who could stop you is "The Wall (pure defense)". However, it is not your concern at wall because Walls are rare in nature, I'll tell you why later on. Lots of foods lies around, so, move on if you hit a wall. You deal massive damage on monsters too, compared to your peer. But defensively, you are going to suck big time. Even if you are a "Destroyer" with a hardcore 7.0 BSI, in defenses your defense score is amounted to 4.9x your level. You can take it as good as a 4.9 BSI in defense. Any "The Beginner" of this "Destroyer" build will crush you biscuits, and they love it. Everyone loves it, BTW. As such, this build is clearly not viable in the long run; at high ranks it's difficult to get good BP per fight, and if you continue to be a "Destroyer" you are going to lose more than you gain.

war council
2 3 1 5 1west rampart mage tower archer wall main gate armory
ambrosia you aurora azriel azeron
you aurora ambrosiamalukus jahanna
ATTACK DEFENSE
(Bonus "while attacked" applied)
Malekus 92.95Ambrosia 92.45
Azriel 88.9Draconius 81.6
Kull 86.7 80.985.4 Corvintheus
Malekus 75.26Ambrosia 77.26
70.9 Azriel 74.6
CorvintheusKull 71.4
Aurora 69.2Aurora 61.7
Draconius 66.3Skaar Deathrune 58.2
Skaar Deathrune 54 58.2Kaylen 52.85 Suri
52.26Suri Sylvanas 57.6
Kaylen 48.72
50 best Generals ordered by attack based on att+70%def formula
50 best Generals ordered by defense based on def+70%att formula
Karn the Minotaur **(+50 atk for your next atk)

Athenia 52.1
52 Athenia 48.2
Elora49.6 Celesta 47.5
46.6
49.4 EloraBanthus Archfiend 45.2
48.2Azul
SereneIsolde 44.6
Calista 46.3Keira 44.2
Azul 44.9Azeron 43.6
Azeron 44.8Vulcan 43.5
Lotus Ravenmoore 44.3 Halcyon 43
44.142.9
Sylvanas Xira43.8
Xira Calista 42.1
41.923.8 Serene
Mephistopheles 43.1 Mephistopheles 41.9
Tristram 42.6 Marina 41.2
41.7 41Kobo
Illusia 41.6 Dexter 40.9
40.8Memnon 41.5 Godric
Helena 41.2 Kataan 40.8
Lyra 40.9 40.7
37.4Godric Anwar 40.2
40.8 39.9Kataan
40.8 39.4Solara
Phaetor **(+14 atk for your next 2 actions)
Elin **(+20 atk for monst.)
Azalia **(+5 atk to the second position of your War Council)
Lotus Ravenmoore
Azalia **(+5 atk to the second position of your War Council)
Sofira **(+5 atk to your War Council for the next 5 atk)

Isolde 40.4 Lailah 39.3
40.3Halcyon Tristram 39
38.8
Fenris 40.3
Medius 39.9 Theorin 38.4
38.9Delfina Cloudslayer Illusia 38.3
38.8 Scarlett 38
Solara38.5 Fenris 37.9
JadaGallador 37.8
Chimerus 38.537.4Orc King
Theorin 38.1 37.3Sofira
Vulcan 38.1
37.7 Lyra 37.3
Adriana 37.1
37.6Adriana
Barbarus
37.4Helena 37
Orc King 36.7Kaiser 37.3 Zin
37.3Dexter Memnon 36.7
Lailah 37.2 Medius 36.6
36
Marina 37
The purpose of this table is to show which Hero is better as you get max bonuses for him but some heroes could be better than others at the moment you get them.
Bonuses are calculated based on max items so i.e.:Draconius is best hero for Defense if you have: 25 Griffin Raiders + 1 Draken Blade + 1 Draken Plate which would mean at least 840 favor points in case you always get the item you are looking for. [However, if you get "refunded" favor points for pulling the same general this can go down to 540 favor points since a double refund returns 60 favor points and the 1 item ends up only costing 20 favor points for 27 items total times 20 favor points].Ambrosia, Malekus, Kaylen and Suri Bonuses are calculated on 105 max heroes collected.Note: The bonuses to Ambrosia, Malekus, Kaylen and Suri are for Player Attack/Defense, not for the general themselves (which has a greater impact with invasions than just boosting the generals Attack/Defense). When duelling though whether the bonus is to the general or player doesn't have an impact.The bonuses to Aurora and Corvintheus are based on 100 health pointsIf you have at least 195 health points (best way is to get most of them from praying to Aurora for moonfall amulet, and a good chunk of stat points) Corvintheus is the best general for both attacking and defending, if you have full heath (93.1 attacking, 112.6 defending).
Banthus Archfiend
Miri Bladebourne/ Karn the Minautor/ Stone Guardian
All heroes here are shown at level 4 with all their equipments.

jahanna3 2 aurelius
tower east rampart agamemnonalyzia
corvintheuszurran
corventheus malukus ### best defense posseble raziel the silentameronelaida
malekusambrosia
corventheus 28-May auroraaurelius

The purpose of this table is to show which Hero is better as you get max bonuses for him but some heroes could be better than others at the moment you get them.
Draconius is best hero for Defense if you have: 25 Griffin Raiders + 1 Draken Blade + 1 Draken Plate which would mean at least 840 favor points in case you always get the item you are looking for. [However, if you get "refunded" favor points for pulling the same general this can go down to 540 favor points since a double refund returns 60 favor points and the 1 item ends up only costing 20 favor points for 27 items total times 20 favor points].
Note: The bonuses to Ambrosia, Malekus, Kaylen and Suri are for Player Attack/Defense, not for the general themselves (which has a greater impact with invasions than just boosting the generals Attack/Defense). When duelling though whether the bonus is to the general or player doesn't have an impact.
If you have at least 195 health points (best way is to get most of them from praying to Aurora for moonfall amulet, and a good chunk of stat points) Corvintheus is the best general for both attacking and defending, if you have full heath (93.1 attacking, 112.6 defending).

1 29 29 58 attack +1.1 every 4 health27 30 57 +1,1 defense for every 3 health
agamemnon 32 25 57 +30 attack vs monsters+3% critical3 28 26 54 +2 defense for every guardion of alyzia (max 50)
corvintheus 25 25 50 +1 defense for every 3 health25 25 50 +8 damage as mage on guild battle
raziel the silent 26 23 49 +6% evade22 25 47 warrior +15% wirlwind damage22 25 47 +25 using heal abelity28 18 46 player attack increased by 0.45 for every hero owns23 23 46 player defense increased by 0.45 for every hero owns23 23 46 player attack increased by 1 for every 4 health

Draconius is best hero for Defense if you have: 25 Griffin Raiders + 1 Draken Blade + 1 Draken Plate which would mean at least 840 favor points in case you always get the item you are looking for. [However, if you get "refunded" favor points for pulling the same general this can go down to 540 favor points since a double refund returns 60 favor points and the 1 item ends up only costing 20 favor points for 27 items total times 20 favor points].
Note: The bonuses to Ambrosia, Malekus, Kaylen and Suri are for Player Attack/Defense, not for the general themselves (which has a greater impact with invasions than just boosting the generals Attack/Defense). When duelling though whether the bonus is to the general or player doesn't have an impact.
If you have at least 195 health points (best way is to get most of them from praying to Aurora for moonfall amulet, and a good chunk of stat points) Corvintheus is the best general for both attacking and defending, if you have full heath (93.1 attacking, 112.6 defending).

attack defense29 0
0 720 0
1 0 10 640 00 00 00 0
51 00 51
49 0

Draconius is best hero for Defense if you have: 25 Griffin Raiders + 1 Draken Blade + 1 Draken Plate which would mean at least 840 favor points in case you always get the item you are looking for. [However, if you get "refunded" favor points for pulling the same general this can go down to 540 favor points since a double refund returns 60 favor points and the 1 item ends up only costing 20 favor points for 27 items total times 20 favor points].

Draconius is best hero for Defense if you have: 25 Griffin Raiders + 1 Draken Blade + 1 Draken Plate which would mean at least 840 favor points in case you always get the item you are looking for. [However, if you get "refunded" favor points for pulling the same general this can go down to 540 favor points since a double refund returns 60 favor points and the 1 item ends up only costing 20 favor points for 27 items total times 20 favor points].

Attack ChallengeCome back once every 12 hours to test your attack power against the greatest Defenders in the Land!
Prove yourself worthy and show that you have the power to defy the Gods themselves.
General Rank Requires Reward
Disciple 50+ Attack
+1 Attack
"You are stronger than you look!"
Savannah
Soldier 100+ Attack
+2 Attack
"You are a worthy adversary!"
Serra Silverlight
Fighter 150+ Attack
+2 Attack
"My master shall know of your strength!"
Halcyon
Hero 200+ Attack
+2 Attack
Celesta
Gladiator 280+ Attack
+3 Attack
"Finally a worthy foe!"
Sylvanas
Crusader 375+ Attack
+4 Attack
"Don't hurt me! Let's make a deal!"
Kobo
Destroyer 510+ Attack
+4 Attack
Ambrosia
Warlord 725+ Attack
+6 Attack
"We can protect Valeria with your strength!"
"Your strength must be incredible to be able to defeat a demi-god!"
"Proud warrior, please accept my honorable defeat!"

Corvintheus Warlord 725+ Attack
Edit
Defense ChallengeCome back once every 12 hours to test your attack power against the greatest Attackers in the Land!
Prove yourself worthy and show that you have the power to defy the Gods themselves.
General Rank Requires Reward
Guard 50+ Defense
+1 Defense
Ophelia
Warden 100+ Defense
+2 Defense
"That was my best shot too!"
Vanquish
Keeper 150+ Defense
+2 Defense
Keira
Protector 200+ Defense
+2 Defense
"I need to sharpen my knives!"
Kataan
Overseer 280+ Defense
+3 Defense
Lotus Ravenmoore
Dread Knight 375+ Defense
+4 Defense
"Heaven still has a chance!"
Azriel
Sentinel 510+ Defense
+4 Defense
Defense Feat
"I thought I would be able to beat you for sure! You are tough!"
"I must let Mephistopheles know of your power!"
"I cannot believe you were able to withstand the Onslaught"
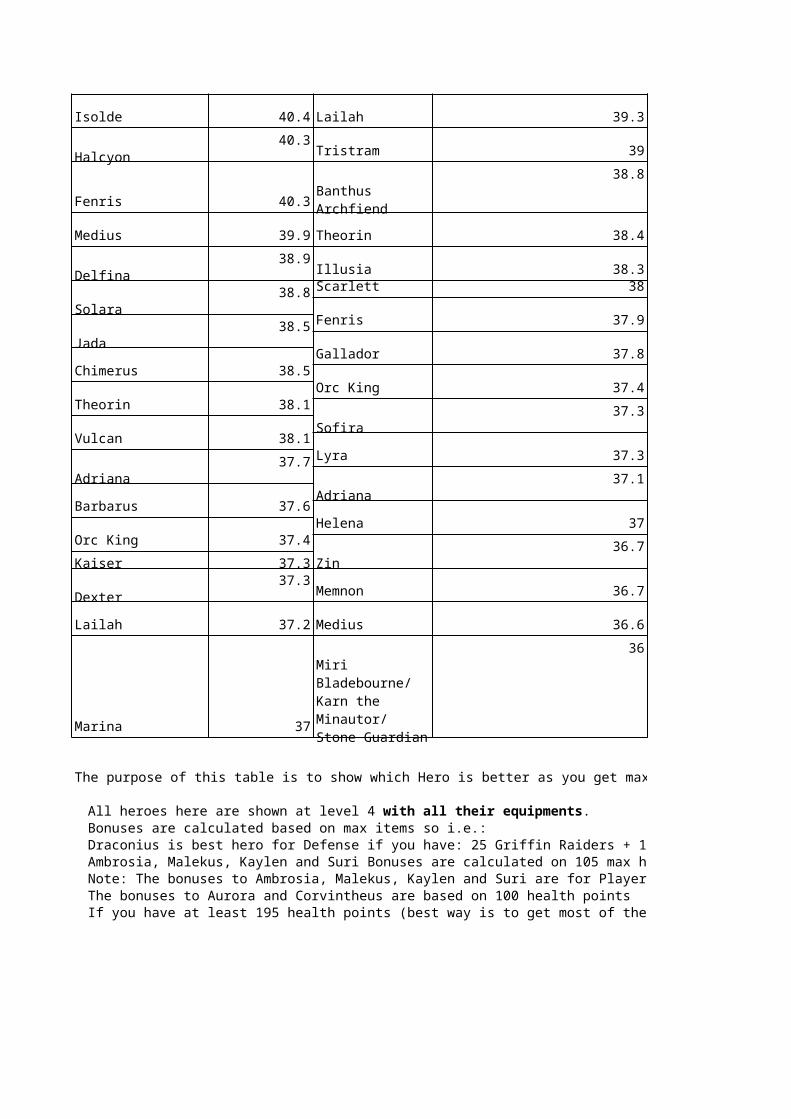
Sentinel 510+ Defense
"You have foiled my plans again!"
Mephistopheles
Guardian 725+ Defense
+6 Defense
Malekus
Edit
Energy ChallengeCome back once every 12 hours to test your energy against various perilous journeys!
Prove yourself worthy and rank yourself amongst the greatest explorers this age has ever known.
Area Rank Requires Reward
Scout 50+ Energy
+1 Energy
"You have successfully reached Terra!"
Town of Terra
Explorer 100+ Energy
+2 Energy
Forbidden Forest
Wanderer 150+ Energy
+2 Energy
Smouldering Pit
Traveler 200+ Energy
+2 Energy
Spire of Death
Adventurer 280+ Energy
+3 Energy
"HOW CAN A MERE MORTAL STAND AGAINST ME?"
Energy Feat
"You have successfully reached the Forbidden Forest!"
"You have successfully reached the Smouldering Pit!"
"You have successfully reached the Spire of Death!"
"You have successfully reached the Gates to the Undead!"

Adventurer 280+ EnergyGates to the Undead
Seeker 375+ Energy
+4 Energy
Deathrune Castle
Worldseeker 510+ Energy
+4 Energy
Path to Heaven
Ascendant 725+ Energy
+6 Energy
Ivory Palace
Edit
Stamina ChallengeCome back once every 12 hours to test your stamina to see if you can stand against the Beasts of Legend!
Prove yourself worthy and all beasts in this world will tremble at your name.
Monster Rank Requires Reward
Monster Tamer 25+ stamina
+1 Stamina
"You have defeated the mighty Colossus!"
Colossus of Terra
Survivor 50+ stamina
+1 Stamina
Ancient Red Dragon
Hunter 75+ stamina
+1 Stamina
"You have defeated the mighty Cronus!"
"You have successfully reached Deathrune Castle!"
"You have successfully reached the Path to Heaven!"
"You have successfully reached Ivory Palace!"
Stamina Feat
"You have defeated the mighty Ancient Red Dragon!"

Hunter 75+ stamina
Beastmaster 100+ stamina
+1 Stamina
"You have defeated the mighty Genesis!"
Slayer 140+ stamina
+1 Stamina
"You have defeated the mighty Ragnarok!"
Grand Slayer 185+ stamina
+2 Stamina
"You have defeated the mighty Bahamut!"
Force of Nature 255+ stamina
+2 Stamina
"You have defeated the mighty Gehenna!"
Lord of the Wild 360+ Stamina
+3 Stamina
"You have defeated the mighty Valhalla!"
Edit
Health ChallengeCome back once every 12 hours to test your health against those that would do you harm!
Prove yourself worthy and show everyone that your resilience is unmatched and forged of steel.
General Rank Requires Reward
Test Dummy 125+ Health
+1 Health
"It is a good start warrior!"
Cronus, the World Hydra
Genesis, the Earth Elemental
Ragnarok, the Ice Elemental
Bahamut, the Volcanic Dragon
Gehenna, the Fire Elemental
Valhalla, the Air Elemental
Health Feat

Test Dummy 125+ HealthGallador
Punching Bag 150+ Health
+2 Health
"KULL FAIL!"
Kull
Tough Guy 200+ Health
+2 Health
"Moooooooo!"
Karn the Minotaur
Hard As Nails 255+ Health
+2 Health
"The Shadowmoon bow down to you!"
Vorenus
Indomitable 302+ Health +3 HealthOrc King
Almighty 371+ Health +4 HealthCrom
Invincible 470+ Health +4 HealthDeianira
Immortal 500+ Health +6 HealthBarbarus
Edit
Army ChallengeCome back once every 12 hours to test the might of your army!
Army Feat

Prove yourself worthy and the path to power and riches are yours for the taking!
Test Rank Requires Reward
Promising Soldier 50+ Army
+1 Skill Point
"You have successfully pillaged a village!"
Pillage a Village
Respected Sergeant 100+ Army
+1 Skill Point
Defeat a Dungeon
Reliable Mercenary 200+ Army
+1 Skill Point
"Your army successfully won a skirmish!"
Win a Skirmish
Combat Captain 400+ Army
+1 Skill Point
"You have successfully sacked a castle!"
Sack a Castle
Feared Chief 600+ Army
+1 Skill Point
Win an Epic Battle
Storied Hero 800+ Army
+1 Skill Point
Destroy a Fortress
Legendary General 1000+ Army
+3 Skill Points
"You have successfully invaded hell!"
Invade Hell
The Chosen 1200+ Army
+5 Favor Points
Secure Heaven
"Your army successfully defeated a dungeon!"
"You have successfully won an epic battle!"
"You have successfully destroyed a fortress!"
"Your army successfully secured heaven!"

Come back once every 12 hours to test your stamina to see if you can stand against the Beasts of Legend!

Member Rules
1) Every member is expected to be a team player. Though all of us have friends, and some more than others, we would like to see guild members assist each other in such a way as a tight knit "family". Most in here have been so since guilds came about, just to give you an idea as to how we like to operate.
2) If you opt to avidly participate in guild battles, you will need to message me (John Coulter) as to what times work best for you. This allows for me to schedule times where all members have an opportunity to participate and earn guild points and coins.
3) If you are to take a break longer than five days, I would appreciate notice of this. For this is the reason; I do not wish to let you go from the guild due to inactivity.
4) I would like to see those monsters you summon offered within our guild page or our guild chat, so that we may maximize the amount of monster points allocated to our guild. More so, I would also like to see more posted for achievements for guild members to jump on. In short, we should offer to the guild as much as possible to see that our members are well taken care of and in turn our guild to reach the top every month.
5) Absolutely no summoning of guild monsters without an officers or the GM's permission. There are many reasons for this to include; that any monsters summoned do not fail and so we may best coordinate times for all to get components needed to perform alchemy for generals and items. No CTA's on guild monsters, unless word is given. For Vincents, leave one succubus alive to prolong the battle and for more to earn greater rewards.
6) Please build heavily on your attack, as this is the main component needed to be fierce competitors within guild battles (whether or not you participate). This is also a main component in doing damage on summoned monsters. Secondary is defense, as it is essential when being attacked. This is not just important for guild battles; but also for monsters and when attacked outside of guild battles; ie. duels, wars, and being invaded. This is not mandatory; but is asked of you.
7) If you have a conflict with another guild member or officer, please bring it to my attention right away, so I can diffuse it without losing valuable members. Please do not feel as if anything is unimportant, you are pointing fingers, or cannot resolve a situation. This is one of my forte's and would be the best recourse, before making any rash decision.
8) There is to be no arguing in open chat. Please bring it to me or resolve it amongst yourselves within a private setting. We do not wish to bring morale down with other guild members.
9) This is a democracy and all major guild decisions are to be made by a majority vote amongst officers. We do take into consideration the feelings and input of other guild members. We do this, as to avoid any type of dictatorship. Not one person may infringe upon the entirety.
10) This is just a broad outline of the rules within this guild. They are subject to change for the betterment of all. I would be more than happy to hear what any member may have to say to either add to or alter these rules. Let's maintain a happy healthy guild. :D
New to the game or our guid?
Sue CaldwellI think battling monsters is one of the coolest features of Castle Age. The whole coop teamwork thing is different from a lot of computer and fb games. I noticed fairly early in my Castle Age career that some of these monsters were pretty tough to beat... and quite a few of them failed. I wish that someone would have sat me down and told me then what I am about to tell you now. Here goes.It takes teamwork to defeat a monster. The monsters in Castle Age are designed to be challenging but not overly so if everyone pulls their weight. As with every team, when someone doesn't do his or her fair share, everyone else has to work harder. This inevitably leads to bad feelings, hostilities and increases the likelihood that the monster will fail. Some folks invest days working over a monster along with a ton of energy and stamina... only to get nothing for their efforts in the end. That just plain sucks. Everyone therefore has a responsibility to do as much damage as they are able, put out Calls to Arms and, in the case of many monsters, spend energy.Do as Much Damage as You Can
This starts with taking on the appropriate monster for your level and not spreading yourself over too many monsters. Use the guidelines under the "summon monster" tab in the game if you are not sure. If you attack a monster you are taking up one of a limited number of spots. If you can or will not invest a goodly portion of your stamina (and in some cases energy) then you are taking that spot away from someone who can and will. This is known as "tagging" in Castle Age (because some people will "tag" a monster with one attack and come back later when they have more stamina). If you don't have the stamina NOW then don't commit to this monster NOW. Without exception everybody in Castle Age hates taggers."There are others here way tougher than me who can kill this monster." "Yeah, but I am also working on 3 other monsters." "It looks like the monster might fail so I will lay back and see how it is going before I commit my stamina." All it takes is a small percentage of folks with these attitudes to ensure a failure. 4 or 5 people like this on the bottom of a small list of attackers discourages others from joining in or doing their share if they are already in. YOU are committed to this monster once you make your first attack. YOU must do what YOU can to help kill the monster. Don't leave it to others to do YOUR job.Let me give you an example. Azriel probably has one of the highest failure rates. Why? She has around 600 million points and only 135 spots. 45 of those spots are for big hitters level 150 or above. Including launching some the weapons, and assuming some of the bottom tiers don't get filled, that works out to an average, give or take, of about 6 million damage per player. Yet time and time again players take up a spot and do 1, 2 or 3 million damage (and sometimes even less) thinking they have done their share. People end up having to spend favour points to bail out everybody else or worse yet some high level player who could have contributed more can't get in because YOU, who have taken up one of their potential spots, are happy with your 2 million damage... and the monster fails.Call to Arms (CTA)

In addition to doing as much damage as you can, you should also put out a CTA regularly throughout your battle with the monster. First, it lets others know about the monster and invites them in to fight, filling up spaces. More people fighting = better chance of success and less work for everyone else. A good rule of thumb is to CTA once about every 6 or 8 hours or so.Second, putting our a Call to Arms allows people seeing it on your page, the fb feed or the CA and guild monster feeds to help summon a special weapon that will inflict a massive amount of damage on your monster. It costs 1 stamina to respond to a CTA and gets you 1-3 experience. When you do the math, CTAs are a very economical way of inflicting damage on a creature (as well as collecting xp)... and reduces the amount of stamina everyone fighting the monster needs to spend. You can click on your own CTA once per weapon as well further reducing the amount of time it takes to summon the weapon.Spend Energy
Many monsters require the use of energy as well as stamina. In some cases it is to reduce a forcefield, fortify, or a use special class skill such as strengthening, healing, crippling or deflecting. As is sometimes the case with doing damage, some players are stingy with their energy. Maybe they are saving it up for questing or maybe they think because there are so many folks participating in the battle someone else will step up. Don't be one of those players. You get experience for using energy as well as stamina... experience which increases loot when the monster gets deaded.With some monsters such as Bahamut, Gehenna and Azriel, when the energy bar is under 80%, less damage is inflicted on attacks. The lower the bar the lower the damage for folks spending their hard earned stamina, in some cases up to 1/2 or 1/3 the damage they could have done if the bar were full. Personally I won't even attack if the bar isn't at least 3/4 full. Proper etiquette is to leave the bar as full if not fuller than you found it. Don't be an energy vampire, don't cheap out.Good players do this stuff automatically. Unknowledgeable or selfish players don't. Which category do you fall into?
Sheldon Mojelski That's exactly why I wrote it. Spread the word. Thanks Stanley. :)

1) Every member is expected to be a team player. Though all of us have friends, and some more than others, we would like to see guild members assist each other in such a way as a tight knit "family". Most in here have been so since guilds came about, just to give you an idea as to how we like to operate.
2) If you opt to avidly participate in guild battles, you will need to message me (John Coulter) as to what times work best for you. This allows for me to schedule times where all members have an opportunity to participate and earn guild points and coins.
3) If you are to take a break longer than five days, I would appreciate notice of this. For this is the reason; I do not wish to let you go from the guild due to inactivity.
4) I would like to see those monsters you summon offered within our guild page or our guild chat, so that we may maximize the amount of monster points allocated to our guild. More so, I would also like to see more posted for achievements for guild members to jump on. In short, we should offer to the guild as much as possible to see that our members are well taken care of and in turn our guild to reach the top every month.
5) Absolutely no summoning of guild monsters without an officers or the GM's permission. There are many reasons for this to include; that any monsters summoned do not fail and so we may best coordinate times for all to get components needed to perform alchemy for generals and items. No CTA's on guild monsters, unless word is given. For Vincents, leave one succubus alive to prolong the battle and for more to earn greater rewards.
6) Please build heavily on your attack, as this is the main component needed to be fierce competitors within guild battles (whether or not you participate). This is also a main component in doing damage on summoned monsters. Secondary is defense, as it is essential when being attacked. This is not just important for guild battles; but also for monsters and when attacked outside of guild battles; ie. duels, wars, and being invaded. This is not mandatory; but is asked of you.
7) If you have a conflict with another guild member or officer, please bring it to my attention right away, so I can diffuse it without losing valuable members. Please do not feel as if anything is unimportant, you are pointing fingers, or cannot resolve a situation. This is one of my forte's and would be the best recourse, before making any rash decision.
8) There is to be no arguing in open chat. Please bring it to me or resolve it amongst yourselves within a private setting. We do not wish to bring morale down with other guild members.
9) This is a democracy and all major guild decisions are to be made by a majority vote amongst officers. We do take into consideration the feelings and input of other guild members. We do this, as to avoid any type of dictatorship. Not one person may infringe upon the entirety.
10) This is just a broad outline of the rules within this guild. They are subject to change for the betterment of all. I would be more than happy to hear what any member may have to say to either add to or alter these rules. Let's maintain a happy healthy guild. :D
I think battling monsters is one of the coolest features of Castle Age. The whole coop teamwork thing is different from a lot of computer and fb games. I noticed fairly early in my Castle Age career that some of these monsters were pretty tough to beat... and quite a few of them failed. I wish that someone would have sat me down and told me then what I am about to tell you now. Here goes.It takes teamwork to defeat a monster. The monsters in Castle Age are designed to be challenging but not overly so if everyone pulls their weight. As with every team, when someone doesn't do his or her fair share, everyone else has to work harder. This inevitably leads to bad feelings, hostilities and increases the likelihood that the monster will fail. Some folks invest days working over a monster along with a ton of energy and stamina... only to get nothing for their efforts in the end. That just plain sucks. Everyone therefore has a responsibility to do as much damage as they are able, put out Calls to Arms and, in the case of many monsters, spend energy.
This starts with taking on the appropriate monster for your level and not spreading yourself over too many monsters. Use the guidelines under the "summon monster" tab in the game if you are not sure. If you attack a monster you are taking up one of a limited number of spots. If you can or will not invest a goodly portion of your stamina (and in some cases energy) then you are taking that spot away from someone who can and will. This is known as "tagging" in Castle Age (because some people will "tag" a monster with one attack and come back later when they have more stamina). If you don't have the stamina NOW then don't commit to this monster NOW. Without exception everybody in Castle Age hates taggers."There are others here way tougher than me who can kill this monster." "Yeah, but I am also working on 3 other monsters." "It looks like the monster might fail so I will lay back and see how it is going before I commit my stamina." All it takes is a small percentage of folks with these attitudes to ensure a failure. 4 or 5 people like this on the bottom of a small list of attackers discourages others from joining in or doing their share if they are already in. YOU are committed to this monster once you make your first attack. YOU must do what YOU can to help kill the monster. Don't leave it to others to do YOUR job.Let me give you an example. Azriel probably has one of the highest failure rates. Why? She has around 600 million points and only 135 spots. 45 of those spots are for big hitters level 150 or above. Including launching some the weapons, and assuming some of the bottom tiers don't get filled, that works out to an average, give or take, of about 6 million damage per player. Yet time and time again players take up a spot and do 1, 2 or 3 million damage (and sometimes even less) thinking they have done their share. People end up having to spend favour points to bail out everybody else or worse yet some high level player who could have contributed more can't get in because YOU, who have taken up one of their potential spots, are happy with your 2 million damage... and the monster fails.

In addition to doing as much damage as you can, you should also put out a CTA regularly throughout your battle with the monster. First, it lets others know about the monster and invites them in to fight, filling up spaces. More people fighting = better chance of success and less work for everyone else. A good rule of thumb is to CTA once about every 6 or 8 hours or so.Second, putting our a Call to Arms allows people seeing it on your page, the fb feed or the CA and guild monster feeds to help summon a special weapon that will inflict a massive amount of damage on your monster. It costs 1 stamina to respond to a CTA and gets you 1-3 experience. When you do the math, CTAs are a very economical way of inflicting damage on a creature (as well as collecting xp)... and reduces the amount of stamina everyone fighting the monster needs to spend. You can click on your own CTA once per weapon as well further reducing the amount of time it takes to summon the weapon.
Many monsters require the use of energy as well as stamina. In some cases it is to reduce a forcefield, fortify, or a use special class skill such as strengthening, healing, crippling or deflecting. As is sometimes the case with doing damage, some players are stingy with their energy. Maybe they are saving it up for questing or maybe they think because there are so many folks participating in the battle someone else will step up. Don't be one of those players. You get experience for using energy as well as stamina... experience which increases loot when the monster gets deaded.With some monsters such as Bahamut, Gehenna and Azriel, when the energy bar is under 80%, less damage is inflicted on attacks. The lower the bar the lower the damage for folks spending their hard earned stamina, in some cases up to 1/2 or 1/3 the damage they could have done if the bar were full. Personally I won't even attack if the bar isn't at least 3/4 full. Proper etiquette is to leave the bar as full if not fuller than you found it. Don't be an energy vampire, don't cheap out.Good players do this stuff automatically. Unknowledgeable or selfish players don't. Which category do you fall into?
Sheldon Mojelski That's exactly why I wrote it. Spread the word. Thanks Stanley. :)

1) Every member is expected to be a team player. Though all of us have friends, and some more than others, we would like to see guild members assist each other in such a way as a tight knit "family". Most in here have been so since guilds came about, just to give you an idea as to how we like to operate.
2) If you opt to avidly participate in guild battles, you will need to message me (John Coulter) as to what times work best for you. This allows for me to schedule times where all members have an opportunity to participate and earn guild points and coins.
3) If you are to take a break longer than five days, I would appreciate notice of this. For this is the reason; I do not wish to let you go from the guild due to inactivity.
4) I would like to see those monsters you summon offered within our guild page or our guild chat, so that we may maximize the amount of monster points allocated to our guild. More so, I would also like to see more posted for achievements for guild members to jump on. In short, we should offer to the guild as much as possible to see that our members are well taken care of and in turn our guild to reach the top every month.
5) Absolutely no summoning of guild monsters without an officers or the GM's permission. There are many reasons for this to include; that any monsters summoned do not fail and so we may best coordinate times for all to get components needed to perform alchemy for generals and items. No CTA's on guild monsters, unless word is given. For Vincents, leave one succubus alive to prolong the battle and for more to earn greater rewards.
6) Please build heavily on your attack, as this is the main component needed to be fierce competitors within guild battles (whether or not you participate). This is also a main component in doing damage on summoned monsters. Secondary is defense, as it is essential when being attacked. This is not just important for guild battles; but also for monsters and when attacked outside of guild battles; ie. duels, wars, and being invaded. This is not mandatory; but is asked of you.
7) If you have a conflict with another guild member or officer, please bring it to my attention right away, so I can diffuse it without losing valuable members. Please do not feel as if anything is unimportant, you are pointing fingers, or cannot resolve a situation. This is one of my forte's and would be the best recourse, before making any rash decision.
8) There is to be no arguing in open chat. Please bring it to me or resolve it amongst yourselves within a private setting. We do not wish to bring morale down with other guild members.
9) This is a democracy and all major guild decisions are to be made by a majority vote amongst officers. We do take into consideration the feelings and input of other guild members. We do this, as to avoid any type of dictatorship. Not one person may infringe upon the entirety.
10) This is just a broad outline of the rules within this guild. They are subject to change for the betterment of all. I would be more than happy to hear what any member may have to say to either add to or alter these rules. Let's maintain a happy healthy guild. :D
I think battling monsters is one of the coolest features of Castle Age. The whole coop teamwork thing is different from a lot of computer and fb games. I noticed fairly early in my Castle Age career that some of these monsters were pretty tough to beat... and quite a few of them failed. I wish that someone would have sat me down and told me then what I am about to tell you now. Here goes.It takes teamwork to defeat a monster. The monsters in Castle Age are designed to be challenging but not overly so if everyone pulls their weight. As with every team, when someone doesn't do his or her fair share, everyone else has to work harder. This inevitably leads to bad feelings, hostilities and increases the likelihood that the monster will fail. Some folks invest days working over a monster along with a ton of energy and stamina... only to get nothing for their efforts in the end. That just plain sucks. Everyone therefore has a responsibility to do as much damage as they are able, put out Calls to Arms and, in the case of many monsters, spend energy.
This starts with taking on the appropriate monster for your level and not spreading yourself over too many monsters. Use the guidelines under the "summon monster" tab in the game if you are not sure. If you attack a monster you are taking up one of a limited number of spots. If you can or will not invest a goodly portion of your stamina (and in some cases energy) then you are taking that spot away from someone who can and will. This is known as "tagging" in Castle Age (because some people will "tag" a monster with one attack and come back later when they have more stamina). If you don't have the stamina NOW then don't commit to this monster NOW. Without exception everybody in Castle Age hates taggers."There are others here way tougher than me who can kill this monster." "Yeah, but I am also working on 3 other monsters." "It looks like the monster might fail so I will lay back and see how it is going before I commit my stamina." All it takes is a small percentage of folks with these attitudes to ensure a failure. 4 or 5 people like this on the bottom of a small list of attackers discourages others from joining in or doing their share if they are already in. YOU are committed to this monster once you make your first attack. YOU must do what YOU can to help kill the monster. Don't leave it to others to do YOUR job.Let me give you an example. Azriel probably has one of the highest failure rates. Why? She has around 600 million points and only 135 spots. 45 of those spots are for big hitters level 150 or above. Including launching some the weapons, and assuming some of the bottom tiers don't get filled, that works out to an average, give or take, of about 6 million damage per player. Yet time and time again players take up a spot and do 1, 2 or 3 million damage (and sometimes even less) thinking they have done their share. People end up having to spend favour points to bail out everybody else or worse yet some high level player who could have contributed more can't get in because YOU, who have taken up one of their potential spots, are happy with your 2 million damage... and the monster fails.
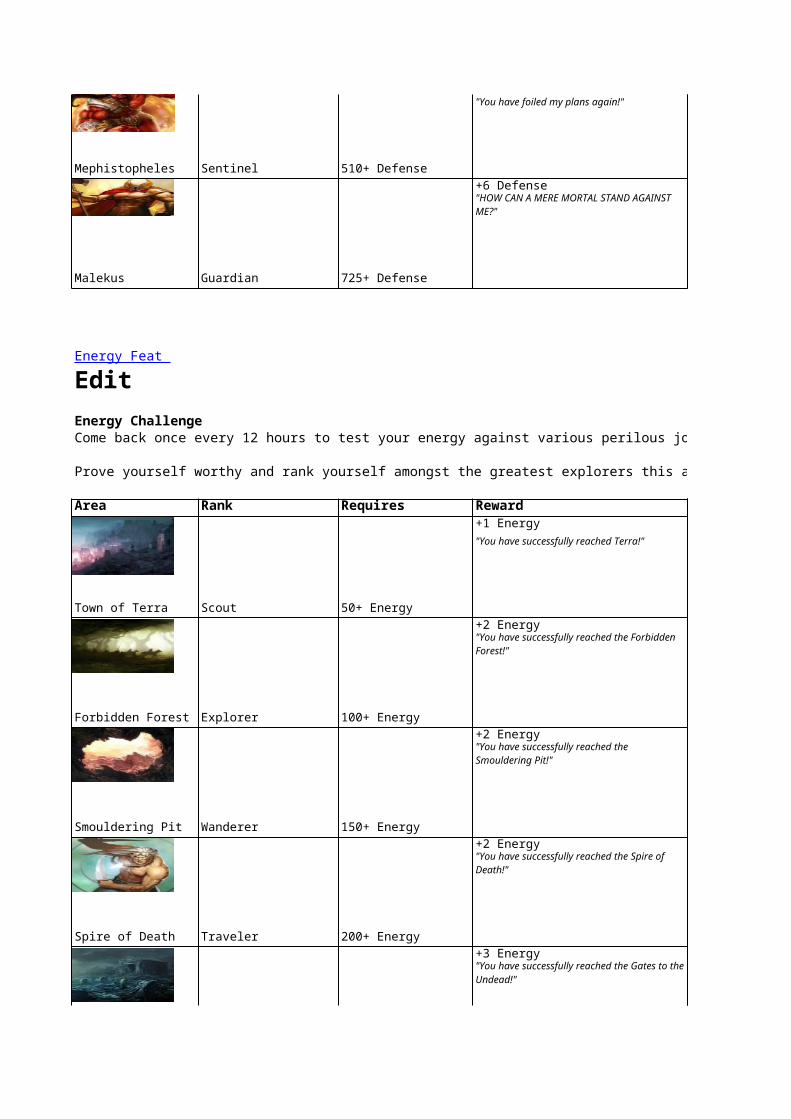
In addition to doing as much damage as you can, you should also put out a CTA regularly throughout your battle with the monster. First, it lets others know about the monster and invites them in to fight, filling up spaces. More people fighting = better chance of success and less work for everyone else. A good rule of thumb is to CTA once about every 6 or 8 hours or so.Second, putting our a Call to Arms allows people seeing it on your page, the fb feed or the CA and guild monster feeds to help summon a special weapon that will inflict a massive amount of damage on your monster. It costs 1 stamina to respond to a CTA and gets you 1-3 experience. When you do the math, CTAs are a very economical way of inflicting damage on a creature (as well as collecting xp)... and reduces the amount of stamina everyone fighting the monster needs to spend. You can click on your own CTA once per weapon as well further reducing the amount of time it takes to summon the weapon.
Many monsters require the use of energy as well as stamina. In some cases it is to reduce a forcefield, fortify, or a use special class skill such as strengthening, healing, crippling or deflecting. As is sometimes the case with doing damage, some players are stingy with their energy. Maybe they are saving it up for questing or maybe they think because there are so many folks participating in the battle someone else will step up. Don't be one of those players. You get experience for using energy as well as stamina... experience which increases loot when the monster gets deaded.With some monsters such as Bahamut, Gehenna and Azriel, when the energy bar is under 80%, less damage is inflicted on attacks. The lower the bar the lower the damage for folks spending their hard earned stamina, in some cases up to 1/2 or 1/3 the damage they could have done if the bar were full. Personally I won't even attack if the bar isn't at least 3/4 full. Proper etiquette is to leave the bar as full if not fuller than you found it. Don't be an energy vampire, don't cheap out.

1) Every member is expected to be a team player. Though all of us have friends, and some more than others, we would like to see guild members assist each other in such a way as a tight knit "family". Most in here have been so since guilds came about, just to give you an idea as to how we like to operate.
2) If you opt to avidly participate in guild battles, you will need to message me (John Coulter) as to what times work best for you. This allows for me to schedule times where all members have an opportunity to participate and earn guild points and coins.
4) I would like to see those monsters you summon offered within our guild page or our guild chat, so that we may maximize the amount of monster points allocated to our guild. More so, I would also like to see more posted for achievements for guild members to jump on. In short, we should offer to the guild as much as possible to see that our members are well taken care of and in turn our guild to reach the top every month.
5) Absolutely no summoning of guild monsters without an officers or the GM's permission. There are many reasons for this to include; that any monsters summoned do not fail and so we may best coordinate times for all to get components needed to perform alchemy for generals and items. No CTA's on guild monsters, unless word is given. For Vincents, leave one succubus alive to prolong the battle and for more to earn greater rewards.
6) Please build heavily on your attack, as this is the main component needed to be fierce competitors within guild battles (whether or not you participate). This is also a main component in doing damage on summoned monsters. Secondary is defense, as it is essential when being attacked. This is not just important for guild battles; but also for monsters and when attacked outside of guild battles; ie. duels, wars, and being invaded. This is not mandatory; but is asked of you.
7) If you have a conflict with another guild member or officer, please bring it to my attention right away, so I can diffuse it without losing valuable members. Please do not feel as if anything is unimportant, you are pointing fingers, or cannot resolve a situation. This is one of my forte's and would be the best recourse, before making any rash decision.
9) This is a democracy and all major guild decisions are to be made by a majority vote amongst officers. We do take into consideration the feelings and input of other guild members. We do this, as to avoid any type of dictatorship. Not one person may infringe upon the entirety.
10) This is just a broad outline of the rules within this guild. They are subject to change for the betterment of all. I would be more than happy to hear what any member may have to say to either add to or alter these rules. Let's maintain a happy healthy guild. :D
I think battling monsters is one of the coolest features of Castle Age. The whole coop teamwork thing is different from a lot of computer and fb games. I noticed fairly early in my Castle Age career that some of these monsters were pretty tough to beat... and quite a few of them failed. I wish that someone would have sat me down and told me then what I am about to tell you now. Here goes.It takes teamwork to defeat a monster. The monsters in Castle Age are designed to be challenging but not overly so if everyone pulls their weight. As with every team, when someone doesn't do his or her fair share, everyone else has to work harder. This inevitably leads to bad feelings, hostilities and increases the likelihood that the monster will fail. Some folks invest days working over a monster along with a ton of energy and stamina... only to get nothing for their efforts in the end. That just plain sucks. Everyone therefore has a responsibility to do as much damage as they are able, put out Calls to Arms and, in the case of many monsters, spend energy.
This starts with taking on the appropriate monster for your level and not spreading yourself over too many monsters. Use the guidelines under the "summon monster" tab in the game if you are not sure. If you attack a monster you are taking up one of a limited number of spots. If you can or will not invest a goodly portion of your stamina (and in some cases energy) then you are taking that spot away from someone who can and will. This is known as "tagging" in Castle Age (because some people will "tag" a monster with one attack and come back later when they have more stamina). If you don't have the stamina NOW then don't commit to this monster NOW. Without exception everybody in Castle Age hates taggers."There are others here way tougher than me who can kill this monster." "Yeah, but I am also working on 3 other monsters." "It looks like the monster might fail so I will lay back and see how it is going before I commit my stamina." All it takes is a small percentage of folks with these attitudes to ensure a failure. 4 or 5 people like this on the bottom of a small list of attackers discourages others from joining in or doing their share if they are already in. YOU are committed to this monster once you make your first attack. YOU must do what YOU can to help kill the monster. Don't leave it to others to do YOUR job.Let me give you an example. Azriel probably has one of the highest failure rates. Why? She has around 600 million points and only 135 spots. 45 of those spots are for big hitters level 150 or above. Including launching some the weapons, and assuming some of the bottom tiers don't get filled, that works out to an average, give or take, of about 6 million damage per player. Yet time and time again players take up a spot and do 1, 2 or 3 million damage (and sometimes even less) thinking they have done their share. People end up having to spend favour points to bail out everybody else or worse yet some high level player who could have contributed more can't get in because YOU, who have taken up one of their potential spots, are happy with your 2 million damage... and the monster fails.
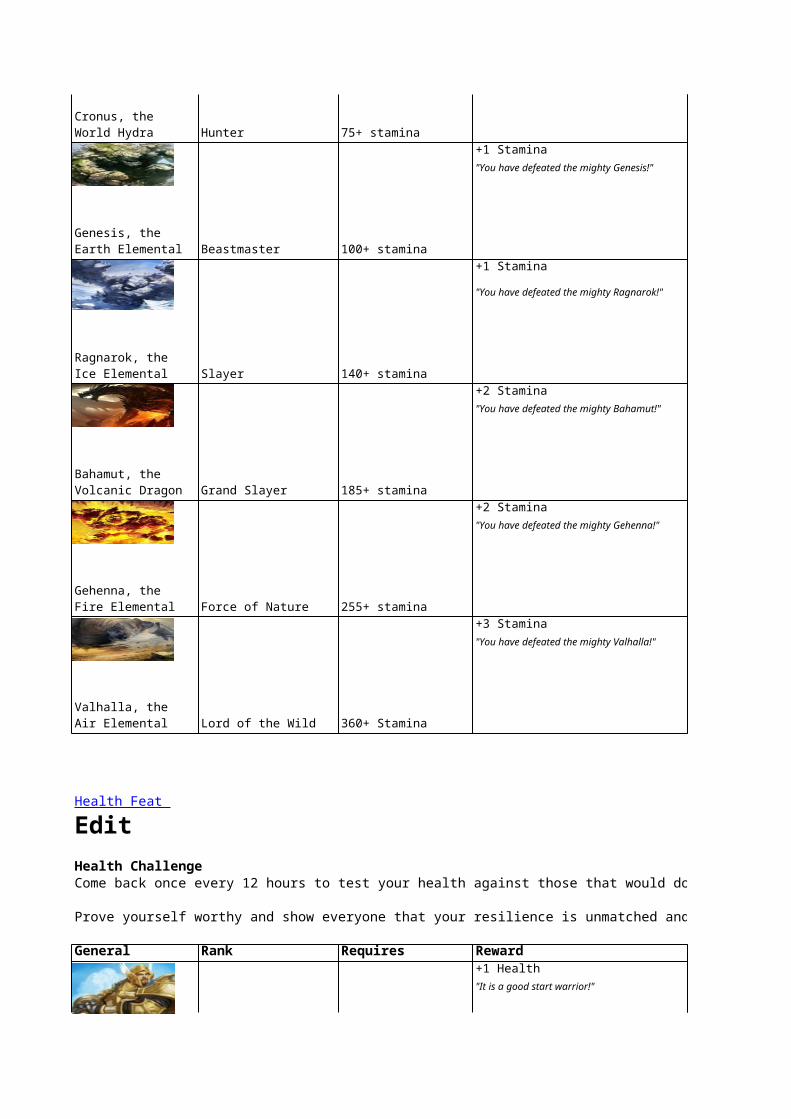
In addition to doing as much damage as you can, you should also put out a CTA regularly throughout your battle with the monster. First, it lets others know about the monster and invites them in to fight, filling up spaces. More people fighting = better chance of success and less work for everyone else. A good rule of thumb is to CTA once about every 6 or 8 hours or so.Second, putting our a Call to Arms allows people seeing it on your page, the fb feed or the CA and guild monster feeds to help summon a special weapon that will inflict a massive amount of damage on your monster. It costs 1 stamina to respond to a CTA and gets you 1-3 experience. When you do the math, CTAs are a very economical way of inflicting damage on a creature (as well as collecting xp)... and reduces the amount of stamina everyone fighting the monster needs to spend. You can click on your own CTA once per weapon as well further reducing the amount of time it takes to summon the weapon.
Many monsters require the use of energy as well as stamina. In some cases it is to reduce a forcefield, fortify, or a use special class skill such as strengthening, healing, crippling or deflecting. As is sometimes the case with doing damage, some players are stingy with their energy. Maybe they are saving it up for questing or maybe they think because there are so many folks participating in the battle someone else will step up. Don't be one of those players. You get experience for using energy as well as stamina... experience which increases loot when the monster gets deaded.With some monsters such as Bahamut, Gehenna and Azriel, when the energy bar is under 80%, less damage is inflicted on attacks. The lower the bar the lower the damage for folks spending their hard earned stamina, in some cases up to 1/2 or 1/3 the damage they could have done if the bar were full. Personally I won't even attack if the bar isn't at least 3/4 full. Proper etiquette is to leave the bar as full if not fuller than you found it. Don't be an energy vampire, don't cheap out.

4) I would like to see those monsters you summon offered within our guild page or our guild chat, so that we may maximize the amount of monster points allocated to our guild. More so, I would also like to see more posted for achievements for guild members to jump on. In short, we should offer to the guild as much as possible to see that our members are well taken care of and in turn our guild to reach the top every month.
5) Absolutely no summoning of guild monsters without an officers or the GM's permission. There are many reasons for this to include; that any monsters summoned do not fail and so we may best coordinate times for all to get components needed to perform alchemy for generals and items. No CTA's on guild monsters, unless word is given. For Vincents, leave one succubus alive to prolong the battle and for more to earn greater rewards.
6) Please build heavily on your attack, as this is the main component needed to be fierce competitors within guild battles (whether or not you participate). This is also a main component in doing damage on summoned monsters. Secondary is defense, as it is essential when being attacked. This is not just important for guild battles; but also for monsters and when attacked outside of guild battles; ie. duels, wars, and being invaded. This is not mandatory; but is asked of you.
7) If you have a conflict with another guild member or officer, please bring it to my attention right away, so I can diffuse it without losing valuable members. Please do not feel as if anything is unimportant, you are pointing fingers, or cannot resolve a situation. This is one of my forte's and would be the best recourse, before making any rash decision.
I think battling monsters is one of the coolest features of Castle Age. The whole coop teamwork thing is different from a lot of computer and fb games. I noticed fairly early in my Castle Age career that some of these monsters were pretty tough to beat... and quite a few of them failed. I wish that someone would have sat me down and told me then what I am about to tell you now. Here goes.It takes teamwork to defeat a monster. The monsters in Castle Age are designed to be challenging but not overly so if everyone pulls their weight. As with every team, when someone doesn't do his or her fair share, everyone else has to work harder. This inevitably leads to bad feelings, hostilities and increases the likelihood that the monster will fail. Some folks invest days working over a monster along with a ton of energy and stamina... only to get nothing for their efforts in the end. That just plain sucks. Everyone therefore has a responsibility to do as much damage as they are able, put out Calls to Arms and, in the case of many monsters, spend energy.
This starts with taking on the appropriate monster for your level and not spreading yourself over too many monsters. Use the guidelines under the "summon monster" tab in the game if you are not sure. If you attack a monster you are taking up one of a limited number of spots. If you can or will not invest a goodly portion of your stamina (and in some cases energy) then you are taking that spot away from someone who can and will. This is known as "tagging" in Castle Age (because some people will "tag" a monster with one attack and come back later when they have more stamina). If you don't have the stamina NOW then don't commit to this monster NOW. Without exception everybody in Castle Age hates taggers."There are others here way tougher than me who can kill this monster." "Yeah, but I am also working on 3 other monsters." "It looks like the monster might fail so I will lay back and see how it is going before I commit my stamina." All it takes is a small percentage of folks with these attitudes to ensure a failure. 4 or 5 people like this on the bottom of a small list of attackers discourages others from joining in or doing their share if they are already in. YOU are committed to this monster once you make your first attack. YOU must do what YOU can to help kill the monster. Don't leave it to others to do YOUR job.Let me give you an example. Azriel probably has one of the highest failure rates. Why? She has around 600 million points and only 135 spots. 45 of those spots are for big hitters level 150 or above. Including launching some the weapons, and assuming some of the bottom tiers don't get filled, that works out to an average, give or take, of about 6 million damage per player. Yet time and time again players take up a spot and do 1, 2 or 3 million damage (and sometimes even less) thinking they have done their share. People end up having to spend favour points to bail out everybody else or worse yet some high level player who could have contributed more can't get in because YOU, who have taken up one of their potential spots, are happy with your 2 million damage... and the monster fails.

In addition to doing as much damage as you can, you should also put out a CTA regularly throughout your battle with the monster. First, it lets others know about the monster and invites them in to fight, filling up spaces. More people fighting = better chance of success and less work for everyone else. A good rule of thumb is to CTA once about every 6 or 8 hours or so.Second, putting our a Call to Arms allows people seeing it on your page, the fb feed or the CA and guild monster feeds to help summon a special weapon that will inflict a massive amount of damage on your monster. It costs 1 stamina to respond to a CTA and gets you 1-3 experience. When you do the math, CTAs are a very economical way of inflicting damage on a creature (as well as collecting xp)... and reduces the amount of stamina everyone fighting the monster needs to spend. You can click on your own CTA once per weapon as well further reducing the amount of time it takes to summon the weapon.
Many monsters require the use of energy as well as stamina. In some cases it is to reduce a forcefield, fortify, or a use special class skill such as strengthening, healing, crippling or deflecting. As is sometimes the case with doing damage, some players are stingy with their energy. Maybe they are saving it up for questing or maybe they think because there are so many folks participating in the battle someone else will step up. Don't be one of those players. You get experience for using energy as well as stamina... experience which increases loot when the monster gets deaded.With some monsters such as Bahamut, Gehenna and Azriel, when the energy bar is under 80%, less damage is inflicted on attacks. The lower the bar the lower the damage for folks spending their hard earned stamina, in some cases up to 1/2 or 1/3 the damage they could have done if the bar were full. Personally I won't even attack if the bar isn't at least 3/4 full. Proper etiquette is to leave the bar as full if not fuller than you found it. Don't be an energy vampire, don't cheap out.

4) I would like to see those monsters you summon offered within our guild page or our guild chat, so that we may maximize the amount of monster points allocated to our guild. More so, I would also like to see more posted for achievements for guild members to jump on. In short, we should offer to the guild as much as possible to see that our members are well taken care of and in turn our guild to reach the top every month.
5) Absolutely no summoning of guild monsters without an officers or the GM's permission. There are many reasons for this to include; that any monsters summoned do not fail and so we may best coordinate times for all to get components needed to perform alchemy for generals and items. No CTA's on guild monsters, unless word is given. For Vincents, leave one succubus alive to prolong the battle and for more to earn greater rewards.
6) Please build heavily on your attack, as this is the main component needed to be fierce competitors within guild battles (whether or not you participate). This is also a main component in doing damage on summoned monsters. Secondary is defense, as it is essential when being attacked. This is not just important for guild battles; but also for monsters and when attacked outside of guild battles; ie. duels, wars, and being invaded. This is not mandatory; but is asked of you.
I think battling monsters is one of the coolest features of Castle Age. The whole coop teamwork thing is different from a lot of computer and fb games. I noticed fairly early in my Castle Age career that some of these monsters were pretty tough to beat... and quite a few of them failed. I wish that someone would have sat me down and told me then what I am about to tell you now. Here goes.It takes teamwork to defeat a monster. The monsters in Castle Age are designed to be challenging but not overly so if everyone pulls their weight. As with every team, when someone doesn't do his or her fair share, everyone else has to work harder. This inevitably leads to bad feelings, hostilities and increases the likelihood that the monster will fail. Some folks invest days working over a monster along with a ton of energy and stamina... only to get nothing for their efforts in the end. That just plain sucks. Everyone therefore has a responsibility to do as much damage as they are able, put out Calls to Arms and, in the case of many monsters, spend energy.
This starts with taking on the appropriate monster for your level and not spreading yourself over too many monsters. Use the guidelines under the "summon monster" tab in the game if you are not sure. If you attack a monster you are taking up one of a limited number of spots. If you can or will not invest a goodly portion of your stamina (and in some cases energy) then you are taking that spot away from someone who can and will. This is known as "tagging" in Castle Age (because some people will "tag" a monster with one attack and come back later when they have more stamina). If you don't have the stamina NOW then don't commit to this monster NOW. Without exception everybody in Castle Age hates taggers."There are others here way tougher than me who can kill this monster." "Yeah, but I am also working on 3 other monsters." "It looks like the monster might fail so I will lay back and see how it is going before I commit my stamina." All it takes is a small percentage of folks with these attitudes to ensure a failure. 4 or 5 people like this on the bottom of a small list of attackers discourages others from joining in or doing their share if they are already in. YOU are committed to this monster once you make your first attack. YOU must do what YOU can to help kill the monster. Don't leave it to others to do YOUR job.Let me give you an example. Azriel probably has one of the highest failure rates. Why? She has around 600 million points and only 135 spots. 45 of those spots are for big hitters level 150 or above. Including launching some the weapons, and assuming some of the bottom tiers don't get filled, that works out to an average, give or take, of about 6 million damage per player. Yet time and time again players take up a spot and do 1, 2 or 3 million damage (and sometimes even less) thinking they have done their share. People end up having to spend favour points to bail out everybody else or worse yet some high level player who could have contributed more can't get in because YOU, who have taken up one of their potential spots, are happy with your 2 million damage... and the monster fails.

Second, putting our a Call to Arms allows people seeing it on your page, the fb feed or the CA and guild monster feeds to help summon a special weapon that will inflict a massive amount of damage on your monster. It costs 1 stamina to respond to a CTA and gets you 1-3 experience. When you do the math, CTAs are a very economical way of inflicting damage on a creature (as well as collecting xp)... and reduces the amount of stamina everyone fighting the monster needs to spend. You can click on your own CTA once per weapon as well further reducing the amount of time it takes to summon the weapon.
Many monsters require the use of energy as well as stamina. In some cases it is to reduce a forcefield, fortify, or a use special class skill such as strengthening, healing, crippling or deflecting. As is sometimes the case with doing damage, some players are stingy with their energy. Maybe they are saving it up for questing or maybe they think because there are so many folks participating in the battle someone else will step up. Don't be one of those players. You get experience for using energy as well as stamina... experience which increases loot when the monster gets deaded.With some monsters such as Bahamut, Gehenna and Azriel, when the energy bar is under 80%, less damage is inflicted on attacks. The lower the bar the lower the damage for folks spending their hard earned stamina, in some cases up to 1/2 or 1/3 the damage they could have done if the bar were full. Personally I won't even attack if the bar isn't at least 3/4 full. Proper etiquette is to leave the bar as full if not fuller than you found it. Don't be an energy vampire, don't cheap out.

6) Please build heavily on your attack, as this is the main component needed to be fierce competitors within guild battles (whether or not you participate). This is also a main component in doing damage on summoned monsters. Secondary is defense, as it is essential when being attacked. This is not just important for guild battles; but also for monsters and when attacked outside of guild battles; ie. duels, wars, and being invaded. This is not mandatory; but is asked of you.
It takes teamwork to defeat a monster. The monsters in Castle Age are designed to be challenging but not overly so if everyone pulls their weight. As with every team, when someone doesn't do his or her fair share, everyone else has to work harder. This inevitably leads to bad feelings, hostilities and increases the likelihood that the monster will fail. Some folks invest days working over a monster along with a ton of energy and stamina... only to get nothing for their efforts in the end. That just plain sucks. Everyone therefore has a responsibility to do as much damage as they are able, put out Calls to Arms and, in the case of many monsters, spend energy.
This starts with taking on the appropriate monster for your level and not spreading yourself over too many monsters. Use the guidelines under the "summon monster" tab in the game if you are not sure. If you attack a monster you are taking up one of a limited number of spots. If you can or will not invest a goodly portion of your stamina (and in some cases energy) then you are taking that spot away from someone who can and will. This is known as "tagging" in Castle Age (because some people will "tag" a monster with one attack and come back later when they have more stamina). If you don't have the stamina NOW then don't commit to this monster NOW. Without exception everybody in Castle Age hates taggers."There are others here way tougher than me who can kill this monster." "Yeah, but I am also working on 3 other monsters." "It looks like the monster might fail so I will lay back and see how it is going before I commit my stamina." All it takes is a small percentage of folks with these attitudes to ensure a failure. 4 or 5 people like this on the bottom of a small list of attackers discourages others from joining in or doing their share if they are already in. YOU are committed to this monster once you make your first attack. YOU must do what YOU can to help kill the monster. Don't leave it to others to do YOUR job.Let me give you an example. Azriel probably has one of the highest failure rates. Why? She has around 600 million points and only 135 spots. 45 of those spots are for big hitters level 150 or above. Including launching some the weapons, and assuming some of the bottom tiers don't get filled, that works out to an average, give or take, of about 6 million damage per player. Yet time and time again players take up a spot and do 1, 2 or 3 million damage (and sometimes even less) thinking they have done their share. People end up having to spend favour points to bail out everybody else or worse yet some high level player who could have contributed more can't get in because YOU, who have taken up one of their potential spots, are happy with your 2 million damage... and the monster fails.

Second, putting our a Call to Arms allows people seeing it on your page, the fb feed or the CA and guild monster feeds to help summon a special weapon that will inflict a massive amount of damage on your monster. It costs 1 stamina to respond to a CTA and gets you 1-3 experience. When you do the math, CTAs are a very economical way of inflicting damage on a creature (as well as collecting xp)... and reduces the amount of stamina everyone fighting the monster needs to spend. You can click on your own CTA once per weapon as well further reducing the amount of time it takes to summon the weapon.
Many monsters require the use of energy as well as stamina. In some cases it is to reduce a forcefield, fortify, or a use special class skill such as strengthening, healing, crippling or deflecting. As is sometimes the case with doing damage, some players are stingy with their energy. Maybe they are saving it up for questing or maybe they think because there are so many folks participating in the battle someone else will step up. Don't be one of those players. You get experience for using energy as well as stamina... experience which increases loot when the monster gets deaded.With some monsters such as Bahamut, Gehenna and Azriel, when the energy bar is under 80%, less damage is inflicted on attacks. The lower the bar the lower the damage for folks spending their hard earned stamina, in some cases up to 1/2 or 1/3 the damage they could have done if the bar were full. Personally I won't even attack if the bar isn't at least 3/4 full. Proper etiquette is to leave the bar as full if not fuller than you found it. Don't be an energy vampire, don't cheap out.

It takes teamwork to defeat a monster. The monsters in Castle Age are designed to be challenging but not overly so if everyone pulls their weight. As with every team, when someone doesn't do his or her fair share, everyone else has to work harder. This inevitably leads to bad feelings, hostilities and increases the likelihood that the monster will fail. Some folks invest days working over a monster along with a ton of energy and stamina... only to get nothing for their efforts in the end. That just plain sucks. Everyone therefore has a responsibility to do as much damage as they are able, put out Calls to Arms and, in the case of many monsters, spend energy.
This starts with taking on the appropriate monster for your level and not spreading yourself over too many monsters. Use the guidelines under the "summon monster" tab in the game if you are not sure. If you attack a monster you are taking up one of a limited number of spots. If you can or will not invest a goodly portion of your stamina (and in some cases energy) then you are taking that spot away from someone who can and will. This is known as "tagging" in Castle Age (because some people will "tag" a monster with one attack and come back later when they have more stamina). If you don't have the stamina NOW then don't commit to this monster NOW. Without exception everybody in Castle Age hates taggers."There are others here way tougher than me who can kill this monster." "Yeah, but I am also working on 3 other monsters." "It looks like the monster might fail so I will lay back and see how it is going before I commit my stamina." All it takes is a small percentage of folks with these attitudes to ensure a failure. 4 or 5 people like this on the bottom of a small list of attackers discourages others from joining in or doing their share if they are already in. YOU are committed to this monster once you make your first attack. YOU must do what YOU can to help kill the monster. Don't leave it to others to do YOUR job.Let me give you an example. Azriel probably has one of the highest failure rates. Why? She has around 600 million points and only 135 spots. 45 of those spots are for big hitters level 150 or above. Including launching some the weapons, and assuming some of the bottom tiers don't get filled, that works out to an average, give or take, of about 6 million damage per player. Yet time and time again players take up a spot and do 1, 2 or 3 million damage (and sometimes even less) thinking they have done their share. People end up having to spend favour points to bail out everybody else or worse yet some high level player who could have contributed more can't get in because YOU, who have taken up one of their potential spots, are happy with your 2 million damage... and the monster fails.

Second, putting our a Call to Arms allows people seeing it on your page, the fb feed or the CA and guild monster feeds to help summon a special weapon that will inflict a massive amount of damage on your monster. It costs 1 stamina to respond to a CTA and gets you 1-3 experience. When you do the math, CTAs are a very economical way of inflicting damage on a creature (as well as collecting xp)... and reduces the amount of stamina everyone fighting the monster needs to spend. You can click on your own CTA once per weapon as well further reducing the amount of time it takes to summon the weapon.
Many monsters require the use of energy as well as stamina. In some cases it is to reduce a forcefield, fortify, or a use special class skill such as strengthening, healing, crippling or deflecting. As is sometimes the case with doing damage, some players are stingy with their energy. Maybe they are saving it up for questing or maybe they think because there are so many folks participating in the battle someone else will step up. Don't be one of those players. You get experience for using energy as well as stamina... experience which increases loot when the monster gets deaded.

It takes teamwork to defeat a monster. The monsters in Castle Age are designed to be challenging but not overly so if everyone pulls their weight. As with every team, when someone doesn't do his or her fair share, everyone else has to work harder. This inevitably leads to bad feelings, hostilities and increases the likelihood that the monster will fail. Some folks invest days working over a monster along with a ton of energy and stamina... only to get nothing for their efforts in the end. That just plain sucks. Everyone therefore has a responsibility to do as much damage as they are able, put out Calls to Arms and, in the case of many monsters, spend energy.
This starts with taking on the appropriate monster for your level and not spreading yourself over too many monsters. Use the guidelines under the "summon monster" tab in the game if you are not sure. If you attack a monster you are taking up one of a limited number of spots. If you can or will not invest a goodly portion of your stamina (and in some cases energy) then you are taking that spot away from someone who can and will. This is known as "tagging" in Castle Age (because some people will "tag" a monster with one attack and come back later when they have more stamina). If you don't have the stamina NOW then don't commit to this monster NOW. Without exception everybody in Castle Age hates taggers.
Let me give you an example. Azriel probably has one of the highest failure rates. Why? She has around 600 million points and only 135 spots. 45 of those spots are for big hitters level 150 or above. Including launching some the weapons, and assuming some of the bottom tiers don't get filled, that works out to an average, give or take, of about 6 million damage per player. Yet time and time again players take up a spot and do 1, 2 or 3 million damage (and sometimes even less) thinking they have done their share. People end up having to spend favour points to bail out everybody else or worse yet some high level player who could have contributed more can't get in because YOU, who have taken up one of their potential spots, are happy with your 2 million damage... and the monster fails.
Let me give you an example. Azriel probably has one of the highest failure rates. Why? She has around 600 million points and only 135 spots. 45 of those spots are for big hitters level 150 or above. Including launching some the weapons, and assuming some of the bottom tiers don't get filled, that works out to an average, give or take, of about 6 million damage per player. Yet time and time again players take up a spot and do 1, 2 or 3 million damage (and sometimes even less) thinking they have done their share. People end up having to spend favour points to bail out everybody else or worse yet some high level player who could have contributed more can't get in because YOU, who have taken up one of their potential spots, are happy with your 2 million damage... and the monster fails.

In Festive Monsters, you can choose the one you want to do, simply double click on the monster that you want to do and when the summon button changes colors , then click. This eliminates getting the same one over and over...Note....I did this 2 times, the first time the summon button didn't change color, but I still got the correct monster. The second time it did..Try it, it works:)
works 80% of the time
http://castleage.wikia.com/wiki/Tower_of_Transcendence

In Festive Monsters, you can choose the one you want to do, simply double click on the monster that you want to do and when the summon button changes colors , then click. This eliminates getting the same one over and over...Note....I did this 2 times, the first time the summon button didn't change color, but I still got the correct monster. The second time it did..Try it, it works:)
In Festive Monsters, you can choose the one you want to do, simply double click on the monster that you want to do and when the summon button changes colors , then click. This eliminates getting the same one over and over...Note....I did this 2 times, the first time the summon button didn't change color, but I still got the correct monster. The second time it did..Try it, it works:)

In Festive Monsters, you can choose the one you want to do, simply double click on the monster that you want to do and when the summon button changes colors , then click. This eliminates getting the same one over and over...Note....I did this 2 times, the first time the summon button didn't change color, but I still got the correct monster. The second time it did..Try it, it works:)
In Festive Monsters, you can choose the one you want to do, simply double click on the monster that you want to do and when the summon button changes colors , then click. This eliminates getting the same one over and over...Note....I did this 2 times, the first time the summon button didn't change color, but I still got the correct monster. The second time it did..Try it, it works:)

Festival Guild Battle
This instruction is for those not familiar with our battle operations or Strategy1. Would require Everyone other than those appointed to change their Class to Cleric.
2. All Cleric would require to save with 10 token at or towards the end 3 minutes of battle timer.
3. All Cleric responsibility is to ensure their own Gate Top Cleric is in Good health or to heal their own top cleric if and when its needed.
4. Otherwise you may hit who you can beat, but keeping in mind to save or horde tokens for the End Mass Healing.
5. At the precise 3 or 2 minutes depending on the Officer command, All Clerics will used the tokens to heal themself back up to healthy and whats remaining tokens to Heal those at their own gate, in this case would be the other classes such as rogues, mages to ensure everyone in their own gates is healthy again.
6. At No Time is anyone allow to hit other gates unless its the Officer decision, We believe in Teamwork.
7. Do NOT Keep Quiet when you hit a cleric and lose, please put in chat box to let everyone knows that you lost, this is to allow a mage or someone with tokens to come undo that effect, otherwise all effort from hitting and stunning that gate would be lost.
8. All opposing Clerics needs to be stunned and their health especially the active ones need to be bring down to Zero, otherwise they would still be able to hit and heal their own gates back up.
9. All other classes, Except Mage need to bring them down to below 200 and we are fine.
10. All active Mage will be like rule 8. Same applies to bring them down to stunned or Zero
11. Always seek out the ones with low health as 1hr battle time for Festival, it would be foolish to go for those with high health. for example low health as in the rage of 3000 and below is consider low health. anything upwards is on the high side and this being said, its also up to that officer in charge to decide on that battle day.
This applies to Festival Battles Only.
For Guild Battle my emphasis is for everyone to be the classes they enjoy and to have fun, Benson and Anthony will remain as Cleric in case they are need to heal.Festival Battle All to Follow as every win will rank us higher and we all reap the rewards.
Yours TrulyBenson Ang
Insight about Festival Guild War
H all~ allow me to share my insight about Festival Guild War..
Before reading this, allow me to tell you that this is all based on my knowledge alone, and after putting a lot of thought on it.
First of all, on guild battles, we are lacking of active players, but well lets put that aside first... After all, time difference also matter.
Since not much we can do, I'll discuss about classes, their nature, and my thought about how to play them.
* Warriors : well, I dont like this class, as its skill only +10atk/def. You can think its good, but remember 10 points is too small. our scale is on hundreds.Like if you have 750 atk, would 10 point matter? become 760. and does it matter? I can say no it is not There is an algorithm to attack system where sometimes you will find that you can win and lose on the same person. And that 10 point didnt put much effort on it.BUT, their skill whirlwind does put on a value. So, in short Warrior would be the best when you are sure of victory, like when you play rogue, only good when you sure of victory.Now, they have Confidence Ability, which makes them stronger. Use them wisely. as this job will be the hardest to show its efficiency.* Clerics : most important in battle. I don't need to say anything, you guys should know about this class.* Mages : Mainly supporter on guild battles, they have amazing "backstab" damage. 10 (normally), up to 16 (with Zuran)* Rogues : Mainly a common attacker, they have the largest damage of all. And combined with some certain hero (Deshara is the best), a certain rogue can deal up to 310 damage to enemy upon victory.

On my own guide, warriors would be good only for its whirlwind.
Now, onto the next part. How should we play our class.
This will do if we are active on the same time, and communicate well in the group chat. Or can even works accordingly if you want to do some personal chats.
Warriors : Use them if you have whirlwind, only that. And use the skill wisely to deal damage to an opponent you certain of victory. But, don't hit the lowest level. Save the lowest level foes for clerics and mages. And if you have Confidence, you can coordinate well with the other teammates to deal damage.
Clerics : if cleric stocked up some tokens, it would be wise to coordinate well with the group... especially when the party is stunned. (I'm talking about the 10 HP heal upon victory)
Why? coz a cleric heal at least 10 HP. and that 10 HP would revive us from stun.
Here, I give you how it will work.
If I'm stunned, I will do half damage, if I get a heal from winning cleric, I will have 10 HP, and since my HP is not 0, I will deal full damage.
so, you cleric should heal once, only once. And after the whole party have 10 HP, let them hit the foes. They will stunned again. Then, cleric heal again, they will be revived, and when the party attack, they will deal full damage again.
So, with 10 tokens, a cleric will allow stunned people on their gate to hit full power 10 times.
Clerics will be the best to be used by high levels. So they wont fall, and so the whole gate. And also, low level clerics can keep attacking the lowest level foe to heal. or if you are not active, cleric would be the best choice too.As for fortitude, use it for the most active players, but for my own oppinion, use it to the highest level cleric in the guild, that should be priority number 1.
Mages : I will divide them into 2 kinds.
1. Polymorph Mage : Well, they can help the guild with polymorph. Poly high levels to help the others achieve victory. And would stop enemies from healing or attacking us, even for one turn. (I Love Mages!!!!!)2. Damage Mage : This one is the most important thing to keep our enemy low. What if enemies stunned, and another cleric healed them? when we saw enemy left only 10, suddenly become 30 again, or more?Here comes the damage mage. These kind of mages can be used by anyone, but I suggest low levels use mage. And they hit the lowest levels too.But, there is a plan of how to do it.1st, a Damage Mage shall never stun an enemy with their own attack, that will waste tokens. Once a foe entered a low Health state, move onto another foe.... 2nd, a Damage Mage should wait their token. Never use them each one, but wait till your tokens full, once it is full, you can use them all. Why? coz, if you stock up 10 tokens, you will deal 100 extra damage at the moment. combined with another mage, it will become awesome. If you hit every 1 token you get, you will deal 10 damage, and that 10 damage will be negated easier than 100 damage.Doing this, mages will keep the stunned foe remain stunned. But, this requires you to have magic barrier and resistance IV.
Rogues : The main damage dealer of war. Common rogues can kill up to 3 person with 10 tokens, or do a hard damage to foes with high HP. They are good at stunning, and actually hard to not stunning an enemy while using rogue. But actually, playing rogues will require you to have a high atk and def. As you need to earn victory as rogue, just like warrior. And rogue's skill will force them to fight foes on the same level instead of lower level.
COMBOS :
* Poly Mage + Warrior ~> usually top 3 member on a gate is the highest level. will be hard to deal with. so, let the mage poly one of them, and let warrior whirlwind them.* Poly Mage + Rogue ~> would be the same with above, but this would be better if the foe is high level and high HP, that would be a wiser choice. And if the rogue have poison, that would be wonderful.* Cleric + stunned members (Same gate only) ~> do attack in turns, but remember that the cleric should always attain a victory.* And last, The Damage Mage would have the honor of doing the last hit.* New Combo : Confuse (mage) + Poison (Rogue) ~> use this to active players that you want to leave alone. (That you wont keep attacking. But the weakness of this combo is that cleric's debuff skill would be able to negate Confuse and poison.
You can stun anyone if you want, but if there are several damage mages, let them have it.
Would save tokens for both sides.
Update 1: Save the low levels if possible. If we are losing, they will be sacrificed. So we get another kill and might be able to turn the tides of war.
Update 2: Enter time is also a critical value. Those who come in to the battle since the start would be stunned for sure (or with a high chance). But those who are not active wont be a target. And this shall prevent us from losing. Consider them a "reinforcements", they come a bit later but with a full HP and not stunned + full tokens. They will be able to deal full damage AND might be able to turn the tides of battle. This one is a bit confusing, but you can ask me for this directly :)

Update 3 : Poison shall be the most epic skill for the while. Since it gives +35 damage for each turn for 5 turns, like dealing a free 175 damage. And considering how rogue's nature which makes rogue can deal around 240 to 300 damage each hit, the poison become more effective. so Each turn for 5 turns, a rogue can deal up to 335 damage, and "Maybe" if combined with ambush, a rogue can deal up to 385 damage. And with this calculation, you can put down any high HP foe fast, with fewer tokens. And also, combined with poly mages, rogues can put down High Level foes easier.
* Thats all from my guide, actually its far from perfect. I just try to make it more effective and efficient. I dont know lots of things, and my thought might be wrong. Discuss about it here, and let me know more, and I'll edit it, or might even create the perfect release for Guild War Guide :)
Have a nice day~ Consider me a 'strategist wanna be'~ lol~sharon Tan

1. Would require Everyone other than those appointed to change their Class to Cleric.
2. All Cleric would require to save with 10 token at or towards the end 3 minutes of battle timer.
3. All Cleric responsibility is to ensure their own Gate Top Cleric is in Good health or to heal their own top cleric if and when its needed.
4. Otherwise you may hit who you can beat, but keeping in mind to save or horde tokens for the End Mass Healing.
5. At the precise 3 or 2 minutes depending on the Officer command, All Clerics will used the tokens to heal themself back up to healthy and whats remaining tokens to Heal those at their own gate, in this case would be the other classes such as rogues, mages to ensure everyone in their own gates is healthy again.
6. At No Time is anyone allow to hit other gates unless its the Officer decision, We believe in Teamwork.
7. Do NOT Keep Quiet when you hit a cleric and lose, please put in chat box to let everyone knows that you lost, this is to allow a mage or someone with tokens to come undo that effect, otherwise all effort from hitting and stunning that gate would be lost.
8. All opposing Clerics needs to be stunned and their health especially the active ones need to be bring down to Zero, otherwise they would still be able to hit and heal their own gates back up.
9. All other classes, Except Mage need to bring them down to below 200 and we are fine.
10. All active Mage will be like rule 8. Same applies to bring them down to stunned or Zero
11. Always seek out the ones with low health as 1hr battle time for Festival, it would be foolish to go for those with high health. for example low health as in the rage of 3000 and below is consider low health. anything upwards is on the high side and this being said, its also up to that officer in charge to decide on that battle day.
For Guild Battle my emphasis is for everyone to be the classes they enjoy and to have fun, Benson and Anthony will remain as Cleric in case they are need to heal.Festival Battle All to Follow as every win will rank us higher and we all reap the rewards.
Before reading this, allow me to tell you that this is all based on my knowledge alone, and after putting a lot of thought on it.
First of all, on guild battles, we are lacking of active players, but well lets put that aside first... After all, time difference also matter.
Since not much we can do, I'll discuss about classes, their nature, and my thought about how to play them.
* Warriors : well, I dont like this class, as its skill only +10atk/def. You can think its good, but remember 10 points is too small. our scale is on hundreds.Like if you have 750 atk, would 10 point matter? become 760. and does it matter? I can say no it is not There is an algorithm to attack system where sometimes you will find that you can win and lose on the same person. And that 10 point didnt put much effort on it.BUT, their skill whirlwind does put on a value. So, in short Warrior would be the best when you are sure of victory, like when you play rogue, only good when you sure of victory.Now, they have Confidence Ability, which makes them stronger. Use them wisely. as this job will be the hardest to show its efficiency.* Clerics : most important in battle. I don't need to say anything, you guys should know about this class.* Mages : Mainly supporter on guild battles, they have amazing "backstab" damage. 10 (normally), up to 16 (with Zuran)* Rogues : Mainly a common attacker, they have the largest damage of all. And combined with some certain hero (Deshara is the best), a certain rogue can deal up to 310 damage to enemy upon victory.

This will do if we are active on the same time, and communicate well in the group chat. Or can even works accordingly if you want to do some personal chats.
Warriors : Use them if you have whirlwind, only that. And use the skill wisely to deal damage to an opponent you certain of victory. But, don't hit the lowest level. Save the lowest level foes for clerics and mages. And if you have Confidence, you can coordinate well with the other teammates to deal damage.
Clerics : if cleric stocked up some tokens, it would be wise to coordinate well with the group... especially when the party is stunned. (I'm talking about the 10 HP heal upon victory)
Why? coz a cleric heal at least 10 HP. and that 10 HP would revive us from stun.
If I'm stunned, I will do half damage, if I get a heal from winning cleric, I will have 10 HP, and since my HP is not 0, I will deal full damage.
so, you cleric should heal once, only once. And after the whole party have 10 HP, let them hit the foes. They will stunned again. Then, cleric heal again, they will be revived, and when the party attack, they will deal full damage again.
So, with 10 tokens, a cleric will allow stunned people on their gate to hit full power 10 times.
Clerics will be the best to be used by high levels. So they wont fall, and so the whole gate. And also, low level clerics can keep attacking the lowest level foe to heal. or if you are not active, cleric would be the best choice too.As for fortitude, use it for the most active players, but for my own oppinion, use it to the highest level cleric in the guild, that should be priority number 1.
1. Polymorph Mage : Well, they can help the guild with polymorph. Poly high levels to help the others achieve victory. And would stop enemies from healing or attacking us, even for one turn. (I Love Mages!!!!!)2. Damage Mage : This one is the most important thing to keep our enemy low. What if enemies stunned, and another cleric healed them? when we saw enemy left only 10, suddenly become 30 again, or more?Here comes the damage mage. These kind of mages can be used by anyone, but I suggest low levels use mage. And they hit the lowest levels too.But, there is a plan of how to do it.1st, a Damage Mage shall never stun an enemy with their own attack, that will waste tokens. Once a foe entered a low Health state, move onto another foe.... 2nd, a Damage Mage should wait their token. Never use them each one, but wait till your tokens full, once it is full, you can use them all. Why? coz, if you stock up 10 tokens, you will deal 100 extra damage at the moment. combined with another mage, it will become awesome. If you hit every 1 token you get, you will deal 10 damage, and that 10 damage will be negated easier than 100 damage.Doing this, mages will keep the stunned foe remain stunned. But, this requires you to have magic barrier and resistance IV.
Rogues : The main damage dealer of war. Common rogues can kill up to 3 person with 10 tokens, or do a hard damage to foes with high HP. They are good at stunning, and actually hard to not stunning an enemy while using rogue. But actually, playing rogues will require you to have a high atk and def. As you need to earn victory as rogue, just like warrior. And rogue's skill will force them to fight foes on the same level instead of lower level.
* Poly Mage + Warrior ~> usually top 3 member on a gate is the highest level. will be hard to deal with. so, let the mage poly one of them, and let warrior whirlwind them.* Poly Mage + Rogue ~> would be the same with above, but this would be better if the foe is high level and high HP, that would be a wiser choice. And if the rogue have poison, that would be wonderful.* Cleric + stunned members (Same gate only) ~> do attack in turns, but remember that the cleric should always attain a victory.
* New Combo : Confuse (mage) + Poison (Rogue) ~> use this to active players that you want to leave alone. (That you wont keep attacking. But the weakness of this combo is that cleric's debuff skill would be able to negate Confuse and poison.
You can stun anyone if you want, but if there are several damage mages, let them have it.
Update 1: Save the low levels if possible. If we are losing, they will be sacrificed. So we get another kill and might be able to turn the tides of war.
Update 2: Enter time is also a critical value. Those who come in to the battle since the start would be stunned for sure (or with a high chance). But those who are not active wont be a target. And this shall prevent us from losing. Consider them a "reinforcements", they come a bit later but with a full HP and not stunned + full tokens. They will be able to deal full damage AND might be able to turn the tides of battle. This one is a bit confusing, but you can ask me for this directly :)

Update 3 : Poison shall be the most epic skill for the while. Since it gives +35 damage for each turn for 5 turns, like dealing a free 175 damage. And considering how rogue's nature which makes rogue can deal around 240 to 300 damage each hit, the poison become more effective. so Each turn for 5 turns, a rogue can deal up to 335 damage, and "Maybe" if combined with ambush, a rogue can deal up to 385 damage. And with this calculation, you can put down any high HP foe fast, with fewer tokens. And also, combined with poly mages, rogues can put down High Level foes easier.
* Thats all from my guide, actually its far from perfect. I just try to make it more effective and efficient. I dont know lots of things, and my thought might be wrong. Discuss about it here, and let me know more, and I'll edit it, or might even create the perfect release for Guild War Guide :)

5. At the precise 3 or 2 minutes depending on the Officer command, All Clerics will used the tokens to heal themself back up to healthy and whats remaining tokens to Heal those at their own gate, in this case would be the other classes such as rogues, mages to ensure everyone in their own gates is healthy again.
7. Do NOT Keep Quiet when you hit a cleric and lose, please put in chat box to let everyone knows that you lost, this is to allow a mage or someone with tokens to come undo that effect, otherwise all effort from hitting and stunning that gate would be lost.
8. All opposing Clerics needs to be stunned and their health especially the active ones need to be bring down to Zero, otherwise they would still be able to hit and heal their own gates back up.
11. Always seek out the ones with low health as 1hr battle time for Festival, it would be foolish to go for those with high health. for example low health as in the rage of 3000 and below is consider low health. anything upwards is on the high side and this being said, its also up to that officer in charge to decide on that battle day.
For Guild Battle my emphasis is for everyone to be the classes they enjoy and to have fun, Benson and Anthony will remain as Cleric in case they are need to heal.
* Warriors : well, I dont like this class, as its skill only +10atk/def. You can think its good, but remember 10 points is too small. our scale is on hundreds.Like if you have 750 atk, would 10 point matter? become 760. and does it matter? I can say no it is not There is an algorithm to attack system where sometimes you will find that you can win and lose on the same person. And that 10 point didnt put much effort on it.BUT, their skill whirlwind does put on a value. So, in short Warrior would be the best when you are sure of victory, like when you play rogue, only good when you sure of victory.Now, they have Confidence Ability, which makes them stronger. Use them wisely. as this job will be the hardest to show its efficiency.
* Rogues : Mainly a common attacker, they have the largest damage of all. And combined with some certain hero (Deshara is the best), a certain rogue can deal up to 310 damage to enemy upon victory.

Warriors : Use them if you have whirlwind, only that. And use the skill wisely to deal damage to an opponent you certain of victory. But, don't hit the lowest level. Save the lowest level foes for clerics and mages. And if you have Confidence, you can coordinate well with the other teammates to deal damage.
Clerics : if cleric stocked up some tokens, it would be wise to coordinate well with the group... especially when the party is stunned. (I'm talking about the 10 HP heal upon victory)
so, you cleric should heal once, only once. And after the whole party have 10 HP, let them hit the foes. They will stunned again. Then, cleric heal again, they will be revived, and when the party attack, they will deal full damage again.
Clerics will be the best to be used by high levels. So they wont fall, and so the whole gate. And also, low level clerics can keep attacking the lowest level foe to heal. or if you are not active, cleric would be the best choice too.As for fortitude, use it for the most active players, but for my own oppinion, use it to the highest level cleric in the guild, that should be priority number 1.
1. Polymorph Mage : Well, they can help the guild with polymorph. Poly high levels to help the others achieve victory. And would stop enemies from healing or attacking us, even for one turn. (I Love Mages!!!!!)2. Damage Mage : This one is the most important thing to keep our enemy low. What if enemies stunned, and another cleric healed them? when we saw enemy left only 10, suddenly become 30 again, or more?Here comes the damage mage. These kind of mages can be used by anyone, but I suggest low levels use mage. And they hit the lowest levels too.But, there is a plan of how to do it.1st, a Damage Mage shall never stun an enemy with their own attack, that will waste tokens. Once a foe entered a low Health state, move onto another foe.... 2nd, a Damage Mage should wait their token. Never use them each one, but wait till your tokens full, once it is full, you can use them all. Why? coz, if you stock up 10 tokens, you will deal 100 extra damage at the moment. combined with another mage, it will become awesome. If you hit every 1 token you get, you will deal 10 damage, and that 10 damage will be negated easier than 100 damage.Doing this, mages will keep the stunned foe remain stunned. But, this requires you to have magic barrier and resistance IV.
Rogues : The main damage dealer of war. Common rogues can kill up to 3 person with 10 tokens, or do a hard damage to foes with high HP. They are good at stunning, and actually hard to not stunning an enemy while using rogue. But actually, playing rogues will require you to have a high atk and def. As you need to earn victory as rogue, just like warrior. And rogue's skill will force them to fight foes on the same level instead of lower level.
* Poly Mage + Warrior ~> usually top 3 member on a gate is the highest level. will be hard to deal with. so, let the mage poly one of them, and let warrior whirlwind them.* Poly Mage + Rogue ~> would be the same with above, but this would be better if the foe is high level and high HP, that would be a wiser choice. And if the rogue have poison, that would be wonderful.
* New Combo : Confuse (mage) + Poison (Rogue) ~> use this to active players that you want to leave alone. (That you wont keep attacking. But the weakness of this combo is that cleric's debuff skill would be able to negate Confuse and poison.
Update 2: Enter time is also a critical value. Those who come in to the battle since the start would be stunned for sure (or with a high chance). But those who are not active wont be a target. And this shall prevent us from losing. Consider them a "reinforcements", they come a bit later but with a full HP and not stunned + full tokens. They will be able to deal full damage AND might be able to turn the tides of battle. This one is a bit confusing, but you can ask me for this directly :)

Update 3 : Poison shall be the most epic skill for the while. Since it gives +35 damage for each turn for 5 turns, like dealing a free 175 damage. And considering how rogue's nature which makes rogue can deal around 240 to 300 damage each hit, the poison become more effective. so Each turn for 5 turns, a rogue can deal up to 335 damage, and "Maybe" if combined with ambush, a rogue can deal up to 385 damage. And with this calculation, you can put down any high HP foe fast, with fewer tokens. And also, combined with poly mages, rogues can put down High Level foes easier.
* Thats all from my guide, actually its far from perfect. I just try to make it more effective and efficient. I dont know lots of things, and my thought might be wrong. Discuss about it here, and let me know more, and I'll edit it, or might even create the perfect release for Guild War Guide :)

5. At the precise 3 or 2 minutes depending on the Officer command, All Clerics will used the tokens to heal themself back up to healthy and whats remaining tokens to Heal those at their own gate, in this case would be the other classes such as rogues, mages to ensure everyone in their own gates is healthy again.
7. Do NOT Keep Quiet when you hit a cleric and lose, please put in chat box to let everyone knows that you lost, this is to allow a mage or someone with tokens to come undo that effect, otherwise all effort from hitting and stunning that gate would be lost.
11. Always seek out the ones with low health as 1hr battle time for Festival, it would be foolish to go for those with high health. for example low health as in the rage of 3000 and below is consider low health. anything upwards is on the high side and this being said, its also up to that officer in charge to decide on that battle day.
* Warriors : well, I dont like this class, as its skill only +10atk/def. You can think its good, but remember 10 points is too small. our scale is on hundreds.Like if you have 750 atk, would 10 point matter? become 760. and does it matter? I can say no it is not There is an algorithm to attack system where sometimes you will find that you can win and lose on the same person. And that 10 point didnt put much effort on it.BUT, their skill whirlwind does put on a value. So, in short Warrior would be the best when you are sure of victory, like when you play rogue, only good when you sure of victory.Now, they have Confidence Ability, which makes them stronger. Use them wisely. as this job will be the hardest to show its efficiency.

Warriors : Use them if you have whirlwind, only that. And use the skill wisely to deal damage to an opponent you certain of victory. But, don't hit the lowest level. Save the lowest level foes for clerics and mages. And if you have Confidence, you can coordinate well with the other teammates to deal damage.
Clerics will be the best to be used by high levels. So they wont fall, and so the whole gate. And also, low level clerics can keep attacking the lowest level foe to heal. or if you are not active, cleric would be the best choice too.As for fortitude, use it for the most active players, but for my own oppinion, use it to the highest level cleric in the guild, that should be priority number 1.
2. Damage Mage : This one is the most important thing to keep our enemy low. What if enemies stunned, and another cleric healed them? when we saw enemy left only 10, suddenly become 30 again, or more?Here comes the damage mage. These kind of mages can be used by anyone, but I suggest low levels use mage. And they hit the lowest levels too.But, there is a plan of how to do it.1st, a Damage Mage shall never stun an enemy with their own attack, that will waste tokens. Once a foe entered a low Health state, move onto another foe.... 2nd, a Damage Mage should wait their token. Never use them each one, but wait till your tokens full, once it is full, you can use them all. Why? coz, if you stock up 10 tokens, you will deal 100 extra damage at the moment. combined with another mage, it will become awesome. If you hit every 1 token you get, you will deal 10 damage, and that 10 damage will be negated easier than 100 damage.Doing this, mages will keep the stunned foe remain stunned. But, this requires you to have magic barrier and resistance IV.
Rogues : The main damage dealer of war. Common rogues can kill up to 3 person with 10 tokens, or do a hard damage to foes with high HP. They are good at stunning, and actually hard to not stunning an enemy while using rogue. But actually, playing rogues will require you to have a high atk and def. As you need to earn victory as rogue, just like warrior. And rogue's skill will force them to fight foes on the same level instead of lower level.
* New Combo : Confuse (mage) + Poison (Rogue) ~> use this to active players that you want to leave alone. (That you wont keep attacking. But the weakness of this combo is that cleric's debuff skill would be able to negate Confuse and poison.
Update 2: Enter time is also a critical value. Those who come in to the battle since the start would be stunned for sure (or with a high chance). But those who are not active wont be a target. And this shall prevent us from losing. Consider them a "reinforcements", they come a bit later but with a full HP and not stunned + full tokens. They will be able to deal full damage AND might be able to turn the tides of battle. This one is a bit confusing, but you can ask me for this directly :)

Update 3 : Poison shall be the most epic skill for the while. Since it gives +35 damage for each turn for 5 turns, like dealing a free 175 damage. And considering how rogue's nature which makes rogue can deal around 240 to 300 damage each hit, the poison become more effective. so Each turn for 5 turns, a rogue can deal up to 335 damage, and "Maybe" if combined with ambush, a rogue can deal up to 385 damage. And with this calculation, you can put down any high HP foe fast, with fewer tokens. And also, combined with poly mages, rogues can put down High Level foes easier.
* Thats all from my guide, actually its far from perfect. I just try to make it more effective and efficient. I dont know lots of things, and my thought might be wrong. Discuss about it here, and let me know more, and I'll edit it, or might even create the perfect release for Guild War Guide :)

11. Always seek out the ones with low health as 1hr battle time for Festival, it would be foolish to go for those with high health. for example low health as in the rage of 3000 and below is consider low health. anything upwards is on the high side and this being said, its also up to that officer in charge to decide on that battle day.
* Warriors : well, I dont like this class, as its skill only +10atk/def. You can think its good, but remember 10 points is too small. our scale is on hundreds.Like if you have 750 atk, would 10 point matter? become 760. and does it matter? I can say no it is not There is an algorithm to attack system where sometimes you will find that you can win and lose on the same person. And that 10 point didnt put much effort on it.BUT, their skill whirlwind does put on a value. So, in short Warrior would be the best when you are sure of victory, like when you play rogue, only good when you sure of victory.Now, they have Confidence Ability, which makes them stronger. Use them wisely. as this job will be the hardest to show its efficiency.

Clerics will be the best to be used by high levels. So they wont fall, and so the whole gate. And also, low level clerics can keep attacking the lowest level foe to heal. or if you are not active, cleric would be the best choice too.As for fortitude, use it for the most active players, but for my own oppinion, use it to the highest level cleric in the guild, that should be priority number 1.
2. Damage Mage : This one is the most important thing to keep our enemy low. What if enemies stunned, and another cleric healed them? when we saw enemy left only 10, suddenly become 30 again, or more?Here comes the damage mage. These kind of mages can be used by anyone, but I suggest low levels use mage. And they hit the lowest levels too.But, there is a plan of how to do it.1st, a Damage Mage shall never stun an enemy with their own attack, that will waste tokens. Once a foe entered a low Health state, move onto another foe.... 2nd, a Damage Mage should wait their token. Never use them each one, but wait till your tokens full, once it is full, you can use them all. Why? coz, if you stock up 10 tokens, you will deal 100 extra damage at the moment. combined with another mage, it will become awesome. If you hit every 1 token you get, you will deal 10 damage, and that 10 damage will be negated easier than 100 damage.Doing this, mages will keep the stunned foe remain stunned. But, this requires you to have magic barrier and resistance IV.
Rogues : The main damage dealer of war. Common rogues can kill up to 3 person with 10 tokens, or do a hard damage to foes with high HP. They are good at stunning, and actually hard to not stunning an enemy while using rogue. But actually, playing rogues will require you to have a high atk and def. As you need to earn victory as rogue, just like warrior. And rogue's skill will force them to fight foes on the same level instead of lower level.
Update 2: Enter time is also a critical value. Those who come in to the battle since the start would be stunned for sure (or with a high chance). But those who are not active wont be a target. And this shall prevent us from losing. Consider them a "reinforcements", they come a bit later but with a full HP and not stunned + full tokens. They will be able to deal full damage AND might be able to turn the tides of battle. This one is a bit confusing, but you can ask me for this directly :)

Update 3 : Poison shall be the most epic skill for the while. Since it gives +35 damage for each turn for 5 turns, like dealing a free 175 damage. And considering how rogue's nature which makes rogue can deal around 240 to 300 damage each hit, the poison become more effective. so Each turn for 5 turns, a rogue can deal up to 335 damage, and "Maybe" if combined with ambush, a rogue can deal up to 385 damage. And with this calculation, you can put down any high HP foe fast, with fewer tokens. And also, combined with poly mages, rogues can put down High Level foes easier.

* Warriors : well, I dont like this class, as its skill only +10atk/def. You can think its good, but remember 10 points is too small. our scale is on hundreds.Like if you have 750 atk, would 10 point matter? become 760. and does it matter? I can say no it is not There is an algorithm to attack system where sometimes you will find that you can win and lose on the same person. And that 10 point didnt put much effort on it.BUT, their skill whirlwind does put on a value. So, in short Warrior would be the best when you are sure of victory, like when you play rogue, only good when you sure of victory.Now, they have Confidence Ability, which makes them stronger. Use them wisely. as this job will be the hardest to show its efficiency.

2. Damage Mage : This one is the most important thing to keep our enemy low. What if enemies stunned, and another cleric healed them? when we saw enemy left only 10, suddenly become 30 again, or more?Here comes the damage mage. These kind of mages can be used by anyone, but I suggest low levels use mage. And they hit the lowest levels too.But, there is a plan of how to do it.1st, a Damage Mage shall never stun an enemy with their own attack, that will waste tokens. Once a foe entered a low Health state, move onto another foe.... 2nd, a Damage Mage should wait their token. Never use them each one, but wait till your tokens full, once it is full, you can use them all. Why? coz, if you stock up 10 tokens, you will deal 100 extra damage at the moment. combined with another mage, it will become awesome. If you hit every 1 token you get, you will deal 10 damage, and that 10 damage will be negated easier than 100 damage.Doing this, mages will keep the stunned foe remain stunned. But, this requires you to have magic barrier and resistance IV.

Update 3 : Poison shall be the most epic skill for the while. Since it gives +35 damage for each turn for 5 turns, like dealing a free 175 damage. And considering how rogue's nature which makes rogue can deal around 240 to 300 damage each hit, the poison become more effective. so Each turn for 5 turns, a rogue can deal up to 335 damage, and "Maybe" if combined with ambush, a rogue can deal up to 385 damage. And with this calculation, you can put down any high HP foe fast, with fewer tokens. And also, combined with poly mages, rogues can put down High Level foes easier.
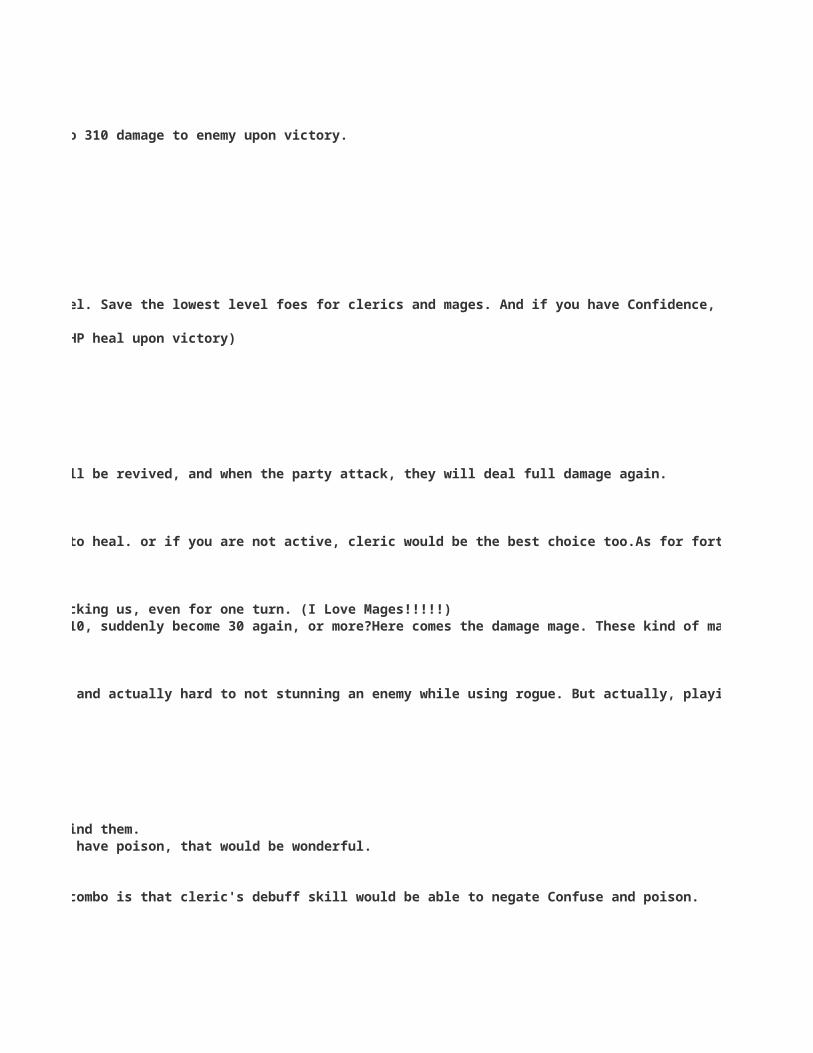
* Warriors : well, I dont like this class, as its skill only +10atk/def. You can think its good, but remember 10 points is too small. our scale is on hundreds.Like if you have 750 atk, would 10 point matter? become 760. and does it matter? I can say no it is not There is an algorithm to attack system where sometimes you will find that you can win and lose on the same person. And that 10 point didnt put much effort on it.BUT, their skill whirlwind does put on a value. So, in short Warrior would be the best when you are sure of victory, like when you play rogue, only good when you sure of victory.Now, they have Confidence Ability, which makes them stronger. Use them wisely. as this job will be the hardest to show its efficiency.

2. Damage Mage : This one is the most important thing to keep our enemy low. What if enemies stunned, and another cleric healed them? when we saw enemy left only 10, suddenly become 30 again, or more?Here comes the damage mage. These kind of mages can be used by anyone, but I suggest low levels use mage. And they hit the lowest levels too.But, there is a plan of how to do it.1st, a Damage Mage shall never stun an enemy with their own attack, that will waste tokens. Once a foe entered a low Health state, move onto another foe.... 2nd, a Damage Mage should wait their token. Never use them each one, but wait till your tokens full, once it is full, you can use them all. Why? coz, if you stock up 10 tokens, you will deal 100 extra damage at the moment. combined with another mage, it will become awesome. If you hit every 1 token you get, you will deal 10 damage, and that 10 damage will be negated easier than 100 damage.Doing this, mages will keep the stunned foe remain stunned. But, this requires you to have magic barrier and resistance IV.

* Warriors : well, I dont like this class, as its skill only +10atk/def. You can think its good, but remember 10 points is too small. our scale is on hundreds.Like if you have 750 atk, would 10 point matter? become 760. and does it matter? I can say no it is not There is an algorithm to attack system where sometimes you will find that you can win and lose on the same person. And that 10 point didnt put much effort on it.BUT, their skill whirlwind does put on a value. So, in short Warrior would be the best when you are sure of victory, like when you play rogue, only good when you sure of victory.Now, they have Confidence Ability, which makes them stronger. Use them wisely. as this job will be the hardest to show its efficiency.
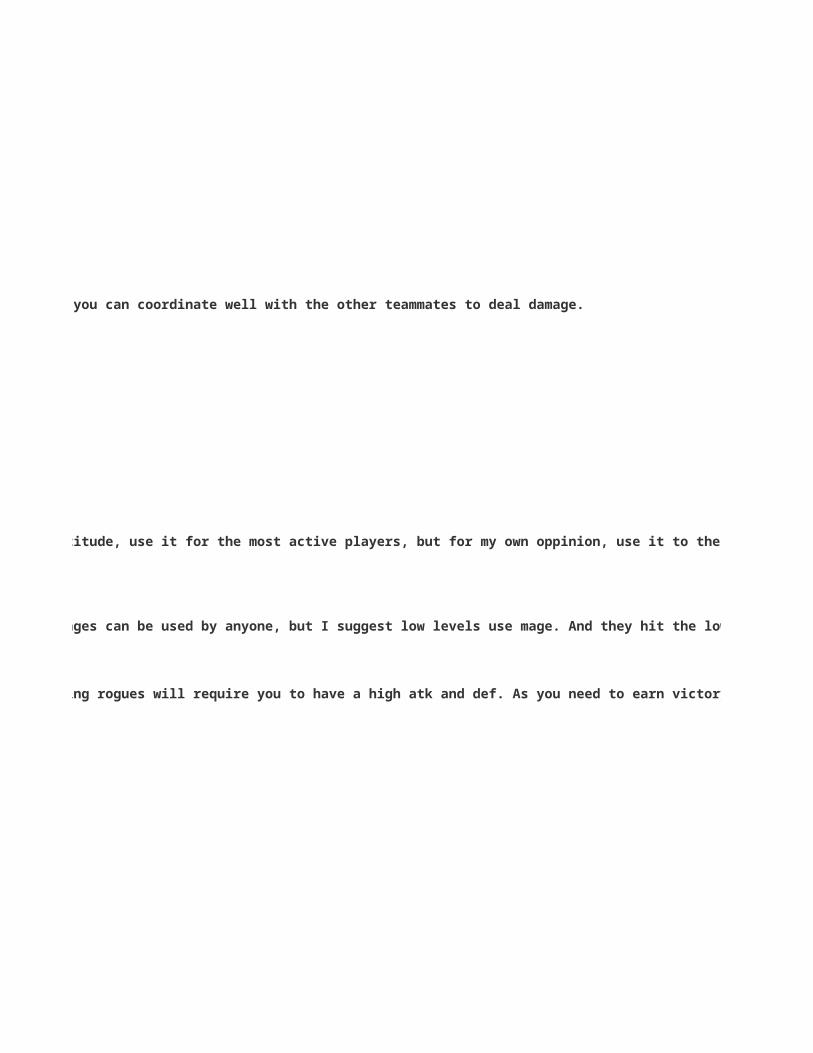
2. Damage Mage : This one is the most important thing to keep our enemy low. What if enemies stunned, and another cleric healed them? when we saw enemy left only 10, suddenly become 30 again, or more?Here comes the damage mage. These kind of mages can be used by anyone, but I suggest low levels use mage. And they hit the lowest levels too.But, there is a plan of how to do it.1st, a Damage Mage shall never stun an enemy with their own attack, that will waste tokens. Once a foe entered a low Health state, move onto another foe.... 2nd, a Damage Mage should wait their token. Never use them each one, but wait till your tokens full, once it is full, you can use them all. Why? coz, if you stock up 10 tokens, you will deal 100 extra damage at the moment. combined with another mage, it will become awesome. If you hit every 1 token you get, you will deal 10 damage, and that 10 damage will be negated easier than 100 damage.Doing this, mages will keep the stunned foe remain stunned. But, this requires you to have magic barrier and resistance IV.

2. Damage Mage : This one is the most important thing to keep our enemy low. What if enemies stunned, and another cleric healed them? when we saw enemy left only 10, suddenly become 30 again, or more?Here comes the damage mage. These kind of mages can be used by anyone, but I suggest low levels use mage. And they hit the lowest levels too.But, there is a plan of how to do it.1st, a Damage Mage shall never stun an enemy with their own attack, that will waste tokens. Once a foe entered a low Health state, move onto another foe.... 2nd, a Damage Mage should wait their token. Never use them each one, but wait till your tokens full, once it is full, you can use them all. Why? coz, if you stock up 10 tokens, you will deal 100 extra damage at the moment. combined with another mage, it will become awesome. If you hit every 1 token you get, you will deal 10 damage, and that 10 damage will be negated easier than 100 damage.Doing this, mages will keep the stunned foe remain stunned. But, this requires you to have magic barrier and resistance IV.

2. Damage Mage : This one is the most important thing to keep our enemy low. What if enemies stunned, and another cleric healed them? when we saw enemy left only 10, suddenly become 30 again, or more?Here comes the damage mage. These kind of mages can be used by anyone, but I suggest low levels use mage. And they hit the lowest levels too.But, there is a plan of how to do it.1st, a Damage Mage shall never stun an enemy with their own attack, that will waste tokens. Once a foe entered a low Health state, move onto another foe.... 2nd, a Damage Mage should wait their token. Never use them each one, but wait till your tokens full, once it is full, you can use them all. Why? coz, if you stock up 10 tokens, you will deal 100 extra damage at the moment. combined with another mage, it will become awesome. If you hit every 1 token you get, you will deal 10 damage, and that 10 damage will be negated easier than 100 damage.Doing this, mages will keep the stunned foe remain stunned. But, this requires you to have magic barrier and resistance IV.
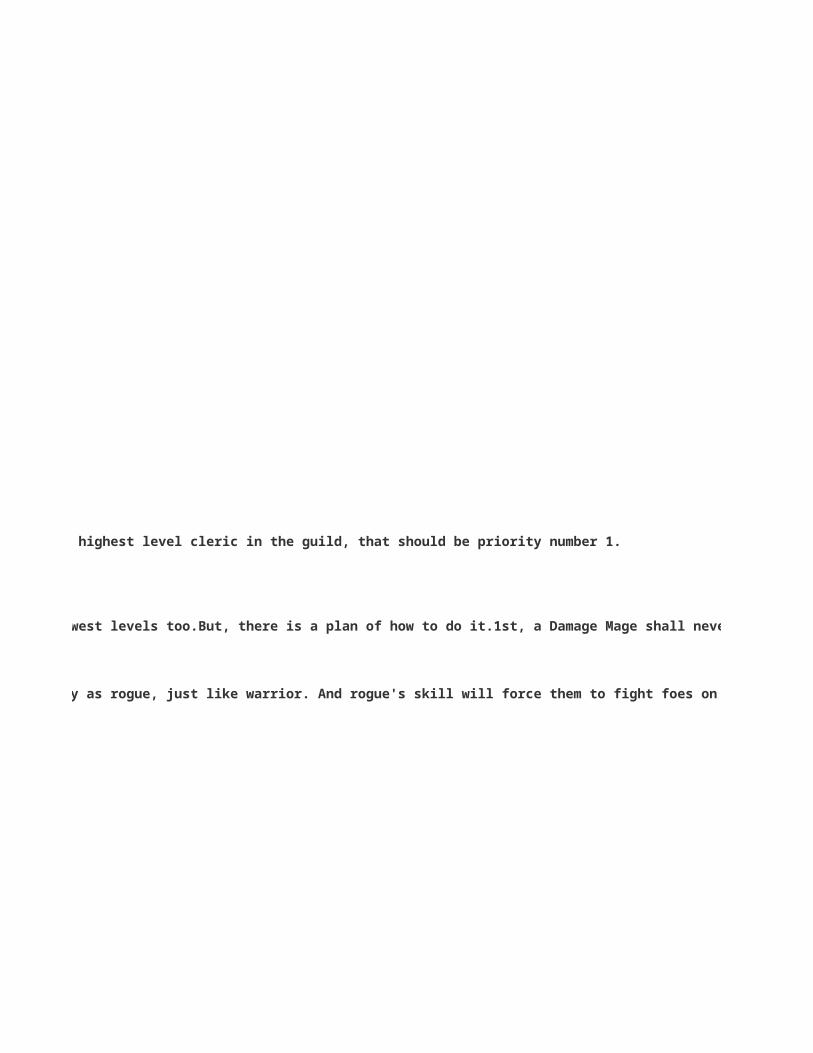
2. Damage Mage : This one is the most important thing to keep our enemy low. What if enemies stunned, and another cleric healed them? when we saw enemy left only 10, suddenly become 30 again, or more?Here comes the damage mage. These kind of mages can be used by anyone, but I suggest low levels use mage. And they hit the lowest levels too.But, there is a plan of how to do it.1st, a Damage Mage shall never stun an enemy with their own attack, that will waste tokens. Once a foe entered a low Health state, move onto another foe.... 2nd, a Damage Mage should wait their token. Never use them each one, but wait till your tokens full, once it is full, you can use them all. Why? coz, if you stock up 10 tokens, you will deal 100 extra damage at the moment. combined with another mage, it will become awesome. If you hit every 1 token you get, you will deal 10 damage, and that 10 damage will be negated easier than 100 damage.Doing this, mages will keep the stunned foe remain stunned. But, this requires you to have magic barrier and resistance IV.

2. Damage Mage : This one is the most important thing to keep our enemy low. What if enemies stunned, and another cleric healed them? when we saw enemy left only 10, suddenly become 30 again, or more?Here comes the damage mage. These kind of mages can be used by anyone, but I suggest low levels use mage. And they hit the lowest levels too.But, there is a plan of how to do it.1st, a Damage Mage shall never stun an enemy with their own attack, that will waste tokens. Once a foe entered a low Health state, move onto another foe.... 2nd, a Damage Mage should wait their token. Never use them each one, but wait till your tokens full, once it is full, you can use them all. Why? coz, if you stock up 10 tokens, you will deal 100 extra damage at the moment. combined with another mage, it will become awesome. If you hit every 1 token you get, you will deal 10 damage, and that 10 damage will be negated easier than 100 damage.Doing this, mages will keep the stunned foe remain stunned. But, this requires you to have magic barrier and resistance IV.

Preliminary Information on Festival DuelingFestival Dueling by Ronda Grogan What we know so far:
1) IT USES YOUR ACTUAL STAMINA (and health and money) - not a separate stash of stamina and health (and money). When you hit someone on the list, you use one stamina, same as in normal dueling. Your own health is depleted as well as you hit and are hit. Refilling your health refills your festival dueling health....allowing you to hit or be hit again. (Yes, hiding should work in festival dueling.)
2) FRIENDS, ARMY MEMBERS, GROUPS, GUILDS - THEY ALL SHOW UP. The system hands you level groupings, and as you hit, those groupings change. Everyone is fair game. If you've entered the Festival Dueling, you will be hit by friends and army members. Expect it. Do not take it personal.
3) ALL ATTACKS SHOW UP ON YOUR NORMAL BATTLE LOG. Yes, those friends who hit you most likely did it through festival battle dueling. Please, before thinking you suddenly have developed an unknown enemy, stop and realize what likely has happened.
4) YOU EARN FESTIVAL DUELING BP THE SAME WAY YOU EARN REGULAR BP: Hit same rank as you, earn +10 BP. Hit 1 rank higher, earn +12 BP. Lose to the same rank, lose -4 BP, etc. Followers:Sending requests to your friends will earn you a little boost in battling. This are handled exactly the same as gift requests, and yes, they do cut into the number of gifts you can send. When you reach 90 followers filled, you earn +14 attack and +14 defense. 100 followers will get you +1 point on victory (so if you hit someone you should have received 10 points for, you will instead receive 11 points). Follower Count Rewards:1 - +1 Attack5 - +1 Defense (+1 Attack, +1 Defense)10 - +1 Attack (+2 total Attack, +1 Defense)15 - +1 Defense (+2 total Attack, +2 total Defense)20 - +2 Attack (+4 total Attack, +2 total Defense)30 - +2 Defense (+4 total Attack, +4 total Defense)40 - +3 Attack (+7 total Attack, +4 total Defense)50 - +3 Attack (+10 total Attack, +4 total Defense)60 - +3 Defense (+10 total Attack, +7 total Defense)70 - +4 Attack (+14 total Attack, +7 total Defense)80 - +3 Defense (+14 total Attack, +10 total Defense)90 - +4 Defense (+14 total Attack, +14 total Defense)100 - +1 Duel Battle Point on Offensive Victory (only works when earning at least 1 point in the battle.) Rank Rewards:Just as the regular battle tiers, the bottom 2 levels on each tier give you 5 Skill Points each, with the top rank earning you something for your keep. (Total of 60 SP available) Savage Tier: Savage Smash - magic, 16/16 - 3000 BP neededFighter Tier: Fighter Glaive - glove, 12/11 - 20,000 BP neededDefender Tier: Guardian Amulet - pendant, 32/28 - 100,000 BP neededSlayer Tier: Slayer Helm - helm, 38/32 - 250,000 BP neededEradicator Tier: Eradicator Hammer - weapon, 40/30 - 500,000 BP neededMaster Tier: Kraxus - general, 24/21 - 1,000,000 BP needed
So what does this all mean for you? If you've chosen to join, you will be hit and killed a LOT in the coming days, especially as you rank up. Be prepared to refill your health if you are attempting to hit a monster. Be prepared to bank your money if you do not like losing it. Be prepared to ignore your battle log....or return the favor, as you so choose. Just realize this is not a personal attack, but rather a new facet of CA that people are exploring. Even if you have not chosen to join, expect people with spare stamina to be harder to find, especially as everyone pushes to rank up quickly.PLAN YOUR MONSTERS. Join monsters already summoned. Be aware of the changes this will cause throughout the CA community in the coming days.

1) IT USES YOUR ACTUAL STAMINA (and health and money) - not a separate stash of stamina and health (and money). When you hit someone on the list, you use one stamina, same as in normal dueling. Your own health is depleted as well as you hit and are hit. Refilling your health refills your festival dueling health....allowing you to hit or be hit again. (Yes, hiding should work in festival dueling.)
2) FRIENDS, ARMY MEMBERS, GROUPS, GUILDS - THEY ALL SHOW UP. The system hands you level groupings, and as you hit, those groupings change. Everyone is fair game. If you've entered the Festival Dueling, you will be hit by friends and army members. Expect it. Do not take it personal.
3) ALL ATTACKS SHOW UP ON YOUR NORMAL BATTLE LOG. Yes, those friends who hit you most likely did it through festival battle dueling. Please, before thinking you suddenly have developed an unknown enemy, stop and realize what likely has happened.
4) YOU EARN FESTIVAL DUELING BP THE SAME WAY YOU EARN REGULAR BP: Hit same rank as you, earn +10 BP. Hit 1 rank higher, earn +12 BP. Lose to the same rank, lose -4 BP, etc. Followers:Sending requests to your friends will earn you a little boost in battling. This are handled exactly the same as gift requests, and yes, they do cut into the number of gifts you can send. When you reach 90 followers filled, you earn +14 attack and +14 defense. 100 followers will get you +1 point on victory (so if you hit someone you should have received 10 points for, you will instead receive 11 points). Follower Count Rewards:1 - +1 Attack5 - +1 Defense (+1 Attack, +1 Defense)10 - +1 Attack (+2 total Attack, +1 Defense)15 - +1 Defense (+2 total Attack, +2 total Defense)20 - +2 Attack (+4 total Attack, +2 total Defense)30 - +2 Defense (+4 total Attack, +4 total Defense)40 - +3 Attack (+7 total Attack, +4 total Defense)50 - +3 Attack (+10 total Attack, +4 total Defense)60 - +3 Defense (+10 total Attack, +7 total Defense)70 - +4 Attack (+14 total Attack, +7 total Defense)80 - +3 Defense (+14 total Attack, +10 total Defense)90 - +4 Defense (+14 total Attack, +14 total Defense)100 - +1 Duel Battle Point on Offensive Victory (only works when earning at least 1 point in the battle.) Rank Rewards:Just as the regular battle tiers, the bottom 2 levels on each tier give you 5 Skill Points each, with the top rank earning you something for your keep. (Total of 60 SP available) Savage Tier: Savage Smash - magic, 16/16 - 3000 BP neededFighter Tier: Fighter Glaive - glove, 12/11 - 20,000 BP neededDefender Tier: Guardian Amulet - pendant, 32/28 - 100,000 BP neededSlayer Tier: Slayer Helm - helm, 38/32 - 250,000 BP neededEradicator Tier: Eradicator Hammer - weapon, 40/30 - 500,000 BP neededMaster Tier: Kraxus - general, 24/21 - 1,000,000 BP needed
So what does this all mean for you? If you've chosen to join, you will be hit and killed a LOT in the coming days, especially as you rank up. Be prepared to refill your health if you are attempting to hit a monster. Be prepared to bank your money if you do not like losing it. Be prepared to ignore your battle log....or return the favor, as you so choose. Just realize this is not a personal attack, but rather a new facet of CA that people are exploring. Even if you have not chosen to join, expect people with spare stamina to be harder to find, especially as everyone pushes to rank up quickly.

1) IT USES YOUR ACTUAL STAMINA (and health and money) - not a separate stash of stamina and health (and money). When you hit someone on the list, you use one stamina, same as in normal dueling. Your own health is depleted as well as you hit and are hit. Refilling your health refills your festival dueling health....allowing you to hit or be hit again. (Yes, hiding should work in festival dueling.)
4) YOU EARN FESTIVAL DUELING BP THE SAME WAY YOU EARN REGULAR BP: Hit same rank as you, earn +10 BP. Hit 1 rank higher, earn +12 BP. Lose to the same rank, lose -4 BP, etc. Followers:Sending requests to your friends will earn you a little boost in battling. This are handled exactly the same as gift requests, and yes, they do cut into the number of gifts you can send. When you reach 90 followers filled, you earn +14 attack and +14 defense. 100 followers will get you +1 point on victory (so if you hit someone you should have received 10 points for, you will instead receive 11 points). Follower Count Rewards:1 - +1 Attack5 - +1 Defense (+1 Attack, +1 Defense)10 - +1 Attack (+2 total Attack, +1 Defense)15 - +1 Defense (+2 total Attack, +2 total Defense)20 - +2 Attack (+4 total Attack, +2 total Defense)30 - +2 Defense (+4 total Attack, +4 total Defense)40 - +3 Attack (+7 total Attack, +4 total Defense)50 - +3 Attack (+10 total Attack, +4 total Defense)60 - +3 Defense (+10 total Attack, +7 total Defense)70 - +4 Attack (+14 total Attack, +7 total Defense)80 - +3 Defense (+14 total Attack, +10 total Defense)90 - +4 Defense (+14 total Attack, +14 total Defense)100 - +1 Duel Battle Point on Offensive Victory (only works when earning at least 1 point in the battle.) Rank Rewards:Just as the regular battle tiers, the bottom 2 levels on each tier give you 5 Skill Points each, with the top rank earning you something for your keep. (Total of 60 SP available) Savage Tier: Savage Smash - magic, 16/16 - 3000 BP neededFighter Tier: Fighter Glaive - glove, 12/11 - 20,000 BP neededDefender Tier: Guardian Amulet - pendant, 32/28 - 100,000 BP neededSlayer Tier: Slayer Helm - helm, 38/32 - 250,000 BP neededEradicator Tier: Eradicator Hammer - weapon, 40/30 - 500,000 BP neededMaster Tier: Kraxus - general, 24/21 - 1,000,000 BP needed
So what does this all mean for you? If you've chosen to join, you will be hit and killed a LOT in the coming days, especially as you rank up. Be prepared to refill your health if you are attempting to hit a monster. Be prepared to bank your money if you do not like losing it. Be prepared to ignore your battle log....or return the favor, as you so choose. Just realize this is not a personal attack, but rather a new facet of CA that people are exploring. Even if you have not chosen to join, expect people with spare stamina to be harder to find, especially as everyone pushes to rank up quickly.

4) YOU EARN FESTIVAL DUELING BP THE SAME WAY YOU EARN REGULAR BP: Hit same rank as you, earn +10 BP. Hit 1 rank higher, earn +12 BP. Lose to the same rank, lose -4 BP, etc. Followers:Sending requests to your friends will earn you a little boost in battling. This are handled exactly the same as gift requests, and yes, they do cut into the number of gifts you can send. When you reach 90 followers filled, you earn +14 attack and +14 defense. 100 followers will get you +1 point on victory (so if you hit someone you should have received 10 points for, you will instead receive 11 points). Follower Count Rewards:1 - +1 Attack5 - +1 Defense (+1 Attack, +1 Defense)10 - +1 Attack (+2 total Attack, +1 Defense)15 - +1 Defense (+2 total Attack, +2 total Defense)20 - +2 Attack (+4 total Attack, +2 total Defense)30 - +2 Defense (+4 total Attack, +4 total Defense)40 - +3 Attack (+7 total Attack, +4 total Defense)50 - +3 Attack (+10 total Attack, +4 total Defense)60 - +3 Defense (+10 total Attack, +7 total Defense)70 - +4 Attack (+14 total Attack, +7 total Defense)80 - +3 Defense (+14 total Attack, +10 total Defense)90 - +4 Defense (+14 total Attack, +14 total Defense)100 - +1 Duel Battle Point on Offensive Victory (only works when earning at least 1 point in the battle.) Rank Rewards:Just as the regular battle tiers, the bottom 2 levels on each tier give you 5 Skill Points each, with the top rank earning you something for your keep. (Total of 60 SP available) Savage Tier: Savage Smash - magic, 16/16 - 3000 BP neededFighter Tier: Fighter Glaive - glove, 12/11 - 20,000 BP neededDefender Tier: Guardian Amulet - pendant, 32/28 - 100,000 BP neededSlayer Tier: Slayer Helm - helm, 38/32 - 250,000 BP neededEradicator Tier: Eradicator Hammer - weapon, 40/30 - 500,000 BP neededMaster Tier: Kraxus - general, 24/21 - 1,000,000 BP needed

4) YOU EARN FESTIVAL DUELING BP THE SAME WAY YOU EARN REGULAR BP: Hit same rank as you, earn +10 BP. Hit 1 rank higher, earn +12 BP. Lose to the same rank, lose -4 BP, etc. Followers:Sending requests to your friends will earn you a little boost in battling. This are handled exactly the same as gift requests, and yes, they do cut into the number of gifts you can send. When you reach 90 followers filled, you earn +14 attack and +14 defense. 100 followers will get you +1 point on victory (so if you hit someone you should have received 10 points for, you will instead receive 11 points). Follower Count Rewards:1 - +1 Attack5 - +1 Defense (+1 Attack, +1 Defense)10 - +1 Attack (+2 total Attack, +1 Defense)15 - +1 Defense (+2 total Attack, +2 total Defense)20 - +2 Attack (+4 total Attack, +2 total Defense)30 - +2 Defense (+4 total Attack, +4 total Defense)40 - +3 Attack (+7 total Attack, +4 total Defense)50 - +3 Attack (+10 total Attack, +4 total Defense)60 - +3 Defense (+10 total Attack, +7 total Defense)70 - +4 Attack (+14 total Attack, +7 total Defense)80 - +3 Defense (+14 total Attack, +10 total Defense)90 - +4 Defense (+14 total Attack, +14 total Defense)100 - +1 Duel Battle Point on Offensive Victory (only works when earning at least 1 point in the battle.) Rank Rewards:Just as the regular battle tiers, the bottom 2 levels on each tier give you 5 Skill Points each, with the top rank earning you something for your keep. (Total of 60 SP available) Savage Tier: Savage Smash - magic, 16/16 - 3000 BP neededFighter Tier: Fighter Glaive - glove, 12/11 - 20,000 BP neededDefender Tier: Guardian Amulet - pendant, 32/28 - 100,000 BP neededSlayer Tier: Slayer Helm - helm, 38/32 - 250,000 BP neededEradicator Tier: Eradicator Hammer - weapon, 40/30 - 500,000 BP neededMaster Tier: Kraxus - general, 24/21 - 1,000,000 BP needed

4) YOU EARN FESTIVAL DUELING BP THE SAME WAY YOU EARN REGULAR BP: Hit same rank as you, earn +10 BP. Hit 1 rank higher, earn +12 BP. Lose to the same rank, lose -4 BP, etc. Followers:Sending requests to your friends will earn you a little boost in battling. This are handled exactly the same as gift requests, and yes, they do cut into the number of gifts you can send. When you reach 90 followers filled, you earn +14 attack and +14 defense. 100 followers will get you +1 point on victory (so if you hit someone you should have received 10 points for, you will instead receive 11 points). Follower Count Rewards:1 - +1 Attack5 - +1 Defense (+1 Attack, +1 Defense)10 - +1 Attack (+2 total Attack, +1 Defense)15 - +1 Defense (+2 total Attack, +2 total Defense)20 - +2 Attack (+4 total Attack, +2 total Defense)30 - +2 Defense (+4 total Attack, +4 total Defense)40 - +3 Attack (+7 total Attack, +4 total Defense)50 - +3 Attack (+10 total Attack, +4 total Defense)60 - +3 Defense (+10 total Attack, +7 total Defense)70 - +4 Attack (+14 total Attack, +7 total Defense)80 - +3 Defense (+14 total Attack, +10 total Defense)90 - +4 Defense (+14 total Attack, +14 total Defense)100 - +1 Duel Battle Point on Offensive Victory (only works when earning at least 1 point in the battle.) Rank Rewards:Just as the regular battle tiers, the bottom 2 levels on each tier give you 5 Skill Points each, with the top rank earning you something for your keep. (Total of 60 SP available) Savage Tier: Savage Smash - magic, 16/16 - 3000 BP neededFighter Tier: Fighter Glaive - glove, 12/11 - 20,000 BP neededDefender Tier: Guardian Amulet - pendant, 32/28 - 100,000 BP neededSlayer Tier: Slayer Helm - helm, 38/32 - 250,000 BP neededEradicator Tier: Eradicator Hammer - weapon, 40/30 - 500,000 BP neededMaster Tier: Kraxus - general, 24/21 - 1,000,000 BP needed

4) YOU EARN FESTIVAL DUELING BP THE SAME WAY YOU EARN REGULAR BP: Hit same rank as you, earn +10 BP. Hit 1 rank higher, earn +12 BP. Lose to the same rank, lose -4 BP, etc. Followers:Sending requests to your friends will earn you a little boost in battling. This are handled exactly the same as gift requests, and yes, they do cut into the number of gifts you can send. When you reach 90 followers filled, you earn +14 attack and +14 defense. 100 followers will get you +1 point on victory (so if you hit someone you should have received 10 points for, you will instead receive 11 points). Follower Count Rewards:1 - +1 Attack5 - +1 Defense (+1 Attack, +1 Defense)10 - +1 Attack (+2 total Attack, +1 Defense)15 - +1 Defense (+2 total Attack, +2 total Defense)20 - +2 Attack (+4 total Attack, +2 total Defense)30 - +2 Defense (+4 total Attack, +4 total Defense)40 - +3 Attack (+7 total Attack, +4 total Defense)50 - +3 Attack (+10 total Attack, +4 total Defense)60 - +3 Defense (+10 total Attack, +7 total Defense)70 - +4 Attack (+14 total Attack, +7 total Defense)80 - +3 Defense (+14 total Attack, +10 total Defense)90 - +4 Defense (+14 total Attack, +14 total Defense)100 - +1 Duel Battle Point on Offensive Victory (only works when earning at least 1 point in the battle.) Rank Rewards:Just as the regular battle tiers, the bottom 2 levels on each tier give you 5 Skill Points each, with the top rank earning you something for your keep. (Total of 60 SP available) Savage Tier: Savage Smash - magic, 16/16 - 3000 BP neededFighter Tier: Fighter Glaive - glove, 12/11 - 20,000 BP neededDefender Tier: Guardian Amulet - pendant, 32/28 - 100,000 BP neededSlayer Tier: Slayer Helm - helm, 38/32 - 250,000 BP neededEradicator Tier: Eradicator Hammer - weapon, 40/30 - 500,000 BP neededMaster Tier: Kraxus - general, 24/21 - 1,000,000 BP needed

4) YOU EARN FESTIVAL DUELING BP THE SAME WAY YOU EARN REGULAR BP: Hit same rank as you, earn +10 BP. Hit 1 rank higher, earn +12 BP. Lose to the same rank, lose -4 BP, etc. Followers:Sending requests to your friends will earn you a little boost in battling. This are handled exactly the same as gift requests, and yes, they do cut into the number of gifts you can send. When you reach 90 followers filled, you earn +14 attack and +14 defense. 100 followers will get you +1 point on victory (so if you hit someone you should have received 10 points for, you will instead receive 11 points). Follower Count Rewards:1 - +1 Attack5 - +1 Defense (+1 Attack, +1 Defense)10 - +1 Attack (+2 total Attack, +1 Defense)15 - +1 Defense (+2 total Attack, +2 total Defense)20 - +2 Attack (+4 total Attack, +2 total Defense)30 - +2 Defense (+4 total Attack, +4 total Defense)40 - +3 Attack (+7 total Attack, +4 total Defense)50 - +3 Attack (+10 total Attack, +4 total Defense)60 - +3 Defense (+10 total Attack, +7 total Defense)70 - +4 Attack (+14 total Attack, +7 total Defense)80 - +3 Defense (+14 total Attack, +10 total Defense)90 - +4 Defense (+14 total Attack, +14 total Defense)100 - +1 Duel Battle Point on Offensive Victory (only works when earning at least 1 point in the battle.) Rank Rewards:Just as the regular battle tiers, the bottom 2 levels on each tier give you 5 Skill Points each, with the top rank earning you something for your keep. (Total of 60 SP available) Savage Tier: Savage Smash - magic, 16/16 - 3000 BP neededFighter Tier: Fighter Glaive - glove, 12/11 - 20,000 BP neededDefender Tier: Guardian Amulet - pendant, 32/28 - 100,000 BP neededSlayer Tier: Slayer Helm - helm, 38/32 - 250,000 BP neededEradicator Tier: Eradicator Hammer - weapon, 40/30 - 500,000 BP neededMaster Tier: Kraxus - general, 24/21 - 1,000,000 BP needed

4) YOU EARN FESTIVAL DUELING BP THE SAME WAY YOU EARN REGULAR BP: Hit same rank as you, earn +10 BP. Hit 1 rank higher, earn +12 BP. Lose to the same rank, lose -4 BP, etc. Followers:Sending requests to your friends will earn you a little boost in battling. This are handled exactly the same as gift requests, and yes, they do cut into the number of gifts you can send. When you reach 90 followers filled, you earn +14 attack and +14 defense. 100 followers will get you +1 point on victory (so if you hit someone you should have received 10 points for, you will instead receive 11 points). Follower Count Rewards:1 - +1 Attack5 - +1 Defense (+1 Attack, +1 Defense)10 - +1 Attack (+2 total Attack, +1 Defense)15 - +1 Defense (+2 total Attack, +2 total Defense)20 - +2 Attack (+4 total Attack, +2 total Defense)30 - +2 Defense (+4 total Attack, +4 total Defense)40 - +3 Attack (+7 total Attack, +4 total Defense)50 - +3 Attack (+10 total Attack, +4 total Defense)60 - +3 Defense (+10 total Attack, +7 total Defense)70 - +4 Attack (+14 total Attack, +7 total Defense)80 - +3 Defense (+14 total Attack, +10 total Defense)90 - +4 Defense (+14 total Attack, +14 total Defense)100 - +1 Duel Battle Point on Offensive Victory (only works when earning at least 1 point in the battle.) Rank Rewards:Just as the regular battle tiers, the bottom 2 levels on each tier give you 5 Skill Points each, with the top rank earning you something for your keep. (Total of 60 SP available) Savage Tier: Savage Smash - magic, 16/16 - 3000 BP neededFighter Tier: Fighter Glaive - glove, 12/11 - 20,000 BP neededDefender Tier: Guardian Amulet - pendant, 32/28 - 100,000 BP neededSlayer Tier: Slayer Helm - helm, 38/32 - 250,000 BP neededEradicator Tier: Eradicator Hammer - weapon, 40/30 - 500,000 BP neededMaster Tier: Kraxus - general, 24/21 - 1,000,000 BP needed

4) YOU EARN FESTIVAL DUELING BP THE SAME WAY YOU EARN REGULAR BP: Hit same rank as you, earn +10 BP. Hit 1 rank higher, earn +12 BP. Lose to the same rank, lose -4 BP, etc. Followers:Sending requests to your friends will earn you a little boost in battling. This are handled exactly the same as gift requests, and yes, they do cut into the number of gifts you can send. When you reach 90 followers filled, you earn +14 attack and +14 defense. 100 followers will get you +1 point on victory (so if you hit someone you should have received 10 points for, you will instead receive 11 points). Follower Count Rewards:1 - +1 Attack5 - +1 Defense (+1 Attack, +1 Defense)10 - +1 Attack (+2 total Attack, +1 Defense)15 - +1 Defense (+2 total Attack, +2 total Defense)20 - +2 Attack (+4 total Attack, +2 total Defense)30 - +2 Defense (+4 total Attack, +4 total Defense)40 - +3 Attack (+7 total Attack, +4 total Defense)50 - +3 Attack (+10 total Attack, +4 total Defense)60 - +3 Defense (+10 total Attack, +7 total Defense)70 - +4 Attack (+14 total Attack, +7 total Defense)80 - +3 Defense (+14 total Attack, +10 total Defense)90 - +4 Defense (+14 total Attack, +14 total Defense)100 - +1 Duel Battle Point on Offensive Victory (only works when earning at least 1 point in the battle.) Rank Rewards:Just as the regular battle tiers, the bottom 2 levels on each tier give you 5 Skill Points each, with the top rank earning you something for your keep. (Total of 60 SP available) Savage Tier: Savage Smash - magic, 16/16 - 3000 BP neededFighter Tier: Fighter Glaive - glove, 12/11 - 20,000 BP neededDefender Tier: Guardian Amulet - pendant, 32/28 - 100,000 BP neededSlayer Tier: Slayer Helm - helm, 38/32 - 250,000 BP neededEradicator Tier: Eradicator Hammer - weapon, 40/30 - 500,000 BP neededMaster Tier: Kraxus - general, 24/21 - 1,000,000 BP needed

4) YOU EARN FESTIVAL DUELING BP THE SAME WAY YOU EARN REGULAR BP: Hit same rank as you, earn +10 BP. Hit 1 rank higher, earn +12 BP. Lose to the same rank, lose -4 BP, etc. Followers:Sending requests to your friends will earn you a little boost in battling. This are handled exactly the same as gift requests, and yes, they do cut into the number of gifts you can send. When you reach 90 followers filled, you earn +14 attack and +14 defense. 100 followers will get you +1 point on victory (so if you hit someone you should have received 10 points for, you will instead receive 11 points). Follower Count Rewards:1 - +1 Attack5 - +1 Defense (+1 Attack, +1 Defense)10 - +1 Attack (+2 total Attack, +1 Defense)15 - +1 Defense (+2 total Attack, +2 total Defense)20 - +2 Attack (+4 total Attack, +2 total Defense)30 - +2 Defense (+4 total Attack, +4 total Defense)40 - +3 Attack (+7 total Attack, +4 total Defense)50 - +3 Attack (+10 total Attack, +4 total Defense)60 - +3 Defense (+10 total Attack, +7 total Defense)70 - +4 Attack (+14 total Attack, +7 total Defense)80 - +3 Defense (+14 total Attack, +10 total Defense)90 - +4 Defense (+14 total Attack, +14 total Defense)100 - +1 Duel Battle Point on Offensive Victory (only works when earning at least 1 point in the battle.) Rank Rewards:Just as the regular battle tiers, the bottom 2 levels on each tier give you 5 Skill Points each, with the top rank earning you something for your keep. (Total of 60 SP available) Savage Tier: Savage Smash - magic, 16/16 - 3000 BP neededFighter Tier: Fighter Glaive - glove, 12/11 - 20,000 BP neededDefender Tier: Guardian Amulet - pendant, 32/28 - 100,000 BP neededSlayer Tier: Slayer Helm - helm, 38/32 - 250,000 BP neededEradicator Tier: Eradicator Hammer - weapon, 40/30 - 500,000 BP neededMaster Tier: Kraxus - general, 24/21 - 1,000,000 BP needed

4) YOU EARN FESTIVAL DUELING BP THE SAME WAY YOU EARN REGULAR BP: Hit same rank as you, earn +10 BP. Hit 1 rank higher, earn +12 BP. Lose to the same rank, lose -4 BP, etc. Followers:Sending requests to your friends will earn you a little boost in battling. This are handled exactly the same as gift requests, and yes, they do cut into the number of gifts you can send. When you reach 90 followers filled, you earn +14 attack and +14 defense. 100 followers will get you +1 point on victory (so if you hit someone you should have received 10 points for, you will instead receive 11 points). Follower Count Rewards:1 - +1 Attack5 - +1 Defense (+1 Attack, +1 Defense)10 - +1 Attack (+2 total Attack, +1 Defense)15 - +1 Defense (+2 total Attack, +2 total Defense)20 - +2 Attack (+4 total Attack, +2 total Defense)30 - +2 Defense (+4 total Attack, +4 total Defense)40 - +3 Attack (+7 total Attack, +4 total Defense)50 - +3 Attack (+10 total Attack, +4 total Defense)60 - +3 Defense (+10 total Attack, +7 total Defense)70 - +4 Attack (+14 total Attack, +7 total Defense)80 - +3 Defense (+14 total Attack, +10 total Defense)90 - +4 Defense (+14 total Attack, +14 total Defense)100 - +1 Duel Battle Point on Offensive Victory (only works when earning at least 1 point in the battle.) Rank Rewards:Just as the regular battle tiers, the bottom 2 levels on each tier give you 5 Skill Points each, with the top rank earning you something for your keep. (Total of 60 SP available) Savage Tier: Savage Smash - magic, 16/16 - 3000 BP neededFighter Tier: Fighter Glaive - glove, 12/11 - 20,000 BP neededDefender Tier: Guardian Amulet - pendant, 32/28 - 100,000 BP neededSlayer Tier: Slayer Helm - helm, 38/32 - 250,000 BP neededEradicator Tier: Eradicator Hammer - weapon, 40/30 - 500,000 BP neededMaster Tier: Kraxus - general, 24/21 - 1,000,000 BP needed

4) YOU EARN FESTIVAL DUELING BP THE SAME WAY YOU EARN REGULAR BP: Hit same rank as you, earn +10 BP. Hit 1 rank higher, earn +12 BP. Lose to the same rank, lose -4 BP, etc. Followers:Sending requests to your friends will earn you a little boost in battling. This are handled exactly the same as gift requests, and yes, they do cut into the number of gifts you can send. When you reach 90 followers filled, you earn +14 attack and +14 defense. 100 followers will get you +1 point on victory (so if you hit someone you should have received 10 points for, you will instead receive 11 points). Follower Count Rewards:1 - +1 Attack5 - +1 Defense (+1 Attack, +1 Defense)10 - +1 Attack (+2 total Attack, +1 Defense)15 - +1 Defense (+2 total Attack, +2 total Defense)20 - +2 Attack (+4 total Attack, +2 total Defense)30 - +2 Defense (+4 total Attack, +4 total Defense)40 - +3 Attack (+7 total Attack, +4 total Defense)50 - +3 Attack (+10 total Attack, +4 total Defense)60 - +3 Defense (+10 total Attack, +7 total Defense)70 - +4 Attack (+14 total Attack, +7 total Defense)80 - +3 Defense (+14 total Attack, +10 total Defense)90 - +4 Defense (+14 total Attack, +14 total Defense)100 - +1 Duel Battle Point on Offensive Victory (only works when earning at least 1 point in the battle.) Rank Rewards:Just as the regular battle tiers, the bottom 2 levels on each tier give you 5 Skill Points each, with the top rank earning you something for your keep. (Total of 60 SP available) Savage Tier: Savage Smash - magic, 16/16 - 3000 BP neededFighter Tier: Fighter Glaive - glove, 12/11 - 20,000 BP neededDefender Tier: Guardian Amulet - pendant, 32/28 - 100,000 BP neededSlayer Tier: Slayer Helm - helm, 38/32 - 250,000 BP neededEradicator Tier: Eradicator Hammer - weapon, 40/30 - 500,000 BP neededMaster Tier: Kraxus - general, 24/21 - 1,000,000 BP needed

4) YOU EARN FESTIVAL DUELING BP THE SAME WAY YOU EARN REGULAR BP: Hit same rank as you, earn +10 BP. Hit 1 rank higher, earn +12 BP. Lose to the same rank, lose -4 BP, etc. Followers:Sending requests to your friends will earn you a little boost in battling. This are handled exactly the same as gift requests, and yes, they do cut into the number of gifts you can send. When you reach 90 followers filled, you earn +14 attack and +14 defense. 100 followers will get you +1 point on victory (so if you hit someone you should have received 10 points for, you will instead receive 11 points). Follower Count Rewards:1 - +1 Attack5 - +1 Defense (+1 Attack, +1 Defense)10 - +1 Attack (+2 total Attack, +1 Defense)15 - +1 Defense (+2 total Attack, +2 total Defense)20 - +2 Attack (+4 total Attack, +2 total Defense)30 - +2 Defense (+4 total Attack, +4 total Defense)40 - +3 Attack (+7 total Attack, +4 total Defense)50 - +3 Attack (+10 total Attack, +4 total Defense)60 - +3 Defense (+10 total Attack, +7 total Defense)70 - +4 Attack (+14 total Attack, +7 total Defense)80 - +3 Defense (+14 total Attack, +10 total Defense)90 - +4 Defense (+14 total Attack, +14 total Defense)100 - +1 Duel Battle Point on Offensive Victory (only works when earning at least 1 point in the battle.) Rank Rewards:Just as the regular battle tiers, the bottom 2 levels on each tier give you 5 Skill Points each, with the top rank earning you something for your keep. (Total of 60 SP available) Savage Tier: Savage Smash - magic, 16/16 - 3000 BP neededFighter Tier: Fighter Glaive - glove, 12/11 - 20,000 BP neededDefender Tier: Guardian Amulet - pendant, 32/28 - 100,000 BP neededSlayer Tier: Slayer Helm - helm, 38/32 - 250,000 BP neededEradicator Tier: Eradicator Hammer - weapon, 40/30 - 500,000 BP neededMaster Tier: Kraxus - general, 24/21 - 1,000,000 BP needed

4) YOU EARN FESTIVAL DUELING BP THE SAME WAY YOU EARN REGULAR BP: Hit same rank as you, earn +10 BP. Hit 1 rank higher, earn +12 BP. Lose to the same rank, lose -4 BP, etc. Followers:Sending requests to your friends will earn you a little boost in battling. This are handled exactly the same as gift requests, and yes, they do cut into the number of gifts you can send. When you reach 90 followers filled, you earn +14 attack and +14 defense. 100 followers will get you +1 point on victory (so if you hit someone you should have received 10 points for, you will instead receive 11 points). Follower Count Rewards:1 - +1 Attack5 - +1 Defense (+1 Attack, +1 Defense)10 - +1 Attack (+2 total Attack, +1 Defense)15 - +1 Defense (+2 total Attack, +2 total Defense)20 - +2 Attack (+4 total Attack, +2 total Defense)30 - +2 Defense (+4 total Attack, +4 total Defense)40 - +3 Attack (+7 total Attack, +4 total Defense)50 - +3 Attack (+10 total Attack, +4 total Defense)60 - +3 Defense (+10 total Attack, +7 total Defense)70 - +4 Attack (+14 total Attack, +7 total Defense)80 - +3 Defense (+14 total Attack, +10 total Defense)90 - +4 Defense (+14 total Attack, +14 total Defense)100 - +1 Duel Battle Point on Offensive Victory (only works when earning at least 1 point in the battle.) Rank Rewards:Just as the regular battle tiers, the bottom 2 levels on each tier give you 5 Skill Points each, with the top rank earning you something for your keep. (Total of 60 SP available) Savage Tier: Savage Smash - magic, 16/16 - 3000 BP neededFighter Tier: Fighter Glaive - glove, 12/11 - 20,000 BP neededDefender Tier: Guardian Amulet - pendant, 32/28 - 100,000 BP neededSlayer Tier: Slayer Helm - helm, 38/32 - 250,000 BP neededEradicator Tier: Eradicator Hammer - weapon, 40/30 - 500,000 BP neededMaster Tier: Kraxus - general, 24/21 - 1,000,000 BP needed

4) YOU EARN FESTIVAL DUELING BP THE SAME WAY YOU EARN REGULAR BP: Hit same rank as you, earn +10 BP. Hit 1 rank higher, earn +12 BP. Lose to the same rank, lose -4 BP, etc. Followers:Sending requests to your friends will earn you a little boost in battling. This are handled exactly the same as gift requests, and yes, they do cut into the number of gifts you can send. When you reach 90 followers filled, you earn +14 attack and +14 defense. 100 followers will get you +1 point on victory (so if you hit someone you should have received 10 points for, you will instead receive 11 points). Follower Count Rewards:1 - +1 Attack5 - +1 Defense (+1 Attack, +1 Defense)10 - +1 Attack (+2 total Attack, +1 Defense)15 - +1 Defense (+2 total Attack, +2 total Defense)20 - +2 Attack (+4 total Attack, +2 total Defense)30 - +2 Defense (+4 total Attack, +4 total Defense)40 - +3 Attack (+7 total Attack, +4 total Defense)50 - +3 Attack (+10 total Attack, +4 total Defense)60 - +3 Defense (+10 total Attack, +7 total Defense)70 - +4 Attack (+14 total Attack, +7 total Defense)80 - +3 Defense (+14 total Attack, +10 total Defense)90 - +4 Defense (+14 total Attack, +14 total Defense)100 - +1 Duel Battle Point on Offensive Victory (only works when earning at least 1 point in the battle.) Rank Rewards:Just as the regular battle tiers, the bottom 2 levels on each tier give you 5 Skill Points each, with the top rank earning you something for your keep. (Total of 60 SP available) Savage Tier: Savage Smash - magic, 16/16 - 3000 BP neededFighter Tier: Fighter Glaive - glove, 12/11 - 20,000 BP neededDefender Tier: Guardian Amulet - pendant, 32/28 - 100,000 BP neededSlayer Tier: Slayer Helm - helm, 38/32 - 250,000 BP neededEradicator Tier: Eradicator Hammer - weapon, 40/30 - 500,000 BP neededMaster Tier: Kraxus - general, 24/21 - 1,000,000 BP needed

4) YOU EARN FESTIVAL DUELING BP THE SAME WAY YOU EARN REGULAR BP: Hit same rank as you, earn +10 BP. Hit 1 rank higher, earn +12 BP. Lose to the same rank, lose -4 BP, etc. Followers:Sending requests to your friends will earn you a little boost in battling. This are handled exactly the same as gift requests, and yes, they do cut into the number of gifts you can send. When you reach 90 followers filled, you earn +14 attack and +14 defense. 100 followers will get you +1 point on victory (so if you hit someone you should have received 10 points for, you will instead receive 11 points). Follower Count Rewards:1 - +1 Attack5 - +1 Defense (+1 Attack, +1 Defense)10 - +1 Attack (+2 total Attack, +1 Defense)15 - +1 Defense (+2 total Attack, +2 total Defense)20 - +2 Attack (+4 total Attack, +2 total Defense)30 - +2 Defense (+4 total Attack, +4 total Defense)40 - +3 Attack (+7 total Attack, +4 total Defense)50 - +3 Attack (+10 total Attack, +4 total Defense)60 - +3 Defense (+10 total Attack, +7 total Defense)70 - +4 Attack (+14 total Attack, +7 total Defense)80 - +3 Defense (+14 total Attack, +10 total Defense)90 - +4 Defense (+14 total Attack, +14 total Defense)100 - +1 Duel Battle Point on Offensive Victory (only works when earning at least 1 point in the battle.) Rank Rewards:Just as the regular battle tiers, the bottom 2 levels on each tier give you 5 Skill Points each, with the top rank earning you something for your keep. (Total of 60 SP available) Savage Tier: Savage Smash - magic, 16/16 - 3000 BP neededFighter Tier: Fighter Glaive - glove, 12/11 - 20,000 BP neededDefender Tier: Guardian Amulet - pendant, 32/28 - 100,000 BP neededSlayer Tier: Slayer Helm - helm, 38/32 - 250,000 BP neededEradicator Tier: Eradicator Hammer - weapon, 40/30 - 500,000 BP neededMaster Tier: Kraxus - general, 24/21 - 1,000,000 BP needed

4) YOU EARN FESTIVAL DUELING BP THE SAME WAY YOU EARN REGULAR BP: Hit same rank as you, earn +10 BP. Hit 1 rank higher, earn +12 BP. Lose to the same rank, lose -4 BP, etc. Followers:Sending requests to your friends will earn you a little boost in battling. This are handled exactly the same as gift requests, and yes, they do cut into the number of gifts you can send. When you reach 90 followers filled, you earn +14 attack and +14 defense. 100 followers will get you +1 point on victory (so if you hit someone you should have received 10 points for, you will instead receive 11 points). Follower Count Rewards:1 - +1 Attack5 - +1 Defense (+1 Attack, +1 Defense)10 - +1 Attack (+2 total Attack, +1 Defense)15 - +1 Defense (+2 total Attack, +2 total Defense)20 - +2 Attack (+4 total Attack, +2 total Defense)30 - +2 Defense (+4 total Attack, +4 total Defense)40 - +3 Attack (+7 total Attack, +4 total Defense)50 - +3 Attack (+10 total Attack, +4 total Defense)60 - +3 Defense (+10 total Attack, +7 total Defense)70 - +4 Attack (+14 total Attack, +7 total Defense)80 - +3 Defense (+14 total Attack, +10 total Defense)90 - +4 Defense (+14 total Attack, +14 total Defense)100 - +1 Duel Battle Point on Offensive Victory (only works when earning at least 1 point in the battle.) Rank Rewards:Just as the regular battle tiers, the bottom 2 levels on each tier give you 5 Skill Points each, with the top rank earning you something for your keep. (Total of 60 SP available) Savage Tier: Savage Smash - magic, 16/16 - 3000 BP neededFighter Tier: Fighter Glaive - glove, 12/11 - 20,000 BP neededDefender Tier: Guardian Amulet - pendant, 32/28 - 100,000 BP neededSlayer Tier: Slayer Helm - helm, 38/32 - 250,000 BP neededEradicator Tier: Eradicator Hammer - weapon, 40/30 - 500,000 BP neededMaster Tier: Kraxus - general, 24/21 - 1,000,000 BP needed

4) YOU EARN FESTIVAL DUELING BP THE SAME WAY YOU EARN REGULAR BP: Hit same rank as you, earn +10 BP. Hit 1 rank higher, earn +12 BP. Lose to the same rank, lose -4 BP, etc. Followers:Sending requests to your friends will earn you a little boost in battling. This are handled exactly the same as gift requests, and yes, they do cut into the number of gifts you can send. When you reach 90 followers filled, you earn +14 attack and +14 defense. 100 followers will get you +1 point on victory (so if you hit someone you should have received 10 points for, you will instead receive 11 points). Follower Count Rewards:1 - +1 Attack5 - +1 Defense (+1 Attack, +1 Defense)10 - +1 Attack (+2 total Attack, +1 Defense)15 - +1 Defense (+2 total Attack, +2 total Defense)20 - +2 Attack (+4 total Attack, +2 total Defense)30 - +2 Defense (+4 total Attack, +4 total Defense)40 - +3 Attack (+7 total Attack, +4 total Defense)50 - +3 Attack (+10 total Attack, +4 total Defense)60 - +3 Defense (+10 total Attack, +7 total Defense)70 - +4 Attack (+14 total Attack, +7 total Defense)80 - +3 Defense (+14 total Attack, +10 total Defense)90 - +4 Defense (+14 total Attack, +14 total Defense)100 - +1 Duel Battle Point on Offensive Victory (only works when earning at least 1 point in the battle.) Rank Rewards:Just as the regular battle tiers, the bottom 2 levels on each tier give you 5 Skill Points each, with the top rank earning you something for your keep. (Total of 60 SP available) Savage Tier: Savage Smash - magic, 16/16 - 3000 BP neededFighter Tier: Fighter Glaive - glove, 12/11 - 20,000 BP neededDefender Tier: Guardian Amulet - pendant, 32/28 - 100,000 BP neededSlayer Tier: Slayer Helm - helm, 38/32 - 250,000 BP neededEradicator Tier: Eradicator Hammer - weapon, 40/30 - 500,000 BP neededMaster Tier: Kraxus - general, 24/21 - 1,000,000 BP needed

FESTIVAL TAVERN QUEST - SOFIA
Run 1Leave the Sanctuary. (Option 1)Head towards Triste. (Option 1)Continue walking. (Option 1)Continue! (Option 1)Leave the skull! (Option 1)Proceed to Triste! (Option 1)I am Sophia! (Option 1)Go willingly! (Option 1)Greet the king! (Option 1)Continue. (Option 1)Give soul! (Option 1)END-Results ~ Good 7 - Neutral 0 - Evil 0RewardsNone
Run 2Leave the Sanctuary. (Option 1)Head towards Triste. (Option 1)Hide in thicket. (Option 2)Continue to Triste! (Option 1)Give the hound food! (Option 1)Continue to Triste. (Option 1)I am Elaina! (Option 2)Enter the city of Triste. (Option 1)Accept the gift. (Option 1)(Recieved Cursed Bow)Continue. (Option 1)Follow the guards. (Option 1)Continue. (Option 1)Refuse the king! (Option 2)ENDResults ~ Good 9 - Neutral 2 - Evil 4RewardsCursed Bow
Run 3Leave the Sanctuary. (Option 1)Head towards the Hills of Boralis. (Option 2)Walk away! (Option 1)Continue to Triste. (Option 1)Greet the king! (Option 1)Continue. (Option 1)Refuse the king! (Option 2)ENDResults- Good 10 - Neutral 2 - Evil 7RewardsNone
Run 4Leave the Sanctuary. (Option 1)(Obtained Elven Talisman x1 Smoked Salmon x1 Gold Coins x150?)

Head towards Triste. (Option 1)Ready weapon! (Option 3)Use power! (Option 1)Take the skull! (Option 2)Proceed to Triste! (Option 1)(Obtained Ork Skull)I am Elaina! (Option 2)Enter the city of Triste. (Option 1)Let him see the bow. (Option 1)(Obtained Arcane Bow x1 Lost Cursed Bow x1 Lost Gold Coins x100)Leave shop. (Option 1)Follow the guards. (Option 1)Continue. (Option 1)Give soul! (Option 1)ENDResults ~ Good 14 - Neutral 3 - Evil 11RewardsSophia Hero MedalArcane Bow
Run 5Leave the Sanctuary. (Option 1)(Obtained Elven Talisman x1 Smoked Salmon x1 Gold Coins x150 again?)Head towards the Hills of Boralis. (Option 2)Feed cub! (Option 2)(Lost 1 Smoked Salmon)Continue to observing. (Option 1)Refuse power! (Option 2)(Obtained Dragon Tooth x1)Continue. (Option 1)Continue. (Option 1)Greet the king! (Option 1)Continue. (Option 1)Refuse the king! (Option 2)ENDResults ~ Good 17 - Neutral 3 - Evil 14RewardsSophia Hero Medal
THAT IS ALL THE KNOWN REWARDS- ANY RUN FROM HERE ON IS PURELY TO FIND OUT WHAT THE INVENTORY ITEMS ARE FO
Run 6Leave the Sanctuary. (Option 1)(Obtained Elven Talisman x1 Smoked Salmon x1 Gold Coins x150 again?)Head towards the Hills of Boralis. (Option 2)Feed cub! (Option 2)(Lost Smoked Salmon)Continue to observing. (Option 1)Use power! (Option 1)Fight! (Option 2)Continue. (Option 1)Refuse! (Option 1)ENDResult - Failure Good 19 - Neutral 3 - Evil 17RewardsNone
INVENTORY ITEM USESCursed Bow- Give it to someone to turn into the Arcane Bow for 100 Gold Coins.Gold Coins- To pay the person to purify the Cursed BowElven Talismen- Unknown

Dragon Tooth- UnknownOrc Skull- UnknownTHIS IS ALL I WAS ABOUT TO DO UNTIL I RAN OUT OF ENERGY. 810 ENERGY USED.
By Anty~ Feel free to share, just credit me please.*Guide created by Anty on Castle Age Forum
http://www.castleageforums.com /cforum/showthread.php?t=52768

THAT IS ALL THE KNOWN REWARDS- ANY RUN FROM HERE ON IS PURELY TO FIND OUT WHAT THE INVENTORY ITEMS ARE FO

FESTIVAL TAVERN QUEST - STRIDER
What I have so far.... I've got all the known rewards...
Don't get it? PM me and I'll gladly help you out soon as I can :)
Take the scroll and accept the mission. = +1 NeutralScout the area where the target located. = +1 NeutralSpeak to the local farmer. = +2 GoodSneak in under the cover of the wheat wagon. = +1 NeutralPrepare for the kill. = +1 NeutralA pair of cruel looking daggers. = +2 GoodRetreat into darkness... = +3 GoodEND RESULT - Good 7 Nuetral 4 Evil 0
Rewards:
Strider Hero Medal
Description:
Increase Strider max level by 1
Take the scroll and accept the mission. = +1 NeutralResearch the target and learn more about him. = +1 NeutralTravel to guard post. = +1 NeutralNone of your business! = +2 Evil and Failure. Start again.
END RESULT - Good 7 Neutral 7 Evil 2
Take the scroll and accept the mission. = +1 NeutralResearch the target and learn more about him. = +1 NeutralTravel to guard post. = +1 NeutralDelivering a message. = +1 GoodPrepare for the kill. = +1 NeutralA deadly dose of hydra poison. = +2 EvilKill all witnesses! = +3 Evil
END RESULT - 9 Good 11 Neutral 7 Evil
Rewards:
Strider Hero Medal
Description:
------------------------------ -----
------------------------------ -----

Increase Strider max level by 1
Take the scroll and accept the mission. = +1 NeutralResearch the target and learn more about him. = +1 NeutralTravel to guard post. = +1 NeutralDelivering a message. = +2 GoodPrepare for the kill. = +1 NeutralA finely crafted crossbow. = +2 NeutralRetreat into darkness... = +3 GoodEND RESULT - 14 Good 17 Neutral 7 Evil
Rewards:
Redeeming Light
Description:
Take the scroll and accept the mission. = +1 NeutralResearch the target and learn more about him. = +1 NeutralTravel to guard post. = +1 NeutralDelivering a message. = +2 GoodPrepare for the kill. = +1 NeutralA pair of cruel looking daggers. = +2 GoodRetreat into darkness... = +3 GoodEND RESULT 21 Good 21 Neutral 7 Evil
Rewards:
Description:
Take the scroll and accept the mission. = +1 NeutralResearch the target and learn more about him. = +1 NeutralTravel to guard post. = +1 NeutralDelivering a message. = +1 GoodPrepare for the kill. = +1 NeutralA finely crafted crossbow. = +2 NeutralKill all witnesses! = +3 EvilEND RESULT - 23 Good 27 Neutral 10 Evil
Rewards:
Description:
Take the scroll and accept the mission. = +1 NeutralScout the area where the target located. = +1 NeutralSeek a guard working for the merchant. = + 1 NeutralBribe the guard for information. = +1 NeutralPrepare for the kill. = +1 Neutral
------------------------------ ----
------------------------------ ----
------------------------------ ------
------------------------------ ---------------------

A deadly dose of hydra poison. = +2 EvilKill all witnesses! =+ 3 EvilEND RESULT - 23 Good 32 Neutral 15 Evil
Rewards:
Amulet of Despair

Primarily based on REGARDING ARIELLE: IN DEPTH GUIDE by Joyce Chung.
Contents[show]
* 1 Caveat* 2 Getting Arielle* 3 Getting her shield* 4 Get her armor and bladeo 4.1 Part 1o 4.2 Part 2* 5 Finally* 6 Sources
Caveat Edit Caveat sectionEdit
* If you are a long time player, you may not be able to do the quests to get Arielle and her gear (shield, armor, and blade).[citation needed]* If these quests do not show up on your Land page in Castle Age, you can access them by using the links in this article.
Getting Arielle Edit Getting Arielle sectionEdit
Epic questLand of Mist
Population Achievement Rewards:
* Rescue 500 Rangers: +1 Skill Point and 1 Castle. [Income $65,000]* Rescue 400 Rogues: +1 Skill Point and 10 Shortsword +1s. [3/1]* Rescue 350 Wizards: +1 Skill Point and 5 Fireballs. [5/0]* Rescue 10 Princesses: +1 Skill Point and the General, Arielle.
Quest Loot to Collect: Mystic Scrolls (10 scrolls).
1. Explore the wooded area surrounding the Elven Castle (Stat energy.png 5 Energy)* A Special Event may occur here, where you must fight the shadows.o If you receive this quest, choose Option #3 - "Engage the enemy in Battle!" (Stat stamina.png 2 Stamina)2. Head towards the fire (Stat energy.png 5 Energy)* A Special Event may occur here, where you must fight the shadows.o If you receive this quest, choose Option #3 - "Engage the enemy in Battle!" (Stat stamina.png 2 Stamina)3. Aid the Allied Rangers and Rogues to ensure their safety (Stat energy.png 5 Energy)4. Remain in the outer campsite to aid the allied Rangers and seek Mystic Scrolls! (Stat energy.png 5 Energy)* Keep repeating this step.o A "Special Event" will randomly occur, where you can gain the Mystic Scrolls.o Use the 3rd option - "Attack and Capture Ranger" (Stat energy.png 5 Energy).
1.
You need 10 Mystic Scrolls - stay here until you have all 10. If you run out of turns before you have all 10, simply walk through the first steps to return to this spot and finish collecting scrolls.
2. Once you have 10 Mystic Scrolls, Find the Princess before... (Stat energy.png 5 Energy)3. Search Tent (Stat energy.png 5 Energy)* Keep repeating this step as well.o A "Special Event" will randomly occur, where you can rescue the princess.

o 3rd option is recommended - "Save the princess with a Mystic Scroll while looting the Tent!" (Stat energy.png 5 Energy). #:Continue searching the tent until you have rescued all 10 princesses (watch your Mystic Scroll count go down).4. Collect Bonuses - you will most likely complete this step multiple times while working toward rescuing the 10 princesses.
At the end of 25 rounds, you are awarded the bonuses you have so far earned. You will not be awarded Arielle until you collect bonuses at the end of the final 25 rounds, even if you have already rescued the 10 princesses. If you have not rescued 10 at the end of that, restart the quest from begining and click the options that leads you right to the end and keep rescuing her.
NOTE: Every quest item, bonus item and population is accumulative. Don't worry if you need to restart it.Getting her shield Edit Getting her shield sectionEdit
Epic questLand of Water: Docks
Population Achievement Rewards:
* Capture 500 Warlocks: +1 Skill Point and 1 Lake Fortress. [Income $150,000]* Capture 100 Knights: +1 Skill Point and 10 Longsword +1. [4/4]* Capture 400 Shamans: +1 Skill Point and 3 Dragonbanes. [5/5]* Capture 10 Assassins: +1 Skill Point and the Shield of Arielle.
Quest Loot to Collect: Dark Elixir (10 Elixirs)
1. Check the cabins surrounding the docks. (Stat energy.png 5 Energy)2. Continue checking the docks. (Stat energy.png 5 Energy)* You will get a "Special Event" here to battle the enemy Knight.o Choose option 3: Engage the enemy in Battle! (Stat stamina.png 2 Stamina)o Higher chances of getting Dark Elixir. Stay here and continue till you get your 10 Elixirs.3. Head to Merchant Ships! (Stat energy.png 5 Energy)4. Search the Merchant Ships for the "Assassin". (Stat energy.png 5 Energy)* You will also get a "Special Event" here. Move on if you don't get the event.o Option 3 gives a chance for a Dark Elixir. Choose 1 and 2 if you don't want to spend your energy here.o You can capture knights here if you want to get the skill points.5. Head to the last ship... (Stat energy.png 5 Energy)6. Search the last ship! (Stat energy.png 5 Energy)* Keep repeating this step and look for "Special Event", where you can capture the Assassin.o Choose 1st option "Use a Dark Elixir to Hypnotize the Enemy Forces!" (Stat energy.png 5 Energy).o Continue searching until you have 10 Assassins.o If you clicked wrong and went past the above steps before you have 10 elixirs... you can still get them here. Choose option 3 to attack. (Stat stamina.png 4 Stamina) It will give 1 dark elixir.7. Collect bonuses (including Shield of Arielle, if you have captured 10 Assassins).
Get her armor and blade Edit Get her armor and blade sectionEdit
IMPORTANT NOTE: THE CAVES AND DARK TOWER QUESTS ARE LINKED. FOLLOW INSTRUCTIONS CAREFULLY.
Epic questLand of Water: CavesEpic questLand of Water: Dark Tower
Population Achievement Rewards: CAVES
* Capture 800 Warlocks: +1 Skill Point and 2 Lake Fortresses. [Income $150,000]* Capture 300 Knights: +1 Skill Point and 10 Longsword +1s. [4/4]* Capture 10 Golems: +1 Skill Point and 3 Dragon Talons. [6/6]* Capture 10 Champions: +1 Skill Point and the Armor of Arielle.

Quest Loot to Collect: Empty Crystals (15 crystals)
Population Achievement Rewards: DARK TOWER
* Capture 800 Warlocks: +1 Skill Point and 1 Sky Sanctuary. [Income $200,000]* Capture 300 Knights: +1 Skill Point and 10 Longsword +1s. [4/4]* Capture 1200 Shadows: +1 Skill Point and 2 Demonic Circles. [9/6]* Capture 15 Maidens: +1 Skill Point and the Blade of Arielle.
Quest Loot to Collect: Maiden Soul (15 souls) + Golem Banes (10 banes)
Part 1 Edit Part 1 sectionEdit
Epic questLand of Water: Caves
1. Explore the caves. (Stat energy.png 5 Energy)* "Special Event" will sometimes occur here.o Choose to Engage enemy in Battle! (Stat stamina.png 2 Stamina) for +5? EXP bonus.o If going for Achievement "Capture 10 Golems: +1 Skill Point and 3 Dragon Talons. [6/6]" Choose Capture the Golem with Golem Bane! (You will need 10 extra Golem Banes.)2. Head toward the light source! (Stat energy.png 5 Energy)3. Hurry past the Golems, avoiding detection. (Stat energy.png 5 Energy)* If you get a "Special Event" here...o Choose OPTION 2 (Stat stamina.png 4 Stamina) for 1,000,000 gold (no Golem Banes here... sorry).4. Head to the light... (Stat energy.png 5 Energy)5. Explore Vault! (Stat energy.png 5 Energy)* Keep Exploring till you get a "Special Event", where Champion appears to challenge you.o Choose OPTION 3: Rush the Enemies with overwhelming force (Requires 30 Army Members) (Stat stamina.png 4 Stamina)o Quest Loot: Empty Crystal.o Repeat this step till you have collected 15 crystals.6. After you have 15 crystals, PAUSE here.. go do Dark Tower quest. Don't finish this round first.
Epic questLand of Water: Dark Tower
1. Click the hyperlink above and open in new tab...2. Explore the lower levels. (Stat energy.png 5 Energy)* "Special Event" may appear here.o Choose OPTION 1: There is much darkness in the heart of every man. (Stat energy.png 5 Energy).o Loot: +5? EXP or Maiden Shadow join you as a soldier (not important).3. Head higher... (Stat energy.png 5 Energy)
* "Continue exploring the lower levels." to capture more Warlocks and Knights for Achievement Rewards
1. Continue your ascent (Stat energy.png 5 Energy)2. Remain in the middle of the tower. (Stat energy.png 5 Energy)* Stay here and keep doing clicking the quest till "Special Event" appears, where you can capture the Maiden Shadow.o Choose OPTION 1: Hold an Empty Crystal in her direction... (quest item: Maiden Soul - needs 15 Maiden Souls).o You will need to repeat the quests to collect all 15 souls.3. After you have all the 15 Maiden Souls, Head to the top... (Stat energy.png 5 Energy)4. Explore Room. (Stat energy.png 5 Energy)* Keep Exploring till you get the "Special Event". The Dark Maiden will appear here. PAY ATTENTION HERE!o Choose OPTION 1: Shatter a Maiden Soul in her presence! (Stat energy.png 5 Energy) to Capture The Maiden!o Capture 15 Maidens. You will need to repeat this many times to complete 15 captures as you may not capture a Maiden every time, the use of 15 Maiden Souls yields about 12 Maidens, be prepared to go get more Empties, fill them, and come back.

o Repeat the quest from beginning if needed, but proceed directly all the way to top without stopping in the middle, to complete all 15 captured Maidens.* After you've captured 15 Maidens, either continue to Explore Room. (Stat energy.png 5 Energy) or start again at Dark Tower and get back to this point and repeat until you get the "Special Event" again.o Choose OPTION 3: Rush the Enemy with overwhelming force (Requires 70 Army Members)! (Stat stamina.png 4 Stamina)
This gives you a confirmed Golem Bane EVERYTIME.
1.
NOTE ON GOLEM BANES:* Complimenting the Dark Maiden on her beauty can give a Golem Bane, but other times she embraces you and leaves 1 million gold...* You can also get the golem by attacking the Dark Maiden, and the Shadow Maiden often gets in your way redoing the quest... get 7 or 8 Golem Banes then go for the Dark Maiden; when the Shadow Maiden intervenes restarting the quest, compliment her and get the last few Golem Banes, saves a few hundred energy.* For those collectors while attacking the Shadow Maiden does get her, you get her anyway from collecting the Dark Maiden later on, so no need to waste the energy/stamina at that point.
2. Collect your reward including Blade of Arielle , if you captured 15 Maidens.
Part 2 Edit Part 2 sectionEdit
Assuming you have 10 Golem Banes, return to...
Epic questLand of Water: Caves
1. Continue with Explore Vault! (Stat energy.png 5 Energy)* Repeat that till you get the "Special Event" where the Champion appears.o This time... choose OPTION 1: Use a Golem Bane to control the Golems and capture the Champion!o You will need to repeat that multiple times or restart the whole quest until you have 10 Champions. If restart, choose the options that lead to the vault and continue collecting Champions.2. Collect your rewards including Armor Of Arielle , if you collected 10 Champions.
Finally Edit Finally sectionEdit
There you go... NOW you have Arielle AND her FULL SET!
NOTE: The quest items all drop from "Special Events", so you need to keep doing the quests till that random EVENT pops out! Good Luck~!!Sources Edit Sources sectionEdit
* REGARDING ARIELLE: IN DEPTH GUIDE (on Facebook) by Joyce Chung* Epic Quest Walkthrough (on Official Castle Age forums) by Death of Rats* Notes (on Facebook) from Arthur Niel

At the end of 25 rounds, you are awarded the bonuses you have so far earned. You will not be awarded Arielle until you collect bonuses at the end of the final 25 rounds, even if you have already rescued the 10 princesses. If you have not rescued 10 at the end of that, restart the quest from begining and click the options that leads you right to the end and keep rescuing her.

o Capture 15 Maidens. You will need to repeat this many times to complete 15 captures as you may not capture a Maiden every time, the use of 15 Maiden Souls yields about 12 Maidens, be prepared to go get more Empties, fill them, and come back.

* You can also get the golem by attacking the Dark Maiden, and the Shadow Maiden often gets in your way redoing the quest... get 7 or 8 Golem Banes then go for the Dark Maiden; when the Shadow Maiden intervenes restarting the quest, compliment her and get the last few Golem Banes, saves a few hundred energy.

At the end of 25 rounds, you are awarded the bonuses you have so far earned. You will not be awarded Arielle until you collect bonuses at the end of the final 25 rounds, even if you have already rescued the 10 princesses. If you have not rescued 10 at the end of that, restart the quest from begining and click the options that leads you right to the end and keep rescuing her.

Reinforcements for Arena you have to kick a friend out of your army is the easiest
http://apps.facebook.com/castle_age/army_member.php?action=delete&player_id=123456789
Switch the id number with the's person player number. Seems like you can't get the no. from the photo anymore - I used the elite guard links. Then when you're in Arena & playing click the Add & then send the invite army.
karen rogers id 1811259193aliantha castle ###

Reinforcements for Arena you have to kick a friend out of your army is the easiest
http://apps.facebook.com/castle_age/army_member.php?action=delete&player_id=123456789
Switch the id number with the's person player number. Seems like you can't get the no. from the photo anymore - I used the elite guard links. Then when you're in Arena & playing click the Add & then send the invite army.

Switch the id number with the's person player number. Seems like you can't get the no. from the photo anymore - I used the elite guard links. Then when you're in Arena & playing click the Add & then send the invite army.
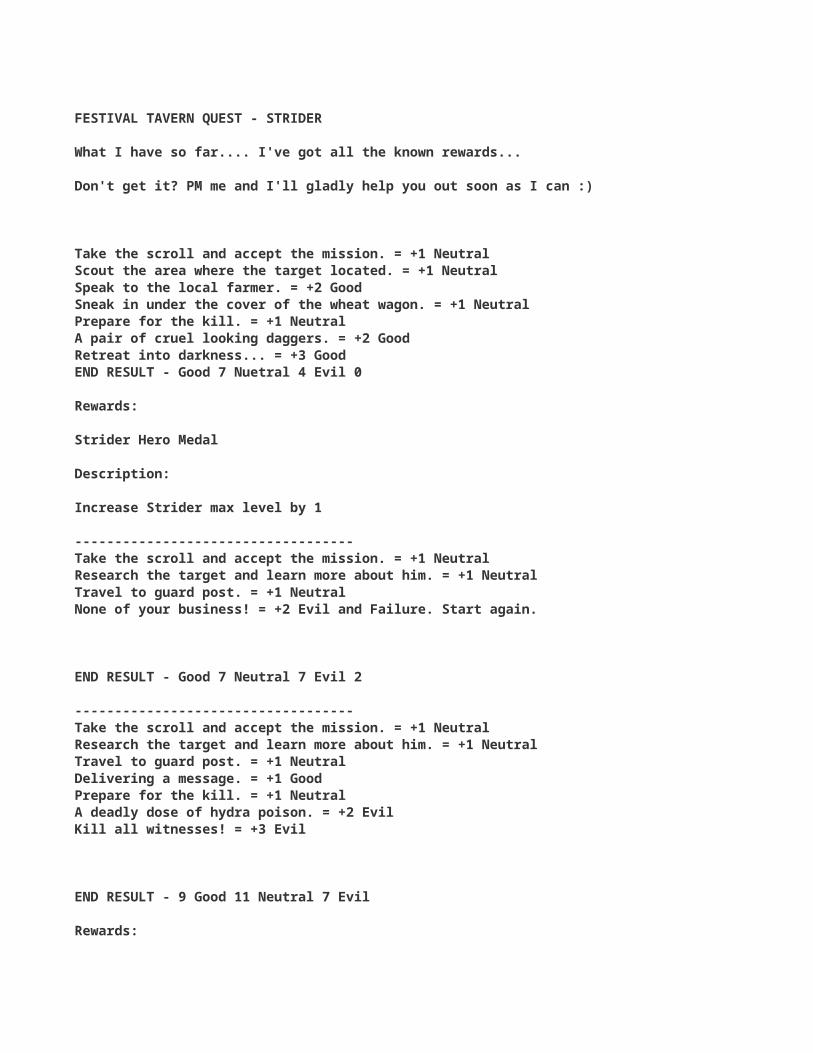
Alpha Vincent Guidelines
Rules for Summoning/Attacking Vincent and Alpha Vincents:1) It is possible for 10 to 15 of us to get in 310,000 damage, and I would like to see more take advantage of this so you may get the general.2) Leave all succubi remaining in all towers. This allows for him to be healed and also for us to achieve more monster points; both individually and for the guild. Only take her out when the word is given.3) No CTA's are to be posted, unless told otherwise by an officer or I. This also allows for more points to be achieved for the individuals and the guild.4) Lower levels who are defeated attacking guild monsters are welcome. You not only earn points for losing; but also when attacking succubus', allow for the tower to be healed...therefore allowing to collect more points.5) Summoning of any guild monster must only be done with an officer's or my permission. We do this to advertise that a guild monster is going to be summoned, allowing for some to save stamina. In addition, this gives our guild a heads up to ensure that all other monsters within the guild will not fail.6) Please do not join as a mage. We give ample notice as to when our guild monsters will be summoned. For best results, go in as a rogue with might lvl 4 equipped (should you have might). Doing so will earn you maximum points in achieving your goal of 310,000 damage, battle points.7) Absolutely no mages allowed when summoned please. This will damage all within the towers you attack and lower the chance of others achieving their goal.8) Attack all but the succubus' with 10 to 20 stamina, no matter how much health the monster has. Doing so will still give you full battle points and experience.9) Have fun doing this as a team event. ;)
Failure to adhere to these rules can result in one or more of the following: demotion of rank, a warning, being spoken to by myself, or in extreme cases expulsion from this guild. Many have been here long enough to know some of these rules and should follow them already. Some rules are new and I would like to see that you all work as a team. Expulsion from the guild is the most extreme and if done, I would have to have just cause. As with any action, there will be voting by officers as to what is done when rules are not followed. I'd like to consider this guild built with members who are adamant players. This is now what is an expectation of the guild: Those who are daily team players, building their characters to not only suit the individual; but the guild as well. Thank you for your cooperation.
Thorgrim {[TRC~RCE]}-Wyrmslayer's Guild Master
did some quick research. a/v will drop legend when you achieve 140k damage (15% drop rate). My mini (lvl116) can achieve 250k damage (34.48% legend drop rate) with only 119 stamina. regular vincent and a/v epic drop rate is about the same. Isn't it more profitable to try our luck in getting a legend from a/v, then no chance to get legend by attacking vincent? I'm not opposing the idea of helping the lower lvls to get good item. i'm just curious that is it hard for us to aim for at least 140k damage in a/v?
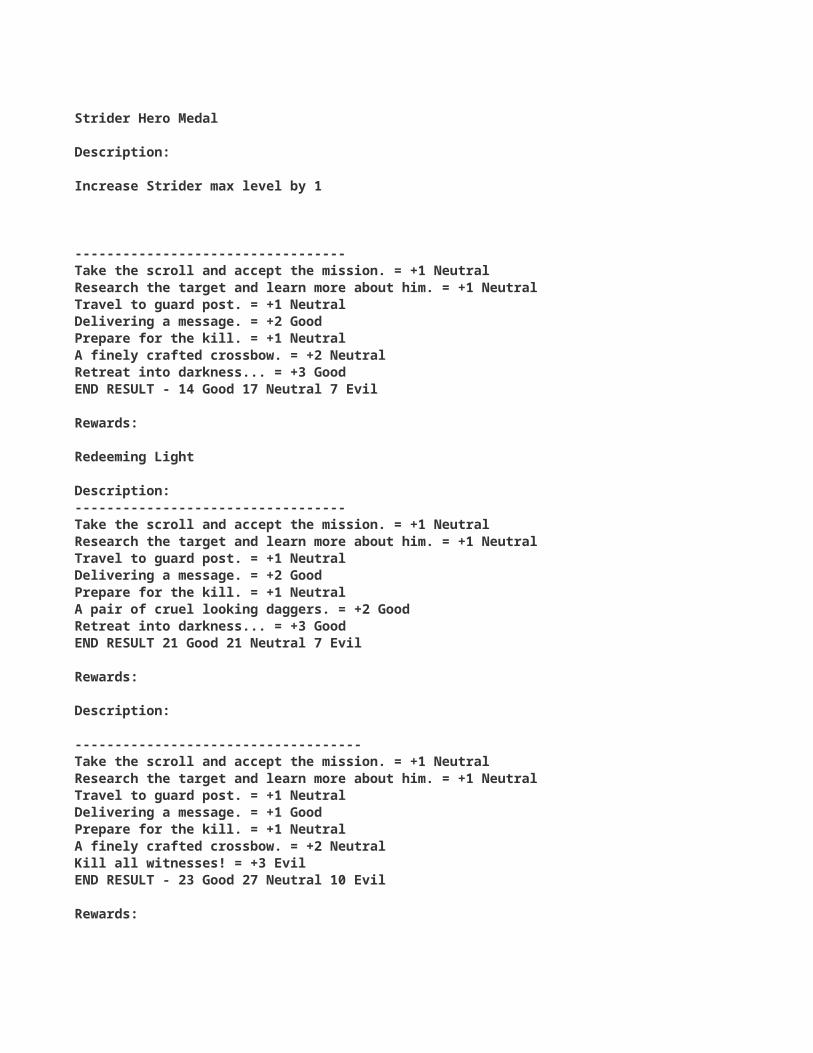
1) It is possible for 10 to 15 of us to get in 310,000 damage, and I would like to see more take advantage of this so you may get the general.2) Leave all succubi remaining in all towers. This allows for him to be healed and also for us to achieve more monster points; both individually and for the guild. Only take her out when the word is given.3) No CTA's are to be posted, unless told otherwise by an officer or I. This also allows for more points to be achieved for the individuals and the guild.4) Lower levels who are defeated attacking guild monsters are welcome. You not only earn points for losing; but also when attacking succubus', allow for the tower to be healed...therefore allowing to collect more points.5) Summoning of any guild monster must only be done with an officer's or my permission. We do this to advertise that a guild monster is going to be summoned, allowing for some to save stamina. In addition, this gives our guild a heads up to ensure that all other monsters within the guild will not fail.6) Please do not join as a mage. We give ample notice as to when our guild monsters will be summoned. For best results, go in as a rogue with might lvl 4 equipped (should you have might). Doing so will earn you maximum points in achieving your goal of 310,000 damage, battle points.7) Absolutely no mages allowed when summoned please. This will damage all within the towers you attack and lower the chance of others achieving their goal.8) Attack all but the succubus' with 10 to 20 stamina, no matter how much health the monster has. Doing so will still give you full battle points and experience.
Failure to adhere to these rules can result in one or more of the following: demotion of rank, a warning, being spoken to by myself, or in extreme cases expulsion from this guild. Many have been here long enough to know some of these rules and should follow them already. Some rules are new and I would like to see that you all work as a team. Expulsion from the guild is the most extreme and if done, I would have to have just cause. As with any action, there will be voting by officers as to what is done when rules are not followed. I'd like to consider this guild built with members who are adamant players. This is now what is an expectation of the guild: Those who are daily team players, building their characters to not only suit the individual; but the guild as well. Thank you for your cooperation.
did some quick research. a/v will drop legend when you achieve 140k damage (15% drop rate). My mini (lvl116) can achieve 250k damage (34.48% legend drop rate) with only 119 stamina. regular vincent and a/v epic drop rate is about the same. Isn't it more profitable to try our luck in getting a legend from a/v, then no chance to get legend by attacking vincent? I'm not opposing the idea of helping the lower lvls to get good item. i'm just curious that is it hard for us to aim for at least 140k damage in a/v?
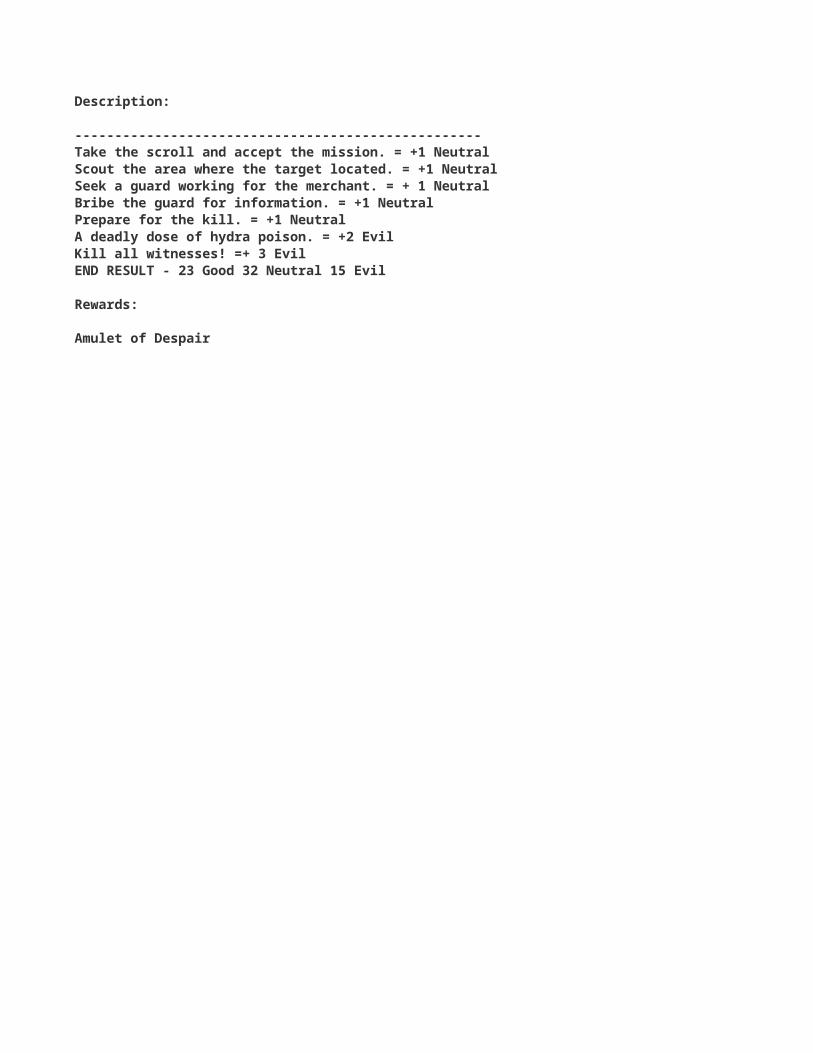
2) Leave all succubi remaining in all towers. This allows for him to be healed and also for us to achieve more monster points; both individually and for the guild. Only take her out when the word is given.3) No CTA's are to be posted, unless told otherwise by an officer or I. This also allows for more points to be achieved for the individuals and the guild.4) Lower levels who are defeated attacking guild monsters are welcome. You not only earn points for losing; but also when attacking succubus', allow for the tower to be healed...therefore allowing to collect more points.5) Summoning of any guild monster must only be done with an officer's or my permission. We do this to advertise that a guild monster is going to be summoned, allowing for some to save stamina. In addition, this gives our guild a heads up to ensure that all other monsters within the guild will not fail.6) Please do not join as a mage. We give ample notice as to when our guild monsters will be summoned. For best results, go in as a rogue with might lvl 4 equipped (should you have might). Doing so will earn you maximum points in achieving your goal of 310,000 damage, battle points.7) Absolutely no mages allowed when summoned please. This will damage all within the towers you attack and lower the chance of others achieving their goal.8) Attack all but the succubus' with 10 to 20 stamina, no matter how much health the monster has. Doing so will still give you full battle points and experience.
Failure to adhere to these rules can result in one or more of the following: demotion of rank, a warning, being spoken to by myself, or in extreme cases expulsion from this guild. Many have been here long enough to know some of these rules and should follow them already. Some rules are new and I would like to see that you all work as a team. Expulsion from the guild is the most extreme and if done, I would have to have just cause. As with any action, there will be voting by officers as to what is done when rules are not followed. I'd like to consider this guild built with members who are adamant players. This is now what is an expectation of the guild: Those who are daily team players, building their characters to not only suit the individual; but the guild as well. Thank you for your cooperation.
did some quick research. a/v will drop legend when you achieve 140k damage (15% drop rate). My mini (lvl116) can achieve 250k damage (34.48% legend drop rate) with only 119 stamina. regular vincent and a/v epic drop rate is about the same. Isn't it more profitable to try our luck in getting a legend from a/v, then no chance to get legend by attacking vincent? I'm not opposing the idea of helping the lower lvls to get good item. i'm just curious that is it hard for us to aim for at least 140k damage in a/v?

5) Summoning of any guild monster must only be done with an officer's or my permission. We do this to advertise that a guild monster is going to be summoned, allowing for some to save stamina. In addition, this gives our guild a heads up to ensure that all other monsters within the guild will not fail.6) Please do not join as a mage. We give ample notice as to when our guild monsters will be summoned. For best results, go in as a rogue with might lvl 4 equipped (should you have might). Doing so will earn you maximum points in achieving your goal of 310,000 damage, battle points.
Failure to adhere to these rules can result in one or more of the following: demotion of rank, a warning, being spoken to by myself, or in extreme cases expulsion from this guild. Many have been here long enough to know some of these rules and should follow them already. Some rules are new and I would like to see that you all work as a team. Expulsion from the guild is the most extreme and if done, I would have to have just cause. As with any action, there will be voting by officers as to what is done when rules are not followed. I'd like to consider this guild built with members who are adamant players. This is now what is an expectation of the guild: Those who are daily team players, building their characters to not only suit the individual; but the guild as well. Thank you for your cooperation.
did some quick research. a/v will drop legend when you achieve 140k damage (15% drop rate). My mini (lvl116) can achieve 250k damage (34.48% legend drop rate) with only 119 stamina. regular vincent and a/v epic drop rate is about the same. Isn't it more profitable to try our luck in getting a legend from a/v, then no chance to get legend by attacking vincent? I'm not opposing the idea of helping the lower lvls to get good item. i'm just curious that is it hard for us to aim for at least 140k damage in a/v?
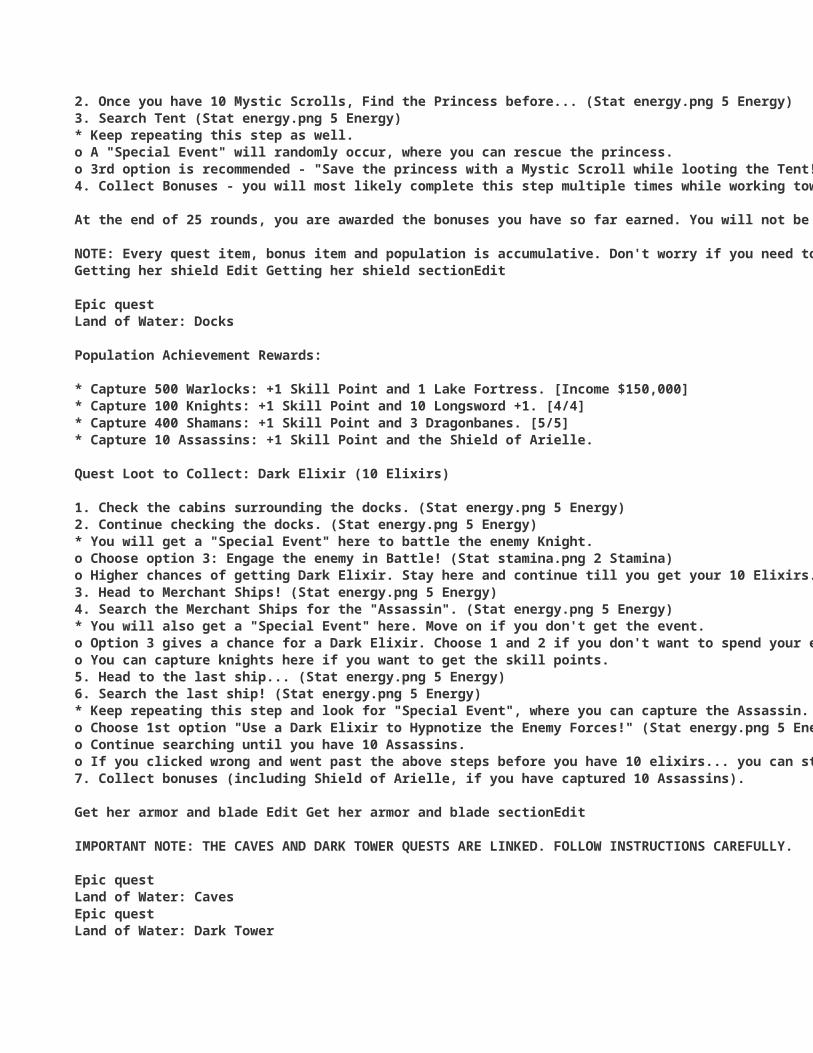
5) Summoning of any guild monster must only be done with an officer's or my permission. We do this to advertise that a guild monster is going to be summoned, allowing for some to save stamina. In addition, this gives our guild a heads up to ensure that all other monsters within the guild will not fail.
Failure to adhere to these rules can result in one or more of the following: demotion of rank, a warning, being spoken to by myself, or in extreme cases expulsion from this guild. Many have been here long enough to know some of these rules and should follow them already. Some rules are new and I would like to see that you all work as a team. Expulsion from the guild is the most extreme and if done, I would have to have just cause. As with any action, there will be voting by officers as to what is done when rules are not followed. I'd like to consider this guild built with members who are adamant players. This is now what is an expectation of the guild: Those who are daily team players, building their characters to not only suit the individual; but the guild as well. Thank you for your cooperation.
did some quick research. a/v will drop legend when you achieve 140k damage (15% drop rate). My mini (lvl116) can achieve 250k damage (34.48% legend drop rate) with only 119 stamina. regular vincent and a/v epic drop rate is about the same. Isn't it more profitable to try our luck in getting a legend from a/v, then no chance to get legend by attacking vincent? I'm not opposing the idea of helping the lower lvls to get good item. i'm just curious that is it hard for us to aim for at least 140k damage in a/v?

Failure to adhere to these rules can result in one or more of the following: demotion of rank, a warning, being spoken to by myself, or in extreme cases expulsion from this guild. Many have been here long enough to know some of these rules and should follow them already. Some rules are new and I would like to see that you all work as a team. Expulsion from the guild is the most extreme and if done, I would have to have just cause. As with any action, there will be voting by officers as to what is done when rules are not followed. I'd like to consider this guild built with members who are adamant players. This is now what is an expectation of the guild: Those who are daily team players, building their characters to not only suit the individual; but the guild as well. Thank you for your cooperation.

Failure to adhere to these rules can result in one or more of the following: demotion of rank, a warning, being spoken to by myself, or in extreme cases expulsion from this guild. Many have been here long enough to know some of these rules and should follow them already. Some rules are new and I would like to see that you all work as a team. Expulsion from the guild is the most extreme and if done, I would have to have just cause. As with any action, there will be voting by officers as to what is done when rules are not followed. I'd like to consider this guild built with members who are adamant players. This is now what is an expectation of the guild: Those who are daily team players, building their characters to not only suit the individual; but the guild as well. Thank you for your cooperation.

Failure to adhere to these rules can result in one or more of the following: demotion of rank, a warning, being spoken to by myself, or in extreme cases expulsion from this guild. Many have been here long enough to know some of these rules and should follow them already. Some rules are new and I would like to see that you all work as a team. Expulsion from the guild is the most extreme and if done, I would have to have just cause. As with any action, there will be voting by officers as to what is done when rules are not followed. I'd like to consider this guild built with members who are adamant players. This is now what is an expectation of the guild: Those who are daily team players, building their characters to not only suit the individual; but the guild as well. Thank you for your cooperation.
Failure to adhere to these rules can result in one or more of the following: demotion of rank, a warning, being spoken to by myself, or in extreme cases expulsion from this guild. Many have been here long enough to know some of these rules and should follow them already. Some rules are new and I would like to see that you all work as a team. Expulsion from the guild is the most extreme and if done, I would have to have just cause. As with any action, there will be voting by officers as to what is done when rules are not followed. I'd like to consider this guild built with members who are adamant players. This is now what is an expectation of the guild: Those who are daily team players, building their characters to not only suit the individual; but the guild as well. Thank you for your cooperation.

Wikia article:
http://castleage.wikia.com/wik
i/Divine_Items
CA Forum thread:
http://174.37.115.166/cforum/s
howthread.php?t=52830
What are Divine Items?
Divine Items are special equipment which are used against monsters with Divine Armor. They have Divine Power stats/rating that is used to help in reducing or completely eliminating the amount of damage a monster blocks per attack. Merely owning them is enough to have an effect. You can see their Divine Power stats in your keep page.
Divine Item "Rule"
An interesting, unmentioned "rule" is that Divine Items does not stack in the same slot. Which means you can only use 1 divine item per equipment slot.
List of Available Divine Items
Generals
Agamemnon - 20 Divine Power (Ascension Chest Epic)
Aurelius - 20 Divine Power (Ascension Chest Epic)
Jahanna - 20 Divine Power (Ascension Chest Epic)
Alyzia - 5 Divine Power (Ascension Chest Epic)
Weapons
Heart of the Woods - 120 Divine Power (alchemy, ingriedients dropped by Aurora)
Hammer of Storms - 40 (alchemy, ingredients dropped by each of the four giants)
Off-hands
Aegis of Kings - 120 (alchemy, ingredients dropped by Agamemnon, also requires a summoner drop)
Aegis of Stone - 40 (alchemy, ingredients dropped by each of the four giants)
Helmet
Helm of Arcane Energies - 120 (alchemy, ingredients dropped by Ambrosia)
Armor
Glacial Plate - 40 (alchemy, ingredients dropped by each of the four giants)
Tempest Plate - 10 (6500 Ambrosia demi points)
Moonfall Battlegear - 10 (6500 Aurora demi points)
Retribution Armor - 10 (6500 Azeron demi points)
Amulet
Keeper of Chaos - 180 (alchemy, ingredients dropped by Malekus)
Force of Nature - 80 (alchemy, ingredients dropped by Jahanna)
Juggernaut Medallion - 10 (6500 Malekus demi points)
Lionheart Seal - 10 (6500 Corvintheus demi points)
Divine Power Information (in courtesy of my fellow countrymen pinoys)
I have been doing experiments and gathering/trading info on the divine power feature of CA. I have already published my findings in CA Wikia and the official CA Forums. But I feel I... should share this with the PCA group as well especially if they don't visit the aforementioned sites.
This doc is roughly the same as the ones published/posted in the above pages but with some edits here or there. Consider this as the latest version.
Say you own 2 Force of Nature, you can only use the divine power of one of them to counter a monster's divine armor effect. Which means you will only use 80 Divine Power instead of 160 in the amulet slot. The same is true if you have Tempest Plate and Moonfall Battlegear. Although the items are different, since they share the same slot, only one of them will be used.
Similar to dueling, the game chooses your best equipment according to their Divine Power stats. Force of Nature will always be used over Juggernaut Medallion and Lionheart Seal in the amulet slot if you own all 3.
Trisoul Plate - 160 (alchemy, ingredients dropped by Typhonus)

Magic
Lava Inferno - 40 (alchemy, ingredients dropped by each of the four giants)
Calculating the Divine Power/Armor Effect.
Sample Attack Log:
Jahanna, Priestess of Aurora has prevented 4765 damage with their Divine Armor, get items with Divine Power to do more damage!
*If you have enough divine power, you will not see the prevented damage message and instead get the one where is says your divine items helped you deal more damage to the monster.
Based from the Log:
58,775 -> Inflicted Damage
4,765 -> Prevented Damage
Formulas:
Inflicted Damage + Prevented Damage = Total Damage
Prevented Damage / Total Damage = Percentage of Prevented Damage
Where:
Inflicted Damage - This is the actual damage that you logged in your activity.
Prevented Damage - This is the damage that the monster's divine armor blocked
Total Damage - This is the damage you would've done if you had enough Divine Power to fully cancel a monster's divine armor
Percentage of Prevented Damage - Used to measure the monster's divine armor potential. A player with 0 divine items will know/feel the full effect of a monster's divine armor. Comparing this player's damage to the damage of other players with divine items, we can measure how a divine armor's effectiveness goes down for every divine power used. Using this, I was able to make the monster info below
Monsters
Jahanna: Blocks 10% of damage. Decreases by 0.125% per 1 divine power used. Needs 80 divine power to fully cancel.
Agamemnon: Blocks 30% of damage. Decreases by 0.25% per 1 divine power used. Needs 120 divine power to fully cancel.
Aurora: Blocks 40% of damage. Decreases by 0.25% per 1 divine power used. Needs 160 divine power to fully cancel.
Magmos: Blocks 40% of damage. Decreases by 0.2225% per 1 divine power used. Needs 180 divine power to fully cancel.
Using the info above, let's say you only have Tempest Plate (armor) and Lionheart Seal (amulet) as your divine items. Against Jahanna, you will use 20 divine power against her divine armor:
0.125 * (10 + 10) = 2.5
Since Jahanna is set to block 10% of damage, your divine items will reduce it's effectiveness, lowering the Prevented Damage to only 7.5%
*10% - 2.5% = 7.5%
Molten Core - 70 (alchemy, ingredients dropped in the Cave of Wonder, requires Lava Inferno)
XXX cast magic both on Jahann, stopping her in his tracks for a Devastating amount of Damage[58,775]. Jahanna, Priestess of Aurora dealt 4078 damage to the party.
Glacius: Blocks 30% of damage. Decreases by 0.25% per 1 divine power used. Needs 120 divine power to fully cancel.
Ambrosia: Blocks 45% of damage. Decreases by 0.2045% per 1 divine power used. Needs 220 divine power to fully cancel.
Typhonus: Blocks 45% of damage. Decreases by ~0.18% per 1 divine power used. Needs 250 divine power to fully cancel.

Dark Rage:
Dark Rage adds 40 divine power to the amount you use. Even if you have 0 divine items, you'll get 40 divine power if you activate Dark Rage. Currently, among the 5 monsters above, only Aurora's and Ambrosia's battle has the Dark Rage system installed.
Tips on building divine item arsenal:
At this stage, the choices are easy. Hit Jahanna first, her item offers a solid 80 divine power and her block is only at 10%. Once you obtain Force of Nature, look to hit Agamemnon or Aurora next. Both offer BIS items with 120 divine power.
If you are able to summon or close to summoning Agamemnon yourself (2000 pts or less to complete Vanguard rank), go fight the Overseer. His divine armor is weaker and his summon cooldown is shorter, not to mention extra 24 hours time limit to beat him. However, Aegis of Kings requires a summoner drop so you need to be in a good position in the Tower of Transcendence for this choice.
If you are not in a good position in ToT, look to fight Aurora instead. She has a tougher divine armor but has the Dark Rage system to help out. Heart of Woods requires no summoner drop which is the main headache in the Agamemnon hunt.
Ambrosia is rarer since only those who have quested far into Fire II can summon her. Her divine armor is tougher but is of no consequence if you build up as recommended. Her divine item is a BIS helmet with 120 divine power and has the highest stats among all equipment to date (101 combined).
Magmos and his giant troupe are more common since their summon items are easily gifted. Their divine items offer only 40 divine power. If you choose this route, save up to create Lava Inferno (BIS magic, only magic divine item currently) and Glacial Plate (BIS attack armor, highest rated armor divine item currently). Choose Aegis of Stone next if you got Heart of the Woods earlier to fill your offhand slot with a divine item. Go with Hammer of Storms if you got Aegis of Kings instead to fill your weapon slot with a divine item.
Optional Detour:
Crutch Divine Items: Aegis of Stone, Hammer of Storms
Why fight Magmos now?
Why create Aegis of Stone?
Why create Hammer of Storms?
See "Why create Aegis of Stone?" above.
Current Game Standing:
Highest Effective Divine Power Output Possible: 790 Divine Power (Agamemnon/Aurelius/Jahanna + Heart of Woods + Aegis of Kings + Helm of Arcane Energies + Trisoul Plate + Keeper of Chaos + Molten Core)
Highest Monster Divine Armor Rating: Requires 275 Divine Power, 45% Block, ~0.1636% reduction rate (Malekus)
This is for those who still only have the demi divine items. Power players and/or Heavy Slayers may not need this guide if they have majority of the divine items already.
After obtaining either Aegis of Kings or Heart of Woods (or both if you like), your overall divine power rating is now at least 200. Magmos can't stop you while Ambrosia and Typhonus could but only barely. With Dark Rage, the energy demi-goddess' divine armor will be nullified. You are free to choose which tough nuts to crack next to further build up your divine power.
Typhonus is a combination of the giants and mama Ambro. Easily gifted ingredients paired with the toughest divine armor to date. The chimera's divine item has the highest divine power rating of all divine items currently, clocking in at 160 DP. Be warned though that the recipe requires the most number of ingredients of all divine items (not to mention that its epic drops are spread out, diliuting the chances of landing a *particular one*) with 22. Keep also in mind that it's stats is only 75 combined (it's amulet epic drop has 76 combined!!!) although it is a BIS overall armor. Keep this in mind.
Going through Agamemnon or Aurora is the optimal route to build your divine power immediately to 200. However, this can get tiring as you need to rid of them more than 10 times on average. You may get sick of fighting them halfway. As a distraction, fight Kromash, Shardros and/or Glacius in between to break the monotomy and collect some alchemy pieces for your Lava Inferno(s) and Glacial Plate(s) later. However, you can also build the two lesser divine items first if you wish. Doing so however will require you to "prematurely" face the game's second toughest divine armored monster: Magmos.
As mentioned, Magmos has the second toughest divine armor of all. However, he has 1 thing about him that is better than Ag or Aurora: he is a common monster. His summon ingredient can be obtain from gifts hence a more people can summon him compared to the other two. Just look at the public monster high tier page. Also creating either Aegis of Stone or Hammer of Storms only requires fighting him 3-4 times on average. Compared to more than 10x against the two A's, this detour makes sense for our short term goals. Be warned though that with only at most 90 divine power in your hands, it will be a painful 3-4 times as the Lava giant will still block 20% of your damage. If you don't have the stamina, time and/or FP to get to epic thresholds in his fight, stick to hitting Agememnon or Aurora.
For the purposes of this guide, we are trying to outfit every slot with divine items. Aegis of Kings is superior than Aegis of Stone in both stats and divine power. However, AoS benefits from having a more forgiving recipe than AoK. Not to mention that the monsters that drop it's ingredients are easily summoned by anyone who are at least level 185.
With these 2, your divine item gear should now be HoS (40) + AoS (40) + Tempest Plate/Moonfall Battlegear (10) + FoN (80) for a total of 170 divine power. High enough to cancel Agamemnon, Glacius and Aurora's armors (even without Dark Rage) but 10 point short of fully cancelling Magmos'...but at least it will hurt A LOT less (only 2.175% block). Ambrosia will be quite a pain with a 10.235% block (Dark Rage cuts it down to only 2.055%)
Remember though that AoS and HoS are only temporary crutches, short term goals of having our weapon and shield slot filled with divine item. In the long run, getting AoK and HotW are better. At least, until the next BIS divine weapon and shield are released (if there will be). But who knows how long will that be.

Divine Items are special equipment which are used against monsters with Divine Armor. They have Divine Power stats/rating that is used to help in reducing or completely eliminating the amount of damage a monster blocks per attack. Merely owning them is enough to have an effect. You can see their Divine Power stats in your keep page.
An interesting, unmentioned "rule" is that Divine Items does not stack in the same slot. Which means you can only use 1 divine item per equipment slot.
Aegis of Kings - 120 (alchemy, ingredients dropped by Agamemnon, also requires a summoner drop)
I have been doing experiments and gathering/trading info on the divine power feature of CA. I have already published my findings in CA Wikia and the official CA Forums. But I feel I... should share this with the PCA group as well especially if they don't visit the aforementioned sites.
This doc is roughly the same as the ones published/posted in the above pages but with some edits here or there. Consider this as the latest version.
Say you own 2 Force of Nature, you can only use the divine power of one of them to counter a monster's divine armor effect. Which means you will only use 80 Divine Power instead of 160 in the amulet slot. The same is true if you have Tempest Plate and Moonfall Battlegear. Although the items are different, since they share the same slot, only one of them will be used.
Similar to dueling, the game chooses your best equipment according to their Divine Power stats. Force of Nature will always be used over Juggernaut Medallion and Lionheart Seal in the amulet slot if you own all 3.

Jahanna, Priestess of Aurora has prevented 4765 damage with their Divine Armor, get items with Divine Power to do more damage!
*If you have enough divine power, you will not see the prevented damage message and instead get the one where is says your divine items helped you deal more damage to the monster.
Total Damage - This is the damage you would've done if you had enough Divine Power to fully cancel a monster's divine armor
Percentage of Prevented Damage - Used to measure the monster's divine armor potential. A player with 0 divine items will know/feel the full effect of a monster's divine armor. Comparing this player's damage to the damage of other players with divine items, we can measure how a divine armor's effectiveness goes down for every divine power used. Using this, I was able to make the monster info below
Jahanna: Blocks 10% of damage. Decreases by 0.125% per 1 divine power used. Needs 80 divine power to fully cancel.
Agamemnon: Blocks 30% of damage. Decreases by 0.25% per 1 divine power used. Needs 120 divine power to fully cancel.
Aurora: Blocks 40% of damage. Decreases by 0.25% per 1 divine power used. Needs 160 divine power to fully cancel.
Magmos: Blocks 40% of damage. Decreases by 0.2225% per 1 divine power used. Needs 180 divine power to fully cancel.
Using the info above, let's say you only have Tempest Plate (armor) and Lionheart Seal (amulet) as your divine items. Against Jahanna, you will use 20 divine power against her divine armor:
Since Jahanna is set to block 10% of damage, your divine items will reduce it's effectiveness, lowering the Prevented Damage to only 7.5%
Molten Core - 70 (alchemy, ingredients dropped in the Cave of Wonder, requires Lava Inferno)
XXX cast magic both on Jahann, stopping her in his tracks for a Devastating amount of Damage[58,775]. Jahanna, Priestess of Aurora dealt 4078 damage to the party.
Glacius: Blocks 30% of damage. Decreases by 0.25% per 1 divine power used. Needs 120 divine power to fully cancel.
Ambrosia: Blocks 45% of damage. Decreases by 0.2045% per 1 divine power used. Needs 220 divine power to fully cancel.
Typhonus: Blocks 45% of damage. Decreases by ~0.18% per 1 divine power used. Needs 250 divine power to fully cancel.

Dark Rage adds 40 divine power to the amount you use. Even if you have 0 divine items, you'll get 40 divine power if you activate Dark Rage. Currently, among the 5 monsters above, only Aurora's and Ambrosia's battle has the Dark Rage system installed.
At this stage, the choices are easy. Hit Jahanna first, her item offers a solid 80 divine power and her block is only at 10%. Once you obtain Force of Nature, look to hit Agamemnon or Aurora next. Both offer BIS items with 120 divine power.
If you are able to summon or close to summoning Agamemnon yourself (2000 pts or less to complete Vanguard rank), go fight the Overseer. His divine armor is weaker and his summon cooldown is shorter, not to mention extra 24 hours time limit to beat him. However, Aegis of Kings requires a summoner drop so you need to be in a good position in the Tower of Transcendence for this choice.
If you are not in a good position in ToT, look to fight Aurora instead. She has a tougher divine armor but has the Dark Rage system to help out. Heart of Woods requires no summoner drop which is the main headache in the Agamemnon hunt.
Ambrosia is rarer since only those who have quested far into Fire II can summon her. Her divine armor is tougher but is of no consequence if you build up as recommended. Her divine item is a BIS helmet with 120 divine power and has the highest stats among all equipment to date (101 combined).
Magmos and his giant troupe are more common since their summon items are easily gifted. Their divine items offer only 40 divine power. If you choose this route, save up to create Lava Inferno (BIS magic, only magic divine item currently) and Glacial Plate (BIS attack armor, highest rated armor divine item currently). Choose Aegis of Stone next if you got Heart of the Woods earlier to fill your offhand slot with a divine item. Go with Hammer of Storms if you got Aegis of Kings instead to fill your weapon slot with a divine item.
Highest Effective Divine Power Output Possible: 790 Divine Power (Agamemnon/Aurelius/Jahanna + Heart of Woods + Aegis of Kings + Helm of Arcane Energies + Trisoul Plate + Keeper of Chaos + Molten Core)
Highest Monster Divine Armor Rating: Requires 275 Divine Power, 45% Block, ~0.1636% reduction rate (Malekus)
This is for those who still only have the demi divine items. Power players and/or Heavy Slayers may not need this guide if they have majority of the divine items already.
After obtaining either Aegis of Kings or Heart of Woods (or both if you like), your overall divine power rating is now at least 200. Magmos can't stop you while Ambrosia and Typhonus could but only barely. With Dark Rage, the energy demi-goddess' divine armor will be nullified. You are free to choose which tough nuts to crack next to further build up your divine power.
Typhonus is a combination of the giants and mama Ambro. Easily gifted ingredients paired with the toughest divine armor to date. The chimera's divine item has the highest divine power rating of all divine items currently, clocking in at 160 DP. Be warned though that the recipe requires the most number of ingredients of all divine items (not to mention that its epic drops are spread out, diliuting the chances of landing a *particular one*) with 22. Keep also in mind that it's stats is only 75 combined (it's amulet epic drop has 76 combined!!!) although it is a BIS overall armor. Keep this in mind.
Going through Agamemnon or Aurora is the optimal route to build your divine power immediately to 200. However, this can get tiring as you need to rid of them more than 10 times on average. You may get sick of fighting them halfway. As a distraction, fight Kromash, Shardros and/or Glacius in between to break the monotomy and collect some alchemy pieces for your Lava Inferno(s) and Glacial Plate(s) later. However, you can also build the two lesser divine items first if you wish. Doing so however will require you to "prematurely" face the game's second toughest divine armored monster: Magmos.
As mentioned, Magmos has the second toughest divine armor of all. However, he has 1 thing about him that is better than Ag or Aurora: he is a common monster. His summon ingredient can be obtain from gifts hence a more people can summon him compared to the other two. Just look at the public monster high tier page. Also creating either Aegis of Stone or Hammer of Storms only requires fighting him 3-4 times on average. Compared to more than 10x against the two A's, this detour makes sense for our short term goals. Be warned though that with only at most 90 divine power in your hands, it will be a painful 3-4 times as the Lava giant will still block 20% of your damage. If you don't have the stamina, time and/or FP to get to epic thresholds in his fight, stick to hitting Agememnon or Aurora.
For the purposes of this guide, we are trying to outfit every slot with divine items. Aegis of Kings is superior than Aegis of Stone in both stats and divine power. However, AoS benefits from having a more forgiving recipe than AoK. Not to mention that the monsters that drop it's ingredients are easily summoned by anyone who are at least level 185.
With these 2, your divine item gear should now be HoS (40) + AoS (40) + Tempest Plate/Moonfall Battlegear (10) + FoN (80) for a total of 170 divine power. High enough to cancel Agamemnon, Glacius and Aurora's armors (even without Dark Rage) but 10 point short of fully cancelling Magmos'...but at least it will hurt A LOT less (only 2.175% block). Ambrosia will be quite a pain with a 10.235% block (Dark Rage cuts it down to only 2.055%)
Remember though that AoS and HoS are only temporary crutches, short term goals of having our weapon and shield slot filled with divine item. In the long run, getting AoK and HotW are better. At least, until the next BIS divine weapon and shield are released (if there will be). But who knows how long will that be.

Divine Items are special equipment which are used against monsters with Divine Armor. They have Divine Power stats/rating that is used to help in reducing or completely eliminating the amount of damage a monster blocks per attack. Merely owning them is enough to have an effect. You can see their Divine Power stats in your keep page.
I have been doing experiments and gathering/trading info on the divine power feature of CA. I have already published my findings in CA Wikia and the official CA Forums. But I feel I... should share this with the PCA group as well especially if they don't visit the aforementioned sites.
Say you own 2 Force of Nature, you can only use the divine power of one of them to counter a monster's divine armor effect. Which means you will only use 80 Divine Power instead of 160 in the amulet slot. The same is true if you have Tempest Plate and Moonfall Battlegear. Although the items are different, since they share the same slot, only one of them will be used.
Similar to dueling, the game chooses your best equipment according to their Divine Power stats. Force of Nature will always be used over Juggernaut Medallion and Lionheart Seal in the amulet slot if you own all 3.

Percentage of Prevented Damage - Used to measure the monster's divine armor potential. A player with 0 divine items will know/feel the full effect of a monster's divine armor. Comparing this player's damage to the damage of other players with divine items, we can measure how a divine armor's effectiveness goes down for every divine power used. Using this, I was able to make the monster info below

Dark Rage adds 40 divine power to the amount you use. Even if you have 0 divine items, you'll get 40 divine power if you activate Dark Rage. Currently, among the 5 monsters above, only Aurora's and Ambrosia's battle has the Dark Rage system installed.
At this stage, the choices are easy. Hit Jahanna first, her item offers a solid 80 divine power and her block is only at 10%. Once you obtain Force of Nature, look to hit Agamemnon or Aurora next. Both offer BIS items with 120 divine power.
If you are able to summon or close to summoning Agamemnon yourself (2000 pts or less to complete Vanguard rank), go fight the Overseer. His divine armor is weaker and his summon cooldown is shorter, not to mention extra 24 hours time limit to beat him. However, Aegis of Kings requires a summoner drop so you need to be in a good position in the Tower of Transcendence for this choice.
If you are not in a good position in ToT, look to fight Aurora instead. She has a tougher divine armor but has the Dark Rage system to help out. Heart of Woods requires no summoner drop which is the main headache in the Agamemnon hunt.
Ambrosia is rarer since only those who have quested far into Fire II can summon her. Her divine armor is tougher but is of no consequence if you build up as recommended. Her divine item is a BIS helmet with 120 divine power and has the highest stats among all equipment to date (101 combined).
Magmos and his giant troupe are more common since their summon items are easily gifted. Their divine items offer only 40 divine power. If you choose this route, save up to create Lava Inferno (BIS magic, only magic divine item currently) and Glacial Plate (BIS attack armor, highest rated armor divine item currently). Choose Aegis of Stone next if you got Heart of the Woods earlier to fill your offhand slot with a divine item. Go with Hammer of Storms if you got Aegis of Kings instead to fill your weapon slot with a divine item.
Highest Effective Divine Power Output Possible: 790 Divine Power (Agamemnon/Aurelius/Jahanna + Heart of Woods + Aegis of Kings + Helm of Arcane Energies + Trisoul Plate + Keeper of Chaos + Molten Core)
After obtaining either Aegis of Kings or Heart of Woods (or both if you like), your overall divine power rating is now at least 200. Magmos can't stop you while Ambrosia and Typhonus could but only barely. With Dark Rage, the energy demi-goddess' divine armor will be nullified. You are free to choose which tough nuts to crack next to further build up your divine power.
Typhonus is a combination of the giants and mama Ambro. Easily gifted ingredients paired with the toughest divine armor to date. The chimera's divine item has the highest divine power rating of all divine items currently, clocking in at 160 DP. Be warned though that the recipe requires the most number of ingredients of all divine items (not to mention that its epic drops are spread out, diliuting the chances of landing a *particular one*) with 22. Keep also in mind that it's stats is only 75 combined (it's amulet epic drop has 76 combined!!!) although it is a BIS overall armor. Keep this in mind.
Going through Agamemnon or Aurora is the optimal route to build your divine power immediately to 200. However, this can get tiring as you need to rid of them more than 10 times on average. You may get sick of fighting them halfway. As a distraction, fight Kromash, Shardros and/or Glacius in between to break the monotomy and collect some alchemy pieces for your Lava Inferno(s) and Glacial Plate(s) later. However, you can also build the two lesser divine items first if you wish. Doing so however will require you to "prematurely" face the game's second toughest divine armored monster: Magmos.
As mentioned, Magmos has the second toughest divine armor of all. However, he has 1 thing about him that is better than Ag or Aurora: he is a common monster. His summon ingredient can be obtain from gifts hence a more people can summon him compared to the other two. Just look at the public monster high tier page. Also creating either Aegis of Stone or Hammer of Storms only requires fighting him 3-4 times on average. Compared to more than 10x against the two A's, this detour makes sense for our short term goals. Be warned though that with only at most 90 divine power in your hands, it will be a painful 3-4 times as the Lava giant will still block 20% of your damage. If you don't have the stamina, time and/or FP to get to epic thresholds in his fight, stick to hitting Agememnon or Aurora.
For the purposes of this guide, we are trying to outfit every slot with divine items. Aegis of Kings is superior than Aegis of Stone in both stats and divine power. However, AoS benefits from having a more forgiving recipe than AoK. Not to mention that the monsters that drop it's ingredients are easily summoned by anyone who are at least level 185.
With these 2, your divine item gear should now be HoS (40) + AoS (40) + Tempest Plate/Moonfall Battlegear (10) + FoN (80) for a total of 170 divine power. High enough to cancel Agamemnon, Glacius and Aurora's armors (even without Dark Rage) but 10 point short of fully cancelling Magmos'...but at least it will hurt A LOT less (only 2.175% block). Ambrosia will be quite a pain with a 10.235% block (Dark Rage cuts it down to only 2.055%)
Remember though that AoS and HoS are only temporary crutches, short term goals of having our weapon and shield slot filled with divine item. In the long run, getting AoK and HotW are better. At least, until the next BIS divine weapon and shield are released (if there will be). But who knows how long will that be.

Divine Items are special equipment which are used against monsters with Divine Armor. They have Divine Power stats/rating that is used to help in reducing or completely eliminating the amount of damage a monster blocks per attack. Merely owning them is enough to have an effect. You can see their Divine Power stats in your keep page.
Say you own 2 Force of Nature, you can only use the divine power of one of them to counter a monster's divine armor effect. Which means you will only use 80 Divine Power instead of 160 in the amulet slot. The same is true if you have Tempest Plate and Moonfall Battlegear. Although the items are different, since they share the same slot, only one of them will be used.

Percentage of Prevented Damage - Used to measure the monster's divine armor potential. A player with 0 divine items will know/feel the full effect of a monster's divine armor. Comparing this player's damage to the damage of other players with divine items, we can measure how a divine armor's effectiveness goes down for every divine power used. Using this, I was able to make the monster info below

If you are able to summon or close to summoning Agamemnon yourself (2000 pts or less to complete Vanguard rank), go fight the Overseer. His divine armor is weaker and his summon cooldown is shorter, not to mention extra 24 hours time limit to beat him. However, Aegis of Kings requires a summoner drop so you need to be in a good position in the Tower of Transcendence for this choice.
Magmos and his giant troupe are more common since their summon items are easily gifted. Their divine items offer only 40 divine power. If you choose this route, save up to create Lava Inferno (BIS magic, only magic divine item currently) and Glacial Plate (BIS attack armor, highest rated armor divine item currently). Choose Aegis of Stone next if you got Heart of the Woods earlier to fill your offhand slot with a divine item. Go with Hammer of Storms if you got Aegis of Kings instead to fill your weapon slot with a divine item.
After obtaining either Aegis of Kings or Heart of Woods (or both if you like), your overall divine power rating is now at least 200. Magmos can't stop you while Ambrosia and Typhonus could but only barely. With Dark Rage, the energy demi-goddess' divine armor will be nullified. You are free to choose which tough nuts to crack next to further build up your divine power.
Typhonus is a combination of the giants and mama Ambro. Easily gifted ingredients paired with the toughest divine armor to date. The chimera's divine item has the highest divine power rating of all divine items currently, clocking in at 160 DP. Be warned though that the recipe requires the most number of ingredients of all divine items (not to mention that its epic drops are spread out, diliuting the chances of landing a *particular one*) with 22. Keep also in mind that it's stats is only 75 combined (it's amulet epic drop has 76 combined!!!) although it is a BIS overall armor. Keep this in mind.
Going through Agamemnon or Aurora is the optimal route to build your divine power immediately to 200. However, this can get tiring as you need to rid of them more than 10 times on average. You may get sick of fighting them halfway. As a distraction, fight Kromash, Shardros and/or Glacius in between to break the monotomy and collect some alchemy pieces for your Lava Inferno(s) and Glacial Plate(s) later. However, you can also build the two lesser divine items first if you wish. Doing so however will require you to "prematurely" face the game's second toughest divine armored monster: Magmos.
As mentioned, Magmos has the second toughest divine armor of all. However, he has 1 thing about him that is better than Ag or Aurora: he is a common monster. His summon ingredient can be obtain from gifts hence a more people can summon him compared to the other two. Just look at the public monster high tier page. Also creating either Aegis of Stone or Hammer of Storms only requires fighting him 3-4 times on average. Compared to more than 10x against the two A's, this detour makes sense for our short term goals. Be warned though that with only at most 90 divine power in your hands, it will be a painful 3-4 times as the Lava giant will still block 20% of your damage. If you don't have the stamina, time and/or FP to get to epic thresholds in his fight, stick to hitting Agememnon or Aurora.
For the purposes of this guide, we are trying to outfit every slot with divine items. Aegis of Kings is superior than Aegis of Stone in both stats and divine power. However, AoS benefits from having a more forgiving recipe than AoK. Not to mention that the monsters that drop it's ingredients are easily summoned by anyone who are at least level 185.
With these 2, your divine item gear should now be HoS (40) + AoS (40) + Tempest Plate/Moonfall Battlegear (10) + FoN (80) for a total of 170 divine power. High enough to cancel Agamemnon, Glacius and Aurora's armors (even without Dark Rage) but 10 point short of fully cancelling Magmos'...but at least it will hurt A LOT less (only 2.175% block). Ambrosia will be quite a pain with a 10.235% block (Dark Rage cuts it down to only 2.055%)
Remember though that AoS and HoS are only temporary crutches, short term goals of having our weapon and shield slot filled with divine item. In the long run, getting AoK and HotW are better. At least, until the next BIS divine weapon and shield are released (if there will be). But who knows how long will that be.

Magmos and his giant troupe are more common since their summon items are easily gifted. Their divine items offer only 40 divine power. If you choose this route, save up to create Lava Inferno (BIS magic, only magic divine item currently) and Glacial Plate (BIS attack armor, highest rated armor divine item currently). Choose Aegis of Stone next if you got Heart of the Woods earlier to fill your offhand slot with a divine item. Go with Hammer of Storms if you got Aegis of Kings instead to fill your weapon slot with a divine item.
Typhonus is a combination of the giants and mama Ambro. Easily gifted ingredients paired with the toughest divine armor to date. The chimera's divine item has the highest divine power rating of all divine items currently, clocking in at 160 DP. Be warned though that the recipe requires the most number of ingredients of all divine items (not to mention that its epic drops are spread out, diliuting the chances of landing a *particular one*) with 22. Keep also in mind that it's stats is only 75 combined (it's amulet epic drop has 76 combined!!!) although it is a BIS overall armor. Keep this in mind.
Going through Agamemnon or Aurora is the optimal route to build your divine power immediately to 200. However, this can get tiring as you need to rid of them more than 10 times on average. You may get sick of fighting them halfway. As a distraction, fight Kromash, Shardros and/or Glacius in between to break the monotomy and collect some alchemy pieces for your Lava Inferno(s) and Glacial Plate(s) later. However, you can also build the two lesser divine items first if you wish. Doing so however will require you to "prematurely" face the game's second toughest divine armored monster: Magmos.
As mentioned, Magmos has the second toughest divine armor of all. However, he has 1 thing about him that is better than Ag or Aurora: he is a common monster. His summon ingredient can be obtain from gifts hence a more people can summon him compared to the other two. Just look at the public monster high tier page. Also creating either Aegis of Stone or Hammer of Storms only requires fighting him 3-4 times on average. Compared to more than 10x against the two A's, this detour makes sense for our short term goals. Be warned though that with only at most 90 divine power in your hands, it will be a painful 3-4 times as the Lava giant will still block 20% of your damage. If you don't have the stamina, time and/or FP to get to epic thresholds in his fight, stick to hitting Agememnon or Aurora.
With these 2, your divine item gear should now be HoS (40) + AoS (40) + Tempest Plate/Moonfall Battlegear (10) + FoN (80) for a total of 170 divine power. High enough to cancel Agamemnon, Glacius and Aurora's armors (even without Dark Rage) but 10 point short of fully cancelling Magmos'...but at least it will hurt A LOT less (only 2.175% block). Ambrosia will be quite a pain with a 10.235% block (Dark Rage cuts it down to only 2.055%)

Typhonus is a combination of the giants and mama Ambro. Easily gifted ingredients paired with the toughest divine armor to date. The chimera's divine item has the highest divine power rating of all divine items currently, clocking in at 160 DP. Be warned though that the recipe requires the most number of ingredients of all divine items (not to mention that its epic drops are spread out, diliuting the chances of landing a *particular one*) with 22. Keep also in mind that it's stats is only 75 combined (it's amulet epic drop has 76 combined!!!) although it is a BIS overall armor. Keep this in mind.
Going through Agamemnon or Aurora is the optimal route to build your divine power immediately to 200. However, this can get tiring as you need to rid of them more than 10 times on average. You may get sick of fighting them halfway. As a distraction, fight Kromash, Shardros and/or Glacius in between to break the monotomy and collect some alchemy pieces for your Lava Inferno(s) and Glacial Plate(s) later. However, you can also build the two lesser divine items first if you wish. Doing so however will require you to "prematurely" face the game's second toughest divine armored monster: Magmos.
As mentioned, Magmos has the second toughest divine armor of all. However, he has 1 thing about him that is better than Ag or Aurora: he is a common monster. His summon ingredient can be obtain from gifts hence a more people can summon him compared to the other two. Just look at the public monster high tier page. Also creating either Aegis of Stone or Hammer of Storms only requires fighting him 3-4 times on average. Compared to more than 10x against the two A's, this detour makes sense for our short term goals. Be warned though that with only at most 90 divine power in your hands, it will be a painful 3-4 times as the Lava giant will still block 20% of your damage. If you don't have the stamina, time and/or FP to get to epic thresholds in his fight, stick to hitting Agememnon or Aurora.
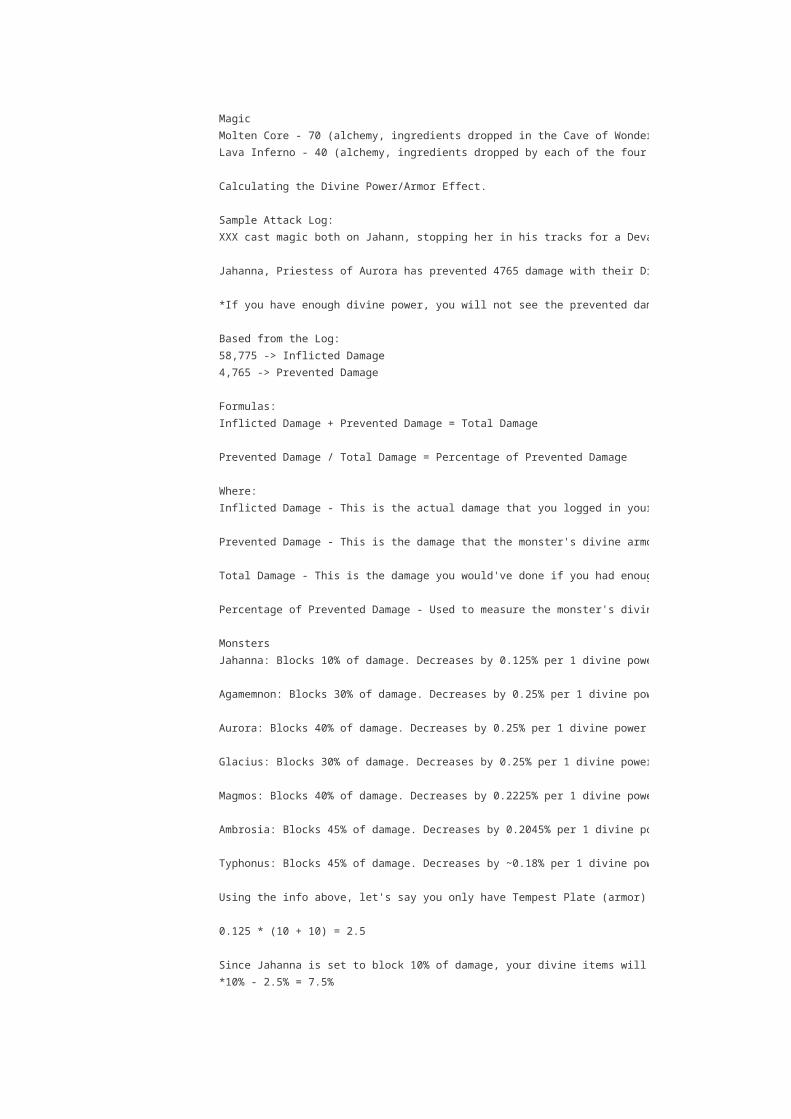
As mentioned, Magmos has the second toughest divine armor of all. However, he has 1 thing about him that is better than Ag or Aurora: he is a common monster. His summon ingredient can be obtain from gifts hence a more people can summon him compared to the other two. Just look at the public monster high tier page. Also creating either Aegis of Stone or Hammer of Storms only requires fighting him 3-4 times on average. Compared to more than 10x against the two A's, this detour makes sense for our short term goals. Be warned though that with only at most 90 divine power in your hands, it will be a painful 3-4 times as the Lava giant will still block 20% of your damage. If you don't have the stamina, time and/or FP to get to epic thresholds in his fight, stick to hitting Agememnon or Aurora.

As mentioned, Magmos has the second toughest divine armor of all. However, he has 1 thing about him that is better than Ag or Aurora: he is a common monster. His summon ingredient can be obtain from gifts hence a more people can summon him compared to the other two. Just look at the public monster high tier page. Also creating either Aegis of Stone or Hammer of Storms only requires fighting him 3-4 times on average. Compared to more than 10x against the two A's, this detour makes sense for our short term goals. Be warned though that with only at most 90 divine power in your hands, it will be a painful 3-4 times as the Lava giant will still block 20% of your damage. If you don't have the stamina, time and/or FP to get to epic thresholds in his fight, stick to hitting Agememnon or Aurora.

Excavation QuestDemon Realm's Cave of Wonder and Molten CoreMolten Core can be pursued simultaneously while hunting the divine monsters. Boasting 38/25 stats and 70 divine power, it is the best magic in the game, stat-wise and divine power-wise. It has one HUGE fatal flaw though, more fatal than Agamemnon's Aegis of Kings. Not only does it require Lava Inferno in it's recipe, the other ingredients can only be obtained from the energy vacuum Cave of Wonder quest in the Demon Realm. It needs 6 Temporal Rune of Embers: 3 for it's recipe and 3 for Meteor Storm which is another ingredient for it's recipe. The ember runes are very rare and would require high level excavation for a chance drop (highest level is 8). FP is mandatory to get to that level. It can be obtained slowly by combining lower level Temporal Rune of Mists and Leaves but the time investment will be a long one. Not to mention that the quest does not offer skill points so think twice about your situation in the game whether to pursue this or not.And just so you know, once you complete the quest to level 8 and collect your reward, it shows back up on your page as never having been done, so you can do this mulltiple times...

Molten Core can be pursued simultaneously while hunting the divine monsters. Boasting 38/25 stats and 70 divine power, it is the best magic in the game, stat-wise and divine power-wise. It has one HUGE fatal flaw though, more fatal than Agamemnon's Aegis of Kings. Not only does it require Lava Inferno in it's recipe, the other ingredients can only be obtained from the energy vacuum Cave of Wonder quest in the Demon Realm. It needs 6 Temporal Rune of Embers: 3 for it's recipe and 3 for Meteor Storm which is another ingredient for it's recipe. The ember runes are very rare and would require high level excavation for a chance drop (highest level is 8). FP is mandatory to get to that level. It can be obtained slowly by combining lower level Temporal Rune of Mists and Leaves but the time investment will be a long one. Not to mention that the quest does not offer skill points so think twice about your situation in the game whether to pursue this or not.And just so you know, once you complete the quest to level 8 and collect your reward, it shows back up on your page as never having been done, so you can do this mulltiple times...

Molten Core can be pursued simultaneously while hunting the divine monsters. Boasting 38/25 stats and 70 divine power, it is the best magic in the game, stat-wise and divine power-wise. It has one HUGE fatal flaw though, more fatal than Agamemnon's Aegis of Kings. Not only does it require Lava Inferno in it's recipe, the other ingredients can only be obtained from the energy vacuum Cave of Wonder quest in the Demon Realm. It needs 6 Temporal Rune of Embers: 3 for it's recipe and 3 for Meteor Storm which is another ingredient for it's recipe. The ember runes are very rare and would require high level excavation for a chance drop (highest level is 8). FP is mandatory to get to that level. It can be obtained slowly by combining lower level Temporal Rune of Mists and Leaves but the time investment will be a long one. Not to mention that the quest does not offer skill points so think twice about your situation in the game whether to pursue this or not.And just so you know, once you complete the quest to level 8 and collect your reward, it shows back up on your page as never having been done, so you can do this mulltiple times...

Molten Core can be pursued simultaneously while hunting the divine monsters. Boasting 38/25 stats and 70 divine power, it is the best magic in the game, stat-wise and divine power-wise. It has one HUGE fatal flaw though, more fatal than Agamemnon's Aegis of Kings. Not only does it require Lava Inferno in it's recipe, the other ingredients can only be obtained from the energy vacuum Cave of Wonder quest in the Demon Realm. It needs 6 Temporal Rune of Embers: 3 for it's recipe and 3 for Meteor Storm which is another ingredient for it's recipe. The ember runes are very rare and would require high level excavation for a chance drop (highest level is 8). FP is mandatory to get to that level. It can be obtained slowly by combining lower level Temporal Rune of Mists and Leaves but the time investment will be a long one. Not to mention that the quest does not offer skill points so think twice about your situation in the game whether to pursue this or not.

Molten Core can be pursued simultaneously while hunting the divine monsters. Boasting 38/25 stats and 70 divine power, it is the best magic in the game, stat-wise and divine power-wise. It has one HUGE fatal flaw though, more fatal than Agamemnon's Aegis of Kings. Not only does it require Lava Inferno in it's recipe, the other ingredients can only be obtained from the energy vacuum Cave of Wonder quest in the Demon Realm. It needs 6 Temporal Rune of Embers: 3 for it's recipe and 3 for Meteor Storm which is another ingredient for it's recipe. The ember runes are very rare and would require high level excavation for a chance drop (highest level is 8). FP is mandatory to get to that level. It can be obtained slowly by combining lower level Temporal Rune of Mists and Leaves but the time investment will be a long one. Not to mention that the quest does not offer skill points so think twice about your situation in the game whether to pursue this or not.
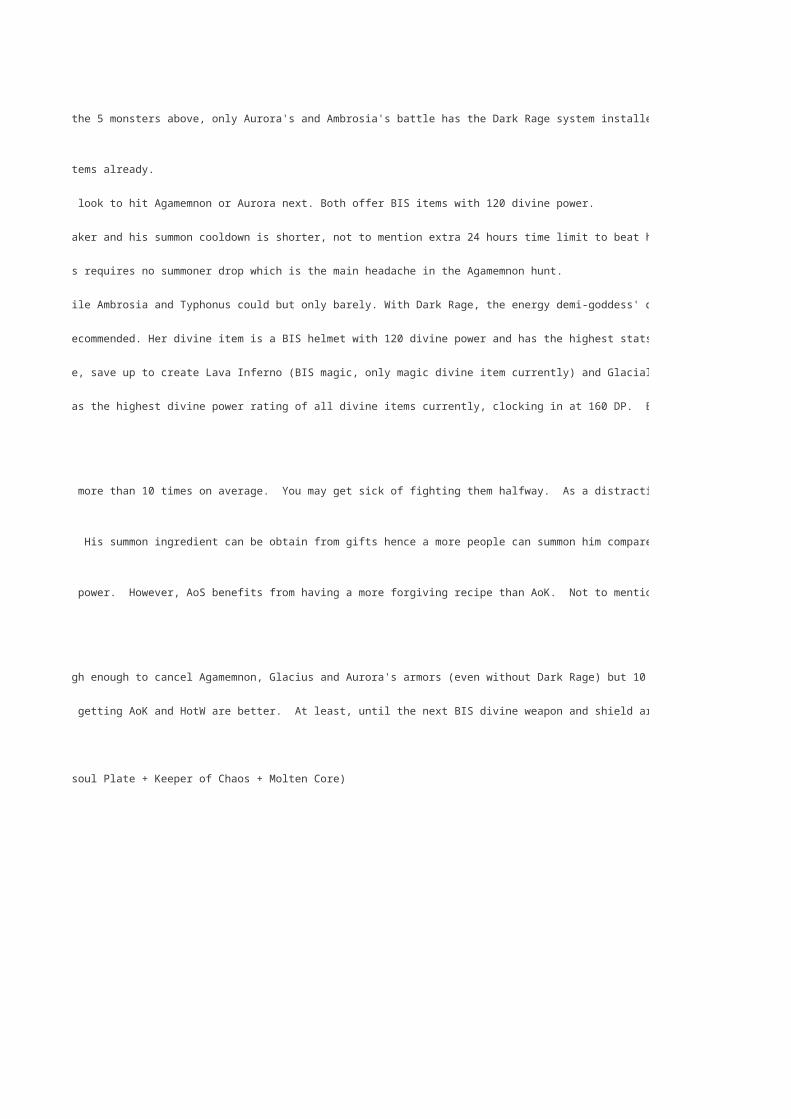
Molten Core can be pursued simultaneously while hunting the divine monsters. Boasting 38/25 stats and 70 divine power, it is the best magic in the game, stat-wise and divine power-wise. It has one HUGE fatal flaw though, more fatal than Agamemnon's Aegis of Kings. Not only does it require Lava Inferno in it's recipe, the other ingredients can only be obtained from the energy vacuum Cave of Wonder quest in the Demon Realm. It needs 6 Temporal Rune of Embers: 3 for it's recipe and 3 for Meteor Storm which is another ingredient for it's recipe. The ember runes are very rare and would require high level excavation for a chance drop (highest level is 8). FP is mandatory to get to that level. It can be obtained slowly by combining lower level Temporal Rune of Mists and Leaves but the time investment will be a long one. Not to mention that the quest does not offer skill points so think twice about your situation in the game whether to pursue this or not.

Molten Core can be pursued simultaneously while hunting the divine monsters. Boasting 38/25 stats and 70 divine power, it is the best magic in the game, stat-wise and divine power-wise. It has one HUGE fatal flaw though, more fatal than Agamemnon's Aegis of Kings. Not only does it require Lava Inferno in it's recipe, the other ingredients can only be obtained from the energy vacuum Cave of Wonder quest in the Demon Realm. It needs 6 Temporal Rune of Embers: 3 for it's recipe and 3 for Meteor Storm which is another ingredient for it's recipe. The ember runes are very rare and would require high level excavation for a chance drop (highest level is 8). FP is mandatory to get to that level. It can be obtained slowly by combining lower level Temporal Rune of Mists and Leaves but the time investment will be a long one. Not to mention that the quest does not offer skill points so think twice about your situation in the game whether to pursue this or not.

Molten Core can be pursued simultaneously while hunting the divine monsters. Boasting 38/25 stats and 70 divine power, it is the best magic in the game, stat-wise and divine power-wise. It has one HUGE fatal flaw though, more fatal than Agamemnon's Aegis of Kings. Not only does it require Lava Inferno in it's recipe, the other ingredients can only be obtained from the energy vacuum Cave of Wonder quest in the Demon Realm. It needs 6 Temporal Rune of Embers: 3 for it's recipe and 3 for Meteor Storm which is another ingredient for it's recipe. The ember runes are very rare and would require high level excavation for a chance drop (highest level is 8). FP is mandatory to get to that level. It can be obtained slowly by combining lower level Temporal Rune of Mists and Leaves but the time investment will be a long one. Not to mention that the quest does not offer skill points so think twice about your situation in the game whether to pursue this or not.

Molten Core can be pursued simultaneously while hunting the divine monsters. Boasting 38/25 stats and 70 divine power, it is the best magic in the game, stat-wise and divine power-wise. It has one HUGE fatal flaw though, more fatal than Agamemnon's Aegis of Kings. Not only does it require Lava Inferno in it's recipe, the other ingredients can only be obtained from the energy vacuum Cave of Wonder quest in the Demon Realm. It needs 6 Temporal Rune of Embers: 3 for it's recipe and 3 for Meteor Storm which is another ingredient for it's recipe. The ember runes are very rare and would require high level excavation for a chance drop (highest level is 8). FP is mandatory to get to that level. It can be obtained slowly by combining lower level Temporal Rune of Mists and Leaves but the time investment will be a long one. Not to mention that the quest does not offer skill points so think twice about your situation in the game whether to pursue this or not.

Molten Core can be pursued simultaneously while hunting the divine monsters. Boasting 38/25 stats and 70 divine power, it is the best magic in the game, stat-wise and divine power-wise. It has one HUGE fatal flaw though, more fatal than Agamemnon's Aegis of Kings. Not only does it require Lava Inferno in it's recipe, the other ingredients can only be obtained from the energy vacuum Cave of Wonder quest in the Demon Realm. It needs 6 Temporal Rune of Embers: 3 for it's recipe and 3 for Meteor Storm which is another ingredient for it's recipe. The ember runes are very rare and would require high level excavation for a chance drop (highest level is 8). FP is mandatory to get to that level. It can be obtained slowly by combining lower level Temporal Rune of Mists and Leaves but the time investment will be a long one. Not to mention that the quest does not offer skill points so think twice about your situation in the game whether to pursue this or not.

Molten Core can be pursued simultaneously while hunting the divine monsters. Boasting 38/25 stats and 70 divine power, it is the best magic in the game, stat-wise and divine power-wise. It has one HUGE fatal flaw though, more fatal than Agamemnon's Aegis of Kings. Not only does it require Lava Inferno in it's recipe, the other ingredients can only be obtained from the energy vacuum Cave of Wonder quest in the Demon Realm. It needs 6 Temporal Rune of Embers: 3 for it's recipe and 3 for Meteor Storm which is another ingredient for it's recipe. The ember runes are very rare and would require high level excavation for a chance drop (highest level is 8). FP is mandatory to get to that level. It can be obtained slowly by combining lower level Temporal Rune of Mists and Leaves but the time investment will be a long one. Not to mention that the quest does not offer skill points so think twice about your situation in the game whether to pursue this or not.
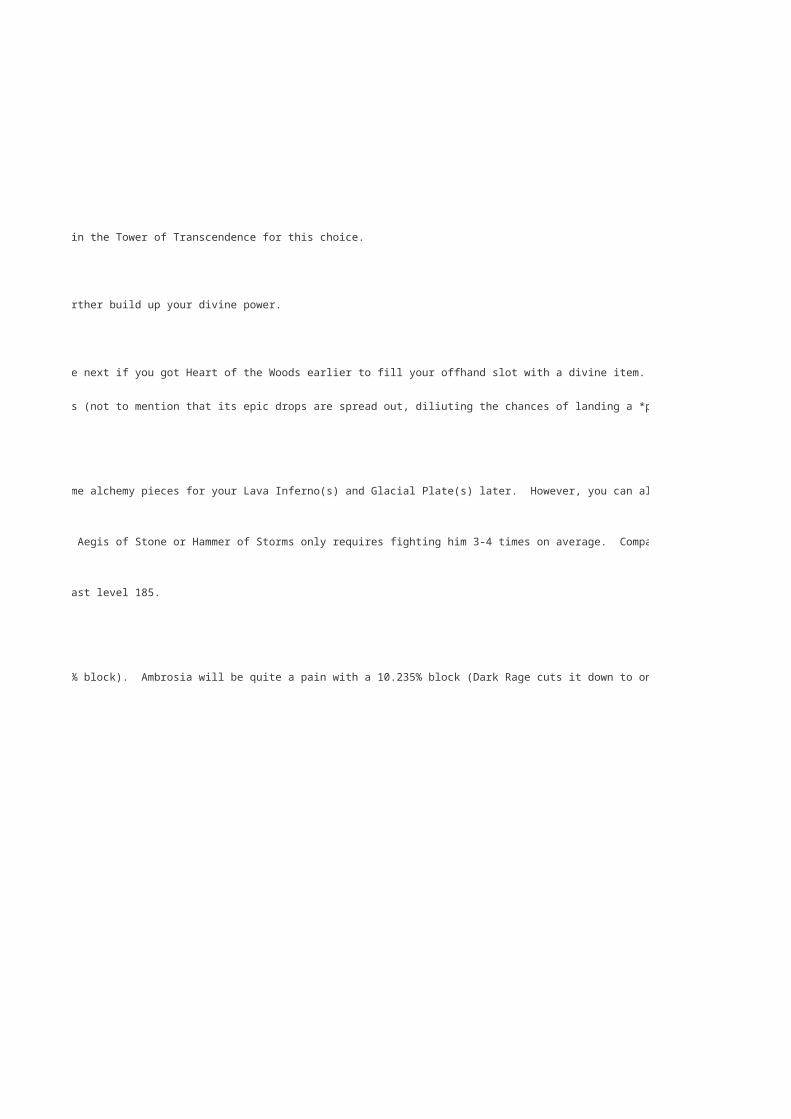
Molten Core can be pursued simultaneously while hunting the divine monsters. Boasting 38/25 stats and 70 divine power, it is the best magic in the game, stat-wise and divine power-wise. It has one HUGE fatal flaw though, more fatal than Agamemnon's Aegis of Kings. Not only does it require Lava Inferno in it's recipe, the other ingredients can only be obtained from the energy vacuum Cave of Wonder quest in the Demon Realm. It needs 6 Temporal Rune of Embers: 3 for it's recipe and 3 for Meteor Storm which is another ingredient for it's recipe. The ember runes are very rare and would require high level excavation for a chance drop (highest level is 8). FP is mandatory to get to that level. It can be obtained slowly by combining lower level Temporal Rune of Mists and Leaves but the time investment will be a long one. Not to mention that the quest does not offer skill points so think twice about your situation in the game whether to pursue this or not.

Molten Core can be pursued simultaneously while hunting the divine monsters. Boasting 38/25 stats and 70 divine power, it is the best magic in the game, stat-wise and divine power-wise. It has one HUGE fatal flaw though, more fatal than Agamemnon's Aegis of Kings. Not only does it require Lava Inferno in it's recipe, the other ingredients can only be obtained from the energy vacuum Cave of Wonder quest in the Demon Realm. It needs 6 Temporal Rune of Embers: 3 for it's recipe and 3 for Meteor Storm which is another ingredient for it's recipe. The ember runes are very rare and would require high level excavation for a chance drop (highest level is 8). FP is mandatory to get to that level. It can be obtained slowly by combining lower level Temporal Rune of Mists and Leaves but the time investment will be a long one. Not to mention that the quest does not offer skill points so think twice about your situation in the game whether to pursue this or not.
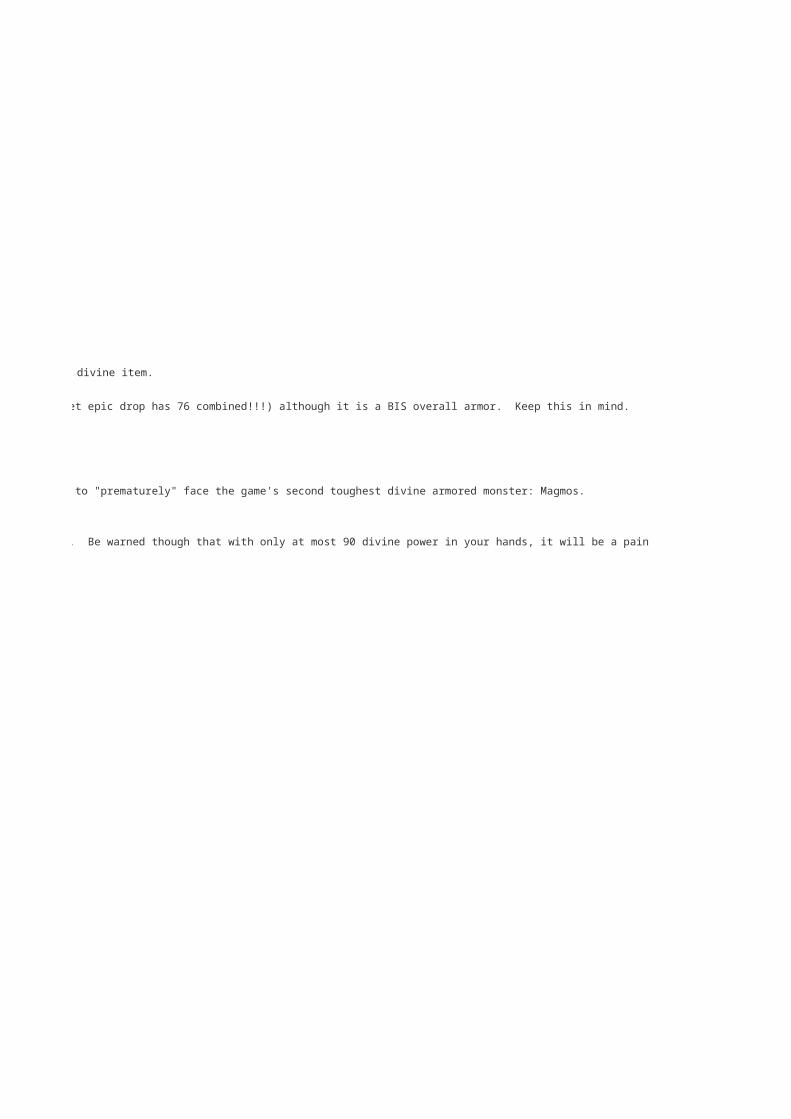
Attention Nursing Corps
Re: Guidelines for the dispersal of Penicilin to the troops in combat:
MOST of us are wasting way to many tokens on it. Let me explain...
A Cleric NORMALLY has healed his entire tower by 10 (or 14 if you have Sanna) points every time (s)he wins either offensively or defensivly. NOW that means if you spent ONE token you do three things (one bad two good).
First the bad ... YOU hurt yourself this could be any amount of damage usually around 80 POINTS damage... if you have RES 4 on the damage lowers to around 40 and if they are using Deneara it increases by 20 (so 60 if you have RES 4 or 100 if you do not).
NOW the GOOD things about this hit is you heal by 14 x 25 (or 350 total health) your entire tower (that includes yourself fixing some of that damage you just took) AND you damage the enemy (80% of the time that enemy is a cleric who the LONGER he is alive the longer he is keeping his friends alive).
NOW in order for your enemy to COUNTER what you have just done the LEAST he must now spend is THREE tokens... ONE to heal THAT cleric... and TWO mage tokens must be spent to counter the healing you just did... (oh did I forget to mention MATHS would be in this MEMO)
Now lets use the NEW cleric HEAL ability (by the way for clarity sake we shall try to remember to call this something other than HEAL as we are so used to saying HEAL and meaning "hit an opposing team member to damage him and heal your tower" so from now on I will call the NEW ability CURE ... ) .
So if you spend a token to CURE someone you then give that person from 70 to 120 health back... and that is ALL... the enemy can counter this by simply hitting them ONCE for one token... an even exchange.
You spend one token he spends one token and everything remains the same... most likely you will even LOSE on the equation because he will do MORE damage than you hea-... er I mean CURED. The bad news is you also are NOT doing anything NEGATIVE to the enemy... They are still free to do what they want with the next tokens and OTHER members of their Guild are still getting and giving SUPPORT to their team...
Now do NOT get me wrong there are VARIOUS reasons to Cure someone. The most obvious and most devestating is using it to "wake up" a stunned team member to allow them to now operate freely again. BUT this needs to be coordinated. FOR instance simply using ONE token to cure a fellow cleric so they can then cure someone else and keep the curing around in a circle is USELESS the circle is EASILY broken by the Enemy with ONE token and nobody ever gets fully cured and SLOWLY we get worn down. Eventually it is a loss.
The way to use this is to BLITZKRIEG... hold 3 tokens and find a stunned person who has ten tokens... CURE them 3 times that allows them to use ALL ten tokens... if they are a mage they will do real nasty things to the enemy or if they are a CLERIC they can now HEAL (the old fashioned way) an entire tower back up by 140 points...
AND if there is another cleric in that tower they can now Heal another 140 points ... if this is done in the last 2 to 3 minutes a HEALING SURGE will take a tower of ZERO to a tower of 25 in 2 minutes it will also do DAMAGE to the enemy taking out between 3 to 5 enemies (or more if STRAFING had been done earlier) making a sudden 30 member shift and winning a game.
The KEY to this is communication and patience. If you are stunned you NEED to hold your tokens and WAIT for an unstunned cleric to heal you .. but do NOT get impatient... do this at the END... or occasionally do it to feel out their response time. Another thing this means is DO NOT EQUIP the special abilities UNTIL needed. Keeping the RESISTANCE on will keep you alive LONGER and mean you will have LESS need for the Curing of a cleric (or HEALING the Old fashioned way for that matter LOL)
I will send out another memo tomorrow about frogging... but all clerics need to UNDERSTAND that the new CURE ability is TO be used SPARINGLY because it is INFERIOR to the original HEALING ability you have been using SO well for so LONG
keep your ENTIRE tower healed and DAMAGE the ENEMY... remember the SOONER he is STUNNED the less damage he can do to you... FOCUS more on being OFFENSIVE and less on being a NURSE.... that is all.
Where-as it has come to the High Muckity mucks attention that alot of the Troops have been needing "medical" attention lately. So I wanted to talk a little about... the NEW Healing abilities of Clerics. This ability is NOT really the powerful ability it seems at first glance...

First the bad ... YOU hurt yourself this could be any amount of damage usually around 80 POINTS damage... if you have RES 4 on the damage lowers to around 40 and if they are using Deneara it increases by 20 (so 60 if you have RES 4 or 100 if you do not).
NOW the GOOD things about this hit is you heal by 14 x 25 (or 350 total health) your entire tower (that includes yourself fixing some of that damage you just took) AND you damage the enemy (80% of the time that enemy is a cleric who the LONGER he is alive the longer he is keeping his friends alive).
NOW in order for your enemy to COUNTER what you have just done the LEAST he must now spend is THREE tokens... ONE to heal THAT cleric... and TWO mage tokens must be spent to counter the healing you just did... (oh did I forget to mention MATHS would be in this MEMO)
Now lets use the NEW cleric HEAL ability (by the way for clarity sake we shall try to remember to call this something other than HEAL as we are so used to saying HEAL and meaning "hit an opposing team member to damage him and heal your tower" so from now on I will call the NEW ability CURE ... ) .
You spend one token he spends one token and everything remains the same... most likely you will even LOSE on the equation because he will do MORE damage than you hea-... er I mean CURED. The bad news is you also are NOT doing anything NEGATIVE to the enemy... They are still free to do what they want with the next tokens and OTHER members of their Guild are still getting and giving SUPPORT to their team...
Now do NOT get me wrong there are VARIOUS reasons to Cure someone. The most obvious and most devestating is using it to "wake up" a stunned team member to allow them to now operate freely again. BUT this needs to be coordinated. FOR instance simply using ONE token to cure a fellow cleric so they can then cure someone else and keep the curing around in a circle is USELESS the circle is EASILY broken by the Enemy with ONE token and nobody ever gets fully cured and SLOWLY we get worn down. Eventually it is a loss.
The way to use this is to BLITZKRIEG... hold 3 tokens and find a stunned person who has ten tokens... CURE them 3 times that allows them to use ALL ten tokens... if they are a mage they will do real nasty things to the enemy or if they are a CLERIC they can now HEAL (the old fashioned way) an entire tower back up by 140 points...
AND if there is another cleric in that tower they can now Heal another 140 points ... if this is done in the last 2 to 3 minutes a HEALING SURGE will take a tower of ZERO to a tower of 25 in 2 minutes it will also do DAMAGE to the enemy taking out between 3 to 5 enemies (or more if STRAFING had been done earlier) making a sudden 30 member shift and winning a game.
The KEY to this is communication and patience. If you are stunned you NEED to hold your tokens and WAIT for an unstunned cleric to heal you .. but do NOT get impatient... do this at the END... or occasionally do it to feel out their response time. Another thing this means is DO NOT EQUIP the special abilities UNTIL needed. Keeping the RESISTANCE on will keep you alive LONGER and mean you will have LESS need for the Curing of a cleric (or HEALING the Old fashioned way for that matter LOL)
I will send out another memo tomorrow about frogging... but all clerics need to UNDERSTAND that the new CURE ability is TO be used SPARINGLY because it is INFERIOR to the original HEALING ability you have been using SO well for so LONG
Where-as it has come to the High Muckity mucks attention that alot of the Troops have been needing "medical" attention lately. So I wanted to talk a little about... the NEW Healing abilities of Clerics. This ability is NOT really the powerful ability it seems at first glance...

You spend one token he spends one token and everything remains the same... most likely you will even LOSE on the equation because he will do MORE damage than you hea-... er I mean CURED. The bad news is you also are NOT doing anything NEGATIVE to the enemy... They are still free to do what they want with the next tokens and OTHER members of their Guild are still getting and giving SUPPORT to their team...
Now do NOT get me wrong there are VARIOUS reasons to Cure someone. The most obvious and most devestating is using it to "wake up" a stunned team member to allow them to now operate freely again. BUT this needs to be coordinated. FOR instance simply using ONE token to cure a fellow cleric so they can then cure someone else and keep the curing around in a circle is USELESS the circle is EASILY broken by the Enemy with ONE token and nobody ever gets fully cured and SLOWLY we get worn down. Eventually it is a loss.
AND if there is another cleric in that tower they can now Heal another 140 points ... if this is done in the last 2 to 3 minutes a HEALING SURGE will take a tower of ZERO to a tower of 25 in 2 minutes it will also do DAMAGE to the enemy taking out between 3 to 5 enemies (or more if STRAFING had been done earlier) making a sudden 30 member shift and winning a game.
The KEY to this is communication and patience. If you are stunned you NEED to hold your tokens and WAIT for an unstunned cleric to heal you .. but do NOT get impatient... do this at the END... or occasionally do it to feel out their response time. Another thing this means is DO NOT EQUIP the special abilities UNTIL needed. Keeping the RESISTANCE on will keep you alive LONGER and mean you will have LESS need for the Curing of a cleric (or HEALING the Old fashioned way for that matter LOL)

Now do NOT get me wrong there are VARIOUS reasons to Cure someone. The most obvious and most devestating is using it to "wake up" a stunned team member to allow them to now operate freely again. BUT this needs to be coordinated. FOR instance simply using ONE token to cure a fellow cleric so they can then cure someone else and keep the curing around in a circle is USELESS the circle is EASILY broken by the Enemy with ONE token and nobody ever gets fully cured and SLOWLY we get worn down. Eventually it is a loss.
The KEY to this is communication and patience. If you are stunned you NEED to hold your tokens and WAIT for an unstunned cleric to heal you .. but do NOT get impatient... do this at the END... or occasionally do it to feel out their response time. Another thing this means is DO NOT EQUIP the special abilities UNTIL needed. Keeping the RESISTANCE on will keep you alive LONGER and mean you will have LESS need for the Curing of a cleric (or HEALING the Old fashioned way for that matter LOL)

WARRIOR CLASS..great for level above 400 in arena and festi.. o...you're a long standing CA player...you have always dismissed the Warrior class as something a 2 day old newb says, "Hey cool, I want to be powerful, I'll choose Warrior".
This document is being created to show the realities of a players with Guild Coin, Favor Points, and a willingness to play a class to its limits, to really show what CA have done to make this class actually viable. I will lay down true costs as best as possible here (some things are based on chest rolls...so impossible to be precise). I will do a comparison to other classes in a limited fashion, and really show how, properly used and properly equipped, the Warrior class has its place in any CA guild.
The hard reality:
Warrior class takes a lot of gear and generals, some can be gained via chest rolls, other via Guild Coin, sadly, the realities are that the best items are obtained only from spending Favor Points.
The minimum configuration (least FP spent):
---
Heros: Oberon and MeekahAbilities: Shout, Whirl Wind, Confidence and Resistance 4
---
FP Cost:
Oberon and Meekah: 30 FP each (60 total)
(can be obtained from this link, *HEED THE WARNINGS*)
Total FP cost = 60
GC Cost:
1. Shout: 4000 GC
2. WW: 1250 GC
3. Confidence: 5000 GC
4. Resistance 4 : 250+375+625+625 = 1875
Total GC cost = 12125
(this can be reduced by 5% total with appropriate guild banner up)
Abilities in minimum configuration:
1. Oberon at level 4 is the best HP general in the game at +25 hp (but MUST be Warrior class when entering battle to get the bonus).
2. Meekah at level 4 takes maximum Confidence damage to +90 on primary target.
3. Shout: +16 damage to primary target, +9 to guild member in tower on each side of you (remains active after activating with single win, can be switched out, and stays if stunned).
4. Whirl Wind: Splash damage, hit to primary target is also sent to target on each side primary target.
5. Confidence: For every win, you gain +10 damage to primary target (and thus secondary targets if WW is used). It is cumulative, must be built up with wins, and you WILL lose confidence losing, being healed/cleansed by a guild mate, or debuffed (poly, confuse, poison) by enemy guild. You gain/lose 10 at a time. This remains an active bonus even if stunned like Shout.
http://castleage.wikia.com/wik i/Oracle/Monthly_Specials

The maximum configuration (FP galore, be warned, not for thin wallets):
--
Heros: Oberon, Meekah and AmeronAbilities: Leadership 4, Whirl Wind, Confidence and Resistance 4
--
FP Cost:
1. Oberon and Meekah - 30 FP each (60 total)
(can be obtained from this link, *HEED THE WARNINGS*)
2. Ameron - total cost unknown, up to luck, chest roll required
Total FP cost = 60 + $$$$$$ (luck factor too much to calculate this)
GC Cost:
1. WW: 1250 GC
2. Confidence: 5000 GC
3. Resistance 4 : 250+375+625+625 = 1875
Total GC cost = 8125
(this can be reduced by 5% total with appropriate guild banner up)
Abilities in maximum configuration:
1. Oberon at level 4 is the best HP general in the game at +25 hp (but MUST be Warrior class when entering battle to get the bonus).
2. Meekah at level 4 takes maximum Confidence damage to +90 on primary target.
3. Ameron at level 4 increases splash damage to side targets by 15% when using WW.
4. Leadership 4: +25 damage to primary target, +15 to guild member in tower on each side of you (remains active after activating with single win, can be switched out, and stays if stunned).
5. Whirl Wind: Splash damage, hit to primary target is also sent to target on each side primary target.
6. Confidence: For every win, you gain +10 damage to primary target (and thus secondary targets if WW is used). It is cumulative, must be built up with wins, and you WILL lose confidence losing, being healed/cleansed by a guild mate, or debuffed (poly, confuse, poison) by enemy guild. You gain/lose 10 at a time. This remains an active bonus even if stunned like Shout.
Tacics:
1. Before battle begins, switch to Warrior and put up Oberon for +25 hp, equip Res4, Leadership/Shout and Confidence.
http://castleage.wikia.com/wik i/Oracle/Monthly_Specials
http://castleage.wikia.com/wik i/Annihilator_chest
3. Leadership 4 - Insane amount of chest rolls required - Leadership 1 and 2 obtained from Annihilator chest (see

2. Join battle, find a Cleric, hit once for win to activate Leadership/Shout.
3. Switch to Ameron if you have him, if not Meekah, remove Leadership/Shout and replace with Whirl Wind. (So now Res4, WW and Confidence equipped)
4. Search tower that has been designated as target tower for 3 Clerics in a row, select center of the 3 and use WW, if using Ameron, hit to win until confidence hits +50 damage, then switch to Meekah to finish taking Confidence to max of +90 damage.
5. Work with your guild mates to maximize the usefulness of your WW hits (see below).
The analysis, numbers and possible team tactics within guild battle:
So the numbers...everyone has a feeling that the Mage is the most powerful class when it comes to damage done per token...this is wrong.
Mages are very powerful in battles for sure, with their low amount of splash damage done to an entire tower...they are extremely effective to locking a cleric tower down.
However, every one quotes the best case scenario, a full 25 person tower, Mage hits a target and wins for 99-165, doing 20 damage (Alexandurrran) to the other 24 targets in the tower.
A Warrior only needs 3 live targets in a row to do his max damage, not a full tower...as targets in the tower die, the Mage damage per token ratio decreases massively, while the Warrior can still focus doing more than the perfect Mage scenario.
Damage:
Lets take best case scenario here (this from my personal use of Mage and Warrior, no Poison help).
-Mage
165 damage to primary target, plus 20*24 = 645 damage per token, as long as all in the gate are alive
-Warrior
220 damage to 3 targets as long as 3 targets in a row are alive = 660 damage per token
Final Thoughts:
As WW is so diverse, so many things can be done...if paired properly with a Rogue that has max poison, the primary target can be poisoned to maximize damage to side targets when using WW (yes, the +45 does get sent to the sides as well). Likewise with a Mage polying a particular lower target for you to damage say a very high level side target (for 200 plus per hit).
Introduction of a Warrior to a guild's battle tactics are up to the creativity of the tactician.
Additionally, if a Warrior is properly placed in a tower, their Leadership/Shout bonus can give a boost to lower hitting classes (Clerics and Mages do not hit for much damage on their primary target, but have other benefits, Leadership/Shout makes them more potent in the damage per token category).
Conclusions:
Mages have clear superiority when the tower is full of live targets, the Warrior is superior as long as there are 3 live targets in a row.
Rogues can assist a Warrior by poisoning central targets (increased splash damage).
Warriors can assist Mages and Clerics if placed properly in a tower with Leadership/Shout bonus.

WARRIOR CLASS..great for level above 400 in arena and festi.. o...you're a long standing CA player...you have always dismissed the Warrior class as something a 2 day old newb says, "Hey cool, I want to be powerful, I'll choose Warrior".
This document is being created to show the realities of a players with Guild Coin, Favor Points, and a willingness to play a class to its limits, to really show what CA have done to make this class actually viable. I will lay down true costs as best as possible here (some things are based on chest rolls...so impossible to be precise). I will do a comparison to other classes in a limited fashion, and really show how, properly used and properly equipped, the Warrior class has its place in any CA guild.
Warrior class takes a lot of gear and generals, some can be gained via chest rolls, other via Guild Coin, sadly, the realities are that the best items are obtained only from spending Favor Points.
1. Oberon at level 4 is the best HP general in the game at +25 hp (but MUST be Warrior class when entering battle to get the bonus).
2. Meekah at level 4 takes maximum Confidence damage to +90 on primary target.
3. Shout: +16 damage to primary target, +9 to guild member in tower on each side of you (remains active after activating with single win, can be switched out, and stays if stunned).
4. Whirl Wind: Splash damage, hit to primary target is also sent to target on each side primary target.
5. Confidence: For every win, you gain +10 damage to primary target (and thus secondary targets if WW is used). It is cumulative, must be built up with wins, and you WILL lose confidence losing, being healed/cleansed by a guild mate, or debuffed (poly, confuse, poison) by enemy guild. You gain/lose 10 at a time. This remains an active bonus even if stunned like Shout.

The maximum configuration (FP galore, be warned, not for thin wallets):
1. Oberon at level 4 is the best HP general in the game at +25 hp (but MUST be Warrior class when entering battle to get the bonus).
2. Meekah at level 4 takes maximum Confidence damage to +90 on primary target.
3. Ameron at level 4 increases splash damage to side targets by 15% when using WW.
4. Leadership 4: +25 damage to primary target, +15 to guild member in tower on each side of you (remains active after activating with single win, can be switched out, and stays if stunned).
5. Whirl Wind: Splash damage, hit to primary target is also sent to target on each side primary target.
6. Confidence: For every win, you gain +10 damage to primary target (and thus secondary targets if WW is used). It is cumulative, must be built up with wins, and you WILL lose confidence losing, being healed/cleansed by a guild mate, or debuffed (poly, confuse, poison) by enemy guild. You gain/lose 10 at a time. This remains an active bonus even if stunned like Shout.
1. Before battle begins, switch to Warrior and put up Oberon for +25 hp, equip Res4, Leadership/Shout and Confidence.
3. Leadership 4 - Insane amount of chest rolls required - Leadership 1 and 2 obtained from Annihilator chest (see http://castleage.wikia.com/wik i/Annihilator_chest

2. Join battle, find a Cleric, hit once for win to activate Leadership/Shout.
3. Switch to Ameron if you have him, if not Meekah, remove Leadership/Shout and replace with Whirl Wind. (So now Res4, WW and Confidence equipped)
4. Search tower that has been designated as target tower for 3 Clerics in a row, select center of the 3 and use WW, if using Ameron, hit to win until confidence hits +50 damage, then switch to Meekah to finish taking Confidence to max of +90 damage.
5. Work with your guild mates to maximize the usefulness of your WW hits (see below).
So the numbers...everyone has a feeling that the Mage is the most powerful class when it comes to damage done per token...this is wrong.
Mages are very powerful in battles for sure, with their low amount of splash damage done to an entire tower...they are extremely effective to locking a cleric tower down.
However, every one quotes the best case scenario, a full 25 person tower, Mage hits a target and wins for 99-165, doing 20 damage (Alexandurrran) to the other 24 targets in the tower.
A Warrior only needs 3 live targets in a row to do his max damage, not a full tower...as targets in the tower die, the Mage damage per token ratio decreases massively, while the Warrior can still focus doing more than the perfect Mage scenario.
Lets take best case scenario here (this from my personal use of Mage and Warrior, no Poison help).
165 damage to primary target, plus 20*24 = 645 damage per token, as long as all in the gate are alive
220 damage to 3 targets as long as 3 targets in a row are alive = 660 damage per token
As WW is so diverse, so many things can be done...if paired properly with a Rogue that has max poison, the primary target can be poisoned to maximize damage to side targets when using WW (yes, the +45 does get sent to the sides as well). Likewise with a Mage polying a particular lower target for you to damage say a very high level side target (for 200 plus per hit).
Introduction of a Warrior to a guild's battle tactics are up to the creativity of the tactician.
Additionally, if a Warrior is properly placed in a tower, their Leadership/Shout bonus can give a boost to lower hitting classes (Clerics and Mages do not hit for much damage on their primary target, but have other benefits, Leadership/Shout makes them more potent in the damage per token category).
Mages have clear superiority when the tower is full of live targets, the Warrior is superior as long as there are 3 live targets in a row.
Rogues can assist a Warrior by poisoning central targets (increased splash damage).
Warriors can assist Mages and Clerics if placed properly in a tower with Leadership/Shout bonus.

WARRIOR CLASS..great for level above 400 in arena and festi.. o...you're a long standing CA player...you have always dismissed the Warrior class as something a 2 day old newb says, "Hey cool, I want to be powerful, I'll choose Warrior".
This document is being created to show the realities of a players with Guild Coin, Favor Points, and a willingness to play a class to its limits, to really show what CA have done to make this class actually viable. I will lay down true costs as best as possible here (some things are based on chest rolls...so impossible to be precise). I will do a comparison to other classes in a limited fashion, and really show how, properly used and properly equipped, the Warrior class has its place in any CA guild.
Warrior class takes a lot of gear and generals, some can be gained via chest rolls, other via Guild Coin, sadly, the realities are that the best items are obtained only from spending Favor Points.
3. Shout: +16 damage to primary target, +9 to guild member in tower on each side of you (remains active after activating with single win, can be switched out, and stays if stunned).
5. Confidence: For every win, you gain +10 damage to primary target (and thus secondary targets if WW is used). It is cumulative, must be built up with wins, and you WILL lose confidence losing, being healed/cleansed by a guild mate, or debuffed (poly, confuse, poison) by enemy guild. You gain/lose 10 at a time. This remains an active bonus even if stunned like Shout.

4. Leadership 4: +25 damage to primary target, +15 to guild member in tower on each side of you (remains active after activating with single win, can be switched out, and stays if stunned).
6. Confidence: For every win, you gain +10 damage to primary target (and thus secondary targets if WW is used). It is cumulative, must be built up with wins, and you WILL lose confidence losing, being healed/cleansed by a guild mate, or debuffed (poly, confuse, poison) by enemy guild. You gain/lose 10 at a time. This remains an active bonus even if stunned like Shout.
http://castleage.wikia.com/wik i/Annihilator_chest) and are combined to make Leadership 3. 3 Battle standards needed from Ascension chest to combine with Leadership 3 to make Leadership 4 (see

3. Switch to Ameron if you have him, if not Meekah, remove Leadership/Shout and replace with Whirl Wind. (So now Res4, WW and Confidence equipped)
4. Search tower that has been designated as target tower for 3 Clerics in a row, select center of the 3 and use WW, if using Ameron, hit to win until confidence hits +50 damage, then switch to Meekah to finish taking Confidence to max of +90 damage.
Mages are very powerful in battles for sure, with their low amount of splash damage done to an entire tower...they are extremely effective to locking a cleric tower down.
However, every one quotes the best case scenario, a full 25 person tower, Mage hits a target and wins for 99-165, doing 20 damage (Alexandurrran) to the other 24 targets in the tower.
A Warrior only needs 3 live targets in a row to do his max damage, not a full tower...as targets in the tower die, the Mage damage per token ratio decreases massively, while the Warrior can still focus doing more than the perfect Mage scenario.
As WW is so diverse, so many things can be done...if paired properly with a Rogue that has max poison, the primary target can be poisoned to maximize damage to side targets when using WW (yes, the +45 does get sent to the sides as well). Likewise with a Mage polying a particular lower target for you to damage say a very high level side target (for 200 plus per hit).
Additionally, if a Warrior is properly placed in a tower, their Leadership/Shout bonus can give a boost to lower hitting classes (Clerics and Mages do not hit for much damage on their primary target, but have other benefits, Leadership/Shout makes them more potent in the damage per token category).

WARRIOR CLASS..great for level above 400 in arena and festi.. o...you're a long standing CA player...you have always dismissed the Warrior class as something a 2 day old newb says, "Hey cool, I want to be powerful, I'll choose Warrior".
This document is being created to show the realities of a players with Guild Coin, Favor Points, and a willingness to play a class to its limits, to really show what CA have done to make this class actually viable. I will lay down true costs as best as possible here (some things are based on chest rolls...so impossible to be precise). I will do a comparison to other classes in a limited fashion, and really show how, properly used and properly equipped, the Warrior class has its place in any CA guild.
5. Confidence: For every win, you gain +10 damage to primary target (and thus secondary targets if WW is used). It is cumulative, must be built up with wins, and you WILL lose confidence losing, being healed/cleansed by a guild mate, or debuffed (poly, confuse, poison) by enemy guild. You gain/lose 10 at a time. This remains an active bonus even if stunned like Shout.

6. Confidence: For every win, you gain +10 damage to primary target (and thus secondary targets if WW is used). It is cumulative, must be built up with wins, and you WILL lose confidence losing, being healed/cleansed by a guild mate, or debuffed (poly, confuse, poison) by enemy guild. You gain/lose 10 at a time. This remains an active bonus even if stunned like Shout.
) and are combined to make Leadership 3. 3 Battle standards needed from Ascension chest to combine with Leadership 3 to make Leadership 4 (see

4. Search tower that has been designated as target tower for 3 Clerics in a row, select center of the 3 and use WW, if using Ameron, hit to win until confidence hits +50 damage, then switch to Meekah to finish taking Confidence to max of +90 damage.
A Warrior only needs 3 live targets in a row to do his max damage, not a full tower...as targets in the tower die, the Mage damage per token ratio decreases massively, while the Warrior can still focus doing more than the perfect Mage scenario.
As WW is so diverse, so many things can be done...if paired properly with a Rogue that has max poison, the primary target can be poisoned to maximize damage to side targets when using WW (yes, the +45 does get sent to the sides as well). Likewise with a Mage polying a particular lower target for you to damage say a very high level side target (for 200 plus per hit).
Additionally, if a Warrior is properly placed in a tower, their Leadership/Shout bonus can give a boost to lower hitting classes (Clerics and Mages do not hit for much damage on their primary target, but have other benefits, Leadership/Shout makes them more potent in the damage per token category).
This document is being created to show the realities of a players with Guild Coin, Favor Points, and a willingness to play a class to its limits, to really show what CA have done to make this class actually viable. I will lay down true costs as best as possible here (some things are based on chest rolls...so impossible to be precise). I will do a comparison to other classes in a limited fashion, and really show how, properly used and properly equipped, the Warrior class has its place in any CA guild.
5. Confidence: For every win, you gain +10 damage to primary target (and thus secondary targets if WW is used). It is cumulative, must be built up with wins, and you WILL lose confidence losing, being healed/cleansed by a guild mate, or debuffed (poly, confuse, poison) by enemy guild. You gain/lose 10 at a time. This remains an active bonus even if stunned like Shout.

6. Confidence: For every win, you gain +10 damage to primary target (and thus secondary targets if WW is used). It is cumulative, must be built up with wins, and you WILL lose confidence losing, being healed/cleansed by a guild mate, or debuffed (poly, confuse, poison) by enemy guild. You gain/lose 10 at a time. This remains an active bonus even if stunned like Shout.
) and are combined to make Leadership 3. 3 Battle standards needed from Ascension chest to combine with Leadership 3 to make Leadership 4 (see http://castleage.wikia.com/wik i/Ascension_Chest)

As WW is so diverse, so many things can be done...if paired properly with a Rogue that has max poison, the primary target can be poisoned to maximize damage to side targets when using WW (yes, the +45 does get sent to the sides as well). Likewise with a Mage polying a particular lower target for you to damage say a very high level side target (for 200 plus per hit).

This document is being created to show the realities of a players with Guild Coin, Favor Points, and a willingness to play a class to its limits, to really show what CA have done to make this class actually viable. I will lay down true costs as best as possible here (some things are based on chest rolls...so impossible to be precise). I will do a comparison to other classes in a limited fashion, and really show how, properly used and properly equipped, the Warrior class has its place in any CA guild.

This document is being created to show the realities of a players with Guild Coin, Favor Points, and a willingness to play a class to its limits, to really show what CA have done to make this class actually viable. I will lay down true costs as best as possible here (some things are based on chest rolls...so impossible to be precise). I will do a comparison to other classes in a limited fashion, and really show how, properly used and properly equipped, the Warrior class has its place in any CA guild.
Recommended