Building Offline Mobile Applications for Windows CE: a Tutorial This document describes how to build a Visual Basic application using the Oracle9i Lite ADOCE interface for Pocket PC. It enables you to implement offline mobile applications for the Pocket PC using Oracle9i Lite. It provides you with the complete framework to build, deploy, and manage offline mobile applications. Oracle9i Lite supports various application models for the Pocket PC by supporting industry standard interfaces such as ODBC, JDBC, and ADOCE. Topics include:
Section 2.1, "Overview"
Section 2.2, "Developing the Application"
Section 2.3, "Packaging and Publishing the Application"
Section 2.4, "Administering the Application"
Section 2.5, "Running the Application on Pocket PC"
2.1 Overview This document guides you through the entire offline mobile application implementation process using a sample Pocket PC application. The sample Pocket PC application enables you to create, deploy, administer and use a Pocket PC Windows CE application.
The sample Pocket PC application is based on typical activities of delivery personnel in the Transportation and Logistics industry. The day-to-day operations of such personnel involve package pick-up and delivery. A delivery person collects the complete delivery package list and the package delivery destination information for the day before he leaves the dispatch center on his Pocket PC. As the truck driver also carries information related to package pick-up and delivery with him, the delivery person can work offline and update the package pick-up and delivery status on his Pocket PC. Later, he can synchronize his updated information with the central server running in the dispatch center over any wireless network.
2.1.1 Before You Start
This tutorial assumes that the Mobile Server is installed on the same desktop that is used for Pocket PC application development. Before starting the offline mobile application development process, you must ensure that the development computer and the client device meet the requirements specified below.
2.1.1.1 Application Development Computer Requirements
You must configure and install the following components on the development computer.
Table 2-1 lists the configuration and installation requirements for the mobile application development
computer.
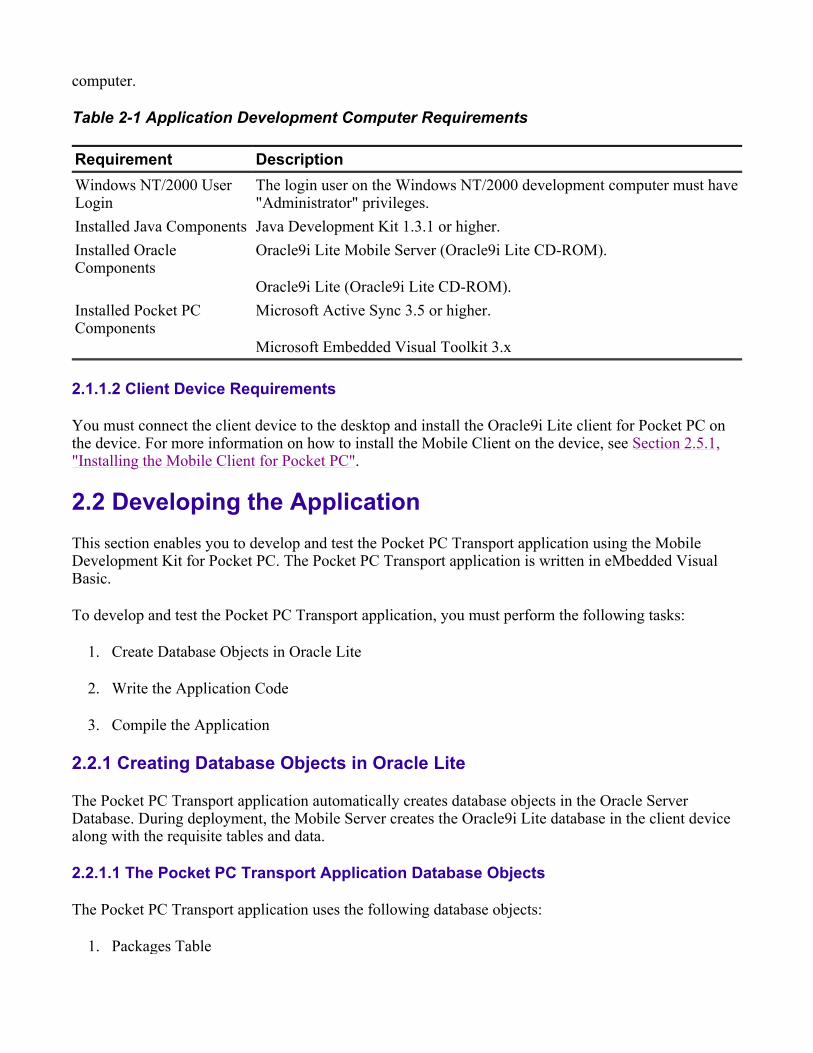
Table 2-1 Application Development Computer Requirements
2.1.1.2 Client Device Requirements
You must connect the client device to the desktop and install the Oracle9i Lite client for Pocket PC on the device. For more information on how to install the Mobile Client on the device, see Section 2.5.1, "Installing the Mobile Client for Pocket PC".
2.2 Developing the Application This section enables you to develop and test the Pocket PC Transport application using the Mobile Development Kit for Pocket PC. The Pocket PC Transport application is written in eMbedded Visual Basic.
To develop and test the Pocket PC Transport application, you must perform the following tasks:
1. Create Database Objects in Oracle Lite
2. Write the Application Code
3. Compile the Application
2.2.1 Creating Database Objects in Oracle Lite
The Pocket PC Transport application automatically creates database objects in the Oracle Server Database. During deployment, the Mobile Server creates the Oracle9i Lite database in the client device along with the requisite tables and data.
2.2.1.1 The Pocket PC Transport Application Database Objects
The Pocket PC Transport application uses the following database objects:
1. Packages Table
Requirement Description Windows NT/2000 User Login
The login user on the Windows NT/2000 development computer must have "Administrator" privileges.
Installed Java Components Java Development Kit 1.3.1 or higher. Installed Oracle Components
Oracle9i Lite Mobile Server (Oracle9i Lite CD-ROM).
Oracle9i Lite (Oracle9i Lite CD-ROM). Installed Pocket PC Components
Microsoft Active Sync 3.5 or higher.
Microsoft Embedded Visual Toolkit 3.x
2. Routes Table
3. Trucks Table
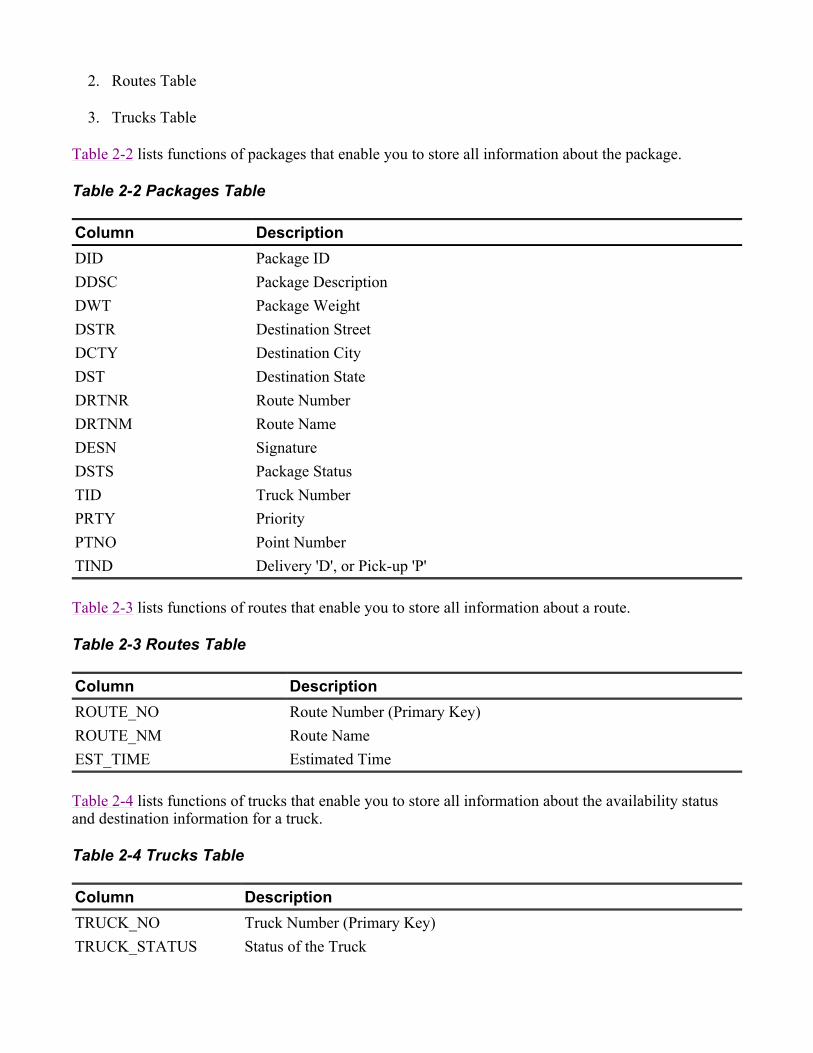
Table 2-2 lists functions of packages that enable you to store all information about the package.
Table 2-2 Packages Table
Table 2-3 lists functions of routes that enable you to store all information about a route.
Table 2-3 Routes Table
Table 2-4 lists functions of trucks that enable you to store all information about the availability status and destination information for a truck.
Table 2-4 Trucks Table
Column Description DID Package ID DDSC Package Description DWT Package Weight DSTR Destination Street DCTY Destination City DST Destination State DRTNR Route Number DRTNM Route Name DESN Signature DSTS Package Status TID Truck Number PRTY Priority PTNO Point Number TIND Delivery 'D', or Pick-up 'P'
Column Description ROUTE_NO Route Number (Primary Key) ROUTE_NM Route Name EST_TIME Estimated Time
Column Description TRUCK_NO Truck Number (Primary Key) TRUCK_STATUS Status of the Truck
To Create Database Objects
1. The "master" schema is available in the Oracle Database Server. In case the "master" schema is not available, enter the following command in the Command Prompt window:
> msql system/[email protected]> create user master identified by master
2. Enter the following commands to create database objects in the Oracle Database Server.
> cd <ORACLE_HOME>\mobile\sdk\wince\samples\tutorial\Transport> msql master/mas
2.2.2 Writing the Application Code
The Pocket PC Transport application's eMbedded VB code is readily available with the sample application. The following section explains the code written for the Transport application and is presented below.
2.2.2.1 Creating a New Project
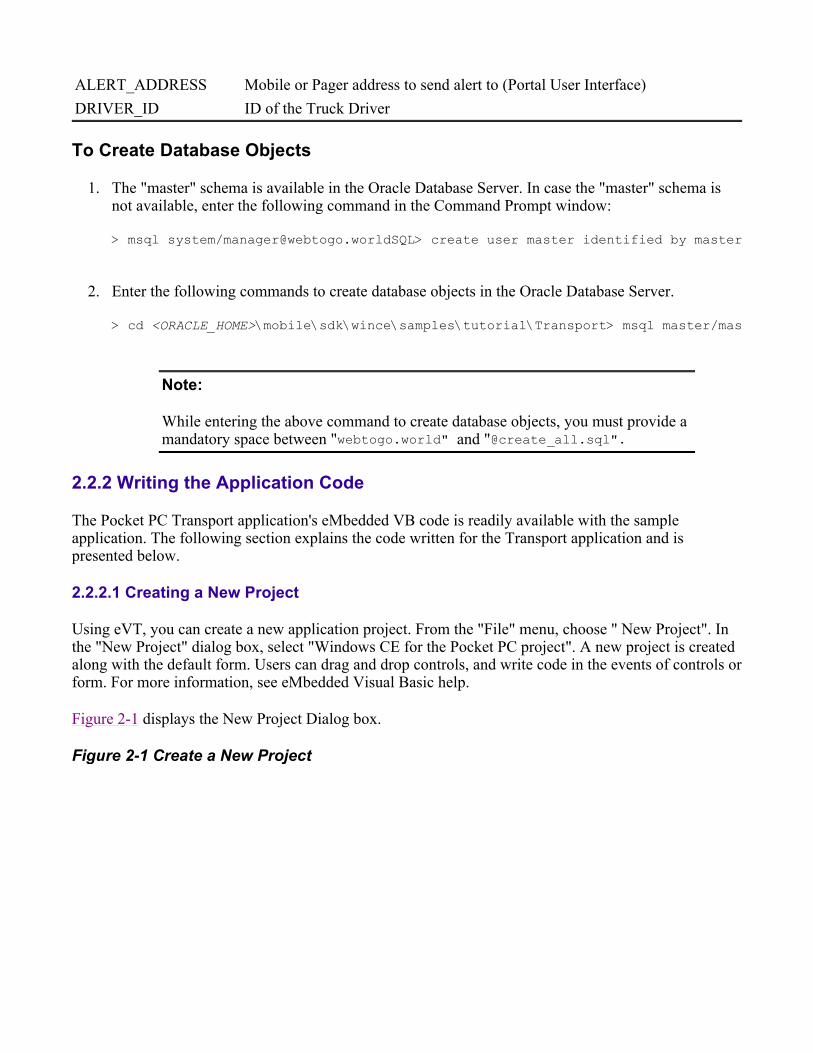
Using eVT, you can create a new application project. From the "File" menu, choose " New Project". In the "New Project" dialog box, select "Windows CE for the Pocket PC project". A new project is created along with the default form. Users can drag and drop controls, and write code in the events of controls or form. For more information, see eMbedded Visual Basic help.
Figure 2-1 displays the New Project Dialog box.
Figure 2-1 Create a New Project
ALERT_ADDRESS Mobile or Pager address to send alert to (Portal User Interface) DRIVER_ID ID of the Truck Driver
Note:
While entering the above command to create database objects, you must provide a mandatory space between "webtogo.world" and "@create_all.sql".
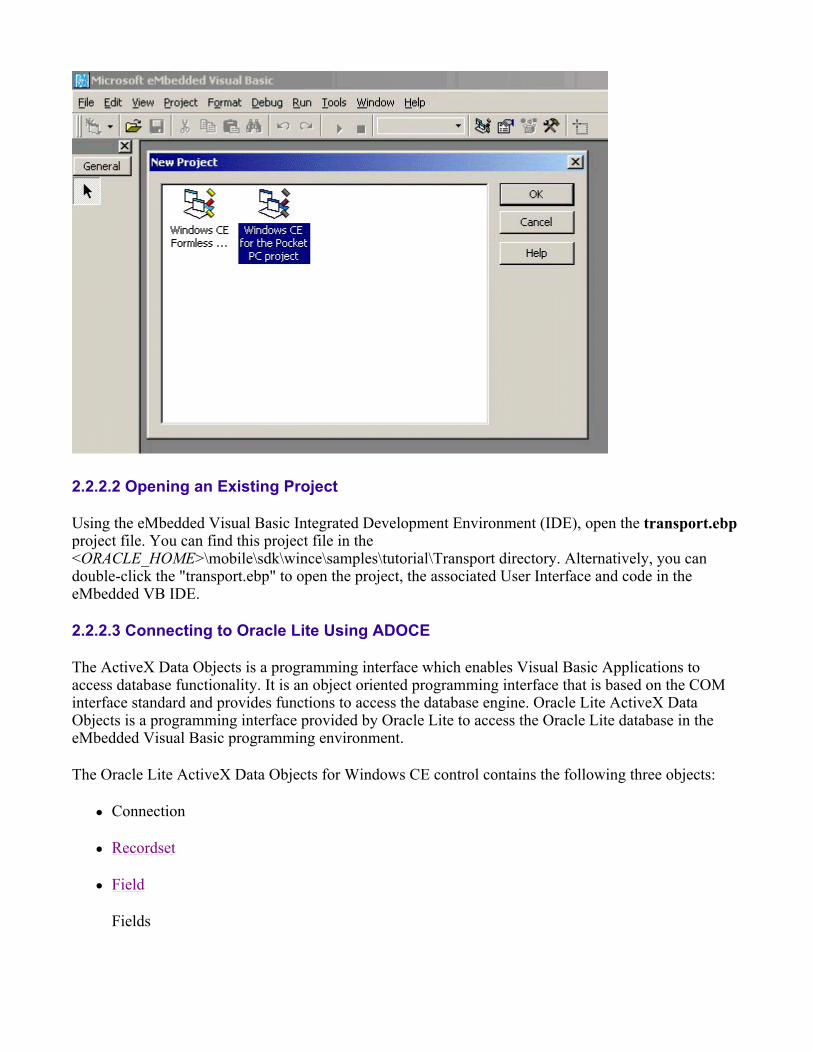
2.2.2.2 Opening an Existing Project
Using the eMbedded Visual Basic Integrated Development Environment (IDE), open the transport.ebp project file. You can find this project file in the <ORACLE_HOME>\mobile\sdk\wince\samples\tutorial\Transport directory. Alternatively, you can double-click the "transport.ebp" to open the project, the associated User Interface and code in the eMbedded VB IDE.
2.2.2.3 Connecting to Oracle Lite Using ADOCE
The ActiveX Data Objects is a programming interface which enables Visual Basic Applications to access database functionality. It is an object oriented programming interface that is based on the COM interface standard and provides functions to access the database engine. Oracle Lite ActiveX Data Objects is a programming interface provided by Oracle Lite to access the Oracle Lite database in the eMbedded Visual Basic programming environment.
The Oracle Lite ActiveX Data Objects for Windows CE control contains the following three objects:
Connection
Recordset
Field
Fields
Connection
Using the "CreateObject" statement, you must create a Connection object and activate a connection based on the DSN entry. It is available in the "ODBC.txt" file under the "\ORACE" directory of the device. If the user creates a new Recordset object and the connection is still not opened, the default "polite" DSN is called and the Recordset is automatically connected to the default "polite.odb" database.
Recordset
Using the "CreateObject" statement, you must create a new Recordset object. Execute a SQL statement to return records from a table by opening the recordset. You can accomplish this by specifying the table name in the "Open" statement of the recordset.
Field
You must not create Field objects directly because they exist only in the context of an existing recordset.
Fields
The Fields collection contains a Field object for each column in the Recordset. You can refer to a particular field by name or by index. The Fields collection supports the Count property.
The following code example shows how to use the Fields collection to get all the field names for "MyTable" table.
Dim rs, n
Set rs = CreateObject(oladoce.recordset)
rs.open "MyTable", dbconn
for n = 0 to rs.Fields.Count -1
Msgbox rs.Fields(n).Name
Next
2.2.2.4 Writing Event Handler Subroutines for Controls
Figure 2-2 displays the Transport application project opened in eMbedded Visual Basic.
Figure 2-2 Transport Application project in eMbedded Visual Basic
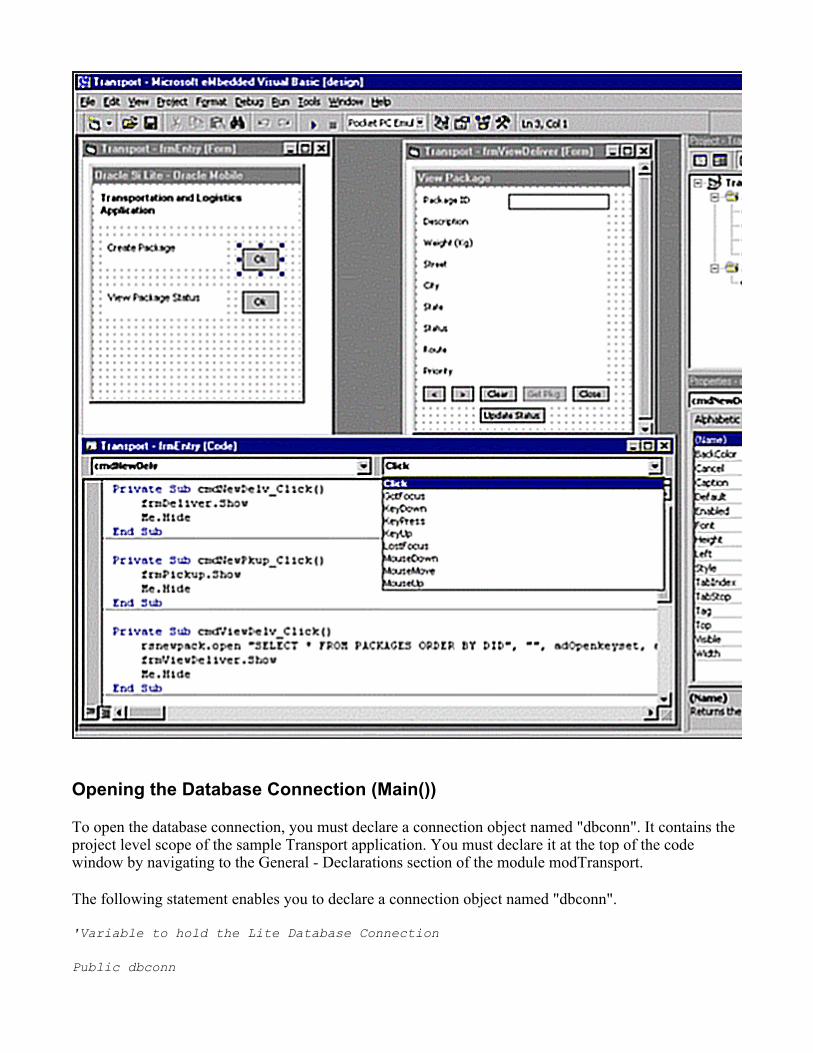
Opening the Database Connection (Main())
To open the database connection, you must declare a connection object named "dbconn". It contains the project level scope of the sample Transport application. You must declare it at the top of the code window by navigating to the General - Declarations section of the module modTransport.
The following statement enables you to declare a connection object named "dbconn".
'Variable to hold the Lite Database Connection
Public dbconn
After declaring the above statement, you must run the application in the "Main" subroutine and set the "dbconn" to the Oracle Lite ADOCE connection object. Open the connection to the database with the DSN name "Transport". The DSN name is mentioned in the Packaging Wizard and allows the Mobile Server to create such an entry for the DSN name in the client device. For more information, see Section 2.3.2, "Defining the Application Connection to the Oracle Database Server".
The following statement enables you to set the "dbconn" to the Oracle Lite ADOCE connection object.
Set dbconn = CreateObject("oladoce.Connection")
dbconn.connect ("Transport")
... ... ....
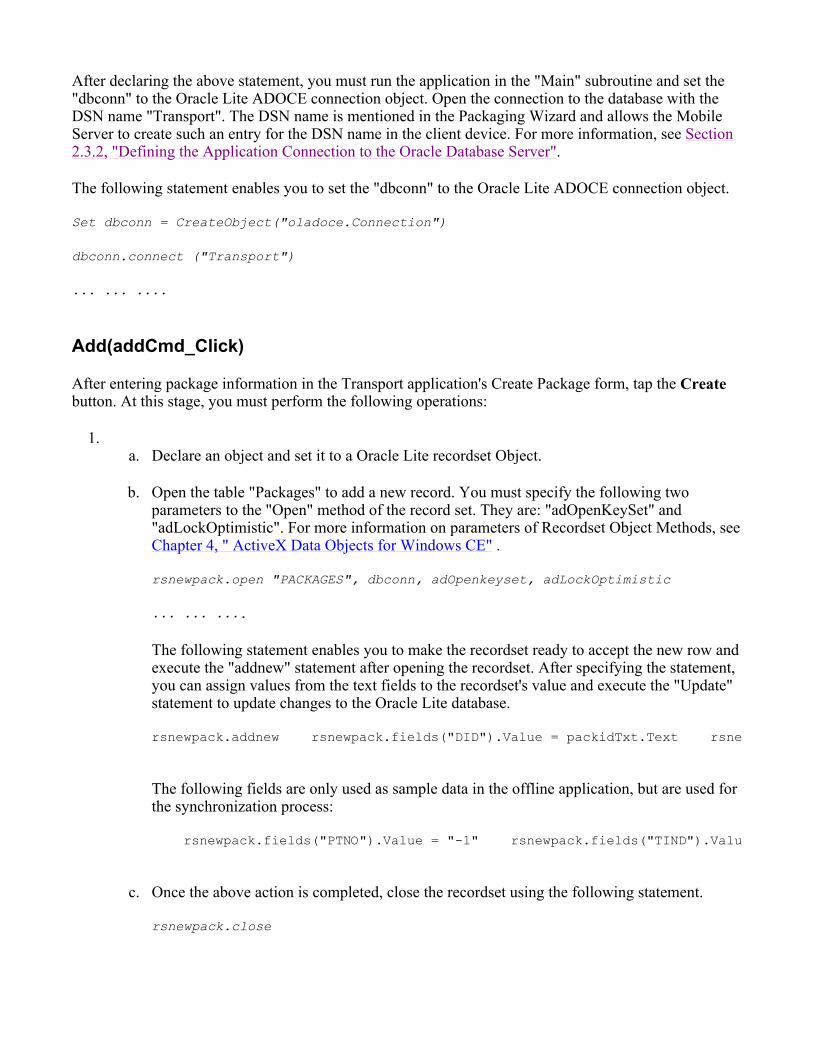
Add(addCmd_Click)
After entering package information in the Transport application's Create Package form, tap the Create button. At this stage, you must perform the following operations:
1.a. Declare an object and set it to a Oracle Lite recordset Object.
b. Open the table "Packages" to add a new record. You must specify the following two parameters to the "Open" method of the record set. They are: "adOpenKeySet" and "adLockOptimistic". For more information on parameters of Recordset Object Methods, see Chapter 4, " ActiveX Data Objects for Windows CE" .
rsnewpack.open "PACKAGES", dbconn, adOpenkeyset, adLockOptimistic
... ... ....
The following statement enables you to make the recordset ready to accept the new row and execute the "addnew" statement after opening the recordset. After specifying the statement, you can assign values from the text fields to the recordset's value and execute the "Update" statement to update changes to the Oracle Lite database.
rsnewpack.addnew rsnewpack.fields("DID").Value = packidTxt.Text rsne
The following fields are only used as sample data in the offline application, but are used for the synchronization process:
rsnewpack.fields("PTNO").Value = "-1" rsnewpack.fields("TIND").Valu
c. Once the above action is completed, close the recordset using the following statement.
rsnewpack.close
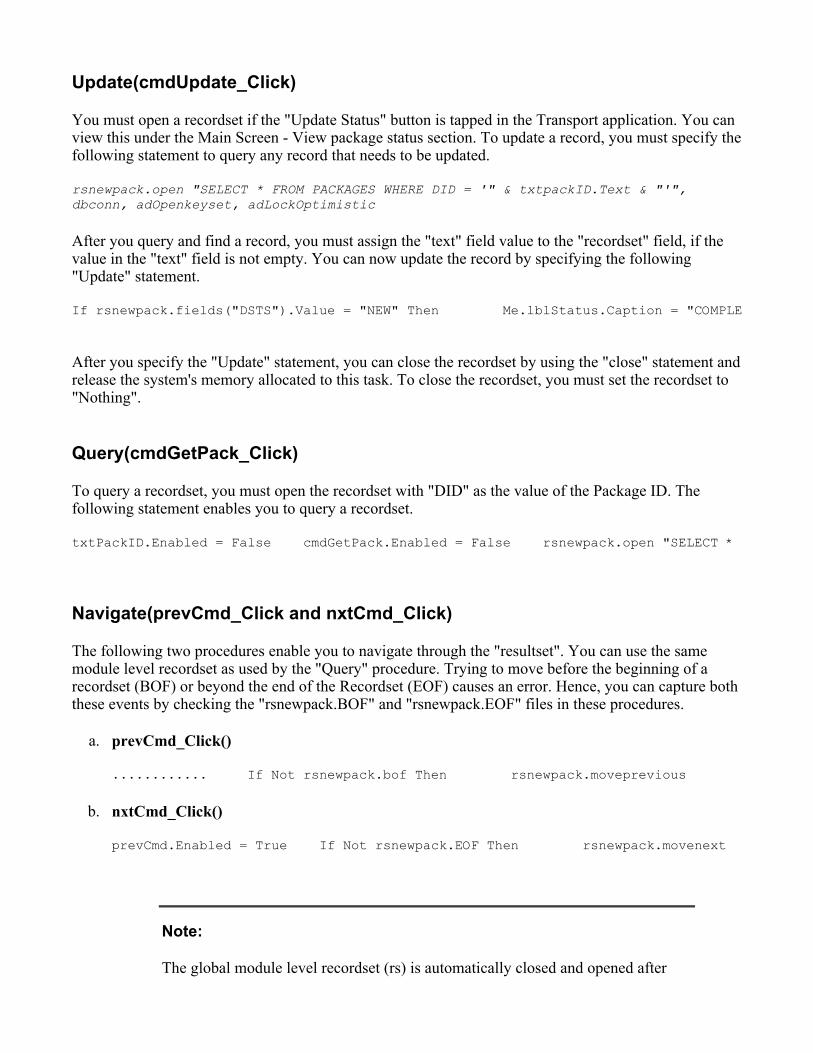
Update(cmdUpdate_Click)
You must open a recordset if the "Update Status" button is tapped in the Transport application. You can view this under the Main Screen - View package status section. To update a record, you must specify the following statement to query any record that needs to be updated.
rsnewpack.open "SELECT * FROM PACKAGES WHERE DID = '" & txtpackID.Text & "'", dbconn, adOpenkeyset, adLockOptimistic
After you query and find a record, you must assign the "text" field value to the "recordset" field, if the value in the "text" field is not empty. You can now update the record by specifying the following "Update" statement.
If rsnewpack.fields("DSTS").Value = "NEW" Then Me.lblStatus.Caption = "COMPLE
After you specify the "Update" statement, you can close the recordset by using the "close" statement and release the system's memory allocated to this task. To close the recordset, you must set the recordset to "Nothing".
Query(cmdGetPack_Click)
To query a recordset, you must open the recordset with "DID" as the value of the Package ID. The following statement enables you to query a recordset.
txtPackID.Enabled = False cmdGetPack.Enabled = False rsnewpack.open "SELECT *
Navigate(prevCmd_Click and nxtCmd_Click)
The following two procedures enable you to navigate through the "resultset". You can use the same module level recordset as used by the "Query" procedure. Trying to move before the beginning of a recordset (BOF) or beyond the end of the Recordset (EOF) causes an error. Hence, you can capture both these events by checking the "rsnewpack.BOF" and "rsnewpack.EOF" files in these procedures.
a. prevCmd_Click()
............ If Not rsnewpack.bof Then rsnewpack.moveprevious
b. nxtCmd_Click()
prevCmd.Enabled = True If Not rsnewpack.EOF Then rsnewpack.movenext
Note:
The global module level recordset (rs) is automatically closed and opened after
Viewing the Application Code
You can view the application code and the user interface from the following location:
<ORACLE_HOME>\mobile\sdk\wce\samples\tutorial\Transport
2.2.3 Compiling the Application
To install the application on the device, you must create a CAB file. The CAB file is uploaded into the Mobile Server Repository during the application's publish phase. You can create a CAB file using the eMbedded Visual Basic IDE.
Before creating the CAB file, you must compile and create an executable ".vb" file from the eMbedded Visual Basic IDE.
2.2.3.1 Creating the Executable .vb File
To create the ".vb" file, choose the "Make..." option from the File menu. At this stage, you must provide a file name to save the executable ".vb" file. You can save the ".vb" file under the following directory:
<ORACLE_HOME>\mobile\sdk\wce\samples\tutorial\Transport\Transport.vb
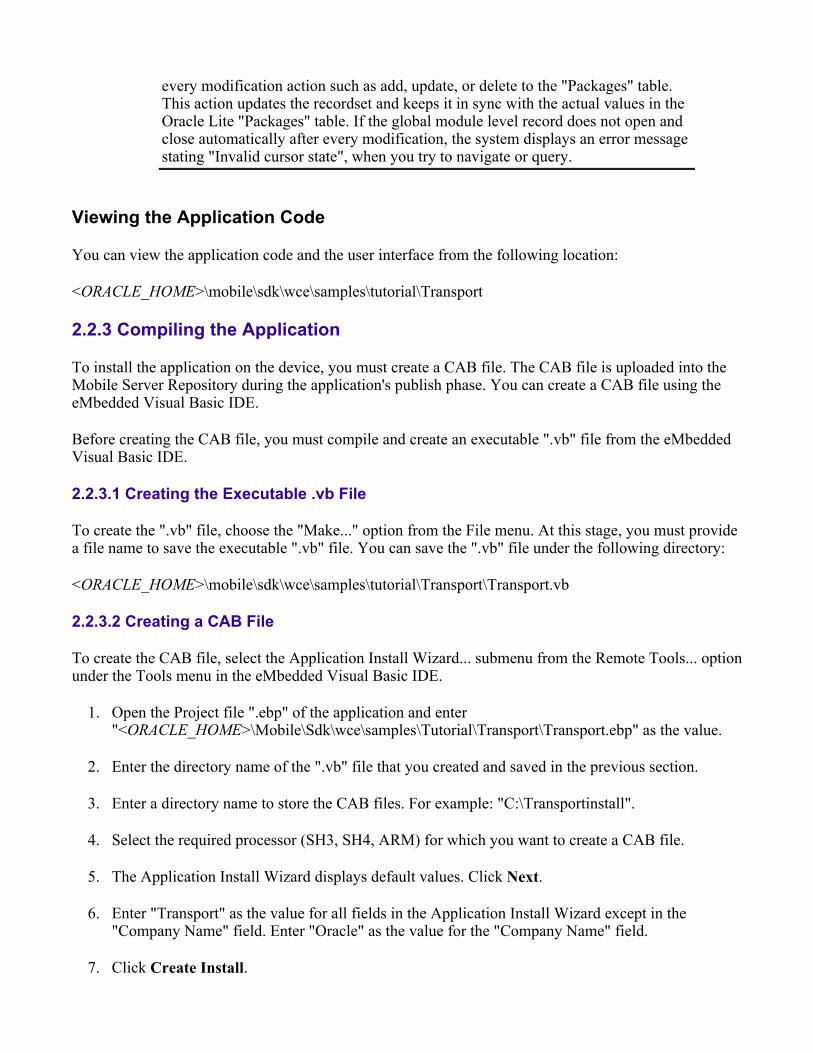
2.2.3.2 Creating a CAB File
To create the CAB file, select the Application Install Wizard... submenu from the Remote Tools... optionunder the Tools menu in the eMbedded Visual Basic IDE.
1. Open the Project file ".ebp" of the application and enter "<ORACLE_HOME>\Mobile\Sdk\wce\samples\Tutorial\Transport\Transport.ebp" as the value.
2. Enter the directory name of the ".vb" file that you created and saved in the previous section.
3. Enter a directory name to store the CAB files. For example: "C:\Transportinstall".
4. Select the required processor (SH3, SH4, ARM) for which you want to create a CAB file.
5. The Application Install Wizard displays default values. Click Next.
6. Enter "Transport" as the value for all fields in the Application Install Wizard except in the "Company Name" field. Enter "Oracle" as the value for the "Company Name" field.
7. Click Create Install.
every modification action such as add, update, or delete to the "Packages" table. This action updates the recordset and keeps it in sync with the actual values in the Oracle Lite "Packages" table. If the global module level record does not open and close automatically after every modification, the system displays an error message stating "Invalid cursor state", when you try to navigate or query.
The Application Install Wizard creates CAB files for the selected processors and saves them under the "C:\Transportinstall\CD1" directory.
2.2.3.3 Installing the Application from the CAB File
You can download and install the application on the device after packaging and publishing the application. The following sections describe how to package and publish the application.
2.3 Packaging and Publishing the Application This section describes how to package the application and prepare it for publishing into the Mobile Server. To package and publish the application, you must perform the following tasks:
1. Define the application using the Packaging Wizard
2. Define the application Connection to the Oracle Database Server
3. Define the Snapshot
2.3.1 Defining the Application Using the Packaging Wizard
Using the Packaging Wizard, you can select and describe the Transport application.
2.3.1.1 Creating a New Application
Using the Packaging Wizard, you can create or modify a Pocket PC application and publish the Pocket PC application into the Mobile Server. For more information on how to use the Packaging Wizard, see Chapter 5.
This section enables you to create or modify a Pocket PC application. You can select and describe the Pocket PC Transport application by launching the Packaging Wizard in regular mode.
To launch the Packaging Wizard in regular mode, perform the following steps.
1. Open the Command Prompt window and enter:
> cd <ORACLE_HOME>\mobile\sdk\bin
> wtgpack
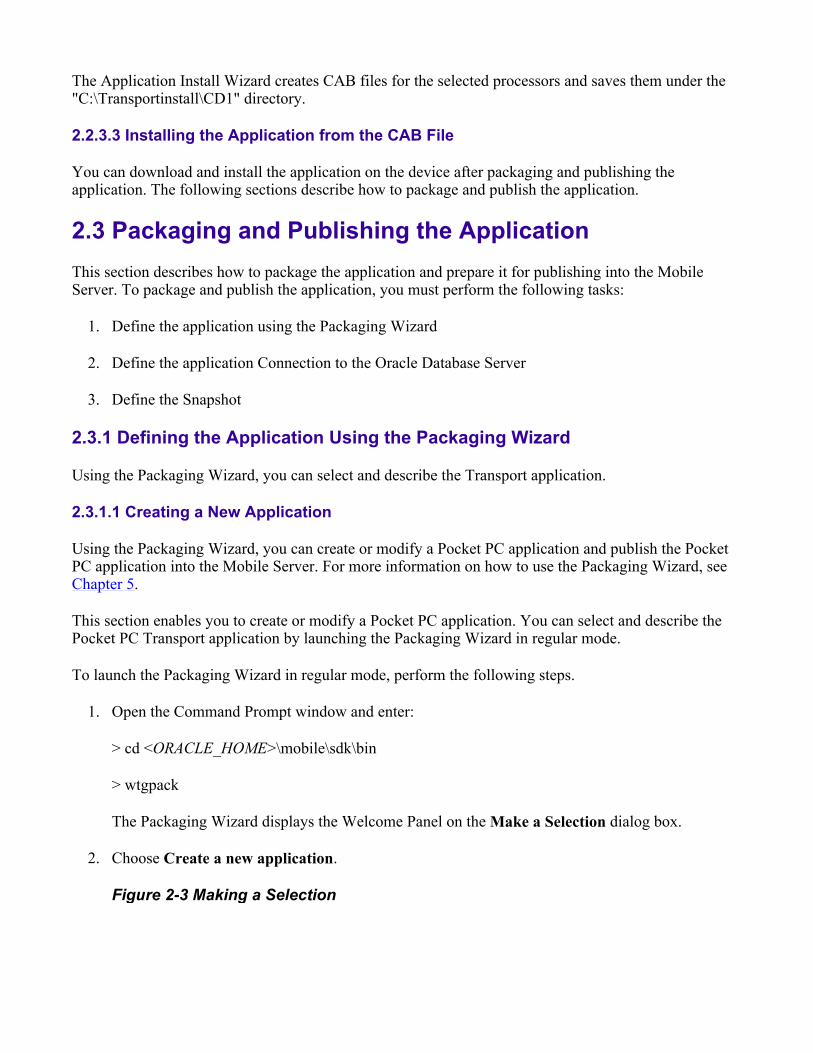
The Packaging Wizard displays the Welcome Panel on the Make a Selection dialog box.
2. Choose Create a new application.
Figure 2-3 Making a Selection
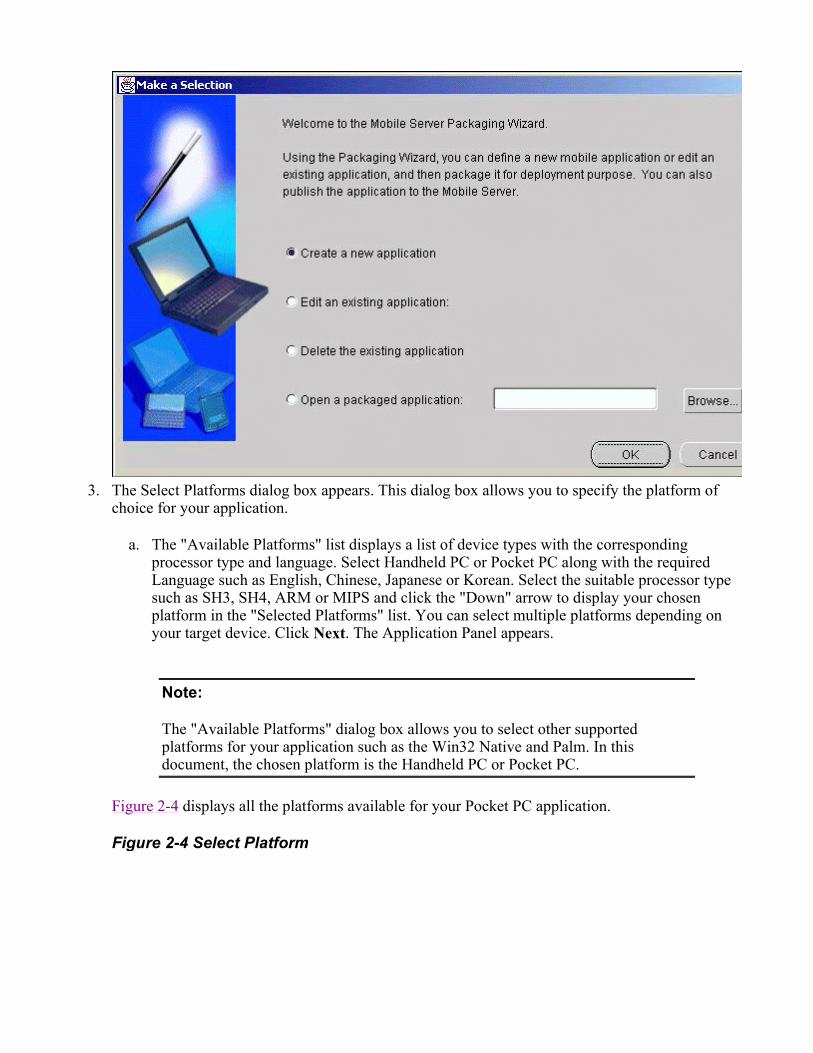
3. The Select Platforms dialog box appears. This dialog box allows you to specify the platform of choice for your application.
a. The "Available Platforms" list displays a list of device types with the corresponding processor type and language. Select Handheld PC or Pocket PC along with the required Language such as English, Chinese, Japanese or Korean. Select the suitable processor type such as SH3, SH4, ARM or MIPS and click the "Down" arrow to display your chosen platform in the "Selected Platforms" list. You can select multiple platforms depending on your target device. Click Next. The Application Panel appears.
Figure 2-4 displays all the platforms available for your Pocket PC application.
Figure 2-4 Select Platform
Note:
The "Available Platforms" dialog box allows you to select other supported platforms for your application such as the Win32 Native and Palm. In this document, the chosen platform is the Handheld PC or Pocket PC.
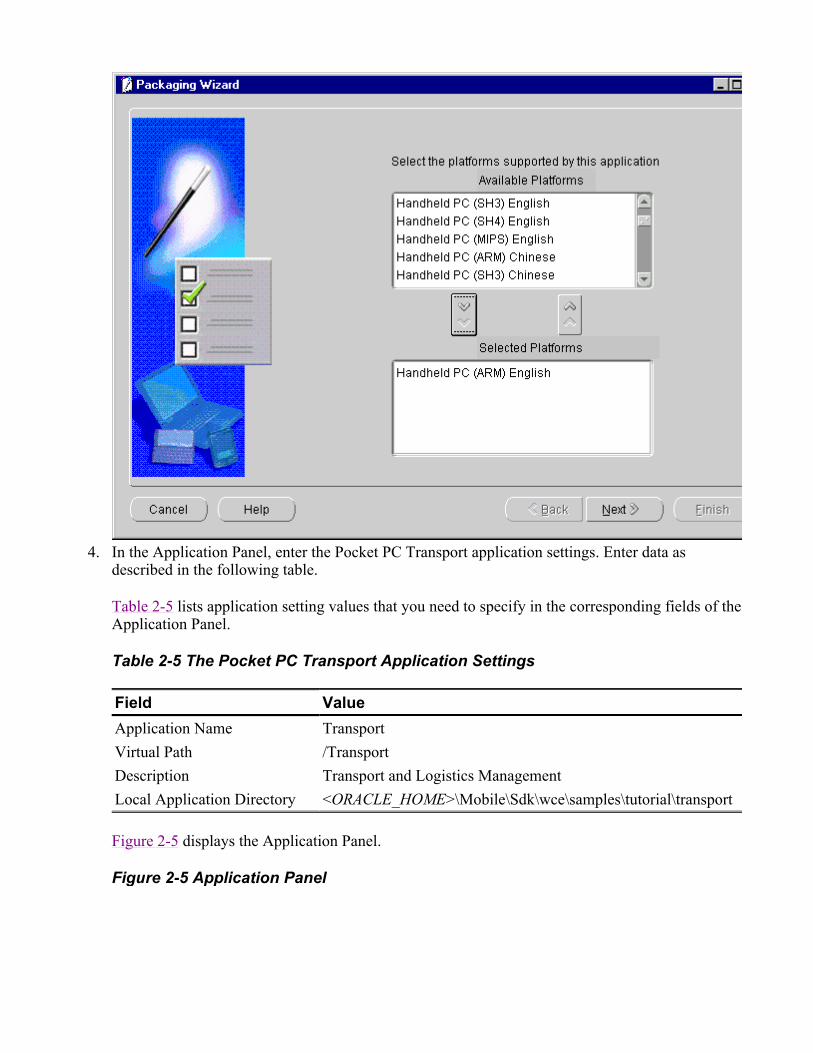
4. In the Application Panel, enter the Pocket PC Transport application settings. Enter data as described in the following table.
Table 2-5 lists application setting values that you need to specify in the corresponding fields of the Application Panel.
Table 2-5 The Pocket PC Transport Application Settings
Figure 2-5 displays the Application Panel.
Figure 2-5 Application Panel
Field Value Application Name Transport Virtual Path /Transport Description Transport and Logistics Management Local Application Directory <ORACLE_HOME>\Mobile\Sdk\wce\samples\tutorial\transport

5. Click Next. The Files panel appears.
The Files panel automatically finds all files that must be uploaded based on the "Local Application Directory" specified in the previous panel. You must ensure that you copy the correct CAB files in the corresponding directories.
For example, you can copy the ÒTransport.Arm 1100 (4K) v3.00.cabÓ file into the "Arm" directory. The full path to this directory is:
<ORACLE_HOME>\Mobile\Sdk\wce\samples\tutorial\Transport\wce\Pocket_PC\us\arm.
Figure 2-6 displays the Files Panel.
Figure 2-6 Select Files for Upload

2.3.2 Defining the Application Connection to the Oracle Database Server
Using the "Database" panel of the Packaging Wizard, you can define the Transport Application's connection information to the Oracle Database Server.
Figure 2-7 displays the Database panel.
Figure 2-7 Database Panel
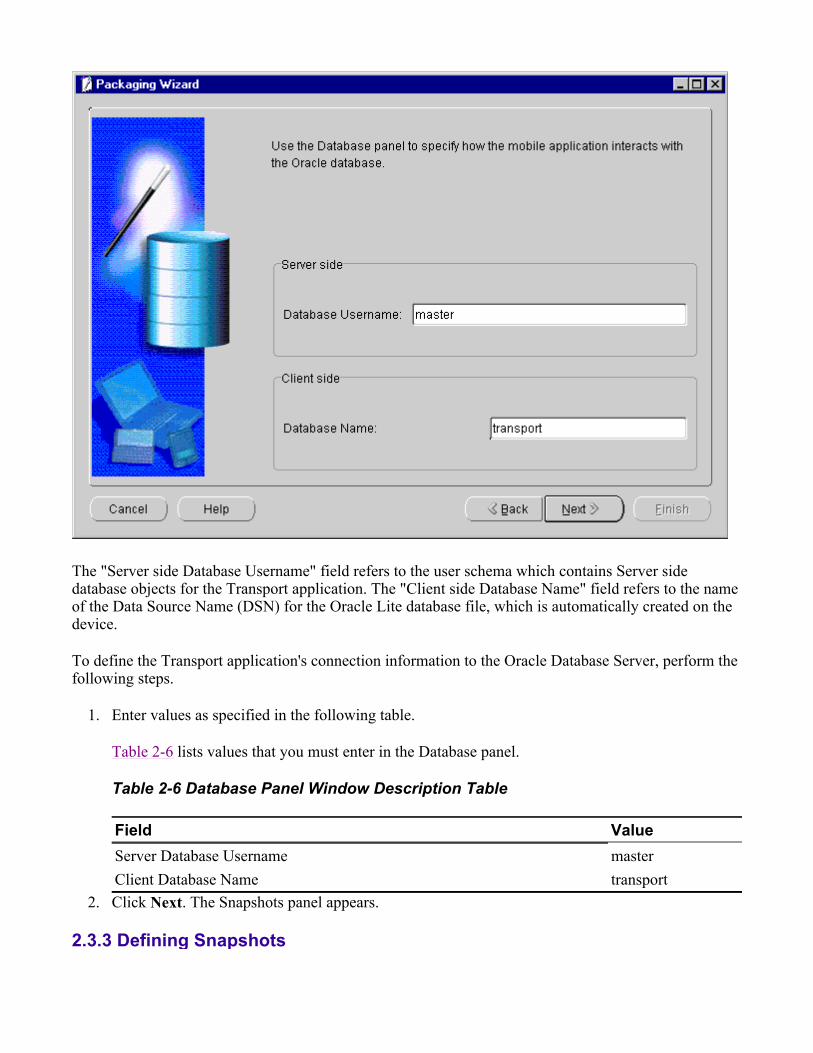
The "Server side Database Username" field refers to the user schema which contains Server side database objects for the Transport application. The "Client side Database Name" field refers to the name of the Data Source Name (DSN) for the Oracle Lite database file, which is automatically created on the device.
To define the Transport application's connection information to the Oracle Database Server, perform the following steps.
1. Enter values as specified in the following table.
Table 2-6 lists values that you must enter in the Database panel.
Table 2-6 Database Panel Window Description Table
2. Click Next. The Snapshots panel appears.
2.3.3 Defining Snapshots
Field Value Server Database Username master Client Database Name transport
The Snapshots panel defines database tables that you must synchronize. It enables you to define the synchronization logic for the Transport application. The Packaging Wizard also enables you to import table definitions from the Oracle Server Database.
To define snapshots for the Transport application, perform the following steps.
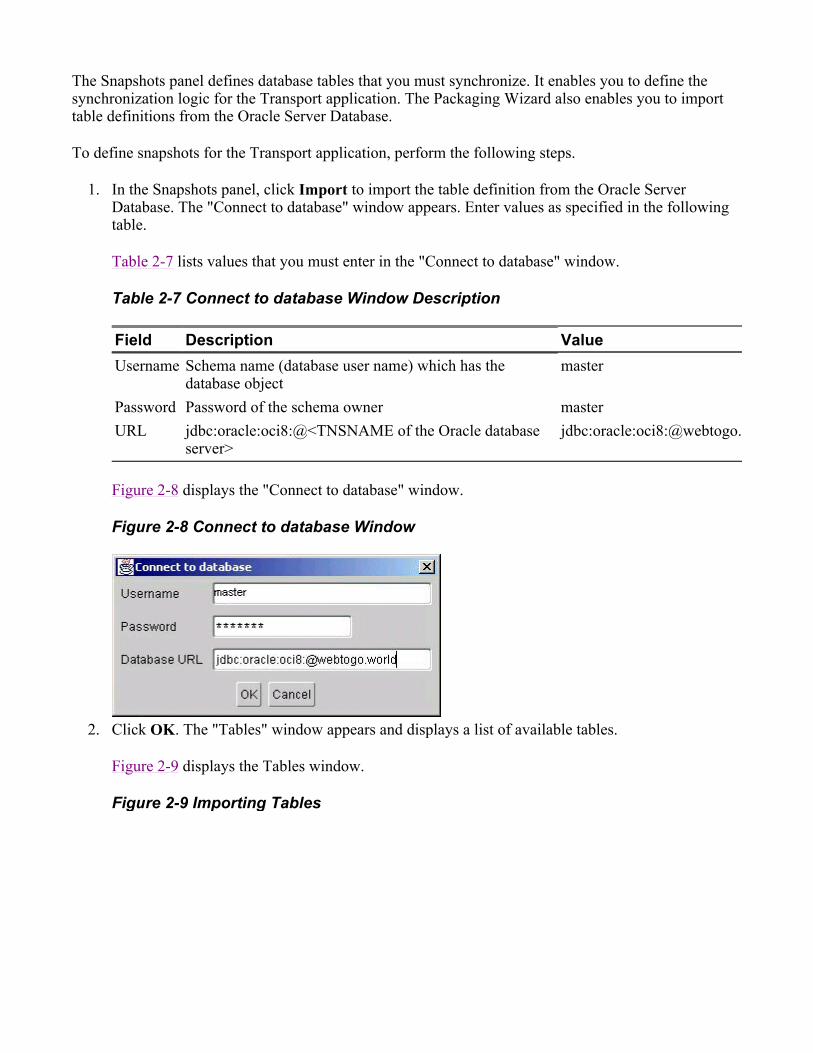
1. In the Snapshots panel, click Import to import the table definition from the Oracle Server Database. The "Connect to database" window appears. Enter values as specified in the following table.
Table 2-7 lists values that you must enter in the "Connect to database" window.
Table 2-7 Connect to database Window Description
Figure 2-8 displays the "Connect to database" window.
Figure 2-8 Connect to database Window
2. Click OK. The "Tables" window appears and displays a list of available tables.
Figure 2-9 displays the Tables window.
Figure 2-9 Importing Tables
Field Description Value Username Schema name (database user name) which has the
database object master
Password Password of the schema owner master URL jdbc:oracle:oci8:@<TNSNAME of the Oracle database
server> jdbc:oracle:oci8:@webtogo.w
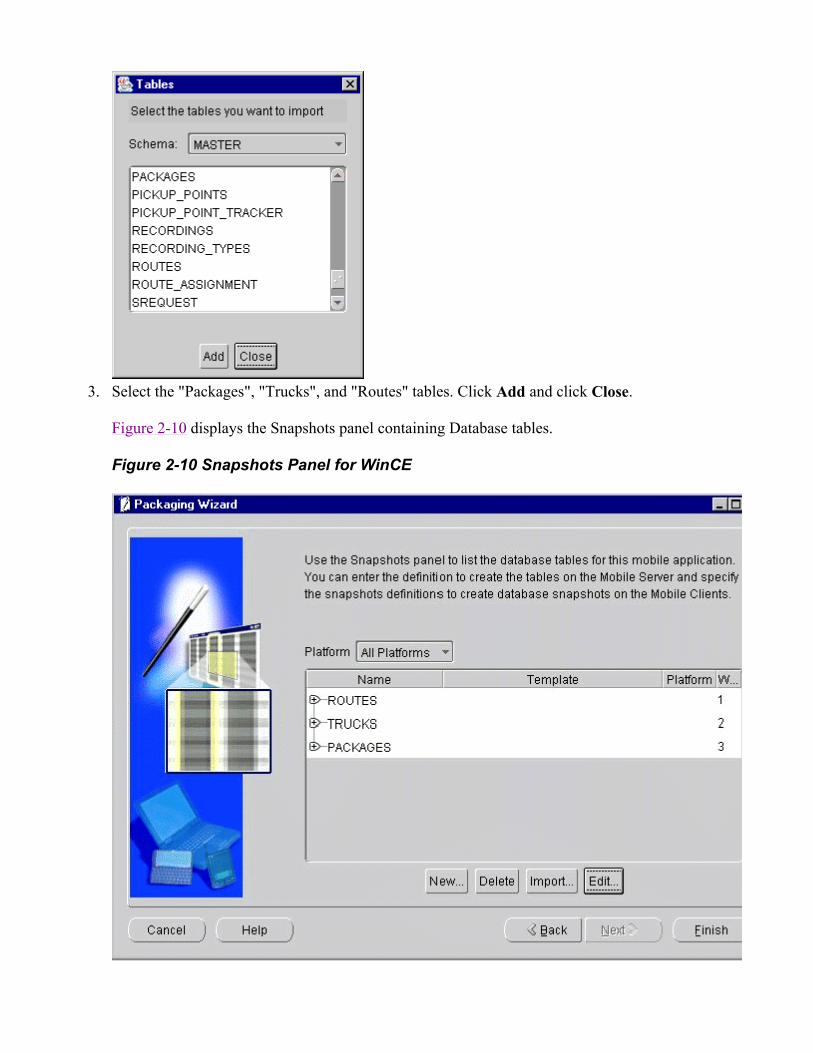
3. Select the "Packages", "Trucks", and "Routes" tables. Click Add and click Close.
Figure 2-10 displays the Snapshots panel containing Database tables.
Figure 2-10 Snapshots Panel for WinCE

4. Select "Packages" and click Edit. The Edit Snapshot dialog box appears.
5. To control the order in which the snapshots are refreshed on the client, you must change the weight for the "Packages" table to "1". Clear the "Generate SQL" check box, as you have already created Database Objects in the Oracle Database Server and hence, do not need to create SQL for creating the database.
Figure 2-11 displays the Snapshots panel for the Packages table.
Figure 2-11 Edit Snapshots Panel for Packages Table
6. Click the WinCE tab. You must ensure that the "Create on client" check box is selected, and the
"Template" field displays the following SQL statement:
SELECT * FROM MASTER.PACKAGES
Note:
You must ensure that the "Create on Client" box is checked. If the "Create on Client" box is not checked, the corresponding snapshot will not be created in the Oracle Lite Database on the client.
7. Click OK.
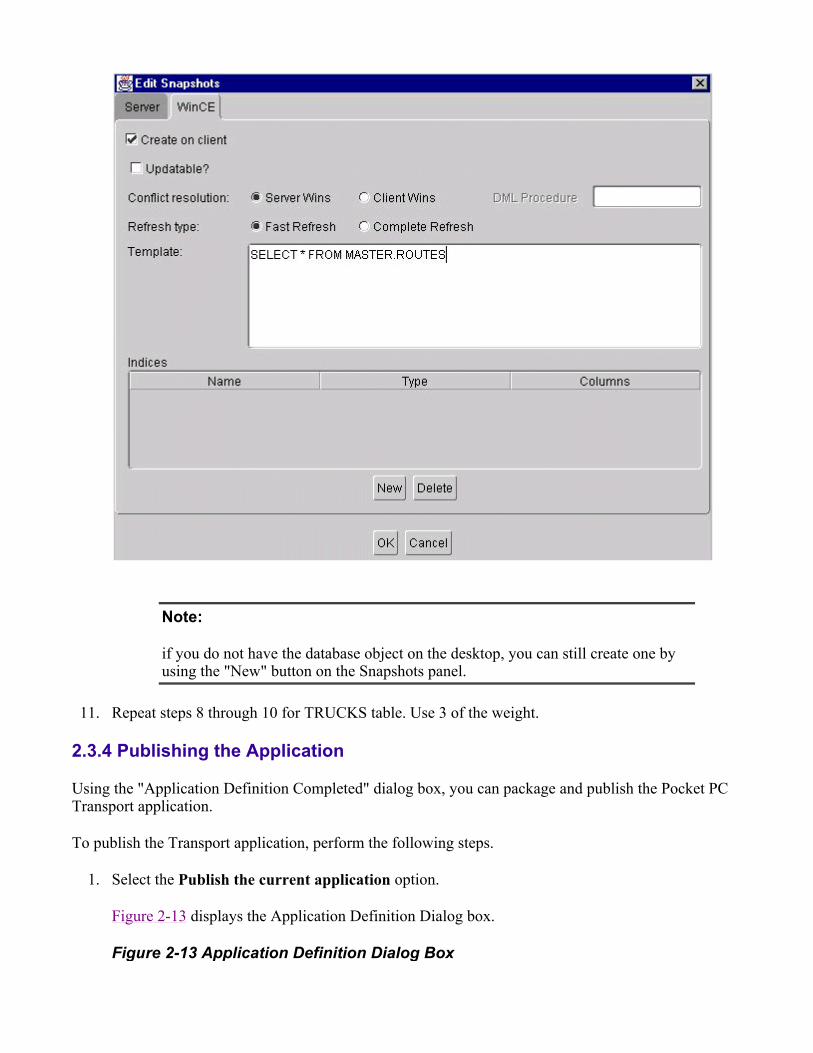
8. In the Snapshots panel, select the "Routes" table and click Edit. The Edit Snapshot dialog box appears.
9. To control the order in which snapshots are refreshed on the client, change the weight for the "Routes" table to "2". Clear the "General SQL" check box, as you have already created Database Objects in the Oracle Database Server and do not need to create SQL for creating the database.
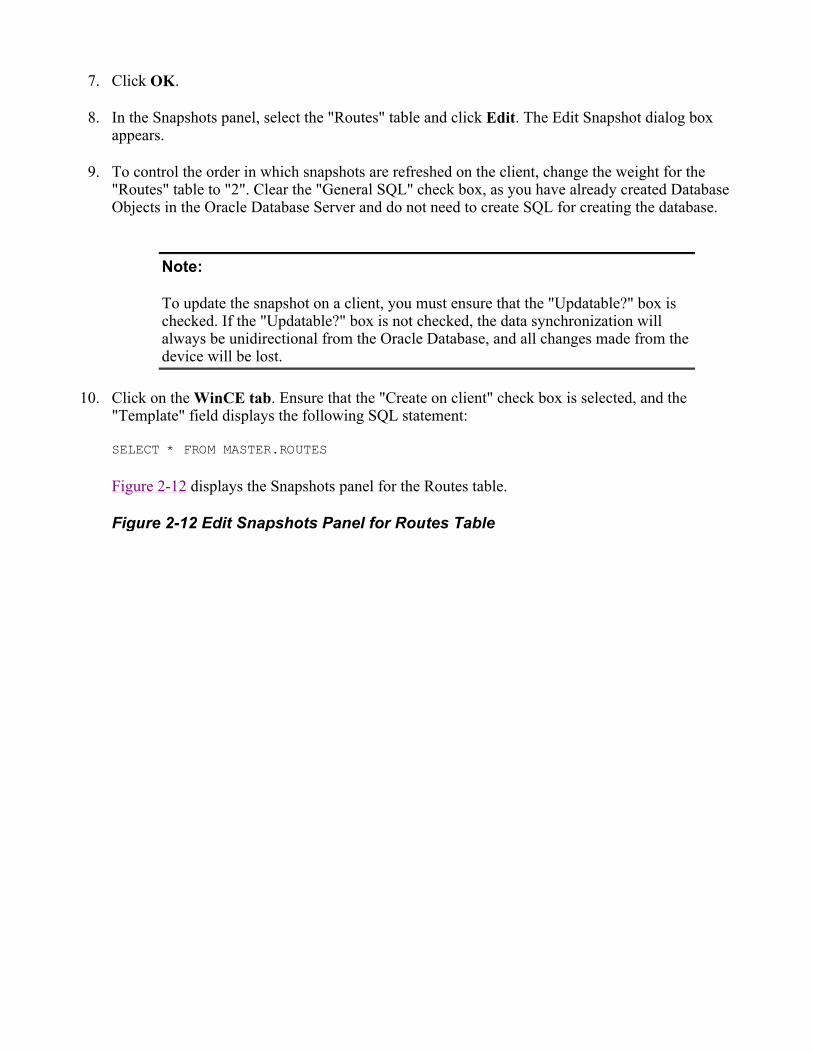
10. Click on the WinCE tab. Ensure that the "Create on client" check box is selected, and the "Template" field displays the following SQL statement:
SELECT * FROM MASTER.ROUTES
Figure 2-12 displays the Snapshots panel for the Routes table.
Figure 2-12 Edit Snapshots Panel for Routes Table
Note:
To update the snapshot on a client, you must ensure that the "Updatable?" box is checked. If the "Updatable?" box is not checked, the data synchronization will always be unidirectional from the Oracle Database, and all changes made from the device will be lost.
11. Repeat steps 8 through 10 for TRUCKS table. Use 3 of the weight.
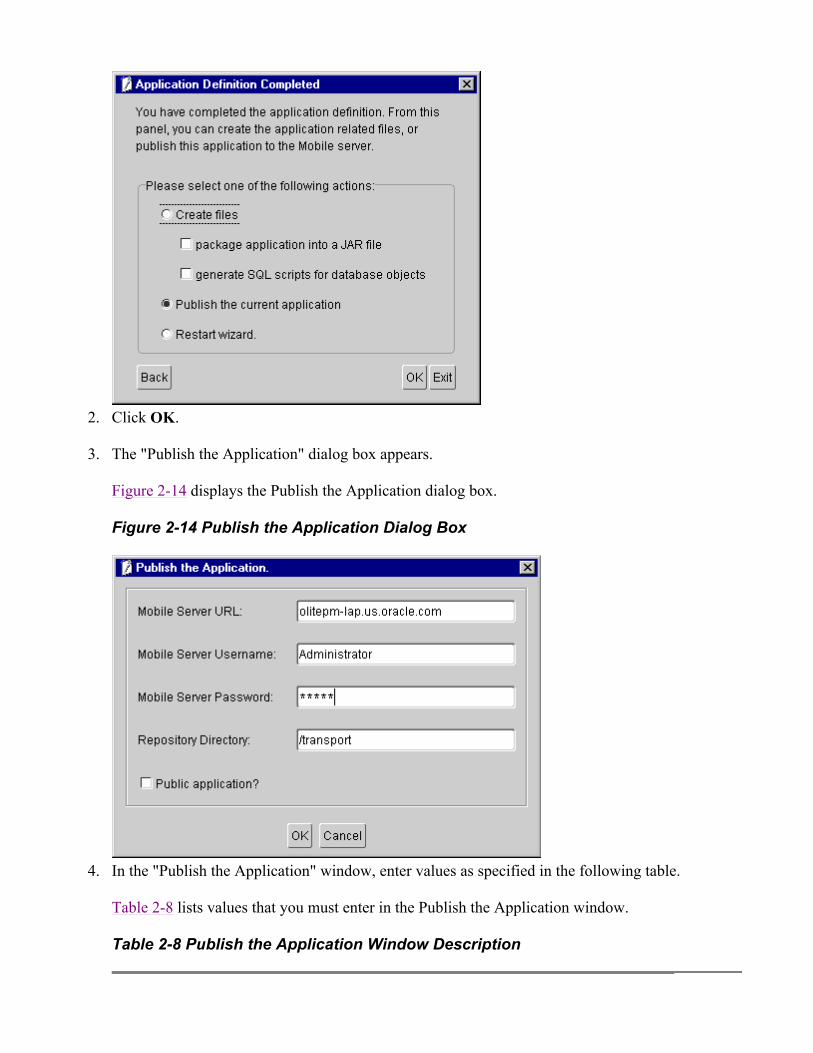
2.3.4 Publishing the Application
Using the "Application Definition Completed" dialog box, you can package and publish the Pocket PC Transport application.
To publish the Transport application, perform the following steps.
1. Select the Publish the current application option.
Figure 2-13 displays the Application Definition Dialog box.
Figure 2-13 Application Definition Dialog Box
Note:
if you do not have the database object on the desktop, you can still create one by using the "New" button on the Snapshots panel.
2. Click OK.
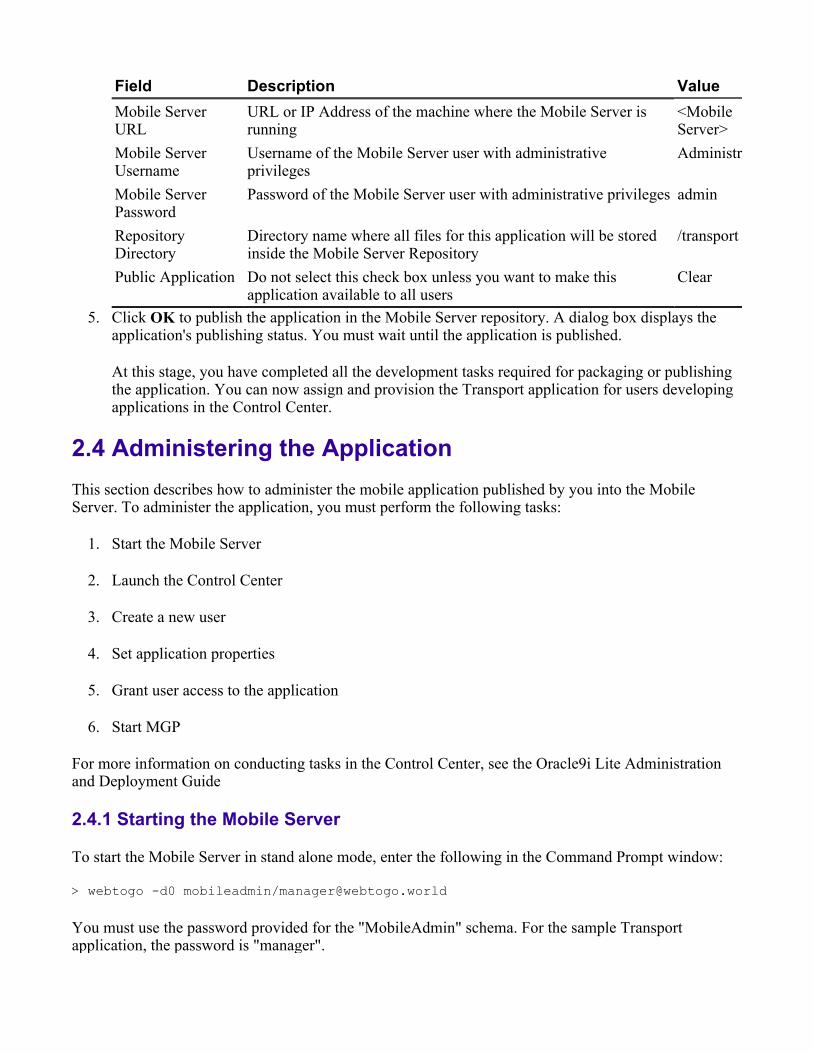
3. The "Publish the Application" dialog box appears.
Figure 2-14 displays the Publish the Application dialog box.
Figure 2-14 Publish the Application Dialog Box
4. In the "Publish the Application" window, enter values as specified in the following table.
Table 2-8 lists values that you must enter in the Publish the Application window.
Table 2-8 Publish the Application Window Description
5. Click OK to publish the application in the Mobile Server repository. A dialog box displays the application's publishing status. You must wait until the application is published.
At this stage, you have completed all the development tasks required for packaging or publishing the application. You can now assign and provision the Transport application for users developing applications in the Control Center.
2.4 Administering the Application This section describes how to administer the mobile application published by you into the Mobile Server. To administer the application, you must perform the following tasks:
1. Start the Mobile Server
2. Launch the Control Center
3. Create a new user
4. Set application properties
5. Grant user access to the application
6. Start MGP
For more information on conducting tasks in the Control Center, see the Oracle9i Lite Administration and Deployment Guide
2.4.1 Starting the Mobile Server
To start the Mobile Server in stand alone mode, enter the following in the Command Prompt window:
> webtogo -d0 mobileadmin/[email protected]
You must use the password provided for the "MobileAdmin" schema. For the sample Transport application, the password is "manager".
Field Description Value Mobile Server URL
URL or IP Address of the machine where the Mobile Server is running
<Mobile Server>
Mobile Server Username
Username of the Mobile Server user with administrative privileges
Administr
Mobile Server Password
Password of the Mobile Server user with administrative privileges admin
Repository Directory
Directory name where all files for this application will be stored inside the Mobile Server Repository
/transport
Public Application Do not select this check box unless you want to make this application available to all users
Clear
2.4.2 Launching the Mobile Server Control Center
Using the login username and password, you can log in to the Mobile Server and launch the Mobile Server Control Center.
To start the Mobile Server Control Center, perform the following steps:
1. Open your Web browser and connect to the Mobile Server by entering the following URL:
http://<mobileserver>/webtogo
2. Log in as the Mobile Server administrator by entering account information as specified in the following table.
Table 2-9 lists values that you must enter in the Mobile Server Control Center login window.
Table 2-9 Mobile Server Control Center Login Window Description
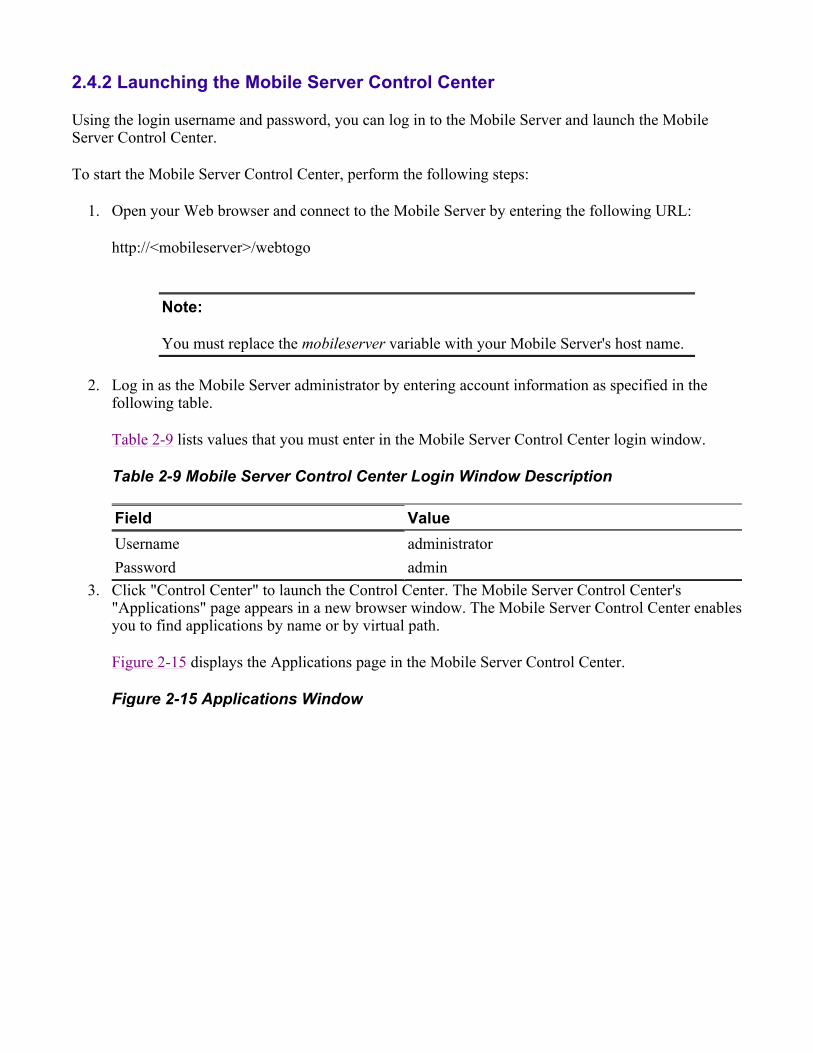
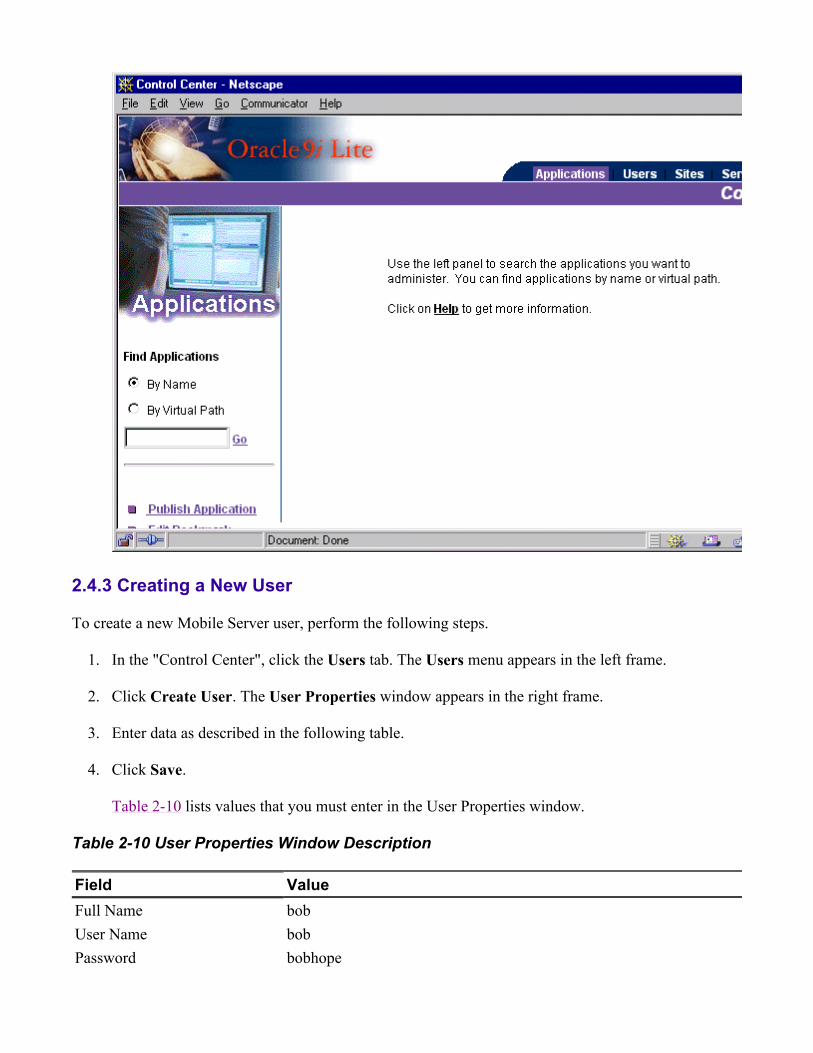
3. Click "Control Center" to launch the Control Center. The Mobile Server Control Center's "Applications" page appears in a new browser window. The Mobile Server Control Center enables you to find applications by name or by virtual path.
Figure 2-15 displays the Applications page in the Mobile Server Control Center.
Figure 2-15 Applications Window
Note:
You must replace the mobileserver variable with your Mobile Server's host name.
Field Value Username administrator Password admin
2.4.3 Creating a New User
To create a new Mobile Server user, perform the following steps.
1. In the "Control Center", click the Users tab. The Users menu appears in the left frame.
2. Click Create User. The User Properties window appears in the right frame.
3. Enter data as described in the following table.
4. Click Save.
Table 2-10 lists values that you must enter in the User Properties window.
Table 2-10 User Properties Window Description
Field Value Full Name bob User Name bob Password bobhope
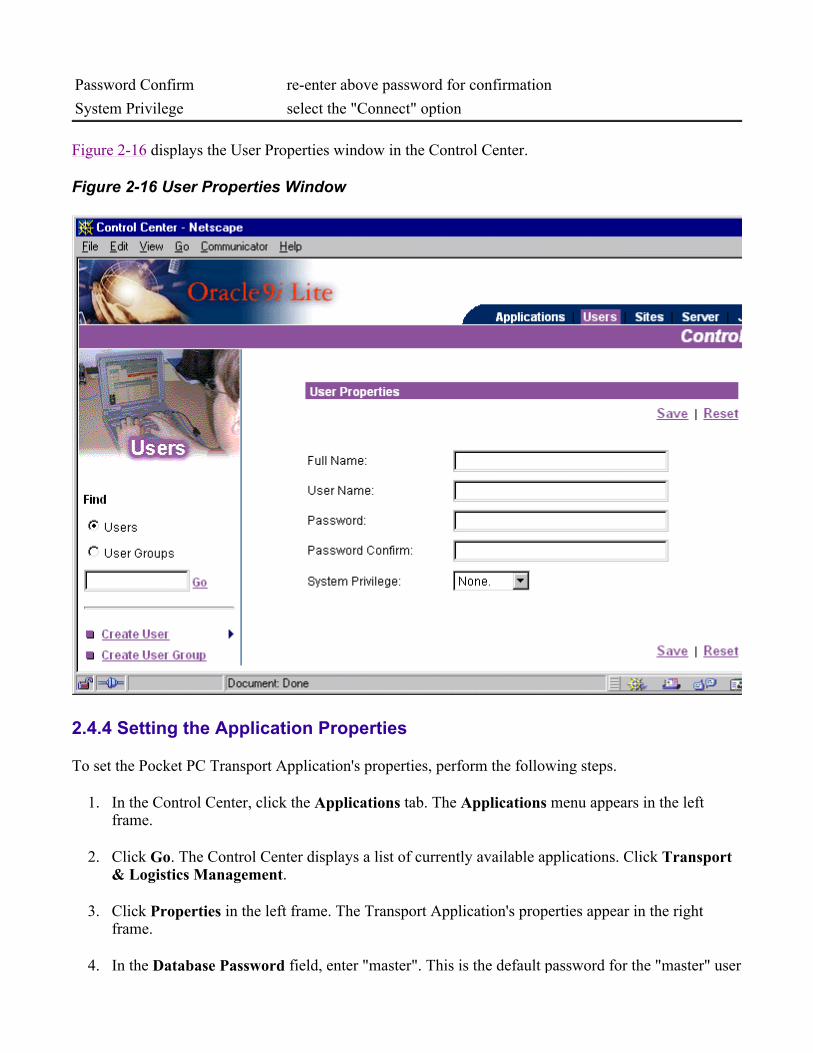
Figure 2-16 displays the User Properties window in the Control Center.
Figure 2-16 User Properties Window
2.4.4 Setting the Application Properties
To set the Pocket PC Transport Application's properties, perform the following steps.
1. In the Control Center, click the Applications tab. The Applications menu appears in the left frame.
2. Click Go. The Control Center displays a list of currently available applications. Click Transport & Logistics Management.
3. Click Properties in the left frame. The Transport Application's properties appear in the right frame.
4. In the Database Password field, enter "master". This is the default password for the "master" user
Password Confirm re-enter above password for confirmation System Privilege select the "Connect" option
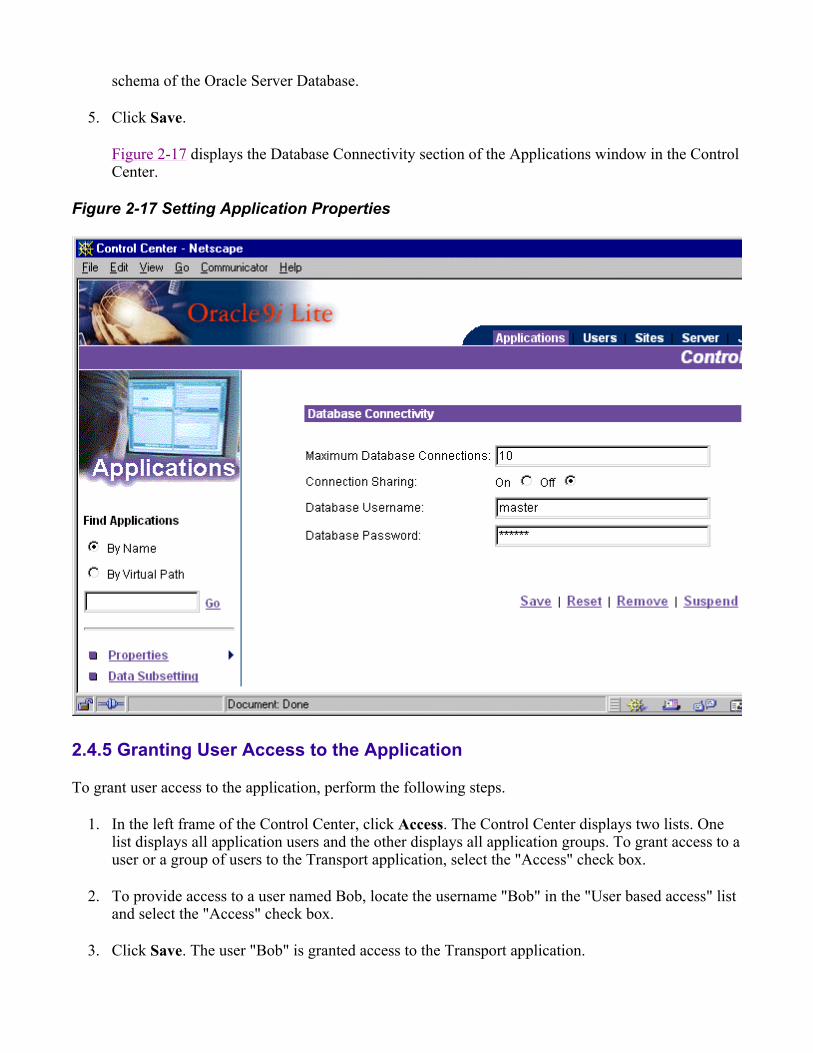
schema of the Oracle Server Database.
5. Click Save.
Figure 2-17 displays the Database Connectivity section of the Applications window in the Control Center.
Figure 2-17 Setting Application Properties
2.4.5 Granting User Access to the Application
To grant user access to the application, perform the following steps.
1. In the left frame of the Control Center, click Access. The Control Center displays two lists. One list displays all application users and the other displays all application groups. To grant access to a user or a group of users to the Transport application, select the "Access" check box.
2. To provide access to a user named Bob, locate the username "Bob" in the "User based access" list and select the "Access" check box.
3. Click Save. The user "Bob" is granted access to the Transport application.
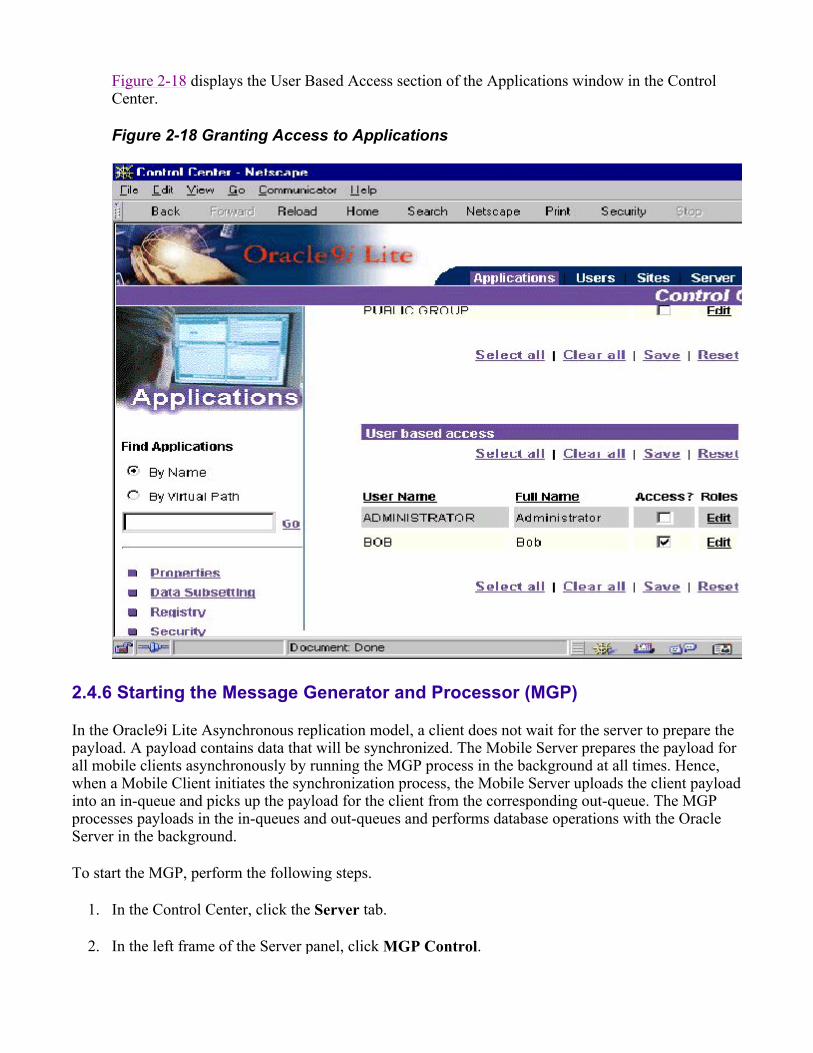
Figure 2-18 displays the User Based Access section of the Applications window in the Control Center.
Figure 2-18 Granting Access to Applications
2.4.6 Starting the Message Generator and Processor (MGP)
In the Oracle9i Lite Asynchronous replication model, a client does not wait for the server to prepare the payload. A payload contains data that will be synchronized. The Mobile Server prepares the payload for all mobile clients asynchronously by running the MGP process in the background at all times. Hence, when a Mobile Client initiates the synchronization process, the Mobile Server uploads the client payload into an in-queue and picks up the payload for the client from the corresponding out-queue. The MGP processes payloads in the in-queues and out-queues and performs database operations with the Oracle Server in the background.
To start the MGP, perform the following steps.
1. In the Control Center, click the Server tab.
2. In the left frame of the Server panel, click MGP Control.
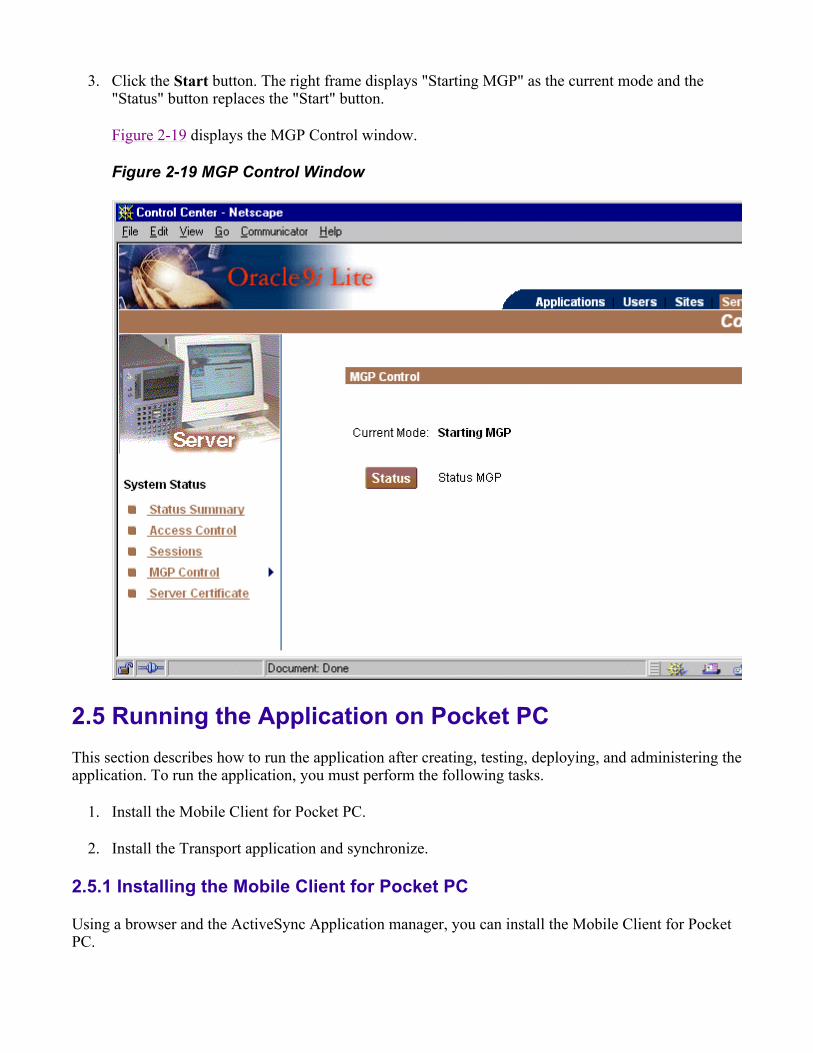
3. Click the Start button. The right frame displays "Starting MGP" as the current mode and the "Status" button replaces the "Start" button.
Figure 2-19 displays the MGP Control window.
Figure 2-19 MGP Control Window
2.5 Running the Application on Pocket PC This section describes how to run the application after creating, testing, deploying, and administering the application. To run the application, you must perform the following tasks.
1. Install the Mobile Client for Pocket PC.
2. Install the Transport application and synchronize.
2.5.1 Installing the Mobile Client for Pocket PC
Using a browser and the ActiveSync Application manager, you can install the Mobile Client for Pocket PC.
To install the Mobile Client for Pocket PC, perform the following actions.
1. Open your desktop browser and enter the following URL to connect to the Mobile Server:
http://<MobileServer>/webtogo/setup
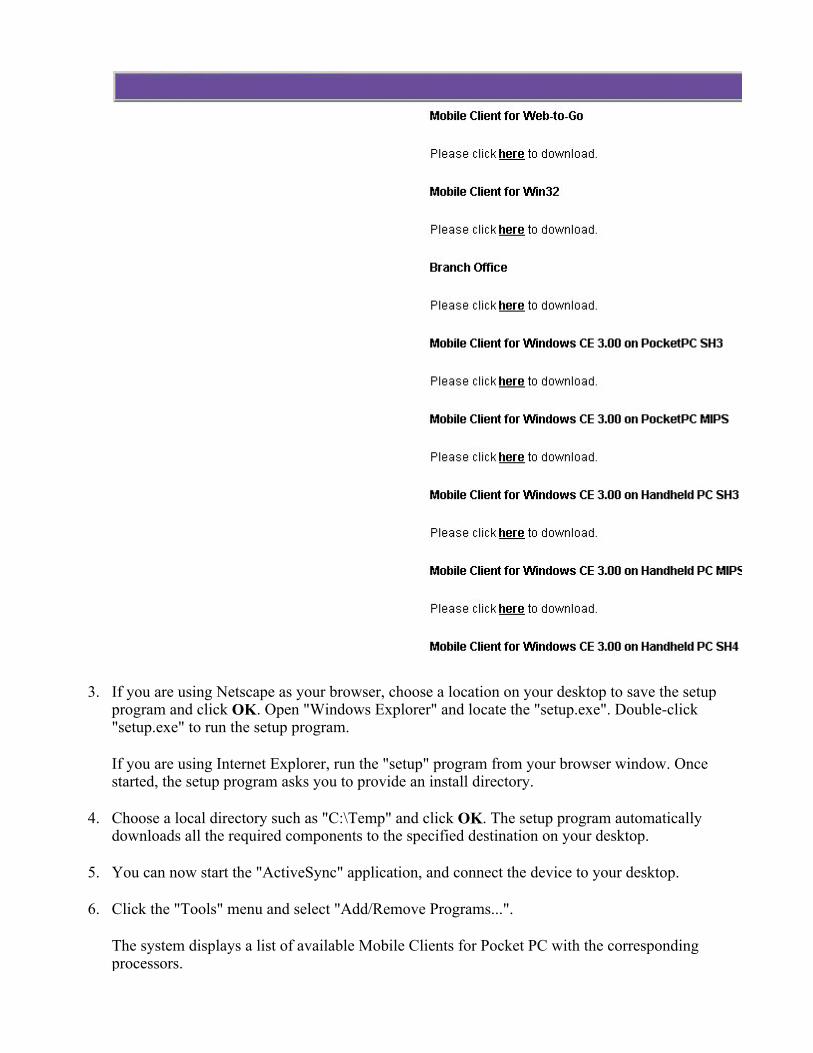
A web page appears displaying links to various Windows CE clients with different processors such as Pocket PC and Handheld PC with SH3, SH4 and ARM processors.
2. Click the hyperlink "here" to access the Mobile Client for Pocket PC setup program depending on your device. For example: Pocket PC runs on the StrongArm processor.
Figure 2-20 Installing the Mobile Client for Pocket PC
Note:
You must replace the Mobile Server variable with the host name or IP address of your Mobile Server.
3. If you are using Netscape as your browser, choose a location on your desktop to save the setup program and click OK. Open "Windows Explorer" and locate the "setup.exe". Double-click "setup.exe" to run the setup program.
If you are using Internet Explorer, run the "setup" program from your browser window. Once started, the setup program asks you to provide an install directory.
4. Choose a local directory such as "C:\Temp" and click OK. The setup program automatically downloads all the required components to the specified destination on your desktop.
5. You can now start the "ActiveSync" application, and connect the device to your desktop.
6. Click the "Tools" menu and select "Add/Remove Programs...".
The system displays a list of available Mobile Clients for Pocket PC with the corresponding processors.
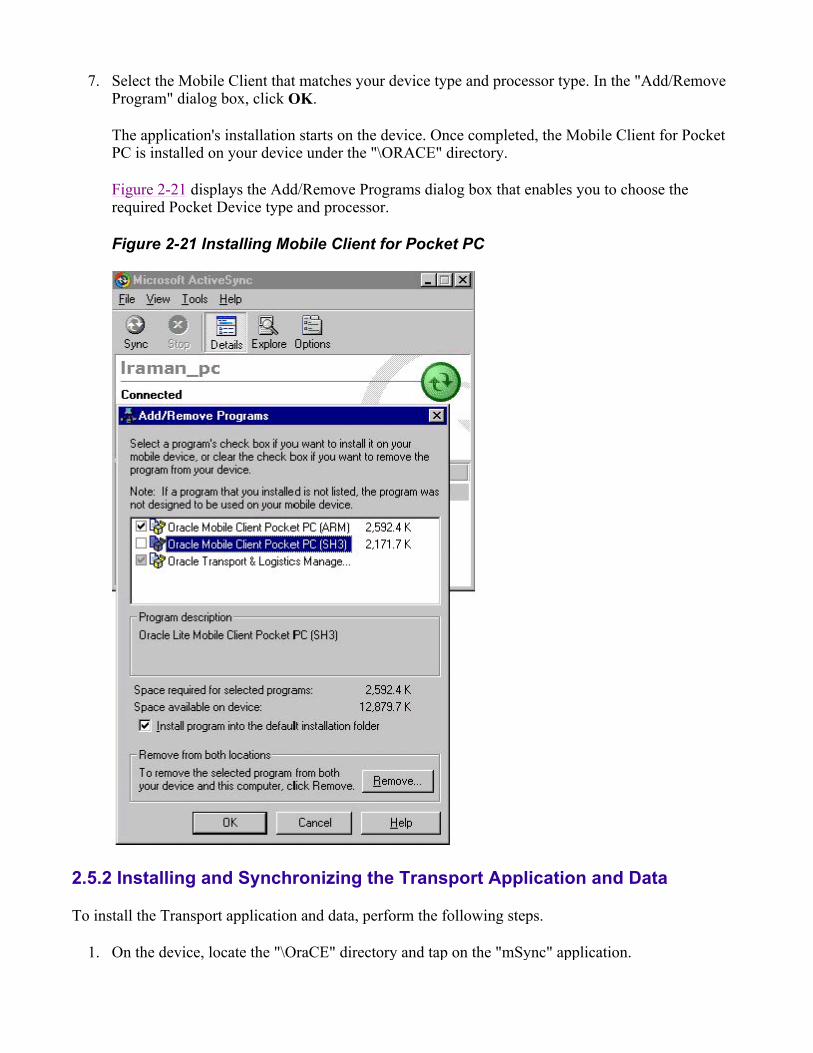
7. Select the Mobile Client that matches your device type and processor type. In the "Add/Remove Program" dialog box, click OK.
The application's installation starts on the device. Once completed, the Mobile Client for Pocket PC is installed on your device under the "\ORACE" directory.
Figure 2-21 displays the Add/Remove Programs dialog box that enables you to choose the required Pocket Device type and processor.
Figure 2-21 Installing Mobile Client for Pocket PC
2.5.2 Installing and Synchronizing the Transport Application and Data
To install the Transport application and data, perform the following steps.
1. On the device, locate the "\OraCE" directory and tap on the "mSync" application.
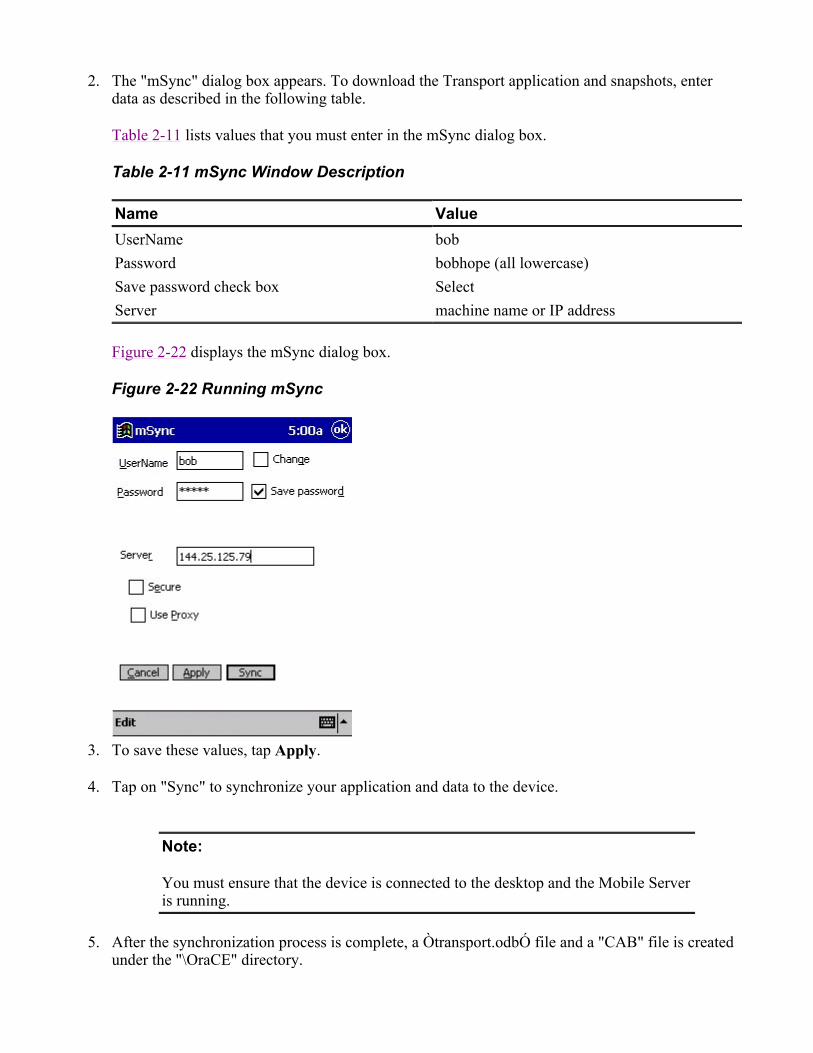
2. The "mSync" dialog box appears. To download the Transport application and snapshots, enter data as described in the following table.
Table 2-11 lists values that you must enter in the mSync dialog box.
Table 2-11 mSync Window Description
Figure 2-22 displays the mSync dialog box.
Figure 2-22 Running mSync
3. To save these values, tap Apply.
4. Tap on "Sync" to synchronize your application and data to the device.
5. After the synchronization process is complete, a Òtransport.odbÓ file and a "CAB" file is created under the "\OraCE" directory.
Name Value UserName bob Password bobhope (all lowercase) Save password check box Select Server machine name or IP address
Note:
You must ensure that the device is connected to the desktop and the Mobile Server is running.
6. Tap on the "CAB" file to install your application.
7. Using the "Start" menu on the device, you can locate the application under the "Programs" menu.
8. Tap on the "Transport" application.
Copyright © 2002 Oracle Corporation
All rights reserved
Recommended