Azure Application Deployment and Management
Containers ndash Practical Exercises
Overview
This course includes optional practical exercises where you can try out the techniques
demonstrated in the course for yourself This guide lists the steps for the individual
practical exercises
See the Practical Exercises gt Overview page in your course for information about
getting started
You do not need an Azure subscription to complete the first set of exercises However
you will need an Azure Subscription to complete some of the later exercises and tasks If
you already have an Azure subscription you can use in a test or practice environment
you can use that otherwise there are details available on the Practical Exercises gt
Overview page to help you set up a free trial account There is also a step by step video
available to walk you through this process at the beginning of the course in the
Welcome gt Start Here section called Setting up a Free Microsoft Azure 30-day
Trial
Practical Exercise Install Docker Client on Your
Local Machine
In this exercise you will install Docker client on your local machine
You do not need a Microsoft Azure subscription for this first exercise but you will need
one for the subsequent exercises
1 Navigate to the Install Docker Engine page
2 Locate the instructions for your particular operating system be it one of the listed
Linux distributions
CentOS
Debian
Fedora
Oracle Linux
Red Hat Enterprise Linux
openSUSE and SUSE Linux Enterprise
Ubuntu
Other Linux distributions
Or for Windows or Mac
3 Read any notes or important sections prior to install then download and install
the Docker engine You may need to restart to complete the depending on your
installation
Note The following commands will be the same in each environment
1 Run the command Docker and verify help command options are returned
2 Run the command Docker version and verify it returns version information It
should return the client and server details for version API version GO version Git
commit date built and OSArchitecture
3 Run the command Docker --version and verify it returns just the version
information
4 Run the command docker-compose -- version to get the docker compose
version Docker-compose allows you write yml files to configure an applicationrsquos
services in your containers
5 Run the command docker-machine -- version to get the docker machine version
Docker machine allows you to manage host machines
6 Run the command docker info
7 This will return various information about number of containers running images
architecture and various settings Scroll through them to get a feeling for what
the individual elements are referring to
Practical Exercise Work with Docker Images and
containers
In this exercise you will download and run some simple containers deploy a container
web server Obtain container information and work with docker commands Delete
containers and images and scale up and scale down web containers on a local host
These steps are performed on your local machine and no Azure subscription is needed
1 Get a list of all container images that have ever run in the local environment by
running the command Docker ps ndasha and verify no container objects are listed
The ps is querying process status so whats the status of running processes
The ndasha switch tells the command to include all container processes that have run
even if they are not running now
2 Run the command Docker run Hello-World
3 Verify the container was ldquopulledrdquo from the Docker Hub repository and run
successfully Read the output text to verify what has been run
4 Run the command Docker ps -a again and verify the Hello-World container is
now listed
As prompted by the output when running the above command now download
and run an Ubuntu Linux container launching the bash directly within which you
can run commands
5 Run the command Docker run ndashit Ubuntu bash
6 Verify the Ubuntu container is downloaded and a bash is available Ie type some
command such as ls or ls bin to verify you can access the shell successfully
7 Exit the shell by typing exit
8 View container image repository now by running Docker ps ndasha The Ubuntu
container should now also be listed
Deploy a Container Web Server
We will run the container for longer so you can view and access the container while it is
running
1 Run the command docker search hello-world
Whats returned is a list of all available containers with the name hello-world
These images are on the Docker hub and are publicly available for download and
use
You can likewise search for various other container types such as docker search
Apache (for apache web server images) Docker search IIS (for IIS web server
images) Docker search SQL Docker search windows etc
A word of caution here is just to be careful what you run on your machine and try
validate or have some assurance of the images you are pulling down and running
locally
2 We will use the tutumhello-world image so run the command docker run ndashd ndashp
8080 tutumhello-world
The -d is detached mode which allows you return to the command line while the
container is running Normally containers run and exit but in the case of a web
server we donrsquotrsquo want t to exit so this ensure the container continues running until
we tell it to stop
The -p defines the ports in this instance port 80 on the local machine is mapped
to port 80 on the container
The container used here is an Apache Web server image
3 Now run the command docker ndashps and view the running containers It will list the
container details and port information
4 Note if you receive an error about mapping the port when you run the docker run
command you may already have the port mapped and may need to specify
another port to map to the container ie docker run ndashd ndashp 100080
tutumhello-world
5 Now open a browser and go to httplocalhost80 (where 80 is the port number
you used) and verify you can access the web page with the tutum logo and that it
specifies the hostname
6 Now we will stop the container by running the command docker stop lt 1st 4
characters from the container idgt ie docker stop a4fb
You can also use the name which you can obtain from the output of the docker
ps command
7 Refresh the browser page and verify the web page is no longer accessible
Obtain container information and work with docker commands
1 Get a list of all container images locally by running the command docker ps ndasha
2 Get details of all containers (running paused or stopped) and images on the local
machine by running the command docker info
This command will give you general information about the system and the
containers and images on it
3 Run the command docker ps ndashhelp
This will give us some usage commands for the containers
Use the help command --help when getting familiar with available switches and
commands to allow you manipulate images and containers ie docker --help
docker container --help docker image--help etc
4 Now run docker ps -a -s followed by docker ps -a ndashq to obtain the size of the
containers on the machine and then to make sure you can obtain a list of
container IDs
You may start it run out of space if you are building many images and containers
locally as images size can mount up You can use the tag slim to try identify
images that have reduced size when downloading from docker hub You can also
remove individual images and containers using the rm and rmi commands or the
prune command
Delete containers and images
Important We will be removing images and containers in these next steps If
you have containers and images you do not wish to delete you should skip
these steps or modify the steps to make sure you do not delete anything that
you need to retain
1 Run the command docker container ls no containers should be returned
2 Run the command docker image ls to get a list of images present
3 Now remove all stopped containers by running the command docker container
prune and say yes when prompted and ensure the containers are deleted
successfully
4 Run the command docker image rmi tutumhello-world
5 Run the ls commands listed above and verify the images and containers have
been removed
6 There are other options for deleting images and containers in bulk you can
investigate these further but again be careful not to delete anything you wish to
retain
Scale up and Down web containers on a local host
1 Lets find a nginx web server container we can use by running the command
docker search nginx
2 We can try find a slim version by running docker search nginxslim
3 Wersquoll use the official version so lets spin up a single instance and verify it works
successfully by running the command docker run ndashd ndashp 101080 nginx
4 Open a web browser and go to httplocalhost1010 and verify an Nginx welcome
page appears successfully
5 Now lets stop that container and scale the number of instances of it
6 To stop the container run the command docker ps ndasha obtain the name value for
the nginx container image and run the command docker container stop
ltNamegt ie docker container stop dreamy_einstein or whatever that name
value is
Docker automatically assigns a random name to the container process and they
are typically in a format similar to the example above You can specify a name if
you want using the --name flag ie docker run --namehellip Specifying a name can
also be useful as it allows easier control when starting and stopping as you know
the name up front for your web or db servers if you name them with functional
conventions such as web01 db1 db2 etc
7 Return to your web browser and verify the nginx welcome page is no longer
present
8 Now lets run several instances of the web server by running the command
If you are running on a Linux or Mac box in a shell you can run the following
command
For i in 110 do docker run ndashd ndashp 80 nginx done
If you are on a windows machines copy the following command into a txt file
save it as a batch file bat and then run the batch file by typing the file name
and pressing enter from the command line
FOR L A IN (1110) DO (
docker run -d -p 80 nginx
)
9 This has now quickly spun up 10 separate web servers of your nginx web server
10 Run the command docker ps and see all 10 instances up and running Note the
port numbers associated with each container
Note we did not specify a port number in the command so docker has randomly
assigned a port number to each container
11 Open a web browser and go to httplocalhostltport number form earliergt ie
httplocalhost32777 or httplocalhost32776 etc and verify the nginx welcome
page is accessible
12 Now lets stop the web server instances
On a Linux or mac box you can run the following command
Docker stop $(docker ps ndashq)
On a Windows machines perform the following steps
Run the command Docker ps ndashq gt CtempContainerstxt
As the container IDs are randomly assigned this just gets the container IDs
into a txt file which allows us to read them in the next command
Copy the below command into a txt file save it as a batch file bat and then
run the batch file by typing the file name and pressing enter from the
command line
FOR F tokens= A in (Ctempcontainerstxt) DO (
docker stop A
)
13 Verify all containers have stopped by running docker ps
14 Also open up a web browser and confirm the nginx welcome page is no longer
available
This task has just allowed us to show how quickly you can scale up and scale down
with containers The can be spun up and down pretty quickly
Practical Exercise Create Windows Server
Containers in Azure
In this exercise you will create a new windows virtual machine with a Resource Manager
deployment model
You will need an Azure subscription to complete this exercise If you already have an
Azure subscription you can use in a test or practice environment you can use that
otherwise there are details available on the Practical Exercises gt Overview page to help
you set up a free trial account There is also a step by step video available to walk you
through this process at the beginning of the course in the Welcome gt Start Here
section called Setting up a Free Microsoft Azure 30-day Trial
Deploy a New Windows Server Virtual Machine
In this exercise you will create a new virtual machine with a Resource Manager
deployment model
1 Navigate to the new Azure Portal and sign in
2 On the Hub menu click New
3 On the New blade click Compute and then select See all
4 Type containers notice that there is an option for Windows Server 2016
Datacenter ndash with Containers option
5 Choose to Create a virtual machine with that image using the Resource Manager
deployment model
6 On the Create Virtual Machine blade fill in the following values for basic settings
(substituting your information for the user name subscription and location) and
click OK
bull Name WS2016Cntnrs1
bull VM disk type HDD
bull User name ltYour first namegt
bull Password Pa$$w0rd12345
bull Subscription ltYour subscriptiongt
bull Resource group Create a new one named ldquoWS2016Cntnrs1_rgrdquo
bull Location ltYour locationgt
7 On the Choose a size blade click View all Notice the sizing details in each size
available Some may be greyed out or not be available depending on your
subscription type Click the A1 Basic size and then click Select
8 On the Settings blade review the default options for storage network extensions
high availability monitoring etc Click OK
9 On the Summary blade make sure validation has passed as per a notification at
the top of the blade and then click OK
10 Click the Notification icon in the top right to see notifications of the virtual
machine deployment It should say Deployment startedhellip It will take a few
minutes to deploy
11 Close the notifications menu
12 Open the Virtual machines blade by clicking Virtual machines in the left pane
13 In the Virtual machines blade click the server name WS2016Cntnrs1 for the VM
that you deployed You may need to refresh the console if it has not yet deployed
14 Click Connect and then open and enter the credential you entered earlier to
connect ie WS2016Cntnrs1ltyour first namegt and the password
Pa$$w0rd12345
Download and Run a Windows Server Container
1 Open a command prompt and run the command docker
2 Run the command docker ps and verify it runs successfully although no
containers are listed as noen are present
If you receive an error something like ldquoerror during connect Get
http2F2F2Fpipe2Fdocker_enginev125containersjson open
pipedocker_engine The system cannot find the file specifiedrdquo
You should open the Services management window locate the docker service
and ensure it is running If it is not running right click it and select start to re-start
it
3 Run the command docker run hello-world
Notice you receive and error ldquoimage operating system Linux cannot be used on
this platformrdquo
This is as expected as we are running a Windows operating system and as
containers share the kernel of the host a Linux container would be expecting a
Linux kernel as such you will not be able to run Linux processes
The operating system image we installed in Azure only supports native windows
containers Docker for Windows is not installed in this virtual machine which
would allow us run both but it can be installed as per our steps in previous
exercises
4 Now run the command docker search iis
5 Lets run an IIS web server on nano server by running the command docker run ndash
dit ndashp 80 nanoserveriis
Note the use of -dit switch instead of -d
6 Once complete run docker ps followed by docker ps ndasha
7 In some circumstances you may receive an error based on the OS Architecture
being specified when trying to run either windows or Linux containers on w
windows machines
Run the command docker version
Note the values listed for OSArch for both Client and Server If they do not match
you may receive an error when trying to run Linux containers on a windows box
To fix this right click the docker icon in the system tray and choose Switch to
Windows containershellip
Now run docker version again and notice the two values now match
Practical Exercise Create a Dockerfile and build a
new container image
In this exercise you will create a Dockerfile and build a new container image
1 On WS2016Cntnrs1 virtual machine in the location CTempDockerfile create
two new files and call them iisstarthtm and iisstartpng and create a new folder
WebPackage and add a random txt file to it
This is just to simulate some sample web Appp which we will copy over to the
container from the host
2 On WS2016Cntnrs1 virtual machine copy the content below between the wild
characters but not including the wild characters into a txt file
CTempDockerfile and save it ensuring it has no file extension ie just the full
name of Dockerfile not Dockerfiletxt
Sample Dockerfile
Every instruction you see here generates a layer for the image
A container essentially being a read write layer on top of that
Minimising the number of instructions reduces the number of layers
Indicates that the nanoserver image will be used as the base image
FROM nanoserveriis
Metadata indicating an image maintainer
MAINTAINER testuser1contosocom
Open Port 9000
Expose 9000
Specify a working dorectory as we execute command this will be the directory from
where things are run
WORKDIR Ctemp
We can specify some environment variables and compress them onto a single line
to reduce the number of layers
ENV NODE_ENV=production NODE_Path=app NODE_PORT=9000
Create a directory CTestFolder in the container
RUN mkdir CTestFolder
all files to be copied from the host into the container should reside alongside the
Dockerfile that we are building from
This command copies all the files alongside the dockerfile into CTemp in the
container
COPY Ctemp
Sets a command or process that will run each time a container is run from the
new image
CMD [ cmd ]
3 At the command line go to the directory CTempDockerfile this is the context
from which we will run the build command
4 Run the command Docker build ndasht nanoserveriistestimage
Donrsquot forget the dot at the end of the command This provides a build context and
the dot means the current directory
Also the testimage label is a tag wersquore specifying for the image
5 Read through the output step by step and try understand what has occurred in
relation to your Dockerfile
6 Run the command docker images and verify your newly created image is listed it
can be identified by the tag we specified earlier
Practical Exercise Create repository on Docker
Hub and push your image to it
In this exercise you will create a new Docker Hub registry and then push a container
image up to it
You do not need an Azure subscription to complete this exercise
1 Go to httphubdockercom and register for an account noting your repository
names ie something like ltyournamegtltrepo namegt as well as you login in
credentials You can choose to make your credential public for the moment you
can change this in docker hub later
2 Rename your newly created image to align with what you have called your
repository ie ltyournamegt
3 Run the command docker images and copy the Image ID value
4 Run the command docker tag ltImage IDgt ltyournamegtrepo namegtlttaggt
Where ltyournamegtrepo namegt is your repository information and lttaggt is
the tag you define din the image when creating it ie as per above it was
testimage
5 Run the command docker images and verify the newly renamed image is listed
6 Sign into docker by running the command docker login and enter your user
name and password
7 Push the image up to your repository by running the command docker push
ltyour namegtltrepo namegtlttaggt
8 The image should successfully uploaded now
9 Log in to your account on docker hub and in the image is now listed
10
Practical Exercise Create repository on Azure
Container Registry service and push your image to it
In this exercise you will create a new Azure Container registry and then push a container
image up to it
1 Navigate to azure portal portalazurecom
2 Open Azure Container Registry and choose Create
3 Use the Following details
bull Registry name CntrRegistry1
bull Subscription lt your subscriptiongt
bull Resource Group CntnrRgstr_rg
bull Locationlt your nearest datacenter locationgt
bull Admin User Enable
bull Storage Account Create New gt name=cntnrregstrgacnt
4 Click Create
5 When it is created open the Azure Container Registry you just created
6 Go to Settings gt Access keys and note the values for
bull Registry name gt ie CntrRegistry1
bull Login Server gt ie cntrregistry1-microsoftazurecrio
bull Username gt ie CntrRegistry1 and Password ltthe password value listedgt
7 Run the command docker login cntrregistry1-microsoftazurecrio
8 Enter the username from above ie CntrRegistry1 and password ie copy the
value from the Azure portal and paste into the login password prompt
9 Run the command docker images and note an image that is available locally If
there is none pull any one down locally
10 Rename the image by running the command docker tag ltImage IDgt
cntrregistry1-microsoftazurecriosampletestACRimage
11 Where cntrregistry1-microsoftazurecrio is your repository name and sample is
a sample repository name and testACRImage is the tag
12 Push up the image by running the command docker push cntrregistry1-
microsoftazurecriosampletestACRimage
13 Verify the image gets pushed up to your Azure Container Repository successfully
run the command docker pull cntrregistry1-
microsoftazurecriosampletestACRimage
and verify you get a message saying image is up to date
14 Return to the Azure portal in your browser and go to Azure Container Registry gt
Activity Log and verify there are entries for write are present
Practical Exercise Deploy a Linux Virtual
Machine in Azure connect to it and run docker containers
In this exercise you will create a new Linux virtual machine with a Resource Manager
deployment model
Install PuTTy and Generate Public and Private Keys
We will use PuTTy to create public and private keys and later to open a connection to
the Linux virtual machine
1 Navigate to the httpwwwputtyorg site and download PuTTy to your local
machine
2 Once downloaded launch the PuTTYgen app
3 Click the Generate button and move the mouse cursor over the blank grey area to
generate some random data to use in the key
4 When finished click Save public key and save the public key to
Ckeyspublickey
5 When finished click Save private key and in the warning dialogue choose Yes to
save the key without a passphrase to protect it and save the private key to
Ckeysprivatekeyppk
The public key will be used as the SSH public key data to input on Azure and the
private key will be used from your local machine with Putty to connect to the
Azure virtual machine
Deploy a New Linux Virtual Machine in Azure connect to it
and run Docker containers
In this exercise you will create a new Linux virtual machine with a Resource Manager
Deployment model connect to it and run some docker commands
1 Navigate to the new Azure Portal and sign in
2 On the Hub menu click New
3 On the New blade click Compute then select Ubuntu Server and from the list of
options choose the latest version It does not have to be an LTS version
4 Click Create choosing the Resource Manager deployment model
5 On the Create Virtual Machine blade fill in the following values for basic settings
(substituting your information for the user name subscription and location) and
click OK
bull Name UbuntuCntnrs1
bull VM disk type HDD
bull User name ltYour first namegt
bull Choose SSH public Key Open the file Ckeyspublickey that you created earlier
with PuTTYgen with notepad Copy the text in the file and paste it into the SSH
public key window
bull Subscription ltYour subscriptiongt
bull Resource group Create a new one named ldquoUbuntuCntnrs1_rgrdquo
bull Location ltYour locationgt
6 On the Choose a size blade click View all Notice the sizing details in each size
available Some may be greyed out or not be available depending on your
subscription type Click the A0 Basic size and then click Select
7 On the Settings blade review the default options for storage network extensions
high availability monitoring etc Click OK
8 On the Summary blade make sure validation has passed as per a notification at
the top of the blade and then click OK
9 Click the Notification icon in the top right to see notifications of the virtual
machine deployment It should say Deployment startedhellip
10 Close the notifications menu
11 Open the Virtual machines blade by clicking Virtual machines in the left pane
12 In the Virtual machines blade click the server name UbuntuCntnrs1 for the VM
that you deployed You may need to refresh the console if it has not yet deployed
13 Click Connect and note the command you are given to connect to the virtual
machine ie ssh ltusernamegtltIP addressgt
14 Launch the PuTTy desktop app and configure the following settings
bull Session gt Host Name (or IP address) ltenter the IP address you copied
earliergt
bull Session gt Port 2212 (this value is just to provide a non-standard connection
port for security reasons)
bull Connection gt SSH gt Auth gt click Browse gt add Ckeysprivatekeyppk that
you created earlier Because of using keys you will not have to provide
passwords to connect
NOTE Creating a tunnel will allow us to run commands on our local box
directly onto the Azure Linux virtual machine We will not complete these steps
in this exercise but some steps are included here below as an example if you
wish to attempt them
bull Connection gt SSH gt Tunnels gt
Source Port 22375
Destination 1270012375
Click Add
This configures a tunnel to allow local Docker client to connect to the
Azure virtual machine running in the cloud over SSH It forwards the
local port 22375 to the local host on Azure on its local port 22375 which
is the port where the local Docker daemon runs
bull Sessions Saved Sessions UbuntuCntnrs1
bull Sessions Saved Sessions Click Save to save the session
15 On the PuTTy configuration app click Open an SSH window opens and if
prompted click Yes to add the key to PuTTyrsquos cache
16 At the login prompt enter the username you specified earlier
17 You should now be connected to the remote Ubuntu server
18 If you are running a mac you can connect to the Linux virtual machine using
Terminalapp under utilities using ssh and providing the parameters we outlined
above
19 Type cd followed ls to see some local folder structures and confirm it is up and
running successfully
20 Type the command docker and notice the prompt that it is not installed and the
listing of the command to install it
21 Install the docker engine in the Ubuntu virtual machine by running the command
sudo apt install dockerio and accept the prompt to continue when notified of
additional disk space requirements
22 Once complete run the command docker ps and verify it runs successfully
bull If you receive and error saying cannot connect to the docker daemon Is the
docker daemon running on this host You will need to add your account to the
docker group Do that by running the command sudo usermod ndashaG docker
($whoami)
bull Close the session by exiting the window
bull Relaunch PuTTy desktop app and open the connection again Entering your
login username
bull Verify you can now run the command docker ps successfully
23 Now try downloading some docker container images and running them
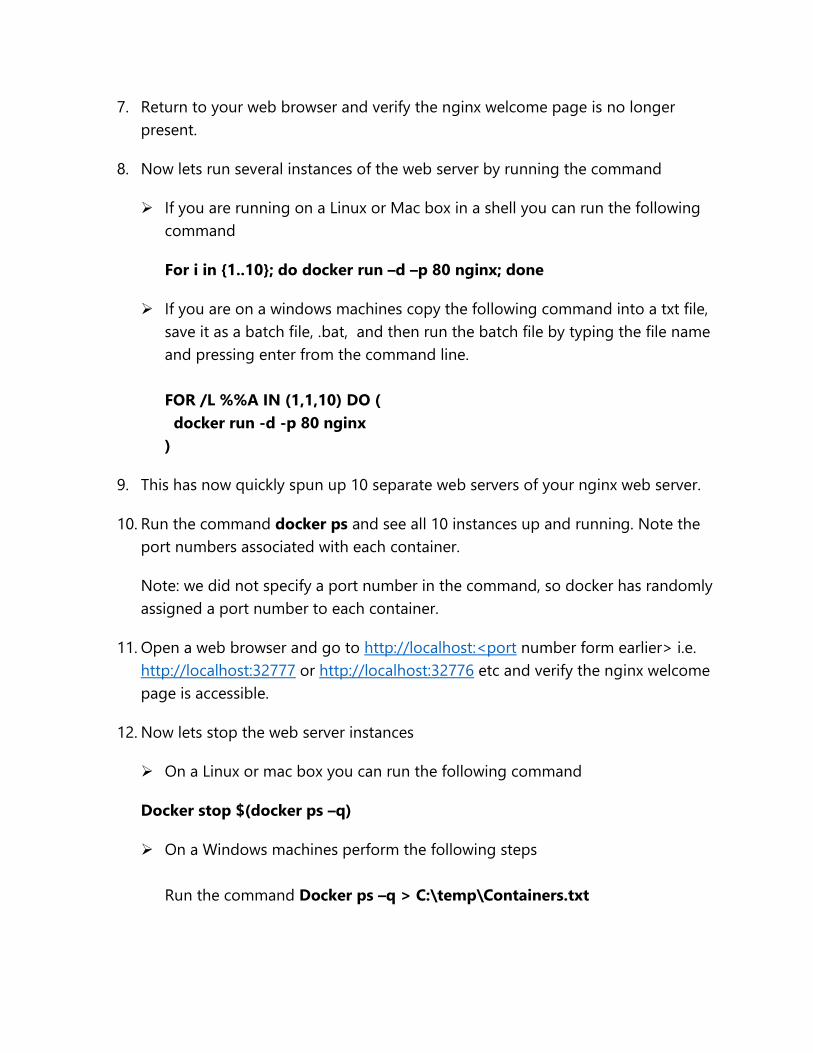
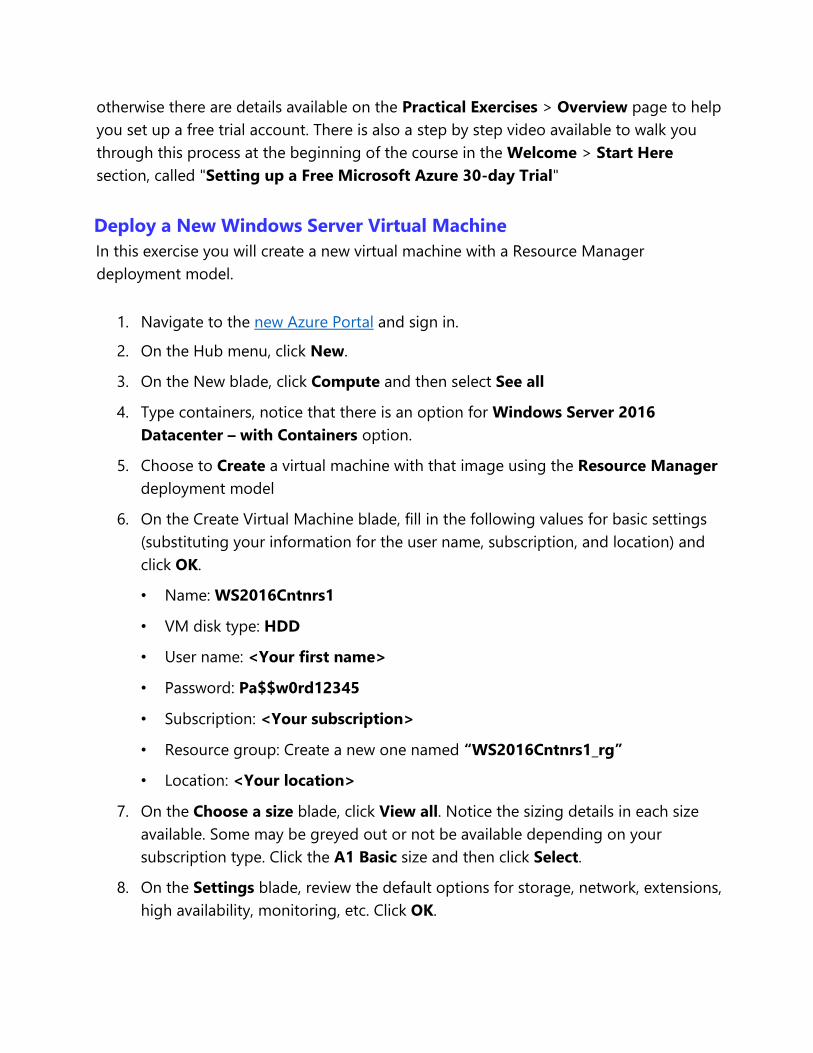
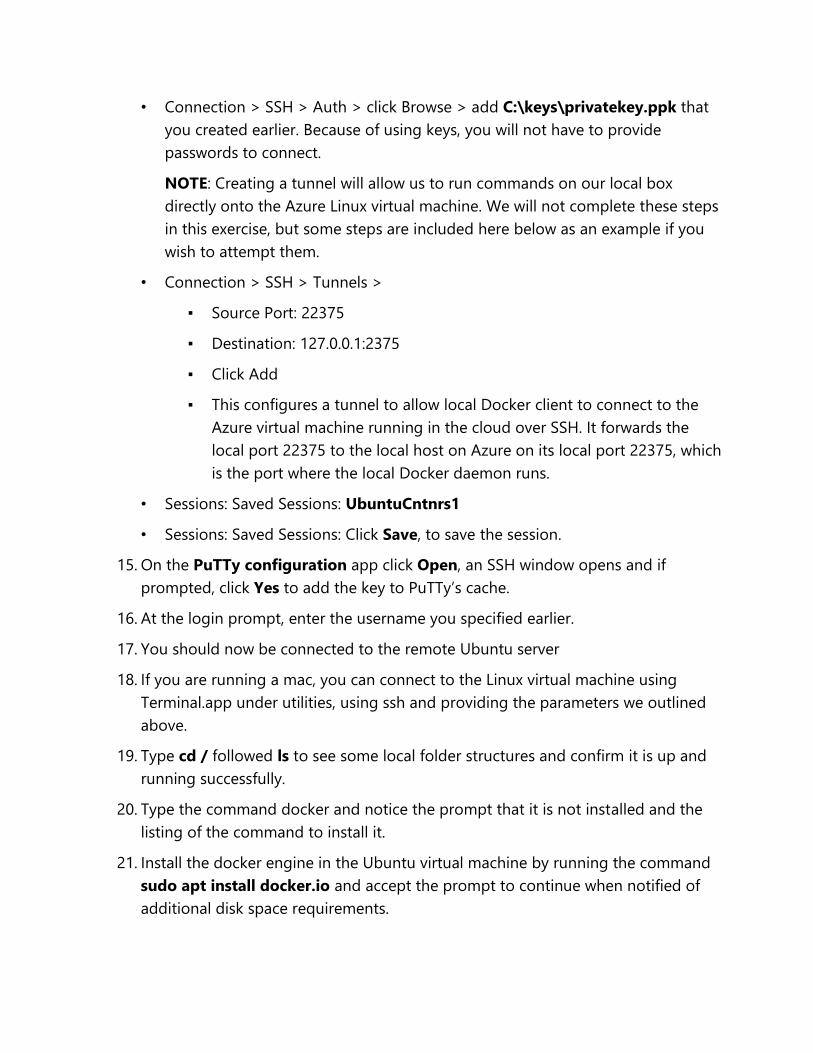
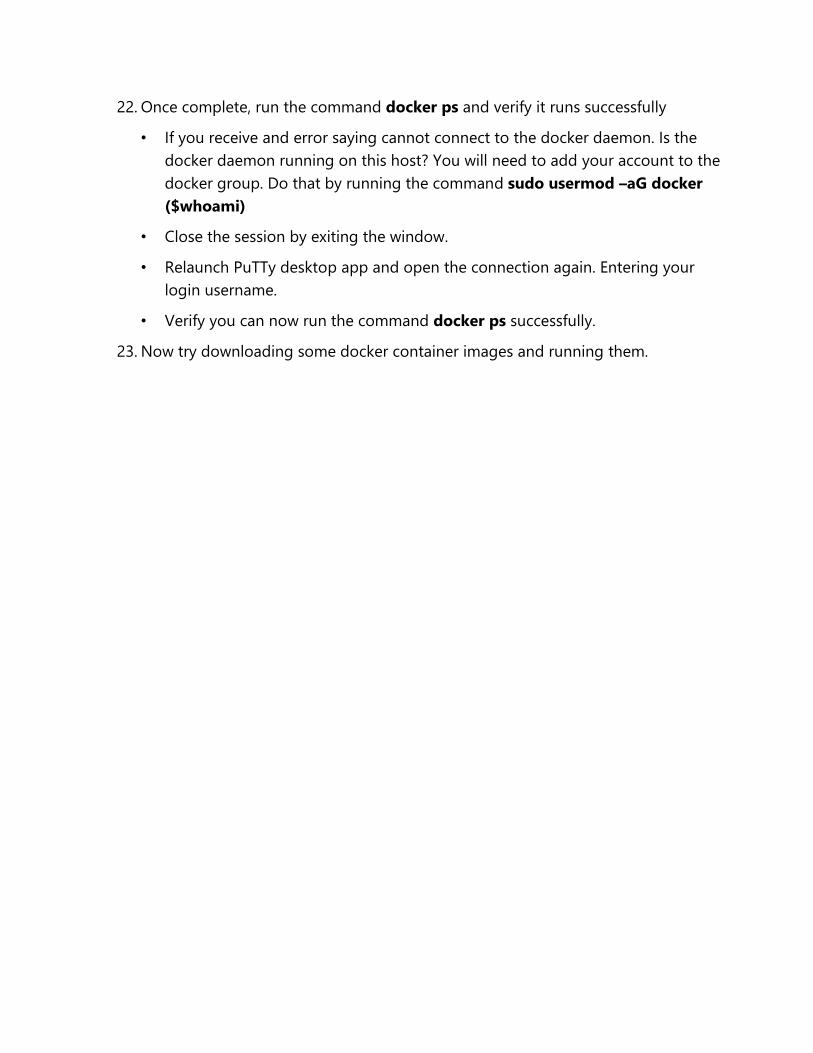
Recommended


![[MSPVN - Azure Workshop] Day 1 - Azure Web App with WordPress deployment](https://img.pdfslide.us/doc/110x75/5a64b0e07f8b9ac21c8b4665/mspvn-azure-workshop-day-1-azure-web-app-with-wordpress-deployment.jpg)