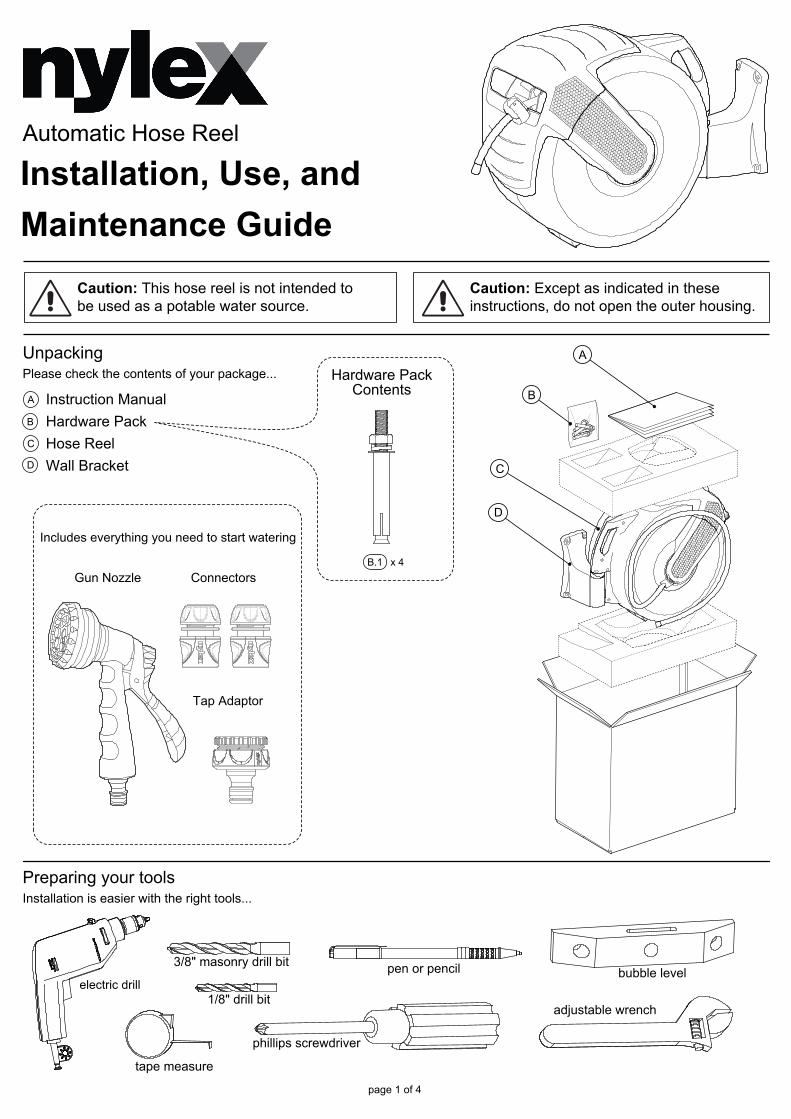
Gun Nozzle Connectors
Tap Adaptor
Instruction ManualHardware PackHose ReelWall Bracket
A
B
D
C
A
B
C
D
Hardware PackContents
Installation, Use, andMaintenance Guide
UnpackingPlease check the contents of your package...
B.1 x 4
page 1 of 4
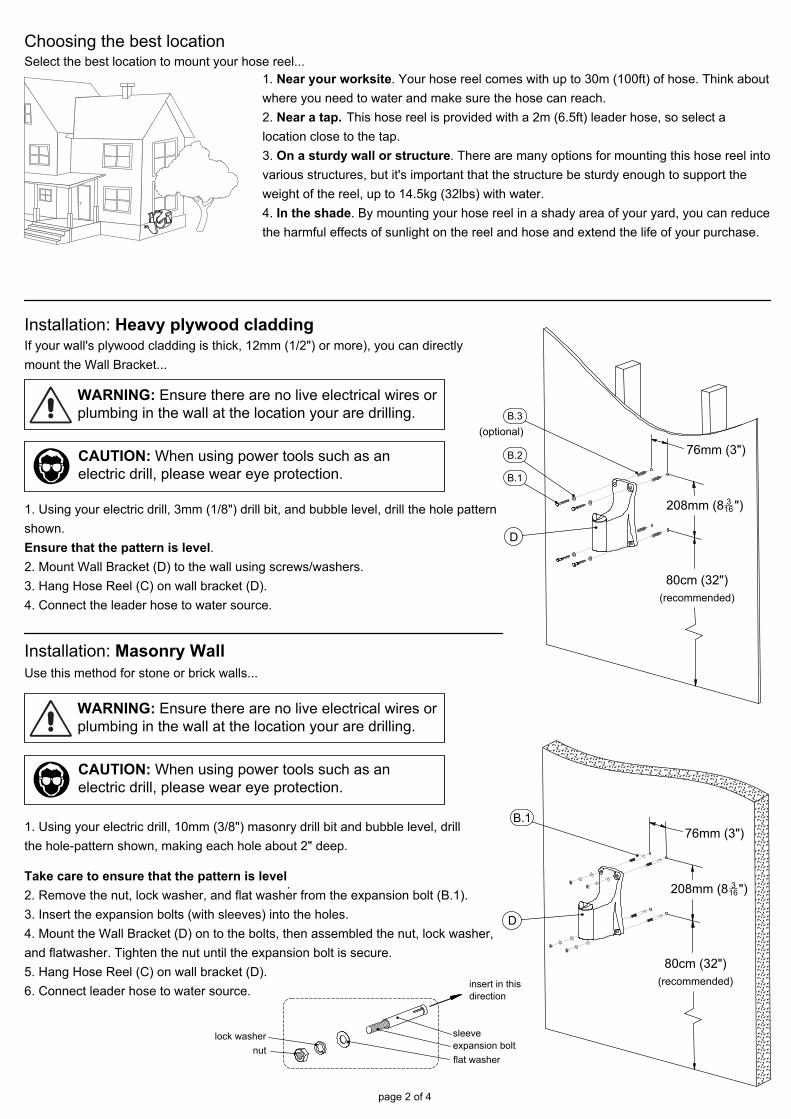
Installation is easier with the right tools...Preparing your tools
electric drill
3/8" masonry drill bit
1/8" drill bit
bubble level
adjustable wrench
tape measure
phillips screwdriver
pen or pencil
Caution: This hose reel is not intended tobe used as a potable water source.
Caution: Except as indicated in theseinstructions, do not open the outer housing.
Automatic Hose Reel
Includes everything you need to start watering
Choosing the best locationSelect the best location to mount your hose reel...
1. Near your worksite. Your hose reel comes with up to 30m (100ft) of hose. Think aboutwhere you need to water and make sure the hose can reach.2. Near a tap. This hose reel is provided with a 2m (6.5ft) leader hose, so select alocation close to the tap. 3. On a sturdy wall or structure. There are many options for mounting this hose reel intovarious structures, but it's important that the structure be sturdy enough to support theweight of the reel, up to 14.5kg (32lbs) with water. 4. In the shade. By mounting your hose reel in a shady area of your yard, you can reducethe harmful effects of sunlight on the reel and hose and extend the life of your purchase.
Use this method for stone or brick walls...Installation: Masonry Wall
1. Using your electric drill, 10mm (3/8") masonry drill bit and bubble level, drillthe hole-pattern shown, making each hole about 2" deep.
Take care to ensure that the pattern is level.2. Remove the nut, lock washer, and flat washer from the expansion bolt (B.1). 3. Insert the expansion bolts (with sleeves) into the holes.4. Mount the Wall Bracket (D) on to the bolts, then assembled the nut, lock washer,and flatwasher. Tighten the nut until the expansion bolt is secure.5. Hang Hose Reel (C) on wall bracket (D).6. Connect leader hose to water source.
76mm (3")
208mm (8 ")316
80cm (32")(recommended)
B.1
D
nutlock washer
flat washerexpansion boltsleeve
insert in thisdirection
If your wall's plywood cladding is thick, 12mm (1/2") or more), you can directlymount the Wall Bracket...
Installation: Heavy plywood cladding
1. Using your electric drill, 3mm (1/8") drill bit, and bubble level, drill the hole patternshown.Ensure that the pattern is level.2. Mount Wall Bracket (D) to the wall using screws/washers.3. Hang Hose Reel (C) on wall bracket (D).4. Connect the leader hose to water source.
WARNING: Ensure there are no live electrical wires orplumbing in the wall at the location your are drilling.
CAUTION: When using power tools such as anelectric drill, please wear eye protection.
76mm (3")
208mm (8 ")316
80cm (32")(recommended)
B.1
B.2
B.3
D
(optional)
WARNING: Ensure there are no live electrical wires orplumbing in the wall at the location your are drilling.
CAUTION: When using power tools such as anelectric drill, please wear eye protection.
page 2 of 4
Operating Instructions1. Pull the hose out to the desired length. The hose will automatically lock in position. 2. To unlock and retract, give the hose a short pull. Walk the hose back to the hose reel.
Caution: Always hold the hose until it completelyretracts into the hose reel.
Care and Maintenance TipsTurn off the water source and release the pressure in the hose when not in use.To prevent freezing and potential damage to the hose reel, store indoors during winter months.Clean the housing and hose using only mild soap and water.
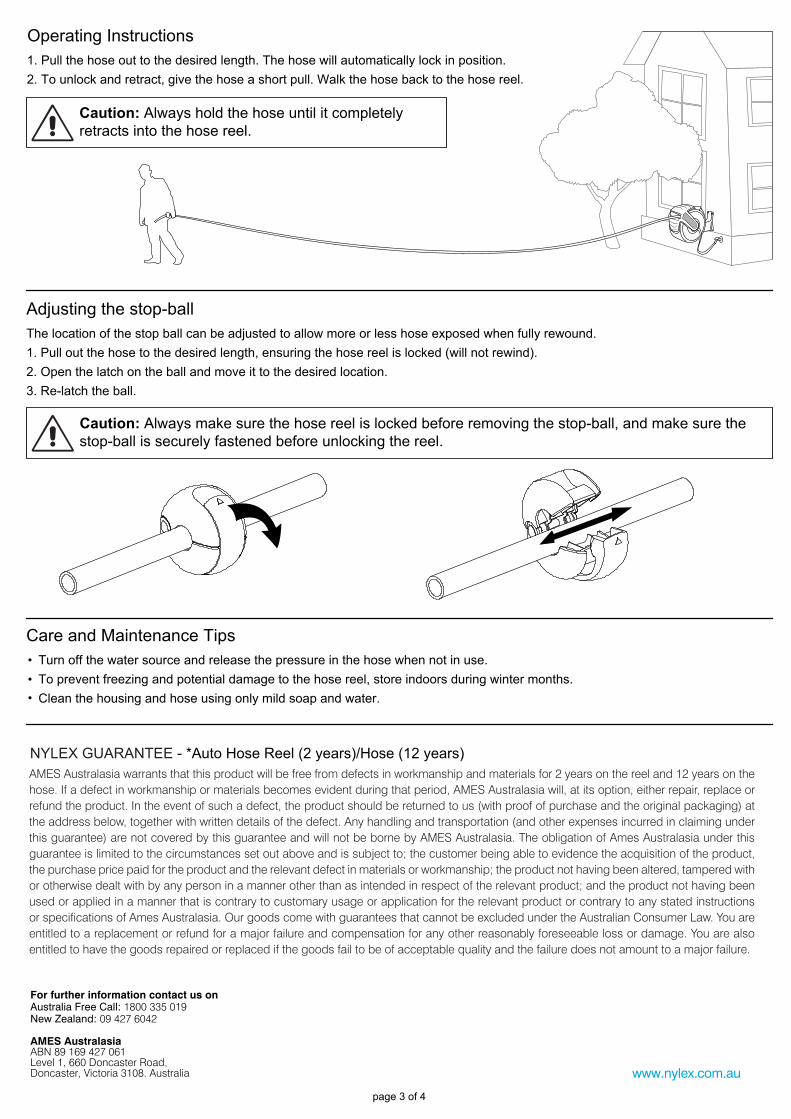
Adjusting the stop-ballThe location of the stop ball can be adjusted to allow more or less hose exposed when fully rewound.1. Pull out the hose to the desired length, ensuring the hose reel is locked (will not rewind).2. Open the latch on the ball and move it to the desired location.3. Re-latch the ball.
Caution: Always make sure the hose reel is locked before removing the stop-ball, and make sure thestop-ball is securely fastened before unlocking the reel.
page 3 of 4
NYLEX GUARANTEE - *Auto Hose Reel (2 years)/Hose (12 years)AMES Australasia warrants that this product will be free from defects in workmanship and materials for 2 years on the reel and 12 years on the hose. If a defect in workmanship or materials becomes evident during that period, AMES Australasia will, at its option, either repair, replace or refund the product. In the event of such a defect, the product should be returned to us (with proof of purchase and the original packaging) at the address below, together with written details of the defect. Any handling and transportation (and other expenses incurred in claiming under this guarantee) are not covered by this guarantee and will not be borne by AMES Australasia. The obligation of Ames Australasia under this guarantee is limited to the circumstances set out above and is subject to; the customer being able to evidence the acquisition of the product, the purchase price paid for the product and the relevant defect in materials or workmanship; the product not having been altered, tampered with or otherwise dealt with by any person in a manner other than as intended in respect of the relevant product; and the product not having been used or applied in a manner that is contrary to customary usage or application for the relevant product or contrary to any stated instructions or specifications of Ames Australasia. Our goods come with guarantees that cannot be excluded under the Australian Consumer Law. You are entitled to a replacement or refund for a major failure and compensation for any other reasonably foreseeable loss or damage. You are also entitled to have the goods repaired or replaced if the goods fail to be of acceptable quality and the failure does not amount to a major failure.
For further information contact us onAustralia Free Call: 1800 335 019New Zealand: 09 427 6042
AMES AustralasiaABN 89 169 427 061Level 1, 660 Doncaster Road, Doncaster, Victoria 3108. Australia www.nylex.com.au
Recommended