Introduction
You know you should be testing your Angular code. But you aren’t.
It’s painful, too, seeing article after article espousing the need to test.
Sometimes you don’t even feel like a “real” developer. “Real developers write
tests,” they say. “100% coverage is the only way to be sure.”
You’ve tried to test
Maybe you tried it once and ran into a roadblock testing directives.
Maybe you never even got that far – Karma and Jasmine and Grunt were just a
pain to set up and you said, “Screw it I’ll do it later.”
It feels too late to start testing
Perhaps it’s worth giving testing another shot. But where to begin? The tutorials
don’t cover how to test your code… and you can hardly just go on Reddit and
admit to the world that you’ve never written a test. Those angry test-first people
would have a feeding frenzy!
And there’s so much untested code already…
“All or nothing” is not the only way!
What if you could gradually introduce tests around your code, though? Little by
little, the tests would form a scaffold of safety. Right away, you’d be able to
refactor the tested parts of your app with complete confidence.
Sounds great, but how exactly do you test all the components in your app? The
controllers, the services, and the trickiest of the bunch, directives? They’re all
different.
What you need is a set of patterns – “recipes”. If it’s a service, test it this way. If
it’s a directive, the test looks slightly different. Promises need their own special
magic…
Part 1
Testing Environment and The First Test
To start with, we’ll set up a testing environment, and you’ll write your first test
(or your first in a while!), in your own app, and start building that scaffold of
safety.
In Part 2, we’ll cover Jasmine’s syntax.
And in Part 3, we’ll go over a few Recipes for testing the various parts of your
app.
Set up Karma
Karma is a test runner. Supplied with a configuration file, it will load up your
tests along with your app and execute the tests in a browser of your choosing.
The browser can be a real one (Chrome, Safari, Firefox, etc) or a headless one
(PhantomJS).
Install Karma
Assuming you already have npm installed, this is easy:
npm install karma karma-jasmine karma-phantomjs-launcher
phantomjs jasmine-core --save-dev
npm install -g karma-cli
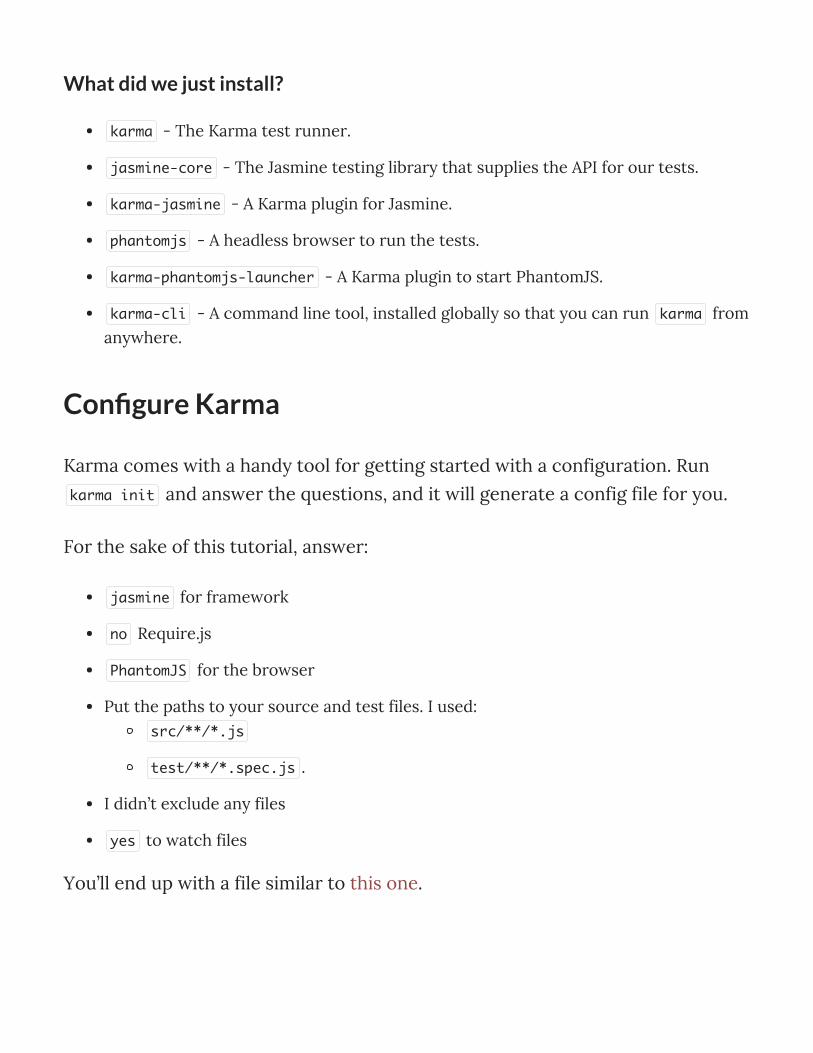
What did we just install?
karma - The Karma test runner.
jasmine-core - The Jasmine testing library that supplies the API for our tests.
karma-jasmine - A Karma plugin for Jasmine.
phantomjs - A headless browser to run the tests.
karma-phantomjs-launcher - A Karma plugin to start PhantomJS.
karma-cli - A command line tool, installed globally so that you can run karma fromanywhere.
Con�gure Karma
Karma comes with a handy tool for getting started with a configuration. Run
karma init and answer the questions, and it will generate a config file for you.
For the sake of this tutorial, answer:
jasmine for framework
no Require.js
PhantomJS for the browser
Put the paths to your source and test files. I used:src/**/*.js
test/**/*.spec.js .
I didn’t exclude any files
yes to watch files
You’ll end up with a file similar to this one.
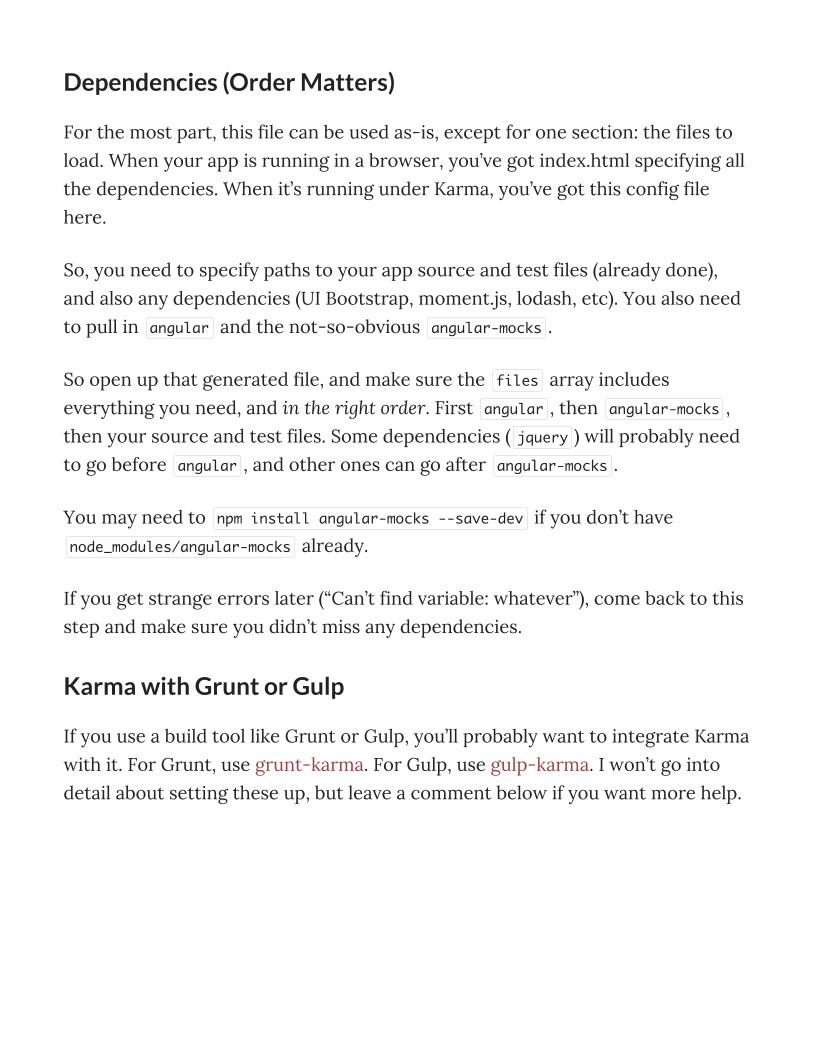
Dependencies (Order Matters)
For the most part, this file can be used as-is, except for one section: the files to
load. When your app is running in a browser, you’ve got index.html specifying all
the dependencies. When it’s running under Karma, you’ve got this config file
here.
So, you need to specify paths to your app source and test files (already done),
and also any dependencies (UI Bootstrap, moment.js, lodash, etc). You also need
to pull in angular and the not-so-obvious angular-mocks .
So open up that generated file, and make sure the files array includes
everything you need, and in the right order. First angular , then angular-mocks ,
then your source and test files. Some dependencies ( jquery ) will probably need
to go before angular , and other ones can go after angular-mocks .
You may need to npm install angular-mocks --save-dev if you don’t have
node_modules/angular-mocks already.
If you get strange errors later (“Can’t find variable: whatever”), come back to this
step and make sure you didn’t miss any dependencies.
Karma with Grunt or Gulp
If you use a build tool like Grunt or Gulp, you’ll probably want to integrate Karma
with it. For Grunt, use grunt-karma. For Gulp, use gulp-karma. I won’t go into
detail about setting these up, but leave a comment below if you want more help.
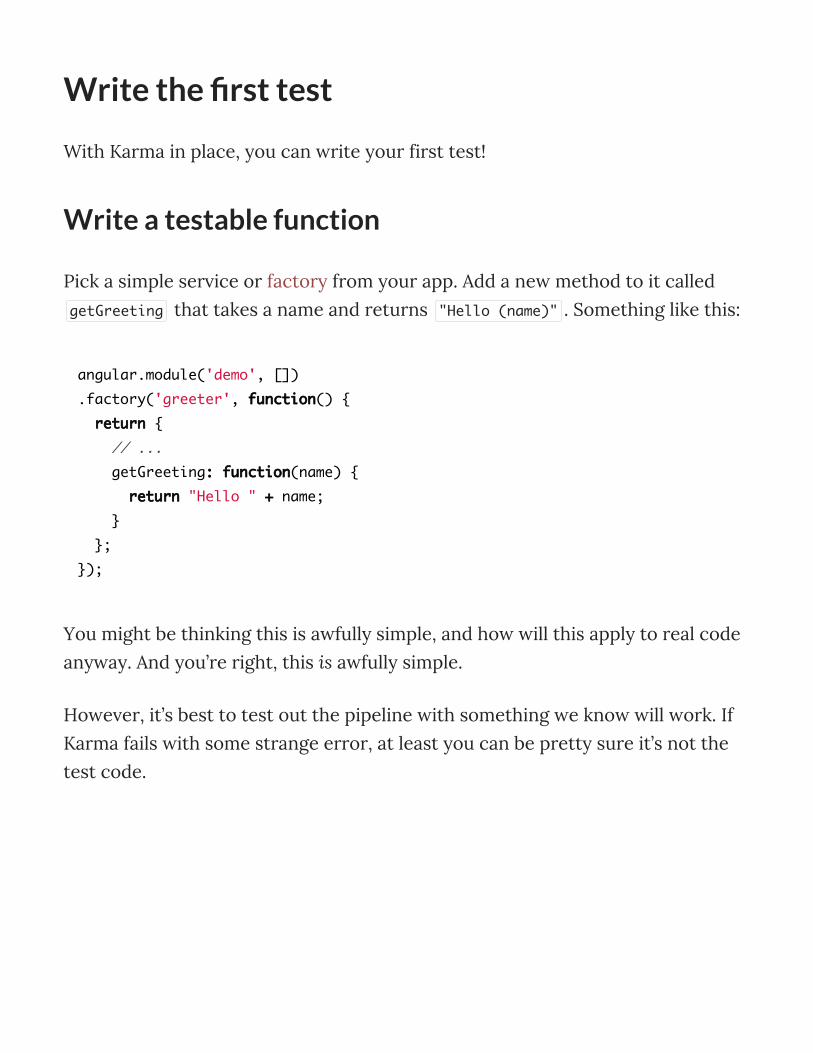
Write the �rst test
With Karma in place, you can write your first test!
Write a testable function
Pick a simple service or factory from your app. Add a new method to it called
getGreeting that takes a name and returns "Hello (name)" . Something like this:
You might be thinking this is awfully simple, and how will this apply to real code
anyway. And you’re right, this is awfully simple.
However, it’s best to test out the pipeline with something we know will work. If
Karma fails with some strange error, at least you can be pretty sure it’s not the
test code.
angular.module('demo', [])
.factory('greeter', function() {
return {
// ...
getGreeting: function(name) {
return "Hello " + name;
}
};
});
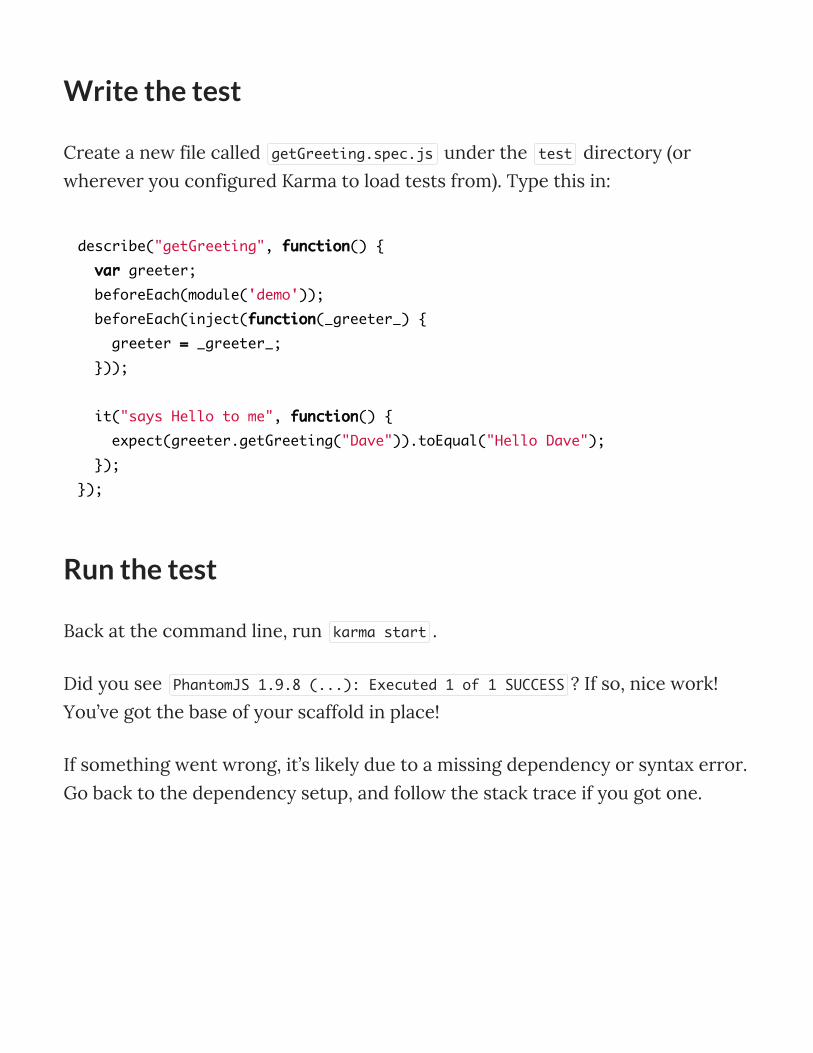
Write the test
Create a new file called getGreeting.spec.js under the test directory (or
wherever you configured Karma to load tests from). Type this in:
Run the test
Back at the command line, run karma start .
Did you see PhantomJS 1.9.8 (...): Executed 1 of 1 SUCCESS ? If so, nice work!
You’ve got the base of your scaffold in place!
If something went wrong, it’s likely due to a missing dependency or syntax error.
Go back to the dependency setup, and follow the stack trace if you got one.
describe("getGreeting", function() {
var greeter;
beforeEach(module('demo'));
beforeEach(inject(function(_greeter_) {
greeter = _greeter_;
}));
it("says Hello to me", function() {
expect(greeter.getGreeting("Dave")).toEqual("Hello Dave");
});
});
Part 2 - Jasmine Syntax
If you haven’t done much or any testing up til now, Jasmine’s syntax can look a
little strange. There’s nested describe , it , beforeEach blocks, and those
expect matchers…
And then Angular heaps more syntax on top of that!
In order to get confident and fast at writing tests in your own app, it’ll help to
have an overview of these functions.
You don’t have to memorize them all immediately – look them up when you need
them – but you’ll probably find over time that you’ll naturally start to remember
them all as you use them more.
Here are the ones you’ll use most often:
Jasmine functions
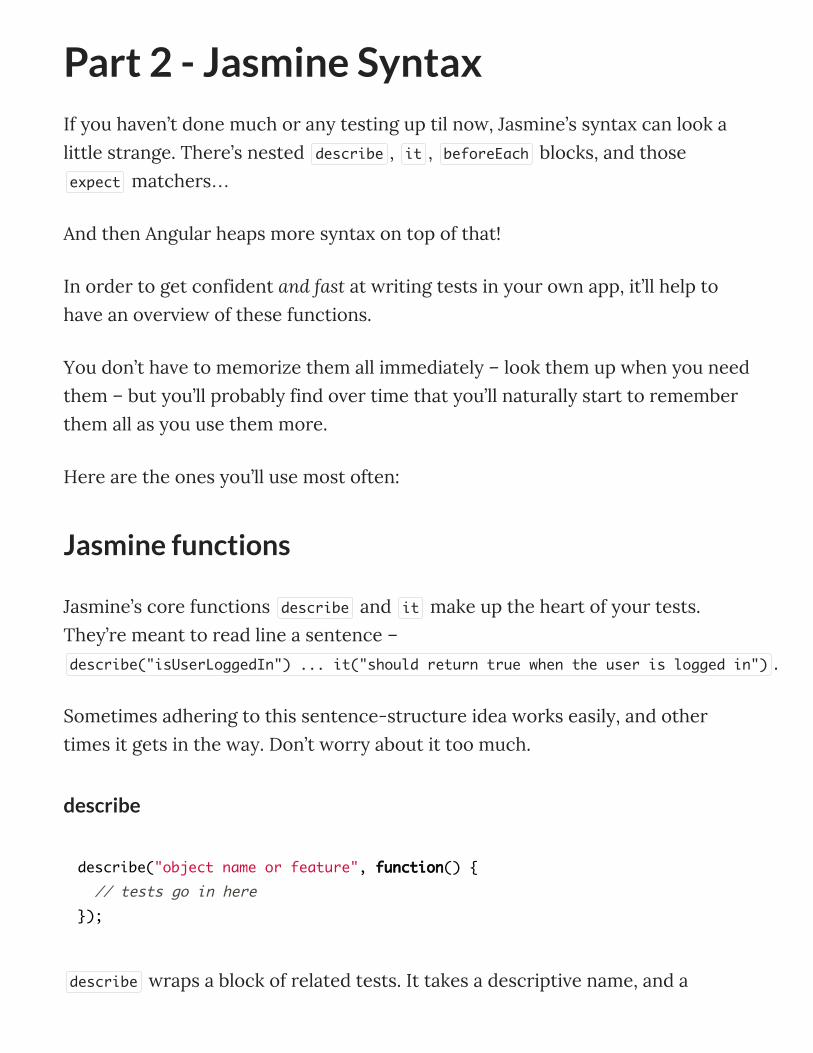
Jasmine’s core functions describe and it make up the heart of your tests.
They’re meant to read line a sentence –
describe("isUserLoggedIn") ... it("should return true when the user is logged in") .
Sometimes adhering to this sentence-structure idea works easily, and other
times it gets in the way. Don’t worry about it too much.
describe
describe wraps a block of related tests. It takes a descriptive name, and a
describe("object name or feature", function() {
// tests go in here
});
function that executes when your tests run.
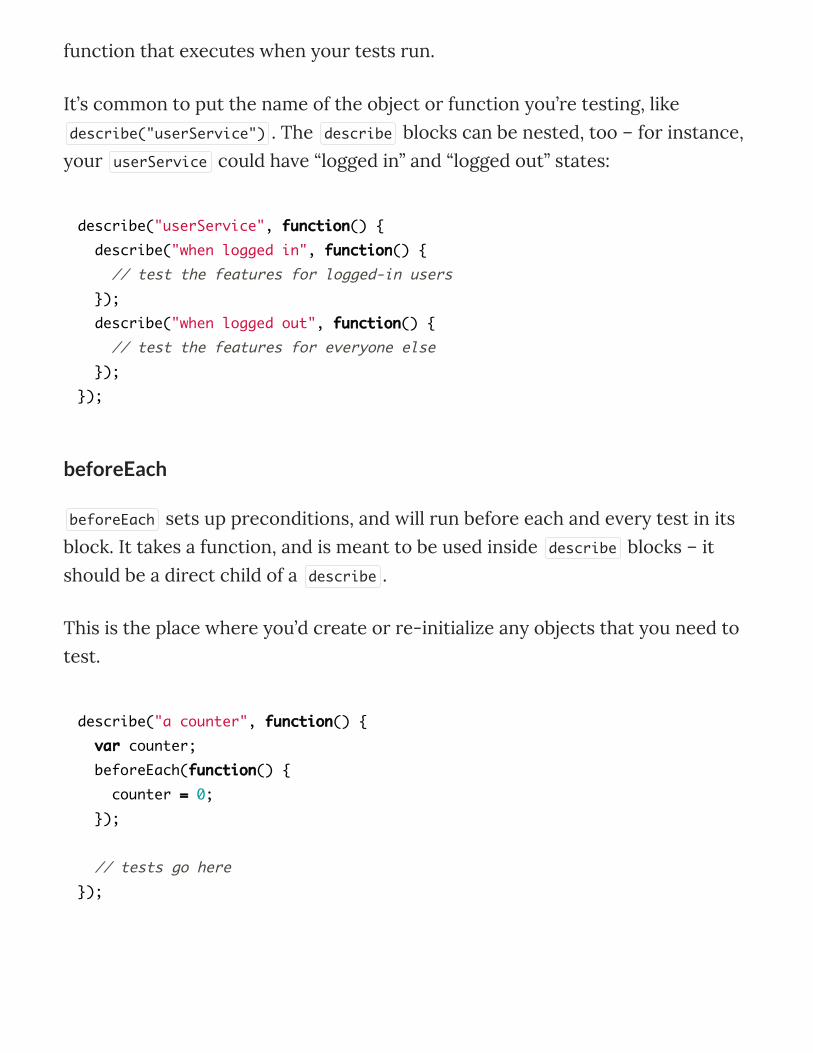
It’s common to put the name of the object or function you’re testing, like
describe("userService") . The describe blocks can be nested, too – for instance,
your userService could have “logged in” and “logged out” states:
beforeEach
beforeEach sets up preconditions, and will run before each and every test in its
block. It takes a function, and is meant to be used inside describe blocks – it
should be a direct child of a describe .
This is the place where you’d create or re-initialize any objects that you need to
test.
describe("userService", function() {
describe("when logged in", function() {
// test the features for logged-in users
});
describe("when logged out", function() {
// test the features for everyone else
});
});
describe("a counter", function() {
var counter;
beforeEach(function() {
counter = 0;
});
// tests go here
});
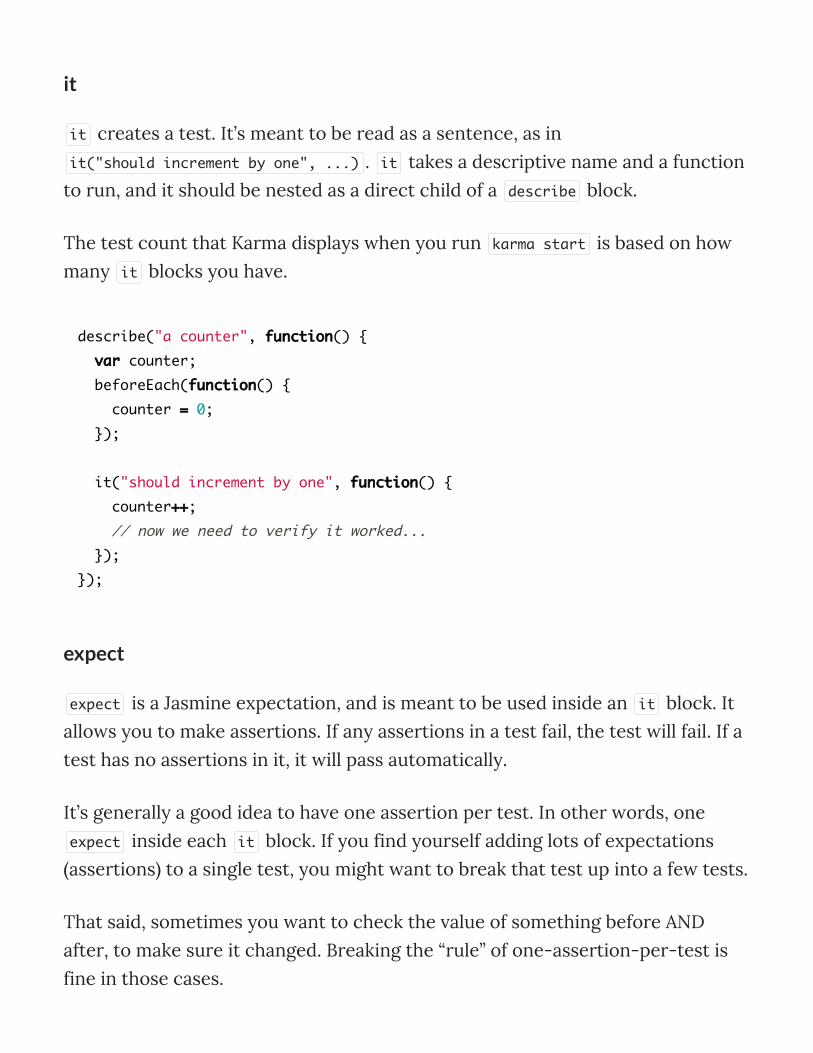
it
it creates a test. It’s meant to be read as a sentence, as in
it("should increment by one", ...) . it takes a descriptive name and a function
to run, and it should be nested as a direct child of a describe block.
The test count that Karma displays when you run karma start is based on how
many it blocks you have.
expect
expect is a Jasmine expectation, and is meant to be used inside an it block. It
allows you to make assertions. If any assertions in a test fail, the test will fail. If a
test has no assertions in it, it will pass automatically.
It’s generally a good idea to have one assertion per test. In other words, one
expect inside each it block. If you find yourself adding lots of expectations
(assertions) to a single test, you might want to break that test up into a few tests.
That said, sometimes you want to check the value of something before AND
after, to make sure it changed. Breaking the “rule” of one-assertion-per-test is
fine in those cases.
describe("a counter", function() {
var counter;
beforeEach(function() {
counter = 0;
});
it("should increment by one", function() {
counter++;
// now we need to verify it worked...
});
});
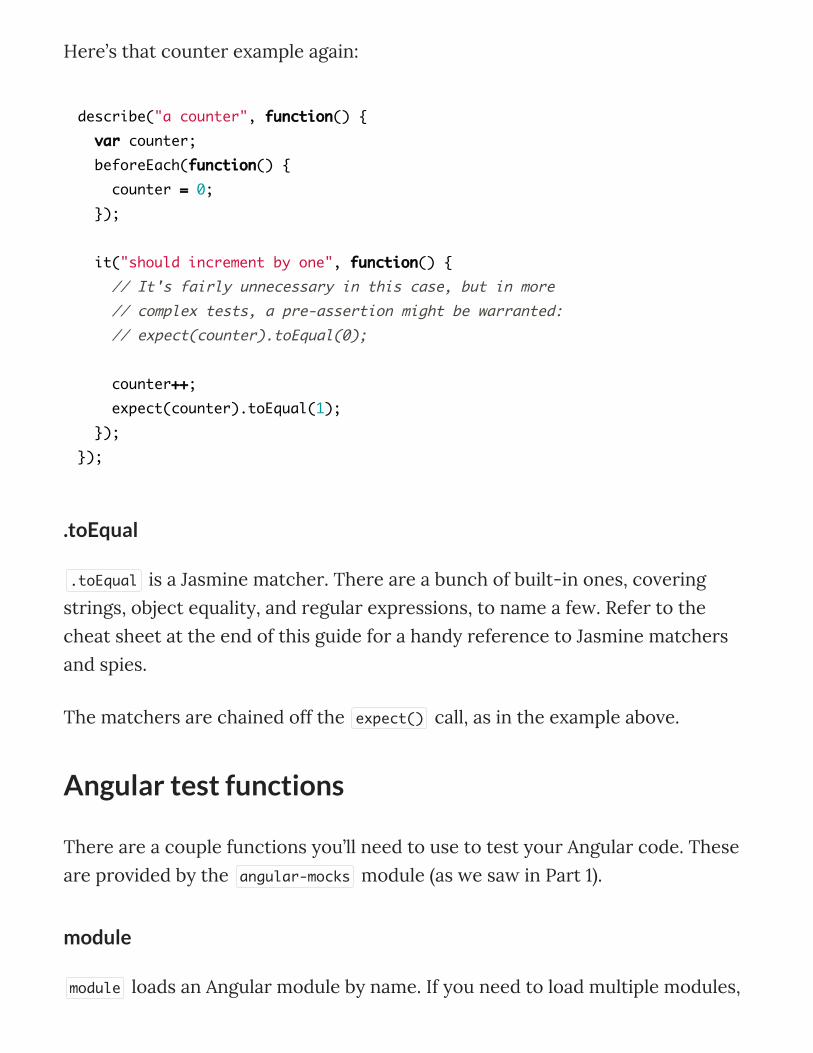
Here’s that counter example again:
.toEqual
.toEqual is a Jasmine matcher. There are a bunch of built-in ones, covering
strings, object equality, and regular expressions, to name a few. Refer to the
cheat sheet at the end of this guide for a handy reference to Jasmine matchers
and spies.
The matchers are chained off the expect() call, as in the example above.
Angular test functions
There are a couple functions you’ll need to use to test your Angular code. These
are provided by the angular-mocks module (as we saw in Part 1).
module
module loads an Angular module by name. If you need to load multiple modules,
describe("a counter", function() {
var counter;
beforeEach(function() {
counter = 0;
});
it("should increment by one", function() {
// It's fairly unnecessary in this case, but in more
// complex tests, a pre-assertion might be warranted:
// expect(counter).toEqual(0);
counter++;
expect(counter).toEqual(1);
});
});
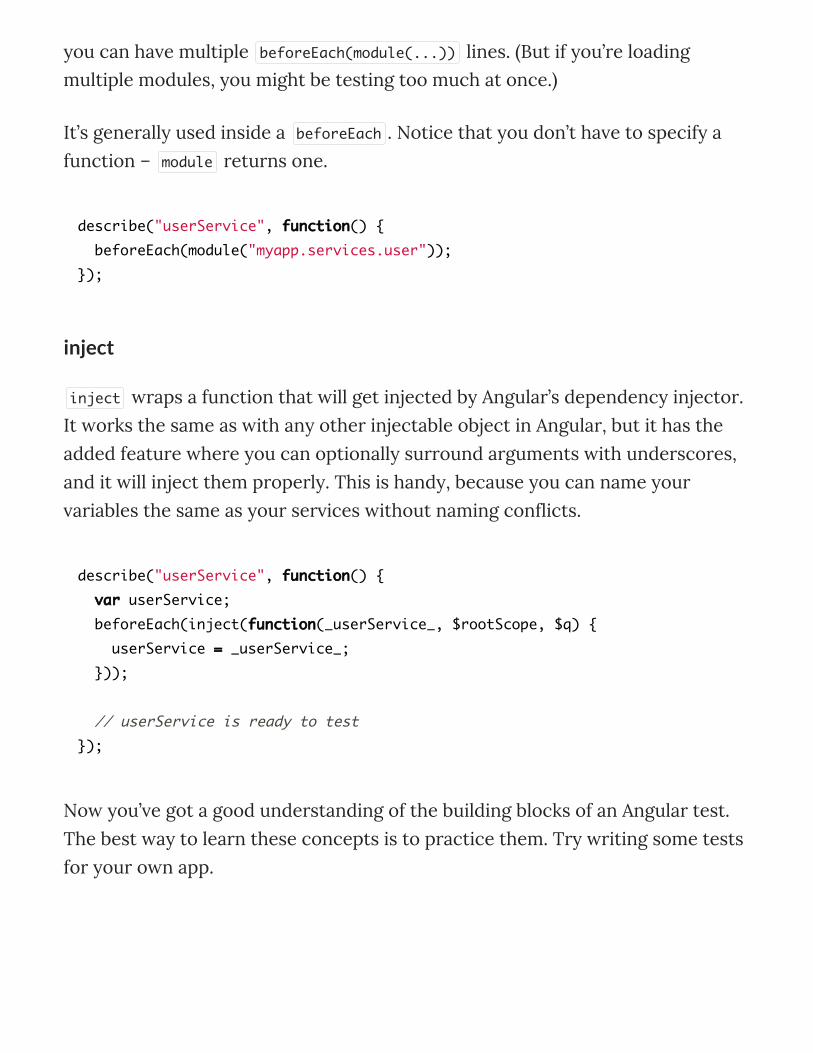
you can have multiple beforeEach(module(...)) lines. (But if you’re loadingmultiple modules, you might be testing too much at once.)
It’s generally used inside a beforeEach . Notice that you don’t have to specify a
function – module returns one.
inject
inject wraps a function that will get injected by Angular’s dependency injector.
It works the same as with any other injectable object in Angular, but it has the
added feature where you can optionally surround arguments with underscores,
and it will inject them properly. This is handy, because you can name your
variables the same as your services without naming conflicts.
Now you’ve got a good understanding of the building blocks of an Angular test.
The best way to learn these concepts is to practice them. Try writing some tests
for your own app.
describe("userService", function() {
beforeEach(module("myapp.services.user"));
});
describe("userService", function() {
var userService;
beforeEach(inject(function(_userService_, $rootScope, $q) {
userService = _userService_;
}));
// userService is ready to test
});
Part 3 - Testing Recipes
Now that you’ve got a test environment set up (from Part 1) and you understand
the Jasmine syntax you’ll need (Part 2), we can look at recipes that you can apply
for testing the various components in your app: the services, controllers, and
directives.
We’ll also look at how to test code that uses promises, and how to mock services
so that you can test isolated pieces.
Let’s dive in.
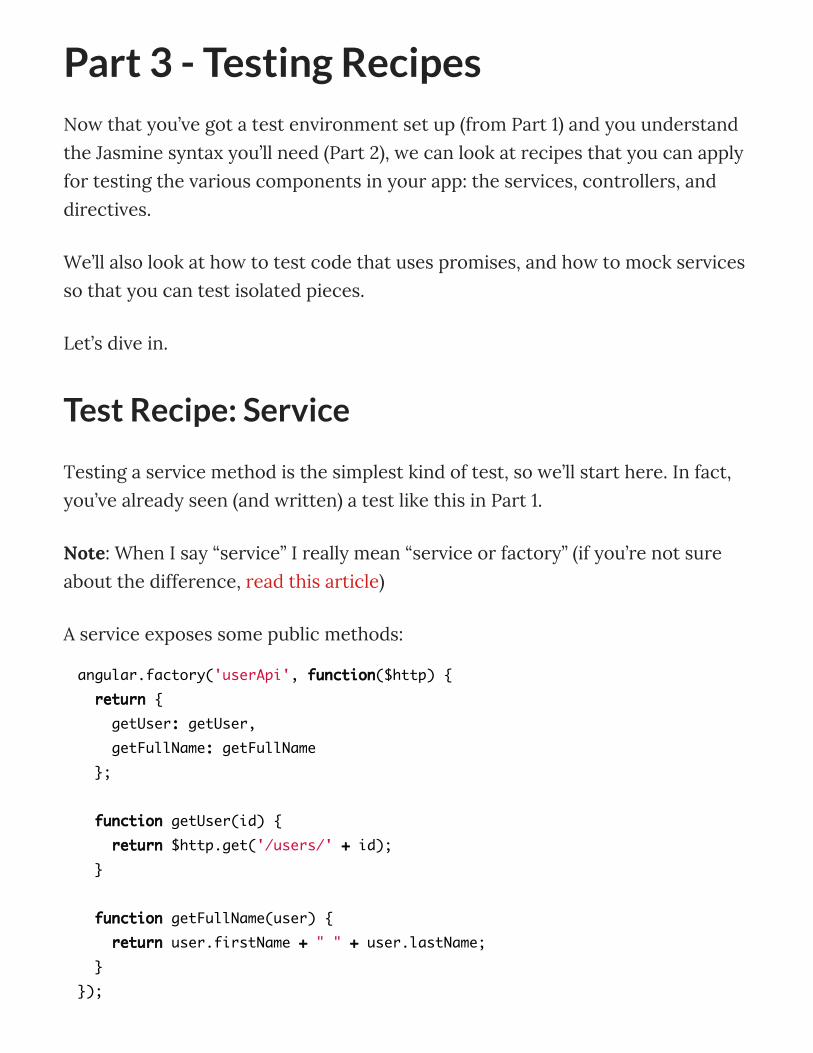
Test Recipe: Service
Testing a service method is the simplest kind of test, so we’ll start here. In fact,
you’ve already seen (and written) a test like this in Part 1.
Note: When I say “service” I really mean “service or factory” (if you’re not sure
about the difference, read this article)
A service exposes some public methods:
angular.factory('userApi', function($http) {
return {
getUser: getUser,
getFullName: getFullName
};
function getUser(id) {
return $http.get('/users/' + id);
}
function getFullName(user) {
return user.firstName + " " + user.lastName;
}
});
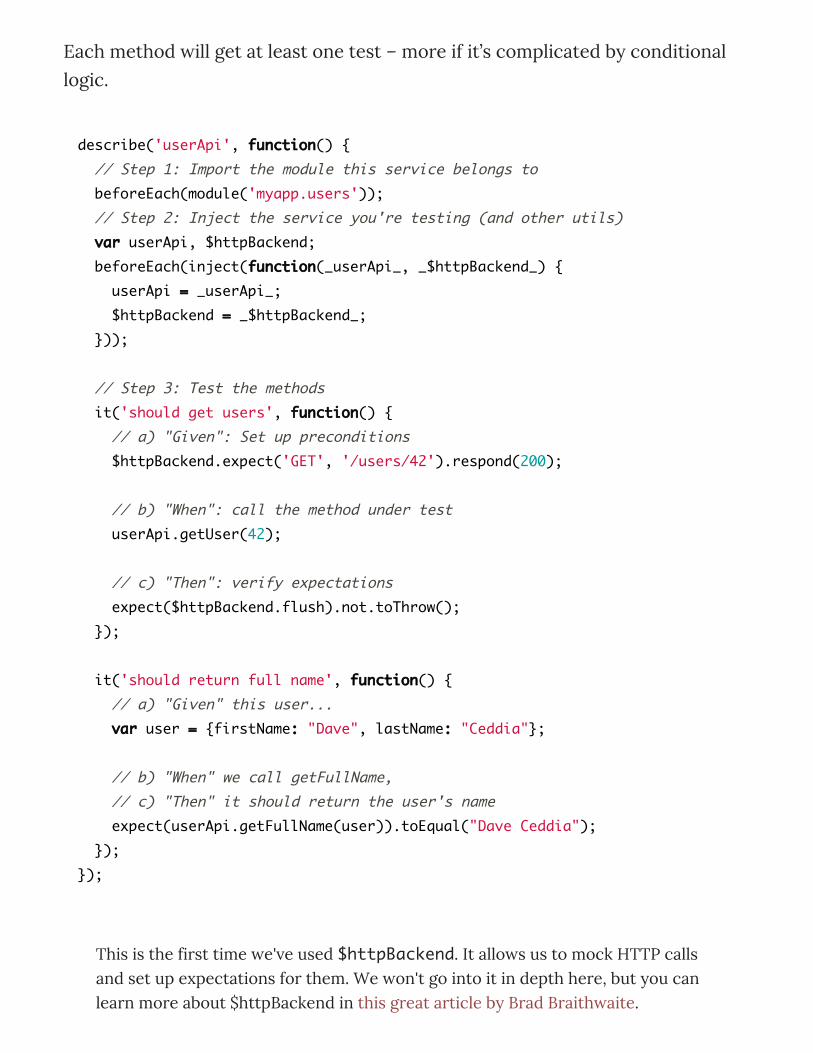
Each method will get at least one test – more if it’s complicated by conditional
logic.
This is the first time we've used $httpBackend. It allows us to mock HTTP callsand set up expectations for them. We won't go into it in depth here, but you canlearn more about $httpBackend in this great article by Brad Braithwaite.
describe('userApi', function() {
// Step 1: Import the module this service belongs to
beforeEach(module('myapp.users'));
// Step 2: Inject the service you're testing (and other utils)
var userApi, $httpBackend;
beforeEach(inject(function(_userApi_, _$httpBackend_) {
userApi = _userApi_;
$httpBackend = _$httpBackend_;
}));
// Step 3: Test the methods
it('should get users', function() {
// a) "Given": Set up preconditions
$httpBackend.expect('GET', '/users/42').respond(200);
// b) "When": call the method under test
userApi.getUser(42);
// c) "Then": verify expectations
expect($httpBackend.flush).not.toThrow();
});
it('should return full name', function() {
// a) "Given" this user...
var user = {firstName: "Dave", lastName: "Ceddia"};
// b) "When" we call getFullName,
// c) "Then" it should return the user's name
expect(userApi.getFullName(user)).toEqual("Dave Ceddia");
});
});
This pattern, or some variation on it, will be present in all your tests.
1. Import the module that contains the service you’re testing.
2. Inject the service you’re testing, and save it for later use. You may also want to set upmocks or spies at this point.
3. Write the tests. Each one should ideally follow the pattern of Given/When/Then, anidea from BDD (Behavior-Driven Development):
Given some particular state of my appset up state, mock or spy functions if necessary
When I call some methodcall the method you’re testing
Then that method behaves in a certain wayverify the method did the right thing
In an ideal world, you’ll have one assertion per test (one expect(...) within each
it ). This doesn’t always work out, but try to stick to it if you can. Your tests will
probably be easier to read.
If you find yourself violating the one-assertion-per-test rule frequently, it might
be a sign that your methods are doing too much. Try simplifying those methods
by breaking out behavior into other ones. Each method should be responsible for
a single thing.
Test Recipe: Controller
When testing a controller, the recipe is very similar to testing a service, except
that you need the controller function itself. Angular doesn’t allow you to inject
controllers, though. That’d be too easy. So how do you get it?
Using the $controller service! Inject that, then use it to instantiate your
controller.
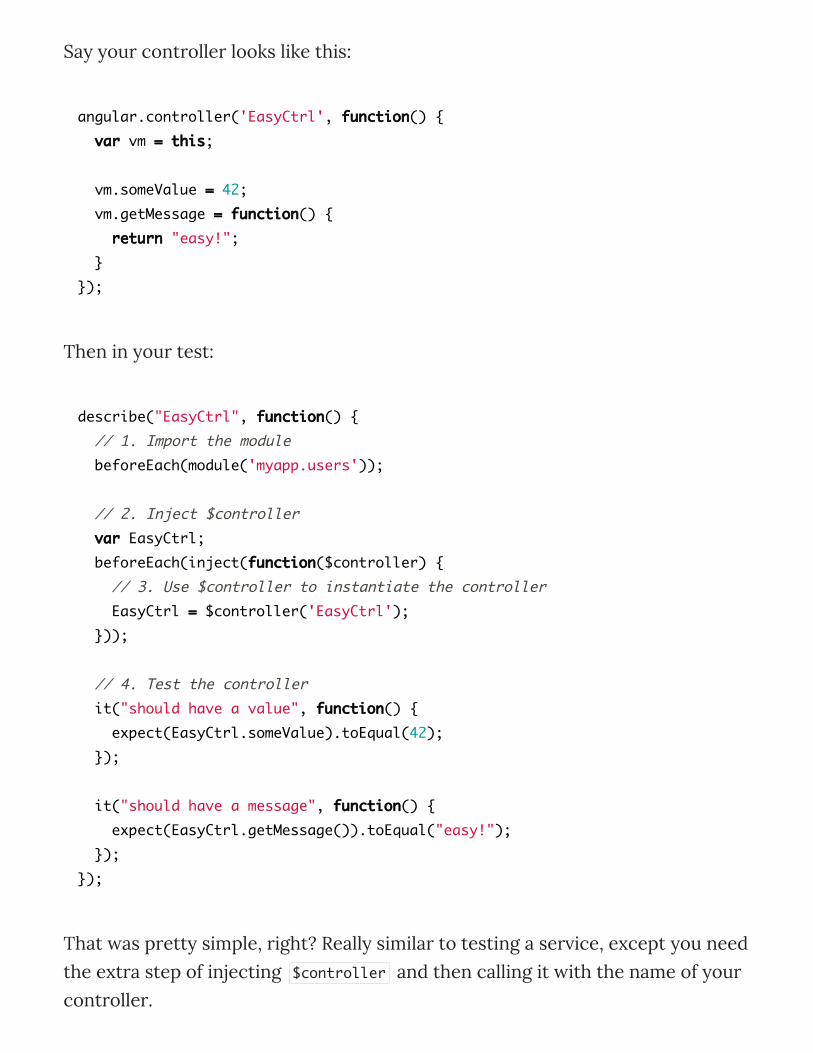
Say your controller looks like this:
Then in your test:
That was pretty simple, right? Really similar to testing a service, except you need
the extra step of injecting $controller and then calling it with the name of your
controller.
Controller Recipe 2: $scope
angular.controller('EasyCtrl', function() {
var vm = this;
vm.someValue = 42;
vm.getMessage = function() {
return "easy!";
}
});
describe("EasyCtrl", function() {
// 1. Import the module
beforeEach(module('myapp.users'));
// 2. Inject $controller
var EasyCtrl;
beforeEach(inject(function($controller) {
// 3. Use $controller to instantiate the controller
EasyCtrl = $controller('EasyCtrl');
}));
// 4. Test the controller
it("should have a value", function() {
expect(EasyCtrl.someValue).toEqual(42);
});
it("should have a message", function() {
expect(EasyCtrl.getMessage()).toEqual("easy!");
});
});
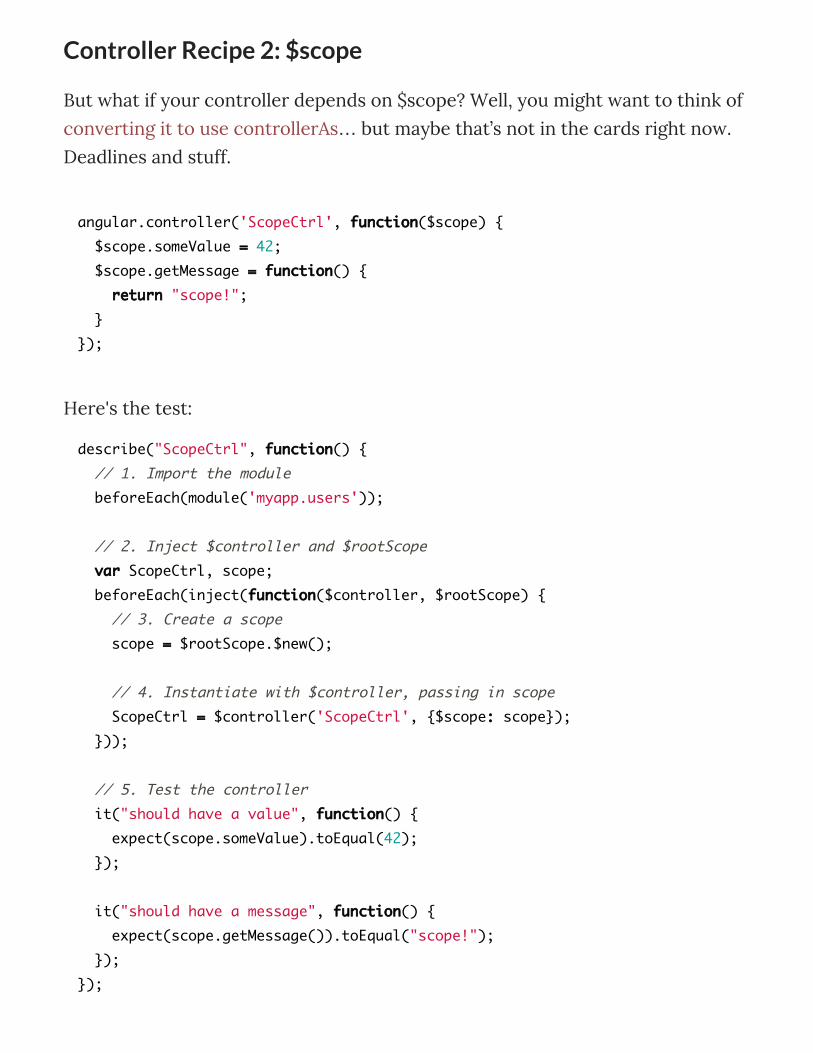
Controller Recipe 2: $scope
But what if your controller depends on $scope? Well, you might want to think of
converting it to use controllerAs… but maybe that’s not in the cards right now.
Deadlines and stuff.
Here's the test:
angular.controller('ScopeCtrl', function($scope) {
$scope.someValue = 42;
$scope.getMessage = function() {
return "scope!";
}
});
describe("ScopeCtrl", function() {
// 1. Import the module
beforeEach(module('myapp.users'));
// 2. Inject $controller and $rootScope
var ScopeCtrl, scope;
beforeEach(inject(function($controller, $rootScope) {
// 3. Create a scope
scope = $rootScope.$new();
// 4. Instantiate with $controller, passing in scope
ScopeCtrl = $controller('ScopeCtrl', {$scope: scope});
}));
// 5. Test the controller
it("should have a value", function() {
expect(scope.someValue).toEqual(42);
});
it("should have a message", function() {
expect(scope.getMessage()).toEqual("scope!");
});
});

What’s different here?
$rootScope
We need to be able to create a scope object to pass in. $rootScope can do that
for us with its $new method.
2nd argument to $controllerThe 2nd argument specifies what to inject into the controller. It’s an object
where the keys match the arguments to your controller function, and the values
are what will be injected.
It’s worth noting that you don’t need to provide every injected parameter in that
object. Angular’s dependency injector is still working for you, and it’ll inject what
it can. It can’t inject $scope though, so if you forget to provide it, you’ll get some
error like:
Error: [$injector:unpr] Unknown provider:
$scopeProvider <- $scope <- YourControllerName
This also applies to arguments provided by UI-Router, if you’re using it.
Tests use scopeThe tests now use the scope object instead of the controller itself. (I kept the
test similar to the old one so you could see the differences easily, but you could
actually remove the ScopeCtrl variable entirely)
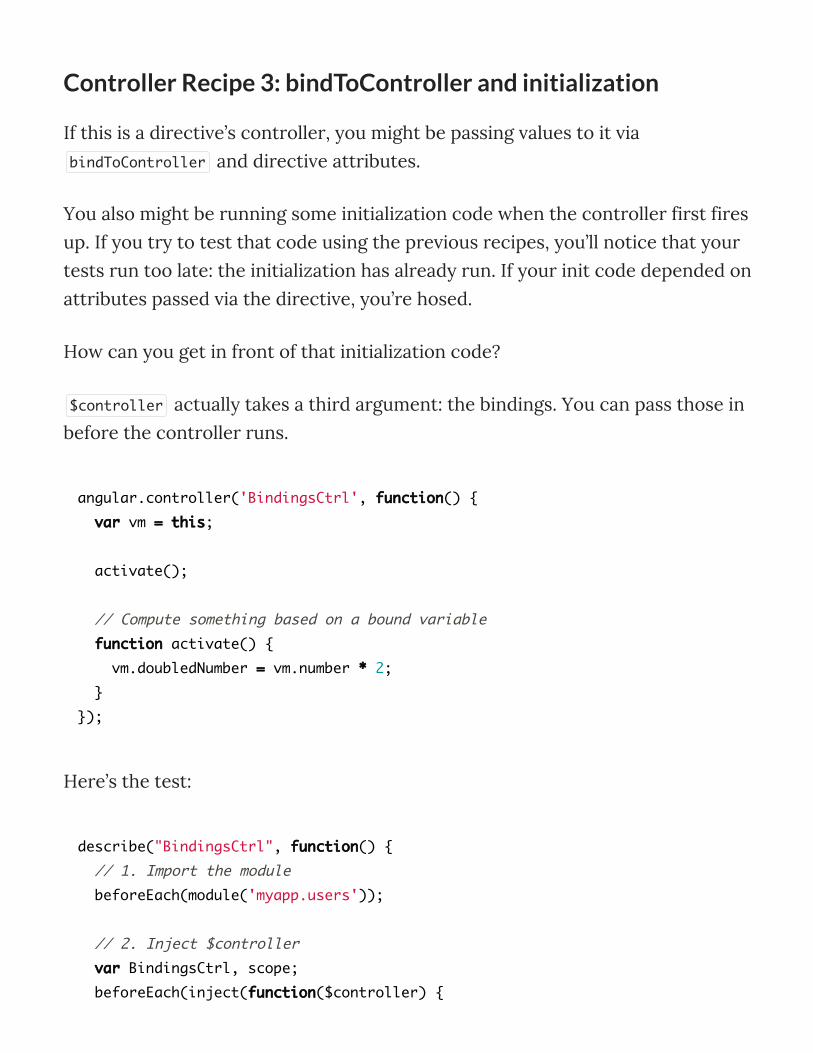
Controller Recipe 3: bindToController and initialization
If this is a directive’s controller, you might be passing values to it via
bindToController and directive attributes.
You also might be running some initialization code when the controller first fires
up. If you try to test that code using the previous recipes, you’ll notice that your
tests run too late: the initialization has already run. If your init code depended on
attributes passed via the directive, you’re hosed.
How can you get in front of that initialization code?
$controller actually takes a third argument: the bindings. You can pass those in
before the controller runs.
Here’s the test:
angular.controller('BindingsCtrl', function() {
var vm = this;
activate();
// Compute something based on a bound variable
function activate() {
vm.doubledNumber = vm.number * 2;
}
});
describe("BindingsCtrl", function() {
// 1. Import the module
beforeEach(module('myapp.users'));
// 2. Inject $controller
var BindingsCtrl, scope;
beforeEach(inject(function($controller) {
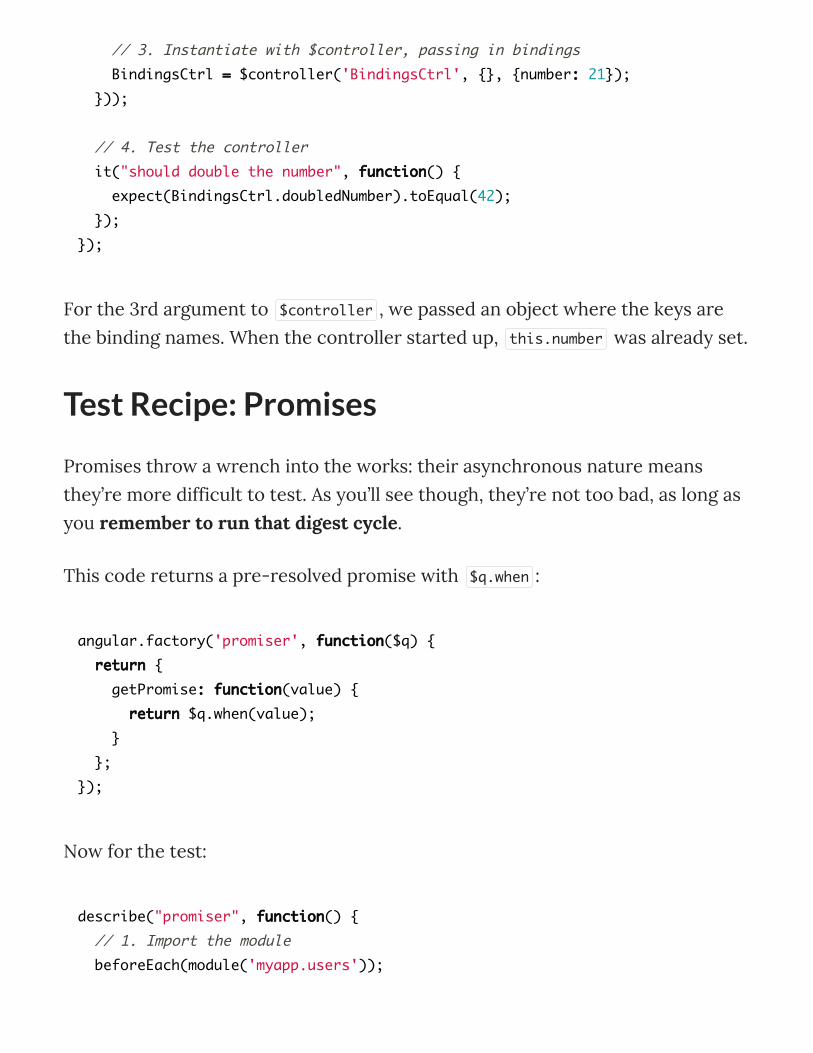
For the 3rd argument to $controller , we passed an object where the keys are
the binding names. When the controller started up, this.number was already set.
Test Recipe: Promises
Promises throw a wrench into the works: their asynchronous nature means
they’re more difficult to test. As you’ll see though, they’re not too bad, as long as
you remember to run that digest cycle.
This code returns a pre-resolved promise with $q.when :
Now for the test:
// 3. Instantiate with $controller, passing in bindings
BindingsCtrl = $controller('BindingsCtrl', {}, {number: 21});
}));
// 4. Test the controller
it("should double the number", function() {
expect(BindingsCtrl.doubledNumber).toEqual(42);
});
});
angular.factory('promiser', function($q) {
return {
getPromise: function(value) {
return $q.when(value);
}
};
});
describe("promiser", function() {
// 1. Import the module
beforeEach(module('myapp.users'));
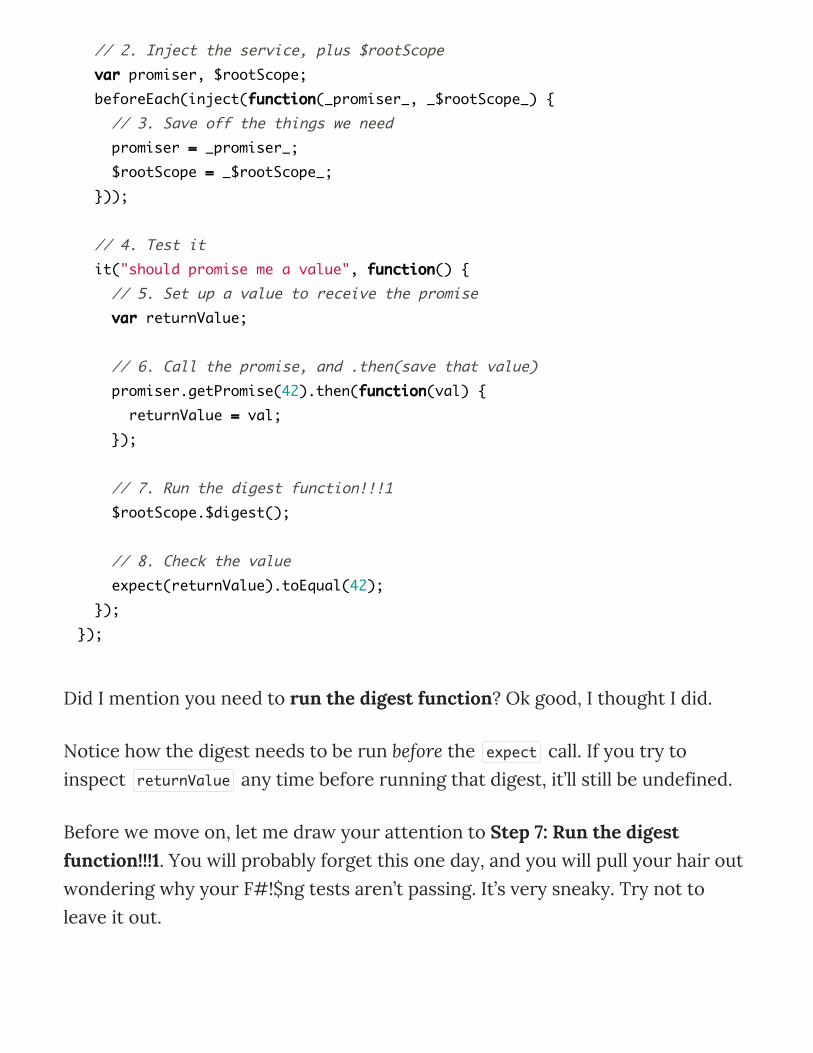
Did I mention you need to run the digest function? Ok good, I thought I did.
Notice how the digest needs to be run before the expect call. If you try to
inspect returnValue any time before running that digest, it’ll still be undefined.
Before we move on, let me draw your attention to Step 7: Run the digestfunction!!!1. You will probably forget this one day, and you will pull your hair out
wondering why your F#!$ng tests aren’t passing. It’s very sneaky. Try not to
leave it out.
// 2. Inject the service, plus $rootScope
var promiser, $rootScope;
beforeEach(inject(function(_promiser_, _$rootScope_) {
// 3. Save off the things we need
promiser = _promiser_;
$rootScope = _$rootScope_;
}));
// 4. Test it
it("should promise me a value", function() {
// 5. Set up a value to receive the promise
var returnValue;
// 6. Call the promise, and .then(save that value)
promiser.getPromise(42).then(function(val) {
returnValue = val;
});
// 7. Run the digest function!!!1
$rootScope.$digest();
// 8. Check the value
expect(returnValue).toEqual(42);
});
});
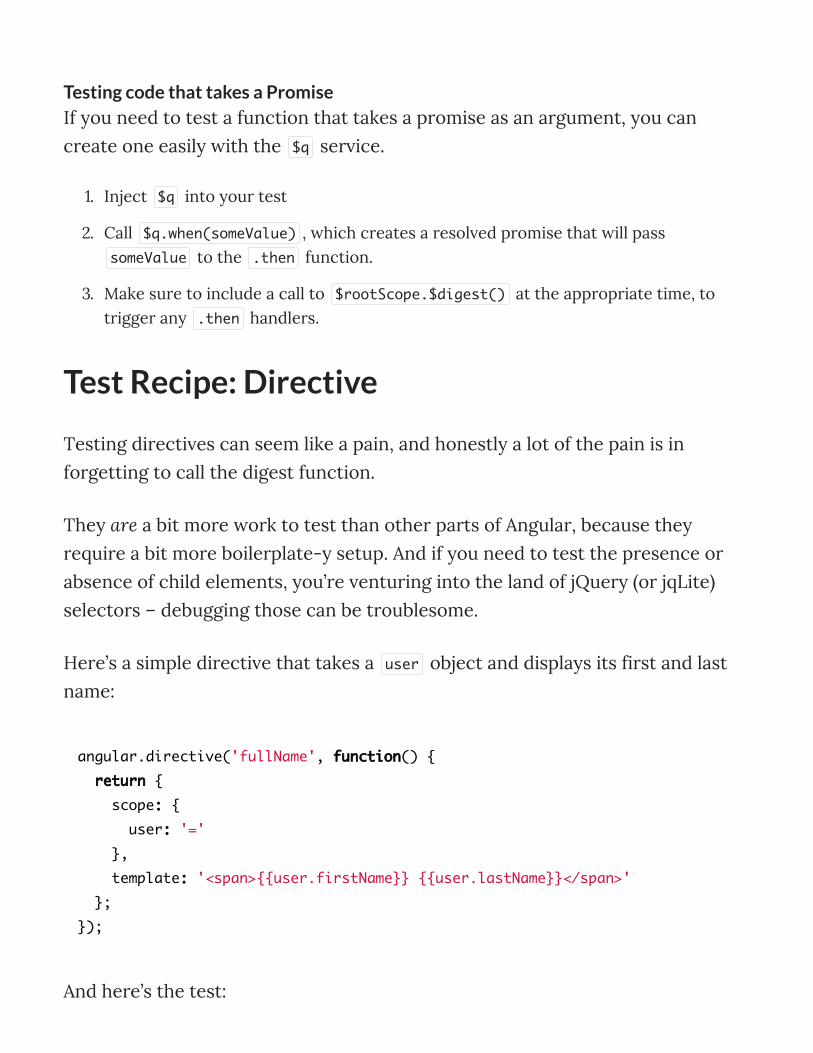
Testing code that takes a Promise
If you need to test a function that takes a promise as an argument, you can
create one easily with the $q service.
1. Inject $q into your test
2. Call $q.when(someValue) , which creates a resolved promise that will passsomeValue to the .then function.
3. Make sure to include a call to $rootScope.$digest() at the appropriate time, totrigger any .then handlers.
Test Recipe: Directive
Testing directives can seem like a pain, and honestly a lot of the pain is in
forgetting to call the digest function.
They are a bit more work to test than other parts of Angular, because they
require a bit more boilerplate-y setup. And if you need to test the presence or
absence of child elements, you’re venturing into the land of jQuery (or jqLite)
selectors – debugging those can be troublesome.
Here’s a simple directive that takes a user object and displays its first and last
name:
And here’s the test:
angular.directive('fullName', function() {
return {
scope: {
user: '='
},
template: '<span>{{user.firstName}} {{user.lastName}}</span>'
};
});

Play around with it a little and see how it breaks.
If you forget the $compile , it fails – the element is empty.
If you forget the $digest , it fails – the element’s contents are
{{user.firstName}} {{user.lastName}} .
describe("fullName", function() {
// 1. Load the module
beforeEach(module('myapp.users'));
// 2. Inject $rootScope and $compile
var scope, element;
beforeEach(inject(function($rootScope, $compile) {
// 3. Set up the scope with test data
scope = $rootScope.$new();
scope.user = {
firstName: "Dave",
lastName: "Ceddia"
};
// 4. Create an element
element = angular.element('<full-name user="user"></full-name>');
// 5. Compile that element with your scope
element = $compile(element)(scope);
// 6. Run the digest cycle to ACTUALLY compile the element
$rootScope.$digest();
}));
// 7. Test that it worked
it("should display the full name", function() {
// 'element' is a jqLite or jQuery element
expect(element.text()).toEqual("Dave Ceddia");
});
});
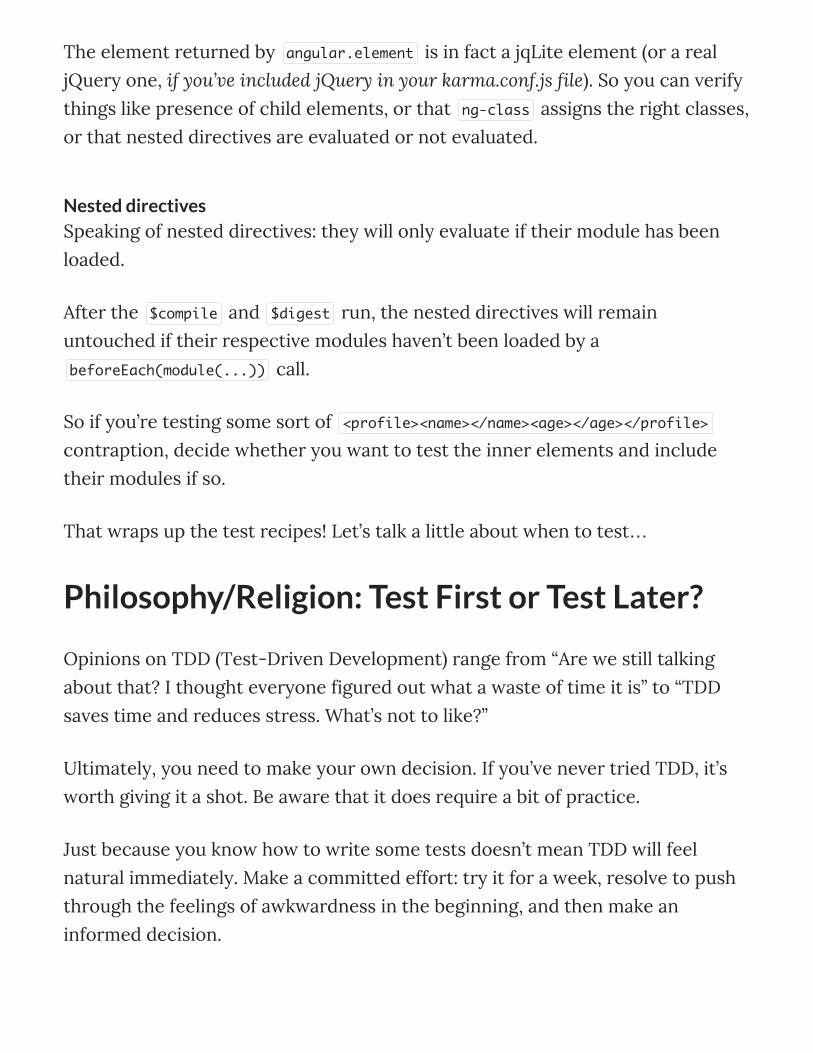
The element returned by angular.element is in fact a jqLite element (or a real
jQuery one, if you’ve included jQuery in your karma.conf.js file). So you can verify
things like presence of child elements, or that ng-class assigns the right classes,
or that nested directives are evaluated or not evaluated.
Nested directives
Speaking of nested directives: they will only evaluate if their module has been
loaded.
After the $compile and $digest run, the nested directives will remain
untouched if their respective modules haven’t been loaded by a
beforeEach(module(...)) call.
So if you’re testing some sort of <profile><name></name><age></age></profile>
contraption, decide whether you want to test the inner elements and include
their modules if so.
That wraps up the test recipes! Let’s talk a little about when to test…
Philosophy/Religion: Test First or Test Later?
Opinions on TDD (Test-Driven Development) range from “Are we still talking
about that? I thought everyone figured out what a waste of time it is” to “TDD
saves time and reduces stress. What’s not to like?”
Ultimately, you need to make your own decision. If you’ve never tried TDD, it’s
worth giving it a shot. Be aware that it does require a bit of practice.
Just because you know how to write some tests doesn’t mean TDD will feel
natural immediately. Make a committed effort: try it for a week, resolve to push
through the feelings of awkwardness in the beginning, and then make an
informed decision.
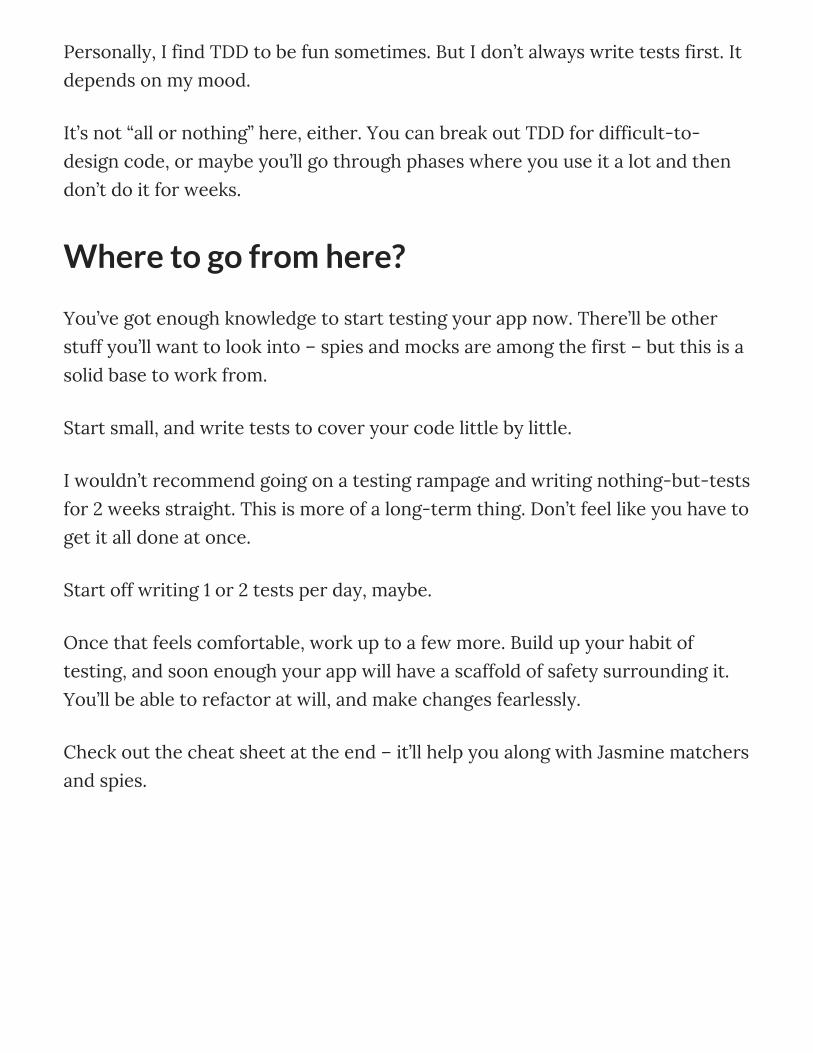
Personally, I find TDD to be fun sometimes. But I don’t always write tests first. It
depends on my mood.
It’s not “all or nothing” here, either. You can break out TDD for difficult-to-
design code, or maybe you’ll go through phases where you use it a lot and then
don’t do it for weeks.
Where to go from here?
You’ve got enough knowledge to start testing your app now. There’ll be other
stuff you’ll want to look into – spies and mocks are among the first – but this is a
solid base to work from.
Start small, and write tests to cover your code little by little.
I wouldn’t recommend going on a testing rampage and writing nothing-but-tests
for 2 weeks straight. This is more of a long-term thing. Don’t feel like you have to
get it all done at once.
Start off writing 1 or 2 tests per day, maybe.
Once that feels comfortable, work up to a few more. Build up your habit of
testing, and soon enough your app will have a scaffold of safety surrounding it.
You’ll be able to refactor at will, and make changes fearlessly.
Check out the cheat sheet at the end – it’ll help you along with Jasmine matchers
and spies.
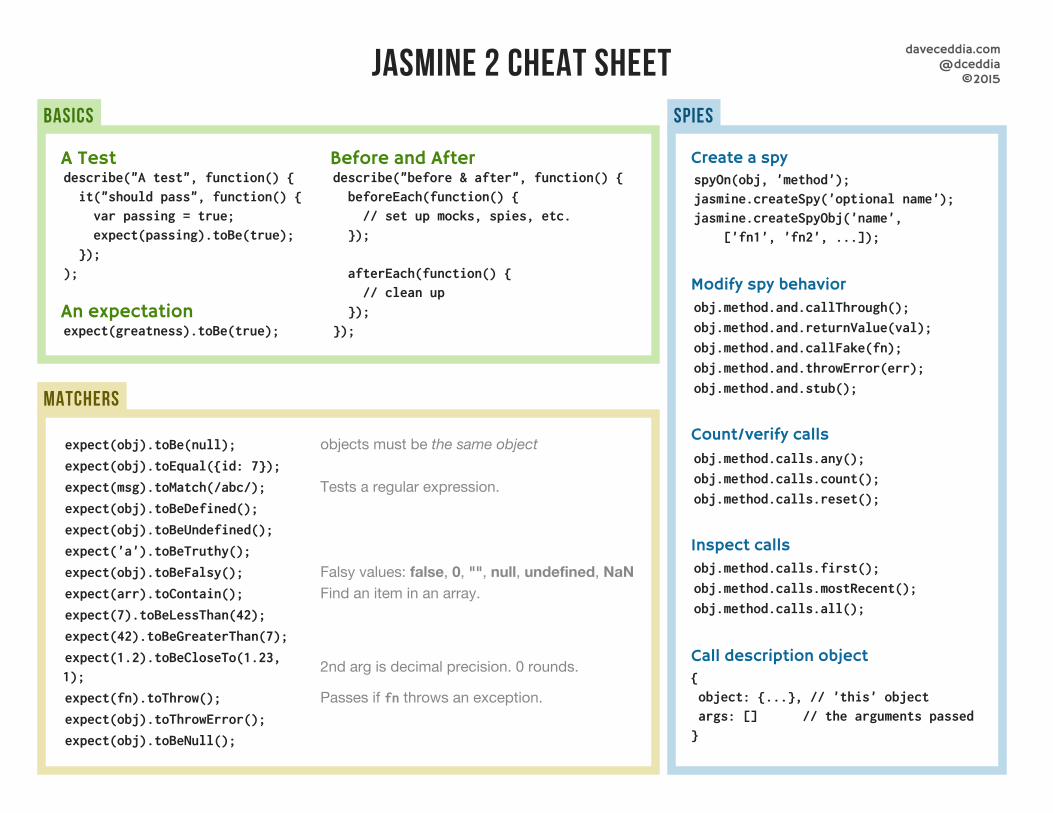
daveceddia.com@dceddia
©2015
A Testdescribe("A test", function() {
it("should pass", function() {
var passing = true;
expect(passing).toBe(true);
});
);
An expectationexpect(greatness).toBe(true);
Before and Afterdescribe("before & after", function() {
beforeEach(function() {
// set up mocks, spies, etc.
});
afterEach(function() {
// clean up
});
});
expect(obj).toBe(null); objects must be the same objectexpect(obj).toEqual({id: 7});
expect(msg).toMatch(/abc/); Tests a regular expression.expect(obj).toBeDefined();
expect(obj).toBeUndefined();
expect('a').toBeTruthy();
expect(obj).toBeFalsy(); Falsy values: false, 0, "", null, undefined, NaNexpect(arr).toContain(); Find an item in an array.expect(7).toBeLessThan(42);
expect(42).toBeGreaterThan(7);
expect(1.2).toBeCloseTo(1.23,
1);2nd arg is decimal precision. 0 rounds.
expect(fn).toThrow(); Passes if fn throws an exception.expect(obj).toThrowError();
expect(obj).toBeNull();
Create a spyspyOn(obj, 'method');
jasmine.createSpy('optional name');
jasmine.createSpyObj('name',
['fn1', 'fn2', ...]);
Modify spy behaviorobj.method.and.callThrough();
obj.method.and.returnValue(val);
obj.method.and.callFake(fn);
obj.method.and.throwError(err);
obj.method.and.stub();
Count/verify callsobj.method.calls.any();
obj.method.calls.count();
obj.method.calls.reset();
Inspect callsobj.method.calls.first();
obj.method.calls.mostRecent();
obj.method.calls.all();
Call description object{
object: {...}, // 'this' object
args: [] // the arguments passed
}
Recommended


![Chapter 1: Creating Our First Component in Angular...Chapter 13: Unit Testing in Angular [ 22 ] Appendix B: Webpack with Angular 8 11 12 export class AppComponent title = lapp works!](https://img.pdfslide.us/doc/110x75/5ed14d4ea7db810bbc0586d4/chapter-1-creating-our-first-component-in-angular-chapter-13-unit-testing.jpg)