Creative Living with Sheryl Borden6100 Series
Crafts - Section Crafts - Section Crafts - Section Crafts - Section Crafts - Section III
CraftsEasy Peel & Stick Lampshades ............................I-3Ruched Bias Tape Flower Pin ...............................I-3Upcycled Sweaters with Needle Felting................. I-4Button Basics .......................................................I-5Sculpting & Painting Cloth Dolls ............................I-7Marbleizing Fabric Using Shaving Cream ............. I-8Fabric Postcards - Art in the Mail! ......................... I-9Playarn.................................................................II-10Scrap Fleece Quilts Without the Bulk ....................II-11Pack of Paper Party .............................................II-12Fun With Embossed Velvet ...................................II-13Sockie Snow People.............................................II-14Polymer Clay Flower Magnet ................................II-15Dorae Maedeup Bracelet .....................................II-15Yummy Yarns to Knit & Crochet Your Way ............ III-16Donna Salazar .....................................................III-17Art Glitter Home Decor .........................................III-18Expressions, Inc. ..................................................III-19The Crochet Dude................................................III-19“Green” Jewelry ...................................................III-19Lace Bud Vase Cover ..........................................III-20Color Diffusing .....................................................III-21Papers with Pizzazz! ............................................III-21Simply Elaborate Stencils .....................................III-22Creating Your Own Background Paper ..................III-23Quotable Canvases .............................................III-24Projects from Elmers ............................................III-25It’s to Dye For ......................................................III-26Guests .................................................................III-27
Table of ContentsTable of ContentsTable of ContentsTable of ContentsTable of Contents
Due to the size of this section, it has been separated into three sectionsin order for it to be downloaded more quickly. For instance, “Easy Peel &Stick Lampshades” is in Section I on page 3, “Playarn” is in Section II onpage 10 and “Yummy Yarns to Knit & Crochet Your Way” is in Section III onpage 16.

18
ART GLITTER HOME DECORART GLITTER HOME DECORART GLITTER HOME DECORART GLITTER HOME DECORART GLITTER HOME DECOR
Each of the above projects was embellishedusing art glitter products.
The Art Glittering System
You can adhere our Art Glitter and Vintage GlassGlitter to most surfaces with our adhesives.
The Designer Dries Clear Adhesive adheres tomost surfaces, including but not limited to paper,cardboard, card stock, transparencies, glass,plastic, wood, metal, and ceramics. It can beapplied with the spout, metal tip or brushed onlarger areas (mix with a couple drops of water iftoo thick).
Our Fabric Dries Clear Adhesive is specificallymade for use with our glitter on fabric. After theglue has dried completely, your fabric item thenmust be cured to make it washable. This is doneby heating the fabric in an oven. Refer to thedirections on our bottle for complete instructions.
Note: Do not use Vintage Glass Glitter onfabrics as it is made with glass.
At Art Glitter we use plastic containers to holdand catch our excess glitter. You can also use acreased piece of paper under your jar of glitter,or place your jar inside a basket filter. When donewith that color, pour glitter back into jar.
Hold adhesive bottle in your hand like a pencil,touch spout tip or Ultrafine Metal Tip to surfacebefore squeezing bottle. Once tip is in place,carefully squeeze bottle and move spout or tipover area to achieve a controlled, accurate line.Our adhesives are three-dimensional, applyliberally for best results.
Spoon glitter on adhesive while glue is wet, whiteand shiny. Turn project over tray/creased paperand tap backside with spoon to expel excessglitter before moving on to next color. Adhesivewill hold glitter, you do not have to wait for it todry before tapping excess off.
Always put adhesive down in small, controlledareas, so glitter can be applied before adhesivebegins to dry. Depending on thickness of adhe-sive and climate, your area should dry in 10 to 30minutes.
Using DesignerDries Clear and
golden opaque glitteron blue paper.
COURTESY: Barbara TrombleyArt Institute Glitter
www.artglitter.com
Using Designer DriesWhite and transparentcrystal glitter on same
blue paper.
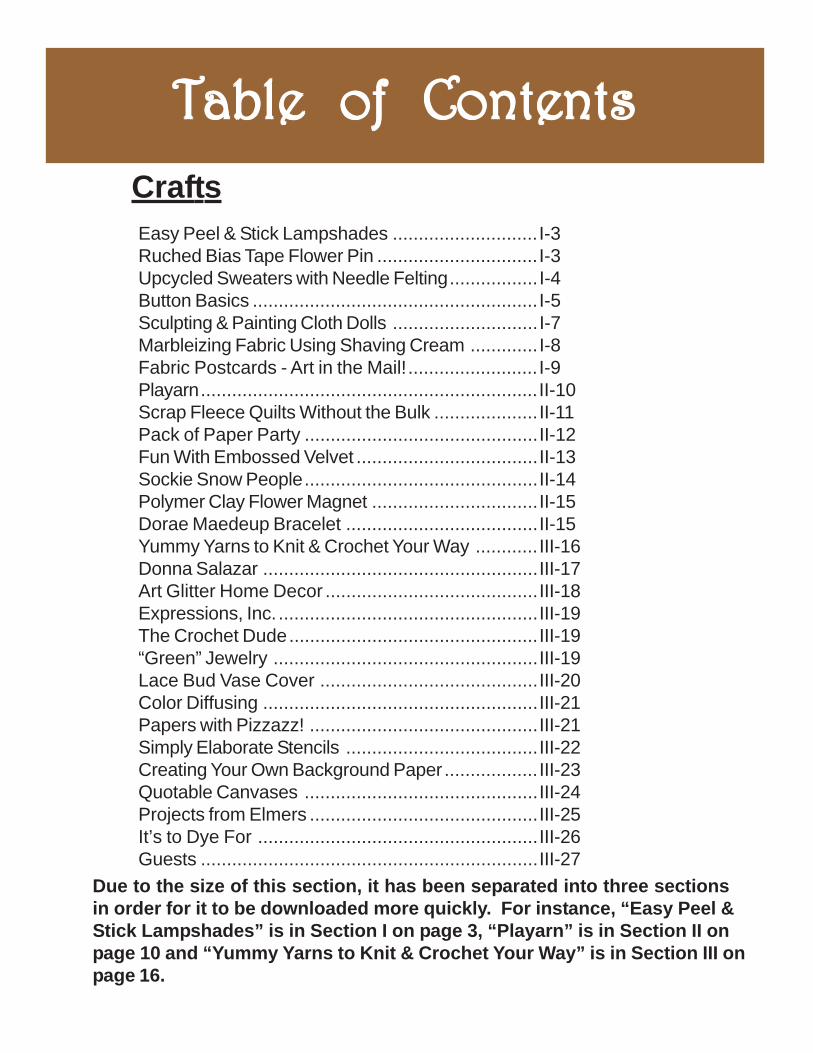
Welcome to the world of Expressions. We make and distribute molds for the beautiful porcelain dollsdesigned by Dianna Effner and other fine artists. We also stock a large assortment of products fordollmakers such as paints, brushes, instructional videos, doll boxes, and wigs. You can see the videowith Dianna Effner when she appeared on Creative Living by going to: www.expressionsdolls.com.
COURTESY: Dianna EffnerExpressions, Inc.
www.expressionsdolls.com
For information on products, kits, books and work-shops by Drew Emborsky, you can visit his websiteat: www.thecrochetdude.com.
COURTESY: Drew EmborskyThe Crochet Dude - Simplicity Creative Group
www.thecrochetdude.comwww.simplicity.com
“Green” Jewelry
This project involves usingrecycled products along with paints to create beautifuljewelry. The base of the jewelry is chipboard, or a pieceof cardboard (not corrugated.) You can use pre-cutchipboard pieces or cut your own – or use both.
1. Coat all pieces, front and back, with black acrylic paint.2. When dry, coat all pieces with a mixture of gold andcopper paints. Allow to dry. Gently rub a bit of the met-allic paint off most pieces to reveal a bit of the blackunderneath.3. Using the end of a small paintbrush, pound it over andover into the painted pieces to create the “old workedmetal” look.4. Using blue and green acrylic paints, dab a bit of eachcolor on some of the pieces to create a patina effect.5. Using needle nose pliers, separate pieces of old chains
and connect them to individual piecesof jewelry with holes already piercedin them.6. Build a necklace and bracelet byputting pieces together as desired,connecting with rings and chainsections. Create earrings to match.
COURTESY: Shannon BielkeSha & Co.
www.shaandco.net19
A Beautiful Sulky® Thread Lace BudVase Cover
Using Sulky Fabri-SolvyTM WaterSoluble Stabilizer
Learn how to create a decorative lace cover for a budvase. Nobody likes to see the the dirty water or stemsin the bottom of the vase. Why not create a lovelylace cover you can leave on all the time. Create onefor all the seasons or any holiday! Makes a terrifichostess gift.
Supplies:• Sulky Fabri-SolvyTM Water Soluble Stabilizer:
2 - 12" x 12" pieces• 30 wt. SulkyTM Rayon Thread• Sulky HoloshimmerTM Metallic Thread• Sulky KK 2000TM Temporary Spray Adhesive• 1 - 12" x 12" piece of Tulle
(optional: 2 pieces - seenote at #4)
• Long Quilter’s Pins• Free-motion, Spring-Loaded
Foot• 2 empty bobbins• Schmetz® 14/90 Topstitch,
Metallic or Embroidery Needle• Water Soluble Marker• Vase Pattern• General Sewing Supplies
1. Wind a bobbin half full of each color to be used.(1 full bobbin, if only one color is used).2. Trace the vase pattern onto a 12" x 12" piece ofFabri-Solvy using the water soluble marker.3. Place the traced pattern onto a large piece of card-board or in a cardboard box (to protect your surfaces),and lightly spray the wrong side of the Fabri-Solvypattern with Sulky KK 2000. Place on a flat surface,sticky side up.4. Smooth a piece of the 12" X 12" Tulle onto thesprayed side of the Fabri-Solvy pattern. *Optional:If you want a confetti look to your lace, spray the tullewith KK 2000 again, and sprinkle tiny bits of choppedup fabric, ribbons, threads or yarns on top of the Tulleand lay another layer of Tulle over it.5. Again, place your square sandwich on the card-board, and spray the Tulle side with KK 2000 andsmooth a second square of Fabri-Solvy over it.6. Set machine for straight-stitch, free-motion work,by dropping or covering the feed dogs, and attachinga darning or free-motion (spring-loaded) foot.
7. Start in the center of the sandwich and work to theoutside to reduce puckering.HINT: Be sure you don’t fill-in the center of the de-sign, because this will be cut out later. Move the sand-wich in a fluid, circular motion forming small to mediumsize circles. Your circles should overlap slightly forstrength, but not be super filled in. You want a lightlacy effect.8. When stitching the sides, draw your circles so theycover or overlap the edge by 1/4 inch. After it is allfilled in, go around the outside and inside lines again.This reinforces the edge for the seam that will be sewn.9. Reset the machine for normal stitching. Raise thefeed dogs and attach the general purpose foot. Stitchlength is 2.0 to 2.5.11. Fold the lace in half, right sides together. Line upthe edges and pin together. With a 1/4" seam allowancesew a seam from the top, outside edge, down the vaseneck, and stop at the bottom. Do not sew the top orbottom closed. (I used a pin to remind me to stop sew-ing. Or, use a water soluble marker.)12. Sew the inside seam using a 1/4" seam allowanceon the traced line.13. Cut away the Tulle and stabilizer from outside thestitched lines. Don’t forget to cut out the center too.14. Press the sandwich with a warm, dry iron to hastenthe dissipation of KK 2000. (If your iron does not havea non-stick surface, use a press cloth.) KK 2000 is notwater soluble, so you either need to allow it to dissipatenaturally in 2 to 5 days (and it may take longer whentrapped inside a fabric sandwich), or speed up theprocess with the warm, dry iron.15. Rinse thoroughly with warm water, and turn rightside out. When it is dry, stretch it top-down over a budvase. Add a ribbon and a flower and give to a friend orlover.
HINT: You could also use New Sulky Sticky Fabri-Solvy (which has a release sheet) and eliminate theneed for KK 2000 except if you were sandwichingsnippets of fabric, yarns, threads, etc, in between thetwo layers of tulle. You could trace the pattern throughthe release sheet right onto the Sticky Fabri-Solvy.
COURTESY: Eric DrexlerSulky of America
www.sulky.com
20
21
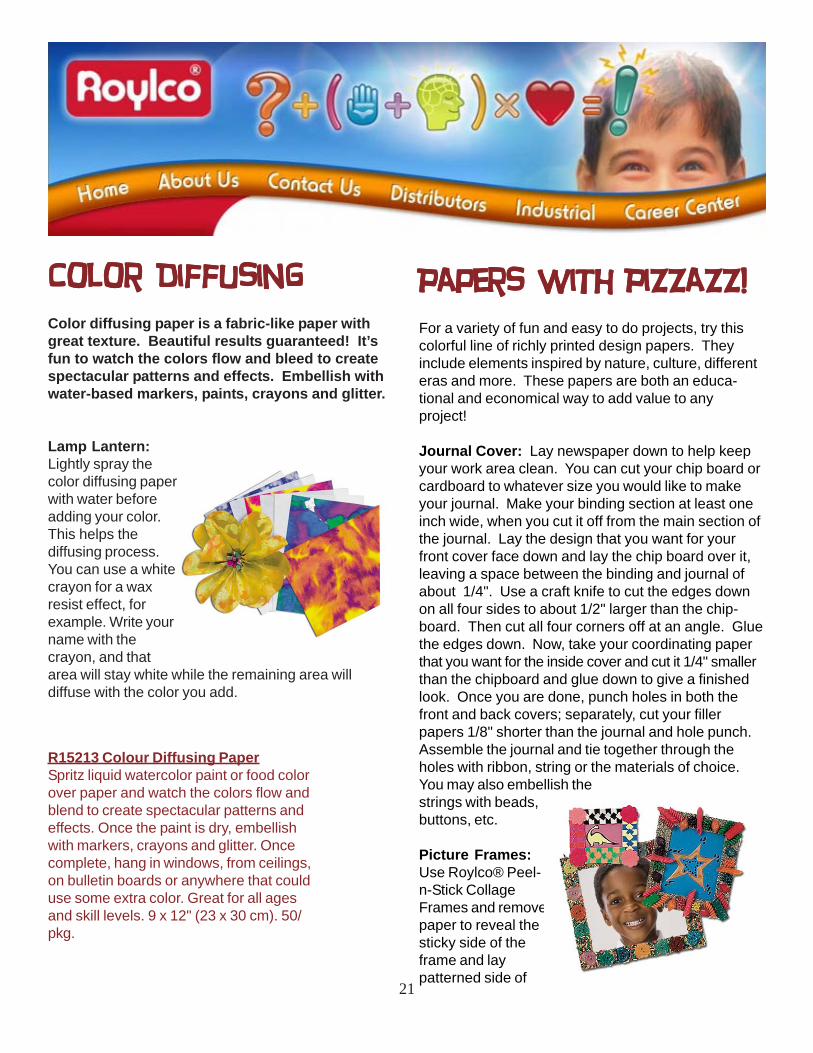
Color DiffusingColor DiffusingColor DiffusingColor DiffusingColor DiffusingColor diffusing paper is a fabric-like paper withgreat texture. Beautiful results guaranteed! It’sfun to watch the colors flow and bleed to createspectacular patterns and effects. Embellish withwater-based markers, paints, crayons and glitter.
Lamp Lantern:Lightly spray thecolor diffusing paperwith water beforeadding your color.This helps thediffusing process.You can use a whitecrayon for a waxresist effect, forexample. Write yourname with thecrayon, and thatarea will stay white while the remaining area willdiffuse with the color you add.
Papers with Pizzazz!Papers with Pizzazz!Papers with Pizzazz!Papers with Pizzazz!Papers with Pizzazz!For a variety of fun and easy to do projects, try thiscolorful line of richly printed design papers. Theyinclude elements inspired by nature, culture, differenteras and more. These papers are both an educa-tional and economical way to add value to anyproject!
Journal Cover: Lay newspaper down to help keepyour work area clean. You can cut your chip board orcardboard to whatever size you would like to makeyour journal. Make your binding section at least oneinch wide, when you cut it off from the main section ofthe journal. Lay the design that you want for yourfront cover face down and lay the chip board over it,leaving a space between the binding and journal ofabout 1/4". Use a craft knife to cut the edges downon all four sides to about 1/2" larger than the chip-board. Then cut all four corners off at an angle. Gluethe edges down. Now, take your coordinating paperthat you want for the inside cover and cut it 1/4" smallerthan the chipboard and glue down to give a finishedlook. Once you are done, punch holes in both thefront and back covers; separately, cut your fillerpapers 1/8" shorter than the journal and hole punch.Assemble the journal and tie together through theholes with ribbon, string or the materials of choice.You may also embellish thestrings with beads,buttons, etc.
Picture Frames:Use Roylco® Peel-n-Stick CollageFrames and removepaper to reveal thesticky side of theframe and laypatterned side of
R15213 Colour Diffusing PaperSpritz liquid watercolor paint or food colorover paper and watch the colors flow andblend to create spectacular patterns andeffects. Once the paint is dry, embellishwith markers, crayons and glitter. Oncecomplete, hang in windows, from ceilings,on bulletin boards or anywhere that coulduse some extra color. Great for all agesand skill levels. 9 x 12" (23 x 30 cm). 50/pkg.
22
COURTESY: Sara MowerRoylco, Inc.
www.roylco.com
just flip the stencil over to have the reverse image. Thisprocess can be done on many types of surfaces, i.e. walls,canvas, floors, paper. Start by putting a base coat on apiece of canvas and let it dry completely. Place the desiredstencils on the canvas and tape down with masking tape.Apply the paint in the stencil area with a blotting motion toavoid the paint bleeding under the edges. Once the paint isdry, you can embellish your art with free hand drawing.
R5615 Nature StencilsAges 5+R5615 Nature Stencils, Age 5+ Up to 7 x 7" (19 cm)10/pkg. A great stencil set for creative children! De-tailed shapes ideal for tracing and painting. Use theedges to create coordinating frames and borders.Includes stencils, templates and idea guide.
Rangoli Stencils: Tapeyour stencil in place withmasking tape to avoid itmoving around. Pressdown on the stencil tokeep it flat to yoursurface. For a tiledeffect, just flip thestencil over to have themirrored image.
R5621 Rangoli MegaStencilsAges 5+Rangoli is a traditional and beautiful art form fromIndia. Complex stencil designs are commonly used tobeautify floors and surroundings for festivals andspecial occasions. Extra large stencils are based onclassic designs. Easy to use. 11 x 11" (28 cm). Comeswith an extensive guide detailing this wonderful craft.4/pkg.
paper face down. Place sticky side down on paper.Cut edges off with a craft knife. Glue or tape your pictureto the back side of the smaller frame. Glue smaller frameto larger frame. To give a finished look and depth to yourframe, use cardboard or card-stock in coordinating solidcolor and glue to the back of the main frame.
R22500 Peel & Stick Fun Frames Ages 4+Super results without glue! Peel off liner paper toreveal adhesive. 3 sizes, up to 7 1/2 x 8 1/2 (19 x 21cm). Idea guide. 12/pkg.
Gift Boxes: Start by gluingyour paper to thebottom of the box. Usea craft knife and cutparallel lines straight outfrom two ends. Takeends and fold and gluethem in place. Then dothe same process on the adjacent side. Repeat the sameprocess for the lid. Use a coordinating pattern to addpizzazz to it!
R22060 Collage Boxes to DecorateAges 4+Decorate fun boxes with crayons, stickers and paints.6 bold colors with really unique pre-cut edges for extraappeal. 5 1/2 x 7 x 1 1/2" (14 x 18 x 4 cm). 12/pkg.
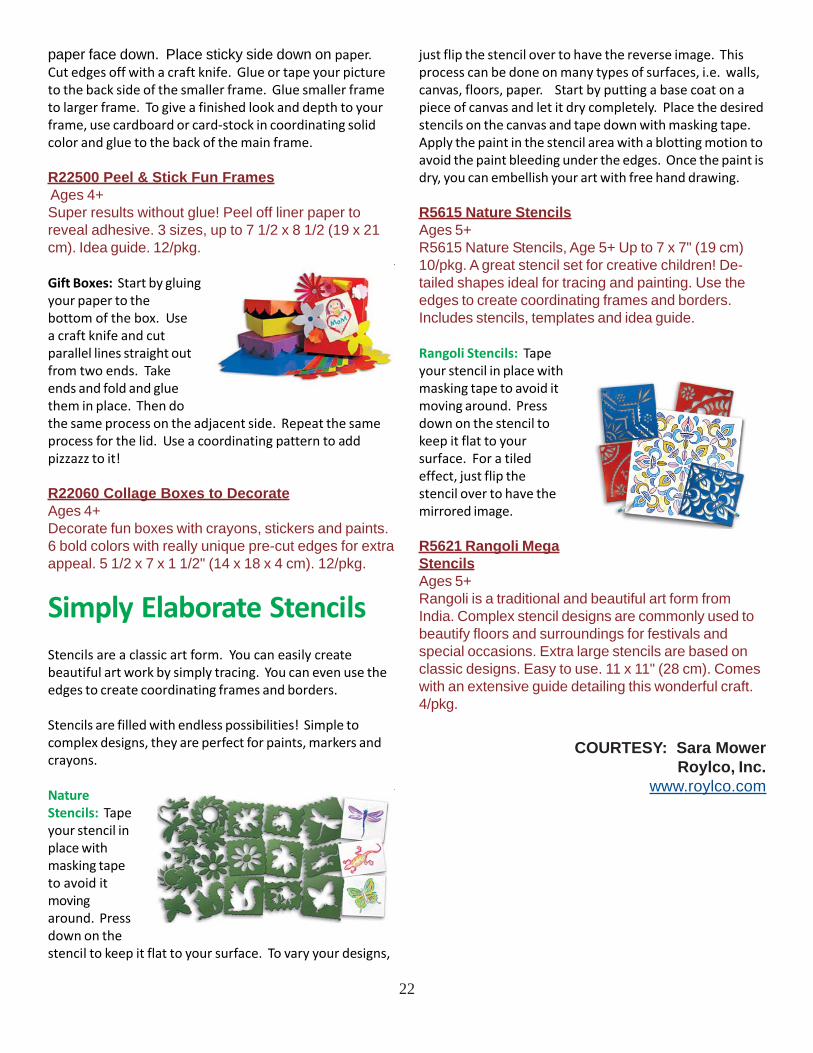
Simply Elaborate Stencils
Stencils are a classic art form. You can easily createbeautiful art work by simply tracing. You can even use theedges to create coordinating frames and borders.
Stencils are filled with endless possibilities! Simple tocomplex designs, they are perfect for paints, markers andcrayons.
NatureStencils: Tapeyour stencil inplace withmasking tapeto avoid itmovingaround. Pressdown on thestencil to keep it flat to your surface. To vary your designs,
23
Have you everdriven yourselfnearly mad justtrying to find theabsolute right pieceof patterned paperto go with yourscrapbook layoutsor handmade cards?Learn how to makeyour own uniquebackground papersthat coordinateperfectly with yourhandcraftedcreations.
Materials:• White or a fairly light colored piece of card
stock or scrapbook paper• StazOn permanent ink by Tsukineko)• Tim Holtz’s Distress Inks• Stipple brushes• An assortment of rubber stamps
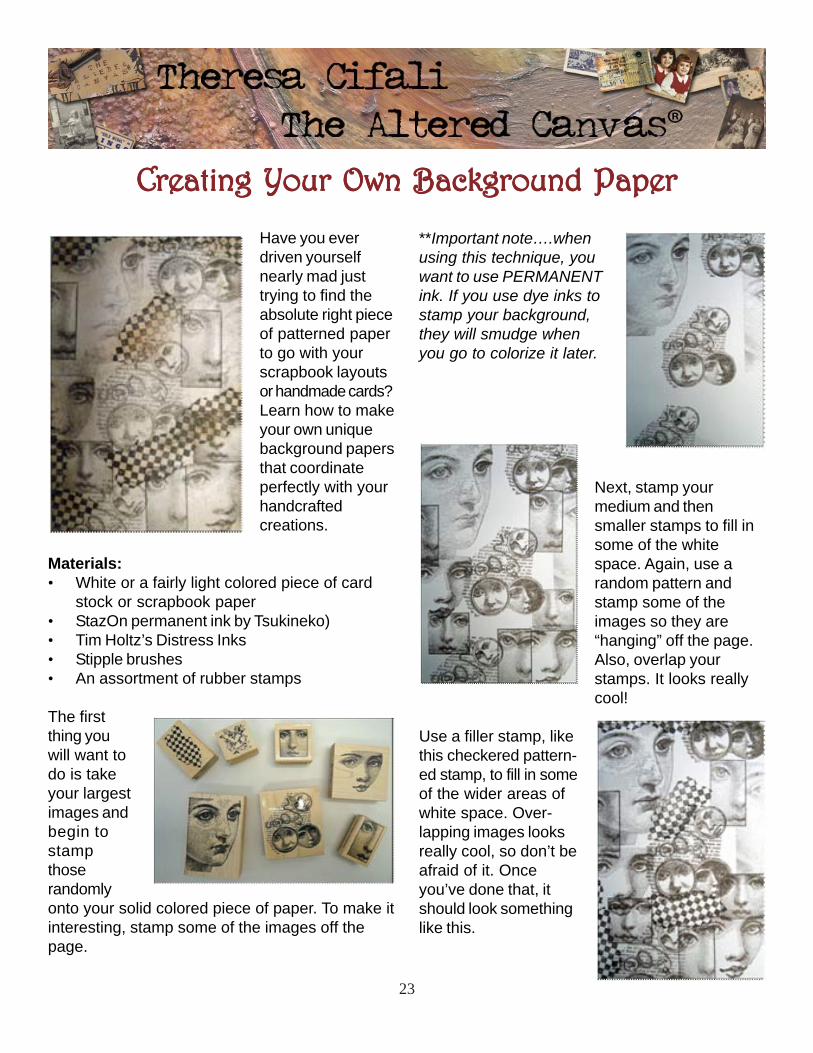
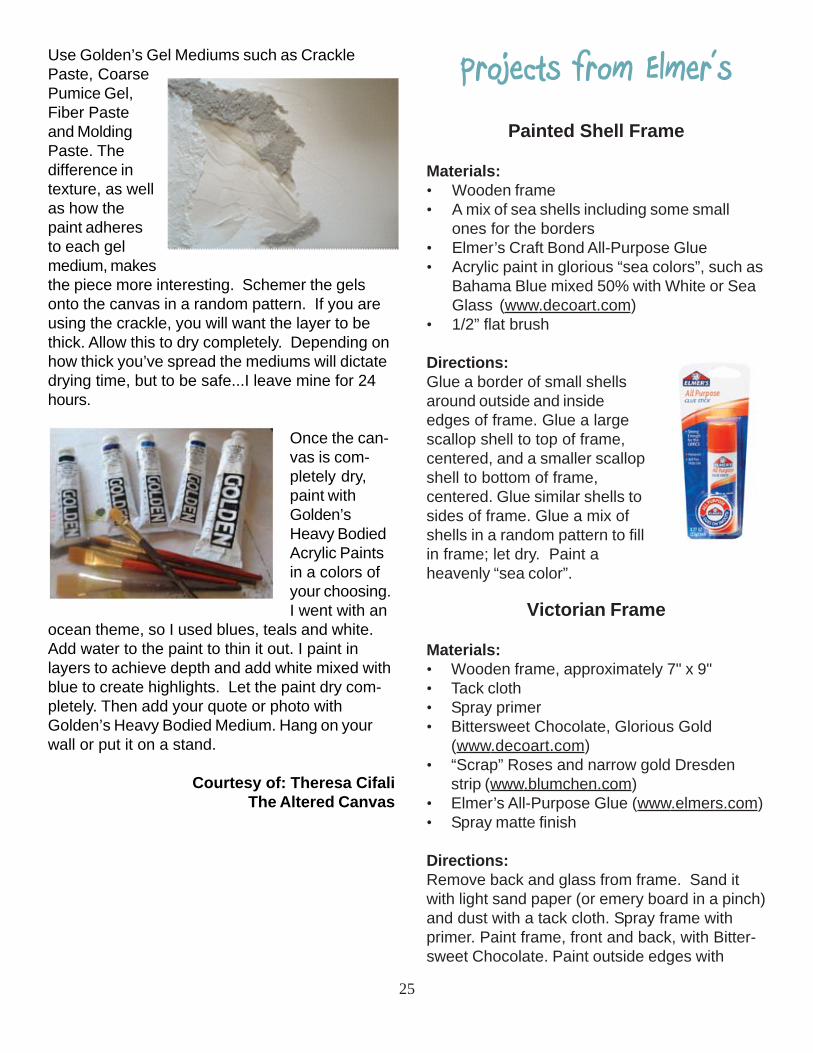
The firstthing youwill want todo is takeyour largestimages andbegin tostampthoserandomlyonto your solid colored piece of paper. To make itinteresting, stamp some of the images off thepage.
Creating Your Own Background PaperCreating Your Own Background PaperCreating Your Own Background PaperCreating Your Own Background PaperCreating Your Own Background Paper
**Important note….whenusing this technique, youwant to use PERMANENTink. If you use dye inks tostamp your background,they will smudge whenyou go to colorize it later.
Next, stamp yourmedium and thensmaller stamps to fill insome of the whitespace. Again, use arandom pattern andstamp some of theimages so they are“hanging” off the page.Also, overlap yourstamps. It looks reallycool!
Use a filler stamp, likethis checkered pattern-ed stamp, to fill in someof the wider areas ofwhite space. Over-lapping images looksreally cool, so don’t beafraid of it. Onceyou’ve done that, itshould look somethinglike this.
24
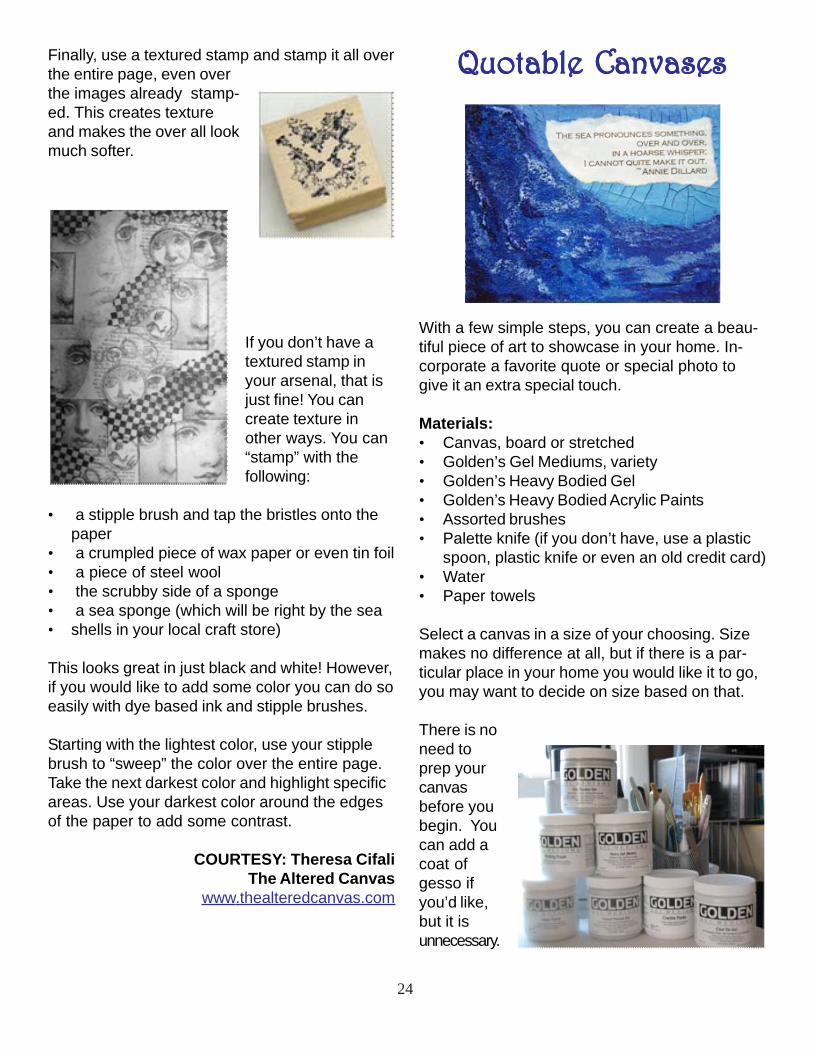
Finally, use a textured stamp and stamp it all overthe entire page, even overthe images already stamp-ed. This creates textureand makes the over all lookmuch softer.
If you don’t have atextured stamp inyour arsenal, that isjust fine! You cancreate texture inother ways. You can“stamp” with thefollowing:
• a stipple brush and tap the bristles onto thepaper
• a crumpled piece of wax paper or even tin foil• a piece of steel wool• the scrubby side of a sponge• a sea sponge (which will be right by the sea• shells in your local craft store)
This looks great in just black and white! However,if you would like to add some color you can do soeasily with dye based ink and stipple brushes.
Starting with the lightest color, use your stipplebrush to “sweep” the color over the entire page.Take the next darkest color and highlight specificareas. Use your darkest color around the edgesof the paper to add some contrast.
COURTESY: Theresa CifaliThe Altered Canvas
www.thealteredcanvas.com
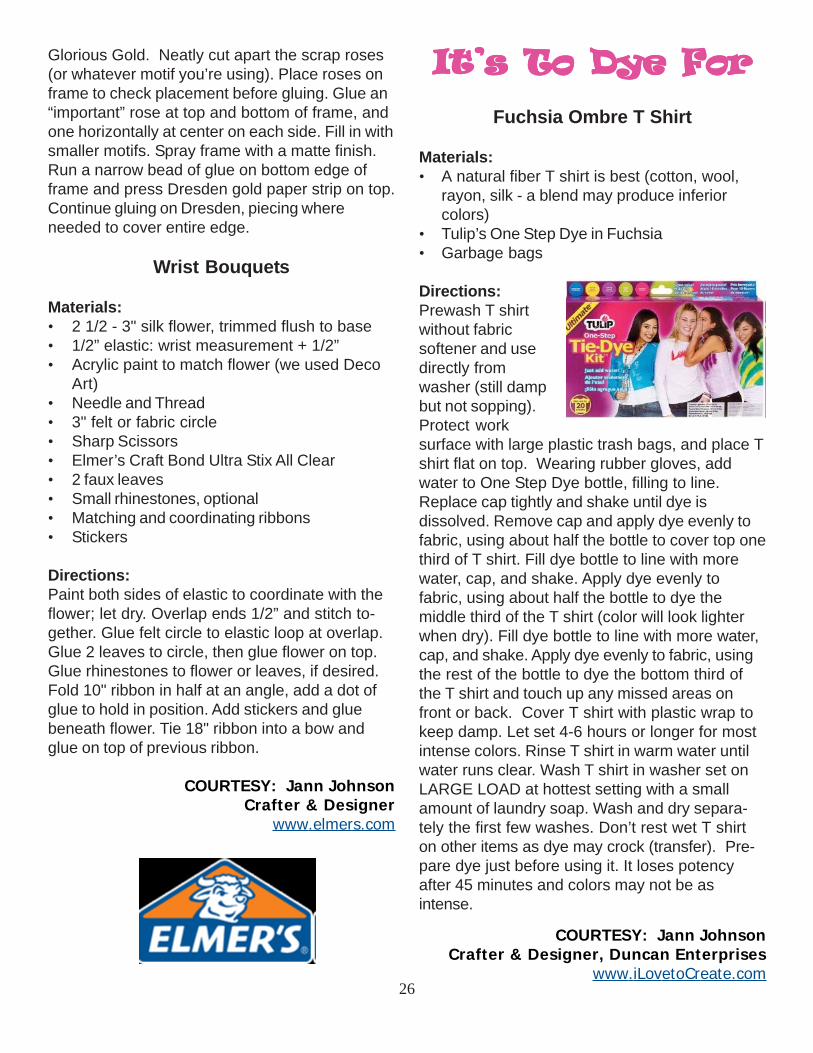
With a few simple steps, you can create a beau-tiful piece of art to showcase in your home. In-corporate a favorite quote or special photo togive it an extra special touch.
Materials:• Canvas, board or stretched• Golden’s Gel Mediums, variety• Golden’s Heavy Bodied Gel• Golden’s Heavy Bodied Acrylic Paints• Assorted brushes• Palette knife (if you don’t have, use a plastic
spoon, plastic knife or even an old credit card)• Water• Paper towels
Select a canvas in a size of your choosing. Sizemakes no difference at all, but if there is a par-ticular place in your home you would like it to go,you may want to decide on size based on that.
There is noneed toprep yourcanvasbefore youbegin. Youcan add acoat ofgesso ifyou’d like,but it isunnecessary.
Quotable CanvasesQuotable CanvasesQuotable CanvasesQuotable CanvasesQuotable Canvases
25
Use Golden’s Gel Mediums such as CracklePaste, CoarsePumice Gel,Fiber Pasteand MoldingPaste. Thedifference intexture, as wellas how thepaint adheresto each gelmedium, makesthe piece more interesting. Schemer the gelsonto the canvas in a random pattern. If you areusing the crackle, you will want the layer to bethick. Allow this to dry completely. Depending onhow thick you’ve spread the mediums will dictatedrying time, but to be safe...I leave mine for 24hours.
Once the can-vas is com-pletely dry,paint withGolden’sHeavy BodiedAcrylic Paintsin a colors ofyour choosing.I went with an
ocean theme, so I used blues, teals and white.Add water to the paint to thin it out. I paint inlayers to achieve depth and add white mixed withblue to create highlights. Let the paint dry com-pletely. Then add your quote or photo withGolden’s Heavy Bodied Medium. Hang on yourwall or put it on a stand.
Courtesy of: Theresa CifaliThe Altered Canvas
Painted Shell Frame
Materials:• Wooden frame• A mix of sea shells including some small
ones for the borders• Elmer’s Craft Bond All-Purpose Glue• Acrylic paint in glorious “sea colors”, such as
Bahama Blue mixed 50% with White or SeaGlass (www.decoart.com)
• 1/2” flat brush
Directions:Glue a border of small shellsaround outside and insideedges of frame. Glue a largescallop shell to top of frame,centered, and a smaller scallopshell to bottom of frame,centered. Glue similar shells tosides of frame. Glue a mix ofshells in a random pattern to fillin frame; let dry. Paint aheavenly “sea color”.
Victorian Frame
Materials:• Wooden frame, approximately 7" x 9"• Tack cloth• Spray primer• Bittersweet Chocolate, Glorious Gold
(www.decoart.com)• “Scrap” Roses and narrow gold Dresden
strip (www.blumchen.com)• Elmer’s All-Purpose Glue (www.elmers.com)• Spray matte finish
Directions:Remove back and glass from frame. Sand itwith light sand paper (or emery board in a pinch)and dust with a tack cloth. Spray frame withprimer. Paint frame, front and back, with Bitter-sweet Chocolate. Paint outside edges with
Projects from Elmer’s
Glorious Gold. Neatly cut apart the scrap roses(or whatever motif you’re using). Place roses onframe to check placement before gluing. Glue an“important” rose at top and bottom of frame, andone horizontally at center on each side. Fill in withsmaller motifs. Spray frame with a matte finish.Run a narrow bead of glue on bottom edge offrame and press Dresden gold paper strip on top.Continue gluing on Dresden, piecing whereneeded to cover entire edge.
Wrist Bouquets
Materials:• 2 1/2 - 3" silk flower, trimmed flush to base• 1/2” elastic: wrist measurement + 1/2”• Acrylic paint to match flower (we used Deco
Art)• Needle and Thread• 3" felt or fabric circle• Sharp Scissors• Elmer’s Craft Bond Ultra Stix All Clear• 2 faux leaves• Small rhinestones, optional• Matching and coordinating ribbons• Stickers
Directions:Paint both sides of elastic to coordinate with theflower; let dry. Overlap ends 1/2” and stitch to-gether. Glue felt circle to elastic loop at overlap.Glue 2 leaves to circle, then glue flower on top.Glue rhinestones to flower or leaves, if desired.Fold 10" ribbon in half at an angle, add a dot ofglue to hold in position. Add stickers and gluebeneath flower. Tie 18" ribbon into a bow andglue on top of previous ribbon.
COURTESY: Jann JohnsonCrafter & Designer
www.elmers.com
It’s To Dye ForIt’s To Dye ForIt’s To Dye ForIt’s To Dye ForIt’s To Dye For
Fuchsia Ombre T Shirt
Materials:• A natural fiber T shirt is best (cotton, wool,
rayon, silk - a blend may produce inferiorcolors)
• Tulip’s One Step Dye in Fuchsia• Garbage bags
Directions:Prewash T shirtwithout fabricsoftener and usedirectly fromwasher (still dampbut not sopping).Protect worksurface with large plastic trash bags, and place Tshirt flat on top. Wearing rubber gloves, addwater to One Step Dye bottle, filling to line.Replace cap tightly and shake until dye isdissolved. Remove cap and apply dye evenly tofabric, using about half the bottle to cover top onethird of T shirt. Fill dye bottle to line with morewater, cap, and shake. Apply dye evenly tofabric, using about half the bottle to dye themiddle third of the T shirt (color will look lighterwhen dry). Fill dye bottle to line with more water,cap, and shake. Apply dye evenly to fabric, usingthe rest of the bottle to dye the bottom third ofthe T shirt and touch up any missed areas onfront or back. Cover T shirt with plastic wrap tokeep damp. Let set 4-6 hours or longer for mostintense colors. Rinse T shirt in warm water untilwater runs clear. Wash T shirt in washer set onLARGE LOAD at hottest setting with a smallamount of laundry soap. Wash and dry separa-tely the first few washes. Don’t rest wet T shirton other items as dye may crock (transfer). Pre-pare dye just before using it. It loses potencyafter 45 minutes and colors may not be asintense.
COURTESY: Jann JohnsonCrafter & Designer, Duncan Enterprises
www.iLovetoCreate.com26
Crafts GuestsCrafts GuestsCrafts GuestsCrafts GuestsCrafts Guests
27
Shannon BielkeSha & Co292 W. Midway St.Payson, AZ 85541928-472-7404FAX: [email protected]
Laura BrayKaty Did Designs46 Northern Pine LoopAliso Viejo, CA 92656949-533-8296laura@katydid-designs.comwww.katydiddys.blogspot.com
Terese Cato5239 Leopard Spot Ct.North Las Vegas, NV [email protected]
Theresa CifaliThe Altered Canvas4 Broadway, Suite 8Valhalla, NY [email protected]
Eric DrexlerSulky of America, Inc.P O Box 494129Port Charlotte, FL 33949941-629-3199 #164800-874-4115 #[email protected]
Dianna EffnerExpressions, Inc.P O Box 206Jamestown, MO 65046660-849-2114800-452-2480sales@expressionsdolls.comwww.expressionsdolls.com
Drew EmborskyThe Crochet Dude404 W. 31st St.Houston, TX [email protected]
Jann Johnson1319 Jackson Ave.Long Island City, NY [email protected]
Franki Kohler2635 Charleston St.Oakland, CA [email protected] orwww.postmarkdart.com
Nancy Lovett10301 Nita Place NEAlbuquerque, NM [email protected]
Becky Meverden2634 Richard Dr.White Bear Lake, MN [email protected]
Sara MowerRoylco, Inc.P O Box 13409Anderson, SC 29624800-362-8656FAX: 800-461-7328e-mail: [email protected] Page: www.roylco.com
Michele MuskaSimplicity Creative Group6050 Dana WayAntioch, TN [email protected]
Maria NeriusFaveCrafts.com141 Salmon Dr. NEPalm Bay, FL [email protected]
Judy NovellaFairfield Processing Corp.88 Rose Hill Ave.P. O. Box 1157Danbury, CT 06810-1157203-744-2090 #265800-980-8040 #[email protected]

Donna SalazarDonna Salazar DesignsP O Box 61002Irvine, CA [email protected]
Evelyn TerhuneOzark CraftsP. O. Box 67Gilbert, AR 72636800-648-5084FAX: [email protected]
Megan ThomeEK Success Brands11125 NW Ambassador Dr., Suite 200Kansas City, MO 64153816-389-4150Fax: [email protected]
Barbara TrombleyArt Institute Glitter720 N. Balboa St.Cottonwood, AZ [email protected]
Laura West KongAuthor & Designer26346 Saint David St.Loma Linda, CA [email protected] or [email protected]
28
Recommended