2002-2006 Harley Davidson Touring Model - PCIII USB - 1i807-511
2002-2006 Harley Davidson
Installation Instructions
Dynojet Research 2191 Mendenhall Drive North Las Vegas, NV 89081 (800) 992-4993 www.powercommander.com
Parts List1 Power Commander1 USB Cable1 CD-ROM1 Installation Guide1 Power Adapter2 Power Commander Decals2 Dynojet Decals1 Velcro® Strip1 Alcohol Swab3 Zip ties
You can also download the PowerCommander software and latest mapsfrom our web site at:
www.powercommander.com
The ignition MUST be turnedOFF before installation!
PLEASE READ ALL DIRECTIONS BEFORE STARTING INSTALLATION
Button Adjustment Display
Faceplate Buttons
USB PortExpansion Port
Touring Models
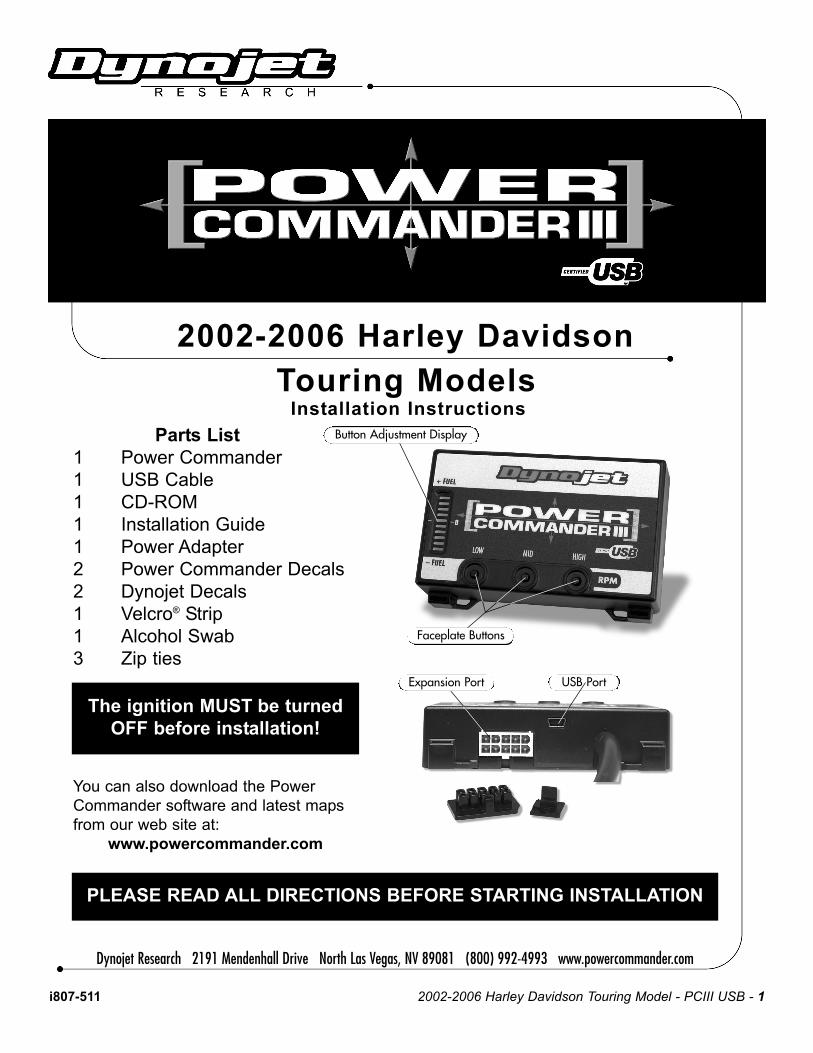
1 Remove the right hand sidecover.
2 Unplug the wiring harness fromthe ECM. Remove the two boltsthat hold the ECM to the batterytray (Fig. A).
3 Plug the black connector fromthe PCIII into the stock wiringharness (Fig. B).
Note: It is recommended to use dielec-tric grease on this connection.
4 Clean the backside of these twoconnectors with the suppliedalcohol swab. Install the sup-plied velcro to the backside(opposite release tab) of the con-nectors (Fig. C).
Fig.
AFi
g. B
Fig.
C
2002-2006 Harley Davidson Touring Model - PCIII USB - 2i807-511 www.powercommander.com
Remove these bolts
PCIII connectors
Stock connectors
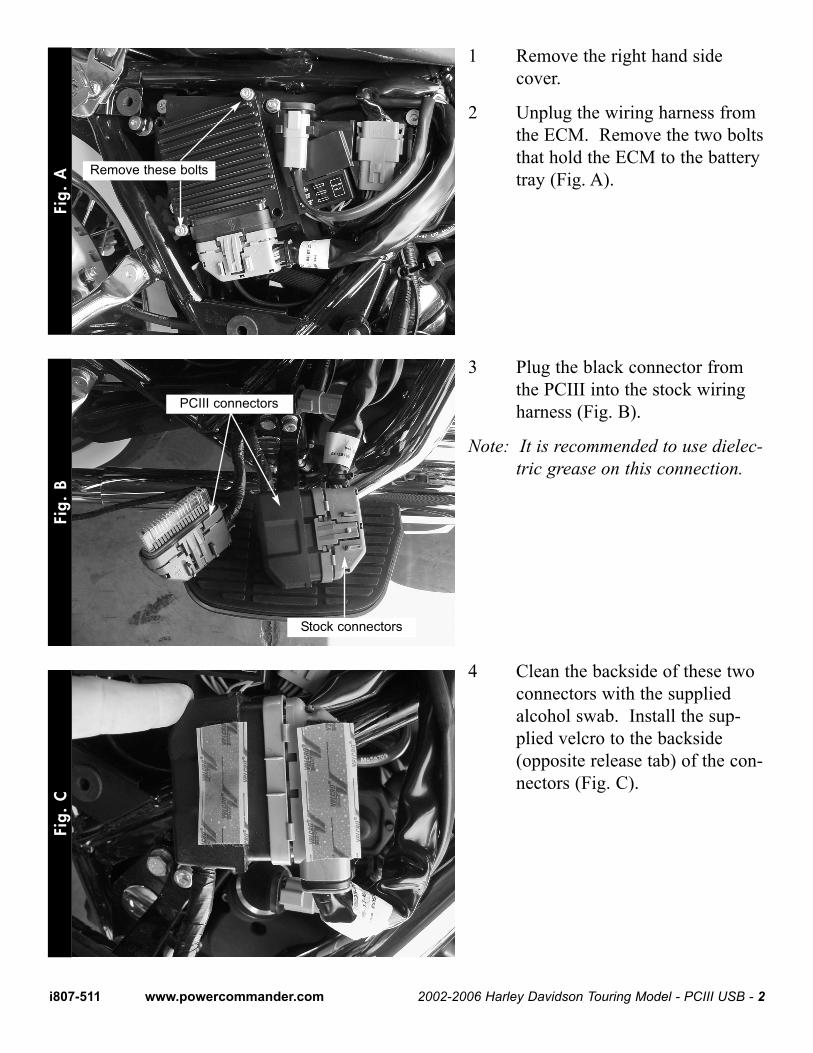
5 Remove the backing from thevelcro and mount connectors tothe bottom side of the batterytray (Fig. D).
6 Plug the grey connector from thePCIII into the ECM.
Note: It is recommended to use dielec-tric grease on this connection
.7 Reinstall the ECM. Beforetightening down the bolts, slideat least 1 zip tie behind the ECMto secure the PCIII (Fig. E).
Fig.
D
2002-2006 Harley Davidson Touring Model - PCIII USB - 3i807-511 www.powercommander.com
PCIII connector
Stock connector
Fig.
E
Zip tie
Fig.
F
The unit can also be installed asin Fig. F. Use a zip tied to holdthe connectors in place.
Recommended