1
Create a Create a Questionnaire Questionnaire
•Learning ObjectiveTo learn how to use the features in
Microsoft Publisher to create a questionnaire

2
Create a QuestionnaireCreate a Questionnaire
•Start Publisher•Click Blank Page Sizes in
the Popular Publication Types catalog
•Select Letter (Portrait) 8.5 X 11”
•Click Create

3
Create a QuestionnaireCreate a Questionnaire•Click Arrange, Layout Guides•Under the Margin Guides tab,
specify .5" margins for all four margins
•Click OK•Save the publication as Questionnaire Demonstration in the Microsoft Publisher folder

4
Create Horizontal Ruler BarCreate Horizontal Ruler Bar
•In Whole Page viewClick in the Horizontal
ruler bar and drag a ruler guide to 1.5" on the Vertical ruler bar

5
Insert TableInsert Table
• Click the Insert Table button on the Objects toolbar
• Draw a box that fills the entire space from the ruler guide to the bottom margin and from the left margin to the right margin29 rows8 columns
• Click OK

6
Format TableFormat Table• Drag the mouse to select all the cells in
the table• Click on Font & change to Tahoma• With table selected, right-click and
select Format Table• Under Presets, Click the Full Grid
buttonLower-right corner of the dialog boxSee picture above
• Click OK

7
Format TableFormat Table• In 100% view
Select the first two cells in row 1You can hold down Shift & Control & use the arrow key to select the cells
Right-clickClick Change Table, Merge CellsKey… Gender

8
Format TableFormat Table
•Select the next six cells in row 1Merge themKey… Age
•Select Gender & AgeChange both to Bold

9
Enter TextEnter Text• Use the attached handout to enter the text
Merge cells as requiredBold font as required
Do not do other changes at this time!You may want to add the Merge Cells
button to the toolbarClick View, Toolbars, CustomizeUnder the Commands tab, under Categories Categories, select Table
Find Merge Cells under CommandsDrag to toolbarClose box

10
Enhance the TableEnhance the Table•Select all of row 1•Click the Fill Color list arrow on
the Formatting toolbar•Click More Fill Colors•Select Accent 4
5th one over•Repeat for each of the rows that
contain bold text9 rows total

11
Add 2 RectanglesAdd 2 Rectangles• Above the table
Use the Rectangle button on the Objects toolbar to draw a box
With the Rectangle selected, right-click & select Format AutoShape and format it as follows….15" height under Size tab.15" width under Size tabVertical position .8” under Layout tabHorizontal position .8” under Layout tabFill color White under Colors and Lines tab
Click OK

12
Add 2 RectanglesAdd 2 Rectangles
•Click the Zoom list arrow on the toolbar, then click 200%
•With the Rectangle selected,Press [Ctrl] [C]Press [Ctrl] [V]
Enabling you to copy & paste a 2nd rectangle BEFORE the next step
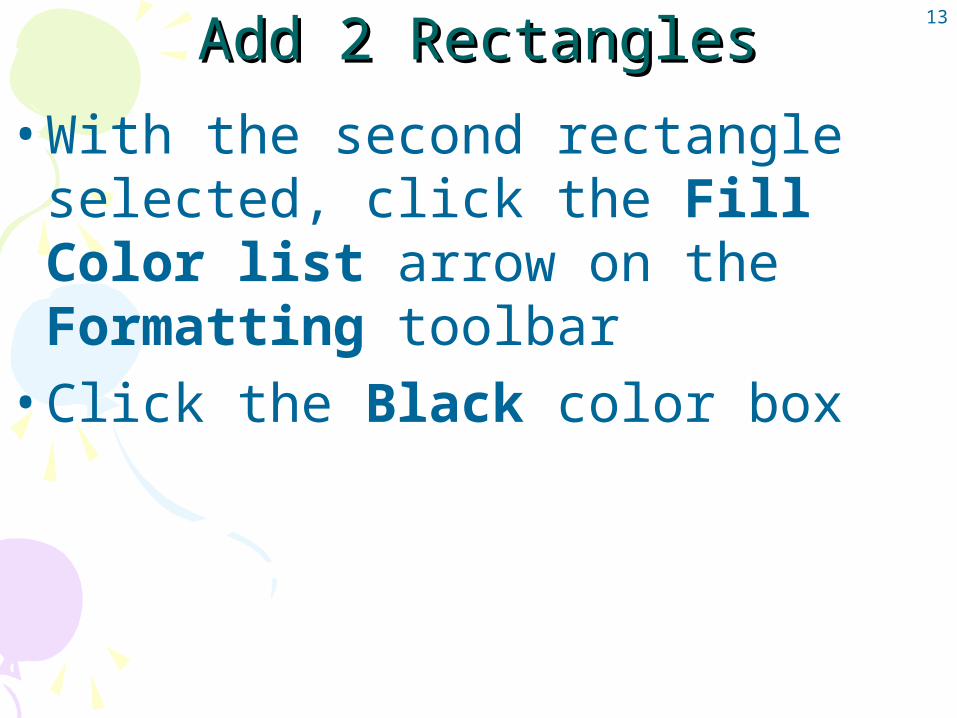
13
Add 2 RectanglesAdd 2 Rectangles
•With the second rectangle selected, click the Fill Color list arrow on the Formatting toolbar
•Click the Black color box

14
Add 2 RectanglesAdd 2 Rectangles• Position second rectangle
Horizontal position .82“Vertical position .82“
• With Rectangle selected, click Arrange• Point Order• Click Send to Back
Save the publication as Questionnaire Demonstration in the Microsoft Publisher folder

15
Insert Check BoxesInsert Check Boxes• Drag the pointer over the two boxes to select
them• Click Arrange• Click Group• Right-click & Select Format Object• Click the Layout tab
Horizontal position 1.125”Vertical position 2.344”
• Click OKThis should have placed check box in the “Male” cellIf it didn’t, use your arrow keys to move it into the
“Male” cell similar in position to handout attached to these slides

16Check BoxesCheck Boxes• With the check box selected
Press [Ctrl] [C] to copy itThen press [Ctrl] [V] to paste it
• Drag the check box into the “Female” cellUse mouse & arrow keys to modify the
horizontal position of the check box so that it appears placed within the cell similar to the check box in the “Male” cellDon’t worry about lining up the top of the check boxes at this time.
You will use the Align and Distribute Align and Distribute command to align the boxes vertically later in this exercise.

17
Check BoxesCheck Boxes
• Press [Ctrl] [V] to paste again• Move this check box into the “12-
14” cellUse the arrow keys to position the check box horizontally
• Continue to use [Ctrl] [V] to paste & position all the check boxes required for the second row of the questionnaire

18
Check BoxesCheck Boxes• Switch to 100% view• Press & hold Shift…
Click all of the check boxes in row 2 to select them
Click ArrangePoint to Align or DistributeClick Align Top
• Click ArrangeClick Group

19
Check BoxesCheck Boxes
•Press [Ctrl] [C] to copy•Press [Ctrl] [V] to paste•Use your mouse & arrow keys
to move the grouped cells down to row 10Contains the number of
hours options

20Check BoxesCheck Boxes
•With the check boxes still selected…Click ArrangeClick Ungroup
•Copy and paste check boxes into the remaining required cells of the questionnaire so that it appears as shown on the attached handout
21
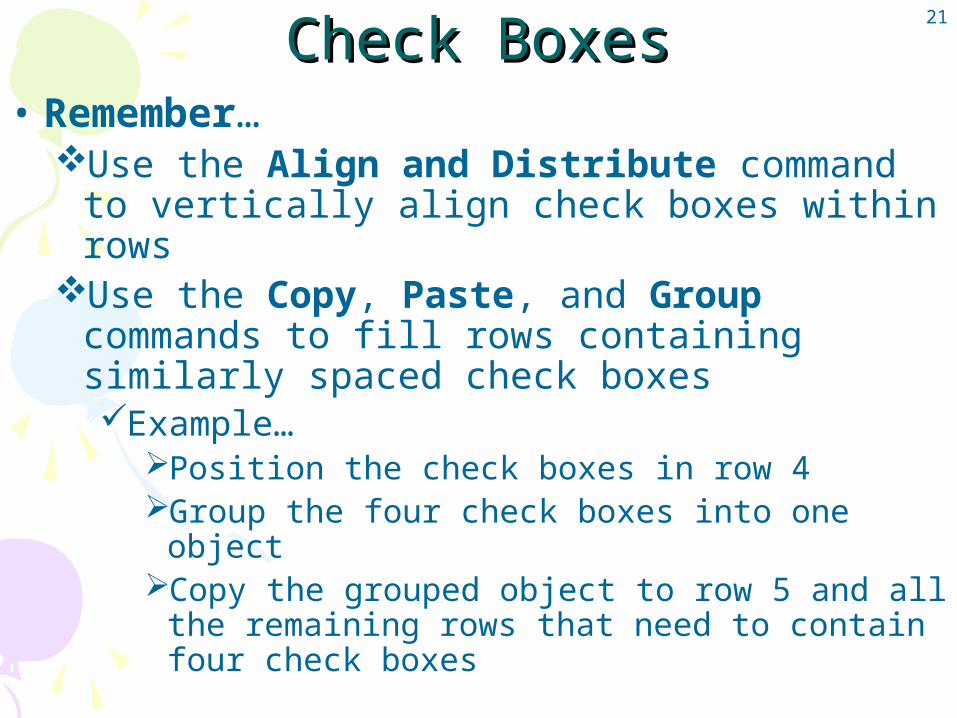
Check BoxesCheck Boxes• Remember…
Use the Align and Distribute command to vertically align check boxes within rows
Use the Copy, Paste, and Group commands to fill rows containing similarly spaced check boxesExample…
Position the check boxes in row 4Group the four check boxes into one objectCopy the grouped object to row 5 and all
the remaining rows that need to contain four check boxes

22
Beginning Survey TextBeginning Survey Text
•Create a text box that covers all of the white area at the top of the surveySurrounded by blue borders
and above the Gender/Age row

23
Beginning Survey TextBeginning Survey Text• Enter the title and introductory
paragraph as shown in the handoutHit Enter once before adding any
textAll text should still be in TahomaHeading…
18 pt Bold CenterParagraph 13 pt
Press Enter once before beginning paragraph
Do not indent paragraph

24
FinalizeFinalize•Create a text box at the bottom
of the page containing your name and computer number as shown on handout
•Save the publication as Questionnaire Demonstration in the Microsoft Publisher folder
•Print & turn in for a grade
Recommended