© 2003 Xilinx, Inc. All Rights Reserved
FPGA Editor: Viewing and Editing a Routed Design

FPGA Editor - 18 - 2 © 2003 Xilinx, Inc. All Rights Reserved For Academic Use Only
Objectives
After completing this module, you will be able to: • Use the FPGA Editor to view device resources• Connect the internal nets of an FPGA to output pins (Insert Probes)• Determine the specific resources used by your design• Make minor changes to your design without re-implementing

FPGA Editor - 18 - 3 © 2003 Xilinx, Inc. All Rights Reserved For Academic Use Only
Outline
• FPGA Editor Basics• Viewing Device Resources
and Constrained Paths • Adding a Probe• Making Minor Changes• Summary• Appendix: Creating a Macro
Rhett Whatcott:
v6.1: Changed the order of the sections - moved “Viewing Device Resources…” as 2nd section.
Rhett Whatcott:
v6.1: Changed the order of the sections - moved “Viewing Device Resources…” as 2nd section.

FPGA Editor - 18 - 4 © 2003 Xilinx, Inc. All Rights Reserved For Academic Use Only
What Does the FPGA Editor Do?
• The FPGA Editor is a graphical application
– Displays device resources– Precise layout of chosen
device• The FPGA Editor is commonly
used to:– View device resources– Make minor modifications
• Done late in the design cycle• Does not require re-
implementation of the design– Insert Probes
• Used for in circuit testing
Rhett Whatcott:
v6.1: Next slide was removed, titled: FPGA Editor Input Files
Rhett Whatcott:
v6.1: Next slide was removed, titled: FPGA Editor Input Files

FPGA Editor - 18 - 5 © 2003 Xilinx, Inc. All Rights Reserved For Academic Use Only
When to Use the FPGA Editor
• Use the FPGA Editor to:– View the design’s layout– Drive a signal to an output pin for testing (inserting a probe)– Add logic or special architectural features to your design without having to
recompile the design
• Do not use the FPGA Editor to:– Floorplan– Carelessly control the place and route

FPGA Editor - 18 - 6 © 2003 Xilinx, Inc. All Rights Reserved For Academic Use Only
What the FPGA Editor Cannot Do
• The FPGA Editor cannot:
– Add additional logic from a second netlist• Because translation (NGDBuild) is completed • Additional logic would need to be hand-placed and routed
– Make modification to design files • HDL and netlist files will not reflect modifications

FPGA Editor - 18 - 7 © 2003 Xilinx, Inc. All Rights Reserved For Academic Use Only
Design Flow Diagram
• Xilinx implementation flow – Entry points for FPGA Editor
• Placing and routing critical components
– Before implementation (Post-MAP)
• Making minor changes – After implementation (Post-PAR)
MAP
NCD
NCD & PCF
PAR
BITGEN
FPGA Editor
BIT
Rhett Whatcott:
v6.1: Changed notes
Removed next slide.
Rhett Whatcott:
v6.1: Changed notes
Removed next slide.
Remember to document the changes to your design, becauseyour netlist will not reflect the changes made by the FPGA Editor!

FPGA Editor - 18 - 8 © 2003 Xilinx, Inc. All Rights Reserved For Academic Use Only
History Window
Push Button Panel
World Window
Menu Bar
Array Window
List Window
FPGA EditorRhett Whatcott:
v6.1: Removed next two slides.
Rhett Whatcott:
v6.1: Removed next two slides.

FPGA Editor - 18 - 9 © 2003 Xilinx, Inc. All Rights Reserved For Academic Use Only
Navigating
• Zoom
• Use the World window to keep track of your location on the die when you are zoomed in
Rhett Whatcott:
v6.1: New slide, replacing the next two.
Rhett Whatcott:
v6.1: New slide, replacing the next two.
• Array window resources

FPGA Editor - 18 - 10 © 2003 Xilinx, Inc. All Rights Reserved For Academic Use Only
List Window
• Easiest way to select objects in your design• Displays
– Components– Nets– Paths– Layers– Constraints– Macros
• Name Filter search feature– Limit the number of elements shown– Use Wildcards (* and ?)
• Ability to highlight components– Choose from 15 different colors
Rhett Whatcott:
v6.1: retranslate.
Rhett Whatcott:
v6.1: retranslate.
FPGA Editor - 18 - 11 © 2003 Xilinx, Inc. All Rights Reserved For Academic Use Only
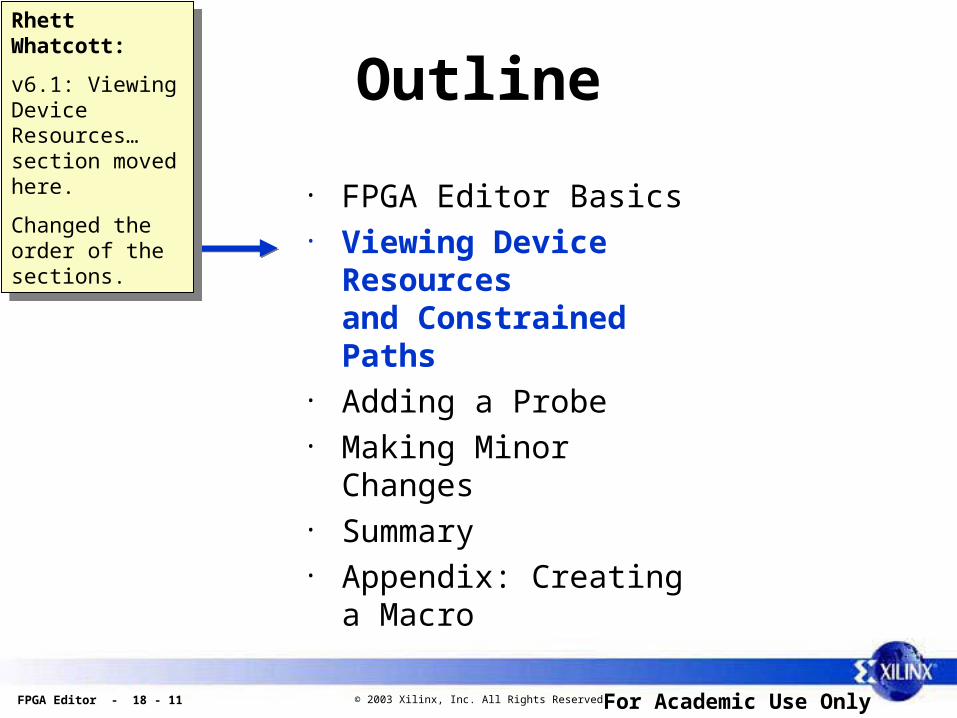
Outline
• FPGA Editor Basics• Viewing Device Resources
and Constrained Paths • Adding a Probe• Making Minor Changes• Summary• Appendix: Creating a Macro
Rhett Whatcott:
v6.1: Viewing Device Resources… section moved here.
Changed the order of the sections.
Rhett Whatcott:
v6.1: Viewing Device Resources… section moved here.
Changed the order of the sections.
FPGA Editor - 18 - 12 © 2003 Xilinx, Inc. All Rights Reserved For Academic Use Only
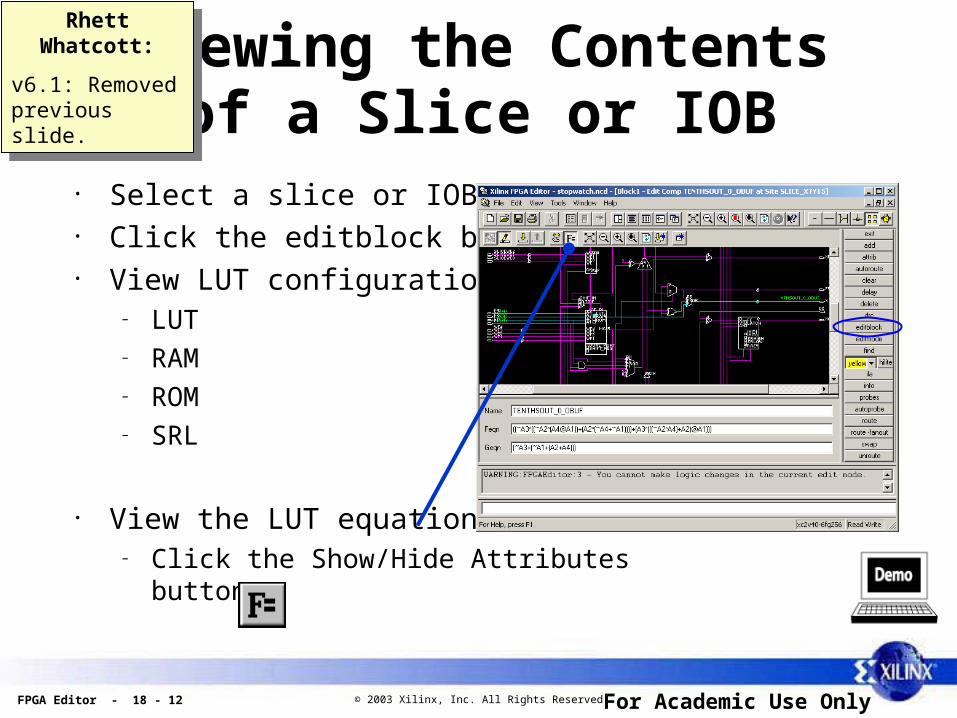
Viewing the Contentsof a Slice or IOB
• Select a slice or IOB • Click the editblock button• View LUT configuration
– LUT– RAM– ROM– SRL
• View the LUT equations– Click the Show/Hide Attributes
button
Rhett Whatcott:
v6.1: Removed previous slide.
Rhett Whatcott:
v6.1: Removed previous slide.
FPGA Editor - 18 - 13 © 2003 Xilinx, Inc. All Rights Reserved For Academic Use Only
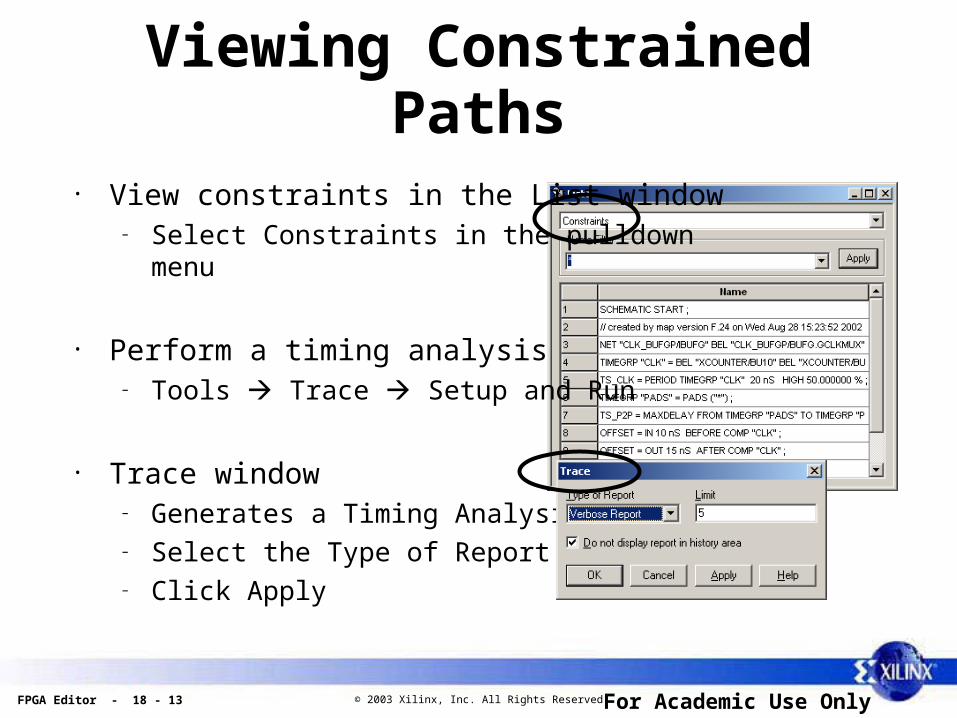
Viewing Constrained Paths
• View constraints in the List window – Select Constraints in the pulldown
menu
• Perform a timing analysis – Tools Trace Setup and Run
• Trace window– Generates a Timing Analysis report – Select the Type of Report – Click Apply
FPGA Editor - 18 - 14 © 2003 Xilinx, Inc. All Rights Reserved For Academic Use Only
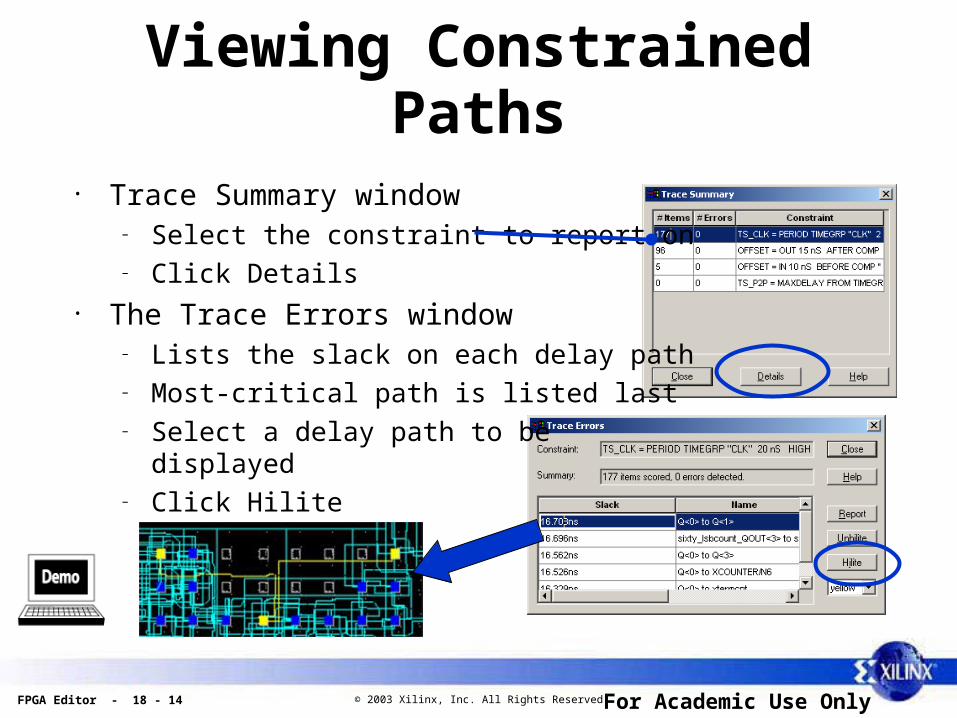
Viewing Constrained Paths
• Trace Summary window– Select the constraint to report on– Click Details
• The Trace Errors window– Lists the slack on each delay path– Most-critical path is listed last – Select a delay path to be
displayed– Click Hilite

FPGA Editor - 18 - 15 © 2003 Xilinx, Inc. All Rights Reserved For Academic Use Only
Calculating Skew
• Determine net delays – History window shows:
• Net destination• Associated delay
• Click the “attrib” button– Located on the Push Button Panel– Select Pins tab
• Determine skew– (Longest Delay) - (Shortest Delay)
Rhett Whatcott:
v6.1: Moved location of this slide… retranslate.
Rhett Whatcott:
v6.1: Moved location of this slide… retranslate.

FPGA Editor - 18 - 16 © 2003 Xilinx, Inc. All Rights Reserved For Academic Use Only
Viewing Multiple Windows
• Multiple Array windows can be viewed by using the command:
– Window New Array Window
– List, Array, or World window can be selected
• Useful for viewing different areas of interest at the same time
• View and edit the sources and destinations of routes
FPGA Editor - 18 - 17 © 2003 Xilinx, Inc. All Rights Reserved For Academic Use Only
Outline
• FPGA Editor Basics• Viewing Device Resources
and Constrained Paths • Adding a Probe• Making Minor Changes• Summary• Appendix: Creating a Macro
Rhett Whatcott:
v6.1: Changed the order of the sections - moved “Viewing Device Resources…” as 2nd section.
Rhett Whatcott:
v6.1: Changed the order of the sections - moved “Viewing Device Resources…” as 2nd section.

FPGA Editor - 18 - 18 © 2003 Xilinx, Inc. All Rights Reserved For Academic Use Only
Adding a Probe:Probes GUI
• Ties an internal signal to an output pin
• Probes are managed in the Probes GUI
– Click the “probes” button on the Push Button Panel
– Tools Probes
• Probes can be added, deleted, edited, or highlighted

FPGA Editor - 18 - 19 © 2003 Xilinx, Inc. All Rights Reserved For Academic Use Only
Adding a Probe:Probes GUI
• Click the Add button– Opens the Define Probe
window• Select desired probes
to Delete, Edit, or Hilite• After a Probe has been
added:– Click Bitgen to create
new bitfile– Click Download to open
iMPACT programmer – Document the change

FPGA Editor - 18 - 20 © 2003 Xilinx, Inc. All Rights Reserved For Academic Use Only
Defining a Probe
• Enter a Pin Name• Select Net to be probed• Click OK
• Filter feature to limit net options
• Method – Automatic routing
• Selects the shortest route • Possible long wait times
– Manual routing • Specific pins can be selected • Selects the shortest route if multiple pins are selected
Rhett Whatcott:
v5.2: Changed Notes for Demo.
Rhett Whatcott:
v5.2: Changed Notes for Demo.

FPGA Editor - 18 - 21 © 2003 Xilinx, Inc. All Rights Reserved For Academic Use Only
Outline
• FPGA Editor Basics• Viewing Device Resources
and Constrained Paths • Adding a Probe• Making Minor Changes• Summary• Appendix: Creating a Macro
Rhett Whatcott:
v6.1: Changed the order of the sections - moved “Viewing Device Resources…” as 2nd section.
Rhett Whatcott:
v6.1: Changed the order of the sections - moved “Viewing Device Resources…” as 2nd section.

FPGA Editor - 18 - 22 © 2003 Xilinx, Inc. All Rights Reserved For Academic Use Only
Adding Components
• Adding a Component– Select the resource (slice, IOB, etc.) from the Array window – Click the add button– Complete the Component Properties box
• All resources can be added
Rhett Whatcott:
v6.1: retranslate.
Rhett Whatcott:
v6.1: retranslate.

FPGA Editor - 18 - 23 © 2003 Xilinx, Inc. All Rights Reserved For Academic Use Only
Adding Component Pins
• Adding component pins– Select pin– Select “add” in push button panel– Complete Properties box
• Pin name
Rhett Whatcott:
v6.1: New slide.
Rhett Whatcott:
v6.1: New slide.

FPGA Editor - 18 - 24 © 2003 Xilinx, Inc. All Rights Reserved For Academic Use Only
Modifying LUTs
• Modifying the equations – Click the Show/Hide Attributes
button– Complete the Component
Properties box • * (AND), + (OR), ~ (NOT), @
(XOR)– Select Apply changes
• Tool performs a Design Rule Check (DRC)
• Click the Save Changes and Close Window button
Rhett Whatcott:
v6.1: retranslate.
Added demo.
Rhett Whatcott:
v6.1: retranslate.
Added demo.

FPGA Editor - 18 - 25 © 2003 Xilinx, Inc. All Rights Reserved For Academic Use Only
Modifying Other Slice Resources
• Add resources– Select properties of resource – Click on pin to route signal paths – This will automatically route
the signals inside the slice
• Click the Apply button– Performs a Design Rule Check
• Click the Save Changes and Close Window button
Rhett Whatcott:
v6.1: Added demo.
Rhett Whatcott:
v6.1: Added demo.

FPGA Editor - 18 - 26 © 2003 Xilinx, Inc. All Rights Reserved For Academic Use Only
Routing Signals
• Routing setup: Tools Route Auto Route Setup…– Auto Route Design: Options used to auto route the entire
design (default values)• Timespec Driven: Auto routes signals to meet timing
constraints– Generally best results
• Allow Pin Swap: Allow for pin swapping during auto routing. Enables better use of resources
– Auto Route Selection: Options used for a selected route (pins, nets, components)
• Delay driven: Auto routes selected item as fast as possible– Generally best results
• Resource Driven: Minimizes use of resources (wires and pips) during auto route
– Default
Rhett Whatcott:
v6.1: New slide.
Rhett Whatcott:
v6.1: New slide.
FPGA Editor - 18 - 27 © 2003 Xilinx, Inc. All Rights Reserved For Academic Use Only
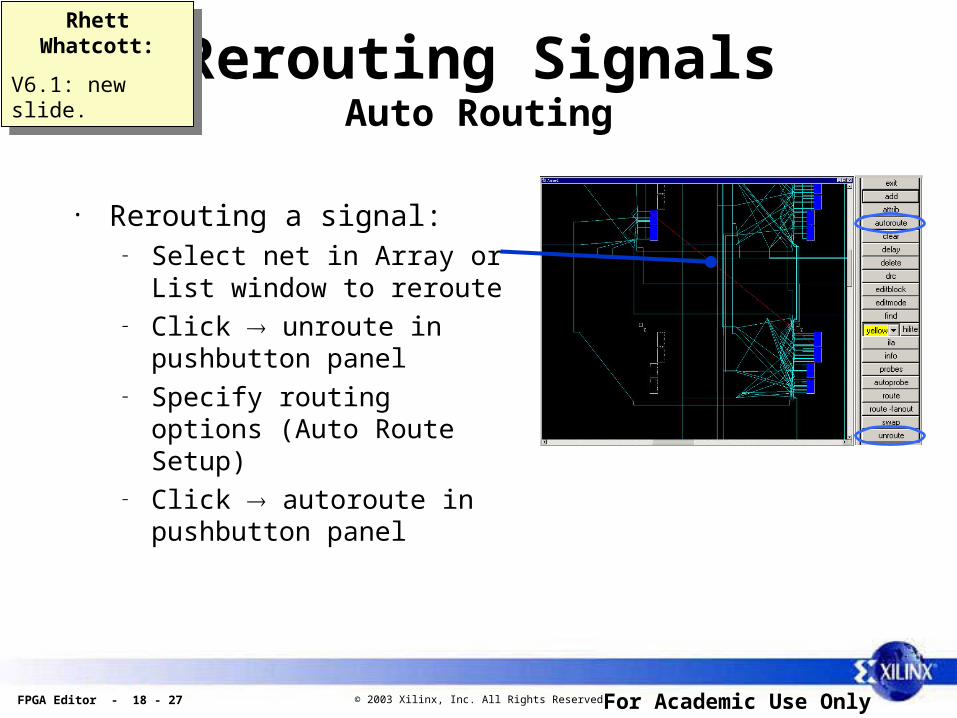
Rerouting SignalsAuto Routing
• Rerouting a signal:– Select net in Array or List window to
reroute– Click unroute in pushbutton panel– Specify routing options (Auto Route
Setup)– Click autoroute in pushbutton
panel
Rhett Whatcott:
V6.1: new slide.
Rhett Whatcott:
V6.1: new slide.

FPGA Editor - 18 - 28 © 2003 Xilinx, Inc. All Rights Reserved For Academic Use Only
Manual Routing Signals I
• Select site pins– Click the site pin of a resource– Hold down the Shift key– Click another site pin
• Route the net– Click the “route” button
• Automatically chooses the shortest route between site pins
Rhett Whatcott:
v6.1: Changed Heading.
Rhett Whatcott:
v6.1: Changed Heading.

FPGA Editor - 18 - 29 © 2003 Xilinx, Inc. All Rights Reserved For Academic Use Only
Manual Routing Signals II
• Select object to route– Click the site pin of a
resource– Hold down the Shift key– Click net– Click subsequent nets
• Route the net– Click the “route” button
• Routes one net segment
Rhett Whatcott:
v6.1: Changed Heading.
Rhett Whatcott:
v6.1: Changed Heading.

FPGA Editor - 18 - 30 © 2003 Xilinx, Inc. All Rights Reserved For Academic Use Only
Manual Routing Signals III
• Select object to route– Click previously
routed segment– Hold down the Shift key– Click site pin
• Route the net– Click the “route” button
• Automatically chooses the shortest route from segment to site pins
Rhett Whatcott:
v6.1: Changed Heading.
Rhett Whatcott:
v6.1: Changed Heading.

FPGA Editor - 18 - 31 © 2003 Xilinx, Inc. All Rights Reserved For Academic Use Only
Adding an External IOB
• Adding an IOB– Select IOB
• Make certain the IOB is bonded, unbonded IOBs have X in IOB box
– Select “add” in pushbutton panel– Edit Properties, click OK
• Use the editblock command to edit resources
Rhett Whatcott:
v6.1: retranslate.
Rhett Whatcott:
v6.1: retranslate.

FPGA Editor - 18 - 32 © 2003 Xilinx, Inc. All Rights Reserved For Academic Use Only
IOB Resources
• Input/Output registers, output 3-state, I/O standard, drive strength, and slew rate control can be viewed and modified
Rhett Whatcott:
v6.1: Changed heading.
Removed next slide.
Rhett Whatcott:
v6.1: Changed heading.
Removed next slide.

FPGA Editor - 18 - 33 © 2003 Xilinx, Inc. All Rights Reserved For Academic Use Only
Outline
• FPGA Editor Basics• Viewing Device Resources
and Constrained Paths • Adding a Probe• Making Minor Changes• Summary• Appendix: Creating a Macro
Rhett Whatcott:
v6.1: Changed the order of the sections - moved “Viewing Device Resources…” as 2nd section.
Rhett Whatcott:
v6.1: Changed the order of the sections - moved “Viewing Device Resources…” as 2nd section.

FPGA Editor - 18 - 34 © 2003 Xilinx, Inc. All Rights Reserved For Academic Use Only
Review Questions
• List some of the common uses for the FPGA Editor
• When should the FPGA Editor not be used?
• What are the benefits of inserting a probe?
• If any modifications were made using the FPGA Editor, it is important to __________ any changes. Why?

FPGA Editor - 18 - 35 © 2003 Xilinx, Inc. All Rights Reserved For Academic Use Only
Answers
• List some of the common uses for the FPGA Editor– View device resources– Make minor modification– Insert probes– Generate a new bitstream
• When should the FPGA Editor not be used?– FPGA Editor should not be used to Floorplan a design or control the place
and route

FPGA Editor - 18 - 36 © 2003 Xilinx, Inc. All Rights Reserved For Academic Use Only
Answers
• What are the benefits of inserting a probe?– The probes capability makes it possible to route a signal to an output
pin for testing, and generate a new bitstream for the design without re-implementing
• If any modifications were made using the FPGA Editor, it is important to Document any changes. Why?
– It is necessary to document your changes because the netlist will not reflect the changes made by the FPGA Editor

FPGA Editor - 18 - 37 © 2003 Xilinx, Inc. All Rights Reserved For Academic Use Only
Summary
• The FPGA Editor provides you with a tremendous amount of design control
• Most customers use this tool for understanding the device utilization or adding test probes
• Careful use of this tool is important because indiscriminate movement of logic can severely reduce the likelihood of getting good design performance and utilization
• The FPGA Editor allows you to make minor changes to a design without re-implementing your design
• Document any changes to your design because your netlist will not reflect the changes made by the FPGA Editor

FPGA Editor - 18 - 38 © 2003 Xilinx, Inc. All Rights Reserved For Academic Use Only
Where Can I Learn More?
• FPGA Editor Help– http://support.xilinx.com Software Manuals– Help Help Topics
• Tech Tips– http://support.xilinx.com Tech Tips Floorplanner & FPGA Editor
Recommended