Embed Size (px)
Citation preview
RECONDITIONBATTERY.COM
1
You Too, Can Recondition Batteries
The Complete Story
Copyright: www.reconditionbattery.com , 2009
Copying, reselling, or giving away this e-book is not permitted

RECONDITIONBATTERY.COM
2
Table of Contents Introduction Why Do Batteries Need to be Reconditioned? Types of Rechargeable Batteries Proper TLC for Your Rechargeable Batteries Useful Equipment and Supplies How to Test Batteries Battery Testing with a Multimeter Testing Batteries with a Battery Tester Testing Batteries with a Battery Analyzer How to Recondition a Rechargeable Battery How to Rejuvenate a Rechargeable Battery What to Do About a Reversed Cell How to Recondition Car Batteries (Lead Acid type) Lead Acid Battery Background What does a Lead Acid Battery Look Like Inside? What is Sulfation and How Does it Affect a Battery?
Equipment for Lead Acid Battery Work Testing a Lead Acid Battery
Reconditioning Lead Acid Batteries
RECONDITIONBATTERY.COM
3
Types of Lead Acid Batteries
How to Maintain Your Lead Acid Batteries
Disclaimer This e-book is intended for informational purposes only. We are not responsible for any injury or damage to property that may take place. Please take the precautions outlined in the next section when working with batteries. Precautions
Use a pair of safety goggles and a pair of high voltage gloves when doing any of the procedures with batteries described in this e-book.
Do not wear jewelry while working on batteries.
A battery's negative terminal should never be connected directly to its positive terminal. This would cause a “short circuit” and result in a large current flow.
Be sure that you always connect the positive lead of an instrument to the positive battery terminal and the negative lead to the negative battery terminal. Reversing these connections could damage the instrument.
Lead-acid batteries contain sulfuric acid, which is very corrosive. Use goggles, acid gloves, and an apron (and great care) when handling them.
Recharge lead-acid batteries in a well-ventilated area.
RECONDITIONBATTERY.COM
4
Introduction Rechargeable batteries are everywhere these days: cordless tools, laptop computers, cordless phones, and cell phones, just to name a few. What's more, the pesky things are always wearing out, not taking a charge, or running down in a very short time. Well… now there's something you can do about it! This publication contains a lot of information about rechargeable batteries, such as the different types, how to take care of them to make them last longer, how to test one to see if it can be reconditioned, how to recondition rechargeable batteries for electronic devices, and finally a section on reconditioning car batteries. You can use this information to take care of your own rechargeable batteries, to help out your friends, or perhaps even to make some money on the side with a part-time business. Why Do Rechargeable Batteries Need to be Reconditioned? When you first buy a device with a rechargeable battery everything works fine. You usually plug it in to fully charge the battery before using the device. Then you use it for awhile and when it needs charging, you plug it in again. This goes on for quite awhile. Just like most everything else in this world, however, rechargeable batteries wear out too. This wearing out often shows up as less and less useful time between the need to charge the battery again. Often the battery is then discarded and a new one is purchased. In many cases, however, doing the reconditioning described in this book will bring the battery back to life and make it work almost like new again. The decreasing useful time between charges for a rechargeable battery is due to what is called the memory effect. The type of battery most subject to the memory effect is the Ni-Cd. The newer Ni-MH are affected to a lesser extent– more about that later. For these type batteries, it is helpful to allow the battery to discharge nearly completely and then charge it
RECONDITIONBATTERY.COM
5
completely. If you frequently allow the battery to discharge only halfway before recharging it, the battery “remembers” that and loses the ability to discharge completely. The actual cause for the memory effect is growth of the originally finely divided crystals inside a Ni-Cad battery. The details of that are not really important here. What is important is the fact that this process can often be reversed and the battery can be revived using the procedures described in this book. Another important thing to keep in mind is that doing some preventive maintenance (tender loving care) as described in a later section can keep your batteries going longer with good performance. You may have noticed that car batteries wear out also, usually at a very inconvenient time and place! The reason that automobile (lead acid) batteries wear out is different than the reason that Ni-Cd and similar batteries do. Lead acid batteries don’t suffer from the memory effect, so it doesn’t matter that the battery in your car gets recharged whenever the car is running, even though it is not completely discharged. In fact it is bad for lead acid batteries to allow them to discharge completely. The cause for lead acid batteries wearing out is the effect of undesirable chemical reactions that take place slowly within the battery. Once again the details are not important to us. In this case also, however, many “dead” lead acid batteries can be brought back to life, using the procedures outlined in this book, so that they work properly again. Types of Rechargeable Batteries Rechargeable batteries for use with consumer electronic products are of three basic types: nickel cadmium (Ni-Cd), nickel metal hydride (Ni-MH) and lithium ion (Li-Ion). Although these three types of batteries will not look much different from the outside, there are significant differences among them. I will tell you a bit about each of them now.
RECONDITIONBATTERY.COM
6
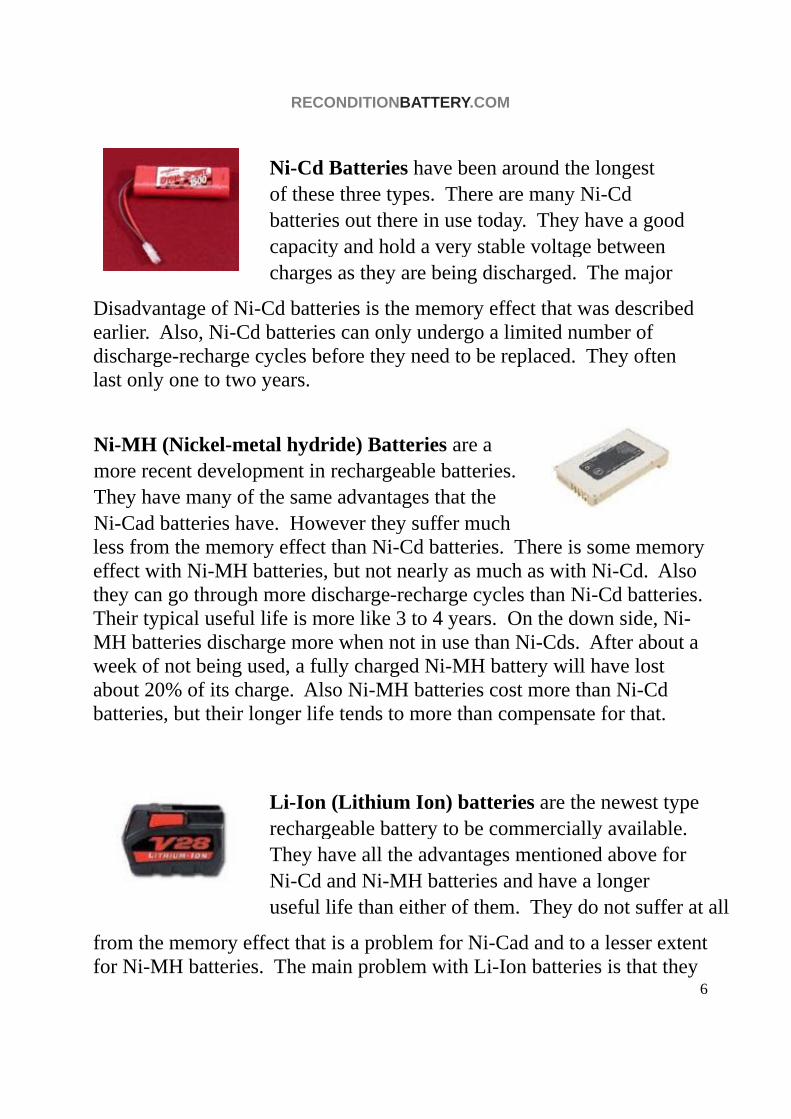
Ni-Cd Batteries have been around the longest of these three types. There are many Ni-Cd
batteries out there in use today. They have a good capacity and hold a very stable voltage between charges as they are being discharged. The major
Disadvantage of Ni-Cd batteries is the memory effect that was described earlier. Also, Ni-Cd batteries can only undergo a limited number of discharge-recharge cycles before they need to be replaced. They often last only one to two years.
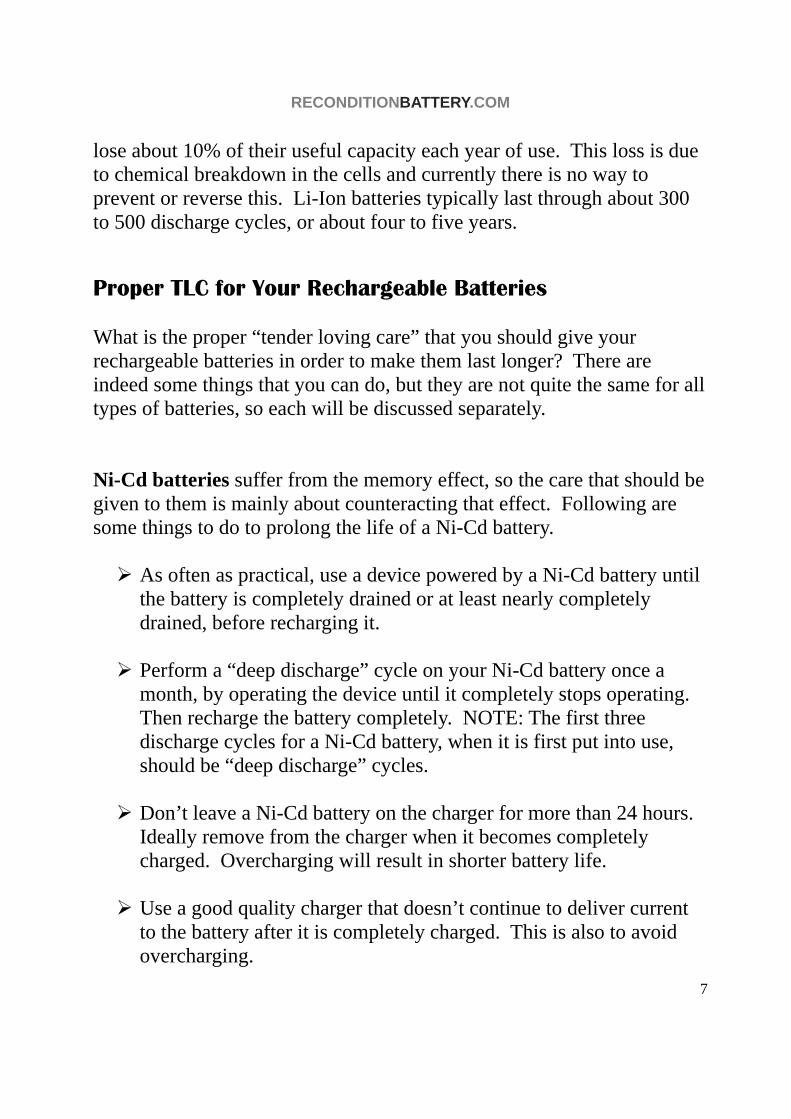
Ni-MH (Nickel-metal hydride) Batteries are a
more recent development in rechargeable batteries.
They have many of the same advantages that the
Ni-Cad batteries have. However they suffer much
less from the memory effect than Ni-Cd batteries. There is some memory effect with Ni-MH batteries, but not nearly as much as with Ni-Cd. Also they can go through more discharge-recharge cycles than Ni-Cd batteries. Their typical useful life is more like 3 to 4 years. On the down side, Ni-MH batteries discharge more when not in use than Ni-Cds. After about a week of not being used, a fully charged Ni-MH battery will have lost about 20% of its charge. Also Ni-MH batteries cost more than Ni-Cd batteries, but their longer life tends to more than compensate for that.
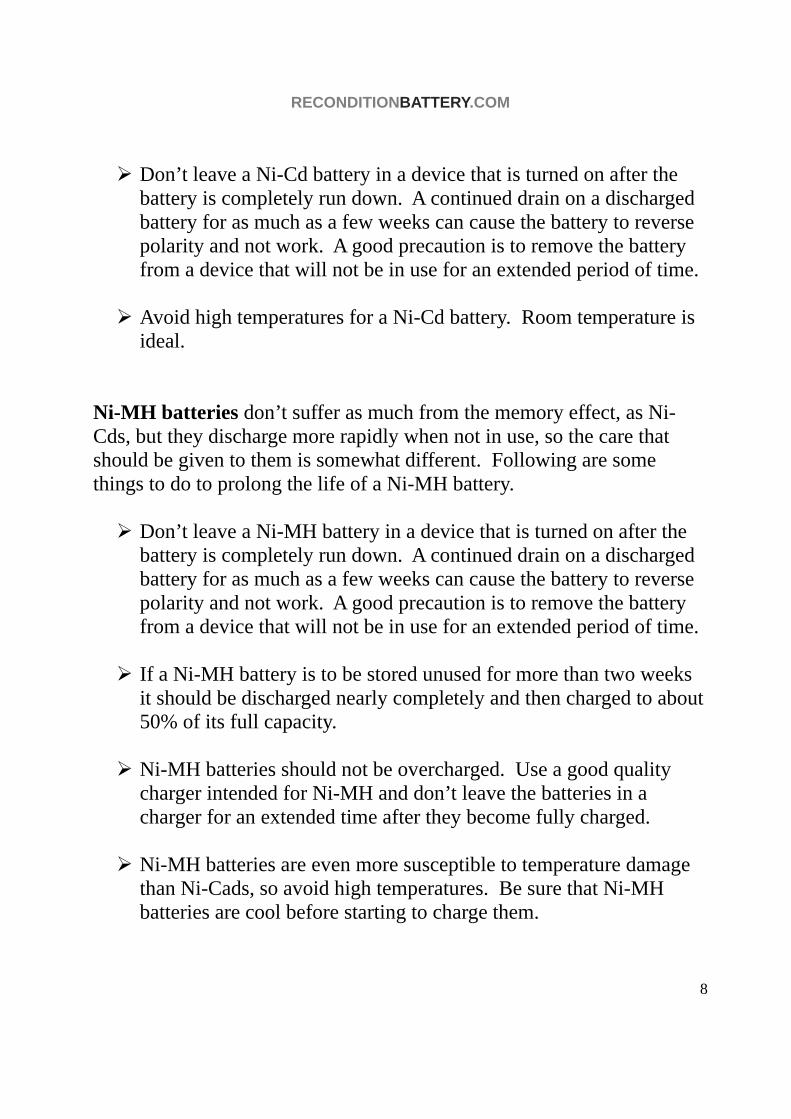
Li-Ion (Lithium Ion) batteries are the newest type rechargeable battery to be commercially available. They have all the advantages mentioned above for Ni-Cd and Ni-MH batteries and have a longer useful life than either of them. They do not suffer at all
from the memory effect that is a problem for Ni-Cad and to a lesser extent for Ni-MH batteries. The main problem with Li-Ion batteries is that they
RECONDITIONBATTERY.COM
7
lose about 10% of their useful capacity each year of use. This loss is due to chemical breakdown in the cells and currently there is no way to prevent or reverse this. Li-Ion batteries typically last through about 300 to 500 discharge cycles, or about four to five years. Proper TLC for Your Rechargeable Batteries What is the proper “tender loving care” that you should give your rechargeable batteries in order to make them last longer? There are indeed some things that you can do, but they are not quite the same for all types of batteries, so each will be discussed separately. Ni-Cd batteries suffer from the memory effect, so the care that should be given to them is mainly about counteracting that effect. Following are some things to do to prolong the life of a Ni-Cd battery.
As often as practical, use a device powered by a Ni-Cd battery until the battery is completely drained or at least nearly completely drained, before recharging it.
Perform a “deep discharge” cycle on your Ni-Cd battery once a month, by operating the device until it completely stops operating. Then recharge the battery completely. NOTE: The first three discharge cycles for a Ni-Cd battery, when it is first put into use, should be “deep discharge” cycles.
Don’t leave a Ni-Cd battery on the charger for more than 24 hours. Ideally remove from the charger when it becomes completely charged. Overcharging will result in shorter battery life.
Use a good quality charger that doesn’t continue to deliver current to the battery after it is completely charged. This is also to avoid overcharging.
RECONDITIONBATTERY.COM
8
Don’t leave a Ni-Cd battery in a device that is turned on after the battery is completely run down. A continued drain on a discharged battery for as much as a few weeks can cause the battery to reverse polarity and not work. A good precaution is to remove the battery from a device that will not be in use for an extended period of time.
Avoid high temperatures for a Ni-Cd battery. Room temperature is ideal.
Ni-MH batteries don’t suffer as much from the memory effect, as Ni-Cds, but they discharge more rapidly when not in use, so the care that should be given to them is somewhat different. Following are some things to do to prolong the life of a Ni-MH battery.
Don’t leave a Ni-MH battery in a device that is turned on after the battery is completely run down. A continued drain on a discharged battery for as much as a few weeks can cause the battery to reverse polarity and not work. A good precaution is to remove the battery from a device that will not be in use for an extended period of time.
If a Ni-MH battery is to be stored unused for more than two weeks it should be discharged nearly completely and then charged to about 50% of its full capacity.
Ni-MH batteries should not be overcharged. Use a good quality charger intended for Ni-MH and don’t leave the batteries in a charger for an extended time after they become fully charged.
Ni-MH batteries are even more susceptible to temperature damage than Ni-Cads, so avoid high temperatures. Be sure that Ni-MH batteries are cool before starting to charge them.
RECONDITIONBATTERY.COM
9
Occasionally perform a “deep discharge” cycle on your Ni-MH battery, by operating the device until it completely stops operating. Then recharge the battery completely.
Li-Ion batteries don’t suffer at all from the memory effect, but the battery life depends on the number of discharge cycles, so the care of Li-Ion batteries is quite different from Ni-Cad and Ni-MH batteries. Following are some things to do to prolong the life of a Li-Ion battery.
Keeping your Li-Ion battery on the charger as much as possible and keeping it fully charged is helpful, because this avoids discharge cycles and prolongs the battery life. It does not harm a Li-Ion battery to leave it on the charger, even if it is fully charged.
Condition your Li-Ion battery once a month by fully charging the battery (overnight). Then operate the device until it shuts down. Then recharge again. NOTE: For Li-Ion batteries, this process is also called “calibrating” the battery.
Avoid high temperatures for a Li-Ion battery. Room temperature is ideal.
For storage, a Li-Ion battery should be charged to about 40% of its full capacity.
Use a charger that is intended for use with a Li-Ion battery.
Useful Equipment and Supplies For General Use there are a few item that you will probably want. As a minimum, if you are going to do any work on batteries at all, you will need an electrical multimeter, a set of alligator clip test leads and a pair of safety glasses. These three items will not set you back very much
RECONDITIONBATTERY.COM
10
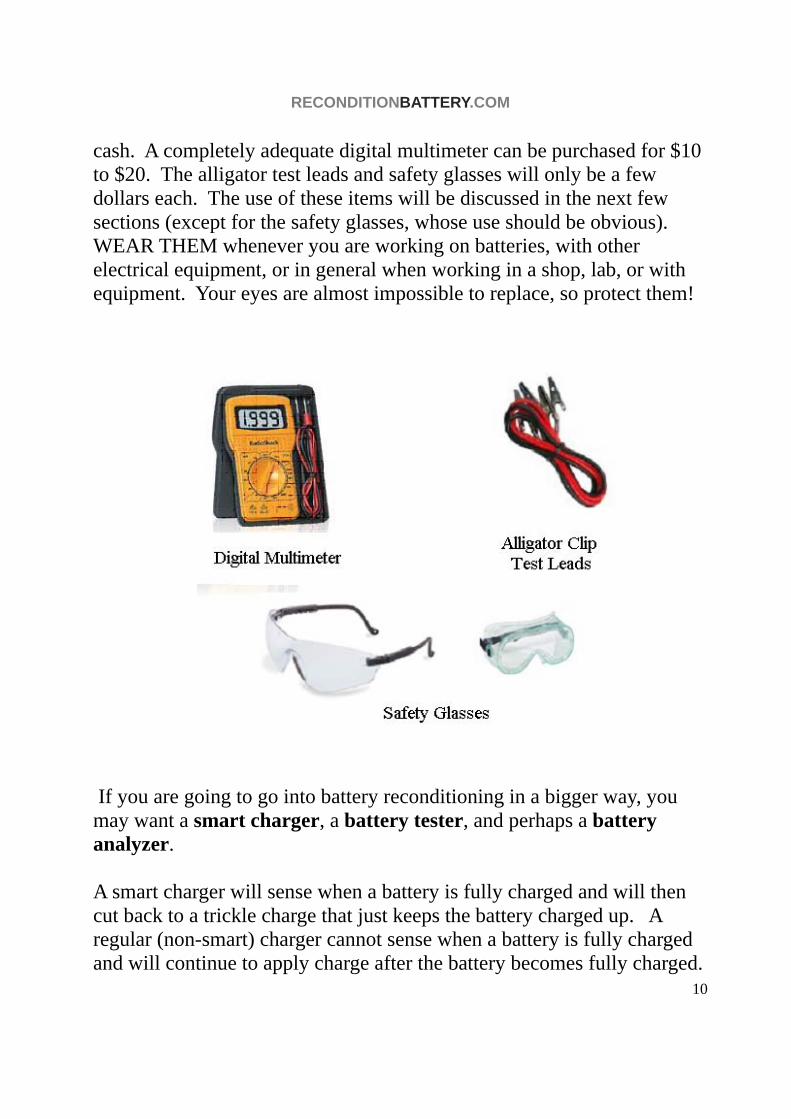
cash. A completely adequate digital multimeter can be purchased for $10 to $20. The alligator test leads and safety glasses will only be a few dollars each. The use of these items will be discussed in the next few sections (except for the safety glasses, whose use should be obvious). WEAR THEM whenever you are working on batteries, with other electrical equipment, or in general when working in a shop, lab, or with equipment. Your eyes are almost impossible to replace, so protect them!
If you are going to go into battery reconditioning in a bigger way, you may want a smart charger, a battery tester, and perhaps a battery analyzer. A smart charger will sense when a battery is fully charged and will then cut back to a trickle charge that just keeps the battery charged up. A regular (non-smart) charger cannot sense when a battery is fully charged and will continue to apply charge after the battery becomes fully charged.
RECONDITIONBATTERY.COM
11
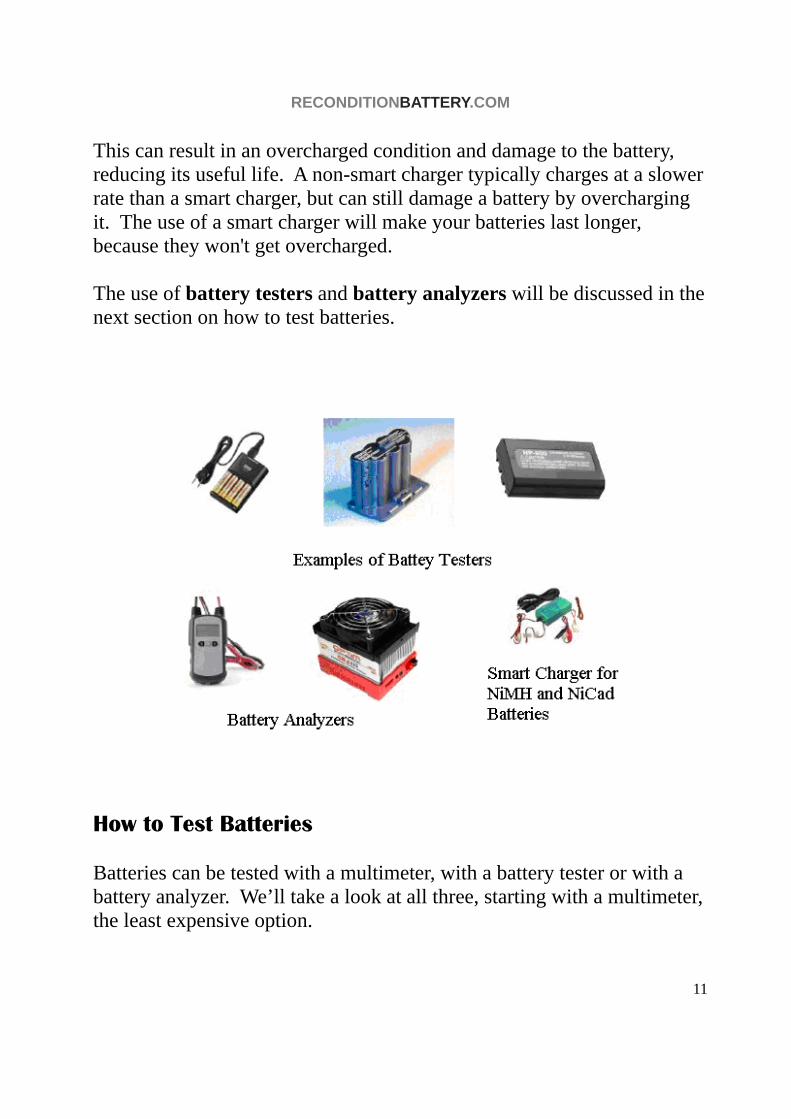
This can result in an overcharged condition and damage to the battery, reducing its useful life. A non-smart charger typically charges at a slower rate than a smart charger, but can still damage a battery by overcharging it. The use of a smart charger will make your batteries last longer, because they won't get overcharged. The use of battery testers and battery analyzers will be discussed in the next section on how to test batteries.
How to Test Batteries Batteries can be tested with a multimeter, with a battery tester or with a battery analyzer. We’ll take a look at all three, starting with a multimeter, the least expensive option.
RECONDITIONBATTERY.COM
12
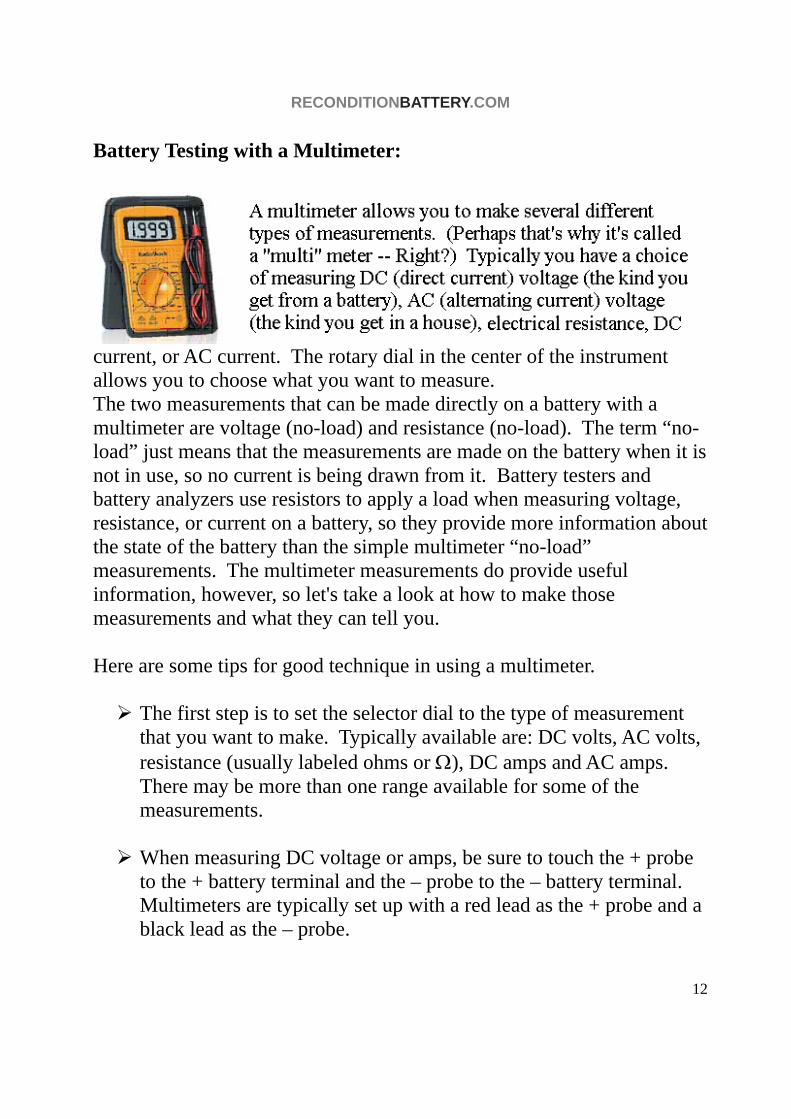
Battery Testing with a Multimeter:
current, or AC current. The rotary dial in the center of the instrument allows you to choose what you want to measure. The two measurements that can be made directly on a battery with a multimeter are voltage (no-load) and resistance (no-load). The term “no-load” just means that the measurements are made on the battery when it is not in use, so no current is being drawn from it. Battery testers and battery analyzers use resistors to apply a load when measuring voltage, resistance, or current on a battery, so they provide more information about the state of the battery than the simple multimeter “no-load” measurements. The multimeter measurements do provide useful information, however, so let's take a look at how to make those measurements and what they can tell you. Here are some tips for good technique in using a multimeter.
The first step is to set the selector dial to the type of measurement that you want to make. Typically available are: DC volts, AC volts, resistance (usually labeled ohms or Ω), DC amps and AC amps. There may be more than one range available for some of the measurements.
When measuring DC voltage or amps, be sure to touch the + probe to the + battery terminal and the – probe to the – battery terminal. Multimeters are typically set up with a red lead as the + probe and a black lead as the – probe.
RECONDITIONBATTERY.COM
13
In order to get accurate readings, hold the probe tips (not the sides) tightly to the appropriate contact. Avoid touching the metal part of the probes when making a measurement. That may affect the reading and it could even get you zapped.
Before making an ohms (resistance ) measurement, touch the two probes together while the dial is set to “ohms” to calibrate the zero ohm reading. A digital multimeter will automatically calibrate itself when you do this. With an analog meter, there is a screw to be used to adjust the dial to zero.
The probe tips should be kept clean to avoid extra “contact” resistance between the probe tip and the battery terminal.
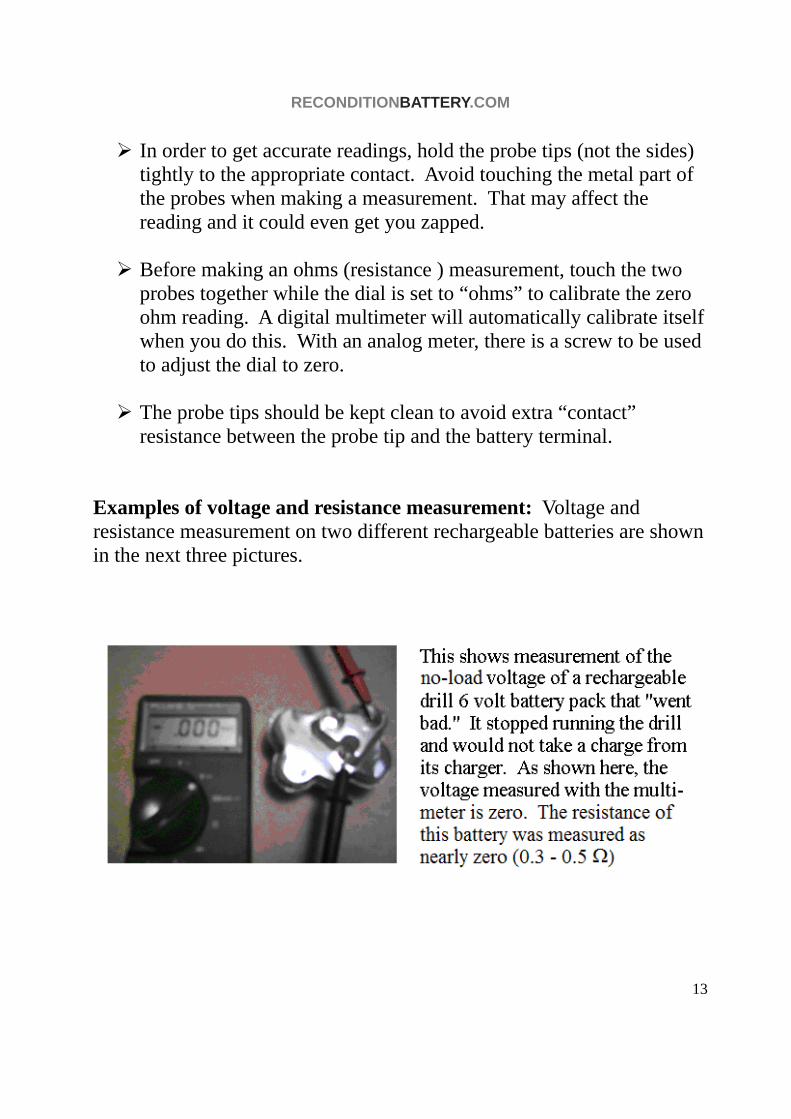
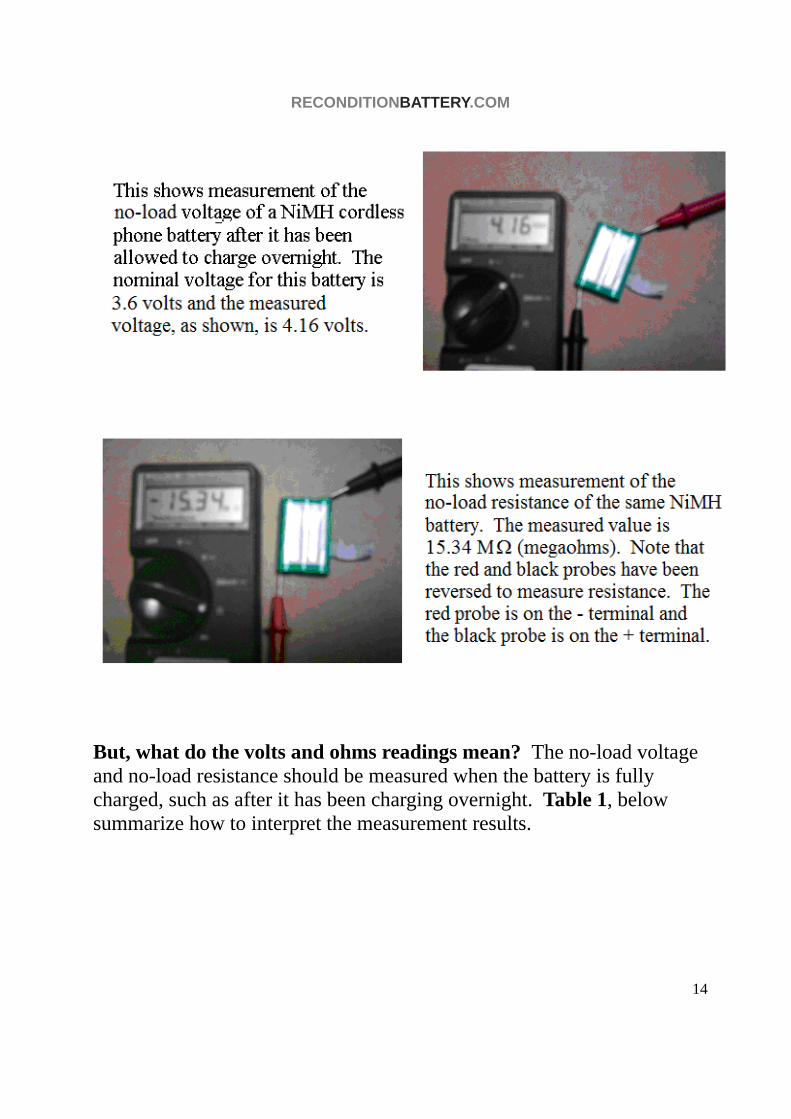
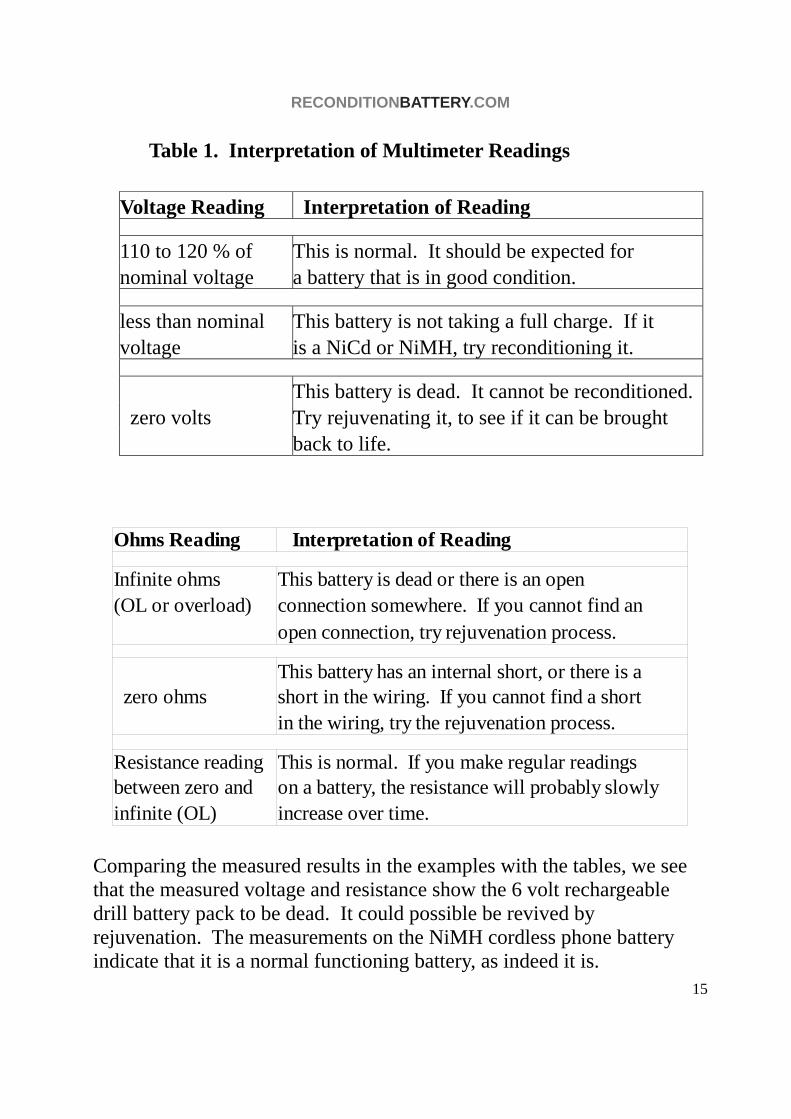
Examples of voltage and resistance measurement: Voltage and resistance measurement on two different rechargeable batteries are shown in the next three pictures.
RECONDITIONBATTERY.COM
14
But, what do the volts and ohms readings mean? The no-load voltage and no-load resistance should be measured when the battery is fully charged, such as after it has been charging overnight. Table 1, below summarize how to interpret the measurement results.
RECONDITIONBATTERY.COM
15
Table 1. Interpretation of Multimeter Readings Voltage Reading Interpretation of Reading
110 to 120 % of This is normal. It should be expected for nominal voltage a battery that is in good condition.
less than nominal This battery is not taking a full charge. If it voltage is a NiCd or NiMH, try reconditioning it.
This battery is dead. It cannot be reconditioned. zero volts Try rejuvenating it, to see if it can be brought back to life.
Comparing the measured results in the examples with the tables, we see that the measured voltage and resistance show the 6 volt rechargeable drill battery pack to be dead. It could possible be revived by rejuvenation. The measurements on the NiMH cordless phone battery indicate that it is a normal functioning battery, as indeed it is.
Ohms Reading Interpretation of Reading
Infinite ohms This battery is dead or there is an open (OL or overload) connection somewhere. If you cannot find an
open connection, try rejuvenation process.
This battery has an internal short, or there is a zero ohms short in the wiring. If you cannot find a short
in the wiring, try the rejuvenation process.
Resistance reading This is normal. If you make regular readings between zero and on a battery, the resistance will probably slowlyinfinite (OL) increase over time.
RECONDITIONBATTERY.COM
16
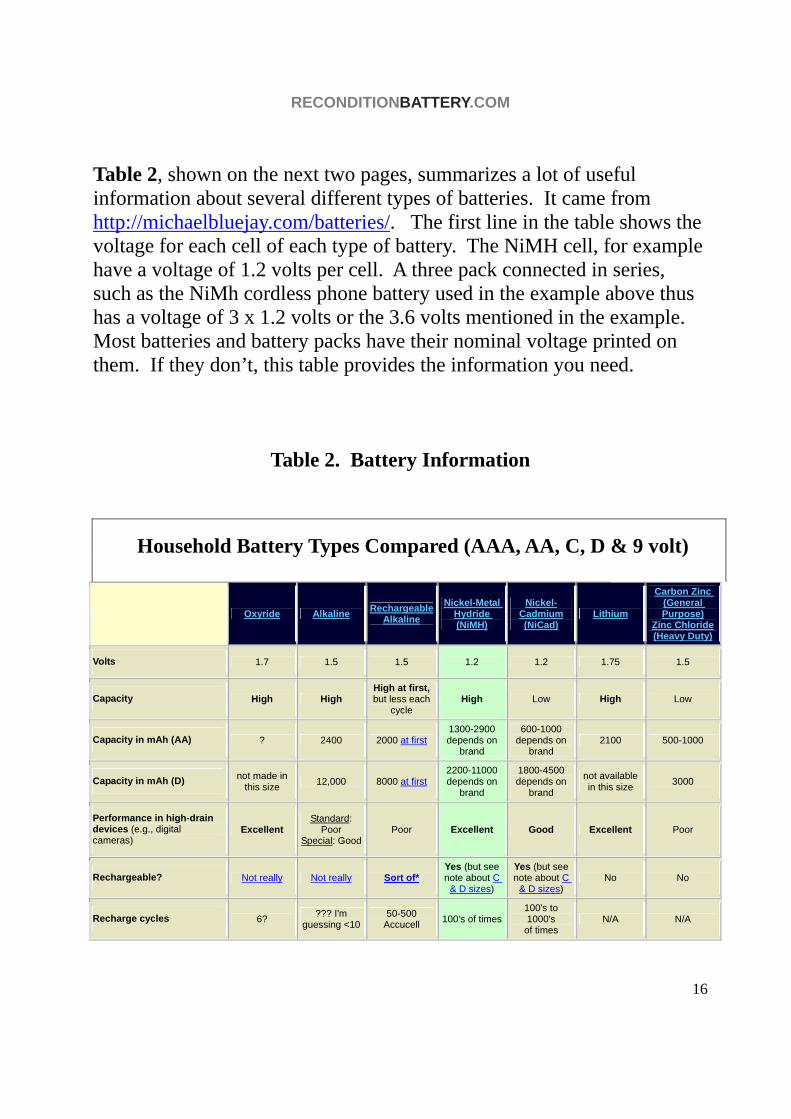
Table 2, shown on the next two pages, summarizes a lot of useful information about several different types of batteries. It came from http://michaelbluejay.com/batteries/. The first line in the table shows the voltage for each cell of each type of battery. The NiMH cell, for example have a voltage of 1.2 volts per cell. A three pack connected in series, such as the NiMh cordless phone battery used in the example above thus has a voltage of 3 x 1.2 volts or the 3.6 volts mentioned in the example. Most batteries and battery packs have their nominal voltage printed on them. If they don’t, this table provides the information you need.
Table 2. Battery Information
Household Battery Types Compared (AAA, AA, C, D & 9 volt)
Oxyride Alkaline Rechargeable Alkaline
Nickel-Metal Hydride (NiMH)
Nickel-Cadmium (NiCad)
Lithium
Carbon Zinc (General Purpose)
Zinc Chloride(Heavy Duty)
Volts 1.7 1.5 1.5 1.2 1.2 1.75 1.5
Capacity High High High at first, but less each
cycle High Low High Low
Capacity in mAh (AA) ? 2400 2000 at first 1300-2900depends on
brand
600-1000 depends on
brand 2100 500-1000
Capacity in mAh (D) not made in this size 12,000 8000 at first
2200-11000depends on
brand
1800-4500 depends on
brand
not available in this size 3000
Performance in high-drain devices (e.g., digital cameras)
Excellent Standard:
Poor Special: Good
Poor Excellent Good Excellent Poor
Rechargeable? Not really Not really Sort of* Yes (but see note about C
& D sizes)
Yes (but see note about C
& D sizes) No No
Recharge cycles 6? ??? I'm guessing <10
50-500 Accucell 100's of times
100's to 1000's
of times N/A N/A

RECONDITIONBATTERY.COM
17
Toxic (special disposal needs) No No No No Yes Yes No
Self-discharge rate Slow Slow / up to 5 yrs. shelf Slow Fast
(25%/mo.)
Fast (10% in 1st 24hrs,
then 10%/mo.)
Very slow Slow
Memory effect No No No No Maybe N/A N/A
Price for 2 AA's $2.48 $1.36 $3.00 - $3.60 $5.00
$5.49 standard $6.99 hi capacity
$6.99 $1.75
Notes Cheap, high capacity, lasts longer than alkalines. Best bet if you're not recharging.
Cheap, high capacity, but doesn't last as long as oxyride, and can't be recharged like NiMH. Not much reason to buy.
Fewer recharge cycles, and capacity drops after just a few charges. NiMH is usually a better bet.
Your best bet for a chargeable.Good for everything except emergency flashlights & smoke detectors.
Toxic, low capacity, high self-discharge rate. Use NiMH's instead.
Great power, but can't be recharged, and are toxic. Best choice for smoke detectors, though.
Absolute crap. Do not buy.
Notes on the Table:
Volts. The fact that NiMH & NiCD put out less voltage than alkalines is usually not a problem, unless your device uses six or more batteries. Capacity in mAh. Varies by brand. Alkaline figure is from ZBattery. Rechargeable alkaline figure is for Pure Energy Brand for AA, and Accucell brand for D. NiCd are for Golden Power and Radio Shack brands. NiMH figures are for batteries carried by Thomas Distributing and Radio Shack. Capacity for lithium, and carbon zinc/zinc chloride are not usually published by manufacturers and hard to track down; I got figures for these from a Battery FAQ website and from Accucell's website, though both sites are now down. Recharge cycles. The number of times the battery can be recharged. Figures for Rechargeable Alkalines are from manufacturers' claims. Getting the most cycles out of NiCads requires periodically draining the battery (or using a charger that does so). Getting the most cycles out of NiMH requires shallow discharging (charging before the battery loses too much power).Special Disposal Needs. See NiCads, below. Self-discharge rate. How quickly the batteries lose their charge just sitting in the drawer. Discharge is faster at higher temperatures. From Batteries in a Portable World. Prices. Pricing is from Radio Shack 2000 catalog for Alklanie, NiCd, and Lithium; from Thomas Distributing for NiMH; from Sundance Solar and CET Solar for Rechargeable Alkaline (Pure Energy & Accucell); from my local grocery store for Zinc Chloride.
RECONDITIONBATTERY.COM
18
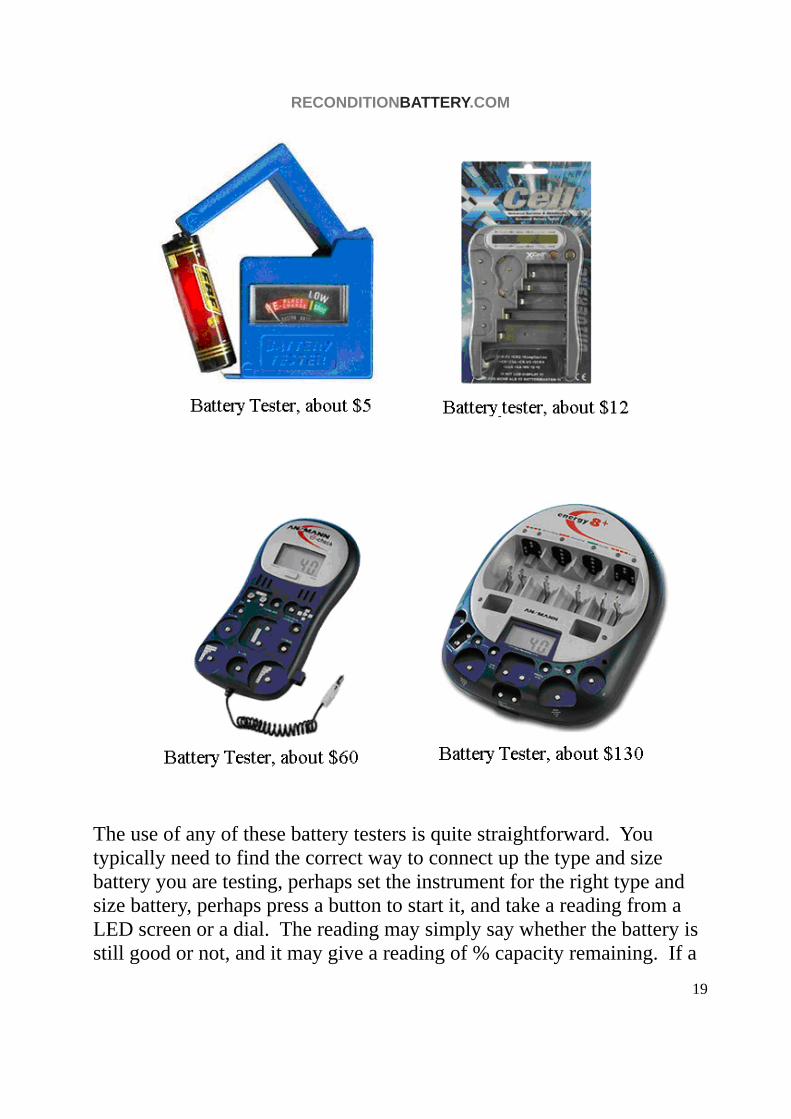
Testing Batteries with a Battery Tester A battery tester provides different information than the multimeter measurements that we just discussed. A battery tester measures one thing, the remaining useful charge in the battery. They can be used for testing disposable batteries to see if there is still useful charge in the battery or if it is ready to be discarded. They are also now widely used with rechargeable batteries. In fact most devices like cell phones and laptop computers have a built in battery tester that shows how much charge is left in the battery. It shows up on the screen somewhere with a visual indication of the remaining battery charge, so you know when to recharge the battery. Battery testers measure the voltage of the battery while a load is being applied. For the built in cell phone/laptop type battery testers, the device is on when you can see the battery icon on the screen, so it is drawing a load from the battery. For free standing battery testers, an appropriate resistance (load) is applied when the battery is tested so that it is being tested under load. Some battery testers are made to test only one type and size battery and the appropriate resistance for that battery is in the tester. Some testers are made to test a variety of types and/or sizes of batteries. They need different resistors built in to use with each battery type or size. Following are some examples of the types of battery testers available over a range of prices.
RECONDITIONBATTERY.COM
19
The use of any of these battery testers is quite straightforward. You typically need to find the correct way to connect up the type and size battery you are testing, perhaps set the instrument for the right type and size battery, perhaps press a button to start it, and take a reading from a LED screen or a dial. The reading may simply say whether the battery is still good or not, and it may give a reading of % capacity remaining. If a
RECONDITIONBATTERY.COM
20
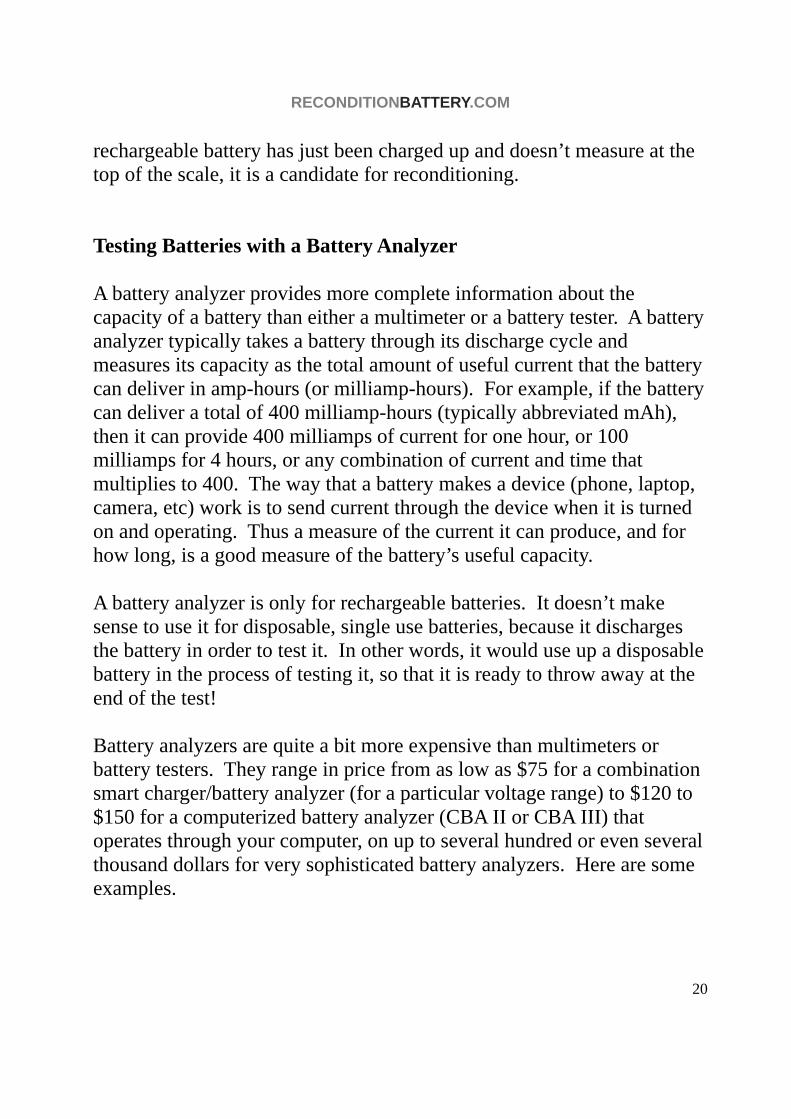
rechargeable battery has just been charged up and doesn’t measure at the top of the scale, it is a candidate for reconditioning. Testing Batteries with a Battery Analyzer A battery analyzer provides more complete information about the capacity of a battery than either a multimeter or a battery tester. A battery analyzer typically takes a battery through its discharge cycle and measures its capacity as the total amount of useful current that the battery can deliver in amp-hours (or milliamp-hours). For example, if the battery can deliver a total of 400 milliamp-hours (typically abbreviated mAh), then it can provide 400 milliamps of current for one hour, or 100 milliamps for 4 hours, or any combination of current and time that multiplies to 400. The way that a battery makes a device (phone, laptop, camera, etc) work is to send current through the device when it is turned on and operating. Thus a measure of the current it can produce, and for how long, is a good measure of the battery’s useful capacity. A battery analyzer is only for rechargeable batteries. It doesn’t make sense to use it for disposable, single use batteries, because it discharges the battery in order to test it. In other words, it would use up a disposable battery in the process of testing it, so that it is ready to throw away at the end of the test! Battery analyzers are quite a bit more expensive than multimeters or battery testers. They range in price from as low as $75 for a combination smart charger/battery analyzer (for a particular voltage range) to $120 to $150 for a computerized battery analyzer (CBA II or CBA III) that operates through your computer, on up to several hundred or even several thousand dollars for very sophisticated battery analyzers. Here are some examples.
RECONDITIONBATTERY.COM
21
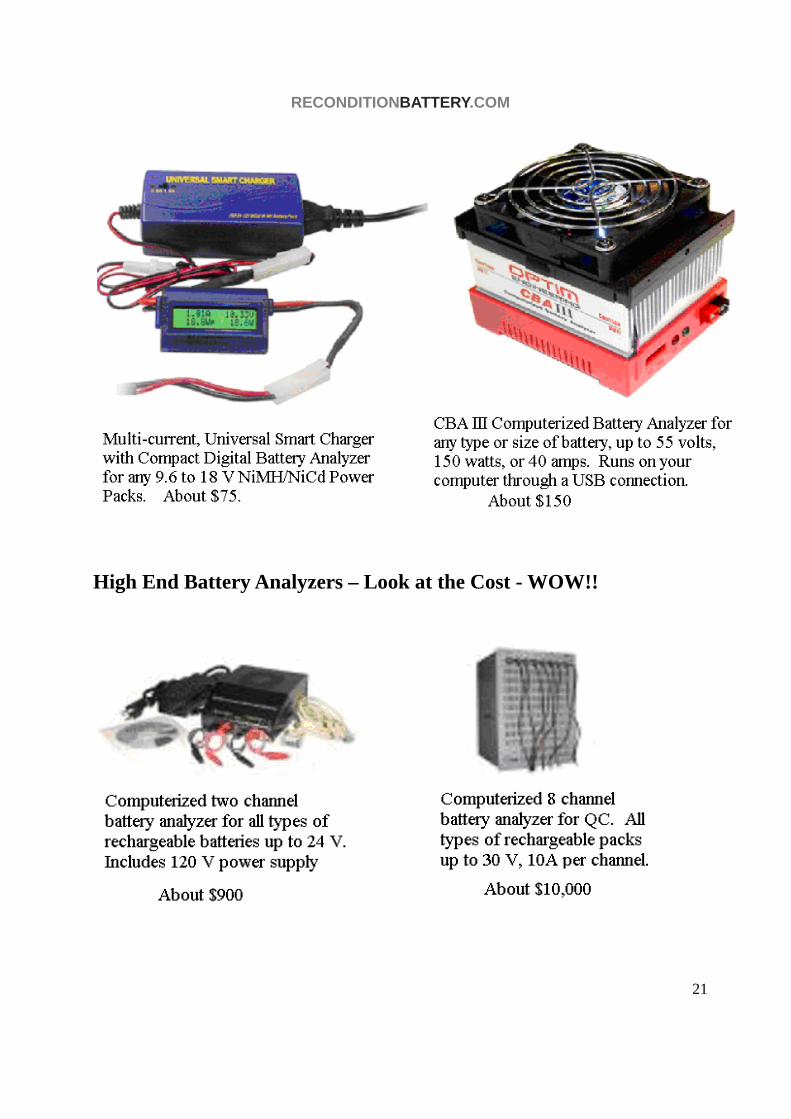
High End Battery Analyzers – Look at the Cost - WOW!!
RECONDITIONBATTERY.COM
22
The combination smart charger/compact battery analyzer shown above will give a readout with battery capacity information, but is pretty limited in the voltage range it can handle. The two “high end” battery analyzers pictured, were included just to show how much you really could pay for a battery analyzer if you want to. They’re not the kind of instrument needed for the type of work being discussed here. The CBA III, on the other hand, is quite a versatile instrument for the type of testing and reconditioning being discussed in this book. If you are just going to test and recondition a few of your own rechargeable batteries, you probably won’t want to spend the money for a battery analyzer, but if you are going to try to do this as a part-time or full-time business, the CBA III would be a good investment for approximately $150. There is also a CBA II battery analyzer, which you could probably pick up for $100 to $120, but my inclination would be to buy the newer model, CBA III, since the prices aren’t all that much different. If you buy a CBA III, you will get detailed instructions on how to use it. We’ll just include some information about what you can do with the CBA III, and the general steps for its use. There’s a temperature probe that can be purchased as an extra with the CAB III. That seems like a good idea, because it would prevent overheating of the battery as it’s going through the test cycle. Overheating a battery is very hard on it and can cause permanent damage. The CBA III works through your computer using a USB connection. You will get software with the instrument that needs to be installed on your computer after connecting the CBA III to it with the USB cable. Then the steps summarized below will take you through the battery test.
1. Make sure that the battery is fully charged in order to get a good test of its capacity.
2. The first step is to connect the battery to the CBA III. The red and
black CBA III leads should be connected to the battery terminals with alligator clip test leads as shown in the picture below. The red
RECONDITIONBATTERY.COM
23
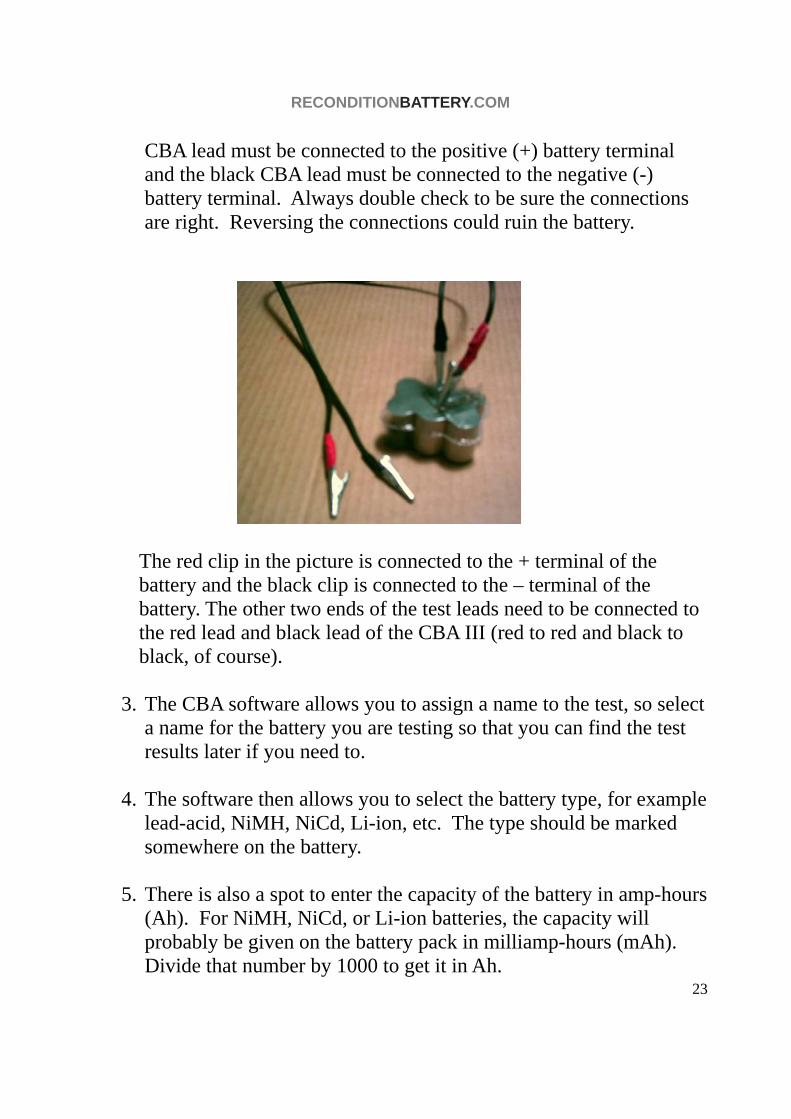
CBA lead must be connected to the positive (+) battery terminal and the black CBA lead must be connected to the negative (-) battery terminal. Always double check to be sure the connections are right. Reversing the connections could ruin the battery.
The red clip in the picture is connected to the + terminal of the battery and the black clip is connected to the – terminal of the battery. The other two ends of the test leads need to be connected to the red lead and black lead of the CBA III (red to red and black to black, of course).
3. The CBA software allows you to assign a name to the test, so select a name for the battery you are testing so that you can find the test results later if you need to.
4. The software then allows you to select the battery type, for example
lead-acid, NiMH, NiCd, Li-ion, etc. The type should be marked somewhere on the battery.
5. There is also a spot to enter the capacity of the battery in amp-hours
(Ah). For NiMH, NiCd, or Li-ion batteries, the capacity will probably be given on the battery pack in milliamp-hours (mAh). Divide that number by 1000 to get it in Ah.
RECONDITIONBATTERY.COM
24
6. Now you can enter the nominal voltage as given on the battery or
battery pack. The nominal voltage per cell is also available from Table 2 on pages 16-17.
7. The number of cells is the next thing to enter. You may be able to
see how many cells there are in the battery pack. If not, divide the total nominal voltage for the battery pack by the nominal voltage per cell from Table 2.
8. The Test Amps and Test Cutoff Voltage should be left at the default
values set by the program. 9. Now, clicking on the “start” button on the screen will start the test.
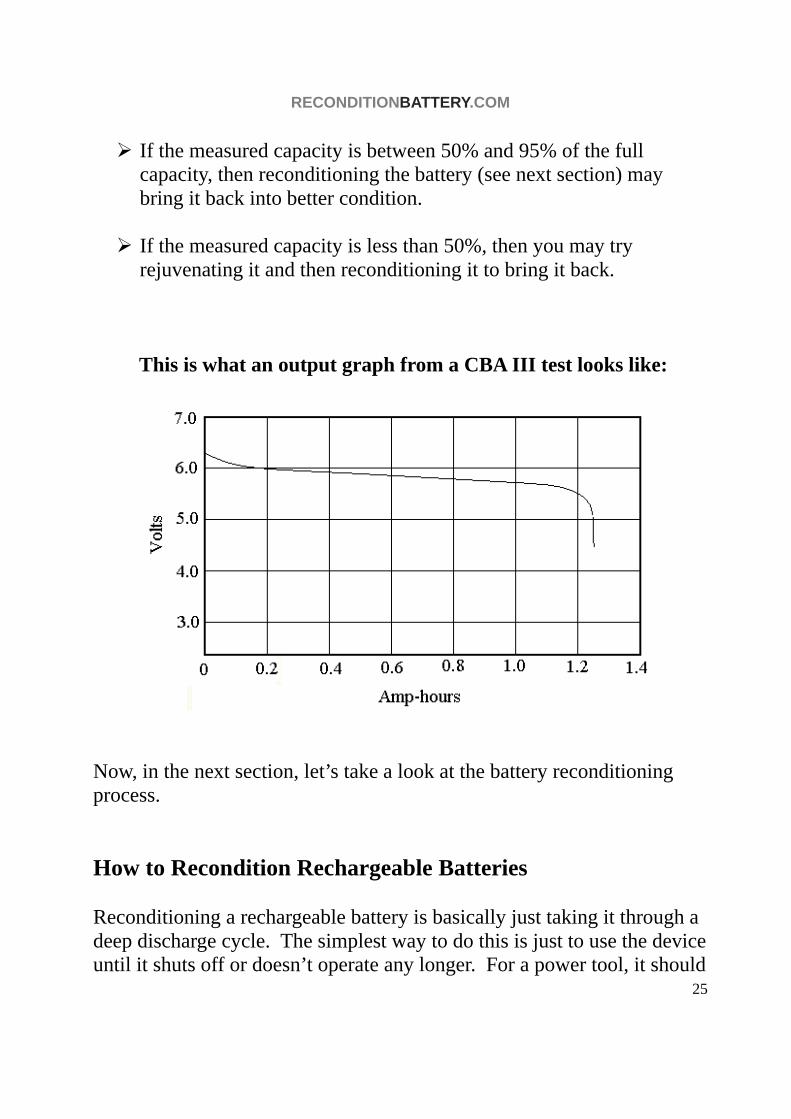
The CBA III will then take the battery or battery pack through a discharge cycle. While it is doing this, the battery voltage and current are displayed on screen. Also the cumulative amp-hours and watts are displayed, and if the optional temperature probe is used, battery temperature is displayed. The program also allows for automatic shutoff at a set battery temperature if the temperature probe is being used. When the test is completed, there will be a graph on the screen showing voltage plotted against Amp-hours. It will look something like the graph on the next page. The output graph shown is for a battery pack with nominal voltage of 6 volts. The graph shows the battery capacity to be about 1.25 Amp-hours. (That is the Amp-hours at the cut-off point, where the test was ended.) Here’s how to interpret the results:
If the measured battery capacity is 95% of the battery’s rated full capacity or more, then nothing more needs to be done with it. It is still in very good condition.
RECONDITIONBATTERY.COM
25
If the measured capacity is between 50% and 95% of the full capacity, then reconditioning the battery (see next section) may bring it back into better condition.
If the measured capacity is less than 50%, then you may try rejuvenating it and then reconditioning it to bring it back.
This is what an output graph from a CBA III test looks like:
Now, in the next section, let’s take a look at the battery reconditioning process. How to Recondition Rechargeable Batteries Reconditioning a rechargeable battery is basically just taking it through a deep discharge cycle. The simplest way to do this is just to use the device until it shuts off or doesn’t operate any longer. For a power tool, it should
RECONDITIONBATTERY.COM
26
be run without putting a load on it at the end of the discharge cycle. Then just charge it up completely again. This is simply the deep discharge cycle that was described earlier in the section on “Proper TLC for Your Rechargeable Batteries”. This process can be repeated up to two more times if necessary. If the battery hasn’t come back to good condition after that, you may try rejuvenating it. If that doesn’t help, the battery is no good. In addition to simply taking the battery through a deep discharge cycle, there are two ways of reconditioning a battery in a more controlled way. The easiest is using a CBA III. The other way is a bit more complicated, but it is a process that I’m sure you can handle. The CBA III process will be discussed first, then the other way. Reconditioning with a CBA III Battery Analyzer: Here are the steps for battery reconditioning with a CBA III:
1. The battery should be discharged to about 90% of its nominal voltage. That would be about 1 volt per cell for NiMH or NiCd batteries. If you have just finished testing the battery, it will be at the right voltage, because the test procedure takes it down to 90% of its nominal voltage. If you haven’t just tested the battery, the easiest way to bring it down to the right voltage would be to test it, as just described in the last section.
2. After completing the testing, all of the information about battery
type, voltage, etc should already be entered in the proper places on the computer screen. You just need to change the entries for “Test Amps” and “Test Cutoff Voltage”.
3. The “Test Amps” should be set between 1/10 and 1/20 of the rated
battery capacity in Amp-hours. For example: if the capacity listed on the battery is 1200 mAh, then divide by 1000 to get 1.2 Amp-hours. 1/10 of 1.2 = 0.12 and 1/20 of 1.2 = 0.06, so the Test Amps should be set somewhere between 0.06 and 0.12 Amps.
RECONDITIONBATTERY.COM
27
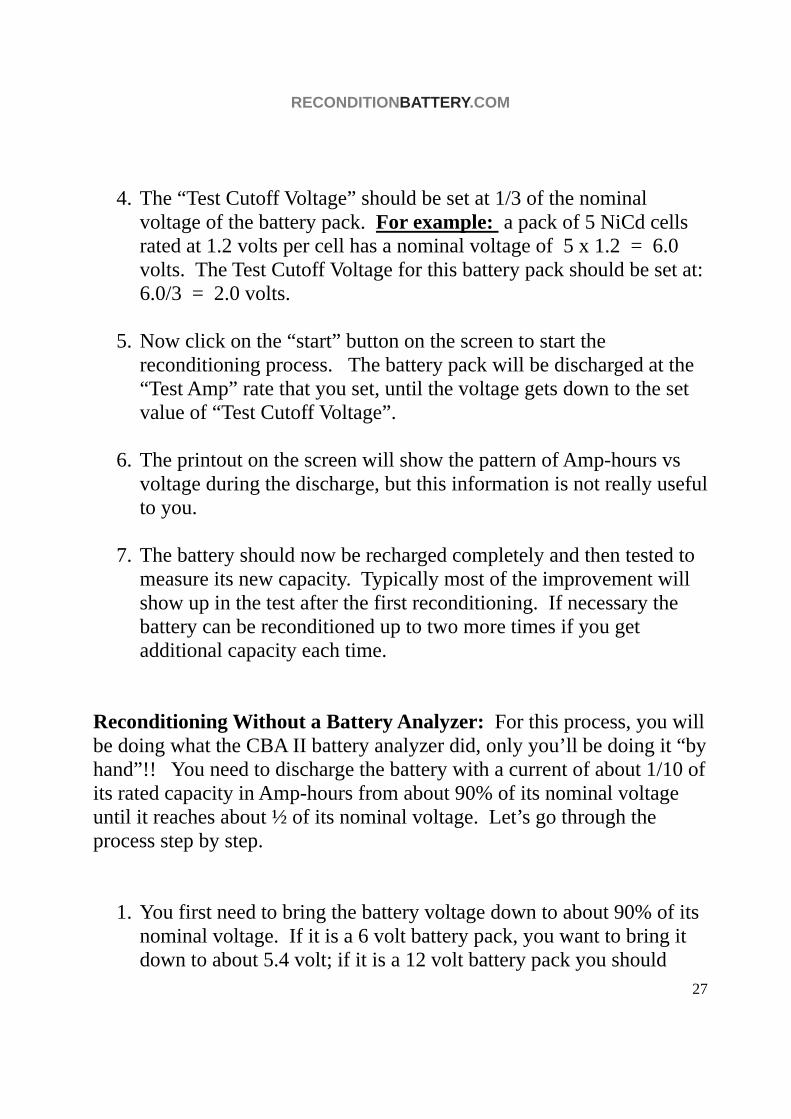
4. The “Test Cutoff Voltage” should be set at 1/3 of the nominal
voltage of the battery pack. For example: a pack of 5 NiCd cells rated at 1.2 volts per cell has a nominal voltage of 5 x 1.2 = 6.0 volts. The Test Cutoff Voltage for this battery pack should be set at: 6.0/3 = 2.0 volts.
5. Now click on the “start” button on the screen to start the
reconditioning process. The battery pack will be discharged at the “Test Amp” rate that you set, until the voltage gets down to the set value of “Test Cutoff Voltage”.
6. The printout on the screen will show the pattern of Amp-hours vs
voltage during the discharge, but this information is not really useful to you.
7. The battery should now be recharged completely and then tested to
measure its new capacity. Typically most of the improvement will show up in the test after the first reconditioning. If necessary the battery can be reconditioned up to two more times if you get additional capacity each time.
Reconditioning Without a Battery Analyzer: For this process, you will be doing what the CBA II battery analyzer did, only you’ll be doing it “by hand”!! You need to discharge the battery with a current of about 1/10 of its rated capacity in Amp-hours from about 90% of its nominal voltage until it reaches about ½ of its nominal voltage. Let’s go through the process step by step.
1. You first need to bring the battery voltage down to about 90% of its nominal voltage. If it is a 6 volt battery pack, you want to bring it down to about 5.4 volt; if it is a 12 volt battery pack you should
RECONDITIONBATTERY.COM
28
bring it down to about 10.8 volts, etc. You can typically do this by operating the device until it shuts down or stops. If you can measure the battery voltage with your multimeter, while the device is operating, that would be ideal. If not, check the voltage when the device stops or shuts down and you should be close to your 90% target.
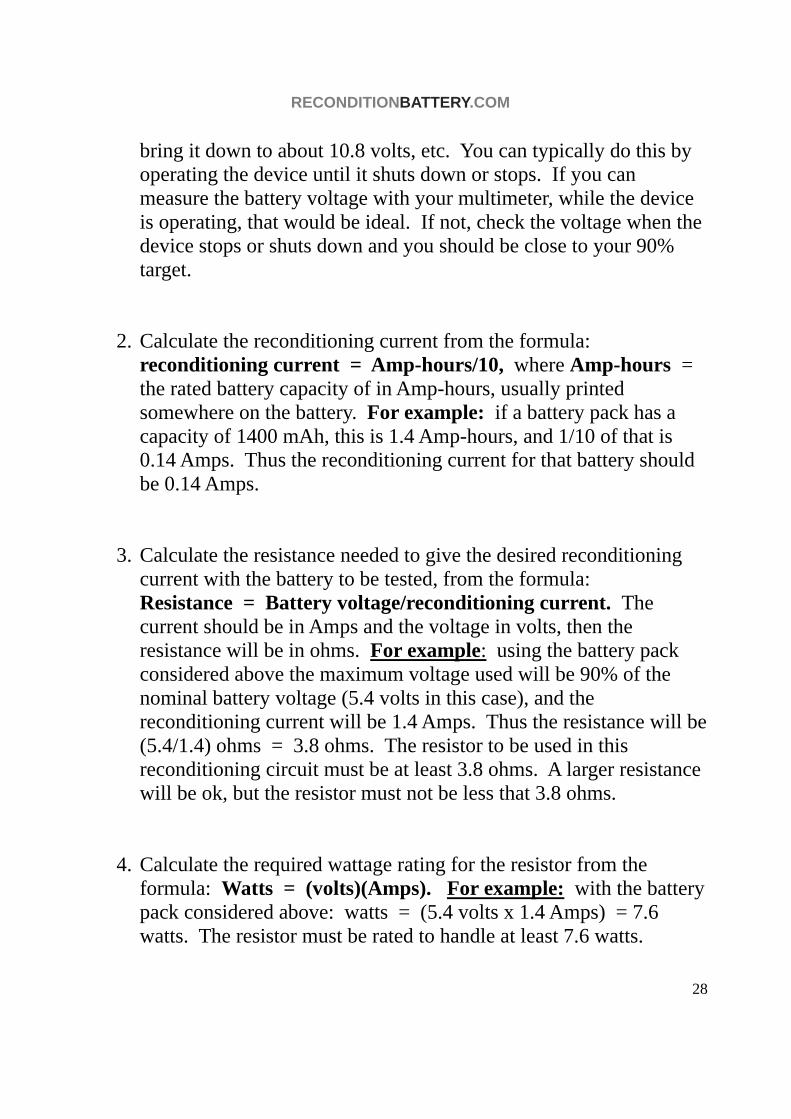
2. Calculate the reconditioning current from the formula: reconditioning current = Amp-hours/10, where Amp-hours = the rated battery capacity of in Amp-hours, usually printed somewhere on the battery. For example: if a battery pack has a capacity of 1400 mAh, this is 1.4 Amp-hours, and 1/10 of that is 0.14 Amps. Thus the reconditioning current for that battery should be 0.14 Amps.
3. Calculate the resistance needed to give the desired reconditioning current with the battery to be tested, from the formula: Resistance = Battery voltage/reconditioning current. The current should be in Amps and the voltage in volts, then the resistance will be in ohms. For example: using the battery pack considered above the maximum voltage used will be 90% of the nominal battery voltage (5.4 volts in this case), and the reconditioning current will be 1.4 Amps. Thus the resistance will be (5.4/1.4) ohms = 3.8 ohms. The resistor to be used in this reconditioning circuit must be at least 3.8 ohms. A larger resistance will be ok, but the resistor must not be less that 3.8 ohms.
4. Calculate the required wattage rating for the resistor from the
formula: Watts = (volts)(Amps). For example: with the battery pack considered above: watts = (5.4 volts x 1.4 Amps) = 7.6 watts. The resistor must be rated to handle at least 7.6 watts.
RECONDITIONBATTERY.COM
29
5. Calculate the cutoff voltage, which will be half of the nominal battery voltage. For the example battery we’ve been considering with a nominal voltage of 6 volts, the cutoff voltage will be 3 volts.
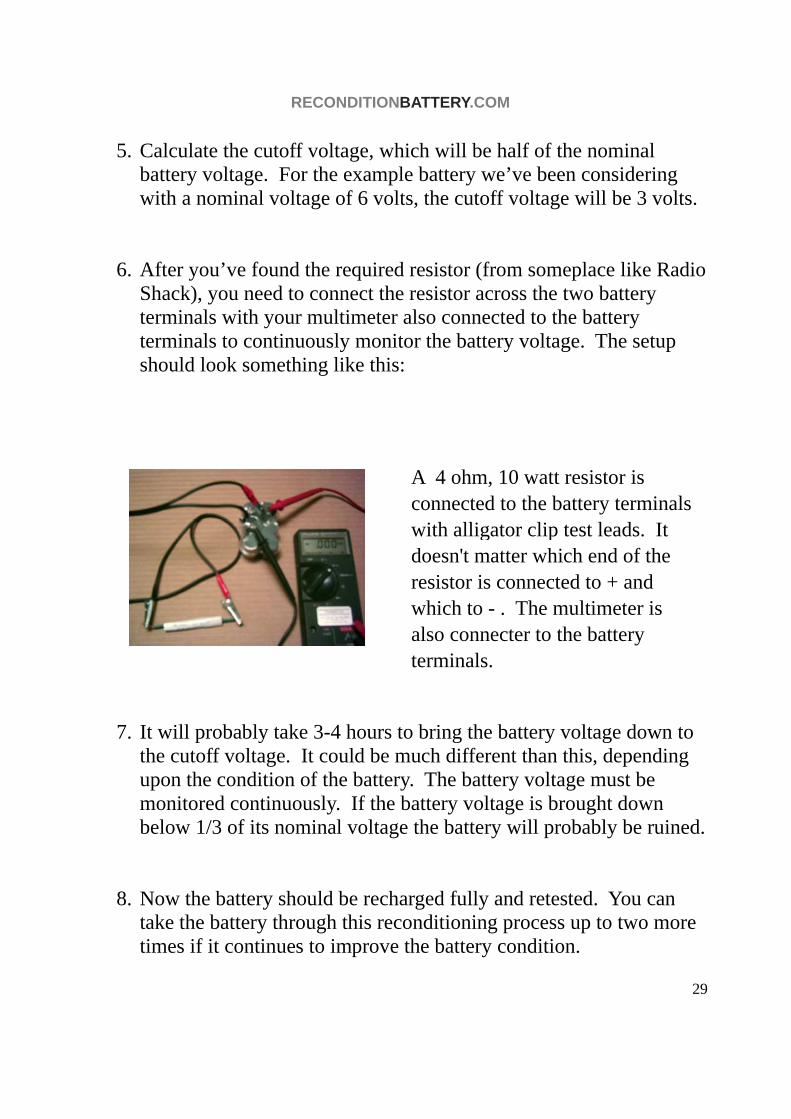
6. After you’ve found the required resistor (from someplace like Radio
Shack), you need to connect the resistor across the two battery terminals with your multimeter also connected to the battery terminals to continuously monitor the battery voltage. The setup should look something like this:
A 4 ohm, 10 watt resistor is connected to the battery terminals with alligator clip test leads. It doesn't matter which end of the resistor is connected to + and which to - . The multimeter is also connecter to the battery terminals.
7. It will probably take 3-4 hours to bring the battery voltage down to the cutoff voltage. It could be much different than this, depending upon the condition of the battery. The battery voltage must be monitored continuously. If the battery voltage is brought down below 1/3 of its nominal voltage the battery will probably be ruined.
8. Now the battery should be recharged fully and retested. You can
take the battery through this reconditioning process up to two more times if it continues to improve the battery condition.

RECONDITIONBATTERY.COM
30
How to Rejuvenate a Rechargeable Battery If a battery doesn’t respond to reconditioning or if its testing doesn’t indicate that it’s a good candidate for reconditioning, it may be possible to bring the battery back to life by “rejuvenating” it. This consists of applying a voltage somewhat higher than the nominal voltage to the battery terminals. Here is a summary of the steps to take:
1. Identify a “rejuvenating battery” to be used to apply voltage to the bad battery or cell. This could be a 9 volt battery or 6 volt dry cell for rejuvenation of small, low voltage battery packs, or a 12 volt car battery or charged up power tool battery for higher voltage power packs. If you need more than 12 volts, you can connect two 12 volt batteries in series as shown below to get 24 volts. The + terminal of one battery is connected to the – terminal of the other. Then there is 24 volts available from the other two terminals.
2. Connect one end of your alligator clip test leads to the positive and
negative terminals of the rejuvenating battery. (Be sure that you have the black clip to the negative terminal and the red clip to the positive terminal.)
3. Using the alligator clips at the other end of the test leads, touch the
black clip to the negative terminal of the battery to be rejuvenated
RECONDITIONBATTERY.COM
31
and very briefly touch the red clip to the positive terminal of the battery to be rejuvenated. This should be no more than 1 to 3 seconds.
4. Check the voltage of the rejuvenated battery. If it is not at or near
the nominal voltage, try repeating the rejuvenation and tapping the positive terminal about three times with the red (positive) clip. If this doesn’t do it the battery cannot be rejuvenated.
5. If the battery was successfully rejuvenated, it will need to be
recharged to a full state of charge. If necessary recondition the battery also.
If you can take a battery pack apart and can identify a bad cell or shorted cell in it, then you can do the rejuvenation process as described above on a single cell and then put the battery pack back together. What to do About a Reversed Cell Sometimes one cell in a battery pack is weaker than the others and will reverse its polarity, so that the terminal that should be negative is positive and the terminal that should be positive is now negative. This is most likely to happen if the battery pack is discharged to a very low level. The weak battery then starts to accept charge from the other cells in the opposite direction. In order to find this problem, you need to be able to take the battery pack apart. Then check the voltage of each cell. If a cell show negative voltage when you connect the red multimeter lead to its + terminal and the black lead to its – terminal, then that cell has reversed polarity. Applying a “shock charge” of about 4.5 volts to a reversed 1.2 volt cell will often convert is polarity back to the right direction. If that doesn’t bring the polarity back to the right direction, try a higher voltage, perhaps
RECONDITIONBATTERY.COM
32
up to 9 volts. Once the polarity is in the right direction again, the battery pack should be put back together and recharged completely. Don’t allow this battery pack to be discharged to a very low level in order to avoid having the weak cell reverse its polarity again. How to Recondition Car Batteries (Lead Acid type)
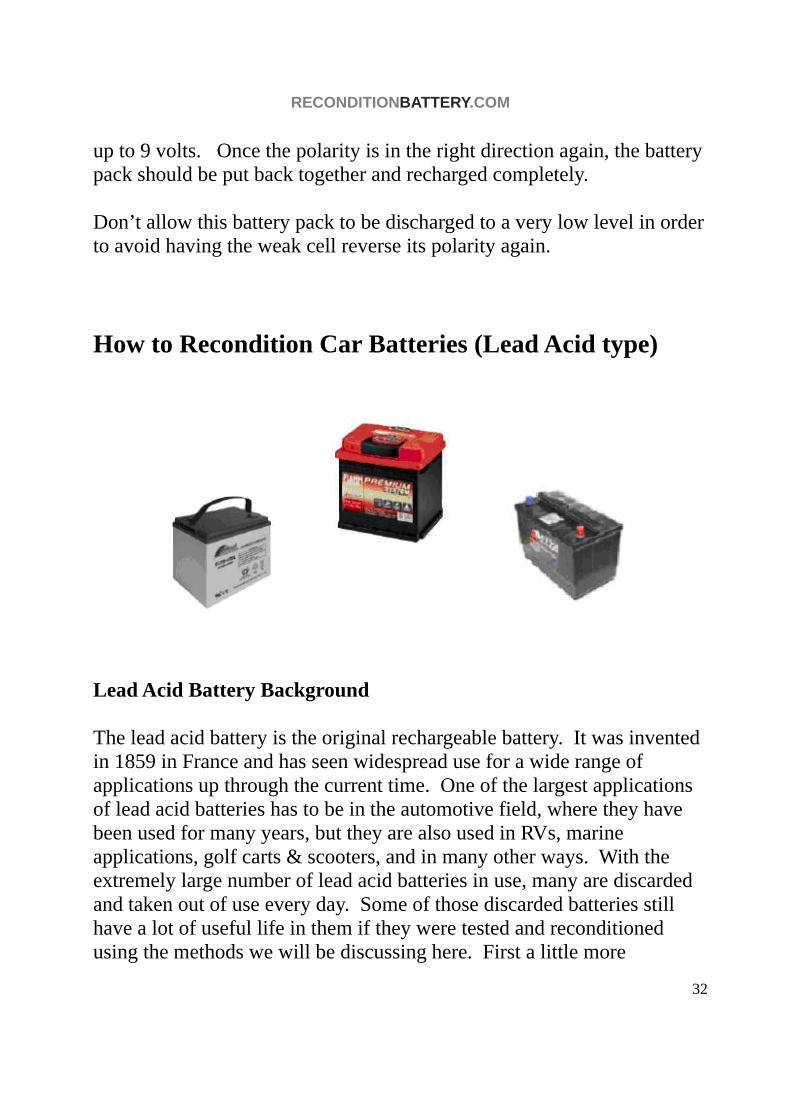
Lead Acid Battery Background The lead acid battery is the original rechargeable battery. It was invented in 1859 in France and has seen widespread use for a wide range of applications up through the current time. One of the largest applications of lead acid batteries has to be in the automotive field, where they have been used for many years, but they are also used in RVs, marine applications, golf carts & scooters, and in many other ways. With the extremely large number of lead acid batteries in use, many are discarded and taken out of use every day. Some of those discarded batteries still have a lot of useful life in them if they were tested and reconditioned using the methods we will be discussing here. First a little more
RECONDITIONBATTERY.COM
33
background, then we’ll get into the testing, reconditioning, and how to take care of a lead acid battery. Personal Safety: A lead acid battery has lead and acid in it, just as its name indicates. It has plates made of lead and the liquid in the battery is a weak sulfuric acid solution. The acid solution is called weak, because it is fairly low in sulfuric acid concentration, but don’t think of it as weak in terms of its possible effects on you. If spilled on your skin, it will burn you. If spilled on your clothes, it will burn a hole in them. So… wear rubber gloves to protect your hands, wear a rubber apron to protect your clothes and BE CAREFUL. The safety glass requirement is a bit more stringent when working with lead acid batteries, as compared with NiCd, NiMH, etc. Your safety glasses should have front and side protection, or even better would be a full-face shield. Also do not smoke around lead acid batteries and avoid sparks and flames, especially when charging a battery, as the gas produced when charging can explode if brought in contact with sparks or flames. Also, along the same lines, whenever connecting or disconnecting cables from a lead acid battery (in a car or when charging for example) be sure to connect or disconnect the negative (ground) terminal first and then the positive (live) terminal. This helps to avoid a spark that could cause an explosion. Environmental Safety: Besides concern about your personal safety due to the acid while working on and being around the batteries, there is an environmental concern. Lead is a toxic material and is classified as a hazardous waste, so it is important to dispose of useless lead acid batteries properly. If you do reconditioning of lead acid batteries and need to dispose of those that cannot be brought back to life, be sure that you follow all federal, state and local requirements for proper disposal. Here is a website that is a good start at getting information about how to dispose of them: http://www.ehso.com/battery.php.
RECONDITIONBATTERY.COM
34
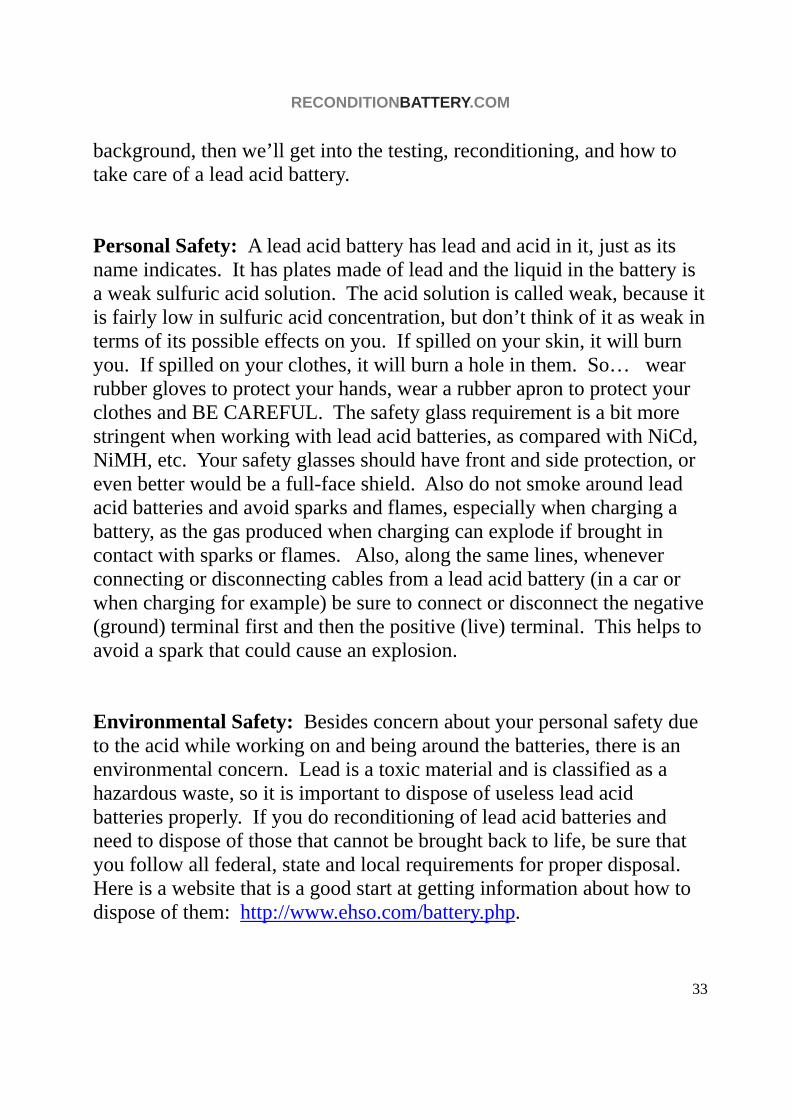
What Does a Lead Acid Battery Look Like Inside? You can do the testing and reconditioning processes that are going to be described shortly, without knowing anything about the inside of a lead acid battery. But… understanding a bit more about the battery might be helpful, so we are going to give some detail here. A lead acid battery cell is made up of two plates, one connected to the positive terminal and one connected to the negative terminal of the battery, and separated by insulating material. This whole apparatus is placed into a container (usually plastic) and filled with liquid (dilute sulfuric acid – called the electrolyte) until it covers the top of the plates. The inside of a single lead acid cell would look something like the diagram below. A single cell with one negative and one positive plate will have a nominal voltage of 2 volts. After the battery has been charged by sending electrical current through the battery backwards, it will produce a flow of electrical current through an electrical device (like your car's headlights or radio or starter motor) connected between the battery's two terminals. A lead acid battery doesn't produce electrical energy unless it has been previously charged. That is why it is sometimes called a “storage battery.”
Lead acid batteries seldom consist of a single cell as shown above. For many years the standard automobile battery was made up of three cells connected in series to generate about 6 volts. Quite some time ago the
RECONDITIONBATTERY.COM
35
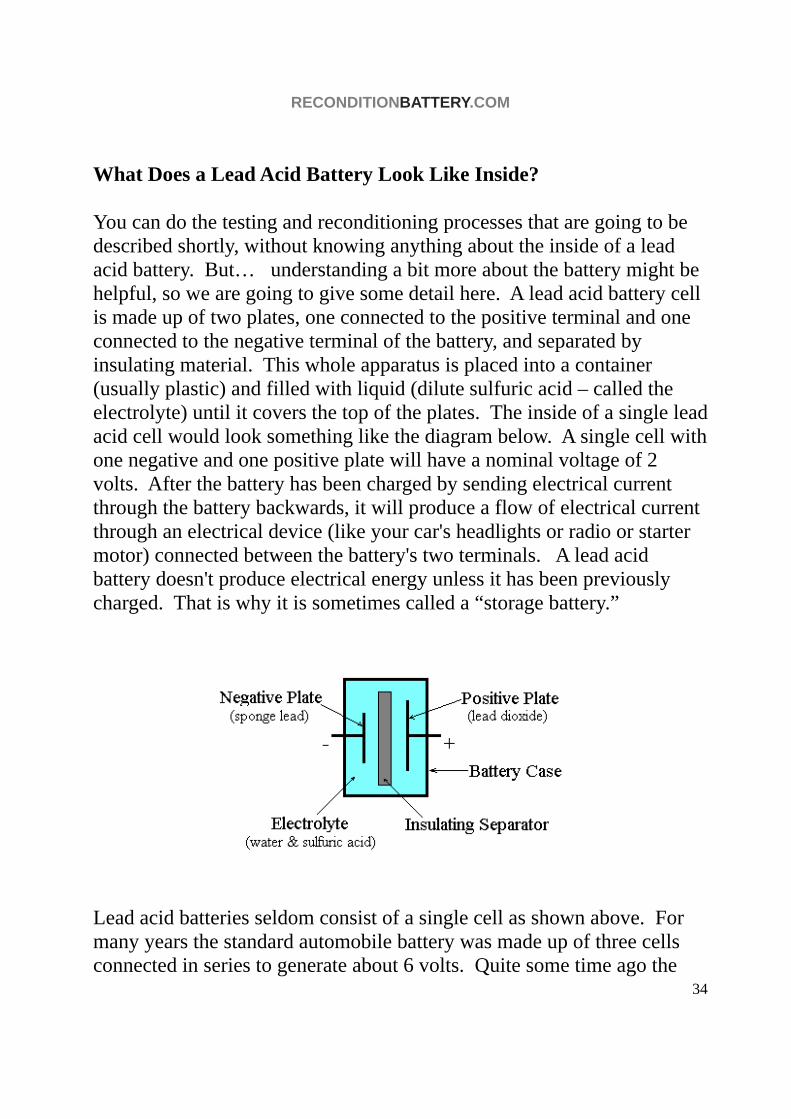
standard was switched to a 12 volt battery made up of 6 cells. Below is a schematic diagram of a 12 volt lead acid battery. As you can see, lead acid batteries could be made up in any voltage which is a multiple of two, by putting together the right number of cells in series. The most common voltages are 6 volts and 12 volts, but lead acid batteries are produced in other voltages also.
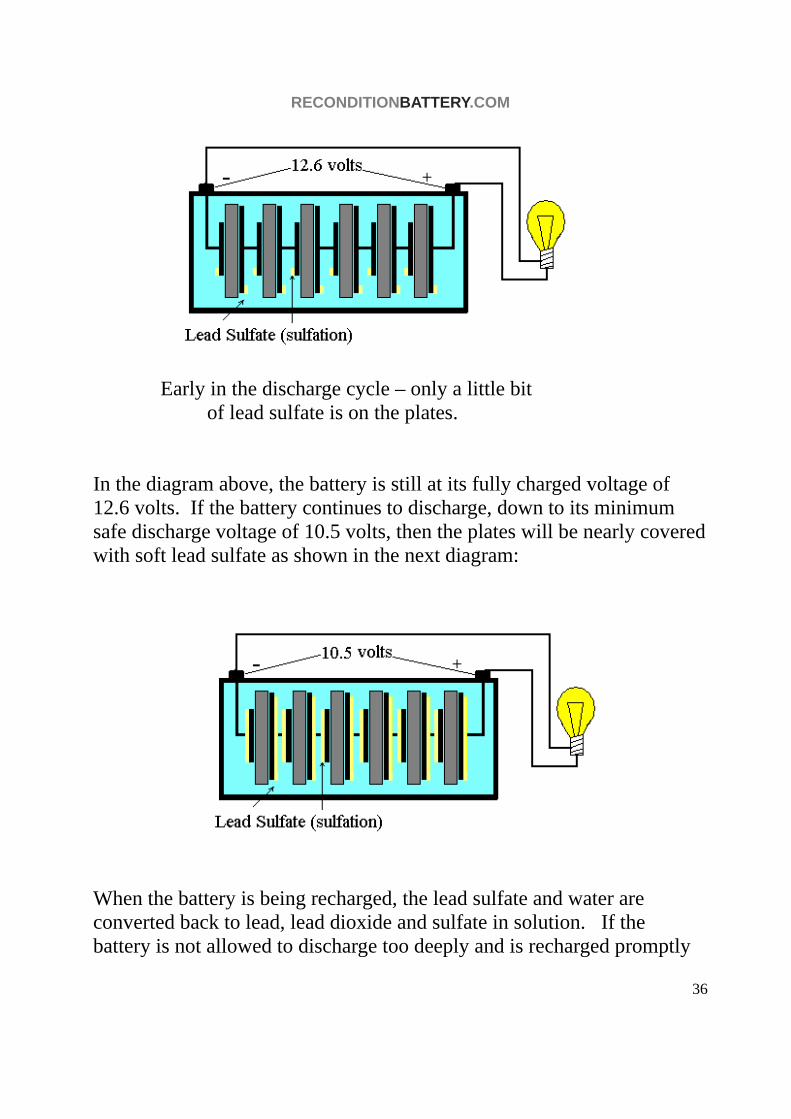
What is Sulfation and How does it Affect a Battery? If you do any reading about lead acid battery testing and reconditioning, you will find the terms sulfation or sulfating, so lets clear up what these terms mean. When the battery is discharging (sending current through your car headlights, etc.) the lead dioxide positive plate and lead negative plate react with the sulfate in the electrolyte to create lead sulfate (which collects on the battery plates), water and electrical energy. Early in the discharge cycle, there will only be a little bit of soft lead sulfate on the plates as shown in the following diagram:
RECONDITIONBATTERY.COM
36
Early in the discharge cycle – only a little bit of lead sulfate is on the plates. In the diagram above, the battery is still at its fully charged voltage of 12.6 volts. If the battery continues to discharge, down to its minimum safe discharge voltage of 10.5 volts, then the plates will be nearly covered with soft lead sulfate as shown in the next diagram:
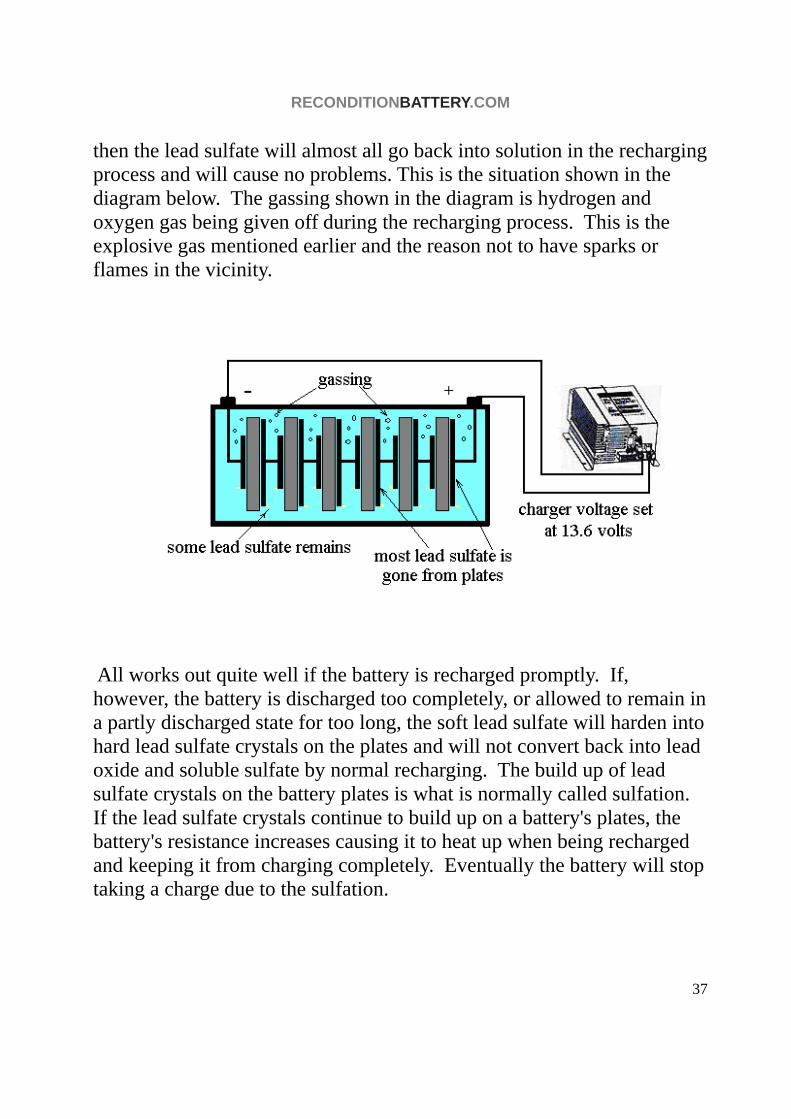
When the battery is being recharged, the lead sulfate and water are converted back to lead, lead dioxide and sulfate in solution. If the battery is not allowed to discharge too deeply and is recharged promptly
RECONDITIONBATTERY.COM
37
then the lead sulfate will almost all go back into solution in the recharging process and will cause no problems. This is the situation shown in the diagram below. The gassing shown in the diagram is hydrogen and oxygen gas being given off during the recharging process. This is the explosive gas mentioned earlier and the reason not to have sparks or flames in the vicinity.
All works out quite well if the battery is recharged promptly. If, however, the battery is discharged too completely, or allowed to remain in a partly discharged state for too long, the soft lead sulfate will harden into hard lead sulfate crystals on the plates and will not convert back into lead oxide and soluble sulfate by normal recharging. The build up of lead sulfate crystals on the battery plates is what is normally called sulfation. If the lead sulfate crystals continue to build up on a battery's plates, the battery's resistance increases causing it to heat up when being recharged and keeping it from charging completely. Eventually the battery will stop taking a charge due to the sulfation.
RECONDITIONBATTERY.COM
38
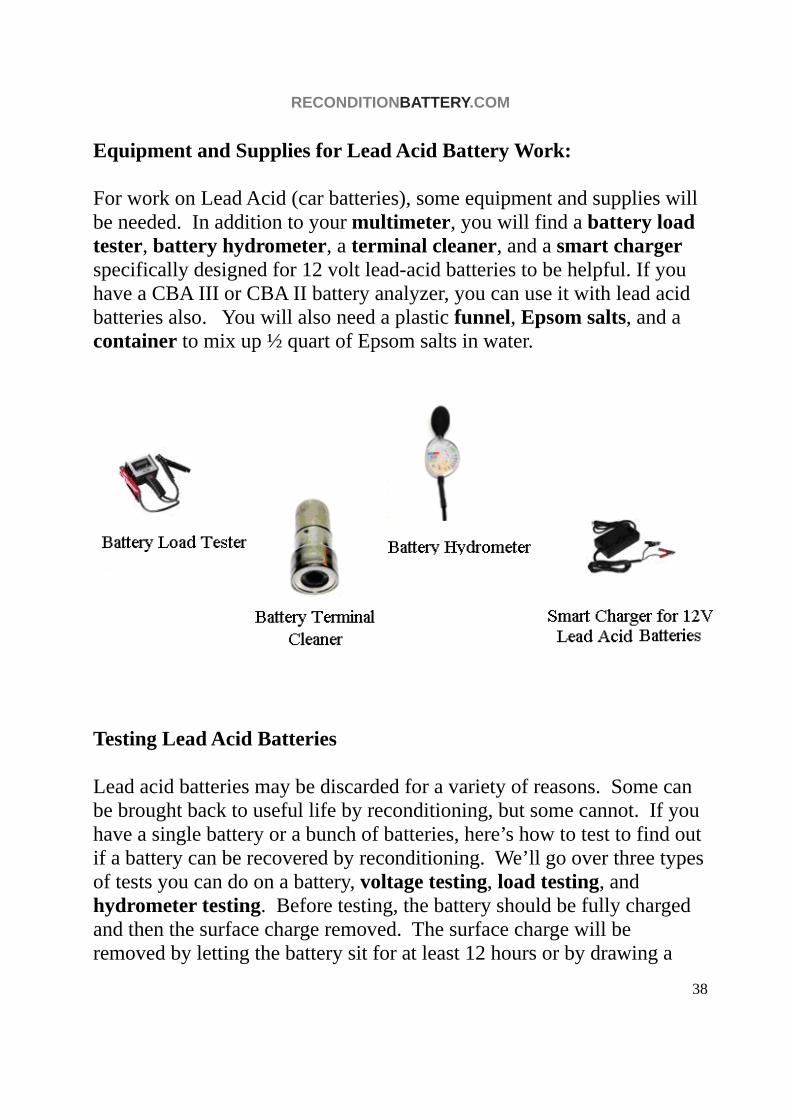
Equipment and Supplies for Lead Acid Battery Work: For work on Lead Acid (car batteries), some equipment and supplies will be needed. In addition to your multimeter, you will find a battery load tester, battery hydrometer, a terminal cleaner, and a smart charger specifically designed for 12 volt lead-acid batteries to be helpful. If you have a CBA III or CBA II battery analyzer, you can use it with lead acid batteries also. You will also need a plastic funnel, Epsom salts, and a container to mix up ½ quart of Epsom salts in water.
Testing Lead Acid Batteries Lead acid batteries may be discarded for a variety of reasons. Some can be brought back to useful life by reconditioning, but some cannot. If you have a single battery or a bunch of batteries, here’s how to test to find out if a battery can be recovered by reconditioning. We’ll go over three types of tests you can do on a battery, voltage testing, load testing, and hydrometer testing. Before testing, the battery should be fully charged and then the surface charge removed. The surface charge will be removed by letting the battery sit for at least 12 hours or by drawing a
RECONDITIONBATTERY.COM
39
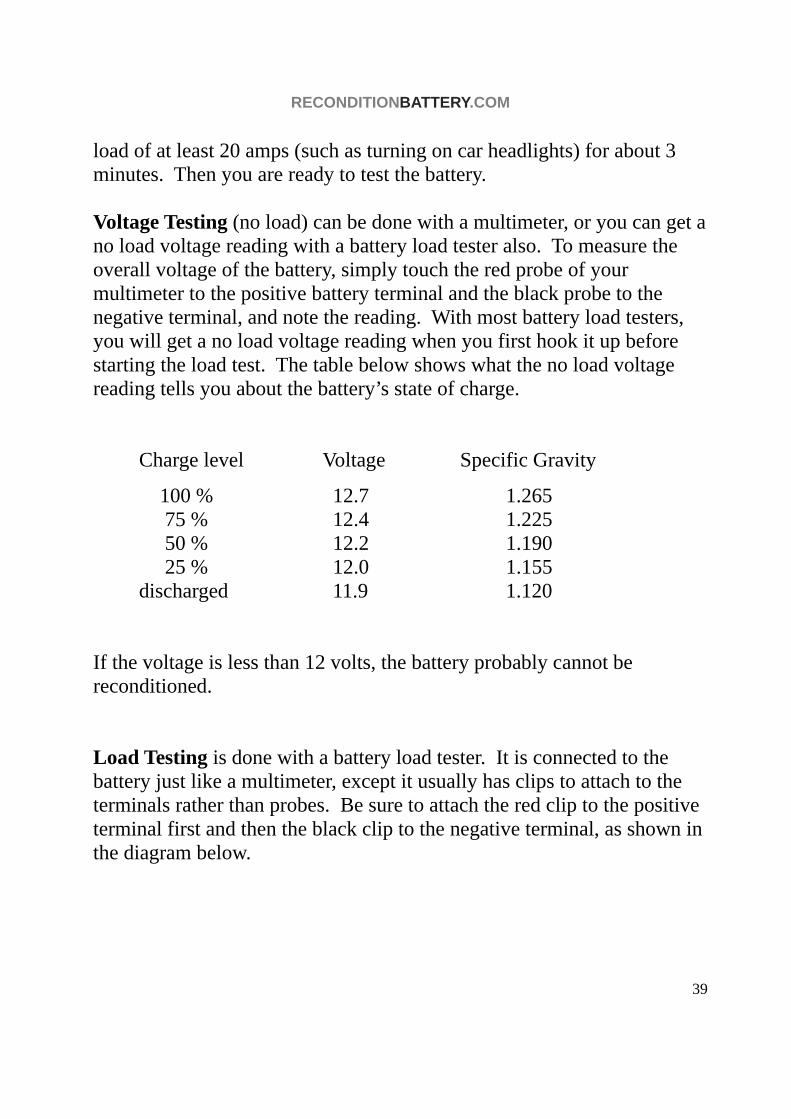
load of at least 20 amps (such as turning on car headlights) for about 3 minutes. Then you are ready to test the battery. Voltage Testing (no load) can be done with a multimeter, or you can get a no load voltage reading with a battery load tester also. To measure the overall voltage of the battery, simply touch the red probe of your multimeter to the positive battery terminal and the black probe to the negative terminal, and note the reading. With most battery load testers, you will get a no load voltage reading when you first hook it up before starting the load test. The table below shows what the no load voltage reading tells you about the battery’s state of charge. Charge level Voltage Specific Gravity
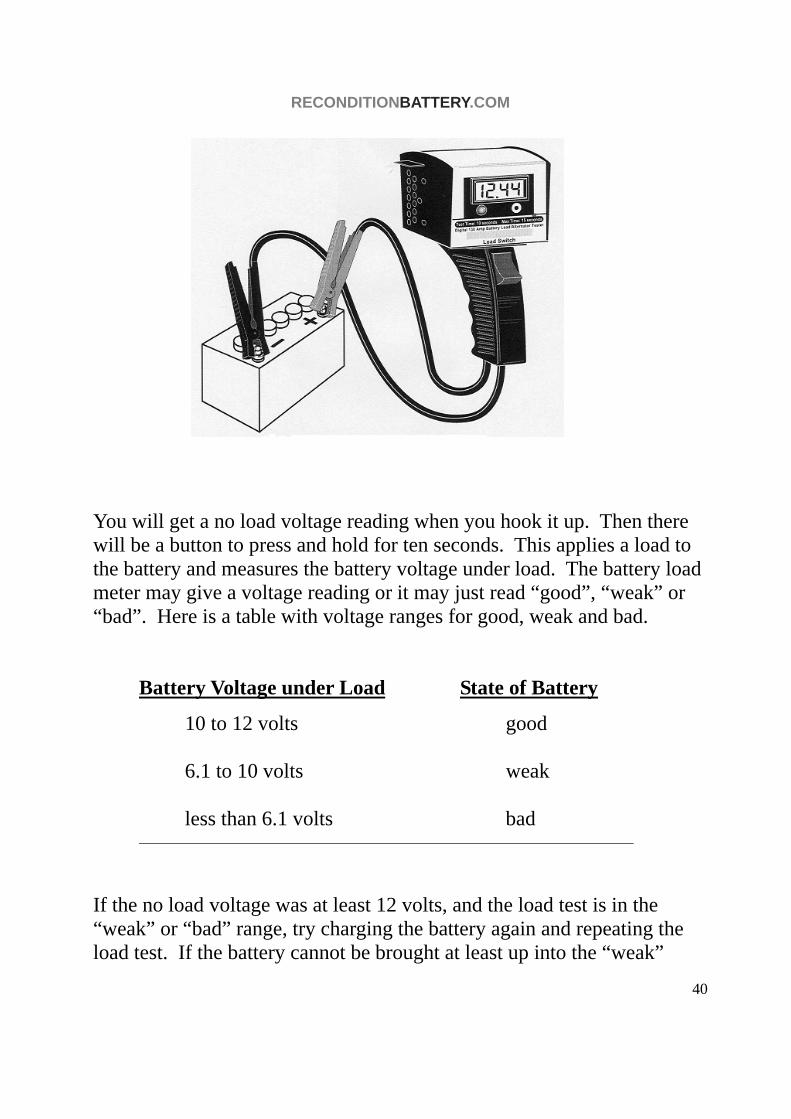
100 % 12.7 1.265 75 % 12.4 1.225 50 % 12.2 1.190 25 % 12.0 1.155 discharged 11.9 1.120 If the voltage is less than 12 volts, the battery probably cannot be reconditioned. Load Testing is done with a battery load tester. It is connected to the battery just like a multimeter, except it usually has clips to attach to the terminals rather than probes. Be sure to attach the red clip to the positive terminal first and then the black clip to the negative terminal, as shown in the diagram below.
RECONDITIONBATTERY.COM
40
You will get a no load voltage reading when you hook it up. Then there will be a button to press and hold for ten seconds. This applies a load to the battery and measures the battery voltage under load. The battery load meter may give a voltage reading or it may just read “good”, “weak” or “bad”. Here is a table with voltage ranges for good, weak and bad.
Battery Voltage under Load State of Battery
10 to 12 volts good 6.1 to 10 volts weak less than 6.1 volts bad
If the no load voltage was at least 12 volts, and the load test is in the “weak” or “bad” range, try charging the battery again and repeating the load test. If the battery cannot be brought at least up into the “weak”
RECONDITIONBATTERY.COM
41
range reconditioning will probably not work. Batteries that are in the upper part of the weak range have the best chance of recovering with reconditioning treatment. Hydrometer Testing can be used to test the individual cells to make sure that there is no dead cell. To do this test you need to remove the cell caps if they are present. If you have a sealed lead acid battery there will be no cell caps and you will need to drill a hole to access each cell. You should be able to see the “shadow” holes into the cells, through the plastic top of the battery. Use a stop with your drill bit, so you won’t hit the battery plates and damage them. After gaining access to each cell, draw some liquid up into the hydrometer, and note the reading. The table on page 39 shows what the hydrometer reading tells you about the condition of the cell. If most of the cells have a hydrometer reading above 1.2 and one cell has a reading of 1.12 or below, the cell that reads low is probably dead and the battery cannot be reconditioned. An alternative to the hydrometer testing, for checking on the cells, is measuring the no load voltage of each cell. This can be done with a multimeter or a battery load tester. Start with the red clip or probe on the positive terminal and the black clip or probe connected to a wire which is inserted into the liquid in the negative side of the first cell. The voltage should be 2 volts or more. Then connect the red clip or probe to a wire in the first cell and the black clip or probe to a wire in the second cell. Repeat until the voltage has been checked for each cell. If one of the cells is below 2 volts and all of the others are 2 volts or above, then you’ve found a dead cell. A battery with a dead cell can’t be reconditioned and should be discarded. If you had to drill holes into the battery, you should now plug the holes with plastic plugs or plastic corks. They are available at most hardware stores. Reconditioning Lead Acid Batteries There are several possible approaches used for lead acid battery reconditioning. We will discuss these three: i) apply an “equalizing
RECONDITIONBATTERY.COM
42
charge; ii) using chemical addition; and iii) using special desulfating equipment. Applying an equalizing charge consists of charging at a higher voltage for a short period of time. Here are the steps:
1. Make sure that the plates in all of the cells are covered with electrolyte, and add distilled water during the equalizing process if necessary in order to keep them covered.
2. Fully recharge the battery using normal charging procedure. 3. Increase the charging voltage to 5% to 10% above the normal
charging voltage. The equalizing voltage is typically at least 14.4 volts and sometimes as high as 15 volts for a 12 volt battery.
4. Monitor the battery temperature and don’t allow it to go above
100oF for a sealed battery or 125oF for a battery with caps. Stop equalizing and allow the battery to cool before continuing if it reaches this temperature.
5. The equalizing voltage should cause gassing (gas bubbles coming
up in the liquid) in each cell. 6. Take specific gravity readings in each cell at least once an hour,
and stop equalizing when the specific gravity values no longer rise and when every cell is gassing evenly.
7. Discharge the battery to 50% and recharge it normally a couple of
times and test it to see if the equalizing charge has helped. Use chemical addition: This procedure uses a common chemical that you can buy at almost any drug store. The chemical is magnesium
RECONDITIONBATTERY.COM
43
sulfate, but it is better recognized by the name Epsom salt. Here are the steps for using Epsom salt for battery reconditioning.
1. Measure out about 7 to 8 ounces (250 grams) of Epsom salt. 2. Heat about ½ quart of distilled water to about 150oF. This is very
hot but not boiling. It doesn’t have to be exactly 150oF, but does need to be hot or the Epsom salt won’t dissolve.
3. Add the 7 to 8 ounces of Epsom Salt to the ½ quart of hot water and
stir until it is all or almost all dissolved. 4. If you haven’t already done so, the battery caps need to be removed
or holes drilled into each cell in a sealed battery. 5. If the battery has electrolyte up to the proper level (battery plates
completely covered), then remove about ½ quart of liquid from the cells of the battery, taking approximately the same amount from each cell.
6. Using a small plastic funnel, add the ½ quart of Epsom salt solution
to the battery, putting approximately the same amount into each cell, and making sure that the plates are all completely covered.
7. Put the battery caps back on or put plastic plugs into the drilled
holes and shake the battery to make sure that the Epsom salt solution is well distributed in each cell.
8. Charge the battery completely, then discharge it to 50% and
recharge it a couple of times and test to see if the chemical addition has helped the battery.
Special Desulfating Equipment can be used. There are quite a few devices on the market for desulfating lead acid batteries. Many of them
RECONDITIONBATTERY.COM
44
use pulses of alternating current to break loose the lead sulfate. Some lead acid battery chargers now include a “desulfating” mode. Information from several manufacturers is available at http://jgdarden.com/batteryfaq/batlinks.htm#desulfators. Types of Lead Acid Batteries Starting Lighting and Ignition (SLI) batteries are the type typically used in cars. They are designed to be fully charged when starting the car. About 2% to 5% of the charge is used in starting the car, and is then replaced by the alternator, so that the battery remains fully charged. This type of battery should not be discharged below 50% . Discharging them below the 50% level can damage the plates and shorten the battery life. Deep Cycle Batteries are used for applications such as golf buggies, fork-lift trucks, electric vehicles, and marine applications, where the battery can’t conveniently be kept fully charged like in a car. They are designed to be completely discharged before recharging. Both SLI and deep cycle batteries can be either vented or sealed. Vented Batteries have a removable cap to provide access to each cell. When a vented battery gets hot or gasses during charging, water vapor or hydrogen and oxygen gas are given off through the vents. Thus, this type of battery needs to have distilled water added to the cells periodically to keep the plates covered. Sealed (maintenance-free) Batteries do not have caps providing access to the cells. They are designed to allow less gassing and thus less loss of water from the electrolyte. There is no way to add water or to gain access to the cells except by drilling holes and then using plastic plugs as discussed earlier.
RECONDITIONBATTERY.COM
45
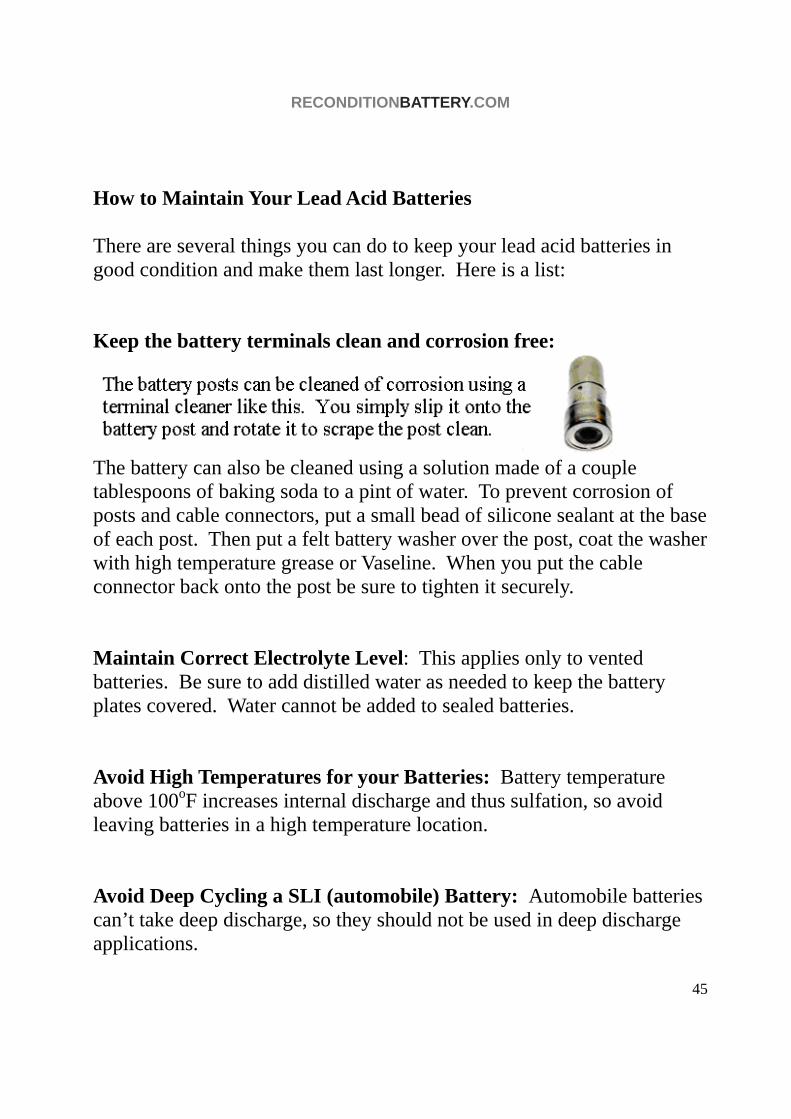
How to Maintain Your Lead Acid Batteries There are several things you can do to keep your lead acid batteries in good condition and make them last longer. Here is a list: Keep the battery terminals clean and corrosion free:
The battery can also be cleaned using a solution made of a couple tablespoons of baking soda to a pint of water. To prevent corrosion of posts and cable connectors, put a small bead of silicone sealant at the base of each post. Then put a felt battery washer over the post, coat the washer with high temperature grease or Vaseline. When you put the cable connector back onto the post be sure to tighten it securely. Maintain Correct Electrolyte Level: This applies only to vented batteries. Be sure to add distilled water as needed to keep the battery plates covered. Water cannot be added to sealed batteries. Avoid High Temperatures for your Batteries: Battery temperature above 100oF increases internal discharge and thus sulfation, so avoid leaving batteries in a high temperature location. Avoid Deep Cycling a SLI (automobile) Battery: Automobile batteries can’t take deep discharge, so they should not be used in deep discharge applications.
RECONDITIONBATTERY.COM
46
Don’t Allow a Long Time Between Charges: It is hard on a battery to sit too long between charges. It gradually self discharges. Don’t Undercharge Batteries: Charging a battery to less than 100% of its capacity will allow sulfation to begin. Use a Smart Charger for Deep Cycle Batteries: If working properly, the alternator will keep a car battery fully charged, but deep cycle batteries need to be charged properly after their discharge cycle to extend their life. A smart charger for lead acid batteries should have either three or four steps. A three step charger will start with bulk charging, in which the battery is charged up to 80% of its capacity at the maximum voltage and current rating of the charger. The absorption charge step starts when the battery voltage reaches 14.4 volts. For this step, the voltage is held at 14.4 volts and the current decreases until the battery is 98% charged. The third step is float charging, in which the voltage is held at 13.4 volts and the current is kept below one amp. This will gradually bring the battery charge level to 100%. This low level charge will not heat the battery or cause gassing, but will keep at the 100% charge level. If the smart charger has a fourth step, it will be equalization charging, as discussed earlier. This consists of applying a higher level voltage to a fully charged battery for a period of time.