Embed Size (px)
Citation preview
XML Specification of GUI
Wang Xin
Kongens Lyngby 2006
Master Thesis IMM-Thesis-2006-3

Technical University of Denmark
Informatics and Mathematical Modelling
Building 321, DK-2800 Kongens Lyngby, Denmark
Phone +45 45253351, Fax +45 45882673
www.imm.dtu.dk
Summary
This project is to implement a GUI Toolkit based on the XML specifications. The GUI
Toolkit contains three major parts: static behaviour, dynamic behaviour and
transformation.
The static behaviour contains a set of widgets for a GUI, e.g. label, textbox, button,
radio button, checkbox, drop-down menu and listbox. The layout for the widgets is
specified in this part as well.
The dynamic behaviour contains a set of events for a GUI: e.g. get data from the data
island and bind it to the GUI, send data to the data island, validation of the GUI
specifications, validation of the data type and format and validation of Login.
The transformation part contains two XSLT documents for transforming the XML
document into two document types: XHTML and Java.
Preface
This thesis is done for obtaining the M.Sc. degree. The thesis work has been carried
out at the Department of Informatics and Mathematical Modelling, Programme of
Computer Systems Engineering at the Technical University of Denmark, under
supervision of Mads Nyborg. The project corresponds to 35 ECTS points and lasted
from 1st, October, 2005 to 1
st, April, 2006.
This report is the result of the whole project work. Since this is a technical report, it
requires the reader to have some basic knowledge on the XML, XSL, and JavaScript
technologies.
The report is spilt into seven chapters: Project definition, Project Management, Basic
Concepts, Project Solution, Testing, Conclusion and Future Improvement. The
Appendix is considered as an individual part, it contains the User Manual and all the
source code. All the source documents are copied in the enclosed CD.
Wang Xin s010744
Kongens Lyngby, March 2006
Papers included in the thesis
[A] Beginning XML 2nd Edition
Author: David Hunter, Kurt Cagle, Chris Dix, Roger Kovack, Jonatan Pinnock,
Jeff Rafter
ISBN 1-861005-59-8
[B] Professional XML 2nd Edition
Author: Mark Birbeck, Jon Duckett, Oli Gauti Gumundsson, Pete Kobak, Evan
Lenz, Steve Livingstone, Daniel Marcus, Stephen Mohr, Nikola Ozu, Jonathon
Pinnock, Keith Visco, Andrew Watt, Kevin Williams, Zoran Zaev
ISBN 1861005059
[C] http://www.w3schools.com/xml/default.asp
[D] http://www.w3schools.com/xsl/
[E] http://www.w3schools.com/schema/default.asp
[F] http://www.w3schools.com/js/default.asp
[G] http://www.w3schools.com/xforms/default.asp
[H] http://www.xml.com/pub/p/188
[I] http://www.regular-expressions.info/email.html
[K] http://www.w3schools.com/asp/default.asp
[L] http://www.devx.com/webdev/Article/17085
[M] http://www.bambookit.com/Contents.html
Acknowledgements
First of all I would like to address special thank to my supervisor Mads Nyborg, for
the project proposal and the excellent guidance throughout the whole project.
Meanwhile, I shall also thank all the other people who have given me great help on
both the project and the report.
Furthermore, I would like to show my appreciation to the reader who spends time on
reading the report.
Finally I am grateful for the support from my family and friends.
Wang Xin
DTU, Kongens Lyngby, March, 2006
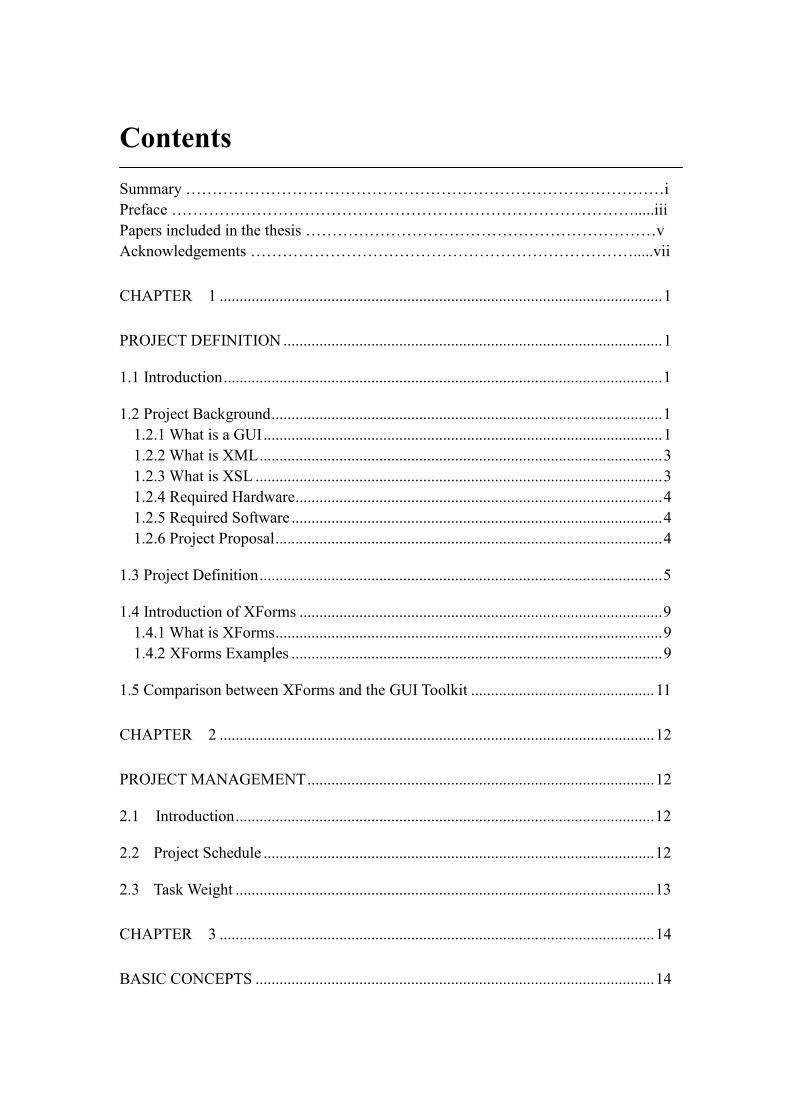
Contents
Summary ………………………………………………………………………………i
Preface …………………………………………………………………………….....iii
Papers included in the thesis …………………………………………………………v
Acknowledgements ……………………………………………………………….....vii
CHAPTER 1 ...............................................................................................................1
PROJECT DEFINITION ...............................................................................................1
1.1 Introduction..............................................................................................................1
1.2 Project Background..................................................................................................1
1.2.1 What is a GUI....................................................................................................1
1.2.2 What is XML.....................................................................................................3
1.2.3 What is XSL ......................................................................................................3
1.2.4 Required Hardware............................................................................................4
1.2.5 Required Software .............................................................................................4
1.2.6 Project Proposal.................................................................................................4
1.3 Project Definition.....................................................................................................5
1.4 Introduction of XForms ...........................................................................................9
1.4.1 What is XForms.................................................................................................9
1.4.2 XForms Examples .............................................................................................9
1.5 Comparison between XForms and the GUI Toolkit ..............................................11
CHAPTER 2 .............................................................................................................12
PROJECT MANAGEMENT.......................................................................................12
2.1 Introduction.........................................................................................................12
2.2 Project Schedule ..................................................................................................12
2.3 Task Weight .........................................................................................................13
CHAPTER 3 .............................................................................................................14
BASIC CONCEPTS ....................................................................................................14
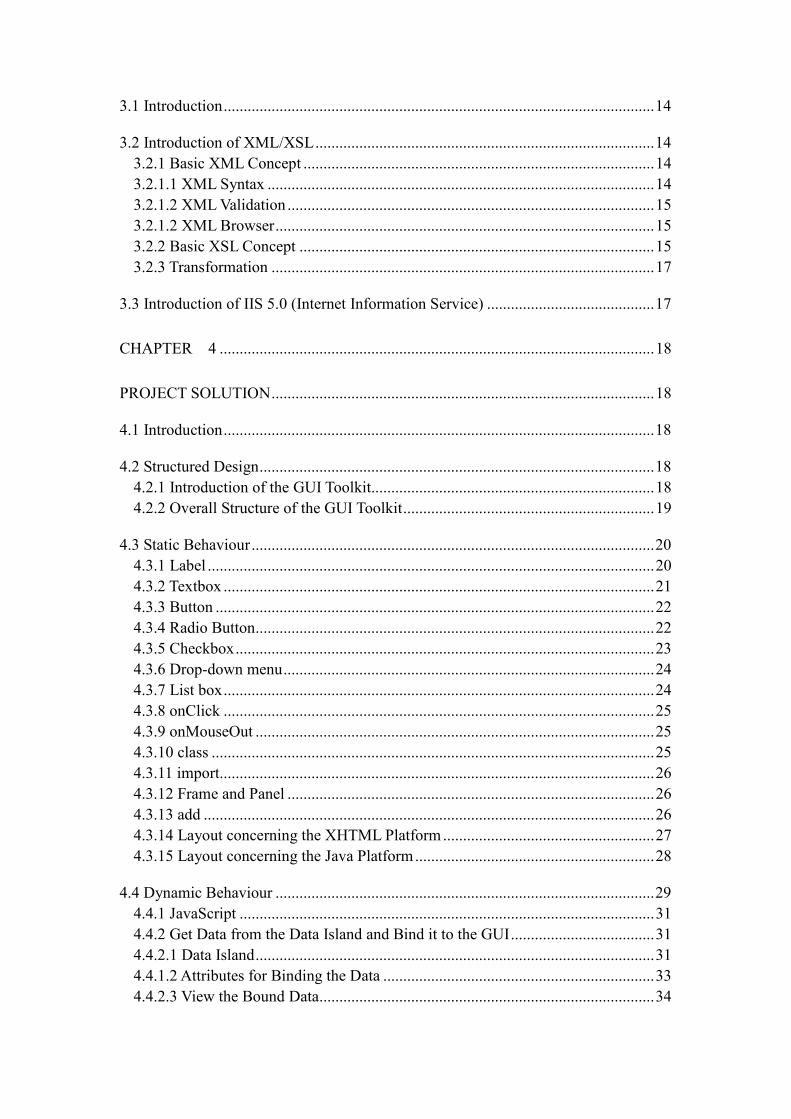
3.1 Introduction............................................................................................................14
3.2 Introduction of XML/XSL.....................................................................................14
3.2.1 Basic XML Concept ........................................................................................14
3.2.1.1 XML Syntax .................................................................................................14
3.2.1.2 XML Validation ............................................................................................15
3.2.1.2 XML Browser...............................................................................................15
3.2.2 Basic XSL Concept .........................................................................................15
3.2.3 Transformation ................................................................................................17
3.3 Introduction of IIS 5.0 (Internet Information Service) ..........................................17
CHAPTER 4 .............................................................................................................18
PROJECT SOLUTION................................................................................................18
4.1 Introduction............................................................................................................18
4.2 Structured Design...................................................................................................18
4.2.1 Introduction of the GUI Toolkit.......................................................................18
4.2.2 Overall Structure of the GUI Toolkit...............................................................19
4.3 Static Behaviour.....................................................................................................20
4.3.1 Label ................................................................................................................20
4.3.2 Textbox ............................................................................................................21
4.3.3 Button ..............................................................................................................22
4.3.4 Radio Button....................................................................................................22
4.3.5 Checkbox.........................................................................................................23
4.3.6 Drop-down menu.............................................................................................24
4.3.7 List box............................................................................................................24
4.3.8 onClick ............................................................................................................25
4.3.9 onMouseOut ....................................................................................................25
4.3.10 class ...............................................................................................................25
4.3.11 import.............................................................................................................26
4.3.12 Frame and Panel ............................................................................................26
4.3.13 add .................................................................................................................26
4.3.14 Layout concerning the XHTML Platform.....................................................27
4.3.15 Layout concerning the Java Platform............................................................28
4.4 Dynamic Behaviour ...............................................................................................29
4.4.1 JavaScript ........................................................................................................31
4.4.2 Get Data from the Data Island and Bind it to the GUI....................................31
4.4.2.1 Data Island....................................................................................................31
4.4.1.2 Attributes for Binding the Data ....................................................................33
4.4.2.3 View the Bound Data....................................................................................34
4.4.2 Send Data to the Data Island ...........................................................................36
4.4.3 Validation of the GUI Specification ................................................................39
4.4.4 Validation of the Data Type and Format..........................................................40
4.4.5 Validation of Login..........................................................................................43
4.5 Transformation.......................................................................................................45
4.5.1 Common Elements used for the XSLT Document ..........................................46
4.5.1.1 Transformation into XHTML.......................................................................47
4.5.2 Transformation into Java .................................................................................51
CHAPTER 5 .............................................................................................................59
TESTING.....................................................................................................................59
5.1 Introduction .........................................................................................................59
5.2 Module Test .........................................................................................................59
5.2.1 Testing of the Static Behaviour......................................................................59
5.2.1.1 Label ...........................................................................................................59
5.2.1.2 Textbox .......................................................................................................60
5.2.1.3 Button .........................................................................................................60
5.2.1.4 Radio Button...............................................................................................60
5.2.1.5 Checkbox....................................................................................................61
5.2.1.6 Drop-down Menu .......................................................................................61
5.2.1.7 Listbox........................................................................................................61
5.3 Integration Test ....................................................................................................62
5.3.1 Testing of a complete GUI with All the widgets............................................62
5.3.2 Testing of Binding data to the GUI................................................................64
5.3.3 Testing of Sending data to the Data Island ....................................................65
5.3.4 Testing of the Data Type and Format Validation ...........................................66
5.3.5 Testing of Login .............................................................................................67
5.3.6 Testing of the Transformation into XHTML..................................................67
5.3.7 Testing of the Transformation into Java.........................................................69
5.4 Acceptance Test ...................................................................................................72
CHAPTER 6 .............................................................................................................78
CONCLUSION............................................................................................................78
6.1 Introduction .........................................................................................................78
6.2 Conclusion on the GUI Toolkit ...........................................................................78
6.3 Conclusion on the Achievement..........................................................................79
6.4 Future Improvement ............................................................................................79
CHAPTER 7 .............................................................................................................80
FURTHER IMPROVEMENT .....................................................................................80
7.1 Introduction .........................................................................................................80
7.2 Improvement on the Static Behaviour ................................................................80
7.3 Improvement on the Dynamic Behaviour ...........................................................81
7.4 Improvement on the Transformation ...................................................................81
APPENDIX A ..............................................................................................................82
USER MANUAL.........................................................................................................82
1.1 Introduction............................................................................................................82
1.2 User Manual...........................................................................................................82
1.2.1 Beginning on the GUI Specification ...............................................................82
1.2.2 Label ................................................................................................................83
1.2.3 Textbox ............................................................................................................83
1.2.4 Button ..............................................................................................................84
1.2.5 Radio Button....................................................................................................84
1.2.6 Checkbox.........................................................................................................85
1.2.7 Drop-down Menu ............................................................................................85
1.2.8 Listbox.............................................................................................................86
1.2.9 Write a Data Island Document ........................................................................86
1.2.10 Get data from the Data Island and Bind it to the GUI...................................87
1.2.11 View the Bound Data.....................................................................................88
1.2.12 Install the IIS (Internet Information Server) 5.0............................................88
1.2.13 Send data to the Data Island ..........................................................................89
1.2.14 Validation of the GUI Specification ..............................................................89
1.2.15 Validation of the Data Type and Format........................................................90
1.2.16 Validation of Login........................................................................................91
1.2.17 Installation of the JDK 5.0 and Xalan-Java...................................................92
1.2.18 Transformation into XHTML........................................................................93
1.2.19 Transformation into Java ...............................................................................93
1.3 GUI Specification Examples ...............................................................................94
1.3.1 Address book .................................................................................................94
1.3.2 Login ..............................................................................................................99
1.3.3 gui_java........................................................................................................101
APPENDIX B ............................................................................................................107
SOURCE CODE........................................................................................................107
1.1 Introduction .......................................................................................................107
1.2 gui_xhtml.xsl .....................................................................................................107
1.3 gui_java.xsl........................................................................................................112
1.4 gui.xsd ...............................................................................................................116
1.5 function.js ..........................................................................................................118
1.6 ASP Document ..................................................................................................120
1.7 Lai.xhtml ...........................................................................................................121
1.8 Lai_java.xml......................................................................................................123
1.9 Lai.java ..............................................................................................................124
1.10 display.html .......................................................................................................127
1 Chapter 1 Project Definition
CHAPTER 1
Project Definition
1.1 Introduction
The purpose of this chapter is to define the goals and expectations of the project, means
setting up the definitions concerning the GUI Toolkit. The project background and the
relevant information are presented as well.
1.2 Project Background
1.2.1 What is a GUI
A GUI (stands for Graphical User Interfaces) contains its own set of terms. The most
common terms are:
Control: It’s a GUI object used for controlling the application. Controls have
properties and usually used for generating events. The GUI environment normally
provides a mechanism for binding the events to methods.
Widget: It’s a control restricted to visible controls. Widgets are controls which are
visible and can be manipulated by the user or the developer. Widgets normally contain
the following basic elements:
� Frame – used to place all the other widgets inside it
� Label – used to set labels on the GUI, e.g. text “Name”
� Button – used to active an action or event, this widget is always used to bind
an event to a method
2 Chapter 1 Project Definition
� Text box - used for entering texts
� Message boxes – a box (the size can be set by the user), used to pop-up
messages, e.g. warning message
� Radio button - used for making single selection
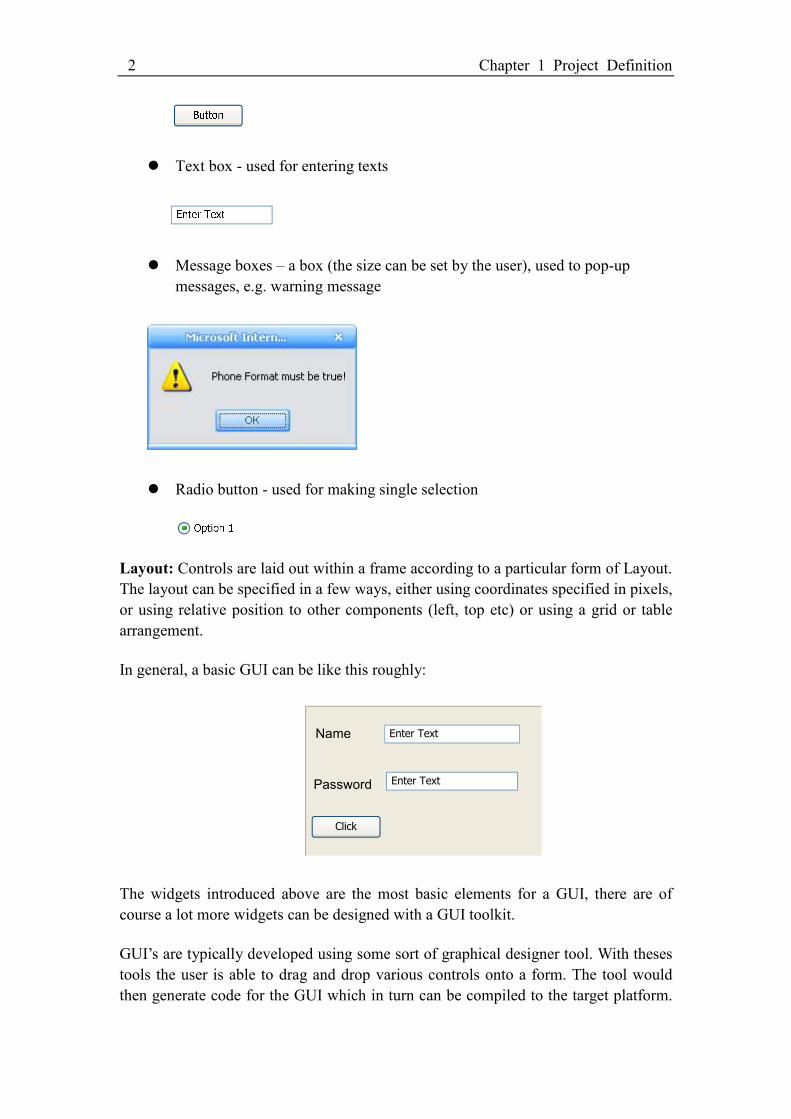
Layout: Controls are laid out within a frame according to a particular form of Layout.
The layout can be specified in a few ways, either using coordinates specified in pixels,
or using relative position to other components (left, top etc) or using a grid or table
arrangement.
In general, a basic GUI can be like this roughly:
Enter TextName
Enter TextPassword
Click
The widgets introduced above are the most basic elements for a GUI, there are of
course a lot more widgets can be designed with a GUI toolkit.
GUI’s are typically developed using some sort of graphical designer tool. With theses
tools the user is able to drag and drop various controls onto a form. The tool would
then generate code for the GUI which in turn can be compiled to the target platform.
3 Chapter 1 Project Definition
The designer tool, however, won’t generate code for actions that should be taken upon
activation of a control. The user needs to understand the code in order to write event
handlers. The design is typical based on the observer design pattern. Although this
code is from an object oriented perspective is well structured. Due to the reason of
this, we would like to search for a mechanism, which can provide the user an easy
way to design and control the GUIs.
1.2.2 What is XML
XML (stands for Extensible Markup Language) is mainly used for handling data. The
main responsibility for XML is to store, carry, and exchange data. XML has the
following important properties:
� Tags are not predefined, so we can freely define our own tags, this is much more
free and flexible compare to HTML.
� Uses either a Document Type Definition (DTD) or an XML Schema to describe
the data, and validate a well-formed XML document.
� Is a W3C Recommendation.
� Leads HTML to XHTML.
� Is license-free, platform-independent and well-supported.
In general, XML is a cross-platform, software and hardware independent tool for
transmitting information. The main advantage and property for XML is that it’s free
and extensible, since XML is independent of hardware, software and application, we
can make our data available to other platforms than only standard HTML browsers.
Another important property for XML is that the syntax rules are very simple and very
strict, therefore software created on based of XML document can be very easy to read
work with.
1.2.3 What is XSL
Since XML is only for handling data, it doesn’t do anything to display data, which is
different from HTML. In order to display data from an XML document, it is necessary
to have a mechanism to describe how the document should be displayed. One of these
mechanisms is Cascading Style Sheets (CSS), but XSL (stands for Extensible
Stylesheet Language) is the preferred style sheet language for XML, and it’s much
more popular than the CSS used by HTML.
XSLT is the most important part of XSL and it became a W3C Recommendation,
XSLT is used to transform an XML document into another XML document, or other
document types that is recognized by a browser, e.g. XHTML.
With XSL we can freely modify the source text, it means we can get different output
document from the same source file. The XSLT specification allows the user to
4 Chapter 1 Project Definition
specify how the result tree to be output, so that the XML document can be
transformed into other document types more than HTML.
1.2.4 Required Hardware
The hardware required for this project is very simple, which include a normal PC with
stable power.
1.2.5 Required Software
The software required for this project is:
IE browser (5.0 or 6.0) – used to view the output result.
XML Editor – used to model, edit and validate the XML/XSL documents. There are
no special requirements on the XML Editor, but Altova XMLSpy can be a very good
choice.
IIS (Internet Information Services) – used to setup a web server on the computer.
JDK 6.0 – used to set up the Java environment.
Xalan-Java – used to transform the XML document into other document types.
1.2.6 Project Proposal
Due to the above description of XML and XSL, my supervisor Mads Nyborg
proposed an idea of designing a GUI Toolkit based on the XML specifications. The
advantage is that:
� This GUI Toolkit could be very easy for the user to learn and use since the XML
syntax is very simple and understandable, the user doesn’t need to do any
complicated programming like Java.
� This GUI Toolkit provides the user with possibilities to output the result on based
of XHTML platform and other platforms. In this project, we choose XHTML and
Java platform for demonstration.
� As a developer, I can freely design my own GUI Toolkit due to the properties of
XML and XSL, it means that I can self define all the widgets and behaviours
according to the user’s need.
� The GUI Toolkit is extensible, it means that it is easier for the developer to add
more functionalities or features to the future development.
5 Chapter 1 Project Definition
1.3 Project Definition
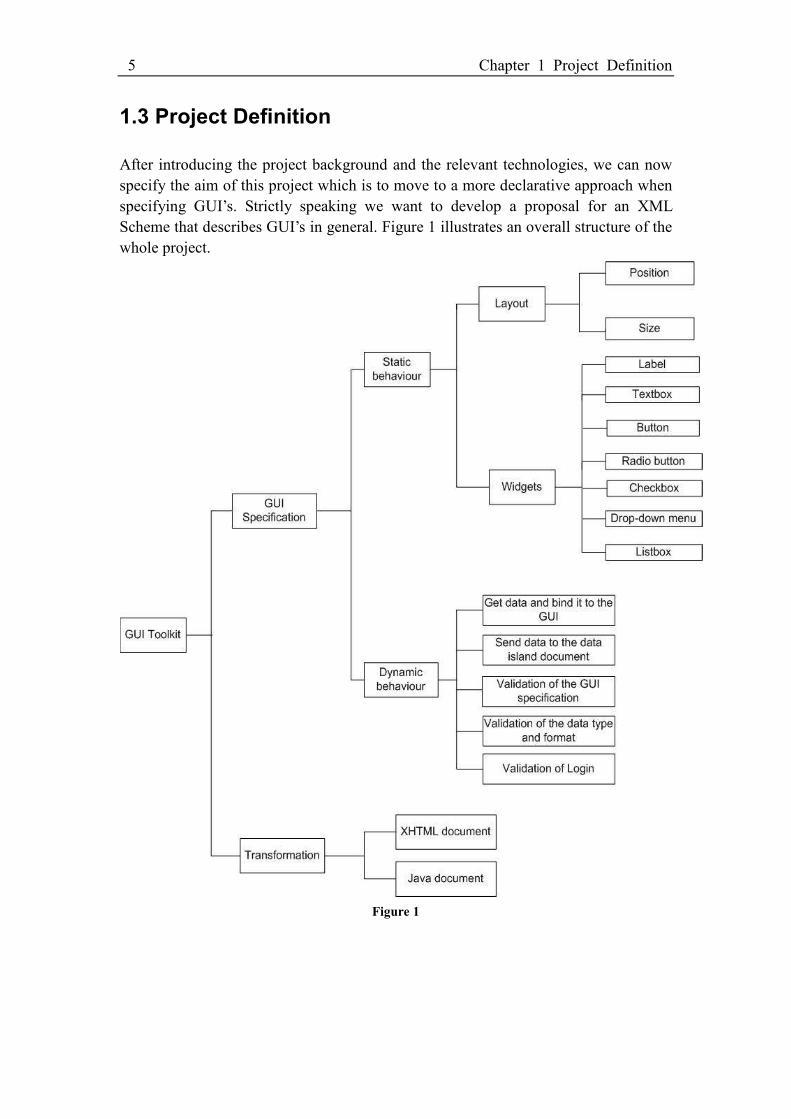
After introducing the project background and the relevant technologies, we can now
specify the aim of this project which is to move to a more declarative approach when
specifying GUI’s. Strictly speaking we want to develop a proposal for an XML
Scheme that describes GUI’s in general. Figure 1 illustrates an overall structure of the
whole project.
Figure 1
6 Chapter 1 Project Definition
As shown in figure 1, there are three major parts going to be developed in this project,
Static behaviour, Dynamic behaviour and Transformation. The next section will
give a detailed definition on each part.
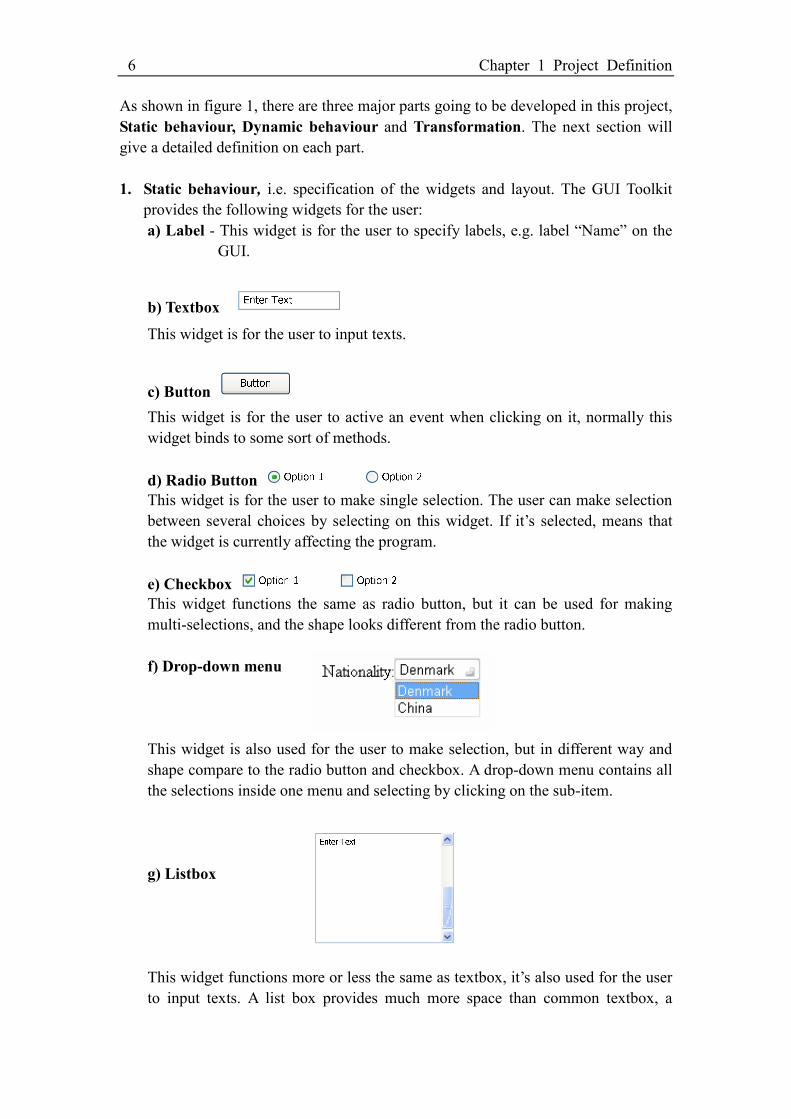
1. Static behaviour, i.e. specification of the widgets and layout. The GUI Toolkit
provides the following widgets for the user:
a) Label - This widget is for the user to specify labels, e.g. label “Name” on the
GUI.
b) Textbox
This widget is for the user to input texts.
c) Button
This widget is for the user to active an event when clicking on it, normally this
widget binds to some sort of methods.
d) Radio Button
This widget is for the user to make single selection. The user can make selection
between several choices by selecting on this widget. If it’s selected, means that
the widget is currently affecting the program.
e) Checkbox
This widget functions the same as radio button, but it can be used for making
multi-selections, and the shape looks different from the radio button.
f) Drop-down menu
This widget is also used for the user to make selection, but in different way and
shape compare to the radio button and checkbox. A drop-down menu contains all
the selections inside one menu and selecting by clicking on the sub-item.
g) Listbox
This widget functions more or less the same as textbox, it’s also used for the user
to input texts. A list box provides much more space than common textbox, a
7 Chapter 1 Project Definition
listbox can contain much more information.
There are two ways to specify the layout, grid layout will be applied for the
XHTML platform, and coordinates specification will be applied for the Java
platform.
2. Dynamic behaviour, i.e. specification of what will happen when the user
activates a widget. This includes potential validation of inputs before final
activation of a method in the application layer.
For this part, some JavaScript methods will be implemented for realizing the
dynamic behaviour, a clear interface between the presentation layer and the
business layer (data logic) will be defined, means how the method can be bound
to the event when a widget is activated.
The GUI Toolkit provides the following dynamic behaviours:
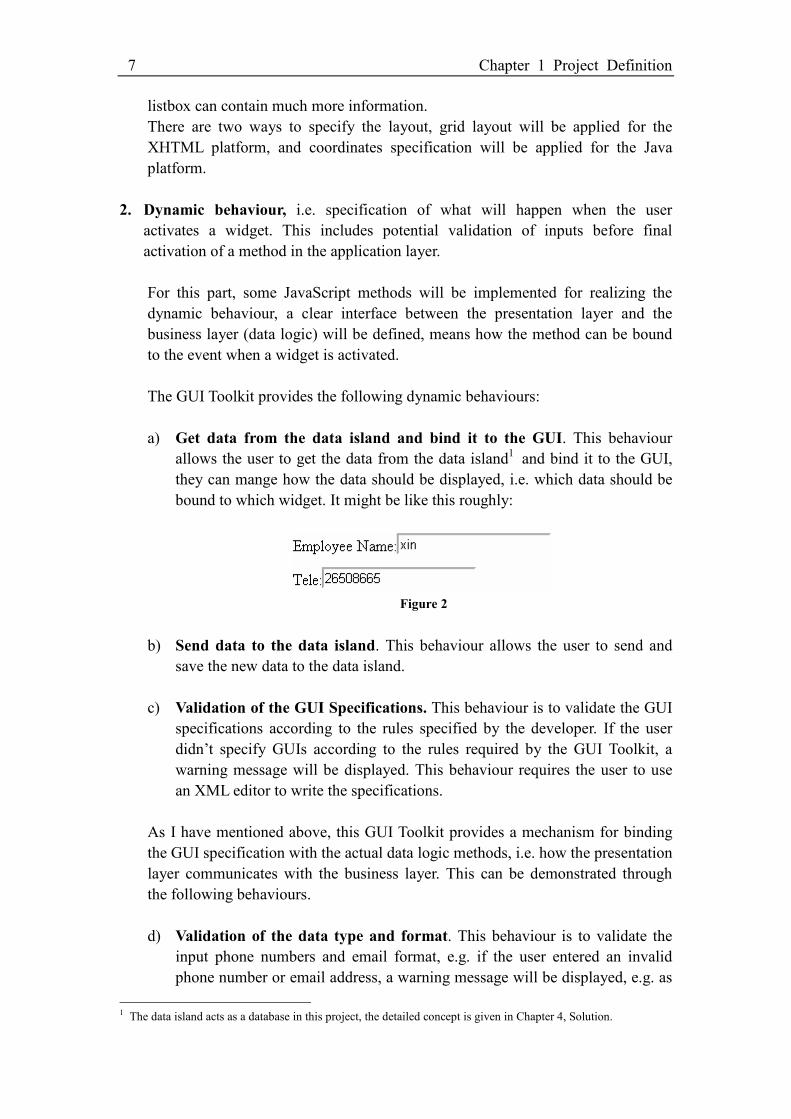
a) Get data from the data island and bind it to the GUI. This behaviour
allows the user to get the data from the data island1 and bind it to the GUI,
they can mange how the data should be displayed, i.e. which data should be
bound to which widget. It might be like this roughly:
Figure 2
b) Send data to the data island. This behaviour allows the user to send and
save the new data to the data island.
c) Validation of the GUI Specifications. This behaviour is to validate the GUI
specifications according to the rules specified by the developer. If the user
didn’t specify GUIs according to the rules required by the GUI Toolkit, a
warning message will be displayed. This behaviour requires the user to use
an XML editor to write the specifications.
As I have mentioned above, this GUI Toolkit provides a mechanism for binding
the GUI specification with the actual data logic methods, i.e. how the presentation
layer communicates with the business layer. This can be demonstrated through
the following behaviours.
d) Validation of the data type and format. This behaviour is to validate the
input phone numbers and email format, e.g. if the user entered an invalid
phone number or email address, a warning message will be displayed, e.g. as
1 The data island acts as a database in this project, the detailed concept is given in Chapter 4, Solution.
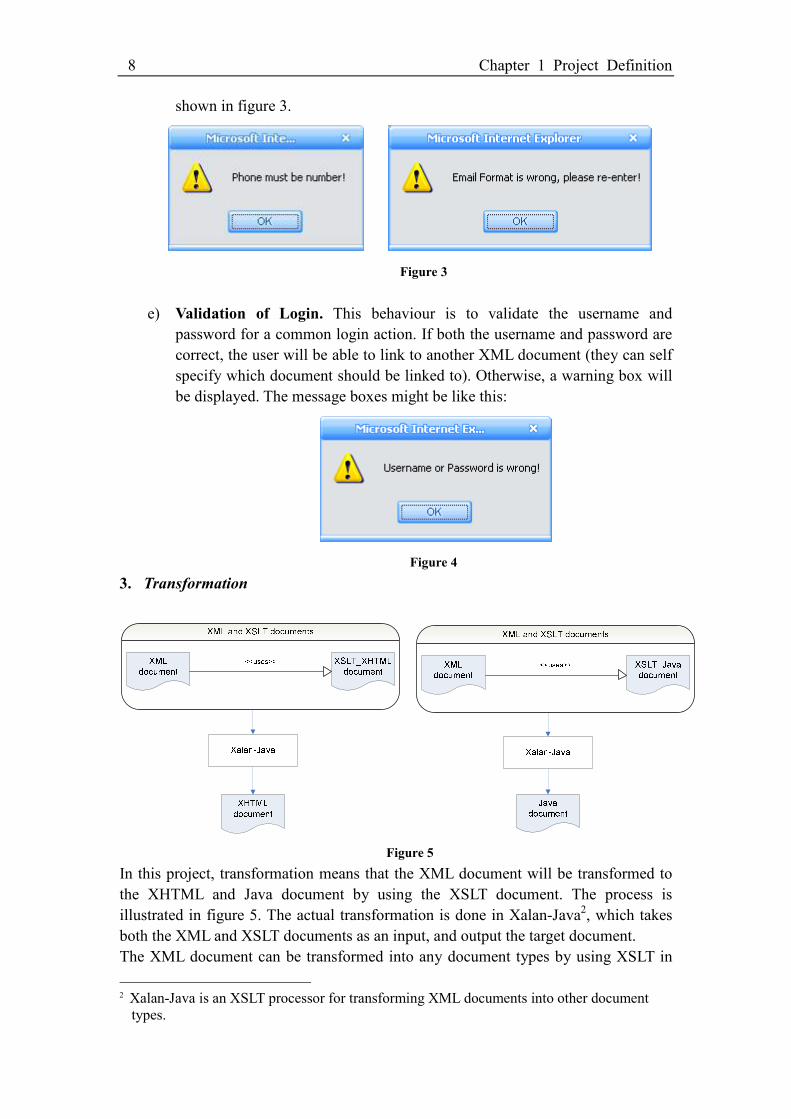
8 Chapter 1 Project Definition
shown in figure 3.
Figure 3
e) Validation of Login. This behaviour is to validate the username and
password for a common login action. If both the username and password are
correct, the user will be able to link to another XML document (they can self
specify which document should be linked to). Otherwise, a warning box will
be displayed. The message boxes might be like this:
Figure 4
3. Transformation
Figure 5
In this project, transformation means that the XML document will be transformed to
the XHTML and Java document by using the XSLT document. The process is
illustrated in figure 5. The actual transformation is done in Xalan-Java2, which takes
both the XML and XSLT documents as an input, and output the target document.
The XML document can be transformed into any document types by using XSLT in
2 Xalan-Java is an XSLT processor for transforming XML documents into other document
types.
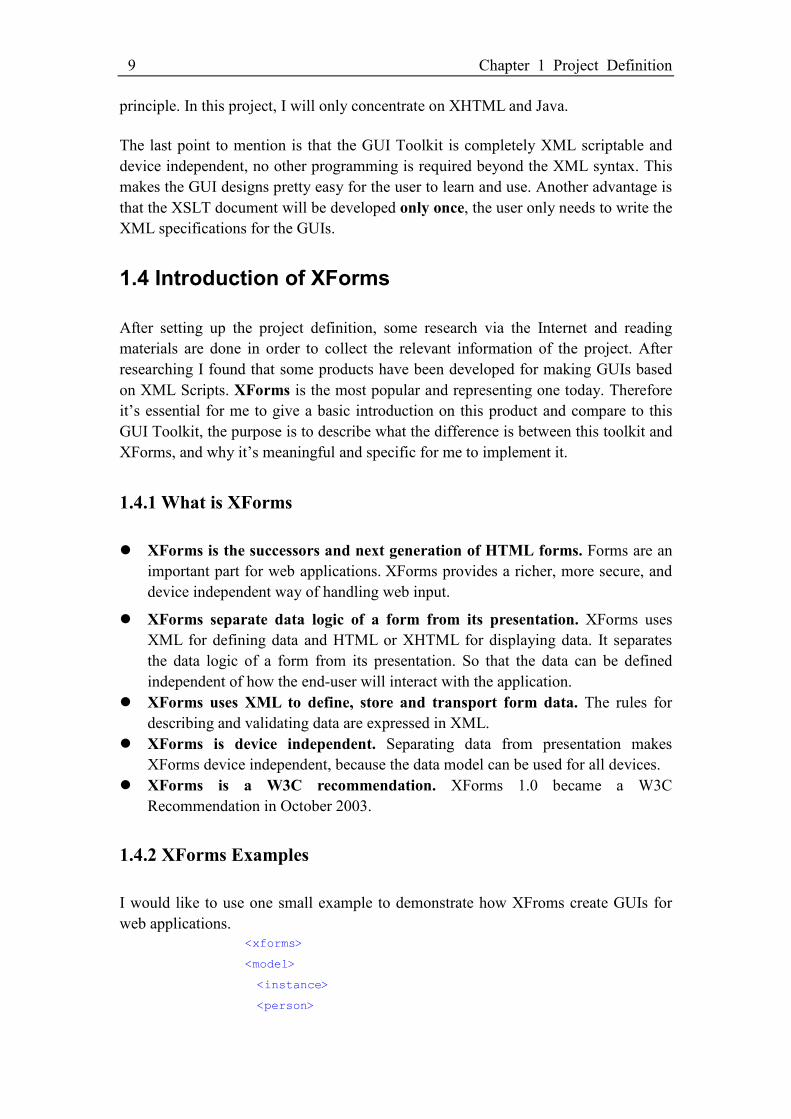
9 Chapter 1 Project Definition
principle. In this project, I will only concentrate on XHTML and Java.
The last point to mention is that the GUI Toolkit is completely XML scriptable and
device independent, no other programming is required beyond the XML syntax. This
makes the GUI designs pretty easy for the user to learn and use. Another advantage is
that the XSLT document will be developed only once, the user only needs to write the
XML specifications for the GUIs.
1.4 Introduction of XForms
After setting up the project definition, some research via the Internet and reading
materials are done in order to collect the relevant information of the project. After
researching I found that some products have been developed for making GUIs based
on XML Scripts. XForms is the most popular and representing one today. Therefore
it’s essential for me to give a basic introduction on this product and compare to this
GUI Toolkit, the purpose is to describe what the difference is between this toolkit and
XForms, and why it’s meaningful and specific for me to implement it.
1.4.1 What is XForms
� XForms is the successors and next generation of HTML forms. Forms are an
important part for web applications. XForms provides a richer, more secure, and
device independent way of handling web input.
� XForms separate data logic of a form from its presentation. XForms uses
XML for defining data and HTML or XHTML for displaying data. It separates
the data logic of a form from its presentation. So that the data can be defined
independent of how the end-user will interact with the application.
� XForms uses XML to define, store and transport form data. The rules for
describing and validating data are expressed in XML.
� XForms is device independent. Separating data from presentation makes
XForms device independent, because the data model can be used for all devices.
� XForms is a W3C recommendation. XForms 1.0 became a W3C
Recommendation in October 2003.
1.4.2 XForms Examples
I would like to use one small example to demonstrate how XFroms create GUIs for
web applications.
<xforms>
<model>
<instance>
<person>
10 Chapter 1 Project Definition
<fname/>
<lname/>
</person>
</instance>
<submission id="form1" method="get"
action="submit.asp"/>
</model>
<input ref="fname">
<label>First Name</label>
</input>
<input ref="lname">
<label>Last Name</label>
</input>
<submit submission="form1">
<label>Submit</label>
</submit>
</xforms>
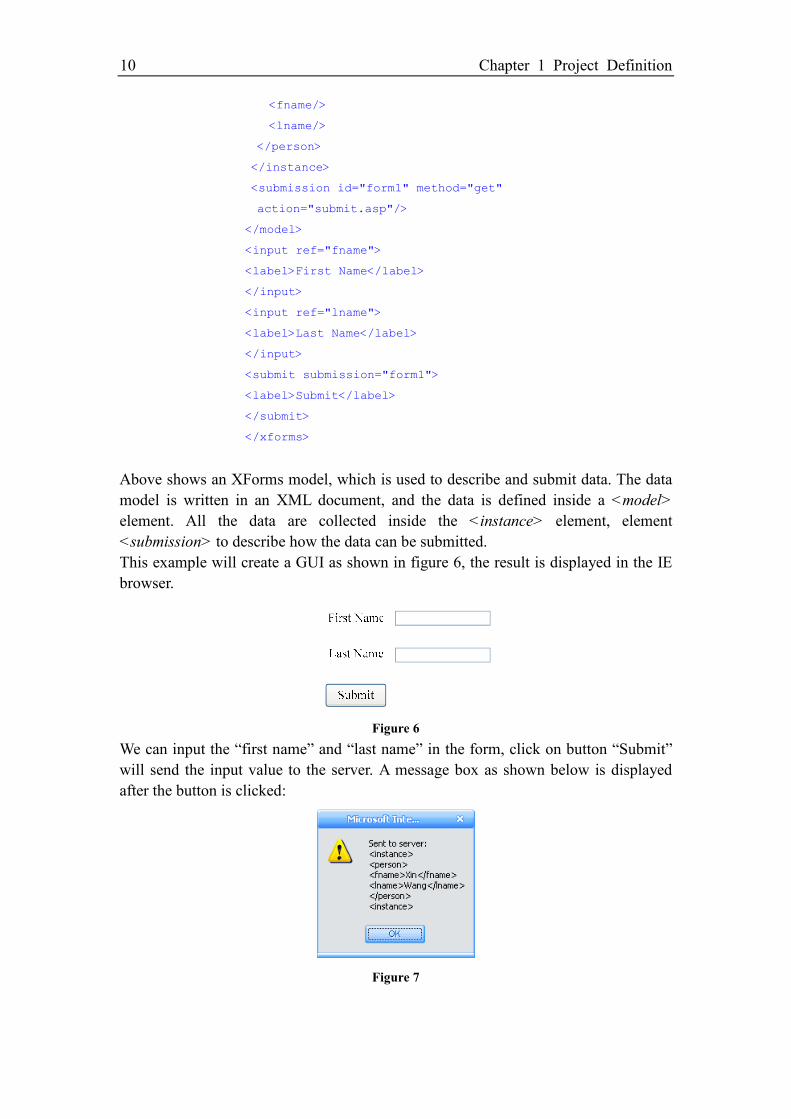
Above shows an XForms model, which is used to describe and submit data. The data
model is written in an XML document, and the data is defined inside a <model>
element. All the data are collected inside the <instance> element, element
<submission> to describe how the data can be submitted.
This example will create a GUI as shown in figure 6, the result is displayed in the IE
browser.
Figure 6
We can input the “first name” and “last name” in the form, click on button “Submit”
will send the input value to the server. A message box as shown below is displayed
after the button is clicked:
Figure 7
11 Chapter 1 Project Definition
The code above shows the general structure of XForms, i.e. how the GUI is specified,
and how the method “submit.asp” is bound to the GUI in order to submit data.
This GUI Toolkit will function in more or less the same way as the example shown
above in XForms. But I will specify my own structure and specification rules for the
user to design GUIs.
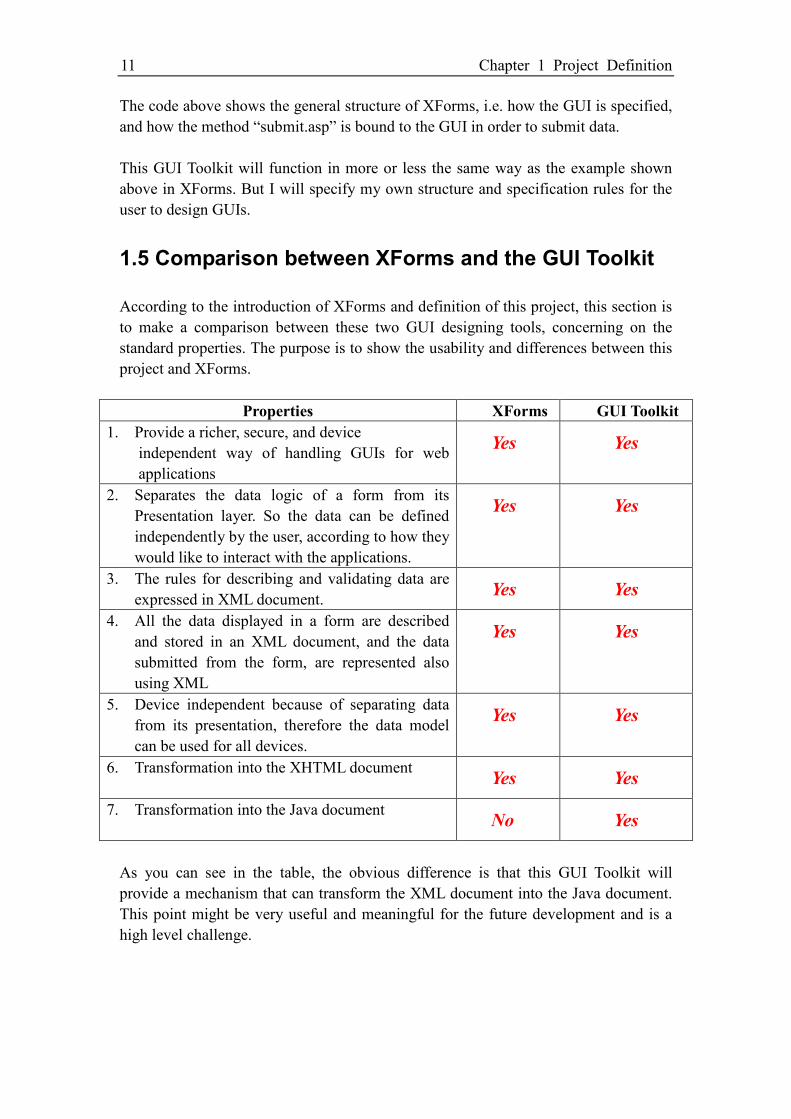
1.5 Comparison between XForms and the GUI Toolkit
According to the introduction of XForms and definition of this project, this section is
to make a comparison between these two GUI designing tools, concerning on the
standard properties. The purpose is to show the usability and differences between this
project and XForms.
Properties XForms GUI Toolkit
1. Provide a richer, secure, and device
independent way of handling GUIs for web
applications
Yes Yes
2. Separates the data logic of a form from its
Presentation layer. So the data can be defined
independently by the user, according to how they
would like to interact with the applications.
Yes Yes
3. The rules for describing and validating data are
expressed in XML document. Yes Yes
4. All the data displayed in a form are described
and stored in an XML document, and the data
submitted from the form, are represented also
using XML
Yes Yes
5. Device independent because of separating data
from its presentation, therefore the data model
can be used for all devices.
Yes Yes
6. Transformation into the XHTML document Yes Yes
7. Transformation into the Java document No Yes
As you can see in the table, the obvious difference is that this GUI Toolkit will
provide a mechanism that can transform the XML document into the Java document.
This point might be very useful and meaningful for the future development and is a
high level challenge.
12 Chapter 2 Project Management
CHAPTER 2
Project Management
2.1 Introduction
This chapter is to state how much time I have spent on the project, and how much it
weights in each process.
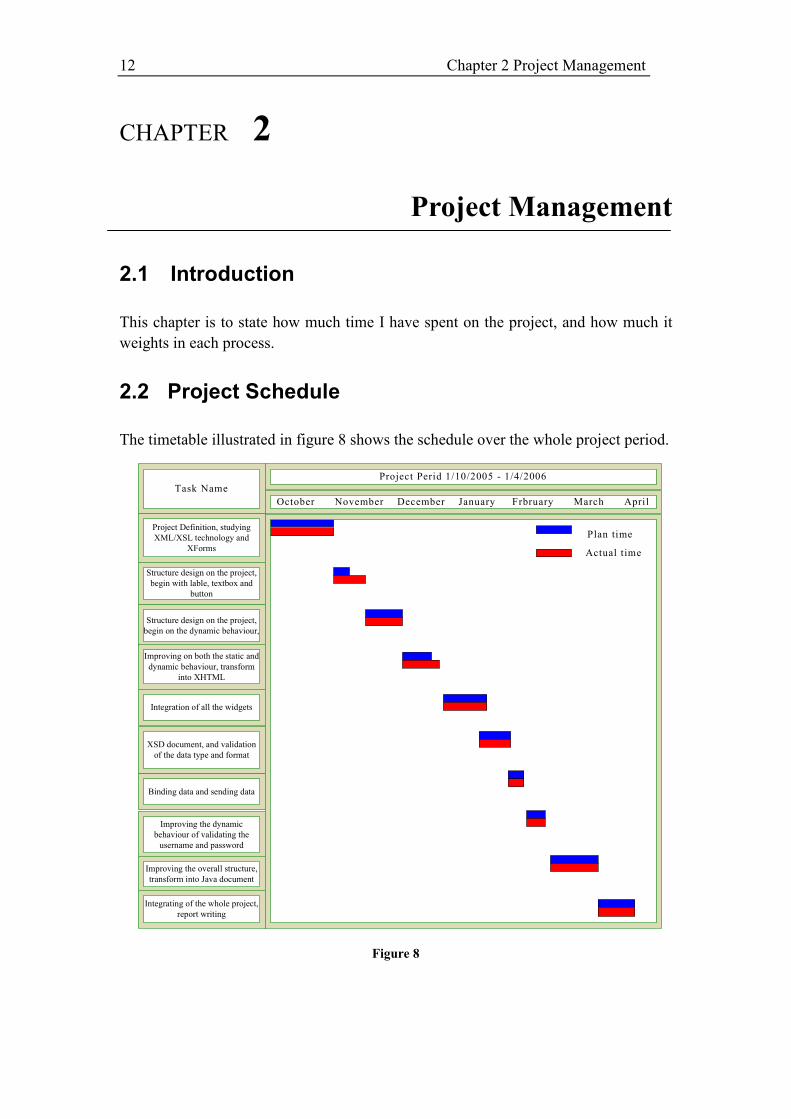
2.2 Project Schedule
The timetable illustrated in figure 8 shows the schedule over the whole project period.
Project Definition, studying
XML/XSL technology and
XForms
Task Name
Project Perid 1/10/2005 - 1/4/2006
October November December January Frbruary March April
Structure design on the project,
begin with lable, textbox and
button
Structure design on the project,
begin on the dynamic behaviour,
Improving on both the static and
dynamic behaviour, transform
into XHTML
Integration of all the widgets
XSD document, and validation
of the data type and format
Binding data and sending data
Improving the dynamic
behaviour of validating the
username and password
Improving the overall structure,
transform into Java document
Integrating of the whole project,
report writing
Plan time
Actual time
Figure 8
13 Chapter 2 Project Management
The whole project period is 6 months, lasting from 1st of October, 2005 to 1
st of April,
2006. Since it is a limited time period, in order to make use of the time efficiently, I
definitely need to assign a time slot to each task during the whole project process. The
blue line represents the plan time, and the red line represents the actual time used on
the task.
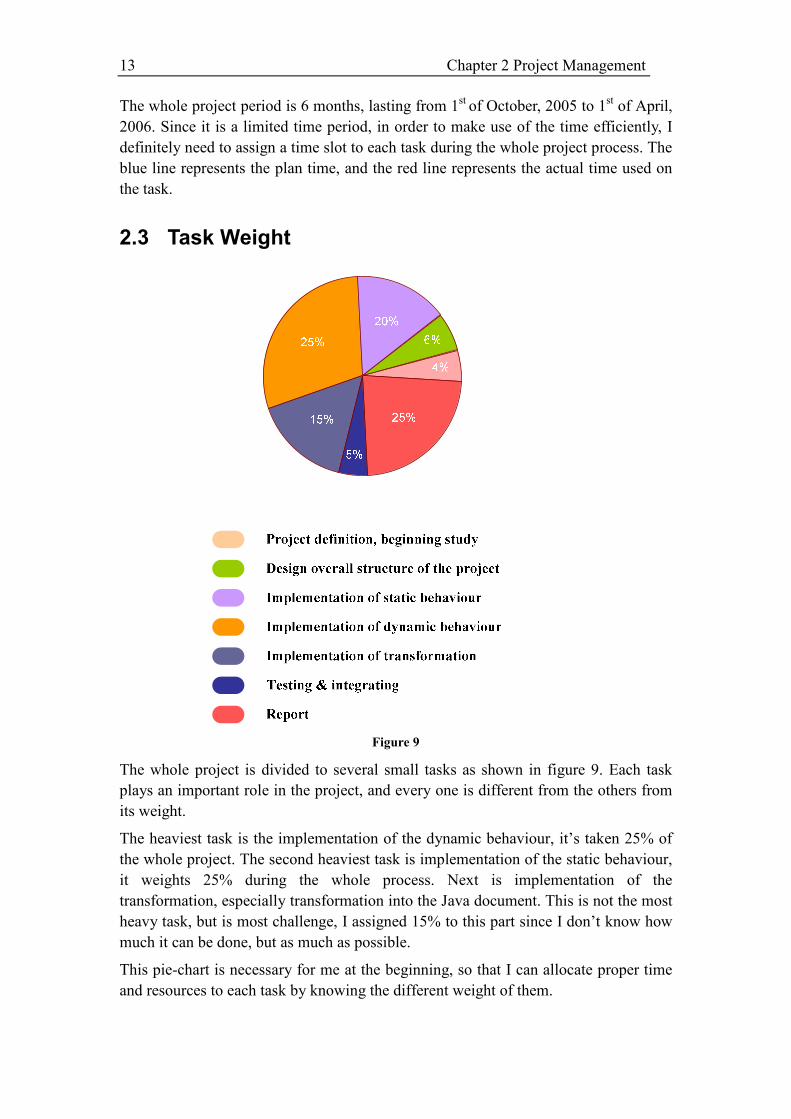
2.3 Task Weight
Figure 9
The whole project is divided to several small tasks as shown in figure 9. Each task
plays an important role in the project, and every one is different from the others from
its weight.
The heaviest task is the implementation of the dynamic behaviour, it’s taken 25% of
the whole project. The second heaviest task is implementation of the static behaviour,
it weights 25% during the whole process. Next is implementation of the
transformation, especially transformation into the Java document. This is not the most
heavy task, but is most challenge, I assigned 15% to this part since I don’t know how
much it can be done, but as much as possible.
This pie-chart is necessary for me at the beginning, so that I can allocate proper time
and resources to each task by knowing the different weight of them.
14 Chapter 3 Basic Concepts
CHAPTER 3
Basic Concepts
3.1 Introduction
The project is going to be developed by applying the relevant technologies. This
chapter is to give a very basic introduction of the relevant theory. This might be
helpful for the reader to get some basic understanding on the technical background.
3.2 Introduction of XML/XSL
This section is to give the reader an overview of how XML/XSL are structured, this
section is a kind of preparation for the next chapter since there will be a lot of
descriptions on the technologies.
3.2.1 Basic XML Concept
3.2.1.1 XML Syntax
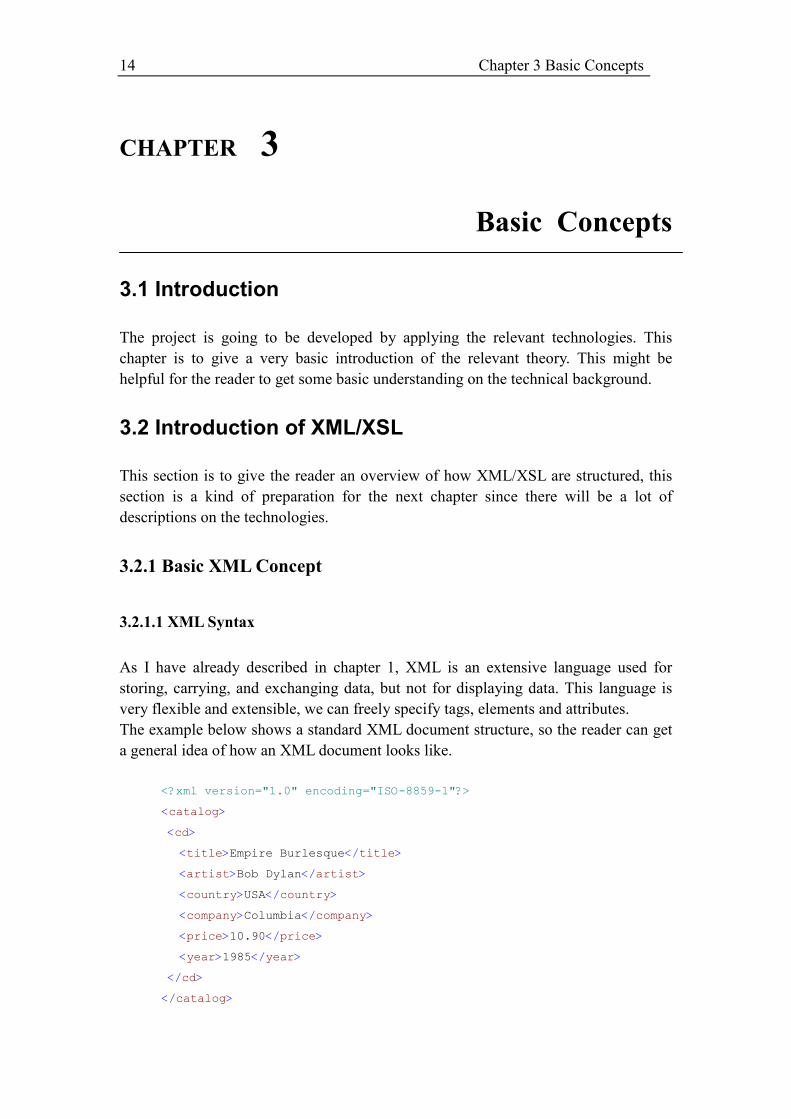
As I have already described in chapter 1, XML is an extensive language used for
storing, carrying, and exchanging data, but not for displaying data. This language is
very flexible and extensible, we can freely specify tags, elements and attributes.
The example below shows a standard XML document structure, so the reader can get
a general idea of how an XML document looks like.
<?xml version="1.0" encoding="ISO-8859-1"?>
<catalog>
<cd>
<title>Empire Burlesque</title>
<artist>Bob Dylan</artist>
<country>USA</country>
<company>Columbia</company>
<price>10.90</price>
<year>1985</year>
</cd>
</catalog>

15 Chapter 3 Basic Concepts
The code above contains the data of a CD catalog.
The first line in the document is the XML declaration, it defines the XML version and
the character encoding used in the document. In this case the document conforms to
the 1.0 specification of XML and uses the ISO-8859-1 (Latin-1/West European)
character set, this one can be set according to user’s need.
The next line describes the root element of the document, in this case it was a
<catalog>, we can of course specify our own name for this element. The next line is
the child element <cd>, the following few lines describe four sub-child elements of
the child elements (title, artist and so on). And the last line defines the end of the root
element. All element names can be specified by the user, it’s totally depending on
what the user wants, so we can see that XML is quite self-descriptive.
3.2.1.2 XML Validation
The XML validation is very important, it validates if the XML document syntax is
well formed. A “Well Formed” XML document is a document that conforms to the
XML syntax rules according to the example shown in last section, it also conforms to
the rules of a Document Type Definition (DTD) or an XML Schema. The purpose of a
DTD or an XML Schema is to define the legal building blocks of an XML document.
It defines the document structure with a list of legal elements. I am going to define my
own specification rules for this GUI Toolkit, the user must write the GUI
specifications by following the rules.
3.2.1.2 XML Browser
Most Internet browsers support XML. In this project, I will use Internet Explorer 6.0
to view the output result. IE 6.0 has full XML support, including Namespaces, Style
sheets in CSS, and XSLT 1.0.
3.2.2 Basic XSL Concept
XSL is an Extensible Stylesheet Language, it was designed because there was a need
for an XML-based Stylesheet Language since XML can’t display any data. Let me use
a small example to explain how an XSLT document is structured.
<?xml version="1.0" encoding="ISO-8859-1"?>
<xsl:stylesheet
version="1.0":xsl="http://www.w3.org/1999/XSL/Transform">
<xsl:template match="/">
<html>
<body>
16 Chapter 3 Basic Concepts
<h2>CD Catalog</h2>
<table border="1">
<tr bgcolor="#9acd32">
<th align="left">Title</th>
<th align="left">Artist</th>
</tr>
<xsl:for-each select="catalog/cd">
<tr>
<td><xsl:value-of select="title"/></td>
<td><xsl:value-of select="artist"/></td>
</tr>
</xsl:for-each>
</table>
</body>
</html>
</xsl:template>
</xsl:stylesheet>
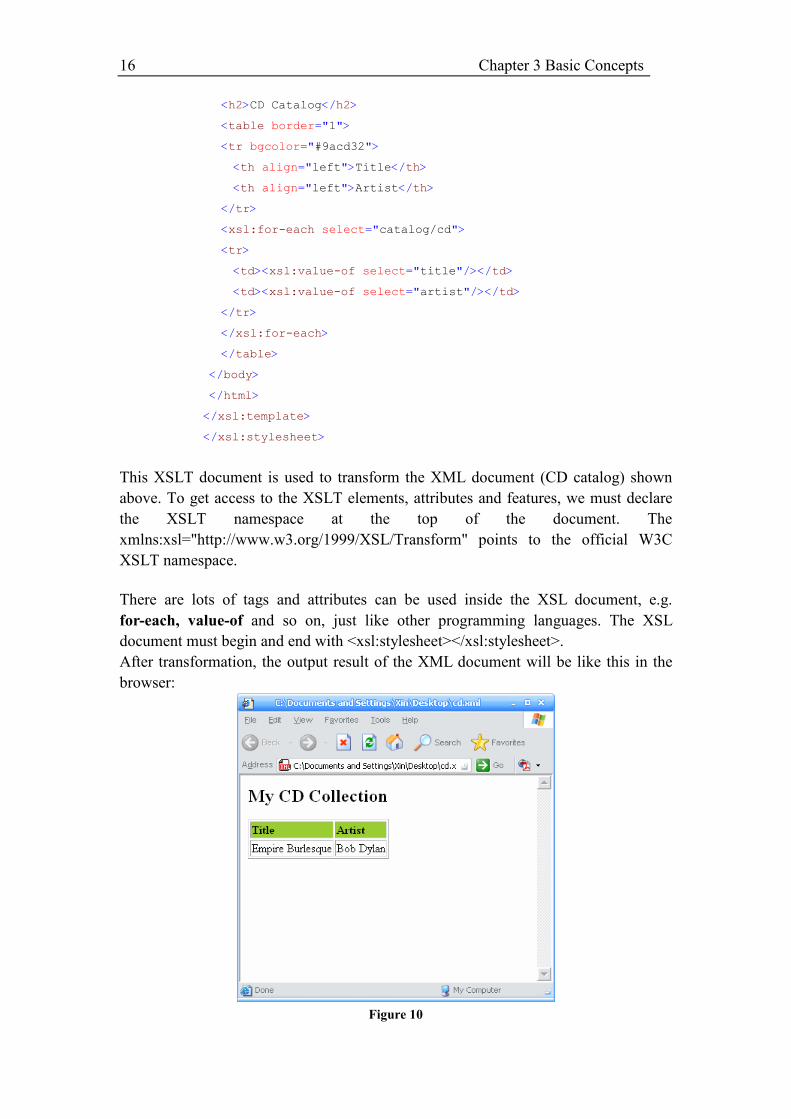
This XSLT document is used to transform the XML document (CD catalog) shown
above. To get access to the XSLT elements, attributes and features, we must declare
the XSLT namespace at the top of the document. The
xmlns:xsl="http://www.w3.org/1999/XSL/Transform" points to the official W3C
XSLT namespace.
There are lots of tags and attributes can be used inside the XSL document, e.g.
for-each, value-of and so on, just like other programming languages. The XSL
document must begin and end with <xsl:stylesheet></xsl:stylesheet>.
After transformation, the output result of the XML document will be like this in the
browser:
Figure 10

17 Chapter 3 Basic Concepts
3.2.3 Transformation
The XML document can be transformed into any document types by using the XSLT
document in principle, e.g. XHTML, plain text and so on. The actual transformation is
done in Xalan-Java. The general process is shown in figure 11:
Xalan-Java
XML and XSLT documents
XML
document
XSLT
document
Target
document
<<uses>>
Figure 11
Xalan-Java is an XSLT processor for transforming XML documents into HTML, text,
or some other XML document types. It implements XSL Transformations (XSLT)
Version 1.0 and XML Path Language (XPath) Version 1.0 and can be used from the
command line (java org.apache.xalan.xslt.Process) in an applet or a servlet, or as a
module in other program.
As you can see in figure11, Xalan-Java takes both the XML and XSLT documents as
an input element, and output the target document after transformation.
3.3 Introduction of IIS 5.0 (Internet Information Service)
Microsoft's Internet Information Services (IIS) is one of the most popular Web servers
in use on the Internet and in intranets throughout the world. IIS includes a broad range
of administrative features for managing Web sites and Web server. With programmatic
features like Active Server Pages (ASP), we can create and deploy scalable, flexible
Web applications. IIS is not installed by default but can be added using the
Add/Remove Programs dialog box from the Control Panel. The detailed guideline for
teaching how this product can be installed and used is in the User Manual.
18 Chapter 4 Project Solution
CHAPTER 4
Project Solution
4.1 Introduction
After the project definition is done, the project management has been set and the
necessary theory has been introduced for preparation, I am now ready to go to the
kernel of this project – SOLUTION. The purpose of this chapter is to give a detailed
description on how the GUI Toolkit is implemented, concerning on the three major
parts: Static Behaviour, Dynamic Behaviour and Transformation.
4.2 Structured Design
4.2.1 Introduction of the GUI Toolkit
First of all, I would like to describe in general of what this GUI Toolkit is and
provides to the user.
This GUI Toolkit provides the user with the possibilities to write the GUI
specifications based on the XML platform. The GUI specification contains both static
and dynamic behaviours. Besides, this toolkit provides a mechanism that can
transform the XML document into the XHTML and Java document types, i.e. the user
is able to run the GUI on these two platforms.
The GUI Toolkit is implemented on basis of XML, XSL and JavaScript technologies.
In this project, XML is used to write the GUI specifications, XSL is used to describe
the target document type, i.e. how the XML document should be displayed. And
JavaScript is used to implement a set of methods for the dynamic behaviour.
According to the project schedule, the dynamic behaviour only works on basis of the
XHTML platform. The Java transformation part provides only a few widgets for
demonstration.
The advantage of this GUI Toolkit is that it is extremely lightweight. The XSLT
documents, the XSD document and the JavaScript methods are developed only once.
It requires the user to use an XML editor for writing the GUI specifications, the user
19 Chapter 4 Project Solution
can freely choose any XML editor, but I strongly recommend one called Altova
XMLSpy, which is the industry standard XML development environment for
modelling, editing, debugging and transforming all XML-related technologies.
4.2.2 Overall Structure of the GUI Toolkit
There are two things I need to consider while specifying the overall structure of the
toolkit. The first thing is how to make it as user-friendly as possible. The second thing
is how to make it personalized so that it’s not a copy or too similar to some other
products, since there are already products (like XForms) being developed.
Now we can see the advantage of choosing XML and XSL to be the implementation
technology, since these two languages are pretty extensible and flexible. I can freely
specify the tags, elements and attributes, and self-design how the output document
type should be.
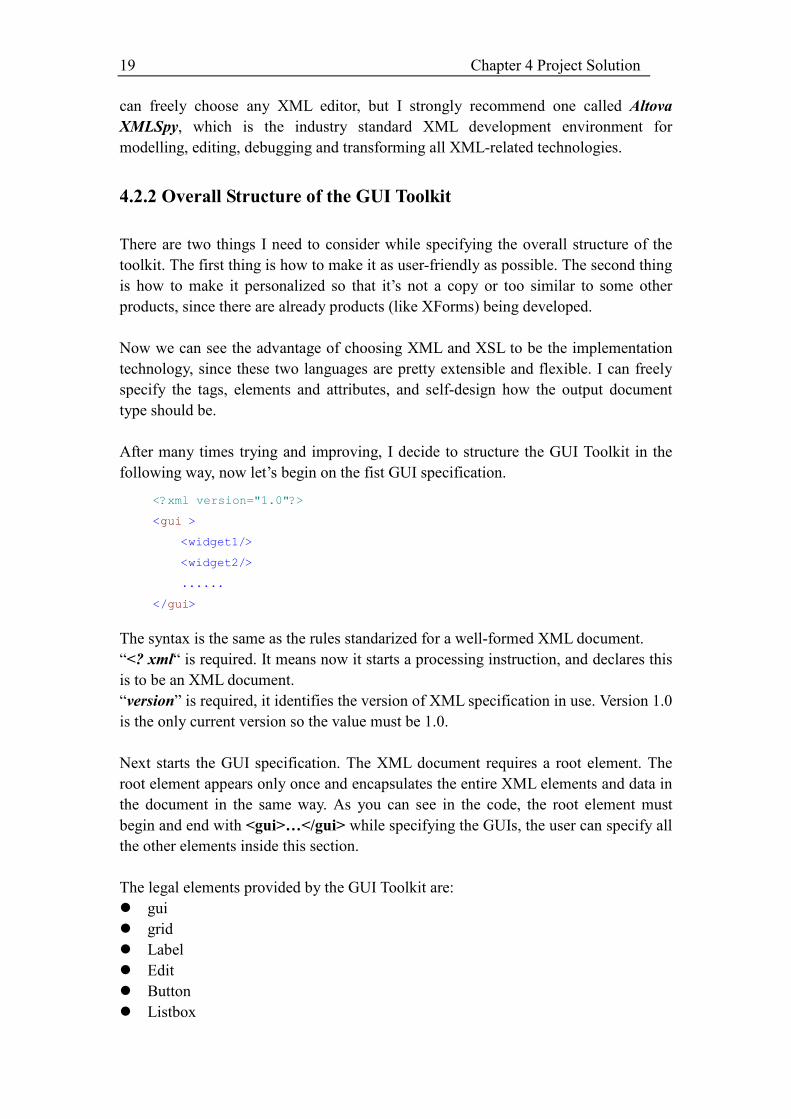
After many times trying and improving, I decide to structure the GUI Toolkit in the
following way, now let’s begin on the fist GUI specification.
The syntax is the same as the rules standarized for a well-formed XML document.
“<? xml“ is required. It means now it starts a processing instruction, and declares this
is to be an XML document.
“version” is required, it identifies the version of XML specification in use. Version 1.0
is the only current version so the value must be 1.0.
Next starts the GUI specification. The XML document requires a root element. The
root element appears only once and encapsulates the entire XML elements and data in
the document in the same way. As you can see in the code, the root element must
begin and end with <gui>…</gui> while specifying the GUIs, the user can specify all
the other elements inside this section.
The legal elements provided by the GUI Toolkit are:
� gui
� grid
� Label
� Edit
� Button
� Listbox
<?xml version="1.0"?>
<gui >
<widget1/>
<widget2/>
......
</gui>
20 Chapter 4 Project Solution
� Checkbox
� Radio
� Select
� onClick
� onMouseOut
� import
� class
� add
� setBounds
� Frame
� Panel
4.3 Static Behaviour
The GUI Toolkit provides the following basic widgets for a GUI:
� Label
� Textbox
� Button
� Radio Button
� Checkbox
� Drop-down Menu
� Listbox
The following sections is to give a detailed description on each widget, concerning on
the specification in the XML document.
4.3.1 Label
The label widget is used to set text on the GUI.
XML element: <Label/>
XML attributes: text, name and ID
“text” is used to set the text, which is going to be displayed. There is no limitation on
the contents or format, the user can freely define any text.
“name” is used to assign a name to the this widget. Usually the name is set to
“Label1”, “Label2” and so on, but the user can of course use any name they prefer to.
“ID” is used as a mark of this widget, this attribute is used for the transformation
purpose. E.g. “ID=Label” means that this is a label going to be transformed in the
XSLT document. Actually the widget can be transformed by its element name,
<Label/>. “ID” is specified for the sake of simplicity, this attribute node is easier for
21 Chapter 4 Project Solution
me to do the transformation in the XSLT document.
All the elements have the attributes “name” and “ID”, and they work in the same
way, so I won’t describe on these two attributes for the following elements. Notice
that the attribute “ID” is mandatory for each element, but “name” is optional, the user
can specify this attribute when it’s needed.
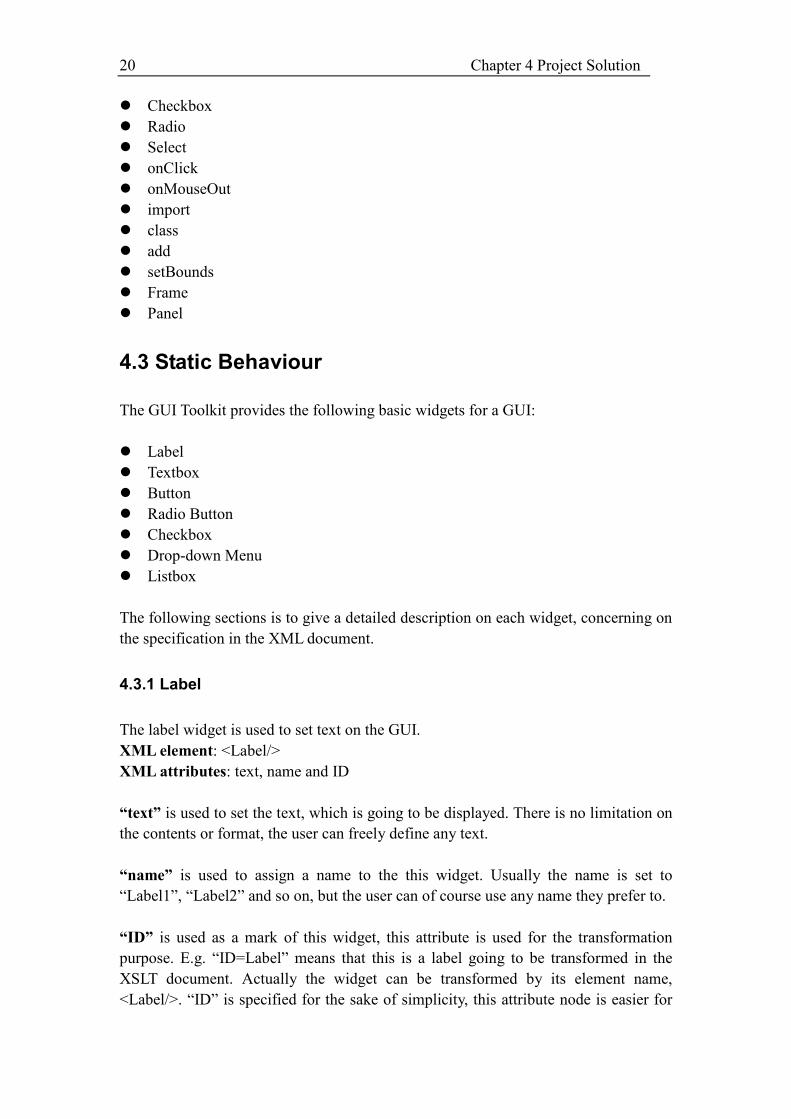
In general, the label can be specified in the following way:
<Label text="Name:" name="Label1" ID="Label"/>
Figure 12
Since this widget is also transformed to Java for demonstration, the specification is
basically the same as described above, but the attribute “ID” has to be “ID=JLabel” as
shown below, so that the XSLT document knows how this widget will be transformed.
The XML specification is shown below, the attribute “text” and “name” can be set to
any according to the use’s needs.
<Label text="Name" name="Label1" ID="JLabel"/>
4.3.2 Textbox
The textbox widget is used for the user to enter texts in it.
XML element: <Edit/>
XML attributes: size, name and ID
“size” is used to set the length of the textbox, the user can freely specify the size. The
XML specification can be like this:
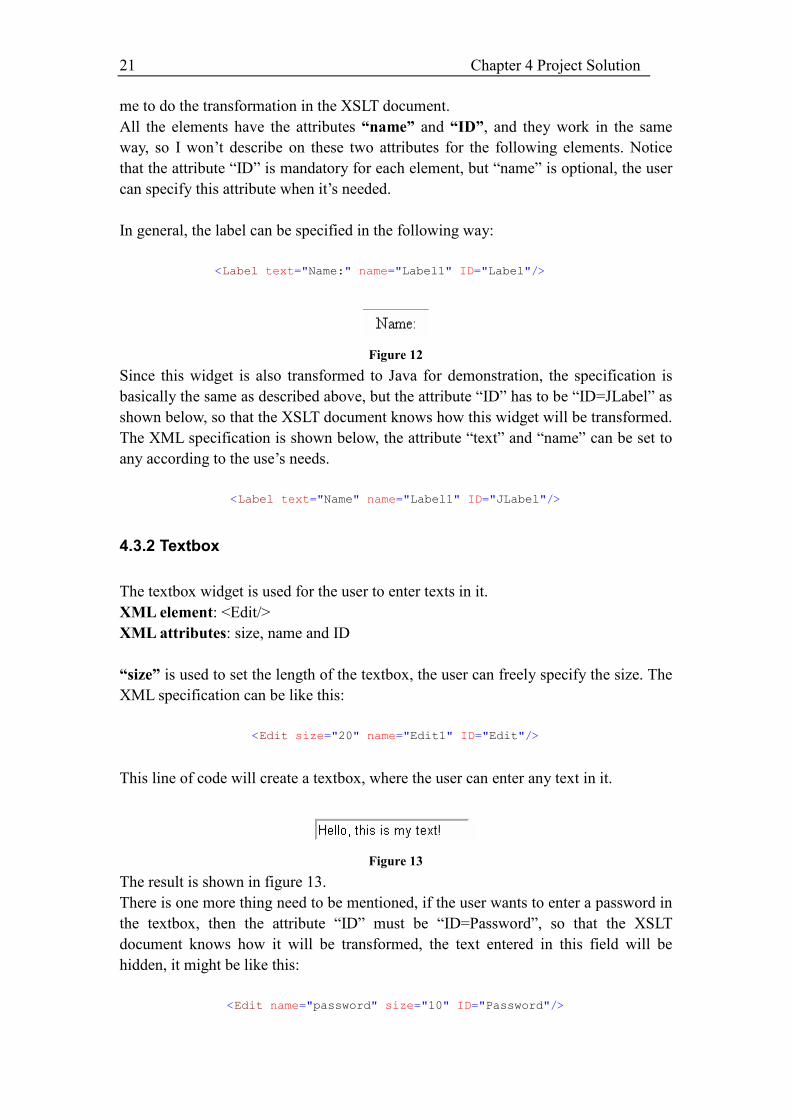
<Edit size="20" name="Edit1" ID="Edit"/>
This line of code will create a textbox, where the user can enter any text in it.
Figure 13
The result is shown in figure 13.
There is one more thing need to be mentioned, if the user wants to enter a password in
the textbox, then the attribute “ID” must be “ID=Password”, so that the XSLT
document knows how it will be transformed, the text entered in this field will be
hidden, it might be like this:
<Edit name="password" size="10" ID="Password"/>
22 Chapter 4 Project Solution
Figure 14
Since this widget is also transformed to the Java document for demonstration, two
new XML elements are specified for the transformation purpose, <TextField/> and
<PasswordField/>, and the attribute “ID” must set to “ID=JTextfield” and
“ID=JPasswordField” as well, in this way, the XSL document knows how they will be
transformed. The specification can be like this:
<TextField name="TextFile1" size="12" ID="JTextField"/>
<PasswordField name="Passwrod1" size="12" ID="JPasswordField"/>
4.3.3 Button
The button widget is perhaps the most interactive user interface element in
presentations. It provides a non-ambiguous place for the user to click to initiate some
actions.
XML element: <Button/>
XML attributes: value, name and ID
“value” is used to set the texts on the button, there is no restriction on the text’s type
or format. This widget can be specified as shown below in the XML document:
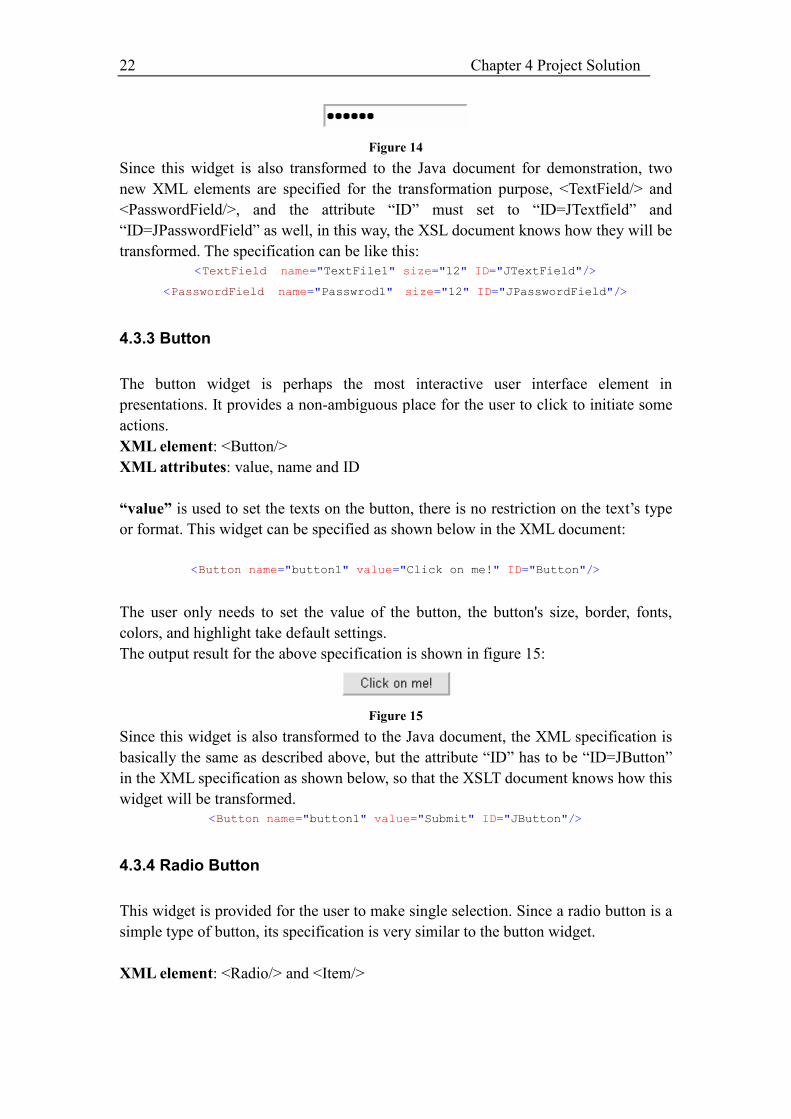
<Button name="button1" value="Click on me!" ID="Button"/>
The user only needs to set the value of the button, the button's size, border, fonts,
colors, and highlight take default settings.
The output result for the above specification is shown in figure 15:
Figure 15
Since this widget is also transformed to the Java document, the XML specification is
basically the same as described above, but the attribute “ID” has to be “ID=JButton”
in the XML specification as shown below, so that the XSLT document knows how this
widget will be transformed.
<Button name="button1" value="Submit" ID="JButton"/>
4.3.4 Radio Button
This widget is provided for the user to make single selection. Since a radio button is a
simple type of button, its specification is very similar to the button widget.
XML element: <Radio/> and <Item/>
23 Chapter 4 Project Solution
<Radio/> is specified for representing the radio button. Besides, this widget contains
one child element <Item/>. Element <Radio/> is used to specify the radio button, and
element <Item/> is used to specify the contents for each radio button.
The element <Radio/> and <Item/> have two attributes in common, “name” and
“ID”. <Radio/> has one attribute called “size”, where the user can set the size of the
radio button.
<Item/> has an attribute called “value”, which is used to set the contents to each radio
button.
I am now ready to specify the radio buttons in the XML document:
<Radio size="1" name="1" ID="Radio">
<Item name="sex" value="male" ID="Radio"/>
<Item name="sex" value="female" ID="Radio"/>
</Radio>
Figure 16
Two radio buttons with the text “male” and “female” are displayed, the user can only
select on one since the radio button only provides single choice.
4.3.5 Checkbox
This widget works nearly the same as the radio button, the difference is that the check
box provides multi selections and expressed in different shape.
XML element: <Checkbox/> and <Item/>
The attributes for these two elements are completely the same as the radio button.
<Checkbox/> contains “size” and “ID” to be its attributes, while <Item/> contains
“name”, “value” and “ID” to be its attributes.
The check box is specified in the XML document as follows:
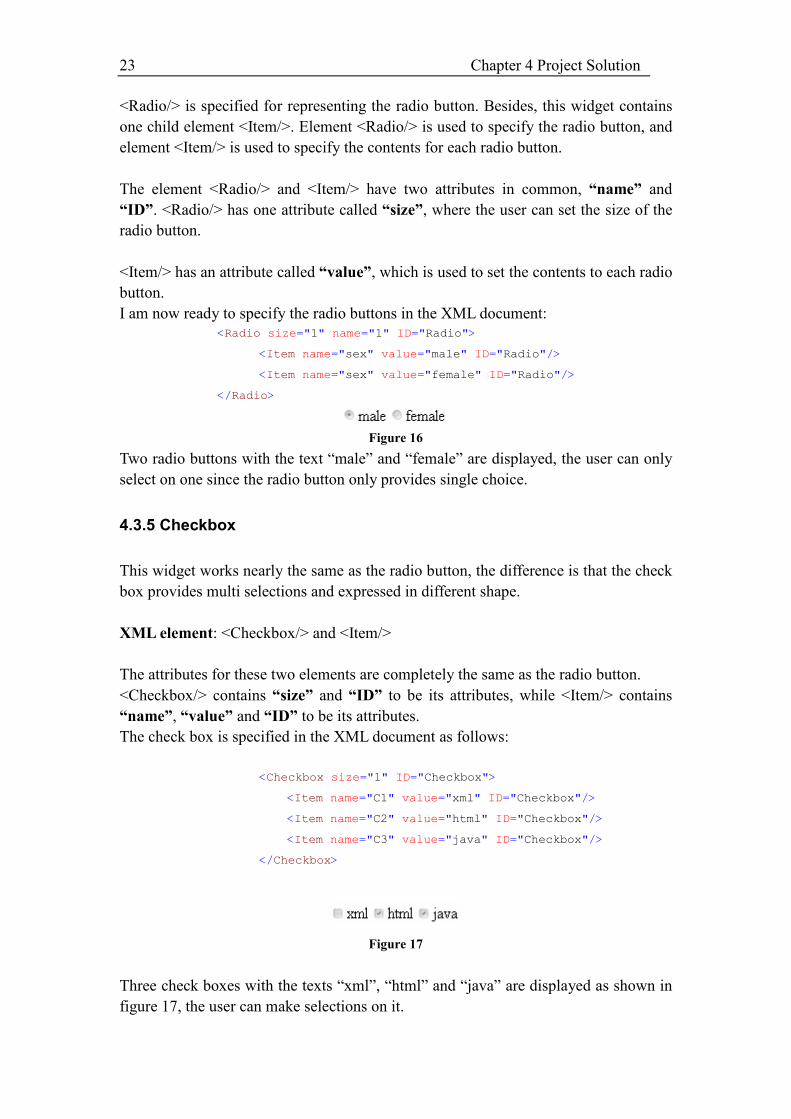
<Checkbox size="1" ID="Checkbox">
<Item name="C1" value="xml" ID="Checkbox"/>
<Item name="C2" value="html" ID="Checkbox"/>
<Item name="C3" value="java" ID="Checkbox"/>
</Checkbox>
Figure 17
Three check boxes with the texts “xml”, “html” and “java” are displayed as shown in
figure 17, the user can make selections on it.
24 Chapter 4 Project Solution
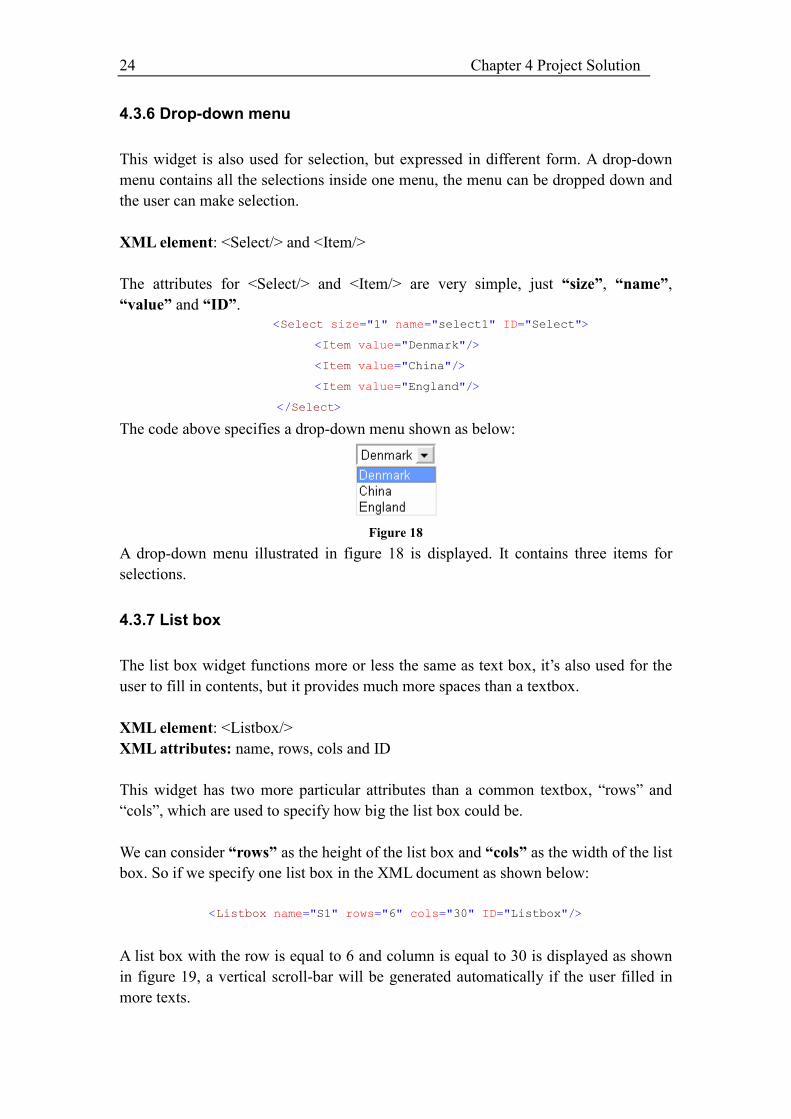
4.3.6 Drop-down menu
This widget is also used for selection, but expressed in different form. A drop-down
menu contains all the selections inside one menu, the menu can be dropped down and
the user can make selection.
XML element: <Select/> and <Item/>
The attributes for <Select/> and <Item/> are very simple, just “size”, “name”,
“value” and “ID”. <Select size="1" name="select1" ID="Select">
<Item value="Denmark"/>
<Item value="China"/>
<Item value="England"/>
</Select>
The code above specifies a drop-down menu shown as below:
Figure 18
A drop-down menu illustrated in figure 18 is displayed. It contains three items for
selections.
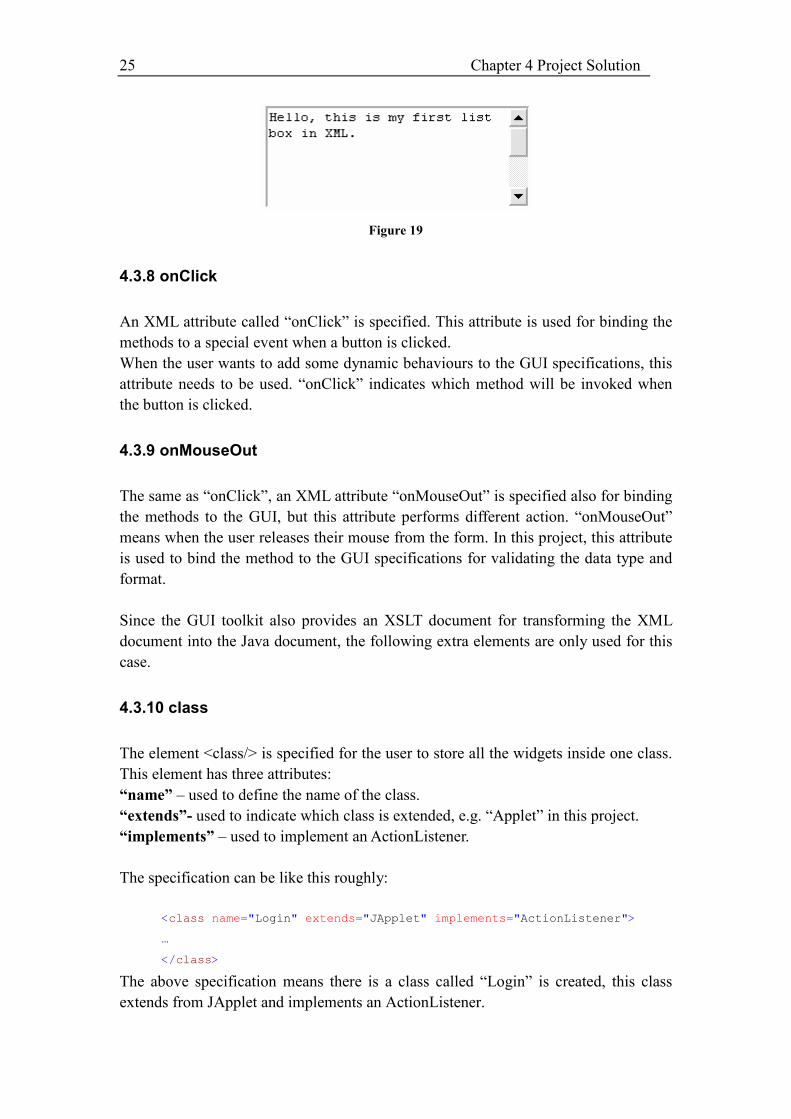
4.3.7 List box
The list box widget functions more or less the same as text box, it’s also used for the
user to fill in contents, but it provides much more spaces than a textbox.
XML element: <Listbox/>
XML attributes: name, rows, cols and ID
This widget has two more particular attributes than a common textbox, “rows” and
“cols”, which are used to specify how big the list box could be.
We can consider “rows” as the height of the list box and “cols” as the width of the list
box. So if we specify one list box in the XML document as shown below:
<Listbox name="S1" rows="6" cols="30" ID="Listbox"/>
A list box with the row is equal to 6 and column is equal to 30 is displayed as shown
in figure 19, a vertical scroll-bar will be generated automatically if the user filled in
more texts.
25 Chapter 4 Project Solution
Figure 19
4.3.8 onClick
An XML attribute called “onClick” is specified. This attribute is used for binding the
methods to a special event when a button is clicked.
When the user wants to add some dynamic behaviours to the GUI specifications, this
attribute needs to be used. “onClick” indicates which method will be invoked when
the button is clicked.
4.3.9 onMouseOut
The same as “onClick”, an XML attribute “onMouseOut” is specified also for binding
the methods to the GUI, but this attribute performs different action. “onMouseOut”
means when the user releases their mouse from the form. In this project, this attribute
is used to bind the method to the GUI specifications for validating the data type and
format.
Since the GUI toolkit also provides an XSLT document for transforming the XML
document into the Java document, the following extra elements are only used for this
case.
4.3.10 class
The element <class/> is specified for the user to store all the widgets inside one class.
This element has three attributes:
“name” – used to define the name of the class.
“extends”- used to indicate which class is extended, e.g. “Applet” in this project.
“implements” – used to implement an ActionListener.
The specification can be like this roughly:
<class name="Login" extends="JApplet" implements="ActionListener">
…
</class>
The above specification means there is a class called “Login” is created, this class
extends from JApplet and implements an ActionListener.
26 Chapter 4 Project Solution
4.3.11 import
The XML element <import/> has two attributes: “value” and “ID”. “value” is used to
specify the imported class, because the user needs to import some classes while
working with Java Swings. The XML specification can be look like this:
<import value="java.awt.*" ID="import"/>
<import value="javax.swing.*" ID="import"/>
The above specifications mean that the class “java.awt.*” and “javax.seing.*” are
imported for the specified GUI. The user can self-define which class needs to be
imported in the XML document according to their need.
4.3.12 Frame and Panel
There are two XML elements <Frame/> and <Panel/> are specified. <Frame/> is used
to create a frame to contain all the elements in it, and <Panel/> is used to add all the
widgets on it.
<Frame/> has three attributes, “name”, “setSize” and “ID”. Where the user can set
the name and size of the frame, means how big it can be.
<Panel/> has four attributes: “name”, “setLayout”, ”setBound” and “ID”.
“setBound” is used to set the position and size of the panel. The XML specification
for <Frame/> and <Panel/> can be like this roughly:
<Frame name="jframe" setSize="350,250" ID="JFrame"/>
<Panel name="JPanel1" setLayout="null" setBounds="-1, 2, 424, 239"
ID="JPanel">
The attribute “setLayout” is normally set to “null”, it means that the user can
self-define the layout. Notice that the attribute “ID” must set to “JFrame” and
“JPanel” for these two elements.
4.3.13 add
The element <add/> is specified to add the widgets onto the panel, it has two
attributes: “value” and “ID”. The attribute “value” is to specify the name of the
widget. The XML specification might look like this:
<add value="top" ID="JPanel1"/>
The above specification means that there is one widget called “top” (top is the name
of the widget, e.g. a label) is added to the panel.
All the widgets have been described, now I need to consider how they can be layout.
After researching on a few methods, I decide to use Grid Layout Arrangement
27 Chapter 4 Project Solution
while concerning the XHTML platform, and Coordinates specified in pixels
concerning the Java platform. The next section is to describe how the layout is
specified in the XML document.
4.3.14 Layout concerning the XHTML Platform
The grid layout is an invisible control that can arrange and align controls in an
application, group or other container in a tabular manner. In order to give the reader a
clear explanation on grid layout, it’s necessary for me to introduce some basic concept
on Box Model.
For display purposes, each element in a document is considered to be a rectangular
box which has a content area surrounded by padding, a border and margins. The width
and height for each box is equal to the width and height of the outer margin box.
There are two basic types of boxes, block and inline. Block boxes are generated by
elements such as P, DIV or TABLE. In this project, I prefer to use <div> for the
layout. DIV (stands for division), a block-level element, simply defines a containing
block of content in the page. Nowadays DIV has been used a lot for making tables in
HTML.
Now I am clear on what <div> is and how grid layout is working, the next thing I
need to consider is how to define the position for each box. One way is to use relative
positioning, the boxes are initially positioned following the normal flow rules.
Surrounding boxes are positioned accordingly. Then, the box is moved according to
its properties. The offset values are specified using a combination of the top, right, left
and bottom style properties. In practice, only the left and top values need to be
specified. Besides, the height and width for the box are also need be specified, i.e.
how big it can be and the widgets can only be placed within this area.
According to the principles described above, let’s come back to the GUI Toolkit. An
XML element <grid/> is specified for the layout. This element is used for creating
containers. The GUI Toolkit container is rectangular-shaped that holds one or more
widgets.
The user can freely specify the attributes for each grid and place their widgets inside,
all the widgets inside one grid share the same layout properties. The widgets inside
one container are placed horizontally in a tabular manner.
There are several attributes defined for the element <grid/>:
“left” specifies the value to the left on the page, all the widgets inside one grid will be
aligned left.
“top” specifies the value to the top on the page.
28 Chapter 4 Project Solution
“width” and “height” specifies how big the grid can be.
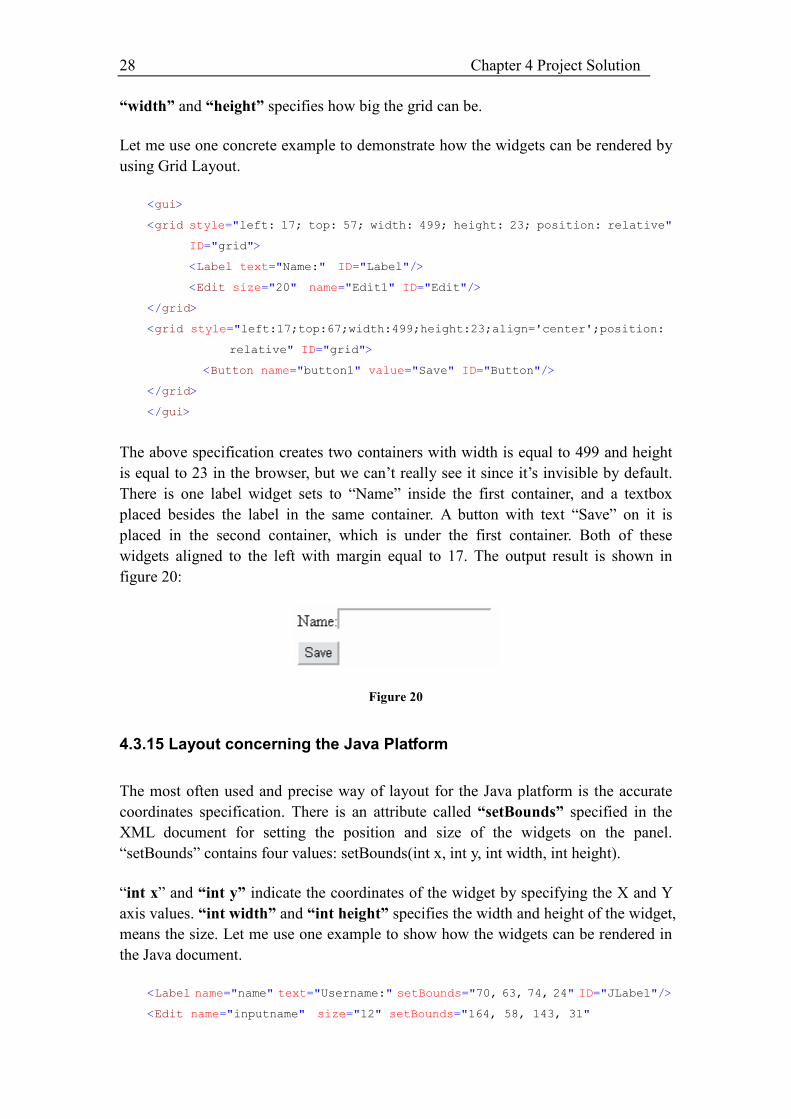
Let me use one concrete example to demonstrate how the widgets can be rendered by
using Grid Layout.
<gui>
<grid style="left: 17; top: 57; width: 499; height: 23; position: relative"
ID="grid">
<Label text="Name:" ID="Label"/>
<Edit size="20" name="Edit1" ID="Edit"/>
</grid>
<grid style="left:17;top:67;width:499;height:23;align='center';position:
relative" ID="grid">
<Button name="button1" value="Save" ID="Button"/>
</grid>
</gui>
The above specification creates two containers with width is equal to 499 and height
is equal to 23 in the browser, but we can’t really see it since it’s invisible by default.
There is one label widget sets to “Name” inside the first container, and a textbox
placed besides the label in the same container. A button with text “Save” on it is
placed in the second container, which is under the first container. Both of these
widgets aligned to the left with margin equal to 17. The output result is shown in
figure 20:
Figure 20
4.3.15 Layout concerning the Java Platform
The most often used and precise way of layout for the Java platform is the accurate
coordinates specification. There is an attribute called “setBounds” specified in the
XML document for setting the position and size of the widgets on the panel.
“setBounds” contains four values: setBounds(int x, int y, int width, int height).
“int x” and “int y” indicate the coordinates of the widget by specifying the X and Y
axis values. “int width” and “int height” specifies the width and height of the widget,
means the size. Let me use one example to show how the widgets can be rendered in
the Java document.
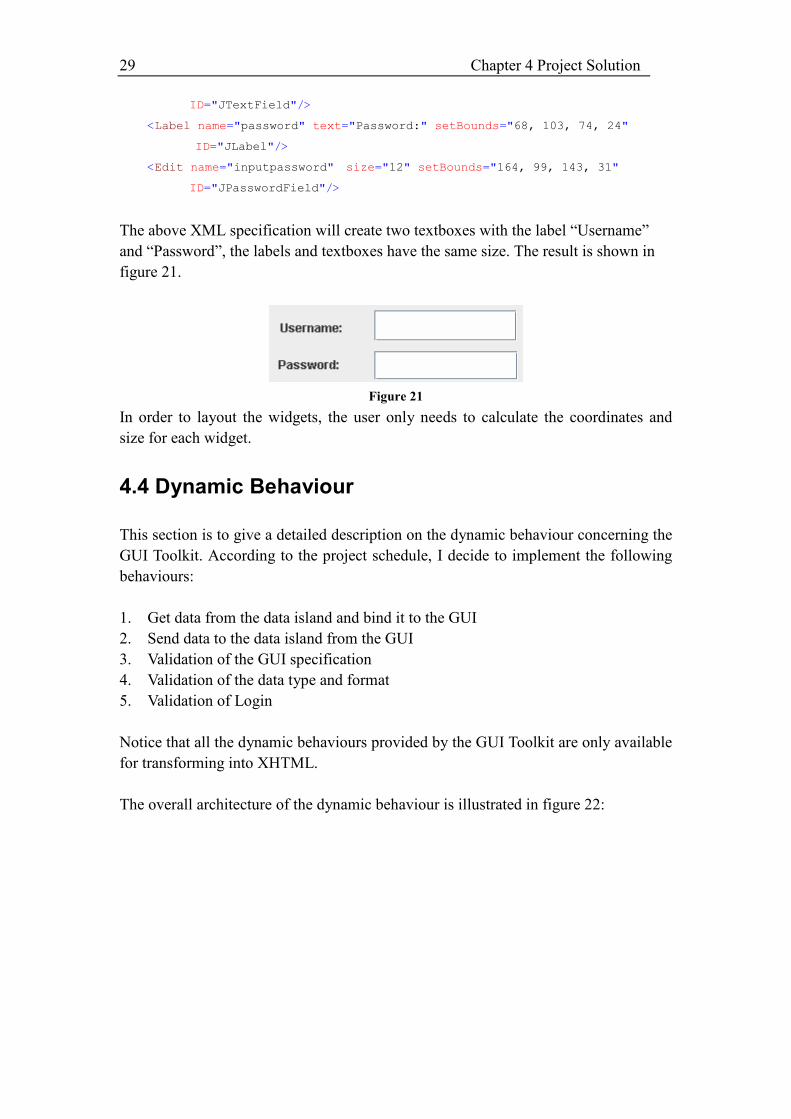
<Label name="name" text="Username:" setBounds="70, 63, 74, 24" ID="JLabel"/>
<Edit name="inputname" size="12" setBounds="164, 58, 143, 31"
29 Chapter 4 Project Solution
ID="JTextField"/>
<Label name="password" text="Password:" setBounds="68, 103, 74, 24"
ID="JLabel"/>
<Edit name="inputpassword" size="12" setBounds="164, 99, 143, 31"
ID="JPasswordField"/>
The above XML specification will create two textboxes with the label “Username”
and “Password”, the labels and textboxes have the same size. The result is shown in
figure 21.
Figure 21
In order to layout the widgets, the user only needs to calculate the coordinates and
size for each widget.
4.4 Dynamic Behaviour
This section is to give a detailed description on the dynamic behaviour concerning the
GUI Toolkit. According to the project schedule, I decide to implement the following
behaviours:
1. Get data from the data island and bind it to the GUI
2. Send data to the data island from the GUI
3. Validation of the GUI specification
4. Validation of the data type and format
5. Validation of Login
Notice that all the dynamic behaviours provided by the GUI Toolkit are only available
for transforming into XHTML.
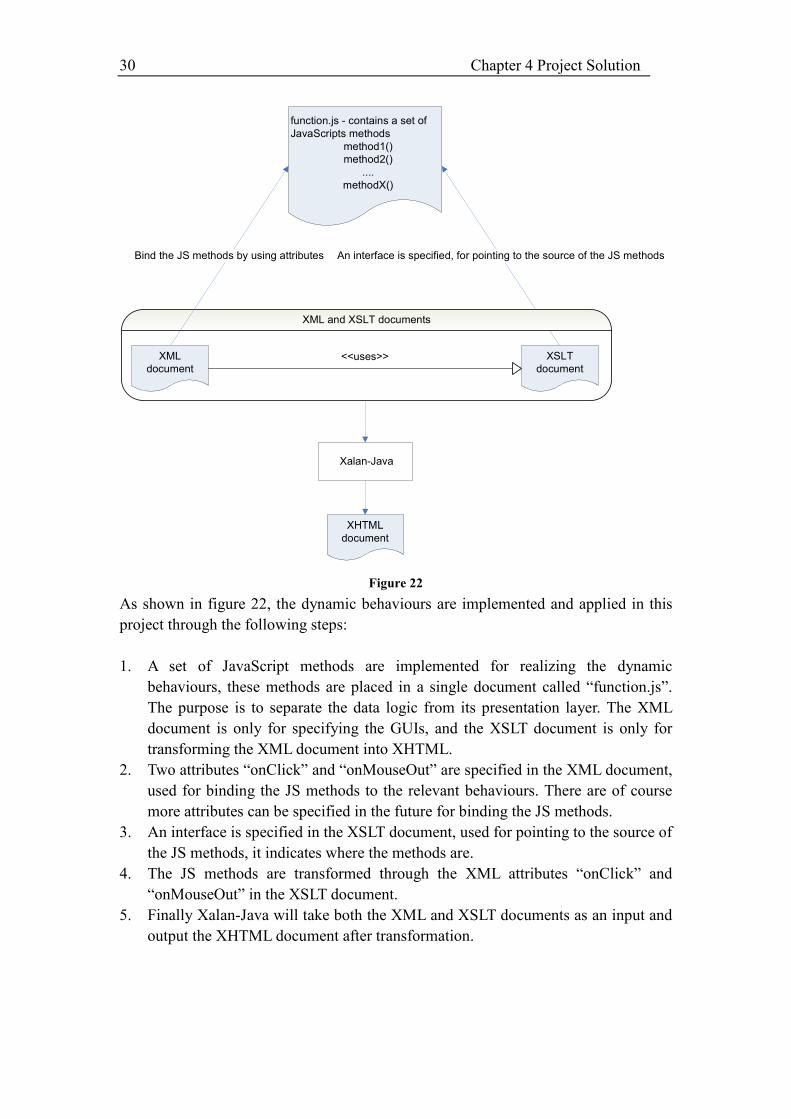
The overall architecture of the dynamic behaviour is illustrated in figure 22:
30 Chapter 4 Project Solution
Xalan-Java
An interface is specified, for pointing to the source of the JS methods
XML
document
XSLT
document
function.js - contains a set of
JavaScripts methods
method1()
method2()
....
methodX()
XML and XSLT documents
XHTML
document
Bind the JS methods by using attributes
<<uses>>
Figure 22
As shown in figure 22, the dynamic behaviours are implemented and applied in this
project through the following steps:
1. A set of JavaScript methods are implemented for realizing the dynamic
behaviours, these methods are placed in a single document called “function.js”.
The purpose is to separate the data logic from its presentation layer. The XML
document is only for specifying the GUIs, and the XSLT document is only for
transforming the XML document into XHTML.
2. Two attributes “onClick” and “onMouseOut” are specified in the XML document,
used for binding the JS methods to the relevant behaviours. There are of course
more attributes can be specified in the future for binding the JS methods.
3. An interface is specified in the XSLT document, used for pointing to the source of
the JS methods, it indicates where the methods are.
4. The JS methods are transformed through the XML attributes “onClick” and
“onMouseOut” in the XSLT document.
5. Finally Xalan-Java will take both the XML and XSLT documents as an input and
output the XHTML document after transformation.
31 Chapter 4 Project Solution
4.4.1 JavaScript
I would like to give a basic introduction on JavaScript since this language has been
used a lot for implementing the dynamic behaviours.
JavaScript is a scripting language of the Web, it is used to improve the design,
validate forms, detect browsers, create cookies, and much more functionalities. The
JavaScript consists of lines of executable computer code.
JavaScript is very powerful for designing web page, it can put dynamic text into an
HTML page, and it can be set to execute when something happens, e.g. when a button
is clicked, besides, JavaScript can also be used to validate form data before it is
submitted to the server.
Most of the dynamic behaviour is implemented by using JavaScript in this project.
4.4.2 Get Data from the Data Island and Bind it to the GUI
This behaviour reflects a very common methodology when designing GUIs – match
merge. It means combining data from one dataset for the same observations. The
simplest merge aligns the first observation in the dataset to produce the first
observation in the resulting dataset, then aligns the second observations,
etc. Match-merging uses the values of a specified variable to match observations.
4.4.2.1 Data Island
In this project, all the dataset are expressed in the form of a data island document. The
XML data island is mainly used for storing the client-side information, and it offers a
useful mechanism to display Web form data, the data island can be embedded into the
HTML forms. In this project, the data island can be freely written by the user, and it’s
only used for storing the data, not for displaying purpose.
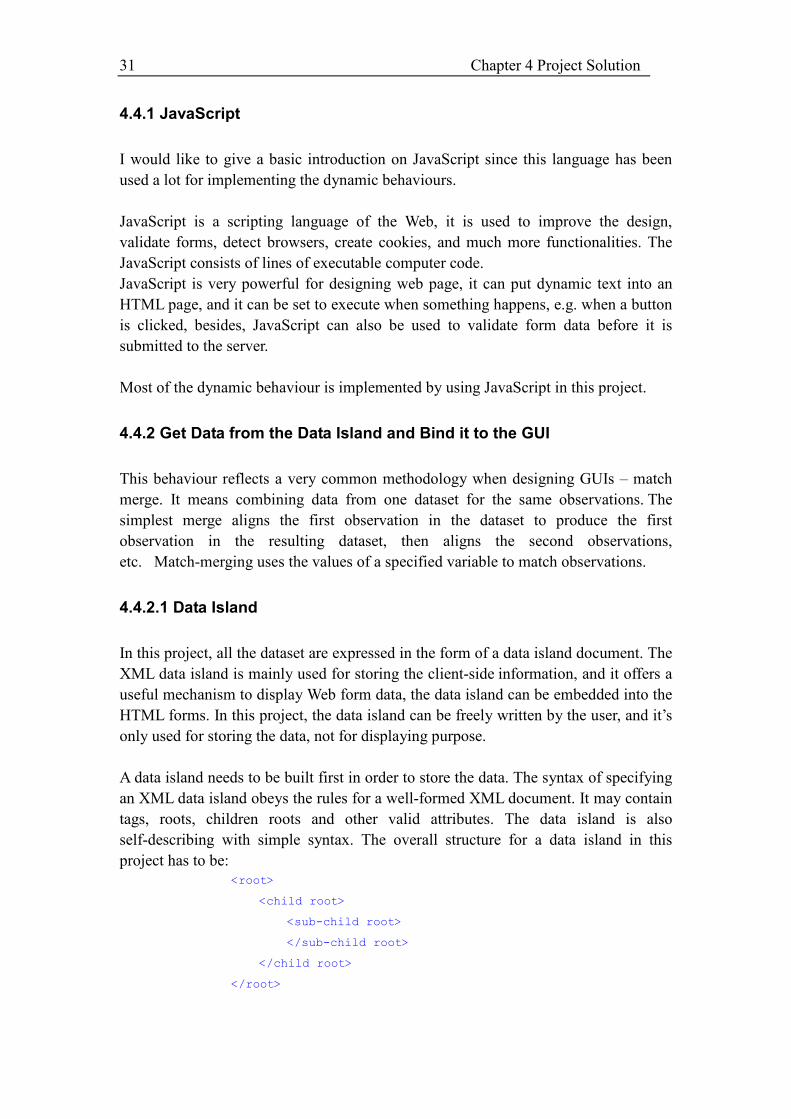
A data island needs to be built first in order to store the data. The syntax of specifying
an XML data island obeys the rules for a well-formed XML document. It may contain
tags, roots, children roots and other valid attributes. The data island is also
self-describing with simple syntax. The overall structure for a data island in this
project has to be:
<root>
<child root>
<sub-child root>
</sub-child root>
</child root>
</root>
32 Chapter 4 Project Solution
Let me use one concrete example to demonstrate:
<?xml version="1.0" encoding="gb2312"?>
<addresslist>
<person>
<name>xin</name>
<mobileph>26508665</mobileph>
<email>[email protected]</email>
<address>Herlev, Denmark</address>
</person>
</addresslist>
This code shows an XML data island of an address list. <addresslist></addresslist>
defines the root for the data island, <person></person> is the child root to record all
the information of persons, while each section contains several sub-child roots, e.g.
<name>, <mobileph> and so on for specifying the detailed information to each
person. All the elements can be freely defined by the user, e.g. the user can call it
<telephonelist> if this data island is for storing telephone numbers.
There is no restriction on the contents in the data island in principle, the user can
define any data according to their needs. Now the data island has been set successfully,
let’s focus on how the user can bind data to the GUI. Before we go into detail, I would
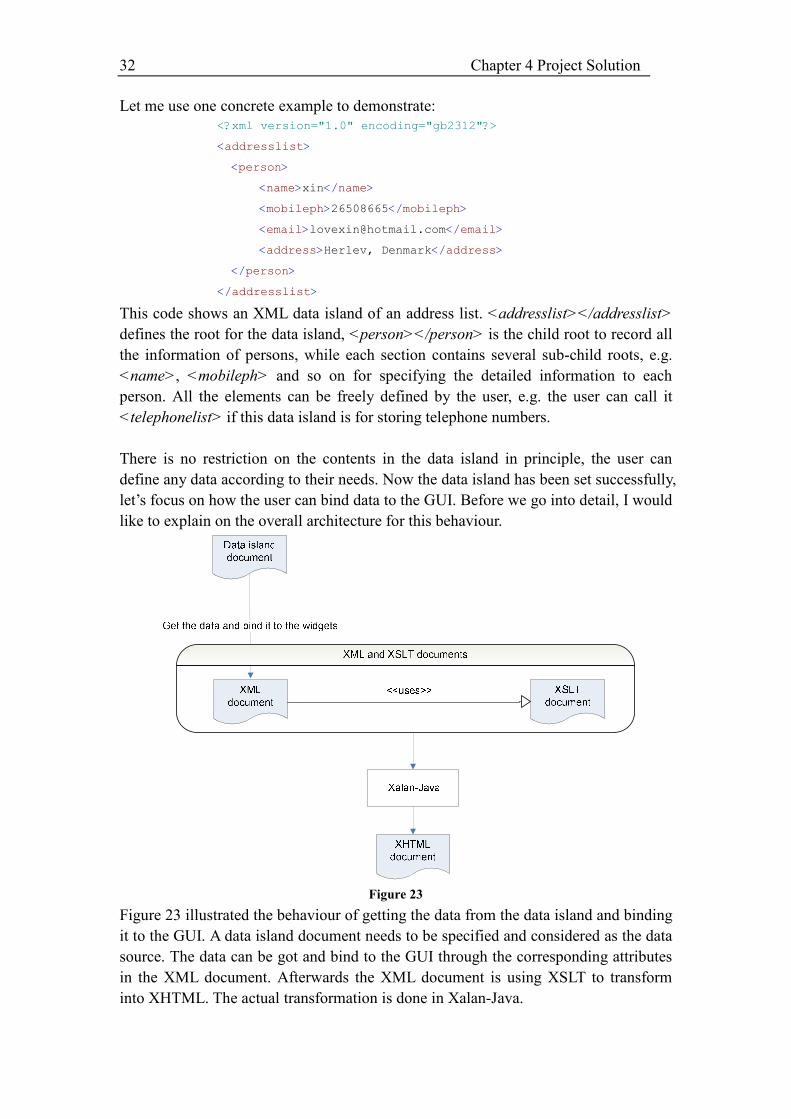
like to explain on the overall architecture for this behaviour.
Figure 23
Figure 23 illustrated the behaviour of getting the data from the data island and binding
it to the GUI. A data island document needs to be specified and considered as the data
source. The data can be got and bind to the GUI through the corresponding attributes
in the XML document. Afterwards the XML document is using XSLT to transform
into XHTML. The actual transformation is done in Xalan-Java.
33 Chapter 4 Project Solution
4.4.1.2 Attributes for Binding the Data
There is an XML element called <XML/> specified for the user to define the data
source, i.e. the data island. Each time when the user wants to bind a data to the GUI,
they must specify the data source in the beginning of the XML document, as shown
below:
<XML id="xmlid" src="addresslist.xml" ID="XML"/>
As you can see from the code above, there are three attributes for the element
<XML/>. “id” is used to assign an ID for the data source, so the user can quote it later
by using this id. “src” is the URL value for an XML data source, so the user can use
this attribute to specify the data source, e.g. “addresslist.xml”, means the data is
contained in the data island called “addresslist.xml”.
After the data source has been specified, the user can get the data and bind it to the
GUI. For doing this, two attributes are specified in the XML document: DATASRC
and DATAFLD. Theses two attributes allow the IE browser to display the bound data.
The DTATSRC attribute is used to specify the data island source with a URI. The
DATAFLD attribute is used to specify the elements in the data island. So if the user
wants to bind elements from the data island document “addresslist.xml” shown on
page 32 to the GUI, the specification of this behaviour can be done like this:
<XML id="xmlid" src="addresslist.xml" ID="XML"/>
<grid style="left: 17; top: 57; width: 499; height: 23; position: relative"
ID="grid">
<Label text="Name:" ID="Label"/>
<Edit size="20" DATASRC="#xmlid" DATAFLD="name" ID="Edit"/>
</grid>
<grid style="left: 17; top: 67; width: 499; height: 23; position: relative"
ID="grid">
<Label text="Mobile:" ID="Label"/>
<Edit size="20" DATASRC="#xmlid" DATAFLD="mobileph" ID="Edit"/>
</grid>
As you can see from the specification above, it specifies two textboxes, with label
“Name” and “Mobile”. DATASRC="#xmlid" specified the data source, in this example,
it’s “addresslist.xml”. DATAFLD="name" specified that the element <name/> from the
data island will be bound to this textbox. The same for the other textbox, but the
element <mobileph/> will be bound to it.
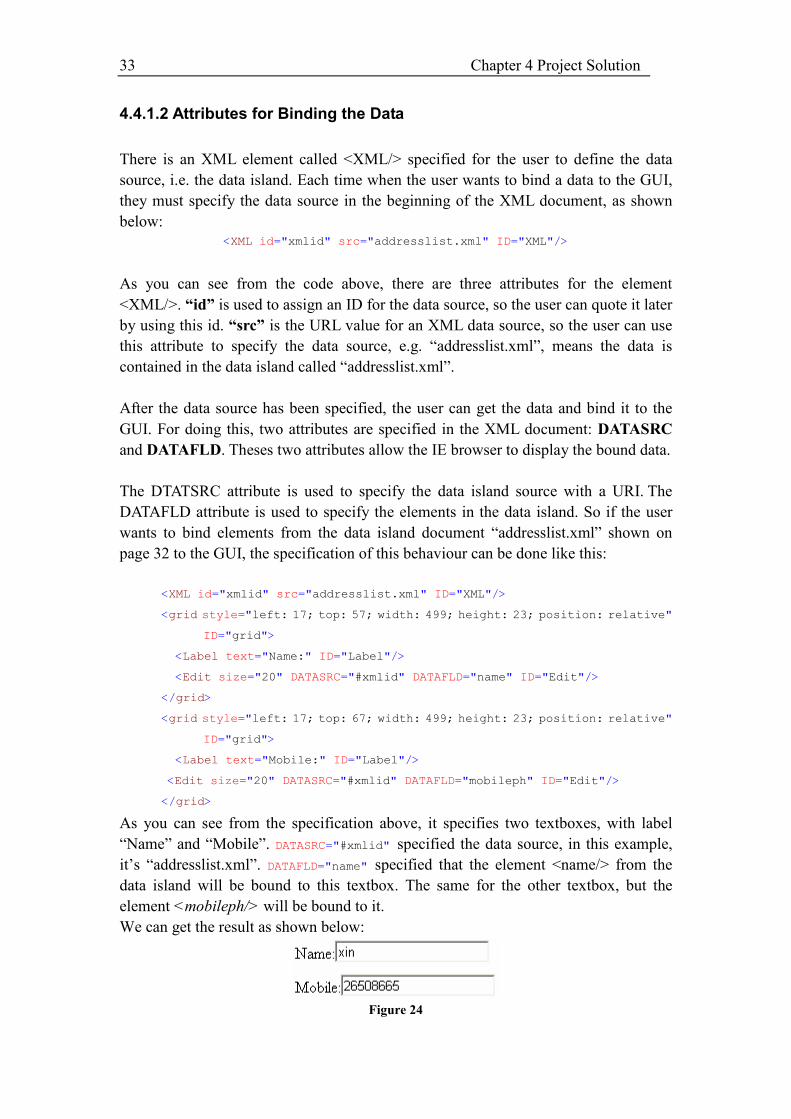
We can get the result as shown below:
Figure 24
34 Chapter 4 Project Solution
As shown in figure 24, the textbox with label “Name” is bound to data “xin”, and the
textbox with label “Mobile” is bound to data “26508665”.
The user can bind data from any data island to the GUI by using the same method
shown above, they can self-define which data element should be bound to which
widget.
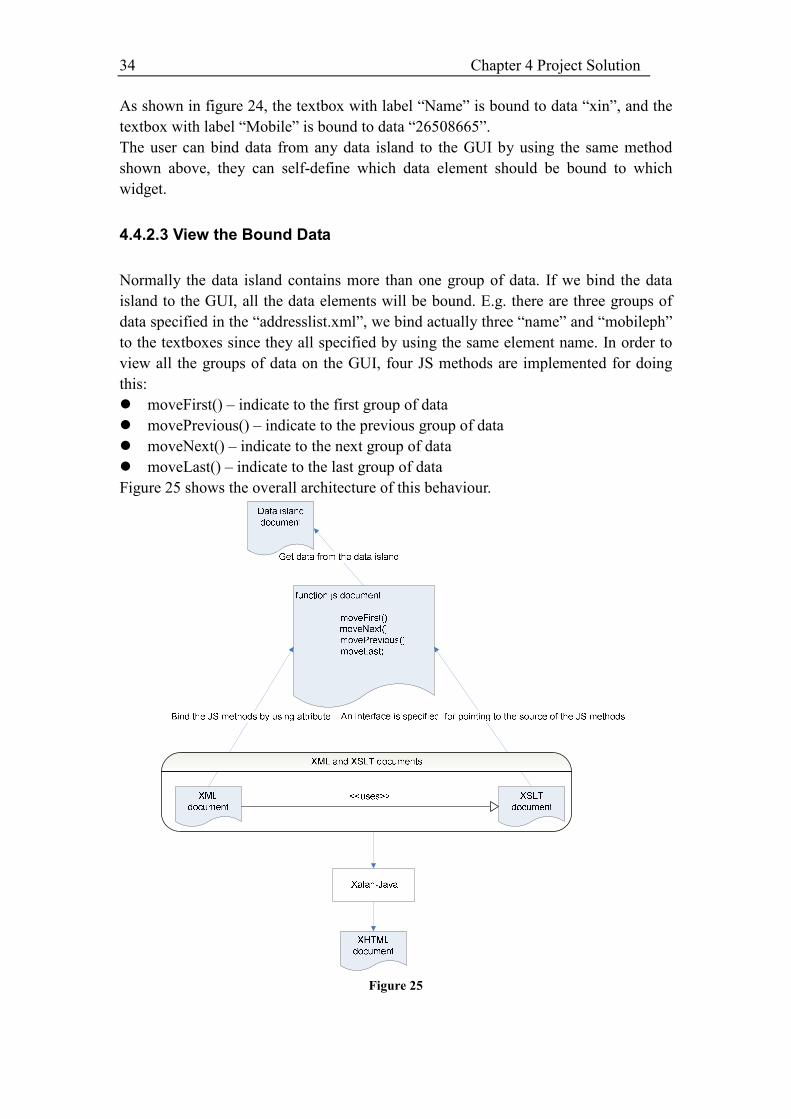
4.4.2.3 View the Bound Data
Normally the data island contains more than one group of data. If we bind the data
island to the GUI, all the data elements will be bound. E.g. there are three groups of
data specified in the “addresslist.xml”, we bind actually three “name” and “mobileph”
to the textboxes since they all specified by using the same element name. In order to
view all the groups of data on the GUI, four JS methods are implemented for doing
this:
� moveFirst() – indicate to the first group of data
� movePrevious() – indicate to the previous group of data
� moveNext() – indicate to the next group of data
� moveLast() – indicate to the last group of data
Figure 25 shows the overall architecture of this behaviour.
Figure 25
35 Chapter 4 Project Solution
The above four JS methods are placed in the document “function.js”. The XML
document specifies the data source, and uses the attribute “onClick” to bind the
methods. The JS methods get the data from the data island document and indicate to
different groups of data. The source of the JS methods is specified in the XSLT
document. Finally the XML document will be transformed to the XHTML document
by using the XSLT document. The actual transformation is done in Xalan-Java.
These four JS methods are implemented in the same way, let me take one to explain
how it works, e.g. moveFirst(). This method contains only one piece of code:
xmlid.recordset.moveFirst();
the above piece of code will point to the first group of data stored in the data island,
“xmlid” is to indicate which data island should refer to. “recordset“ is an ADO
(ActiveX Data Object) object, it is used to hold a set of records from a database, i.e.
the data island in this project. In ADO, “recordset“ object is the most important and
the most often used one to manipulate data from a database. xmlid.recordset means
that the data from the data island will be imported to the recordset.
There are many methods for the recordset object, e.g. moveFirst(). This method is
used to move to the first record in a Recordset object. By using this method, we are
we are able to move to the fist record of data in “recordset“. moveNext(),
movePrevious and moveLast() are all methods of the recordset object, and they work
in the same way as moveFirst(), so I won’t descibe on each one.
An XML attribute “onClick“ is specified for associating the above methods to the
events. E.g. when the user is clicking on the button “next“, it will move to the next
record of data in the data island.
The methods is used in the XML document in the following way, I only use
xmlid.recordset.moveNext() to demonstrate as an example.
<Button name="next" value="next" onClick="moveNext()" ID="Button"/>
The above XML specification will create a button with “next” on it, the method
moveNext() will be activated when this button is clicked. Let me use one concrete
example to illustrate how this method is working:
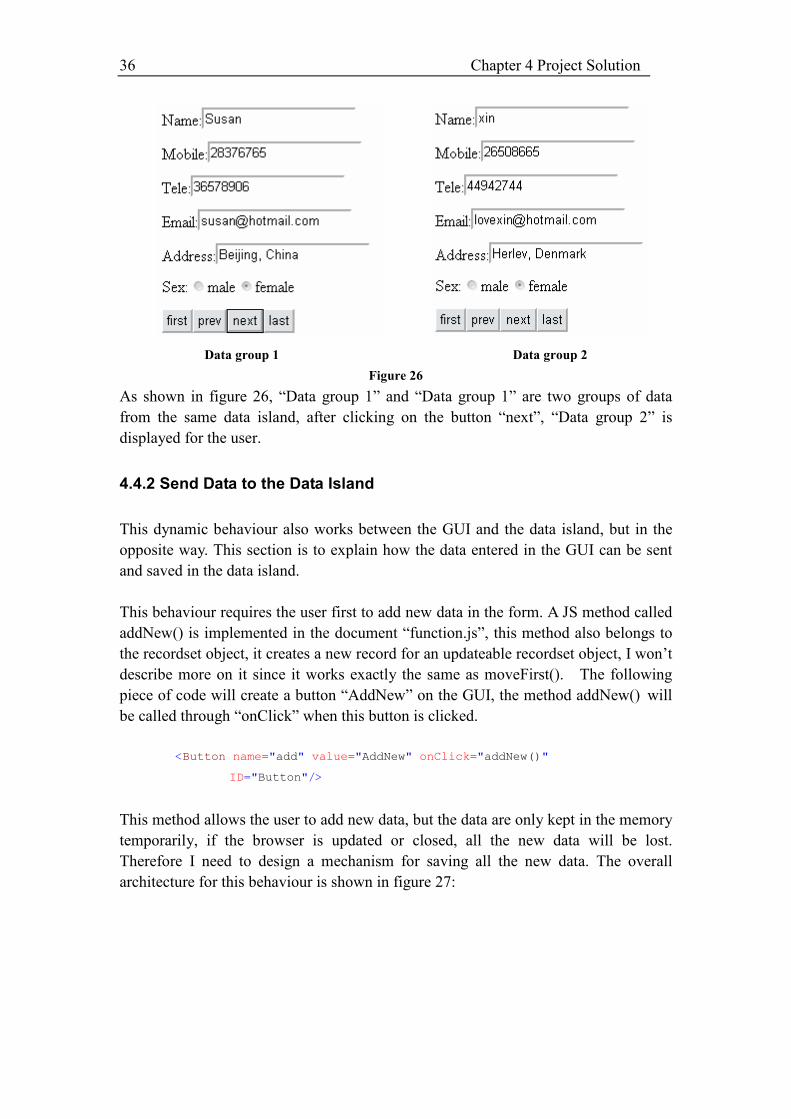
36 Chapter 4 Project Solution
Data group 1 Data group 2
Figure 26
As shown in figure 26, “Data group 1” and “Data group 1” are two groups of data
from the same data island, after clicking on the button “next”, “Data group 2” is
displayed for the user.
4.4.2 Send Data to the Data Island
This dynamic behaviour also works between the GUI and the data island, but in the
opposite way. This section is to explain how the data entered in the GUI can be sent
and saved in the data island.
This behaviour requires the user first to add new data in the form. A JS method called
addNew() is implemented in the document “function.js”, this method also belongs to
the recordset object, it creates a new record for an updateable recordset object, I won’t
describe more on it since it works exactly the same as moveFirst(). The following
piece of code will create a button “AddNew” on the GUI, the method addNew() will
be called through “onClick” when this button is clicked.
<Button name="add" value="AddNew" onClick="addNew()"
ID="Button"/>
This method allows the user to add new data, but the data are only kept in the memory
temporarily, if the browser is updated or closed, all the new data will be lost.
Therefore I need to design a mechanism for saving all the new data. The overall
architecture for this behaviour is shown in figure 27:
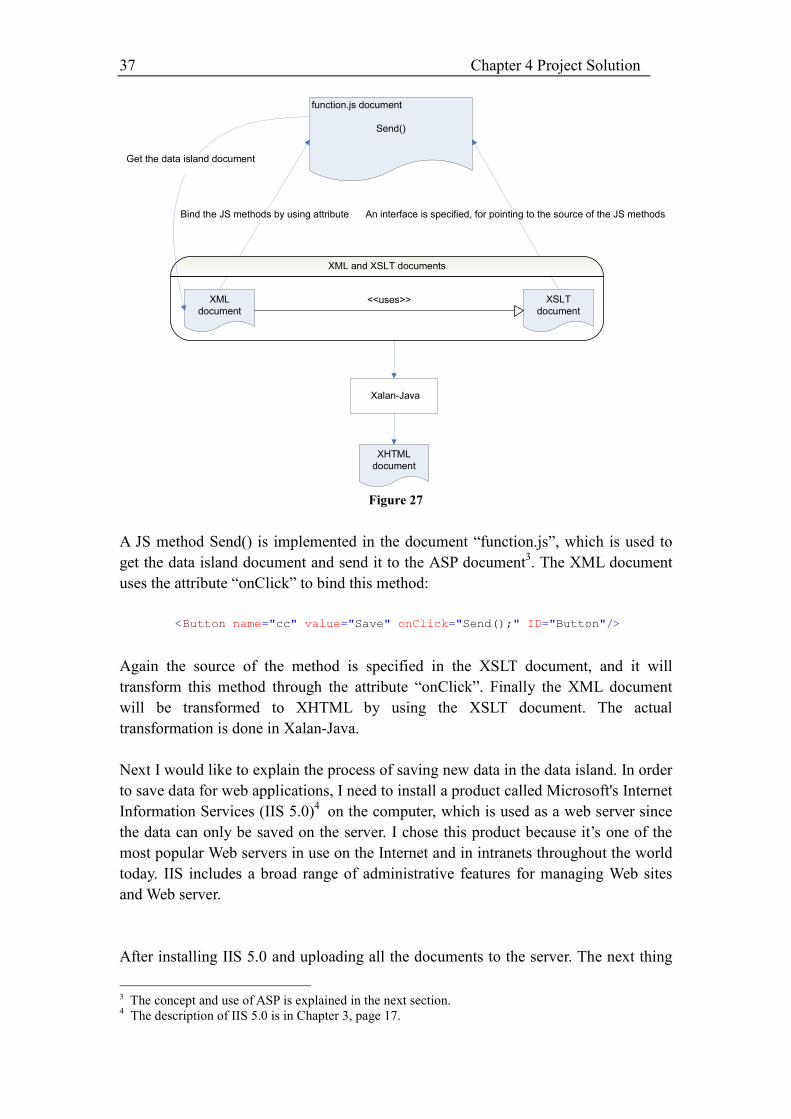
37 Chapter 4 Project Solution
Xalan-Java
Bind the JS methods by using attribute An interface is specified, for pointing to the source of the JS methods
XML
document
XSLT
document
function.js document
Send()
XML and XSLT documents
<<uses>>
XHTML
document
Get the data island document
Figure 27
A JS method Send() is implemented in the document “function.js”, which is used to
get the data island document and send it to the ASP document3. The XML document
uses the attribute “onClick” to bind this method:
<Button name="cc" value="Save" onClick="Send();" ID="Button"/>
Again the source of the method is specified in the XSLT document, and it will
transform this method through the attribute “onClick”. Finally the XML document
will be transformed to XHTML by using the XSLT document. The actual
transformation is done in Xalan-Java.
Next I would like to explain the process of saving new data in the data island. In order
to save data for web applications, I need to install a product called Microsoft's Internet
Information Services (IIS 5.0)4 on the computer, which is used as a web server since
the data can only be saved on the server. I chose this product because it’s one of the
most popular Web servers in use on the Internet and in intranets throughout the world
today. IIS includes a broad range of administrative features for managing Web sites
and Web server.
After installing IIS 5.0 and uploading all the documents to the server. The next thing
3 The concept and use of ASP is explained in the next section. 4 The description of IIS 5.0 is in Chapter 3, page 17.
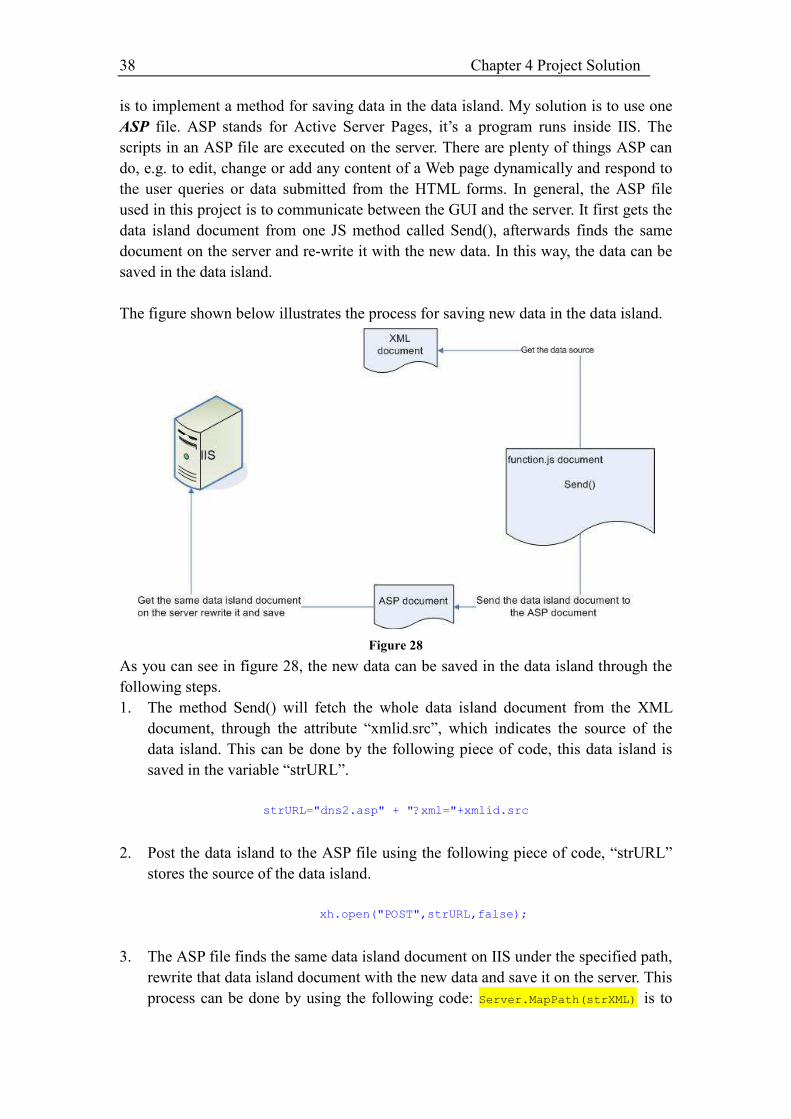
38 Chapter 4 Project Solution
is to implement a method for saving data in the data island. My solution is to use one
ASP file. ASP stands for Active Server Pages, it’s a program runs inside IIS. The
scripts in an ASP file are executed on the server. There are plenty of things ASP can
do, e.g. to edit, change or add any content of a Web page dynamically and respond to
the user queries or data submitted from the HTML forms. In general, the ASP file
used in this project is to communicate between the GUI and the server. It first gets the
data island document from one JS method called Send(), afterwards finds the same
document on the server and re-write it with the new data. In this way, the data can be
saved in the data island.
The figure shown below illustrates the process for saving new data in the data island.
Figure 28
As you can see in figure 28, the new data can be saved in the data island through the
following steps.
1. The method Send() will fetch the whole data island document from the XML
document, through the attribute “xmlid.src”, which indicates the source of the
data island. This can be done by the following piece of code, this data island is
saved in the variable “strURL”.
strURL="dns2.asp" + "?xml="+xmlid.src
2. Post the data island to the ASP file using the following piece of code, “strURL”
stores the source of the data island.
xh.open("POST",strURL,false);
3. The ASP file finds the same data island document on IIS under the specified path,
rewrite that data island document with the new data and save it on the server. This
process can be done by using the following code: Server.MapPath(strXML) is to
39 Chapter 4 Project Solution
find the path which contains the data island on the server, the variable “strXML”
represents the name of the data island document, which is got from the method
Send(). The last piece of code will rewrite the data island document with the new
data and save it on the server.
Set numtxt=files.CreateTextFile(Server.MapPath(strXML),True)
numtxt.WriteLine(replace(ReceivedDoc.xml,"?>"," encoding=""gb2312""?>"))
In this way, the new data can be saved into the data island, the user can check for the
new data by opening that data island document.
4.4.3 Validation of the GUI Specification
The validation for the GUI specification is very important for the user, because the
user can only get the expected result based on a well-formed XML document. Besides,
the user also needs to follow the specification rules defined by the developer. This
section is to describe how the GUI specification can be validated. The validation file
is done using XSD. The XSD document needs to be quoted in the beginning of the
XML document in order to validate the whole GUI specification, it can be done like
this:
<?xml version="1.0"?>
<?xml-stylesheet type="text/xsl" href="gui.xsl" ?>
<gui xmlns:xsi=http://www.w3.org/2001/XMLSchema-instance
xsi:noNamespaceSchemaLocation="gui.xsd">
……
</gui>
XSD stands for XML Schema Definition. The XML schema describes the structure of
an XML document. It uses XML syntax, but with extension .xsd to the file name. We
can simply use the XML editor to edit schema files and use the XML parser to parse
the schema files. The XML schema is also extensible and self-described, so we can
design our own data types.
This GUI Toolkit provides an XML schema, which is used to validate the following
points:
� Elements that can appear in a document – defines which elements must be
included in the specification, otherwise, the document is not considered as
well-formed.
� Attributes that can appear in a document – defines which attributes must be
included in its element.
� Which elements are child elements – defines the child elements in the XML
document, so the user must write it as child elements, otherwise, the document
will not be parsed, this is very important for the XSL transformation.
� The order of the child elements – defines the sequence of the child elements, it’s
also necessary when designing and parsing XML document.
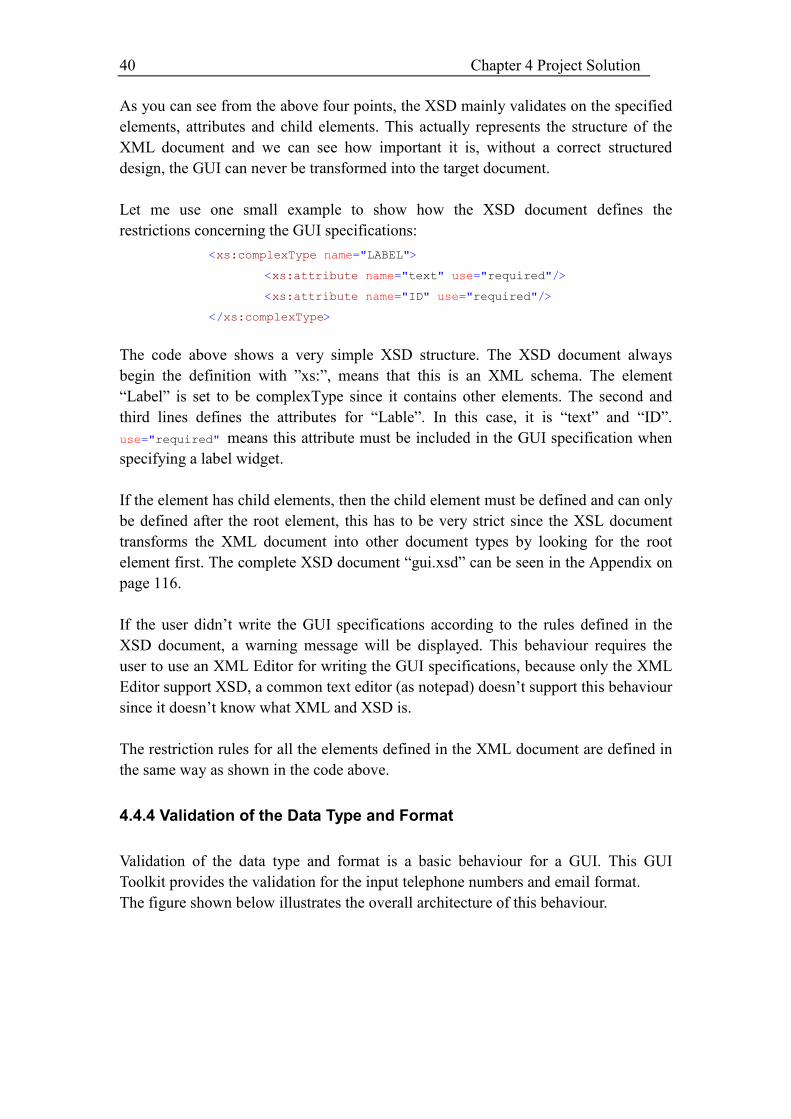
40 Chapter 4 Project Solution
As you can see from the above four points, the XSD mainly validates on the specified
elements, attributes and child elements. This actually represents the structure of the
XML document and we can see how important it is, without a correct structured
design, the GUI can never be transformed into the target document.
Let me use one small example to show how the XSD document defines the
restrictions concerning the GUI specifications:
The code above shows a very simple XSD structure. The XSD document always
begin the definition with ”xs:”, means that this is an XML schema. The element
“Label” is set to be complexType since it contains other elements. The second and
third lines defines the attributes for “Lable”. In this case, it is “text” and “ID”.
use="required" means this attribute must be included in the GUI specification when
specifying a label widget.
If the element has child elements, then the child element must be defined and can only
be defined after the root element, this has to be very strict since the XSL document
transforms the XML document into other document types by looking for the root
element first. The complete XSD document “gui.xsd” can be seen in the Appendix on
page 116.
If the user didn’t write the GUI specifications according to the rules defined in the
XSD document, a warning message will be displayed. This behaviour requires the
user to use an XML Editor for writing the GUI specifications, because only the XML
Editor support XSD, a common text editor (as notepad) doesn’t support this behaviour
since it doesn’t know what XML and XSD is.
The restriction rules for all the elements defined in the XML document are defined in
the same way as shown in the code above.
4.4.4 Validation of the Data Type and Format
Validation of the data type and format is a basic behaviour for a GUI. This GUI
Toolkit provides the validation for the input telephone numbers and email format.
The figure shown below illustrates the overall architecture of this behaviour.
<xs:complexType name="LABEL">
<xs:attribute name="text" use="required"/>
<xs:attribute name="ID" use="required"/>
</xs:complexType>
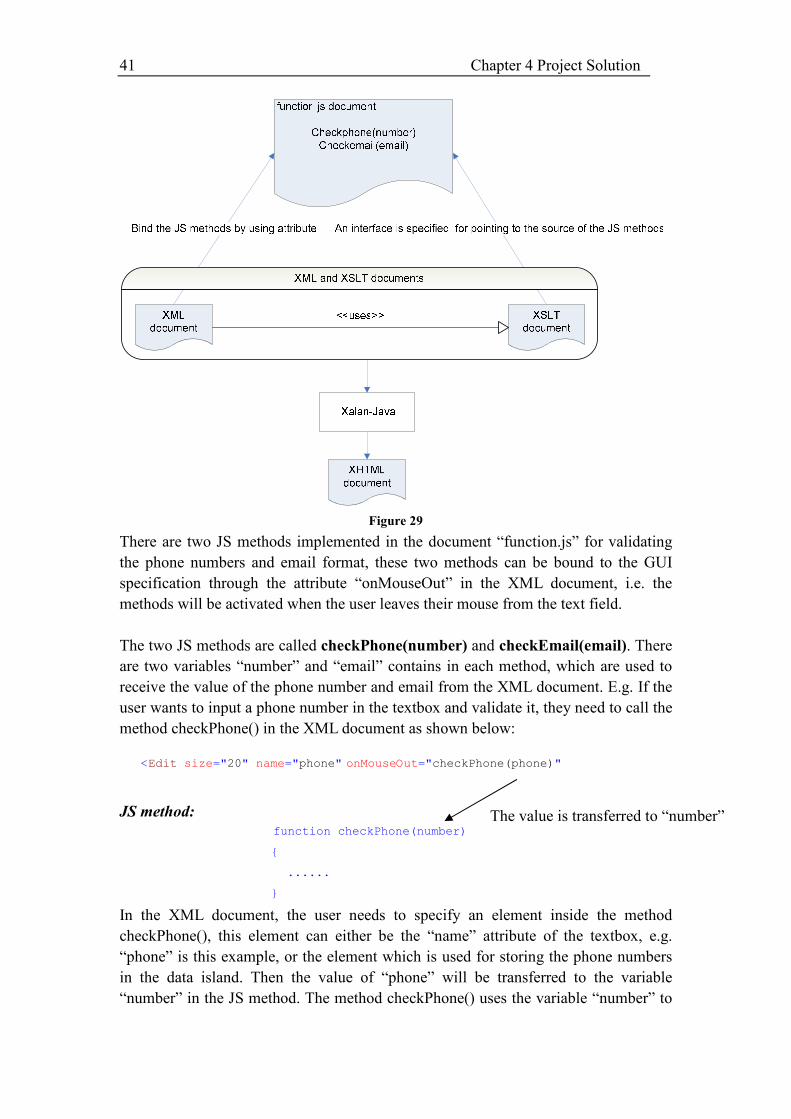
41 Chapter 4 Project Solution
Figure 29
There are two JS methods implemented in the document “function.js” for validating
the phone numbers and email format, these two methods can be bound to the GUI
specification through the attribute “onMouseOut” in the XML document, i.e. the
methods will be activated when the user leaves their mouse from the text field.
The two JS methods are called checkPhone(number) and checkEmail(email). There
are two variables “number” and “email” contains in each method, which are used to
receive the value of the phone number and email from the XML document. E.g. If the
user wants to input a phone number in the textbox and validate it, they need to call the
method checkPhone() in the XML document as shown below:
JS method: function checkPhone(number)
{
......
}
In the XML document, the user needs to specify an element inside the method
checkPhone(), this element can either be the “name” attribute of the textbox, e.g.
“phone” is this example, or the element which is used for storing the phone numbers
in the data island. Then the value of “phone” will be transferred to the variable
“number” in the JS method. The method checkPhone() uses the variable “number” to
<Edit size="20" name="phone" onMouseOut="checkPhone(phone)"
The value is transferred to “number”
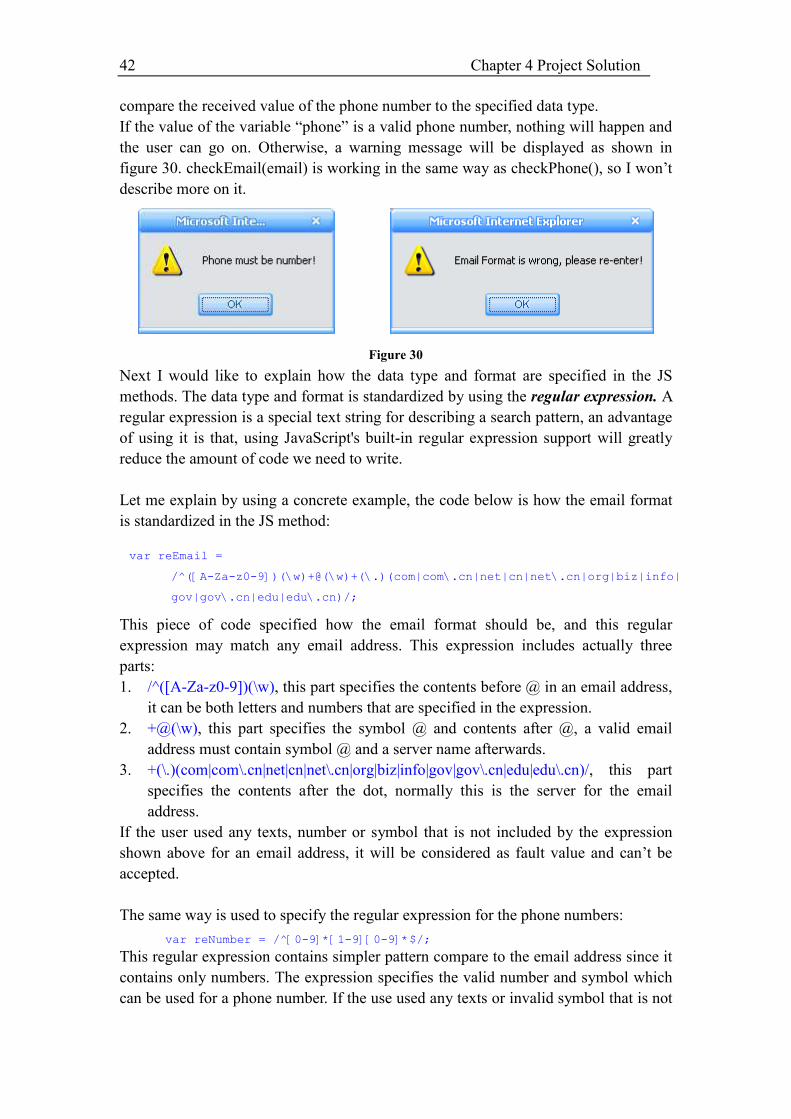
42 Chapter 4 Project Solution
compare the received value of the phone number to the specified data type.
If the value of the variable “phone” is a valid phone number, nothing will happen and
the user can go on. Otherwise, a warning message will be displayed as shown in
figure 30. checkEmail(email) is working in the same way as checkPhone(), so I won’t
describe more on it.
Figure 30
Next I would like to explain how the data type and format are specified in the JS
methods. The data type and format is standardized by using the regular expression. A
regular expression is a special text string for describing a search pattern, an advantage
of using it is that, using JavaScript's built-in regular expression support will greatly
reduce the amount of code we need to write.
Let me explain by using a concrete example, the code below is how the email format
is standardized in the JS method:
This piece of code specified how the email format should be, and this regular
expression may match any email address. This expression includes actually three
parts:
1. /^([A-Za-z0-9])(\w), this part specifies the contents before @ in an email address,
it can be both letters and numbers that are specified in the expression.
2. +@(\w), this part specifies the symbol @ and contents after @, a valid email
address must contain symbol @ and a server name afterwards.
3. +(\.)(com|com\.cn|net|cn|net\.cn|org|biz|info|gov|gov\.cn|edu|edu\.cn)/, this part
specifies the contents after the dot, normally this is the server for the email
address.
If the user used any texts, number or symbol that is not included by the expression
shown above for an email address, it will be considered as fault value and can’t be
accepted.
The same way is used to specify the regular expression for the phone numbers:
This regular expression contains simpler pattern compare to the email address since it
contains only numbers. The expression specifies the valid number and symbol which
can be used for a phone number. If the use used any texts or invalid symbol that is not
var reEmail =
/^([A-Za-z0-9])(\w)+@(\w)+(\.)(com|com\.cn|net|cn|net\.cn|org|biz|info|
gov|gov\.cn|edu|edu\.cn)/;
var reNumber = /^[0-9]*[1-9][0-9]*$/;
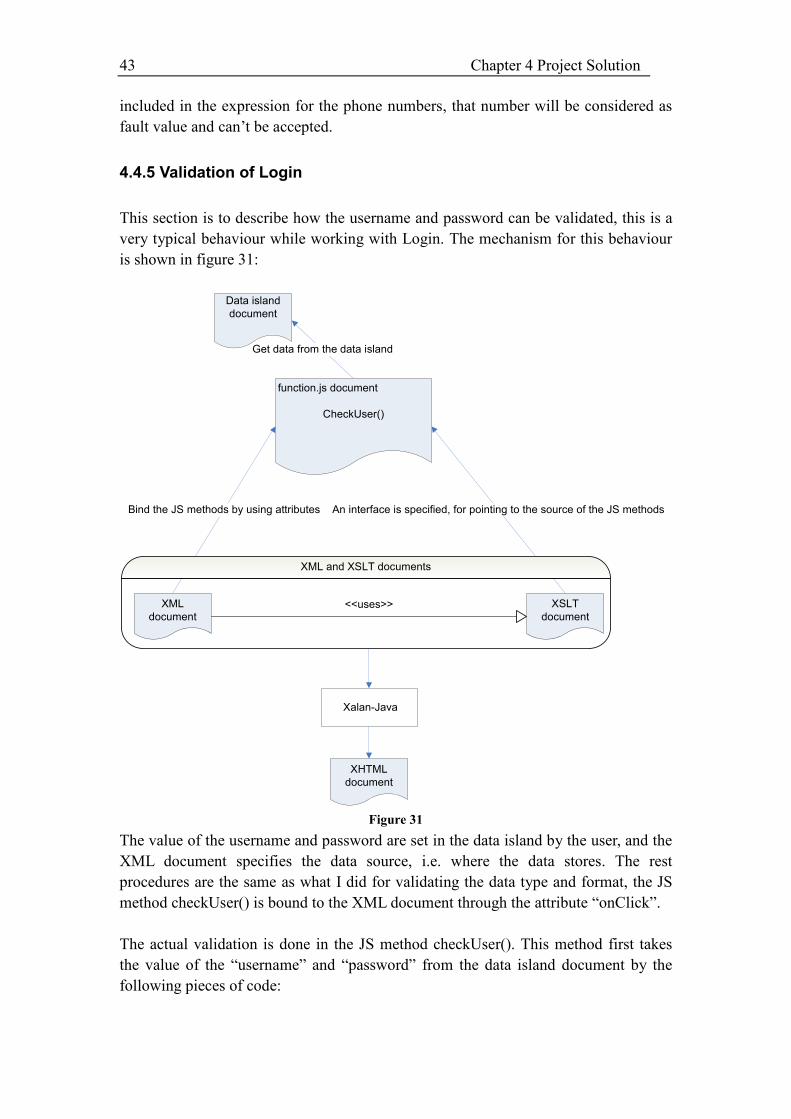
43 Chapter 4 Project Solution
included in the expression for the phone numbers, that number will be considered as
fault value and can’t be accepted.
4.4.5 Validation of Login
This section is to describe how the username and password can be validated, this is a
very typical behaviour while working with Login. The mechanism for this behaviour
is shown in figure 31:
Xalan-Java
Get data from the data island
Bind the JS methods by using attributes An interface is specified, for pointing to the source of the JS methods
XML
document
XSLT
document
function.js document
CheckUser()
Data island
document
XML and XSLT documents
<<uses>>
XHTML
document
Figure 31
The value of the username and password are set in the data island by the user, and the
XML document specifies the data source, i.e. where the data stores. The rest
procedures are the same as what I did for validating the data type and format, the JS
method checkUser() is bound to the XML document through the attribute “onClick”.
The actual validation is done in the JS method checkUser(). This method first takes
the value of the “username” and “password” from the data island document by the
following pieces of code:

44 Chapter 4 Project Solution
userNameNode=userXML.XMLDocument.documentElement.selectNodes("//username");
userPasswordNode=userXML.XMLDocument.documentElement.selectNodes("//password
");
The “username” and “password” in the code above are sub-child elements defined in
the data island, used for storing the value of the usernames and passwords.
There are three variables are used to receive the user’s input value in the method
checkUser(u,p,xml). Let me use one concrete example to explain how this behaviour
works.
E.g. the user specified two textboxes with name “ID” and “Code” in the XML
document, then “ID” and “Code” has to be put inside the method checkUser(), the
value of this element will be transferred to the variables contain in the JS method.
<Edit name="ID" size="10" ID="Edit"/>
<Edit name="Code" size="10" ID="Password"/>
The method checkUser() is invoked in the XML document by using the specification
shown below
<Button name="login" value="Submit"
onClick="checkUser(ID, Code,'gui.xml');" ID="Button"/>
JS Method
function checkUser( u, p, xml)
{
……
}
The code above illustrated how the user’s input value in the textbox can be transferred
to the JS method. The method checkUser() can be invoked in the XML document
through the attribute “onClick”, and the user needs to specify the elements inside this
method, the elements are attribute “name” of the textbox, the “name” can be freely
defined by the user. “ID” and “Code” is only for demonstration.
ID – this element represents the user’s input value of the username, the value of this
element will be transferred to the variable “u” in the JS method, and compare to the
username from the data island.
Code – this element represents the user’s input value for the password, the value of
this element will be transferred to the variable “p” in the JS method, and compare to
the password from the data island.
gui.xml – this element represents the user’s specified document, the value of this
element will be transferred to the variable “xml” in the JS method. It indicates which
The value are transferred to the
variables
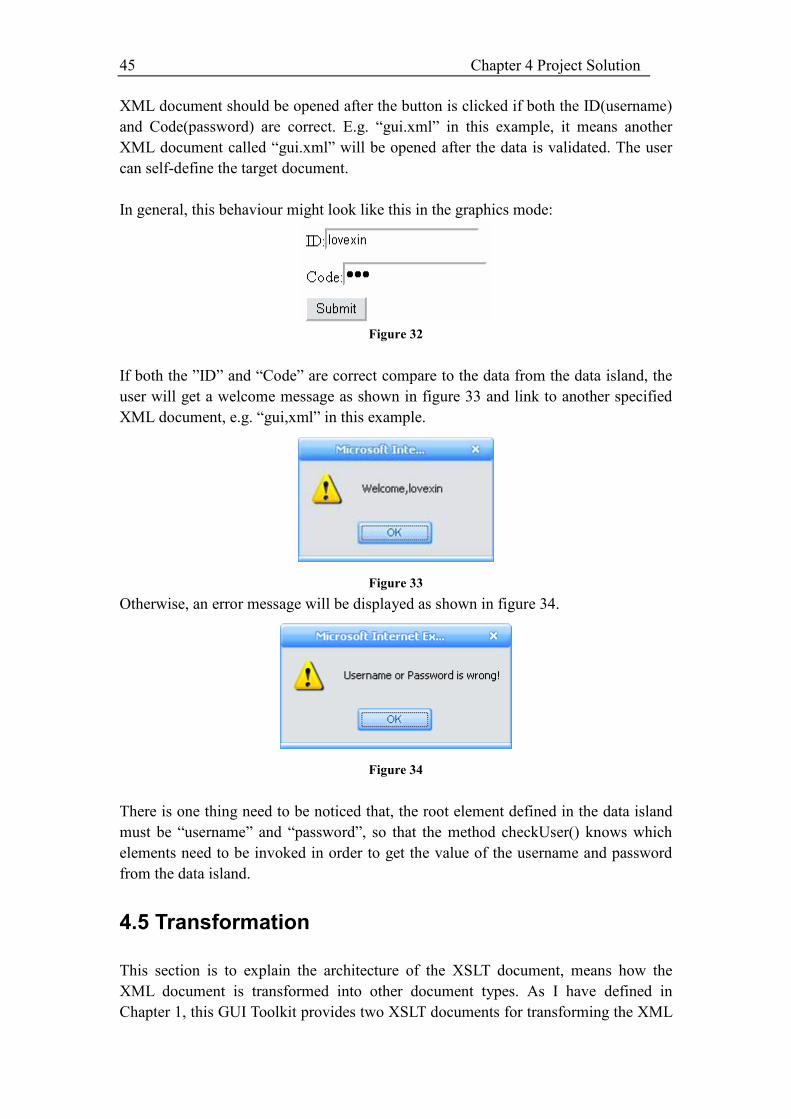
45 Chapter 4 Project Solution
XML document should be opened after the button is clicked if both the ID(username)
and Code(password) are correct. E.g. “gui.xml” in this example, it means another
XML document called “gui.xml” will be opened after the data is validated. The user
can self-define the target document.
In general, this behaviour might look like this in the graphics mode:
Figure 32
If both the ”ID” and “Code” are correct compare to the data from the data island, the
user will get a welcome message as shown in figure 33 and link to another specified
XML document, e.g. “gui,xml” in this example.
Figure 33
Otherwise, an error message will be displayed as shown in figure 34.
Figure 34
There is one thing need to be noticed that, the root element defined in the data island
must be “username” and “password”, so that the method checkUser() knows which
elements need to be invoked in order to get the value of the username and password
from the data island.
4.5 Transformation
This section is to explain the architecture of the XSLT document, means how the
XML document is transformed into other document types. As I have defined in
Chapter 1, this GUI Toolkit provides two XSLT documents for transforming the XML
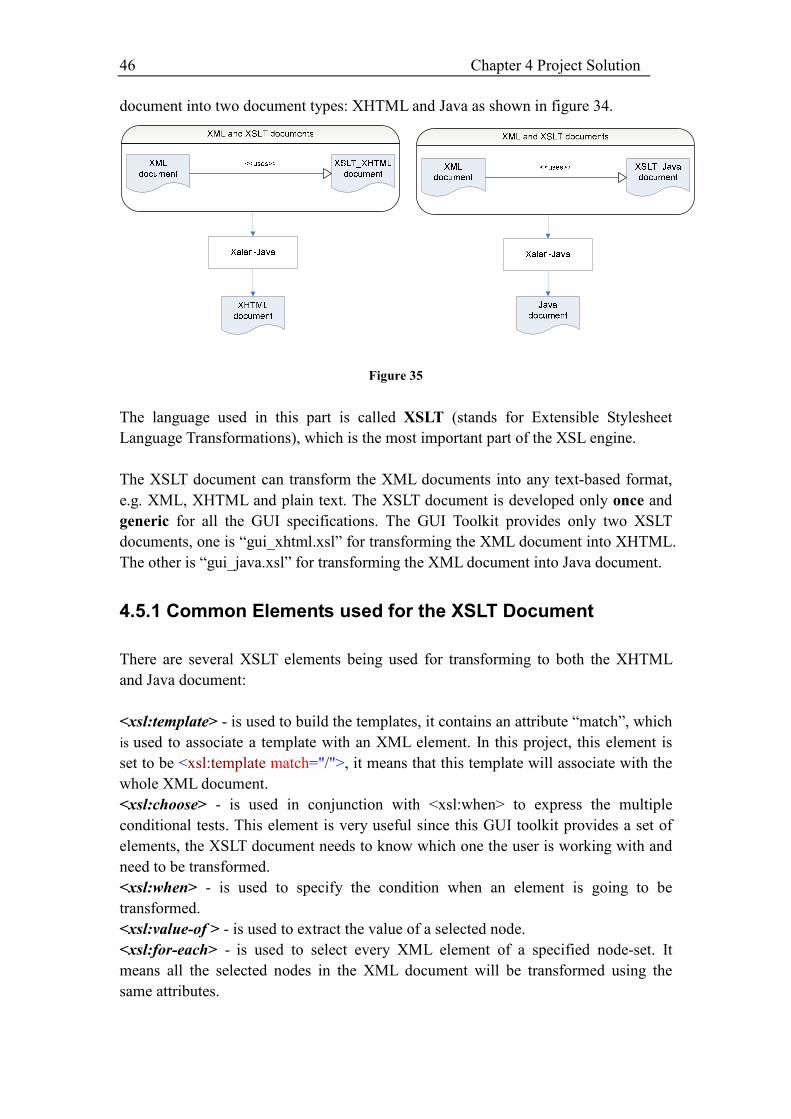
46 Chapter 4 Project Solution
document into two document types: XHTML and Java as shown in figure 34.
Figure 35
The language used in this part is called XSLT (stands for Extensible Stylesheet
Language Transformations), which is the most important part of the XSL engine.
The XSLT document can transform the XML documents into any text-based format,
e.g. XML, XHTML and plain text. The XSLT document is developed only once and
generic for all the GUI specifications. The GUI Toolkit provides only two XSLT
documents, one is “gui_xhtml.xsl” for transforming the XML document into XHTML.
The other is “gui_java.xsl” for transforming the XML document into Java document.
4.5.1 Common Elements used for the XSLT Document
There are several XSLT elements being used for transforming to both the XHTML
and Java document:
<xsl:template> - is used to build the templates, it contains an attribute “match”, which
is used to associate a template with an XML element. In this project, this element is
set to be <xsl:template match="/">, it means that this template will associate with the
whole XML document.
<xsl:choose> - is used in conjunction with <xsl:when> to express the multiple
conditional tests. This element is very useful since this GUI toolkit provides a set of
elements, the XSLT document needs to know which one the user is working with and
need to be transformed.
<xsl:when> - is used to specify the condition when an element is going to be
transformed.
<xsl:value-of > - is used to extract the value of a selected node.
<xsl:for-each> - is used to select every XML element of a specified node-set. It
means all the selected nodes in the XML document will be transformed using the
same attributes.
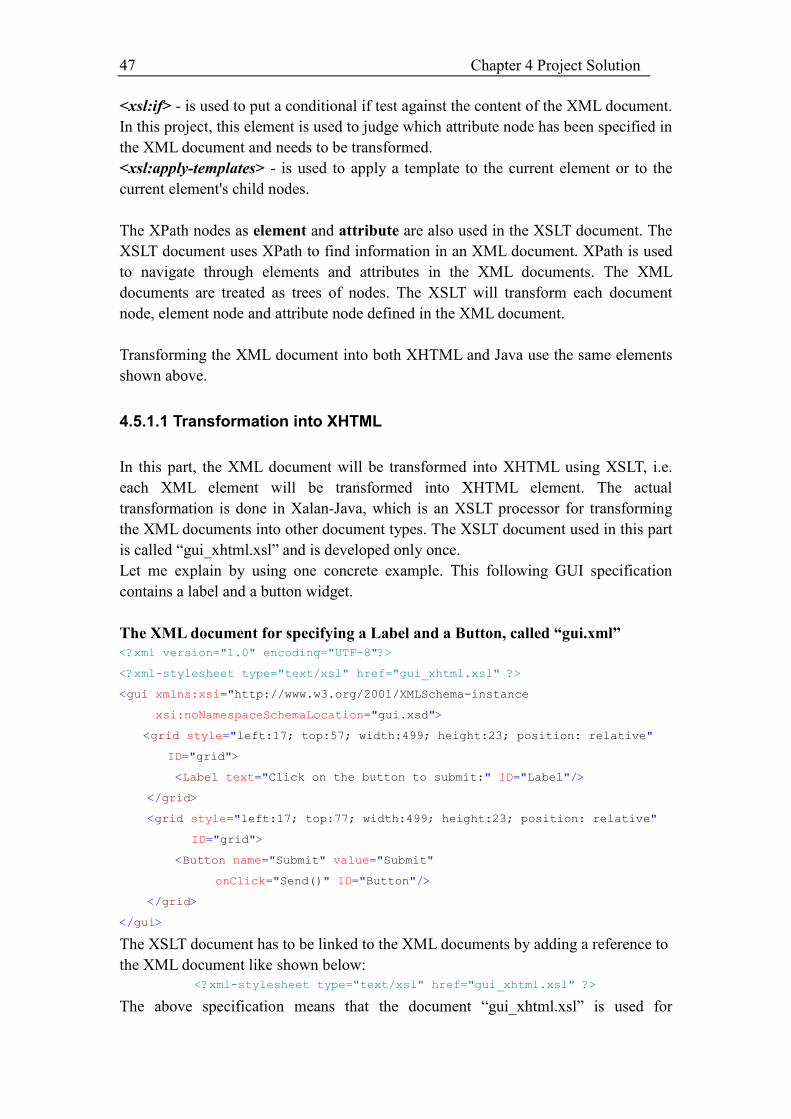
47 Chapter 4 Project Solution
<xsl:if> - is used to put a conditional if test against the content of the XML document.
In this project, this element is used to judge which attribute node has been specified in
the XML document and needs to be transformed.
<xsl:apply-templates> - is used to apply a template to the current element or to the
current element's child nodes.
The XPath nodes as element and attribute are also used in the XSLT document. The
XSLT document uses XPath to find information in an XML document. XPath is used
to navigate through elements and attributes in the XML documents. The XML
documents are treated as trees of nodes. The XSLT will transform each document
node, element node and attribute node defined in the XML document.
Transforming the XML document into both XHTML and Java use the same elements
shown above.
4.5.1.1 Transformation into XHTML
In this part, the XML document will be transformed into XHTML using XSLT, i.e.
each XML element will be transformed into XHTML element. The actual
transformation is done in Xalan-Java, which is an XSLT processor for transforming
the XML documents into other document types. The XSLT document used in this part
is called “gui_xhtml.xsl” and is developed only once.
Let me explain by using one concrete example. This following GUI specification
contains a label and a button widget.
The XML document for specifying a Label and a Button, called “gui.xml”
<?xml version="1.0" encoding="UTF-8"?>
<?xml-stylesheet type="text/xsl" href="gui_xhtml.xsl" ?>
<gui xmlns:xsi="http://www.w3.org/2001/XMLSchema-instance
xsi:noNamespaceSchemaLocation="gui.xsd">
<grid style="left:17; top:57; width:499; height:23; position: relative"
ID="grid">
<Label text="Click on the button to submit:" ID="Label"/>
</grid>
<grid style="left:17; top:77; width:499; height:23; position: relative"
ID="grid">
<Button name="Submit" value="Submit"
onClick="Send()" ID="Button"/>
</grid>
</gui>
The XSLT document has to be linked to the XML documents by adding a reference to
the XML document like shown below:
<?xml-stylesheet type="text/xsl" href="gui_xhtml.xsl" ?>
The above specification means that the document “gui_xhtml.xsl” is used for
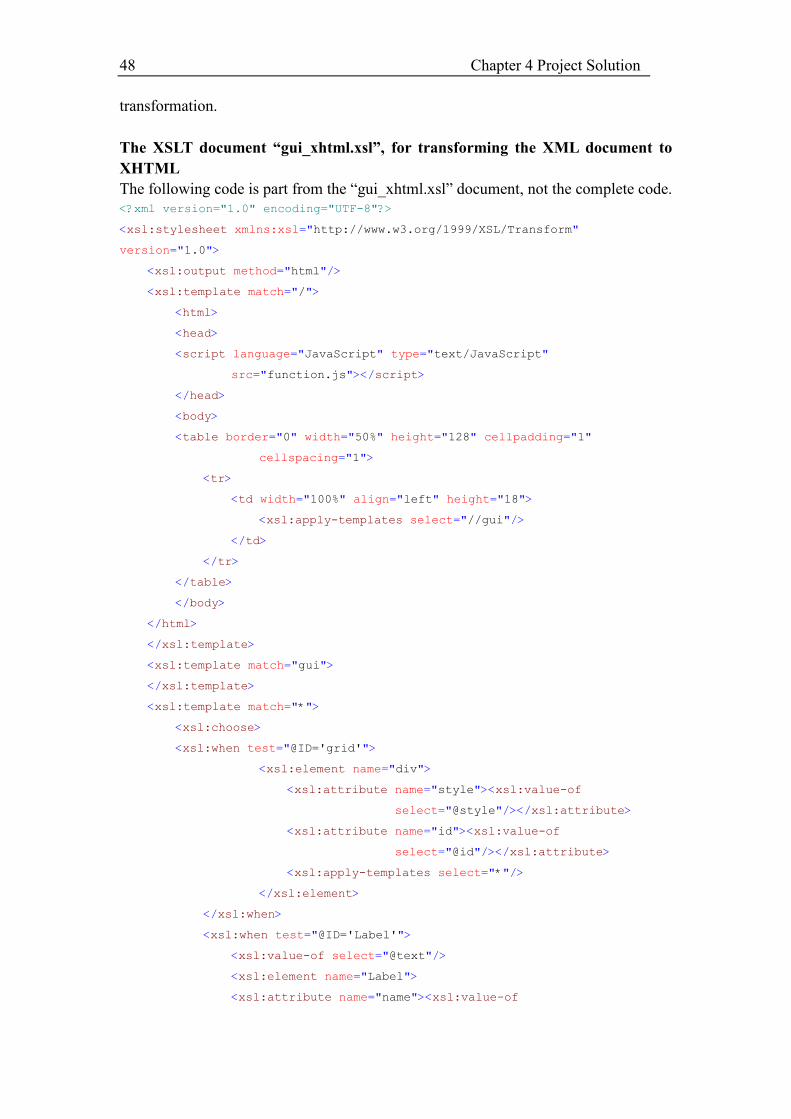
48 Chapter 4 Project Solution
transformation.
The XSLT document “gui_xhtml.xsl”, for transforming the XML document to
XHTML
The following code is part from the “gui_xhtml.xsl” document, not the complete code.
<?xml version="1.0" encoding="UTF-8"?>
<xsl:stylesheet xmlns:xsl="http://www.w3.org/1999/XSL/Transform"
version="1.0">
<xsl:output method="html"/>
<xsl:template match="/">
<html>
<head>
<script language="JavaScript" type="text/JavaScript"
src="function.js"></script>
</head>
<body>
<table border="0" width="50%" height="128" cellpadding="1"
cellspacing="1">
<tr>
<td width="100%" align="left" height="18">
<xsl:apply-templates select="//gui"/>
</td>
</tr>
</table>
</body>
</html>
</xsl:template>
<xsl:template match="gui">
</xsl:template>
<xsl:template match="*">
<xsl:choose>
<xsl:when test="@ID='grid'">
<xsl:element name="div">
<xsl:attribute name="style"><xsl:value-of
select="@style"/></xsl:attribute>
<xsl:attribute name="id"><xsl:value-of
select="@id"/></xsl:attribute>
<xsl:apply-templates select="*"/>
</xsl:element>
</xsl:when>
<xsl:when test="@ID='Label'">
<xsl:value-of select="@text"/>
<xsl:element name="Label">
<xsl:attribute name="name"><xsl:value-of
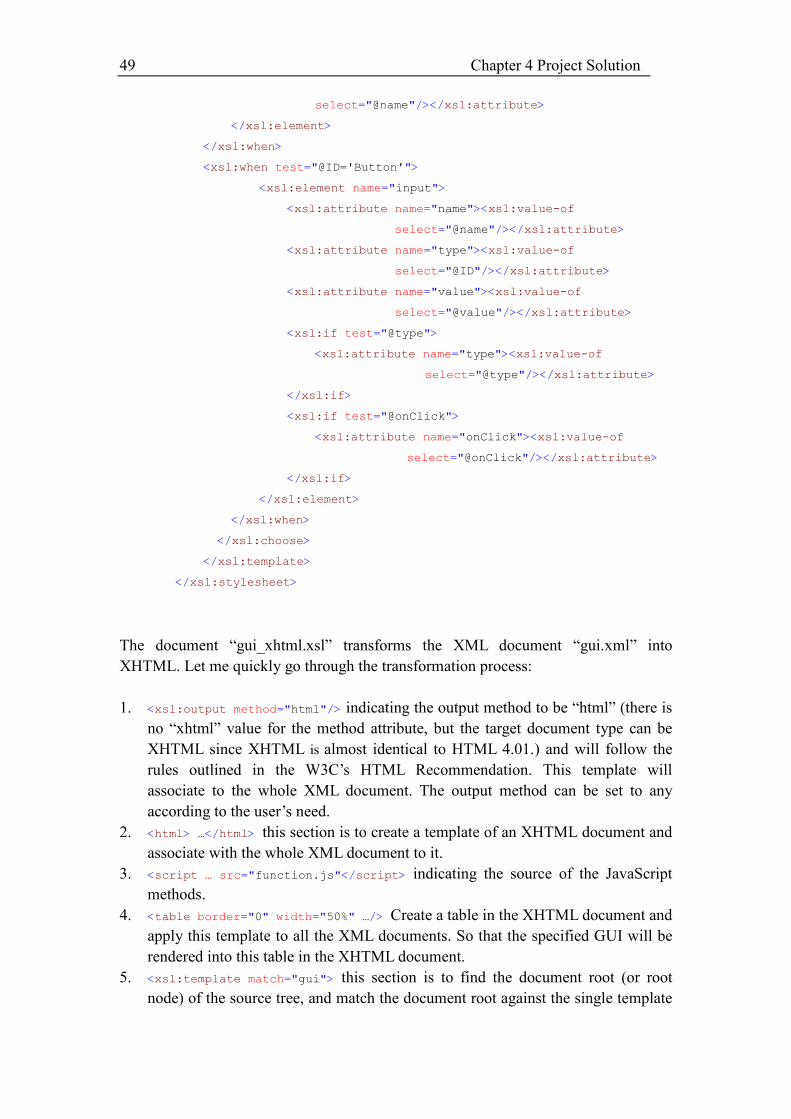
49 Chapter 4 Project Solution
select="@name"/></xsl:attribute>
</xsl:element>
</xsl:when>
<xsl:when test="@ID='Button'">
<xsl:element name="input">
<xsl:attribute name="name"><xsl:value-of
select="@name"/></xsl:attribute>
<xsl:attribute name="type"><xsl:value-of
select="@ID"/></xsl:attribute>
<xsl:attribute name="value"><xsl:value-of
select="@value"/></xsl:attribute>
<xsl:if test="@type">
<xsl:attribute name="type"><xsl:value-of
select="@type"/></xsl:attribute>
</xsl:if>
<xsl:if test="@onClick">
<xsl:attribute name="onClick"><xsl:value-of
select="@onClick"/></xsl:attribute>
</xsl:if>
</xsl:element>
</xsl:when>
</xsl:choose>
</xsl:template>
</xsl:stylesheet>
The document “gui_xhtml.xsl” transforms the XML document “gui.xml” into
XHTML. Let me quickly go through the transformation process:
1. <xsl:output method="html"/> indicating the output method to be “html” (there is
no “xhtml” value for the method attribute, but the target document type can be
XHTML since XHTML is almost identical to HTML 4.01.) and will follow the
rules outlined in the W3C’s HTML Recommendation. This template will
associate to the whole XML document. The output method can be set to any
according to the user’s need.
2. <html> …</html> this section is to create a template of an XHTML document and
associate with the whole XML document to it.
3. <script … src="function.js"</script> indicating the source of the JavaScript
methods.
4. <table border="0" width="50%" …/> Create a table in the XHTML document and
apply this template to all the XML documents. So that the specified GUI will be
rendered into this table in the XHTML document.
5. <xsl:template match="gui"> this section is to find the document root (or root
node) of the source tree, and match the document root against the single template
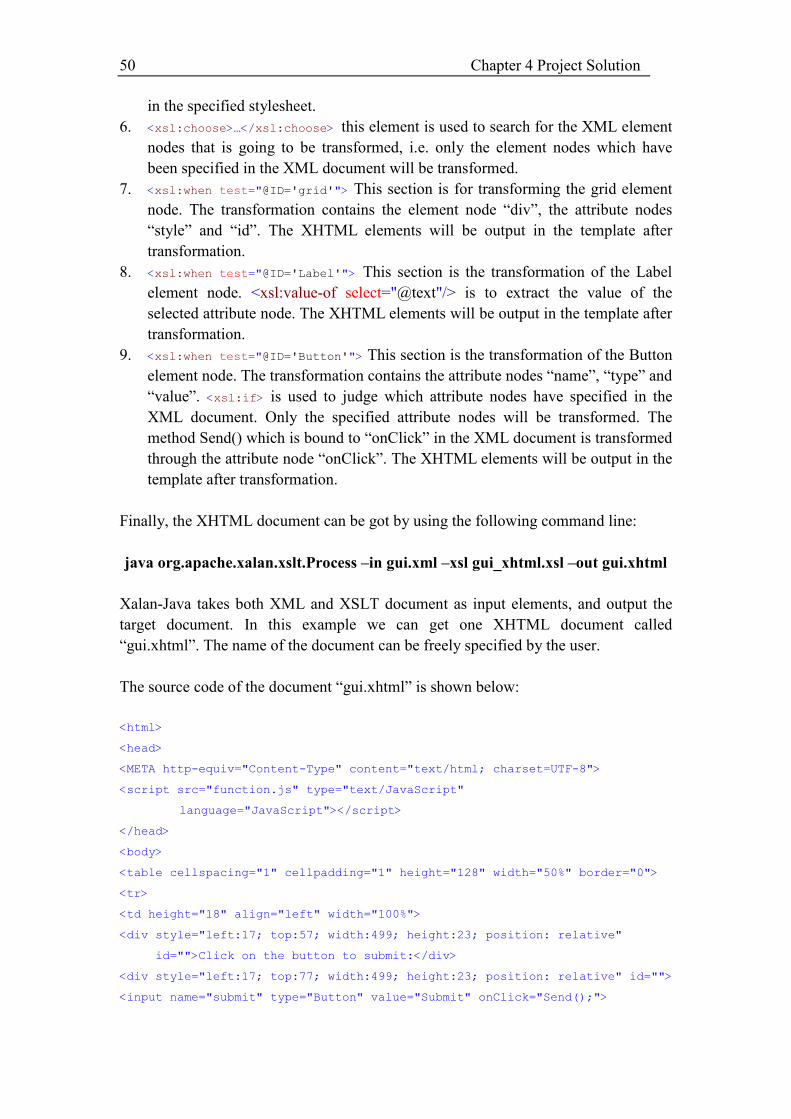
50 Chapter 4 Project Solution
in the specified stylesheet.
6. <xsl:choose>…</xsl:choose> this element is used to search for the XML element
nodes that is going to be transformed, i.e. only the element nodes which have
been specified in the XML document will be transformed.
7. <xsl:when test="@ID='grid'"> This section is for transforming the grid element
node. The transformation contains the element node “div”, the attribute nodes
“style” and “id”. The XHTML elements will be output in the template after
transformation.
8. <xsl:when test="@ID='Label'"> This section is the transformation of the Label
element node. <xsl:value-of select="@text"/> is to extract the value of the
selected attribute node. The XHTML elements will be output in the template after
transformation.
9. <xsl:when test="@ID='Button'"> This section is the transformation of the Button
element node. The transformation contains the attribute nodes “name”, “type” and
“value”. <xsl:if> is used to judge which attribute nodes have specified in the
XML document. Only the specified attribute nodes will be transformed. The
method Send() which is bound to “onClick” in the XML document is transformed
through the attribute node “onClick”. The XHTML elements will be output in the
template after transformation.
Finally, the XHTML document can be got by using the following command line:
java org.apache.xalan.xslt.Process –in gui.xml –xsl gui_xhtml.xsl –out gui.xhtml
Xalan-Java takes both XML and XSLT document as input elements, and output the
target document. In this example we can get one XHTML document called
“gui.xhtml”. The name of the document can be freely specified by the user.
The source code of the document “gui.xhtml” is shown below:
<html>
<head>
<META http-equiv="Content-Type" content="text/html; charset=UTF-8">
<script src="function.js" type="text/JavaScript"
language="JavaScript"></script>
</head>
<body>
<table cellspacing="1" cellpadding="1" height="128" width="50%" border="0">
<tr>
<td height="18" align="left" width="100%">
<div style="left:17; top:57; width:499; height:23; position: relative"
id="">Click on the button to submit:</div>
<div style="left:17; top:77; width:499; height:23; position: relative" id="">
<input name="submit" type="Button" value="Submit" onClick="Send();">
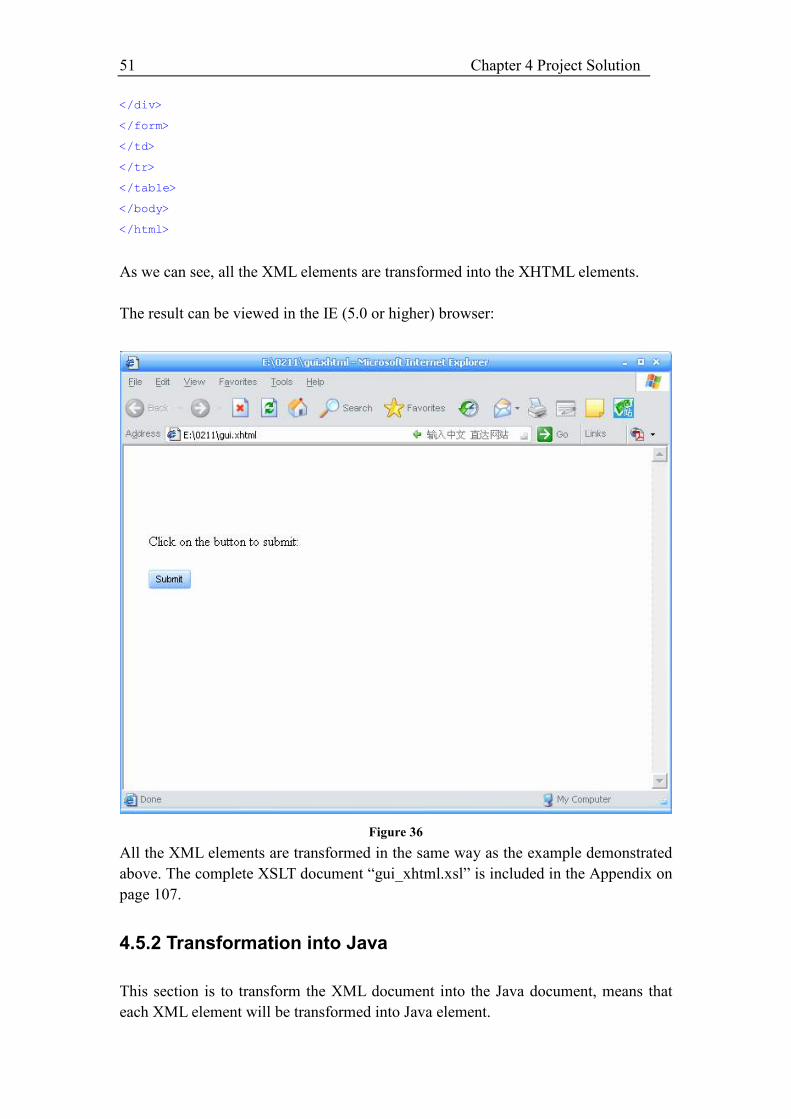
51 Chapter 4 Project Solution
</div>
</form>
</td>
</tr>
</table>
</body>
</html>
As we can see, all the XML elements are transformed into the XHTML elements.
The result can be viewed in the IE (5.0 or higher) browser:
Figure 36
All the XML elements are transformed in the same way as the example demonstrated
above. The complete XSLT document “gui_xhtml.xsl” is included in the Appendix on
page 107.
4.5.2 Transformation into Java
This section is to transform the XML document into the Java document, means that
each XML element will be transformed into Java element.
52 Chapter 4 Project Solution
According to the time schedule, this part only provides the transformation for the
Label, Textbox and Button widgets and one very simple action. An XSLT document
called “gui_java.xsl” is implemented.
The transformation process is more or less the same as transformation into XHTML,
but with different style sheet. This section focus on how the style sheet is
implemented for transforming into Java. In general, the XSLT document used in this
part is to specify several classes, each class is for transforming its corresponding
element node that are specified in the XML document.
Let me explain by using one small example. For the sake of simplicity, it contains
only a label with “Username:” on the panel as shown below:
XML document for specifying a Label on the panel, called “test_java.xml”
<?xml version="1.0"?>
<?xml-stylesheet type="text/xsl" href="gui_java.xsl"?>
<gui>
<import value="java.awt.*" ID="import"/>
<import value="javax.swing.*" ID="import"/>
<import value="java.awt.event.*" ID="import"/>
<import value="java.applet.*" ID="import"/>
<class name="Test" extends="JApplet">
<Frame name="jframe" setSize="350, 250" ID="JFrame"/>
<Panel name="JPanel1" setLayout="null" setBounds="-1, 2, 424, 239"
ID="JPanel">
<add value="name" ID="JPanel1"/>
</Panel>
<Label name="name" text="Welcome!" setBounds="70, 63, 84, 24" ID="JLabel"/>
</class>
</gui>
Now I would like to transform the above XML document into the Java document.
Since the complete XSLT document is too long, I will only take the main part to
explain how the XML elements are transformed (the complete document of
“gui_java.xsl” can be seen in the Appendix on page 112), the transformation is done
through the following steps:
1. Create a public class for transforming the element node “class”, the attribute nodes
“name”, “extends” and “implements” are transformed as well in this section, the
element <xsl:if> is used to judge if the attribute nodes “extends” and
“implements” are specified in the XML document, i.e. if this attribute didn’t
specify by the user, then it won’t be transformed. The Java elements will be output
in the template after transformation. The specification is shown below:
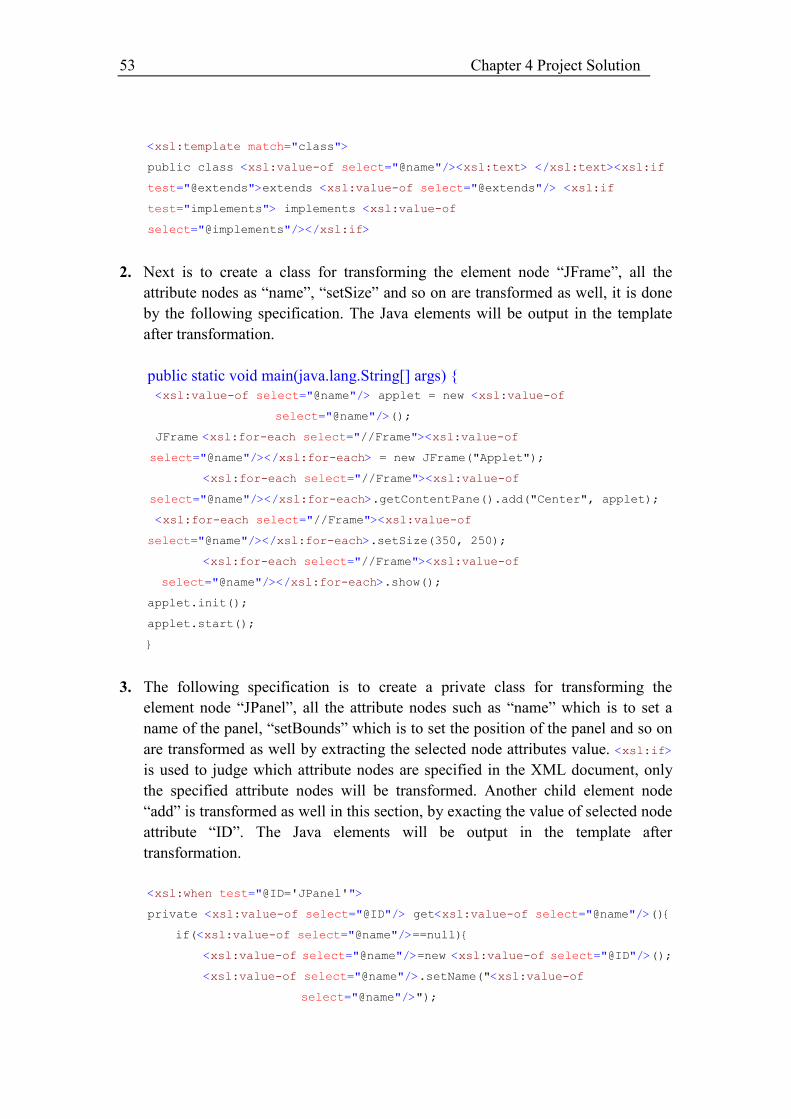
53 Chapter 4 Project Solution
<xsl:template match="class">
public class <xsl:value-of select="@name"/><xsl:text> </xsl:text><xsl:if
test="@extends">extends <xsl:value-of select="@extends"/> <xsl:if
test="implements"> implements <xsl:value-of
select="@implements"/></xsl:if>
2. Next is to create a class for transforming the element node “JFrame”, all the
attribute nodes as “name”, “setSize” and so on are transformed as well, it is done
by the following specification. The Java elements will be output in the template
after transformation.
public static void main(java.lang.String[] args) {
<xsl:value-of select="@name"/> applet = new <xsl:value-of
select="@name"/>();
JFrame <xsl:for-each select="//Frame"><xsl:value-of
select="@name"/></xsl:for-each> = new JFrame("Applet");
<xsl:for-each select="//Frame"><xsl:value-of
select="@name"/></xsl:for-each>.getContentPane().add("Center", applet);
<xsl:for-each select="//Frame"><xsl:value-of
select="@name"/></xsl:for-each>.setSize(350, 250);
<xsl:for-each select="//Frame"><xsl:value-of
select="@name"/></xsl:for-each>.show();
applet.init();
applet.start();
}
3. The following specification is to create a private class for transforming the
element node “JPanel”, all the attribute nodes such as “name” which is to set a
name of the panel, “setBounds” which is to set the position of the panel and so on
are transformed as well by extracting the selected node attributes value. <xsl:if>
is used to judge which attribute nodes are specified in the XML document, only
the specified attribute nodes will be transformed. Another child element node
“add” is transformed as well in this section, by exacting the value of selected node
attribute “ID”. The Java elements will be output in the template after
transformation.
<xsl:when test="@ID='JPanel'">
private <xsl:value-of select="@ID"/> get<xsl:value-of select="@name"/>(){
if(<xsl:value-of select="@name"/>==null){
<xsl:value-of select="@name"/>=new <xsl:value-of select="@ID"/>();
<xsl:value-of select="@name"/>.setName("<xsl:value-of
select="@name"/>");
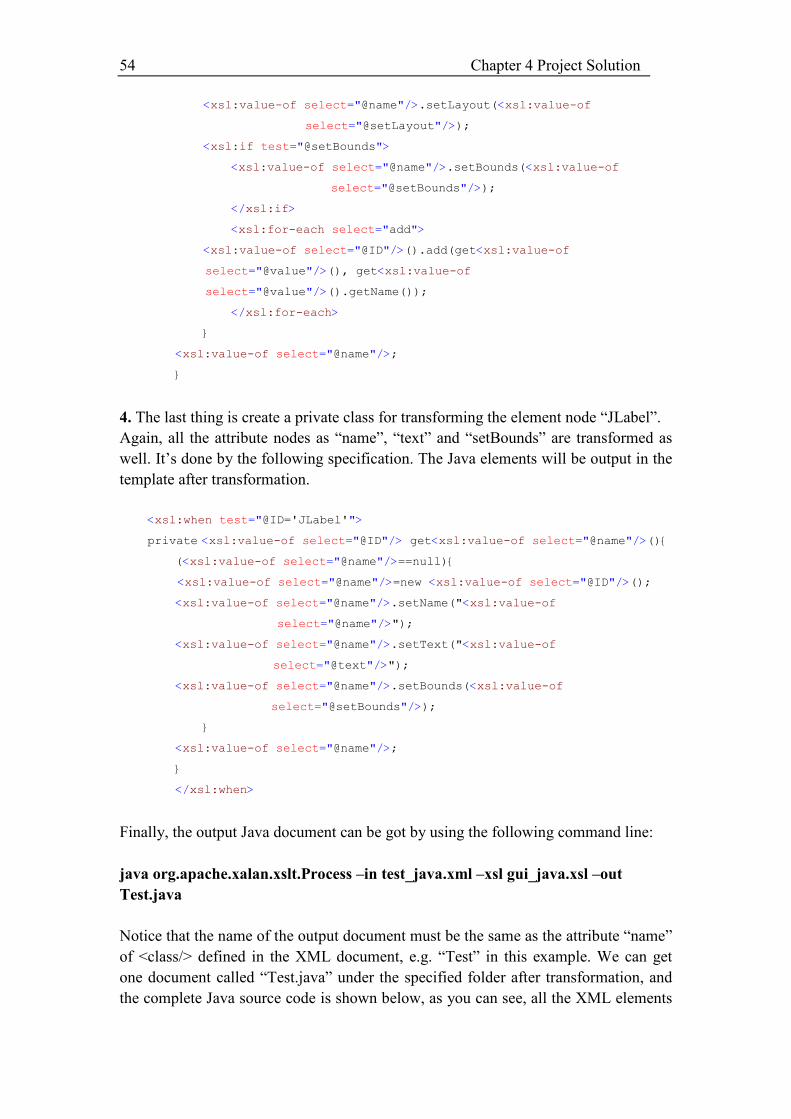
54 Chapter 4 Project Solution
<xsl:value-of select="@name"/>.setLayout(<xsl:value-of
select="@setLayout"/>);
<xsl:if test="@setBounds">
<xsl:value-of select="@name"/>.setBounds(<xsl:value-of
select="@setBounds"/>);
</xsl:if>
<xsl:for-each select="add">
<xsl:value-of select="@ID"/>().add(get<xsl:value-of
select="@value"/>(), get<xsl:value-of
select="@value"/>().getName());
</xsl:for-each>
}
<xsl:value-of select="@name"/>;
}
4. The last thing is create a private class for transforming the element node “JLabel”.
Again, all the attribute nodes as “name”, “text” and “setBounds” are transformed as
well. It’s done by the following specification. The Java elements will be output in the
template after transformation.
<xsl:when test="@ID='JLabel'">
private <xsl:value-of select="@ID"/> get<xsl:value-of select="@name"/>(){
(<xsl:value-of select="@name"/>==null){
<xsl:value-of select="@name"/>=new <xsl:value-of select="@ID"/>();
<xsl:value-of select="@name"/>.setName("<xsl:value-of
select="@name"/>");
<xsl:value-of select="@name"/>.setText("<xsl:value-of
select="@text"/>");
<xsl:value-of select="@name"/>.setBounds(<xsl:value-of
select="@setBounds"/>);
}
<xsl:value-of select="@name"/>;
}
</xsl:when>
Finally, the output Java document can be got by using the following command line:
java org.apache.xalan.xslt.Process –in test_java.xml –xsl gui_java.xsl –out
Test.java
Notice that the name of the output document must be the same as the attribute “name”
of <class/> defined in the XML document, e.g. “Test” in this example. We can get
one document called “Test.java” under the specified folder after transformation, and
the complete Java source code is shown below, as you can see, all the XML elements
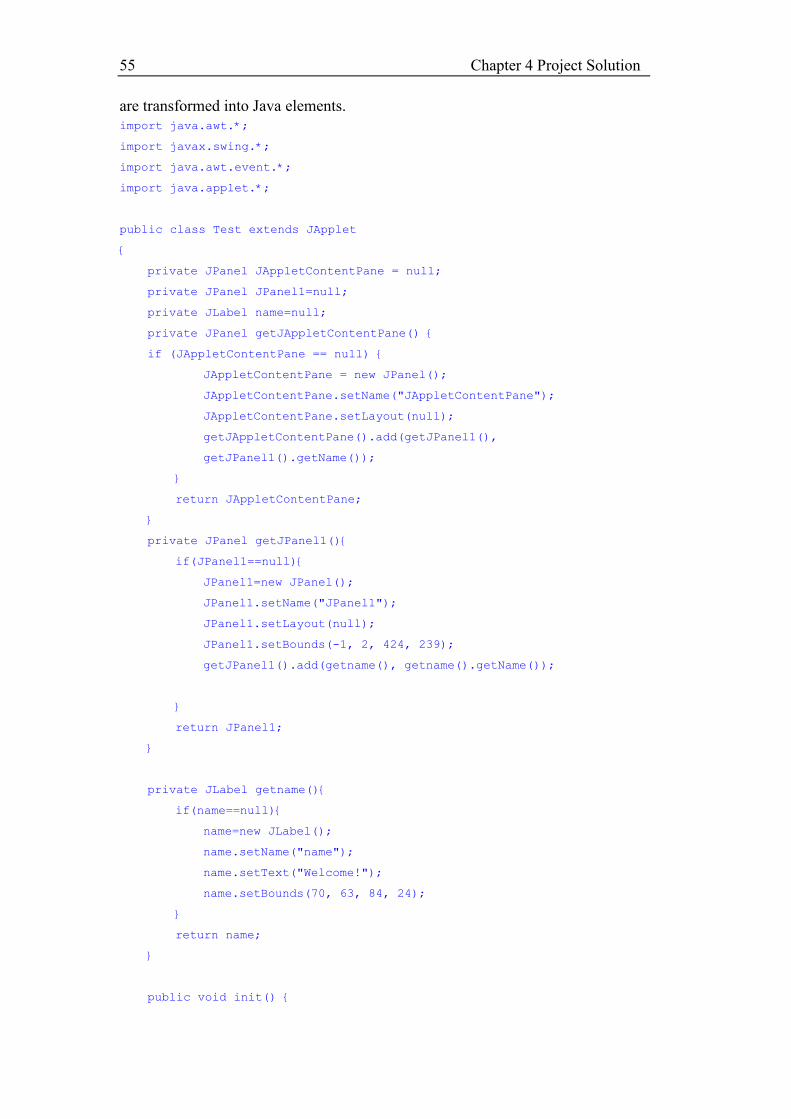
55 Chapter 4 Project Solution
are transformed into Java elements.
import java.awt.*;
import javax.swing.*;
import java.awt.event.*;
import java.applet.*;
public class Test extends JApplet
{
private JPanel JAppletContentPane = null;
private JPanel JPanel1=null;
private JLabel name=null;
private JPanel getJAppletContentPane() {
if (JAppletContentPane == null) {
JAppletContentPane = new JPanel();
JAppletContentPane.setName("JAppletContentPane");
JAppletContentPane.setLayout(null);
getJAppletContentPane().add(getJPanel1(),
getJPanel1().getName());
}
return JAppletContentPane;
}
private JPanel getJPanel1(){
if(JPanel1==null){
JPanel1=new JPanel();
JPanel1.setName("JPanel1");
JPanel1.setLayout(null);
JPanel1.setBounds(-1, 2, 424, 239);
getJPanel1().add(getname(), getname().getName());
}
return JPanel1;
}
private JLabel getname(){
if(name==null){
name=new JLabel();
name.setName("name");
name.setText("Welcome!");
name.setBounds(70, 63, 84, 24);
}
return name;
}
public void init() {
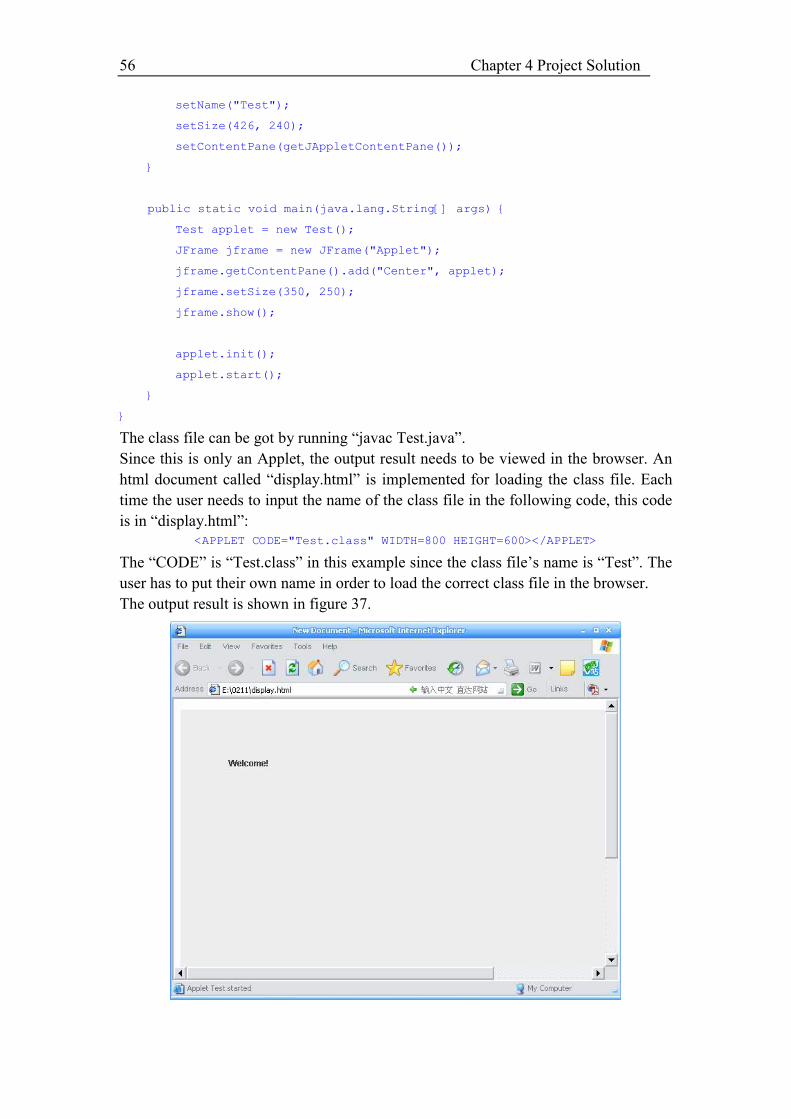
56 Chapter 4 Project Solution
setName("Test");
setSize(426, 240);
setContentPane(getJAppletContentPane());
}
public static void main(java.lang.String[] args) {
Test applet = new Test();
JFrame jframe = new JFrame("Applet");
jframe.getContentPane().add("Center", applet);
jframe.setSize(350, 250);
jframe.show();
applet.init();
applet.start();
}
}
The class file can be got by running “javac Test.java”.
Since this is only an Applet, the output result needs to be viewed in the browser. An
html document called “display.html” is implemented for loading the class file. Each
time the user needs to input the name of the class file in the following code, this code
is in “display.html”:
<APPLET CODE="Test.class" WIDTH=800 HEIGHT=600></APPLET>
The “CODE” is “Test.class” in this example since the class file’s name is “Test”. The
user has to put their own name in order to load the correct class file in the browser.
The output result is shown in figure 37.
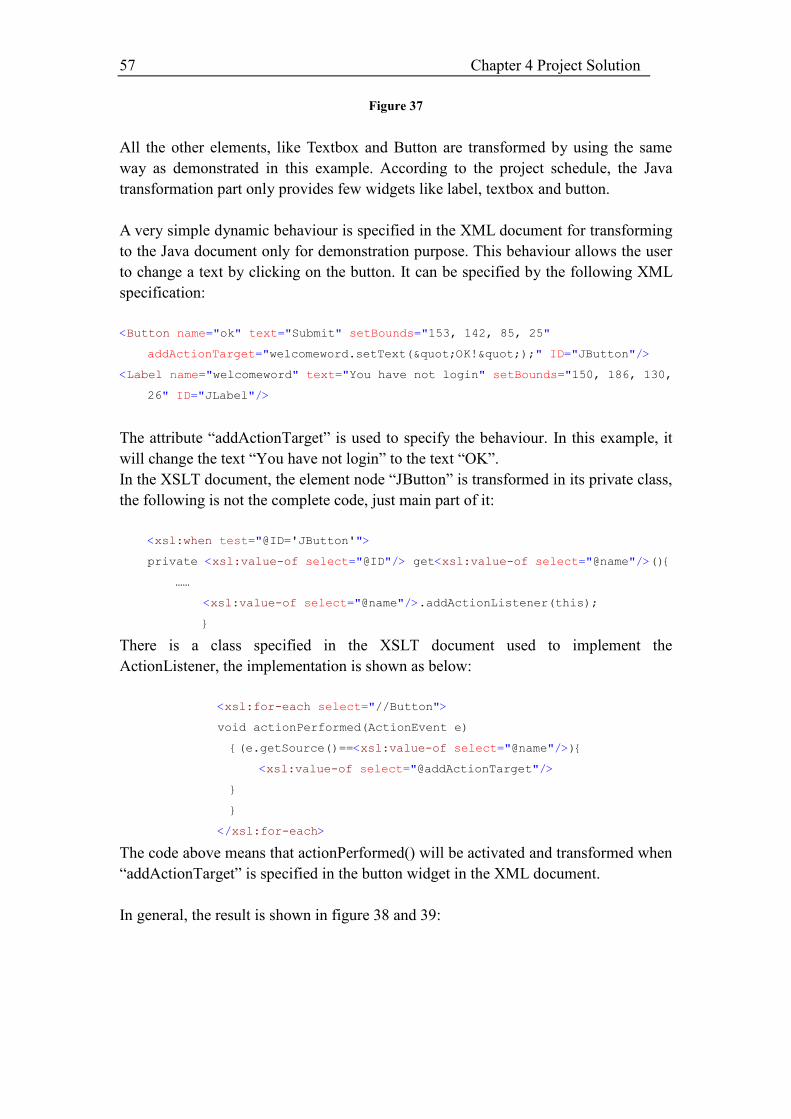
57 Chapter 4 Project Solution
Figure 37
All the other elements, like Textbox and Button are transformed by using the same
way as demonstrated in this example. According to the project schedule, the Java
transformation part only provides few widgets like label, textbox and button.
A very simple dynamic behaviour is specified in the XML document for transforming
to the Java document only for demonstration purpose. This behaviour allows the user
to change a text by clicking on the button. It can be specified by the following XML
specification:
<Button name="ok" text="Submit" setBounds="153, 142, 85, 25"
addActionTarget="welcomeword.setText("OK!");" ID="JButton"/>
<Label name="welcomeword" text="You have not login" setBounds="150, 186, 130,
26" ID="JLabel"/>
The attribute “addActionTarget” is used to specify the behaviour. In this example, it
will change the text “You have not login” to the text “OK”.
In the XSLT document, the element node “JButton” is transformed in its private class,
the following is not the complete code, just main part of it:
<xsl:when test="@ID='JButton'">
private <xsl:value-of select="@ID"/> get<xsl:value-of select="@name"/>(){
……
<xsl:value-of select="@name"/>.addActionListener(this);
}
There is a class specified in the XSLT document used to implement the
ActionListener, the implementation is shown as below:
<xsl:for-each select="//Button">
void actionPerformed(ActionEvent e)
{(e.getSource()==<xsl:value-of select="@name"/>){
<xsl:value-of select="@addActionTarget"/>
}
}
</xsl:for-each>
The code above means that actionPerformed() will be activated and transformed when
“addActionTarget” is specified in the button widget in the XML document.
In general, the result is shown in figure 38 and 39:
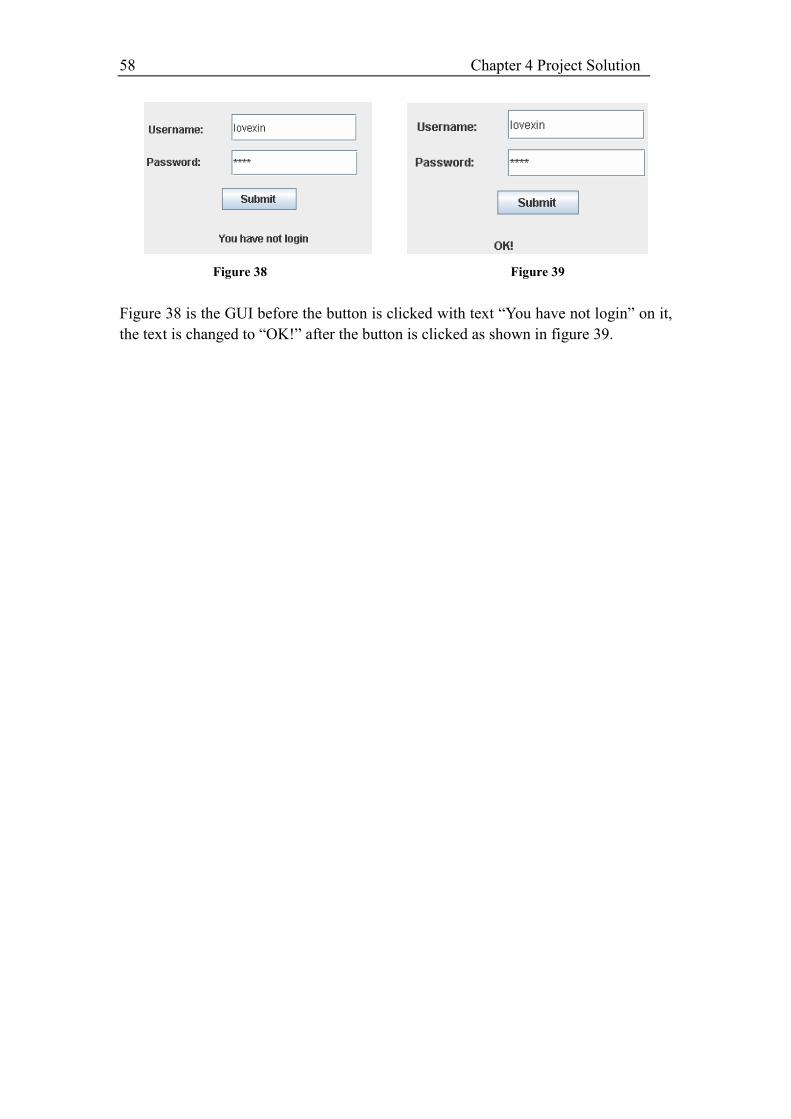
58 Chapter 4 Project Solution
Figure 38 Figure 39
Figure 38 is the GUI before the button is clicked with text “You have not login” on it,
the text is changed to “OK!” after the button is clicked as shown in figure 39.
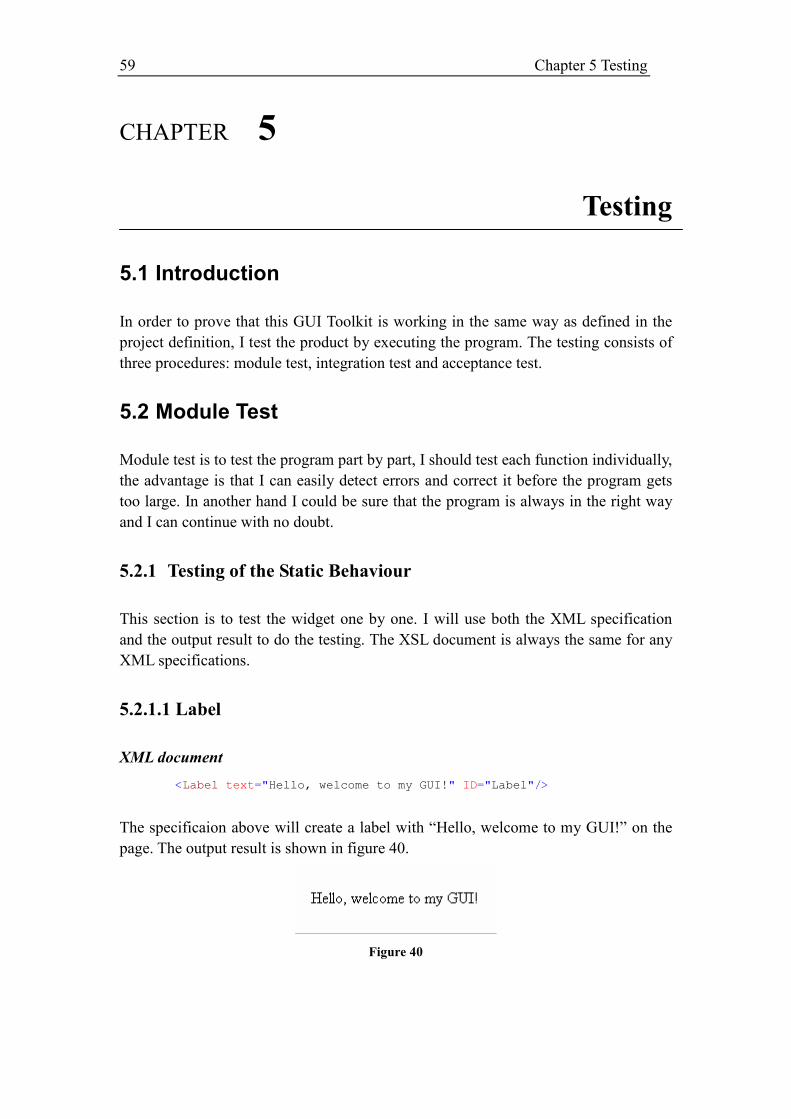
59 Chapter 5 Testing
CHAPTER 5
Testing
5.1 Introduction
In order to prove that this GUI Toolkit is working in the same way as defined in the
project definition, I test the product by executing the program. The testing consists of
three procedures: module test, integration test and acceptance test.
5.2 Module Test
Module test is to test the program part by part, I should test each function individually,
the advantage is that I can easily detect errors and correct it before the program gets
too large. In another hand I could be sure that the program is always in the right way
and I can continue with no doubt.
5.2.1 Testing of the Static Behaviour
This section is to test the widget one by one. I will use both the XML specification
and the output result to do the testing. The XSL document is always the same for any
XML specifications.
5.2.1.1 Label
XML document
<Label text="Hello, welcome to my GUI!" ID="Label"/>
The specificaion above will create a label with “Hello, welcome to my GUI!” on the
page. The output result is shown in figure 40.
Figure 40
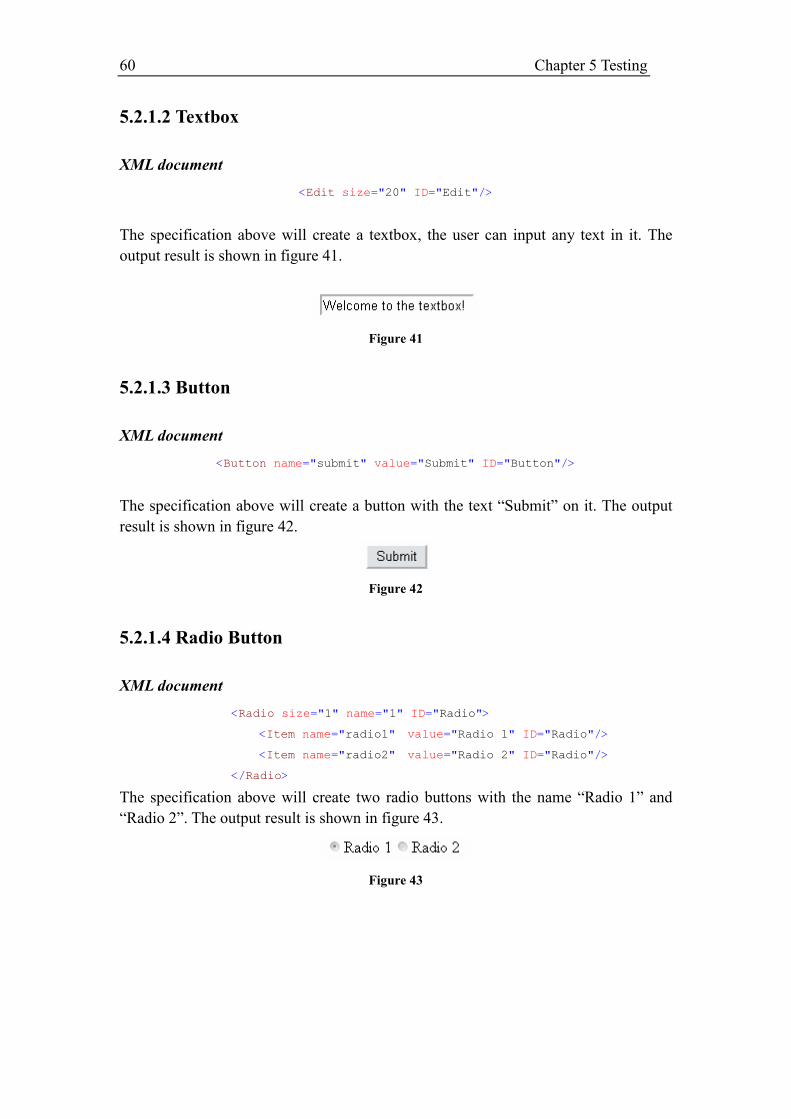
60 Chapter 5 Testing
5.2.1.2 Textbox
XML document
<Edit size="20" ID="Edit"/>
The specification above will create a textbox, the user can input any text in it. The
output result is shown in figure 41.
Figure 41
5.2.1.3 Button
XML document
<Button name="submit" value="Submit" ID="Button"/>
The specification above will create a button with the text “Submit” on it. The output
result is shown in figure 42.
Figure 42
5.2.1.4 Radio Button
XML document
<Radio size="1" name="1" ID="Radio">
<Item name="radio1" value="Radio 1" ID="Radio"/>
<Item name="radio2" value="Radio 2" ID="Radio"/>
</Radio>
The specification above will create two radio buttons with the name “Radio 1” and
“Radio 2”. The output result is shown in figure 43.
Figure 43
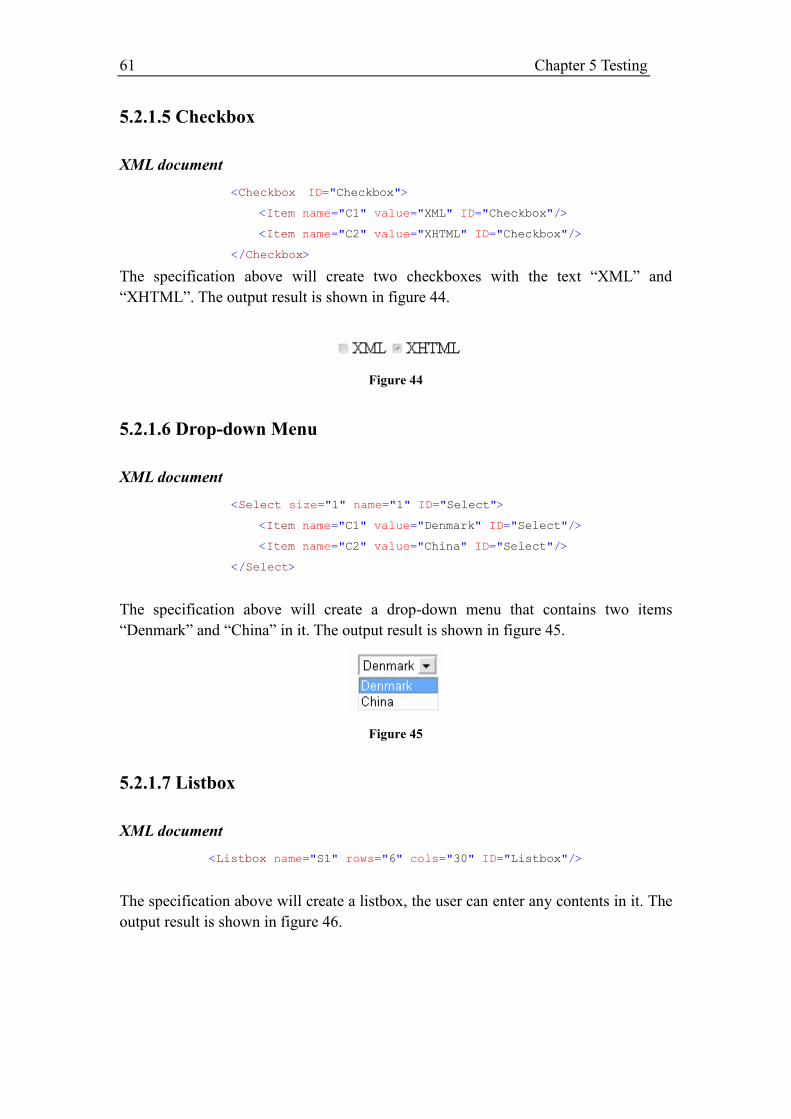
61 Chapter 5 Testing
5.2.1.5 Checkbox
XML document
<Checkbox ID="Checkbox">
<Item name="C1" value="XML" ID="Checkbox"/>
<Item name="C2" value="XHTML" ID="Checkbox"/>
</Checkbox>
The specification above will create two checkboxes with the text “XML” and
“XHTML”. The output result is shown in figure 44.
Figure 44
5.2.1.6 Drop-down Menu
XML document
<Select size="1" name="1" ID="Select">
<Item name="C1" value="Denmark" ID="Select"/>
<Item name="C2" value="China" ID="Select"/>
</Select>
The specification above will create a drop-down menu that contains two items
“Denmark” and “China” in it. The output result is shown in figure 45.
Figure 45
5.2.1.7 Listbox
XML document
<Listbox name="S1" rows="6" cols="30" ID="Listbox"/>
The specification above will create a listbox, the user can enter any contents in it. The
output result is shown in figure 46.
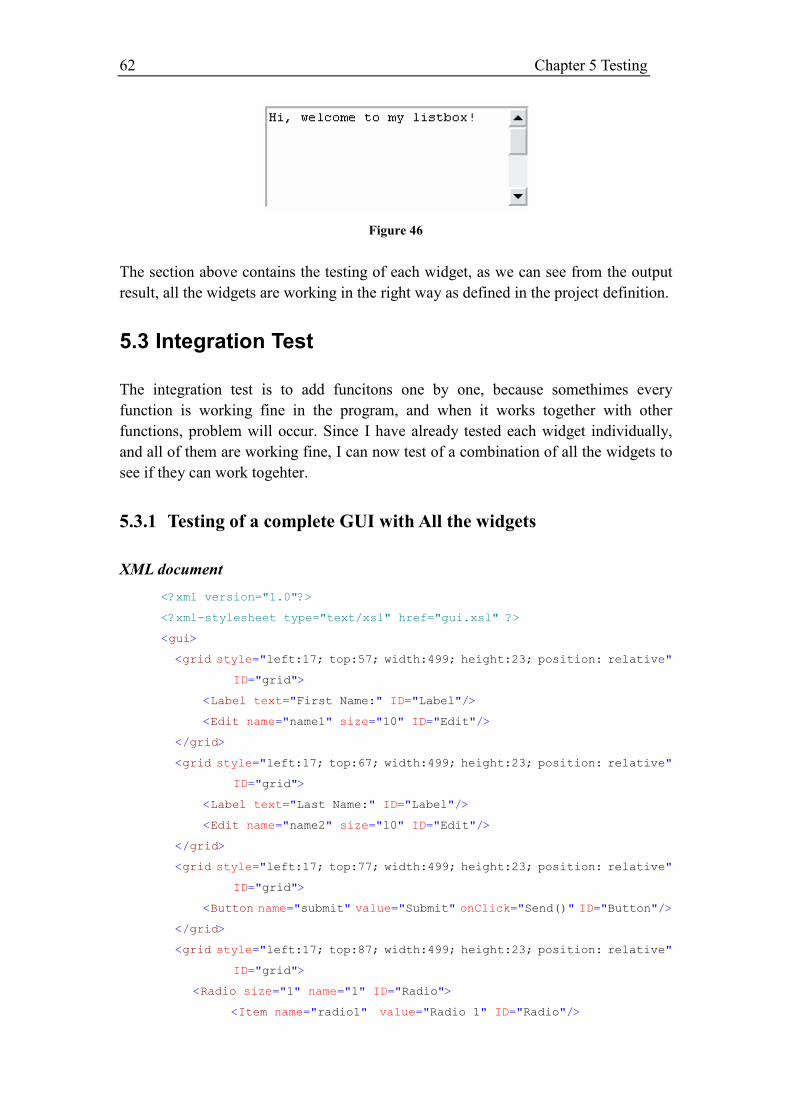
62 Chapter 5 Testing
Figure 46
The section above contains the testing of each widget, as we can see from the output
result, all the widgets are working in the right way as defined in the project definition.
5.3 Integration Test
The integration test is to add funcitons one by one, because somethimes every
function is working fine in the program, and when it works together with other
functions, problem will occur. Since I have already tested each widget individually,
and all of them are working fine, I can now test of a combination of all the widgets to
see if they can work togehter.
5.3.1 Testing of a complete GUI with All the widgets
XML document
<?xml version="1.0"?>
<?xml-stylesheet type="text/xsl" href="gui.xsl" ?>
<gui>
<grid style="left:17; top:57; width:499; height:23; position: relative"
ID="grid">
<Label text="First Name:" ID="Label"/>
<Edit name="name1" size="10" ID="Edit"/>
</grid>
<grid style="left:17; top:67; width:499; height:23; position: relative"
ID="grid">
<Label text="Last Name:" ID="Label"/>
<Edit name="name2" size="10" ID="Edit"/>
</grid>
<grid style="left:17; top:77; width:499; height:23; position: relative"
ID="grid">
<Button name="submit" value="Submit" onClick="Send()" ID="Button"/>
</grid>
<grid style="left:17; top:87; width:499; height:23; position: relative"
ID="grid">
<Radio size="1" name="1" ID="Radio">
<Item name="radio1" value="Radio 1" ID="Radio"/>

63 Chapter 5 Testing
<Item name="radio2" value="Radio 2" ID="Radio"/>
</Radio>
</grid>
<grid style="left:17; top:97; width:499; height:23; position: relative"
ID="grid">
<Checkbox ID="Checkbox">
<Item name="C1" value="XML" ID="Checkbox"/>
<Item name="C2" value="XHTML" ID="Checkbox"/>
</Checkbox>
</grid>
<grid style="left:17; top:107; width:499; height:23; position: relative"
ID="grid">
<Listbox name="S1" rows="6" cols="30" ID="Listbox"/>
</grid>
<grid style="left:17; top:117; width:499; height:23; position: relative"
ID="grid">
<Select size="1" name="1" ID="Select">
<Item name="C1" value="Denmark" ID="Select"/>
<Item name="C2" value="China" ID="Select"/>
</Select>
</grid>
</gui>
The above specification will create a GUI that contains the label, textbox, button,
radio button, checkbox, listbox and drop-down menu on it. All the widgets aligned to
the left. The result is shown in figure 47.
Figure 47
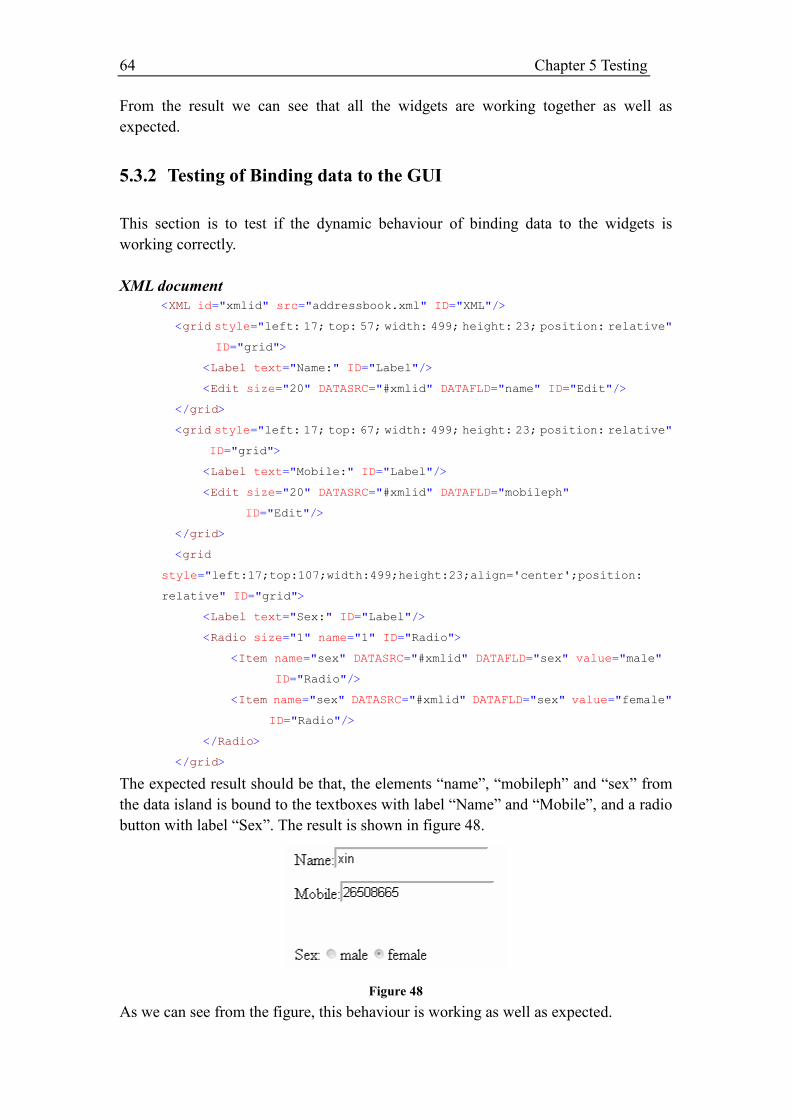
64 Chapter 5 Testing
From the result we can see that all the widgets are working together as well as
expected.
5.3.2 Testing of Binding data to the GUI
This section is to test if the dynamic behaviour of binding data to the widgets is
working correctly.
XML document
<XML id="xmlid" src="addressbook.xml" ID="XML"/>
<grid style="left: 17; top: 57; width: 499; height: 23; position: relative"
ID="grid">
<Label text="Name:" ID="Label"/>
<Edit size="20" DATASRC="#xmlid" DATAFLD="name" ID="Edit"/>
</grid>
<grid style="left: 17; top: 67; width: 499; height: 23; position: relative"
ID="grid">
<Label text="Mobile:" ID="Label"/>
<Edit size="20" DATASRC="#xmlid" DATAFLD="mobileph"
ID="Edit"/>
</grid>
<grid
style="left:17;top:107;width:499;height:23;align='center';position:
relative" ID="grid">
<Label text="Sex:" ID="Label"/>
<Radio size="1" name="1" ID="Radio">
<Item name="sex" DATASRC="#xmlid" DATAFLD="sex" value="male"
ID="Radio"/>
<Item name="sex" DATASRC="#xmlid" DATAFLD="sex" value="female"
ID="Radio"/>
</Radio>
</grid>
The expected result should be that, the elements “name”, “mobileph” and “sex” from
the data island is bound to the textboxes with label “Name” and “Mobile”, and a radio
button with label “Sex”. The result is shown in figure 48.
Figure 48
As we can see from the figure, this behaviour is working as well as expected.
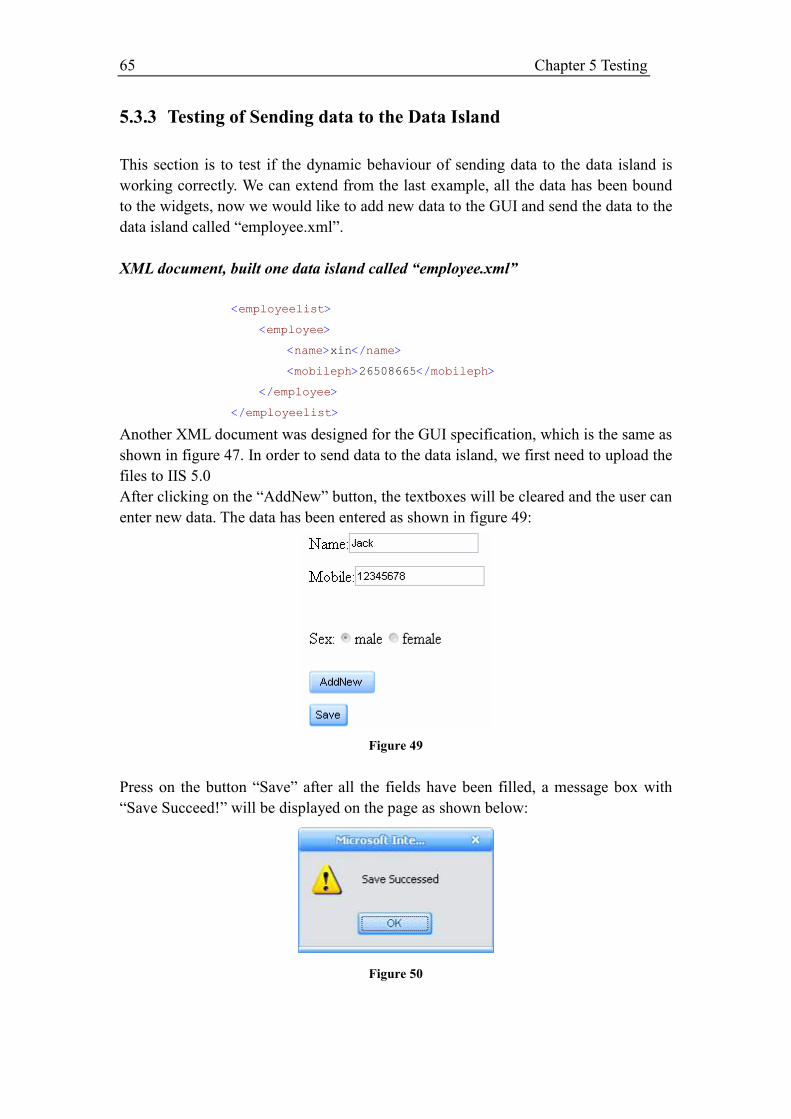
65 Chapter 5 Testing
5.3.3 Testing of Sending data to the Data Island
This section is to test if the dynamic behaviour of sending data to the data island is
working correctly. We can extend from the last example, all the data has been bound
to the widgets, now we would like to add new data to the GUI and send the data to the
data island called “employee.xml”.
XML document, built one data island called “employee.xml”
<employeelist>
<employee>
<name>xin</name>
<mobileph>26508665</mobileph>
</employee>
</employeelist>
Another XML document was designed for the GUI specification, which is the same as
shown in figure 47. In order to send data to the data island, we first need to upload the
files to IIS 5.0
After clicking on the “AddNew” button, the textboxes will be cleared and the user can
enter new data. The data has been entered as shown in figure 49:
Figure 49
Press on the button “Save” after all the fields have been filled, a message box with
“Save Succeed!” will be displayed on the page as shown below:
Figure 50
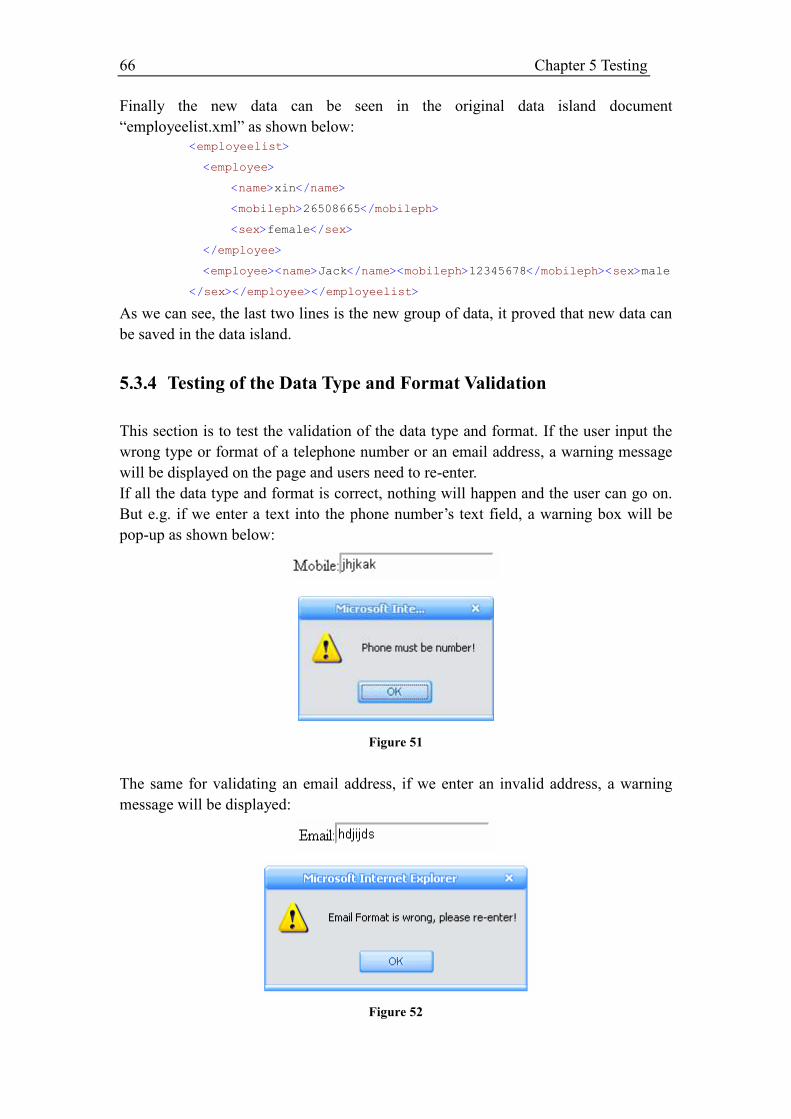
66 Chapter 5 Testing
Finally the new data can be seen in the original data island document
“employeelist.xml” as shown below:
<employeelist>
<employee>
<name>xin</name>
<mobileph>26508665</mobileph>
<sex>female</sex>
</employee>
<employee><name>Jack</name><mobileph>12345678</mobileph><sex>male
</sex></employee></employeelist>
As we can see, the last two lines is the new group of data, it proved that new data can
be saved in the data island.
5.3.4 Testing of the Data Type and Format Validation
This section is to test the validation of the data type and format. If the user input the
wrong type or format of a telephone number or an email address, a warning message
will be displayed on the page and users need to re-enter.
If all the data type and format is correct, nothing will happen and the user can go on.
But e.g. if we enter a text into the phone number’s text field, a warning box will be
pop-up as shown below:
Figure 51
The same for validating an email address, if we enter an invalid address, a warning
message will be displayed:
Figure 52
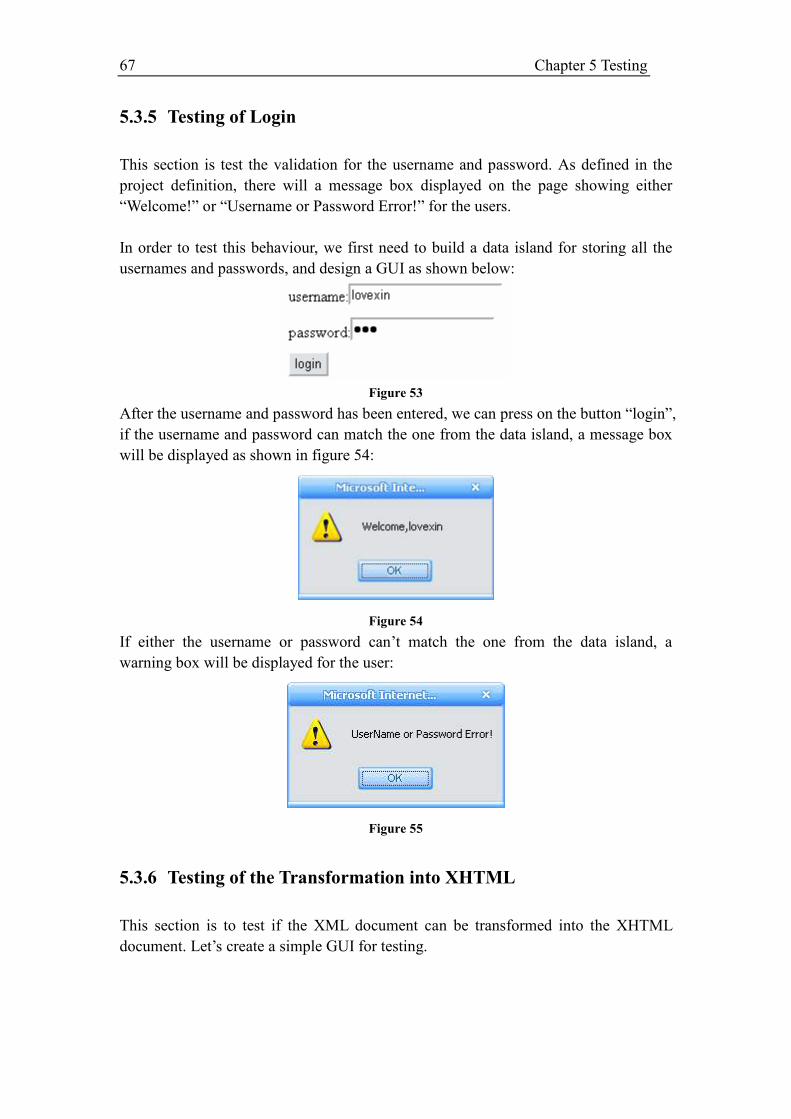
67 Chapter 5 Testing
5.3.5 Testing of Login
This section is test the validation for the username and password. As defined in the
project definition, there will a message box displayed on the page showing either
“Welcome!” or “Username or Password Error!” for the users.
In order to test this behaviour, we first need to build a data island for storing all the
usernames and passwords, and design a GUI as shown below:
Figure 53
After the username and password has been entered, we can press on the button “login”,
if the username and password can match the one from the data island, a message box
will be displayed as shown in figure 54:
Figure 54
If either the username or password can’t match the one from the data island, a
warning box will be displayed for the user:
Figure 55
5.3.6 Testing of the Transformation into XHTML
This section is to test if the XML document can be transformed into the XHTML
document. Let’s create a simple GUI for testing.
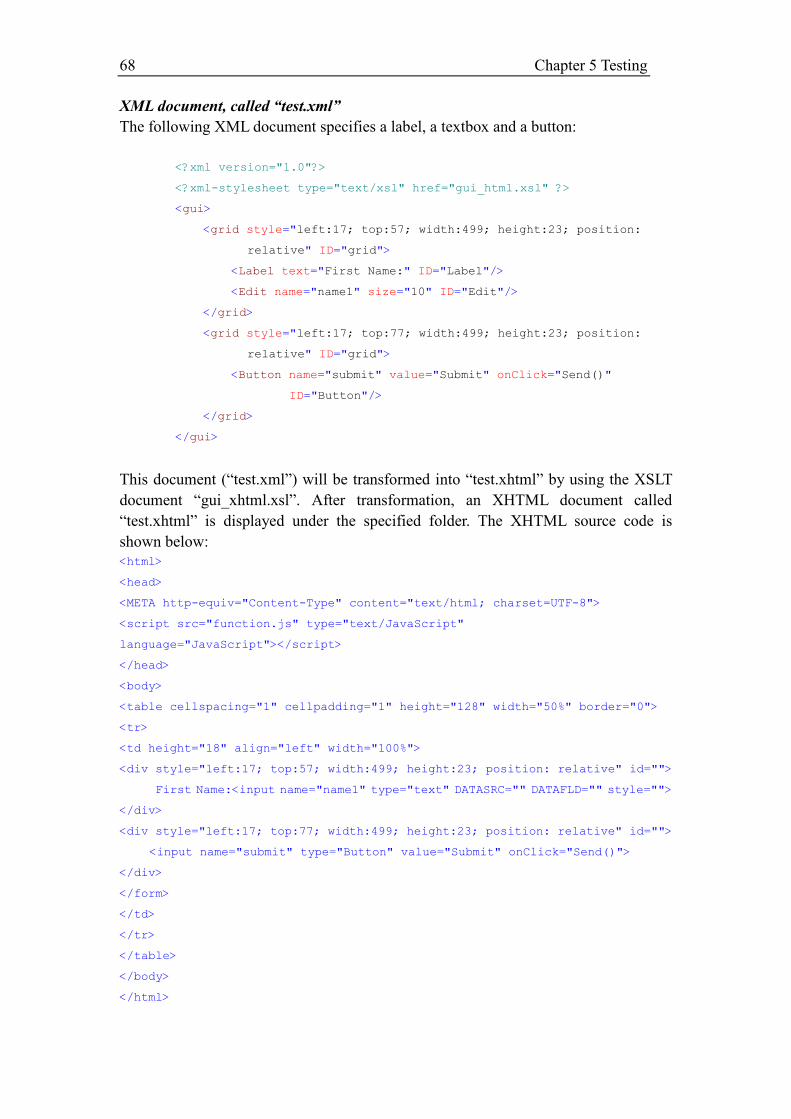
68 Chapter 5 Testing
XML document, called “test.xml”
The following XML document specifies a label, a textbox and a button:
<?xml version="1.0"?>
<?xml-stylesheet type="text/xsl" href="gui_html.xsl" ?>
<gui>
<grid style="left:17; top:57; width:499; height:23; position:
relative" ID="grid">
<Label text="First Name:" ID="Label"/>
<Edit name="name1" size="10" ID="Edit"/>
</grid>
<grid style="left:17; top:77; width:499; height:23; position:
relative" ID="grid">
<Button name="submit" value="Submit" onClick="Send()"
ID="Button"/>
</grid>
</gui>
This document (“test.xml”) will be transformed into “test.xhtml” by using the XSLT
document “gui_xhtml.xsl”. After transformation, an XHTML document called
“test.xhtml” is displayed under the specified folder. The XHTML source code is
shown below:
<html>
<head>
<META http-equiv="Content-Type" content="text/html; charset=UTF-8">
<script src="function.js" type="text/JavaScript"
language="JavaScript"></script>
</head>
<body>
<table cellspacing="1" cellpadding="1" height="128" width="50%" border="0">
<tr>
<td height="18" align="left" width="100%">
<div style="left:17; top:57; width:499; height:23; position: relative" id="">
First Name:<input name="name1" type="text" DATASRC="" DATAFLD="" style="">
</div>
<div style="left:17; top:77; width:499; height:23; position: relative" id="">
<input name="submit" type="Button" value="Submit" onClick="Send()">
</div>
</form>
</td>
</tr>
</table>
</body>
</html>
69 Chapter 5 Testing
As we can see from the code above, all the XML elements are transformed into
XHTML elements.
The output result can be viewed in the IE browser as shown below:
Figure 56
5.3.7 Testing of the Transformation into Java
This section is to test if the XML document can be transformed to the Java document.
Let’s specify a simple GUI for testing.
The following XML document “gui_java.xml” specified a label and a texbox:
<?xml version="1.0"?>
<?xml-stylesheet type="text/xsl" href="gui_java.xsl"?>
<gui>
<import value="java.awt.*" ID="import"/>
<import value="javax.swing.*" ID="import"/>
<import value="java.awt.event.*" ID="import"/>
<import value="java.applet.*" ID="import"/>
<class name="Test1" extends="JApplet">
<Frame name="jframe" setSize="350, 250" ID="JFrame"/>
<Panel name="JPanel1" setLayout="null" setBounds="-1, 2, 424, 239"
ID="JPanel">
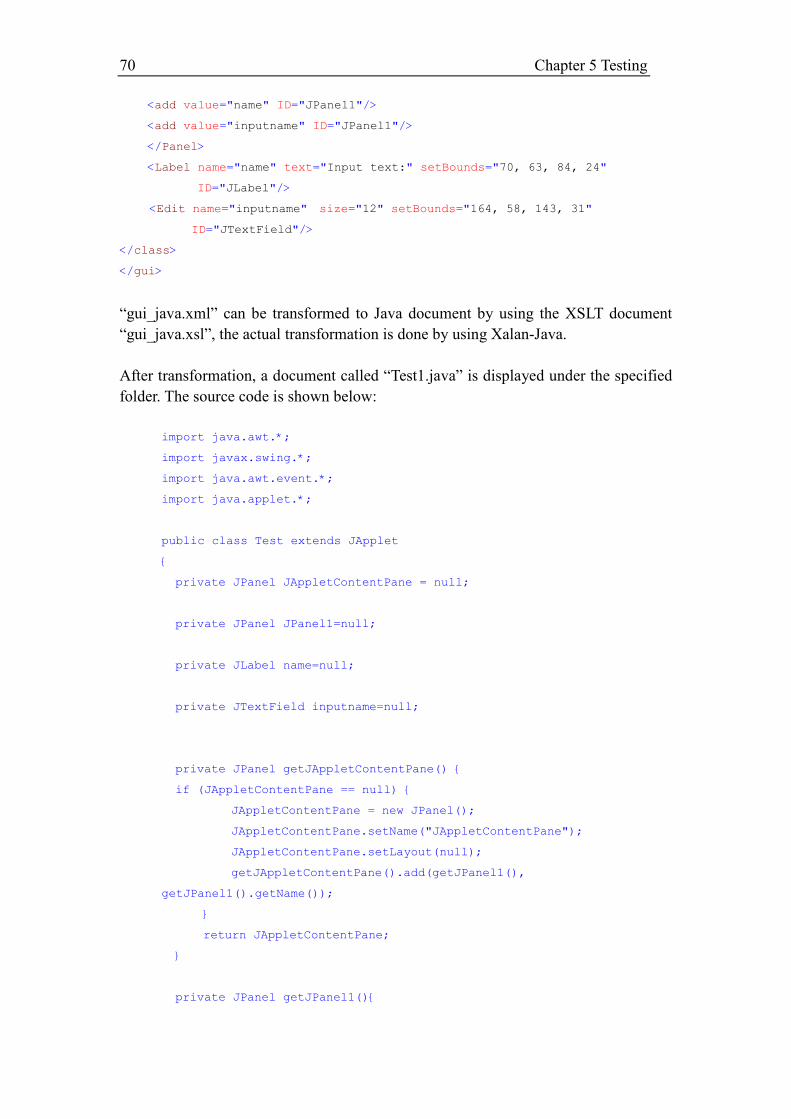
70 Chapter 5 Testing
<add value="name" ID="JPanel1"/>
<add value="inputname" ID="JPanel1"/>
</Panel>
<Label name="name" text="Input text:" setBounds="70, 63, 84, 24"
ID="JLabel"/>
<Edit name="inputname" size="12" setBounds="164, 58, 143, 31"
ID="JTextField"/>
</class>
</gui>
“gui_java.xml” can be transformed to Java document by using the XSLT document
“gui_java.xsl”, the actual transformation is done by using Xalan-Java.
After transformation, a document called “Test1.java” is displayed under the specified
folder. The source code is shown below:
import java.awt.*;
import javax.swing.*;
import java.awt.event.*;
import java.applet.*;
public class Test extends JApplet
{
private JPanel JAppletContentPane = null;
private JPanel JPanel1=null;
private JLabel name=null;
private JTextField inputname=null;
private JPanel getJAppletContentPane() {
if (JAppletContentPane == null) {
JAppletContentPane = new JPanel();
JAppletContentPane.setName("JAppletContentPane");
JAppletContentPane.setLayout(null);
getJAppletContentPane().add(getJPanel1(),
getJPanel1().getName());
}
return JAppletContentPane;
}
private JPanel getJPanel1(){

71 Chapter 5 Testing
if(JPanel1==null){
JPanel1=new JPanel();
JPanel1.setName("JPanel1");
JPanel1.setLayout(null);
JPanel1.setBounds(-1, 2, 424, 239);
getJPanel1().add(getname(), getname().getName());
getJPanel1().add(getinputname(), getinputname().getName());
}
return JPanel1;
}
private JLabel getname(){
if(name==null){
name=new JLabel();
name.setName("name");
name.setText("Input text:");
name.setBounds(70, 63, 84, 24);
}
return name;
}
private JTextField getinputname(){
if(inputname==null){
inputname=new JTextField();
inputname.setName("inputname");
inputname.setBounds(164, 58, 143, 31);
}
return inputname;
}
public void init() {
setName("Test");
setSize(426, 240);
setContentPane(getJAppletContentPane());
}
public static void main(java.lang.String[] args) {
Test applet = new Test();
JFrame jframe = new JFrame("Applet");
jframe.getContentPane().add("Center", applet);
jframe.setSize(350, 250);
jframe.show();
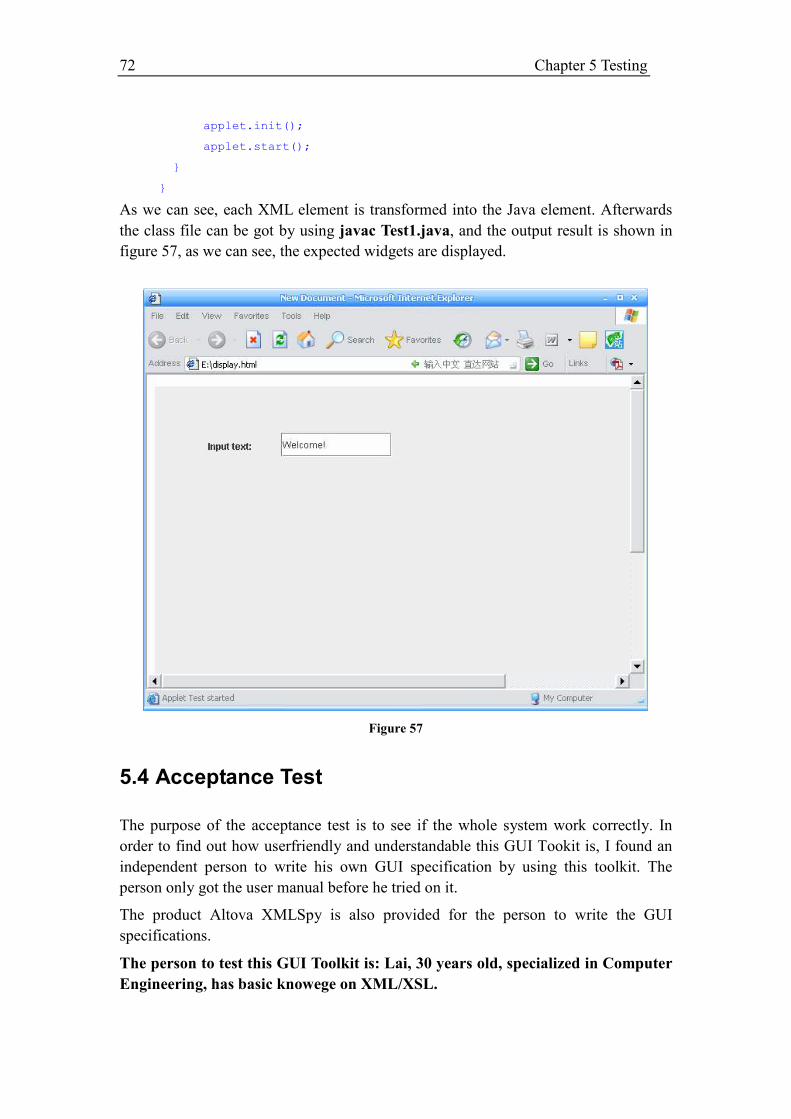
72 Chapter 5 Testing
applet.init();
applet.start();
}
}
As we can see, each XML element is transformed into the Java element. Afterwards
the class file can be got by using javac Test1.java, and the output result is shown in
figure 57, as we can see, the expected widgets are displayed.
Figure 57
5.4 Acceptance Test
The purpose of the acceptance test is to see if the whole system work correctly. In
order to find out how userfriendly and understandable this GUI Tookit is, I found an
independent person to write his own GUI specification by using this toolkit. The
person only got the user manual before he tried on it.
The product Altova XMLSpy is also provided for the person to write the GUI
specifications.
The person to test this GUI Toolkit is: Lai, 30 years old, specialized in Computer
Engineering, has basic knowege on XML/XSL.
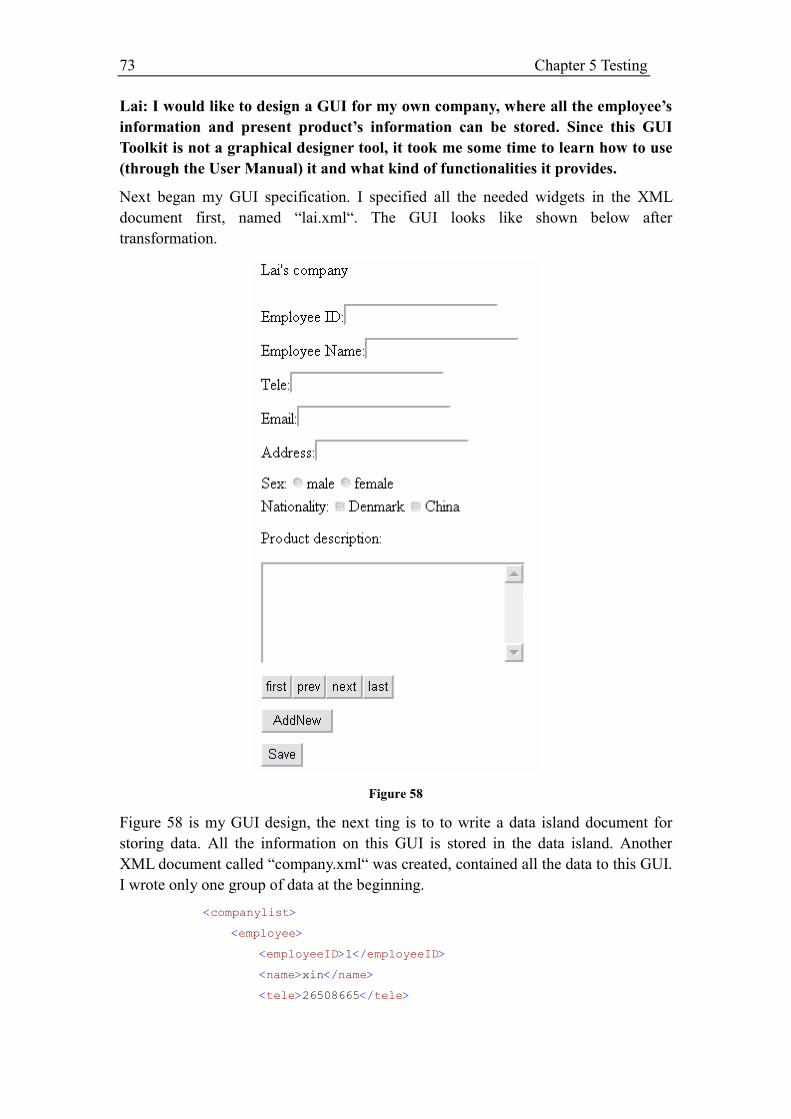
73 Chapter 5 Testing
Lai: I would like to design a GUI for my own company, where all the employee’s
information and present product’s information can be stored. Since this GUI
Toolkit is not a graphical designer tool, it took me some time to learn how to use
(through the User Manual) it and what kind of functionalities it provides.
Next began my GUI specification. I specified all the needed widgets in the XML
document first, named “lai.xml“. The GUI looks like shown below after
transformation.
Figure 58
Figure 58 is my GUI design, the next ting is to to write a data island document for
storing data. All the information on this GUI is stored in the data island. Another
XML document called “company.xml“ was created, contained all the data to this GUI.
I wrote only one group of data at the beginning.
<companylist>
<employee>
<employeeID>1</employeeID>
<name>xin</name>
<tele>26508665</tele>
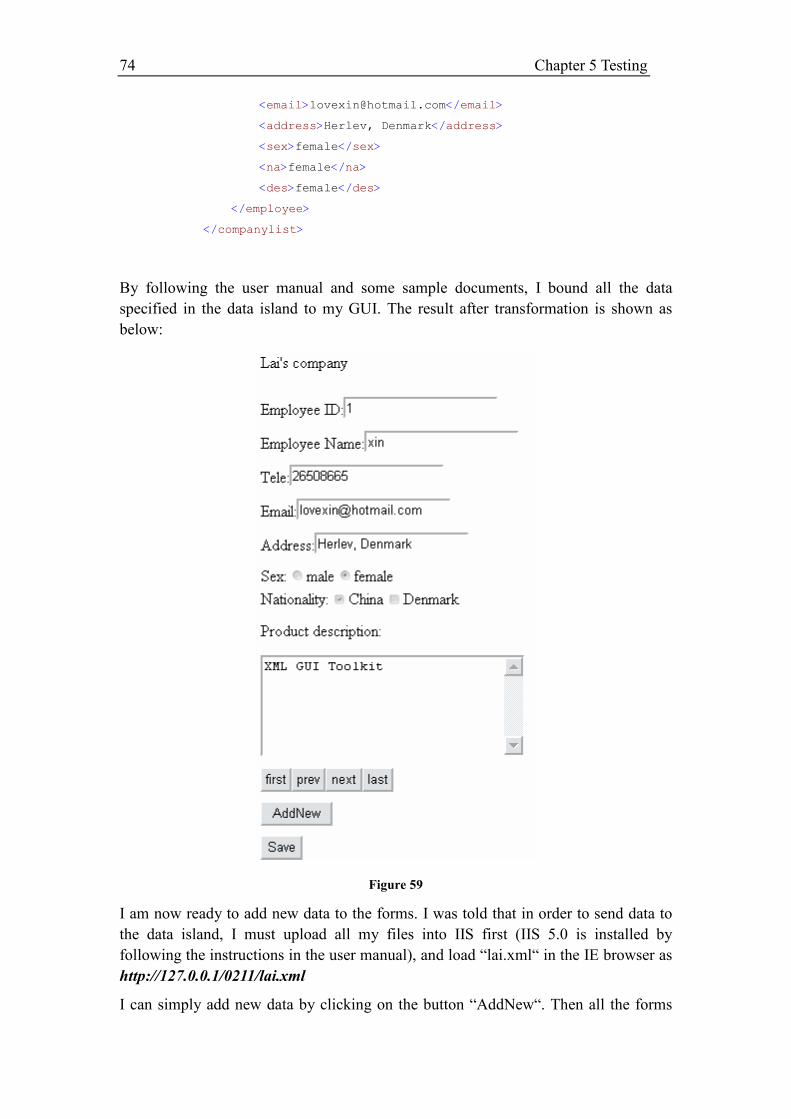
74 Chapter 5 Testing
<email>[email protected]</email>
<address>Herlev, Denmark</address>
<sex>female</sex>
<na>female</na>
<des>female</des>
</employee>
</companylist>
By following the user manual and some sample documents, I bound all the data
specified in the data island to my GUI. The result after transformation is shown as
below:
Figure 59
I am now ready to add new data to the forms. I was told that in order to send data to
the data island, I must upload all my files into IIS first (IIS 5.0 is installed by
following the instructions in the user manual), and load “lai.xml“ in the IE browser as
http://127.0.0.1/0211/lai.xml
I can simply add new data by clicking on the button “AddNew“. Then all the forms
75 Chapter 5 Testing
are cleared and ready for entering the new data. After filled in all the forms just
clicking on the button “Save“ to save the data to the document “company.xml“. A
message box as shown below is displayed for confirming that the data have been
saved successfully.
Figure 60
Rechecking the document “company.xml“, i found that it has been updated with the
new data.
<companylist>
<employee>
<employeeID>1</employeeID>
<name>xin</name>
<tele>26508665</tele>
<email>[email protected]</email>
<address>Herlev, Denmark</address>
<sex>female</sex>
<na>China</na>
<des>XML GUI Toolkit</des>
</employee>
<employee><employeeID>2</employeeID><name>Janne</name><tele>2
6789086</tele><email>[email protected]</email><address>DTU</address>
<sex>female</sex><na>-1</na><des>GUI on based of Java
platform</des></employee></companylist>
The last three lines are the new data received from the GUI. While inputing data into
the forms, if I had wrong data type or format to the telephone numbers or emal
address, a warning message will be displaed when I left the mouse from the text field.
The next thing I would like to try is how the XML document can be transformed to
the XHTML document. I got an XHTML document called “lai.xhtml“ after
transformation. The output result is the same as shown in figure 59, but the source
code is complete an XHTML document. The source code of “lai.xhtml“ is listed in the
Appendix on page 121 since it’s too long.
Besides “lai.xml“, I also specified one GUI called “submit.xml“, where all the
employees can submit their usernames and passwords in order to link to some other
GUIs. After transformation by using the same XSLT document “gui_xhtml.xsl“, I got
one document called “submit.xhtml“, the output result is shown below:
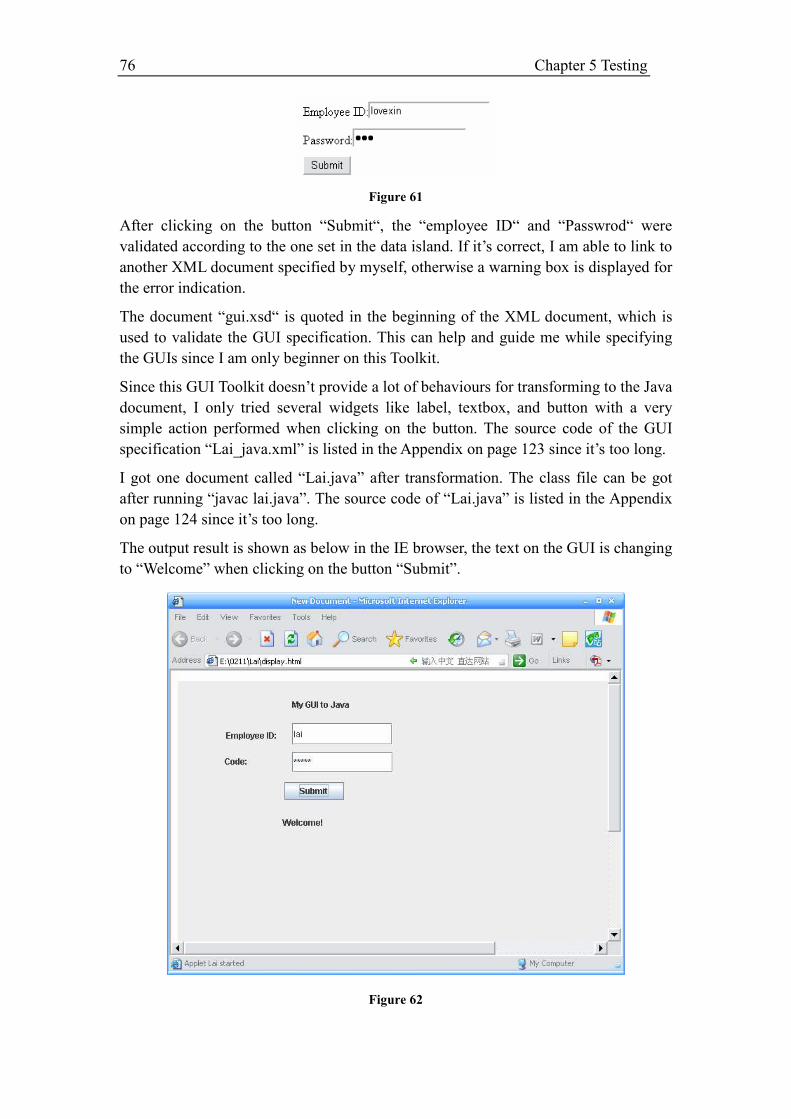
76 Chapter 5 Testing
Figure 61
After clicking on the button “Submit“, the “employee ID“ and “Passwrod“ were
validated according to the one set in the data island. If it’s correct, I am able to link to
another XML document specified by myself, otherwise a warning box is displayed for
the error indication.
The document “gui.xsd“ is quoted in the beginning of the XML document, which is
used to validate the GUI specification. This can help and guide me while specifying
the GUIs since I am only beginner on this Toolkit.
Since this GUI Toolkit doesn’t provide a lot of behaviours for transforming to the Java
document, I only tried several widgets like label, textbox, and button with a very
simple action performed when clicking on the button. The source code of the GUI
specification “Lai_java.xml” is listed in the Appendix on page 123 since it’s too long.
I got one document called “Lai.java” after transformation. The class file can be got
after running “javac lai.java”. The source code of “Lai.java” is listed in the Appendix
on page 124 since it’s too long.
The output result is shown as below in the IE browser, the text on the GUI is changing
to “Welcome” when clicking on the button “Submit”.
Figure 62
77 Chapter 5 Testing
The source code of the acceptance test from Lai is appended in the enclosed CD under
the folder named “Lai”.
From the above testing we can see that, this GUI Toolkit is completely XML scriptible,
and provides all the basic widgets and behaviours for a GUI. The GUI specification
rules are very clear and can be easily learned. There are only two XSLT documents
used for transforming to either XHTML or Java document, and the user doesn’t have
to do anything with it, just use it. The XSLT document “gui_xhtml.xsl“ is generic for
transforming all the GUI specificaitons to the XHTML documents.
78 Chapter 6 Conclusion
CHAPTER 6
Conclusion
6.1 Introduction
This chapter is to have a final statement on the project concerning on the following
points:
• If the GUI Toolkit functions as defined in the project definition;
• What I have achieved in this project.
• What can be improved in the future
6.2 Conclusion on the GUI Toolkit
As defined in the project definition, this GUI Toolkit is implemented for the user to
specify GUIs, and it’s completely XML scriptable, no other programming is required
beyond the XML syntax.
The GUI toolkit provides a set of widgets: label, textbox, button, radio button,
checkbox, drop-down menu and listbox. The user can specify any kind of GUIs
with these widgets and self-define how they can be layout by using the provided
layout method.
Besides, it also provides a set of dynamic behaviou:
� Get the data from the data island and bind it to the GUI
� Send data to the data island
� Validation of the GUI specification
� Validation of the data type and format
� Validation of Login
This GUI toolkit provides two XSLT documents for transforming the XML document
into two document types: XHTML and Java. The XSLT document is developed only
once and generic for all the GUI specifications! The Java part only provides the label,
textbox and button widgets for demonstration.
According to the testing result shown in chapter 5, we can see that all the
functionalities described above have reached the goal. So I can say that this project
fulfil the project definition.
79 Chapter 6 Conclusion
6.3 Conclusion on the Achievement
Through this project, I have learned and gained a lot on the XML and XSL
technologies, the main purpose of this project is to demonstrate how the XML
document stores data and how the XSLT document transforms data to other document
types. After implementation, I can see the advantage of using XML and XSL:
� Very flexible and extensible, there is no restriction on the tags, elements and
attributes in the XML document, so I can freely define according to my
requirements.
� The XML syntax rules are very simple and easy to understand, so the user doesn’t
to do any complicated programming, like Java.
� The XSLT can transform the XML document to any document types in principle,
this makes the XML document is able to work on lots of different environments
according to the user’s needs. I only use XHTML and Java for demonstration in
this project.
� The XSLT document can be developed once and it can be applied to any XML
documents for the same transformation type.
� The JavaScript methods are placed in a single document, which is separated from
the XML/XSL documents. The purpose is to separate the data logic from the
presentation layer. This way of design could be very easy for the future
development.
Since this GUI Toolkit is only version 1.0, it doesn’t provide lots of functionalities,
but with a basic and good architecture and can be easily improved in the future.
6.4 Future Improvement
The project has to stop in this level because of the time limitation, but there are of
course lots of functionalities can be further more implemented concerning on the GUI
Toolkit:
� Static behaviour: there are more attributes can be implemented to the widgets,
e.g. the fonts, color, style of the texts and so on.
� Dynamic behaviour: there are more JavaScript methods can be implemented, e.g.
validation of the forms, the user can self-define which form must be filled, and
which form is optional, and so on. The developer only needs to modify the the
XML specificaiton and the document called “function.js“.
� Transformation: there are more functionalities can be implemented for
transforming to the Java document. And the XML document can be transformed
to more document types more than XHTML and Java according to the user’s
requirements.
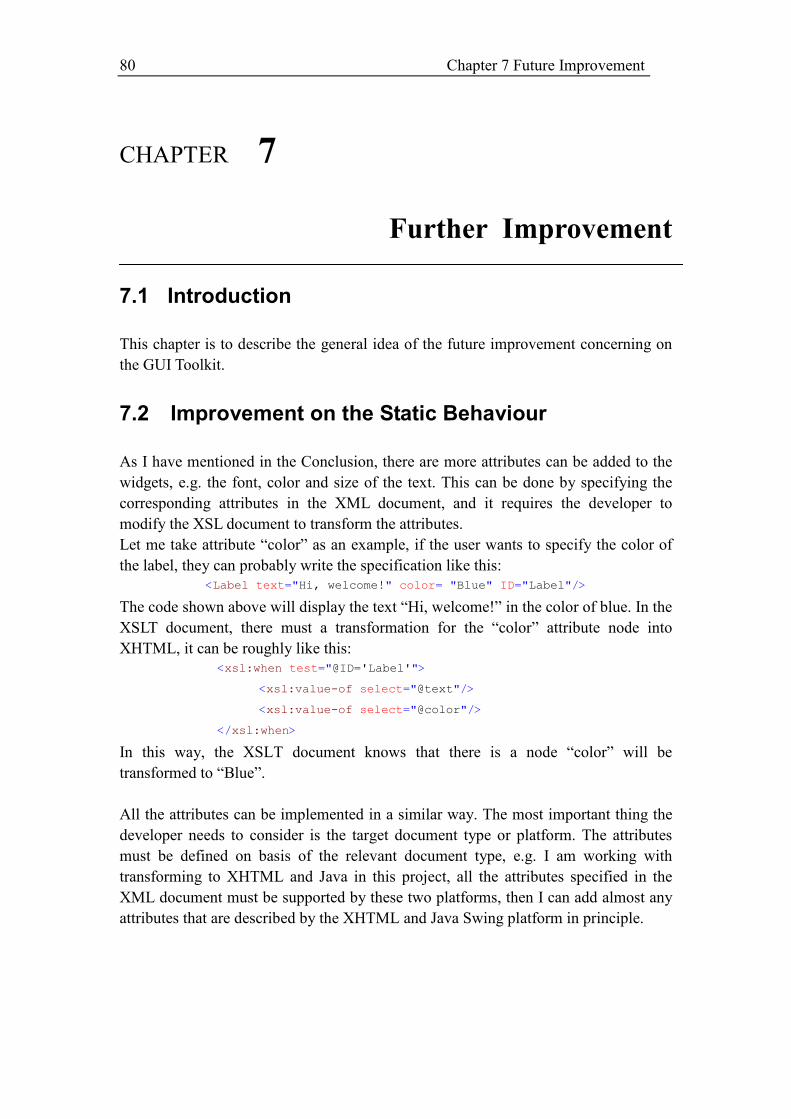
80 Chapter 7 Future Improvement
CHAPTER 7
Further Improvement
7.1 Introduction
This chapter is to describe the general idea of the future improvement concerning on
the GUI Toolkit.
7.2 Improvement on the Static Behaviour
As I have mentioned in the Conclusion, there are more attributes can be added to the
widgets, e.g. the font, color and size of the text. This can be done by specifying the
corresponding attributes in the XML document, and it requires the developer to
modify the XSL document to transform the attributes.
Let me take attribute “color” as an example, if the user wants to specify the color of
the label, they can probably write the specification like this:
<Label text="Hi, welcome!" color= "Blue" ID="Label"/>
The code shown above will display the text “Hi, welcome!” in the color of blue. In the
XSLT document, there must a transformation for the “color” attribute node into
XHTML, it can be roughly like this:
<xsl:when test="@ID='Label'">
<xsl:value-of select="@text"/>
<xsl:value-of select="@color"/>
</xsl:when>
In this way, the XSLT document knows that there is a node “color” will be
transformed to “Blue”.
All the attributes can be implemented in a similar way. The most important thing the
developer needs to consider is the target document type or platform. The attributes
must be defined on basis of the relevant document type, e.g. I am working with
transforming to XHTML and Java in this project, all the attributes specified in the
XML document must be supported by these two platforms, then I can add almost any
attributes that are described by the XHTML and Java Swing platform in principle.
81 Chapter 7 Future Improvement
7.3 Improvement on the Dynamic Behaviour
There are lots of dynamic behaviours can be furthermore implemented to the GUI
specifications. The developer can simply modify the document called “function.js”,
they can add more JavaScript methods in this document and applied it in the XML
document. It also requires the developer to specify more attributes in the XML
document for binding the methods to the behaviours. I suggest to add the following
behaviours:
Validating the empty forms – this behaviour is to validate if the form is empty, if so,
a warning message will be displayed and the user needs to fill in that form. A JS
method is needed for validating if the form is empty, this can be done by compare that
form with the user’s input value in general.
Mandatory/Optional forms – this behaviour allows the user to self define which
form must be filled, and which form can be empty. This implementation might be
more complicated, it requires the developer to specify an attribute in the XML
document, where the user can use it to indicate if the form is mandatory or not, the
value of the attribute will be transferred to the JS method for validation. In the JS
method, a validation is needed to judge if the form is set to “mandatory” or “optional”,
and pop-up for the corresponding message boxes.
There are of course much more behaviours can be added according to the user’s
requirements in the future, the implementation architecture can be like described
above.
7.4 Improvement on the Transformation
There are more widgets and behaviours can be improved for the Java platform, since
this GUI Toolkit only provides the label, textbox, button widget and a very simple
dynamic behaviour. The implementation for the widgets are not very complicated, all
the common used widgets, e.g. radio button, check box, listbox and so on can be
implemented by specifying the widgets in the XML document and create a class for
transformation in the XSLT document, just like what I have done now.
The dynamic behaviours for transforming into Java are more complicated compare to
the XHTML platform since I can’t use JS methods. My solution now is to create a
class for implementing the ActionListener. The most difficult point is how to describe
this behaviour in the XML document since the XML specification can only describe
simple actions, this point needs to be considered and furthermore developed.
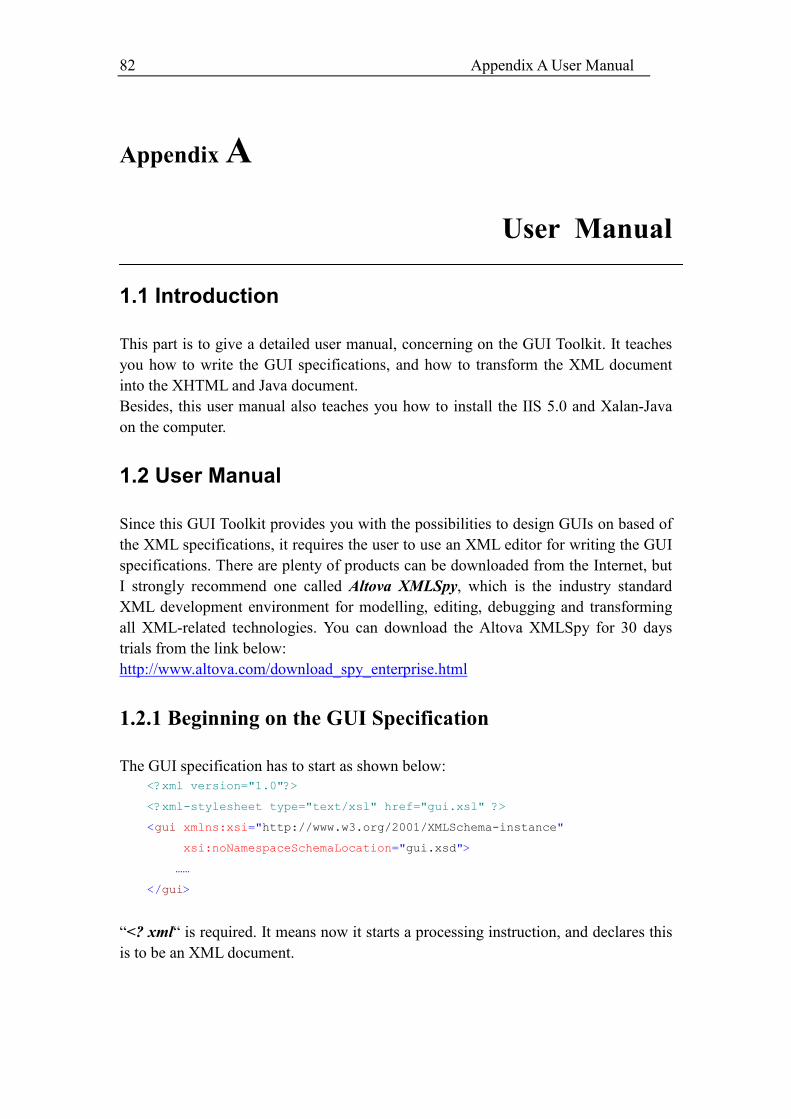
82 Appendix A User Manual
Appendix A
User Manual
1.1 Introduction
This part is to give a detailed user manual, concerning on the GUI Toolkit. It teaches
you how to write the GUI specifications, and how to transform the XML document
into the XHTML and Java document.
Besides, this user manual also teaches you how to install the IIS 5.0 and Xalan-Java
on the computer.
1.2 User Manual
Since this GUI Toolkit provides you with the possibilities to design GUIs on based of
the XML specifications, it requires the user to use an XML editor for writing the GUI
specifications. There are plenty of products can be downloaded from the Internet, but
I strongly recommend one called Altova XMLSpy, which is the industry standard
XML development environment for modelling, editing, debugging and transforming
all XML-related technologies. You can download the Altova XMLSpy for 30 days
trials from the link below:
http://www.altova.com/download_spy_enterprise.html
1.2.1 Beginning on the GUI Specification
The GUI specification has to start as shown below:
<?xml version="1.0"?>
<?xml-stylesheet type="text/xsl" href="gui.xsl" ?>
<gui xmlns:xsi="http://www.w3.org/2001/XMLSchema-instance"
xsi:noNamespaceSchemaLocation="gui.xsd">
……
</gui>
“<? xml“ is required. It means now it starts a processing instruction, and declares this
is to be an XML document.
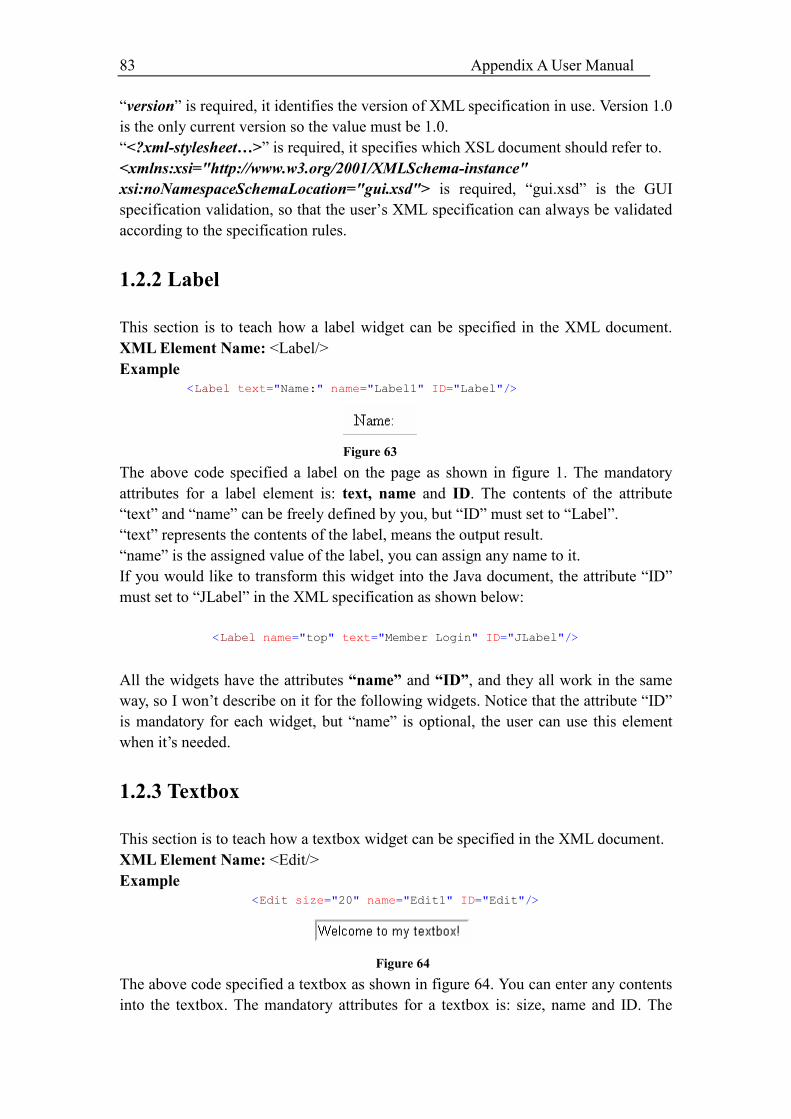
83 Appendix A User Manual
“version” is required, it identifies the version of XML specification in use. Version 1.0
is the only current version so the value must be 1.0.
“<?xml-stylesheet…>” is required, it specifies which XSL document should refer to.
<xmlns:xsi="http://www.w3.org/2001/XMLSchema-instance"
xsi:noNamespaceSchemaLocation="gui.xsd"> is required, “gui.xsd” is the GUI
specification validation, so that the user’s XML specification can always be validated
according to the specification rules.
1.2.2 Label
This section is to teach how a label widget can be specified in the XML document.
XML Element Name: <Label/>
Example
<Label text="Name:" name="Label1" ID="Label"/>
Figure 63
The above code specified a label on the page as shown in figure 1. The mandatory
attributes for a label element is: text, name and ID. The contents of the attribute
“text” and “name” can be freely defined by you, but “ID” must set to “Label”.
“text” represents the contents of the label, means the output result.
“name” is the assigned value of the label, you can assign any name to it.
If you would like to transform this widget into the Java document, the attribute “ID”
must set to “JLabel” in the XML specification as shown below:
<Label name="top" text="Member Login" ID="JLabel"/>
All the widgets have the attributes “name” and “ID”, and they all work in the same
way, so I won’t describe on it for the following widgets. Notice that the attribute “ID”
is mandatory for each widget, but “name” is optional, the user can use this element
when it’s needed.
1.2.3 Textbox
This section is to teach how a textbox widget can be specified in the XML document.
XML Element Name: <Edit/>
Example
<Edit size="20" name="Edit1" ID="Edit"/>
Figure 64
The above code specified a textbox as shown in figure 64. You can enter any contents
into the textbox. The mandatory attributes for a textbox is: size, name and ID. The
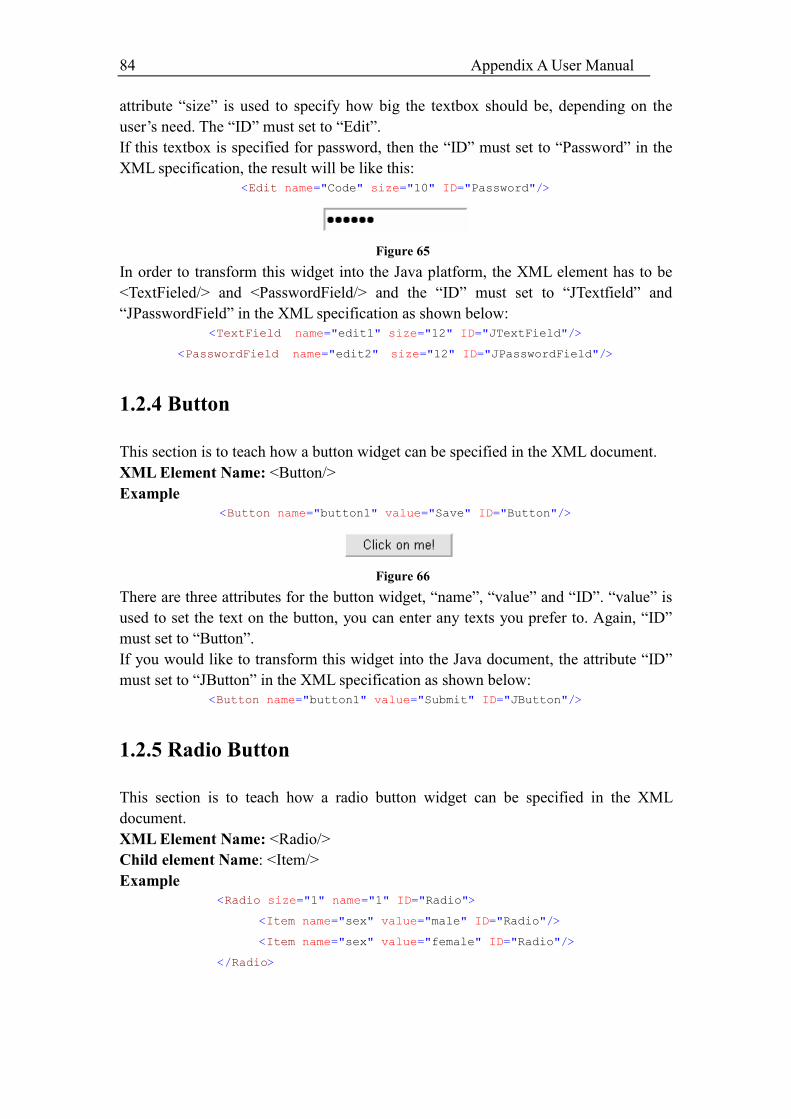
84 Appendix A User Manual
attribute “size” is used to specify how big the textbox should be, depending on the
user’s need. The “ID” must set to “Edit”.
If this textbox is specified for password, then the “ID” must set to “Password” in the
XML specification, the result will be like this:
<Edit name="Code" size="10" ID="Password"/>
Figure 65
In order to transform this widget into the Java platform, the XML element has to be
<TextFieled/> and <PasswordField/> and the “ID” must set to “JTextfield” and
“JPasswordField” in the XML specification as shown below:
<TextField name="edit1" size="12" ID="JTextField"/>
<PasswordField name="edit2" size="12" ID="JPasswordField"/>
1.2.4 Button
This section is to teach how a button widget can be specified in the XML document.
XML Element Name: <Button/>
Example
<Button name="button1" value="Save" ID="Button"/>
Figure 66
There are three attributes for the button widget, “name”, “value” and “ID”. “value” is
used to set the text on the button, you can enter any texts you prefer to. Again, “ID”
must set to “Button”.
If you would like to transform this widget into the Java document, the attribute “ID”
must set to “JButton” in the XML specification as shown below:
<Button name="button1" value="Submit" ID="JButton"/>
1.2.5 Radio Button
This section is to teach how a radio button widget can be specified in the XML
document.
XML Element Name: <Radio/>
Child element Name: <Item/>
Example
<Radio size="1" name="1" ID="Radio">
<Item name="sex" value="male" ID="Radio"/>
<Item name="sex" value="female" ID="Radio"/>
</Radio>
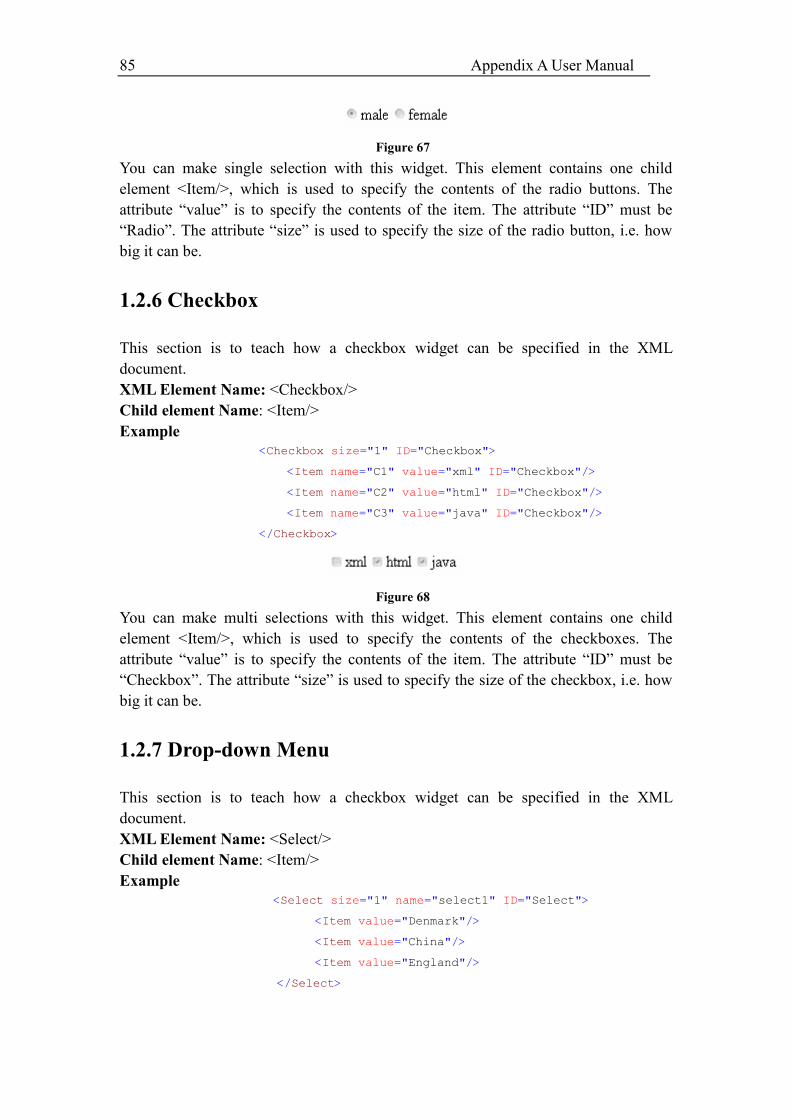
85 Appendix A User Manual
Figure 67
You can make single selection with this widget. This element contains one child
element <Item/>, which is used to specify the contents of the radio buttons. The
attribute “value” is to specify the contents of the item. The attribute “ID” must be
“Radio”. The attribute “size” is used to specify the size of the radio button, i.e. how
big it can be.
1.2.6 Checkbox
This section is to teach how a checkbox widget can be specified in the XML
document.
XML Element Name: <Checkbox/>
Child element Name: <Item/>
Example
<Checkbox size="1" ID="Checkbox">
<Item name="C1" value="xml" ID="Checkbox"/>
<Item name="C2" value="html" ID="Checkbox"/>
<Item name="C3" value="java" ID="Checkbox"/>
</Checkbox>
Figure 68
You can make multi selections with this widget. This element contains one child
element <Item/>, which is used to specify the contents of the checkboxes. The
attribute “value” is to specify the contents of the item. The attribute “ID” must be
“Checkbox”. The attribute “size” is used to specify the size of the checkbox, i.e. how
big it can be.
1.2.7 Drop-down Menu
This section is to teach how a checkbox widget can be specified in the XML
document.
XML Element Name: <Select/>
Child element Name: <Item/>
Example
<Select size="1" name="select1" ID="Select">
<Item value="Denmark"/>
<Item value="China"/>
<Item value="England"/>
</Select>

86 Appendix A User Manual
Figure 69
You can make selections with this widget. This element contains one child element
<Item/>, which is used to specify the contents of the drop-down menu. The attribute
“value” is to specify the contents of the item. The attribute “ID” must be “Select”. The
attribute “size” is used to specify the size of the drop-down menu, i.e. how big it can
be.
1.2.8 Listbox
This section is to teach how a listbox widget can be specified in the XML document.
XML Element Name: <Listbox/>
Example
<Listbox name="S1" rows="6" cols="30" ID="Listbox"/>
Figure 70
This widget is also used to enter the texts, just like the textbox, but it provides much
more spaces. The attributes for this element is: “name”, “rows”, “cols”, and “ID”. The
“rows” represents the height of the list box and “cols” represents the width of the list
box. The attribute “name” can be set to any, but “ID” must set to “Listbox”.
1.2.9 Write a Data Island Document
This section is to teach how to write a data island document, since the following
behaviours are working based on it. The data island in this project is only used for
storing data.
Example
<companylist>
<employee>
<employeeID>1</employeeID>
<name>xin</name>
<tele>26508665</tele>
<email>[email protected]</email>
</employee>
</companylist>
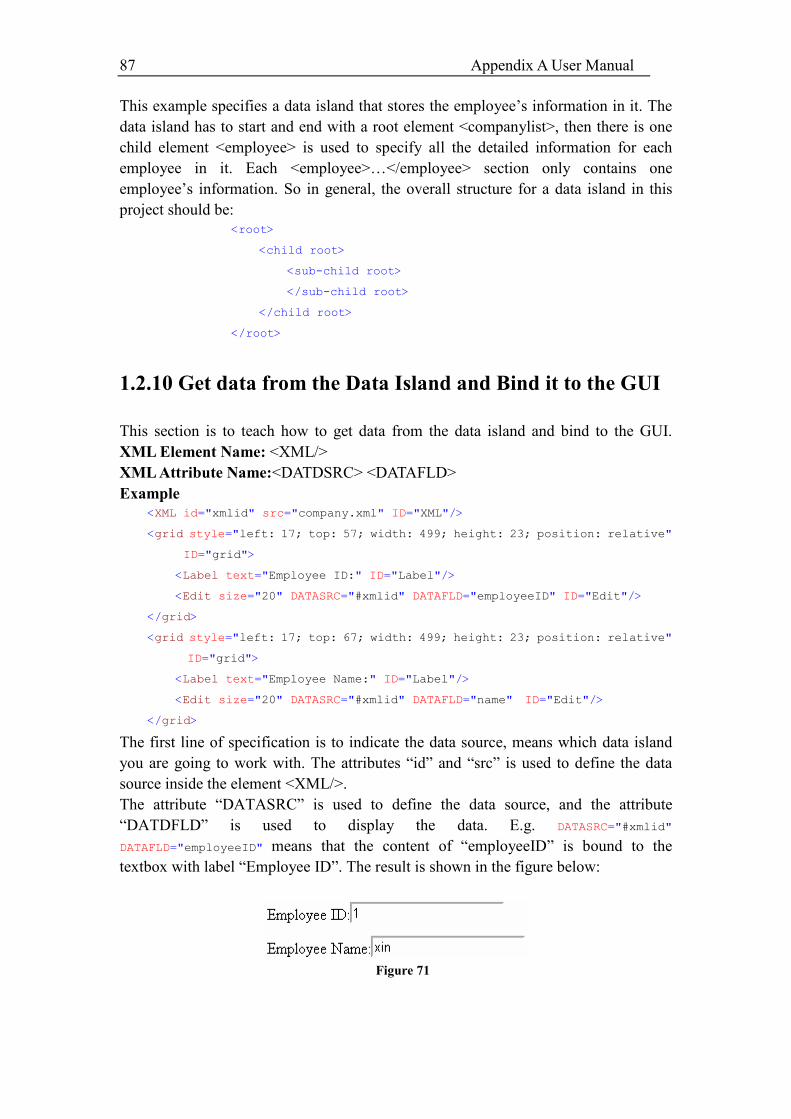
87 Appendix A User Manual
This example specifies a data island that stores the employee’s information in it. The
data island has to start and end with a root element <companylist>, then there is one
child element <employee> is used to specify all the detailed information for each
employee in it. Each <employee>…</employee> section only contains one
employee’s information. So in general, the overall structure for a data island in this
project should be:
<root>
<child root>
<sub-child root>
</sub-child root>
</child root>
</root>
1.2.10 Get data from the Data Island and Bind it to the GUI
This section is to teach how to get data from the data island and bind to the GUI.
XML Element Name: <XML/>
XML Attribute Name:<DATDSRC> <DATAFLD>
Example
<XML id="xmlid" src="company.xml" ID="XML"/>
<grid style="left: 17; top: 57; width: 499; height: 23; position: relative"
ID="grid">
<Label text="Employee ID:" ID="Label"/>
<Edit size="20" DATASRC="#xmlid" DATAFLD="employeeID" ID="Edit"/>
</grid>
<grid style="left: 17; top: 67; width: 499; height: 23; position: relative"
ID="grid">
<Label text="Employee Name:" ID="Label"/>
<Edit size="20" DATASRC="#xmlid" DATAFLD="name" ID="Edit"/>
</grid>
The first line of specification is to indicate the data source, means which data island
you are going to work with. The attributes “id” and “src” is used to define the data
source inside the element <XML/>.
The attribute “DATASRC” is used to define the data source, and the attribute
“DATDFLD” is used to display the data. E.g. DATASRC="#xmlid"
DATAFLD="employeeID" means that the content of “employeeID” is bound to the
textbox with label “Employee ID”. The result is shown in the figure below:
Figure 71
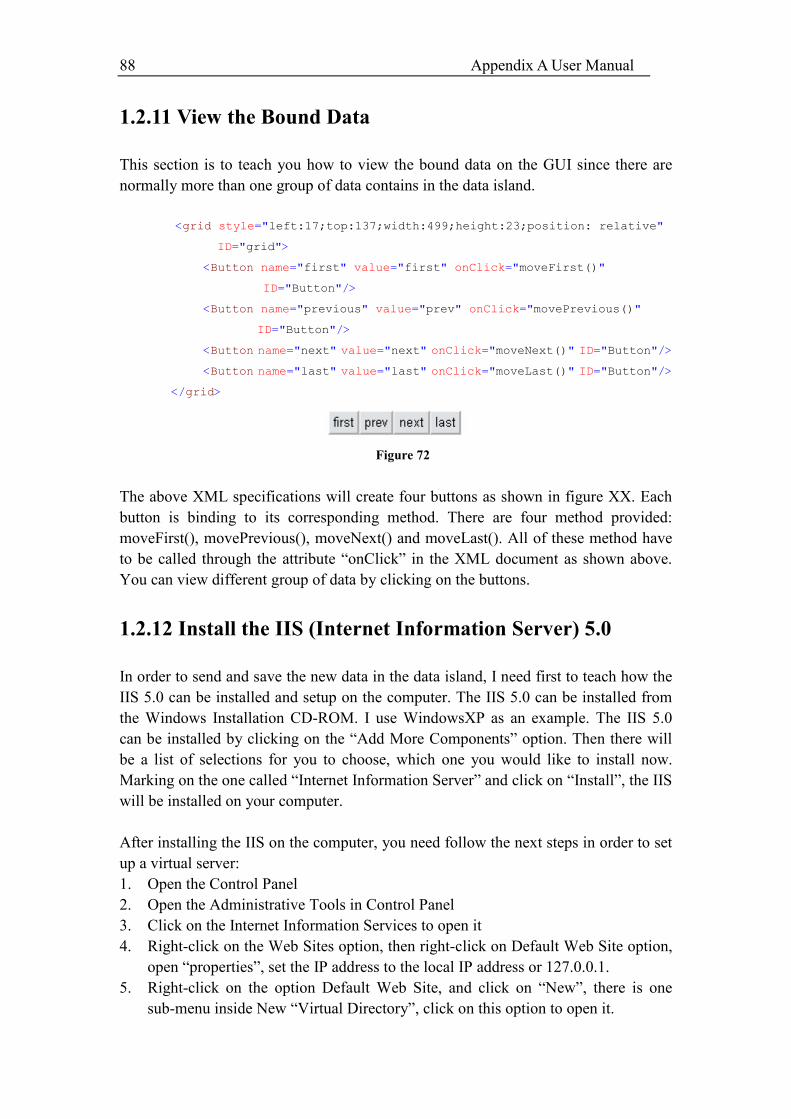
88 Appendix A User Manual
1.2.11 View the Bound Data
This section is to teach you how to view the bound data on the GUI since there are
normally more than one group of data contains in the data island.
<grid style="left:17;top:137;width:499;height:23;position: relative"
ID="grid">
<Button name="first" value="first" onClick="moveFirst()"
ID="Button"/>
<Button name="previous" value="prev" onClick="movePrevious()"
ID="Button"/>
<Button name="next" value="next" onClick="moveNext()" ID="Button"/>
<Button name="last" value="last" onClick="moveLast()" ID="Button"/>
</grid>
Figure 72
The above XML specifications will create four buttons as shown in figure XX. Each
button is binding to its corresponding method. There are four method provided:
moveFirst(), movePrevious(), moveNext() and moveLast(). All of these method have
to be called through the attribute “onClick” in the XML document as shown above.
You can view different group of data by clicking on the buttons.
1.2.12 Install the IIS (Internet Information Server) 5.0
In order to send and save the new data in the data island, I need first to teach how the
IIS 5.0 can be installed and setup on the computer. The IIS 5.0 can be installed from
the Windows Installation CD-ROM. I use WindowsXP as an example. The IIS 5.0
can be installed by clicking on the “Add More Components” option. Then there will
be a list of selections for you to choose, which one you would like to install now.
Marking on the one called “Internet Information Server” and click on “Install”, the IIS
will be installed on your computer.
After installing the IIS on the computer, you need follow the next steps in order to set
up a virtual server:
1. Open the Control Panel
2. Open the Administrative Tools in Control Panel
3. Click on the Internet Information Services to open it
4. Right-click on the Web Sites option, then right-click on Default Web Site option,
open “properties”, set the IP address to the local IP address or 127.0.0.1.
5. Right-click on the option Default Web Site, and click on “New”, there is one
sub-menu inside New “Virtual Directory”, click on this option to open it.
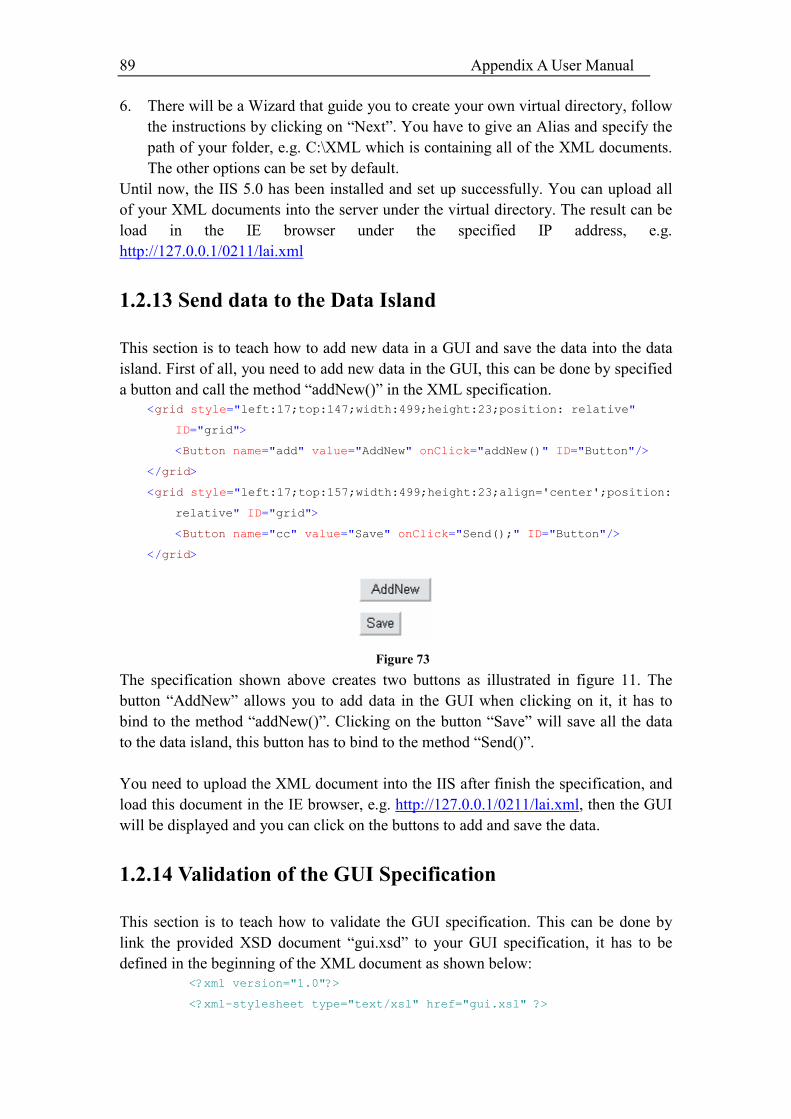
89 Appendix A User Manual
6. There will be a Wizard that guide you to create your own virtual directory, follow
the instructions by clicking on “Next”. You have to give an Alias and specify the
path of your folder, e.g. C:\XML which is containing all of the XML documents.
The other options can be set by default.
Until now, the IIS 5.0 has been installed and set up successfully. You can upload all
of your XML documents into the server under the virtual directory. The result can be
load in the IE browser under the specified IP address, e.g.
http://127.0.0.1/0211/lai.xml
1.2.13 Send data to the Data Island
This section is to teach how to add new data in a GUI and save the data into the data
island. First of all, you need to add new data in the GUI, this can be done by specified
a button and call the method “addNew()” in the XML specification.
<grid style="left:17;top:147;width:499;height:23;position: relative"
ID="grid">
<Button name="add" value="AddNew" onClick="addNew()" ID="Button"/>
</grid>
<grid style="left:17;top:157;width:499;height:23;align='center';position:
relative" ID="grid">
<Button name="cc" value="Save" onClick="Send();" ID="Button"/>
</grid>
Figure 73
The specification shown above creates two buttons as illustrated in figure 11. The
button “AddNew” allows you to add data in the GUI when clicking on it, it has to
bind to the method “addNew()”. Clicking on the button “Save” will save all the data
to the data island, this button has to bind to the method “Send()”.
You need to upload the XML document into the IIS after finish the specification, and
load this document in the IE browser, e.g. http://127.0.0.1/0211/lai.xml, then the GUI
will be displayed and you can click on the buttons to add and save the data.
1.2.14 Validation of the GUI Specification
This section is to teach how to validate the GUI specification. This can be done by
link the provided XSD document “gui.xsd” to your GUI specification, it has to be
defined in the beginning of the XML document as shown below:
<?xml version="1.0"?>
<?xml-stylesheet type="text/xsl" href="gui.xsl" ?>
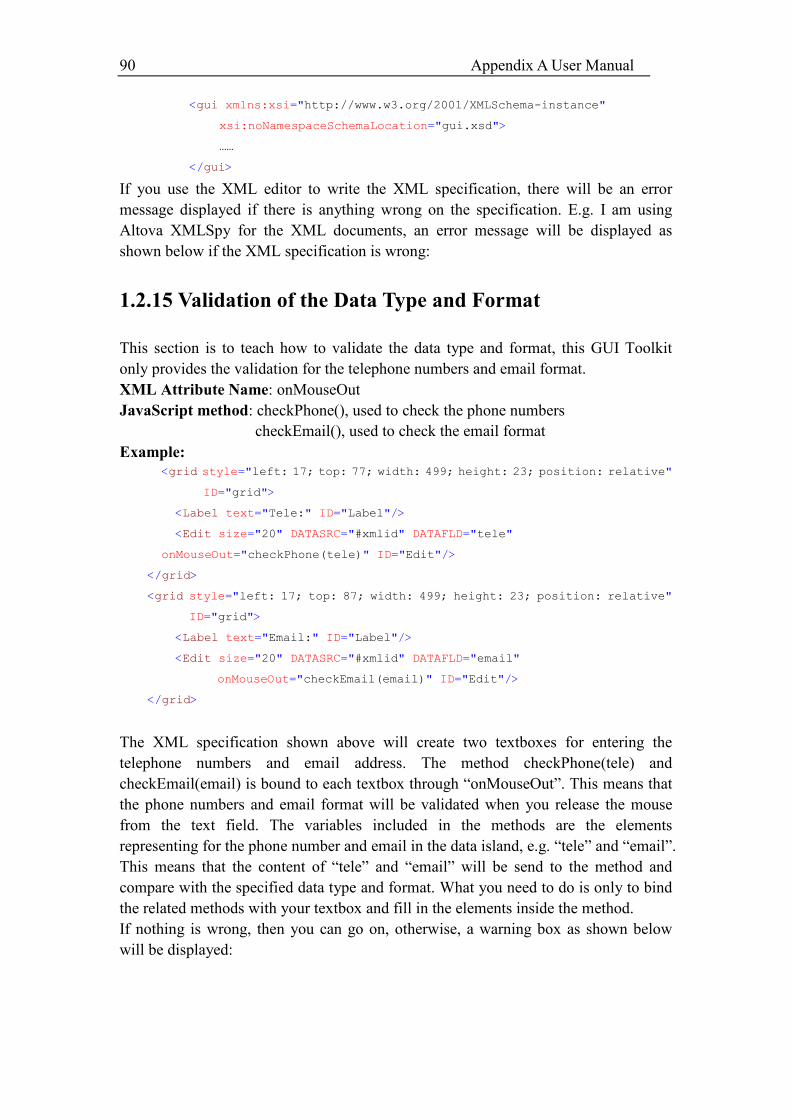
90 Appendix A User Manual
<gui xmlns:xsi="http://www.w3.org/2001/XMLSchema-instance"
xsi:noNamespaceSchemaLocation="gui.xsd">
……
</gui>
If you use the XML editor to write the XML specification, there will be an error
message displayed if there is anything wrong on the specification. E.g. I am using
Altova XMLSpy for the XML documents, an error message will be displayed as
shown below if the XML specification is wrong:
1.2.15 Validation of the Data Type and Format
This section is to teach how to validate the data type and format, this GUI Toolkit
only provides the validation for the telephone numbers and email format.
XML Attribute Name: onMouseOut
JavaScript method: checkPhone(), used to check the phone numbers
checkEmail(), used to check the email format
Example:
<grid style="left: 17; top: 77; width: 499; height: 23; position: relative"
ID="grid">
<Label text="Tele:" ID="Label"/>
<Edit size="20" DATASRC="#xmlid" DATAFLD="tele"
onMouseOut="checkPhone(tele)" ID="Edit"/>
</grid>
<grid style="left: 17; top: 87; width: 499; height: 23; position: relative"
ID="grid">
<Label text="Email:" ID="Label"/>
<Edit size="20" DATASRC="#xmlid" DATAFLD="email"
onMouseOut="checkEmail(email)" ID="Edit"/>
</grid>
The XML specification shown above will create two textboxes for entering the
telephone numbers and email address. The method checkPhone(tele) and
checkEmail(email) is bound to each textbox through “onMouseOut”. This means that
the phone numbers and email format will be validated when you release the mouse
from the text field. The variables included in the methods are the elements
representing for the phone number and email in the data island, e.g. “tele” and “email”.
This means that the content of “tele” and “email” will be send to the method and
compare with the specified data type and format. What you need to do is only to bind
the related methods with your textbox and fill in the elements inside the method.
If nothing is wrong, then you can go on, otherwise, a warning box as shown below
will be displayed:
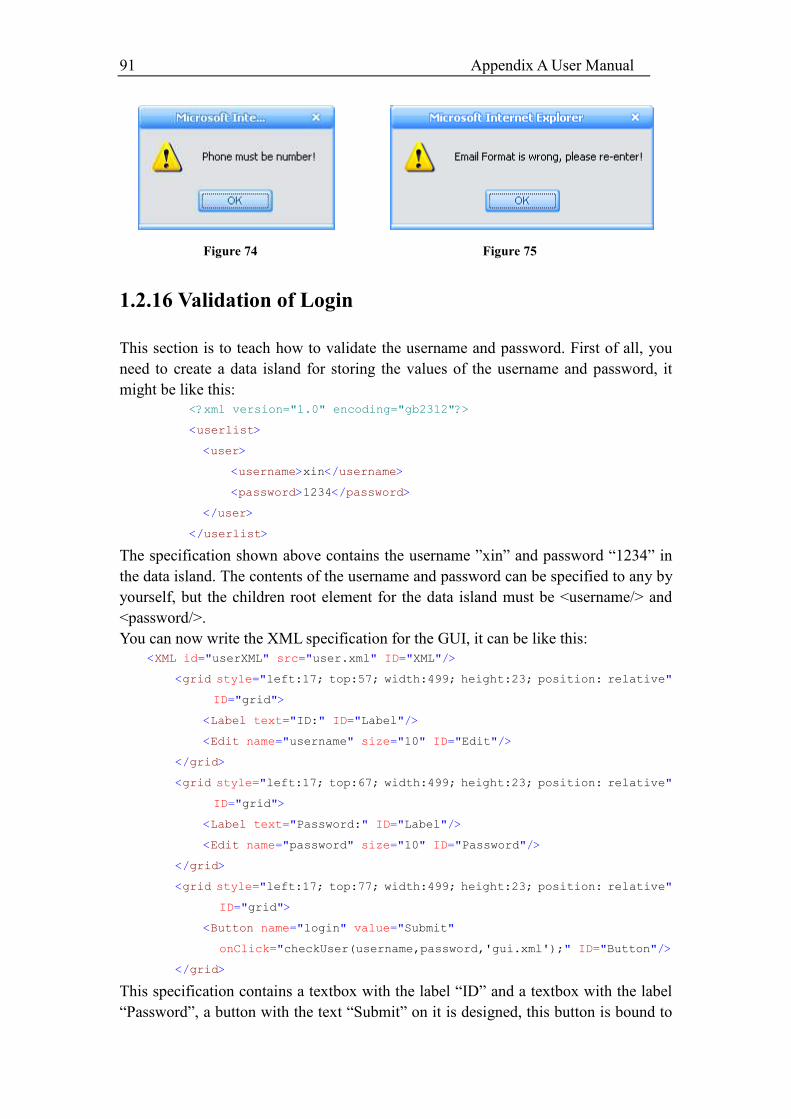
91 Appendix A User Manual
Figure 74 Figure 75
1.2.16 Validation of Login
This section is to teach how to validate the username and password. First of all, you
need to create a data island for storing the values of the username and password, it
might be like this:
<?xml version="1.0" encoding="gb2312"?>
<userlist>
<user>
<username>xin</username>
<password>1234</password>
</user>
</userlist>
The specification shown above contains the username ”xin” and password “1234” in
the data island. The contents of the username and password can be specified to any by
yourself, but the children root element for the data island must be <username/> and
<password/>.
You can now write the XML specification for the GUI, it can be like this:
<XML id="userXML" src="user.xml" ID="XML"/>
<grid style="left:17; top:57; width:499; height:23; position: relative"
ID="grid">
<Label text="ID:" ID="Label"/>
<Edit name="username" size="10" ID="Edit"/>
</grid>
<grid style="left:17; top:67; width:499; height:23; position: relative"
ID="grid">
<Label text="Password:" ID="Label"/>
<Edit name="password" size="10" ID="Password"/>
</grid>
<grid style="left:17; top:77; width:499; height:23; position: relative"
ID="grid">
<Button name="login" value="Submit"
onClick="checkUser(username,password,'gui.xml');" ID="Button"/>
</grid>
This specification contains a textbox with the label “ID” and a textbox with the label
“Password”, a button with the text “Submit” on it is designed, this button is bound to
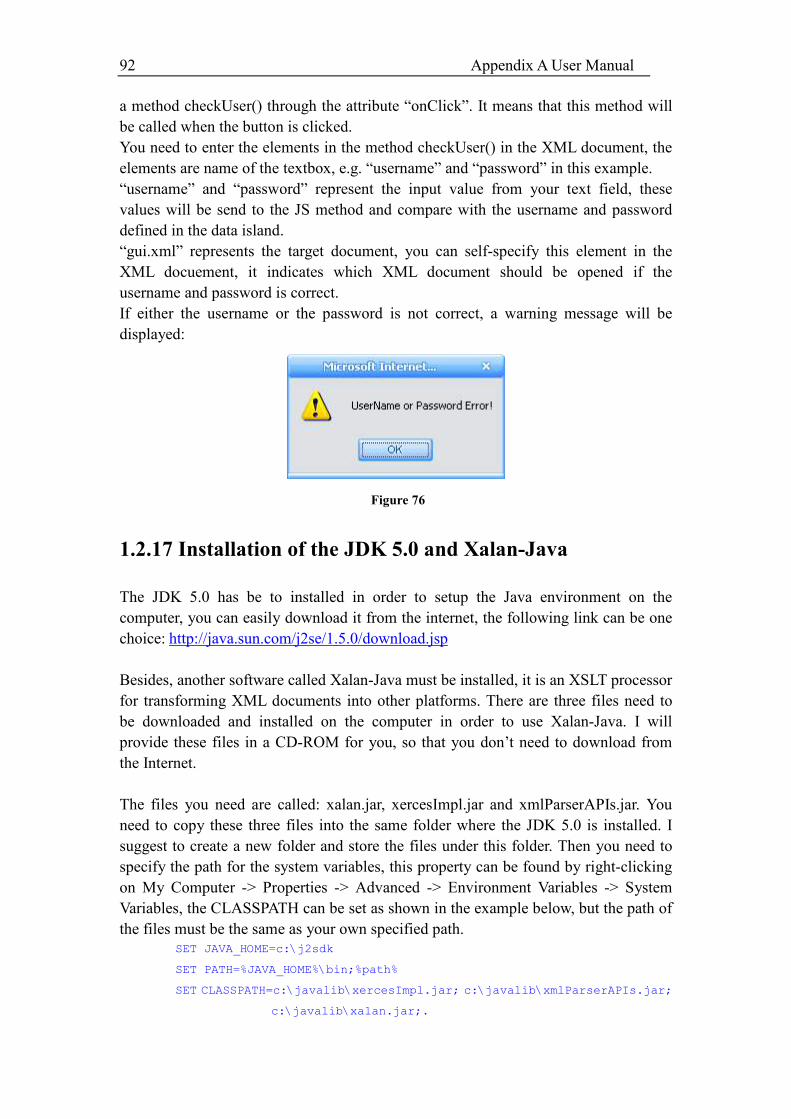
92 Appendix A User Manual
a method checkUser() through the attribute “onClick”. It means that this method will
be called when the button is clicked.
You need to enter the elements in the method checkUser() in the XML document, the
elements are name of the textbox, e.g. “username” and “password” in this example.
“username” and “password” represent the input value from your text field, these
values will be send to the JS method and compare with the username and password
defined in the data island.
“gui.xml” represents the target document, you can self-specify this element in the
XML docuement, it indicates which XML document should be opened if the
username and password is correct.
If either the username or the password is not correct, a warning message will be
displayed:
Figure 76
1.2.17 Installation of the JDK 5.0 and Xalan-Java
The JDK 5.0 has be to installed in order to setup the Java environment on the
computer, you can easily download it from the internet, the following link can be one
choice: http://java.sun.com/j2se/1.5.0/download.jsp
Besides, another software called Xalan-Java must be installed, it is an XSLT processor
for transforming XML documents into other platforms. There are three files need to
be downloaded and installed on the computer in order to use Xalan-Java. I will
provide these files in a CD-ROM for you, so that you don’t need to download from
the Internet.
The files you need are called: xalan.jar, xercesImpl.jar and xmlParserAPIs.jar. You
need to copy these three files into the same folder where the JDK 5.0 is installed. I
suggest to create a new folder and store the files under this folder. Then you need to
specify the path for the system variables, this property can be found by right-clicking
on My Computer -> Properties -> Advanced -> Environment Variables -> System
Variables, the CLASSPATH can be set as shown in the example below, but the path of
the files must be the same as your own specified path.
SET JAVA_HOME=c:\j2sdk
SET PATH=%JAVA_HOME%\bin;%path%
SET CLASSPATH=c:\javalib\xercesImpl.jar; c:\javalib\xmlParserAPIs.jar;
c:\javalib\xalan.jar;.
93 Appendix A User Manual
After configuring the system variables, you can run the following command line to
test if Xalan-Java is installed on the computer:
C:\ java org.apache.xalan.xslt.Process
Press Enter, if you can see the help documentation, it means that this processor has
been installed successfully. Otherwise it might be problems with the specification of
your CLASSPATH.
1.2.18 Transformation into XHTML
This section is to teach how to transform the XML document into the XHTML
platform. This can be done by using Xalan-Java. The XSLT document is provided by
the developer, and it’s fixed, the one used for transforming into the XHTML platform
is called “gui_xhtml.xsl”. The XML document is specified by yourself, all the
documents use the same XSL document. You will get one XHTML document by
using the following command.
E:\0211\ java org.apache.xalan.xslt.Process –in gui.xml –xsl gui_xhtml.xsl –out
gui.xhtml
You must run the command under the specified folder, where all the documents are
placed. The above command means that you get one document called “gui.html”
under the folder. The name of the output file is defined by yourself, you can name
whatever you want. The document “gui.html” needs to be uploaded to the IIS and
view it in the IE browser. E.g. http://127.0.0.1/0211/gui.html, the source code can be
seen by opening this document in Notepad.
1.2.19 Transformation into Java
The same command is used for transforming into the Java document, but with
different XSLT document, the one is called “gui_java.xsl”. The Java document can be
got by using the following command:
E:\0211\ java org.apache.xalan.xslt.Process –in gui.xml –xsl gui_java.xsl –out
gui.java
E:\0211\Javac gui.java
The above command means that you get one document called ”gui.java” under the
folder. You can use Notepad to view the source code. The next command line is to
generate the class file. In order to view the result, you need to use the document called
“display.html”, which is provided by the developer to load the class file, there is one
instruction in the document “display.html” as shown below:
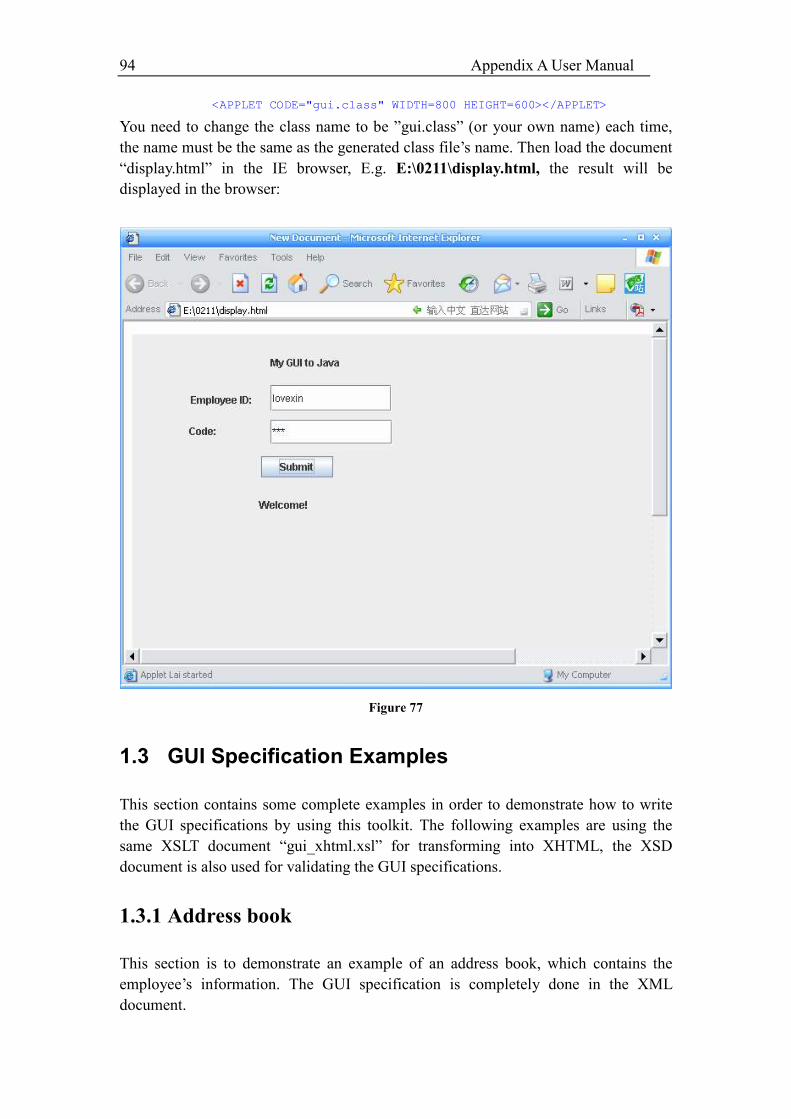
94 Appendix A User Manual
<APPLET CODE="gui.class" WIDTH=800 HEIGHT=600></APPLET>
You need to change the class name to be ”gui.class” (or your own name) each time,
the name must be the same as the generated class file’s name. Then load the document
“display.html” in the IE browser, E.g. E:\0211\display.html, the result will be
displayed in the browser:
Figure 77
1.3 GUI Specification Examples
This section contains some complete examples in order to demonstrate how to write
the GUI specifications by using this toolkit. The following examples are using the
same XSLT document “gui_xhtml.xsl” for transforming into XHTML, the XSD
document is also used for validating the GUI specifications.
1.3.1 Address book
This section is to demonstrate an example of an address book, which contains the
employee’s information. The GUI specification is completely done in the XML
document.
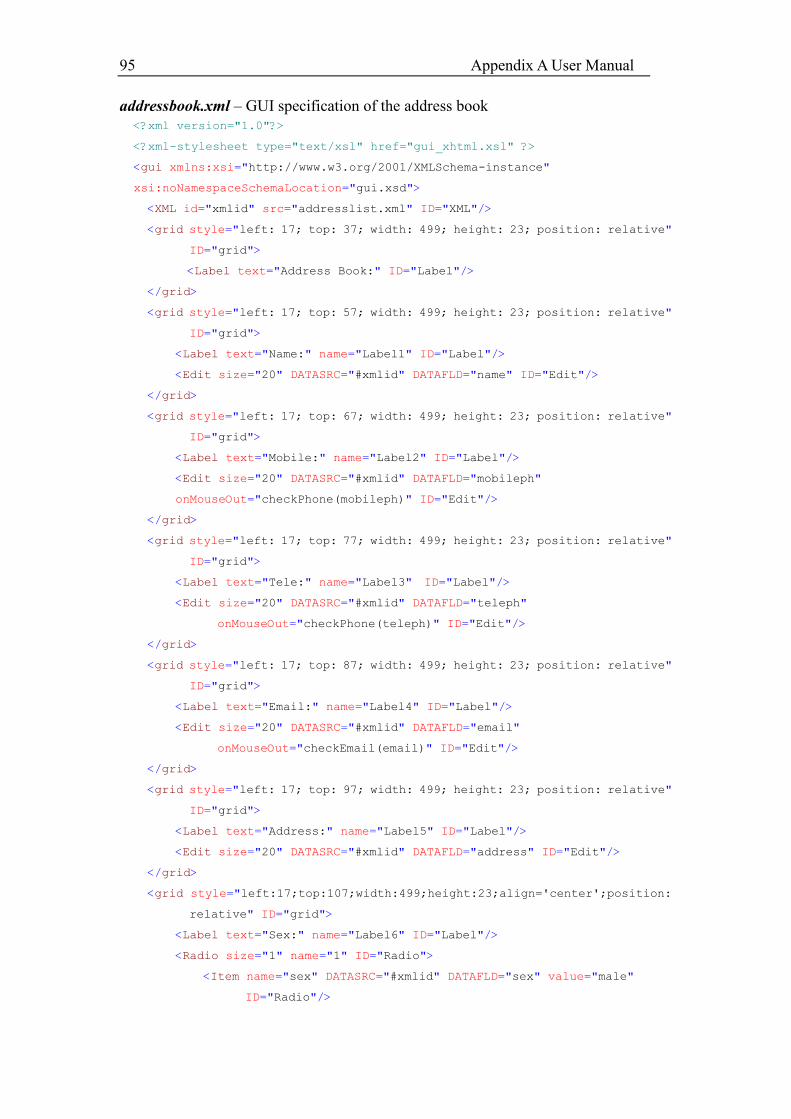
95 Appendix A User Manual
addressbook.xml – GUI specification of the address book
<?xml version="1.0"?>
<?xml-stylesheet type="text/xsl" href="gui_xhtml.xsl" ?>
<gui xmlns:xsi="http://www.w3.org/2001/XMLSchema-instance"
xsi:noNamespaceSchemaLocation="gui.xsd">
<XML id="xmlid" src="addresslist.xml" ID="XML"/>
<grid style="left: 17; top: 37; width: 499; height: 23; position: relative"
ID="grid">
<Label text="Address Book:" ID="Label"/>
</grid>
<grid style="left: 17; top: 57; width: 499; height: 23; position: relative"
ID="grid">
<Label text="Name:" name="Label1" ID="Label"/>
<Edit size="20" DATASRC="#xmlid" DATAFLD="name" ID="Edit"/>
</grid>
<grid style="left: 17; top: 67; width: 499; height: 23; position: relative"
ID="grid">
<Label text="Mobile:" name="Label2" ID="Label"/>
<Edit size="20" DATASRC="#xmlid" DATAFLD="mobileph"
onMouseOut="checkPhone(mobileph)" ID="Edit"/>
</grid>
<grid style="left: 17; top: 77; width: 499; height: 23; position: relative"
ID="grid">
<Label text="Tele:" name="Label3" ID="Label"/>
<Edit size="20" DATASRC="#xmlid" DATAFLD="teleph"
onMouseOut="checkPhone(teleph)" ID="Edit"/>
</grid>
<grid style="left: 17; top: 87; width: 499; height: 23; position: relative"
ID="grid">
<Label text="Email:" name="Label4" ID="Label"/>
<Edit size="20" DATASRC="#xmlid" DATAFLD="email"
onMouseOut="checkEmail(email)" ID="Edit"/>
</grid>
<grid style="left: 17; top: 97; width: 499; height: 23; position: relative"
ID="grid">
<Label text="Address:" name="Label5" ID="Label"/>
<Edit size="20" DATASRC="#xmlid" DATAFLD="address" ID="Edit"/>
</grid>
<grid style="left:17;top:107;width:499;height:23;align='center';position:
relative" ID="grid">
<Label text="Sex:" name="Label6" ID="Label"/>
<Radio size="1" name="1" ID="Radio">
<Item name="sex" DATASRC="#xmlid" DATAFLD="sex" value="male"
ID="Radio"/>
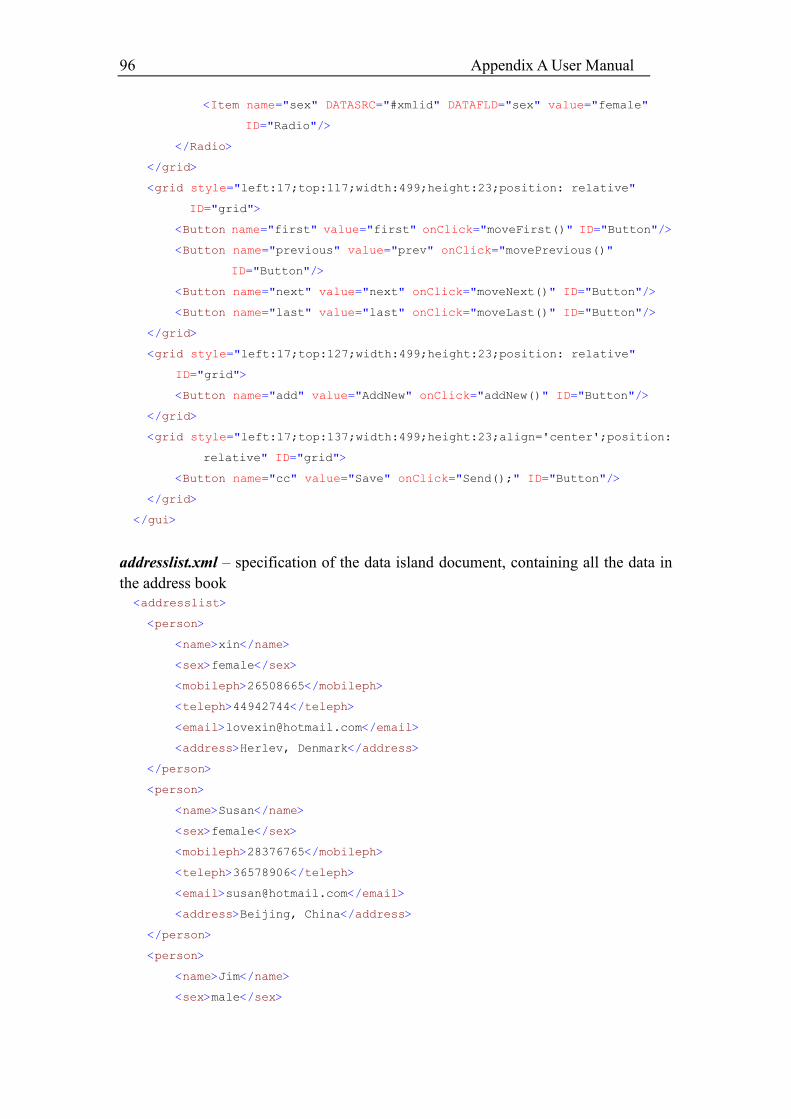
96 Appendix A User Manual
<Item name="sex" DATASRC="#xmlid" DATAFLD="sex" value="female"
ID="Radio"/>
</Radio>
</grid>
<grid style="left:17;top:117;width:499;height:23;position: relative"
ID="grid">
<Button name="first" value="first" onClick="moveFirst()" ID="Button"/>
<Button name="previous" value="prev" onClick="movePrevious()"
ID="Button"/>
<Button name="next" value="next" onClick="moveNext()" ID="Button"/>
<Button name="last" value="last" onClick="moveLast()" ID="Button"/>
</grid>
<grid style="left:17;top:127;width:499;height:23;position: relative"
ID="grid">
<Button name="add" value="AddNew" onClick="addNew()" ID="Button"/>
</grid>
<grid style="left:17;top:137;width:499;height:23;align='center';position:
relative" ID="grid">
<Button name="cc" value="Save" onClick="Send();" ID="Button"/>
</grid>
</gui>
addresslist.xml – specification of the data island document, containing all the data in
the address book
<addresslist>
<person>
<name>xin</name>
<sex>female</sex>
<mobileph>26508665</mobileph>
<teleph>44942744</teleph>
<email>[email protected]</email>
<address>Herlev, Denmark</address>
</person>
<person>
<name>Susan</name>
<sex>female</sex>
<mobileph>28376765</mobileph>
<teleph>36578906</teleph>
<email>[email protected]</email>
<address>Beijing, China</address>
</person>
<person>
<name>Jim</name>
<sex>male</sex>
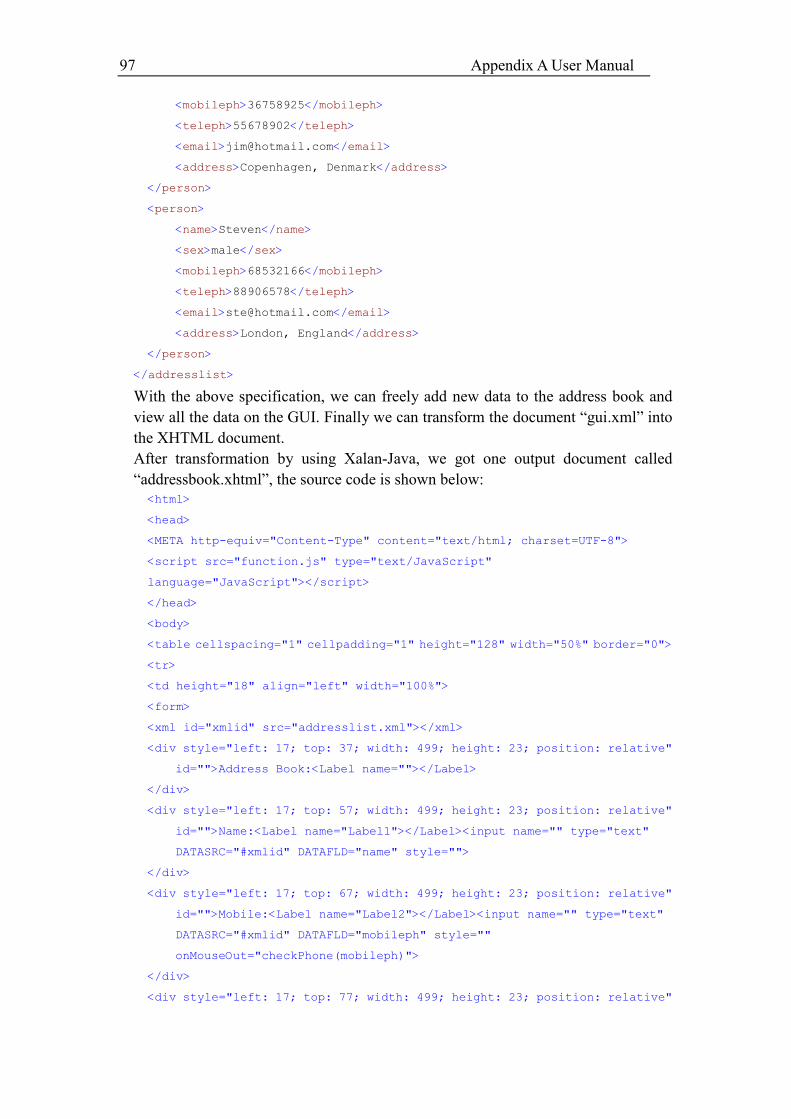
97 Appendix A User Manual
<mobileph>36758925</mobileph>
<teleph>55678902</teleph>
<email>[email protected]</email>
<address>Copenhagen, Denmark</address>
</person>
<person>
<name>Steven</name>
<sex>male</sex>
<mobileph>68532166</mobileph>
<teleph>88906578</teleph>
<email>[email protected]</email>
<address>London, England</address>
</person>
</addresslist>
With the above specification, we can freely add new data to the address book and
view all the data on the GUI. Finally we can transform the document “gui.xml” into
the XHTML document.
After transformation by using Xalan-Java, we got one output document called
“addressbook.xhtml”, the source code is shown below:
<html>
<head>
<META http-equiv="Content-Type" content="text/html; charset=UTF-8">
<script src="function.js" type="text/JavaScript"
language="JavaScript"></script>
</head>
<body>
<table cellspacing="1" cellpadding="1" height="128" width="50%" border="0">
<tr>
<td height="18" align="left" width="100%">
<form>
<xml id="xmlid" src="addresslist.xml"></xml>
<div style="left: 17; top: 37; width: 499; height: 23; position: relative"
id="">Address Book:<Label name=""></Label>
</div>
<div style="left: 17; top: 57; width: 499; height: 23; position: relative"
id="">Name:<Label name="Label1"></Label><input name="" type="text"
DATASRC="#xmlid" DATAFLD="name" style="">
</div>
<div style="left: 17; top: 67; width: 499; height: 23; position: relative"
id="">Mobile:<Label name="Label2"></Label><input name="" type="text"
DATASRC="#xmlid" DATAFLD="mobileph" style=""
onMouseOut="checkPhone(mobileph)">
</div>
<div style="left: 17; top: 77; width: 499; height: 23; position: relative"
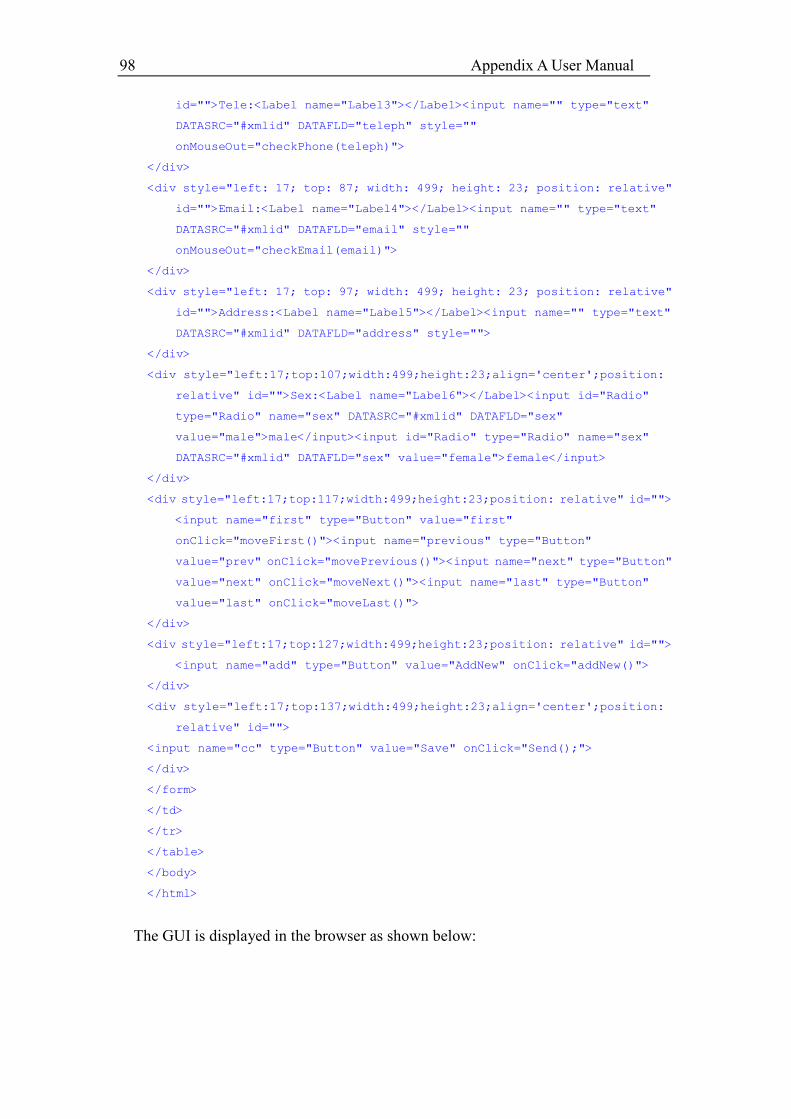
98 Appendix A User Manual
id="">Tele:<Label name="Label3"></Label><input name="" type="text"
DATASRC="#xmlid" DATAFLD="teleph" style=""
onMouseOut="checkPhone(teleph)">
</div>
<div style="left: 17; top: 87; width: 499; height: 23; position: relative"
id="">Email:<Label name="Label4"></Label><input name="" type="text"
DATASRC="#xmlid" DATAFLD="email" style=""
onMouseOut="checkEmail(email)">
</div>
<div style="left: 17; top: 97; width: 499; height: 23; position: relative"
id="">Address:<Label name="Label5"></Label><input name="" type="text"
DATASRC="#xmlid" DATAFLD="address" style="">
</div>
<div style="left:17;top:107;width:499;height:23;align='center';position:
relative" id="">Sex:<Label name="Label6"></Label><input id="Radio"
type="Radio" name="sex" DATASRC="#xmlid" DATAFLD="sex"
value="male">male</input><input id="Radio" type="Radio" name="sex"
DATASRC="#xmlid" DATAFLD="sex" value="female">female</input>
</div>
<div style="left:17;top:117;width:499;height:23;position: relative" id="">
<input name="first" type="Button" value="first"
onClick="moveFirst()"><input name="previous" type="Button"
value="prev" onClick="movePrevious()"><input name="next" type="Button"
value="next" onClick="moveNext()"><input name="last" type="Button"
value="last" onClick="moveLast()">
</div>
<div style="left:17;top:127;width:499;height:23;position: relative" id="">
<input name="add" type="Button" value="AddNew" onClick="addNew()">
</div>
<div style="left:17;top:137;width:499;height:23;align='center';position:
relative" id="">
<input name="cc" type="Button" value="Save" onClick="Send();">
</div>
</form>
</td>
</tr>
</table>
</body>
</html>
The GUI is displayed in the browser as shown below:
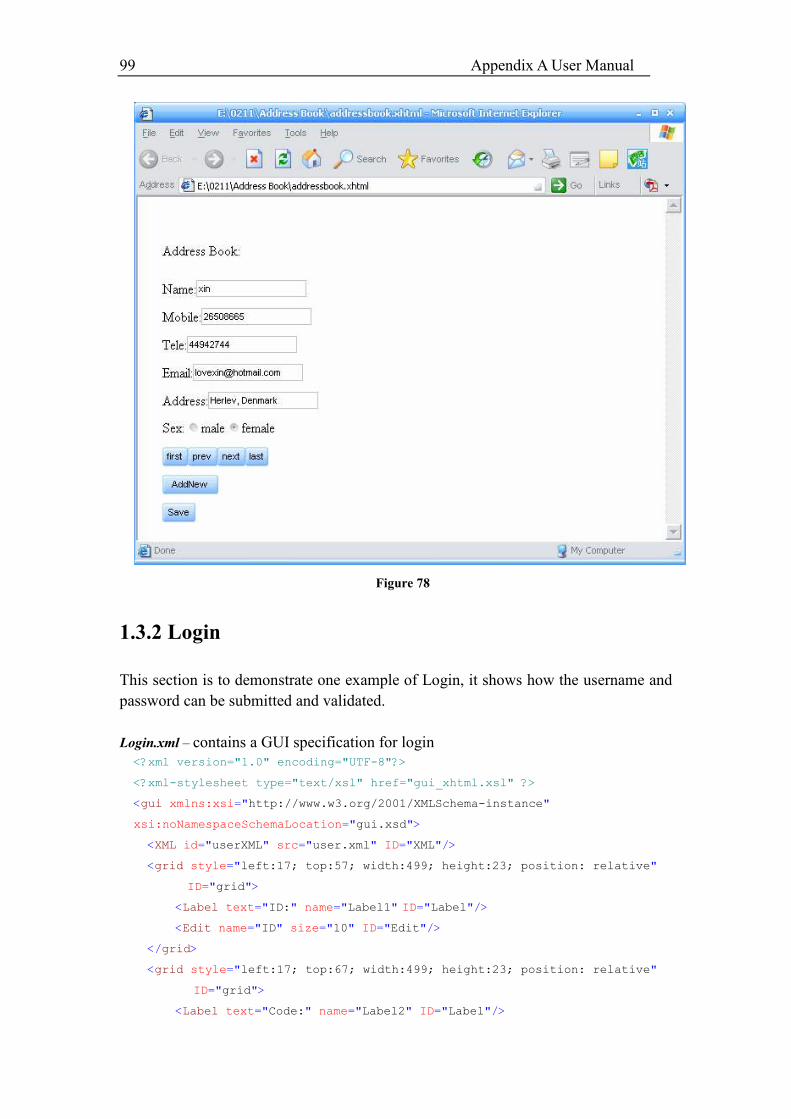
99 Appendix A User Manual
Figure 78
1.3.2 Login
This section is to demonstrate one example of Login, it shows how the username and
password can be submitted and validated.
Login.xml – contains a GUI specification for login
<?xml version="1.0" encoding="UTF-8"?>
<?xml-stylesheet type="text/xsl" href="gui_xhtml.xsl" ?>
<gui xmlns:xsi="http://www.w3.org/2001/XMLSchema-instance"
xsi:noNamespaceSchemaLocation="gui.xsd">
<XML id="userXML" src="user.xml" ID="XML"/>
<grid style="left:17; top:57; width:499; height:23; position: relative"
ID="grid">
<Label text="ID:" name="Label1" ID="Label"/>
<Edit name="ID" size="10" ID="Edit"/>
</grid>
<grid style="left:17; top:67; width:499; height:23; position: relative"
ID="grid">
<Label text="Code:" name="Label2" ID="Label"/>
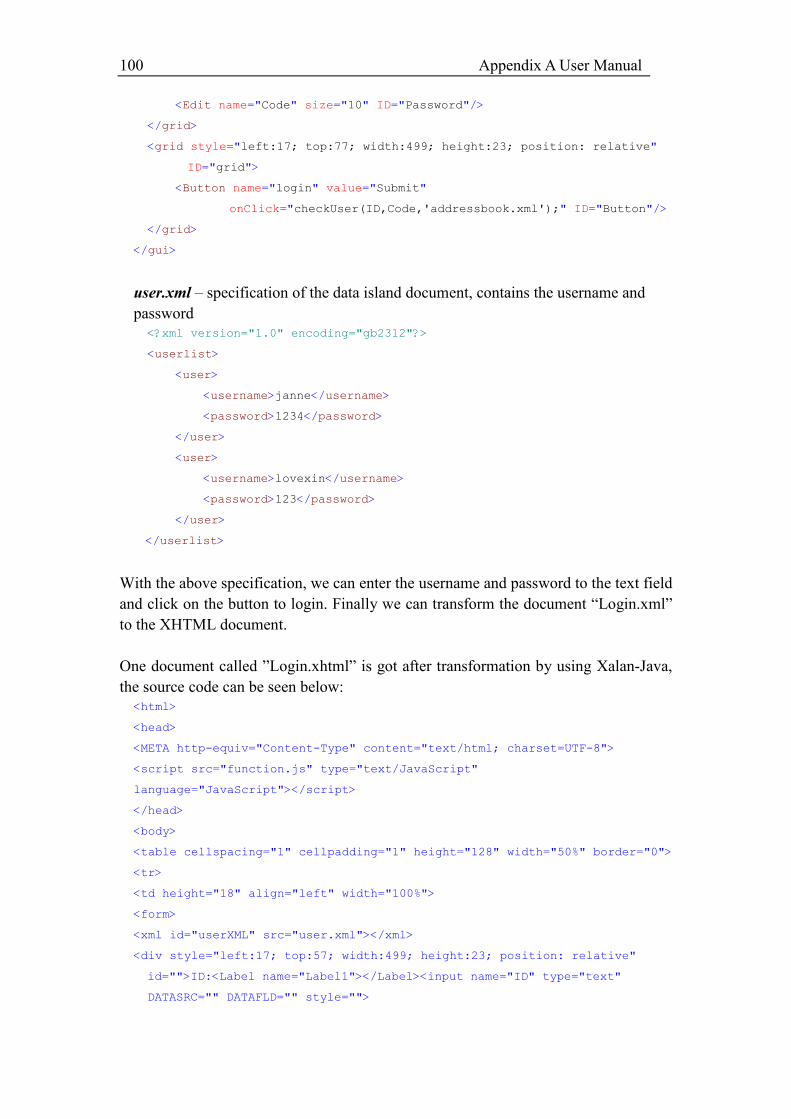
100 Appendix A User Manual
<Edit name="Code" size="10" ID="Password"/>
</grid>
<grid style="left:17; top:77; width:499; height:23; position: relative"
ID="grid">
<Button name="login" value="Submit"
onClick="checkUser(ID,Code,'addressbook.xml');" ID="Button"/>
</grid>
</gui>
user.xml – specification of the data island document, contains the username and
password
<?xml version="1.0" encoding="gb2312"?>
<userlist>
<user>
<username>janne</username>
<password>1234</password>
</user>
<user>
<username>lovexin</username>
<password>123</password>
</user>
</userlist>
With the above specification, we can enter the username and password to the text field
and click on the button to login. Finally we can transform the document “Login.xml”
to the XHTML document.
One document called ”Login.xhtml” is got after transformation by using Xalan-Java,
the source code can be seen below:
<html>
<head>
<META http-equiv="Content-Type" content="text/html; charset=UTF-8">
<script src="function.js" type="text/JavaScript"
language="JavaScript"></script>
</head>
<body>
<table cellspacing="1" cellpadding="1" height="128" width="50%" border="0">
<tr>
<td height="18" align="left" width="100%">
<form>
<xml id="userXML" src="user.xml"></xml>
<div style="left:17; top:57; width:499; height:23; position: relative"
id="">ID:<Label name="Label1"></Label><input name="ID" type="text"
DATASRC="" DATAFLD="" style="">
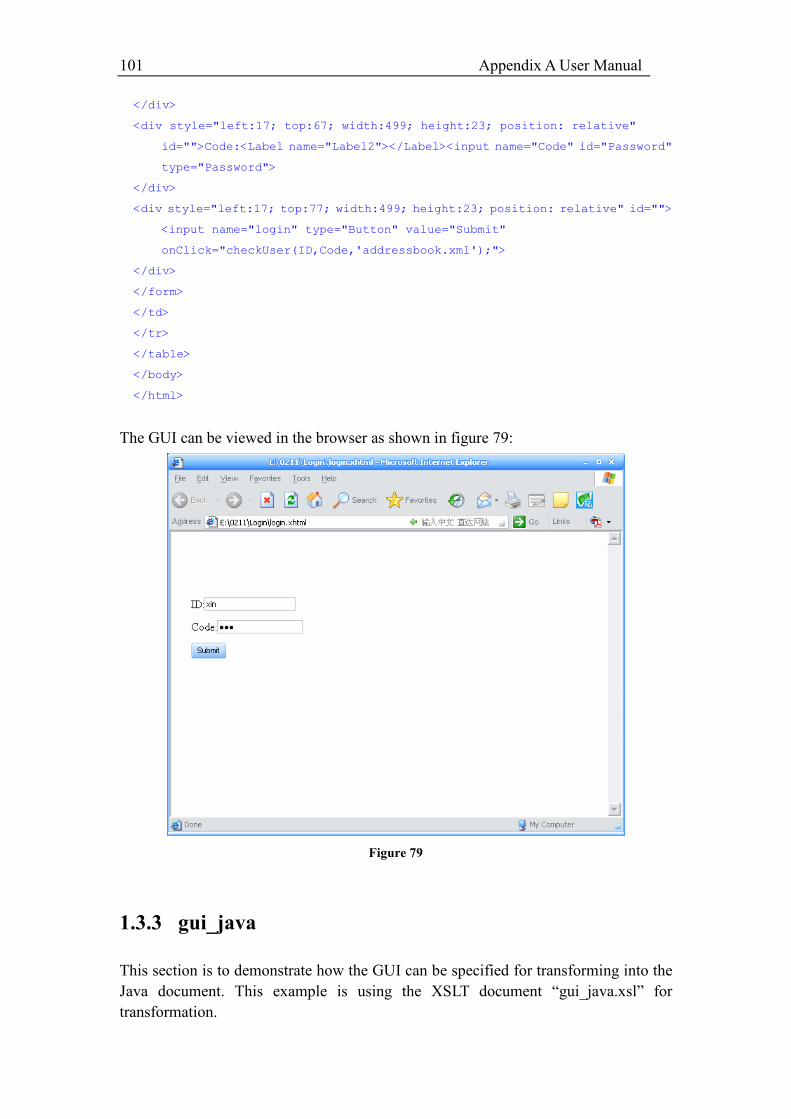
101 Appendix A User Manual
</div>
<div style="left:17; top:67; width:499; height:23; position: relative"
id="">Code:<Label name="Label2"></Label><input name="Code" id="Password"
type="Password">
</div>
<div style="left:17; top:77; width:499; height:23; position: relative" id="">
<input name="login" type="Button" value="Submit"
onClick="checkUser(ID,Code,'addressbook.xml');">
</div>
</form>
</td>
</tr>
</table>
</body>
</html>
The GUI can be viewed in the browser as shown in figure 79:
Figure 79
1.3.3 gui_java
This section is to demonstrate how the GUI can be specified for transforming into the
Java document. This example is using the XSLT document “gui_java.xsl” for
transformation.
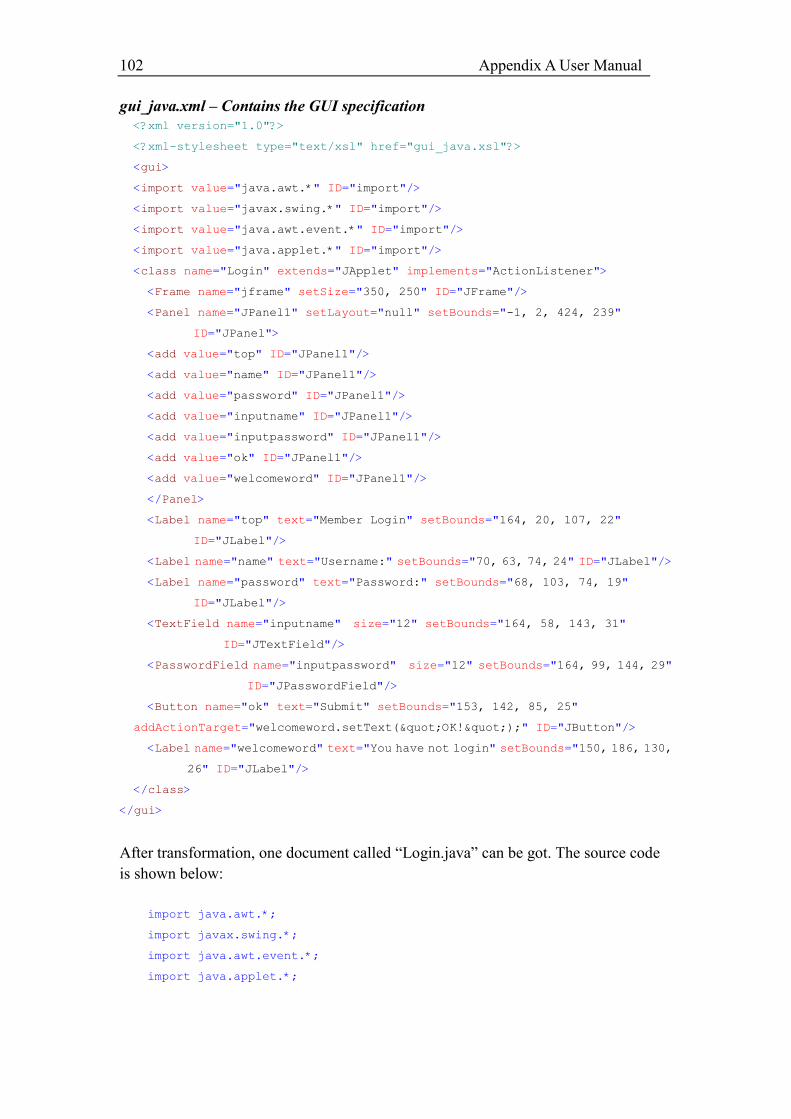
102 Appendix A User Manual
gui_java.xml – Contains the GUI specification
<?xml version="1.0"?>
<?xml-stylesheet type="text/xsl" href="gui_java.xsl"?>
<gui>
<import value="java.awt.*" ID="import"/>
<import value="javax.swing.*" ID="import"/>
<import value="java.awt.event.*" ID="import"/>
<import value="java.applet.*" ID="import"/>
<class name="Login" extends="JApplet" implements="ActionListener">
<Frame name="jframe" setSize="350, 250" ID="JFrame"/>
<Panel name="JPanel1" setLayout="null" setBounds="-1, 2, 424, 239"
ID="JPanel">
<add value="top" ID="JPanel1"/>
<add value="name" ID="JPanel1"/>
<add value="password" ID="JPanel1"/>
<add value="inputname" ID="JPanel1"/>
<add value="inputpassword" ID="JPanel1"/>
<add value="ok" ID="JPanel1"/>
<add value="welcomeword" ID="JPanel1"/>
</Panel>
<Label name="top" text="Member Login" setBounds="164, 20, 107, 22"
ID="JLabel"/>
<Label name="name" text="Username:" setBounds="70, 63, 74, 24" ID="JLabel"/>
<Label name="password" text="Password:" setBounds="68, 103, 74, 19"
ID="JLabel"/>
<TextField name="inputname" size="12" setBounds="164, 58, 143, 31"
ID="JTextField"/>
<PasswordField name="inputpassword" size="12" setBounds="164, 99, 144, 29"
ID="JPasswordField"/>
<Button name="ok" text="Submit" setBounds="153, 142, 85, 25"
addActionTarget="welcomeword.setText("OK!");" ID="JButton"/>
<Label name="welcomeword" text="You have not login" setBounds="150, 186, 130,
26" ID="JLabel"/>
</class>
</gui>
After transformation, one document called “Login.java” can be got. The source code
is shown below:
import java.awt.*;
import javax.swing.*;
import java.awt.event.*;
import java.applet.*;
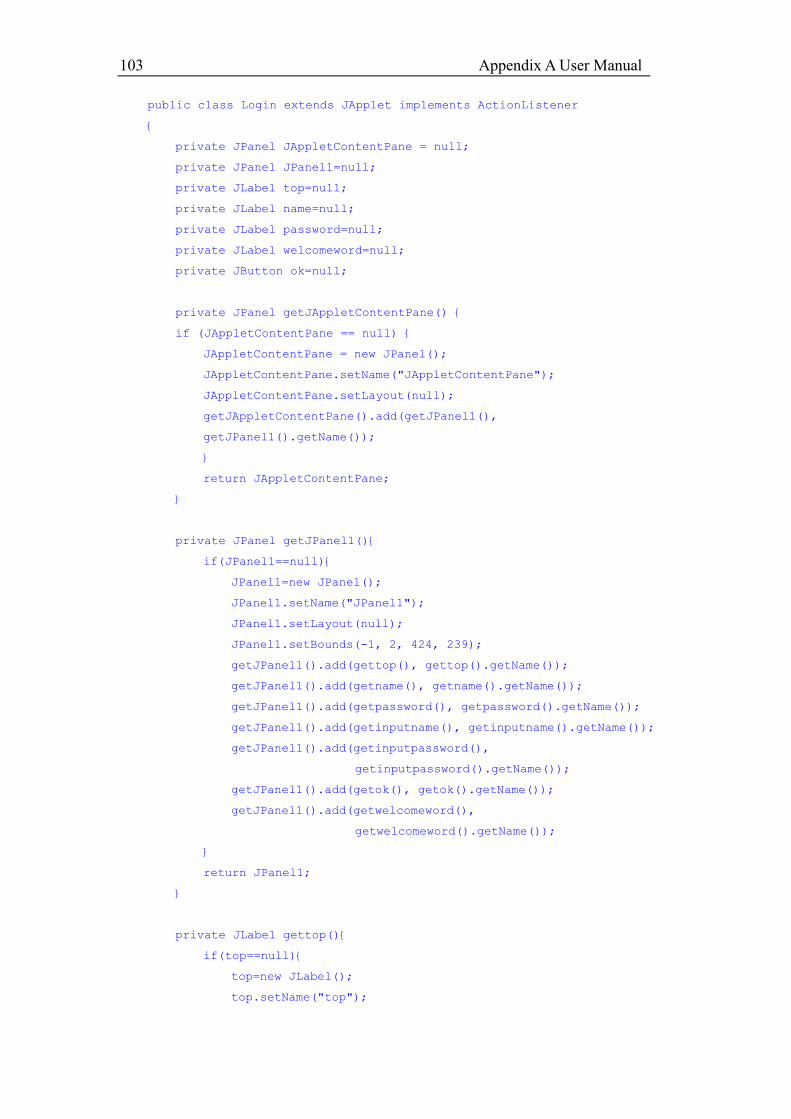
103 Appendix A User Manual
public class Login extends JApplet implements ActionListener
{
private JPanel JAppletContentPane = null;
private JPanel JPanel1=null;
private JLabel top=null;
private JLabel name=null;
private JLabel password=null;
private JLabel welcomeword=null;
private JButton ok=null;
private JPanel getJAppletContentPane() {
if (JAppletContentPane == null) {
JAppletContentPane = new JPanel();
JAppletContentPane.setName("JAppletContentPane");
JAppletContentPane.setLayout(null);
getJAppletContentPane().add(getJPanel1(),
getJPanel1().getName());
}
return JAppletContentPane;
}
private JPanel getJPanel1(){
if(JPanel1==null){
JPanel1=new JPanel();
JPanel1.setName("JPanel1");
JPanel1.setLayout(null);
JPanel1.setBounds(-1, 2, 424, 239);
getJPanel1().add(gettop(), gettop().getName());
getJPanel1().add(getname(), getname().getName());
getJPanel1().add(getpassword(), getpassword().getName());
getJPanel1().add(getinputname(), getinputname().getName());
getJPanel1().add(getinputpassword(),
getinputpassword().getName());
getJPanel1().add(getok(), getok().getName());
getJPanel1().add(getwelcomeword(),
getwelcomeword().getName());
}
return JPanel1;
}
private JLabel gettop(){
if(top==null){
top=new JLabel();
top.setName("top");
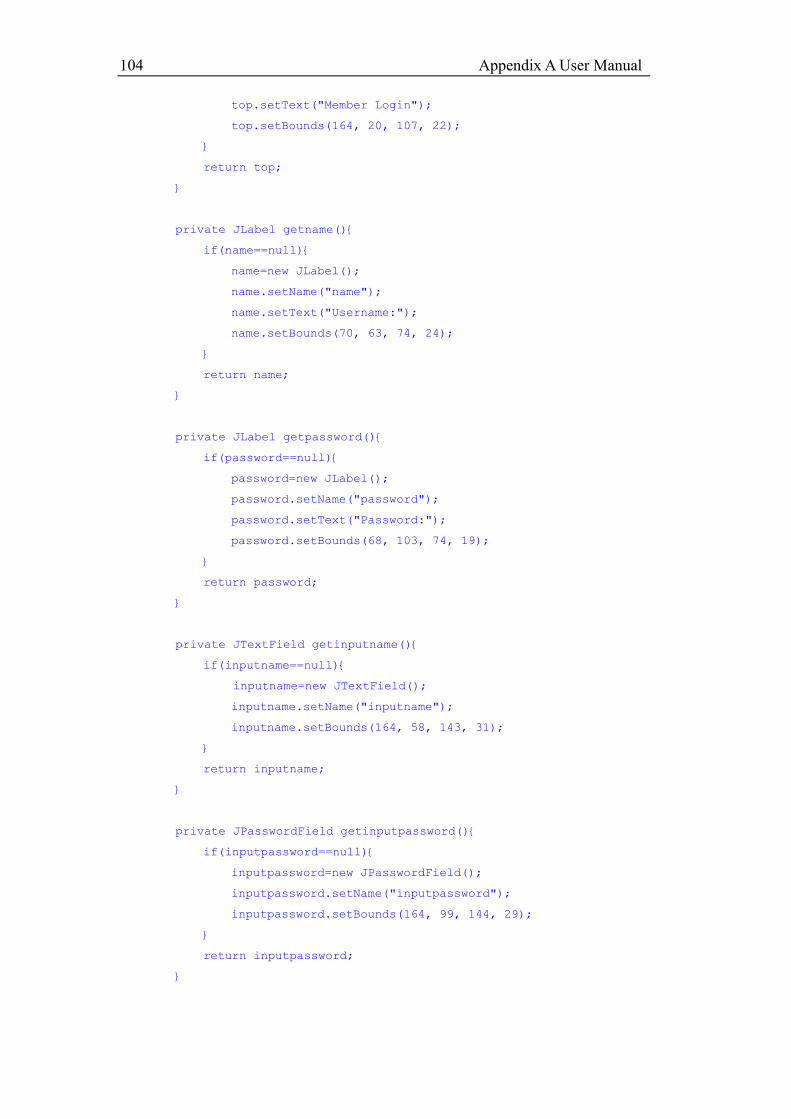
104 Appendix A User Manual
top.setText("Member Login");
top.setBounds(164, 20, 107, 22);
}
return top;
}
private JLabel getname(){
if(name==null){
name=new JLabel();
name.setName("name");
name.setText("Username:");
name.setBounds(70, 63, 74, 24);
}
return name;
}
private JLabel getpassword(){
if(password==null){
password=new JLabel();
password.setName("password");
password.setText("Password:");
password.setBounds(68, 103, 74, 19);
}
return password;
}
private JTextField getinputname(){
if(inputname==null){
inputname=new JTextField();
inputname.setName("inputname");
inputname.setBounds(164, 58, 143, 31);
}
return inputname;
}
private JPasswordField getinputpassword(){
if(inputpassword==null){
inputpassword=new JPasswordField();
inputpassword.setName("inputpassword");
inputpassword.setBounds(164, 99, 144, 29);
}
return inputpassword;
}

105 Appendix A User Manual
private JButton getok(){
if(ok==null){
ok=new JButton();
ok.setName("ok");
ok.setText("Submit");
ok.setBounds(153, 142, 85, 25);
ok.addActionListener(this);
}
return ok;
}
private JLabel getwelcomeword(){
if(welcomeword==null){
welcomeword=new JLabel();
welcomeword.setName("welcomeword");
welcomeword.setText("You have not login");
welcomeword.setBounds(150, 186, 130, 26);
}
return welcomeword;
}
public void init() {
setName("Login");
setSize(426, 240);
setContentPane(getJAppletContentPane());
}
public static void main(java.lang.String[] args) {
Login applet = new Login();
JFrame jframe = new JFrame("Applet");
jframe.getContentPane().add("Center", applet);
jframe.setSize(350, 250);
jframe.show();
applet.init();
applet.start();
}
public void actionPerformed(ActionEvent e)
{
if(e.getSource()==ok){
welcomeword.setText("OK!");
}
}
}
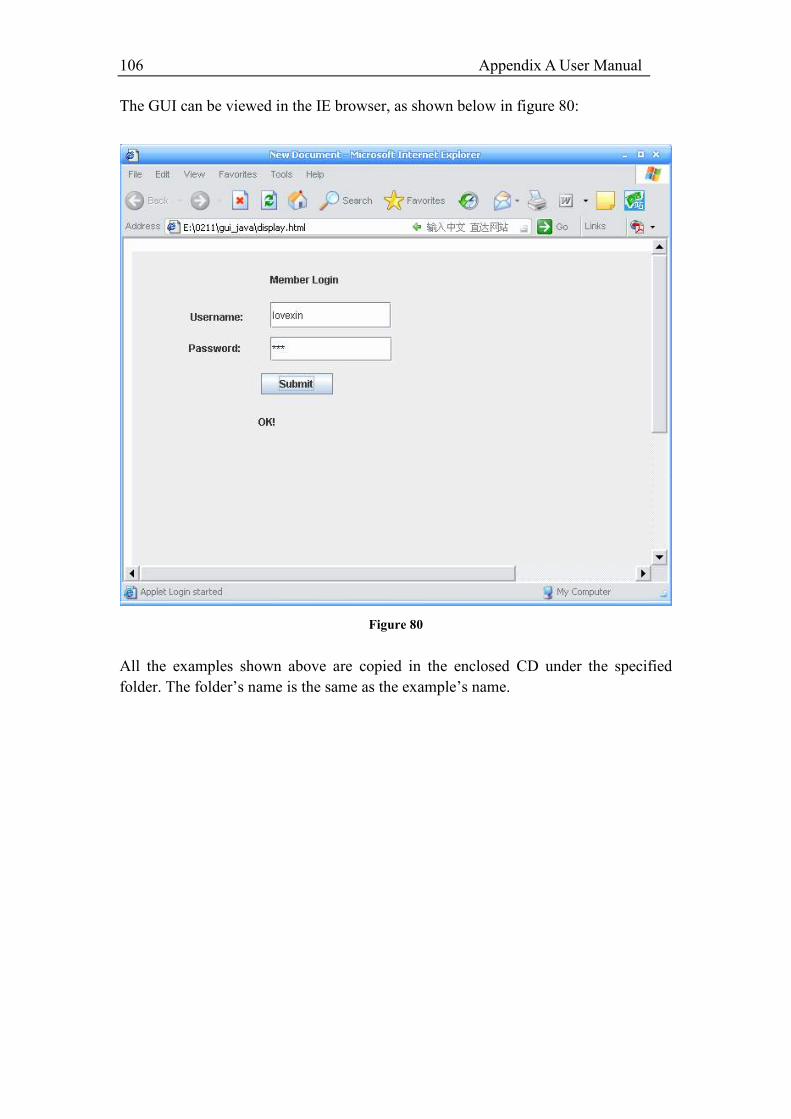
106 Appendix A User Manual
The GUI can be viewed in the IE browser, as shown below in figure 80:
Figure 80
All the examples shown above are copied in the enclosed CD under the specified
folder. The folder’s name is the same as the example’s name.
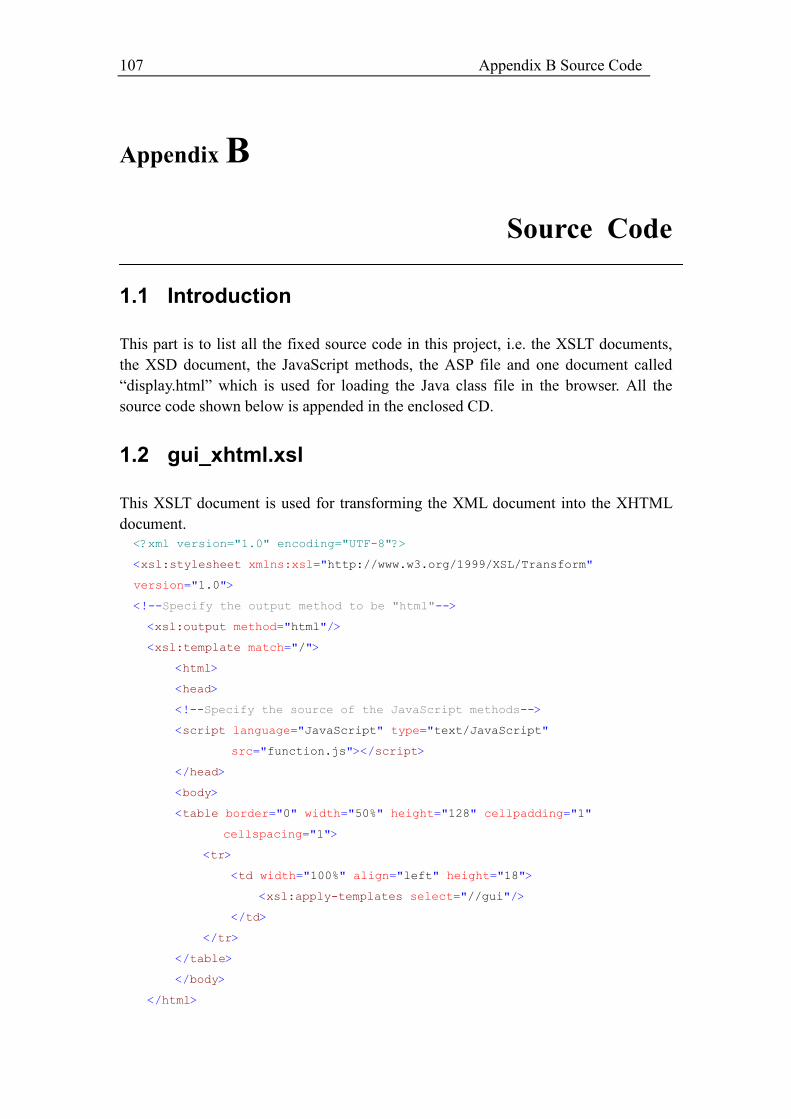
107 Appendix B Source Code
Appendix B
Source Code
1.1 Introduction
This part is to list all the fixed source code in this project, i.e. the XSLT documents,
the XSD document, the JavaScript methods, the ASP file and one document called
“display.html” which is used for loading the Java class file in the browser. All the
source code shown below is appended in the enclosed CD.
1.2 gui_xhtml.xsl
This XSLT document is used for transforming the XML document into the XHTML
document.
<?xml version="1.0" encoding="UTF-8"?>
<xsl:stylesheet xmlns:xsl="http://www.w3.org/1999/XSL/Transform"
version="1.0">
<!--Specify the output method to be "html"-->
<xsl:output method="html"/>
<xsl:template match="/">
<html>
<head>
<!--Specify the source of the JavaScript methods-->
<script language="JavaScript" type="text/JavaScript"
src="function.js"></script>
</head>
<body>
<table border="0" width="50%" height="128" cellpadding="1"
cellspacing="1">
<tr>
<td width="100%" align="left" height="18">
<xsl:apply-templates select="//gui"/>
</td>
</tr>
</table>
</body>
</html>
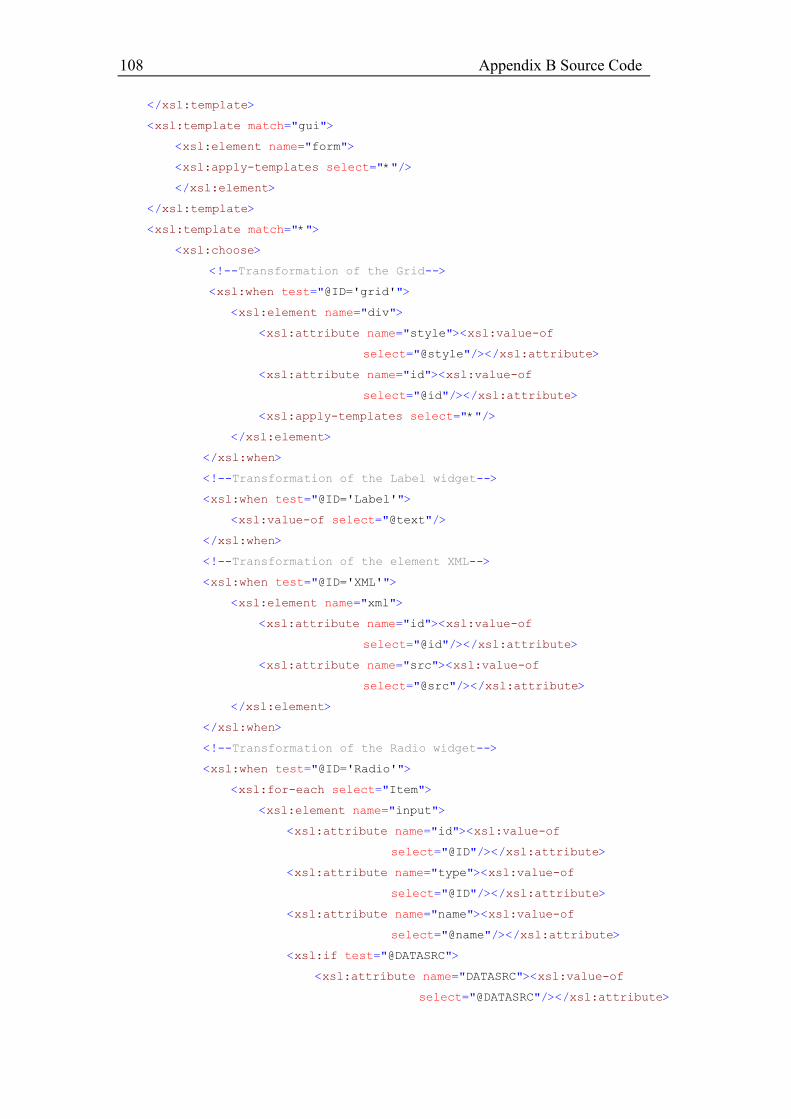
108 Appendix B Source Code
</xsl:template>
<xsl:template match="gui">
<xsl:element name="form">
<xsl:apply-templates select="*"/>
</xsl:element>
</xsl:template>
<xsl:template match="*">
<xsl:choose>
<!--Transformation of the Grid-->
<xsl:when test="@ID='grid'">
<xsl:element name="div">
<xsl:attribute name="style"><xsl:value-of
select="@style"/></xsl:attribute>
<xsl:attribute name="id"><xsl:value-of
select="@id"/></xsl:attribute>
<xsl:apply-templates select="*"/>
</xsl:element>
</xsl:when>
<!--Transformation of the Label widget-->
<xsl:when test="@ID='Label'">
<xsl:value-of select="@text"/>
</xsl:when>
<!--Transformation of the element XML-->
<xsl:when test="@ID='XML'">
<xsl:element name="xml">
<xsl:attribute name="id"><xsl:value-of
select="@id"/></xsl:attribute>
<xsl:attribute name="src"><xsl:value-of
select="@src"/></xsl:attribute>
</xsl:element>
</xsl:when>
<!--Transformation of the Radio widget-->
<xsl:when test="@ID='Radio'">
<xsl:for-each select="Item">
<xsl:element name="input">
<xsl:attribute name="id"><xsl:value-of
select="@ID"/></xsl:attribute>
<xsl:attribute name="type"><xsl:value-of
select="@ID"/></xsl:attribute>
<xsl:attribute name="name"><xsl:value-of
select="@name"/></xsl:attribute>
<xsl:if test="@DATASRC">
<xsl:attribute name="DATASRC"><xsl:value-of
select="@DATASRC"/></xsl:attribute>
109 Appendix B Source Code
</xsl:if>
<xsl:if test="@DATAFLD">
<xsl:attribute name="DATAFLD"><xsl:value-of
select="@DATAFLD"/></xsl:attribute>
</xsl:if>
<xsl:attribute name="value"><xsl:value-of
select="@value"/></xsl:attribute>
<xsl:value-of select="@value"/>
</xsl:element>
</xsl:for-each>
</xsl:when>
<!--Transformation of the Checkbox widget-->
<xsl:when test="@ID='Checkbox'">
<xsl:for-each select="Item">
<xsl:element name="input">
<xsl:attribute name="type"><xsl:value-of
select="@ID"/></xsl:attribute>
<xsl:attribute name="name"><xsl:value-of
select="@name"/></xsl:attribute>
<xsl:if test="@DATASRC">
<xsl:attribute name="DATASRC"><xsl:value-of
select="@DATASRC"/></xsl:attribute>
</xsl:if>
<xsl:if test="@DATAFLD">
<xsl:attribute name="DATAFLD"><xsl:value-of
select="@DATAFLD"/></xsl:attribute>
</xsl:if>
<xsl:attribute name="value"><xsl:value-of
select="@value"/></xsl:attribute>
<xsl:value-of select="@value"/>
</xsl:element>
</xsl:for-each>
</xsl:when>
<!--Transformation of the Drop-down menu widget-->
<xsl:when test="@ID='Select'">
<xsl:element name="select">
<xsl:attribute name="size"><xsl:value-of
select="@size"/></xsl:attribute>
<xsl:attribute name="name"><xsl:value-of
select="@name"/></xsl:attribute>
<xsl:if test="@DATASRC">
<xsl:attribute name="DATASRC"><xsl:value-of
select="@DATASRC"/></xsl:attribute>
</xsl:if>
110 Appendix B Source Code
<xsl:if test="@DATAFLD">
<xsl:attribute name="DATAFLD"><xsl:value-of
select="@DATAFLD"/></xsl:attribute>
</xsl:if>
<xsl:for-each select="Item">
<xsl:element name="option">
<xsl:value-of select="@value"/>
</xsl:element>
</xsl:for-each>
</xsl:element>
</xsl:when>
<!--Transformation of the textbox widget-->
<xsl:when test="@ID='Edit'">
<xsl:element name="input">
<xsl:attribute name="name"><xsl:value-of
select="@name"/></xsl:attribute>
<xsl:attribute name="id"><xsl:value-of
select="@DATAFLD"/></xsl:attribute>
<xsl:attribute name="type">text</xsl:attribute>
<xsl:attribute name="DATASRC"><xsl:value-of
select="@DATASRC"/></xsl:attribute>
<xsl:attribute name="DATAFLD"><xsl:value-of
select="@DATAFLD"/></xsl:attribute>
<xsl:attribute name="style"><xsl:value-of
select="@style"/></xsl:attribute>
<xsl:if test="@value">
<xsl:attribute name="value"><xsl:value-of
select="@value"/></xsl:attribute>
</xsl:if>
<xsl:if test="@onClick">
<xsl:attribute name="onClick"><xsl:value-of
select="@onClick"/></xsl:attribute>
</xsl:if>
<xsl:if test="@onMouseOut">
<xsl:attribute name="onMouseOut"><xsl:value-of
select="@onMouseOut"/></xsl:attribute>
</xsl:if>
</xsl:element>
</xsl:when>
<!--Transformation of the Password Textbox widget-->
<xsl:when test="@ID='Password'">
<xsl:element name="input">
<xsl:attribute name="name"><xsl:value-of
select="@name"/></xsl:attribute>
111 Appendix B Source Code
<xsl:attribute name="id"><xsl:value-of
select="@ID"/></xsl:attribute>
<xsl:attribute name="type"><xsl:value-of
select="@ID"/></xsl:attribute>
<xsl:if test="@onClick">
<xsl:attribute name="onClick"><xsl:value-of
select="@onClick"/></xsl:attribute>
</xsl:if>
</xsl:element>
</xsl:when>
<!--Transformation of the listbox widget-->
<xsl:when test="@ID='Listbox'">
<xsl:element name="textarea">
<xsl:attribute name="name"><xsl:value-of
select="@name"/></xsl:attribute>
<xsl:attribute name="rows"><xsl:value-of
select="@rows"/></xsl:attribute>
<xsl:attribute name="cols"><xsl:value-of
select="@cols"/></xsl:attribute>
<xsl:attribute name="DATASRC"><xsl:value-of
select="@DATASRC"/></xsl:attribute>
<xsl:attribute name="DATAFLD"><xsl:value-of
select="@DATAFLD"/></xsl:attribute>
</xsl:element>
</xsl:when>
<!--Transformation of the Button widget-->
<xsl:when test="@ID='Button'">
<xsl:element name="input">
<xsl:attribute name="name"><xsl:value-of
select="@name"/></xsl:attribute>
<xsl:attribute name="type"><xsl:value-of
select="@ID"/></xsl:attribute>
<xsl:attribute name="value"><xsl:value-of
select="@value"/></xsl:attribute>
<xsl:if test="@type">
<xsl:attribute name="type"><xsl:value-of
select="@type"/></xsl:attribute>
</xsl:if>
<xsl:if test="@onClick">
<xsl:attribute name="onClick"><xsl:value-of
select="@onClick"/></xsl:attribute>
</xsl:if>
</xsl:element>
</xsl:when>
112 Appendix B Source Code
</xsl:choose>
</xsl:template>
</xsl:stylesheet>
1.3 gui_java.xsl
This XSLT document is used for transforming the XML document into the Java
document.
<?xml version="1.0"?>
<xsl:stylesheet version="1.0"
xmlns:xsl="http://www.w3.org/1999/XSL/Transform">
<!--Specify the output method to be plain text-->
<xsl:output method = "text"/>
<xsl:template match="gui">
<xsl:for-each select="import">
<xsl:value-of select="@ID"/><xsl:text> </xsl:text><xsl:value-of
select="@value"/>;
</xsl:for-each>
<xsl:apply-templates select="class"/>
</xsl:template>
<!--Specify a public class-->
<xsl:template match="class">
public class <xsl:value-of select="@name"/><xsl:text> </xsl:text><xsl:if
test="@extends">extends <xsl:value-of select="@extends"/> <xsl:if
test="implements"> implements <xsl:value-of
select="@implements"/></xsl:if>{
private JPanel JAppletContentPane = null;
<xsl:for-each select="//Panel">
private <xsl:value-of select="@ID"/><xsl:text> </xsl:text><xsl:value-of
select="@name"/>=null;
</xsl:for-each>
<xsl:for-each select="//Label">
private <xsl:value-of select="@ID"/><xsl:text> </xsl:text><xsl:value-of
select="@name"/>=null;
</xsl:for-each>
<xsl:for-each select="//TextField">
private <xsl:value-of select="@ID"/><xsl:text> </xsl:text><xsl:value-of
select="@name"/>=null;
</xsl:for-each>
<xsl:for-each select="//PasswordField">
<xsl:value-of select="@ID"/><xsl:text> </xsl:text><xsl:value-of
select="@name"/>=null;
</xsl:for-each>
<xsl:for-each select="//Button">
113 Appendix B Source Code
private <xsl:value-of select="@ID"/><xsl:text> </xsl:text><xsl:value-of
select="@name"/>=null;
</xsl:for-each>
<xsl:for-each select="//Radio">
private <xsl:value-of select="@ID"/><xsl:text> </xsl:text><xsl:value-of
select="@name"/>=null;
</xsl:for-each>
<xsl:for-each select="//CheckBox">
private <xsl:value-of select="@ID"/><xsl:text> </xsl:text><xsl:value-of
select="@name"/>=null;
</xsl:for-each>
<xsl:for-each select="//TextArea">
private <xsl:value-of select="@ID"/><xsl:text> </xsl:text><xsl:value-of
select="@name"/>=null;
</xsl:for-each>
JPanel getJAppletContentPane() {
if (JAppletContentPane == null) {
JAppletContentPane = new JPanel();
JAppletContentPane.setName("JAppletContentPane");
JAppletContentPane.setLayout(null);
getJAppletContentPane().add(<xsl:for-each
select="//Panel">get<xsl:value-of select="@name"/>(), get<xsl:value-of
select="@name"/>().getName()</xsl:for-each>);
}
return JAppletContentPane;
}
<xsl:apply-templates select="*"/>
public void init() {
setName("<xsl:value-of select="@name"/>");
setSize(426, 240);
setContentPane(getJAppletContentPane());
}
<!--Specify a class for transforming the Frame-->
public static void main(java.lang.String[] args) {
<xsl:value-of select="@name"/> applet = new <xsl:value-of
select="@name"/>();
JFrame <xsl:for-each select="//Frame"><xsl:value-of
select="@name"/></xsl:for-each> = new JFrame("Applet");
<xsl:for-each select="//Frame"><xsl:value-of
select="@name"/></xsl:for-each>.getContentPane().add("Center",
applet);
<xsl:for-each select="//Frame"><xsl:value-of
select="@name"/></xsl:for-each>.setSize(350, 250);
114 Appendix B Source Code
<xsl:for-each select="//Frame"><xsl:value-of
select="@name"/></xsl:for-each>.show();
applet.init();
applet.start();
}
<!--Specify a class for transforming the action-->
<xsl:for-each select="//Button">
public void actionPerformed(ActionEvent e)
{
if(e.getSource()==<xsl:value-of select="@name"/>){
<xsl:value-of select="@addActionTarget"/>
}
}
</xsl:for-each>
}
</xsl:template>
<xsl:template match="*">
<xsl:choose>
<!--Specify a class for transforming the Label widget-->
<xsl:when test="@ID='JLabel'">
private <xsl:value-of select="@ID"/> get<xsl:value-of select="@name"/>(){
if(<xsl:value-of select="@name"/>==null){
<xsl:value-of select="@name"/>=new <xsl:value-of select="@ID"/>();
<xsl:value-of select="@name"/>.setName("<xsl:value-of
select="@name"/>");
<xsl:value-of select="@name"/>.setText("<xsl:value-of
select="@text"/>");
<xsl:value-of select="@name"/>.setBounds(<xsl:value-of
select="@setBounds"/>);
}
return <xsl:value-of select="@name"/>;
}
</xsl:when>
<!--Specify a class for transforming the textbox widget-->
<xsl:when test="@ID='JTextField'">
private <xsl:value-of select="@ID"/> get<xsl:value-of select="@name"/>(){
if(<xsl:value-of select="@name"/>==null){
<xsl:value-of select="@name"/>=new <xsl:value-of select="@ID"/>();
<xsl:value-of select="@name"/>.setName("<xsl:value-of
select="@name"/>");
<xsl:value-of select="@name"/>.setBounds(<xsl:value-of
select="@setBounds"/>);
}
return <xsl:value-of select="@name"/>;
115 Appendix B Source Code
}
</xsl:when>
<!--Specify a class for transforming the Password textbox widget-->
<xsl:when test="@ID='JPasswordField'">
private <xsl:value-of select="@ID"/> get<xsl:value-of select="@name"/>(){
if(<xsl:value-of select="@name"/>==null){
<xsl:value-of select="@name"/>=new <xsl:value-of select="@ID"/>();
<xsl:value-of select="@name"/>.setName("<xsl:value-of
select="@name"/>");
<xsl:value-of select="@name"/>.setBounds(<xsl:value-of
select="@setBounds"/>);
}
return <xsl:value-of select="@name"/>;
}
</xsl:when>
<!--Specify a class for transforming the Button widget-->
<xsl:when test="@ID='JButton'">
private <xsl:value-of select="@ID"/> get<xsl:value-of select="@name"/>(){
if(<xsl:value-of select="@name"/>==null){
<xsl:value-of select="@name"/>=new <xsl:value-of select="@ID"/>();
<xsl:value-of select="@name"/>.setName("<xsl:value-of
select="@name"/>");
<xsl:value-of select="@name"/>.setText("<xsl:value-of
select="@text"/>");
<xsl:value-of select="@name"/>.setBounds(<xsl:value-of
select="@setBounds"/>);
<xsl:value-of select="@name"/>.addActionListener(this);
}
return <xsl:value-of select="@name"/>;
}
</xsl:when>
<xsl:when test="@ID='JPanel'">
private <xsl:value-of select="@ID"/> get<xsl:value-of select="@name"/>(){
if(<xsl:value-of select="@name"/>==null){
<xsl:value-of select="@name"/>=new <xsl:value-of select="@ID"/>();
<xsl:value-of select="@name"/>.setName("<xsl:value-of
select="@name"/>");
<xsl:value-of select="@name"/>.setLayout(<xsl:value-of
select="@setLayout"/>);
<xsl:if test="@setBounds">
<xsl:value-of select="@name"/>.setBounds(<xsl:value-of
select="@setBounds"/>);
</xsl:if>
<xsl:for-each select="add">
116 Appendix B Source Code
<xsl:value-of select="@ID"/>().add(get<xsl:value-of
select="@value"/>(), get<xsl:value-of
select="@value"/>().getName());
</xsl:for-each>
}
return <xsl:value-of select="@name"/>;
}
</xsl:when>
</xsl:choose>
</xsl:template>
</xsl:stylesheet>
1.4 gui.xsd
This section contains the soure code of the XSD document, which is used to validate
the GUI specifications.
<?xml version="1.0" encoding="UTF-8"?>
<xs:schema xmlns:xs="http://www.w3.org/2001/XMLSchema"
elementFormDefault="qualified" attributeFormDefault="unqualified">
<xs:element name="gui" type="GUI"/>
<xs:complexType name="GUI">
<xs:sequence>
<xs:element name="XML" type="XML" minOccurs="0"
maxOccurs="unbounded"/>
<xs:element name="grid" type="Grid" minOccurs="0"
maxOccurs="unbounded"/>
</xs:sequence>
</xs:complexType>
<xs:complexType name="Grid">
<xs:sequence>
<xs:element name="Label" type="LABEL" minOccurs="0"
maxOccurs="unbounded"/>
<xs:element name="Edit" type="EDIT" minOccurs="0"
maxOccurs="unbounded"/>
<xs:element name="Checkbox" type="CHECKBOX" minOccurs="0"
maxOccurs="unbounded"/>
<xs:element name="Select" type="SELECT" minOccurs="0"
maxOccurs="unbounded"/>
<xs:element name="Radio" type="RADIO" minOccurs="0"
maxOccurs="unbounded"/>
<xs:element name="Button" type="BUTTON" minOccurs="0"
maxOccurs="unbounded"/>
<xs:element name="Listbox" type="TEXTAREA" minOccurs="0"
maxOccurs="unbounded"/>
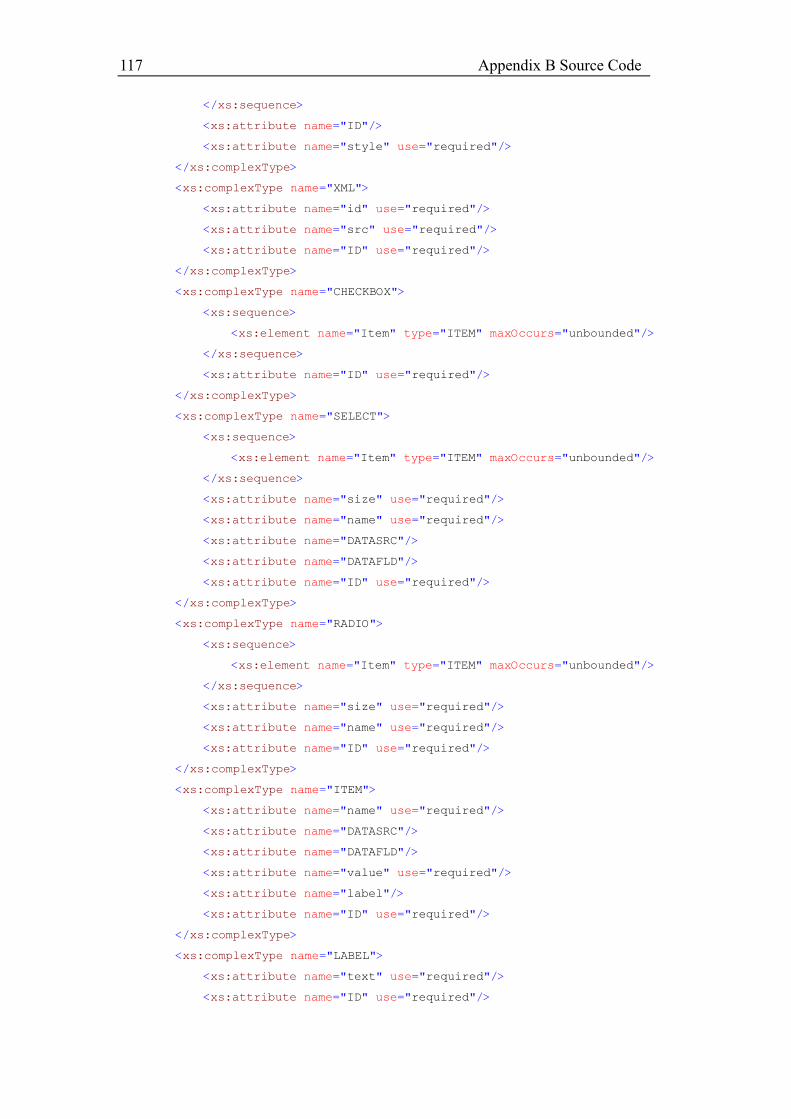
117 Appendix B Source Code
</xs:sequence>
<xs:attribute name="ID"/>
<xs:attribute name="style" use="required"/>
</xs:complexType>
<xs:complexType name="XML">
<xs:attribute name="id" use="required"/>
<xs:attribute name="src" use="required"/>
<xs:attribute name="ID" use="required"/>
</xs:complexType>
<xs:complexType name="CHECKBOX">
<xs:sequence>
<xs:element name="Item" type="ITEM" maxOccurs="unbounded"/>
</xs:sequence>
<xs:attribute name="ID" use="required"/>
</xs:complexType>
<xs:complexType name="SELECT">
<xs:sequence>
<xs:element name="Item" type="ITEM" maxOccurs="unbounded"/>
</xs:sequence>
<xs:attribute name="size" use="required"/>
<xs:attribute name="name" use="required"/>
<xs:attribute name="DATASRC"/>
<xs:attribute name="DATAFLD"/>
<xs:attribute name="ID" use="required"/>
</xs:complexType>
<xs:complexType name="RADIO">
<xs:sequence>
<xs:element name="Item" type="ITEM" maxOccurs="unbounded"/>
</xs:sequence>
<xs:attribute name="size" use="required"/>
<xs:attribute name="name" use="required"/>
<xs:attribute name="ID" use="required"/>
</xs:complexType>
<xs:complexType name="ITEM">
<xs:attribute name="name" use="required"/>
<xs:attribute name="DATASRC"/>
<xs:attribute name="DATAFLD"/>
<xs:attribute name="value" use="required"/>
<xs:attribute name="label"/>
<xs:attribute name="ID" use="required"/>
</xs:complexType>
<xs:complexType name="LABEL">
<xs:attribute name="text" use="required"/>
<xs:attribute name="ID" use="required"/>
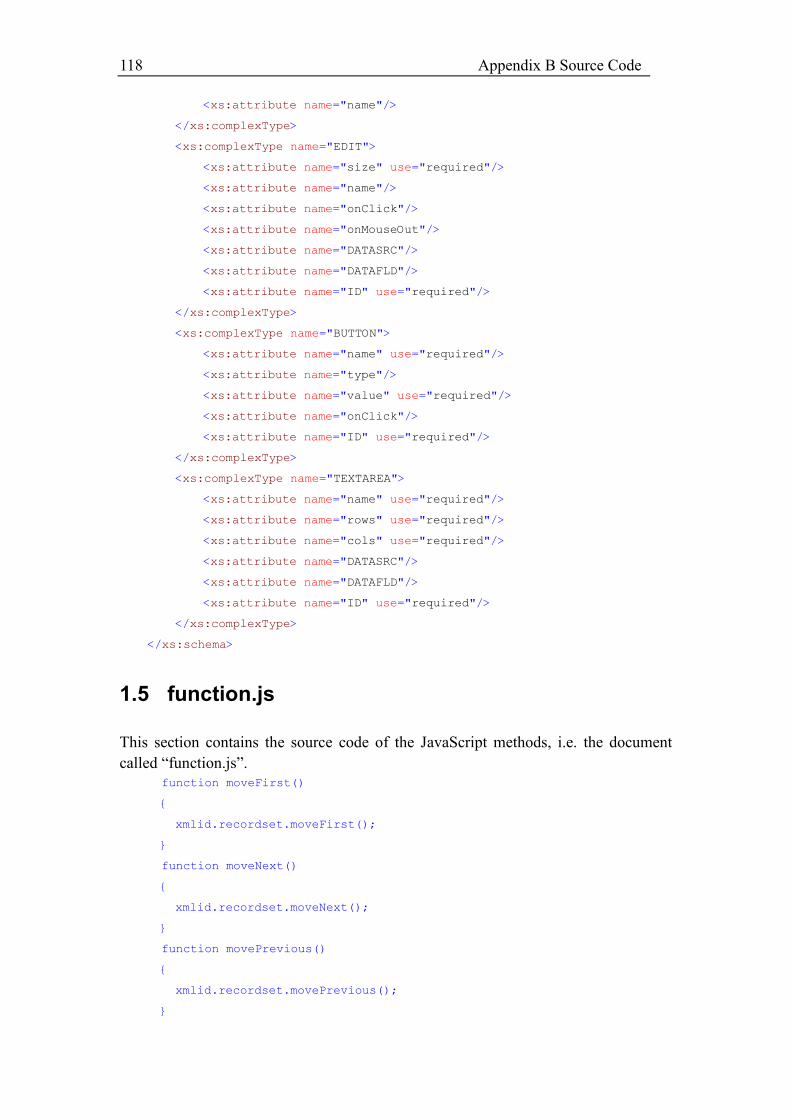
118 Appendix B Source Code
<xs:attribute name="name"/>
</xs:complexType>
<xs:complexType name="EDIT">
<xs:attribute name="size" use="required"/>
<xs:attribute name="name"/>
<xs:attribute name="onClick"/>
<xs:attribute name="onMouseOut"/>
<xs:attribute name="DATASRC"/>
<xs:attribute name="DATAFLD"/>
<xs:attribute name="ID" use="required"/>
</xs:complexType>
<xs:complexType name="BUTTON">
<xs:attribute name="name" use="required"/>
<xs:attribute name="type"/>
<xs:attribute name="value" use="required"/>
<xs:attribute name="onClick"/>
<xs:attribute name="ID" use="required"/>
</xs:complexType>
<xs:complexType name="TEXTAREA">
<xs:attribute name="name" use="required"/>
<xs:attribute name="rows" use="required"/>
<xs:attribute name="cols" use="required"/>
<xs:attribute name="DATASRC"/>
<xs:attribute name="DATAFLD"/>
<xs:attribute name="ID" use="required"/>
</xs:complexType>
</xs:schema>
1.5 function.js
This section contains the source code of the JavaScript methods, i.e. the document
called “function.js”.
function moveFirst()
{
xmlid.recordset.moveFirst();
}
function moveNext()
{
xmlid.recordset.moveNext();
}
function movePrevious()
{
xmlid.recordset.movePrevious();
}
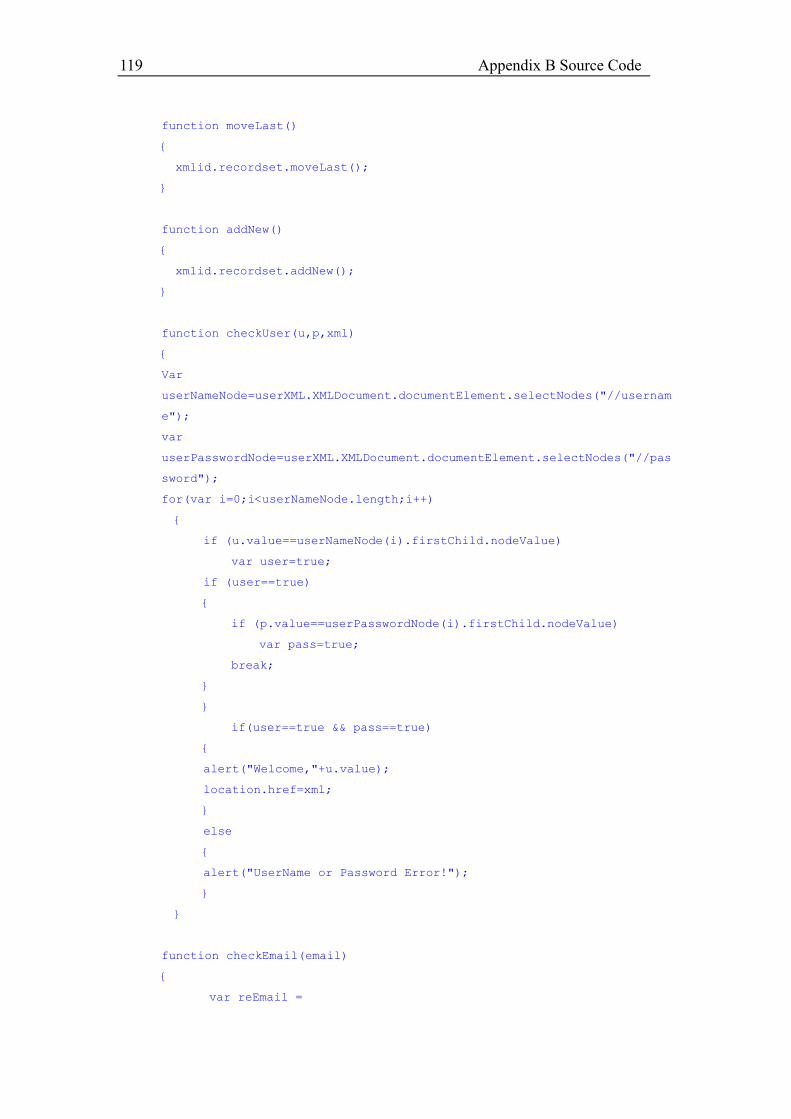
119 Appendix B Source Code
function moveLast()
{
xmlid.recordset.moveLast();
}
function addNew()
{
xmlid.recordset.addNew();
}
function checkUser(u,p,xml)
{
Var
userNameNode=userXML.XMLDocument.documentElement.selectNodes("//usernam
e");
var
userPasswordNode=userXML.XMLDocument.documentElement.selectNodes("//pas
sword");
for(var i=0;i<userNameNode.length;i++)
{
if (u.value==userNameNode(i).firstChild.nodeValue)
var user=true;
if (user==true)
{
if (p.value==userPasswordNode(i).firstChild.nodeValue)
var pass=true;
break;
}
}
if(user==true && pass==true)
{
alert("Welcome,"+u.value);
location.href=xml;
}
else
{
alert("UserName or Password Error!");
}
}
function checkEmail(email)
{
var reEmail =
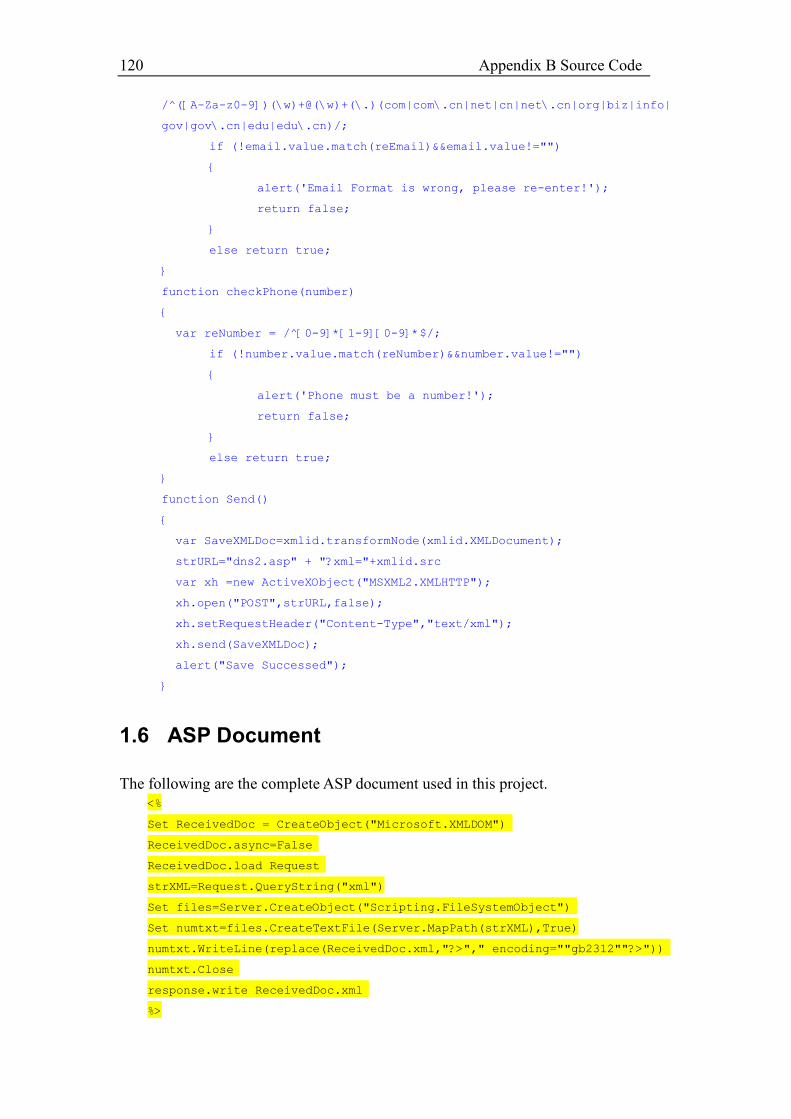
120 Appendix B Source Code
/^([A-Za-z0-9])(\w)+@(\w)+(\.)(com|com\.cn|net|cn|net\.cn|org|biz|info|
gov|gov\.cn|edu|edu\.cn)/;
if (!email.value.match(reEmail)&&email.value!="")
{
alert('Email Format is wrong, please re-enter!');
return false;
}
else return true;
}
function checkPhone(number)
{
var reNumber = /^[0-9]*[1-9][0-9]*$/;
if (!number.value.match(reNumber)&&number.value!="")
{
alert('Phone must be a number!');
return false;
}
else return true;
}
function Send()
{
var SaveXMLDoc=xmlid.transformNode(xmlid.XMLDocument);
strURL="dns2.asp" + "?xml="+xmlid.src
var xh =new ActiveXObject("MSXML2.XMLHTTP");
xh.open("POST",strURL,false);
xh.setRequestHeader("Content-Type","text/xml");
xh.send(SaveXMLDoc);
alert("Save Successed");
}
1.6 ASP Document
The following are the complete ASP document used in this project.
<%
Set ReceivedDoc = CreateObject("Microsoft.XMLDOM")
ReceivedDoc.async=False
ReceivedDoc.load Request
strXML=Request.QueryString("xml")
Set files=Server.CreateObject("Scripting.FileSystemObject")
Set numtxt=files.CreateTextFile(Server.MapPath(strXML),True)
numtxt.WriteLine(replace(ReceivedDoc.xml,"?>"," encoding=""gb2312""?>"))
numtxt.Close
response.write ReceivedDoc.xml
%>
121 Appendix B Source Code
1.7 Lai.xhtml
This is the source code for the acceptance test part on page 74.
<html>
<head>
<META http-equiv="Content-Type" content="text/html; charset=UTF-8">
<script src="function.js" type="text/JavaScript"
language="JavaScript"></script>
</head>
<body>
<table cellspacing="1" cellpadding="1" height="128" width="50%" border="0">
<tr>
<td height="18" align="left" width="100%">
<form>
<xml id="xmlid" src="company.xml"></xml>
<div style="left: 17; top: 37; width: 499; height: 23; position: relative"
id="">Lai's company<Label name=""></Label>
</div>
<div style="left: 17; top: 57; width: 499; height: 23; position: relative"
id="">Employee ID:<Label name="Label2"></Label><input name=""
id="employeeID" type="text" DATASRC="#xmlid" DATAFLD="employeeID"
style="">
</div>
<div style="left: 17; top: 67; width: 499; height: 23; position: relative"
id="">Employee Name:<Label name="Label3"></Label><input name=""
id="name" type="text" DATASRC="#xmlid" DATAFLD="name" style="">
</div>
<div style="left: 17; top: 77; width: 499; height: 23; position: relative"
id="">Tele:<Label name="Label4"></Label><input name="" id="tele"
type="text" DATASRC="#xmlid" DATAFLD="tele" style=""
onMouseOut="checkPhone(tele)">
</div>
<div style="left: 17; top: 87; width: 499; height: 23; position: relative"
id="">Email:<Label name="Label5"></Label><input name="" id="email"
type="text" DATASRC="#xmlid" DATAFLD="email" style=""
onMouseOut="checkEmail(email)">
</div>
<div style="left: 17; top: 97; width: 499; height: 23; position: relative"
id="">Address:<Label name="Label6"></Label><input name="" id="address"
type="text" DATASRC="#xmlid" DATAFLD="address" style="">
</div>
<div style="left:17;top:107;width:499;height:23;align='center';position:
relative" id="">Sex:<Label name="Label7"></Label><input id="Radio"
type="Radio" name="sex" DATASRC="#xmlid" DATAFLD="sex"
122 Appendix B Source Code
value="male">male</input><input id="Radio" type="Radio" name="sex"
DATASRC="#xmlid" DATAFLD="sex" value="female">female</input>
</div>
<div style="left:17;top:107;width:499;height:23;align='center';position:
relative" id="">Nationality:<Label name="Label8"></Label><input
type="Checkbox" name="checkbox1" DATASRC="#xmlid" DATAFLD="na"
value="China">China</input><input type="Checkbox" name="checkbox2"
DATASRC="#xmlid" DATAFLD="na1" value="Denmark">Denmark</input>
</div>
<div style="left: 17; top: 117; width: 499; height: 23; position: relative"
id="">Product description:<Label name="Label9"></Label>
</div>
<div style="left: 17; top: 127; width: 499; height: 23; position: relative"
id="">
<textarea name="S1" rows="6" cols="30" DATASRC="#xmlid"
DATAFLD="des"></textarea>
</div>
<div style="left:17;top:137;width:499;height:23;position: relative" id="">
<input name="first" type="Button" value="first"
onClick="moveFirst()"><input name="previous" type="Button" value="prev"
onClick="movePrevious()"><input name="next" type="Button" value="next"
onClick="moveNext()"><input name="last" type="Button" value="last"
onClick="moveLast()">
</div>
<div style="left:17;top:147;width:499;height:23;position: relative" id="">
<input name="add" type="Button" value="AddNew" onClick="addNew()">
</div>
<div style="left:17;top:157;width:499;height:23;align='center';position:
relative" id="">
<input name="cc" type="Button" value="Save" onClick="Send();">
</div>
</form>
</td>
</tr>
</table>
</body>
</html>
123 Appendix B Source Code
1.8 Lai_java.xml
<?xml version="1.0"?>
<?xml-stylesheet type="text/xsl" href="gui_java.xsl"?>
<gui>
<import value="java.awt.*" ID="import"/>
<import value="javax.swing.*" ID="import"/>
<import value="java.awt.event.*" ID="import"/>
<import value="java.applet.*" ID="import"/>
<class name="Lai" extends="JApplet" implements="ActionListener">
<Frame name="jframe" setSize="350, 250" ID="JFrame"/>
<Panel name="JPanel1" setLayout="null" setBounds="-1, 2, 424, 239"
ID="JPanel">
<add value="top" ID="JPanel1"/>
<add value="name" ID="JPanel1"/>
<add value="password" ID="JPanel1"/>
<add value="inputname" ID="JPanel1"/>
<add value="inputpassword" ID="JPanel1"/>
<add value="ok" ID="JPanel1"/>
<add value="welcomeword" ID="JPanel1"/>
</Panel>
<Label name="top" text="My GUI to Java" setBounds="164, 20, 107, 22"
ID="JLabel"/>
<Label name="name" text="Employee ID:" setBounds="70, 63, 74, 24"
ID="JLabel"/>
<Label name="password" text="Code:" setBounds="68, 103, 74, 19" ID="JLabel"/>
<TextField name="inputname" size="12" setBounds="164, 58, 143, 31"
ID="JTextField"/>
<PasswordField name="inputpassword" size="12" setBounds="164, 99, 144, 29"
ID="JPasswordField"/>
<Button name="ok" text="Submit" setBounds="153, 142, 85, 25"
addActionTarget="welcomeword.setText("Welcome!");"
ID="JButton"/>
<Label name="welcomeword" text="Click to login" setBounds="150, 186, 130, 26"
ID="JLabel"/>
</class>
</gui>
124 Appendix B Source Code
1.9 Lai.java
import java.awt.*;
import javax.swing.*;
import java.awt.event.*;
import java.applet.*;
public class Lai extends JApplet implements ActionListener
{
private JPanel JAppletContentPane = null;
private JPanel JPanel1=null;
private JLabel top=null;
private JLabel name=null;
private JLabel password=null;
private JLabel welcomeword=null;
private JTextField inputname=null;
private JPasswordField inputpassword=null;
private JButton ok=null;
private JPanel getJAppletContentPane() {
if (JAppletContentPane == null) {
JAppletContentPane = new JPanel();
JAppletContentPane.setName("JAppletContentPane");
JAppletContentPane.setLayout(null);
getJAppletContentPane().add(getJPanel1(),
getJPanel1().getName());
}
return JAppletContentPane;
}
private JPanel getJPanel1(){
if(JPanel1==null){
JPanel1=new JPanel();
JPanel1.setName("JPanel1");
JPanel1.setLayout(null);
JPanel1.setBounds(-1, 2, 424, 239);
getJPanel1().add(gettop(), gettop().getName());
getJPanel1().add(getname(), getname().getName());
getJPanel1().add(getpassword(), getpassword().getName());
getJPanel1().add(getinputname(), getinputname().getName());
getJPanel1().add(getinputpassword(),
getinputpassword().getName());
getJPanel1().add(getok(), getok().getName());
getJPanel1().add(getwelcomeword(),
getwelcomeword().getName());
125 Appendix B Source Code
}
return JPanel1;
}
private JLabel gettop(){
if(top==null){
top=new JLabel();
top.setName("top");
top.setText("My GUI to Java");
top.setBounds(164, 20, 107, 22);
}
return top;
}
private JLabel getname(){
if(name==null){
name=new JLabel();
name.setName("name");
name.setText("Employee ID:");
name.setBounds(70, 63, 74, 24);
}
return name;
}
private JLabel getpassword(){
if(password==null){
password=new JLabel();
password.setName("password");
password.setText("Code:");
password.setBounds(68, 103, 74, 19);
}
return password;
}
private JTextField getinputname(){
if(inputname==null){
inputname=new JTextField();
inputname.setName("inputname");
inputname.setBounds(164, 58, 143, 31);
}
return inputname;
}
126 Appendix B Source Code
private JPasswordField getinputpassword(){
if(inputpassword==null){
inputpassword=new JPasswordField();
inputpassword.setName("inputpassword");
inputpassword.setBounds(164, 99, 144, 29);
}
return inputpassword;
}
private JButton getok(){
if(ok==null){
ok=new JButton();
ok.setName("ok");
ok.setText("Submit");
ok.setBounds(153, 142, 85, 25);
ok.addActionListener(this);
}
return ok;
}
private JLabel getwelcomeword(){
if(welcomeword==null){
welcomeword=new JLabel();
welcomeword.setName("welcomeword");
welcomeword.setText("Click to login");
welcomeword.setBounds(150, 186, 130, 26);
}
return welcomeword;
}
public void init() {
setName("Lai");
setSize(426, 240);
setContentPane(getJAppletContentPane());
}
public static void main(java.lang.String[] args) {
Lai applet = new Lai();
JFrame jframe = new JFrame("Applet");
jframe.getContentPane().add("Center", applet);
jframe.setSize(350, 250);
jframe.show();
applet.init();
applet.start();
127 Appendix B Source Code
}
public void actionPerformed(ActionEvent e)
{
if(e.getSource()==ok){
welcomeword.setText("Welcome!");
}
}
}
1.10 display.html
This document is used for loading the Java class file in the IE browser.
<!DOCTYPE HTML PUBLIC "-//W3C//DTD HTML 4.0 Transitional//EN">
<HTML>
<HEAD>
<TITLE> New Document </TITLE>
<META NAME="Generator" CONTENT="EditPlus">
<META NAME="Author" CONTENT="">
<META NAME="Keywords" CONTENT="">
<META NAME="Description" CONTENT="">
</HEAD>
<BODY>
<APPLET CODE="Login.class" WIDTH=800 HEIGHT=600></APPLET>
</BODY>
</HTML>


![[MS-BINXML]: SQL Server Binary XML Structure Specification · SQL Server Binary XML Structure Specification ... products, domain names, e-mail addresses, logos, people, ... (Synopsis)](https://img.pdfslide.us/doc/110x75/5acea2fb7f8b9a1d328c0b59/ms-binxml-sql-server-binary-xml-structure-specification-server-binary-xml-structure.jpg)
![Data Entity Dictionary Specification Language (DEDSL)—XML ... · Specification Language using PVL syntax (see reference [9]) and a Data Entity Specification Language using XML/DTD](https://img.pdfslide.us/doc/110x75/5e9867c48521aa41251724d0/data-entity-dictionary-specification-language-dedslaxml-specification-language.jpg)
![[RT04] XML file specification for batch upload (clean version) file specification for batch... · XML FILE SPECIFICATION FOR BATCH UPLOAD FOR SHIPPERS AND AGENTS Version 1.1 Page](https://img.pdfslide.us/doc/110x75/5e96fbcd0a752d3e9954fa00/rt04-xml-file-specification-for-batch-upload-clean-version-file-specification.jpg)