Embed Size (px)
Citation preview
XBee Java Library
User Guide

Revision history—90001438
Revision Date Description
C June2015
Upgraded XBee Java Library to version v1.1.0: Added support for explicitframes and application layer fields. Added examples that demonstrate the newfunctionality of the API.
D April2016
Upgraded XBee Java Library to version v1.1.1: Added support for S2C 802.15.4(XBee S1B), and added new unit tests.
E January2017
Upgraded XBee Java Library to version v1.2.0: Added support for XBee Cellularand XBee Wi-Fi protocols, compatibility with Android and new examples.
F August2017
Upgraded XBee Java Library to version v1.2.1: Added support for XBee CellularNB-IoT and Thread protocols. Added IPv6 and CoAP support, as well as newexamples and unit tests.
Trademarks and copyrightDigi, Digi International, and the Digi logo are trademarks or registered trademarks in the UnitedStates and other countries worldwide. All other trademarks mentioned in this document are theproperty of their respective owners.© 2017 Digi International Inc. All rights reserved.
DisclaimersInformation in this document is subject to change without notice and does not represent acommitment on the part of Digi International. Digi provides this document “as is,” without warranty ofany kind, expressed or implied, including, but not limited to, the implied warranties of fitness ormerchantability for a particular purpose. Digi may make improvements and/or changes in this manualor in the product(s) and/or the program(s) described in this manual at any time.
WarrantyTo view product warranty information, go to the following website:www.digi.com/howtobuy/terms
Send commentsDocumentation feedback: To provide feedback on this document, send your comments [email protected].
Customer supportDigi Technical Support: Digi offers multiple technical support plans and service packages to help ourcustomers get the most out of their Digi product. For information on Technical Support plans andpricing, contact us at +1 952.912.3444 or visit us at www.digi.com/support.
XBee Java Library User Guide 2
Contents
XBee Java Library
Getting started with XBee Java LibraryInstalling your software 8
XBee Java Library software 8Java Virtual Machine 8XCTU 8Java IDE 9
Configuring your XBee devices 9Add 802.15.4 devices 10Add Zigbee devices 10Add DigiMesh devices 11Add Point-to-Multipoint devices 11Add cellular devices 12AddWi-Fi devices 12
Building your first XBee Java application 13Create the project 13Configure the project 14Add the application source code 17Build the application 21
Launching the application 22Launching the application for non-Cellular protocol 22Launching the application for Cellular protocol 23
Using the XBee Java LibraryXBee terminology 28
RF modules 28XBee RF modules 28Radio firmware 28Radio communication protocols 29Radio module operating modes 29API operating mode 30Application Transparent (AT) operating mode 30API escaped operating mode 31API frames 31AT settings or commands 32
Working with XBee classes 32Instantiate an XBee device object 33Open the XBee device connection 36
XBee Java Library User Guide 3
XBee Java Library User Guide 4
Close the XBee device connection 39Configuring the XBee device 39
Read and set common parameters 40Read, set and execute other parameters 42Apply configuration changes 45Write configuration changes 46Reset the device 47Configure Wi-Fi settings 48Scanning for access points 51Getting/setting the access point operations timeout 52Getting an access point with specific SSID 52Connecting to an access point 53Disconnecting from an access point 54Checking connection status 55Getting the connected access point 56
Discovering the XBee network 56Configure the discovery process 57Discover the network 58Access the discovered devices 63Add and remove devices manually 64
Communicating with XBee devices 66Send data 67Send explicit data 71Send IP data 76Send IPv6 data 79Send CoAP data 81Send SMS messages 85Receive data 87Receive explicit data 91Receive IP data 97Receive IPv6 data 102Receive CoAP data 107Receive SMS messages 107Receive modem status events 109
Handling analog and digital IO lines 110Configure the IO lines 111Read IO samples 115
Logging events 120Download the SLF4J bindings 121Bind the library with SLF4J 121
Building the library 121Install Apache Maven 122Install the library in Maven local repository 122
Android integration 126Instantiate an XBee device object in Android 126Create an XBee Android application 128
XBee Java samplesConfiguration samples 134
Manage common parameters 134Set and get parameters 134Reset 134Connect to access point (Wi-Fi devices) 135
Network samples - discover devices 135
XBee Java Library User Guide 5
Communication samples 135Send data 135Send data asynchronously 135Send broadcast data 136Send CoAP data (Thread devices) 136Send explicit data 136Send explicit data asynchronously 136Send broadcast explicit data 136Send IP data (IP devices) 137Send IPv6 data (Thread devices) 137Send SMS (Cellular devices) 137Send UDP data (IP devices) 137Receive data 137Receive CoAP data (Thread devices) 138Receive data polling 138Receive explicit data 138Receive explicit data polling 138Receive IP data (IP devices) 138Receive IPv6 data (Thread devices) 139Receive SMS (Cellular devices) 139Receive modem status 139Connect to echo server (IP devices) 139Knock Knock (IP devices) 139
IO samples 140Local DIO 140Local ADC 140Remote DIO 140Remote ADC 141IO sampling 141
XBee Java Library API reference
Frequently Asked Questions (FAQs)What is XCTU and how do I download it? 144How do I find the serial port and baud rate of my module? 144Can I use the XBee Java Library with modules in AT operating mode? 144
Additional resourcesContribute now! 145Digi Forum 145
XBee Java Library
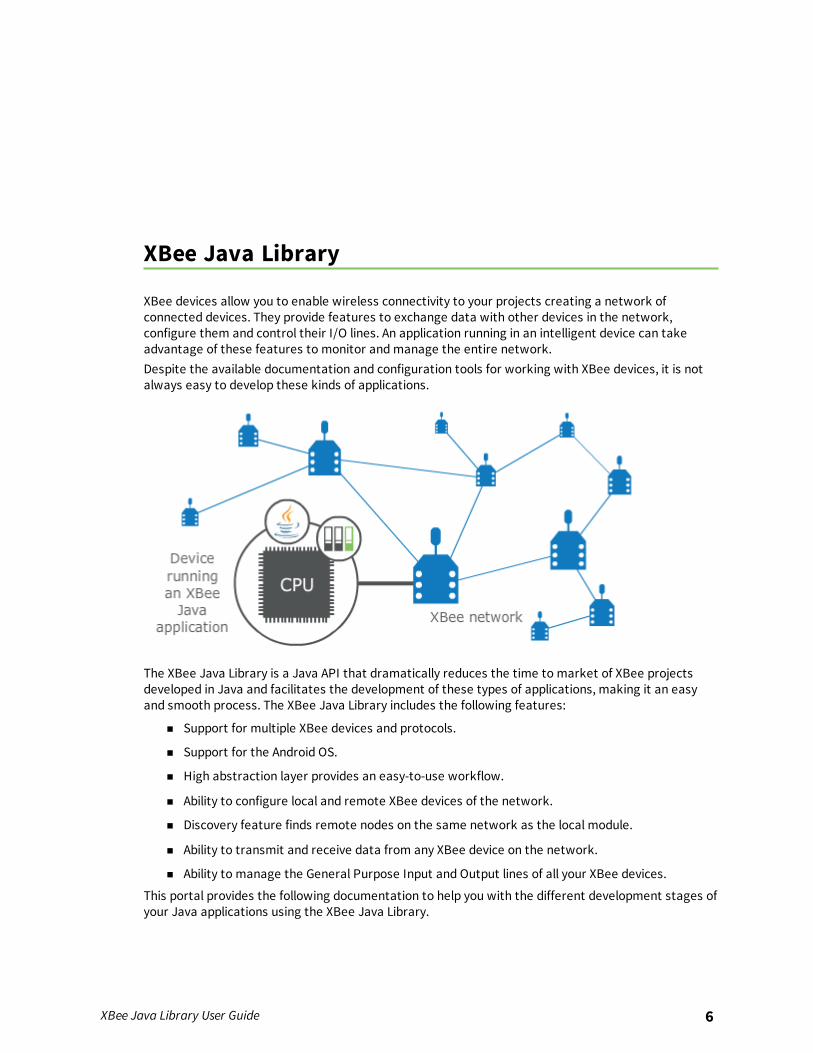
XBee devices allow you to enable wireless connectivity to your projects creating a network ofconnected devices. They provide features to exchange data with other devices in the network,configure them and control their I/O lines. An application running in an intelligent device can takeadvantage of these features to monitor andmanage the entire network.Despite the available documentation and configuration tools for working with XBee devices, it is notalways easy to develop these kinds of applications.
The XBee Java Library is a Java API that dramatically reduces the time to market of XBee projectsdeveloped in Java and facilitates the development of these types of applications, making it an easyand smooth process. The XBee Java Library includes the following features:
n Support for multiple XBee devices and protocols.
n Support for the Android OS.
n High abstraction layer provides an easy-to-use workflow.
n Ability to configure local and remote XBee devices of the network.
n Discovery feature finds remote nodes on the same network as the local module.
n Ability to transmit and receive data from any XBee device on the network.
n Ability to manage the General Purpose Input and Output lines of all your XBee devices.
This portal provides the following documentation to help you with the different development stages ofyour Java applications using the XBee Java Library.
XBee Java Library User Guide 6
Getting started with XBee Java Library
This Getting Started Guide describes how to set up your environment and use the XBee Java Library tocommunicate with your XBee devices.Start here to begin exploring the XBee Java Library. Then follow this guide to install the software,build and launch your first Java application, and begin communicating with your devices using Java.
Installing your software 8Configuring your XBee devices 9Building your first XBee Java application 13Launching the application 22
XBee Java Library User Guide 7
Getting started with XBee Java Library Installing your software
XBee Java Library User Guide 8
Installing your softwareThe following software components are required to build and run your first XBee Java application:
n XBee Java Library software
n Java Virtual Machine
n XCTU
n Java IDE
XBee Java Library softwareThe first software package is the XBee Java Library. This package includes the XBee library, its sourcecode and a collection of samples that will help you to develop Java applications to communicate withyour XBee devices. You can download the latest version at:https://github.com/digidotcom/XBeeJavaLibrary/releasesTo work with this package, unzip the file you just downloaded. The main directory, XBJL-X.Y.Z, has thefollowing structure:
n /examples: Several XBee Java Library examples to demonstrate the XBee Java Libraryfeatures.
n /extra-libs: Libraries needed to build and launch an XBee Java application.
n /javadoc: XBee Java Library API documentation.
n /src: Source code for the XBee Java Library.
n xbee-java-library-X.Y.Z.jar: XBee Java Library jar file which allows you to easily interact withyour XBee modules.
n LICENSE.txt: Legal licensing agreement.
n README.md
n release_notes.txt: Latest release information for XBee Java Library.
Java Virtual MachineYou must install a Java Virtual Machine to compile and launch Java projects. The recommendedversion is Java SE 8. If you already have a JRE or JDK 7 or higher installed on your PC, you can skip thisstep.You can download the Java machine fromwww.oracle.com/technetwork/java/javase/downloads/index.htmlOnce the download is complete, launch the program and follow the on-screen instructions to finish theinstallation process.
XCTUInstall XCTU 6.3.8 or later. XCTU is a free multi-platform application that enables developers tointeract with Digi RF modules through a simple-to-use graphical interface. It includes new tools thatmake it easy to set up, configure, and test XBee RF modules.For instructions on downloading and using XCTU, go to:http://www.digi.com/xctu
Getting started with XBee Java Library Configuring your XBee devices
XBee Java Library User Guide 9
Once you have downloaded XCTU, run the installer and follow the steps to finish the installationprocess.After you load XCTU, a message about software updates appears. We recommend you always updateXCTU to the latest available version.
Java IDETo develop, build and launch Java applications, you can use an IDE (integrated developmentenvironment) capable of managing Java projects. There are many IDEs you can use, such as thefollowing examples:
n Eclipse - http://www.eclipse.org
n NetBeans - https://netbeans.org
n Android Studio - https://developer.android.com/studio/
Configuring your XBee devicesYou need to configure two XBee devices. One module (the sender) sends “Hello XBee World!” using theJava application. The other device (the receiver) receives the message.Both devices must be working in the same protocol (802.15.4, Zigbee, DigiMesh or Point-to-Multipoint,or Wi-Fi) andmust be configured to operate in the same network to enable communication.
Note If you are getting started with Cellular, you only need to configure one device. Cellular protocoldevices are connected directly to the Internet, so there is not a network of remote devices tocommunicate with them. For the Cellular protocol, the XBee application demonstrated in the gettingstarted guide differs from other protocols. The Cellular protocol sends and reads data from an echoserver. All the steps of the guide but the the Add the application source code of the Building your firstXBee Java application section are common to all the XBee devices regardless of their protocol.
Use XCTU to configure the devices. Plug the devices into the XBee adapters and connect them to yourcomputer’s USB or serial ports.
Note For more information about XCTU, see the embedded help or see the XCTU User Guide. You canaccess the Help Contents from the Helpmenu of the tool.
Once XCTU is running, add your devices to the tool, and then select them from the Radio Modulessection. When XCTU is finished reading the device parameters, complete the following steps,according to your device type.Repeat these steps to configure all your XBee devices using XCTU.
n Add 802.15.4 devices
n Add Zigbee devices
n Add DigiMesh devices
n Add Point-to-Multipoint devices
n Add cellular devices
n AddWi-Fi devices
Getting started with XBee Java Library Configuring your XBee devices
XBee Java Library User Guide 10
Add 802.15.4 devices1. Click Load default firmware settings in the Radio Configuration toolbar to load the
default values for the device firmware.
2. Ensure the API mode (API1 or API2) is enabled. To do so, the AP parameter value must be 1(API Mode Without Escapes) or 2 (API Mode With Escapes).
3. Configure ID (PAN ID) setting CAFE.
4. Configure CH (Channel setting) to C.
5. Click Write radio settings in the Radio Configuration toolbar to apply the new values to
the module.
6. Once you have configured both modules, check to make sure they can see each other. Click
Discover radio modules in the same network , the second button of the device panel in
the Radio Modules view. The other device must be listed in the Discovering remote devicesdialog.
Note If the other module is not listed, reboot both devices by pressing the Reset button of the carrierboard and try adding the device again. If the list is still empty, go to the corresponding product manualfor your devices.
Add Zigbee devices1. For old Zigbee devices (S2 and S2B), ensure the devices are using API firmware. The firmware
appears in the Function label of the device in the Radio Modules view.n One of the devices must be a coordinator - Function: Zigbee Coordinator API
n We recommend the other one is a router - Function: Zigbee Router API
Note If any of the two previous conditions is not satisfied, you must change the firmware of the
device. Click the Update firmware button of the Radio Configuration toolbar.
2. Click Load default firmware settings in the Radio Configuration toolbar to load the
default values for the device firmware.
3. Do the following:
n If the device has the AP parameter, set it to 1 (API Mode Without Escapes) or 2 (APIMode With Escapes).
n If the device has the CE parameter, set it to Enabled in the coordinator.
4. Configure the PAN ID setting (ID) to be C001BEE.
5. Configure SC (Scan Channels) setting to FFF.
6. Click Write radio settings in the Radio Configuration toolbar to apply the new values to
the module.
Getting started with XBee Java Library Configuring your XBee devices
XBee Java Library User Guide 11
7. Once you have configured both modules, check to make sure they can see each other. Click
Discover radio modules in the same network , the second button of the device panel in
the Radio Modules view. The other device must be listed in the Discovering remote devicesdialog.
Note If the other module is not listed, reboot both devices by pressing the Reset button of the carrierboard and try adding the device again. If the list is still empty, go to the corresponding product manualfor your devices.
Add DigiMesh devices1. Click Load default firmware settings in the Radio Configuration toolbar to load the
default values for the device firmware.
2. Ensure the API mode (API1 or API2) is enabled. The AP parameter value must be 1 (API ModeWithout Escapes) or 2 (API Mode With Escapes).
3. Configure ID (PAN ID) setting to CAFE.
4. Configure CH (Operating Channel) setting to C.
5. Click Write radio settings in the Radio Configuration toolbar to apply the new values to
the module.
6. Once you have configured both modules, check to make sure they can see each other. Click
Discover radio modules in the same network , the second button of the device panel in
the Radio Modules view. The other device must be listed in the Discovering remote devicesdialog.
Note If the other module is not listed, reboot both devices by pressing the Reset button of the carrierboard and try adding the device again. If the list is still empty, go to the corresponding product manualfor your devices.
Add Point-to-Multipoint devices1. Click Load default firmware settings in the Radio Configuration toolbar to load the
default values for the device firmware.
2. Ensure the API mode (API1 or API2) is enabled. The AP parameter value must be 1 (API ModeWithout Escapes) or 2 (API Mode With Escapes).
3. Configure ID (PAN ID) setting to CAFE.
4. Configure HP (Hopping Channel) setting to 5.
5. Click Write radio settings in the Radio Configuration toolbar to apply the new values to
the module.
Getting started with XBee Java Library Configuring your XBee devices
XBee Java Library User Guide 12
6. Once you have configured both modules, check to make sure they can see each other. Click
Discover radio modules in the same network , the second button of the device panel in
the Radio Modules view. The other device must be listed in the Discovering remote devicesdialog.
Note If the other module is not listed, reboot both devices by pressing the Reset button of the carrierboard and try adding the device again. If the list is still empty, go to the corresponding product manualfor your devices.
Add cellular devices1. Click Load default firmware settings in the Radio Configuration toolbar to load the
default values for the device firmware.
2. Ensure the API mode (API1 or API2) is enabled. To do so, the AP parameter value must be 1(API Mode Without Escapes) or 2 (API Mode With Escapes).
3. Click Write radio settings in the Radio Configuration toolbar to apply the new values to
the module.
4. Verify the module is correctly registered and connected to the Internet. To do so check thatthe LED on the development board blinks. If it is solid or has a double-blink, registration has notoccurred properly. Registration can take several minutes.
Note In addition to the LED confirmation, you can check the IP address assigned to the module byreading the MY parameter and verifying it has a value different than 0.0.0.0.
Add Wi-Fi devices1. Click Load default firmware settings in the Radio Configuration toolbar to load the
default values for the device firmware.
2. Ensure the API mode (API1 or API2) is enabled. To do so, the AP parameter value must be 1(API Mode Without Escapes) or 2 (API Mode With Escapes).
3. Connect to an access point:a. Click the Active Scan button.
b. Select the desired access point from the list of the Active Scan result dialog.
c. If the access point requires a password, type your password.
d. Click the Connect button and wait for the module to connect to the access point.
4. Click Write radio settings in the Radio Configuration toolbar to apply the new values to
the module.
5. Verify the module is correctly connected to the access point by checking the IP addressassigned to the module by reading the MY parameter and verifying it has a value different than0.0.0.0.
Getting started with XBee Java Library Building your first XBee Java application
XBee Java Library User Guide 13
Building your first XBee Java applicationIn this section, you create and build your first XBee application. You can then use a device connectedto your computer to broadcast the message “Hello XBee World!” to all remote devices on the samenetwork using the XBee Java Library.
Note Cellular devices are connected directly to the Internet, so there is no network of remote devicesto communicate with them. For the Cellular protocol, the XBee application demonstrated in thissection differs from other protocols. The application sends and reads data from an echo server. All thesteps in this section except the Add the application source code procedure are common to all theXBee devices, regardless of their protocol.
The following sections describe how to create and build the XBee application:1. Create the project
2. Configure the project
3. Add the application source code
4. Build the application
The section describes the steps for the two most popular development environments: NetBeans andEclipse. We also include instructions for building an application without using an IDE. You should beable to replicate these steps for a different Java IDE or any build automation tool.
Create the projectTo use the XBee Java Library in your code, the first step is to create a new project to store the Javasource code files and the build result. The name of the project is myFirstXBeeApp, and has thefollowing structure:
n A directory called src for the sources organized in packages (com.digi.xbee.example).
n The libs folder to contain the XBee Java Library and other resources needed in order toproperly build.
n The bin directory to store the *.class files that are the result of the build process.
To create the myFirstXBeeApp project, choose one of these development options and follow thesteps:
n Eclipse
n Netbeans
n Command line
After you create the project, you must code the application and add the required libraries to theclasspath of the project, because the classes with the functionality to communicate with your XBeedevices are provided in a jar file (xbee-java-library-X.Y.Z.jar).
EclipseTo create a new Java project in Eclipse, follow these steps:
1. Navigate to the File menu, select New, and click Java Project.A New Java Project window appears.
Getting started with XBee Java Library Building your first XBee Java application
XBee Java Library User Guide 14
2. Enter the Project name,myFirstXBeeApp, and change the location if desired.
3. Click Finish to create the project. The window closes and the project is listed in the PackageExplorer view at the left side of the IDE.
NetbeansTo create a new Java project in NetBeans, follow these steps:
1. Navigate to the File menu and select New project....You are prompted with a New Project window.
2. In the Categories frame, select Java > Java Application on the right panel.
3. Click Next.
4. Enter the Project Name,myFirstXBeeApp, and the Project Location.
5. Clear the Create Main Class option. This will be created later.
6. Click Finish to create the project. The window closes and the project is listed in the Projectsview at the left side of the IDE.
Command line
Note The command samples used in this guide are for Windows PCs. Linux and MacOS computersoperate in a similar manner.
1. Create a directory to store the application source code and other resources, calledmyFirstXBeeApp, and go inside this new directory.
~> mkdir myFirstXBeeApp~> cd myFirstXBeeApp~\myFirstXBeeApp>
2. Then create a folder to store the source code, src .~\myFirstXBeeApp> mkdir src~\myFirstXBeeApp>
3. Inside the src directory, create the folders that represent the packages of the Java application,com.digi.xbee.example.
~\myFirstXBeeApp> cd src~\myFirstXBeeApp\src> mkdir com\digi\xbee\example~\myFirstXBeeApp\src\com\digi\xbee\example>
Configure the projectTo build the project you have just created, you must add the needed JAR files to the classpath, and tellJava where to find the required native libraries when launching the application.The XBJL-X.Y.Z you downloaded and unzipped (see XBee Java Library software) contains the libraryJAR file, xbee-java-library-X.Y.Z.jar, and other needed resources in the directory called extra-libs.The XBee Java Library depends on the following JAR files and native libraries:
n rxtx-2.2.jar: RXTX library that provides serial communication in Java.
n slf4j-api-1.7.12.jar: Simple Logging Facade for Java (SLF4J) for logging.
Getting started with XBee Java Library Building your first XBee Java application
XBee Java Library User Guide 15
n slf4j-nop-1.7.12.jar: SLF4J binding for NOP, silently discarding all logging.
n RXTX native library that depends on your PC operating system and the installed Java VirtualMachine (as an example we are going to use 32-bit Windows).
n android-sdk-5.1.1.jar: Library that provides all the necessary classes to create content forAndroid.
n android-sdk-addon-3.jar: Digi SDK Add-on for Android, which allows you to create apps for DigiEmbedded devices.
Configure the project - Eclipse1. Click File > New > Folder, and create a directory called libs in the root of the project to create
a directory.
2. Copy the xbee-java-library-X.Y.Z.jar file and the contents of the extra-libs directory from theXBJL-X.Y.Z folder to the libs directory.
3. From the Package Explorer view, right-click your sample project and go to Properties.
4. In the list of categories, go to Java Build Path, select the Libraries tab, and click the AddJARs… button.
5. In the JAR Selection window, go to the myFirstXBeeApp project and select only the followingfiles from inside the libs folder:
n xbee-java-library-X.Y.Z.jar
n rxtx-2.2.jar
n slf4j-api-1.7.12.jar
n slf4j-nop-1.7.12.jar
n android-sdk-5.1.1.jar
n android-sdk-addon-3.jar
Ensure only the libraries listed above are added to your project.
6. Click OK to add the libraries.
Note You can optionally register the included API documentation and source code for the XBee JavaLibrary to review classes andmethods documentation within Eclipse.Find the Javadoc in the installation directory, XBJL-X.Y.Z, inside javadoc directory, and the sourcecode inside src/main.
7. Expand the rxtx-2.2.jar file of the Libraries tab list, select the Native library location itemand click Edit….
8. Select the Workspace... button to navigate to the libs\native\Windows\win32 folder, andclick OK to add the path to the native libraries.
Getting started with XBee Java Library Building your first XBee Java application
XBee Java Library User Guide 16
Note The path to the native libraries depends on your computer operating system and the JavaVirtual Machine you have installed (32-bit/64-bit).
9. Click OK to apply the Java Build Path property modifications.
Configure the project - Netbeans1. Click File > New > Folder, and create a directory called libs in the root of the project to create
a directory.
2. Copy the xbee-java-library-X.Y.Z.jar file and the contents of the extra-libs directory from theXBJL-X.Y.Z folder to the libs directory.
3. From Projects view, right-click your project and go to Properties.
4. In the list of categories, go to Libraries and click the Add JAR/Folder button.
5. In the Add JAR/Folderwindow, navigate to the myFirstXBeeApp project location, go to the libsdirectory, and select only the following files:
n xbee-java-library-X.Y.Z.jar
n rxtx-2.2.jar
n slf4j-api-1.7.12.jar
n slf4j-nop-1.7.12.jar
n android-sdk-5.1.1.jar
n android-sdk-addon-3.jar
Ensure only the libraries listed above are added to your project.
6. Click Open to finish.
Note You can optionally register the included API documentation and source code for the XBee JavaLibrary to review classes andmethods documentation within Eclipse.Find the Javadoc in the installation directory, XBJL-X.Y.Z, inside javadoc directory, and the sourcecode inside src/main.
7. Select Run in the left tree of the Properties dialog.
8. In the VM Options field, add the following option:-Djava.library.path=libs\native\Windows\win32
The path is relative to the "myFirstXBeeApp’s" path.
Note The path to the native libraries depends on your computer operating system and the JavaVirtual Machine you have installed (32-bit/64-bit).
9. Click OK to apply the properties modifications.
Getting started with XBee Java Library Building your first XBee Java application
XBee Java Library User Guide 17
Configure the project - Command lineYou can specify all the resources required to build and launch the application in the command line. Tofacilitate that command, you can copy the needed resources and then define some environmentvariables.
1. Create a directory called libs in the root of the project.~\myFirstXBeeApp> mkdir libs~\myFirstXBeeApp>
2. Copy the xbee-java-library-X.Y.Z.jar file inside the libs directory.~\myFirstXBeeApp> xcopy <path_to_XBJL>\XBJL-X.Y.Z\xbee-java-library-X.Y.Z.jarlibs~\myFirstXBeeApp>
3. Copy the contents of the extra-libs directory in the XBJL-X.Y.Z folder to the libs directory.~\myFirstXBeeApp> xcopy /S <path_to_XBJL>\XBJL-X.Y.Z\extra-libs libs
~\myFirstXBeeApp>
4. Define the following environment variables:
XBJL_CLASS_PATH contains the paths to the required JAR files:
n xbee-java-library-X.Y.Z.jar
n rxtx-2.2.jar
n slf4j-api-1.7.12.jar
n slf4j-nop-1.7.12.jar
n android-sdk-5.1.1.jar
n android-sdk-addon-3.jar
~\myFirstXBeeApp> set XBJL_CLASS_PATH=libs\xbee-java-library-X.Y.Z.jar;libs\rxtx-2.2.jar;libs\slf4j-api-1.7.12.jar;libs\slf4j-nop-1.7.12.jar~\myFirstXBeeApp>
Add the application source codeOnce you create your project, the next step is to create the Java source file to send the Hello XBeeWorld! message to the rest of devices in the same network.
Add the application source code - Eclipse1. In the Package Explorer view, select the project myFirstXBeeApp and right-click.
2. From the context menu, select New > Class. The New Java Class wizard opens.
3. Modify the Package to com.digi.xbee.example.
4. Type the Name of the class,MainApp.
5. Click Finish. Inside the src folder, a new package called com.digi.xbee.example is displayed,which contains the class MainApp you have just created.The MainApp.java file opens in the editor.
Getting started with XBee Java Library Building your first XBee Java application
XBee Java Library User Guide 18
6. Remove the existing code and copy the appropriate source code from one the following links: n MainApp.java code (not cellular)
n MainApp.java code (cellular)
7. Set the port (PORT) and baud rate (BAUD_RATE) of the module you are going to use as thesender in the code.
Note Use XCTU to find out the port and baud rate of your sender module. See the Frequently AskedQuestions (FAQs) section for additional information.
8. Save the changes and close the file.
Add the application source code - Netbeans1. In the Projects view, right-click and select the myFirstXBeeApp project.
2. From the context menu select New > Java Class.... The New Java Class wizard opens.
3. Modify the Class Name toMainApp.
4. Type the Package name, com.digi.xbee.example.
5. Click Finish. Inside the Source Packages folder, a new package, com.digi.xbee.example, isdisplayed, which contains the class MainApp you have just created.The MainApp.java file opens in the editor.
6. Remove the existing code and copy the appropriate source code from one the following links: n MainApp.java code (not cellular)
n MainApp.java code (cellular)
7. Set the port (PORT) and baud rate (BAUD_RATE) of the module you are going to use as senderin the code.
Note Use XCTU to find out the port and baud rate of your sender module. See the Frequently AskedQuestions (FAQs) section for additional information.
8. Save the changes and close the file.
Add the application source code - command line1. Inside the last folder of the package structure you have just created
(myFirstXBeeApp/com/digi/xbee/example), create the Java application source file,MainApp.java.
~\myFirstXBeeApp\com\digi\xbee\example> fsutil file createnew MainApp.java 0File [...]\myFirstXBeeApp\com\digi xbee\example\MainApp.java is created~\myFirstXBeeApp\com\digi\xbee\example>
2. Open the MainApp.java file in a text editor and copy the appropriate source code from one thefollowing links:
n MainApp.java code (not cellular)
n MainApp.java code (cellular)
Getting started with XBee Java Library Building your first XBee Java application
XBee Java Library User Guide 19
3. Set the port (PORT) and baud rate (BAUD_RATE) of the module you are going to use as thesender in the code.
Note Use XCTU to find out the port and baud rate of your sender module. See the Frequently AskedQuestions (FAQs) section for additional information.
4. Save the changes and close the file.
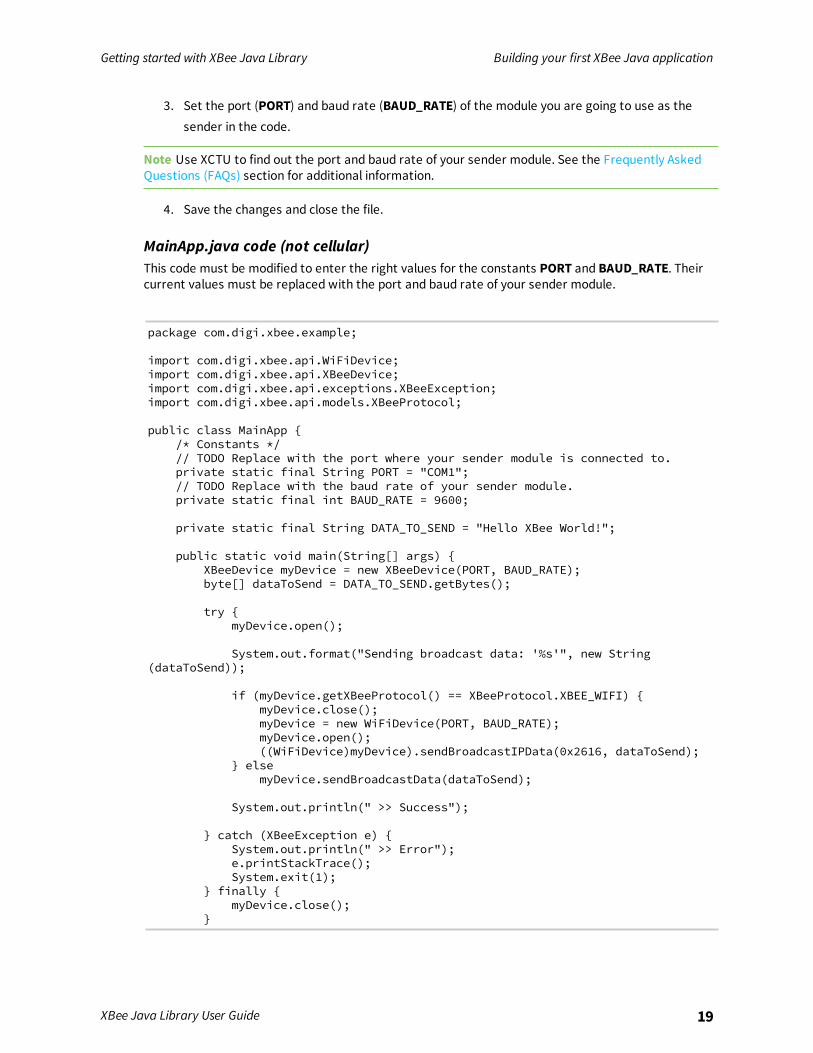
MainApp.java code (not cellular)This code must be modified to enter the right values for the constants PORT and BAUD_RATE. Theircurrent values must be replaced with the port and baud rate of your sender module.
package com.digi.xbee.example;
import com.digi.xbee.api.WiFiDevice;import com.digi.xbee.api.XBeeDevice;import com.digi.xbee.api.exceptions.XBeeException;import com.digi.xbee.api.models.XBeeProtocol;
public class MainApp {/* Constants */// TODO Replace with the port where your sender module is connected to.private static final String PORT = "COM1";// TODO Replace with the baud rate of your sender module.private static final int BAUD_RATE = 9600;
private static final String DATA_TO_SEND = "Hello XBee World!";
public static void main(String[] args) {XBeeDevice myDevice = new XBeeDevice(PORT, BAUD_RATE);byte[] dataToSend = DATA_TO_SEND.getBytes();
try {myDevice.open();
System.out.format("Sending broadcast data: '%s'", new String(dataToSend));
if (myDevice.getXBeeProtocol() == XBeeProtocol.XBEE_WIFI) {myDevice.close();myDevice = new WiFiDevice(PORT, BAUD_RATE);myDevice.open();((WiFiDevice)myDevice).sendBroadcastIPData(0x2616, dataToSend);
} elsemyDevice.sendBroadcastData(dataToSend);
System.out.println(" >> Success");
} catch (XBeeException e) {System.out.println(" >> Error");e.printStackTrace();System.exit(1);
} finally {myDevice.close();
}
Getting started with XBee Java Library Building your first XBee Java application
XBee Java Library User Guide 20
}}
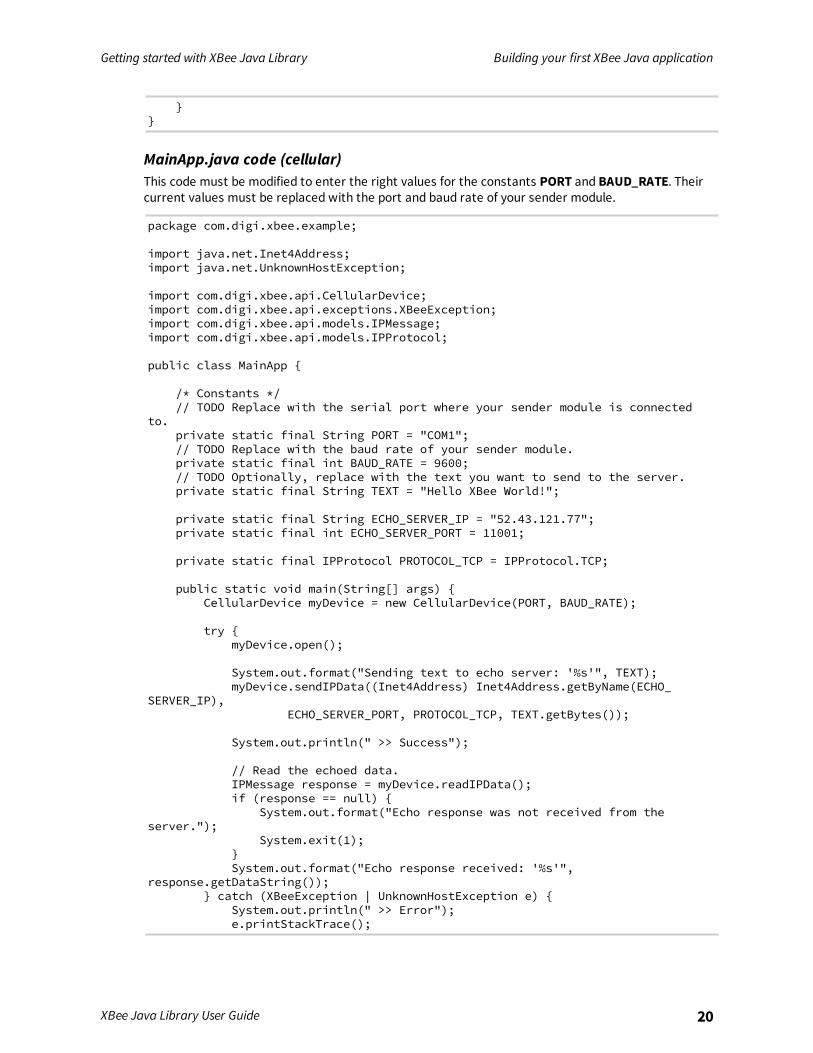
MainApp.java code (cellular)This code must be modified to enter the right values for the constants PORT and BAUD_RATE. Theircurrent values must be replaced with the port and baud rate of your sender module.
package com.digi.xbee.example;
import java.net.Inet4Address;import java.net.UnknownHostException;
import com.digi.xbee.api.CellularDevice;import com.digi.xbee.api.exceptions.XBeeException;import com.digi.xbee.api.models.IPMessage;import com.digi.xbee.api.models.IPProtocol;
public class MainApp {
/* Constants */// TODO Replace with the serial port where your sender module is connected
to.private static final String PORT = "COM1";// TODO Replace with the baud rate of your sender module.private static final int BAUD_RATE = 9600;// TODO Optionally, replace with the text you want to send to the server.private static final String TEXT = "Hello XBee World!";
private static final String ECHO_SERVER_IP = "52.43.121.77";private static final int ECHO_SERVER_PORT = 11001;
private static final IPProtocol PROTOCOL_TCP = IPProtocol.TCP;
public static void main(String[] args) {CellularDevice myDevice = new CellularDevice(PORT, BAUD_RATE);
try {myDevice.open();
System.out.format("Sending text to echo server: '%s'", TEXT);myDevice.sendIPData((Inet4Address) Inet4Address.getByName(ECHO_
SERVER_IP),ECHO_SERVER_PORT, PROTOCOL_TCP, TEXT.getBytes());
System.out.println(" >> Success");
// Read the echoed data.IPMessage response = myDevice.readIPData();if (response == null) {
System.out.format("Echo response was not received from theserver.");
System.exit(1);}System.out.format("Echo response received: '%s'",
response.getDataString());} catch (XBeeException | UnknownHostException e) {
System.out.println(" >> Error");e.printStackTrace();
Getting started with XBee Java Library Building your first XBee Java application
XBee Java Library User Guide 21
System.exit(1);} finally {
myDevice.close();}
}}
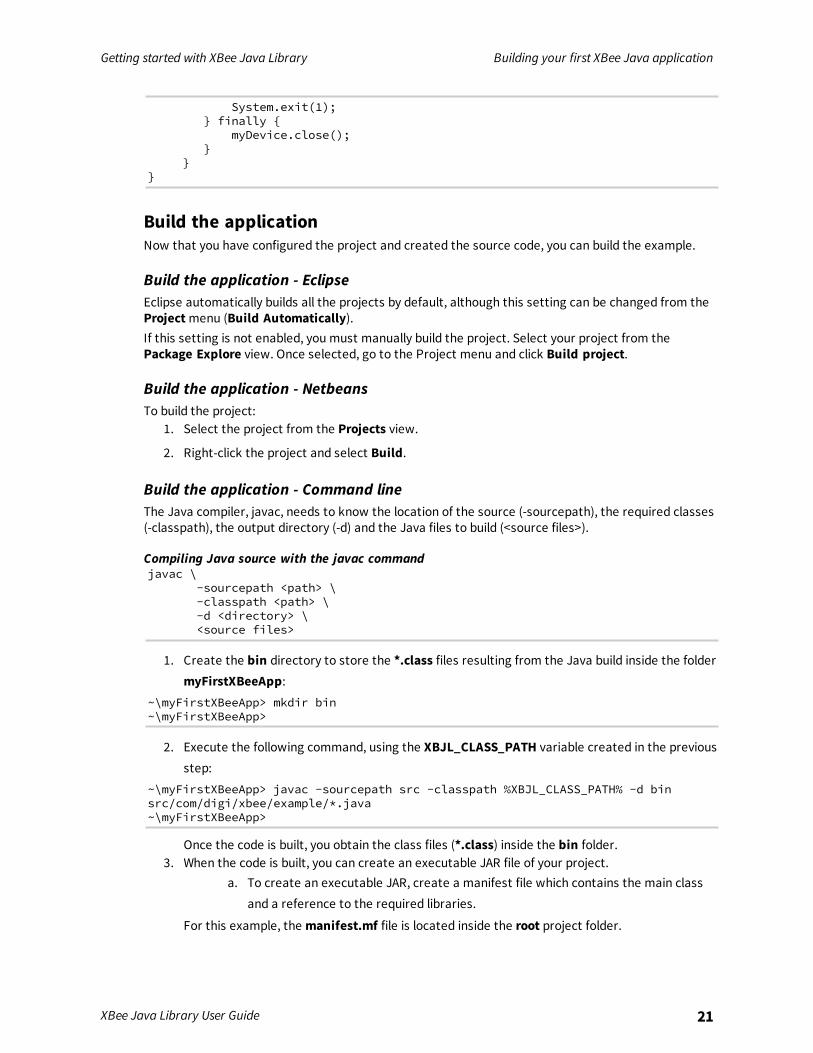
Build the applicationNow that you have configured the project and created the source code, you can build the example.
Build the application - EclipseEclipse automatically builds all the projects by default, although this setting can be changed from theProjectmenu (Build Automatically).If this setting is not enabled, you must manually build the project. Select your project from thePackage Explore view. Once selected, go to the Project menu and click Build project.
Build the application - NetbeansTo build the project:
1. Select the project from the Projects view.
2. Right-click the project and select Build.
Build the application - Command lineThe Java compiler, javac, needs to know the location of the source (-sourcepath), the required classes(-classpath), the output directory (-d) and the Java files to build (<source files>).
Compiling Java source with the javac commandjavac \
-sourcepath <path> \-classpath <path> \-d <directory> \<source files>
1. Create the bin directory to store the *.class files resulting from the Java build inside the foldermyFirstXBeeApp:
~\myFirstXBeeApp> mkdir bin~\myFirstXBeeApp>
2. Execute the following command, using the XBJL_CLASS_PATH variable created in the previousstep:
~\myFirstXBeeApp> javac -sourcepath src -classpath %XBJL_CLASS_PATH% -d binsrc/com/digi/xbee/example/*.java~\myFirstXBeeApp>
Once the code is built, you obtain the class files (*.class) inside the bin folder.3. When the code is built, you can create an executable JAR file of your project.
a. To create an executable JAR, create a manifest file which contains the main classand a reference to the required libraries.
For this example, the manifest.mf file is located inside the root project folder.
Getting started with XBee Java Library Launching the application
XBee Java Library User Guide 22
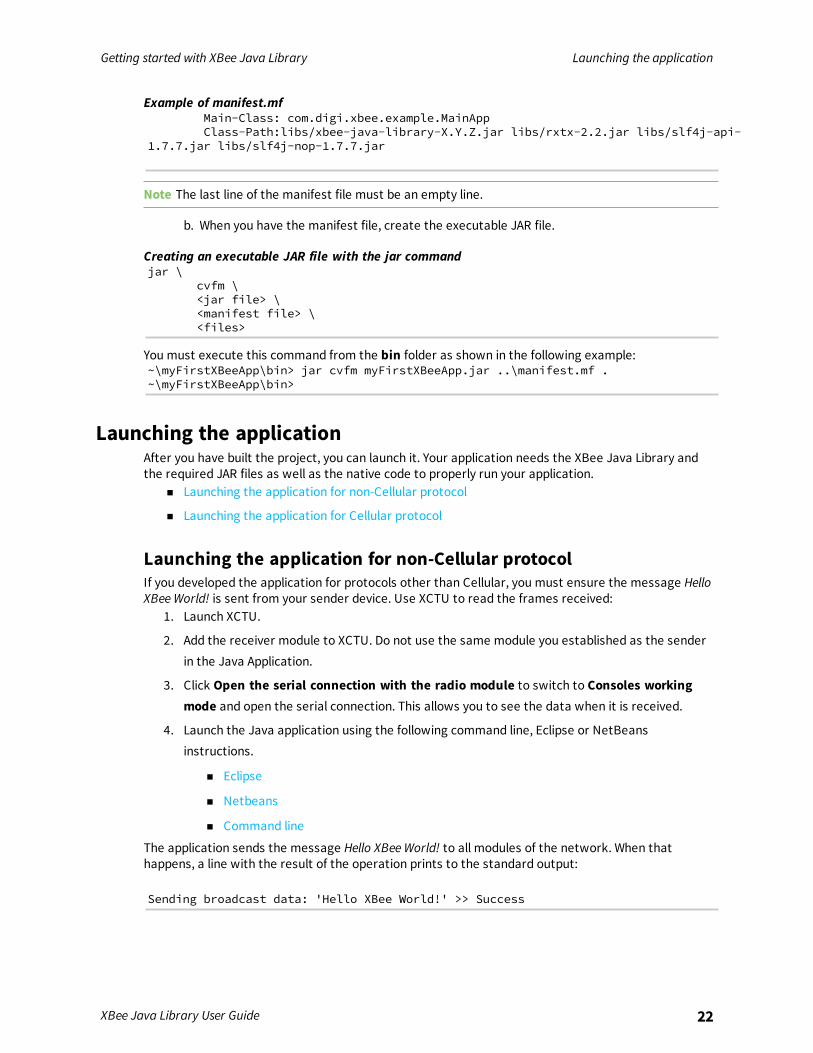
Example of manifest.mfMain-Class: com.digi.xbee.example.MainAppClass-Path:libs/xbee-java-library-X.Y.Z.jar libs/rxtx-2.2.jar libs/slf4j-api-
1.7.7.jar libs/slf4j-nop-1.7.7.jar
Note The last line of the manifest file must be an empty line.
b. When you have the manifest file, create the executable JAR file.
Creating an executable JAR file with the jar commandjar \
cvfm \<jar file> \<manifest file> \<files>
You must execute this command from the bin folder as shown in the following example:~\myFirstXBeeApp\bin> jar cvfm myFirstXBeeApp.jar ..\manifest.mf .~\myFirstXBeeApp\bin>
Launching the applicationAfter you have built the project, you can launch it. Your application needs the XBee Java Library andthe required JAR files as well as the native code to properly run your application.
n Launching the application for non-Cellular protocol
n Launching the application for Cellular protocol
Launching the application for non-Cellular protocolIf you developed the application for protocols other than Cellular, you must ensure the message HelloXBee World! is sent from your sender device. Use XCTU to read the frames received:
1. Launch XCTU.
2. Add the receiver module to XCTU. Do not use the same module you established as the senderin the Java Application.
3. Click Open the serial connection with the radio module to switch to Consoles workingmode and open the serial connection. This allows you to see the data when it is received.
4. Launch the Java application using the following command line, Eclipse or NetBeansinstructions.
n Eclipse
n Netbeans
n Command line
The application sends the message Hello XBee World! to all modules of the network. When thathappens, a line with the result of the operation prints to the standard output:
Sending broadcast data: 'Hello XBee World!' >> Success
Getting started with XBee Java Library Launching the application
XBee Java Library User Guide 23
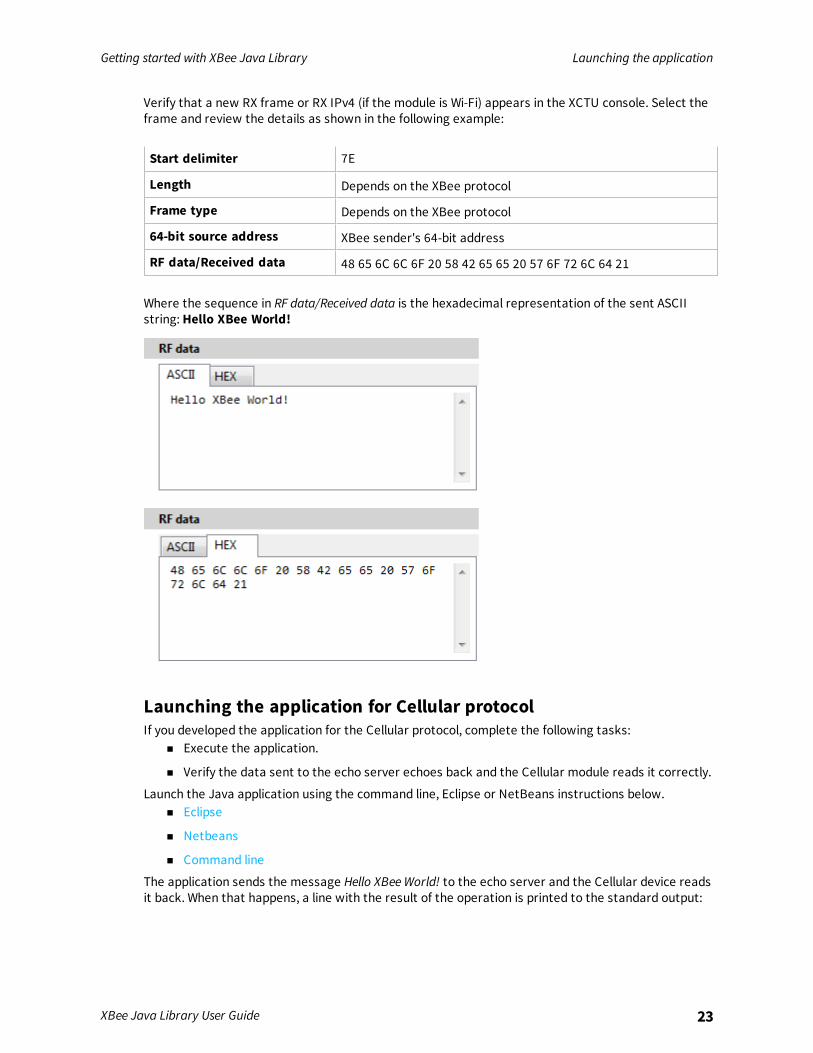
Verify that a new RX frame or RX IPv4 (if the module is Wi-Fi) appears in the XCTU console. Select theframe and review the details as shown in the following example:
Start delimiter 7E
Length Depends on the XBee protocol
Frame type Depends on the XBee protocol
64-bit source address XBee sender's 64-bit address
RF data/Received data 48 65 6C 6C 6F 20 58 42 65 65 20 57 6F 72 6C 64 21
Where the sequence in RF data/Received data is the hexadecimal representation of the sent ASCIIstring:Hello XBee World!
Launching the application for Cellular protocolIf you developed the application for the Cellular protocol, complete the following tasks:
n Execute the application.
n Verify the data sent to the echo server echoes back and the Cellular module reads it correctly.
Launch the Java application using the command line, Eclipse or NetBeans instructions below.n Eclipse
n Netbeans
n Command line
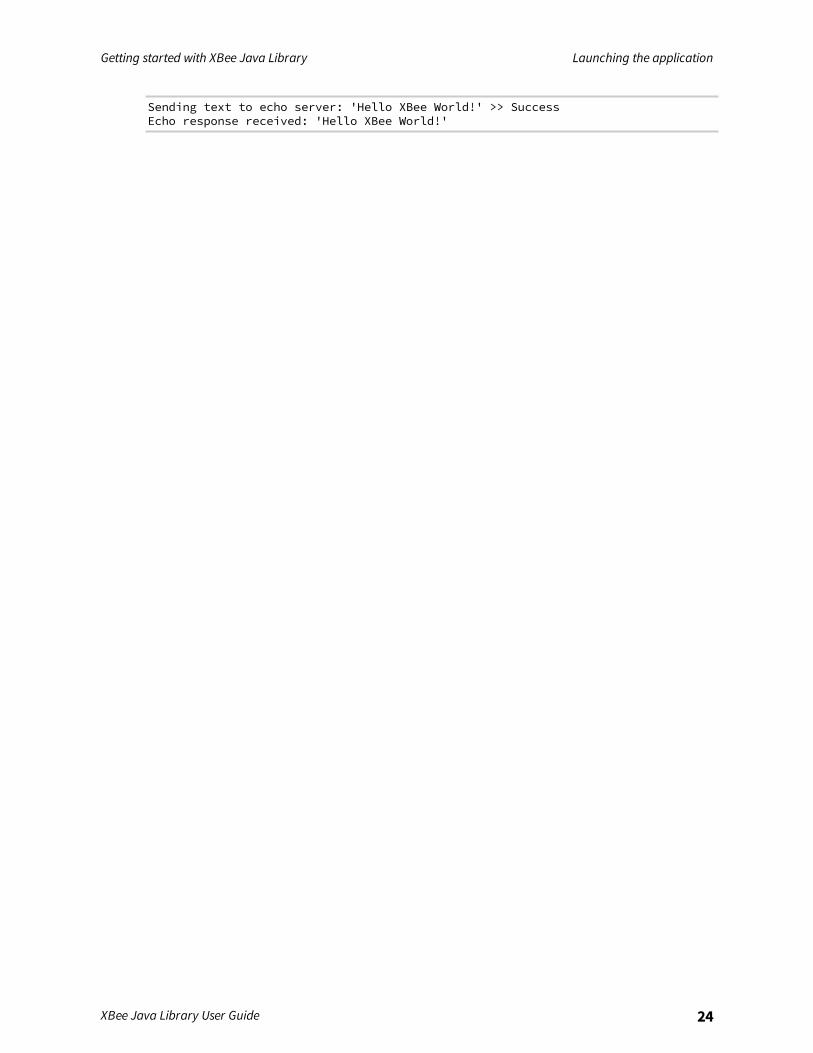
The application sends the message Hello XBee World! to the echo server and the Cellular device readsit back. When that happens, a line with the result of the operation is printed to the standard output:
Getting started with XBee Java Library Launching the application
XBee Java Library User Guide 24
Sending text to echo server: 'Hello XBee World!' >> SuccessEcho response received: 'Hello XBee World!'
Using the XBee Java Library
This section of the guide provides reference information for the XBee Java Library. In addition toserving as a reference, it provides detailed information about the additional capabilities of thisproduct.The XBee Java Library is an easy-to-use API developed in Java that allows you to interact with Digi'sXBee radio frequency (RF) modules. You can use the XBee Java Library to create any kind of Java orAndroid application, from command line to GUI, that needs to communicate with or configure XBeedevices.The API is designed both for new and advanced users. You do not need previous knowledge of XBeecommunication protocols or advanced Java experience to get started. The API provides all themethods you need to perform the most common tasks related to XBee devices. If you are anadvanced user, you can take advantage of the complete set of API commands to create powerfulapplications.The XBee Java Library includes the following features:
n Support for the following XBee devices:l Zigbee
l 802.15.4
l DigiMesh
l Point-to-Multipoint
l Wi-Fi
l Cellular
l Cellular NB-IoT
l Thread
n Support for API and API Escaped operating modes.
n Support for Android.
XBee Java Library User Guide 25
Using the XBee Java Library
XBee Java Library User Guide 26
n A range of capabilities, including the ability to:l Discover all the remote XBee devices in your network.
l Configure your XBee device or any remote module of the network.
l Send data to a specific device, or to all the XBee devices in the network.
l Receive data from remote XBee devices.
l Receive network status changes related to your XBee device.
l Configure, set and read the IO lines of your XBee devices.
l Receive IO data samples at a specific rate from any remote XBee device in the network.
Before you begin to work with the XBee Java Library, we recommended looking at the conceptsexplained in the first section, XBee terminology, to help you while developing your application.
Using the XBee Java Library
XBee Java Library User Guide 27
XBee terminology 28Working with XBee classes 32Configuring the XBee device 39Discovering the XBee network 56Communicating with XBee devices 66Handling analog and digital IO lines 110Logging events 120Building the library 121Android integration 126
Using the XBee Java Library XBee terminology
XBee Java Library User Guide 28
XBee terminologyThis section covers basic XBee concepts and terminology. The XBee Java library manual refers tothese concepts frequently, so it is important to understand these concepts.
RF modulesA radio frequency (RF) module is a small electronic circuit used to transmit and receive radio signalson different frequencies. Digi produces a wide variety of RF modules to meet the requirements ofalmost any wireless solution, such as long-range, low-cost, and low power modules. The most popularwireless products are the XBee RF modules.
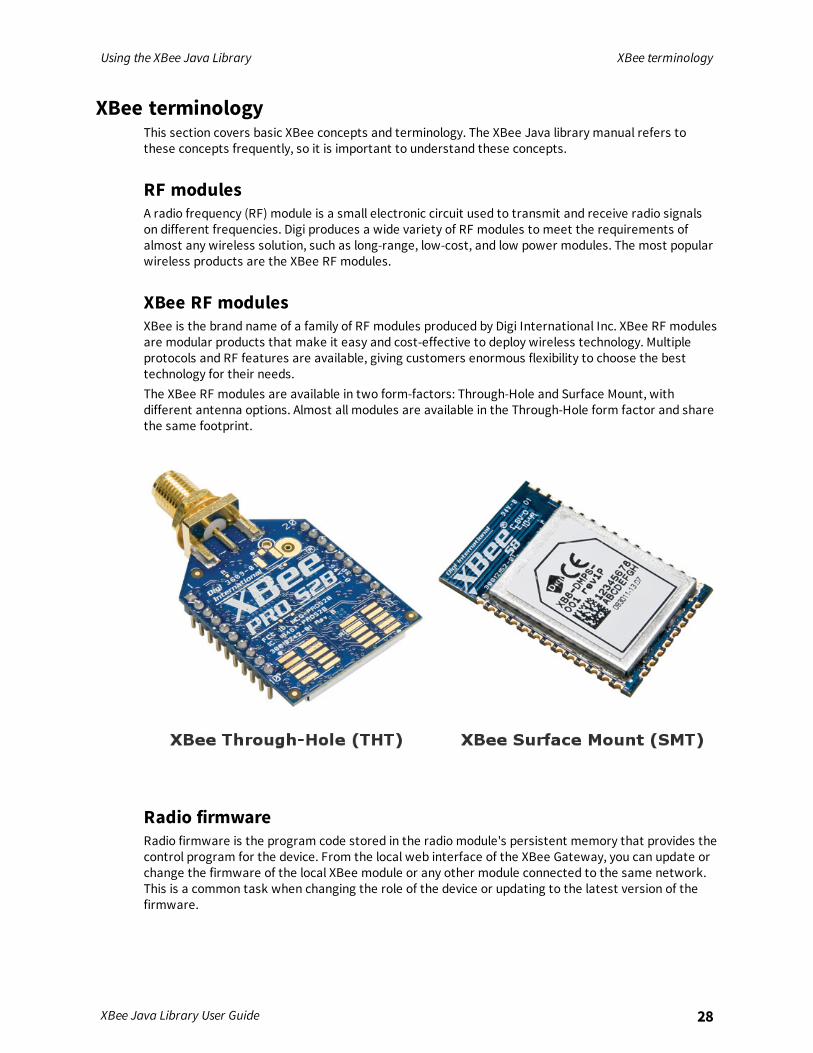
XBee RF modulesXBee is the brand name of a family of RF modules produced by Digi International Inc. XBee RF modulesare modular products that make it easy and cost-effective to deploy wireless technology. Multipleprotocols and RF features are available, giving customers enormous flexibility to choose the besttechnology for their needs.The XBee RF modules are available in two form-factors: Through-Hole and Surface Mount, withdifferent antenna options. Almost all modules are available in the Through-Hole form factor and sharethe same footprint.
Radio firmwareRadio firmware is the program code stored in the radio module's persistent memory that provides thecontrol program for the device. From the local web interface of the XBee Gateway, you can update orchange the firmware of the local XBee module or any other module connected to the same network.This is a common task when changing the role of the device or updating to the latest version of thefirmware.
Using the XBee Java Library XBee terminology
XBee Java Library User Guide 29
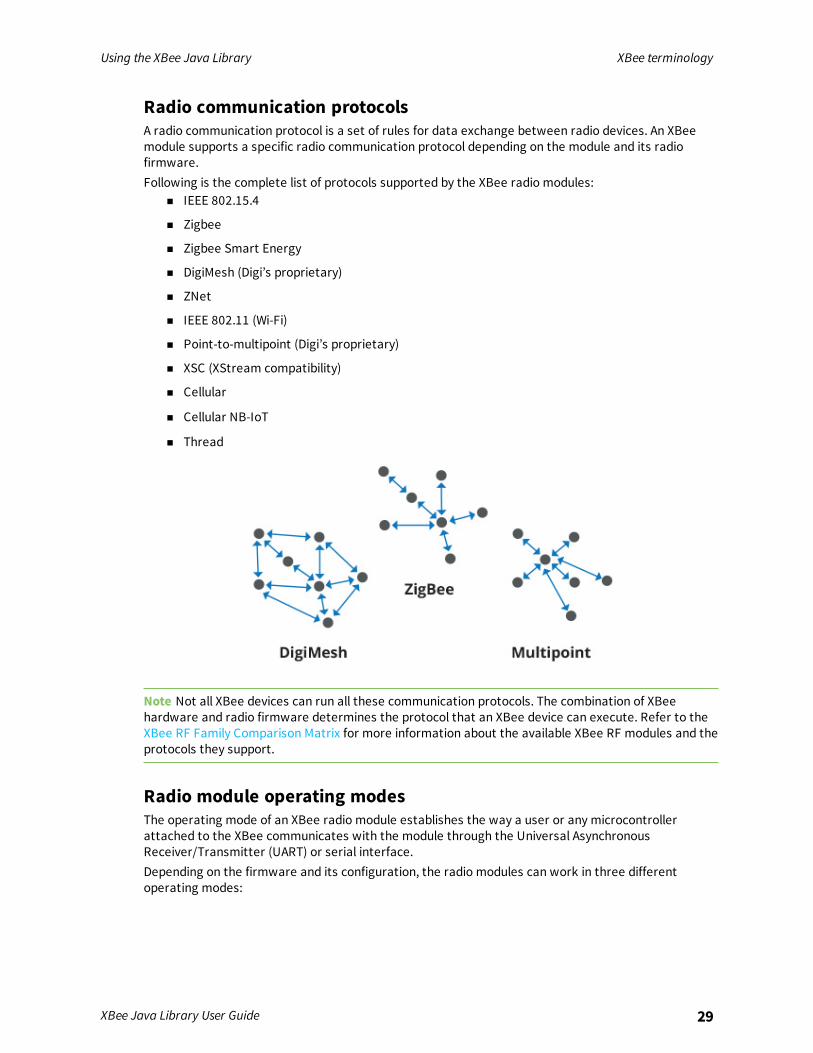
Radio communication protocolsA radio communication protocol is a set of rules for data exchange between radio devices. An XBeemodule supports a specific radio communication protocol depending on the module and its radiofirmware.Following is the complete list of protocols supported by the XBee radio modules:
n IEEE 802.15.4
n Zigbee
n Zigbee Smart Energy
n DigiMesh (Digi’s proprietary)
n ZNet
n IEEE 802.11 (Wi-Fi)
n Point-to-multipoint (Digi’s proprietary)
n XSC (XStream compatibility)
n Cellular
n Cellular NB-IoT
n Thread
Note Not all XBee devices can run all these communication protocols. The combination of XBeehardware and radio firmware determines the protocol that an XBee device can execute. Refer to theXBee RF Family Comparison Matrix for more information about the available XBee RF modules and theprotocols they support.
Radio module operating modesThe operating mode of an XBee radio module establishes the way a user or any microcontrollerattached to the XBee communicates with the module through the Universal AsynchronousReceiver/Transmitter (UART) or serial interface.Depending on the firmware and its configuration, the radio modules can work in three differentoperating modes:

Using the XBee Java Library XBee terminology
XBee Java Library User Guide 30
n Application Transparent (AT) operating mode
n API operating mode
n API escaped operating mode
In some cases, the operating mode of a radio module is established by the firmware version and thefirmware's AP setting. The module's firmware version determines whether the operating mode is ATor API. The firmware's AP setting determines if the API mode is escaped (AP=2) or not (AP=1). In othercases, the operating mode is only determined by the AP setting, which allows you to configure themode to be AT (AP=0), API (AP=1) or API escaped (AP=2).
API operating modeApplication Programming Interface (API) operating mode is an alternative to AT operating mode. APIoperating mode requires that communication with the module through a structured interface; that is,data communicated in API frames.The API specifies how commands, command responses, the module sends and receives statusmessages using the serial interface. API operation mode enables many operations, such as thefollowing:
n Configure the XBee device itself.
n Configure remote devices in the network.
n Manage data transmission to multiple destinations.
n Receive success/failure status of each transmitted RF packet.
n Identify the source address of each received packet.
Depending on the AP parameter value, the device can operate in one of two modes: API (AP = 1) or APIescaped (AP = 2) operating mode.
Application Transparent (AT) operating modeIn Application Transparent (AT) or transparent operating mode, all serial data received by the radiomodule is queued up for RF transmission. When the module receives RF data, it sends the data outthrough the serial interface.To configure an XBee module operating in AT, put the device in commandmode to send theconfiguration commands.
Command modeWhen the radio module is working in AT operating mode, configure settings using the commandmodeinterface.To enter commandmode, send the 3-character command sequence through the serial interface of theradio module, usually +++, within one second. Once the commandmode has been established, themodule sends the reply OK, the commandmode timer starts, and the radio module can receive ATcommands.The structure of an AT command follows this format:AT[ASCII command][Space (optional)][Parameter (optional)][Carriage return]
Example:ATNI MyDevice\r
Using the XBee Java Library XBee terminology
XBee Java Library User Guide 31
If no valid AT commands are received within the commandmode timeout, the radio moduleautomatically exits commandmode. You can also exit commandmode issuing the CN command (ExitCommandmode).
API escaped operating modeAPI escaped operating mode (AP = 2) works similarly to API mode. The only difference is that whenworking in API escapedmode, some bytes of the API frame specific data must be escaped.Use API escaped operating mode to add reliability to the RF transmission, which prevents conflictswith special characters such as the start-of-frame byte (0x7E). Since 0x7E can only appear at the startof an API packet, if 0x7E is received at any time, you can assume that a new packet has startedregardless of length. In API escapedmode, those special bytes are escaped.
Escape charactersWhen sending or receiving an API frame in API escapedmode, you must escape (flag) specific datavalues so they do not interfere with the data frame sequence. To escape a data byte, insert 0x7D andfollow it with the byte being escaped, XOR'd with 0x20.The following data bytes must be escaped:
n 0x7E: Frame delimiter
n 0x7D: Escape
n 0x11: XON
n 0x13: XOFF
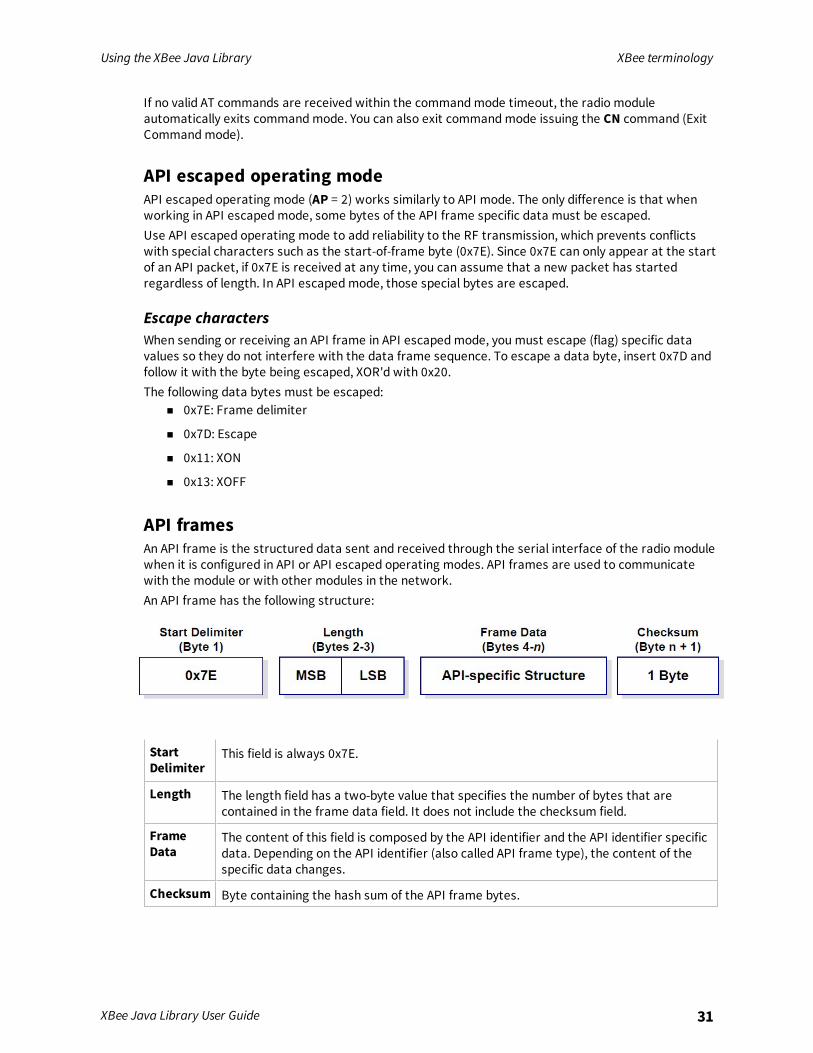
API framesAn API frame is the structured data sent and received through the serial interface of the radio modulewhen it is configured in API or API escaped operating modes. API frames are used to communicatewith the module or with other modules in the network.An API frame has the following structure:
StartDelimiter
This field is always 0x7E.
Length The length field has a two-byte value that specifies the number of bytes that arecontained in the frame data field. It does not include the checksum field.
FrameData
The content of this field is composed by the API identifier and the API identifier specificdata. Depending on the API identifier (also called API frame type), the content of thespecific data changes.
Checksum Byte containing the hash sum of the API frame bytes.
Using the XBee Java Library Working with XBee classes
XBee Java Library User Guide 32
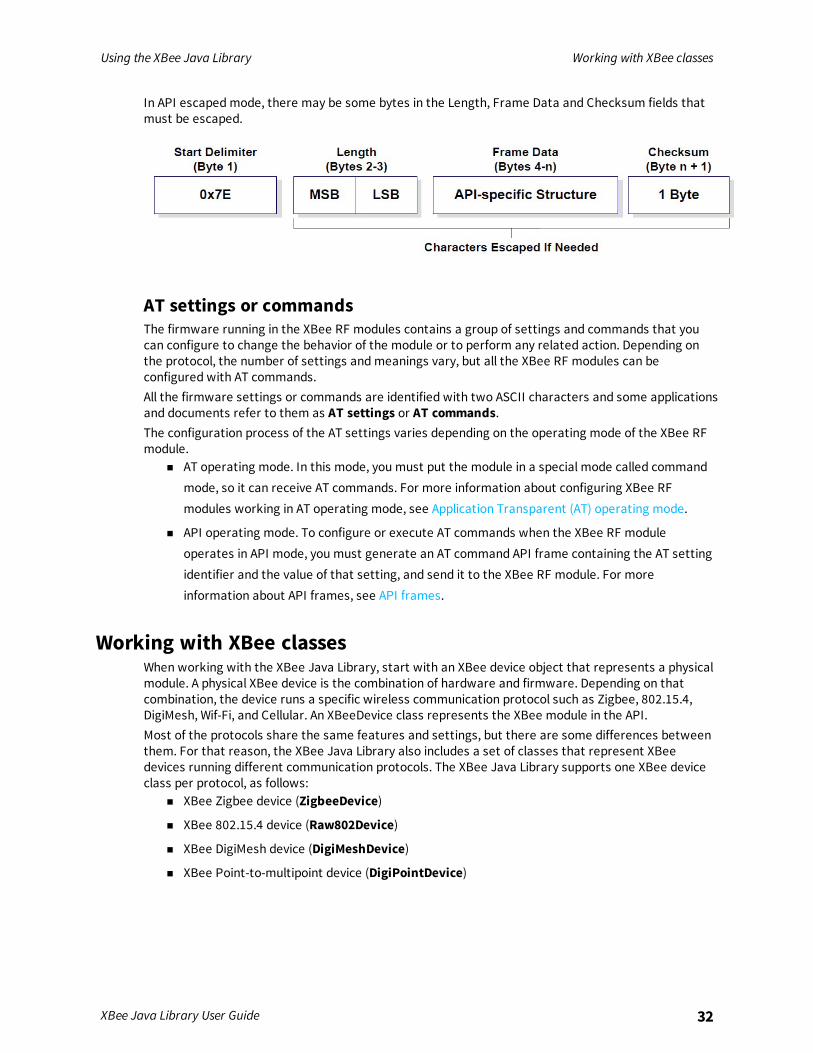
In API escapedmode, there may be some bytes in the Length, Frame Data and Checksum fields thatmust be escaped.
AT settings or commandsThe firmware running in the XBee RF modules contains a group of settings and commands that youcan configure to change the behavior of the module or to perform any related action. Depending onthe protocol, the number of settings andmeanings vary, but all the XBee RF modules can beconfigured with AT commands.All the firmware settings or commands are identified with two ASCII characters and some applicationsand documents refer to them as AT settings or AT commands.The configuration process of the AT settings varies depending on the operating mode of the XBee RFmodule.
n AT operating mode. In this mode, you must put the module in a special mode called commandmode, so it can receive AT commands. For more information about configuring XBee RFmodules working in AT operating mode, see Application Transparent (AT) operating mode.
n API operating mode. To configure or execute AT commands when the XBee RF moduleoperates in API mode, you must generate an AT command API frame containing the AT settingidentifier and the value of that setting, and send it to the XBee RF module. For moreinformation about API frames, see API frames.
Working with XBee classesWhen working with the XBee Java Library, start with an XBee device object that represents a physicalmodule. A physical XBee device is the combination of hardware and firmware. Depending on thatcombination, the device runs a specific wireless communication protocol such as Zigbee, 802.15.4,DigiMesh, Wif-Fi, and Cellular. An XBeeDevice class represents the XBee module in the API.Most of the protocols share the same features and settings, but there are some differences betweenthem. For that reason, the XBee Java Library also includes a set of classes that represent XBeedevices running different communication protocols. The XBee Java Library supports one XBee deviceclass per protocol, as follows:
n XBee Zigbee device (ZigbeeDevice)
n XBee 802.15.4 device (Raw802Device)
n XBee DigiMesh device (DigiMeshDevice)
n XBee Point-to-multipoint device (DigiPointDevice)
Using the XBee Java Library Working with XBee classes
XBee Java Library User Guide 33
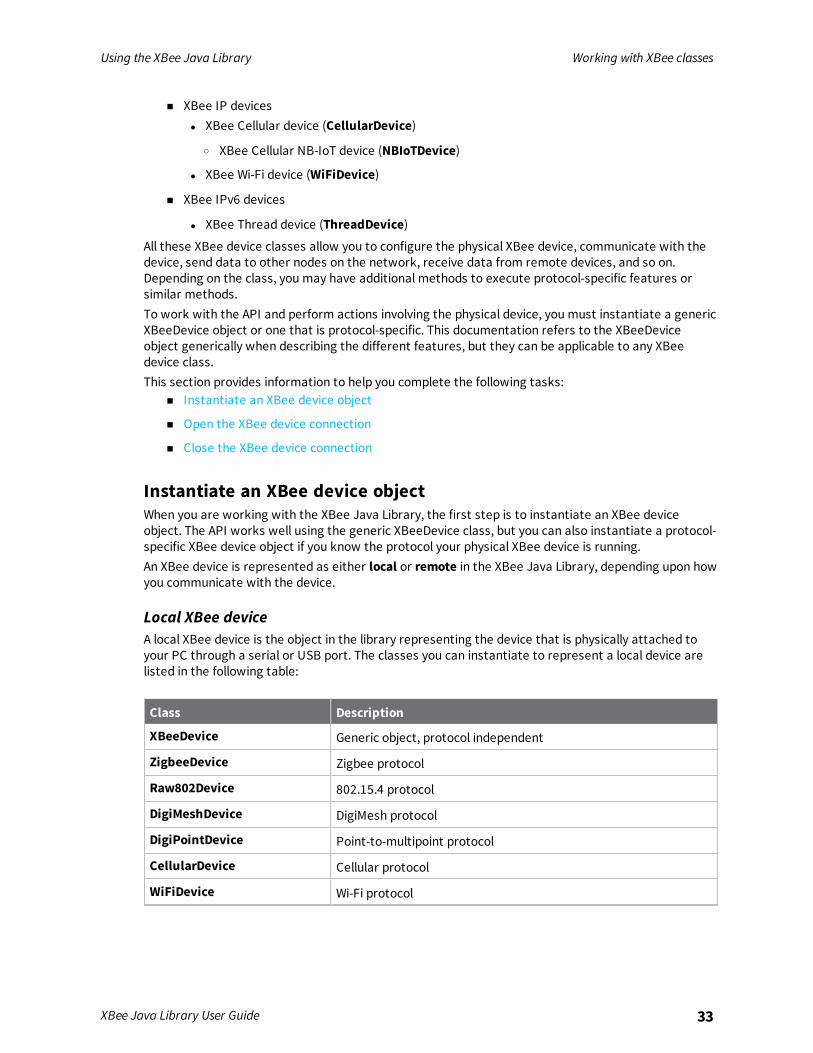
n XBee IP devicesl XBee Cellular device (CellularDevice)
o XBee Cellular NB-IoT device (NBIoTDevice)
l XBee Wi-Fi device (WiFiDevice)
n XBee IPv6 devices
l XBee Thread device (ThreadDevice)All these XBee device classes allow you to configure the physical XBee device, communicate with thedevice, send data to other nodes on the network, receive data from remote devices, and so on.Depending on the class, you may have additional methods to execute protocol-specific features orsimilar methods.To work with the API and perform actions involving the physical device, you must instantiate a genericXBeeDevice object or one that is protocol-specific. This documentation refers to the XBeeDeviceobject generically when describing the different features, but they can be applicable to any XBeedevice class.This section provides information to help you complete the following tasks:
n Instantiate an XBee device object
n Open the XBee device connection
n Close the XBee device connection
Instantiate an XBee device objectWhen you are working with the XBee Java Library, the first step is to instantiate an XBee deviceobject. The API works well using the generic XBeeDevice class, but you can also instantiate a protocol-specific XBee device object if you know the protocol your physical XBee device is running.An XBee device is represented as either local or remote in the XBee Java Library, depending upon howyou communicate with the device.
Local XBee deviceA local XBee device is the object in the library representing the device that is physically attached toyour PC through a serial or USB port. The classes you can instantiate to represent a local device arelisted in the following table:
Class Description
XBeeDevice Generic object, protocol independent
ZigbeeDevice Zigbee protocol
Raw802Device 802.15.4 protocol
DigiMeshDevice DigiMesh protocol
DigiPointDevice Point-to-multipoint protocol
CellularDevice Cellular protocol
WiFiDevice Wi-Fi protocol
Using the XBee Java Library Working with XBee classes
XBee Java Library User Guide 34
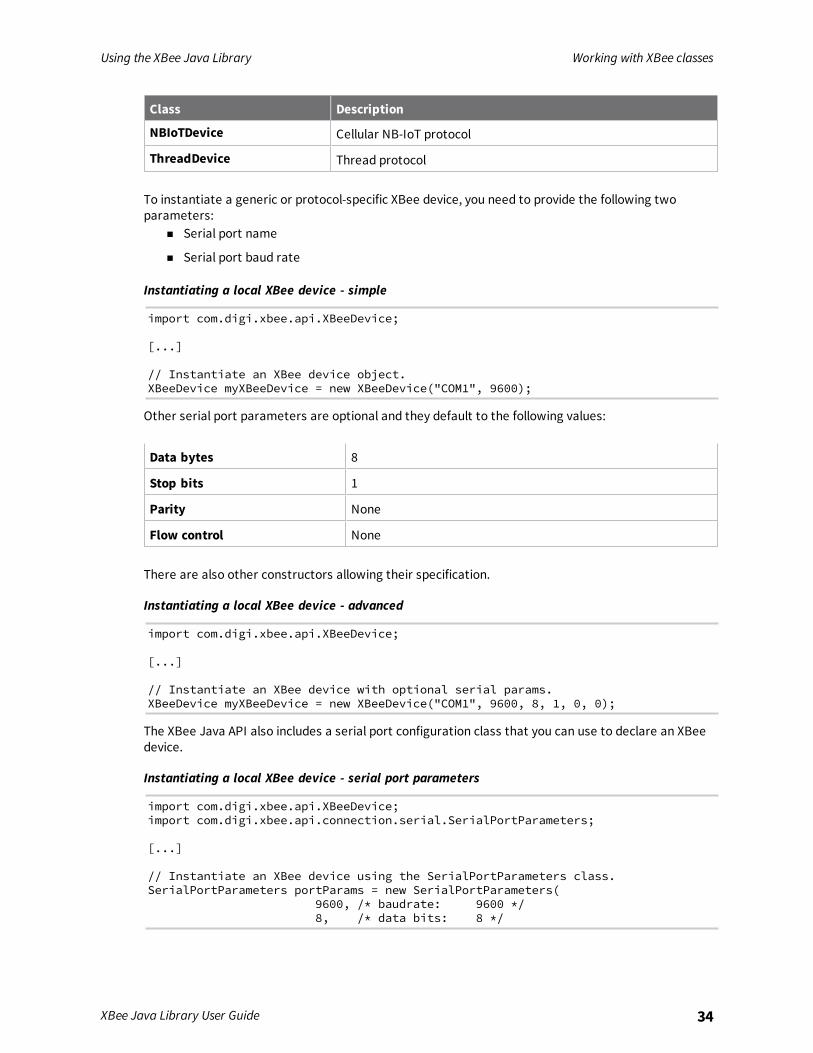
Class Description
NBIoTDevice Cellular NB-IoT protocol
ThreadDevice Thread protocol
To instantiate a generic or protocol-specific XBee device, you need to provide the following twoparameters:
n Serial port name
n Serial port baud rate
Instantiating a local XBee device - simple
import com.digi.xbee.api.XBeeDevice;
[...]
// Instantiate an XBee device object.XBeeDevice myXBeeDevice = new XBeeDevice("COM1", 9600);
Other serial port parameters are optional and they default to the following values:
Data bytes 8
Stop bits 1
Parity None
Flow control None
There are also other constructors allowing their specification.
Instantiating a local XBee device - advanced
import com.digi.xbee.api.XBeeDevice;
[...]
// Instantiate an XBee device with optional serial params.XBeeDevice myXBeeDevice = new XBeeDevice("COM1", 9600, 8, 1, 0, 0);
The XBee Java API also includes a serial port configuration class that you can use to declare an XBeedevice.
Instantiating a local XBee device - serial port parameters
import com.digi.xbee.api.XBeeDevice;import com.digi.xbee.api.connection.serial.SerialPortParameters;
[...]
// Instantiate an XBee device using the SerialPortParameters class.SerialPortParameters portParams = new SerialPortParameters(
9600, /* baudrate: 9600 */8, /* data bits: 8 */
Using the XBee Java Library Working with XBee classes
XBee Java Library User Guide 35
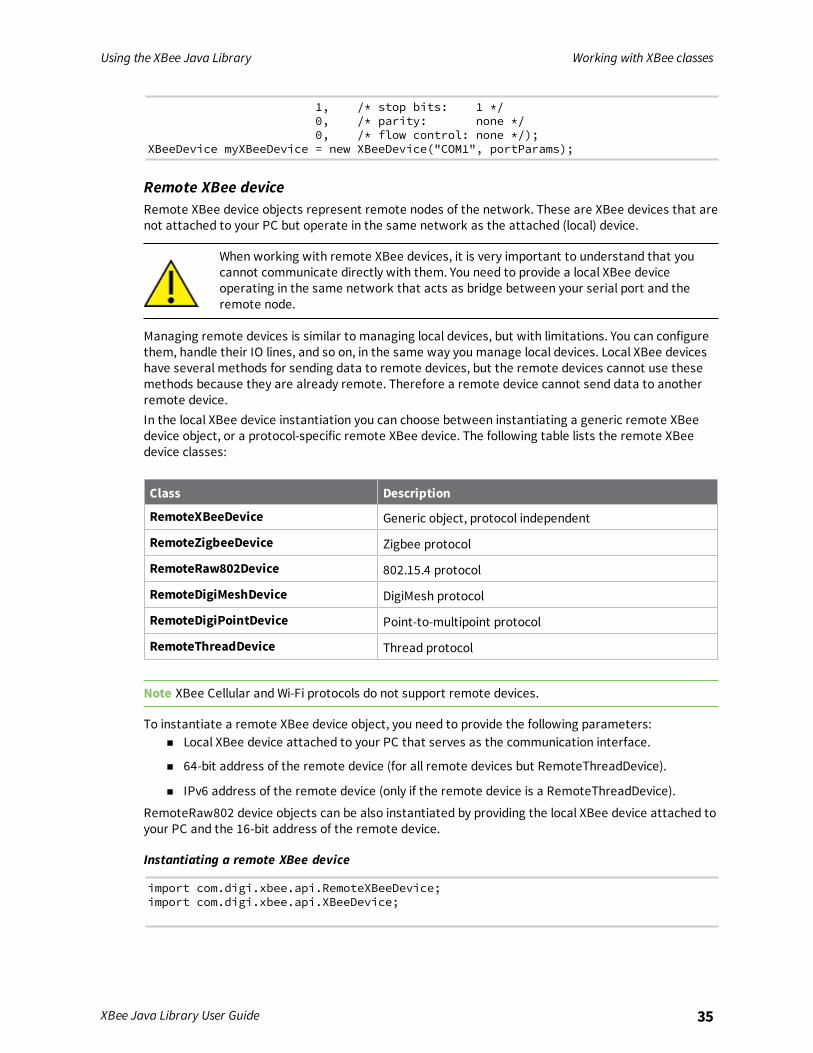
1, /* stop bits: 1 */0, /* parity: none */0, /* flow control: none */);
XBeeDevice myXBeeDevice = new XBeeDevice("COM1", portParams);
Remote XBee deviceRemote XBee device objects represent remote nodes of the network. These are XBee devices that arenot attached to your PC but operate in the same network as the attached (local) device.
When working with remote XBee devices, it is very important to understand that youcannot communicate directly with them. You need to provide a local XBee deviceoperating in the same network that acts as bridge between your serial port and theremote node.
Managing remote devices is similar to managing local devices, but with limitations. You can configurethem, handle their IO lines, and so on, in the same way you manage local devices. Local XBee deviceshave several methods for sending data to remote devices, but the remote devices cannot use thesemethods because they are already remote. Therefore a remote device cannot send data to anotherremote device.In the local XBee device instantiation you can choose between instantiating a generic remote XBeedevice object, or a protocol-specific remote XBee device. The following table lists the remote XBeedevice classes:
Class Description
RemoteXBeeDevice Generic object, protocol independent
RemoteZigbeeDevice Zigbee protocol
RemoteRaw802Device 802.15.4 protocol
RemoteDigiMeshDevice DigiMesh protocol
RemoteDigiPointDevice Point-to-multipoint protocol
RemoteThreadDevice Thread protocol
Note XBee Cellular andWi-Fi protocols do not support remote devices.
To instantiate a remote XBee device object, you need to provide the following parameters:n Local XBee device attached to your PC that serves as the communication interface.
n 64-bit address of the remote device (for all remote devices but RemoteThreadDevice).
n IPv6 address of the remote device (only if the remote device is a RemoteThreadDevice).
RemoteRaw802 device objects can be also instantiated by providing the local XBee device attached toyour PC and the 16-bit address of the remote device.
Instantiating a remote XBee device
import com.digi.xbee.api.RemoteXBeeDevice;import com.digi.xbee.api.XBeeDevice;
Using the XBee Java Library Working with XBee classes
XBee Java Library User Guide 36
[...]
// Instantiate a local XBee device object.XBeeDevice myLocalXBeeDevice = new XBeeDevice("COM1", 9600);
// Instantiate a remote XBee device object.RemoteXBeeDevice myRemoteXBeeDevice = new RemoteXBeeDevice(myLocalXBeeDevice,
new XBee64BitAddress("000000409D5EXXXX"));
The local device must also be the same protocol for protocol-specific remote XBee devices.
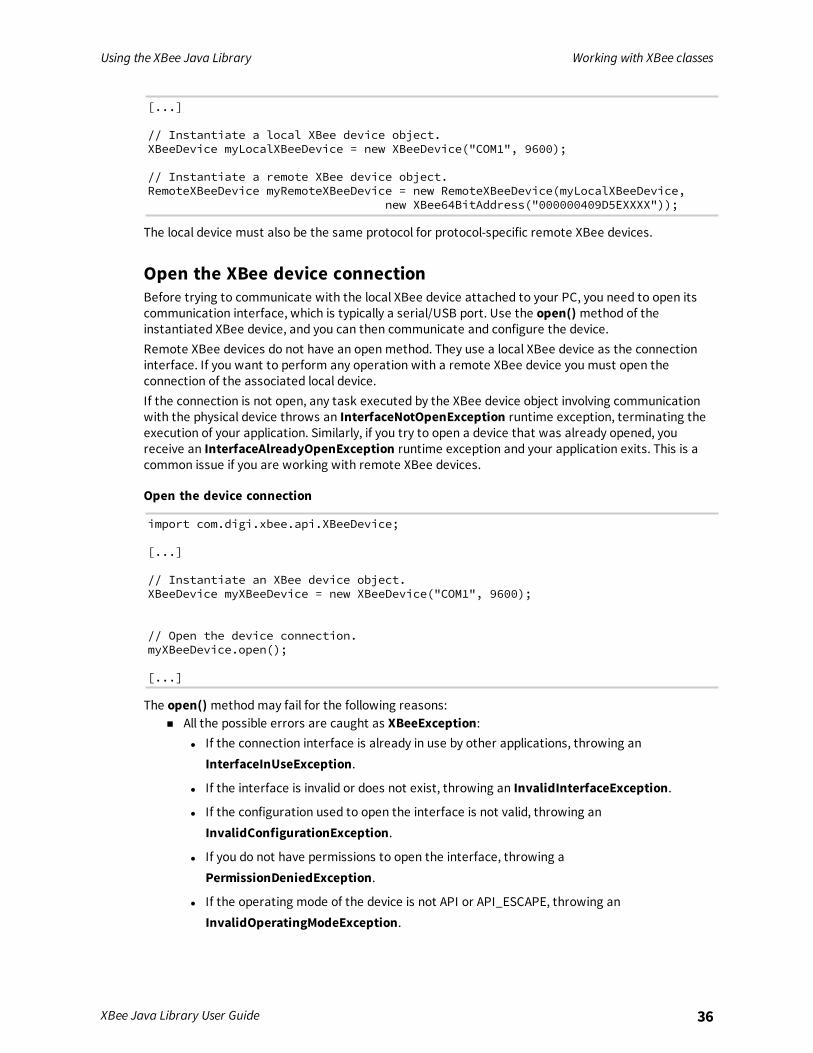
Open the XBee device connectionBefore trying to communicate with the local XBee device attached to your PC, you need to open itscommunication interface, which is typically a serial/USB port. Use the open() method of theinstantiated XBee device, and you can then communicate and configure the device.Remote XBee devices do not have an openmethod. They use a local XBee device as the connectioninterface. If you want to perform any operation with a remote XBee device you must open theconnection of the associated local device.If the connection is not open, any task executed by the XBee device object involving communicationwith the physical device throws an InterfaceNotOpenException runtime exception, terminating theexecution of your application. Similarly, if you try to open a device that was already opened, youreceive an InterfaceAlreadyOpenException runtime exception and your application exits. This is acommon issue if you are working with remote XBee devices.
Open the device connection
import com.digi.xbee.api.XBeeDevice;
[...]
// Instantiate an XBee device object.XBeeDevice myXBeeDevice = new XBeeDevice("COM1", 9600);
// Open the device connection.myXBeeDevice.open();
[...]
The open() methodmay fail for the following reasons:n All the possible errors are caught as XBeeException:
l If the connection interface is already in use by other applications, throwing anInterfaceInUseException.
l If the interface is invalid or does not exist, throwing an InvalidInterfaceException.
l If the configuration used to open the interface is not valid, throwing anInvalidConfigurationException.
l If you do not have permissions to open the interface, throwing aPermissionDeniedException.
l If the operating mode of the device is not API or API_ESCAPE, throwing anInvalidOperatingModeException.
Using the XBee Java Library Working with XBee classes
XBee Java Library User Guide 37
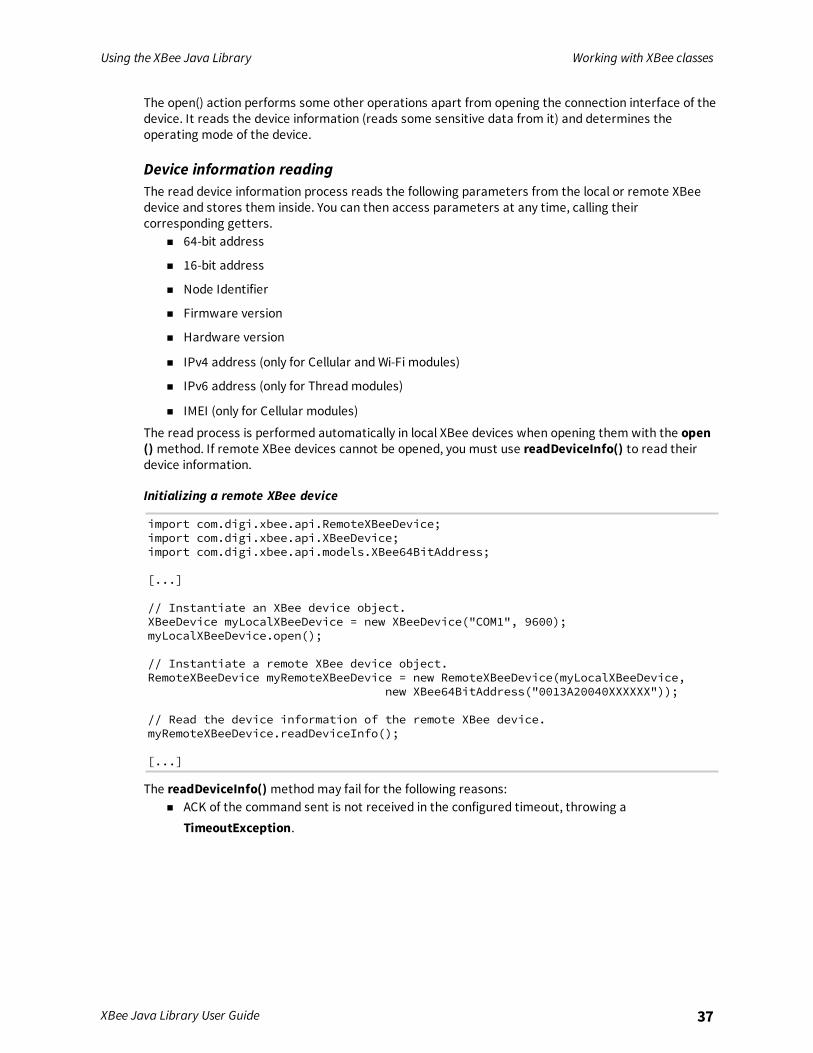
The open() action performs some other operations apart from opening the connection interface of thedevice. It reads the device information (reads some sensitive data from it) and determines theoperating mode of the device.
Device information readingThe read device information process reads the following parameters from the local or remote XBeedevice and stores them inside. You can then access parameters at any time, calling theircorresponding getters.
n 64-bit address
n 16-bit address
n Node Identifier
n Firmware version
n Hardware version
n IPv4 address (only for Cellular andWi-Fi modules)
n IPv6 address (only for Threadmodules)
n IMEI (only for Cellular modules)
The read process is performed automatically in local XBee devices when opening them with the open() method. If remote XBee devices cannot be opened, you must use readDeviceInfo() to read theirdevice information.
Initializing a remote XBee device
import com.digi.xbee.api.RemoteXBeeDevice;import com.digi.xbee.api.XBeeDevice;import com.digi.xbee.api.models.XBee64BitAddress;
[...]
// Instantiate an XBee device object.XBeeDevice myLocalXBeeDevice = new XBeeDevice("COM1", 9600);myLocalXBeeDevice.open();
// Instantiate a remote XBee device object.RemoteXBeeDevice myRemoteXBeeDevice = new RemoteXBeeDevice(myLocalXBeeDevice,
new XBee64BitAddress("0013A20040XXXXXX"));
// Read the device information of the remote XBee device.myRemoteXBeeDevice.readDeviceInfo();
[...]
The readDeviceInfo() methodmay fail for the following reasons:n ACK of the command sent is not received in the configured timeout, throwing a
TimeoutException.
Using the XBee Java Library Working with XBee classes
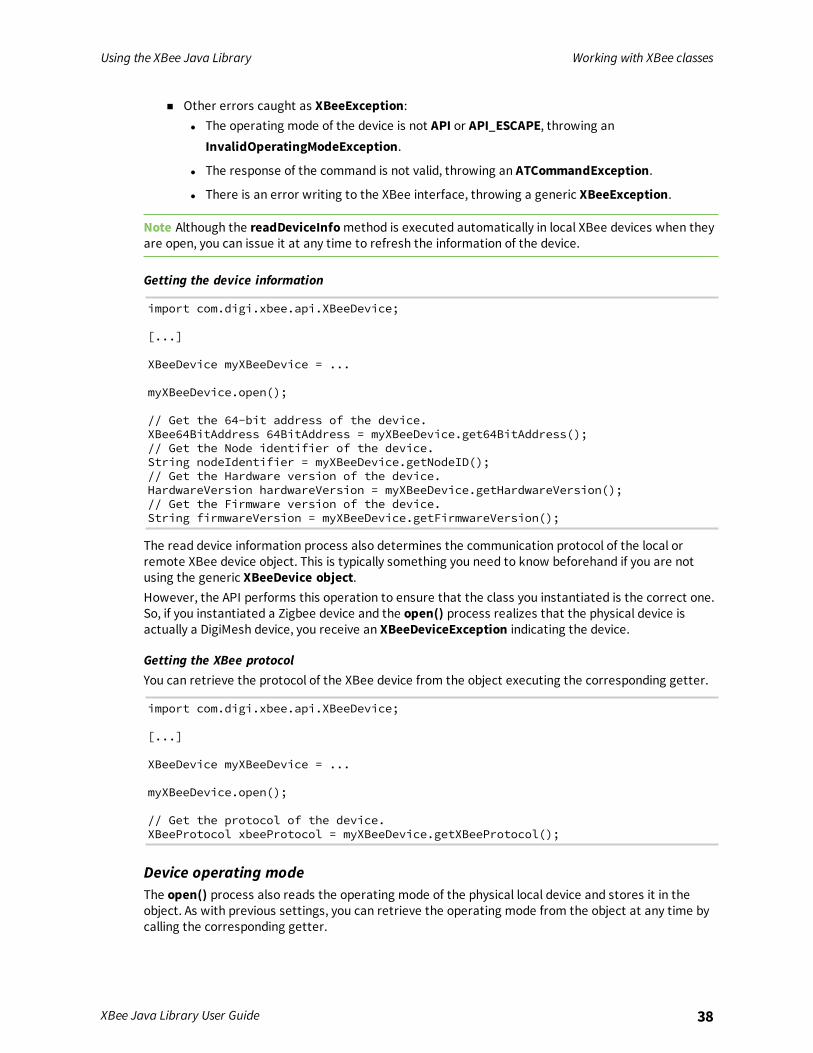
XBee Java Library User Guide 38
n Other errors caught as XBeeException:l The operating mode of the device is not API or API_ESCAPE, throwing an
InvalidOperatingModeException.
l The response of the command is not valid, throwing an ATCommandException.
l There is an error writing to the XBee interface, throwing a generic XBeeException.
Note Although the readDeviceInfomethod is executed automatically in local XBee devices when theyare open, you can issue it at any time to refresh the information of the device.
Getting the device information
import com.digi.xbee.api.XBeeDevice;
[...]
XBeeDevice myXBeeDevice = ...
myXBeeDevice.open();
// Get the 64-bit address of the device.XBee64BitAddress 64BitAddress = myXBeeDevice.get64BitAddress();// Get the Node identifier of the device.String nodeIdentifier = myXBeeDevice.getNodeID();// Get the Hardware version of the device.HardwareVersion hardwareVersion = myXBeeDevice.getHardwareVersion();// Get the Firmware version of the device.String firmwareVersion = myXBeeDevice.getFirmwareVersion();
The read device information process also determines the communication protocol of the local orremote XBee device object. This is typically something you need to know beforehand if you are notusing the generic XBeeDevice object.However, the API performs this operation to ensure that the class you instantiated is the correct one.So, if you instantiated a Zigbee device and the open() process realizes that the physical device isactually a DigiMesh device, you receive an XBeeDeviceException indicating the device.
Getting the XBee protocolYou can retrieve the protocol of the XBee device from the object executing the corresponding getter.
import com.digi.xbee.api.XBeeDevice;
[...]
XBeeDevice myXBeeDevice = ...
myXBeeDevice.open();
// Get the protocol of the device.XBeeProtocol xbeeProtocol = myXBeeDevice.getXBeeProtocol();
Device operating modeThe open() process also reads the operating mode of the physical local device and stores it in theobject. As with previous settings, you can retrieve the operating mode from the object at any time bycalling the corresponding getter.
Using the XBee Java Library Configuring the XBee device
XBee Java Library User Guide 39
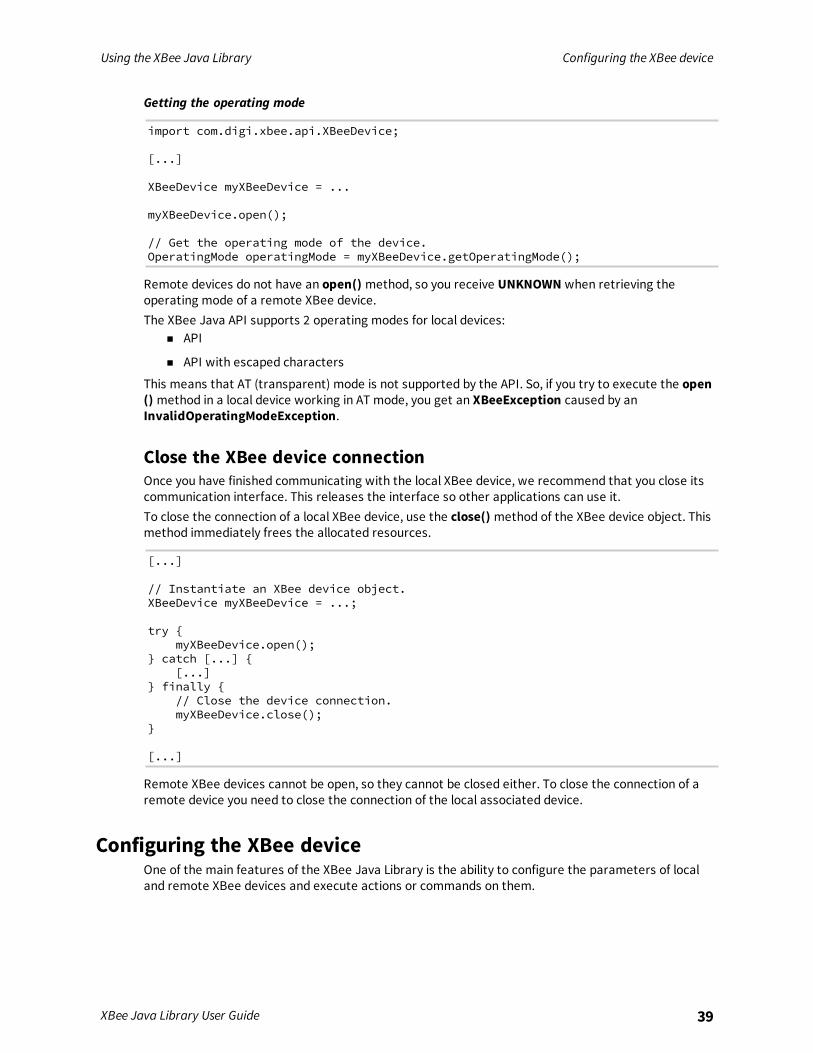
Getting the operating mode
import com.digi.xbee.api.XBeeDevice;
[...]
XBeeDevice myXBeeDevice = ...
myXBeeDevice.open();
// Get the operating mode of the device.OperatingMode operatingMode = myXBeeDevice.getOperatingMode();
Remote devices do not have an open() method, so you receive UNKNOWN when retrieving theoperating mode of a remote XBee device.The XBee Java API supports 2 operating modes for local devices:
n API
n API with escaped characters
This means that AT (transparent) mode is not supported by the API. So, if you try to execute the open() method in a local device working in AT mode, you get an XBeeException caused by anInvalidOperatingModeException.
Close the XBee device connectionOnce you have finished communicating with the local XBee device, we recommend that you close itscommunication interface. This releases the interface so other applications can use it.To close the connection of a local XBee device, use the close() method of the XBee device object. Thismethod immediately frees the allocated resources.
[...]
// Instantiate an XBee device object.XBeeDevice myXBeeDevice = ...;
try {myXBeeDevice.open();
} catch [...] { [...]
} finally {// Close the device connection.myXBeeDevice.close();
}
[...]
Remote XBee devices cannot be open, so they cannot be closed either. To close the connection of aremote device you need to close the connection of the local associated device.
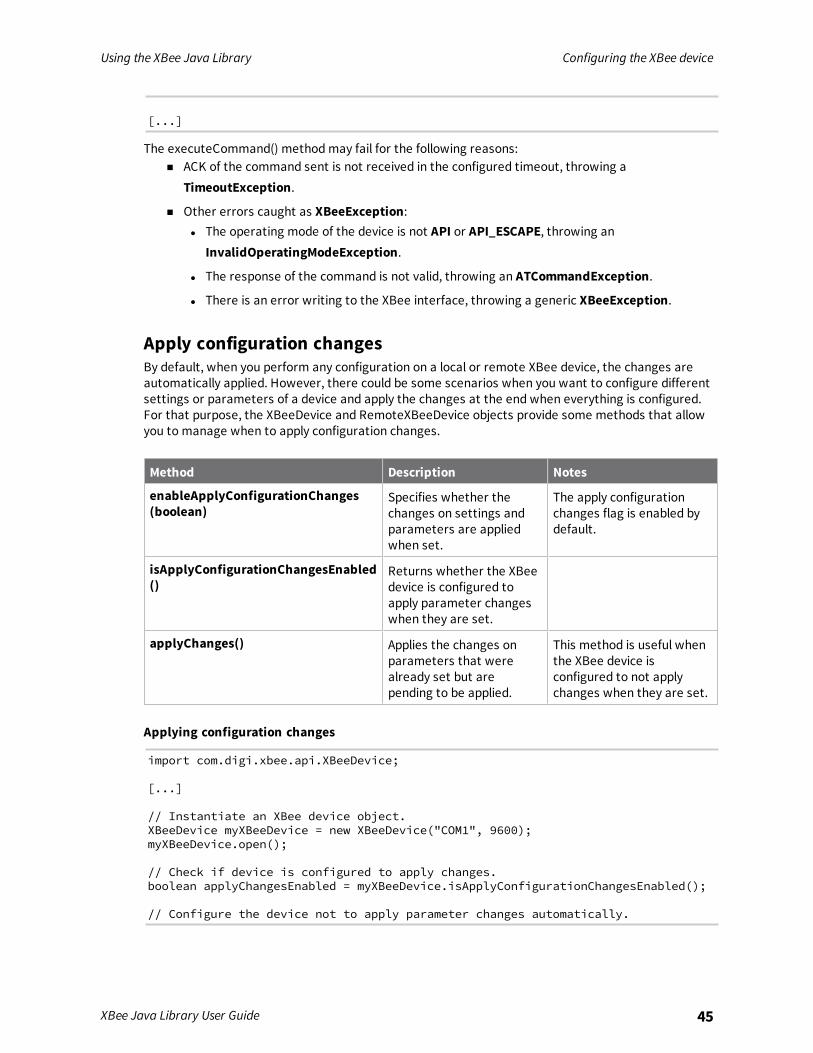
Configuring the XBee deviceOne of the main features of the XBee Java Library is the ability to configure the parameters of localand remote XBee devices and execute actions or commands on them.
Using the XBee Java Library Configuring the XBee device
XBee Java Library User Guide 40
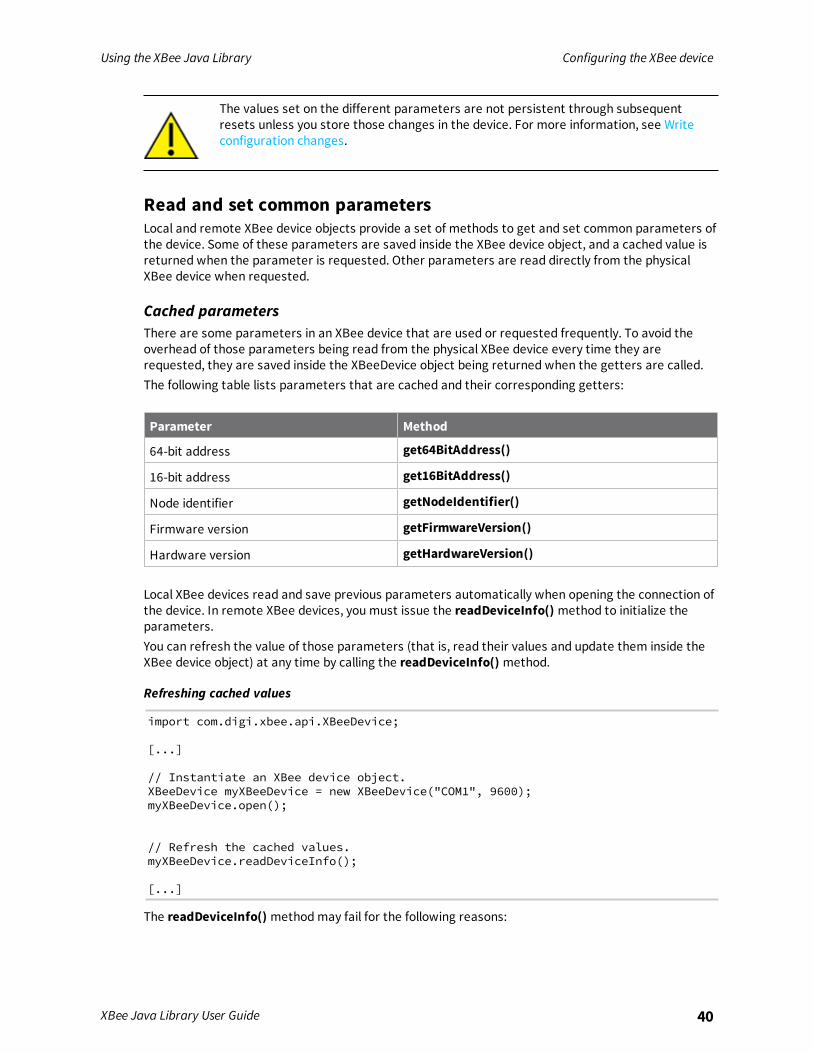
The values set on the different parameters are not persistent through subsequentresets unless you store those changes in the device. For more information, see Writeconfiguration changes.
Read and set common parametersLocal and remote XBee device objects provide a set of methods to get and set common parameters ofthe device. Some of these parameters are saved inside the XBee device object, and a cached value isreturned when the parameter is requested. Other parameters are read directly from the physicalXBee device when requested.
Cached parametersThere are some parameters in an XBee device that are used or requested frequently. To avoid theoverhead of those parameters being read from the physical XBee device every time they arerequested, they are saved inside the XBeeDevice object being returned when the getters are called.The following table lists parameters that are cached and their corresponding getters:
Parameter Method
64-bit address get64BitAddress()
16-bit address get16BitAddress()
Node identifier getNodeIdentifier()
Firmware version getFirmwareVersion()
Hardware version getHardwareVersion()
Local XBee devices read and save previous parameters automatically when opening the connection ofthe device. In remote XBee devices, you must issue the readDeviceInfo() method to initialize theparameters.You can refresh the value of those parameters (that is, read their values and update them inside theXBee device object) at any time by calling the readDeviceInfo() method.
Refreshing cached values
import com.digi.xbee.api.XBeeDevice;
[...]
// Instantiate an XBee device object.XBeeDevice myXBeeDevice = new XBeeDevice("COM1", 9600);myXBeeDevice.open();
// Refresh the cached values.myXBeeDevice.readDeviceInfo();
[...]
The readDeviceInfo() methodmay fail for the following reasons:
Using the XBee Java Library Configuring the XBee device
XBee Java Library User Guide 41
n ACK of the command sent is not received in the configured timeout, throwing aTimeoutException.
n Other errors caught as XBeeException:l The operating mode of the device is not API or API_ESCAPE, throwing an
InvalidOperatingModeException.
l The response of the command is not valid, throwing an ATCommandException.
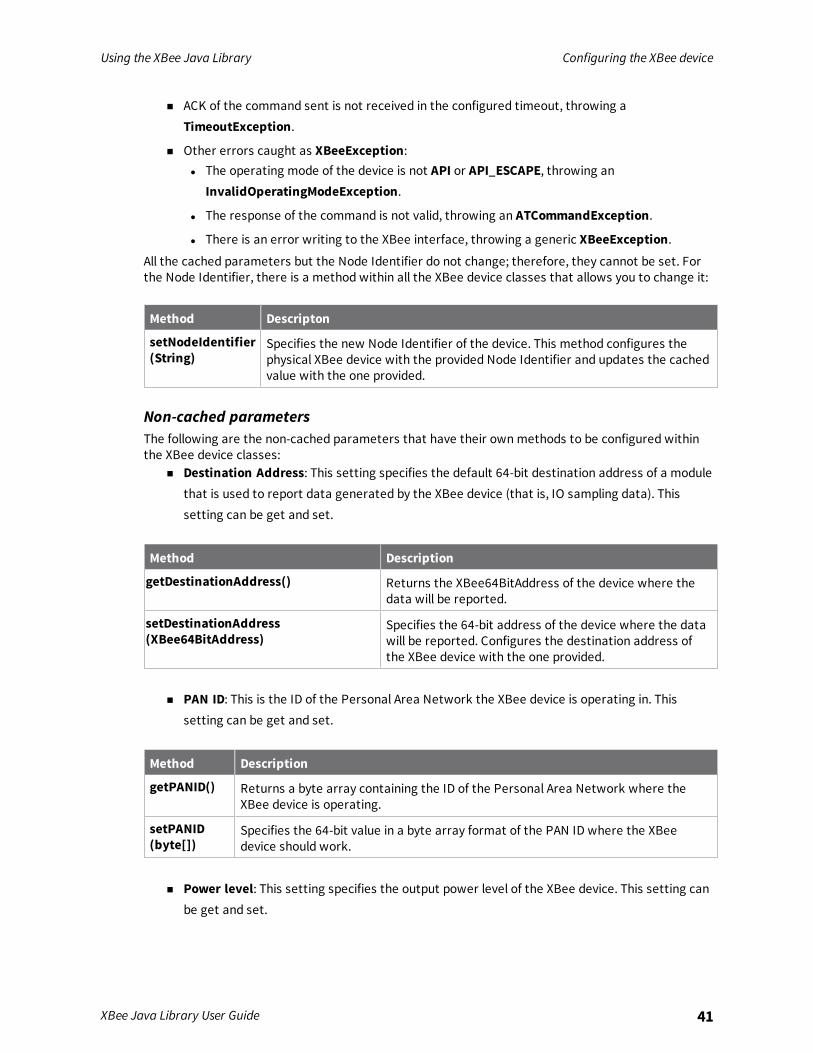
l There is an error writing to the XBee interface, throwing a generic XBeeException.All the cached parameters but the Node Identifier do not change; therefore, they cannot be set. Forthe Node Identifier, there is a method within all the XBee device classes that allows you to change it:
Method Descripton
setNodeIdentifier(String)
Specifies the new Node Identifier of the device. This method configures thephysical XBee device with the provided Node Identifier and updates the cachedvalue with the one provided.
Non-cached parametersThe following are the non-cached parameters that have their ownmethods to be configured withinthe XBee device classes:
n Destination Address: This setting specifies the default 64-bit destination address of a modulethat is used to report data generated by the XBee device (that is, IO sampling data). Thissetting can be get and set.
Method Description
getDestinationAddress() Returns the XBee64BitAddress of the device where thedata will be reported.
setDestinationAddress(XBee64BitAddress)
Specifies the 64-bit address of the device where the datawill be reported. Configures the destination address ofthe XBee device with the one provided.
n PAN ID: This is the ID of the Personal Area Network the XBee device is operating in. Thissetting can be get and set.
Method Description
getPANID() Returns a byte array containing the ID of the Personal Area Network where theXBee device is operating.
setPANID(byte[])
Specifies the 64-bit value in a byte array format of the PAN ID where the XBeedevice should work.
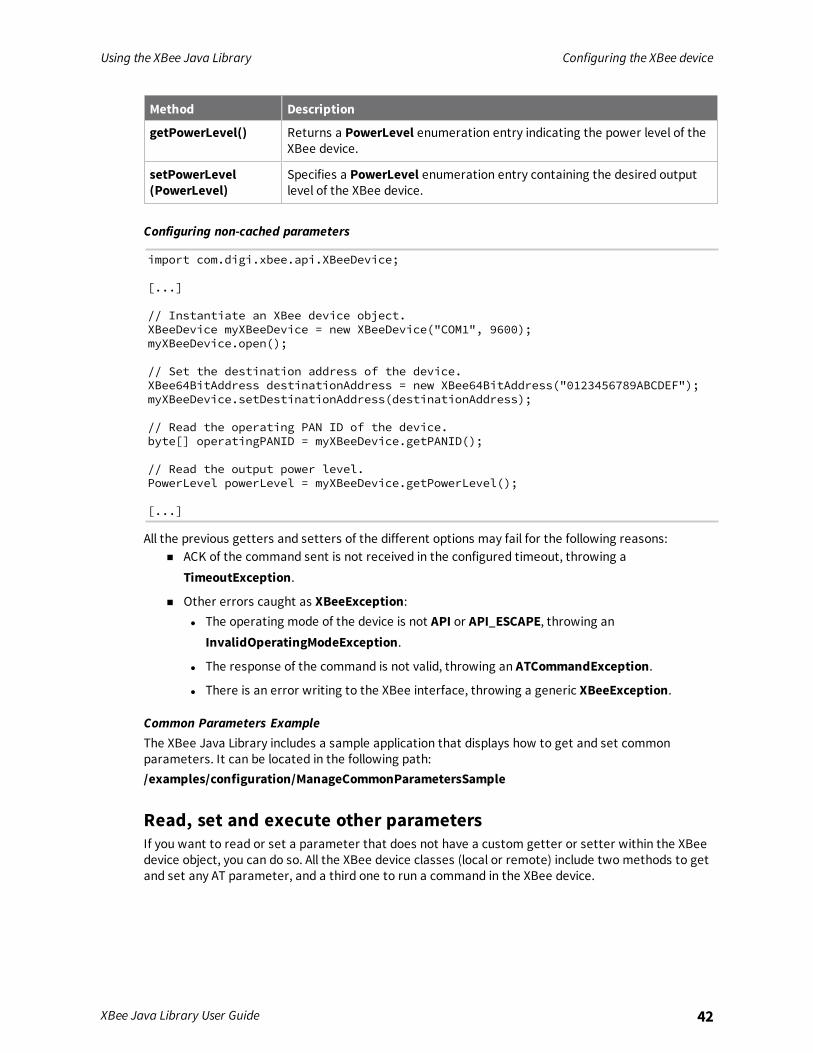
n Power level: This setting specifies the output power level of the XBee device. This setting canbe get and set.
Using the XBee Java Library Configuring the XBee device
XBee Java Library User Guide 42
Method Description
getPowerLevel() Returns a PowerLevel enumeration entry indicating the power level of theXBee device.
setPowerLevel(PowerLevel)
Specifies a PowerLevel enumeration entry containing the desired outputlevel of the XBee device.
Configuring non-cached parameters
import com.digi.xbee.api.XBeeDevice;
[...]
// Instantiate an XBee device object.XBeeDevice myXBeeDevice = new XBeeDevice("COM1", 9600);myXBeeDevice.open();
// Set the destination address of the device.XBee64BitAddress destinationAddress = new XBee64BitAddress("0123456789ABCDEF");myXBeeDevice.setDestinationAddress(destinationAddress);
// Read the operating PAN ID of the device.byte[] operatingPANID = myXBeeDevice.getPANID();
// Read the output power level.PowerLevel powerLevel = myXBeeDevice.getPowerLevel();
[...]
All the previous getters and setters of the different options may fail for the following reasons:n ACK of the command sent is not received in the configured timeout, throwing a
TimeoutException.
n Other errors caught as XBeeException:l The operating mode of the device is not API or API_ESCAPE, throwing an
InvalidOperatingModeException.
l The response of the command is not valid, throwing an ATCommandException.
l There is an error writing to the XBee interface, throwing a generic XBeeException.
Common Parameters ExampleThe XBee Java Library includes a sample application that displays how to get and set commonparameters. It can be located in the following path:/examples/configuration/ManageCommonParametersSample
Read, set and execute other parametersIf you want to read or set a parameter that does not have a custom getter or setter within the XBeedevice object, you can do so. All the XBee device classes (local or remote) include two methods to getand set any AT parameter, and a third one to run a command in the XBee device.
Using the XBee Java Library Configuring the XBee device
XBee Java Library User Guide 43
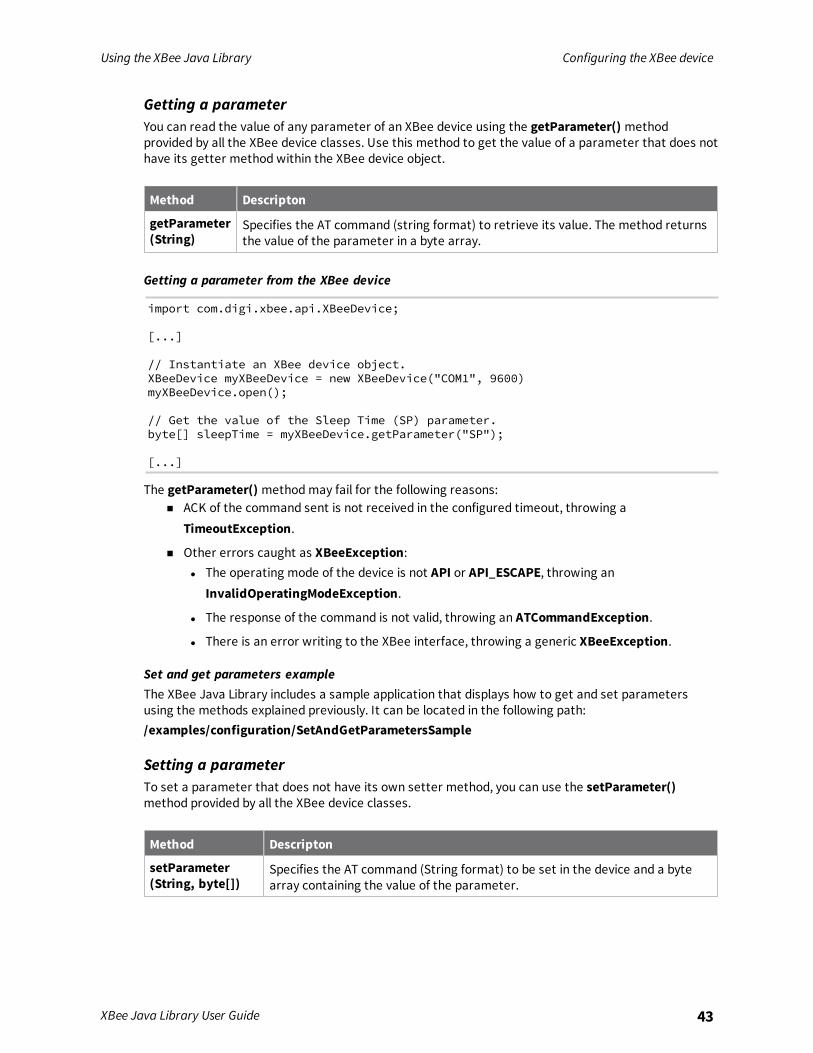
Getting a parameterYou can read the value of any parameter of an XBee device using the getParameter() methodprovided by all the XBee device classes. Use this method to get the value of a parameter that does nothave its getter method within the XBee device object.
Method Descripton
getParameter(String)
Specifies the AT command (string format) to retrieve its value. The method returnsthe value of the parameter in a byte array.
Getting a parameter from the XBee device
import com.digi.xbee.api.XBeeDevice;
[...]
// Instantiate an XBee device object.XBeeDevice myXBeeDevice = new XBeeDevice("COM1", 9600)myXBeeDevice.open();
// Get the value of the Sleep Time (SP) parameter.byte[] sleepTime = myXBeeDevice.getParameter("SP");
[...]
The getParameter() methodmay fail for the following reasons:n ACK of the command sent is not received in the configured timeout, throwing a
TimeoutException.
n Other errors caught as XBeeException:l The operating mode of the device is not API or API_ESCAPE, throwing an
InvalidOperatingModeException.
l The response of the command is not valid, throwing an ATCommandException.
l There is an error writing to the XBee interface, throwing a generic XBeeException.
Set and get parameters exampleThe XBee Java Library includes a sample application that displays how to get and set parametersusing the methods explained previously. It can be located in the following path:/examples/configuration/SetAndGetParametersSample
Setting a parameterTo set a parameter that does not have its own setter method, you can use the setParameter()method provided by all the XBee device classes.
Method Descripton
setParameter(String, byte[])
Specifies the AT command (String format) to be set in the device and a bytearray containing the value of the parameter.
Using the XBee Java Library Configuring the XBee device
XBee Java Library User Guide 44
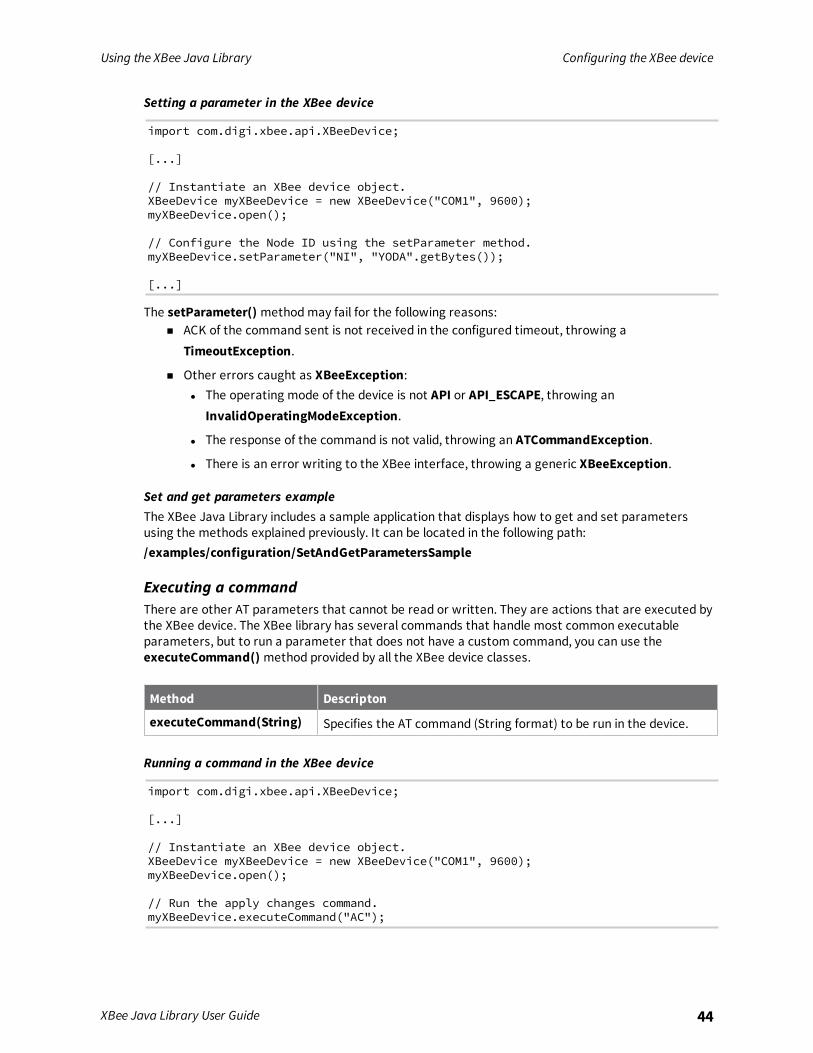
Setting a parameter in the XBee device
import com.digi.xbee.api.XBeeDevice;
[...]
// Instantiate an XBee device object.XBeeDevice myXBeeDevice = new XBeeDevice("COM1", 9600);myXBeeDevice.open();
// Configure the Node ID using the setParameter method.myXBeeDevice.setParameter("NI", "YODA".getBytes());
[...]
The setParameter() methodmay fail for the following reasons:n ACK of the command sent is not received in the configured timeout, throwing a
TimeoutException.
n Other errors caught as XBeeException:l The operating mode of the device is not API or API_ESCAPE, throwing an
InvalidOperatingModeException.
l The response of the command is not valid, throwing an ATCommandException.
l There is an error writing to the XBee interface, throwing a generic XBeeException.
Set and get parameters exampleThe XBee Java Library includes a sample application that displays how to get and set parametersusing the methods explained previously. It can be located in the following path:/examples/configuration/SetAndGetParametersSample
Executing a commandThere are other AT parameters that cannot be read or written. They are actions that are executed bythe XBee device. The XBee library has several commands that handle most common executableparameters, but to run a parameter that does not have a custom command, you can use theexecuteCommand() method provided by all the XBee device classes.
Method Descripton
executeCommand(String) Specifies the AT command (String format) to be run in the device.
Running a command in the XBee device
import com.digi.xbee.api.XBeeDevice;
[...]
// Instantiate an XBee device object.XBeeDevice myXBeeDevice = new XBeeDevice("COM1", 9600);myXBeeDevice.open();
// Run the apply changes command.myXBeeDevice.executeCommand("AC");
Using the XBee Java Library Configuring the XBee device
XBee Java Library User Guide 45
[...]
The executeCommand() methodmay fail for the following reasons:n ACK of the command sent is not received in the configured timeout, throwing a
TimeoutException.
n Other errors caught as XBeeException:l The operating mode of the device is not API or API_ESCAPE, throwing an
InvalidOperatingModeException.
l The response of the command is not valid, throwing an ATCommandException.
l There is an error writing to the XBee interface, throwing a generic XBeeException.
Apply configuration changesBy default, when you perform any configuration on a local or remote XBee device, the changes areautomatically applied. However, there could be some scenarios when you want to configure differentsettings or parameters of a device and apply the changes at the end when everything is configured.For that purpose, the XBeeDevice and RemoteXBeeDevice objects provide some methods that allowyou to manage when to apply configuration changes.
Method Description Notes
enableApplyConfigurationChanges(boolean)
Specifies whether thechanges on settings andparameters are appliedwhen set.
The apply configurationchanges flag is enabled bydefault.
isApplyConfigurationChangesEnabled()
Returns whether the XBeedevice is configured toapply parameter changeswhen they are set.
applyChanges() Applies the changes onparameters that werealready set but arepending to be applied.
This method is useful whenthe XBee device isconfigured to not applychanges when they are set.
Applying configuration changes
import com.digi.xbee.api.XBeeDevice;
[...]
// Instantiate an XBee device object.XBeeDevice myXBeeDevice = new XBeeDevice("COM1", 9600);myXBeeDevice.open();
// Check if device is configured to apply changes.boolean applyChangesEnabled = myXBeeDevice.isApplyConfigurationChangesEnabled();
// Configure the device not to apply parameter changes automatically.
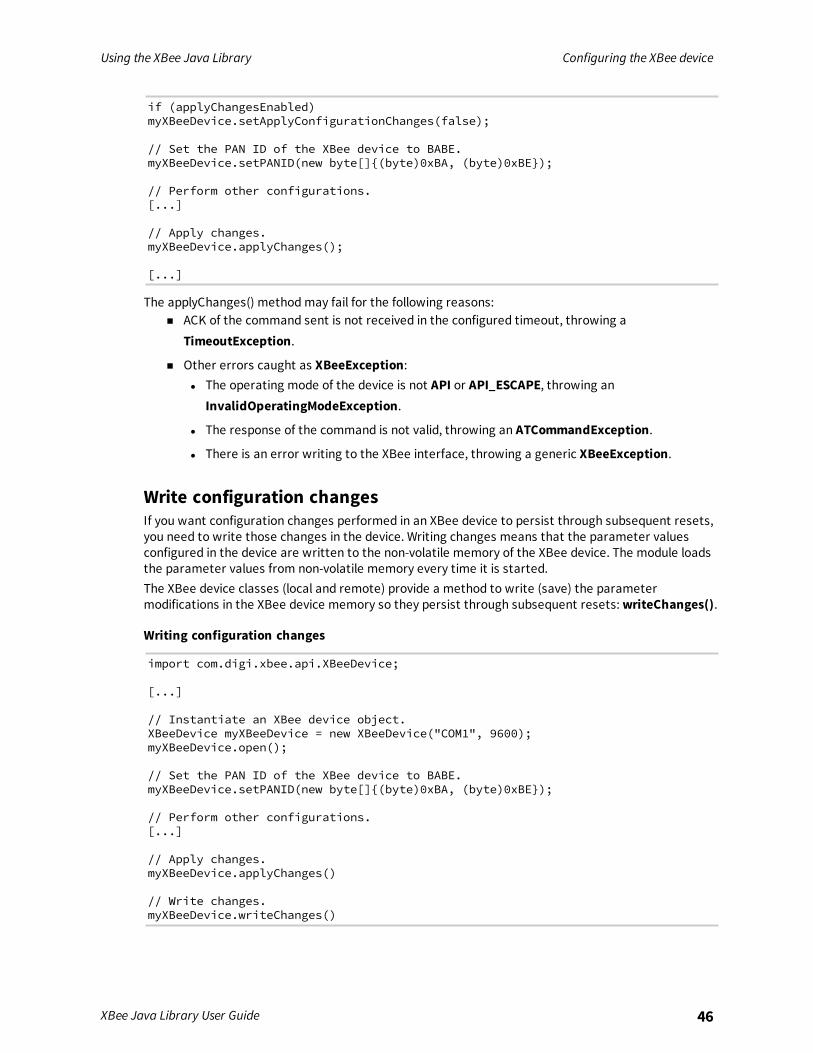
Using the XBee Java Library Configuring the XBee device
XBee Java Library User Guide 46
if (applyChangesEnabled)myXBeeDevice.setApplyConfigurationChanges(false);
// Set the PAN ID of the XBee device to BABE.myXBeeDevice.setPANID(new byte[]{(byte)0xBA, (byte)0xBE});
// Perform other configurations.[...]
// Apply changes.myXBeeDevice.applyChanges();
[...]
The applyChanges() methodmay fail for the following reasons:n ACK of the command sent is not received in the configured timeout, throwing a
TimeoutException.
n Other errors caught as XBeeException:l The operating mode of the device is not API or API_ESCAPE, throwing an
InvalidOperatingModeException.
l The response of the command is not valid, throwing an ATCommandException.
l There is an error writing to the XBee interface, throwing a generic XBeeException.
Write configuration changesIf you want configuration changes performed in an XBee device to persist through subsequent resets,you need to write those changes in the device. Writing changes means that the parameter valuesconfigured in the device are written to the non-volatile memory of the XBee device. The module loadsthe parameter values from non-volatile memory every time it is started.The XBee device classes (local and remote) provide a method to write (save) the parametermodifications in the XBee device memory so they persist through subsequent resets:writeChanges().
Writing configuration changes
import com.digi.xbee.api.XBeeDevice;
[...]
// Instantiate an XBee device object.XBeeDevice myXBeeDevice = new XBeeDevice("COM1", 9600);myXBeeDevice.open();
// Set the PAN ID of the XBee device to BABE.myXBeeDevice.setPANID(new byte[]{(byte)0xBA, (byte)0xBE});
// Perform other configurations.[...]
// Apply changes.myXBeeDevice.applyChanges()
// Write changes.myXBeeDevice.writeChanges()
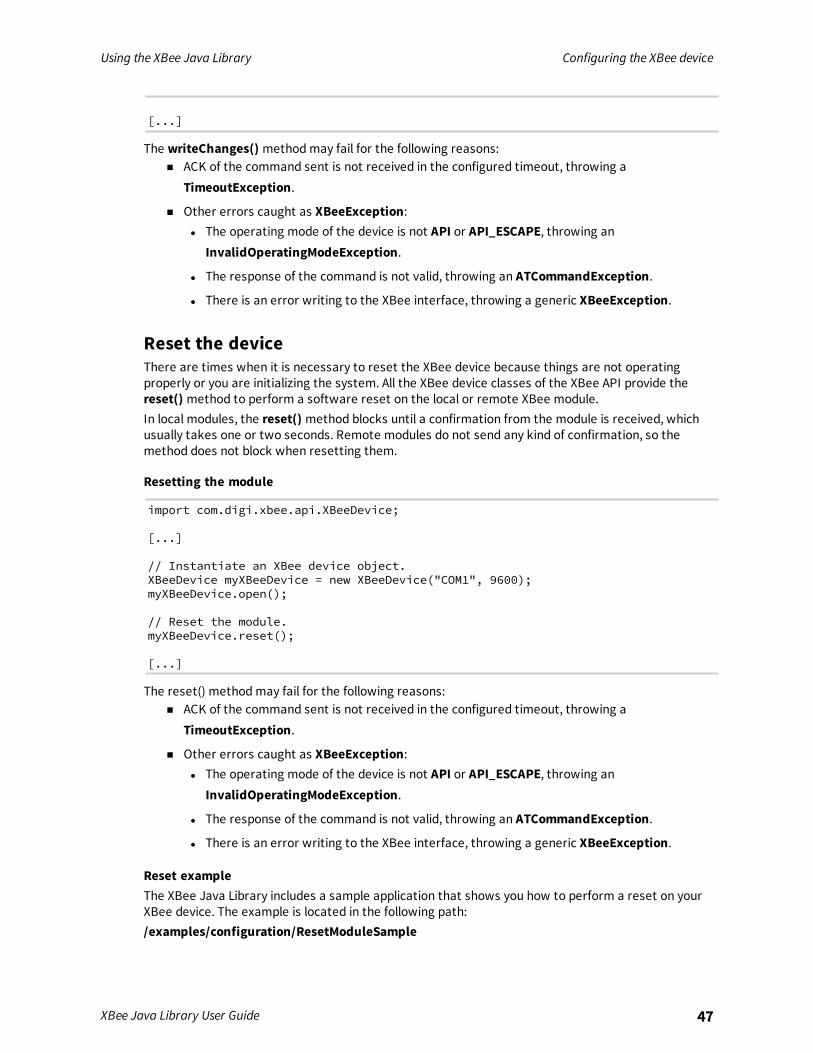
Using the XBee Java Library Configuring the XBee device
XBee Java Library User Guide 47
[...]
The writeChanges() methodmay fail for the following reasons:n ACK of the command sent is not received in the configured timeout, throwing a
TimeoutException.
n Other errors caught as XBeeException:l The operating mode of the device is not API or API_ESCAPE, throwing an
InvalidOperatingModeException.
l The response of the command is not valid, throwing an ATCommandException.
l There is an error writing to the XBee interface, throwing a generic XBeeException.
Reset the deviceThere are times when it is necessary to reset the XBee device because things are not operatingproperly or you are initializing the system. All the XBee device classes of the XBee API provide thereset() method to perform a software reset on the local or remote XBee module.In local modules, the reset() method blocks until a confirmation from the module is received, whichusually takes one or two seconds. Remote modules do not send any kind of confirmation, so themethod does not block when resetting them.
Resetting the module
import com.digi.xbee.api.XBeeDevice;
[...]
// Instantiate an XBee device object.XBeeDevice myXBeeDevice = new XBeeDevice("COM1", 9600);myXBeeDevice.open();
// Reset the module.myXBeeDevice.reset();
[...]
The reset() methodmay fail for the following reasons:n ACK of the command sent is not received in the configured timeout, throwing a
TimeoutException.
n Other errors caught as XBeeException:l The operating mode of the device is not API or API_ESCAPE, throwing an
InvalidOperatingModeException.
l The response of the command is not valid, throwing an ATCommandException.
l There is an error writing to the XBee interface, throwing a generic XBeeException.
Reset exampleThe XBee Java Library includes a sample application that shows you how to perform a reset on yourXBee device. The example is located in the following path:/examples/configuration/ResetModuleSample
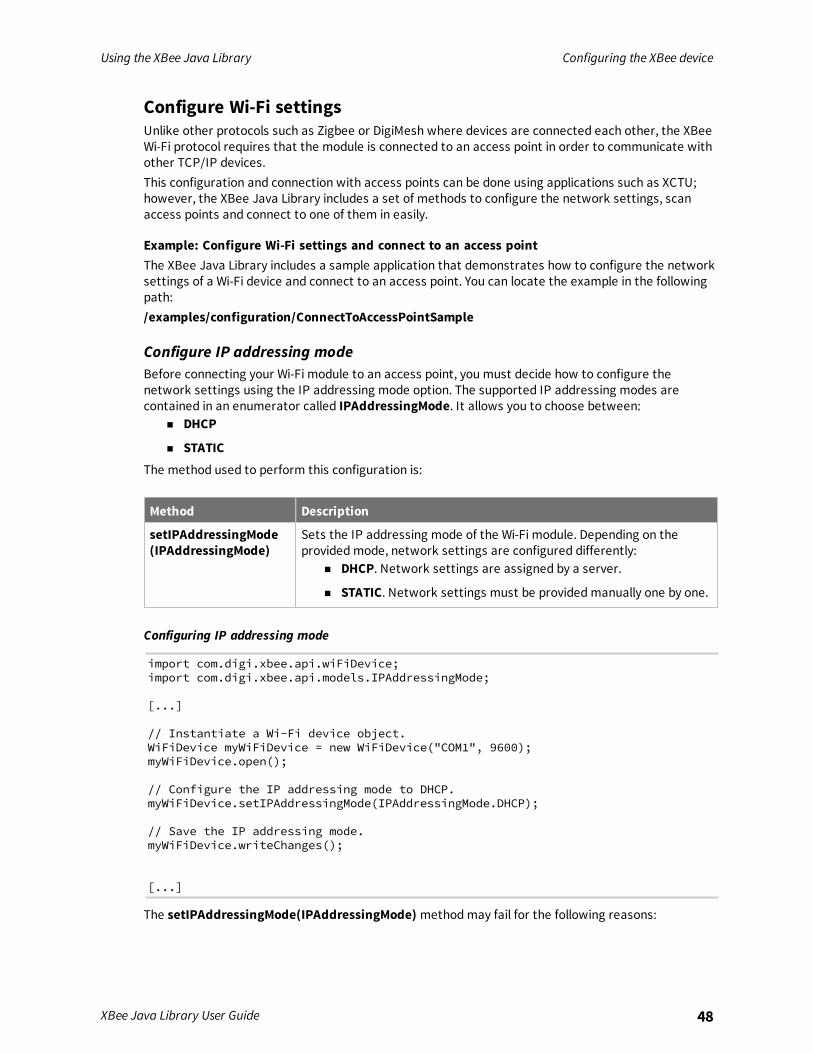
Using the XBee Java Library Configuring the XBee device
XBee Java Library User Guide 48
Configure Wi-Fi settingsUnlike other protocols such as Zigbee or DigiMesh where devices are connected each other, the XBeeWi-Fi protocol requires that the module is connected to an access point in order to communicate withother TCP/IP devices.This configuration and connection with access points can be done using applications such as XCTU;however, the XBee Java Library includes a set of methods to configure the network settings, scanaccess points and connect to one of them in easily.
Example: Configure Wi-Fi settings and connect to an access pointThe XBee Java Library includes a sample application that demonstrates how to configure the networksettings of a Wi-Fi device and connect to an access point. You can locate the example in the followingpath:/examples/configuration/ConnectToAccessPointSample
Configure IP addressing modeBefore connecting your Wi-Fi module to an access point, you must decide how to configure thenetwork settings using the IP addressing mode option. The supported IP addressing modes arecontained in an enumerator called IPAddressingMode. It allows you to choose between:
n DHCP
n STATICThe method used to perform this configuration is:
Method Description
setIPAddressingMode(IPAddressingMode)
Sets the IP addressing mode of the Wi-Fi module. Depending on theprovidedmode, network settings are configured differently:
n DHCP. Network settings are assigned by a server.
n STATIC. Network settings must be providedmanually one by one.
Configuring IP addressing mode
import com.digi.xbee.api.wiFiDevice;import com.digi.xbee.api.models.IPAddressingMode;
[...]
// Instantiate a Wi-Fi device object.WiFiDevice myWiFiDevice = new WiFiDevice("COM1", 9600);myWiFiDevice.open();
// Configure the IP addressing mode to DHCP.myWiFiDevice.setIPAddressingMode(IPAddressingMode.DHCP);
// Save the IP addressing mode.myWiFiDevice.writeChanges();
[...]
The setIPAddressingMode(IPAddressingMode) methodmay fail for the following reasons:
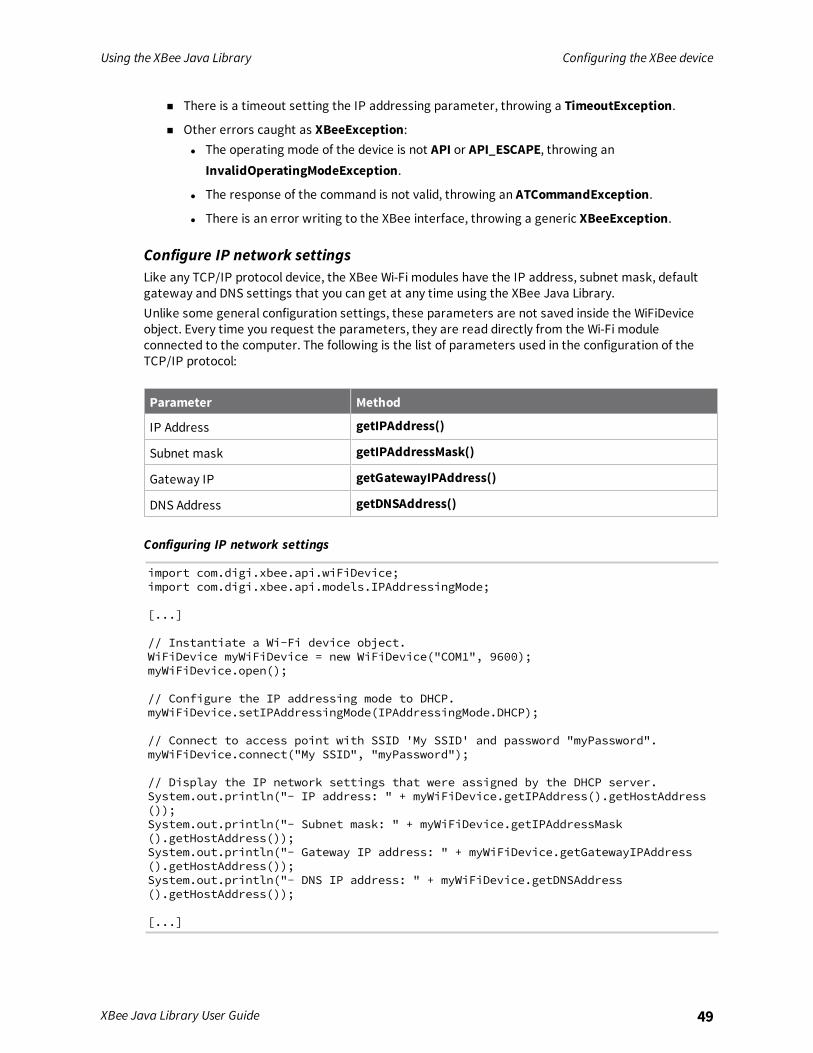
Using the XBee Java Library Configuring the XBee device
XBee Java Library User Guide 49
n There is a timeout setting the IP addressing parameter, throwing a TimeoutException.
n Other errors caught as XBeeException:l The operating mode of the device is not API or API_ESCAPE, throwing an
InvalidOperatingModeException.
l The response of the command is not valid, throwing an ATCommandException.
l There is an error writing to the XBee interface, throwing a generic XBeeException.
Configure IP network settingsLike any TCP/IP protocol device, the XBee Wi-Fi modules have the IP address, subnet mask, defaultgateway and DNS settings that you can get at any time using the XBee Java Library.Unlike some general configuration settings, these parameters are not saved inside the WiFiDeviceobject. Every time you request the parameters, they are read directly from the Wi-Fi moduleconnected to the computer. The following is the list of parameters used in the configuration of theTCP/IP protocol:
Parameter Method
IP Address getIPAddress()
Subnet mask getIPAddressMask()
Gateway IP getGatewayIPAddress()
DNS Address getDNSAddress()
Configuring IP network settings
import com.digi.xbee.api.wiFiDevice;import com.digi.xbee.api.models.IPAddressingMode;
[...]
// Instantiate a Wi-Fi device object.WiFiDevice myWiFiDevice = new WiFiDevice("COM1", 9600);myWiFiDevice.open();
// Configure the IP addressing mode to DHCP.myWiFiDevice.setIPAddressingMode(IPAddressingMode.DHCP);
// Connect to access point with SSID 'My SSID' and password "myPassword".myWiFiDevice.connect("My SSID", "myPassword");
// Display the IP network settings that were assigned by the DHCP server.System.out.println("- IP address: " + myWiFiDevice.getIPAddress().getHostAddress());System.out.println("- Subnet mask: " + myWiFiDevice.getIPAddressMask().getHostAddress());System.out.println("- Gateway IP address: " + myWiFiDevice.getGatewayIPAddress().getHostAddress());System.out.println("- DNS IP address: " + myWiFiDevice.getDNSAddress().getHostAddress());
[...]
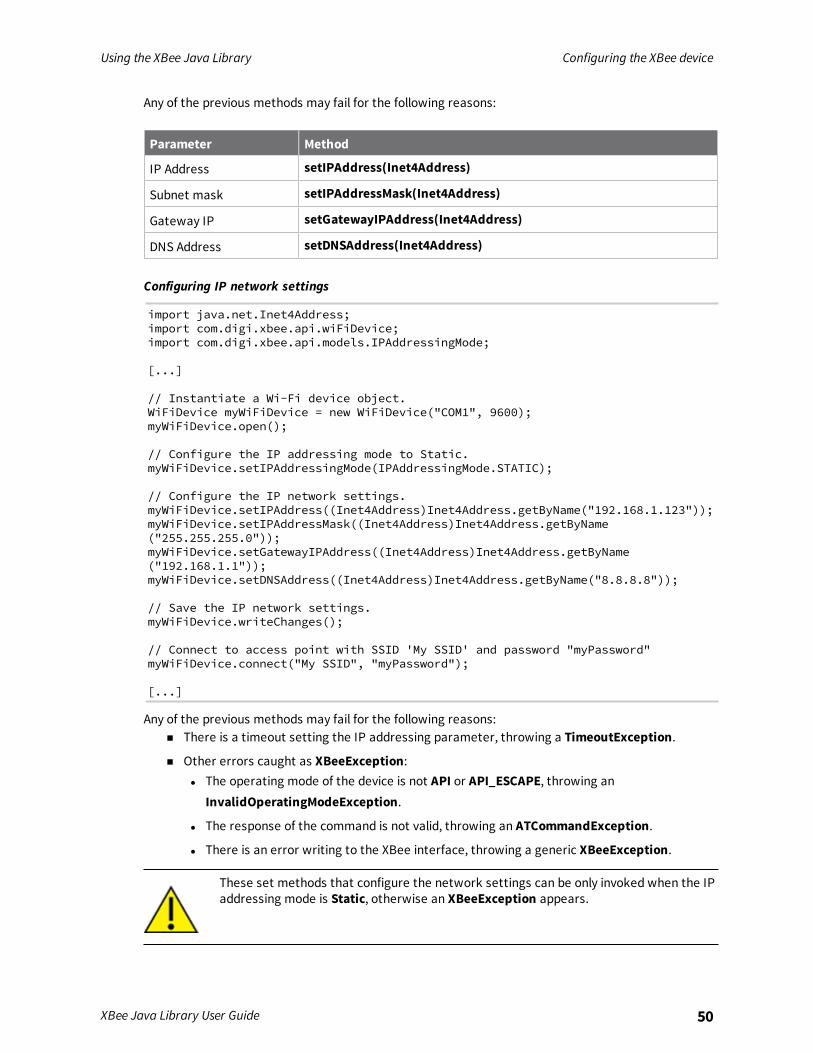
Using the XBee Java Library Configuring the XBee device
XBee Java Library User Guide 50
Any of the previous methods may fail for the following reasons:
Parameter Method
IP Address setIPAddress(Inet4Address)
Subnet mask setIPAddressMask(Inet4Address)
Gateway IP setGatewayIPAddress(Inet4Address)
DNS Address setDNSAddress(Inet4Address)
Configuring IP network settings
import java.net.Inet4Address;import com.digi.xbee.api.wiFiDevice;import com.digi.xbee.api.models.IPAddressingMode;
[...]
// Instantiate a Wi-Fi device object.WiFiDevice myWiFiDevice = new WiFiDevice("COM1", 9600);myWiFiDevice.open();
// Configure the IP addressing mode to Static.myWiFiDevice.setIPAddressingMode(IPAddressingMode.STATIC);
// Configure the IP network settings.myWiFiDevice.setIPAddress((Inet4Address)Inet4Address.getByName("192.168.1.123"));myWiFiDevice.setIPAddressMask((Inet4Address)Inet4Address.getByName("255.255.255.0"));myWiFiDevice.setGatewayIPAddress((Inet4Address)Inet4Address.getByName("192.168.1.1"));myWiFiDevice.setDNSAddress((Inet4Address)Inet4Address.getByName("8.8.8.8"));
// Save the IP network settings.myWiFiDevice.writeChanges();
// Connect to access point with SSID 'My SSID' and password "myPassword"myWiFiDevice.connect("My SSID", "myPassword");
[...]
Any of the previous methods may fail for the following reasons:n There is a timeout setting the IP addressing parameter, throwing a TimeoutException.
n Other errors caught as XBeeException:l The operating mode of the device is not API or API_ESCAPE, throwing an
InvalidOperatingModeException.
l The response of the command is not valid, throwing an ATCommandException.
l There is an error writing to the XBee interface, throwing a generic XBeeException.
These set methods that configure the network settings can be only invoked when the IPaddressing mode is Static, otherwise an XBeeException appears.
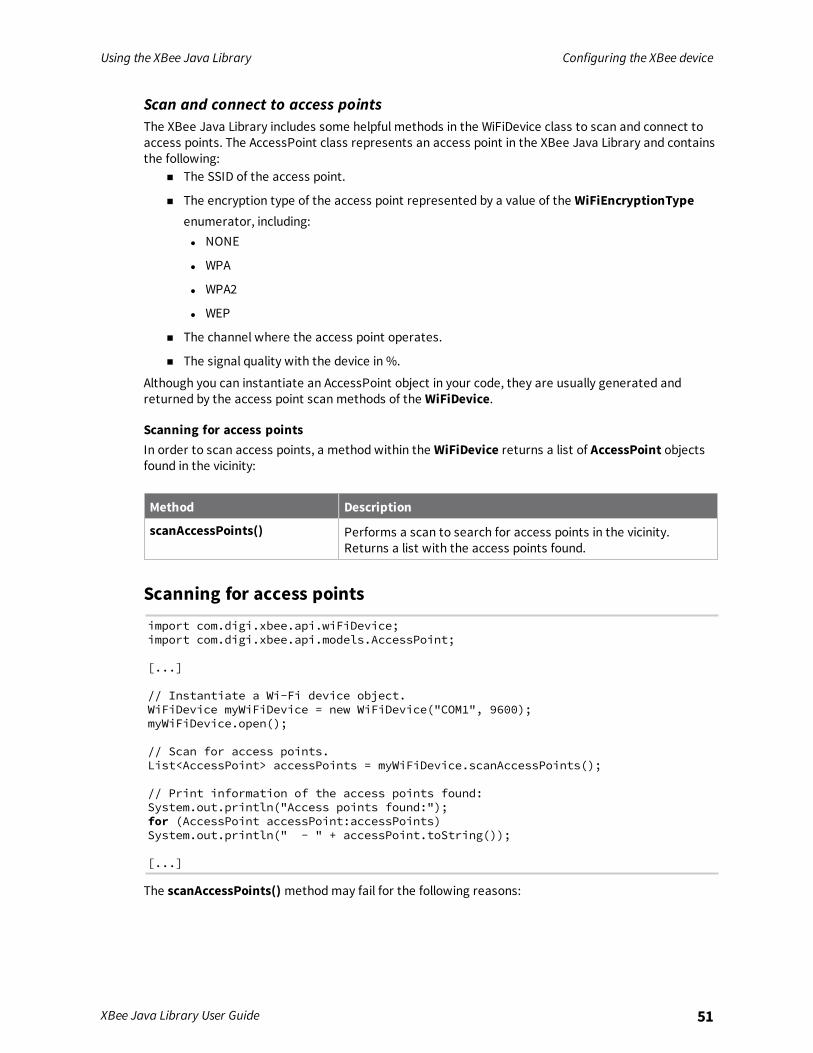
Using the XBee Java Library Configuring the XBee device
XBee Java Library User Guide 51
Scan and connect to access pointsThe XBee Java Library includes some helpful methods in the WiFiDevice class to scan and connect toaccess points. The AccessPoint class represents an access point in the XBee Java Library and containsthe following:
n The SSID of the access point.
n The encryption type of the access point represented by a value of the WiFiEncryptionTypeenumerator, including:l NONE
l WPA
l WPA2
l WEP
n The channel where the access point operates.
n The signal quality with the device in %.
Although you can instantiate an AccessPoint object in your code, they are usually generated andreturned by the access point scan methods of the WiFiDevice.
Scanning for access pointsIn order to scan access points, a method within the WiFiDevice returns a list of AccessPoint objectsfound in the vicinity:
Method Description
scanAccessPoints() Performs a scan to search for access points in the vicinity.Returns a list with the access points found.
Scanning for access pointsimport com.digi.xbee.api.wiFiDevice;import com.digi.xbee.api.models.AccessPoint;
[...]
// Instantiate a Wi-Fi device object.WiFiDevice myWiFiDevice = new WiFiDevice("COM1", 9600);myWiFiDevice.open();
// Scan for access points.List<AccessPoint> accessPoints = myWiFiDevice.scanAccessPoints();
// Print information of the access points found:System.out.println("Access points found:");for (AccessPoint accessPoint:accessPoints)System.out.println(" - " + accessPoint.toString());
[...]
The scanAccessPoints() methodmay fail for the following reasons:
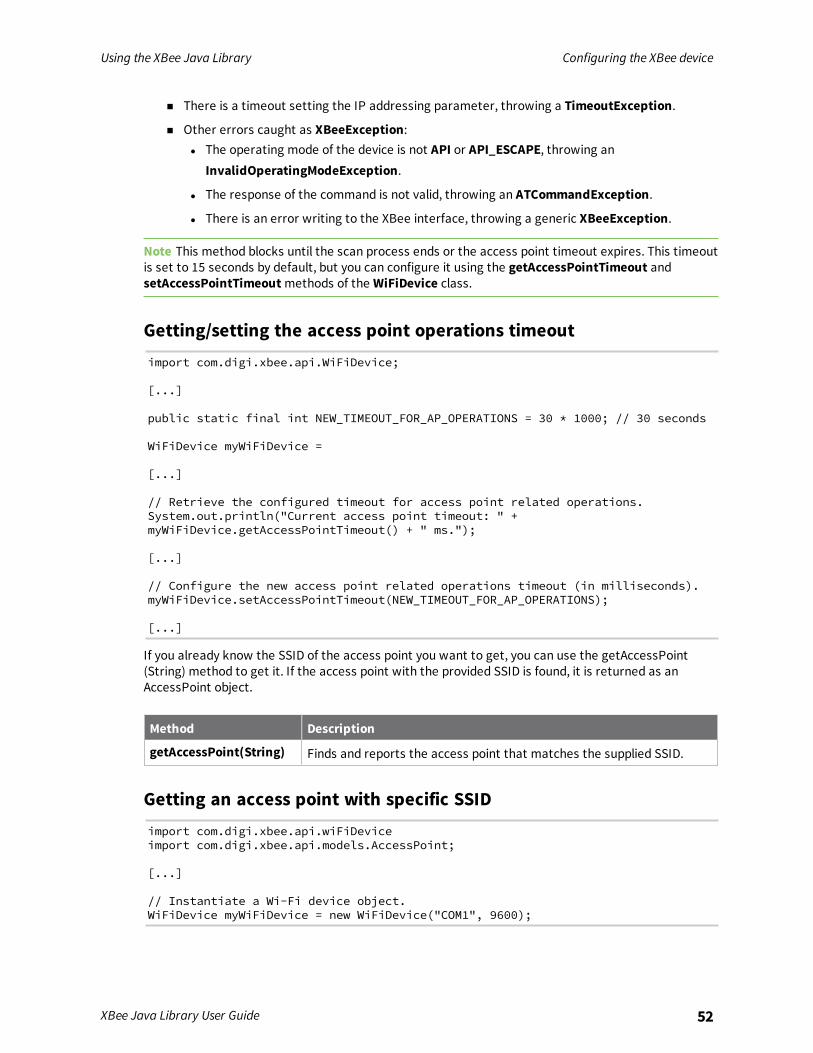
Using the XBee Java Library Configuring the XBee device
XBee Java Library User Guide 52
n There is a timeout setting the IP addressing parameter, throwing a TimeoutException.
n Other errors caught as XBeeException:l The operating mode of the device is not API or API_ESCAPE, throwing an
InvalidOperatingModeException.
l The response of the command is not valid, throwing an ATCommandException.
l There is an error writing to the XBee interface, throwing a generic XBeeException.
Note This method blocks until the scan process ends or the access point timeout expires. This timeoutis set to 15 seconds by default, but you can configure it using the getAccessPointTimeout andsetAccessPointTimeoutmethods of the WiFiDevice class.
Getting/setting the access point operations timeoutimport com.digi.xbee.api.WiFiDevice;
[...]
public static final int NEW_TIMEOUT_FOR_AP_OPERATIONS = 30 * 1000; // 30 seconds
WiFiDevice myWiFiDevice =
[...]
// Retrieve the configured timeout for access point related operations.System.out.println("Current access point timeout: " +myWiFiDevice.getAccessPointTimeout() + " ms.");
[...]
// Configure the new access point related operations timeout (in milliseconds).myWiFiDevice.setAccessPointTimeout(NEW_TIMEOUT_FOR_AP_OPERATIONS);
[...]
If you already know the SSID of the access point you want to get, you can use the getAccessPoint(String) method to get it. If the access point with the provided SSID is found, it is returned as anAccessPoint object.
Method Description
getAccessPoint(String) Finds and reports the access point that matches the supplied SSID.
Getting an access point with specific SSIDimport com.digi.xbee.api.wiFiDeviceimport com.digi.xbee.api.models.AccessPoint;
[...]
// Instantiate a Wi-Fi device object.WiFiDevice myWiFiDevice = new WiFiDevice("COM1", 9600);
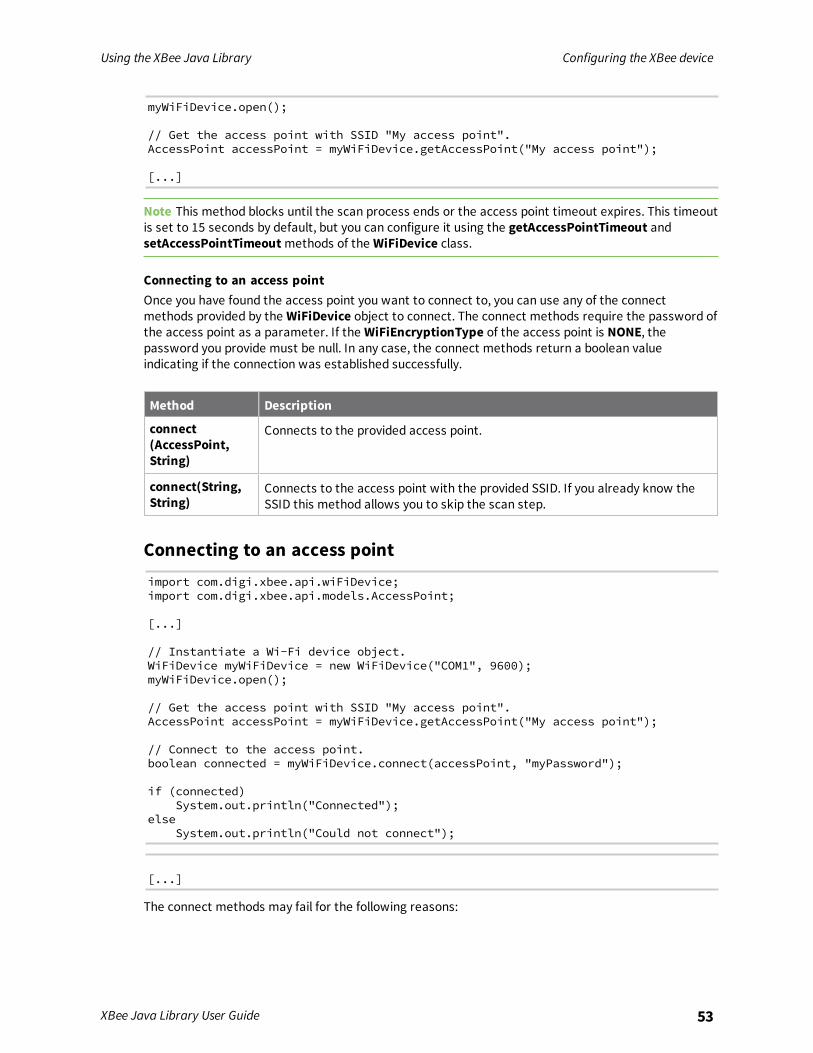
Using the XBee Java Library Configuring the XBee device
XBee Java Library User Guide 53
myWiFiDevice.open();
// Get the access point with SSID "My access point".AccessPoint accessPoint = myWiFiDevice.getAccessPoint("My access point");
[...]
Note This method blocks until the scan process ends or the access point timeout expires. This timeoutis set to 15 seconds by default, but you can configure it using the getAccessPointTimeout andsetAccessPointTimeoutmethods of the WiFiDevice class.
Connecting to an access pointOnce you have found the access point you want to connect to, you can use any of the connectmethods provided by the WiFiDevice object to connect. The connect methods require the password ofthe access point as a parameter. If the WiFiEncryptionType of the access point is NONE, thepassword you provide must be null. In any case, the connect methods return a boolean valueindicating if the connection was established successfully.
Method Description
connect(AccessPoint,String)
Connects to the provided access point.
connect(String,String)
Connects to the access point with the provided SSID. If you already know theSSID this method allows you to skip the scan step.
Connecting to an access pointimport com.digi.xbee.api.wiFiDevice;import com.digi.xbee.api.models.AccessPoint;
[...]
// Instantiate a Wi-Fi device object.WiFiDevice myWiFiDevice = new WiFiDevice("COM1", 9600);myWiFiDevice.open();
// Get the access point with SSID "My access point".AccessPoint accessPoint = myWiFiDevice.getAccessPoint("My access point");
// Connect to the access point.boolean connected = myWiFiDevice.connect(accessPoint, "myPassword");
if (connected)System.out.println("Connected");
elseSystem.out.println("Could not connect");
[...]
The connect methods may fail for the following reasons:
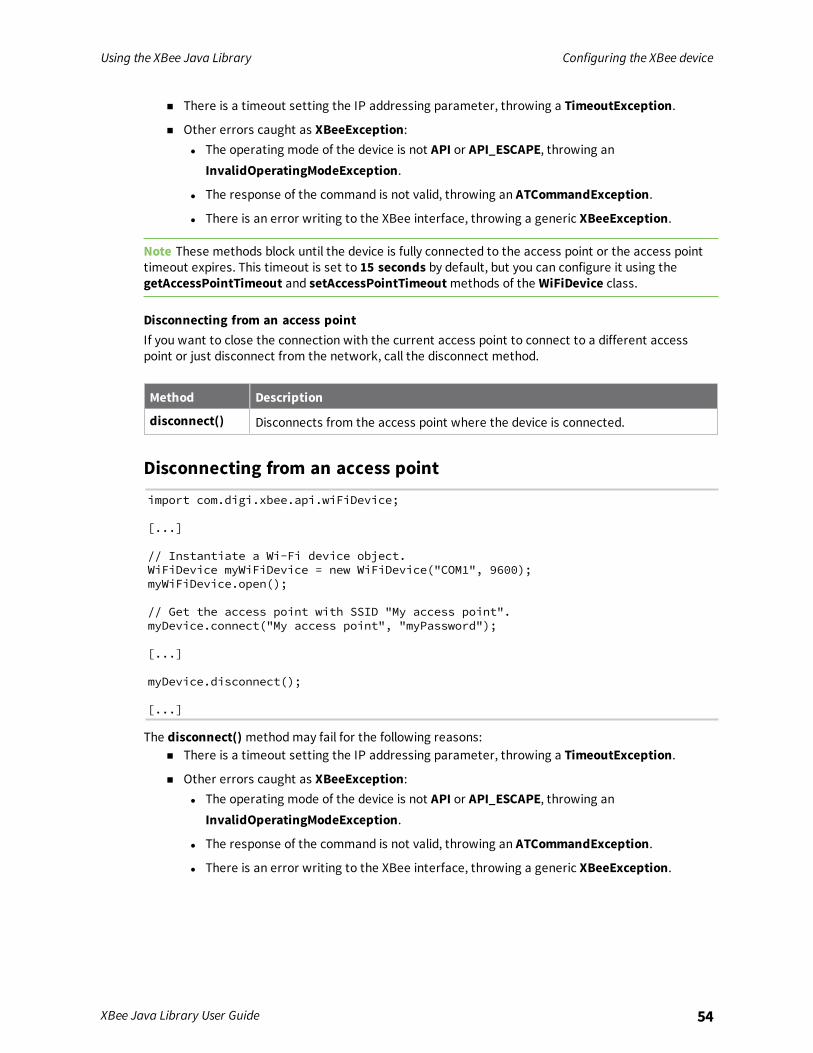
Using the XBee Java Library Configuring the XBee device
XBee Java Library User Guide 54
n There is a timeout setting the IP addressing parameter, throwing a TimeoutException.
n Other errors caught as XBeeException:l The operating mode of the device is not API or API_ESCAPE, throwing an
InvalidOperatingModeException.
l The response of the command is not valid, throwing an ATCommandException.
l There is an error writing to the XBee interface, throwing a generic XBeeException.
Note These methods block until the device is fully connected to the access point or the access pointtimeout expires. This timeout is set to 15 seconds by default, but you can configure it using thegetAccessPointTimeout and setAccessPointTimeoutmethods of the WiFiDevice class.
Disconnecting from an access pointIf you want to close the connection with the current access point to connect to a different accesspoint or just disconnect from the network, call the disconnect method.
Method Description
disconnect() Disconnects from the access point where the device is connected.
Disconnecting from an access pointimport com.digi.xbee.api.wiFiDevice;
[...]
// Instantiate a Wi-Fi device object.WiFiDevice myWiFiDevice = new WiFiDevice("COM1", 9600);myWiFiDevice.open();
// Get the access point with SSID "My access point".myDevice.connect("My access point", "myPassword");
[...]
myDevice.disconnect();
[...]
The disconnect() methodmay fail for the following reasons:n There is a timeout setting the IP addressing parameter, throwing a TimeoutException.
n Other errors caught as XBeeException:l The operating mode of the device is not API or API_ESCAPE, throwing an
InvalidOperatingModeException.
l The response of the command is not valid, throwing an ATCommandException.
l There is an error writing to the XBee interface, throwing a generic XBeeException.
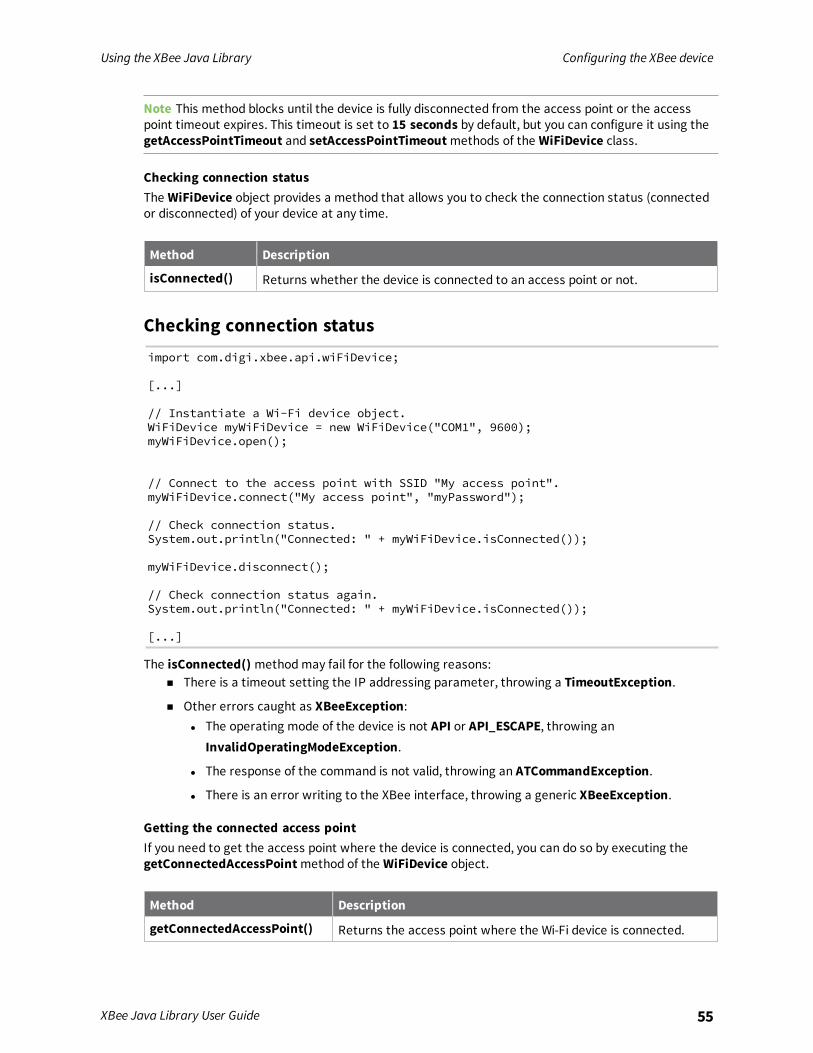
Using the XBee Java Library Configuring the XBee device
XBee Java Library User Guide 55
Note This method blocks until the device is fully disconnected from the access point or the accesspoint timeout expires. This timeout is set to 15 seconds by default, but you can configure it using thegetAccessPointTimeout and setAccessPointTimeoutmethods of the WiFiDevice class.
Checking connection statusThe WiFiDevice object provides a method that allows you to check the connection status (connectedor disconnected) of your device at any time.
Method Description
isConnected() Returns whether the device is connected to an access point or not.
Checking connection statusimport com.digi.xbee.api.wiFiDevice;
[...]
// Instantiate a Wi-Fi device object.WiFiDevice myWiFiDevice = new WiFiDevice("COM1", 9600);myWiFiDevice.open();
// Connect to the access point with SSID "My access point".myWiFiDevice.connect("My access point", "myPassword");
// Check connection status.System.out.println("Connected: " + myWiFiDevice.isConnected());
myWiFiDevice.disconnect();
// Check connection status again.System.out.println("Connected: " + myWiFiDevice.isConnected());
[...]
The isConnected() methodmay fail for the following reasons:n There is a timeout setting the IP addressing parameter, throwing a TimeoutException.
n Other errors caught as XBeeException:l The operating mode of the device is not API or API_ESCAPE, throwing an
InvalidOperatingModeException.
l The response of the command is not valid, throwing an ATCommandException.
l There is an error writing to the XBee interface, throwing a generic XBeeException.
Getting the connected access pointIf you need to get the access point where the device is connected, you can do so by executing thegetConnectedAccessPointmethod of the WiFiDevice object.
Method Description
getConnectedAccessPoint() Returns the access point where the Wi-Fi device is connected.
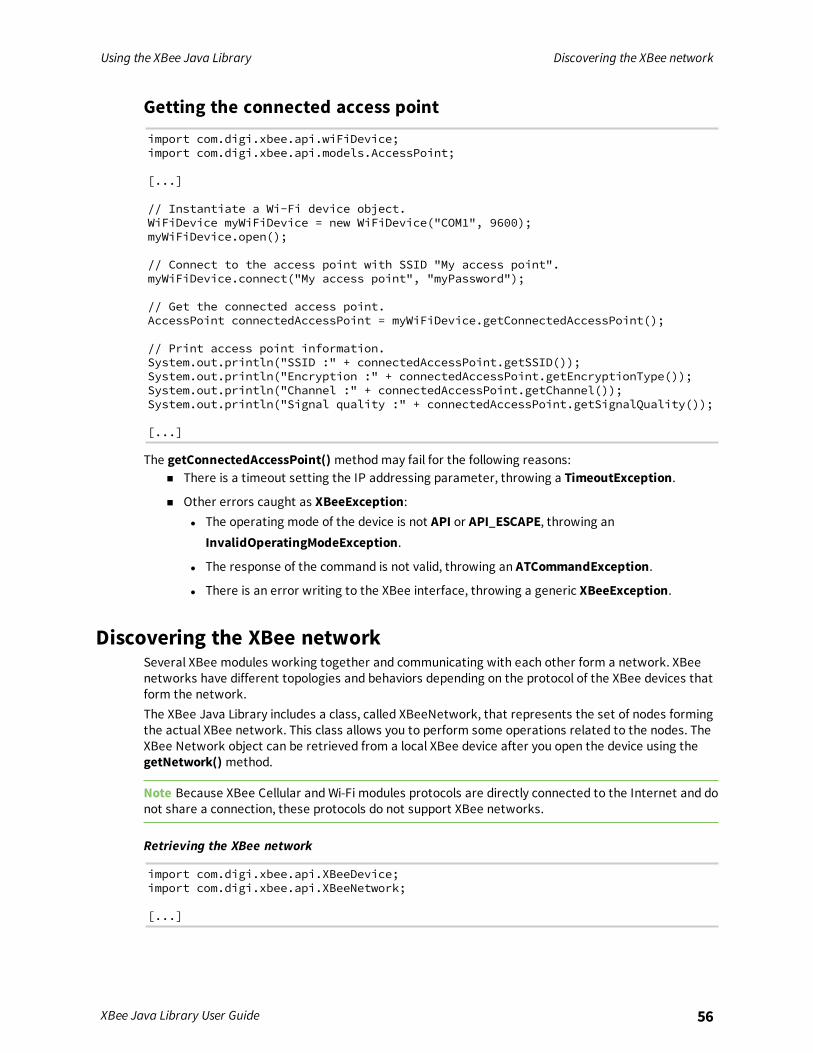
Using the XBee Java Library Discovering the XBee network
XBee Java Library User Guide 56
Getting the connected access pointimport com.digi.xbee.api.wiFiDevice;import com.digi.xbee.api.models.AccessPoint;
[...]
// Instantiate a Wi-Fi device object.WiFiDevice myWiFiDevice = new WiFiDevice("COM1", 9600);myWiFiDevice.open();
// Connect to the access point with SSID "My access point".myWiFiDevice.connect("My access point", "myPassword");
// Get the connected access point.AccessPoint connectedAccessPoint = myWiFiDevice.getConnectedAccessPoint();
// Print access point information.System.out.println("SSID :" + connectedAccessPoint.getSSID());System.out.println("Encryption :" + connectedAccessPoint.getEncryptionType());System.out.println("Channel :" + connectedAccessPoint.getChannel());System.out.println("Signal quality :" + connectedAccessPoint.getSignalQuality());
[...]
The getConnectedAccessPoint() methodmay fail for the following reasons:n There is a timeout setting the IP addressing parameter, throwing a TimeoutException.
n Other errors caught as XBeeException:l The operating mode of the device is not API or API_ESCAPE, throwing an
InvalidOperatingModeException.
l The response of the command is not valid, throwing an ATCommandException.
l There is an error writing to the XBee interface, throwing a generic XBeeException.
Discovering the XBee networkSeveral XBee modules working together and communicating with each other form a network. XBeenetworks have different topologies and behaviors depending on the protocol of the XBee devices thatform the network.The XBee Java Library includes a class, called XBeeNetwork, that represents the set of nodes formingthe actual XBee network. This class allows you to perform some operations related to the nodes. TheXBee Network object can be retrieved from a local XBee device after you open the device using thegetNetwork() method.
Note Because XBee Cellular andWi-Fi modules protocols are directly connected to the Internet and donot share a connection, these protocols do not support XBee networks.
Retrieving the XBee network
import com.digi.xbee.api.XBeeDevice;import com.digi.xbee.api.XBeeNetwork;
[...]

Using the XBee Java Library Discovering the XBee network
XBee Java Library User Guide 57
// Instantiate an XBee device object.XBeeDevice myXBeeDevice = new XBeeDevice("COM1", 9600);myXBeeDevice.open();
// Get the XBee Network object from the XBee device.XBeeNetwork network = myXBeeDevice.getNetwork();
[...]
One of the main features of the XBeeNetwork class is the ability to discover the XBee devices thatform the network. The XBeeNetwork object provides the following operations related to the XBeedevices discovery feature:
n Configure the discovery process
n Discover the network
n Access the discovered devices
n Add and remove devices manually
Configure the discovery processBefore discovering all the nodes of a network you need to configure the settings of that process. TheAPI provides two methods to configure the discovery timeout and discovery options. These methodsset the provided values in the module.
Method Description
setDiscoveryTimeout(long)
Configures the discovery timeout (NT parameter) with the given valuein milliseconds.
setDiscoveryOptions(Set<DiscoveryOptions>)
Configures the discovery options (NO parameter) with the given set ofoptions. The set of discovery options contains the differentDiscoveryOption configuration values that are applied to the local XBeemodule when performing the discovery process. These options are thefollowing:
n DiscoveryOption.APPEND_DD: Appends the device typeidentifier (DD) to the information retrieved when a node isdiscovered. This option is valid for DigiMesh, Point-to-multipoint(Digi Point) and Zigbee protocols.
n DiscoveryOption.DISCOVER_MYSELF: The local XBee device isreturned as a discovered device. This option is valid for allprotocols.
n DiscoveryOption.APPEND_RSSI: Appends the RSSI value of thelast hop to the information retrieved when a node is discovered.This option is valid for DigiMesh and Point-to-multipoint (DigiPoint) protocols.
Using the XBee Java Library Discovering the XBee network
XBee Java Library User Guide 58
Configuring the timeout options
import com.digi.xbee.api.XBeeDevice;import com.digi.xbee.api.XBeeNetwork;import com.digi.xbee.api.models.DiscoveryOptions;
[...]
// Get the XBee Network object from the XBee device.XBeeNetwork network = myXBeeDevice.getNetwork();
// Set the timeout to 10 seconds.network.setDiscoveryTimeout(10000);
// Append the device type identifier and the local device.network.setDiscoveryOptions(EnumSet.of(DiscoveryOptions.APPEND_DD,DiscoveryOptions.DISCOVER_MYSELF));
[...]
Discover the networkThe XBeeNetwork object discovery process allows you to discover and store all the XBee devices thatform the network. The XBeeNetwork object provides a method for executing the discovery process:
Method Description
startDiscoveryProcess()
Starts the discovery process, saving the remote XBee devices found insidethe XBeeNetwork object.
When a discovery process has started, you can monitor andmanage it using the following methodsprovided by the XBeeNetwork object:
Method Description
isDiscoveryRunning() Returns whether the discovery process is running.
stopDiscoveryProcess() Stops the discovery process that is taking place.
Although you call the stopDiscoveryProcess method, DigiMesh and DigiPoint devices areblocked until the configured discovery time has elapsed. If you try to get or set anyparameter during that time, a TimeoutException is thrown.
Discovering the networkOnce the process has finished, you can retrieve the list of devices that form the network using thegetDevices() method provided by the network object.
import com.digi.xbee.api.XBeeDevice;import com.digi.xbee.api.XBeeNetwork;
[...]
Using the XBee Java Library Discovering the XBee network
XBee Java Library User Guide 59
// Instantiate an XBee device object.XBeeDevice myXBeeDevice = new XBeeDevice("COM1", 9600);myXBeeDevice.open();
// Get the XBee Network object from the XBee device.XBeeNetwork network = myXBeeDevice.getNetwork();
// Start the discovery process.network.startDiscoveryProcess();
// Wait until the discovery process has finished.while (network.isDiscoveryRunning()) {// Sleep.}
// Retrieve the devices that form the network.List<RemoteXBeeDevice> remotes = network.getDevices();
[...]
Click one of the following links to view the discovery methods:n Discovering the network with a listener
n IDiscoveryListener implementation example, MyDiscoveryListener
n Removing the discovery listener
n Device discovery example
Discovering the network with a listenerThe API also allows you to add a discovery listener to notify you when new devices are discovered, theprocess finishes, or an error occurs during the process. In this case, you need to provide a listenerbefore starting the discovery process using the addDiscoveryListener(IDiscoveryListener) method.
import com.digi.xbee.api.XBeeDevice;import com.digi.xbee.api.XBeeNetwork;[...]
// Instantiate an XBee device object.XBeeDevice myXBeeDevice = new XBeeDevice("COM1", 9600);myXBeeDevice.open();
// Get the XBee Network object from the XBee device.XBeeNetwork network = myXBeeDevice.getNetwork();
// Create the discovery listener.MyDiscoveryListener myDiscoveryListener = ...
// Add the discovery listener.network.addDiscoveryListener(myDiscoveryListener);
// Start the discovery process.network.startDiscoveryProcess();
[...]

Using the XBee Java Library Discovering the XBee network
XBee Java Library User Guide 60
IDiscoveryListener implementation example, MyDiscoveryListener
import com.digi.xbee.api.RemoteXBeeDevice;import com.digi.xbee.api.listeners.IDiscoveryListener;
public class MyDiscoveryListener implements IDiscoveryListener {
/** Device discovered callback.*/@Overridepublic void deviceDiscovered(RemoteXBeeDevice discoveredDevice) {
System.out.println("New device discovered: " +discoveredDevice.toString());
}
/** Discovery error callback.*/@Overridepublic void discoveryError(String error) {
System.out.println("There was an error during the discovery: " +error);
}
/** Discovery finished callback.*/@Overridepublic void discoveryFinished(String error) {
if (error != null)System.out.println("Discovery finished due to an error: " +
error);else
System.out.println("Discovery finished successfully.");}
}
Removing the discovery listenerTo remove the registered discovery listener, use the removeDiscoveryListener(IDiscoveryListener)method.
[...]
MyDiscoveryListener myDiscoveryListener = ...network.addDiscoveryListener(myDiscoveryListener);
[...]
// Remove the discovery listener.network.removeDiscoveryListener(myDiscoveryListener);
[...]
Device Discovery ExampleThe XBee Java Library includes a sample application that displays how to perform a device discoveryusing a listener. It can be located in the following path:/examples/network/DiscoverDevicesSample
Using the XBee Java Library Discovering the XBee network
XBee Java Library User Guide 61
Discover specific devicesThe XBeeNetwork object also provides a methods to discover specific devices of the network. This isuseful, for example, if you only need to work with a particular remote device.
Method Description
discoverDevice(String)
Specifies the node identifier of the XBee device to be found. Returns the remoteXBee device whose node identifier equals the one provided. In the case of findingmore than one device, it returns the first one.
discoverDevices(List<String>)
Specifies the node identifiers of the XBee devices to be found. Returns a list withthe remote XBee devices whose node identifiers equal those provided.
Note These are blocking methods, so the application blocks until the devices are found or theconfigured timeout expires.
import com.digi.xbee.api.RemoteXBeeDevice;import com.digi.xbee.api.XBeeDevice;import com.digi.xbee.api.XBeeNetwork;
[...]
// Instantiate an XBee device object.XBeeDevice myXBeeDevice = new XBeeDevice("COM1", 9600);myXBeeDevice.open();
// Get the XBee Network object from the XBee device.XBeeNetwork network = myXBeeDevice.getNetwork();
// Discover the remote device whose node ID is ‘Yoda’.RemoteXBeeDevice discoveredDevice = network.discoverDevice("Yoda");
ArrayList<String> ids = new ArrayList<String>();ids.add("R2D2");ids.add("C3PO");
// Discover the remote devices whose node IDs are ‘R2D2’ and ‘C3PO’.ArrayList<RemoteXBeeDevice> discoveredDevices = network.discoverDevices(ids);
[...]
IDiscoveryListener implementation example, MyDiscoveryListenerMyDiscoveryListenermust implement the IDiscoveryListener interface, which includes the methodsthat are executed when discover events occur.The behavior of the listener is as follows:
n When a new remote XBee device is discovered, the deviceDiscovered() method of theIDiscoveryListener executes, providing the reference of the RemoteXBeeDevice discovered asa parameter. It is a reference, because the XBee network already stores that device inside itslist of remote XBee devices.
n If there is an error during the discovery process, the discoveryError() method of theIDiscoveryListener executes, providing an error message with the cause of that error.
Using the XBee Java Library Discovering the XBee network
XBee Java Library User Guide 62
n When the discovery process finishes or the configured timeout expires, the discoveryFinished() method of the IDiscoveryListener executes, providing the error message with the reasonthe process did not finish successfully, or null if the process finished successfully.
IDiscoveryListener implementation example, MyDiscoveryListener
import com.digi.xbee.api.RemoteXBeeDevice;import com.digi.xbee.api.listeners.IDiscoveryListener;
public class MyDiscoveryListener implements IDiscoveryListener {
/** Device discovered callback.*/@Overridepublic void deviceDiscovered(RemoteXBeeDevice discoveredDevice) {
System.out.println("New device discovered: " +discoveredDevice.toString());
}
/** Discovery error callback.*/@Overridepublic void discoveryError(String error) {
System.out.println("There was an error during the discovery: " +error);
}
/** Discovery finished callback.*/@Overridepublic void discoveryFinished(String error) {
if (error != null)System.out.println("Discovery finished due to an error: " +
error);else
System.out.println("Discovery finished successfully.");}
}
Removing the discovery listenerTo remove the registered discovery listener, use the removeDiscoveryListener(IDiscoveryListener)method.
[...]
MyDiscoveryListener myDiscoveryListener = ...network.addDiscoveryListener(myDiscoveryListener);
[...]
// Remove the discovery listener.network.removeDiscoveryListener(myDiscoveryListener);
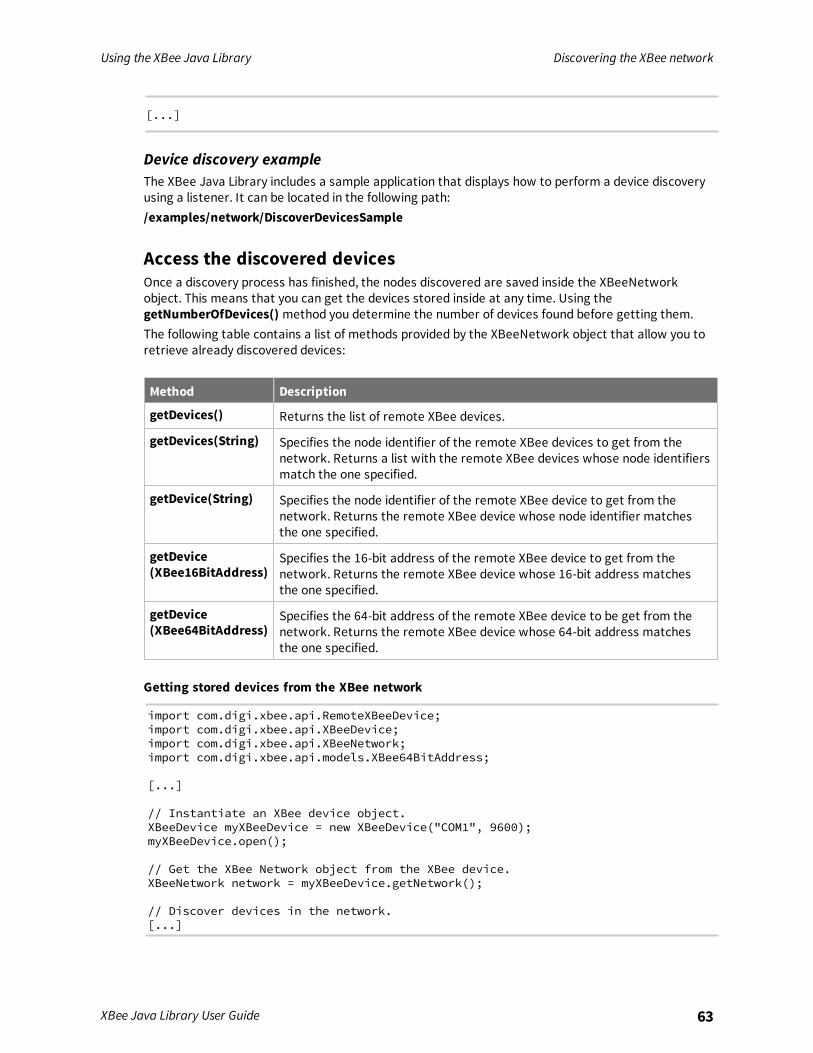
Using the XBee Java Library Discovering the XBee network
XBee Java Library User Guide 63
[...]
Device discovery exampleThe XBee Java Library includes a sample application that displays how to perform a device discoveryusing a listener. It can be located in the following path:/examples/network/DiscoverDevicesSample
Access the discovered devicesOnce a discovery process has finished, the nodes discovered are saved inside the XBeeNetworkobject. This means that you can get the devices stored inside at any time. Using thegetNumberOfDevices() method you determine the number of devices found before getting them.The following table contains a list of methods provided by the XBeeNetwork object that allow you toretrieve already discovered devices:
Method Description
getDevices() Returns the list of remote XBee devices.
getDevices(String) Specifies the node identifier of the remote XBee devices to get from thenetwork. Returns a list with the remote XBee devices whose node identifiersmatch the one specified.
getDevice(String) Specifies the node identifier of the remote XBee device to get from thenetwork. Returns the remote XBee device whose node identifier matchesthe one specified.
getDevice(XBee16BitAddress)
Specifies the 16-bit address of the remote XBee device to get from thenetwork. Returns the remote XBee device whose 16-bit address matchesthe one specified.
getDevice(XBee64BitAddress)
Specifies the 64-bit address of the remote XBee device to be get from thenetwork. Returns the remote XBee device whose 64-bit address matchesthe one specified.
Getting stored devices from the XBee network
import com.digi.xbee.api.RemoteXBeeDevice;import com.digi.xbee.api.XBeeDevice;import com.digi.xbee.api.XBeeNetwork;import com.digi.xbee.api.models.XBee64BitAddress;
[...]
// Instantiate an XBee device object.XBeeDevice myXBeeDevice = new XBeeDevice("COM1", 9600);myXBeeDevice.open();
// Get the XBee Network object from the XBee device.XBeeNetwork network = myXBeeDevice.getNetwork();
// Discover devices in the network.[...]
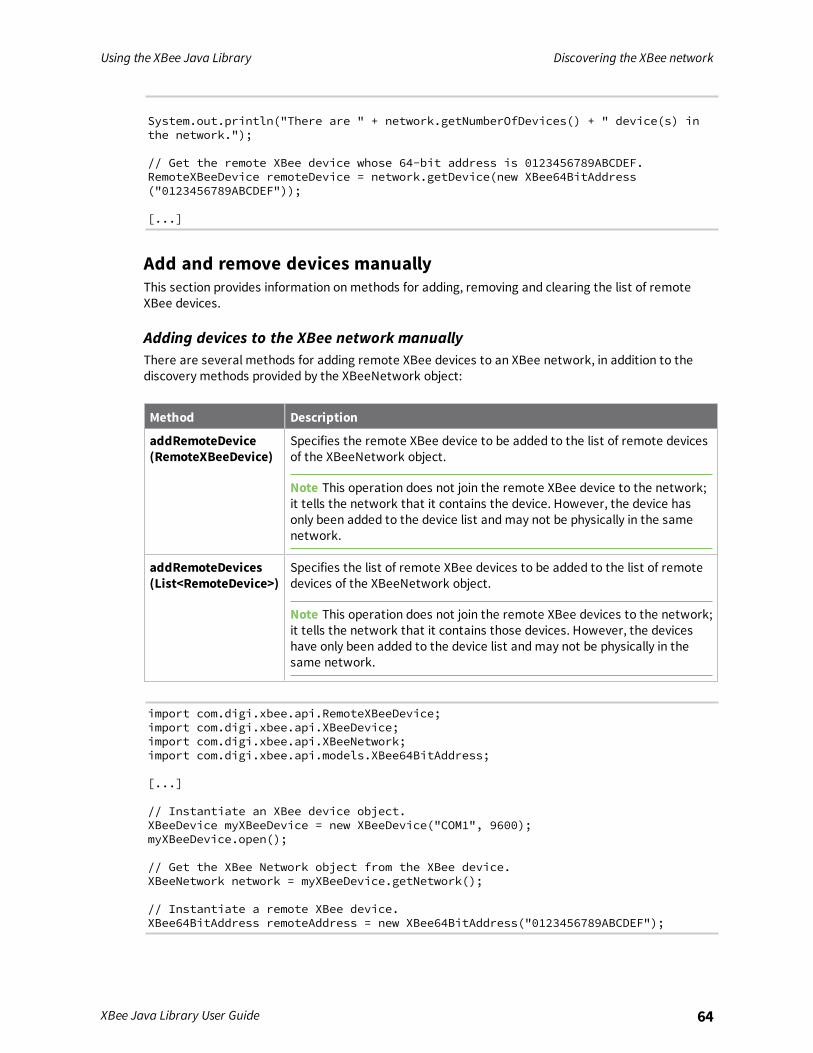
Using the XBee Java Library Discovering the XBee network
XBee Java Library User Guide 64
System.out.println("There are " + network.getNumberOfDevices() + " device(s) inthe network.");
// Get the remote XBee device whose 64-bit address is 0123456789ABCDEF.RemoteXBeeDevice remoteDevice = network.getDevice(new XBee64BitAddress("0123456789ABCDEF"));
[...]
Add and remove devices manuallyThis section provides information onmethods for adding, removing and clearing the list of remoteXBee devices.
Adding devices to the XBee network manuallyThere are several methods for adding remote XBee devices to an XBee network, in addition to thediscovery methods provided by the XBeeNetwork object:
Method Description
addRemoteDevice(RemoteXBeeDevice)
Specifies the remote XBee device to be added to the list of remote devicesof the XBeeNetwork object.
Note This operation does not join the remote XBee device to the network;it tells the network that it contains the device. However, the device hasonly been added to the device list andmay not be physically in the samenetwork.
addRemoteDevices(List<RemoteDevice>)
Specifies the list of remote XBee devices to be added to the list of remotedevices of the XBeeNetwork object.
Note This operation does not join the remote XBee devices to the network;it tells the network that it contains those devices. However, the deviceshave only been added to the device list andmay not be physically in thesame network.
import com.digi.xbee.api.RemoteXBeeDevice;import com.digi.xbee.api.XBeeDevice;import com.digi.xbee.api.XBeeNetwork;import com.digi.xbee.api.models.XBee64BitAddress;
[...]
// Instantiate an XBee device object.XBeeDevice myXBeeDevice = new XBeeDevice("COM1", 9600);myXBeeDevice.open();
// Get the XBee Network object from the XBee device.XBeeNetwork network = myXBeeDevice.getNetwork();
// Instantiate a remote XBee device.XBee64BitAddress remoteAddress = new XBee64BitAddress("0123456789ABCDEF");
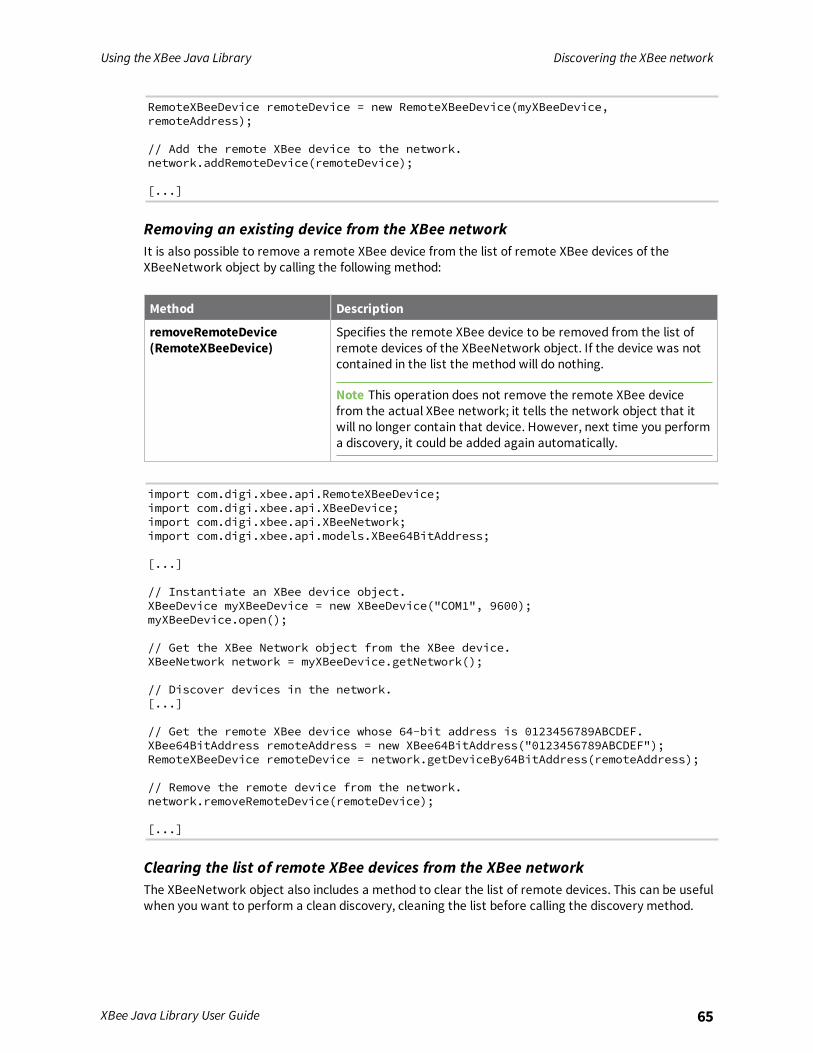
Using the XBee Java Library Discovering the XBee network
XBee Java Library User Guide 65
RemoteXBeeDevice remoteDevice = new RemoteXBeeDevice(myXBeeDevice,remoteAddress);
// Add the remote XBee device to the network.network.addRemoteDevice(remoteDevice);
[...]
Removing an existing device from the XBee networkIt is also possible to remove a remote XBee device from the list of remote XBee devices of theXBeeNetwork object by calling the following method:
Method Description
removeRemoteDevice(RemoteXBeeDevice)
Specifies the remote XBee device to be removed from the list ofremote devices of the XBeeNetwork object. If the device was notcontained in the list the method will do nothing.
Note This operation does not remove the remote XBee devicefrom the actual XBee network; it tells the network object that itwill no longer contain that device. However, next time you performa discovery, it could be added again automatically.
import com.digi.xbee.api.RemoteXBeeDevice;import com.digi.xbee.api.XBeeDevice;import com.digi.xbee.api.XBeeNetwork;import com.digi.xbee.api.models.XBee64BitAddress;
[...]
// Instantiate an XBee device object.XBeeDevice myXBeeDevice = new XBeeDevice("COM1", 9600);myXBeeDevice.open();
// Get the XBee Network object from the XBee device.XBeeNetwork network = myXBeeDevice.getNetwork();
// Discover devices in the network.[...]
// Get the remote XBee device whose 64-bit address is 0123456789ABCDEF.XBee64BitAddress remoteAddress = new XBee64BitAddress("0123456789ABCDEF");RemoteXBeeDevice remoteDevice = network.getDeviceBy64BitAddress(remoteAddress);
// Remove the remote device from the network.network.removeRemoteDevice(remoteDevice);
[...]
Clearing the list of remote XBee devices from the XBee networkThe XBeeNetwork object also includes a method to clear the list of remote devices. This can be usefulwhen you want to perform a clean discovery, cleaning the list before calling the discovery method.
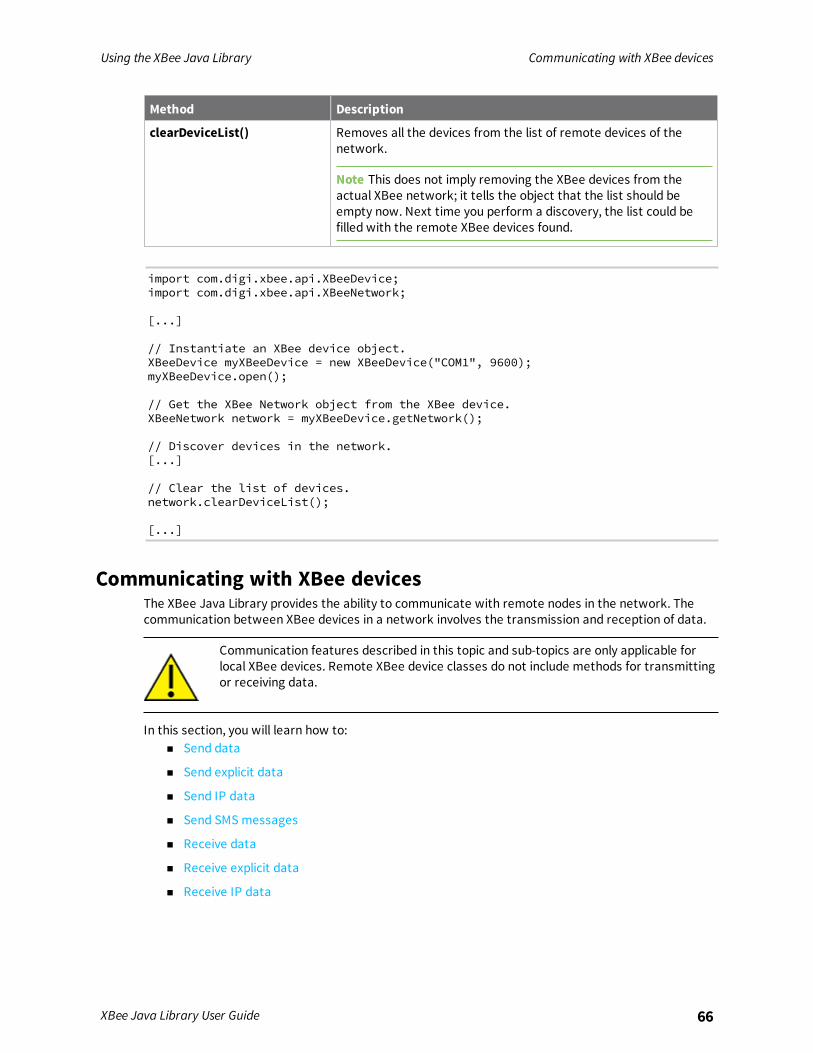
Using the XBee Java Library Communicating with XBee devices
XBee Java Library User Guide 66
Method Description
clearDeviceList() Removes all the devices from the list of remote devices of thenetwork.
Note This does not imply removing the XBee devices from theactual XBee network; it tells the object that the list should beempty now. Next time you perform a discovery, the list could befilled with the remote XBee devices found.
import com.digi.xbee.api.XBeeDevice;import com.digi.xbee.api.XBeeNetwork;
[...]
// Instantiate an XBee device object.XBeeDevice myXBeeDevice = new XBeeDevice("COM1", 9600);myXBeeDevice.open();
// Get the XBee Network object from the XBee device.XBeeNetwork network = myXBeeDevice.getNetwork();
// Discover devices in the network.[...]
// Clear the list of devices.network.clearDeviceList();
[...]
Communicating with XBee devicesThe XBee Java Library provides the ability to communicate with remote nodes in the network. Thecommunication between XBee devices in a network involves the transmission and reception of data.
Communication features described in this topic and sub-topics are only applicable forlocal XBee devices. Remote XBee device classes do not include methods for transmittingor receiving data.
In this section, you will learn how to:n Send data
n Send explicit data
n Send IP data
n Send SMS messages
n Receive data
n Receive explicit data
n Receive IP data
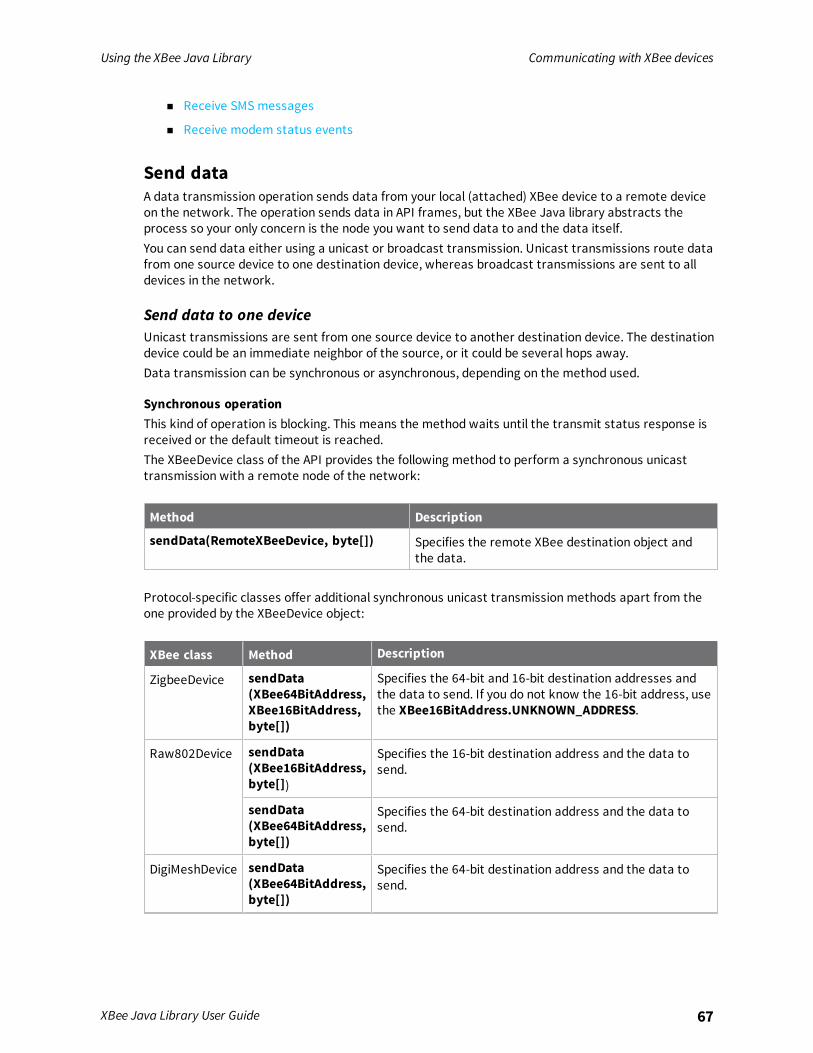
Using the XBee Java Library Communicating with XBee devices
XBee Java Library User Guide 67
n Receive SMS messages
n Receive modem status events
Send dataA data transmission operation sends data from your local (attached) XBee device to a remote deviceon the network. The operation sends data in API frames, but the XBee Java library abstracts theprocess so your only concern is the node you want to send data to and the data itself.You can send data either using a unicast or broadcast transmission. Unicast transmissions route datafrom one source device to one destination device, whereas broadcast transmissions are sent to alldevices in the network.
Send data to one deviceUnicast transmissions are sent from one source device to another destination device. The destinationdevice could be an immediate neighbor of the source, or it could be several hops away.Data transmission can be synchronous or asynchronous, depending on the method used.
Synchronous operationThis kind of operation is blocking. This means the method waits until the transmit status response isreceived or the default timeout is reached.The XBeeDevice class of the API provides the following method to perform a synchronous unicasttransmission with a remote node of the network:
Method Description
sendData(RemoteXBeeDevice, byte[]) Specifies the remote XBee destination object andthe data.
Protocol-specific classes offer additional synchronous unicast transmission methods apart from theone provided by the XBeeDevice object:
XBee class Method Description
ZigbeeDevice sendData(XBee64BitAddress,XBee16BitAddress,byte[])
Specifies the 64-bit and 16-bit destination addresses andthe data to send. If you do not know the 16-bit address, usethe XBee16BitAddress.UNKNOWN_ADDRESS.
Raw802Device sendData(XBee16BitAddress,byte[])
Specifies the 16-bit destination address and the data tosend.
sendData(XBee64BitAddress,byte[])
Specifies the 64-bit destination address and the data tosend.
DigiMeshDevice sendData(XBee64BitAddress,byte[])
Specifies the 64-bit destination address and the data tosend.
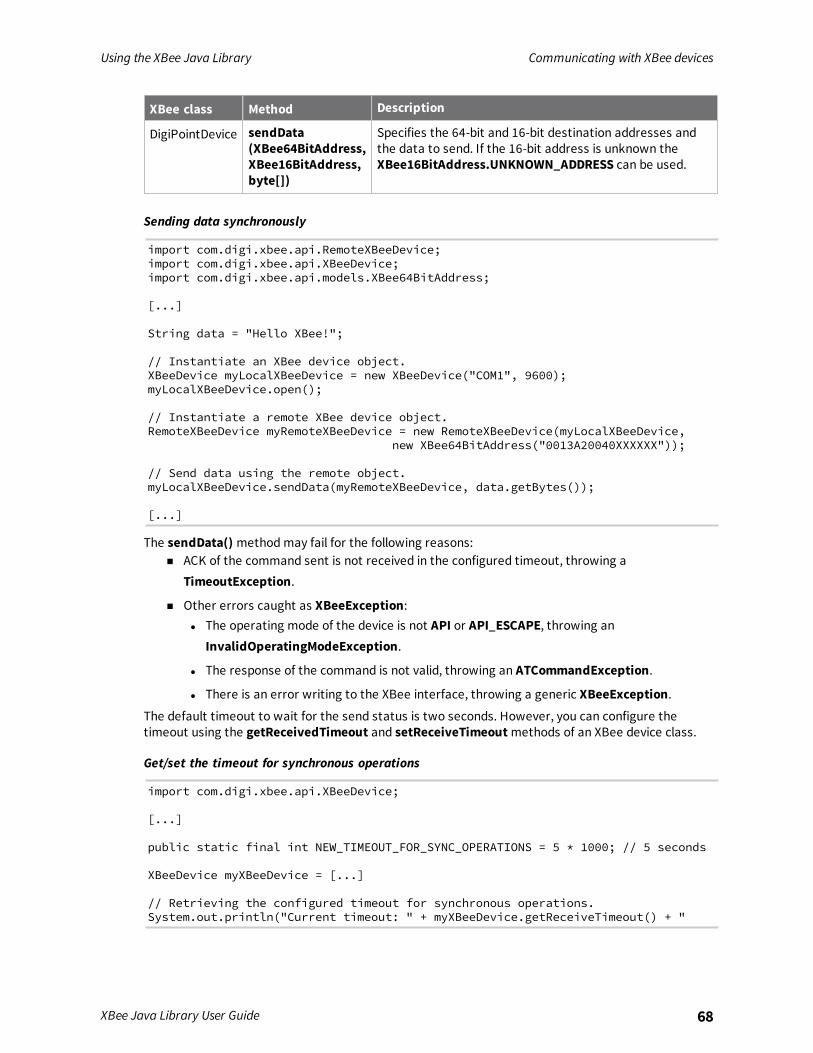
Using the XBee Java Library Communicating with XBee devices
XBee Java Library User Guide 68
XBee class Method Description
DigiPointDevice sendData(XBee64BitAddress,XBee16BitAddress,byte[])
Specifies the 64-bit and 16-bit destination addresses andthe data to send. If the 16-bit address is unknown theXBee16BitAddress.UNKNOWN_ADDRESS can be used.
Sending data synchronously
import com.digi.xbee.api.RemoteXBeeDevice;import com.digi.xbee.api.XBeeDevice;import com.digi.xbee.api.models.XBee64BitAddress;
[...]
String data = "Hello XBee!";
// Instantiate an XBee device object.XBeeDevice myLocalXBeeDevice = new XBeeDevice("COM1", 9600);myLocalXBeeDevice.open();
// Instantiate a remote XBee device object.RemoteXBeeDevice myRemoteXBeeDevice = new RemoteXBeeDevice(myLocalXBeeDevice,
new XBee64BitAddress("0013A20040XXXXXX"));
// Send data using the remote object.myLocalXBeeDevice.sendData(myRemoteXBeeDevice, data.getBytes());
[...]
The sendData() methodmay fail for the following reasons:n ACK of the command sent is not received in the configured timeout, throwing a
TimeoutException.
n Other errors caught as XBeeException:l The operating mode of the device is not API or API_ESCAPE, throwing an
InvalidOperatingModeException.
l The response of the command is not valid, throwing an ATCommandException.
l There is an error writing to the XBee interface, throwing a generic XBeeException.The default timeout to wait for the send status is two seconds. However, you can configure thetimeout using the getReceivedTimeout and setReceiveTimeoutmethods of an XBee device class.
Get/set the timeout for synchronous operations
import com.digi.xbee.api.XBeeDevice;
[...]
public static final int NEW_TIMEOUT_FOR_SYNC_OPERATIONS = 5 * 1000; // 5 seconds
XBeeDevice myXBeeDevice = [...]
// Retrieving the configured timeout for synchronous operations.System.out.println("Current timeout: " + myXBeeDevice.getReceiveTimeout() + "
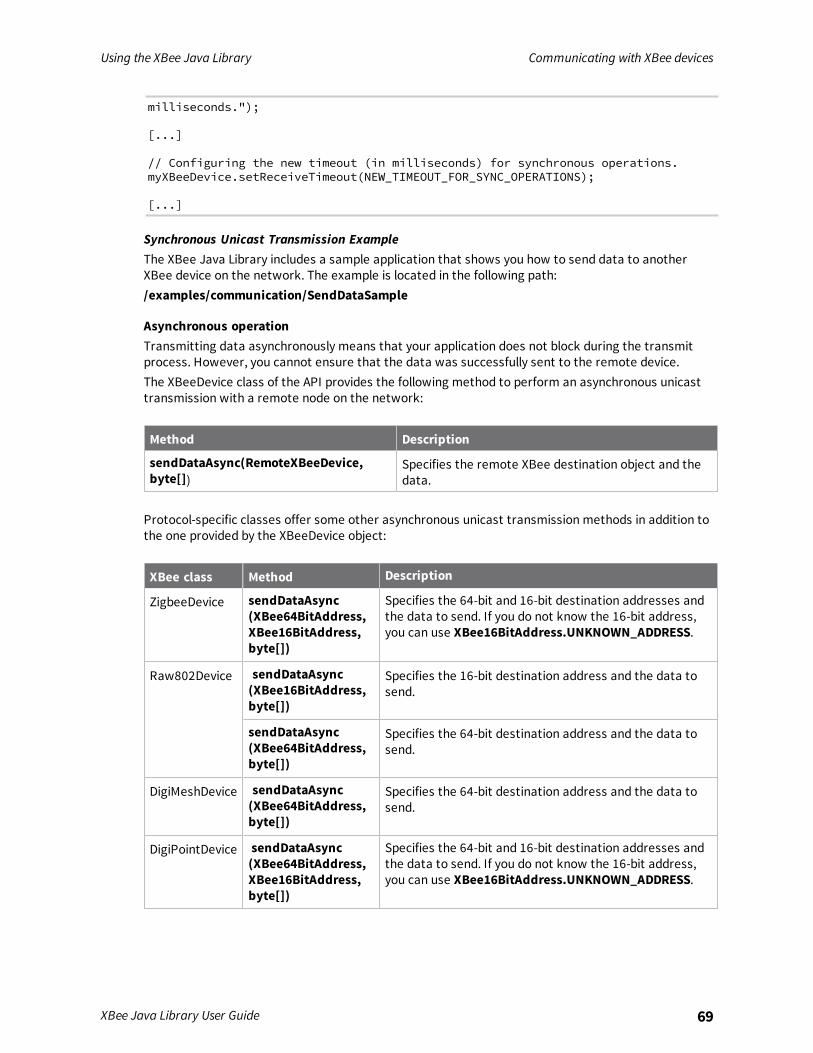
Using the XBee Java Library Communicating with XBee devices
XBee Java Library User Guide 69
milliseconds.");
[...]
// Configuring the new timeout (in milliseconds) for synchronous operations.myXBeeDevice.setReceiveTimeout(NEW_TIMEOUT_FOR_SYNC_OPERATIONS);
[...]
Synchronous Unicast Transmission ExampleThe XBee Java Library includes a sample application that shows you how to send data to anotherXBee device on the network. The example is located in the following path:/examples/communication/SendDataSample
Asynchronous operationTransmitting data asynchronously means that your application does not block during the transmitprocess. However, you cannot ensure that the data was successfully sent to the remote device.The XBeeDevice class of the API provides the following method to perform an asynchronous unicasttransmission with a remote node on the network:
Method Description
sendDataAsync(RemoteXBeeDevice,byte[])
Specifies the remote XBee destination object and thedata.
Protocol-specific classes offer some other asynchronous unicast transmission methods in addition tothe one provided by the XBeeDevice object:
XBee class Method Description
ZigbeeDevice sendDataAsync(XBee64BitAddress,XBee16BitAddress,byte[])
Specifies the 64-bit and 16-bit destination addresses andthe data to send. If you do not know the 16-bit address,you can use XBee16BitAddress.UNKNOWN_ADDRESS.
Raw802Device sendDataAsync(XBee16BitAddress,byte[])
Specifies the 16-bit destination address and the data tosend.
sendDataAsync(XBee64BitAddress,byte[])
Specifies the 64-bit destination address and the data tosend.
DigiMeshDevice sendDataAsync(XBee64BitAddress,byte[])
Specifies the 64-bit destination address and the data tosend.
DigiPointDevice sendDataAsync(XBee64BitAddress,XBee16BitAddress,byte[])
Specifies the 64-bit and 16-bit destination addresses andthe data to send. If you do not know the 16-bit address,you can use XBee16BitAddress.UNKNOWN_ADDRESS.
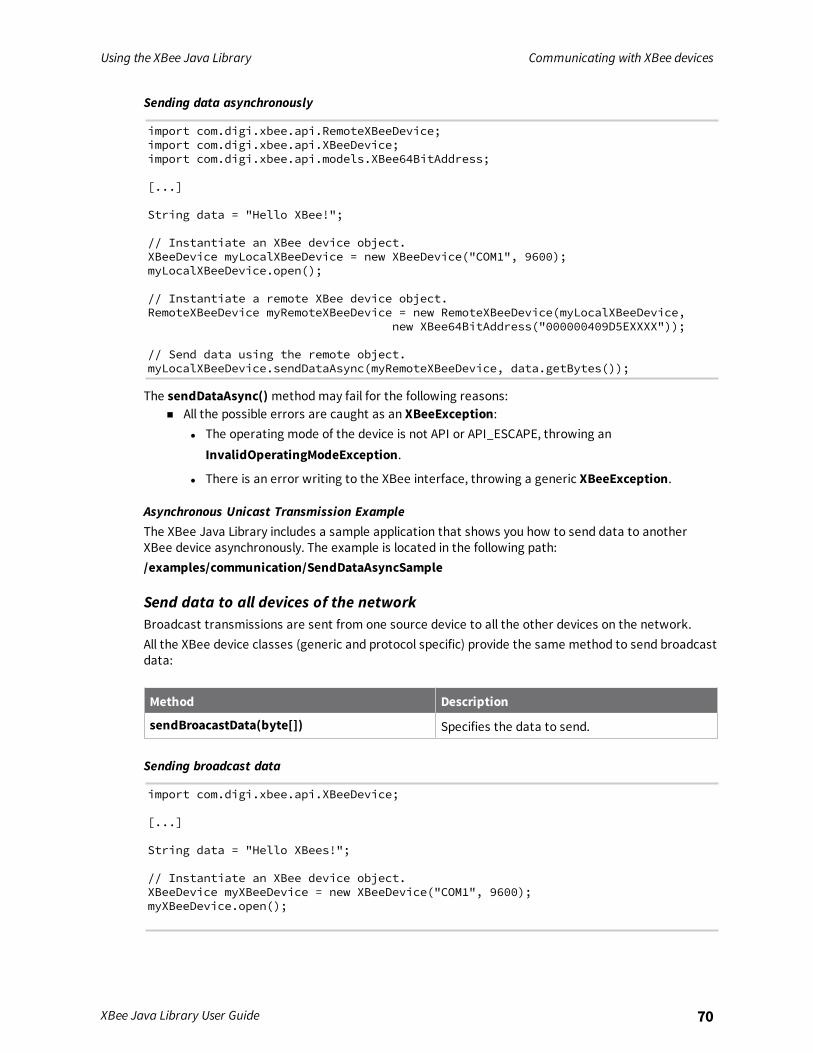
Using the XBee Java Library Communicating with XBee devices
XBee Java Library User Guide 70
Sending data asynchronously
import com.digi.xbee.api.RemoteXBeeDevice;import com.digi.xbee.api.XBeeDevice;import com.digi.xbee.api.models.XBee64BitAddress;
[...]
String data = "Hello XBee!";
// Instantiate an XBee device object.XBeeDevice myLocalXBeeDevice = new XBeeDevice("COM1", 9600);myLocalXBeeDevice.open();
// Instantiate a remote XBee device object.RemoteXBeeDevice myRemoteXBeeDevice = new RemoteXBeeDevice(myLocalXBeeDevice,
new XBee64BitAddress("000000409D5EXXXX"));
// Send data using the remote object.myLocalXBeeDevice.sendDataAsync(myRemoteXBeeDevice, data.getBytes());
The sendDataAsync() methodmay fail for the following reasons:n All the possible errors are caught as an XBeeException:
l The operating mode of the device is not API or API_ESCAPE, throwing anInvalidOperatingModeException.
l There is an error writing to the XBee interface, throwing a generic XBeeException.
Asynchronous Unicast Transmission ExampleThe XBee Java Library includes a sample application that shows you how to send data to anotherXBee device asynchronously. The example is located in the following path:/examples/communication/SendDataAsyncSample
Send data to all devices of the networkBroadcast transmissions are sent from one source device to all the other devices on the network.All the XBee device classes (generic and protocol specific) provide the same method to send broadcastdata:
Method Description
sendBroacastData(byte[]) Specifies the data to send.
Sending broadcast data
import com.digi.xbee.api.XBeeDevice;
[...]
String data = "Hello XBees!";
// Instantiate an XBee device object.XBeeDevice myXBeeDevice = new XBeeDevice("COM1", 9600);myXBeeDevice.open();
Using the XBee Java Library Communicating with XBee devices
XBee Java Library User Guide 71
// Send broadcast data.myXBeeDevice.sendBroadcastData(data.getBytes());
[...]
The sendBroadcastData() methodmay fail for the following reasons:n Transmit status is not received in the configured timeout, throwing a TimeoutException
exception.
n Error types catch as XBeeException:l The operating mode of the device is not API or API_ESCAPE, throwing an
InvalidOperatingModeException.
l The transmit status is not SUCCESS, throwing a TransmitException.
l There is an error writing to the XBee interface, throwing a generic XBeeException.
Broadcast Transmission ExampleThe XBee Java Library includes a sample application that shows you how to send data to all thedevices on the network (broadcast). The example is located in the following path:/examples/communication/SendBroadcastDataSample
Send explicit dataSome Zigbee applications may require communication with third-party (non-Digi) RF modules. Theseapplications often send data of different public profiles such as Home Automation or Smart Energy toother modules.XBee Zigbee modules offer a special type of frame for this purpose. Explicit frames transmit explicitdata. When sending public profile packets, the frames transmit the data itself plus the applicationlayer-specific fields—the source and destination endpoints, profile ID, and cluster ID.
Only Zigbee, DigiMesh, and Point-to-Multipoint protocols support the transmission ofdata in explicit format. This means you cannot transmit explicit data using a genericXBeeDevice object. You must use a protocol-specific XBee device object such as aZigbeeDevice.
You can send explicit data as either unicast or broadcast transmissions. Unicast transmissions routedata from one source device to one destination device, whereas broadcast transmissions are sent toall devices in the network.
Send explicit data to one deviceUnicast transmissions are sent from one source device to another destination device. The destinationdevice could be an immediate neighbor of the source, or it could be several hops away.Unicast explicit data transmission can be a synchronous or asynchronous operation, depending on themethod used.
Synchronous operationThe synchronous data transmission is a blocking operation. That is, the method waits until it eitherreceives the transmit status response or the default timeout is reached.All local XBee device classes that support explicit data transmission provide a method to transmitunicast and synchronous explicit data to a remote node of the network:
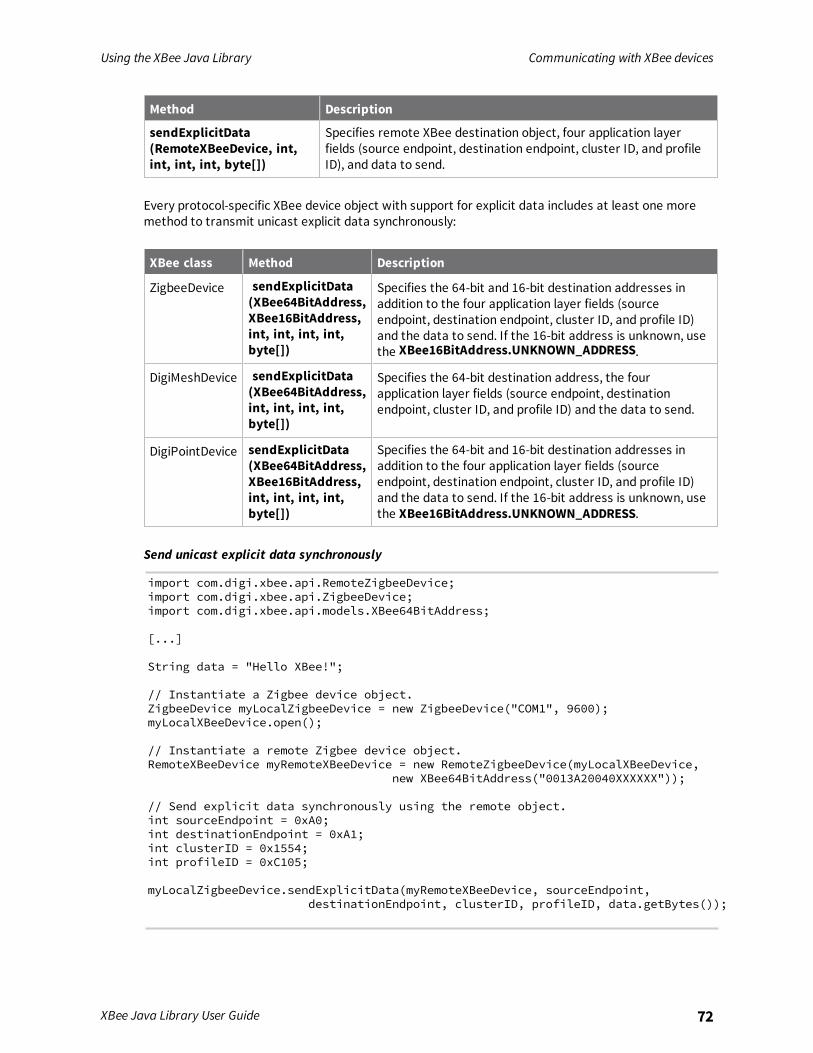
Using the XBee Java Library Communicating with XBee devices
XBee Java Library User Guide 72
Method Description
sendExplicitData(RemoteXBeeDevice, int,int, int, int, byte[])
Specifies remote XBee destination object, four application layerfields (source endpoint, destination endpoint, cluster ID, and profileID), and data to send.
Every protocol-specific XBee device object with support for explicit data includes at least one moremethod to transmit unicast explicit data synchronously:
XBee class Method Description
ZigbeeDevice sendExplicitData(XBee64BitAddress,XBee16BitAddress,int, int, int, int,byte[])
Specifies the 64-bit and 16-bit destination addresses inaddition to the four application layer fields (sourceendpoint, destination endpoint, cluster ID, and profile ID)and the data to send. If the 16-bit address is unknown, usethe XBee16BitAddress.UNKNOWN_ADDRESS.
DigiMeshDevice sendExplicitData(XBee64BitAddress,int, int, int, int,byte[])
Specifies the 64-bit destination address, the fourapplication layer fields (source endpoint, destinationendpoint, cluster ID, and profile ID) and the data to send.
DigiPointDevice sendExplicitData(XBee64BitAddress,XBee16BitAddress,int, int, int, int,byte[])
Specifies the 64-bit and 16-bit destination addresses inaddition to the four application layer fields (sourceendpoint, destination endpoint, cluster ID, and profile ID)and the data to send. If the 16-bit address is unknown, usethe XBee16BitAddress.UNKNOWN_ADDRESS.
Send unicast explicit data synchronously
import com.digi.xbee.api.RemoteZigbeeDevice;import com.digi.xbee.api.ZigbeeDevice;import com.digi.xbee.api.models.XBee64BitAddress;
[...]
String data = "Hello XBee!";
// Instantiate a Zigbee device object.ZigbeeDevice myLocalZigbeeDevice = new ZigbeeDevice("COM1", 9600);myLocalXBeeDevice.open();
// Instantiate a remote Zigbee device object.RemoteXBeeDevice myRemoteXBeeDevice = new RemoteZigbeeDevice(myLocalXBeeDevice,
new XBee64BitAddress("0013A20040XXXXXX"));
// Send explicit data synchronously using the remote object.int sourceEndpoint = 0xA0;int destinationEndpoint = 0xA1;int clusterID = 0x1554;int profileID = 0xC105;
myLocalZigbeeDevice.sendExplicitData(myRemoteXBeeDevice, sourceEndpoint,destinationEndpoint, clusterID, profileID, data.getBytes());
Using the XBee Java Library Communicating with XBee devices
XBee Java Library User Guide 73
[...]
The sendExplicitDatamethodmay fail for the following reasons:n The method throws a TimeoutException exception if the response is not received in the
configured timeout.
n Other errors register as XBeeException:l If the operating mode of the device is not API or API_ESCAPE, the method throws an
InvalidOperatingModeException.
l If the transmit status is not SUCCESS, the method throws a TransmitException.
l If there is an error writing to the XBee interface, the method throws a genericXBeeException.
The default timeout to wait for send status is two seconds. You can configure this value using thegetReceivedTimeout and setReceiveTimeoutmethods of a local XBee device class.
Get/set the timeout for synchronous operations
import com.digi.xbee.api.XBeeDevice;[...]
public static final int NEW_TIMEOUT_FOR_SYNC_OPERATIONS = 5 * 1000; // 5 seconds
XBeeDevice myXBeeDevice = [...]
// Retrieving the configured timeout for synchronous operations.System.out.println("Current timeout: " + myXBeeDevice.getReceiveTimeout() + "milliseconds.");
[...]
// Configuring the new timeout (in milliseconds) for synchronous operations.myXBeeDevice.setReceiveTimeout(NEW_TIMEOUT_FOR_SYNC_OPERATIONS);
[...]
Example: Transmit explicit synchronous unicast dataThe XBee Java Library includes a sample application that demonstrates how to send explicit data to aremote device of the network (unicast). It can be located in the following path:/examples/communication/explicit/SendExplicitDataSample
Asynchronous operationTransmitting explicit data asynchronously means that your application does not block during thetransmit process. However, you cannot ensure that the data was successfully sent to the remotedevice.All local XBee device classes that support explicit data transmission provide a method to transmitunicast and asynchronous explicit data to a remote node of the network:
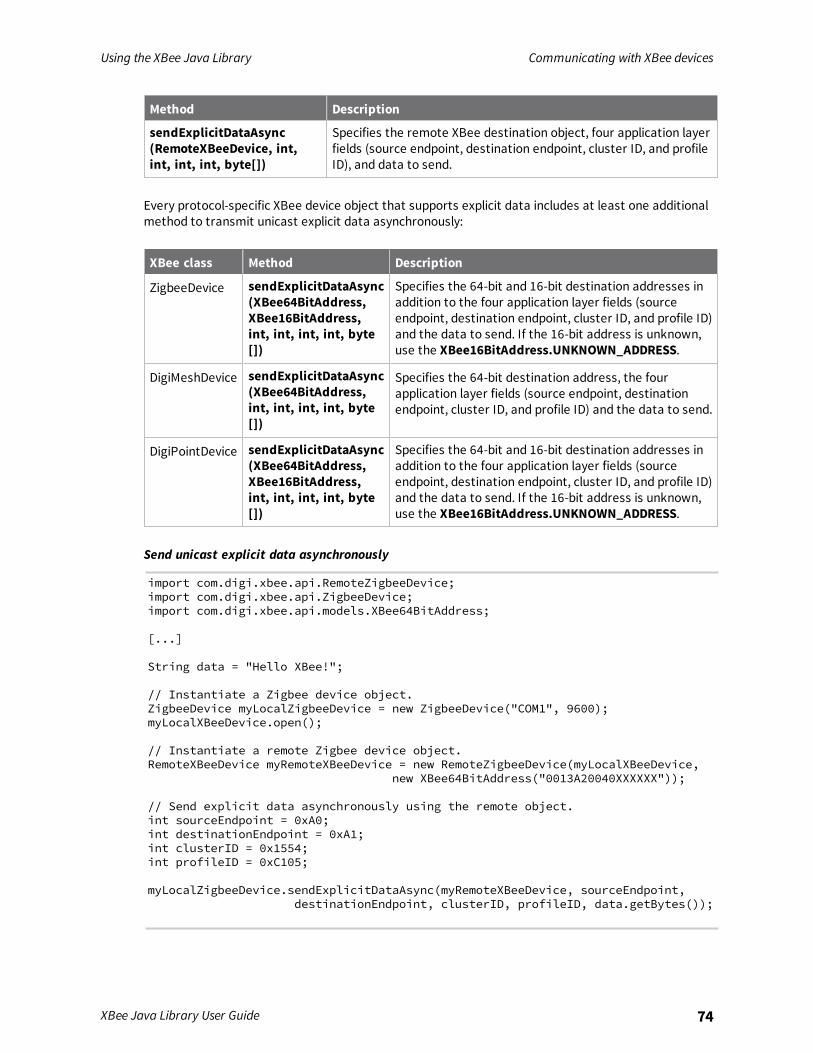
Using the XBee Java Library Communicating with XBee devices
XBee Java Library User Guide 74
Method Description
sendExplicitDataAsync(RemoteXBeeDevice, int,int, int, int, byte[])
Specifies the remote XBee destination object, four application layerfields (source endpoint, destination endpoint, cluster ID, and profileID), and data to send.
Every protocol-specific XBee device object that supports explicit data includes at least one additionalmethod to transmit unicast explicit data asynchronously:
XBee class Method Description
ZigbeeDevice sendExplicitDataAsync(XBee64BitAddress,XBee16BitAddress,int, int, int, int, byte[])
Specifies the 64-bit and 16-bit destination addresses inaddition to the four application layer fields (sourceendpoint, destination endpoint, cluster ID, and profile ID)and the data to send. If the 16-bit address is unknown,use the XBee16BitAddress.UNKNOWN_ADDRESS.
DigiMeshDevice sendExplicitDataAsync(XBee64BitAddress,int, int, int, int, byte[])
Specifies the 64-bit destination address, the fourapplication layer fields (source endpoint, destinationendpoint, cluster ID, and profile ID) and the data to send.
DigiPointDevice sendExplicitDataAsync(XBee64BitAddress,XBee16BitAddress,int, int, int, int, byte[])
Specifies the 64-bit and 16-bit destination addresses inaddition to the four application layer fields (sourceendpoint, destination endpoint, cluster ID, and profile ID)and the data to send. If the 16-bit address is unknown,use the XBee16BitAddress.UNKNOWN_ADDRESS.
Send unicast explicit data asynchronously
import com.digi.xbee.api.RemoteZigbeeDevice;import com.digi.xbee.api.ZigbeeDevice;import com.digi.xbee.api.models.XBee64BitAddress;
[...]
String data = "Hello XBee!";
// Instantiate a Zigbee device object.ZigbeeDevice myLocalZigbeeDevice = new ZigbeeDevice("COM1", 9600);myLocalXBeeDevice.open();
// Instantiate a remote Zigbee device object.RemoteXBeeDevice myRemoteXBeeDevice = new RemoteZigbeeDevice(myLocalXBeeDevice,
new XBee64BitAddress("0013A20040XXXXXX"));
// Send explicit data asynchronously using the remote object.int sourceEndpoint = 0xA0;int destinationEndpoint = 0xA1;int clusterID = 0x1554;int profileID = 0xC105;
myLocalZigbeeDevice.sendExplicitDataAsync(myRemoteXBeeDevice, sourceEndpoint,destinationEndpoint, clusterID, profileID, data.getBytes());
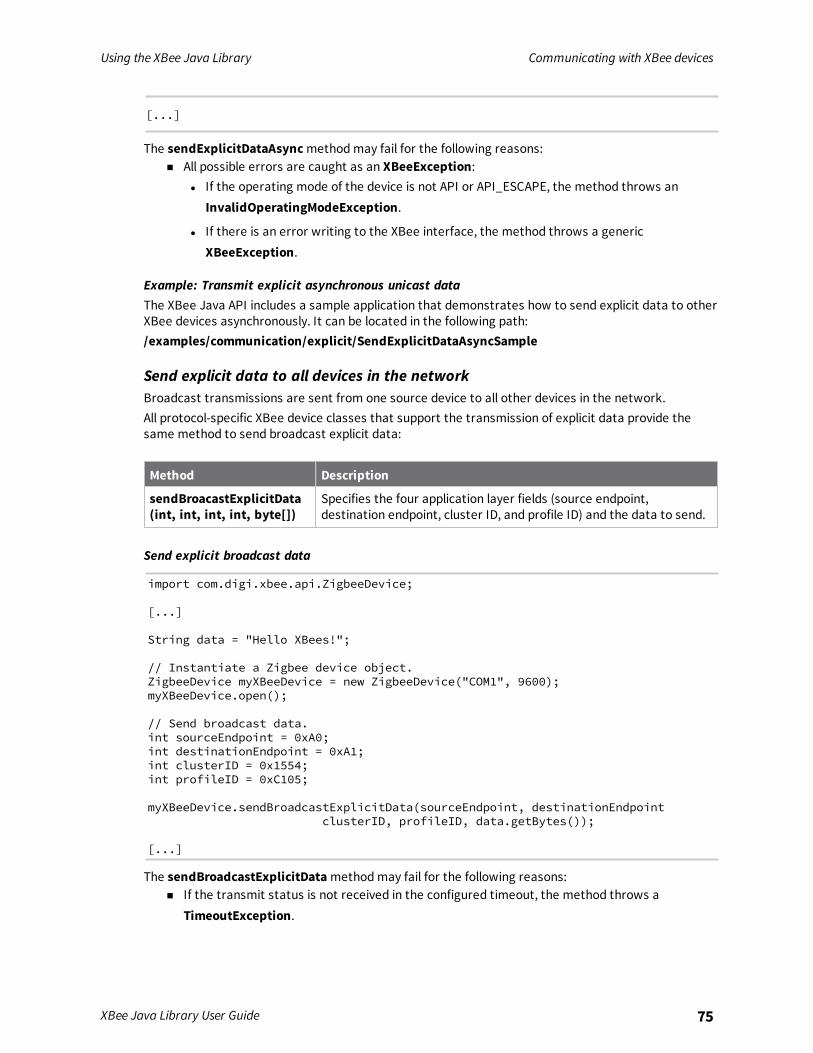
Using the XBee Java Library Communicating with XBee devices
XBee Java Library User Guide 75
[...]
The sendExplicitDataAsyncmethodmay fail for the following reasons:n All possible errors are caught as an XBeeException:
l If the operating mode of the device is not API or API_ESCAPE, the method throws anInvalidOperatingModeException.
l If there is an error writing to the XBee interface, the method throws a genericXBeeException.
Example: Transmit explicit asynchronous unicast dataThe XBee Java API includes a sample application that demonstrates how to send explicit data to otherXBee devices asynchronously. It can be located in the following path:/examples/communication/explicit/SendExplicitDataAsyncSample
Send explicit data to all devices in the networkBroadcast transmissions are sent from one source device to all other devices in the network.All protocol-specific XBee device classes that support the transmission of explicit data provide thesame method to send broadcast explicit data:
Method Description
sendBroacastExplicitData(int, int, int, int, byte[])
Specifies the four application layer fields (source endpoint,destination endpoint, cluster ID, and profile ID) and the data to send.
Send explicit broadcast data
import com.digi.xbee.api.ZigbeeDevice;
[...]
String data = "Hello XBees!";
// Instantiate a Zigbee device object.ZigbeeDevice myXBeeDevice = new ZigbeeDevice("COM1", 9600);myXBeeDevice.open();
// Send broadcast data.int sourceEndpoint = 0xA0;int destinationEndpoint = 0xA1;int clusterID = 0x1554;int profileID = 0xC105;
myXBeeDevice.sendBroadcastExplicitData(sourceEndpoint, destinationEndpointclusterID, profileID, data.getBytes());
[...]
The sendBroadcastExplicitDatamethodmay fail for the following reasons:n If the transmit status is not received in the configured timeout, the method throws a
TimeoutException.
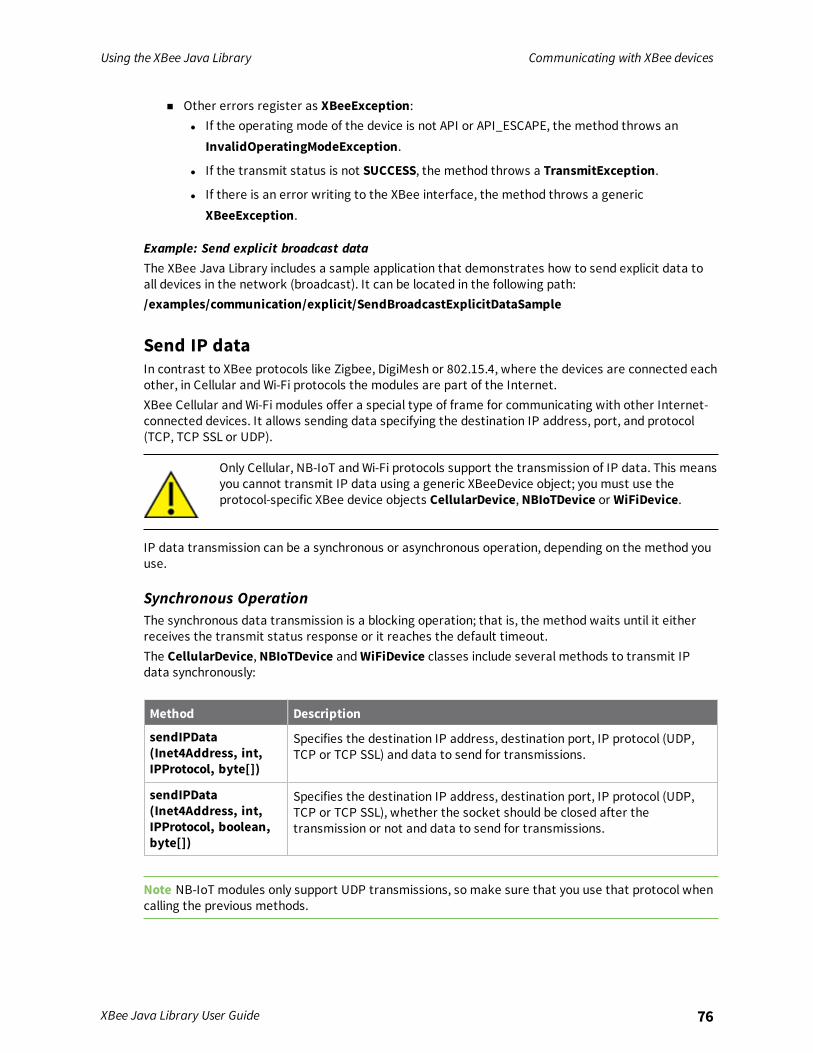
Using the XBee Java Library Communicating with XBee devices
XBee Java Library User Guide 76
n Other errors register as XBeeException:l If the operating mode of the device is not API or API_ESCAPE, the method throws an
InvalidOperatingModeException.
l If the transmit status is not SUCCESS, the method throws a TransmitException.
l If there is an error writing to the XBee interface, the method throws a genericXBeeException.
Example: Send explicit broadcast dataThe XBee Java Library includes a sample application that demonstrates how to send explicit data toall devices in the network (broadcast). It can be located in the following path:/examples/communication/explicit/SendBroadcastExplicitDataSample
Send IP dataIn contrast to XBee protocols like Zigbee, DigiMesh or 802.15.4, where the devices are connected eachother, in Cellular andWi-Fi protocols the modules are part of the Internet.XBee Cellular andWi-Fi modules offer a special type of frame for communicating with other Internet-connected devices. It allows sending data specifying the destination IP address, port, and protocol(TCP, TCP SSL or UDP).
Only Cellular, NB-IoT andWi-Fi protocols support the transmission of IP data. This meansyou cannot transmit IP data using a generic XBeeDevice object; you must use theprotocol-specific XBee device objects CellularDevice, NBIoTDevice or WiFiDevice.
IP data transmission can be a synchronous or asynchronous operation, depending on the method youuse.
Synchronous OperationThe synchronous data transmission is a blocking operation; that is, the method waits until it eitherreceives the transmit status response or it reaches the default timeout.The CellularDevice, NBIoTDevice andWiFiDevice classes include several methods to transmit IPdata synchronously:
Method Description
sendIPData(Inet4Address, int,IPProtocol, byte[])
Specifies the destination IP address, destination port, IP protocol (UDP,TCP or TCP SSL) and data to send for transmissions.
sendIPData(Inet4Address, int,IPProtocol, boolean,byte[])
Specifies the destination IP address, destination port, IP protocol (UDP,TCP or TCP SSL), whether the socket should be closed after thetransmission or not and data to send for transmissions.
Note NB-IoT modules only support UDP transmissions, so make sure that you use that protocol whencalling the previous methods.
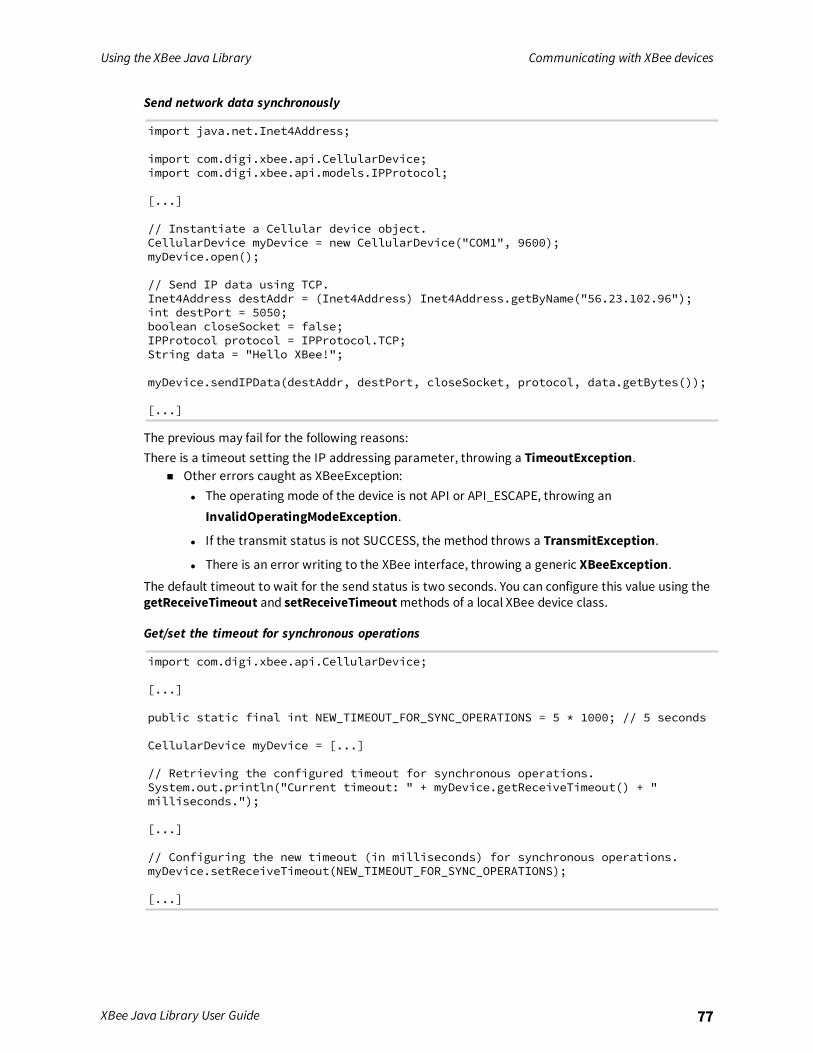
Using the XBee Java Library Communicating with XBee devices
XBee Java Library User Guide 77
Send network data synchronously
import java.net.Inet4Address;
import com.digi.xbee.api.CellularDevice;import com.digi.xbee.api.models.IPProtocol;
[...]
// Instantiate a Cellular device object.CellularDevice myDevice = new CellularDevice("COM1", 9600);myDevice.open();
// Send IP data using TCP.Inet4Address destAddr = (Inet4Address) Inet4Address.getByName("56.23.102.96");int destPort = 5050;boolean closeSocket = false;IPProtocol protocol = IPProtocol.TCP;String data = "Hello XBee!";
myDevice.sendIPData(destAddr, destPort, closeSocket, protocol, data.getBytes());
[...]
The previous may fail for the following reasons:There is a timeout setting the IP addressing parameter, throwing a TimeoutException.
n Other errors caught as XBeeException:l The operating mode of the device is not API or API_ESCAPE, throwing an
InvalidOperatingModeException.
l If the transmit status is not SUCCESS, the method throws a TransmitException.
l There is an error writing to the XBee interface, throwing a generic XBeeException.The default timeout to wait for the send status is two seconds. You can configure this value using thegetReceiveTimeout and setReceiveTimeoutmethods of a local XBee device class.
Get/set the timeout for synchronous operations
import com.digi.xbee.api.CellularDevice;
[...]
public static final int NEW_TIMEOUT_FOR_SYNC_OPERATIONS = 5 * 1000; // 5 seconds
CellularDevice myDevice = [...]
// Retrieving the configured timeout for synchronous operations.System.out.println("Current timeout: " + myDevice.getReceiveTimeout() + "milliseconds.");
[...]
// Configuring the new timeout (in milliseconds) for synchronous operations.myDevice.setReceiveTimeout(NEW_TIMEOUT_FOR_SYNC_OPERATIONS);
[...]
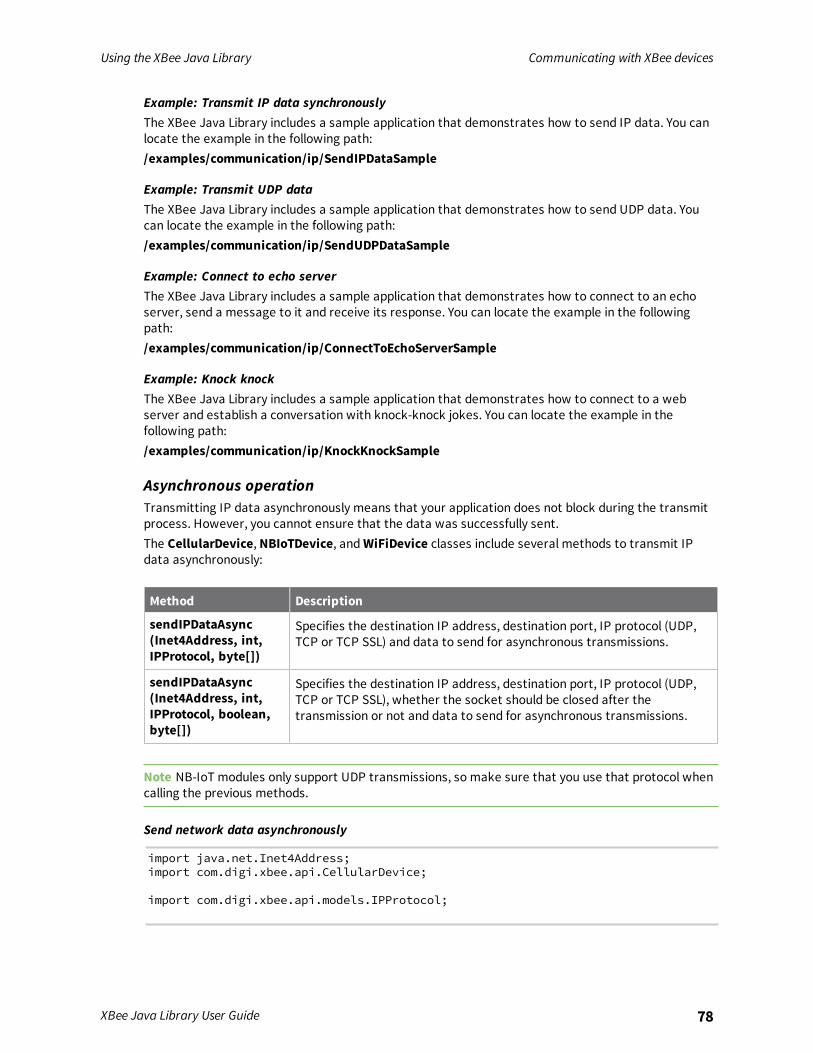
Using the XBee Java Library Communicating with XBee devices
XBee Java Library User Guide 78
Example: Transmit IP data synchronouslyThe XBee Java Library includes a sample application that demonstrates how to send IP data. You canlocate the example in the following path:/examples/communication/ip/SendIPDataSample
Example: Transmit UDP dataThe XBee Java Library includes a sample application that demonstrates how to send UDP data. Youcan locate the example in the following path:/examples/communication/ip/SendUDPDataSample
Example: Connect to echo serverThe XBee Java Library includes a sample application that demonstrates how to connect to an echoserver, send a message to it and receive its response. You can locate the example in the followingpath:/examples/communication/ip/ConnectToEchoServerSample
Example: Knock knockThe XBee Java Library includes a sample application that demonstrates how to connect to a webserver and establish a conversation with knock-knock jokes. You can locate the example in thefollowing path:/examples/communication/ip/KnockKnockSample
Asynchronous operationTransmitting IP data asynchronously means that your application does not block during the transmitprocess. However, you cannot ensure that the data was successfully sent.The CellularDevice, NBIoTDevice, andWiFiDevice classes include several methods to transmit IPdata asynchronously:
Method Description
sendIPDataAsync(Inet4Address, int,IPProtocol, byte[])
Specifies the destination IP address, destination port, IP protocol (UDP,TCP or TCP SSL) and data to send for asynchronous transmissions.
sendIPDataAsync(Inet4Address, int,IPProtocol, boolean,byte[])
Specifies the destination IP address, destination port, IP protocol (UDP,TCP or TCP SSL), whether the socket should be closed after thetransmission or not and data to send for asynchronous transmissions.
Note NB-IoT modules only support UDP transmissions, so make sure that you use that protocol whencalling the previous methods.
Send network data asynchronously
import java.net.Inet4Address;import com.digi.xbee.api.CellularDevice;
import com.digi.xbee.api.models.IPProtocol;
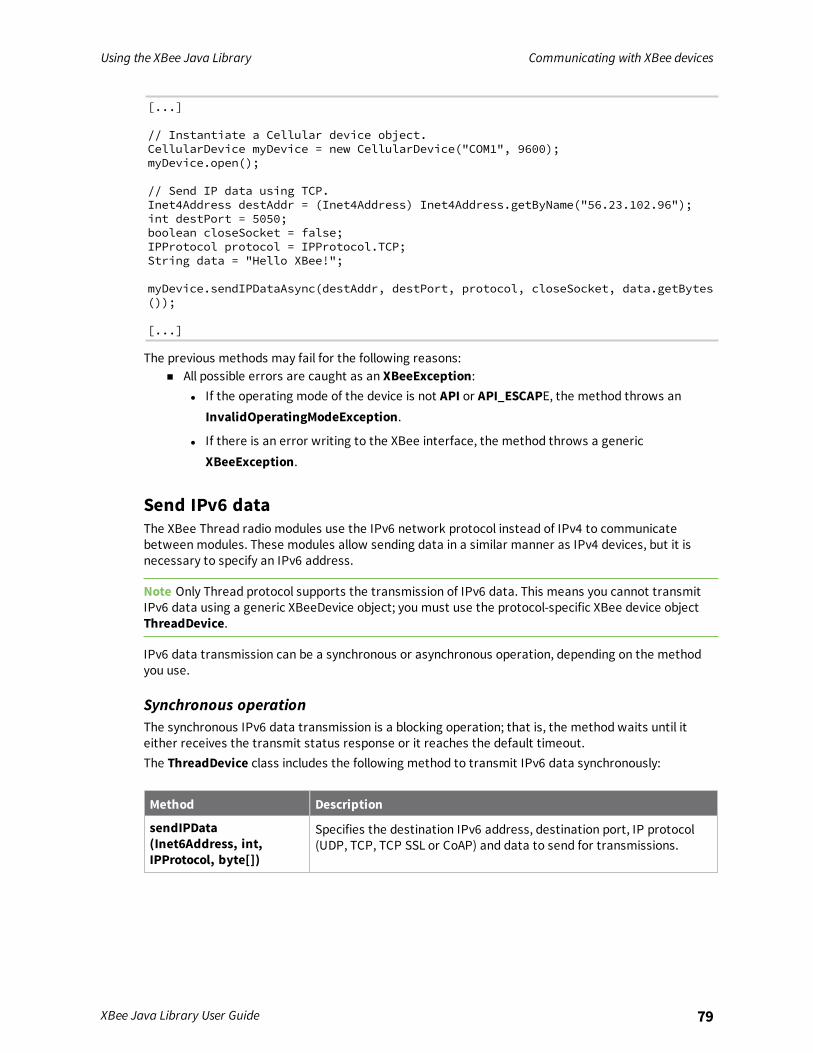
Using the XBee Java Library Communicating with XBee devices
XBee Java Library User Guide 79
[...]
// Instantiate a Cellular device object.CellularDevice myDevice = new CellularDevice("COM1", 9600);myDevice.open();
// Send IP data using TCP.Inet4Address destAddr = (Inet4Address) Inet4Address.getByName("56.23.102.96");int destPort = 5050;boolean closeSocket = false;IPProtocol protocol = IPProtocol.TCP;String data = "Hello XBee!";
myDevice.sendIPDataAsync(destAddr, destPort, protocol, closeSocket, data.getBytes());
[...]
The previous methods may fail for the following reasons:n All possible errors are caught as an XBeeException:
l If the operating mode of the device is not API or API_ESCAPE, the method throws anInvalidOperatingModeException.
l If there is an error writing to the XBee interface, the method throws a genericXBeeException.
Send IPv6 dataThe XBee Thread radio modules use the IPv6 network protocol instead of IPv4 to communicatebetween modules. These modules allow sending data in a similar manner as IPv4 devices, but it isnecessary to specify an IPv6 address.
Note Only Thread protocol supports the transmission of IPv6 data. This means you cannot transmitIPv6 data using a generic XBeeDevice object; you must use the protocol-specific XBee device objectThreadDevice.
IPv6 data transmission can be a synchronous or asynchronous operation, depending on the methodyou use.
Synchronous operationThe synchronous IPv6 data transmission is a blocking operation; that is, the method waits until iteither receives the transmit status response or it reaches the default timeout.The ThreadDevice class includes the following method to transmit IPv6 data synchronously:
Method Description
sendIPData(Inet6Address, int,IPProtocol, byte[])
Specifies the destination IPv6 address, destination port, IP protocol(UDP, TCP, TCP SSL or CoAP) and data to send for transmissions.
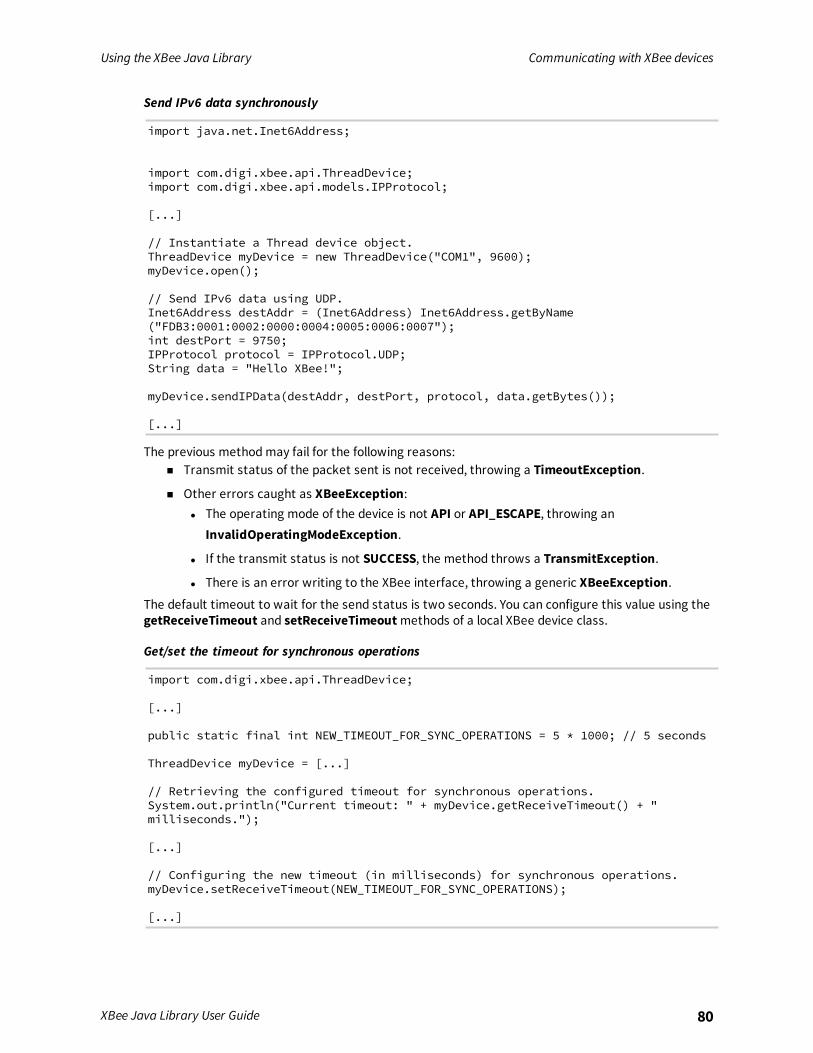
Using the XBee Java Library Communicating with XBee devices
XBee Java Library User Guide 80
Send IPv6 data synchronously
import java.net.Inet6Address;
import com.digi.xbee.api.ThreadDevice;import com.digi.xbee.api.models.IPProtocol;
[...]
// Instantiate a Thread device object.ThreadDevice myDevice = new ThreadDevice("COM1", 9600);myDevice.open();
// Send IPv6 data using UDP.Inet6Address destAddr = (Inet6Address) Inet6Address.getByName("FDB3:0001:0002:0000:0004:0005:0006:0007");int destPort = 9750;IPProtocol protocol = IPProtocol.UDP;String data = "Hello XBee!";
myDevice.sendIPData(destAddr, destPort, protocol, data.getBytes());
[...]
The previous methodmay fail for the following reasons:n Transmit status of the packet sent is not received, throwing a TimeoutException.
n Other errors caught as XBeeException:l The operating mode of the device is not API or API_ESCAPE, throwing an
InvalidOperatingModeException.
l If the transmit status is not SUCCESS, the method throws a TransmitException.
l There is an error writing to the XBee interface, throwing a generic XBeeException.The default timeout to wait for the send status is two seconds. You can configure this value using thegetReceiveTimeout and setReceiveTimeoutmethods of a local XBee device class.
Get/set the timeout for synchronous operations
import com.digi.xbee.api.ThreadDevice;
[...]
public static final int NEW_TIMEOUT_FOR_SYNC_OPERATIONS = 5 * 1000; // 5 seconds
ThreadDevice myDevice = [...]
// Retrieving the configured timeout for synchronous operations.System.out.println("Current timeout: " + myDevice.getReceiveTimeout() + "milliseconds.");
[...]
// Configuring the new timeout (in milliseconds) for synchronous operations.myDevice.setReceiveTimeout(NEW_TIMEOUT_FOR_SYNC_OPERATIONS);
[...]
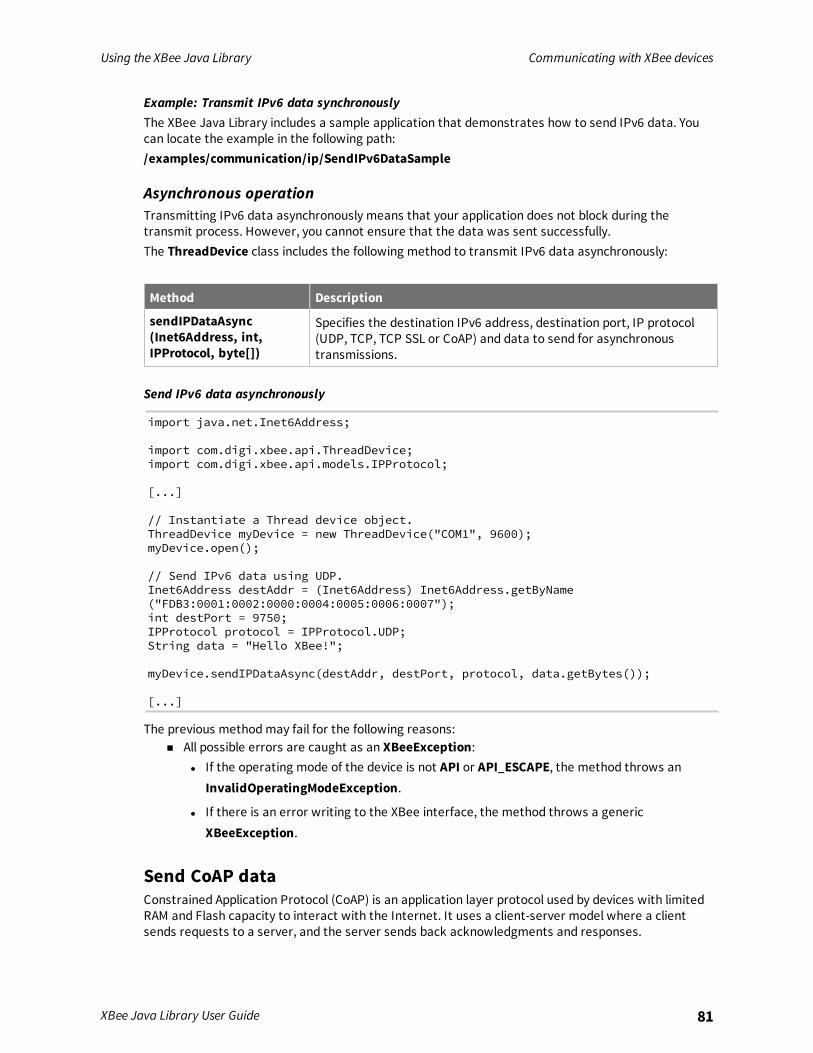
Using the XBee Java Library Communicating with XBee devices
XBee Java Library User Guide 81
Example: Transmit IPv6 data synchronouslyThe XBee Java Library includes a sample application that demonstrates how to send IPv6 data. Youcan locate the example in the following path:/examples/communication/ip/SendIPv6DataSample
Asynchronous operationTransmitting IPv6 data asynchronously means that your application does not block during thetransmit process. However, you cannot ensure that the data was sent successfully.The ThreadDevice class includes the following method to transmit IPv6 data asynchronously:
Method Description
sendIPDataAsync(Inet6Address, int,IPProtocol, byte[])
Specifies the destination IPv6 address, destination port, IP protocol(UDP, TCP, TCP SSL or CoAP) and data to send for asynchronoustransmissions.
Send IPv6 data asynchronously
import java.net.Inet6Address;
import com.digi.xbee.api.ThreadDevice;import com.digi.xbee.api.models.IPProtocol;
[...]
// Instantiate a Thread device object.ThreadDevice myDevice = new ThreadDevice("COM1", 9600);myDevice.open();
// Send IPv6 data using UDP.Inet6Address destAddr = (Inet6Address) Inet6Address.getByName("FDB3:0001:0002:0000:0004:0005:0006:0007");int destPort = 9750;IPProtocol protocol = IPProtocol.UDP;String data = "Hello XBee!";
myDevice.sendIPDataAsync(destAddr, destPort, protocol, data.getBytes());
[...]
The previous methodmay fail for the following reasons:n All possible errors are caught as an XBeeException:
l If the operating mode of the device is not API or API_ESCAPE, the method throws anInvalidOperatingModeException.
l If there is an error writing to the XBee interface, the method throws a genericXBeeException.
Send CoAP dataConstrained Application Protocol (CoAP) is an application layer protocol used by devices with limitedRAM and Flash capacity to interact with the Internet. It uses a client-server model where a clientsends requests to a server, and the server sends back acknowledgments and responses.
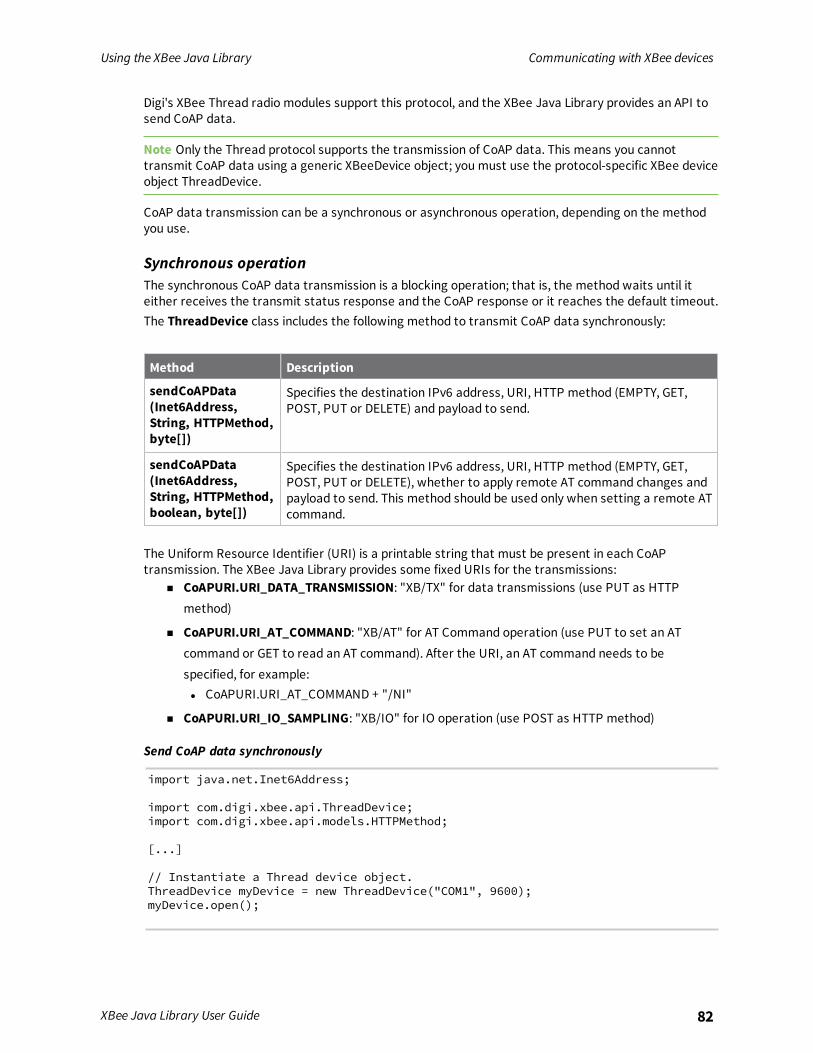
Using the XBee Java Library Communicating with XBee devices
XBee Java Library User Guide 82
Digi's XBee Thread radio modules support this protocol, and the XBee Java Library provides an API tosend CoAP data.
Note Only the Thread protocol supports the transmission of CoAP data. This means you cannottransmit CoAP data using a generic XBeeDevice object; you must use the protocol-specific XBee deviceobject ThreadDevice.
CoAP data transmission can be a synchronous or asynchronous operation, depending on the methodyou use.
Synchronous operationThe synchronous CoAP data transmission is a blocking operation; that is, the method waits until iteither receives the transmit status response and the CoAP response or it reaches the default timeout.The ThreadDevice class includes the following method to transmit CoAP data synchronously:
Method Description
sendCoAPData(Inet6Address,String, HTTPMethod,byte[])
Specifies the destination IPv6 address, URI, HTTP method (EMPTY, GET,POST, PUT or DELETE) and payload to send.
sendCoAPData(Inet6Address,String, HTTPMethod,boolean, byte[])
Specifies the destination IPv6 address, URI, HTTP method (EMPTY, GET,POST, PUT or DELETE), whether to apply remote AT command changes andpayload to send. This method should be used only when setting a remote ATcommand.
The Uniform Resource Identifier (URI) is a printable string that must be present in each CoAPtransmission. The XBee Java Library provides some fixed URIs for the transmissions:
n CoAPURI.URI_DATA_TRANSMISSION: "XB/TX" for data transmissions (use PUT as HTTPmethod)
n CoAPURI.URI_AT_COMMAND: "XB/AT" for AT Command operation (use PUT to set an ATcommand or GET to read an AT command). After the URI, an AT command needs to bespecified, for example:l CoAPURI.URI_AT_COMMAND + "/NI"
n CoAPURI.URI_IO_SAMPLING: "XB/IO" for IO operation (use POST as HTTP method)
Send CoAP data synchronously
import java.net.Inet6Address;
import com.digi.xbee.api.ThreadDevice;import com.digi.xbee.api.models.HTTPMethod;
[...]
// Instantiate a Thread device object.ThreadDevice myDevice = new ThreadDevice("COM1", 9600);myDevice.open();
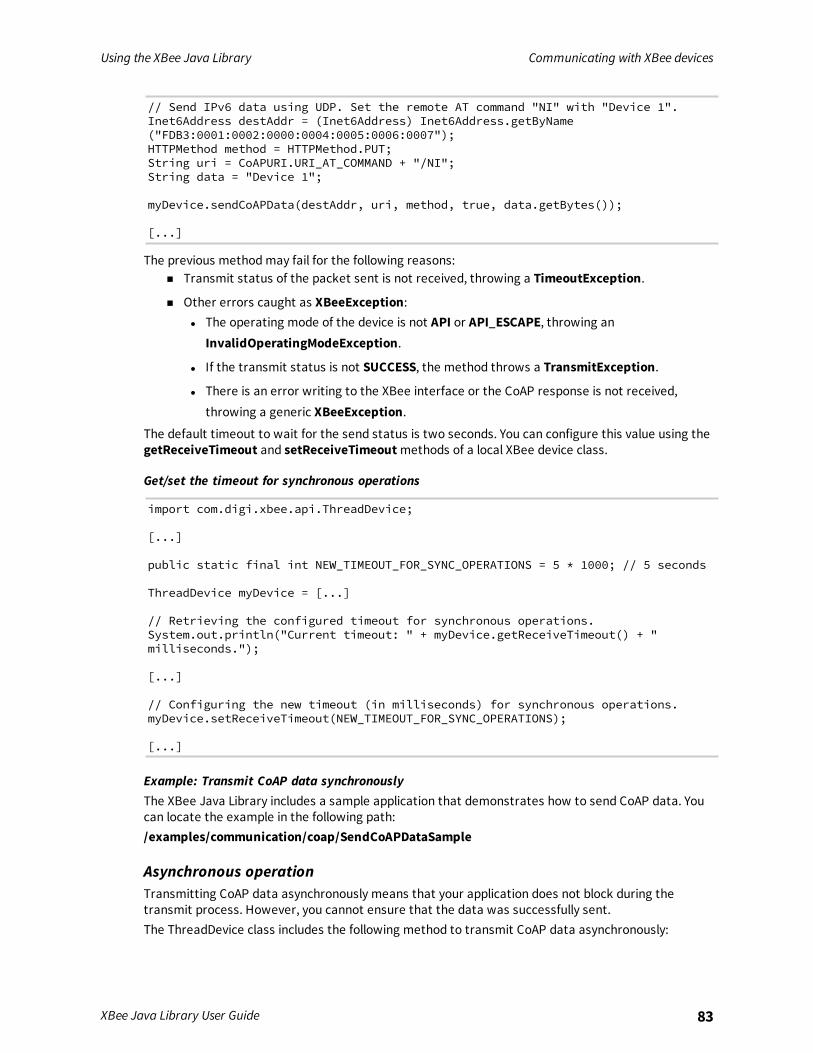
Using the XBee Java Library Communicating with XBee devices
XBee Java Library User Guide 83
// Send IPv6 data using UDP. Set the remote AT command "NI" with "Device 1".Inet6Address destAddr = (Inet6Address) Inet6Address.getByName("FDB3:0001:0002:0000:0004:0005:0006:0007");HTTPMethod method = HTTPMethod.PUT;String uri = CoAPURI.URI_AT_COMMAND + "/NI";String data = "Device 1";
myDevice.sendCoAPData(destAddr, uri, method, true, data.getBytes());
[...]
The previous methodmay fail for the following reasons:n Transmit status of the packet sent is not received, throwing a TimeoutException.
n Other errors caught as XBeeException:l The operating mode of the device is not API or API_ESCAPE, throwing an
InvalidOperatingModeException.
l If the transmit status is not SUCCESS, the method throws a TransmitException.
l There is an error writing to the XBee interface or the CoAP response is not received,throwing a generic XBeeException.
The default timeout to wait for the send status is two seconds. You can configure this value using thegetReceiveTimeout and setReceiveTimeoutmethods of a local XBee device class.
Get/set the timeout for synchronous operations
import com.digi.xbee.api.ThreadDevice;
[...]
public static final int NEW_TIMEOUT_FOR_SYNC_OPERATIONS = 5 * 1000; // 5 seconds
ThreadDevice myDevice = [...]
// Retrieving the configured timeout for synchronous operations.System.out.println("Current timeout: " + myDevice.getReceiveTimeout() + "milliseconds.");
[...]
// Configuring the new timeout (in milliseconds) for synchronous operations.myDevice.setReceiveTimeout(NEW_TIMEOUT_FOR_SYNC_OPERATIONS);
[...]
Example: Transmit CoAP data synchronouslyThe XBee Java Library includes a sample application that demonstrates how to send CoAP data. Youcan locate the example in the following path:/examples/communication/coap/SendCoAPDataSample
Asynchronous operationTransmitting CoAP data asynchronously means that your application does not block during thetransmit process. However, you cannot ensure that the data was successfully sent.The ThreadDevice class includes the following method to transmit CoAP data asynchronously:
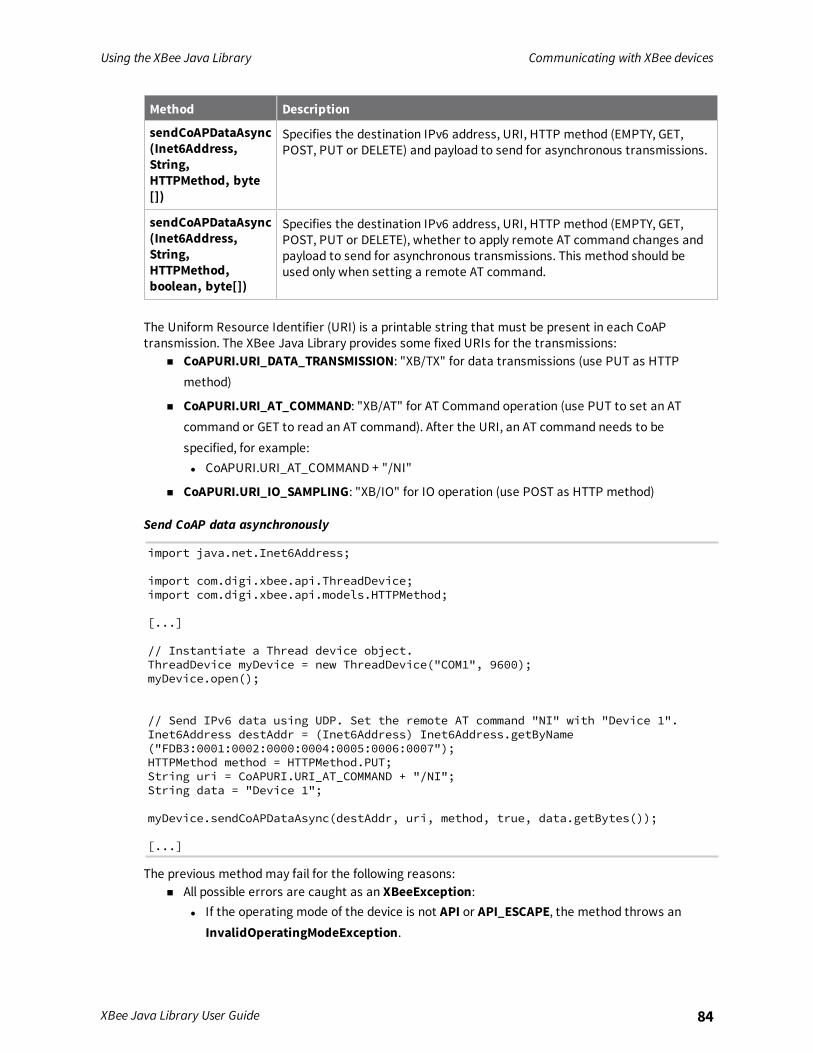
Using the XBee Java Library Communicating with XBee devices
XBee Java Library User Guide 84
Method Description
sendCoAPDataAsync(Inet6Address,String,HTTPMethod, byte[])
Specifies the destination IPv6 address, URI, HTTP method (EMPTY, GET,POST, PUT or DELETE) and payload to send for asynchronous transmissions.
sendCoAPDataAsync(Inet6Address,String,HTTPMethod,boolean, byte[])
Specifies the destination IPv6 address, URI, HTTP method (EMPTY, GET,POST, PUT or DELETE), whether to apply remote AT command changes andpayload to send for asynchronous transmissions. This method should beused only when setting a remote AT command.
The Uniform Resource Identifier (URI) is a printable string that must be present in each CoAPtransmission. The XBee Java Library provides some fixed URIs for the transmissions:
n CoAPURI.URI_DATA_TRANSMISSION: "XB/TX" for data transmissions (use PUT as HTTPmethod)
n CoAPURI.URI_AT_COMMAND: "XB/AT" for AT Command operation (use PUT to set an ATcommand or GET to read an AT command). After the URI, an AT command needs to bespecified, for example:l CoAPURI.URI_AT_COMMAND + "/NI"
n CoAPURI.URI_IO_SAMPLING: "XB/IO" for IO operation (use POST as HTTP method)
Send CoAP data asynchronously
import java.net.Inet6Address;
import com.digi.xbee.api.ThreadDevice;import com.digi.xbee.api.models.HTTPMethod;
[...]
// Instantiate a Thread device object.ThreadDevice myDevice = new ThreadDevice("COM1", 9600);myDevice.open();
// Send IPv6 data using UDP. Set the remote AT command "NI" with "Device 1".Inet6Address destAddr = (Inet6Address) Inet6Address.getByName("FDB3:0001:0002:0000:0004:0005:0006:0007");HTTPMethod method = HTTPMethod.PUT;String uri = CoAPURI.URI_AT_COMMAND + "/NI";String data = "Device 1";
myDevice.sendCoAPDataAsync(destAddr, uri, method, true, data.getBytes());
[...]
The previous methodmay fail for the following reasons:n All possible errors are caught as an XBeeException:
l If the operating mode of the device is not API or API_ESCAPE, the method throws anInvalidOperatingModeException.
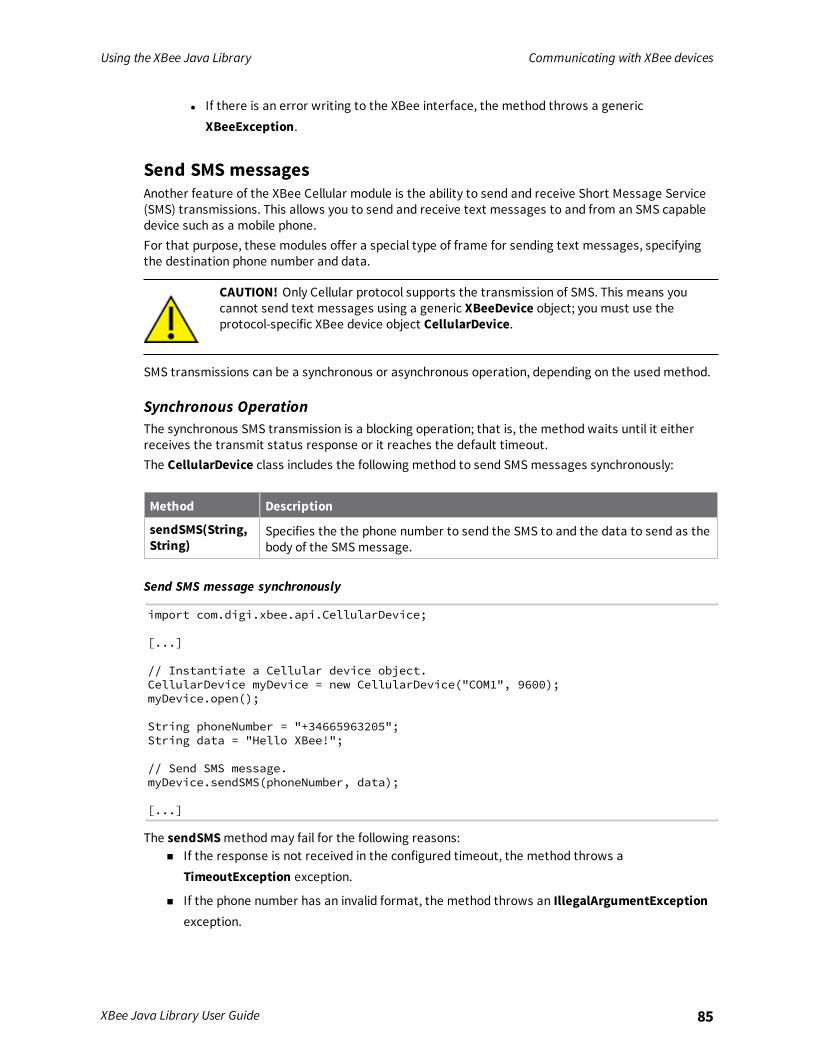
Using the XBee Java Library Communicating with XBee devices
XBee Java Library User Guide 85
l If there is an error writing to the XBee interface, the method throws a genericXBeeException.
Send SMS messagesAnother feature of the XBee Cellular module is the ability to send and receive Short Message Service(SMS) transmissions. This allows you to send and receive text messages to and from an SMS capabledevice such as a mobile phone.For that purpose, these modules offer a special type of frame for sending text messages, specifyingthe destination phone number and data.
CAUTION! Only Cellular protocol supports the transmission of SMS. This means youcannot send text messages using a generic XBeeDevice object; you must use theprotocol-specific XBee device object CellularDevice.
SMS transmissions can be a synchronous or asynchronous operation, depending on the usedmethod.
Synchronous OperationThe synchronous SMS transmission is a blocking operation; that is, the method waits until it eitherreceives the transmit status response or it reaches the default timeout.The CellularDevice class includes the following method to send SMS messages synchronously:
Method Description
sendSMS(String,String)
Specifies the the phone number to send the SMS to and the data to send as thebody of the SMS message.
Send SMS message synchronously
import com.digi.xbee.api.CellularDevice;
[...]
// Instantiate a Cellular device object.CellularDevice myDevice = new CellularDevice("COM1", 9600);myDevice.open();
String phoneNumber = "+34665963205";String data = "Hello XBee!";
// Send SMS message.myDevice.sendSMS(phoneNumber, data);
[...]
The sendSMSmethodmay fail for the following reasons:n If the response is not received in the configured timeout, the method throws a
TimeoutException exception.
n If the phone number has an invalid format, the method throws an IllegalArgumentExceptionexception.
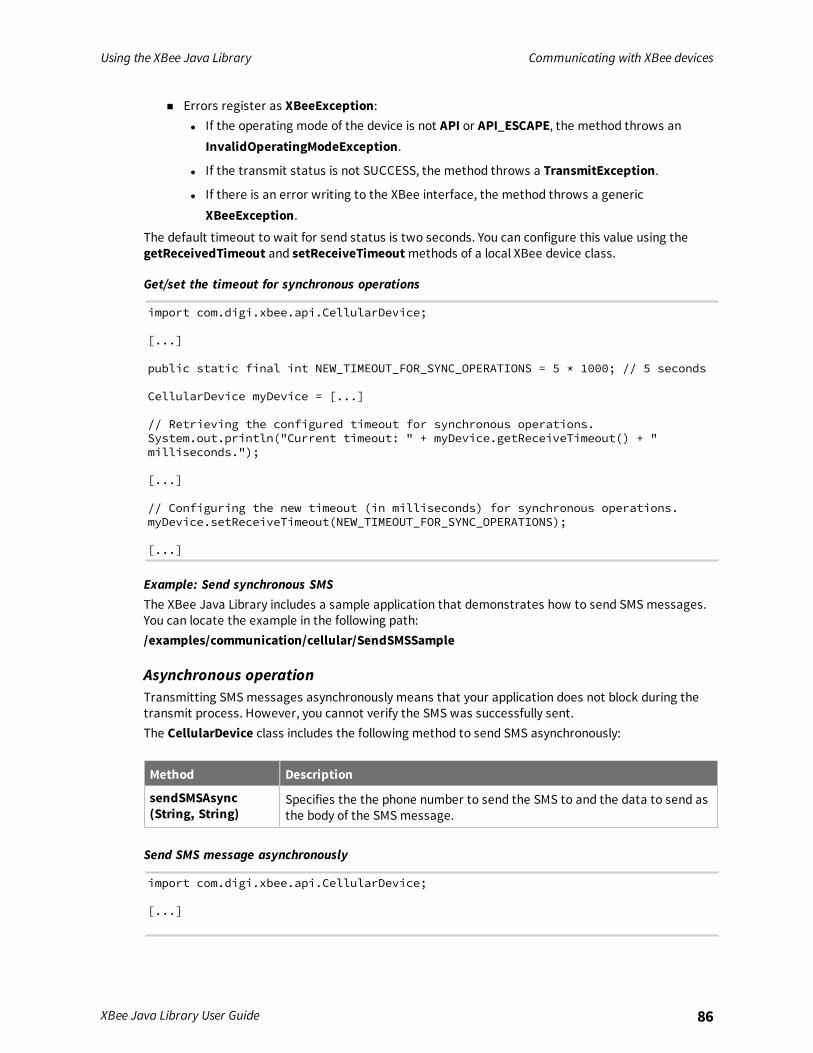
Using the XBee Java Library Communicating with XBee devices
XBee Java Library User Guide 86
n Errors register as XBeeException:l If the operating mode of the device is not API or API_ESCAPE, the method throws an
InvalidOperatingModeException.
l If the transmit status is not SUCCESS, the method throws a TransmitException.
l If there is an error writing to the XBee interface, the method throws a genericXBeeException.
The default timeout to wait for send status is two seconds. You can configure this value using thegetReceivedTimeout and setReceiveTimeoutmethods of a local XBee device class.
Get/set the timeout for synchronous operations
import com.digi.xbee.api.CellularDevice;
[...]
public static final int NEW_TIMEOUT_FOR_SYNC_OPERATIONS = 5 * 1000; // 5 seconds
CellularDevice myDevice = [...]
// Retrieving the configured timeout for synchronous operations.System.out.println("Current timeout: " + myDevice.getReceiveTimeout() + "milliseconds.");
[...]
// Configuring the new timeout (in milliseconds) for synchronous operations.myDevice.setReceiveTimeout(NEW_TIMEOUT_FOR_SYNC_OPERATIONS);
[...]
Example: Send synchronous SMSThe XBee Java Library includes a sample application that demonstrates how to send SMS messages.You can locate the example in the following path:/examples/communication/cellular/SendSMSSample
Asynchronous operationTransmitting SMS messages asynchronously means that your application does not block during thetransmit process. However, you cannot verify the SMS was successfully sent.The CellularDevice class includes the following method to send SMS asynchronously:
Method Description
sendSMSAsync(String, String)
Specifies the the phone number to send the SMS to and the data to send asthe body of the SMS message.
Send SMS message asynchronously
import com.digi.xbee.api.CellularDevice;
[...]
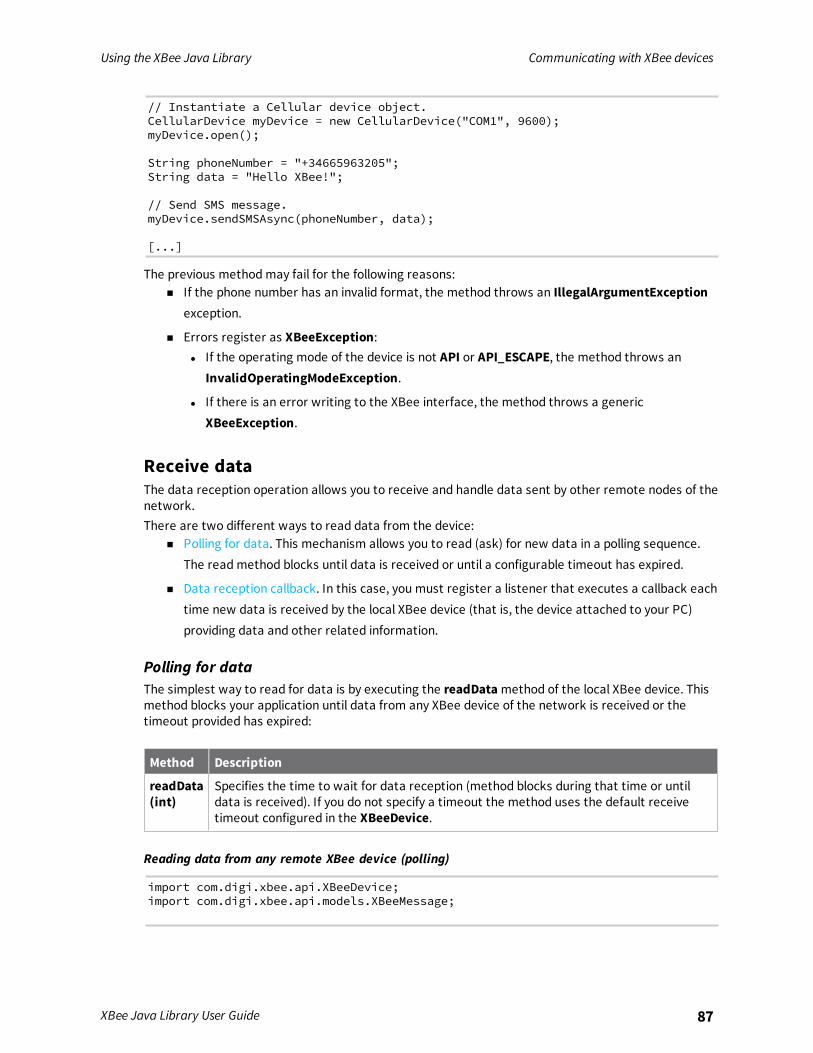
Using the XBee Java Library Communicating with XBee devices
XBee Java Library User Guide 87
// Instantiate a Cellular device object.CellularDevice myDevice = new CellularDevice("COM1", 9600);myDevice.open();
String phoneNumber = "+34665963205";String data = "Hello XBee!";
// Send SMS message.myDevice.sendSMSAsync(phoneNumber, data);
[...]
The previous methodmay fail for the following reasons:n If the phone number has an invalid format, the method throws an IllegalArgumentException
exception.
n Errors register as XBeeException:l If the operating mode of the device is not API or API_ESCAPE, the method throws an
InvalidOperatingModeException.
l If there is an error writing to the XBee interface, the method throws a genericXBeeException.
Receive dataThe data reception operation allows you to receive and handle data sent by other remote nodes of thenetwork.There are two different ways to read data from the device:
n Polling for data. This mechanism allows you to read (ask) for new data in a polling sequence.The readmethod blocks until data is received or until a configurable timeout has expired.
n Data reception callback. In this case, you must register a listener that executes a callback eachtime new data is received by the local XBee device (that is, the device attached to your PC)providing data and other related information.
Polling for dataThe simplest way to read for data is by executing the readDatamethod of the local XBee device. Thismethod blocks your application until data from any XBee device of the network is received or thetimeout provided has expired:
Method Description
readData(int)
Specifies the time to wait for data reception (method blocks during that time or untildata is received). If you do not specify a timeout the method uses the default receivetimeout configured in the XBeeDevice.
Reading data from any remote XBee device (polling)
import com.digi.xbee.api.XBeeDevice;import com.digi.xbee.api.models.XBeeMessage;
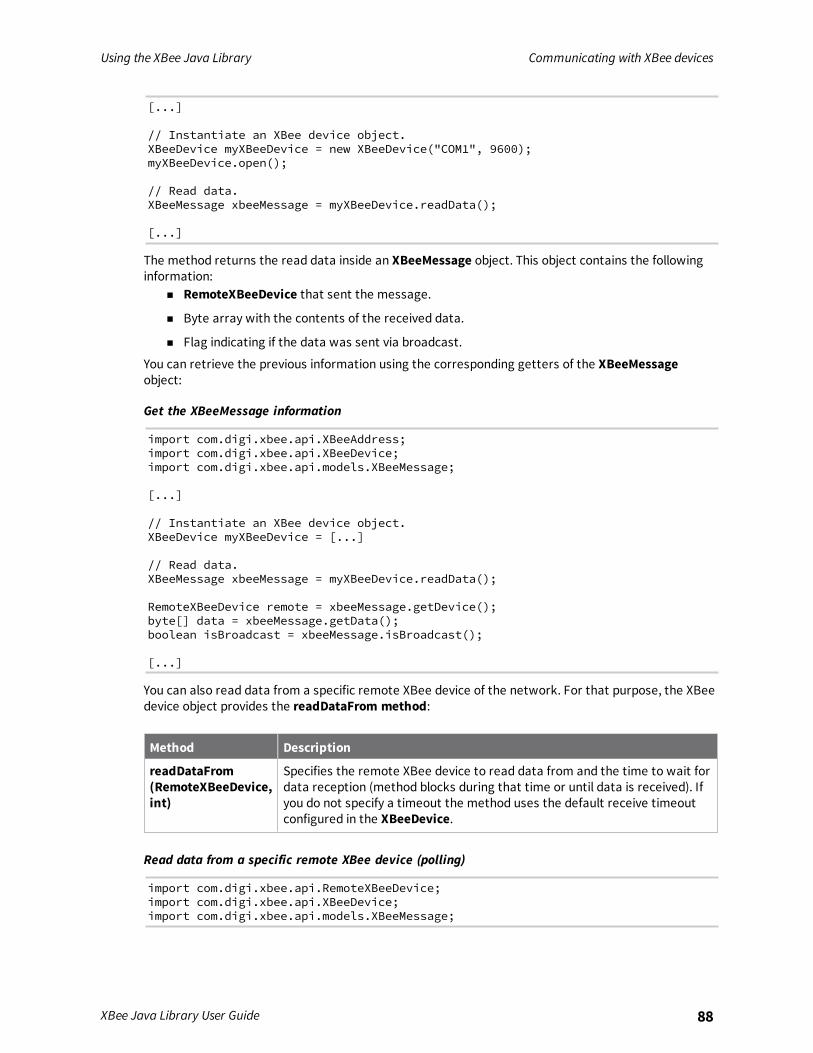
Using the XBee Java Library Communicating with XBee devices
XBee Java Library User Guide 88
[...]
// Instantiate an XBee device object.XBeeDevice myXBeeDevice = new XBeeDevice("COM1", 9600);myXBeeDevice.open();
// Read data.XBeeMessage xbeeMessage = myXBeeDevice.readData();
[...]
The method returns the read data inside an XBeeMessage object. This object contains the followinginformation:
n RemoteXBeeDevice that sent the message.
n Byte array with the contents of the received data.
n Flag indicating if the data was sent via broadcast.
You can retrieve the previous information using the corresponding getters of the XBeeMessageobject:
Get the XBeeMessage information
import com.digi.xbee.api.XBeeAddress;import com.digi.xbee.api.XBeeDevice;import com.digi.xbee.api.models.XBeeMessage;
[...]
// Instantiate an XBee device object.XBeeDevice myXBeeDevice = [...]
// Read data.XBeeMessage xbeeMessage = myXBeeDevice.readData();
RemoteXBeeDevice remote = xbeeMessage.getDevice();byte[] data = xbeeMessage.getData();boolean isBroadcast = xbeeMessage.isBroadcast();
[...]
You can also read data from a specific remote XBee device of the network. For that purpose, the XBeedevice object provides the readDataFrom method:
Method Description
readDataFrom(RemoteXBeeDevice,int)
Specifies the remote XBee device to read data from and the time to wait fordata reception (method blocks during that time or until data is received). Ifyou do not specify a timeout the method uses the default receive timeoutconfigured in the XBeeDevice.
Read data from a specific remote XBee device (polling)
import com.digi.xbee.api.RemoteXBeeDevice;import com.digi.xbee.api.XBeeDevice;import com.digi.xbee.api.models.XBeeMessage;
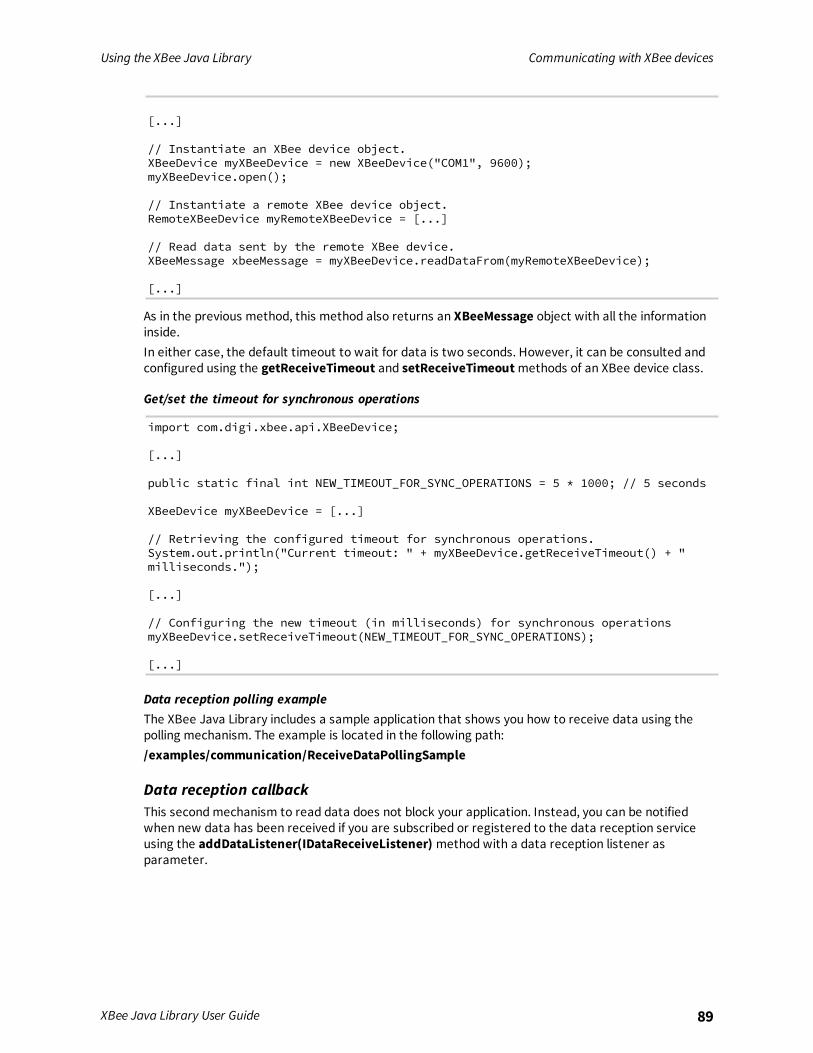
Using the XBee Java Library Communicating with XBee devices
XBee Java Library User Guide 89
[...]
// Instantiate an XBee device object.XBeeDevice myXBeeDevice = new XBeeDevice("COM1", 9600);myXBeeDevice.open();
// Instantiate a remote XBee device object.RemoteXBeeDevice myRemoteXBeeDevice = [...]
// Read data sent by the remote XBee device.XBeeMessage xbeeMessage = myXBeeDevice.readDataFrom(myRemoteXBeeDevice);
[...]
As in the previous method, this method also returns an XBeeMessage object with all the informationinside.In either case, the default timeout to wait for data is two seconds. However, it can be consulted andconfigured using the getReceiveTimeout and setReceiveTimeoutmethods of an XBee device class.
Get/set the timeout for synchronous operations
import com.digi.xbee.api.XBeeDevice;
[...]
public static final int NEW_TIMEOUT_FOR_SYNC_OPERATIONS = 5 * 1000; // 5 seconds
XBeeDevice myXBeeDevice = [...]
// Retrieving the configured timeout for synchronous operations.System.out.println("Current timeout: " + myXBeeDevice.getReceiveTimeout() + "milliseconds.");
[...]
// Configuring the new timeout (in milliseconds) for synchronous operationsmyXBeeDevice.setReceiveTimeout(NEW_TIMEOUT_FOR_SYNC_OPERATIONS);
[...]
Data reception polling exampleThe XBee Java Library includes a sample application that shows you how to receive data using thepolling mechanism. The example is located in the following path:/examples/communication/ReceiveDataPollingSample
Data reception callbackThis secondmechanism to read data does not block your application. Instead, you can be notifiedwhen new data has been received if you are subscribed or registered to the data reception serviceusing the addDataListener(IDataReceiveListener) method with a data reception listener asparameter.
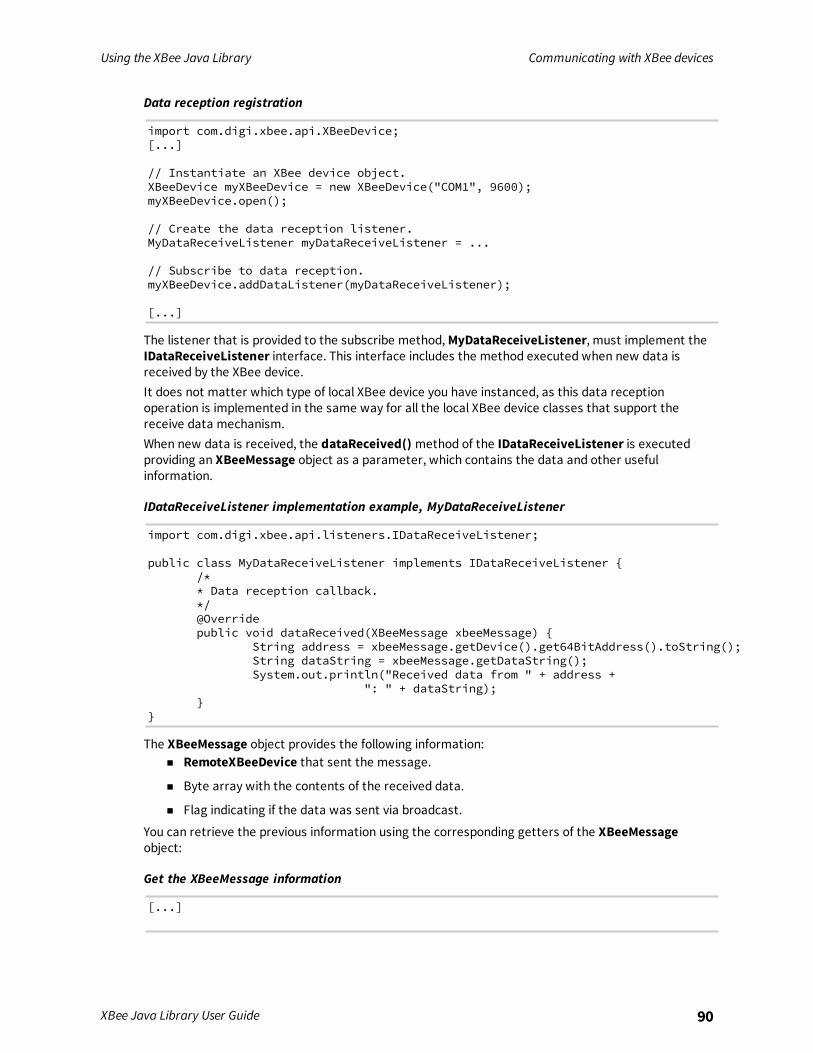
Using the XBee Java Library Communicating with XBee devices
XBee Java Library User Guide 90
Data reception registration
import com.digi.xbee.api.XBeeDevice;[...]
// Instantiate an XBee device object.XBeeDevice myXBeeDevice = new XBeeDevice("COM1", 9600);myXBeeDevice.open();
// Create the data reception listener.MyDataReceiveListener myDataReceiveListener = ...
// Subscribe to data reception.myXBeeDevice.addDataListener(myDataReceiveListener);
[...]
The listener that is provided to the subscribe method,MyDataReceiveListener, must implement theIDataReceiveListener interface. This interface includes the method executed when new data isreceived by the XBee device.It does not matter which type of local XBee device you have instanced, as this data receptionoperation is implemented in the same way for all the local XBee device classes that support thereceive data mechanism.When new data is received, the dataReceived() method of the IDataReceiveListener is executedproviding an XBeeMessage object as a parameter, which contains the data and other usefulinformation.
IDataReceiveListener implementation example, MyDataReceiveListener
import com.digi.xbee.api.listeners.IDataReceiveListener;
public class MyDataReceiveListener implements IDataReceiveListener {/** Data reception callback.*/@Overridepublic void dataReceived(XBeeMessage xbeeMessage) {
String address = xbeeMessage.getDevice().get64BitAddress().toString();String dataString = xbeeMessage.getDataString();System.out.println("Received data from " + address +
": " + dataString);}
}
The XBeeMessage object provides the following information:n RemoteXBeeDevice that sent the message.
n Byte array with the contents of the received data.
n Flag indicating if the data was sent via broadcast.
You can retrieve the previous information using the corresponding getters of the XBeeMessageobject:
Get the XBeeMessage information
[...]
Using the XBee Java Library Communicating with XBee devices
XBee Java Library User Guide 91
XBeeDevice myXBeeDevice = ...MyDataReceiveListener myDataReceiveListener = ...
myXBeeDevice.addDataListener(myDataReceiveListener);
[...]
// Remove the new data reception listener
myXBeeDevice.removeDataListener(myDataReceiveListener);
[...]
To stop listening to new received data, use the removeDataListener(IDataReceiveListener) methodto unsubscribe the already registered listener.
Data reception deregistration
[...]
XBeeDevice myXBeeDevice = ...MyDataReceiveListener myDataReceiveListener = ...
myXBeeDevice.addDataListener(myDataReceiveListener);
[...]
// Remove the new data reception listener.myXBeeDevice.removeDataListener(myDataReceiveListener);
[...]
Data reception callback exampleThe XBee Java Library includes a sample application that shows you how to subscribe to the datareception service to receive data. The example is located in the following path:/examples/communication/ReceiveDataSample
Receive explicit dataSome applications developed with the XBee Java Library may require modules to receive data inapplication layer, or explicit, data format.
Only Zigbee, DigiMesh, and Point-to-Multipoint support the reception of explicit data.
To receive data in explicit format, you must first configure the data output mode of the receiver XBeedevice to explicit format using the setAPIOutputMode method.
Using the XBee Java Library Communicating with XBee devices
XBee Java Library User Guide 92
Method Description
getAPIOutputMode()
Returns the API output mode of the data received by the XBee device.
setAPIOutputMode(APIOutputMode)
Specifies the API output mode of the data received by the XBee device. Themode can be one of the following:
n APIOutputMode.NATIVE: The data received by the device will beoutput as standard received data and it must be read using standarddata-reading methods. It does not matter if the data sent by theremote device was sent in standard or explicit format.
n APIOutputMode.EXPLICIT: The data received by the device will beoutput as explicit received data and it must be read using explicit data-reading methods. It does not matter if the data sent by the remotedevice was sent in standard or explicit format.
n APIOutputMode.EXPLICIT_ZDO_PASSTHRU: The data received by thedevice will be output as explicit received data, like theAPIOutputMode.EXPLICIT option. In addition, this mode also outputsas explicit data Zigbee Device Object (ZDO) packets received by theXBee module through the serial interface.
Once you have configured the device to receive data in explicit format, you can read it using one of thefollowing mechanisms provided by the XBee device object:
Polling for dataThe simplest way to read for explicit data is by executing the readExplicitDatamethod of the localXBee device. This method blocks your application until explicit data from any XBee device of thenetwork is received or the provided timeout has expired:
Method Description
readExplicitData(int)
Specifies the time to wait in milliseconds for explicit data reception (methodblocks during that time or until explicit data is received). If you don't specify atimeout, the method uses the default receive timeout configured in XBeeDevice.
Read explicit data from any remote XBee device (polling)
import com.digi.xbee.api.ZigbeeDevice;import com.digi.xbee.api.models.ExplicitXBeeMessage;
[...]
// Instantiate a Zigbee device object.ZigbeeDevice myZigbeeDevice = new ZigbeeDevice("COM1", 9600);myZigbeeDevice.open();
// Read explicit data.ExplicitXBeeMessage xbeeMessage = myZigbeeDevice.readExplicitData();
Using the XBee Java Library Communicating with XBee devices
XBee Java Library User Guide 93
[...]
The read data is returned inside an ExplicitXBeeMessage object. This object also contains theapplication layer fields as well as the following information:
n RemoteXBeeDevice that sent the data.
n Endpoint of the source that initiated the transmission.
n Endpoint of the destination where the message is addressed.
n Cluster ID where the data was addressed.
n Profile ID where the data was addressed.
n Byte array with the contents of the received data.
n Flag indicating if the data was sent via broadcast.
You can retrieve the previous information using the corresponding getters of theExplicitXBeeMessage object:
Get the ExplicitXBeeMessage information
import com.digi.xbee.api.ZigbeeDevice;import com.digi.xbee.api.XBeeAddress;import com.digi.xbee.api.models.ExplicitXBeeMessage;
[...]
// Instantiate a Zigbee device object.ZigbeeDevice myZigbeeDevice = [...]
// Read explicit data.ExplicitXBeeMessage xbeeMessage = myZigbeeDevice.readExplicitData();
RemoteXBeeDevice remote = xbeeMessage.getDevice();int sourceEndpoint = xbeeMessage.getSourceEndpoint();int destEndpoint = xbeeMessage.getDestinationEndpoint();int clusterID = xbeeMessage.getClusterID();int profileID = xbeeMessage.getProfileID();byte[] data = xbeeMessage.getData();boolean isBroadcast = xbeeMessage.isBroadcast();
[...]
You can also read explicit data from a specific remote XBee device of the network. For that purpose,the XBee device object provides the readExplicitDataFrommethod:
Method Description
readExplicitDataFrom(RemoteXBeeDevice,int)
Specifies the remote XBee device to read explicit data from and the time towait for explicit data reception (method blocks during that time or untilexplicit data is received). If you do not specify a timeout, the method usesthe default receive timeout configured in the XBee device object.
Using the XBee Java Library Communicating with XBee devices
XBee Java Library User Guide 94
Read explicit data from a specific remote XBee device (polling)
import com.digi.xbee.api.RemoteXBeeDevice;import com.digi.xbee.api.ZigbeeDevice;import com.digi.xbee.api.models.ExplicitXBeeMessage;
[...]
// Instantiate a Zigbee device object.ZigbeeDevice myZigbeeDevice = new ZigbeeDevice("COM1", 9600);myZigbeeDevice.open();
// Instantiate a remote XBee device object.RemoteXBeeDevice myRemoteXBeeDevice = [...]
// Read data sent by the remote XBee device.ExplicitXBeeMessage xbeeMessage = myZigbeeDevice.readExplicitDataFrom(myRemoteXBeeDevice);
[...]
This method also returns an ExplicitXBeeMessage object containing the same information as theExplicitXBeeMessage object returned by the readExplicitDatamethod.In either case, the default timeout to wait for data is two seconds. You can configure this timeout withthe getReceiveTimeout and setReceiveTimeoutmethods of an XBee device class.
Get/set the timeout for synchronous operations
import com.digi.xbee.api.ZigbeeDevice;
[...]
public static final int NEW_TIMEOUT_FOR_SYNC_OPERATIONS = 5 * 1000; // 5 seconds
ZigbeeDevice myZigbeeDevice = [...]
// Retrieving the configured timeout for synchronous operations.System.out.println("Current timeout: " + myZigbeeDevice.getReceiveTimeout() + "milliseconds.");
[...]
// Configuring the new timeout (in milliseconds) for synchronous operations.myZigbeeDevice.setReceiveTimeout(NEW_TIMEOUT_FOR_SYNC_OPERATIONS);
[...]
Example: Receive explicit data with pollingThe XBee Java Library includes a sample application that demonstrates how to receive explicit datausing the polling mechanism. It can be located in the following path:/examples/communication/explicit/ReceiveExplicitDataPollingSample
Explicit data reception callbackThis mechanism for reading explicit data does not block your application. Instead, you can be notifiedwhen new explicit data has been received if you are subscribed or registered to the explicit datareception service by the addExplicitDataListener(IExplicitDataReceiveListener).
Using the XBee Java Library Communicating with XBee devices
XBee Java Library User Guide 95
Explicit data reception registration
import com.digi.xbee.api.ZigbeeDevice:import com.digi.xbee.api.listeners.IExplicitDataReceiveListener;
[...]
// Instantiate a Zigbee device object.ZigbeeDevice myZigbeeDevice = new ZigbeeDevice("COM1", 9600);myZigbeeDevice.open();
// Subscribe to explicit data reception.myZigbeeDevice.addExplicitDataListener(new MyExplicitDataReceiveListener());
[...]
The listener provided to the subscribedmethod,MyExplicitDataReceiveListener, must implementthe IExplicitDataReceiveListener interface. This interface includes the method that is executed whennew explicit data is received by the XBee device.This explicit data reception operation is implemented the same way for all local XBee device classes.
Remember that 802.15.4, Cellular andWi-Fi protocols do not support transmittingexplicit data, so you cannot use the methods explained in this section when working withthese protocols.
When new explicit data is received, the explicitDataReceived() method of theIExplicitDataReceiveListener is executed providing as parameter an ExplicitXBeeMessage objectwhich contains the data and other useful information such as the application layer fields.
ExplicitDataReceiveListener implementation example
import com.digi.xbee.api.listeners.IExplicitDataReceiveListener;import com.digi.xbee.api.models.ExplicitXBeeMessage;
public class MyExplicitDataReceiveListener implementsIExplicitDataReceiveListener {
/** Explicit data reception callback.*/@Overridepublic void explicitDataReceived(ExplicitXBeeMessage xbeeMessage) {
String address = xbeeMessage.getDevice().get64BitAddress().toString();int sourceEndpoint = xbeeMessage.getSourceEndpoint();int destEndpoint = xbeeMessage.getDestinationEndpoint();int cluster = xbeeMessage.getClusterID();int profile = xbeeMessage.getProfileID();String dataString = xbeeMessage.getDataString();System.out.println("Received explicit data from " + address +
": " + dataString);System.out.println("Application layer fields:");System.out.println(" - Source endpoint: " + HexUtils.integerToHexString
(sourceEndpoint, 1));System.out.println(" - Destination endpoint: " + HexUtils.integerToHexString
(destEndpoint, 1));System.out.println(" - Cluster ID: " + HexUtils.integerToHexString(cluster,
2));
Using the XBee Java Library Communicating with XBee devices
XBee Java Library User Guide 96
System.out.println(" - Profile ID: " + HexUtils.integerToHexString(profile,2));
}}
The ExplicitXBeeMessage object provides the following information:n RemoteXBeeDevice that sent the data
n Endpoint of the source that initiated the transmission
n Endpoint of the destination where the message is addressed
n Cluster ID where the data was addressed
n Profile ID where the data was addressed
n Byte array with the contents of the received data
n Flag indicating if the data was sent via broadcast
You can retrieve the previous information using the corresponding getters of theExplicitXBeeMessage object:
Get the ExplicitXBeeMessage information
import com.digi.xbee.api.RemoteXBeeDevice;import com.digi.xbee.api.listeners.IExplicitDataReceiveListener;import com.digi.xbee.api.models.ExplicitXBeeMessage;
public class MyExplicitDataReceiveListener implementsIExplicitDataReceiveListener {
/** Explicit data reception callback.*/@Overridepublic void explicitDataReceived(ExplicitXBeeMessage xbeeMessage) {
RemoteXBeeDevice remoteDevice = xbeeMessage.getDevice();int sourceEndpoint = xbeeMessage.getSourceEndpoint();int destEndpoint = xbeeMessage.getDestinationEndpoint();int clusterID = xbeeMessage.getClusterID();int profileID = xbeeMessage.getProfileID();String dataString = xbeeMessage.getDataString();
}}
[...]
To stop listening to new received explicit data, use the removeExplicitDataListener(IExplicitDataReceiveListener) method to unsubscribe the already-registered listener.
Data reception deregistration
[...]
ZigbeeDevice myZigbeeDevice = ...MyExplicitDataReceiveListener myExplicitDataReceiveListener = ...myZigbeeDevice.addExplicitDataListener(myExplicitDataReceiveListener);
[...]
Using the XBee Java Library Communicating with XBee devices
XBee Java Library User Guide 97
// Remove the new explicit data reception listener.myZigbeeDevice.removeExplicitDataListener(myExplicitDataReceiveListener);
[...]
Example: Receive explicit data via callbackThe XBee Java Library includes a sample application that demonstrates how to subscribe to theexplicit data reception service in order to receive explicit data. It can be located in the following path:/examples/communication/explicit/ReceiveExplicitDataSample
Notes:If your XBee module is configured to receive explicit data (APIOutputMode.EXPLICIT orAPIOutputMode.EXPLICIT_ZDO_PASSTHRU) and another device sends non-explicit data, you receivean explicit message whose application layer field values are:
n Source endpoint: 0xE8
n Destination endpoint: 0xE8
n Cluster ID: 0x0011
n Profile ID: 0xC10
When an XBee module receives explicit data with these values, the message notifies both datareception callbacks (explicit and non-explicit) in case you have registered them. If you read thereceived data with the polling mechanism, you also receive the message through both methods.
Receive IP dataSome applications developed with the XBee Java Library may require modules to receive IP data.
Only Cellular, NB-IoT andWi-Fi protocols support the transmission of IP data. This meansyou cannot receive IP data using a generic XBeeDevice object; you must use theprotocol-specific XBee device objects CellularDevice, NBIoTDevice or WiFiDevice.
XBee Cellular andWi-Fi modules operate the same way as other TCP/IP devices. They can initiatecommunications with other devices or listen for TCP or UDP transmissions at a specific port. In eithercase, you must apply any of the receive methods explained in this section in order to read IP data fromother devices:
Listening for incoming transmissionsIf the Cellular or Wi-Fi module operates as a server, listening for incoming TCP or UDP transmissions,you must start listening at a specific port, something similar to the bind operation of a socket. TheXBee Java Library provides a method to listen for incoming transmissions:
Method Description
startListening(int) Starts listening for incoming IP transmissions in the provided port.
Listening for incoming transmissions
import com.digi.xbee.api.CellularDevice;
Using the XBee Java Library Communicating with XBee devices
XBee Java Library User Guide 98
[...]
// Instantiate a Cellular device object.CellularDevice myDevice = new CellularDevice("COM1", 9600);myDevice.open();
// Listen for TCP or UDP transmissions at port 1234.myDevice.startListening(1234);
[...]
The startListeningmethodmay fail for the following reasons:n If the listening port provided is lesser than 0 or greater than 65535, the method throws an
IllegalArgumentException exception.
n If there is a timeout setting the listening port, the method throws a TimeoutExceptionexception .
n Errors that register as an XBeeException:
l If the operating mode of the device is not API or API_ESCAPE, the method throws anInvalidOperatingModeException.
l If the response of the listening port command is not valid, the method throws anATCommandException.
l If there is an error writing to the XBee interface, the method throws a genericXBeeException.
You can call the stopListeningmethod to stop listening for incoming TCP or UDP transmissions:
Method Description
stopListening() Stops listening for incoming IP transmissions.
Stop listening for incoming transmissions
import com.digi.xbee.api.CellularDevice;
[...]
// Instantiate a Cellular device object.CellularDevice myDevice = new CellularDevice("COM1", 9600);myDevice.open();
// Stop listen for TCP or UDP transmissions.myDevice.stopListening();
[...]
The stopListeningmethodmay fail for the following reasons:
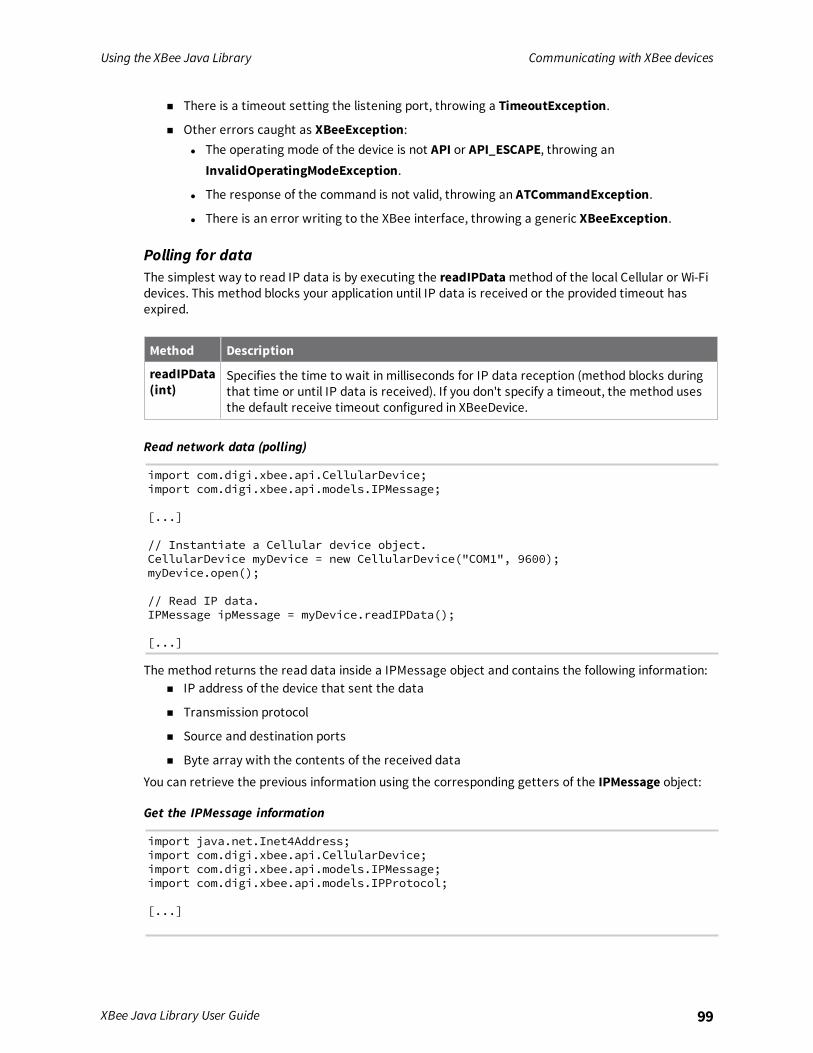
Using the XBee Java Library Communicating with XBee devices
XBee Java Library User Guide 99
n There is a timeout setting the listening port, throwing a TimeoutException.
n Other errors caught as XBeeException:l The operating mode of the device is not API or API_ESCAPE, throwing an
InvalidOperatingModeException.
l The response of the command is not valid, throwing an ATCommandException.
l There is an error writing to the XBee interface, throwing a generic XBeeException.
Polling for dataThe simplest way to read IP data is by executing the readIPDatamethod of the local Cellular or Wi-Fidevices. This method blocks your application until IP data is received or the provided timeout hasexpired.
Method Description
readIPData(int)
Specifies the time to wait in milliseconds for IP data reception (method blocks duringthat time or until IP data is received). If you don't specify a timeout, the method usesthe default receive timeout configured in XBeeDevice.
Read network data (polling)
import com.digi.xbee.api.CellularDevice;import com.digi.xbee.api.models.IPMessage;
[...]
// Instantiate a Cellular device object.CellularDevice myDevice = new CellularDevice("COM1", 9600);myDevice.open();
// Read IP data.IPMessage ipMessage = myDevice.readIPData();
[...]
The method returns the read data inside a IPMessage object and contains the following information:n IP address of the device that sent the data
n Transmission protocol
n Source and destination ports
n Byte array with the contents of the received data
You can retrieve the previous information using the corresponding getters of the IPMessage object:
Get the IPMessage information
import java.net.Inet4Address;import com.digi.xbee.api.CellularDevice;import com.digi.xbee.api.models.IPMessage;import com.digi.xbee.api.models.IPProtocol;
[...]
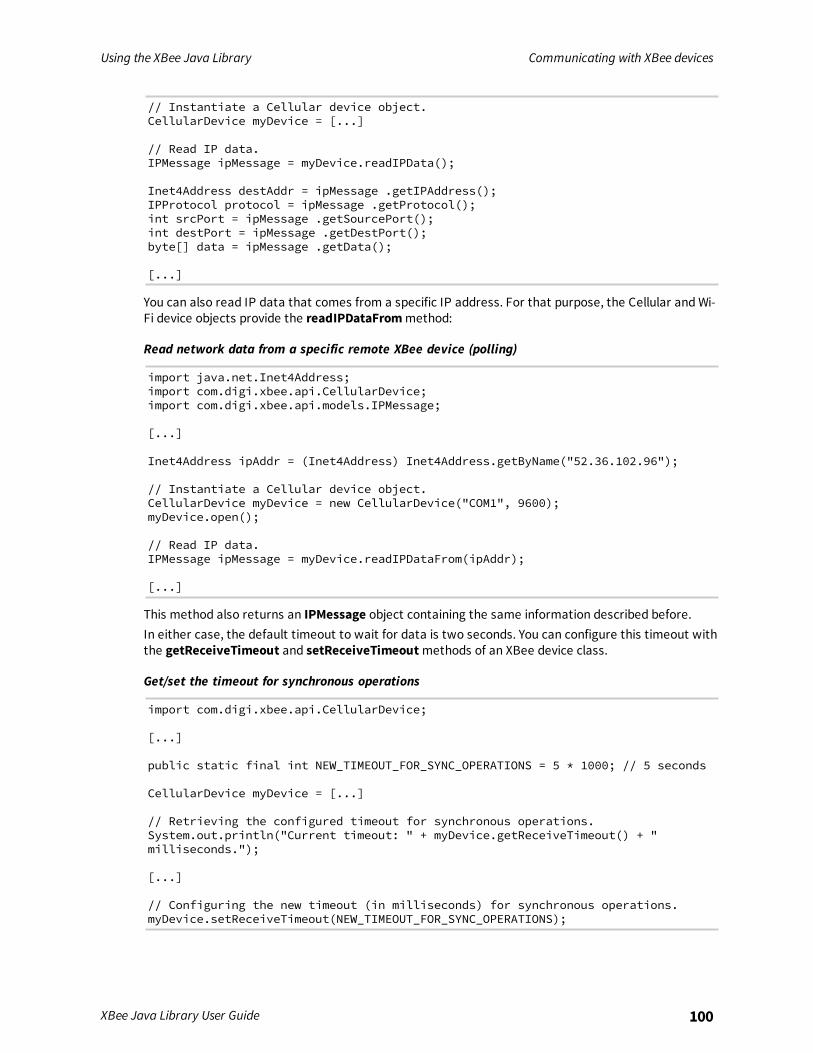
Using the XBee Java Library Communicating with XBee devices
XBee Java Library User Guide 100
// Instantiate a Cellular device object.CellularDevice myDevice = [...]
// Read IP data.IPMessage ipMessage = myDevice.readIPData();
Inet4Address destAddr = ipMessage .getIPAddress();IPProtocol protocol = ipMessage .getProtocol();int srcPort = ipMessage .getSourcePort();int destPort = ipMessage .getDestPort();byte[] data = ipMessage .getData();
[...]
You can also read IP data that comes from a specific IP address. For that purpose, the Cellular andWi-Fi device objects provide the readIPDataFrommethod:
Read network data from a specific remote XBee device (polling)
import java.net.Inet4Address;import com.digi.xbee.api.CellularDevice;import com.digi.xbee.api.models.IPMessage;
[...]
Inet4Address ipAddr = (Inet4Address) Inet4Address.getByName("52.36.102.96");
// Instantiate a Cellular device object.CellularDevice myDevice = new CellularDevice("COM1", 9600);myDevice.open();
// Read IP data.IPMessage ipMessage = myDevice.readIPDataFrom(ipAddr);
[...]
This method also returns an IPMessage object containing the same information described before.In either case, the default timeout to wait for data is two seconds. You can configure this timeout withthe getReceiveTimeout and setReceiveTimeoutmethods of an XBee device class.
Get/set the timeout for synchronous operations
import com.digi.xbee.api.CellularDevice;
[...]
public static final int NEW_TIMEOUT_FOR_SYNC_OPERATIONS = 5 * 1000; // 5 seconds
CellularDevice myDevice = [...]
// Retrieving the configured timeout for synchronous operations.System.out.println("Current timeout: " + myDevice.getReceiveTimeout() + "milliseconds.");
[...]
// Configuring the new timeout (in milliseconds) for synchronous operations.myDevice.setReceiveTimeout(NEW_TIMEOUT_FOR_SYNC_OPERATIONS);
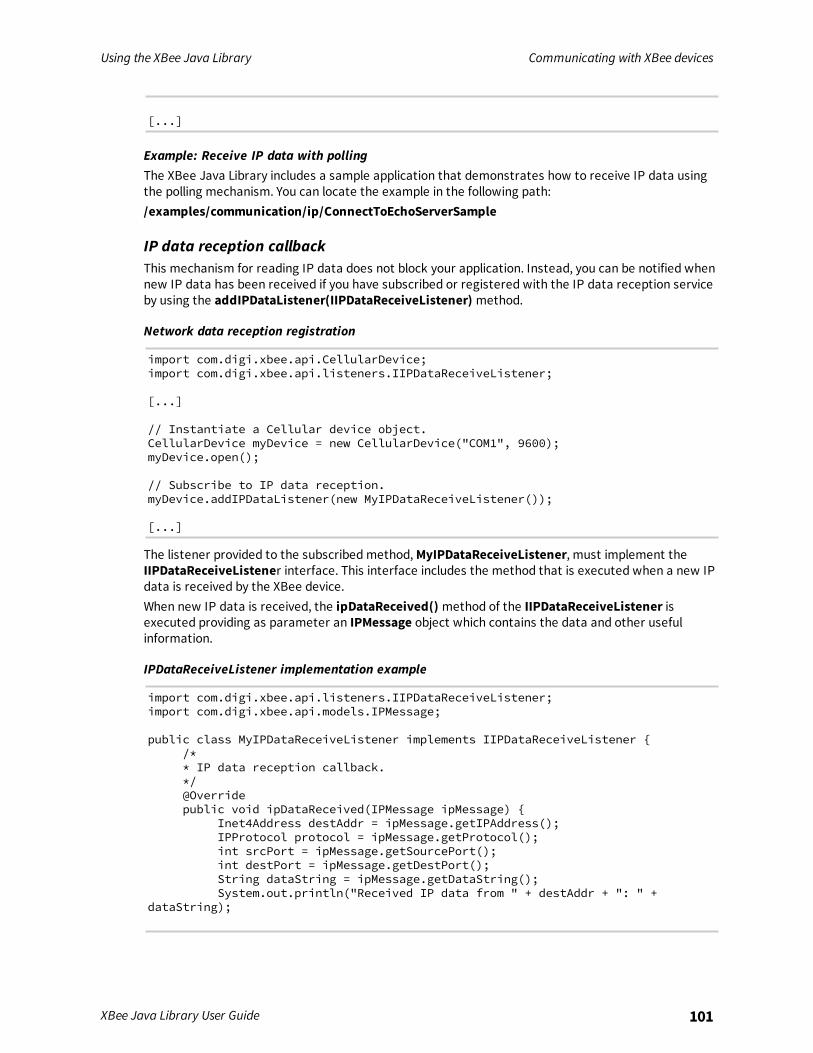
Using the XBee Java Library Communicating with XBee devices
XBee Java Library User Guide 101
[...]
Example: Receive IP data with pollingThe XBee Java Library includes a sample application that demonstrates how to receive IP data usingthe polling mechanism. You can locate the example in the following path:/examples/communication/ip/ConnectToEchoServerSample
IP data reception callbackThis mechanism for reading IP data does not block your application. Instead, you can be notified whennew IP data has been received if you have subscribed or registered with the IP data reception serviceby using the addIPDataListener(IIPDataReceiveListener) method.
Network data reception registration
import com.digi.xbee.api.CellularDevice;import com.digi.xbee.api.listeners.IIPDataReceiveListener;
[...]
// Instantiate a Cellular device object.CellularDevice myDevice = new CellularDevice("COM1", 9600);myDevice.open();
// Subscribe to IP data reception.myDevice.addIPDataListener(new MyIPDataReceiveListener());
[...]
The listener provided to the subscribedmethod,MyIPDataReceiveListener, must implement theIIPDataReceiveListener interface. This interface includes the method that is executed when a new IPdata is received by the XBee device.When new IP data is received, the ipDataReceived() method of the IIPDataReceiveListener isexecuted providing as parameter an IPMessage object which contains the data and other usefulinformation.
IPDataReceiveListener implementation example
import com.digi.xbee.api.listeners.IIPDataReceiveListener;import com.digi.xbee.api.models.IPMessage;
public class MyIPDataReceiveListener implements IIPDataReceiveListener {/** IP data reception callback.*/@Overridepublic void ipDataReceived(IPMessage ipMessage) {
Inet4Address destAddr = ipMessage.getIPAddress();IPProtocol protocol = ipMessage.getProtocol();int srcPort = ipMessage.getSourcePort();int destPort = ipMessage.getDestPort();String dataString = ipMessage.getDataString();System.out.println("Received IP data from " + destAddr + ": " +
dataString);
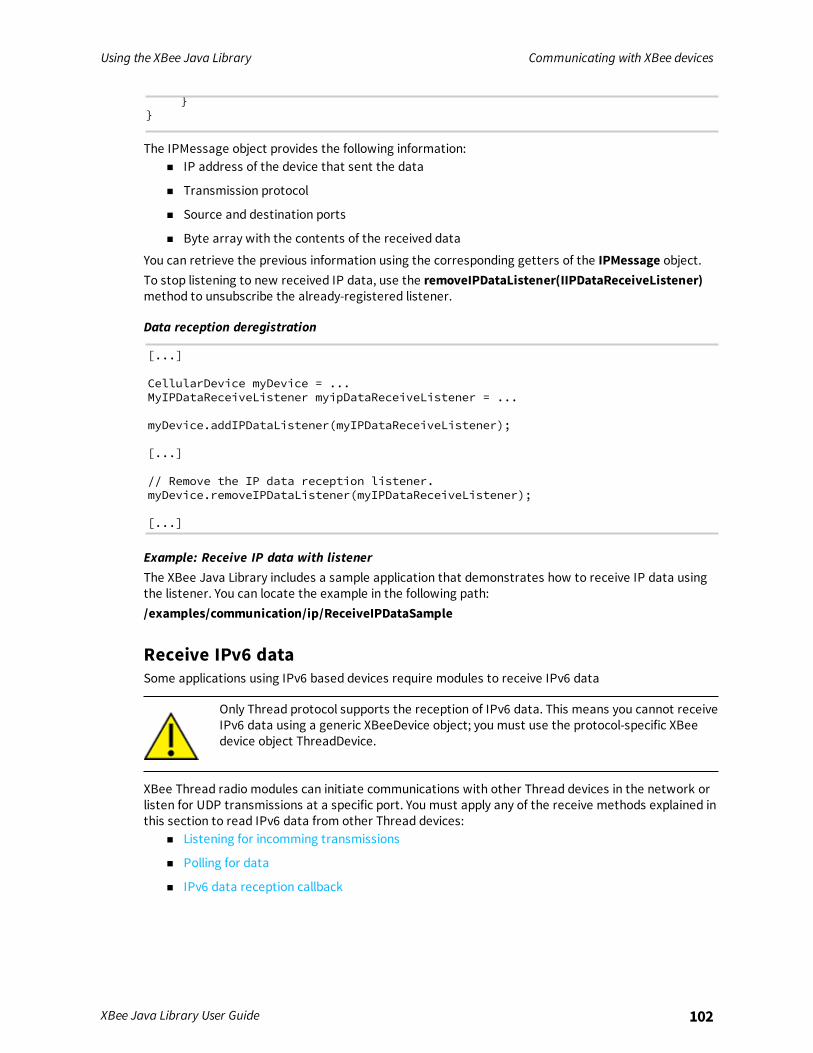
Using the XBee Java Library Communicating with XBee devices
XBee Java Library User Guide 102
}}
The IPMessage object provides the following information:n IP address of the device that sent the data
n Transmission protocol
n Source and destination ports
n Byte array with the contents of the received data
You can retrieve the previous information using the corresponding getters of the IPMessage object.To stop listening to new received IP data, use the removeIPDataListener(IIPDataReceiveListener)method to unsubscribe the already-registered listener.
Data reception deregistration
[...]
CellularDevice myDevice = ...MyIPDataReceiveListener myipDataReceiveListener = ...
myDevice.addIPDataListener(myIPDataReceiveListener);
[...]
// Remove the IP data reception listener.myDevice.removeIPDataListener(myIPDataReceiveListener);
[...]
Example: Receive IP data with listenerThe XBee Java Library includes a sample application that demonstrates how to receive IP data usingthe listener. You can locate the example in the following path:/examples/communication/ip/ReceiveIPDataSample
Receive IPv6 dataSome applications using IPv6 based devices require modules to receive IPv6 data
Only Thread protocol supports the reception of IPv6 data. This means you cannot receiveIPv6 data using a generic XBeeDevice object; you must use the protocol-specific XBeedevice object ThreadDevice.
XBee Thread radio modules can initiate communications with other Thread devices in the network orlisten for UDP transmissions at a specific port. You must apply any of the receive methods explained inthis section to read IPv6 data from other Thread devices:
n Listening for incomming transmissions
n Polling for data
n IPv6 data reception callback
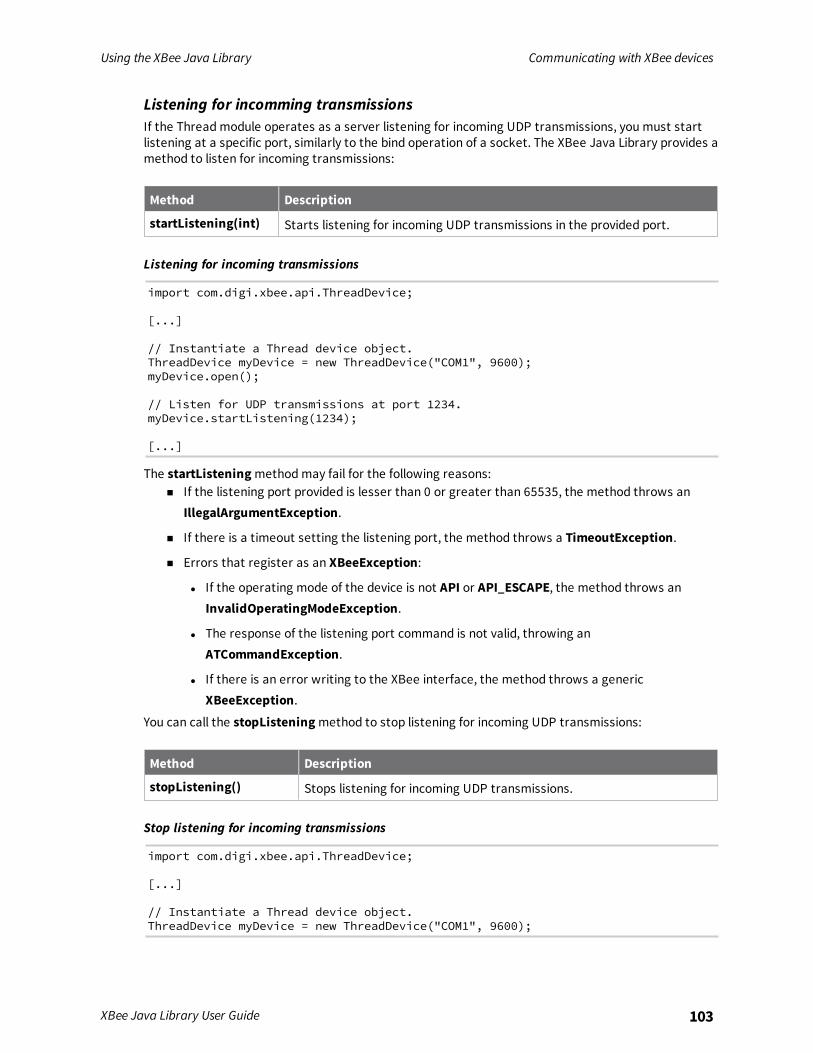
Using the XBee Java Library Communicating with XBee devices
XBee Java Library User Guide 103
Listening for incomming transmissionsIf the Threadmodule operates as a server listening for incoming UDP transmissions, you must startlistening at a specific port, similarly to the bind operation of a socket. The XBee Java Library provides amethod to listen for incoming transmissions:
Method Description
startListening(int) Starts listening for incoming UDP transmissions in the provided port.
Listening for incoming transmissions
import com.digi.xbee.api.ThreadDevice;
[...]
// Instantiate a Thread device object.ThreadDevice myDevice = new ThreadDevice("COM1", 9600);myDevice.open();
// Listen for UDP transmissions at port 1234.myDevice.startListening(1234);
[...]
The startListeningmethodmay fail for the following reasons:n If the listening port provided is lesser than 0 or greater than 65535, the method throws an
IllegalArgumentException.
n If there is a timeout setting the listening port, the method throws a TimeoutException.
n Errors that register as an XBeeException:
l If the operating mode of the device is not API or API_ESCAPE, the method throws anInvalidOperatingModeException.
l The response of the listening port command is not valid, throwing anATCommandException.
l If there is an error writing to the XBee interface, the method throws a genericXBeeException.
You can call the stopListeningmethod to stop listening for incoming UDP transmissions:
Method Description
stopListening() Stops listening for incoming UDP transmissions.
Stop listening for incoming transmissions
import com.digi.xbee.api.ThreadDevice;
[...]
// Instantiate a Thread device object.ThreadDevice myDevice = new ThreadDevice("COM1", 9600);
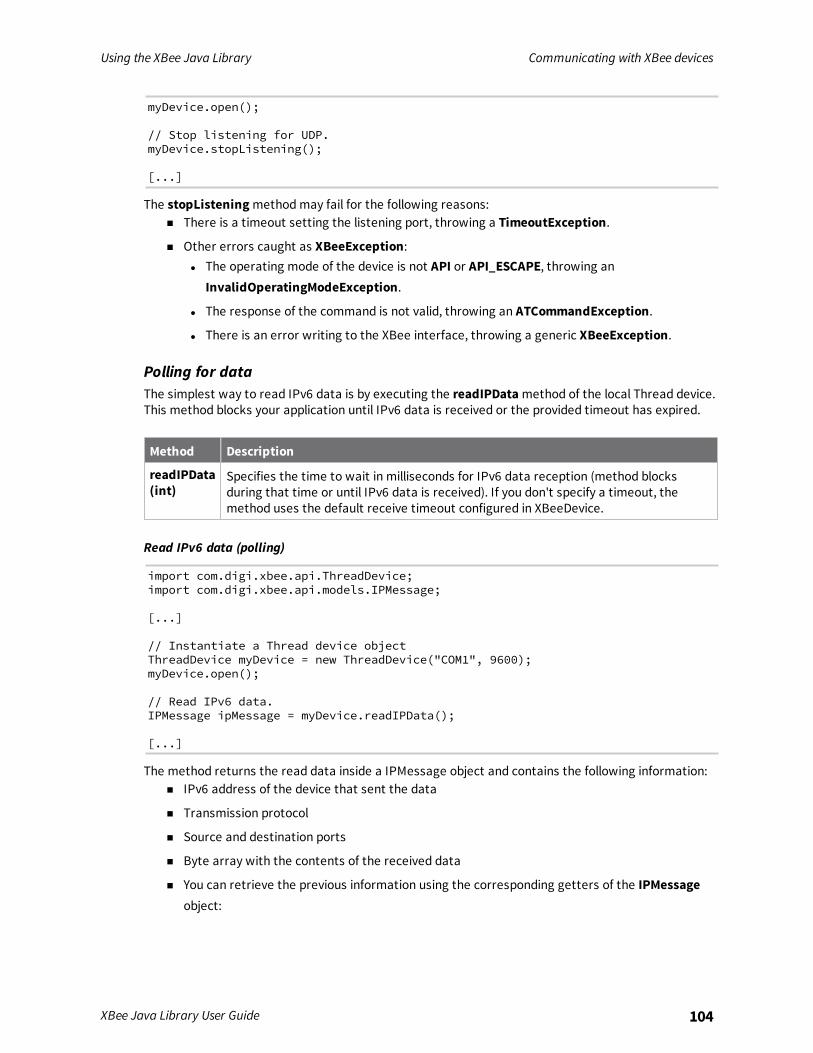
Using the XBee Java Library Communicating with XBee devices
XBee Java Library User Guide 104
myDevice.open();
// Stop listening for UDP.myDevice.stopListening();
[...]
The stopListeningmethodmay fail for the following reasons:n There is a timeout setting the listening port, throwing a TimeoutException.
n Other errors caught as XBeeException:l The operating mode of the device is not API or API_ESCAPE, throwing an
InvalidOperatingModeException.
l The response of the command is not valid, throwing an ATCommandException.
l There is an error writing to the XBee interface, throwing a generic XBeeException.
Polling for dataThe simplest way to read IPv6 data is by executing the readIPDatamethod of the local Thread device.This method blocks your application until IPv6 data is received or the provided timeout has expired.
Method Description
readIPData(int)
Specifies the time to wait in milliseconds for IPv6 data reception (method blocksduring that time or until IPv6 data is received). If you don't specify a timeout, themethod uses the default receive timeout configured in XBeeDevice.
Read IPv6 data (polling)
import com.digi.xbee.api.ThreadDevice;import com.digi.xbee.api.models.IPMessage;
[...]
// Instantiate a Thread device objectThreadDevice myDevice = new ThreadDevice("COM1", 9600);myDevice.open();
// Read IPv6 data.IPMessage ipMessage = myDevice.readIPData();
[...]
The method returns the read data inside a IPMessage object and contains the following information:n IPv6 address of the device that sent the data
n Transmission protocol
n Source and destination ports
n Byte array with the contents of the received data
n You can retrieve the previous information using the corresponding getters of the IPMessageobject:
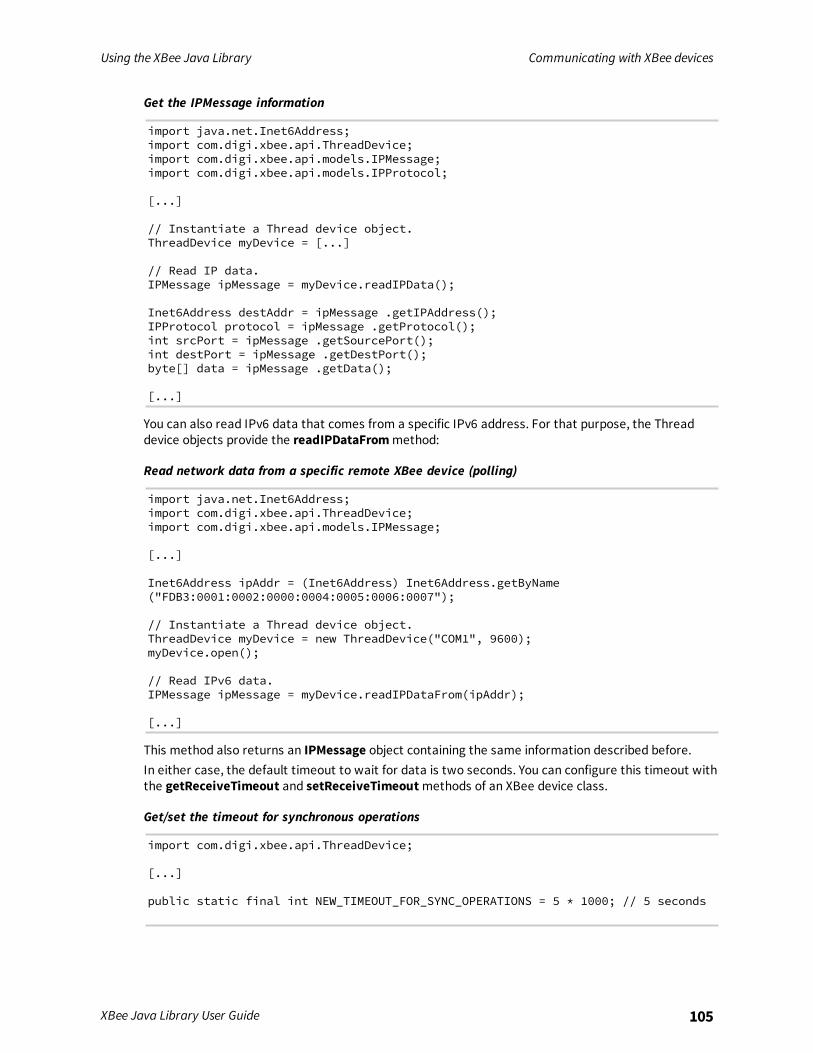
Using the XBee Java Library Communicating with XBee devices
XBee Java Library User Guide 105
Get the IPMessage information
import java.net.Inet6Address;import com.digi.xbee.api.ThreadDevice;import com.digi.xbee.api.models.IPMessage;import com.digi.xbee.api.models.IPProtocol;
[...]
// Instantiate a Thread device object.ThreadDevice myDevice = [...]
// Read IP data.IPMessage ipMessage = myDevice.readIPData();
Inet6Address destAddr = ipMessage .getIPAddress();IPProtocol protocol = ipMessage .getProtocol();int srcPort = ipMessage .getSourcePort();int destPort = ipMessage .getDestPort();byte[] data = ipMessage .getData();
[...]
You can also read IPv6 data that comes from a specific IPv6 address. For that purpose, the Threaddevice objects provide the readIPDataFrommethod:
Read network data from a specific remote XBee device (polling)
import java.net.Inet6Address;import com.digi.xbee.api.ThreadDevice;import com.digi.xbee.api.models.IPMessage;
[...]
Inet6Address ipAddr = (Inet6Address) Inet6Address.getByName("FDB3:0001:0002:0000:0004:0005:0006:0007");
// Instantiate a Thread device object.ThreadDevice myDevice = new ThreadDevice("COM1", 9600);myDevice.open();
// Read IPv6 data.IPMessage ipMessage = myDevice.readIPDataFrom(ipAddr);
[...]
This method also returns an IPMessage object containing the same information described before.In either case, the default timeout to wait for data is two seconds. You can configure this timeout withthe getReceiveTimeout and setReceiveTimeoutmethods of an XBee device class.
Get/set the timeout for synchronous operations
import com.digi.xbee.api.ThreadDevice;
[...]
public static final int NEW_TIMEOUT_FOR_SYNC_OPERATIONS = 5 * 1000; // 5 seconds
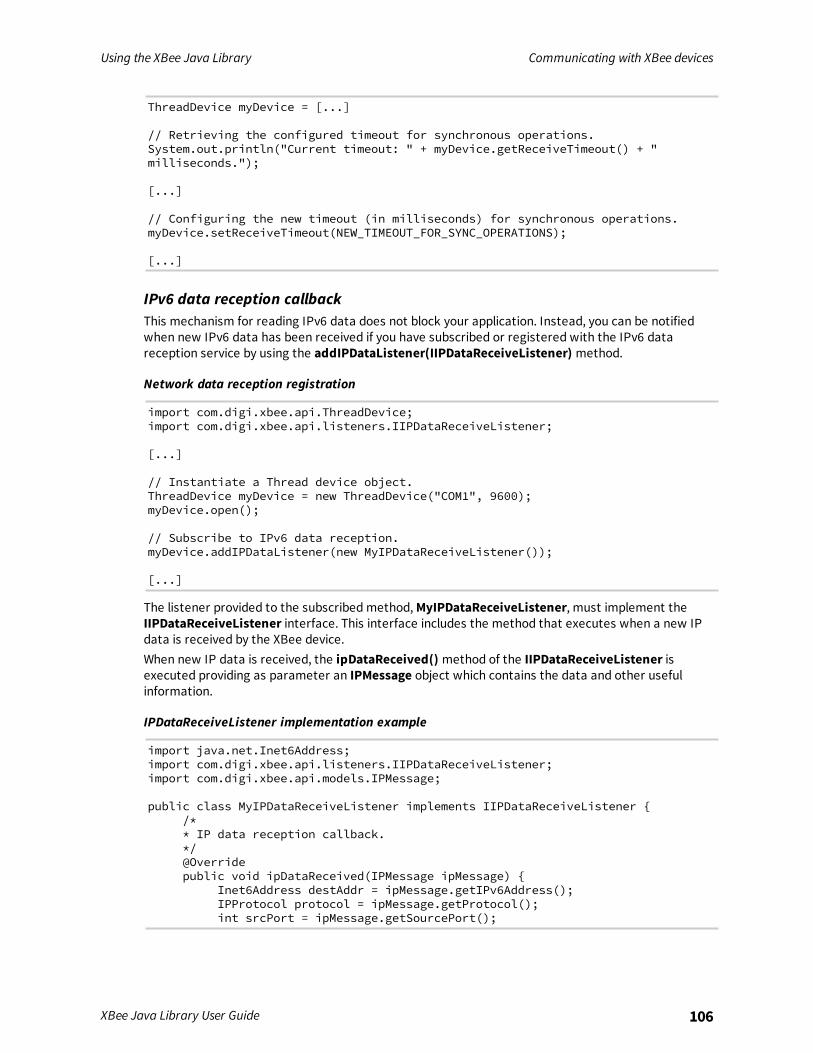
Using the XBee Java Library Communicating with XBee devices
XBee Java Library User Guide 106
ThreadDevice myDevice = [...]
// Retrieving the configured timeout for synchronous operations.System.out.println("Current timeout: " + myDevice.getReceiveTimeout() + "milliseconds.");
[...]
// Configuring the new timeout (in milliseconds) for synchronous operations.myDevice.setReceiveTimeout(NEW_TIMEOUT_FOR_SYNC_OPERATIONS);
[...]
IPv6 data reception callbackThis mechanism for reading IPv6 data does not block your application. Instead, you can be notifiedwhen new IPv6 data has been received if you have subscribed or registered with the IPv6 datareception service by using the addIPDataListener(IIPDataReceiveListener) method.
Network data reception registration
import com.digi.xbee.api.ThreadDevice;import com.digi.xbee.api.listeners.IIPDataReceiveListener;
[...]
// Instantiate a Thread device object.ThreadDevice myDevice = new ThreadDevice("COM1", 9600);myDevice.open();
// Subscribe to IPv6 data reception.myDevice.addIPDataListener(new MyIPDataReceiveListener());
[...]
The listener provided to the subscribedmethod,MyIPDataReceiveListener, must implement theIIPDataReceiveListener interface. This interface includes the method that executes when a new IPdata is received by the XBee device.When new IP data is received, the ipDataReceived() method of the IIPDataReceiveListener isexecuted providing as parameter an IPMessage object which contains the data and other usefulinformation.
IPDataReceiveListener implementation example
import java.net.Inet6Address;import com.digi.xbee.api.listeners.IIPDataReceiveListener;import com.digi.xbee.api.models.IPMessage;
public class MyIPDataReceiveListener implements IIPDataReceiveListener {/** IP data reception callback.*/@Overridepublic void ipDataReceived(IPMessage ipMessage) {
Inet6Address destAddr = ipMessage.getIPv6Address();IPProtocol protocol = ipMessage.getProtocol();int srcPort = ipMessage.getSourcePort();
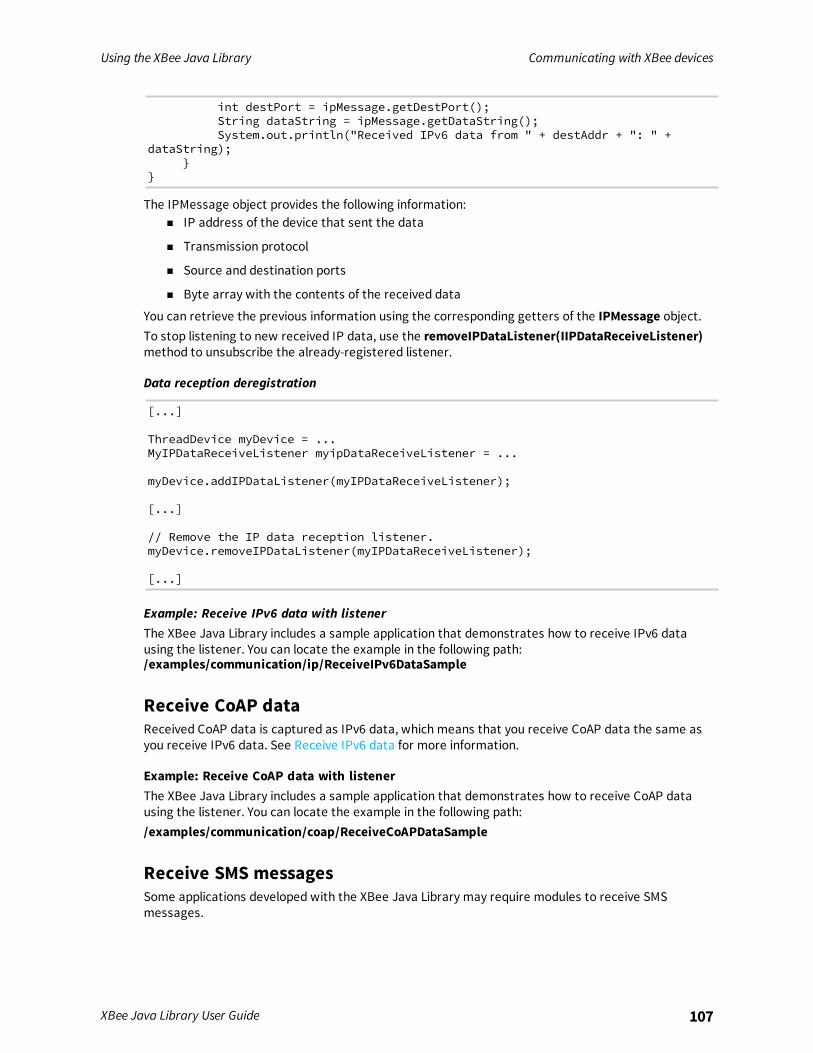
Using the XBee Java Library Communicating with XBee devices
XBee Java Library User Guide 107
int destPort = ipMessage.getDestPort();String dataString = ipMessage.getDataString();System.out.println("Received IPv6 data from " + destAddr + ": " +
dataString);}
}
The IPMessage object provides the following information:n IP address of the device that sent the data
n Transmission protocol
n Source and destination ports
n Byte array with the contents of the received data
You can retrieve the previous information using the corresponding getters of the IPMessage object.To stop listening to new received IP data, use the removeIPDataListener(IIPDataReceiveListener)method to unsubscribe the already-registered listener.
Data reception deregistration
[...]
ThreadDevice myDevice = ...MyIPDataReceiveListener myipDataReceiveListener = ...
myDevice.addIPDataListener(myIPDataReceiveListener);
[...]
// Remove the IP data reception listener.myDevice.removeIPDataListener(myIPDataReceiveListener);
[...]
Example: Receive IPv6 data with listenerThe XBee Java Library includes a sample application that demonstrates how to receive IPv6 datausing the listener. You can locate the example in the following path:/examples/communication/ip/ReceiveIPv6DataSample
Receive CoAP dataReceived CoAP data is captured as IPv6 data, which means that you receive CoAP data the same asyou receive IPv6 data. See Receive IPv6 data for more information.
Example: Receive CoAP data with listenerThe XBee Java Library includes a sample application that demonstrates how to receive CoAP datausing the listener. You can locate the example in the following path:/examples/communication/coap/ReceiveCoAPDataSample
Receive SMS messagesSome applications developed with the XBee Java Library may require modules to receive SMSmessages.
Using the XBee Java Library Communicating with XBee devices
XBee Java Library User Guide 108
Only Cellular modules support the reception of SMS messages.
SMS reception callbackYou can be notified when a new SMS has been received if you are subscribed or registered to the SMSreception service by using the addSMSListenerListener(ISMSReceiveListener) method.
SMS reception registration
import com.digi.xbee.api.CellularDevice;import com.digi.xbee.api.listeners.ISMSReceiveListener;
[...]
// Instantiate a Cellular device object.CellularDevice myDevice = new CellularDevice("COM1", 9600);myDevice.open();
// Subscribe to SMS reception.myDevice.addSMSListener(new MySMSReceiveListener());
[...]
The listener provided to the subscribedmethod,MySMSReceiveListener, must implement theISMSReceiveListener interface. This interface includes the method that is executed when a new SMSis received by the XBee device.When that occurs, the smsReceived() method of the ISMSReceiveListener is executed providing asparameter an SMSMessage object which contains the data and the phone number that sent themessage. You can retrieve that information by using the corresponding getters.
SMSReceiveListener implementation example
import com.digi.xbee.api.listeners.ISMSReceiveListener;import com.digi.xbee.api.models.SMSMessage;
public class MySMSReceiveListener implements ISMSReceiveListener { /** SMS reception callback.*/@Overridepublic void smsReceived(SMSMessage smsMessage) {
String phoneNumber = smsMessage.getPhoneNumber();String data = smsMessage.getData();System.out.println("Received SMS from " + phoneNumber + ": " + data);
}}
To stop listening to new SMS messages, use the removeSMSListener(ISMSReceiveListener) methodto unsubscribe the already-registered listener.
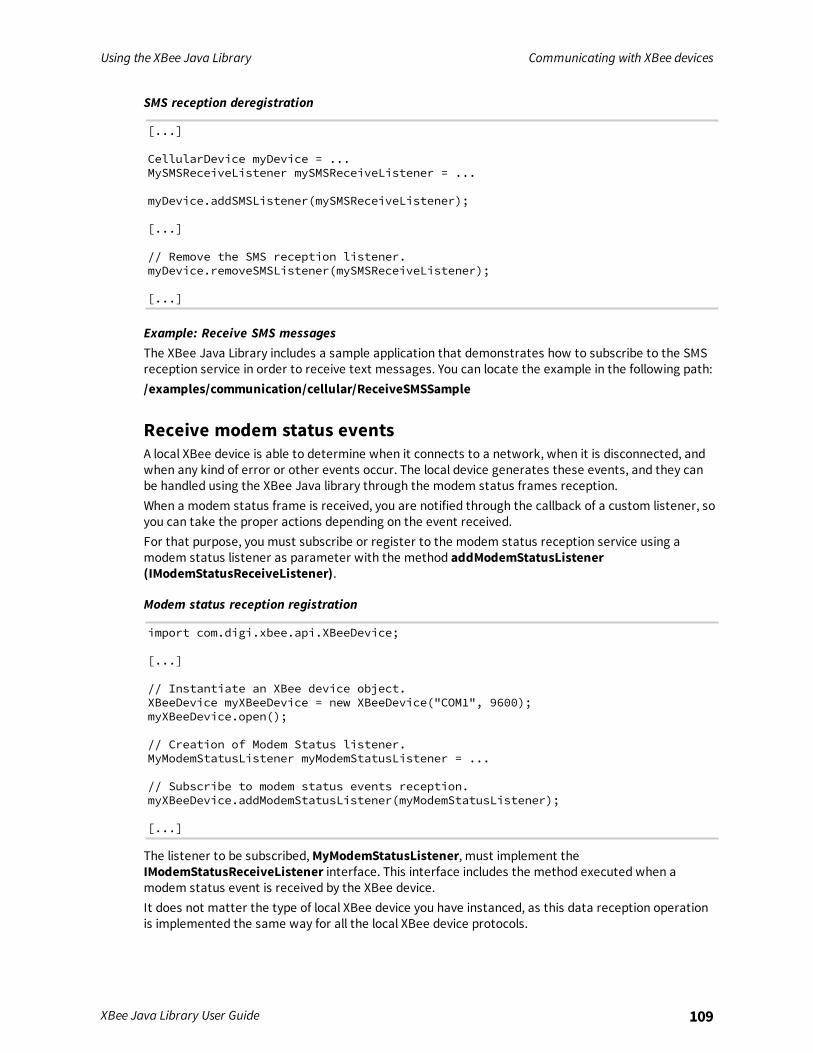
Using the XBee Java Library Communicating with XBee devices
XBee Java Library User Guide 109
SMS reception deregistration
[...]
CellularDevice myDevice = ...MySMSReceiveListener mySMSReceiveListener = ...
myDevice.addSMSListener(mySMSReceiveListener);
[...]
// Remove the SMS reception listener.myDevice.removeSMSListener(mySMSReceiveListener);
[...]
Example: Receive SMS messagesThe XBee Java Library includes a sample application that demonstrates how to subscribe to the SMSreception service in order to receive text messages. You can locate the example in the following path:/examples/communication/cellular/ReceiveSMSSample
Receive modem status eventsA local XBee device is able to determine when it connects to a network, when it is disconnected, andwhen any kind of error or other events occur. The local device generates these events, and they canbe handled using the XBee Java library through the modem status frames reception.When a modem status frame is received, you are notified through the callback of a custom listener, soyou can take the proper actions depending on the event received.For that purpose, you must subscribe or register to the modem status reception service using amodem status listener as parameter with the method addModemStatusListener(IModemStatusReceiveListener).
Modem status reception registration
import com.digi.xbee.api.XBeeDevice;
[...]
// Instantiate an XBee device object.XBeeDevice myXBeeDevice = new XBeeDevice("COM1", 9600);myXBeeDevice.open();
// Creation of Modem Status listener.MyModemStatusListener myModemStatusListener = ...
// Subscribe to modem status events reception.myXBeeDevice.addModemStatusListener(myModemStatusListener);
[...]
The listener to be subscribed,MyModemStatusListener, must implement theIModemStatusReceiveListener interface. This interface includes the method executed when amodem status event is received by the XBee device.It does not matter the type of local XBee device you have instanced, as this data reception operationis implemented the same way for all the local XBee device protocols.

Using the XBee Java Library Handling analog and digital IO lines
XBee Java Library User Guide 110
When a new modem status event is received, the modemStatusEventReceived() method of theIModemStatusReceiveListener is executed, providing a ModemStatusEvent enumeration entryobject parameter, which contains the information about the event.
IModemStatusReceiveListener implementation example, MyModemStatusListener
import com.digi.xbee.api.models.ModemStatusEvent;import com.digi.xbee.api.listeners.IModemStatusReceiveListener;
public class MyModemStatusListener implements IModemStatusReceiveListener {/** Modem status event reception callback.*/@Overridepublic void modemStatusEventReceived(ModemStatusEvent modemStatusEvent) {
System.out.println("Received modem status: " +modemStatusEvent.toString());
}}
To stop listening to modem status events, use the removeModemStatusListener(IModemStatusReceiveListener) method.
Removing the modem status listener
[...]
XBeeDevice myXBeeDevice = ...MyModemStatusListener myModemStatusListener = ...
myXBeeDevice.addModemStatusListener(myModemStatusListener);
[...]
// Remove the modem status listener.myXBeeDevice.removeModemStatusListener(myModemStatusListener);
[...]
Modem status reception exampleThe XBee Java Library includes a sample application that shows you how to subscribe to the modemstatus reception service to receive modem status events. The example is located in the followingpath:/examples/communication/ReceiveModemStatusSample
Handling analog and digital IO linesAll the XBee modules, regardless of the protocol they run, have a set of lines (pins). You can use thesepins to connect sensors or actuators and configure them with specific behavior.You can configure the IO lines of an XBee device to be digital input/output (DIO), analog to digitalconverter (ADC), or pulse-width modulation output (PWM). The configuration you provide to a linedepends on the device where you want to connect.
Note All the IO management features displayed in this topic and sub-topics are applicable for bothlocal and remote XBee devices.
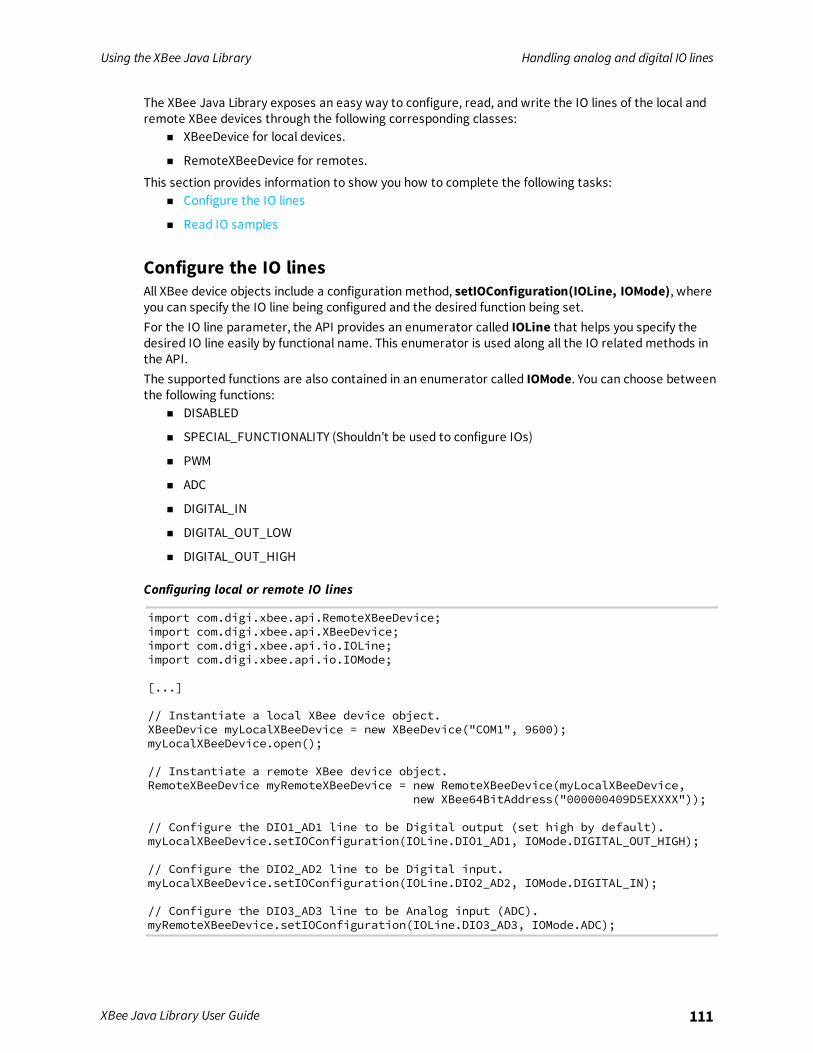
Using the XBee Java Library Handling analog and digital IO lines
XBee Java Library User Guide 111
The XBee Java Library exposes an easy way to configure, read, and write the IO lines of the local andremote XBee devices through the following corresponding classes:
n XBeeDevice for local devices.
n RemoteXBeeDevice for remotes.
This section provides information to show you how to complete the following tasks:n Configure the IO lines
n Read IO samples
Configure the IO linesAll XBee device objects include a configuration method, setIOConfiguration(IOLine, IOMode), whereyou can specify the IO line being configured and the desired function being set.For the IO line parameter, the API provides an enumerator called IOLine that helps you specify thedesired IO line easily by functional name. This enumerator is used along all the IO relatedmethods inthe API.The supported functions are also contained in an enumerator called IOMode. You can choose betweenthe following functions:
n DISABLED
n SPECIAL_FUNCTIONALITY (Shouldn’t be used to configure IOs)
n PWM
n ADC
n DIGITAL_IN
n DIGITAL_OUT_LOW
n DIGITAL_OUT_HIGH
Configuring local or remote IO lines
import com.digi.xbee.api.RemoteXBeeDevice;import com.digi.xbee.api.XBeeDevice;import com.digi.xbee.api.io.IOLine;import com.digi.xbee.api.io.IOMode;
[...]
// Instantiate a local XBee device object.XBeeDevice myLocalXBeeDevice = new XBeeDevice("COM1", 9600);myLocalXBeeDevice.open();
// Instantiate a remote XBee device object.RemoteXBeeDevice myRemoteXBeeDevice = new RemoteXBeeDevice(myLocalXBeeDevice,
new XBee64BitAddress("000000409D5EXXXX"));
// Configure the DIO1_AD1 line to be Digital output (set high by default).myLocalXBeeDevice.setIOConfiguration(IOLine.DIO1_AD1, IOMode.DIGITAL_OUT_HIGH);
// Configure the DIO2_AD2 line to be Digital input.myLocalXBeeDevice.setIOConfiguration(IOLine.DIO2_AD2, IOMode.DIGITAL_IN);
// Configure the DIO3_AD3 line to be Analog input (ADC).myRemoteXBeeDevice.setIOConfiguration(IOLine.DIO3_AD3, IOMode.ADC);
Using the XBee Java Library Handling analog and digital IO lines
XBee Java Library User Guide 112
// Configure the DIO10_PWM0 line to be PWM output (PWM).myRemoteXBeeDevice.setIOConfiguration(IOLine.DIO10_PWM0, IOMode.PWM);
[...]
The setIOConfiguration() methodmay fail for the following reasons:n ACK of the command sent is not received in the configured timeout, throwing a
TimeoutException.
n Other errors caught as XBeeException:l The operating mode of the device is not API or API_ESCAPE, throwing an
InvalidOperatingModeException.
l The response of the command is not valid, throwing an ATCommandException.
l There is an error writing to the XBee interface, throwing a generic XBeeException.You can read the current configuration of any IO line the same way an IO line can be configured with adesired function using the corresponding getter, getIOConfiguration(IOLine).
Getting IOs configuration
[...]
// Get the configuration mode of the DIO1_AD1 line.IOMode ioMode = myXBeeDevice.getIOConfiguration(IOLine.DIO1_AD1);
[...]
The getIOConfiguration() methodmay fail for the following reasons:n ACK of the read command is not received in the configured timeout, throwing a
TimeoutException.
n Other errors caught as XBeeException:l If the operating mode of the device is not API or API_ESCAPE, throwing an
InvalidOperatingModeException.
l If the received response does not contain the value for the given IO line, throwing aOperationNotSupportedException.
l If the response to the read command is not valid, throwing an ATCommandException.
l If there is an error writing to the XBee interface, throwing a generic XBeeException.
Digital input/outputIf your IO line is configured as digital output, you can set its state (high/low) easily. All the XBee deviceclasses provide the method, setDIOValue(IOLine, IOValue), with the desired IO line as the firstparameter and an IOValue as the second. The IOValue enumerator includes HIGH and LOW as possiblevalues.
Setting digital output values
[...]
// Set the DIO2_AD2 line low.
Using the XBee Java Library Handling analog and digital IO lines
XBee Java Library User Guide 113
myXBeeDevice.setDIOValue(IOLine.DIO2_AD2, IOValue.LOW);
// Set the DIO2_AD2 line high.myXBeeDevice.setDIOValue(IOLine.DIO2_AD2, IOValue.HIGH);
[...]
The setDIOValue() methodmay fail for the following reasons:n ACK of the command sent is not received in the configured timeout, throwing a
TimeoutException.
n Other errors caught as XBeeException:l The operating mode of the device is not API or API_ESCAPE, throwing an
InvalidOperatingModeException.
l The response of the command is not valid, throwing an ATCommandException.
l There is an error writing to the XBee interface, throwing a generic XBeeException.You can also read the current status of the pin (high/low) by issuing the method getDIOValue(IOLine).The parameter of the methodmust be the IO line to be read.
Reading digital input values
[...]
// Get the value of the DIO2_AD2.IOValue value = myXBeeDevice.getDIOValue(IOLine.DIO2_AD2);
[...]
n ACK of the read command is not received in the configured timeout, throwing aTimeoutException.
n Other errors caught as XBeeException:l If the operating mode of the device is not API or API_ESCAPE, throwing an
InvalidOperatingModeException.
l If the received response does not contain the value for the given IO line, throwing aOperationNotSupportedException. This can happen (for example) if you try to read theDIO value of an IO line that is not configured as Digital Input.
l If the response to the read command is not valid, throwing an ATCommandException.
l If there is an error writing to the XBee interface, throwing a generic XBeeException.
Handling DIO IO Lines exampleThe XBee Java Library includes two sample applications that demonstrate how to handle DIO lines inyour local and remote XBee Devices. The examples are located in the following path:/examples/io/LocalDIOSample/examples/io/RemoteDIOSample
ADCWhen you configure an IO line as analog to digital converter (ADC), you can only read its value (counts).In this case, the method used to read ADCs is different than the digital I/O method, but the parameter
Using the XBee Java Library Handling analog and digital IO lines
XBee Java Library User Guide 114
provided is the same. The IO line to read the value from getADCValue(IOLine).
Reading ADC values
[...]
// Get the value of the DIO 3 (analog to digital converter).int value = myXBeeDevice.getADCValue(IOLine.DIO3_AD3);
[...]
The getADCValue() methodmay fail for the following reasons:n ACK of the read command is not received in the configured timeout, throwing a
TimeoutException.
n Other errors caught as XBeeException:l If the operating mode of the device is not API or API_ESCAPE, throwing an
InvalidOperatingModeException.
l If the received response does not contain the value for the given IO line, throwing aOperationNotSupportedException. This can happen (for example) if you try to read theADC value of an IO line that is not configured as ADC.
l If the response to the read command is not valid, throwing an ATCommandException.
l If there is an error writing to the XBee interface, throwing a generic XBeeException.
Handling ADC IO Lines exampleThe XBee Java Library includes two sample applications that demonstrate how to handle ADC lines inyour local and remote XBee Devices. The examples are located in the following path:/examples/io/LocalADCSample/examples/io/RemoteADCSample
PWMNot all the XBee protocols support pulse-width modulation (PWM) output handling, but the XBee JavaLibrary provides functionality to manage them. When you configure an IO line as PWM output, youmust use specific methods to set and read the duty cycle of the PWM.For the set case, use the method setPWMDutyCycle(IOLine, double) and provide the IO lineconfigured as PWM and the value of the duty cycle in % of the PWM. The duty cycle is the proportion of'ON' time to the regular interval or 'period' of time. A high duty cycle corresponds to high power,because the power is ON for most of the time. The percentage parameter of the set duty cyclemethod is a double, which allows you to be more precise in the configuration.
Setting the duty cycle of an IO line configure as PWM
[...]
// Set a duty cycle of 75% to the DIO10_PWM0 line (PWM output).myXBeeDevice.setPWMDutyCycle(IOLine.DIO10_PWM0, 75);
[...]
The setPWMDutyCycle() methodmay fail for the following reasons:
Using the XBee Java Library Handling analog and digital IO lines
XBee Java Library User Guide 115
n ACK of the command sent is not received in the configured timeout, throwing aTimeoutException.
n Other errors caught as XBeeException:l The operating mode of the device is not API or API_ESCAPE, throwing an
InvalidOperatingModeException.
l The response of the command is not valid, throwing an ATCommandException.
l There is an error writing to the XBee interface, throwing a generic XBeeException.The getPWMDutyCycle(IOLine) method of a PWM line returns a double value with the current dutycycle percentage of the PWM.
Getting the duty cycle of an IO line configured as PWM
[...]
// Get the duty cycle of the DIO10_PWM0 line (PWM output).double dutyCycle = myXBeeDevice.getPWMDutyCycle(IOLine.DIO10_PWM0);
[...]
The getPWMDutyCycle() methodmay fail for the following reasons:n ACK of the read command is not received in the configured timeout, throwing a
TimeoutException.
n Other errors caught as XBeeException:l If the operating mode of the device is not API or API_ESCAPE, throwing an
InvalidOperatingModeException.
l If the received response does not contain the value for the given IO line, throwing aOperationNotSupportedException.
l If the response to the read command is not valid, throwing an ATCommandException.
l If there is an error writing to the XBee interface, throwing a generic XBeeException.
Note In both cases (get and set), the IO line providedmust be PWM capable andmust be configuredas PWM output.
Read IO samplesXBee modules have the ability to monitor and sample the analog and digital IO lines. You can read IOsamples locally or transmitted to a remote device to provide an indication of the current IO linestates.There are three ways to obtain IO samples on a local or remote device:
n Queried sampling
n Periodic sampling
n Change detection sampling
The XBee Java Library represents an IO sample by the IOSample class, which contains:n Digital and analog channel masks that indicate which lines have sampling enabled.
n Values of those enabled lines.
Using the XBee Java Library Handling analog and digital IO lines
XBee Java Library User Guide 116
You must configure the IO lines you want to receive in the IO samples before enabling sampling.
Queried samplingThe XBee Java Library provides a method to read an IO sample that contains all enabled digital IO andanalog input channels, readIOSample(). The method returns an IOSample object.
Reading an IO sample and getting the DIO value
[...]
// Read an IO sample from the device.IOSample ioSample = myXBeeDevice.readIOSample();
// Select the desired IO line.IOLine ioLine = IOLine.DIO3_AD3;
// Check if the IO sample contains the expected IO line and value.if (ioSample.hasDigitalValue(ioLine)) {
System.out.println(ioSample.getDigitalValue(ioLine));}
[...]
The readIOSample() methodmay fail for the following reasons:n ACK of the command sent is not received in the configured timeout, throwing a
TimeoutException.
n Other errors caught as XBeeException:l The operating mode of the device is not API or API_ESCAPE, throwing an
InvalidOperatingModeException.
l The response of the command is not valid, throwing an ATCommandException.
l There is an error writing to the XBee interface, throwing a generic XBeeException.
Periodic samplingPeriodic sampling allows an XBee module to take an IO sample and transmit it to a remote device at aperiodic rate. That remote device is defined in the destination address through thesetDestinationAddress(XBee64BitAddress) method. The XBee Java Library provides thesetIOSamplingRate(int) method to configure the periodic sampling.The XBee module samples and transmits all enabled digital IO and analog inputs to the remote deviceevery X milliseconds. A sample rate of 0 ms disables this feature.
Setting the IO sampling rate
[...]
// Set the destination address.myXBeeDevice.setDestinationAddress(new XBee64BitAddress("0013A20040XXXXXX"));
// Set the IO sampling rate.myXBeeDevice.setIOSamplingRate(5000); // 5 seconds.
[...]
The setIOSamplingRate() methodmay fail for the following reasons:
Using the XBee Java Library Handling analog and digital IO lines
XBee Java Library User Guide 117
n The sampling rate is lower than 0, throwing an IllegalArgumentException.
n ACK of the command sent is not received in the configured timeout, throwing aTimeoutException.
n Other errors caught as XBeeException:l The operating mode of the device is not API or API_ESCAPE, throwing an
InvalidOperatingModeException.
l The response of the command is not valid, throwing an ATCommandException.
l There is an error writing to the XBee interface, throwing a generic XBeeException.You can also read this value using the getIOSamplingRate() method. This method returns the IOsampling rate in milliseconds and '0' when the feature is disabled.
Getting the IO sampling rate
[...]
// Get the IO sampling rate.int value = myXBeeDevice.getIOSamplingRate();
[...]
The getIOSamplingRate() methodmay fail for the following reasons:n ACK of the command sent is not received in the configured timeout, throwing a
TimeoutException.
n Other errors caught as XBeeException:l The operating mode of the device is not API or API_ESCAPE, throwing an
InvalidOperatingModeException.
l The response of the command is not valid, throwing an ATCommandException.
l There is an error writing to the XBee interface, throwing a generic XBeeException.
Change detection samplingYou can configure modules to transmit a data sample immediately whenever a monitored digital IOpin changes state. The setDIOChangeDetection(Set<IOLine>) method establishes the set of digitalIO lines that are monitored for change detection. A null set disables the change detection sampling.As in the periodic sampling, change detection samples are transmitted to the configured destinationaddress.
Note This feature only monitors and samples digital IOs, so it is not valid for analog lines.
Setting the DIO change detection
[...]
// Set the destination address.myXBeeDevice.setDestinationAddress(new XBee64BitAddress("0013A20040XXXXXX"));
// Create a set of IO lines to be monitored.Set<IOLine> lines = EnumSet.of(IOLine.DIO3_AD3, IOLine.DIO4_AD4);
Using the XBee Java Library Handling analog and digital IO lines
XBee Java Library User Guide 118
// Enable the DIO change detection sampling.myXBeeDevice.setDIOChangeDetection(lines);
[...]
The setIOSamplingRate() methodmay fail for the following reasons:n ACK of the command sent is not received in the configured timeout, throwing a
TimeoutException.
n Other errors caught as XBeeException:l The operating mode of the device is not API or API_ESCAPE, throwing an
InvalidOperatingModeException.
l The response of the command is not valid, throwing an ATCommandException.
l There is an error writing to the XBee interface, throwing a generic XBeeException.You can also get the lines that are monitored using the getDIOChangeDetection() method. A nullindicates that this feature is disabled.
Getting the DIO change detection
[...]
// Get the set of lines that are monitored.Set<IOLine> lines = myXBeeDevice.getDIOChangeDetection();
[...]
The getDIOChangeDetection() methodmay fail for the following reasons:n ACK of the command sent is not received in the configured timeout, throwing a
TimeoutException.
n Other errors caught as XBeeException:l The operating mode of the device is not API or API_ESCAPE, throwing an
InvalidOperatingModeException.
l The response of the command is not valid, throwing an ATCommandException.
l There is an error writing to the XBee interface, throwing a generic XBeeException.
Register an IO sample listenerIn addition to configuring an XBee device to monitor and sample the analog and digital IO lines, youmust register a listener in the local device where you want to receive the IO samples. You are thennotified when the device receives a new IO sample.You must subscribe to the IO samples reception service by using the method addIOSampleListener(IIOSampleReceiveListener) with an IO sample reception listener as parameter.
Registering an IO sample receive listener
[...]
// Create the IO sample listener.MyIOSampleReceiveListener myIOSampleReceiveListener = ...
Using the XBee Java Library Handling analog and digital IO lines
XBee Java Library User Guide 119
// Subscribe to IO samples reception.myXBeeDevice.addIOSampleListener(myIOSampleReceiveListener);
[...]
The listener provided to the subscribe method,MyIOSampleReceiveListener, must implement theIIOSampleReceiveListener interface. This interface includes the method that executes when theXBee device receives a new IO sample.
Note This listener can only be registered on local devices, but is implemented the same way for all theXBeeDevice subclasses.
When the XBee device receives a new IO sample, the ioSampleReceived() method of theIIOSampleReceiveListener executes, providing as parameters a RemoteXBeeDevice object, whichindicates the device that sent the sample, and an IOSample object with the IO data sample.
IIOSampleReceiveListener implementation example, MyIOSampleReceiveListener
import com.digi.xbee.api.listeners.IIOSampleReceiveListener;
public class MyIOSampleReceiveListener implements IIOSampleReceiveListener {@Overridepublic void ioSampleReceived(RemoteXBeeDevice remoteDevice, IOSample ioSample) {
System.out.println("IO sample from " + remoteDevice.get64BitAddress() +" - " + ioSample.toString());
}}
To stop receiving notifications of new IO samples, use the removeIOSampleListener(IIOSampleReceiveListener) method.
Removing the modem status listener.
[...]
XBeeDevice myXBeeDevice= ...MyIOSampleReceiveListener myIOSampleReceiveListener = ...
myXBeeDevice.addIOSampleListener(myIOSampleReceiveListener );
[...]
// Remove the IO sample listener.myXBeeDevice.removeIOSampleListener(myIOSampleReceiveListener);
[...]
IO Sampling exampleThe XBee Java Library includes a sample application that demonstrates how to configure a remotedevice to monitor IO lines and receive the IO samples in the local device. The example is located in thefollowing path:/examples/io/IOSamplingSample

Using the XBee Java Library Logging events
XBee Java Library User Guide 120
Logging eventsLogging is a fundamental part of applications, and every application includes this feature. A well-designed logging system is a useful utility for system administrators, developers and the supportteam and can save valuable time in sorting through the cause of issues. As users execute programs atthe front end, the system invisibly builds a vault of event information (log entries) for systemadministrators and the support team.There are many available logging libraries and logging frameworks for Java, but this API does notforce users to use any specific one. The XBee Java Library is built on top of the Simple LoggingFacade for Java (SLF4J). For more information about SLF4J, see http://www.slf4j.org/.SLF4J serves as a simple facade or abstraction for various logging frameworks (for example,java.util.logging, logback, log4j) allowing the end user to plug in the desired logging framework atdeployment time in the final application.Most of the important open source projects at the moment use this abstraction layer to let usersdecide on their final logging implementation strategy. It is also very common to use it in APIs andlibraries that are later integrated in a user application.SLF4J does not use a specific logging framework. To use a logging framework you must include abinding library in your application classpath as well as the final logger library (if applicable).
The only library that is required for use of the logging features in the XBee Java Library is the slf4j-api.jar, which has a simple syntax for logging messages. The SLF4J API exposes all the requiredmethods and functions to log messages from the XBee Java Library and from the final userapplication. It then relies on a binding library that is specific for each underlying logging framework tobe included by users in the final application.This section provides information to show you how to complete the following tasks:
n Download the SLF4J bindings
n Bind the library with SLF4J
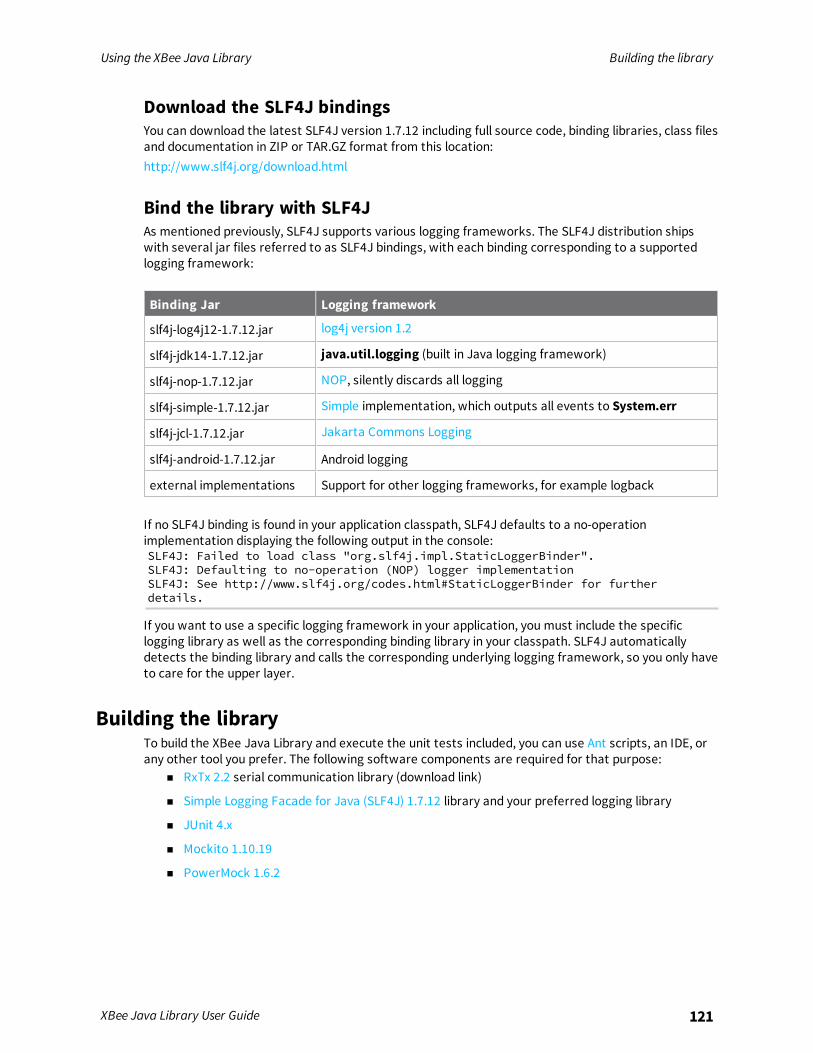
Using the XBee Java Library Building the library
XBee Java Library User Guide 121
Download the SLF4J bindingsYou can download the latest SLF4J version 1.7.12 including full source code, binding libraries, class filesand documentation in ZIP or TAR.GZ format from this location:http://www.slf4j.org/download.html
Bind the library with SLF4JAs mentioned previously, SLF4J supports various logging frameworks. The SLF4J distribution shipswith several jar files referred to as SLF4J bindings, with each binding corresponding to a supportedlogging framework:
Binding Jar Logging framework
slf4j-log4j12-1.7.12.jar log4j version 1.2
slf4j-jdk14-1.7.12.jar java.util.logging (built in Java logging framework)
slf4j-nop-1.7.12.jar NOP, silently discards all logging
slf4j-simple-1.7.12.jar Simple implementation, which outputs all events to System.err
slf4j-jcl-1.7.12.jar Jakarta Commons Logging
slf4j-android-1.7.12.jar Android logging
external implementations Support for other logging frameworks, for example logback
If no SLF4J binding is found in your application classpath, SLF4J defaults to a no-operationimplementation displaying the following output in the console:SLF4J: Failed to load class "org.slf4j.impl.StaticLoggerBinder".SLF4J: Defaulting to no-operation (NOP) logger implementationSLF4J: See http://www.slf4j.org/codes.html#StaticLoggerBinder for furtherdetails.
If you want to use a specific logging framework in your application, you must include the specificlogging library as well as the corresponding binding library in your classpath. SLF4J automaticallydetects the binding library and calls the corresponding underlying logging framework, so you only haveto care for the upper layer.
Building the libraryTo build the XBee Java Library and execute the unit tests included, you can use Ant scripts, an IDE, orany other tool you prefer. The following software components are required for that purpose:
n RxTx 2.2 serial communication library (download link)
n Simple Logging Facade for Java (SLF4J) 1.7.12 library and your preferred logging library
n JUnit 4.x
n Mockito 1.10.19
n PowerMock 1.6.2
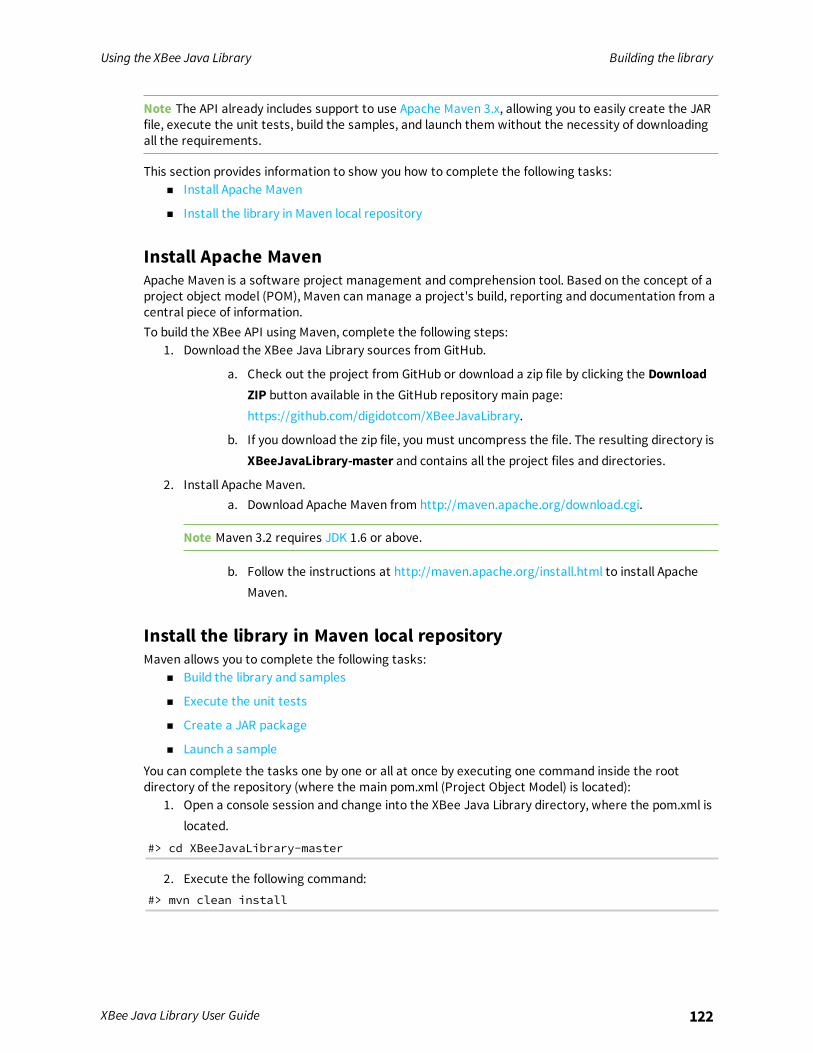
Using the XBee Java Library Building the library
XBee Java Library User Guide 122
Note The API already includes support to use Apache Maven 3.x, allowing you to easily create the JARfile, execute the unit tests, build the samples, and launch them without the necessity of downloadingall the requirements.
This section provides information to show you how to complete the following tasks:n Install Apache Maven
n Install the library in Maven local repository
Install Apache MavenApache Maven is a software project management and comprehension tool. Based on the concept of aproject object model (POM), Maven can manage a project's build, reporting and documentation from acentral piece of information.To build the XBee API using Maven, complete the following steps:
1. Download the XBee Java Library sources from GitHub.
a. Check out the project from GitHub or download a zip file by clicking the DownloadZIP button available in the GitHub repository main page:https://github.com/digidotcom/XBeeJavaLibrary.
b. If you download the zip file, you must uncompress the file. The resulting directory isXBeeJavaLibrary-master and contains all the project files and directories.
2. Install Apache Maven.a. Download Apache Maven from http://maven.apache.org/download.cgi.
Note Maven 3.2 requires JDK 1.6 or above.
b. Follow the instructions at http://maven.apache.org/install.html to install ApacheMaven.
Install the library in Maven local repositoryMaven allows you to complete the following tasks:
n Build the library and samples
n Execute the unit tests
n Create a JAR package
n Launch a sample
You can complete the tasks one by one or all at once by executing one command inside the rootdirectory of the repository (where the main pom.xml (Project Object Model) is located):
1. Open a console session and change into the XBee Java Library directory, where the pom.xml islocated.
#> cd XBeeJavaLibrary-master
2. Execute the following command:#> mvn clean install
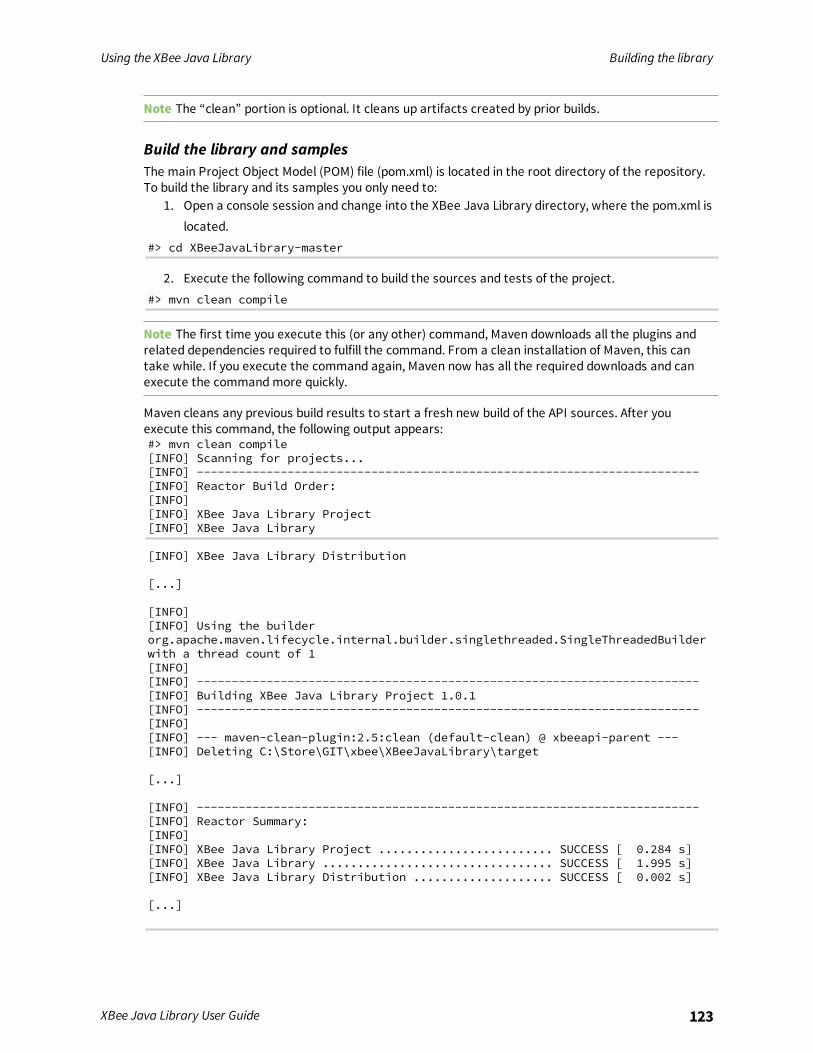
Using the XBee Java Library Building the library
XBee Java Library User Guide 123
Note The “clean” portion is optional. It cleans up artifacts created by prior builds.
Build the library and samplesThe main Project Object Model (POM) file (pom.xml) is located in the root directory of the repository.To build the library and its samples you only need to:
1. Open a console session and change into the XBee Java Library directory, where the pom.xml islocated.
#> cd XBeeJavaLibrary-master
2. Execute the following command to build the sources and tests of the project.#> mvn clean compile
Note The first time you execute this (or any other) command, Maven downloads all the plugins andrelated dependencies required to fulfill the command. From a clean installation of Maven, this cantake while. If you execute the command again, Maven now has all the required downloads and canexecute the commandmore quickly.
Maven cleans any previous build results to start a fresh new build of the API sources. After youexecute this command, the following output appears:#> mvn clean compile[INFO] Scanning for projects...[INFO] ------------------------------------------------------------------------[INFO] Reactor Build Order:[INFO][INFO] XBee Java Library Project[INFO] XBee Java Library
[INFO] XBee Java Library Distribution
[...]
[INFO][INFO] Using the builderorg.apache.maven.lifecycle.internal.builder.singlethreaded.SingleThreadedBuilderwith a thread count of 1[INFO][INFO] ------------------------------------------------------------------------[INFO] Building XBee Java Library Project 1.0.1[INFO] ------------------------------------------------------------------------[INFO][INFO] --- maven-clean-plugin:2.5:clean (default-clean) @ xbeeapi-parent ---[INFO] Deleting C:\Store\GIT\xbee\XBeeJavaLibrary\target
[...]
[INFO] ------------------------------------------------------------------------[INFO] Reactor Summary:[INFO][INFO] XBee Java Library Project ......................... SUCCESS [ 0.284 s][INFO] XBee Java Library ................................. SUCCESS [ 1.995 s][INFO] XBee Java Library Distribution .................... SUCCESS [ 0.002 s]
[...]
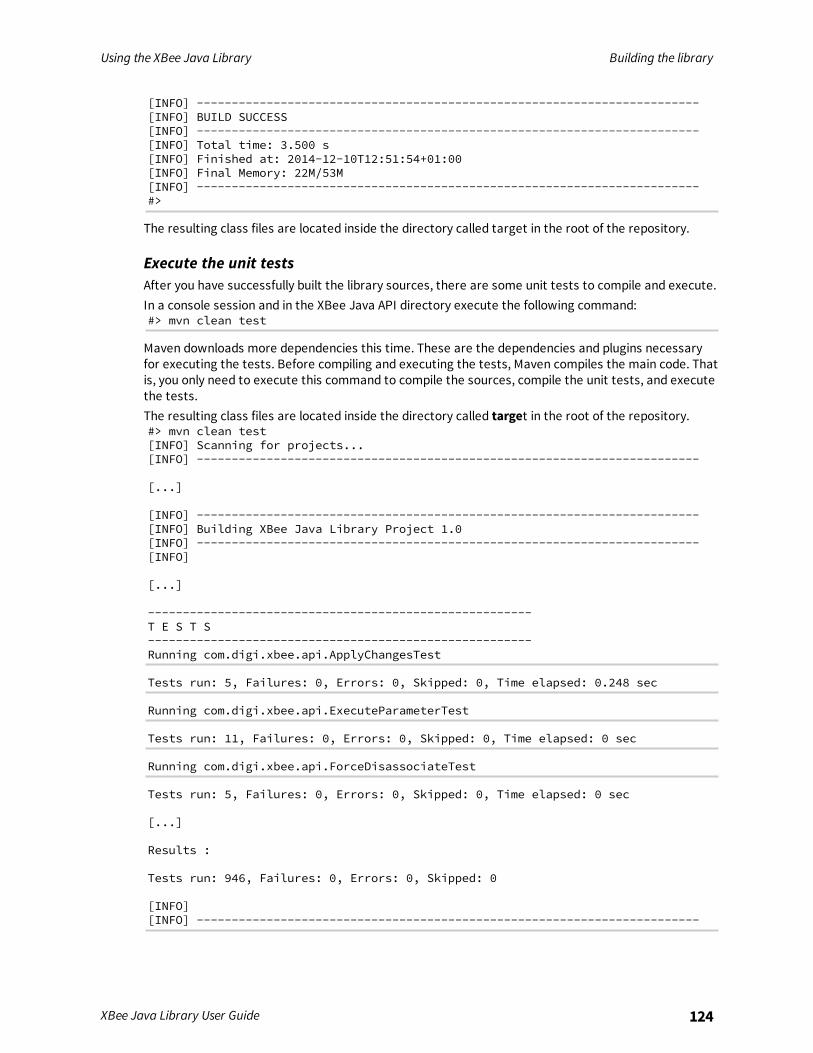
Using the XBee Java Library Building the library
XBee Java Library User Guide 124
[INFO] ------------------------------------------------------------------------[INFO] BUILD SUCCESS[INFO] ------------------------------------------------------------------------[INFO] Total time: 3.500 s[INFO] Finished at: 2014-12-10T12:51:54+01:00[INFO] Final Memory: 22M/53M[INFO] ------------------------------------------------------------------------#>
The resulting class files are located inside the directory called target in the root of the repository.
Execute the unit testsAfter you have successfully built the library sources, there are some unit tests to compile and execute.In a console session and in the XBee Java API directory execute the following command:#> mvn clean test
Maven downloads more dependencies this time. These are the dependencies and plugins necessaryfor executing the tests. Before compiling and executing the tests, Maven compiles the main code. Thatis, you only need to execute this command to compile the sources, compile the unit tests, and executethe tests.The resulting class files are located inside the directory called target in the root of the repository.#> mvn clean test[INFO] Scanning for projects...[INFO] ------------------------------------------------------------------------
[...]
[INFO] ------------------------------------------------------------------------[INFO] Building XBee Java Library Project 1.0[INFO] ------------------------------------------------------------------------[INFO]
[...]
-------------------------------------------------------T E S T S-------------------------------------------------------Running com.digi.xbee.api.ApplyChangesTest
Tests run: 5, Failures: 0, Errors: 0, Skipped: 0, Time elapsed: 0.248 sec
Running com.digi.xbee.api.ExecuteParameterTest
Tests run: 11, Failures: 0, Errors: 0, Skipped: 0, Time elapsed: 0 sec
Running com.digi.xbee.api.ForceDisassociateTest
Tests run: 5, Failures: 0, Errors: 0, Skipped: 0, Time elapsed: 0 sec
[...]
Results :
Tests run: 946, Failures: 0, Errors: 0, Skipped: 0
[INFO][INFO] ------------------------------------------------------------------------
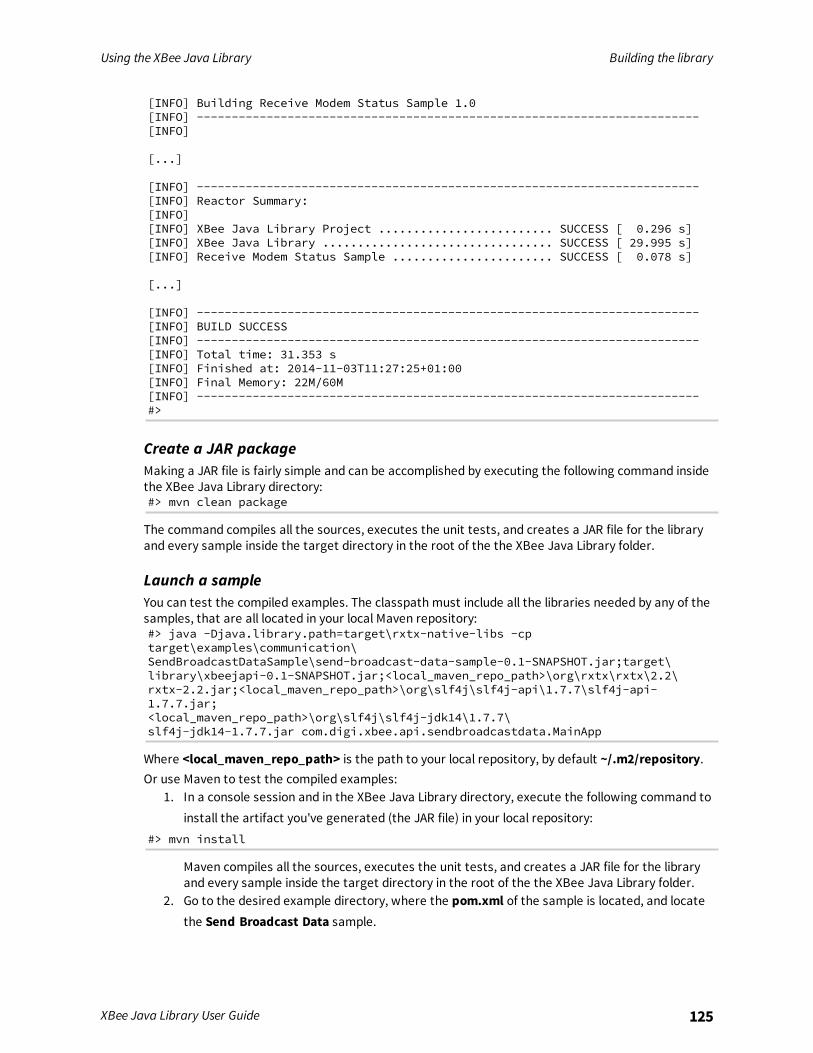
Using the XBee Java Library Building the library
XBee Java Library User Guide 125
[INFO] Building Receive Modem Status Sample 1.0[INFO] ------------------------------------------------------------------------[INFO]
[...]
[INFO] ------------------------------------------------------------------------[INFO] Reactor Summary:[INFO][INFO] XBee Java Library Project ......................... SUCCESS [ 0.296 s][INFO] XBee Java Library ................................. SUCCESS [ 29.995 s][INFO] Receive Modem Status Sample ....................... SUCCESS [ 0.078 s]
[...]
[INFO] ------------------------------------------------------------------------[INFO] BUILD SUCCESS[INFO] ------------------------------------------------------------------------[INFO] Total time: 31.353 s[INFO] Finished at: 2014-11-03T11:27:25+01:00[INFO] Final Memory: 22M/60M[INFO] ------------------------------------------------------------------------#>
Create a JAR packageMaking a JAR file is fairly simple and can be accomplished by executing the following command insidethe XBee Java Library directory:#> mvn clean package
The command compiles all the sources, executes the unit tests, and creates a JAR file for the libraryand every sample inside the target directory in the root of the the XBee Java Library folder.
Launch a sampleYou can test the compiled examples. The classpath must include all the libraries needed by any of thesamples, that are all located in your local Maven repository:#> java -Djava.library.path=target\rxtx-native-libs -cptarget\examples\communication\SendBroadcastDataSample\send-broadcast-data-sample-0.1-SNAPSHOT.jar;target\library\xbeejapi-0.1-SNAPSHOT.jar;<local_maven_repo_path>\org\rxtx\rxtx\2.2\rxtx-2.2.jar;<local_maven_repo_path>\org\slf4j\slf4j-api\1.7.7\slf4j-api-1.7.7.jar;<local_maven_repo_path>\org\slf4j\slf4j-jdk14\1.7.7\slf4j-jdk14-1.7.7.jar com.digi.xbee.api.sendbroadcastdata.MainApp
Where <local_maven_repo_path> is the path to your local repository, by default ~/.m2/repository.Or use Maven to test the compiled examples:
1. In a console session and in the XBee Java Library directory, execute the following command toinstall the artifact you've generated (the JAR file) in your local repository:
#> mvn install
Maven compiles all the sources, executes the unit tests, and creates a JAR file for the libraryand every sample inside the target directory in the root of the the XBee Java Library folder.
2. Go to the desired example directory, where the pom.xml of the sample is located, and locatethe Send Broadcast Data sample.
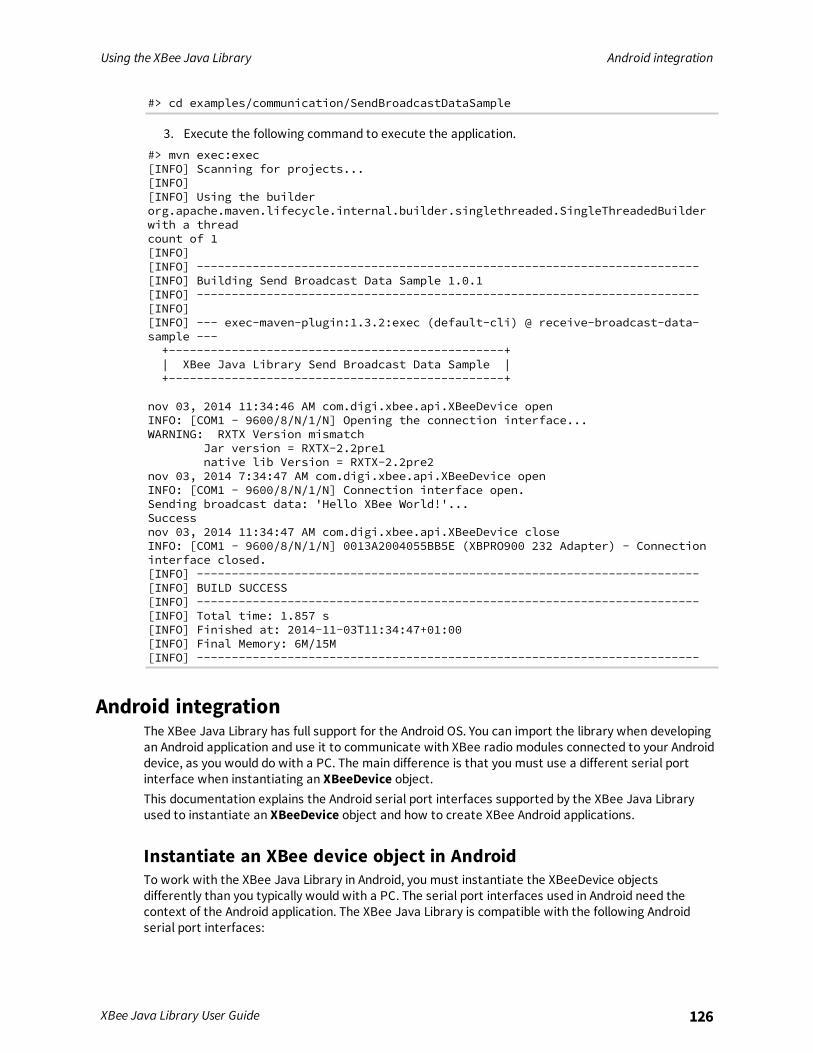
Using the XBee Java Library Android integration
XBee Java Library User Guide 126
#> cd examples/communication/SendBroadcastDataSample
3. Execute the following command to execute the application.#> mvn exec:exec[INFO] Scanning for projects...[INFO][INFO] Using the builderorg.apache.maven.lifecycle.internal.builder.singlethreaded.SingleThreadedBuilderwith a threadcount of 1[INFO][INFO] ------------------------------------------------------------------------[INFO] Building Send Broadcast Data Sample 1.0.1[INFO] ------------------------------------------------------------------------[INFO][INFO] --- exec-maven-plugin:1.3.2:exec (default-cli) @ receive-broadcast-data-sample ---+------------------------------------------------+| XBee Java Library Send Broadcast Data Sample |+------------------------------------------------+
nov 03, 2014 11:34:46 AM com.digi.xbee.api.XBeeDevice openINFO: [COM1 - 9600/8/N/1/N] Opening the connection interface...WARNING: RXTX Version mismatch
Jar version = RXTX-2.2pre1native lib Version = RXTX-2.2pre2
nov 03, 2014 7:34:47 AM com.digi.xbee.api.XBeeDevice openINFO: [COM1 - 9600/8/N/1/N] Connection interface open.Sending broadcast data: 'Hello XBee World!'...Successnov 03, 2014 11:34:47 AM com.digi.xbee.api.XBeeDevice closeINFO: [COM1 - 9600/8/N/1/N] 0013A2004055BB5E (XBPRO900 232 Adapter) - Connectioninterface closed.[INFO] ------------------------------------------------------------------------[INFO] BUILD SUCCESS[INFO] ------------------------------------------------------------------------[INFO] Total time: 1.857 s[INFO] Finished at: 2014-11-03T11:34:47+01:00[INFO] Final Memory: 6M/15M[INFO] ------------------------------------------------------------------------
Android integrationThe XBee Java Library has full support for the Android OS. You can import the library when developingan Android application and use it to communicate with XBee radio modules connected to your Androiddevice, as you would do with a PC. The main difference is that you must use a different serial portinterface when instantiating an XBeeDevice object.This documentation explains the Android serial port interfaces supported by the XBee Java Libraryused to instantiate an XBeeDevice object and how to create XBee Android applications.
Instantiate an XBee device object in AndroidTo work with the XBee Java Library in Android, you must instantiate the XBeeDevice objectsdifferently than you typically would with a PC. The serial port interfaces used in Android need thecontext of the Android application. The XBee Java Library is compatible with the following Androidserial port interfaces:
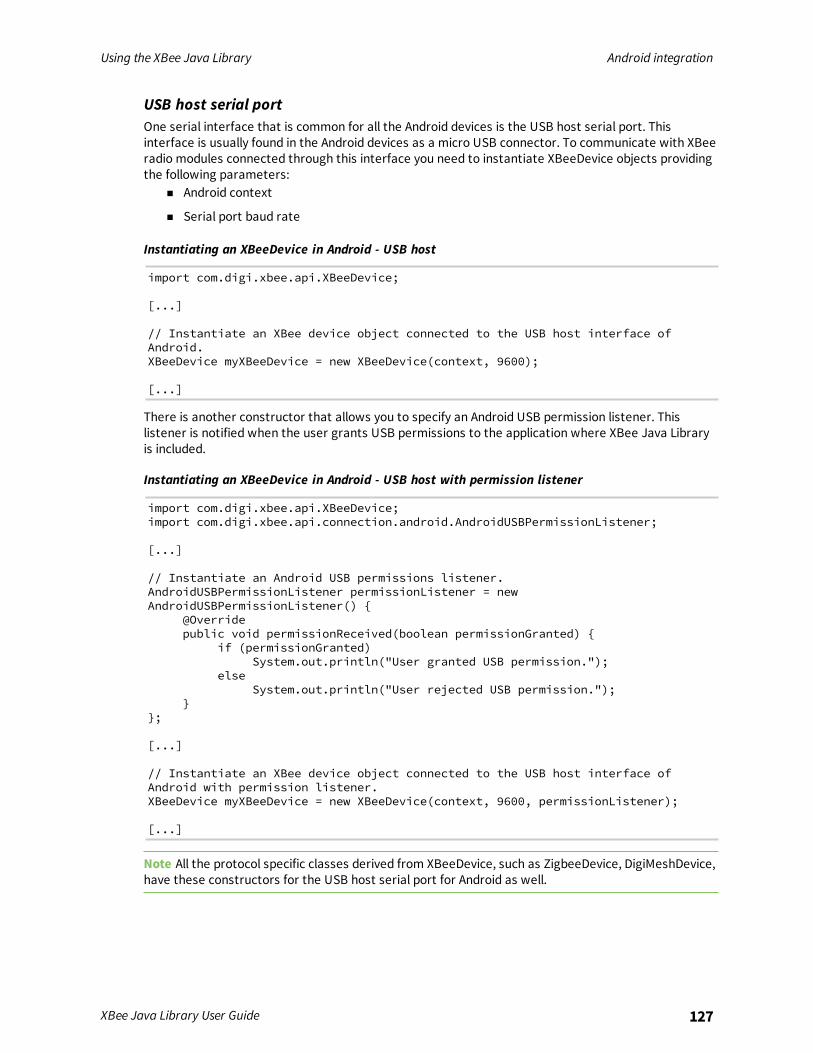
Using the XBee Java Library Android integration
XBee Java Library User Guide 127
USB host serial portOne serial interface that is common for all the Android devices is the USB host serial port. Thisinterface is usually found in the Android devices as a micro USB connector. To communicate with XBeeradio modules connected through this interface you need to instantiate XBeeDevice objects providingthe following parameters:
n Android context
n Serial port baud rate
Instantiating an XBeeDevice in Android - USB host
import com.digi.xbee.api.XBeeDevice;
[...]
// Instantiate an XBee device object connected to the USB host interface ofAndroid.XBeeDevice myXBeeDevice = new XBeeDevice(context, 9600);
[...]
There is another constructor that allows you to specify an Android USB permission listener. Thislistener is notified when the user grants USB permissions to the application where XBee Java Libraryis included.
Instantiating an XBeeDevice in Android - USB host with permission listener
import com.digi.xbee.api.XBeeDevice;import com.digi.xbee.api.connection.android.AndroidUSBPermissionListener;
[...]
// Instantiate an Android USB permissions listener.AndroidUSBPermissionListener permissionListener = newAndroidUSBPermissionListener() {
@Overridepublic void permissionReceived(boolean permissionGranted) {
if (permissionGranted)System.out.println("User granted USB permission.");
elseSystem.out.println("User rejected USB permission.");
}};
[...]
// Instantiate an XBee device object connected to the USB host interface ofAndroid with permission listener.XBeeDevice myXBeeDevice = new XBeeDevice(context, 9600, permissionListener);
[...]
Note All the protocol specific classes derived from XBeeDevice, such as ZigbeeDevice, DigiMeshDevice,have these constructors for the USB host serial port for Android as well.
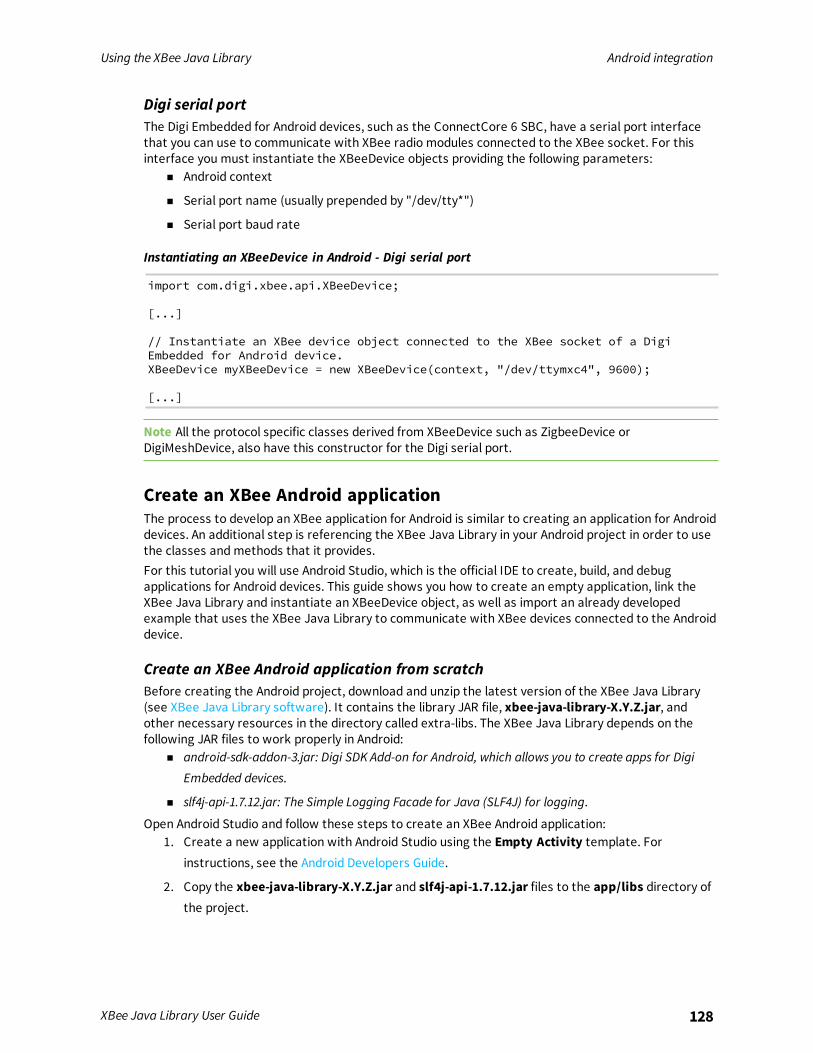
Using the XBee Java Library Android integration
XBee Java Library User Guide 128
Digi serial portThe Digi Embedded for Android devices, such as the ConnectCore 6 SBC, have a serial port interfacethat you can use to communicate with XBee radio modules connected to the XBee socket. For thisinterface you must instantiate the XBeeDevice objects providing the following parameters:
n Android context
n Serial port name (usually prepended by "/dev/tty*")
n Serial port baud rate
Instantiating an XBeeDevice in Android - Digi serial port
import com.digi.xbee.api.XBeeDevice;
[...]
// Instantiate an XBee device object connected to the XBee socket of a DigiEmbedded for Android device.XBeeDevice myXBeeDevice = new XBeeDevice(context, "/dev/ttymxc4", 9600);
[...]
Note All the protocol specific classes derived from XBeeDevice such as ZigbeeDevice orDigiMeshDevice, also have this constructor for the Digi serial port.
Create an XBee Android applicationThe process to develop an XBee application for Android is similar to creating an application for Androiddevices. An additional step is referencing the XBee Java Library in your Android project in order to usethe classes andmethods that it provides.For this tutorial you will use Android Studio, which is the official IDE to create, build, and debugapplications for Android devices. This guide shows you how to create an empty application, link theXBee Java Library and instantiate an XBeeDevice object, as well as import an already developedexample that uses the XBee Java Library to communicate with XBee devices connected to the Androiddevice.
Create an XBee Android application from scratchBefore creating the Android project, download and unzip the latest version of the XBee Java Library(see XBee Java Library software). It contains the library JAR file, xbee-java-library-X.Y.Z.jar, andother necessary resources in the directory called extra-libs. The XBee Java Library depends on thefollowing JAR files to work properly in Android:
n android-sdk-addon-3.jar: Digi SDK Add-on for Android, which allows you to create apps for Digi
Embedded devices.
n slf4j-api-1.7.12.jar: The Simple Logging Facade for Java (SLF4J) for logging.
Open Android Studio and follow these steps to create an XBee Android application:1. Create a new application with Android Studio using the Empty Activity template. For
instructions, see the Android Developers Guide.
2. Copy the xbee-java-library-X.Y.Z.jar and slf4j-api-1.7.12.jar files to the app/libs directory ofthe project.
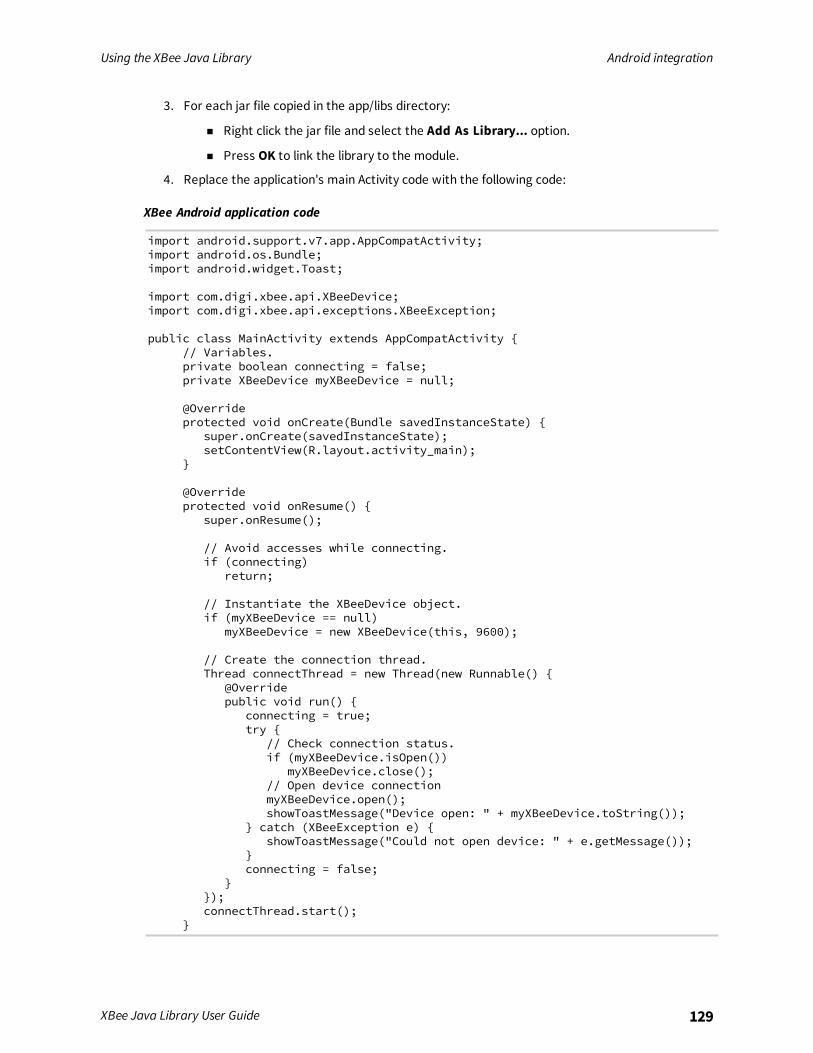
Using the XBee Java Library Android integration
XBee Java Library User Guide 129
3. For each jar file copied in the app/libs directory:
n Right click the jar file and select the Add As Library... option.
n Press OK to link the library to the module.
4. Replace the application's main Activity code with the following code:
XBee Android application code
import android.support.v7.app.AppCompatActivity;import android.os.Bundle;import android.widget.Toast;
import com.digi.xbee.api.XBeeDevice;import com.digi.xbee.api.exceptions.XBeeException;
public class MainActivity extends AppCompatActivity {// Variables.private boolean connecting = false;private XBeeDevice myXBeeDevice = null;
@Overrideprotected void onCreate(Bundle savedInstanceState) {
super.onCreate(savedInstanceState);setContentView(R.layout.activity_main);
}
@Overrideprotected void onResume() {
super.onResume();
// Avoid accesses while connecting.if (connecting)
return;
// Instantiate the XBeeDevice object.if (myXBeeDevice == null)
myXBeeDevice = new XBeeDevice(this, 9600);
// Create the connection thread.Thread connectThread = new Thread(new Runnable() {
@Overridepublic void run() {
connecting = true;try {
// Check connection status.if (myXBeeDevice.isOpen())
myXBeeDevice.close();// Open device connectionmyXBeeDevice.open();showToastMessage("Device open: " + myXBeeDevice.toString());
} catch (XBeeException e) {showToastMessage("Could not open device: " + e.getMessage());
}connecting = false;
}});connectThread.start();
}
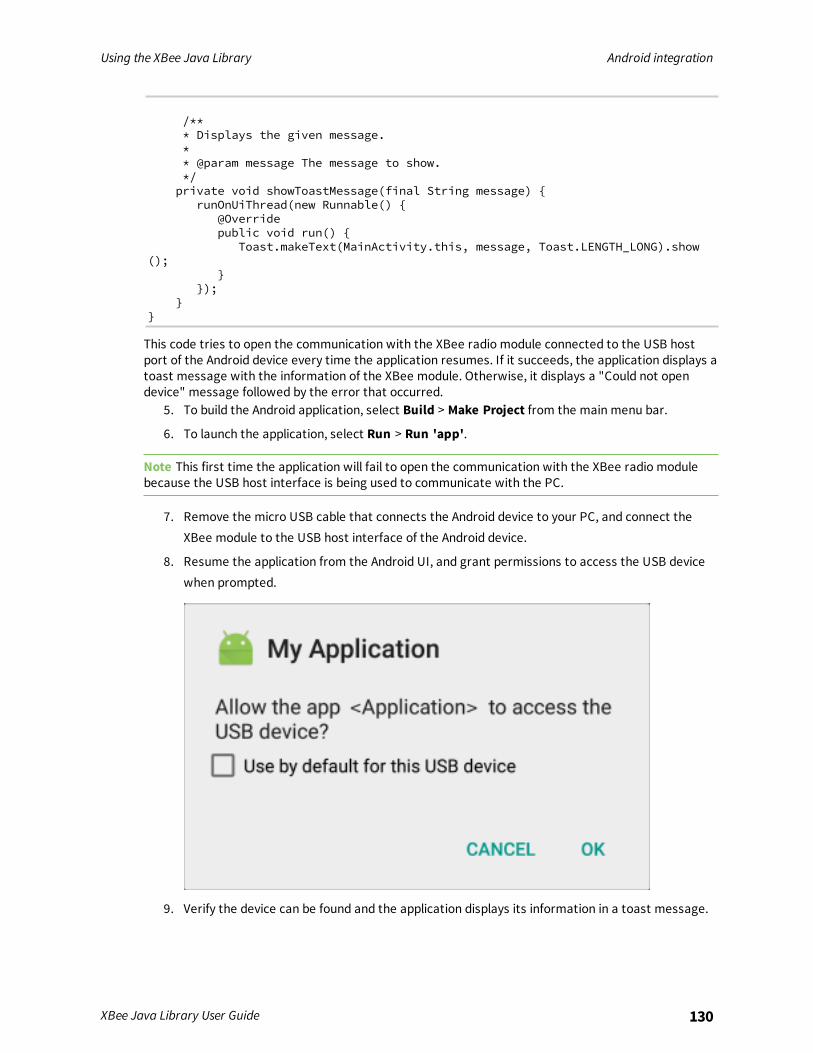
Using the XBee Java Library Android integration
XBee Java Library User Guide 130
/*** Displays the given message.** @param message The message to show.*/private void showToastMessage(final String message) {
runOnUiThread(new Runnable() {@Overridepublic void run() {
Toast.makeText(MainActivity.this, message, Toast.LENGTH_LONG).show();
}});
}}
This code tries to open the communication with the XBee radio module connected to the USB hostport of the Android device every time the application resumes. If it succeeds, the application displays atoast message with the information of the XBee module. Otherwise, it displays a "Could not opendevice" message followed by the error that occurred.
5. To build the Android application, select Build > Make Project from the main menu bar.
6. To launch the application, select Run > Run 'app'.
Note This first time the application will fail to open the communication with the XBee radio modulebecause the USB host interface is being used to communicate with the PC.
7. Remove the micro USB cable that connects the Android device to your PC, and connect theXBee module to the USB host interface of the Android device.
8. Resume the application from the Android UI, and grant permissions to access the USB devicewhen prompted.
9. Verify the device can be found and the application displays its information in a toast message.
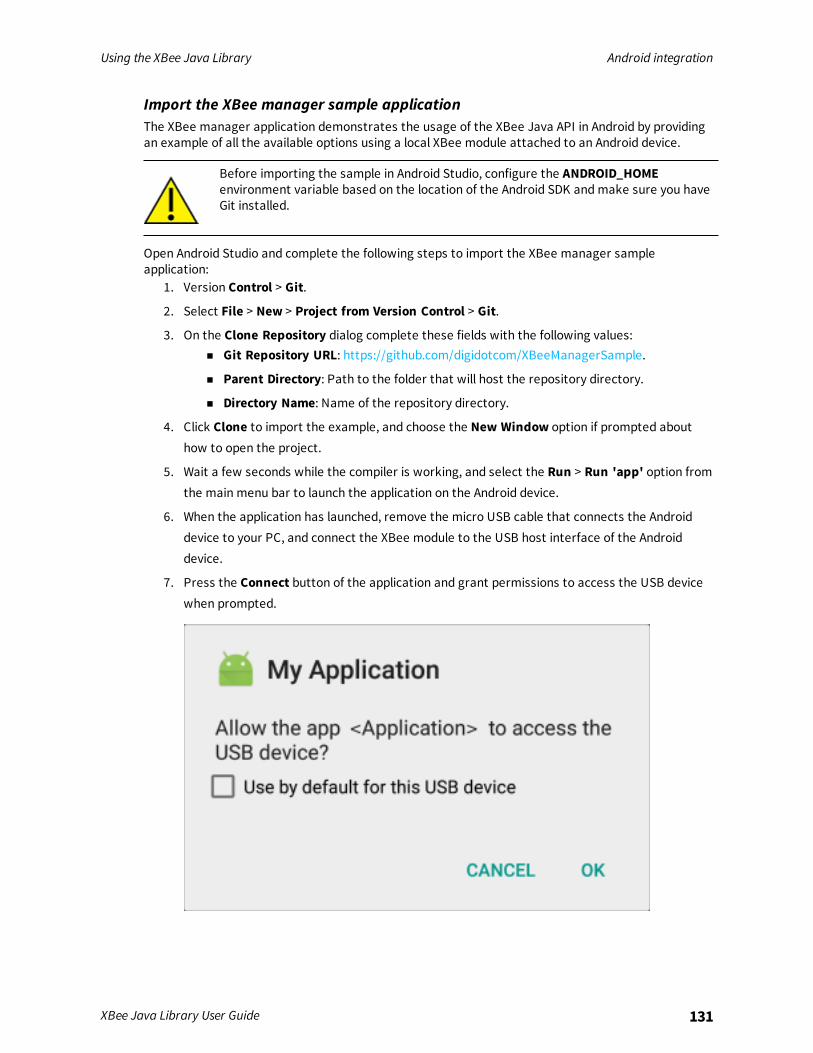
Using the XBee Java Library Android integration
XBee Java Library User Guide 131
Import the XBee manager sample applicationThe XBee manager application demonstrates the usage of the XBee Java API in Android by providingan example of all the available options using a local XBee module attached to an Android device.
Before importing the sample in Android Studio, configure the ANDROID_HOMEenvironment variable based on the location of the Android SDK andmake sure you haveGit installed.
Open Android Studio and complete the following steps to import the XBee manager sampleapplication:
1. Version Control > Git.
2. Select File > New > Project from Version Control > Git.
3. On the Clone Repository dialog complete these fields with the following values:n Git Repository URL: https://github.com/digidotcom/XBeeManagerSample.
n Parent Directory: Path to the folder that will host the repository directory.
n Directory Name: Name of the repository directory.
4. Click Clone to import the example, and choose the New Window option if prompted abouthow to open the project.
5. Wait a few seconds while the compiler is working, and select the Run > Run 'app' option fromthe main menu bar to launch the application on the Android device.
6. When the application has launched, remove the micro USB cable that connects the Androiddevice to your PC, and connect the XBee module to the USB host interface of the Androiddevice.
7. Press the Connect button of the application and grant permissions to access the USB devicewhen prompted.
Using the XBee Java Library Android integration
XBee Java Library User Guide 132
The application allows you to communicate and configure the XBee module connected to your Androiddevice and other remote XBee modules operating in the same network as the local module. When youopen the connection with the local XBee module, the application layout changes and three new tabsare displayed:
n XBee Device Info: Displays information about the attached XBee module. You can configuresome parameters from this tab.
n Remote XBee Devices: Discovers XBee modules in the same network as your local XBeemodule. You can select a remote device, change some parameters, and send data to it.
n Received XBee Data: Displays a table with received data from other XBee modules in thenetwork.
XBee Java samples
The XBee Java Library includes several samples to demonstrate how to do the following:n Communicate with your modules
n Configure your modules
n Read the IO lines
n Perform other common operations
All of the sample applications are contained in the examples folder of the XBJL-X.Y.Z, organized incategories. Every sample includes the source code and a ReadMe file to clarify the purpose and therequired setup to launch the application.
Configuration samples 134Network samples - discover devices 135Communication samples 135IO samples 140
XBee Java Library User Guide 133
XBee Java samples Configuration samples
XBee Java Library User Guide 134
Configuration samplesn Manage common parameters
n Set and get parameters
n Reset
n Connect to access point (Wi-Fi devices)
Manage common parametersThis sample Java application shows how to get and set common parameters of the XBee device.Common parameters are split in cached and non-cached parameters. For that reason, the applicationrefreshes the cached parameters before reading and displaying them. The application thenconfigures, reads, and displays the value of non-cached parameters.The application uses the specific setters and getters provided by the XBee device object to configureand read the different parameters.You can locate the example in the following path:examples/configuration/ManageCommonParametersSample
Note For more information about how to manage common parameters, see Read and set commonparameters.
Set and get parametersThis sample Java application shows how to set and get parameters of a local or remote XBee device.Use this method when you need to set or get the value of a parameter that does not have its owngetter and setter within the XBee device object.The application sets the value of four parameters with different value types:
n String
n Byte
n Array
n Integer
The application then reads the parameters from the device to verify that the read values are thesame as the values that were set.You can locate the example in the following path:examples/configuration/SetAndGetParametersSample
Note For more information about how to get and set other parameters, see Read, set and executeother parameters.
ResetThis sample Java application shows how to perform a software reset on the local XBee module.You can locate the example in the following path:examples/configuration/ResetModuleSample
Note For more information about how to reset a module, see Reset the device.
XBee Java samples Network samples - discover devices
XBee Java Library User Guide 135
Connect to access point (Wi-Fi devices)This sample Java application shows how to configure a Wi-Fi module to connect to a specific accesspoint and read its addressing settings.You can locate the example at the following path:examples/configuration/ConnectToAccessPointFor more information about connecting to an access point, see Configure Wi-Fi settings.
Network samples - discover devicesThis sample Java application demonstrates how to obtain the XBee network object from a local XBeedevice and discover the remote XBee devices that compose the network. The example adds adiscovery listener, so the callbacks provided by the listener object receive the events.The remote XBee devices are printed out as soon as they are found during the discovery.You can locate the example in the following path:examples/network/DiscoverDevicesSample
Note For more information about how to perform a network discovery, see Discover the network.
Communication samples
Send dataThis sample Java application shows how to send data from the XBee device to another remote deviceon the same network using the XBee Java Library. In this example, the application sends data using areliable transmission method. The application blocks during the transmission request, but you arenotified if there is any error during the process.The application sends data to a remote XBee device on the network with a specific node identifier(name).You can locate the example in the following path:examples/communication/SendDataSample
Note For more information about how to send data, see Send data.
Send data asynchronouslyThis sample Java application shows how to send data asynchronously from the XBee device toanother remote device on the same network using the XBee Java Library. Transmitting dataasynchronously means the execution is not blocked during the transmit request, but you cannotdetermine if the data was sent successfully.The application sends data asynchronously to a remote XBee device on the network with a specificnode identifier (name).You can locate the example in the following path:examples/communication/SendDataAsyncSample
Note For more information about how to get and set other parameters, see Send data.
XBee Java samples Communication samples
XBee Java Library User Guide 136
Send broadcast dataThis sample Java application shows how to send data from the local XBee device to all remote deviceson the same network (broadcast) using the XBee Java Library. The application blocks during thetransmission request, but you are notified if there is any error during the process.You can locate the example in the following path:examples/communication/SendBroadcastDataSample
Note For more information about how to get and set other parameters, see Send data to all devicesof the network.
Send CoAP data (Thread devices)This sample Java application shows how to send CoAP data to another Thread device specified by itsIPv6 address.You can find the example at the following path:examples/communication/coap/SendCoAPDataSample
Note For more information about sending CoAP data, see Send CoAP data.
Send explicit dataThis sample Java application shows how to send data in application layer (explicit) format to a remoteZigbee device on the same network as the local one using the XBee Java Library. In this example, theXBee module sends explicit data using a reliable transmission method. The application blocks duringthe transmission request, but you are notified if there is any error during the process.You can locate the example in the following path:examples/communication/explicit/SendExplicitDataSample
Note For more information about how to get and set other parameters, see Send explicit data.
Send explicit data asynchronouslyThis sample Java application shows how to send data in application layer (explicit) formatasynchronously to a remote Zigbee device on the same network as the local one using the XBee JavaLibrary. Transmitting data asynchronously means the execution is not blocked during the transmitrequest, but you cannot determine if the data was sent successfully.You can locate the example in the following path:examples/communication/explicit/SendExplicitDataAsyncSample
Note For more information about how to get and set other parameters, see Send explicit data.
Send broadcast explicit dataThis sample Java application shows how to send data in application layer (explicit) format to allremote devices on the same network (broadcast) as the local one using the XBee Java Library. Theapplication blocks during the transmission request, but you are notified if there is any error during theprocess.You can locate the example in the following path:examples/communication/explicit/SendBroadcastExplicitDataSample
XBee Java samples Communication samples
XBee Java Library User Guide 137
Note For more information about how to get and set other parameters, see Send explicit data to alldevices in the network.
Send IP data (IP devices)This sample Java application shows how to send IP data to another device specified by its IP addressand port number.You can find the example at the following path:examples/communication/ip/SendIPDataSample
Note For more information about sending IP data, see Send IP data.
Send IPv6 data (Thread devices)This sample Java application shows how to send UDP data to another device specified by its IPv6address and port number.You can find the example at the following path:examples/communication/ip/SendIPv6DataSample
Note For more information about sending IP data, see Send IPv6 data.
Send SMS (Cellular devices)This sample Java application shows how to send an SMS to a phone or Cellular device.You can find the example at the following path:examples/communication/cellular/SendSMSSample
Note For more information about how to send SMS messages, see Send SMS messages.
Send UDP data (IP devices)This sample Java application shows how to send UDP data to another device specified by its IPaddress and port number.You can find the example at the following path:examples/communication/ip/SendUDPDataSample
Note For more information about sending IP data, see Send IP data.
Receive dataThis sample Java application shows how data packets are received from another XBee device on thesame network.The application prints the received data to the standard output in ASCII and hexadecimal formatsafter the sender address.You can locate the example in the following path:examples/communication/ReceiveDataSample
Note For more information about how to get and set other parameters, see Data reception callback.
XBee Java samples Communication samples
XBee Java Library User Guide 138
Receive CoAP data (Thread devices)This sample Java application shows how a Thread device receives CoAP data using a callbackexecuted every time it receives new CoAP data.You can find the example at the following path:examples/communication/coap/ReceiveCoAPDataSample
Note For more information about how to receive IPv6 data, see Receive CoAP data.
Receive data pollingThis sample Java application shows how data packets are received from another XBee device on thesame network using a polling mechanism.The application prints the data that was received to the standard output in ASCII and hexadecimalformats after the sender address.You can locate the example in the following path:examples/communication/ReceiveDataPollingSample
Note For more information about how to get and set other parameters, see Polling for data.
Receive explicit dataThis sample Java application shows how a Zigbee device receives data in application layer (explicit)format using a callback executed every time new data is received. Before receiving data in explicitformat, the API output mode of the Zigbee device is configured in explicit mode.You can locate the example in the following path:examples/communication/explicit/ReceiveExplicitDataSample
Note For more information about how to get and set other parameters, see Explicit data receptioncallback.
Receive explicit data pollingThis sample Java application shows how a Zigbee device receives data in application layer (explicit)format using a polling mechanism. Before receiving data in explicit format, the API output mode of theZigbee device is configured in explicit mode.You can locate the example in the following path:examples/communication/explicit/ReceiveExplicitDataPollingSample
Note For more information about how to get and set other parameters, see Polling for data.
Receive IP data (IP devices)This sample Java application shows how an IP device receives IP data using a callback executed everytime it receives new IP data.You can find the example at the following path:examples/communication/ip/ReceiveIPDataSample
XBee Java samples Communication samples
XBee Java Library User Guide 139
Note For more information about how to receive IP data using the polling mechanism, see Receive IPdata.
Receive IPv6 data (Thread devices)This sample Java application shows how a Thread device receives IPv6 data using a callback executedevery time it receives new IPv6 data.You can find the example at the following path:examples/communication/ip/ReceiveIPv6DataSample
Note For more information about how to receive IPv6 data, see Receive IPv6 data.
Receive SMS (Cellular devices)This sample Java application shows how to receive SMS messages configuring a callback executedwhen new SMS is received.You can find the example at the following path:examples/communication/cellular/ReceiveSMSSample
Note For more information about how to receive SMS messages see Receive SMS messages.
Receive modem statusThis sample Java application shows how modem status packets (events related to the device and thenetwork) are handled using the API.The application prints the modem status events to the standard output when received.You can locate the example in the following path:examples/communication/ReceiveModemStatusSample
Note For more information about how to get and set other parameters, see Receive modem statusevents.
Connect to echo server (IP devices)This sample Java application shows how IP devices can connect to an echo server, send data to it andreads the echoed data.You can find the example at the following path:examples/communication/ip/ConnectToEchoServerSample
Note For more information about how to send and receive IP data, see Send IP data and Receive IPdata.
Knock Knock (IP devices)This sample Java application demonstrates the communication with IP devices. It starts a simple webserver and connects to it by sending a message to start a Knock Knock joke.You can find the example at the following path:examples/communication/ip/KnockKnockSample

XBee Java samples IO samples
XBee Java Library User Guide 140
Note For more information about how to send and receive IP data, see Send IP data and Receive IPdata.
IO samplesn Local DIO
n Local ADC
n Remote DIO
n Remote ADC
n IO sampling
Local DIOThis sample Java application shows how to set and read XBee digital lines of the device attached tothe serial/USB port of your PC.The application configures two IO lines of the XBee device: one as a digital input (button) and theother as a digital output (LED). The application reads the status of the input line periodically andupdates the output to follow the input.While you press the push button, the LED should be lit.You can locate the example in the following path:examples/io/LocalDIOSample
Note For more information about how to get and set other parameters, see Digital input/output.
Local ADCThis sample Java application shows how to read XBee analog inputs of the device attached to theserial/USB port of your PC.The application configures an IO line of the XBee device as ADC. It periodically reads its value andprints it in the output console.You can locate the example in the following path:examples/io/LocalADCSample
Note For more information about how to get and set other parameters, see ADC.
Remote DIOThis sample Java application shows how to set and read XBee digital lines of remote devices.The application configures two IO lines of the XBee devices: one in the remote device as a digital input(button) and the other in the local device as a digital output (LED). The application reads the status ofthe input line periodically and updates the output to follow the input.While you press the push button, the LED should be lit.You can locate the example in the following path:examples/io/RemoteDIOSample
Note For more information about how to get and set other parameters, see Digital input/output.
XBee Java samples IO samples
XBee Java Library User Guide 141
Remote ADCThis sample Java application shows how to read XBee analog inputs of remote XBee devices.The application configures an IO line of the remote XBee device as ADC. It periodically reads its valueand prints it in the output console.You can locate the example in the following path:examples/io/RemoteADCSample
Note For more information about how to get and set other parameters, see ADC.
IO samplingThis sample Java application shows how to configure a remote device to send automatic IO samplesand how to read them from the local module.The application configures two IO lines of the remote XBee device: one as digital input (button) andthe other as ADC, and enables periodic sampling and change detection. The device sends a sampleevery five seconds containing the values of the two monitored lines. The device sends another sampleevery time the button is pressed or released, which only contains the value of this digital line.The application registers a listener in the local device to receive and handle all IO samples sent by theremote XBee module.You can locate the example in the following path:examples/io/IOSamplingSample
Note For more information about how to get and set other parameters, see Register an IO samplelistener.
XBee Java Library API reference
Welcome to the XBee Java Library API reference.This guide provides detailed information about the features and capabilities of this product. You canfind additional detailed reference information in the XBee Java Library Javadoc. The Javadocdocumentation is helpful for developers who are interested in using and extending the libraryfunctionality.The Javadoc is available in two ways:
n Off-line use. The library is included in the XBee Java Library release package available atGitHub, inside the javadoc directory.
n Online on our site. You can browse the documentation at XBee Java Library Javadoc.
XBee Java Library User Guide 142
Frequently Asked Questions (FAQs)
The FAQ section contains answers to general questions related to the XBee Java Library.
What is XCTU and how do I download it? 144How do I find the serial port and baud rate of my module? 144Can I use the XBee Java Library with modules in AT operating mode? 144
XBee Java Library User Guide 143
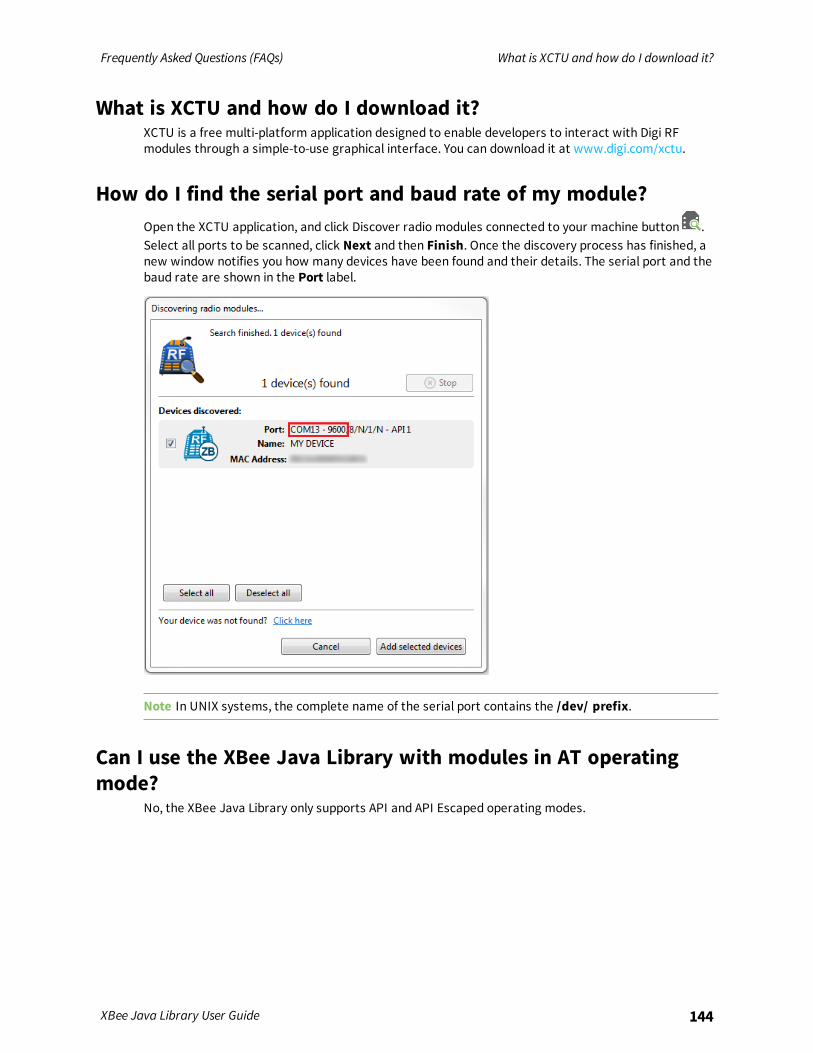
Frequently Asked Questions (FAQs) What is XCTU and how do I download it?
XBee Java Library User Guide 144
What is XCTU and how do I download it?XCTU is a free multi-platform application designed to enable developers to interact with Digi RFmodules through a simple-to-use graphical interface. You can download it at www.digi.com/xctu.
How do I find the serial port and baud rate of my module?Open the XCTU application, and click Discover radio modules connected to your machine button .Select all ports to be scanned, click Next and then Finish. Once the discovery process has finished, anew window notifies you how many devices have been found and their details. The serial port and thebaud rate are shown in the Port label.
Note In UNIX systems, the complete name of the serial port contains the /dev/ prefix.
Can I use the XBee Java Library with modules in AT operatingmode?
No, the XBee Java Library only supports API and API Escaped operating modes.
Additional resources
Contribute now!All ideas and contributions are welcome. If you find a bug or want to request new features, you canreport these on GitHub.
Digi ForumThe Digi Forum is the place where you can ask questions and receive answers from other members ofthe community.
XBee Java Library User Guide 145