Embed Size (px)
Citation preview
WS2812 Breakout Hookup Guide a learn.sparkfun.com tutorial
Available online at: http://sfe.io/t105
Contents
IntroductionWS2812 Hardware OverviewLilyPad PixelAddressable LED StripsAddressable Through-Hole LEDHardware HookupAdding FirmwareResources and Going Further
Introduction
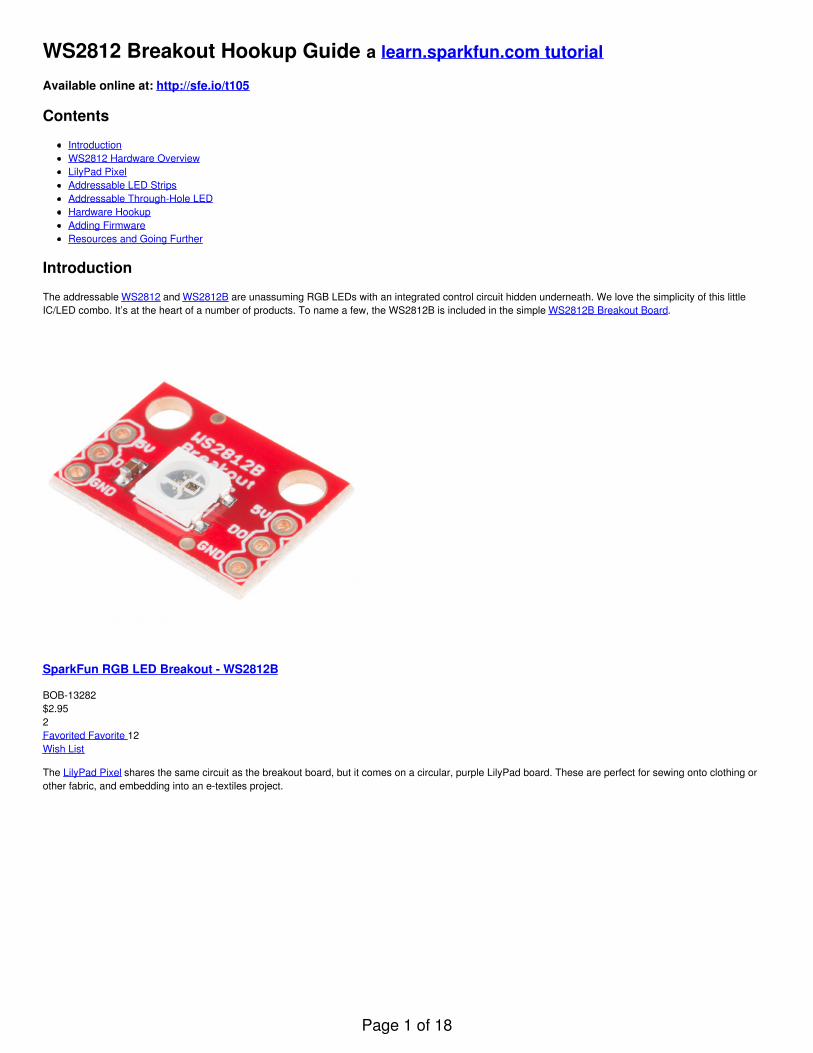
The addressable WS2812 and WS2812B are unassuming RGB LEDs with an integrated control circuit hidden underneath. We love the simplicity of this littleIC/LED combo. It’s at the heart of a number of products. To name a few, the WS2812B is included in the simple WS2812B Breakout Board.
SparkFun RGB LED Breakout - WS2812B
BOB-13282$2.952Favorited Favorite 12Wish List
The LilyPad Pixel shares the same circuit as the breakout board, but it comes on a circular, purple LilyPad board. These are perfect for sewing onto clothing orother fabric, and embedding into an e-textiles project.
Page 1 of 18
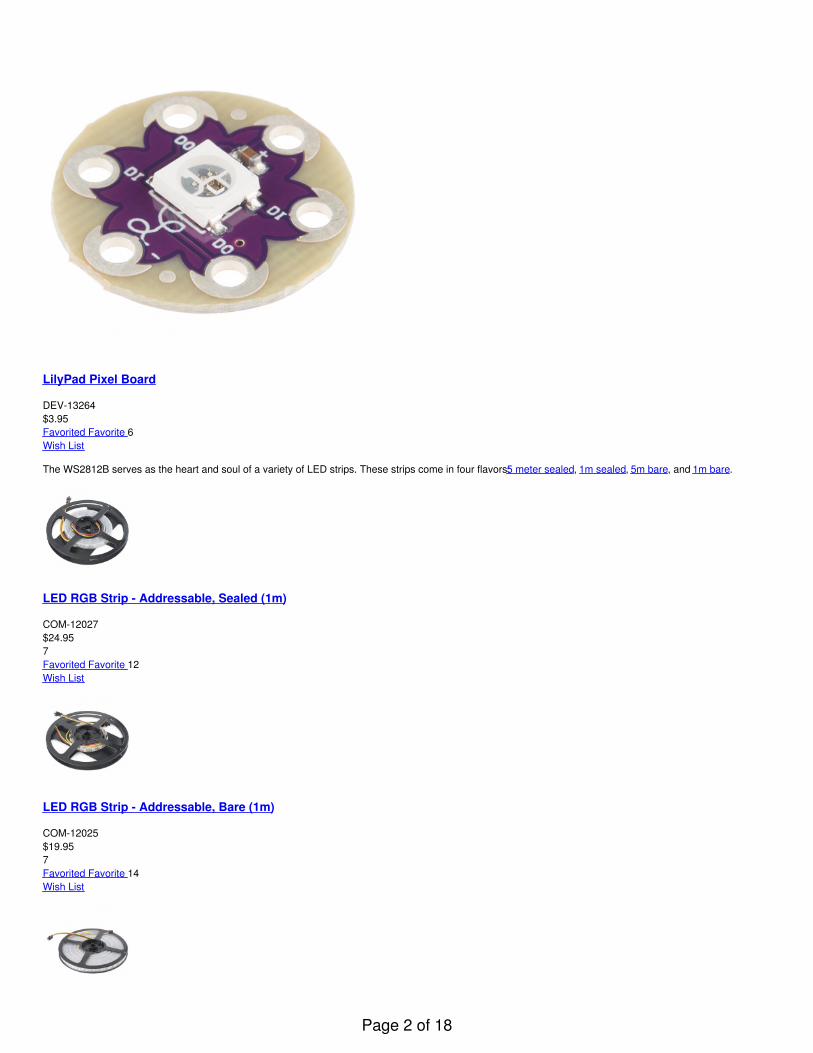
LilyPad Pixel Board
DEV-13264$3.95Favorited Favorite 6Wish List
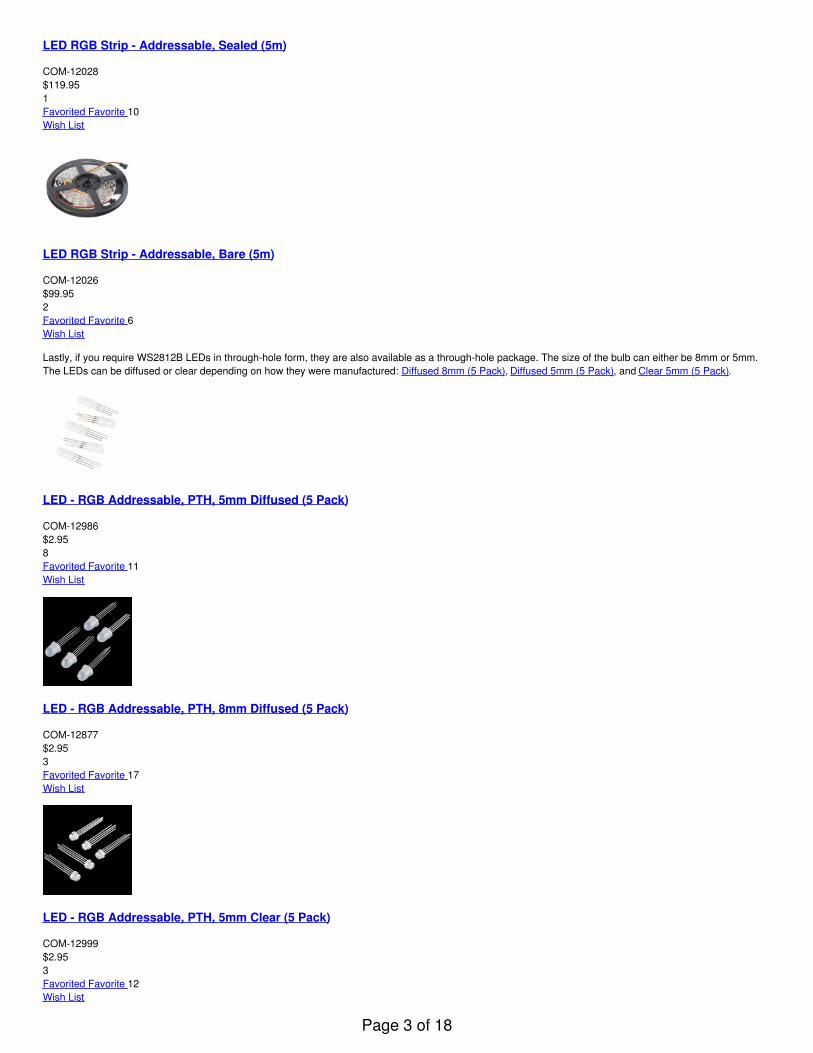
The WS2812B serves as the heart and soul of a variety of LED strips. These strips come in four flavors: 5 meter sealed, 1m sealed, 5m bare, and 1m bare.
LED RGB Strip - Addressable, Sealed (1m)
COM-12027$24.957Favorited Favorite 12Wish List
LED RGB Strip - Addressable, Bare (1m)
COM-12025$19.957Favorited Favorite 14Wish List
Page 2 of 18
LED RGB Strip - Addressable, Sealed (5m)
COM-12028$119.951Favorited Favorite 10Wish List
LED RGB Strip - Addressable, Bare (5m)
COM-12026$99.952Favorited Favorite 6Wish List
Lastly, if you require WS2812B LEDs in through-hole form, they are also available as a through-hole package. The size of the bulb can either be 8mm or 5mm.The LEDs can be diffused or clear depending on how they were manufactured: Diffused 8mm (5 Pack), Diffused 5mm (5 Pack), and Clear 5mm (5 Pack).
LED - RGB Addressable, PTH, 5mm Diffused (5 Pack)
COM-12986$2.958Favorited Favorite 11Wish List
LED - RGB Addressable, PTH, 8mm Diffused (5 Pack)
COM-12877$2.953Favorited Favorite 17Wish List
LED - RGB Addressable, PTH, 5mm Clear (5 Pack)
COM-12999$2.953Favorited Favorite 12Wish List
Page 3 of 18
What makes the WS2812B really special is the way its controlled. The IC embedded into the LED communicates via a very unique one-wire interface. With thehelp of some libraries, they’re really very easy to control. Plus they’re chain-able – the output of one LED can be connected to the input of another to createstrips of hundreds of LEDs. The more boards you have linked together, the fancier your animations can be!
In this tutorial we’re going to get you familiar with the workings of the WS2812 and WS2812B. We’ll go over some of the ways you might want to hook up to thebreakout board, LilyPad, or strips. And we’ll close the tutorial out with some example Arduino code.
Required Materials
WS2812-Based LED Board or Strip
Stating the obvious: you’ll need a WS2812-based board or strip. The more the merrier! In the example hookup, we’ll be linking together five breakout boards, butthe example should be adaptable to the other WS2812-based products. Grab however many you think you’ll need for your project, regardless of how many youhave, it’s not enough.
Microcontroller
Aside from the star of the show, you’ll also need a microcontroller. Something that can send the series of 1’s and 0’s used to control the LEDs. Our go-to is theclassic Arduino Uno, but any Arduino board should do.
Arduino Pro Mini 328 - 5V/16MHz
DEV-11113$9.95127Favorited Favorite 99Wish List
Arduino Mega 2560 R3
DEV-11061$45.9550Favorited Favorite 48Wish List
Pro Micro - 5V/16MHz
DEV-12640$19.9568Favorited Favorite 48Wish List
Page 4 of 18

Arduino Uno - R3 SMD
DEV-11224$29.9521Favorited Favorite 17Wish List
Limitation on AVR-based Microcontrollers : If you are using an AVR-based microcontroller for large LED installations, there is a limitation with the number ofWS2812s LEDs used. This is dependent on the microcontroller's memory and the size of the program. For an ATmega328P-based microcontroller (i.e.RedBoard Programmed with Arduino, Arduino Uno, Arduino Pro Mini, etc.), it can be up to ~300-400 LEDs. Check out Katerborg's note about using WS2812'swith different Arduinos:
Katerborg: Powering Lots of LEDs from Arduino
If you want to get really crazy, hackaday demonstrates how to power 1000 NeoPixels with the Arduino’s limited RAM.
Hackaday: Driving 1000 Neopixels With 1K Of Arduino RAM
Or you can try to adapt the example code to your favorite microcontroller. Teensy development boards are an excellent choice when using a large number ofWS2812 LEDs.
Teensy 3.6
DEV-14057$29.2512Favorited Favorite 26Wish List
Teensy LC
DEV-13305$12.9513Favorited Favorite 22Wish List
Teensy 3.5
DEV-14055
Page 5 of 18
$24.951Favorited Favorite 9Wish List
Note: Depending on the amount of WS2812 LEDs that are being used with the Teensy, you may need to use the octows2811 adapter board:
PJRC: OctoWS2811 LED Library
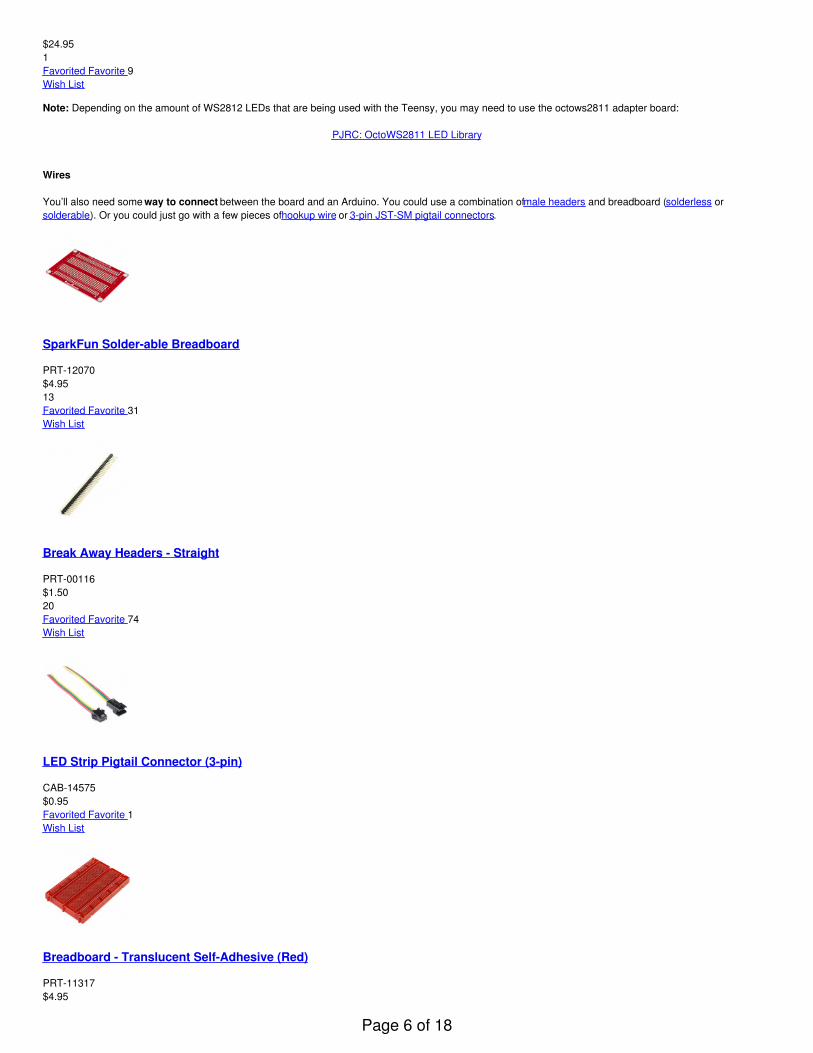
Wires
You’ll also need some way to connect between the board and an Arduino. You could use a combination of male headers and breadboard (solderless orsolderable). Or you could just go with a few pieces of hookup wire or 3-pin JST-SM pigtail connectors.
SparkFun Solder-able Breadboard
PRT-12070$4.9513Favorited Favorite 31Wish List
Break Away Headers - Straight
PRT-00116$1.5020Favorited Favorite 74Wish List
LED Strip Pigtail Connector (3-pin)
CAB-14575$0.95Favorited Favorite 1Wish List
Breadboard - Translucent Self-Adhesive (Red)
PRT-11317$4.95
Page 6 of 18
1Favorited Favorite 8Wish List
Tools
In order to get a good, solid, electrically-sound connection to the breakout boards, you’ll need to solder to the pins. That means you’ll need at least a basicsoldering iron, solder, and general soldering accessories. Check out our how to solder tutorial for help, if this is you first time soldering.
Solder Lead Free - 100-gram Spool
TOL-09325$7.957Favorited Favorite 23Wish List
Soldering Iron - 30W (US, 110V)
TOL-09507$9.956Favorited Favorite 16Wish List
Suggested Reading
These boards aren’t too hard to use. If you’ve done anything with Arduino before, you’ll be prepared to work with the WS2812. If you’re not exactly sure what this“Arduino” thing is, or if you’re not familiar with the topics below, consider reading their tutorials:
How to Solder: Through-Hole Soldering
This tutorial covers everything you need to know about through-hole soldering.Favorited Favorite 31
Binary
Binary is the numeral system of electronics and programming...so it must be important to learn. But, what is binary? How does it translate to other numeralsystems like decimal?Favorited Favorite 28
How to Power a Project
A tutorial to help figure out the power requirements of your project.Favorited Favorite 34
How to Use a Breadboard
Welcome to the wonderful world of breadboards. Here we will learn what a breadboard is and how to use one to build your very first circuit.Favorited Favorite 33
What is an Arduino?
What is this 'Arduino' thing anyway?Favorited Favorite 24
WS2812 Hardware Overview
Page 7 of 18
Note: Make sure to not confuse the WS2812-based IC with the APA102 addressable LEDs. The APA102 LEDs are very similar to WS2812s with a few caveats:APA102s can be controlled with a standard SPI interface, and they have an extremely high PWM frequency. The APA102 requires the FastLED library to control.The FastLED library does support the WS2812 chipset. Try checking out the Lumenati Hookup Guide that uses the APA102-based LEDs for more information.
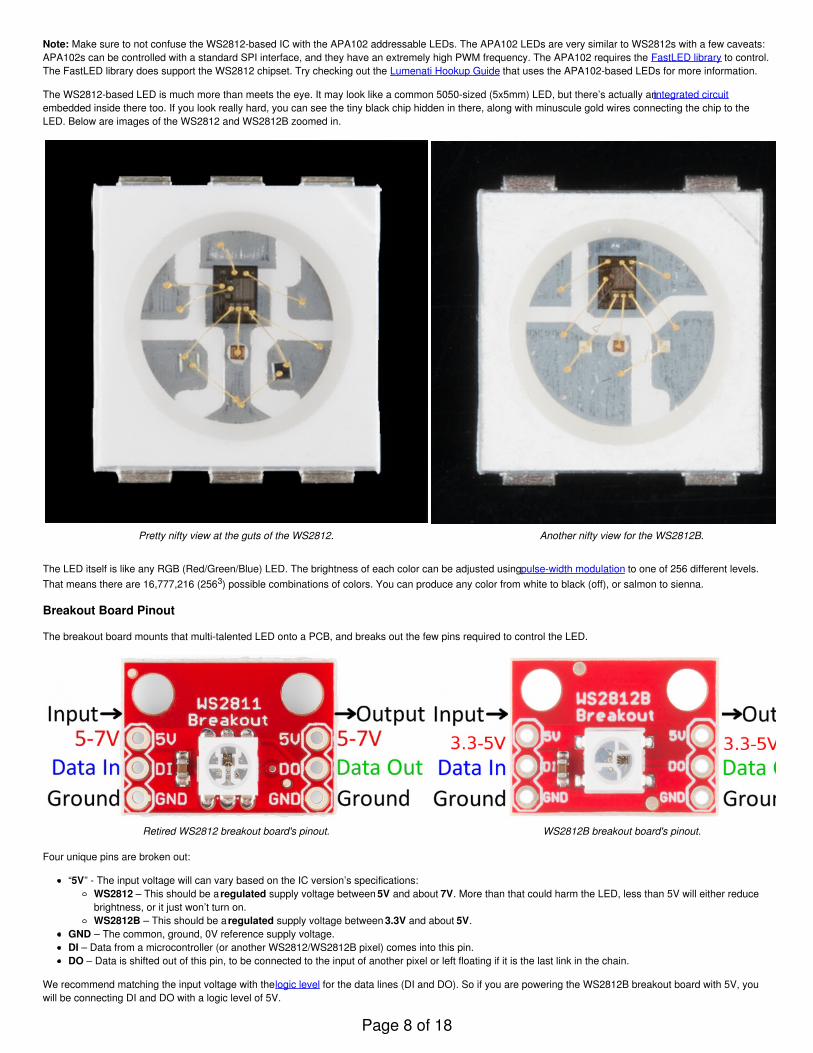
The WS2812-based LED is much more than meets the eye. It may look like a common 5050-sized (5x5mm) LED, but there’s actually an integrated circuitembedded inside there too. If you look really hard, you can see the tiny black chip hidden in there, along with minuscule gold wires connecting the chip to theLED. Below are images of the WS2812 and WS2812B zoomed in.
Pretty nifty view at the guts of the WS2812. Another nifty view for the WS2812B.
The LED itself is like any RGB (Red/Green/Blue) LED. The brightness of each color can be adjusted using pulse-width modulation to one of 256 different levels.That means there are 16,777,216 (2563) possible combinations of colors. You can produce any color from white to black (off), or salmon to sienna.
Breakout Board Pinout
The breakout board mounts that multi-talented LED onto a PCB, and breaks out the few pins required to control the LED.
Retired WS2812 breakout board's pinout. WS2812B breakout board's pinout.
Four unique pins are broken out:
“5V” - The input voltage will can vary based on the IC version’s specifications:WS2812 – This should be a regulated supply voltage between 5V and about 7V. More than that could harm the LED, less than 5V will either reducebrightness, or it just won’t turn on.WS2812B – This should be a regulated supply voltage between 3.3V and about 5V.
GND – The common, ground, 0V reference supply voltage.DI – Data from a microcontroller (or another WS2812/WS2812B pixel) comes into this pin.DO – Data is shifted out of this pin, to be connected to the input of another pixel or left floating if it is the last link in the chain.
We recommend matching the input voltage with the logic level for the data lines (DI and DO). So if you are powering the WS2812B breakout board with 5V, youwill be connecting DI and DO with a logic level of 5V.
Page 8 of 18
Data Transmission Interface
Note: This stuff is ugly, and not critical to understand if you just want to use the breakout board. (That's what libraries are for, right?!) It's interesting to talk about,because the interface is so unique.
The communication interface between a microcontroller and the WS2812 is weird. It’s one wire, but it’s not like a standard, UART serial interface. This interfaceis very time-specific. Both a logic 0 and a logic 1 require a square pulse, and it’s the length of the pulse that defines which it is.
Timing diagram for a single bit of value 0 or 1.
The data is sent in a sequence containing 24 of those bits – 8 bits for each color – followed by a low “reset” pulse of at least 50µs.
A sequence of 24 timed-bits sets the color for each channel. 8-bits per channel. Green first, then red, then blue.
The larger the value of a specific color is, the brighter it will be. If every color is set to 0, the LED will be off. If every color is set to max – 255 – the LED will be asbright and white as can be.
This is all to say that the interface is very time-specific. To run the LEDs you’ll need a real-time processor, like an Arduino; microprocessors like those on theRaspberry Pi or pcDuino can’t give you a reliably-timed pulse. Even if one bit is less than a microsecond off, that could mean the difference between purple andmaroon.
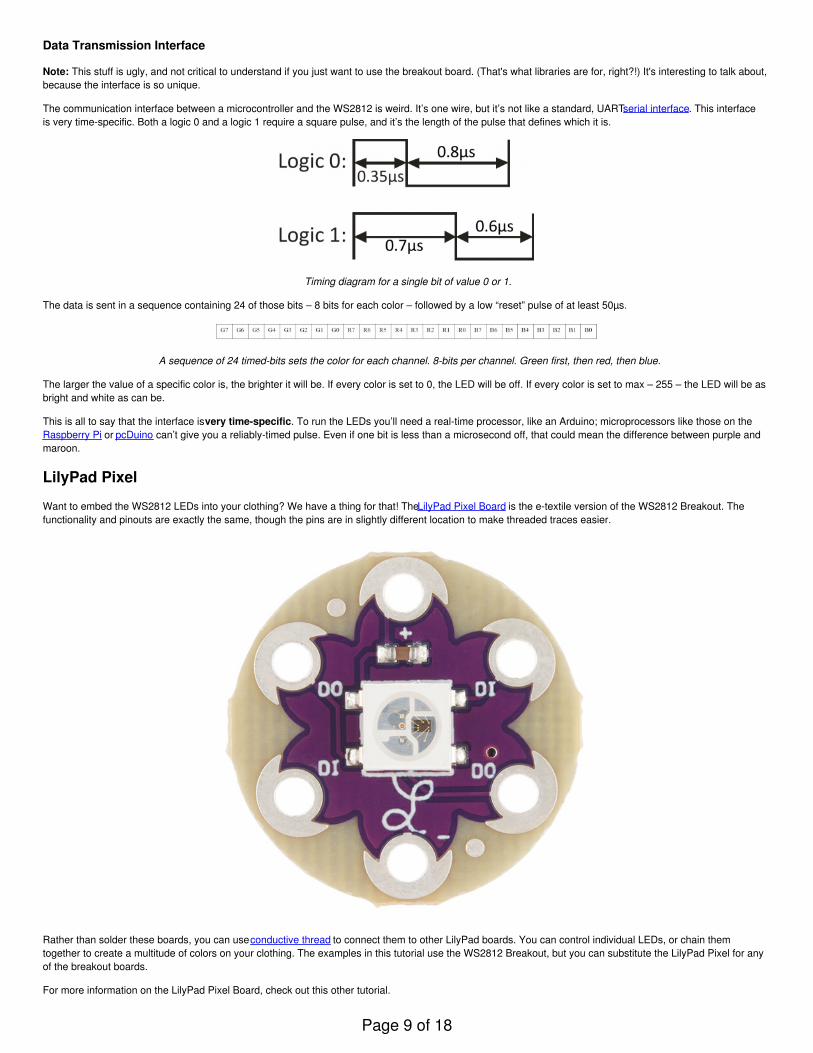
LilyPad Pixel
Want to embed the WS2812 LEDs into your clothing? We have a thing for that! The LilyPad Pixel Board is the e-textile version of the WS2812 Breakout. Thefunctionality and pinouts are exactly the same, though the pins are in slightly different location to make threaded traces easier.
Rather than solder these boards, you can use conductive thread to connect them to other LilyPad boards. You can control individual LEDs, or chain themtogether to create a multitude of colors on your clothing. The examples in this tutorial use the WS2812 Breakout, but you can substitute the LilyPad Pixel for anyof the breakout boards.
For more information on the LilyPad Pixel Board, check out this other tutorial.
Page 9 of 18

LilyPad Pixel Board Hookup Guide
September 16, 2015
Add changing colors to your wearable projects using LilyPad Pixel Boards.Favorited Favorite 4
Addressable LED Strips
If you need an abundance of WS2812 LEDs in a slick, pre-assembled form factor these addressable LED strips might be for you.
The LED strips come on a reel as shown above.
The WS2812 Addressable LED strips come in four product options, which vary by size and sealant. You can get them in either 1m or 5m lengths, and for eachlength the strip can be either covered by a waterproof sealant or left bare.
5m Sealed1m Sealed5m Bare1m Bare
The waterproofed strips are rated IP65 – dust tight and protected from water jets.
Each strip has 60 LEDs per meter, which are spaced about 1.65cm away from each other.
Connecting to the Strips
Each end of the LED strip is terminated with a set of three colored wires: red, green, and yellow. Two wires are for power, and the third transmits data either intoour out of the strip:
WireColor
Function Notes for the WS2812 Notes for the WS2812B
Red VccWS2812 power supply. Should be a regulated supply between 5V
and 7V.WS2812 power supply. Should be a regulated supply between 3.3V
and 5V.
Page 10 of 18

Green DataIn/Out
Serial data in/out. Look at arrows and labels on strip to check whichit is.
Serial data in/out. Look at arrows and labels on strip to check which itis.
Yellow GND Ground. 0V. Ground. 0V.
Each of the wire pigtails are terminated by a three-pin JST SM connector, which you can use to connect string strips together. For the first strip in a string, youcan either connect to a mating connector, or cut and strip the wires, and connect them to your controlling device. To reuse the rest of the LED strip, check out theLED Strip pigtail connector to easily connect the cut strips:
LED Strip Pigtail Connector (3-pin)
CAB-14575$0.95Favorited Favorite 1Wish List
Addressable Through-Hole LED
If you require WS2812 LEDs in through-hole form, they are also available as a through-hole package.
Page 11 of 18
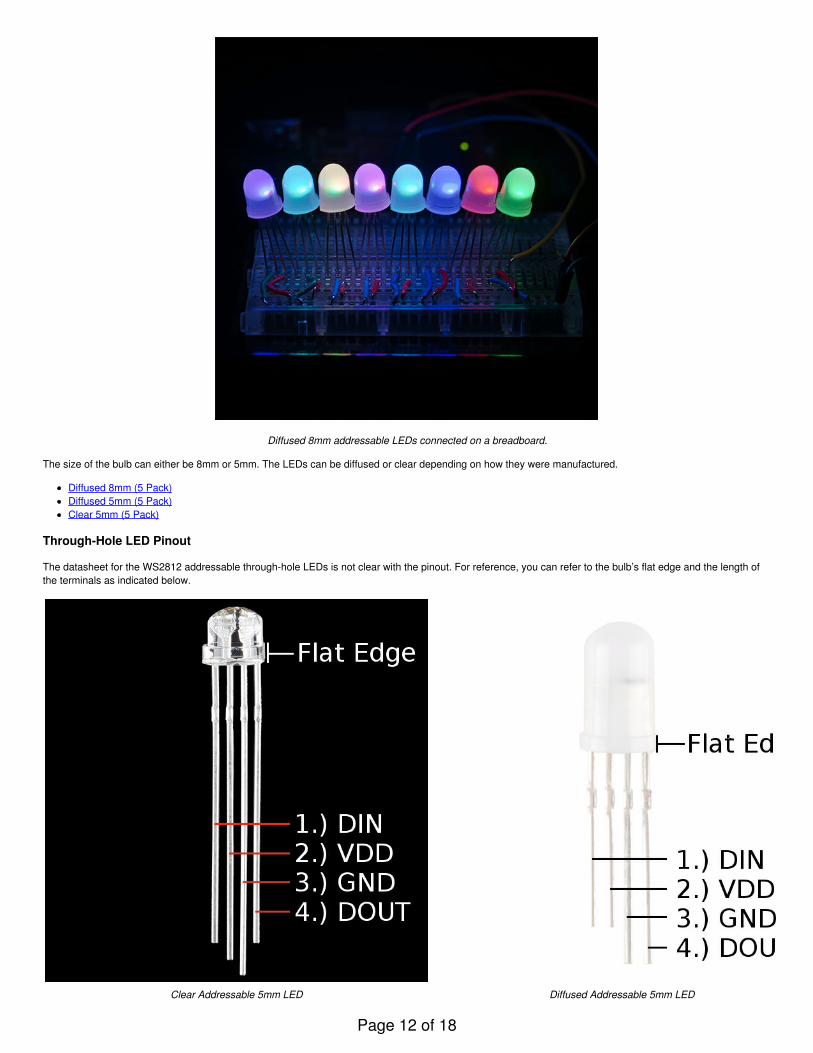
Diffused 8mm addressable LEDs connected on a breadboard.
The size of the bulb can either be 8mm or 5mm. The LEDs can be diffused or clear depending on how they were manufactured.
Diffused 8mm (5 Pack)Diffused 5mm (5 Pack)Clear 5mm (5 Pack)
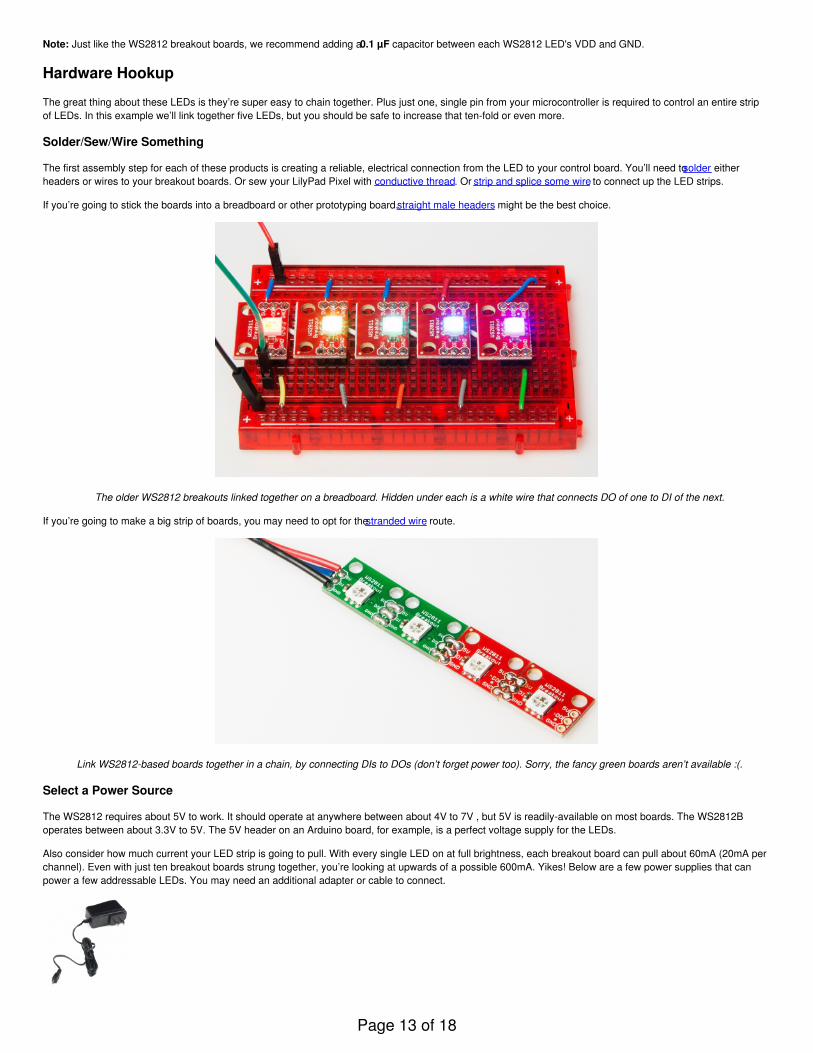
Through-Hole LED Pinout
The datasheet for the WS2812 addressable through-hole LEDs is not clear with the pinout. For reference, you can refer to the bulb’s flat edge and the length ofthe terminals as indicated below.
Clear Addressable 5mm LED Diffused Addressable 5mm LED
Page 12 of 18
Note: Just like the WS2812 breakout boards, we recommend adding a 0.1 µF capacitor between each WS2812 LED's VDD and GND.
Hardware Hookup
The great thing about these LEDs is they’re super easy to chain together. Plus just one, single pin from your microcontroller is required to control an entire stripof LEDs. In this example we’ll link together five LEDs, but you should be safe to increase that ten-fold or even more.
Solder/Sew/Wire Something
The first assembly step for each of these products is creating a reliable, electrical connection from the LED to your control board. You’ll need to solder eitherheaders or wires to your breakout boards. Or sew your LilyPad Pixel with conductive thread. Or strip and splice some wire to connect up the LED strips.
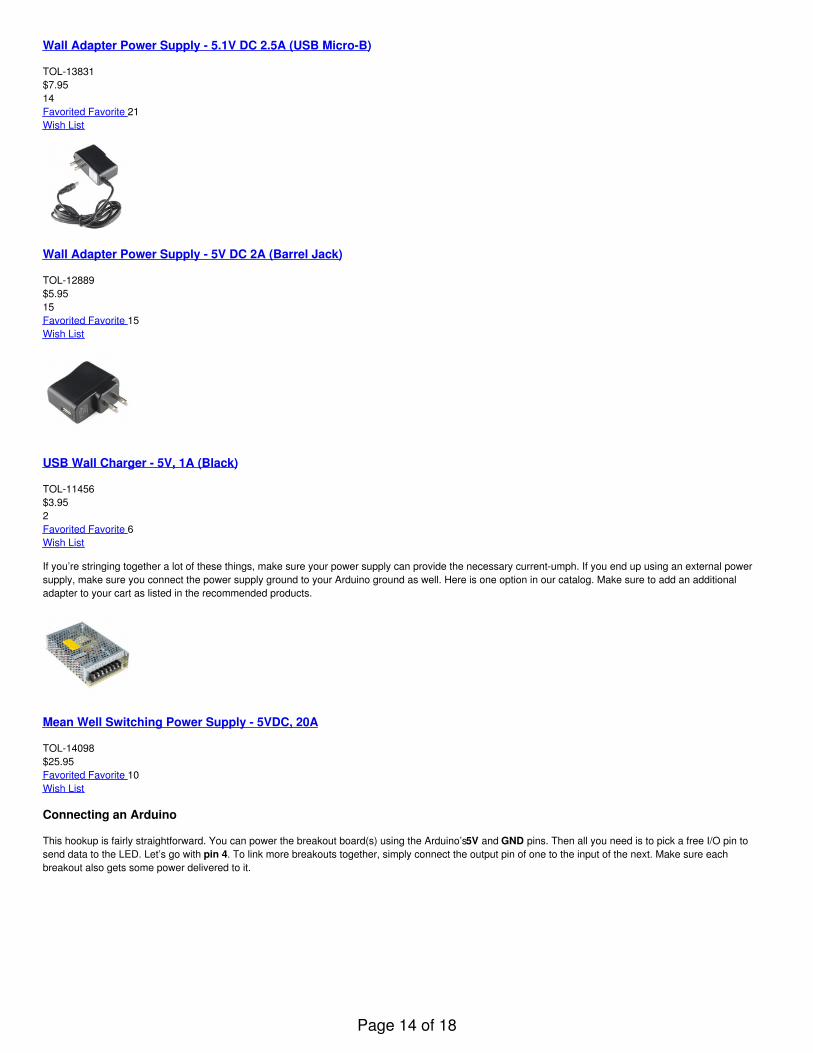
If you’re going to stick the boards into a breadboard or other prototyping board, straight male headers might be the best choice.
The older WS2812 breakouts linked together on a breadboard. Hidden under each is a white wire that connects DO of one to DI of the next.
If you’re going to make a big strip of boards, you may need to opt for the stranded wire route.
Link WS2812-based boards together in a chain, by connecting DIs to DOs (don’t forget power too). Sorry, the fancy green boards aren’t available :(.
Select a Power Source
The WS2812 requires about 5V to work. It should operate at anywhere between about 4V to 7V , but 5V is readily-available on most boards. The WS2812Boperates between about 3.3V to 5V. The 5V header on an Arduino board, for example, is a perfect voltage supply for the LEDs.
Also consider how much current your LED strip is going to pull. With every single LED on at full brightness, each breakout board can pull about 60mA (20mA perchannel). Even with just ten breakout boards strung together, you’re looking at upwards of a possible 600mA. Yikes! Below are a few power supplies that canpower a few addressable LEDs. You may need an additional adapter or cable to connect.
Page 13 of 18
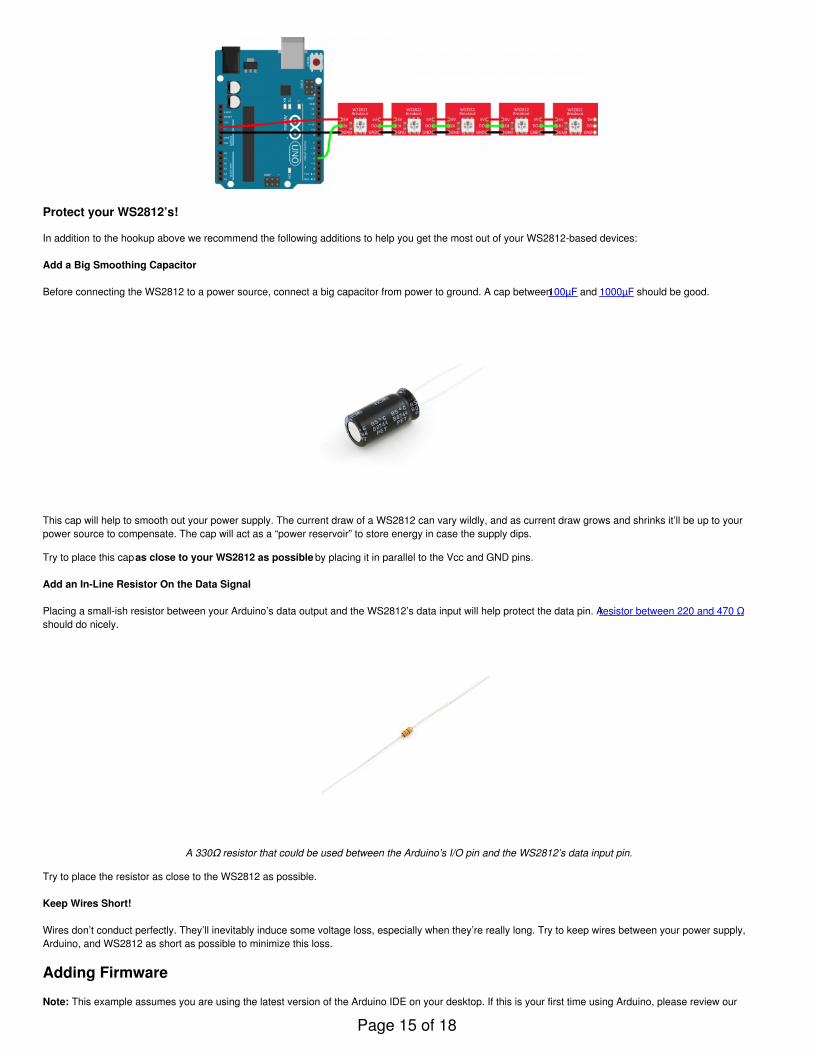
Wall Adapter Power Supply - 5.1V DC 2.5A (USB Micro-B)
TOL-13831$7.9514Favorited Favorite 21Wish List
Wall Adapter Power Supply - 5V DC 2A (Barrel Jack)
TOL-12889$5.9515Favorited Favorite 15Wish List
USB Wall Charger - 5V, 1A (Black)
TOL-11456$3.952Favorited Favorite 6Wish List
If you’re stringing together a lot of these things, make sure your power supply can provide the necessary current-umph. If you end up using an external powersupply, make sure you connect the power supply ground to your Arduino ground as well. Here is one option in our catalog. Make sure to add an additionaladapter to your cart as listed in the recommended products.
Mean Well Switching Power Supply - 5VDC, 20A
TOL-14098$25.95Favorited Favorite 10Wish List
Connecting an Arduino
This hookup is fairly straightforward. You can power the breakout board(s) using the Arduino’s 5V and GND pins. Then all you need is to pick a free I/O pin tosend data to the LED. Let’s go with pin 4. To link more breakouts together, simply connect the output pin of one to the input of the next. Make sure eachbreakout also gets some power delivered to it.
Page 14 of 18
Protect your WS2812’s!
In addition to the hookup above we recommend the following additions to help you get the most out of your WS2812-based devices:
Add a Big Smoothing Capacitor
Before connecting the WS2812 to a power source, connect a big capacitor from power to ground. A cap between 100µF and 1000µF should be good.
This cap will help to smooth out your power supply. The current draw of a WS2812 can vary wildly, and as current draw grows and shrinks it’ll be up to yourpower source to compensate. The cap will act as a “power reservoir” to store energy in case the supply dips.
Try to place this cap as close to your WS2812 as possible by placing it in parallel to the Vcc and GND pins.
Add an In-Line Resistor On the Data Signal
Placing a small-ish resistor between your Arduino’s data output and the WS2812’s data input will help protect the data pin. A resistor between 220 and 470 Ωshould do nicely.
A 330Ω resistor that could be used between the Arduino’s I/O pin and the WS2812’s data input pin.
Try to place the resistor as close to the WS2812 as possible.
Keep Wires Short!
Wires don’t conduct perfectly. They’ll inevitably induce some voltage loss, especially when they’re really long. Try to keep wires between your power supply,Arduino, and WS2812 as short as possible to minimize this loss.
Adding Firmware
Note: This example assumes you are using the latest version of the Arduino IDE on your desktop. If this is your first time using Arduino, please review our
Page 15 of 18

tutorial on installing the Arduino IDE. If you have not previously installed an Arduino library, please check out our installation guide.
For our example code, we’ll be making use of Adafruit’s fantastic NeoPixel library. Click below to download a copy of both the example code, as well as theNeoPixel library.
Arduino Example and NeoPixel Library (ZIP)
The library is located in the “Adafruit_NeoPixel” folder, and the example code is found in the “WS2812_Breakout_Example” folder.
With the library installed, open up WS2812_Breakout_Example.ino within Arduino. Before you upload the code, make sure you adjust the PIN and LED_COUNT
definitions near the top of the sketch. These define which pin the first pixel is connected to, and how many total LEDs are linked up. Then upload away and enjoythe show!
Using the NeoPixel Library
Setup
There are a few lines of code required to set up your sketch to use the library. First, call the constructor near the top of your code (before setup(), you’ll probablywant it to be a global variable).
language:c#define PIN 4#define LED_COUNT 8
// Create an instance of the Adafruit_NeoPixel class called "leds".// That'll be what we refer to from here on...Adafruit_NeoPixel leds = Adafruit_NeoPixel(LED_COUNT, PIN, NEO_GRB + NEO_KHZ800);
The PIN and LED_COUNT parameters in that function call should be set, respectively, to the Arduino pin you’ve connected to the first breakout’s “DIN” pin and thetotal number of breakout boards you have linked up.
The rest of the setup is calling the leds.begin() function somewhere near the beginning of the setup() function.
Setting An LED
Setting an LED with the Adafruit NeoPixel library is a two step process. First, you have to set a pixel color using the leds.setPixelColor(position, color) command. Thecolor parameter in that function can either be a 24-bit RGB color-code, or three separate bytes for each color. For example:
language:cleds.setPixelColor(3, 0xFF00FF); // Set fourth LED to full red, no green, full blueleds.setPixelColor(3, 0xFF, 0x00, 0xFF) // Also set fourth LED to full red, no green, full blue
Setting a pixel’s color does not equate to that pixel actually turning on though. For that, you need to call leds.show(). Note that when this function is called any LEDthat was previously set will turn on.
The Rest of the Code
After you’ve gotten the hang of using the NeoPixel library, the remaining parts of the sketch are finding ways to maniuplate the pixel colors. There are some funfunctions in this example code, which create the classic “cylon” larson scanner, or draw a rainbow. We hope you can adapt them to make even more creativeanimations.
Page 16 of 18
The included “WS2812_Definitions.h” file defines a huge list of standard colors. In there you’ll find anything from navy to saddle brown to ghost white.
Have fun!
FastLED Alternative Library
Looking for an alternative library? Try checking out the FastLED library for more advanced features. The library also supports other LED chipsets.
FastLED GitHub Repo
Resources and Going Further
For more information about the WS2812 and WS2812B, check out the resources below:
Breakout Board Schematic (PDF)Breakout Board Eagle Files (ZIP)Breakout Board GitHub RepoDatasheet
WS2812 (PDF)WS2812B (PDF)Differences between WS2812 vs WS2812B (PDF)
Example Code and NeoPixel Library (ZIP)Adafruit NeoPixel Library GitHub RepoFastLED Library GitHub Repo
Now that you’ve got the gist of the WS2812 Breakout board, how are you going to use it in a project? Need some inspiration? Check out these tutorials:
Using OpenSegment – The OpenSegment is a very large, 4-digit 7-segment display. If you’re on a blinky-high after playing with the WS2812 LEDs, this isanother fun component to play with.Getting Started with the LilyPad MP3 Player – If you’re into e-textiles (or even if you’re not, this thing is awesome), check out the LilyPad MP3 Player.Combine the LilyPad MP3 player with the WS2812 to make a nifty LED-music show.Designing PCBs: Advanced SMD – If you’d like to lay out your own, custom PCB for the WS2812 LED/chip, check out this tutorial. It’ll walk you throughevery step required to design your very own circuit board using free software. You can use the WS2812 footprint from our parts library to get started.
Building Large LED Installations
Learn what it takes to build large LED installations from planning to power requirements to execution.Favorited Favorite 15
Interactive LED Music Visualizer
Use an Arduino and the SparkFun Sound Detector to create visualizations on Addressable RGB LED strips.Favorited Favorite 15
LED Cloud-Connected Cloud
Make an RGB colored cloud light! You can also control it from your phone, or hook up to the weather!Favorited Favorite 19
Addressable LED Strip Hookup Guide
Add blinking lights to any holiday decoration with our Holiday Lights Kit.Favorited Favorite 5
Check out these projects using the WS2812 addressable LEDs for more ideas:
Hardware Hump Day: Blade Runner Parasol
October 4, 2017Favorited Favorite 1
Enginursday: X-Band Motion-Triggered Music
June 29, 2017Favorited Favorite 1
Enginursday: Sound Wave Printing
January 5, 2017Favorited Favorite 1
Nixie LED Clock
May 8, 2018
Page 17 of 18
Favorited Favorite 3
IoTuesday: DIY Smart Backlit Mountain Scene
April 25, 2017Favorited Favorite 6
Fashion Hacking: Infinity Mirror Heart Heels
February 13, 2018Favorited Favorite 1
learn.sparkfun.com | CC BY-SA 3.0 | SparkFun Electronics | Niwot, Colorado
Page 18 of 18