Embed Size (px)
Citation preview
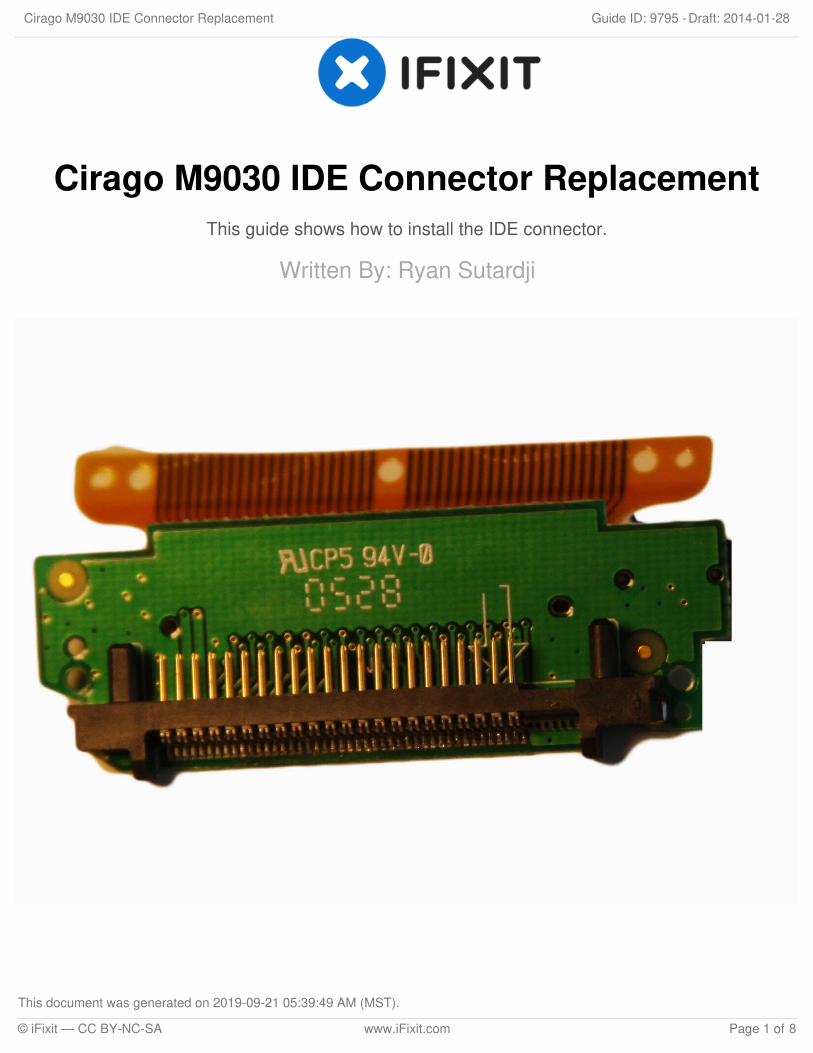
Cirago M9030 IDE Connector ReplacementThis guide shows how to install the IDE connector.
Written By: Ryan Sutardji
Cirago M9030 IDE Connector Replacement Draft: 2014-01-28Guide ID: 9795 -
This document was generated on 2019-09-21 05:39:49 AM (MST).
© iFixit — CC BY-NC-SA www.iFixit.com Page 1 of 8

TOOLS:iFixit Opening Tools (1)Phillips #00 Screwdriver (1)
Cirago M9030 IDE Connector Replacement Draft: 2014-01-28Guide ID: 9795 -
This document was generated on 2019-09-21 05:39:49 AM (MST).
© iFixit — CC BY-NC-SA www.iFixit.com Page 2 of 8
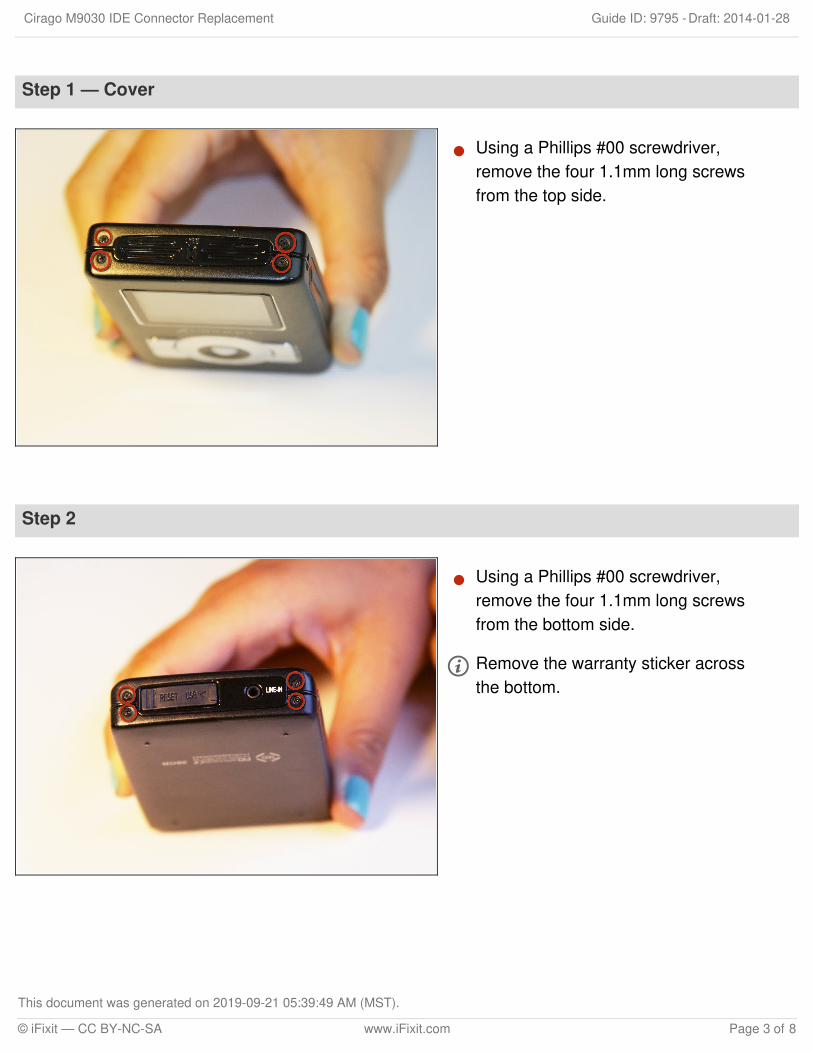
Step 1 — Cover
Using a Phillips #00 screwdriver,remove the four 1.1mm long screwsfrom the top side.
Step 2
Using a Phillips #00 screwdriver,remove the four 1.1mm long screwsfrom the bottom side.
Remove the warranty sticker acrossthe bottom.
Cirago M9030 IDE Connector Replacement Draft: 2014-01-28Guide ID: 9795 -
This document was generated on 2019-09-21 05:39:49 AM (MST).
© iFixit — CC BY-NC-SA www.iFixit.com Page 3 of 8
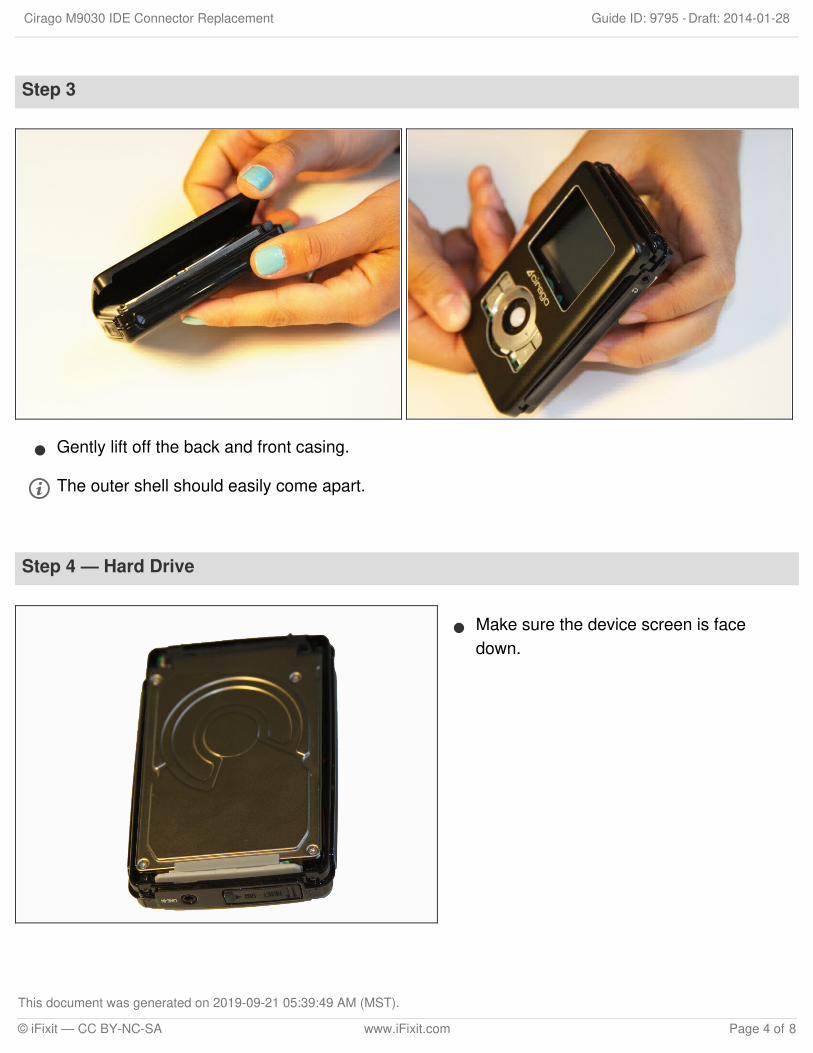
Step 3
Gently lift off the back and front casing.
The outer shell should easily come apart.
Step 4 — Hard Drive
Make sure the device screen is facedown.
Cirago M9030 IDE Connector Replacement Draft: 2014-01-28Guide ID: 9795 -
This document was generated on 2019-09-21 05:39:49 AM (MST).
© iFixit — CC BY-NC-SA www.iFixit.com Page 4 of 8
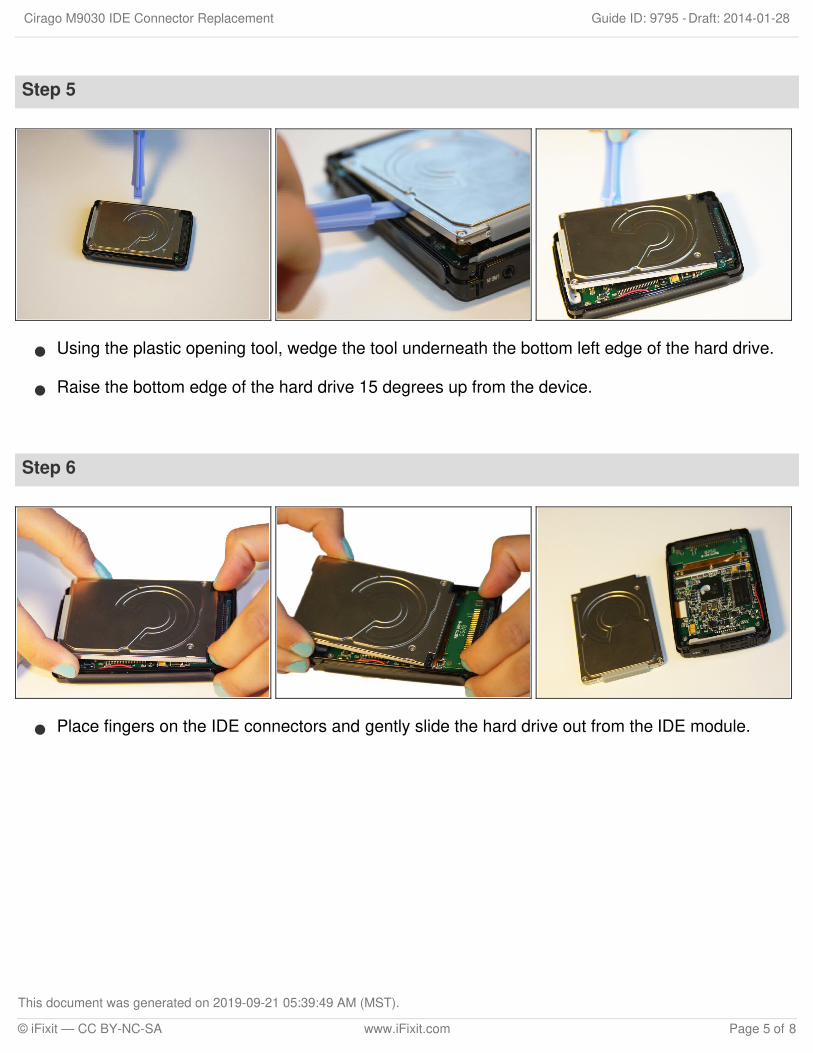
Step 5
Using the plastic opening tool, wedge the tool underneath the bottom left edge of the hard drive.
Raise the bottom edge of the hard drive 15 degrees up from the device.
Step 6
Place fingers on the IDE connectors and gently slide the hard drive out from the IDE module.
Cirago M9030 IDE Connector Replacement Draft: 2014-01-28Guide ID: 9795 -
This document was generated on 2019-09-21 05:39:49 AM (MST).
© iFixit — CC BY-NC-SA www.iFixit.com Page 5 of 8
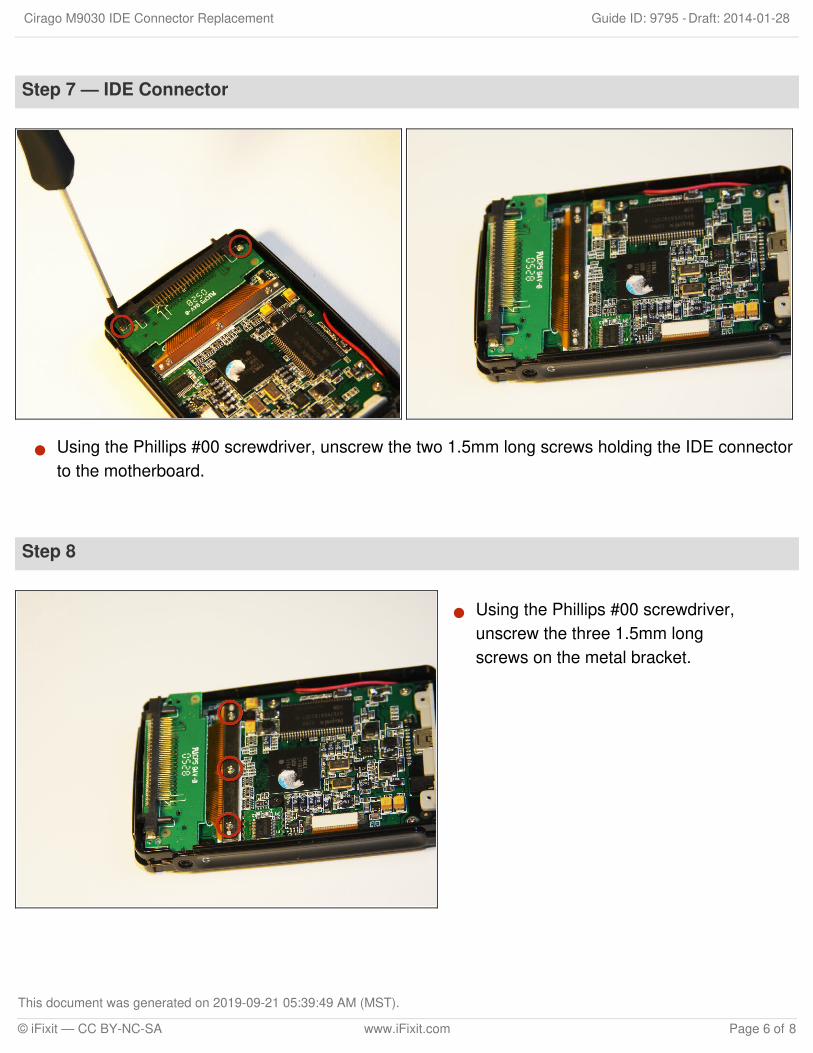
Step 7 — IDE Connector
Using the Phillips #00 screwdriver, unscrew the two 1.5mm long screws holding the IDE connectorto the motherboard.
Step 8
Using the Phillips #00 screwdriver,unscrew the three 1.5mm longscrews on the metal bracket.
Cirago M9030 IDE Connector Replacement Draft: 2014-01-28Guide ID: 9795 -
This document was generated on 2019-09-21 05:39:49 AM (MST).
© iFixit — CC BY-NC-SA www.iFixit.com Page 6 of 8

Step 9
Using the plastic opening tool, completely lift the metal bracket off of the motherboard.
Using the plastic opening tool, completely lift the rubber insulator off of the motherboard.
Step 10
Using the plastic opening tool,completely lift the ribbon off of themotherboard.
Cirago M9030 IDE Connector Replacement Draft: 2014-01-28Guide ID: 9795 -
This document was generated on 2019-09-21 05:39:49 AM (MST).
© iFixit — CC BY-NC-SA www.iFixit.com Page 7 of 8
To reassemble your device, follow these instructions in reverse order.
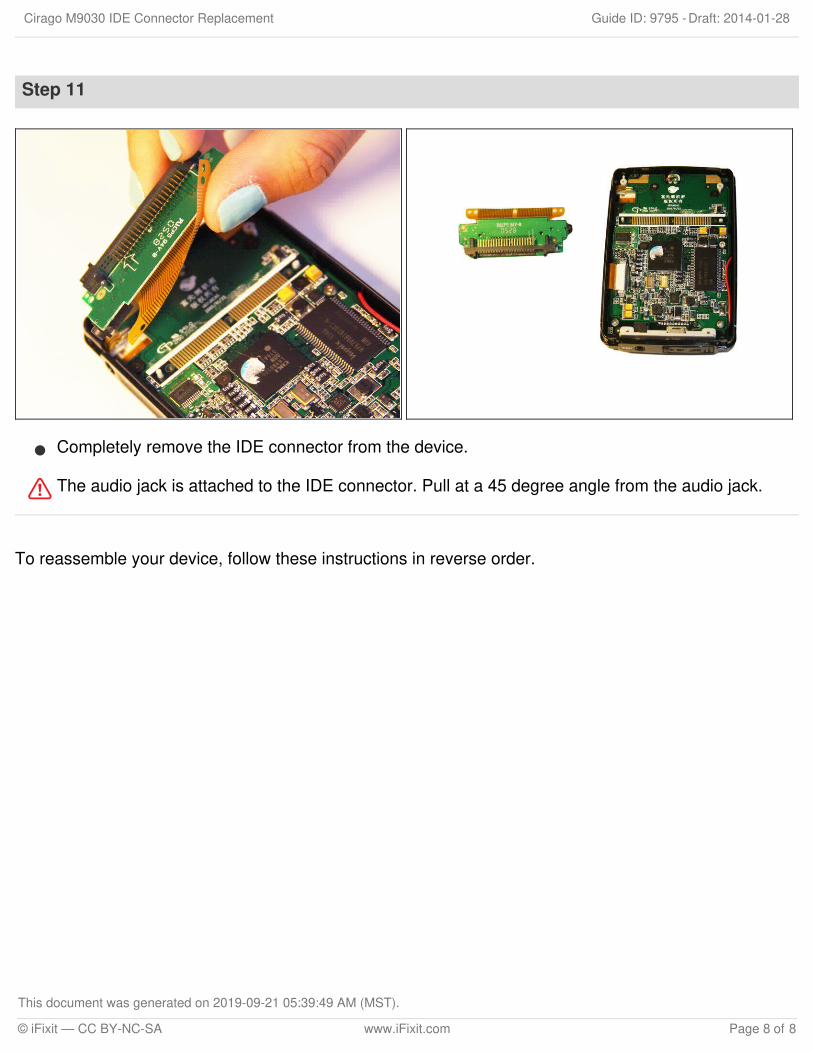
Step 11
Completely remove the IDE connector from the device.
The audio jack is attached to the IDE connector. Pull at a 45 degree angle from the audio jack.
Cirago M9030 IDE Connector Replacement Draft: 2014-01-28Guide ID: 9795 -
This document was generated on 2019-09-21 05:39:49 AM (MST).
© iFixit — CC BY-NC-SA www.iFixit.com Page 8 of 8