Embed Size (px)
Citation preview
OpenStreetMap (OSM) is an open source mapping project which is collabora vely edited by users all over the world. The open source nature of the project means that anyone
can download spa al data from it for free!
Link: h p://www.openstreetmap.org/
Step 1: Type your loca on of interest in the search box
Ex: “Rome, Italy”
Next, select the exact loca on from the “Search results” list that appears beside the search box. Once you select a loca on from this list the map will automa cally zoom to this loca on.
Step 2: Expor ng Spa al Data to OpenStreetMap XML Data files
Once you have your area , click the “Export Data” link on the le of the screen. You can export the en re window view or you can “Manually select a different area” if you only want a por on of the displayed view. If you select the manual op on, you use the box that pops up to specify the area to export.
Next, click on the “Export” bu on to export the data. This will save the file as an “OpenStreetMap XML Data” (.osm).
ww
w.li
bra
ry.c
arle
ton
.ca/fi
nd
/gis
Page 1
Downloading Data from OpenStreetMap
Use the mouse to pan and zoom in/out to locate a specific area of the city.
Notes: if you try to export an area that is too large, then OpenStreetMap will give you “You requested too many nodes (limit is 50000).
Either request a smaller area, or use planet.osm “ . This means exactly what it says: either narrow down your area, or go to
h p://planet.osm.org/ (or downloads.cloudmade.com) to download larger datasets at the country level.
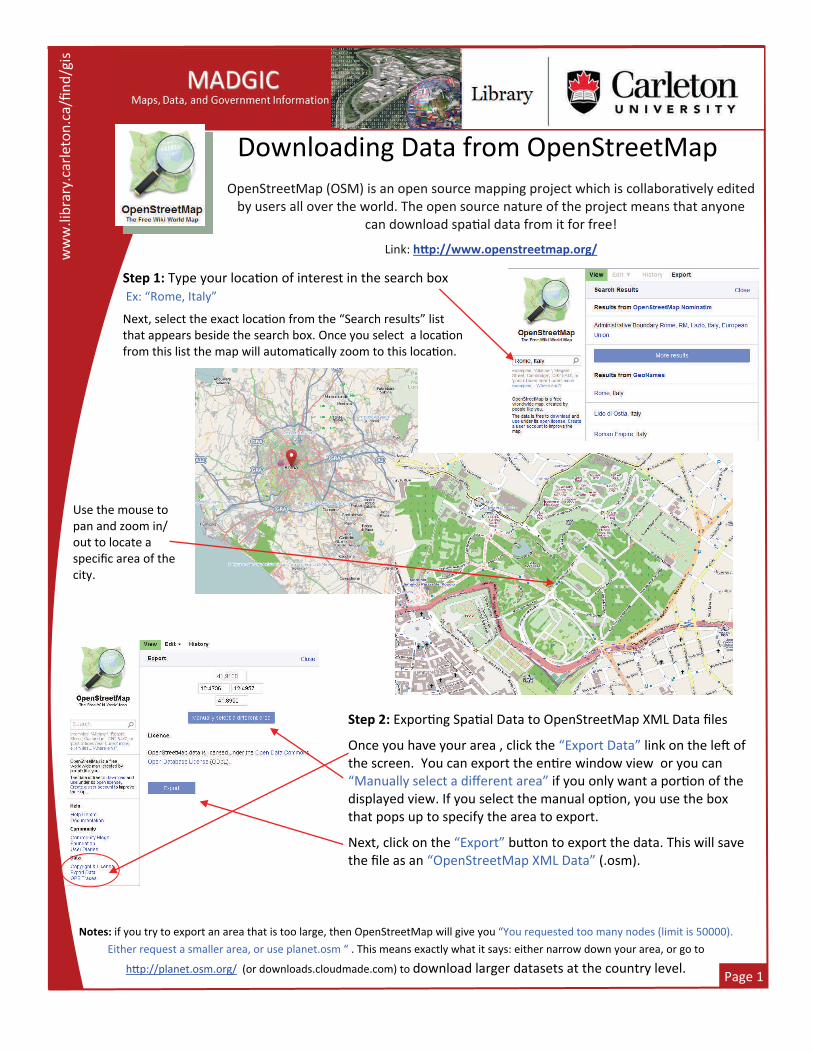
Conver ng to Shapefiles:
ArcMap cannot read the .osm file format. Therefore you must convert it to shapefiles using a program called FME Quick Translator, which can be found on the desktop.
Transla on Parameters for Conver ng to Shapefiles
In the “Reader Format” use the drop down menu to select “OpenStreetMap (OSM) XML”. If the op on is not in the dropdown menu, just start typing it in and it will fill in the rest.
In the “Reader Dataset”, click on the “…” bu on to open a file directory
Opening the Shapefiles in ArcMap
‐Once FME is finished the transla on it will say “Transla on was SUCCESSFUL….Transla on finished” . The newly
created shapefiles will be in your folder and you can add them to ArcMap using the Add Data bu on.
Page 2
Convert OpenStreetMap (.osm) data to Shapefiles (.shp)
When FME opens, go to the File tab and select the “Translate” op on. The “Set Transla on Parameters” window will appear.
In the “WriterFormat” use the drop down menu to select “ESRI Shape”. If the op on is not in the dropdown menu, just start typing it in and it will fill in the rest.
In the “Writer Dataset”, click on the “…” bu on to open a file directory and navigate to the loca on where you want the shapefiles to output to.
Press “OK” once you are done to start the transla on.
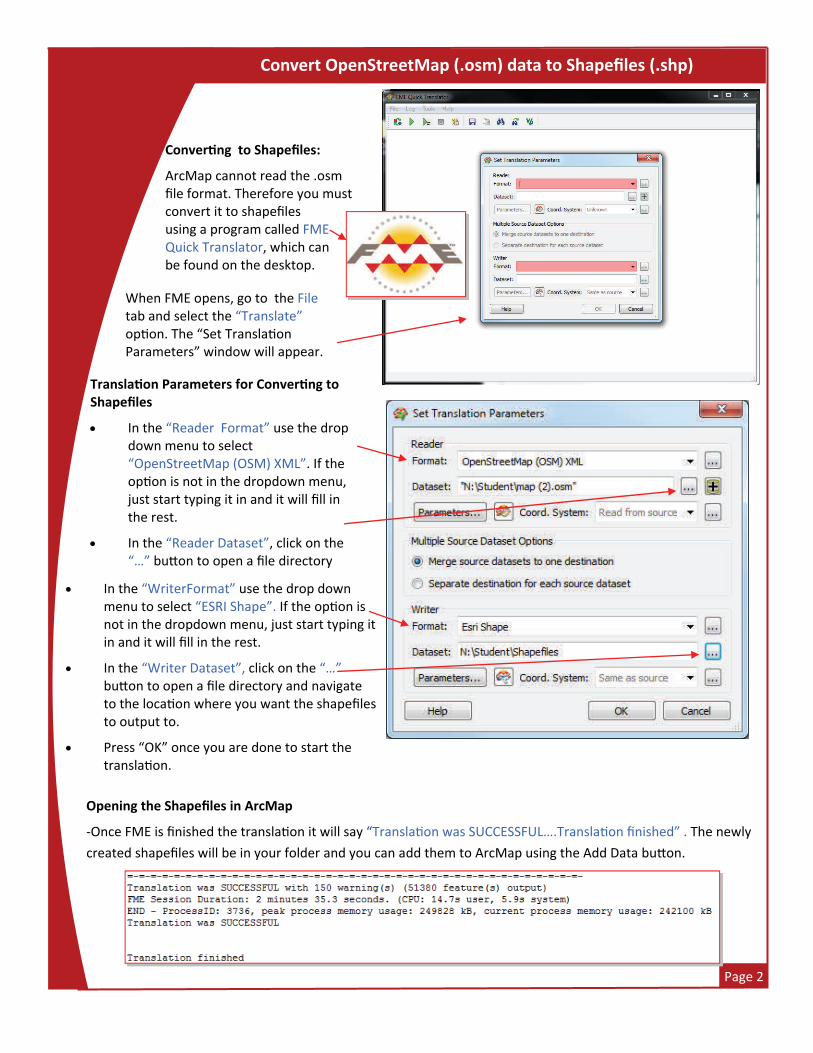
Conver ng to .osm files to DWG:
You can use FME Quick Translator to also convert .osm files to .DWG files for use in AutoCAD. However, you will want to define the coordinate system to a projected coordinate system, such as Universal Transverse Mercator (UTM). If you do not project your files then you will not be able to measure any sort of feature geometry (i.e. length, area, height) in useable units like meters, kilometers etc. Instead, all your measurements will be in decimal degrees, which is not ideal.
Page 3
Finding the Appropriate UTM Zone:
The UTM coordinate system splits the world up into 60 zones which each cover 6o of longitude. This means that you will have to locate your UTM zone in order to project data into a UTM projec on.
Convert OpenStreetMap (.osm) data to AutoCAD (.dwg)
‐Follow the link below and open the “Universal Transverse Mercator (UTM)‐EPSG Codes” index:
h p://www.library.carleton.ca/interac ve‐indexes
Double click on the UTM_Index.kml file to open it in Google Earth Pro.
Pan to your loca on (ex. Rome). The 5 digit label in the grid is the EPSG code which is a unique code given to each WSG 84 UTM zone. Make note of the code because you will use it in
the next step.
Open FME Quick Translator
Open FME Quick Translator which can be found on the Desktop. Under File, select Translate.
In the “Reader Format” use the drop down menu to select “OpenStreetMap (OSM) XML”. If the op on is not in the dropdown menu, just start typing it in and it will fill in the rest.
‐In the “Reader Dataset”, click on the “…” bu on to open a file direc‐tory and navigate to your .osm file you just downloaded.
‐In the “Writer Format” use the drop down menu to select “Autodesk AutoCAD DWG/DXF”. If the op on is not in the dropdown menu, just start typing it in and it will fill in the rest.
‐In the “Writer Dataset”, click on the “…” bu on to open a file directory and navigate to the loca on where you want the .dwg files to output to and give the file an name.
Do NOT press Okay yet...see
next page!
Page 4
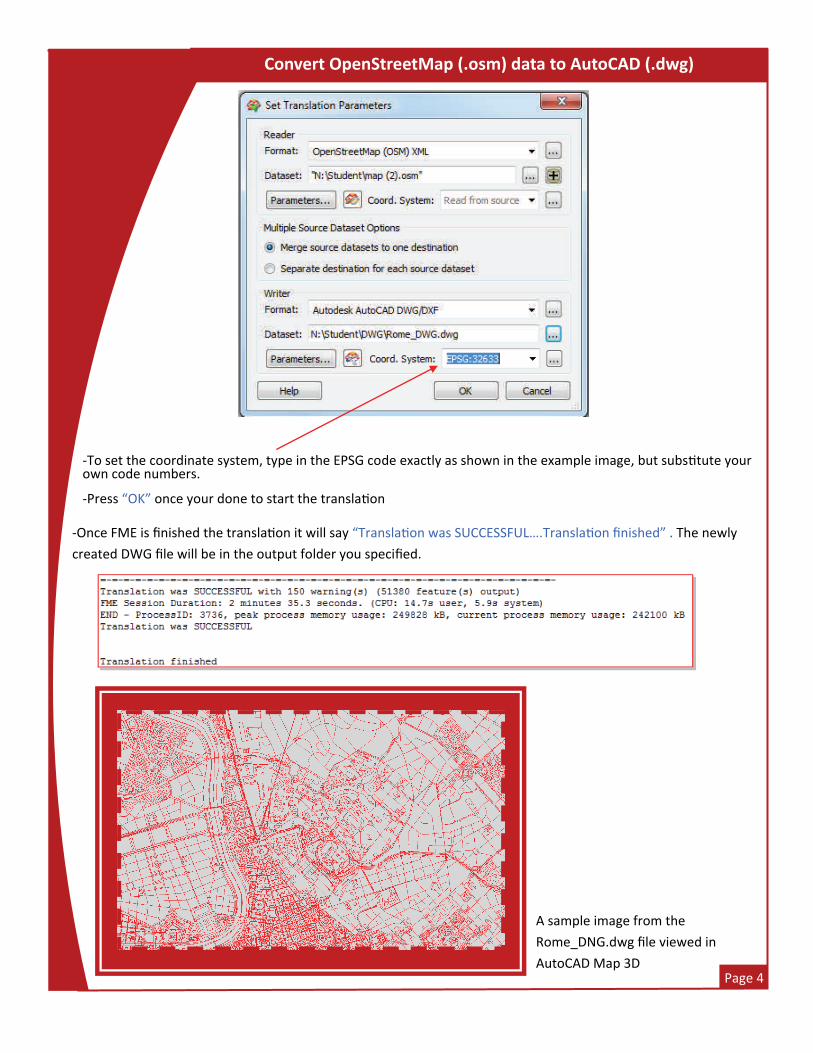
‐To set the coordinate system, type in the EPSG code exactly as shown in the example image, but subs tute your own code numbers.
‐Press “OK” once your done to start the transla on
‐Once FME is finished the transla on it will say “Transla on was SUCCESSFUL….Transla on finished” . The newly
created DWG file will be in the output folder you specified.
Convert OpenStreetMap (.osm) data to AutoCAD (.dwg)
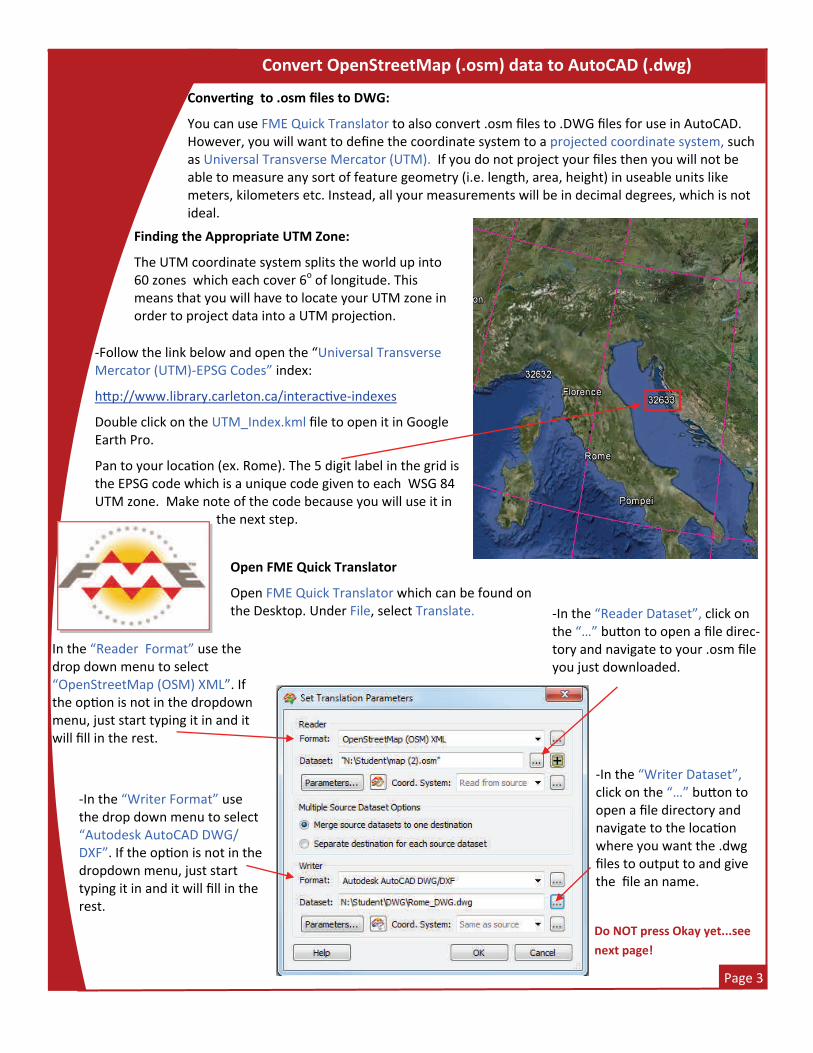
A sample image from the
Rome_DNG.dwg file viewed in
AutoCAD Map 3D