Embed Size (px)
Citation preview

University of Delhi
© Imran Ghani,2006,[email protected]
Word Processing using MS Word
byIMRAN GHANI
WELCOME
© Imran Ghani,2006,[email protected]
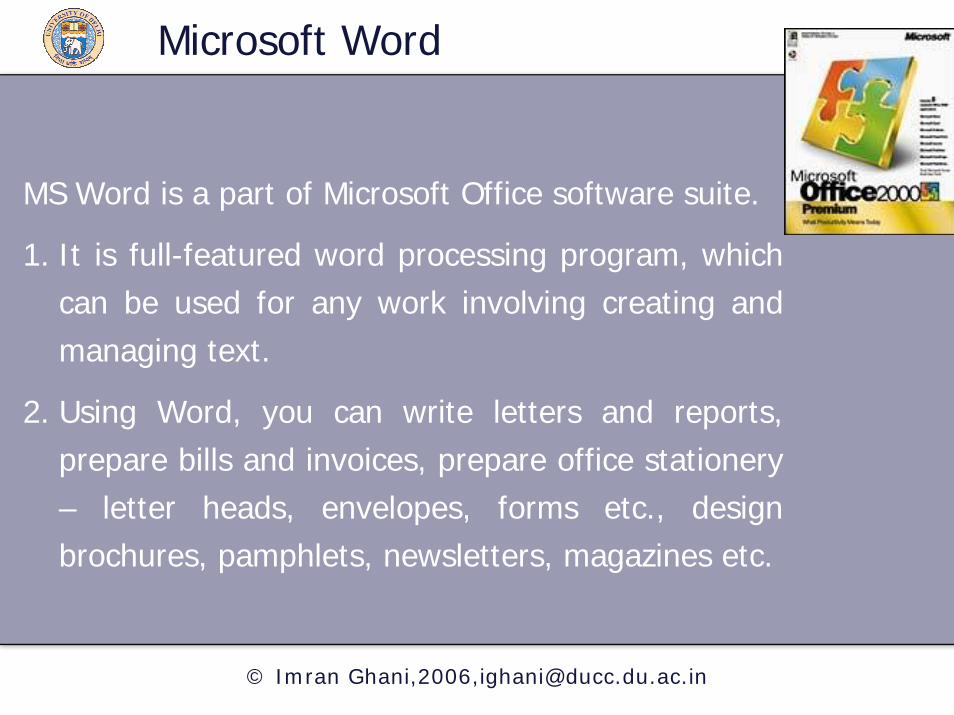
Microsoft Word
MS Word is a part of Microsoft Office software suite.
1. It is full-featured word processing program, which can be used for any work involving creating and managing text.
2. Using Word, you can write letters and reports, prepare bills and invoices, prepare office stationery – letter heads, envelopes, forms etc., design brochures, pamphlets, newsletters, magazines etc.
WELCOME
© Imran Ghani,2006,[email protected]
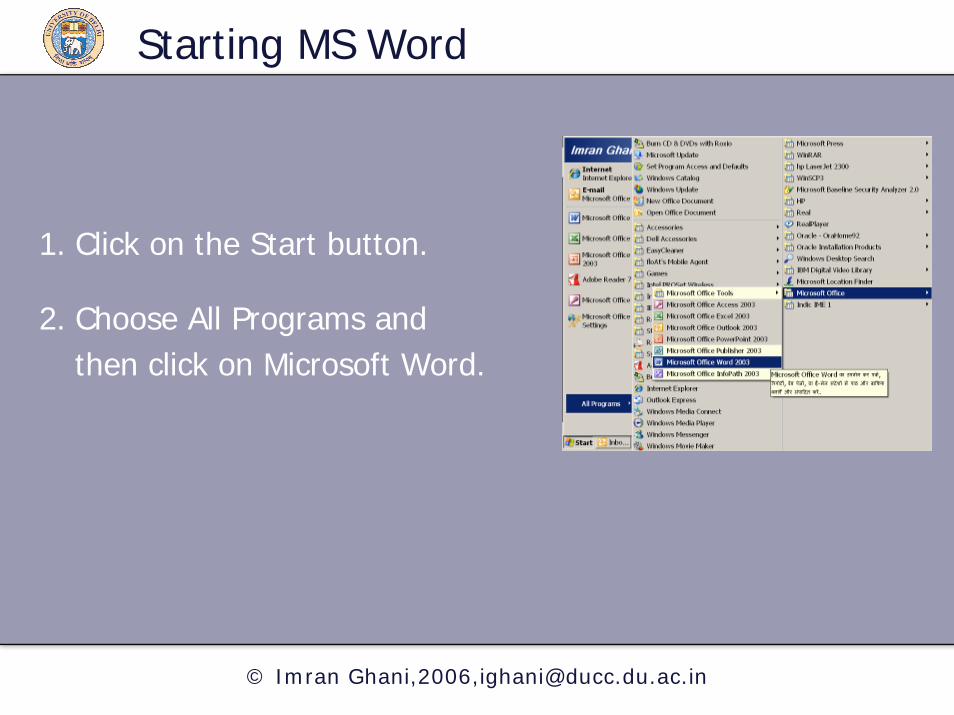
Starting MS Word
1. Click on the Start button.
2. Choose All Programs and then click on Microsoft Word.

WELCOME
© Imran Ghani,2006,[email protected]
Toolbars and MenusStandard Toolbar
Formatting Toolbar
Insertion point
Working area
WELCOME
© Imran Ghani,2006,[email protected]
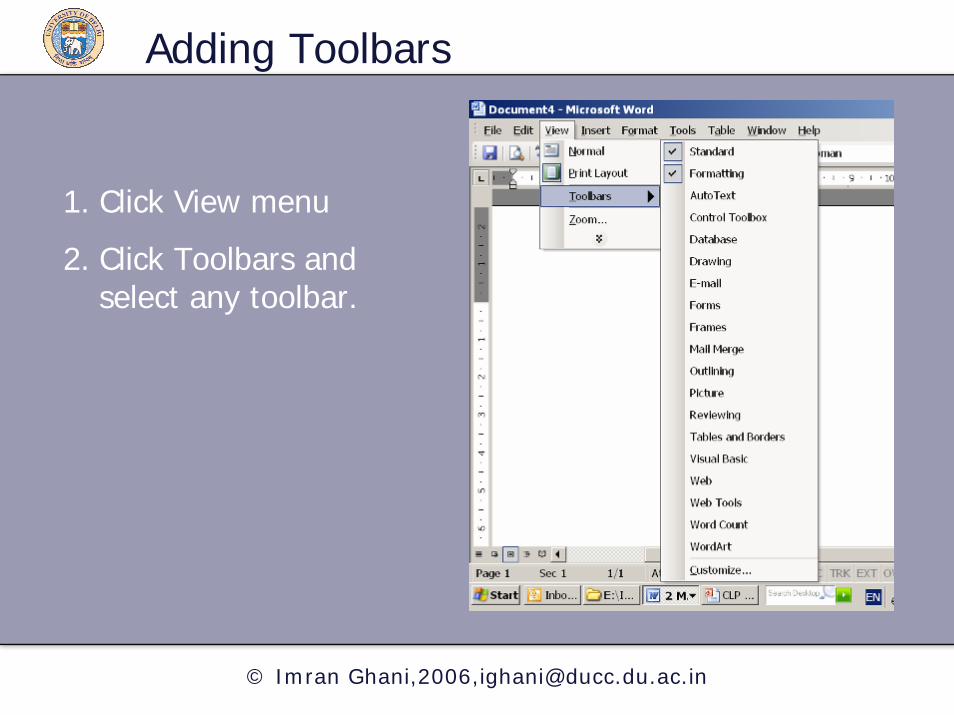
Adding Toolbars
1. Click View menu
2. Click Toolbars and select any toolbar.
WELCOME
© Imran Ghani,2006,[email protected]
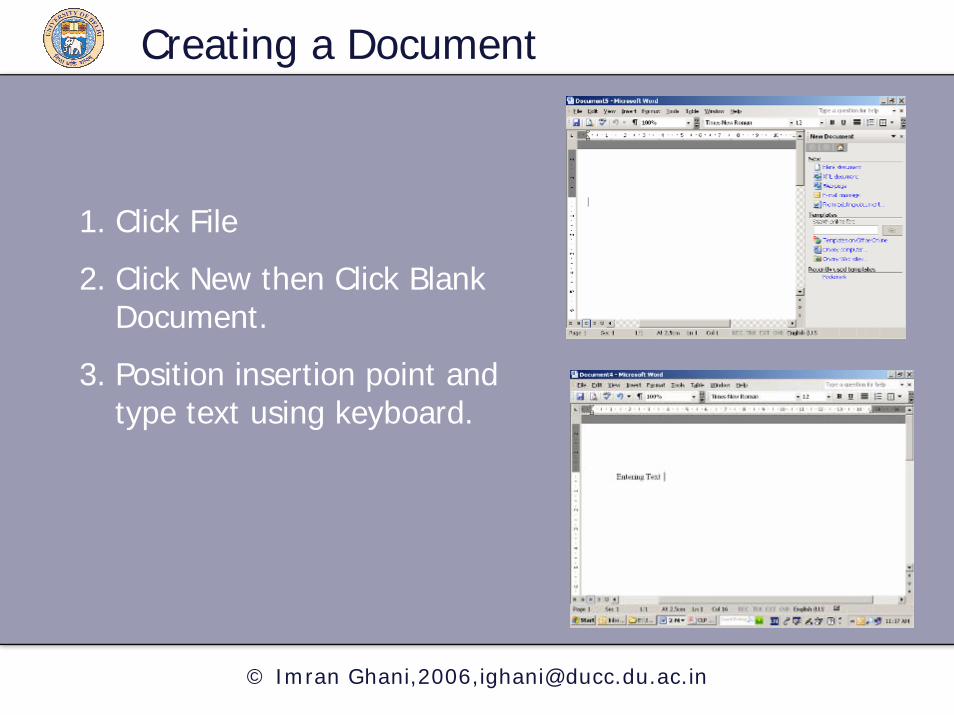
Creating a Document
1. Click File
2. Click New then Click Blank Document.
3. Position insertion point and type text using keyboard.
WELCOME
© Imran Ghani,2006,[email protected]
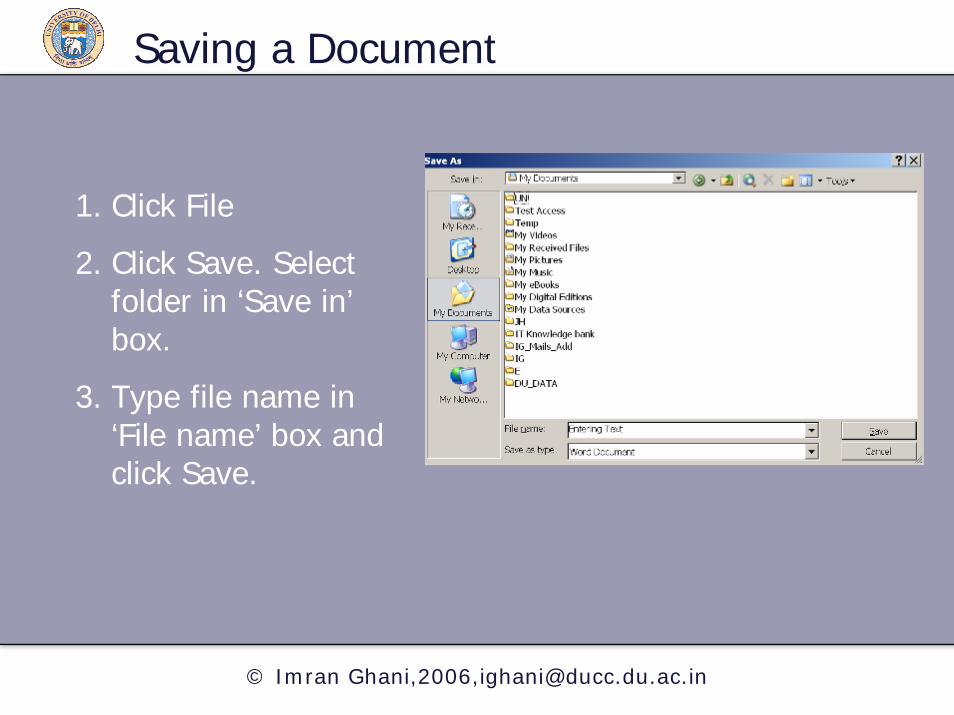
Saving a Document
1. Click File
2. Click Save. Select folder in ‘Save in’box.
3. Type file name in ‘File name’ box and click Save.
WELCOME
© Imran Ghani,2006,[email protected]
Closing a Document
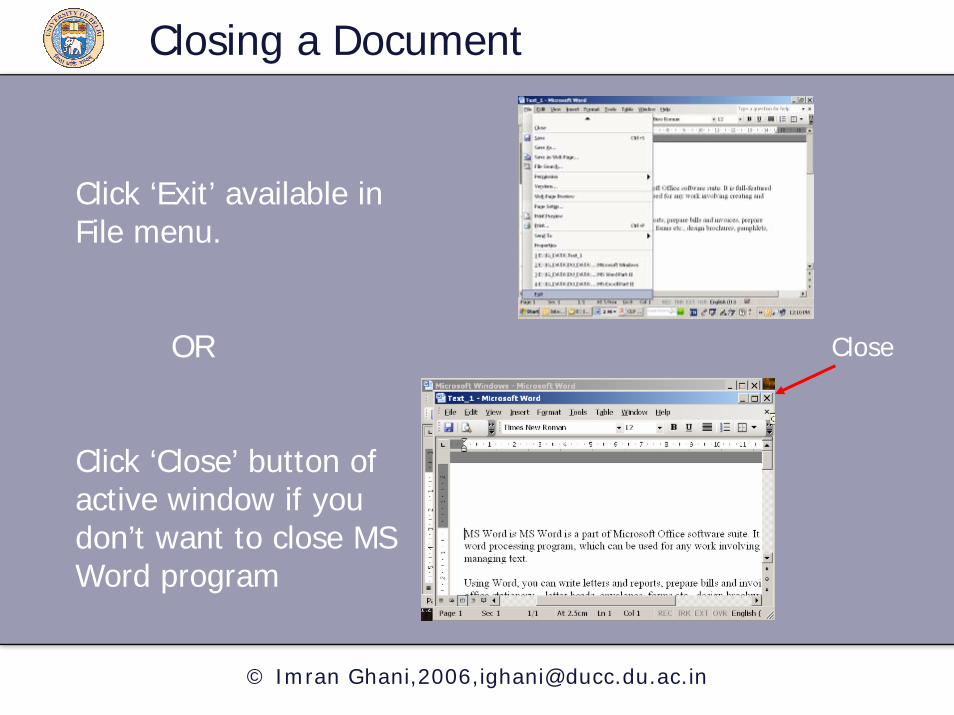
Click ‘Exit’ available in File menu.
OR
Click ‘Close’ button of active window if you don’t want to close MS Word program
Close

WELCOME
© Imran Ghani,2006,[email protected]
Opening a Document
1. Open MS Word application.
2. Click File and click Open.
3. Select appropriate folder in ‘Look in’ drop down menu.
4. Click file name or type file name in ‘File name’ box.
5. Click Open.
WELCOME
© Imran Ghani,2006,[email protected]
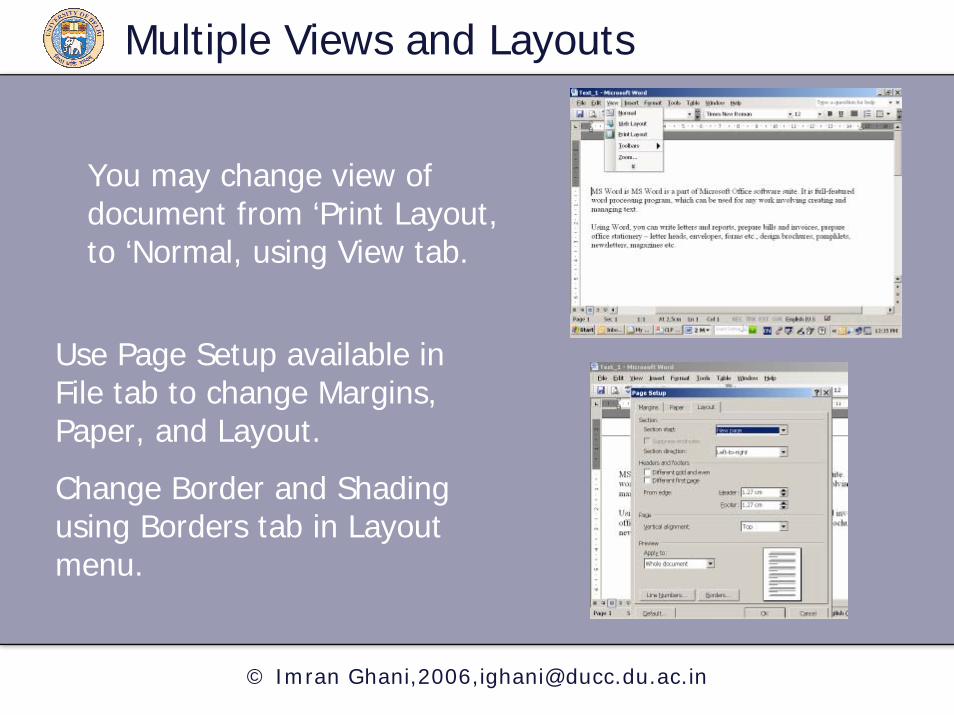
Multiple Views and Layouts
You may change view of document from ‘Print Layout, to ‘Normal, using View tab.
Use Page Setup available in File tab to change Margins, Paper, and Layout.
Change Border and Shading using Borders tab in Layout menu.
WELCOME
© Imran Ghani,2006,[email protected]
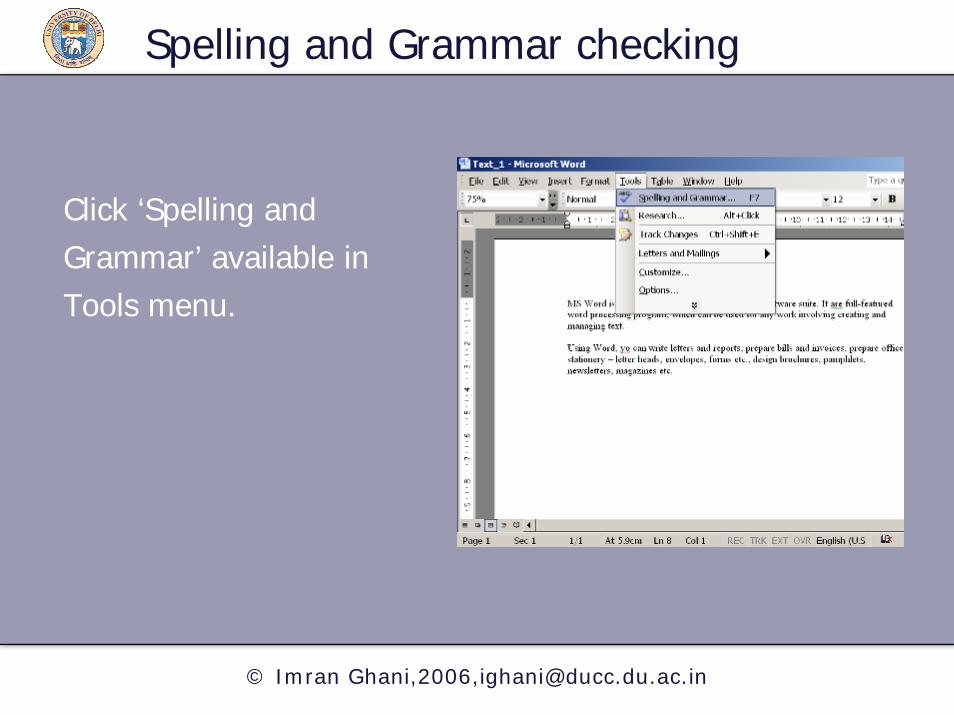
Spelling and Grammar checking
Click ‘Spelling and Grammar’ available in Tools menu.
WELCOME
© Imran Ghani,2006,[email protected]
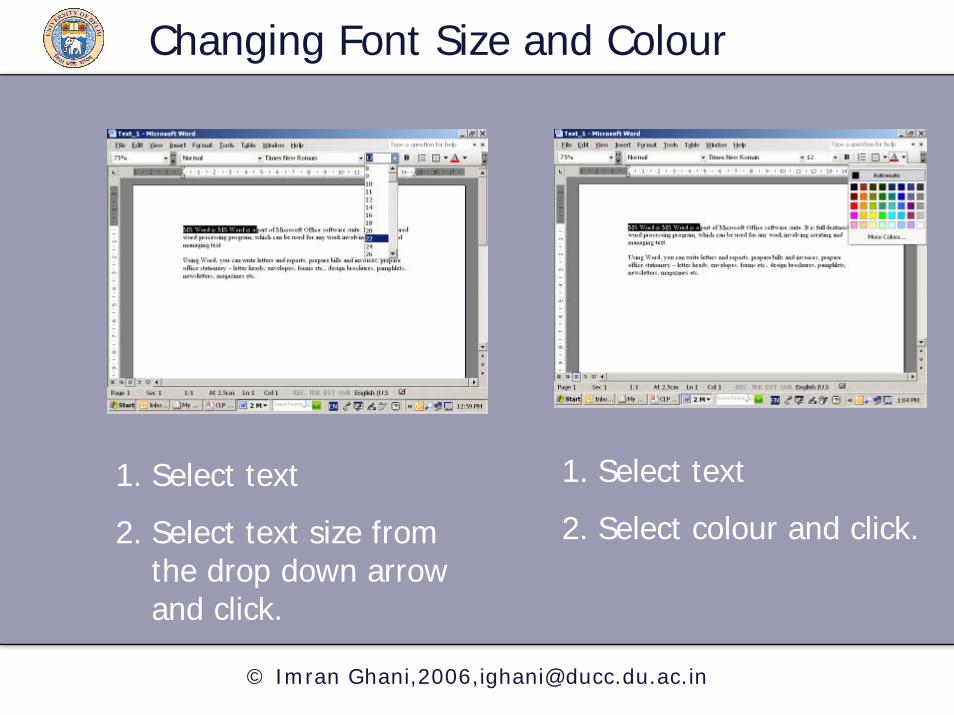
Changing Font Size and Colour
1. Select text
2. Select colour and click.
1. Select text
2. Select text size from the drop down arrow and click.

WELCOME
© Imran Ghani,2006,[email protected]
Changing text Attribute
1. Applying the BoldAttribute
2. Underlining the text
3. Italicizing the text.
WELCOME
© Imran Ghani,2006,[email protected]
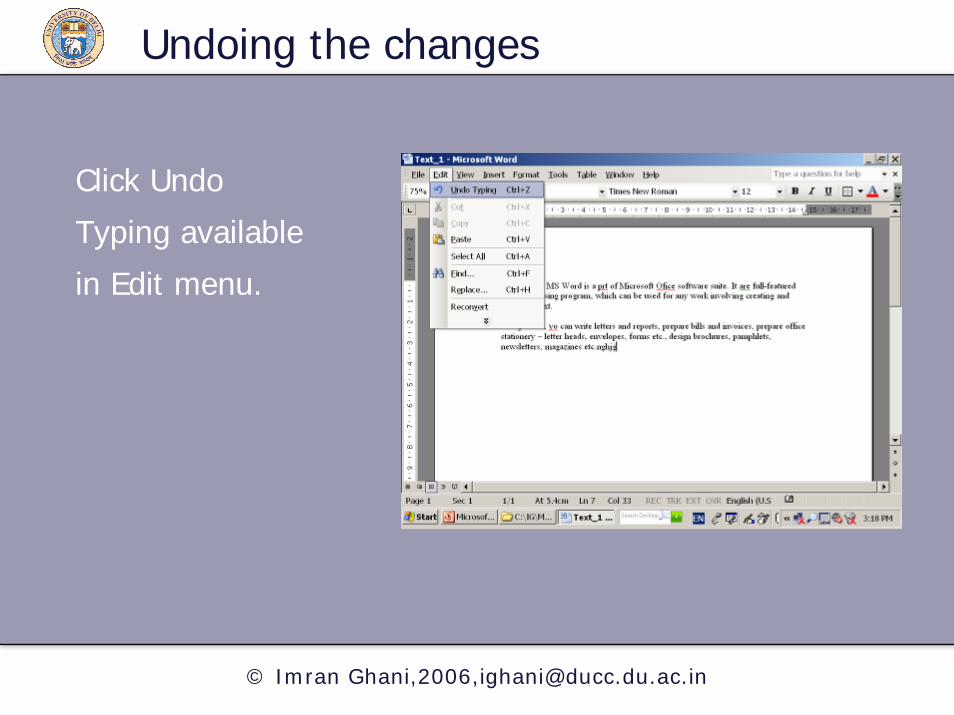
Undoing the changes
Click Undo
Typing available
in Edit menu.
WELCOME
© Imran Ghani,2006,[email protected]
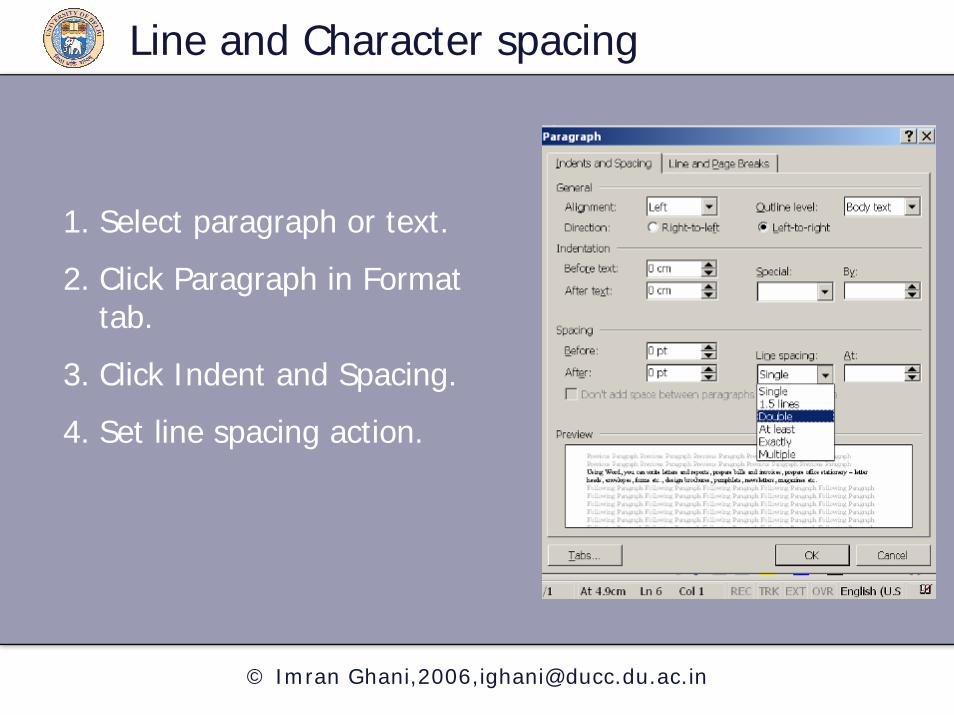
Line and Character spacing
1. Select paragraph or text.
2. Click Paragraph in Format tab.
3. Click Indent and Spacing.
4. Set line spacing action.
WELCOME
© Imran Ghani,2006,[email protected]
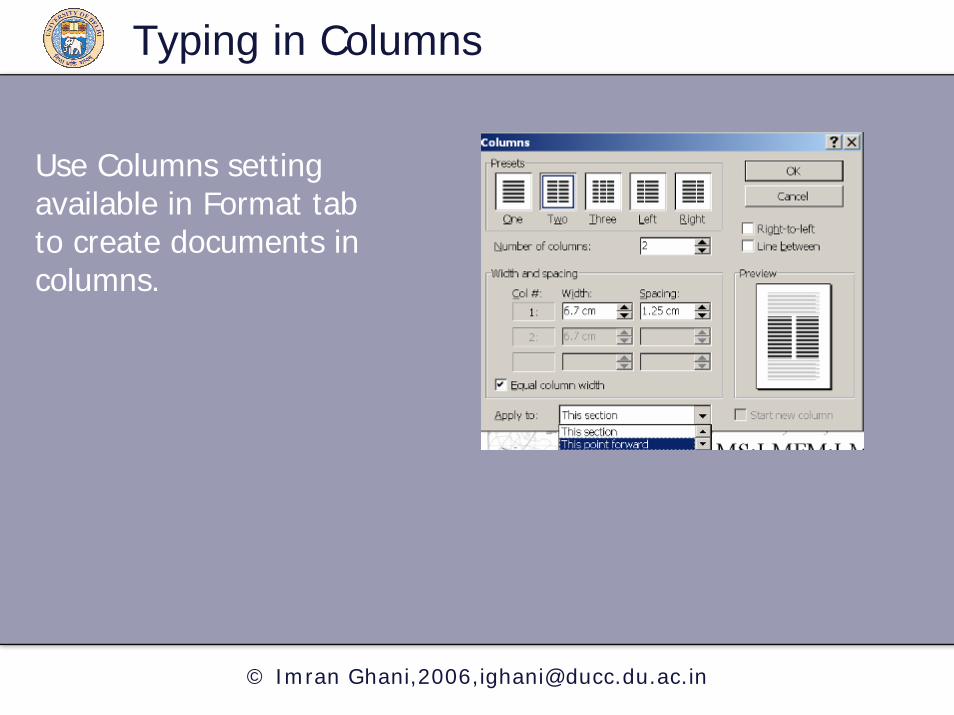
Typing in Columns
Use Columns setting available in Format tab to create documents in columns.
WELCOME
© Imran Ghani,2006,[email protected]
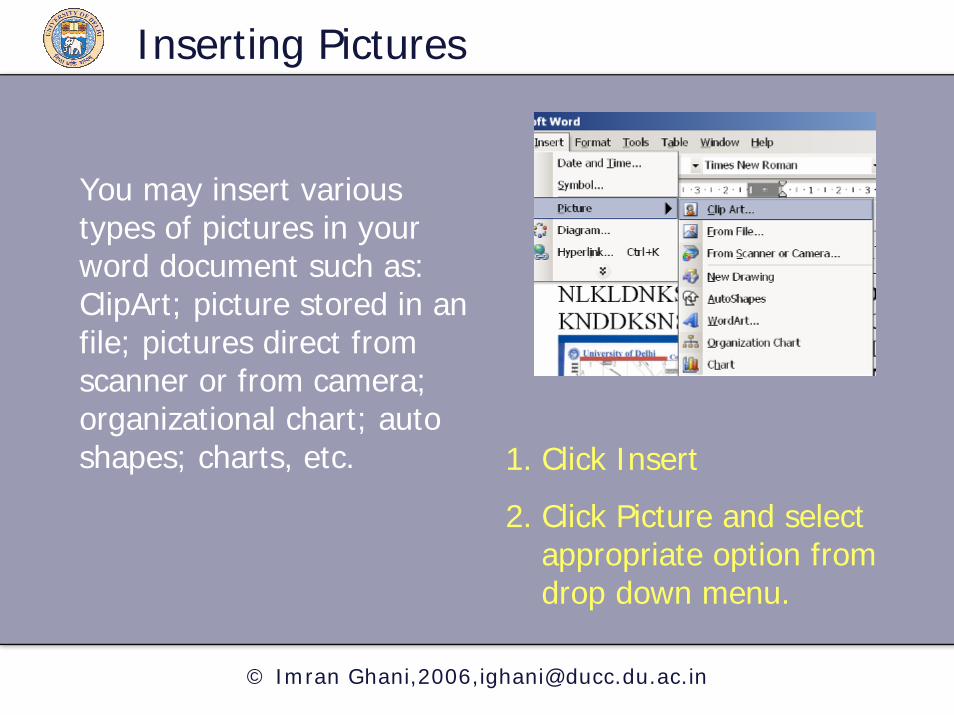
Inserting Pictures
You may insert various types of pictures in your word document such as: ClipArt; picture stored in an file; pictures direct from scanner or from camera; organizational chart; auto shapes; charts, etc. 1. Click Insert
2. Click Picture and select appropriate option from drop down menu.
WELCOME
© Imran Ghani,2006,[email protected]
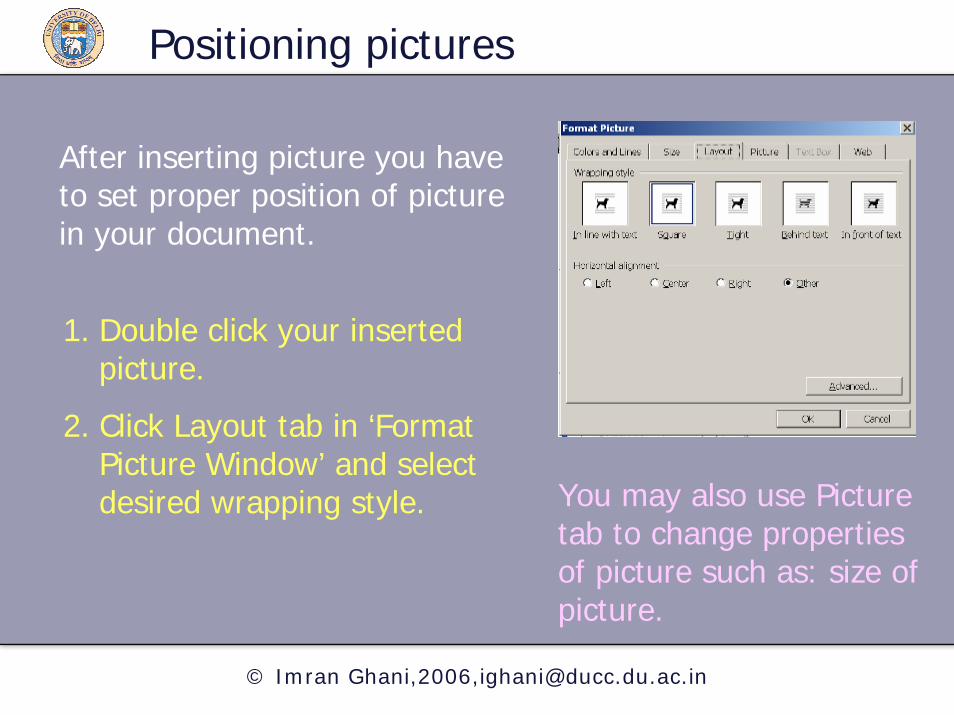
Positioning pictures
After inserting picture you have to set proper position of picture in your document.
1. Double click your inserted picture.
2. Click Layout tab in ‘Format Picture Window’ and select desired wrapping style. You may also use Picture
tab to change properties of picture such as: size of picture.

WELCOME
© Imran Ghani,2006,[email protected]
Aligning the Text
1. Centring the Text
2. Justifying the Text
3. Aligning Left
4. Aligning Right
1. Highlight the text.
2. Click the appropriate aligning button.
WELCOME
© Imran Ghani,2006,[email protected]
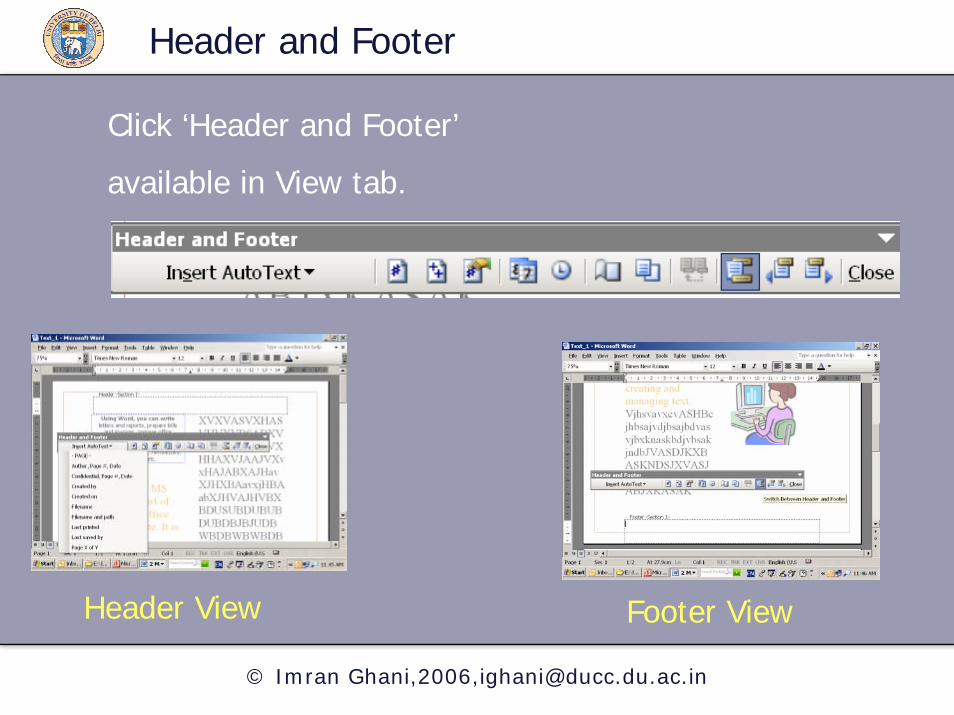
Header and Footer
Click ‘Header and Footer’
available in View tab.
Header View Footer View

WELCOME
© Imran Ghani,2006,[email protected]
Bullets and Numbering
Use ‘Bullets and Numbering’ command available in Format tab.
1. Highlight the text.
2. Click Bullets and Numbering in Format tab.
3. Select required format either clicking Bulleted or Numbered tab.
4. Then click OK
WELCOME
© Imran Ghani,2006,[email protected]
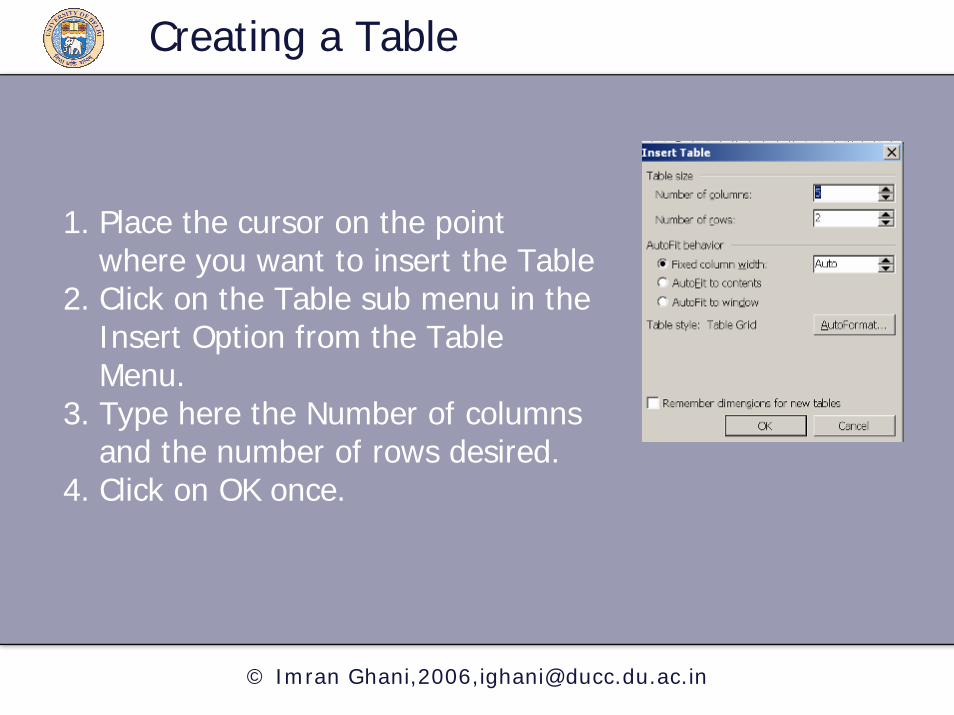
Creating a Table
1. Place the cursor on the point where you want to insert the Table
2. Click on the Table sub menu in the Insert Option from the Table Menu.
3. Type here the Number of columns and the number of rows desired.
4. Click on OK once.
WELCOME
© Imran Ghani,2006,[email protected]
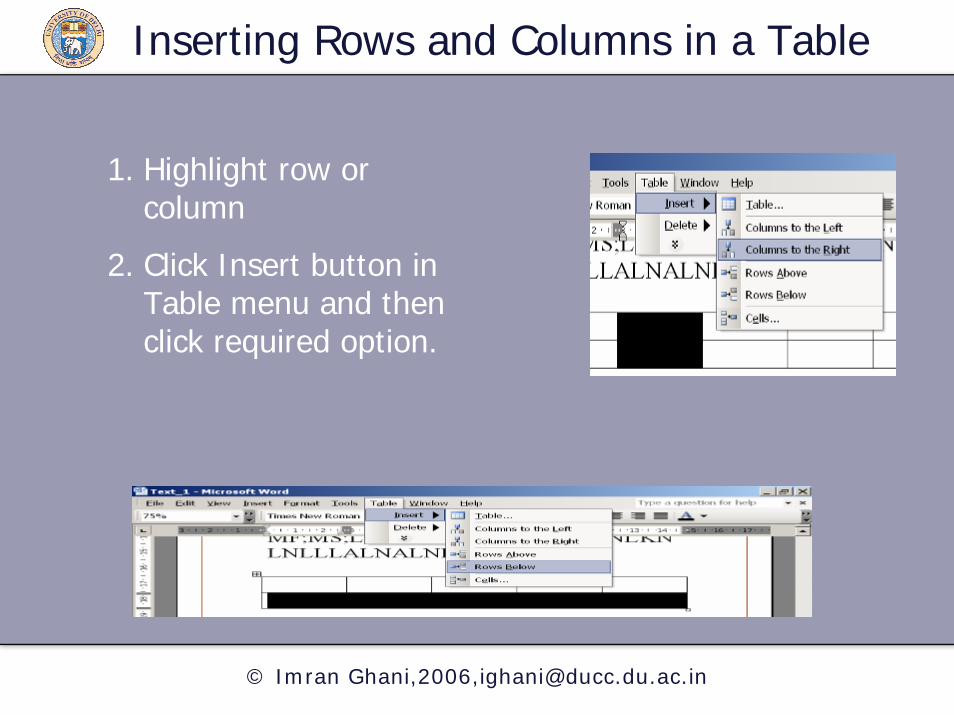
Inserting Rows and Columns in a Table
1. Highlight row or column
2. Click Insert button in Table menu and then click required option.
WELCOME
© Imran Ghani,2006,[email protected]
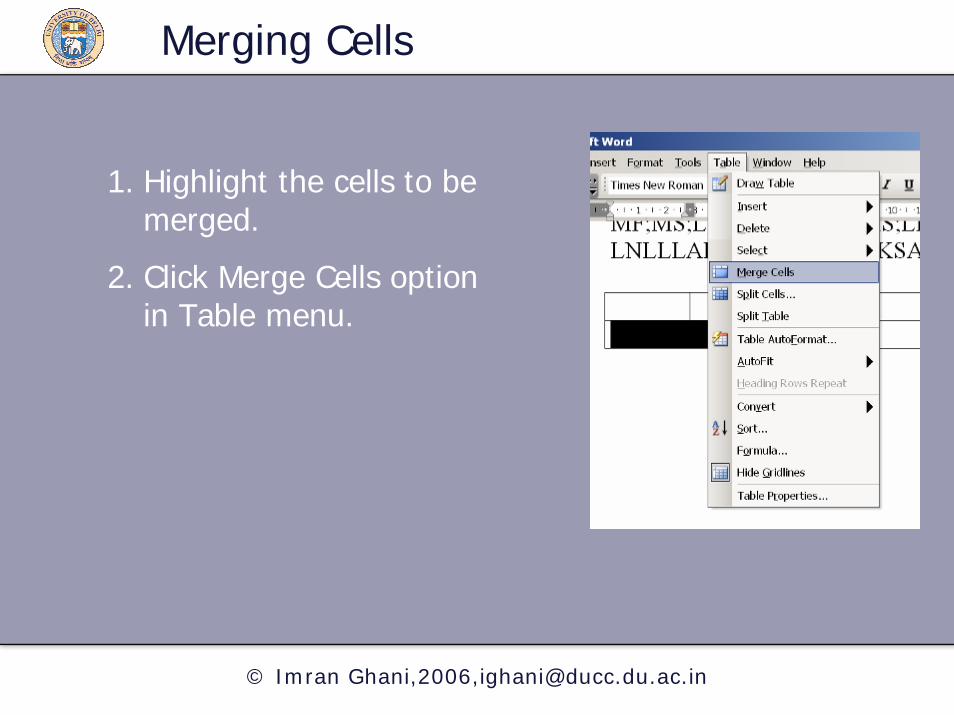
Merging Cells
1. Highlight the cells to be merged.
2. Click Merge Cells option in Table menu.

WELCOME
© Imran Ghani,2006,[email protected]
Deleting Row or Column
1. Highlight the row or column and click Delete button available in Table menu.
2. Then click desired option.

WELCOME
© Imran Ghani,2006,[email protected]
Cell Alignment
You may align the text in a cell as per your requirement.
1. Right click inside the cell.
2. Then click the appropriate alignment icon.
WELCOME
© Imran Ghani,2006,[email protected]
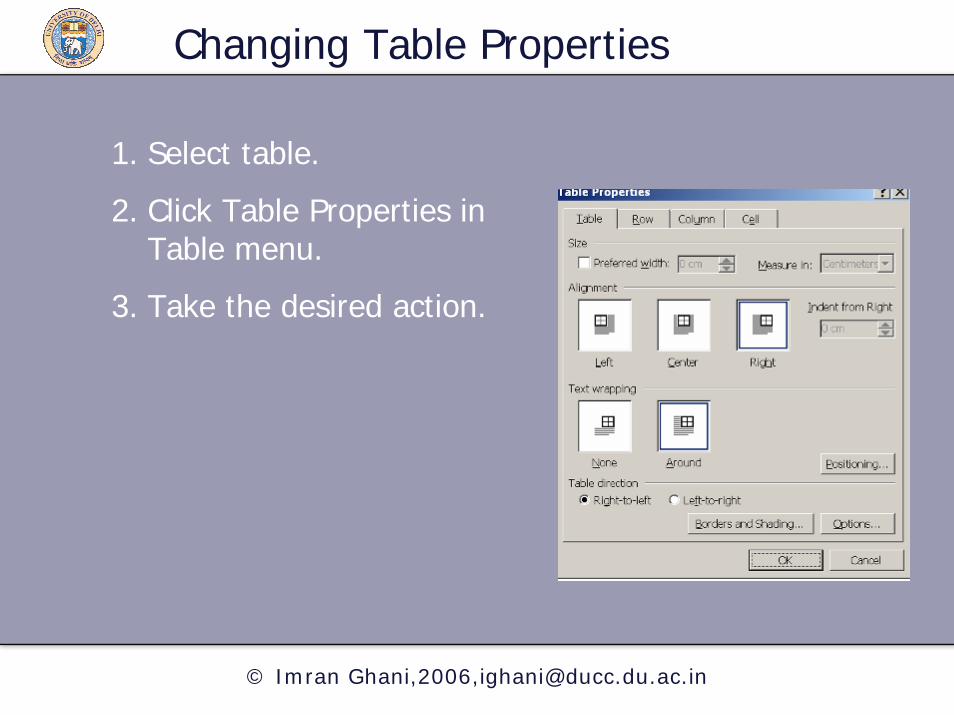
Changing Table Properties
1. Select table.
2. Click Table Properties in Table menu.
3. Take the desired action.

WELCOME
© Imran Ghani,2006,[email protected]
Printing Document
Run ‘Print Preview’command in File menu before taking final printout.
1. Click Print available in File menu and select the required options such as: Name of Printer; Page Range; Number of Copies, etc.
2. Click OK

WELCOME
© Imran Ghani,2006,[email protected]
Thanks.
IMRAN GHANISR. SYSTEM PROGRAMMER
DUCC, UNIVERSITY OF DELHIDELHI-110007
E-mail: [email protected]@hotmail.com
Home page: http://people.du.ac.in/~ighani