Embed Size (px)
Citation preview
Word 2007 13.1 12/31/08
Word 2007
Mail Merge Form Letters
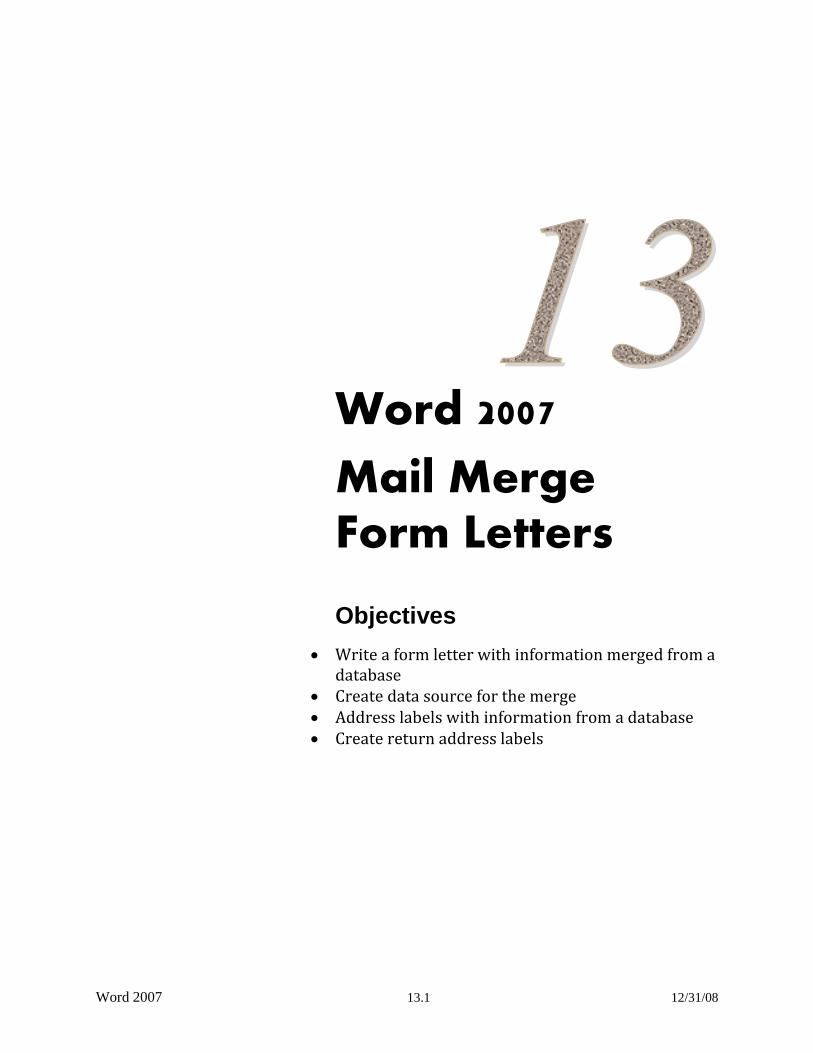
Objectives
Write a form letter with information merged from a database
Create data source for the merge Address labels with information from a database Create return address labels
Word 2007 13.2 12/31/08
Contents Page Mail Merge ............................................................................................................................ 1
View the address book .............................................................................................. 1
Create a form letter .................................................................................................... 2
Identify the address book .......................................................................................... 3
Select Mail Merge Type ............................................................................................ 3
Select Document ....................................................................................................... 4
Insert merge fields ..................................................................................................... 5
Insert Address block .................................................................................................. 6
Match fields ............................................................................................................... 7
Enter a greeting ......................................................................................................... 9
Insert and format date and address .......................................................................... 10
Insert other information........................................................................................... 11
Perform the merge ................................................................................................... 13
Close the documents ............................................................................................... 14
Activity-Merge ........................................................................................................ 14
Create Labels ........................................................................................................... 16
Select starting document ......................................................................................... 16
Set up label printing ................................................................................................ 16
Select recipients ...................................................................................................... 17
Preview the labels ................................................................................................... 18
Edit recipient list ..................................................................................................... 19
Complete the merge ................................................................................................ 19
Activity-Mailing Labels .......................................................................................... 20
Create Return Address Labels ................................................................................. 20
Exercise ................................................................................................................... 23
Return Address Labels: .....................................................................................23
Lesson 13: Mail Merge Part 2
Word 2007 13.1 12/31/08
Mail Merge In a previous lesson, you learned to create a table. A table may be used to hold
many kinds of information. In this lesson we will work with a table which
contains names, addresses, and other types of information about people. Common
names for this type of table are an address book or a mailing list. We will refer to
the table as an address book.
Using an address book, mail merge allows you to address an envelope, a mailing
label, a holiday form letter or any document to many people without typing the
name and/or address in each copy of the document. Mail merge inserts the name
and/or address from your address book into a copy of the document which can then
be mailed. The original document remains unchanged and can be used repeatedly.
View the address book
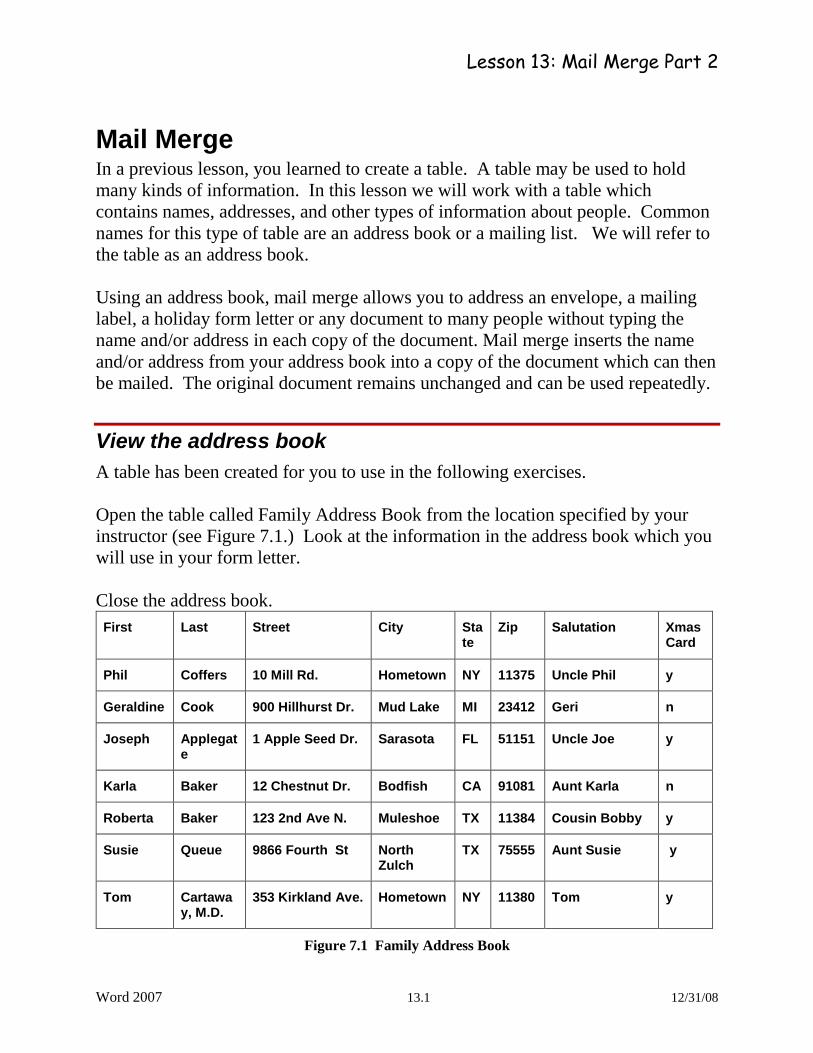
A table has been created for you to use in the following exercises.
Open the table called Family Address Book from the location specified by your
instructor (see Figure 7.1.) Look at the information in the address book which you
will use in your form letter.
Close the address book.
First Last Street City State
Zip Salutation Xmas Card
Phil Coffers 10 Mill Rd. Hometown NY 11375 Uncle Phil y
Geraldine Cook 900 Hillhurst Dr. Mud Lake MI 23412 Geri n
Joseph Applegate
1 Apple Seed Dr. Sarasota FL 51151 Uncle Joe y
Karla Baker 12 Chestnut Dr. Bodfish CA 91081 Aunt Karla n
Roberta Baker 123 2nd Ave N. Muleshoe TX 11384 Cousin Bobby y
Susie Queue 9866 Fourth St North Zulch
TX 75555 Aunt Susie y
Tom Cartaway, M.D.
353 Kirkland Ave. Hometown NY 11380 Tom y
Figure 7.1 Family Address Book
Lesson 13: Mail Merge Part 2
Word 2007 13.2 12/31/08
Create a form letter
The form letter will include two types of information: information that will be the
same in every letter and information (like names and addresses) which will be
different in every letter and which will come from the address book. This allows
you to write a letter, such as an annual holiday letter, which you can personalize
for many individuals.
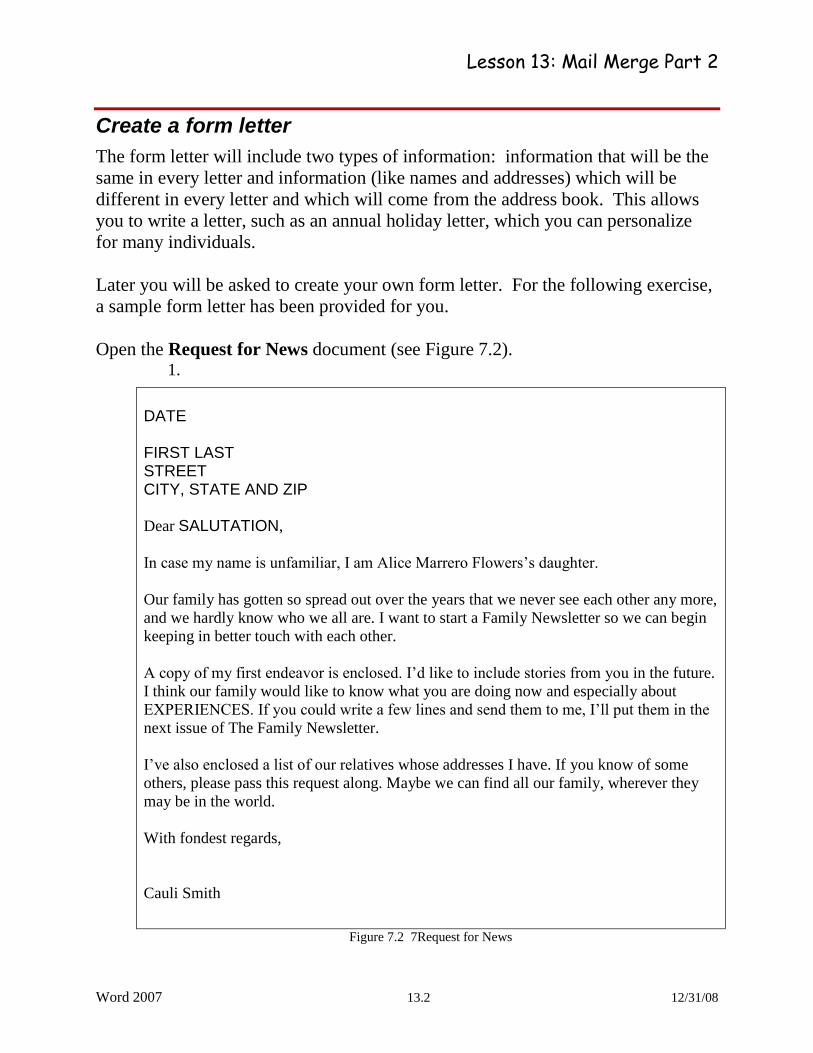
Later you will be asked to create your own form letter. For the following exercise,
a sample form letter has been provided for you.
Open the Request for News document (see Figure 7.2). 1.
DATE FIRST LAST STREET CITY, STATE AND ZIP
Dear SALUTATION,
In case my name is unfamiliar, I am Alice Marrero Flowers’s daughter.
Our family has gotten so spread out over the years that we never see each other any more,
and we hardly know who we all are. I want to start a Family Newsletter so we can begin
keeping in better touch with each other.
A copy of my first endeavor is enclosed. I’d like to include stories from you in the future.
I think our family would like to know what you are doing now and especially about
EXPERIENCES. If you could write a few lines and send them to me, I’ll put them in the
next issue of The Family Newsletter.
I’ve also enclosed a list of our relatives whose addresses I have. If you know of some
others, please pass this request along. Maybe we can find all our family, wherever they
may be in the world.
With fondest regards,
Cauli Smith
2.
Figure 7.2 7Request for News
Lesson 13: Mail Merge Part 2
Word 2007 13.3 12/31/08
The information for First, Last, Street, City, State, Zip and Experiences will come
from the address book. Everything else in the form letter will be the same for
every person.
Identify the address book
You may create many tables which you use as address books. For example, you
may want one for friends and family and another for members of a club.
Therefore, you must tell Word which address book you want to use for this letter.
Select Mail Merge Type
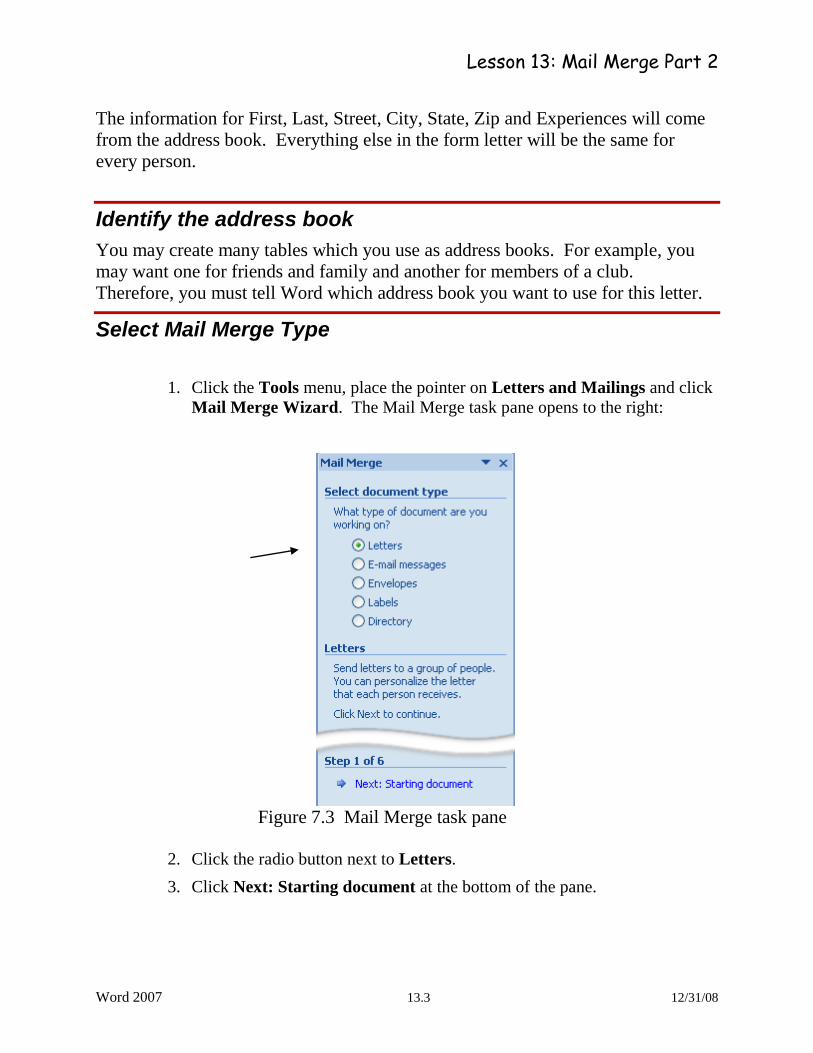
1. Click the Tools menu, place the pointer on Letters and Mailings and click
Mail Merge Wizard. The Mail Merge task pane opens to the right:
Figure 7.3 Mail Merge task pane
2. Click the radio button next to Letters.
3. Click Next: Starting document at the bottom of the pane.
Lesson 13: Mail Merge Part 2
Word 2007 13.4 12/31/08
Select Document
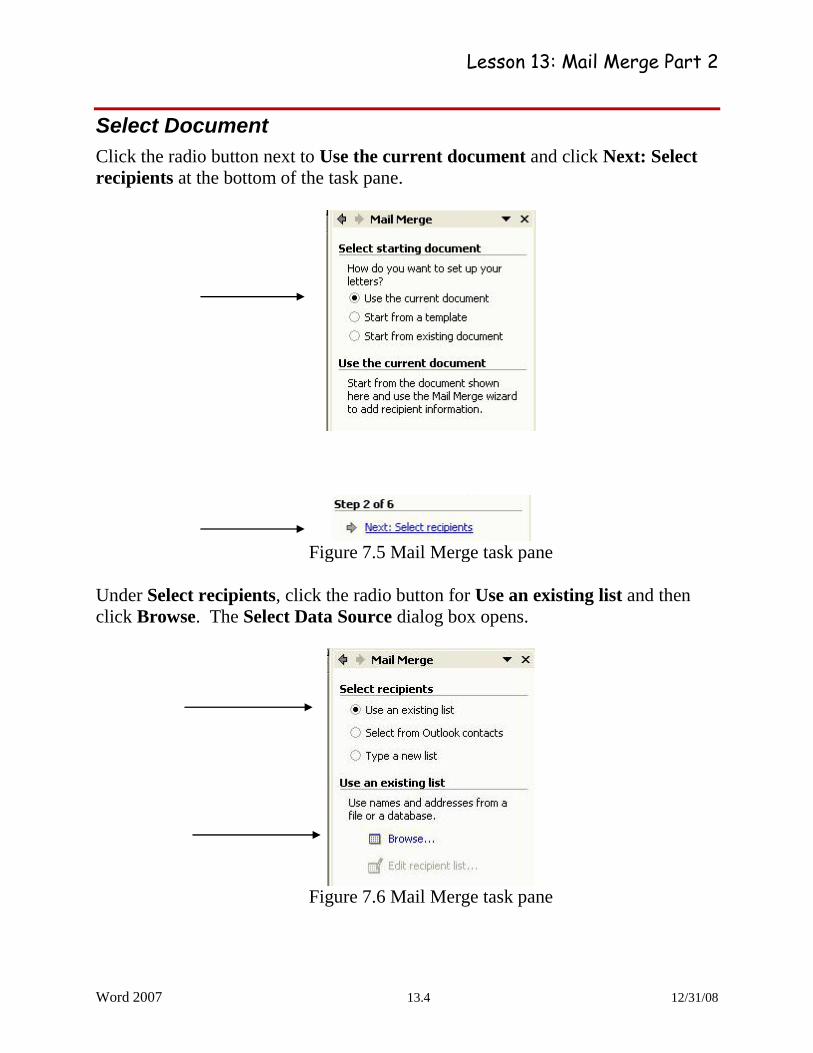
Click the radio button next to Use the current document and click Next: Select
recipients at the bottom of the task pane.
Figure 7.5 Mail Merge task pane
Under Select recipients, click the radio button for Use an existing list and then
click Browse. The Select Data Source dialog box opens.
Figure 7.6 Mail Merge task pane
Lesson 13: Mail Merge Part 2
Word 2007 13.5 12/31/08
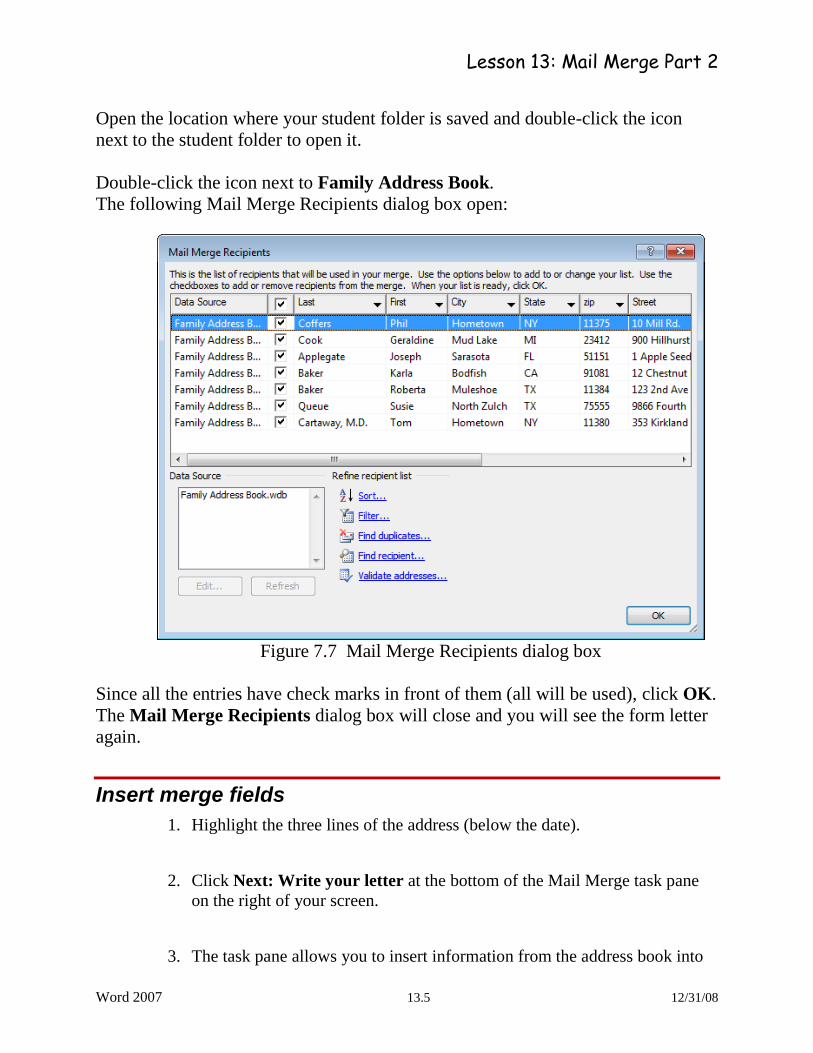
Open the location where your student folder is saved and double-click the icon
next to the student folder to open it.
Double-click the icon next to Family Address Book.
The following Mail Merge Recipients dialog box open:
Figure 7.7 Mail Merge Recipients dialog box
Since all the entries have check marks in front of them (all will be used), click OK.
The Mail Merge Recipients dialog box will close and you will see the form letter
again.
Insert merge fields
1. Highlight the three lines of the address (below the date).
2. Click Next: Write your letter at the bottom of the Mail Merge task pane
on the right of your screen.
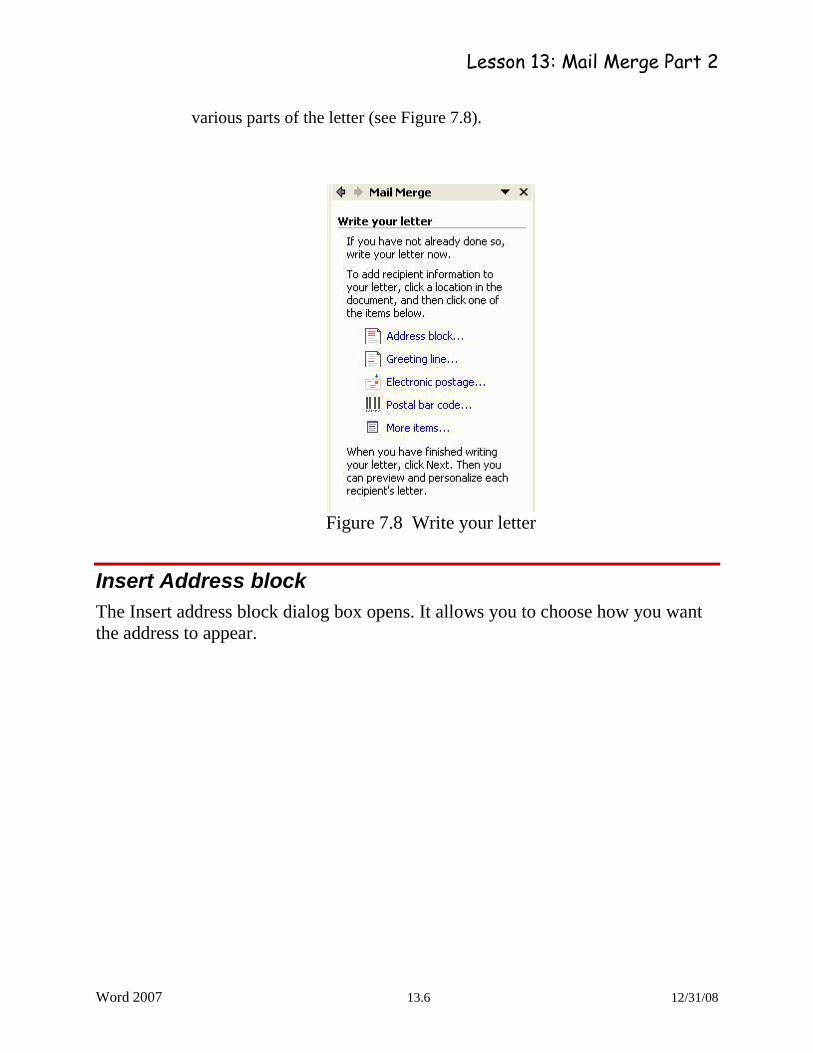
3. The task pane allows you to insert information from the address book into
Lesson 13: Mail Merge Part 2
Word 2007 13.6 12/31/08
various parts of the letter (see Figure 7.8).
Figure 7.8 Write your letter
Insert Address block
The Insert address block dialog box opens. It allows you to choose how you want
the address to appear.

Lesson 13: Mail Merge Part 2
Word 2007 13.7 12/31/08
Figure 7.9 Insert Address Block dialog box
Select the format for the recipient’s name from the list at the top. For now, choose
Mr. Josh Randall Jr. You can see in the Preview box how your selection will appear.
Match fields
The titles we’ve used for the information in our address book need to be matched
to the names that Word uses for the same information.
1 Click the Match Fields button. The Match Fields dialog box appears.
Lesson 13: Mail Merge Part 2
Word 2007 13.8 12/31/08
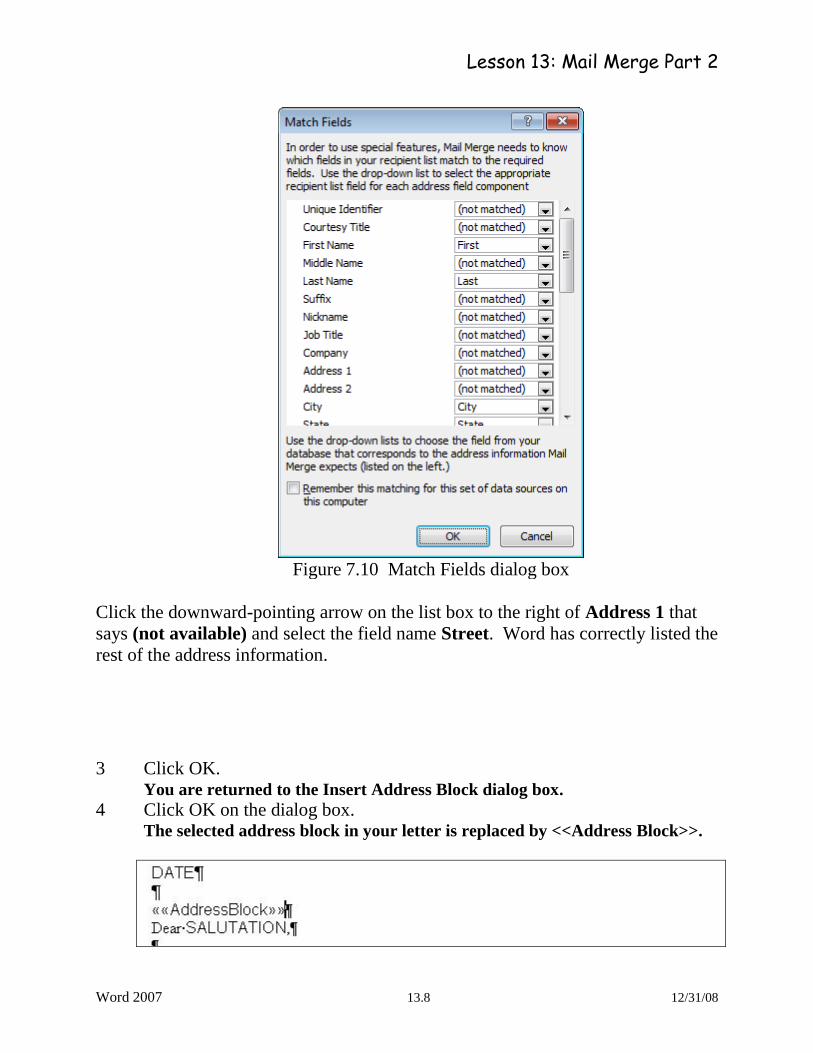
Figure 7.10 Match Fields dialog box
Click the downward-pointing arrow on the list box to the right of Address 1 that
says (not available) and select the field name Street. Word has correctly listed the
rest of the address information.
3 Click OK. You are returned to the Insert Address Block dialog box.
4 Click OK on the dialog box. The selected address block in your letter is replaced by <<Address Block>>.
Lesson 13: Mail Merge Part 2
Word 2007 13.9 12/31/08
Figure 7.12 Address Block
Enter a greeting
Press the Enter key to move the Salutation down a line.
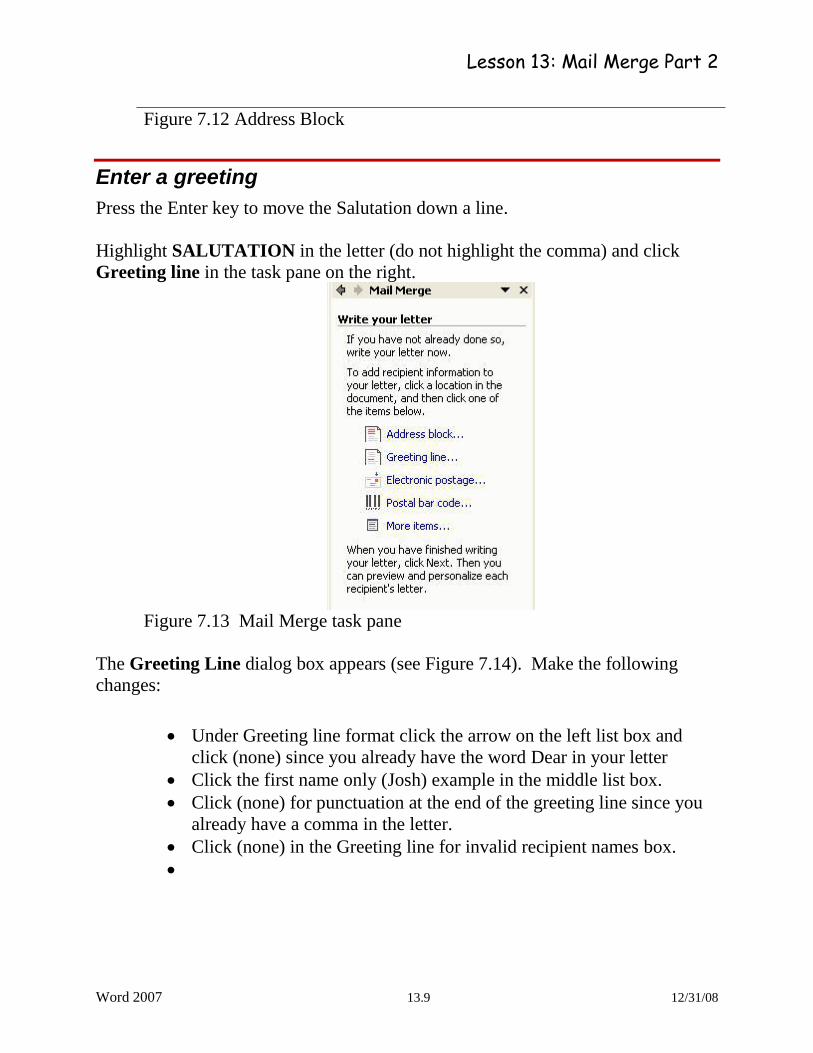
Highlight SALUTATION in the letter (do not highlight the comma) and click
Greeting line in the task pane on the right.
Figure 7.13 Mail Merge task pane
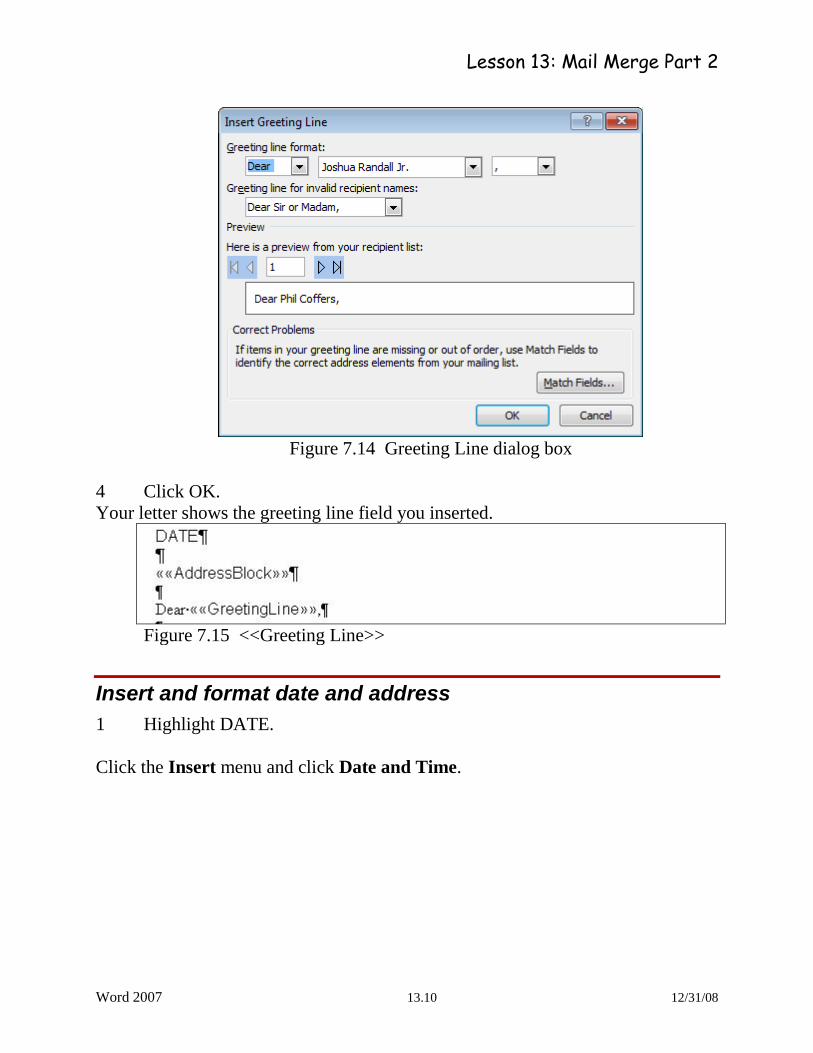
The Greeting Line dialog box appears (see Figure 7.14). Make the following
changes:
Under Greeting line format click the arrow on the left list box and
click (none) since you already have the word Dear in your letter
Click the first name only (Josh) example in the middle list box.
Click (none) for punctuation at the end of the greeting line since you
already have a comma in the letter.
Click (none) in the Greeting line for invalid recipient names box.
Lesson 13: Mail Merge Part 2
Word 2007 13.10 12/31/08
Figure 7.14 Greeting Line dialog box
4 Click OK.
Your letter shows the greeting line field you inserted.
Figure 7.15 <<Greeting Line>>
Insert and format date and address
1 Highlight DATE.
Click the Insert menu and click Date and Time.
Lesson 13: Mail Merge Part 2
Word 2007 13.11 12/31/08
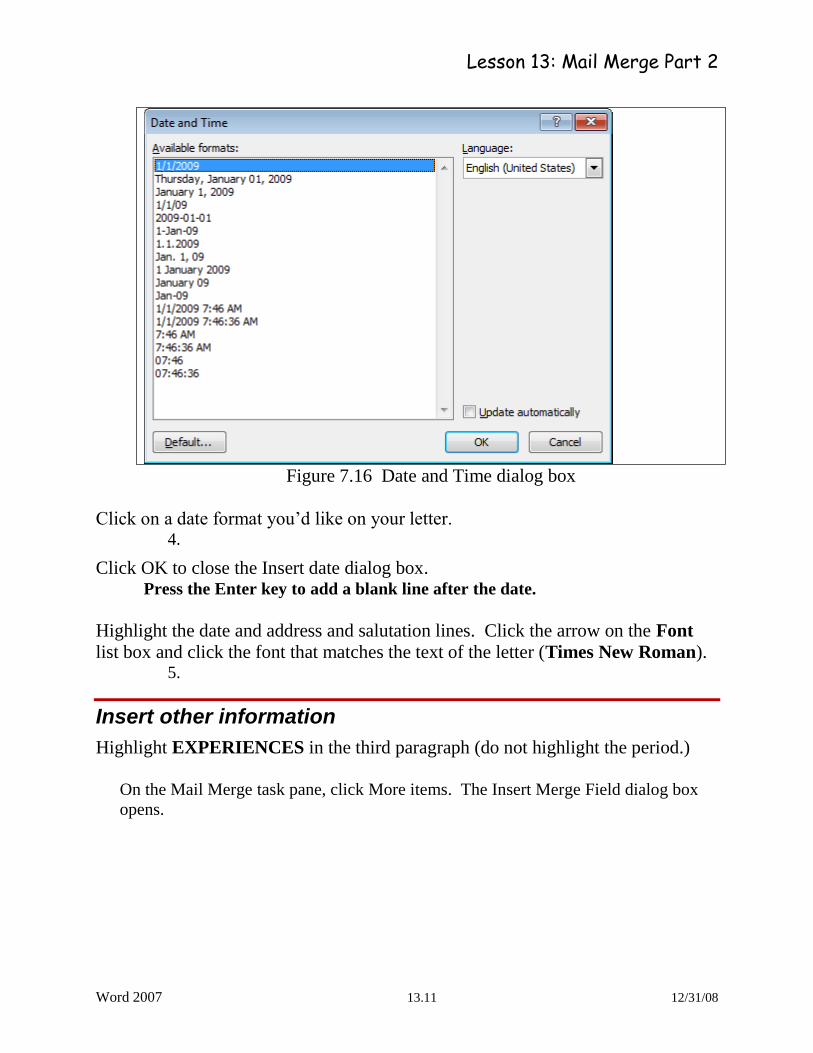
Figure 7.16 Date and Time dialog box
Click on a date format you’d like on your letter. 4.
Click OK to close the Insert date dialog box. Press the Enter key to add a blank line after the date.
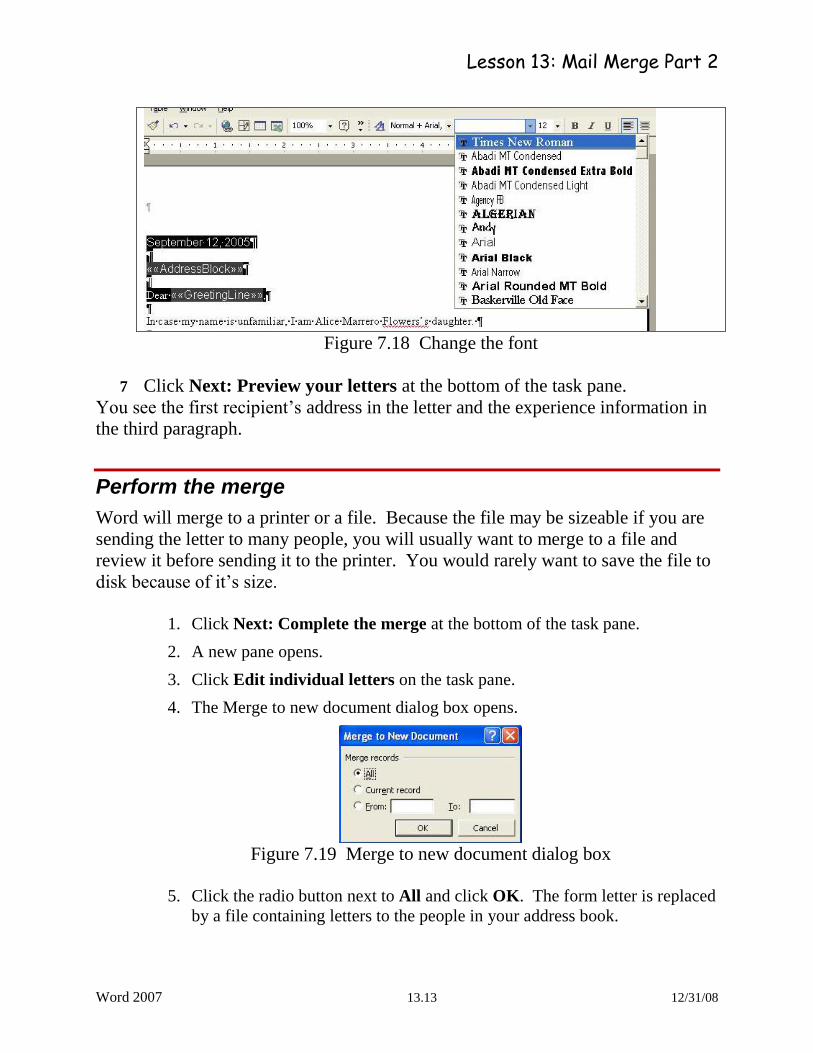
Highlight the date and address and salutation lines. Click the arrow on the Font
list box and click the font that matches the text of the letter (Times New Roman). 5.
Insert other information
Highlight EXPERIENCES in the third paragraph (do not highlight the period.)
On the Mail Merge task pane, click More items. The Insert Merge Field dialog box
opens.
Lesson 13: Mail Merge Part 2
Word 2007 13.12 12/31/08
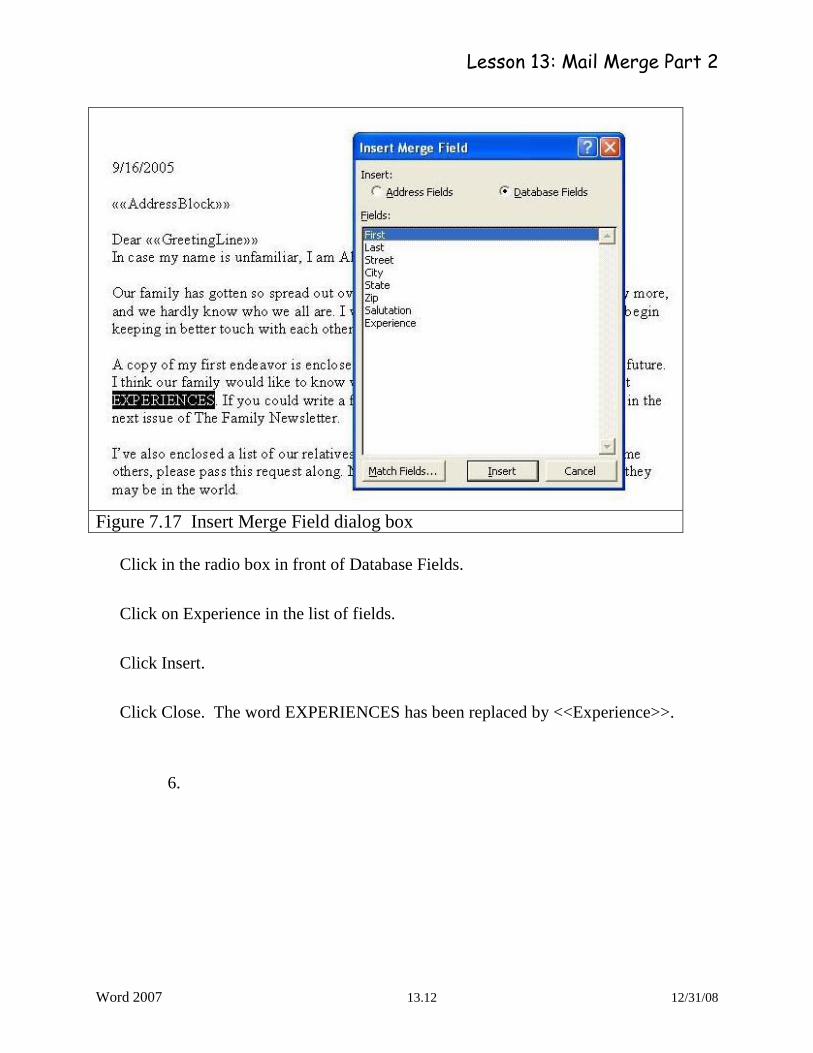
Figure 7.17 Insert Merge Field dialog box
Click in the radio box in front of Database Fields.
Click on Experience in the list of fields.
Click Insert.
Click Close. The word EXPERIENCES has been replaced by <<Experience>>.
6.
Lesson 13: Mail Merge Part 2
Word 2007 13.13 12/31/08
Figure 7.18 Change the font
7 Click Next: Preview your letters at the bottom of the task pane.
You see the first recipient’s address in the letter and the experience information in
the third paragraph.
Perform the merge
Word will merge to a printer or a file. Because the file may be sizeable if you are
sending the letter to many people, you will usually want to merge to a file and
review it before sending it to the printer. You would rarely want to save the file to
disk because of it’s size.
1. Click Next: Complete the merge at the bottom of the task pane.
2. A new pane opens.
3. Click Edit individual letters on the task pane.
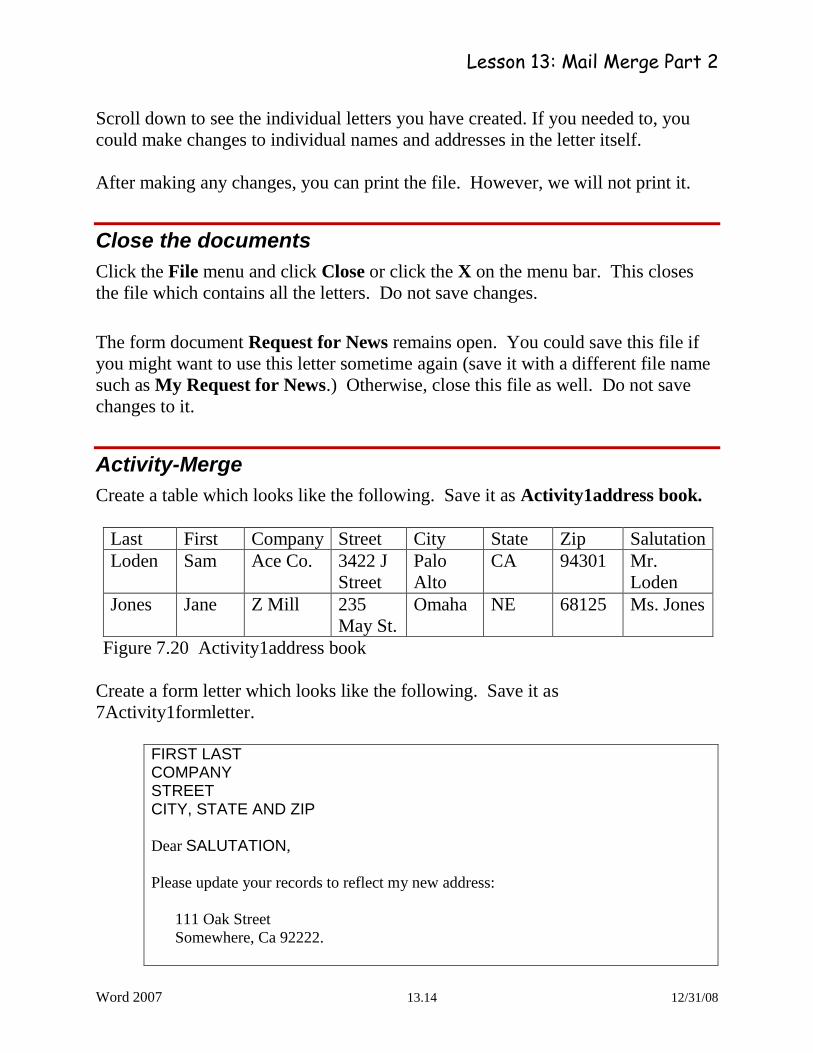
4. The Merge to new document dialog box opens.
Figure 7.19 Merge to new document dialog box
5. Click the radio button next to All and click OK. The form letter is replaced
by a file containing letters to the people in your address book.
Lesson 13: Mail Merge Part 2
Word 2007 13.14 12/31/08
Scroll down to see the individual letters you have created. If you needed to, you
could make changes to individual names and addresses in the letter itself.
After making any changes, you can print the file. However, we will not print it.
Close the documents
Click the File menu and click Close or click the X on the menu bar. This closes
the file which contains all the letters. Do not save changes.
The form document Request for News remains open. You could save this file if
you might want to use this letter sometime again (save it with a different file name
such as My Request for News.) Otherwise, close this file as well. Do not save
changes to it.
Activity-Merge
Create a table which looks like the following. Save it as Activity1address book.
Last First Company Street City State Zip Salutation
Loden Sam Ace Co. 3422 J
Street
Palo
Alto
CA 94301 Mr.
Loden
Jones Jane Z Mill 235
May St.
Omaha NE 68125 Ms. Jones
Figure 7.20 Activity1address book
Create a form letter which looks like the following. Save it as
7Activity1formletter.
FIRST LAST COMPANY STREET CITY, STATE AND ZIP
Dear SALUTATION,
Please update your records to reflect my new address:
111 Oak Street
Somewhere, Ca 92222.
Lesson 13: Mail Merge Part 2
Word 2007 13.15 12/31/08
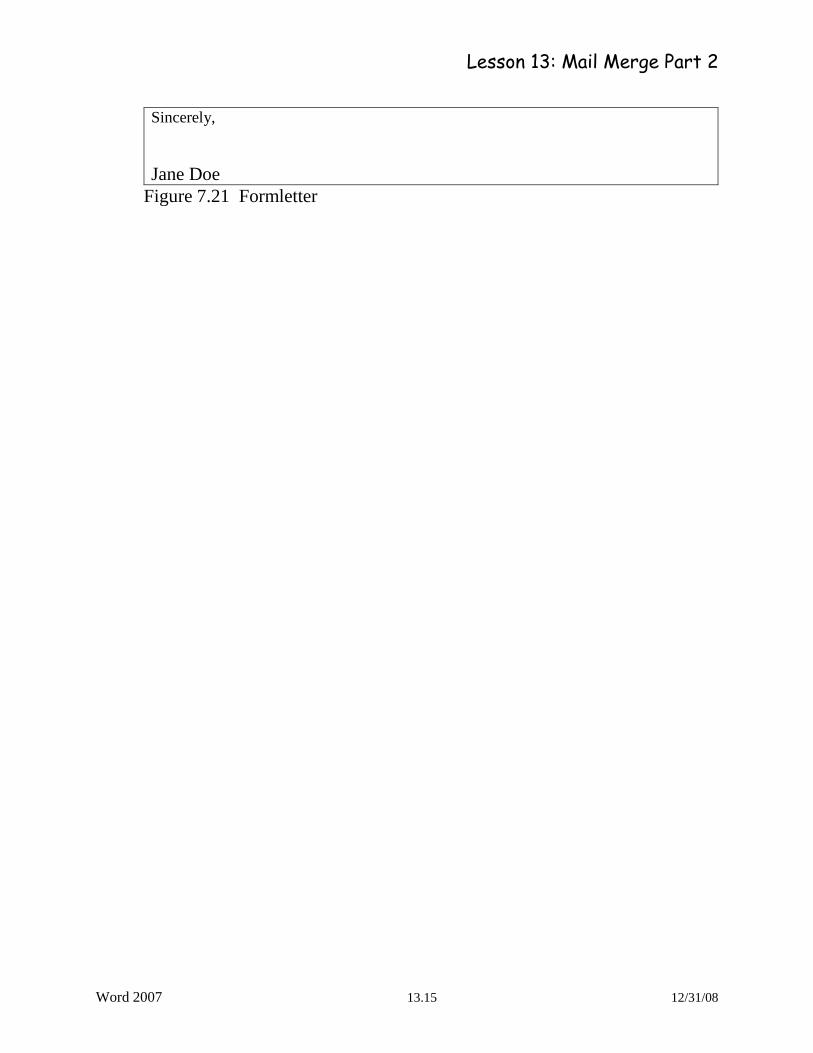
Sincerely,
Jane Doe
Figure 7.21 Formletter
Lesson 13: Mail Merge Part 2
Word 2007 13.16 12/31/08
Create Labels
Printing labels is very similar to printing envelopes.
We will use the address book called 7Family Address Book.
1. Open Word.
Open a blank document.
2. Click the Tools menu, point to Letters and Mailings and click Mail Merge
Wizard.
3. Under Select document type in the Mail Merge task pane, click the radio
button next to Labels.
4. Click Next: Starting document at the bottom of the task pane.
A new pane opens.
Select starting document
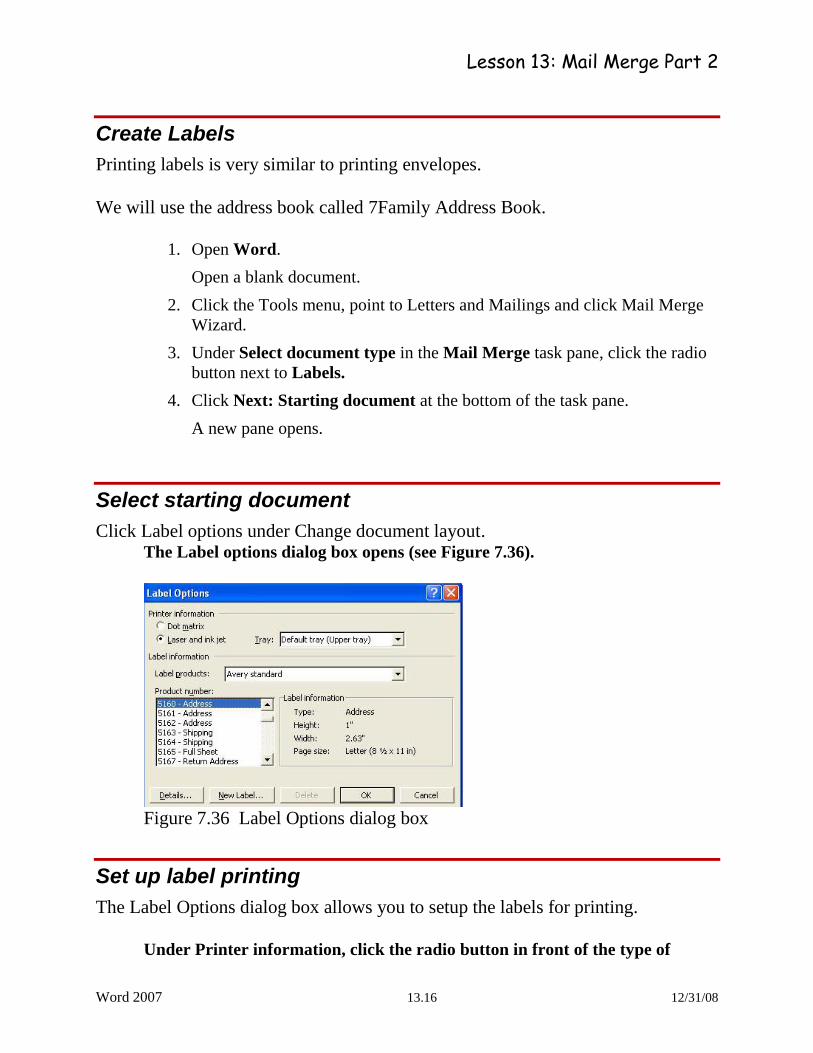
Click Label options under Change document layout. The Label options dialog box opens (see Figure 7.36).
Figure 7.36 Label Options dialog box
Set up label printing
The Label Options dialog box allows you to setup the labels for printing.
Under Printer information, click the radio button in front of the type of
Lesson 13: Mail Merge Part 2
Word 2007 13.17 12/31/08
printer you have.
In Label Products area, click the downward-pointing area to see your choices.
Choose Avery standard.
In Product number, you would choose the label which matches the number
from the box of labels you will be using. For now, choose 5160.
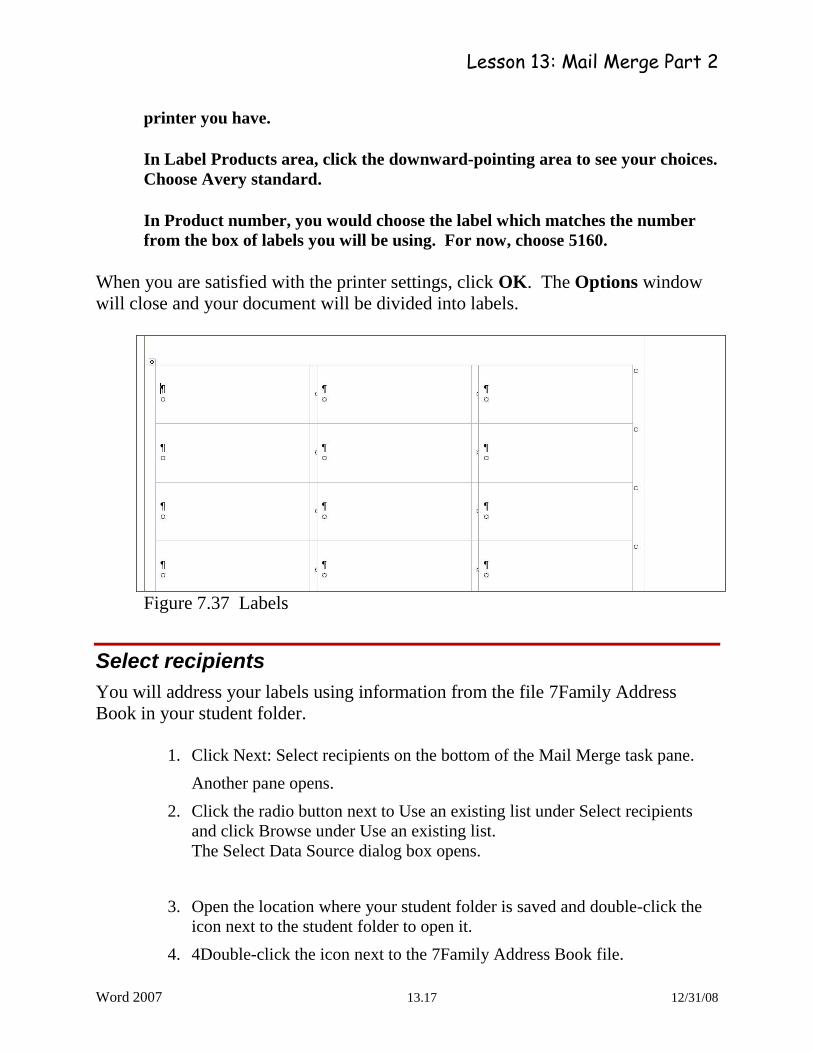
When you are satisfied with the printer settings, click OK. The Options window
will close and your document will be divided into labels.
Figure 7.37 Labels
Select recipients
You will address your labels using information from the file 7Family Address
Book in your student folder.
1. Click Next: Select recipients on the bottom of the Mail Merge task pane.
Another pane opens.
2. Click the radio button next to Use an existing list under Select recipients
and click Browse under Use an existing list.
The Select Data Source dialog box opens.
3. Open the location where your student folder is saved and double-click the
icon next to the student folder to open it.
4. 4Double-click the icon next to the 7Family Address Book file.
Lesson 13: Mail Merge Part 2
Word 2007 13.18 12/31/08
5. The Mail Merge Recipients dialog box opens.
6. Make any changes you wish and then click OK.
7. Click Next: Arrange your labels at the bottom of the task pane.
A new pane opens.
8. Click on Address block. The Insert Address Block box opens. Make any
changes you wish.
9. Click on Match Fields and match Address 1 to Street.
10. Click Ok to close the Match Fields box.
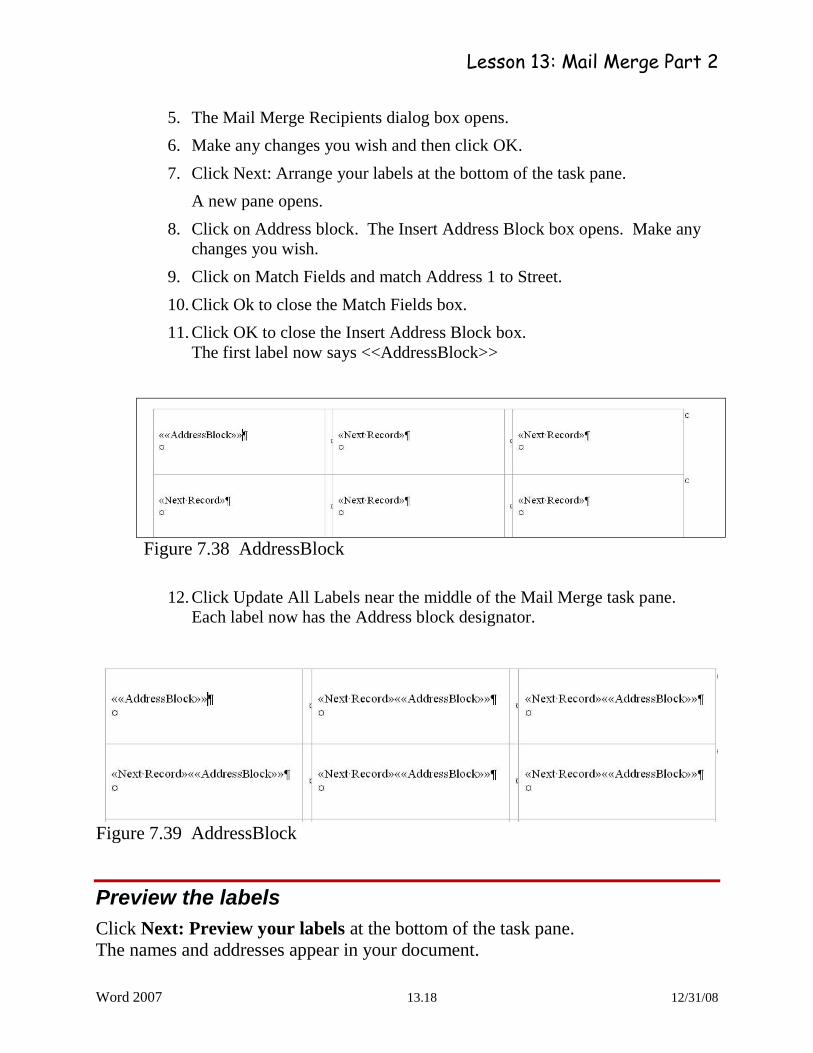
11. Click OK to close the Insert Address Block box.
The first label now says <<AddressBlock>>
Figure 7.38 AddressBlock
12. Click Update All Labels near the middle of the Mail Merge task pane.
Each label now has the Address block designator.
Figure 7.39 AddressBlock
Preview the labels
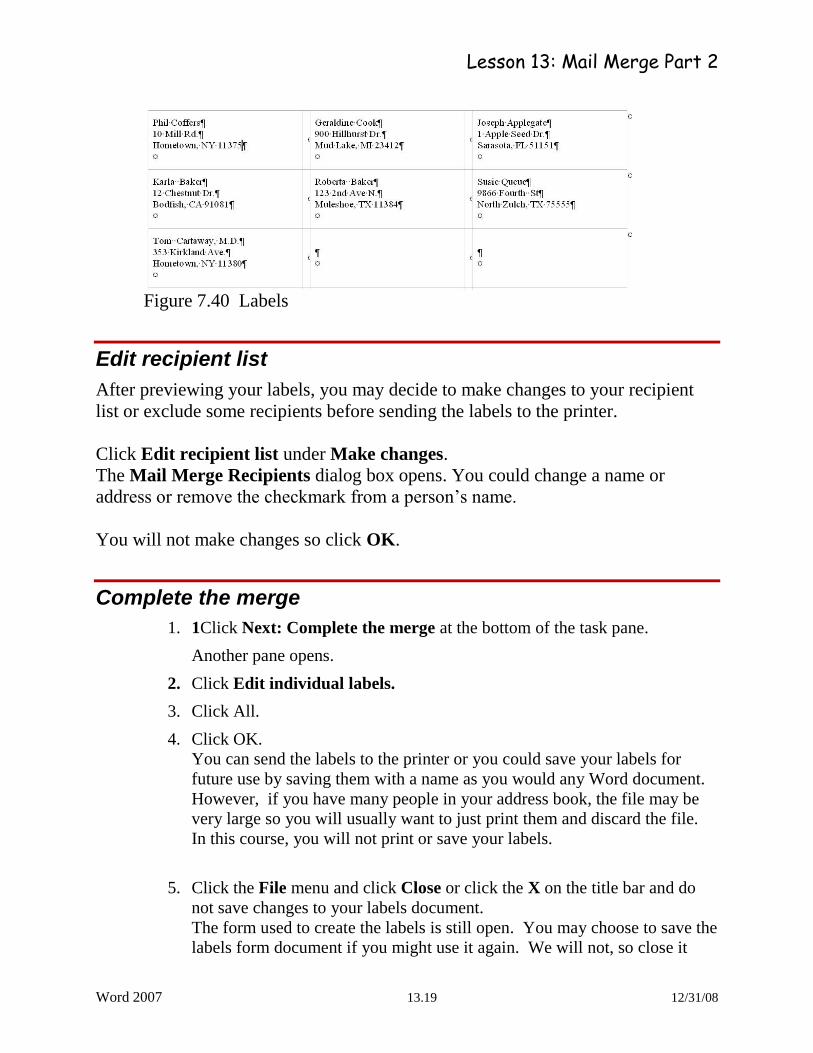
Click Next: Preview your labels at the bottom of the task pane.
The names and addresses appear in your document.
Lesson 13: Mail Merge Part 2
Word 2007 13.19 12/31/08
Figure 7.40 Labels
Edit recipient list
After previewing your labels, you may decide to make changes to your recipient
list or exclude some recipients before sending the labels to the printer.
Click Edit recipient list under Make changes.
The Mail Merge Recipients dialog box opens. You could change a name or
address or remove the checkmark from a person’s name.
You will not make changes so click OK.
Complete the merge
1. 1Click Next: Complete the merge at the bottom of the task pane.
Another pane opens.
2. Click Edit individual labels.
3. Click All.
4. Click OK.
You can send the labels to the printer or you could save your labels for
future use by saving them with a name as you would any Word document.
However, if you have many people in your address book, the file may be
very large so you will usually want to just print them and discard the file.
In this course, you will not print or save your labels.
5. Click the File menu and click Close or click the X on the title bar and do
not save changes to your labels document.
The form used to create the labels is still open. You may choose to save the
labels form document if you might use it again. We will not, so close it
Lesson 13: Mail Merge Part 2
Word 2007 13.20 12/31/08
without saving it.
Activity-Mailing Labels
Create mailing labels using 7Family Address Book. Print mailing labels for only
those people who live in New York. Print them on regular paper.
Create another set of mailing labels for only Tom, Joseph and Phil. Print them on
regular paper.
Create Return Address Labels
You can print a sheet of labels with your own name and address on them to use as
return address labels.
1. Open Word.
Open a blank document.
2. Click the Tools menu, point to Letters and Mailings.
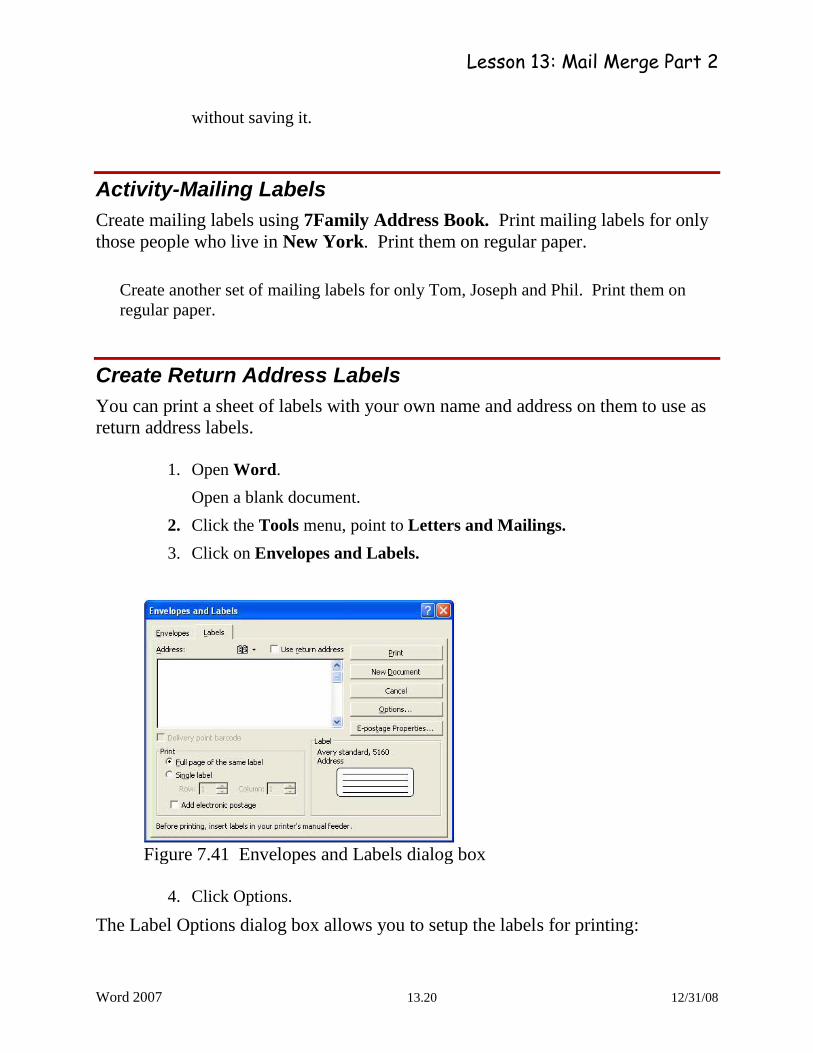
3. Click on Envelopes and Labels.
Figure 7.41 Envelopes and Labels dialog box
4. Click Options.
The Label Options dialog box allows you to setup the labels for printing:
Lesson 13: Mail Merge Part 2
Word 2007 13.21 12/31/08
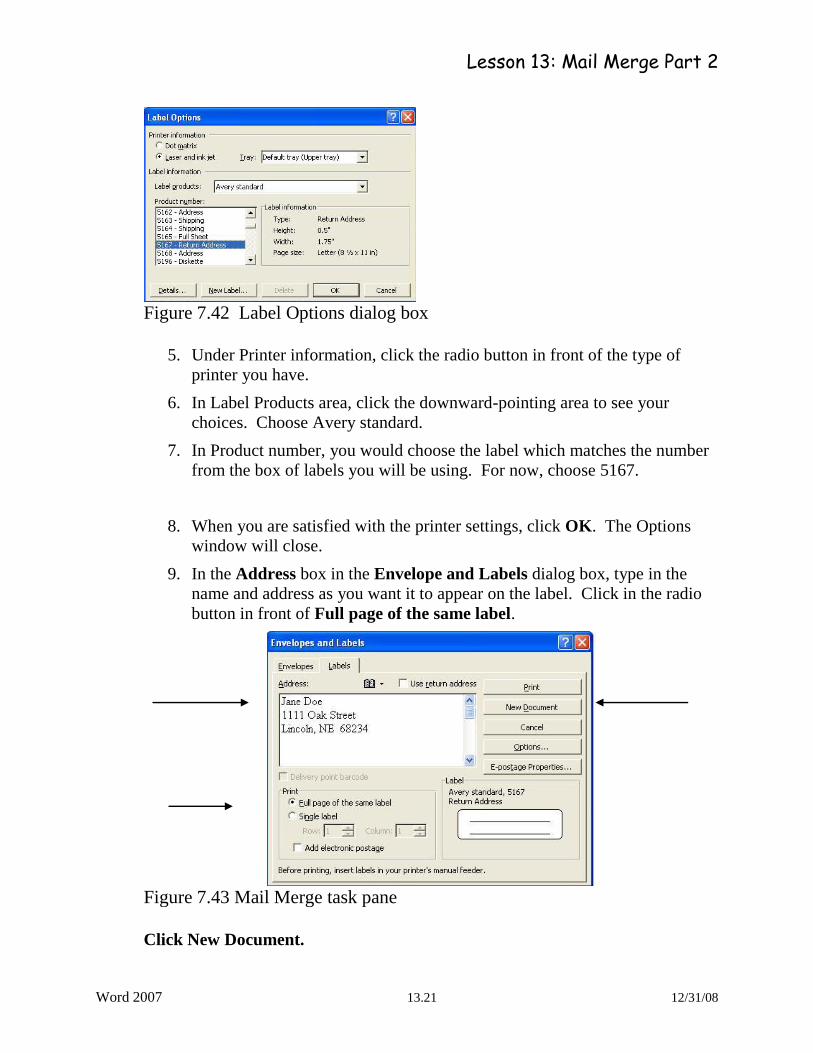
Figure 7.42 Label Options dialog box
5. Under Printer information, click the radio button in front of the type of
printer you have.
6. In Label Products area, click the downward-pointing area to see your
choices. Choose Avery standard.
7. In Product number, you would choose the label which matches the number
from the box of labels you will be using. For now, choose 5167.
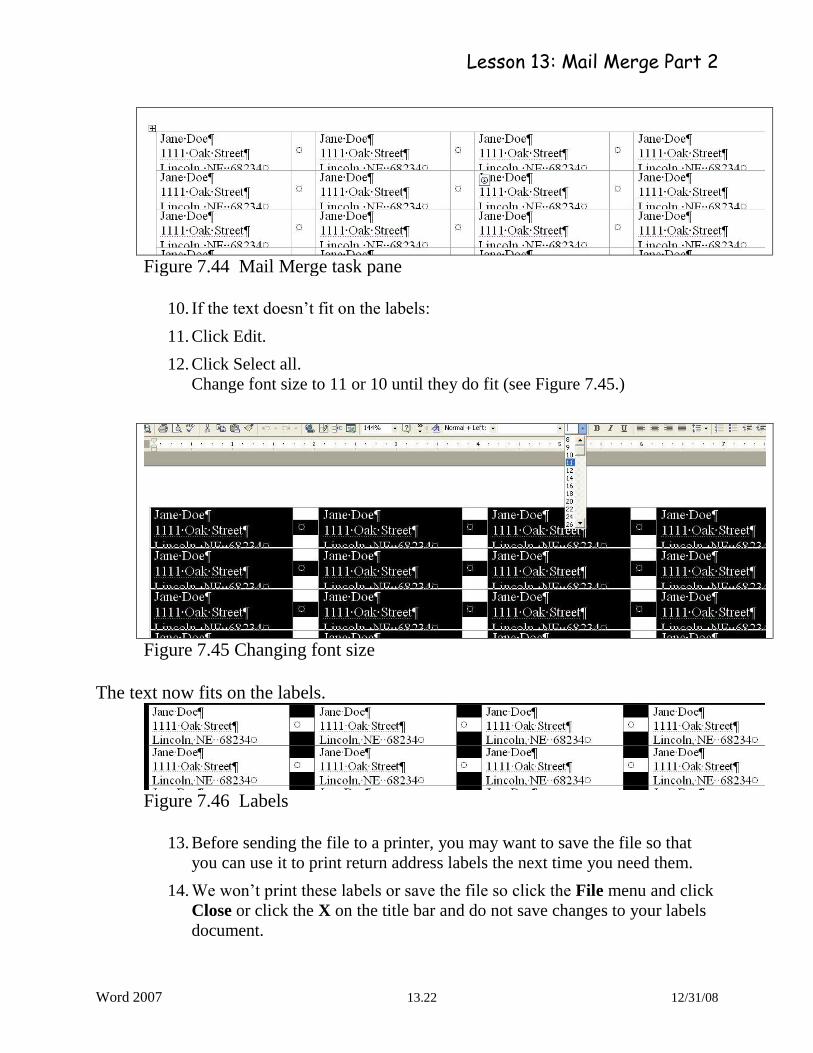
8. When you are satisfied with the printer settings, click OK. The Options
window will close.
9. In the Address box in the Envelope and Labels dialog box, type in the
name and address as you want it to appear on the label. Click in the radio
button in front of Full page of the same label.
Figure 7.43 Mail Merge task pane
Click New Document.
Lesson 13: Mail Merge Part 2
Word 2007 13.22 12/31/08
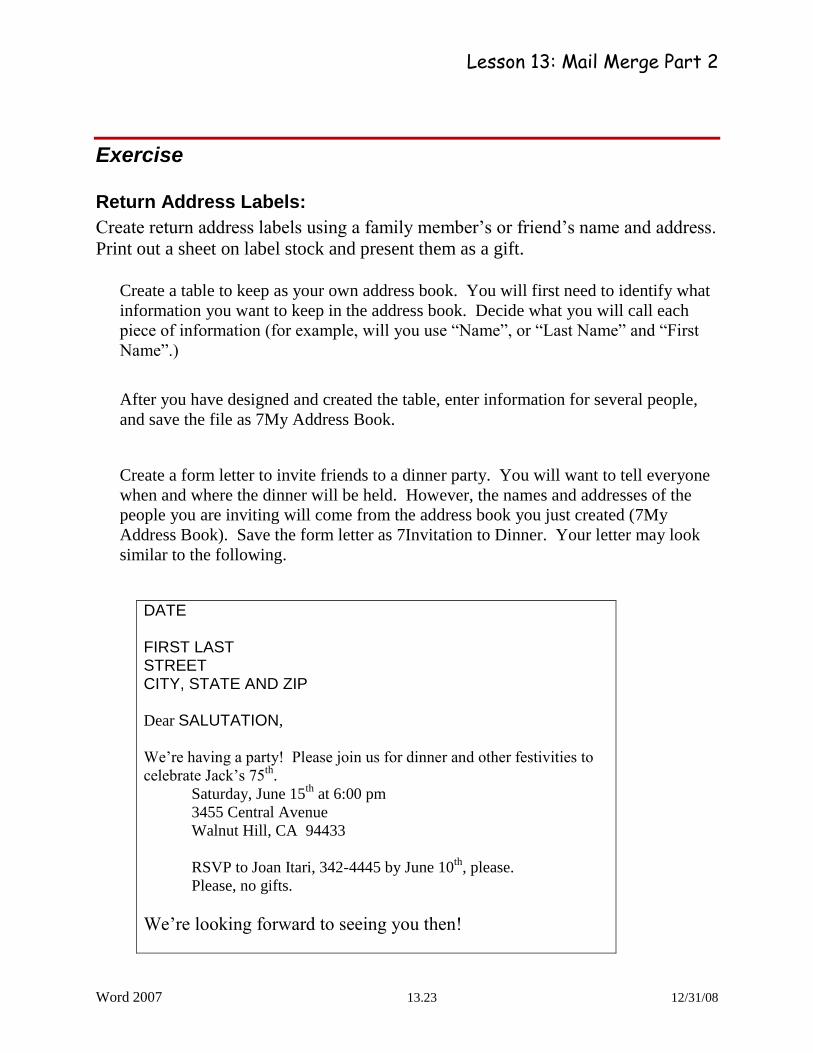
Figure 7.44 Mail Merge task pane
10. If the text doesn’t fit on the labels:
11. Click Edit.
12. Click Select all.
Change font size to 11 or 10 until they do fit (see Figure 7.45.)
Figure 7.45 Changing font size
The text now fits on the labels.
Figure 7.46 Labels
13. Before sending the file to a printer, you may want to save the file so that
you can use it to print return address labels the next time you need them.
14. We won’t print these labels or save the file so click the File menu and click
Close or click the X on the title bar and do not save changes to your labels
document.
Lesson 13: Mail Merge Part 2
Word 2007 13.23 12/31/08
Exercise
Return Address Labels:
Create return address labels using a family member’s or friend’s name and address.
Print out a sheet on label stock and present them as a gift.
Create a table to keep as your own address book. You will first need to identify what
information you want to keep in the address book. Decide what you will call each
piece of information (for example, will you use “Name”, or “Last Name” and “First
Name”.)
After you have designed and created the table, enter information for several people,
and save the file as 7My Address Book.
Create a form letter to invite friends to a dinner party. You will want to tell everyone
when and where the dinner will be held. However, the names and addresses of the
people you are inviting will come from the address book you just created (7My
Address Book). Save the form letter as 7Invitation to Dinner. Your letter may look
similar to the following.
DATE FIRST LAST STREET CITY, STATE AND ZIP
Dear SALUTATION,
We’re having a party! Please join us for dinner and other festivities to
celebrate Jack’s 75th
.
Saturday, June 15th
at 6:00 pm
3455 Central Avenue
Walnut Hill, CA 94433
RSVP to Joan Itari, 342-4445 by June 10th
, please.
Please, no gifts.
We’re looking forward to seeing you then!
Lesson 13: Mail Merge Part 2
Word 2007 13.24 12/31/08
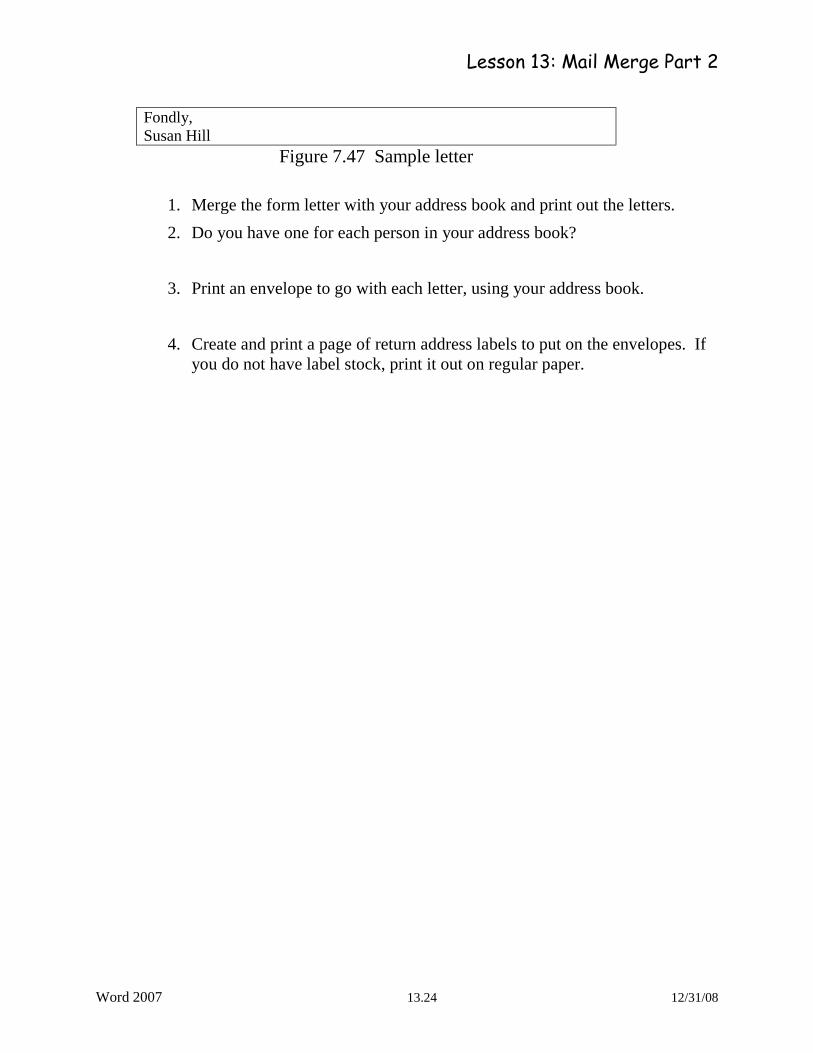
Fondly,
Susan Hill
Figure 7.47 Sample letter
1. Merge the form letter with your address book and print out the letters.
2. Do you have one for each person in your address book?
3. Print an envelope to go with each letter, using your address book.
4. Create and print a page of return address labels to put on the envelopes. If
you do not have label stock, print it out on regular paper.
Lesson 13: Mail Merge Part 2
Word 2007 13.25 12/31/08