Embed Size (px)
Citation preview

WISH Edition 27

Hello and Welcome to this Festive Edition of WISH!
In this edition we have plenty to get your creative juices flowing in time for Christmas!
We also have how to make some Saucy Cakes, bumper edition, courtesy of Befrienders Highland very own Sally
Mackintosh, to inspire you to make something a little different this festive season!!!
We hope you enjoy the edition and wish you a very Merry Christmas and a Happy New Year from the
Team at WISH!

Sally’s Saucy Cakes
You need to begin by taking the photocopies of the torsos (please contact the office for larger A4 copies of the torsos below):
Ingredients
To make 2 saucy fun cakes you will need the following: • 2 x 8” square sponge cakes – no filling and minimum 1”tall and max
3”. Try to find cake with fir texture that is easier for sculpting. • 2 x cake boards • Icing 1 kg – 1.5kg of skintone coloured sugar paste (coloured icing) • Icing – 100 – 250gm coloured icing for the Basque – mixture of
colours depending on what you fancy. • Butter icing or frosting about ½ a mug. Recommend you make it as
shop bought is really sweet and disgusting. • Icing sugar in a shaker • Knife – a long (minimum 4”) sharp ad non serrated • Knife – non serrated non sharp knife – butter knife or small palette
life • Craft brush for dusting • Rolling pin – large (10”+) and a small one • Modelling tools, especially a ball tool (large ball and small ball) • Cocktail stick • Turntable if you have one • A pencil • Scissors suitable for cutting card • A cereal box or similar thin card • Damp Dishcloth for wiping fingers • Skintone dust powder (optional)

The Male Torso Put the photocopies on to a piece of card and use your pencil to draw around the edge to make a template.
Then place cut outs on top of cake and carefully cut around.
Sculpting the muscles
Take your paper outline and cut down the middle as shown. This will form a template to guide you with building up the 6 pack muscles and man boobs or moobs!
Using your sharp knife make a small angled cut into the cake (about ¼ inch deep). Make one cut angled to the right and one to the left so it forms a shallow groove. You need to make one long cut down centre from the bottom of the ‘moobs’ to bottom.
You then need to make similar angled cuts from each side of the top of cake to meet up with top of long cut as shown in pictures. Use the paper picture as a template to see where the shading is so the muscle definition. These cuts will form the shape for sculpting the cake muscles.

Using your paper template make small marks across the cake where the lower muscles are. You will have 3 lines making 3 separate areas on each side. Using your butter icing place a very small amount on each of the 6 areas as shown (used to stick icing on). Take small pieces if icing to form the muscles, starting at the bottom of cake. Make a small oblong shape which is more raised in the centre and taped either side longways. It also needs to be slightly fatter at the centre nearest centre mark. Put some butter icing under the ‘moobs’ and then make your icing ‘moobs’ – again higher in the centre and taped either side.
Cover the whole cake in a thin layer of butter icing – sides included. I used chocolate butter
icing but you can also use vanilla or plain.
The Female Torso The female cake is easier and needs no cutting. Use a thin layer of butter icing where the breasts will be. Using 2 balls of icing make your breasts as large or small as you want them and make sure they are tapered again from the centre to make them look as natural as possible. Cover the cake with a thin layer of butter icing – including the sides.
Decorating the CakesSprinkle some icing sugar on the table – not too much. Take a large ball of your skin tone icing and knead it very well so it is pliable and can be easily worked. Mould it into an oblong and then roll out gently so that it is large enough to cover the whole of one cake. It should not be too thin or thick, no more than ¼ inch.

Carefully pick up your icing from beneath and lay it over your cake from the base upwards. Very gently using the side of your hand gently press the icing onto the cake. Make sure you gently mould the shape of the female breasts and male muscles and ‘moobs’ before attempting to mould the icing to the sides. Also gently press icing into the small grooves you made on the shoulders and down torso of male to form definition. By using the side of your hand you can gently mould it without getting creases. Once happy cut away the excess icing and keep excess wrapped in airtight bag or cling film.
Take your paper template and cut it as shown on either side so that you effectively remove the crisscross pattern up the middle.
Take your coloured icing and knead it carefully until it is very pliable. Roll out using as little icing sugar as you can and DO NOT TURN ICING OVER AS YOU ROLL. Keep it about ¼ “ thick. You need it big enough to cover the area of your cut template and to cover the side of the cake. For the right side of the cake (as you look at it) put the cut template to the left side of the icing and cut around the left side, across top of basque then straight across so it goes down side of cake. Do the same at the bottom cutting icing along the frill and then straight across to cover the side of cake. Once icing is cut use a very small amount of water on a craft brush on the main cake icing so stick the coloured icing to.
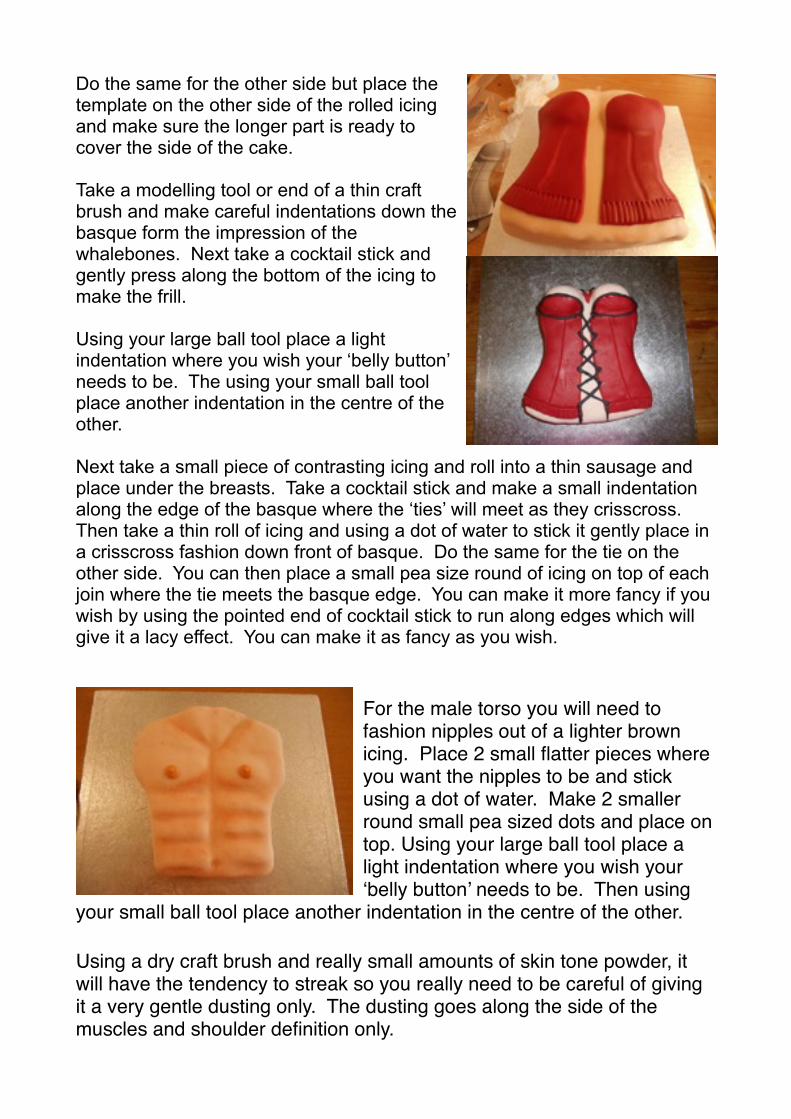
Do the same for the other side but place the template on the other side of the rolled icing and make sure the longer part is ready to cover the side of the cake. Take a modelling tool or end of a thin craft brush and make careful indentations down the basque form the impression of the whalebones. Next take a cocktail stick and gently press along the bottom of the icing to make the frill.
Using your large ball tool place a light indentation where you wish your ‘belly button’ needs to be. The using your small ball tool place another indentation in the centre of the other.
Next take a small piece of contrasting icing and roll into a thin sausage and place under the breasts. Take a cocktail stick and make a small indentation along the edge of the basque where the ‘ties’ will meet as they crisscross. Then take a thin roll of icing and using a dot of water to stick it gently place in a crisscross fashion down front of basque. Do the same for the tie on the other side. You can then place a small pea size round of icing on top of each join where the tie meets the basque edge. You can make it more fancy if you wish by using the pointed end of cocktail stick to run along edges which will give it a lacy effect. You can make it as fancy as you wish.
For the male torso you will need to fashion nipples out of a lighter brown icing. Place 2 small flatter pieces where you want the nipples to be and stick using a dot of water. Make 2 smaller round small pea sized dots and place ontop. Using your large ball tool place a light indentation where you wish your ‘belly button’ needs to be. Then using
your small ball tool place another indentation in the centre of the other.
Using a dry craft brush and really small amounts of skin tone powder, it will have the tendency to streak so you really need to be careful of giving it a very gentle dusting only. The dusting goes along the side of the muscles and shoulder definition only.

The fantastic finished Saucy Cakes!

Some BEAUTIFUL Baskets Norma made recently using lavender
from the garden, willow, birch and thyme:
Beautiful Baskets by Norma

Also a stunning picture Norma did in Watercolour called
‘Island Memories’
Island Memories by Norma
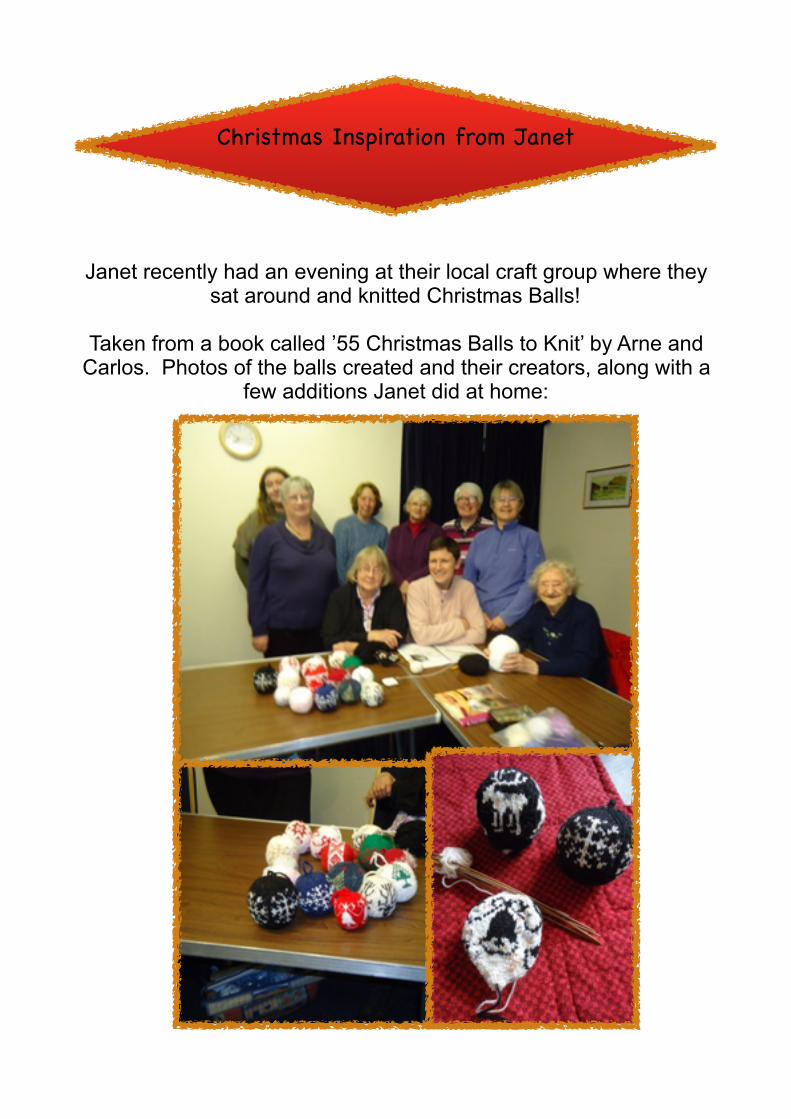
Janet recently had an evening at their local craft group where they sat around and knitted Christmas Balls!
Taken from a book called ’55 Christmas Balls to Knit’ by Arne and Carlos. Photos of the balls created and their creators, along with a
few additions Janet did at home:
Christmas Inspiration from Janet

Janet also recently spotted a great article in ‘Quilting Daily’, an online newsletter, on quilted ‘Christmas Decorations/Ornaments’.
Janet’s Quilting Christmas Decorations >>
Here’s how to make them: 1. Center 1 large print circle design atop of a large felt circle. 2. Using needle-turn appliqué to attach 1 large circle print design in place, using matching thread. 3. Embellish ornament by embroidering around the circle of printed fabric using contrasting perle cotton or embroidery thread and French knots and/or running stitches. 4. Using 1 piece of twine, make a small bow. Glue free ends of twine to wrong side of embellished felt circle, making sure ends are centred above top of the printed circle design. Note: The ends of twine should be about 1¼" inside circle. 5. Place embellished felt circle atop felt circle backing, wrong sides together. Blanket stitch around the edges of the circles using contrasting or matching thread.

I wanted to enter a patchwork competition (just for the fun of it!) The entry theme was 'A Symphony of Colour' .
I tend to prefer shades of cream and brown, I'm not a great fan of blue, so when I found rather a lot of blue in my 'stash' it seemed a good opportunity to use some up the pattern is a variation of Log Cabin - 'Pineapple' - one of my favourites! I completed 1 square so that the 2 navy blue corners were opposite and the light blue and pink corners were the alternatives.
At this stage I decided to call my entry 'Shades of Nightfall' blue representing the night and the pink the last rays of sunset.
I decided it would be easier to cut all the pieces to size at the beginning you'll see I have arranged them in light and dark piles
I kept some with pink or red flowered fabric for use around the pink pieces.
Shades of Nightfall by Janet

In order to make life easier I worked on all the remaining 47 squares at the same time this means that I started at the middle and made the first round of each square then I went back and made the next round, taking care to refer to my sample pattern, and so on until I had all 48 ready to join:
Joining them was ‘easier’ than I expected and I finished the quilt with navy borders I was able to turn the backing material over to right side to finish the edges. It took a lot of thought to work out the quilting but it was simpler than expected.
At the end of the day I entered the competition not expecting to win ... and I didn't win .... but I had enjoyed taking part
this quilt now sits on my bed, while I get on with another ... shades of cream and green this time
in spite of the fact that I still have almost as much blue fabric left as when I started!!

Whilst you may not have run the competition, we at WISH, Janet, think you finished rug is AMAZING!!! An the editor, for one, WISHES she could create something as wonderful as the below
Shades of Nightfall by Janet

Thank you so much to our wonderful contributors!! We hope you enjoyed this edition as much as we did compiling it!!
WITH FESTIVE WISHES FROM THE WISH TEAM!
The deadline for the next issue of WISH is Wednesday 1st March 2017