Embed Size (px)
Citation preview
�/3
Wireless Modem Setup Guide
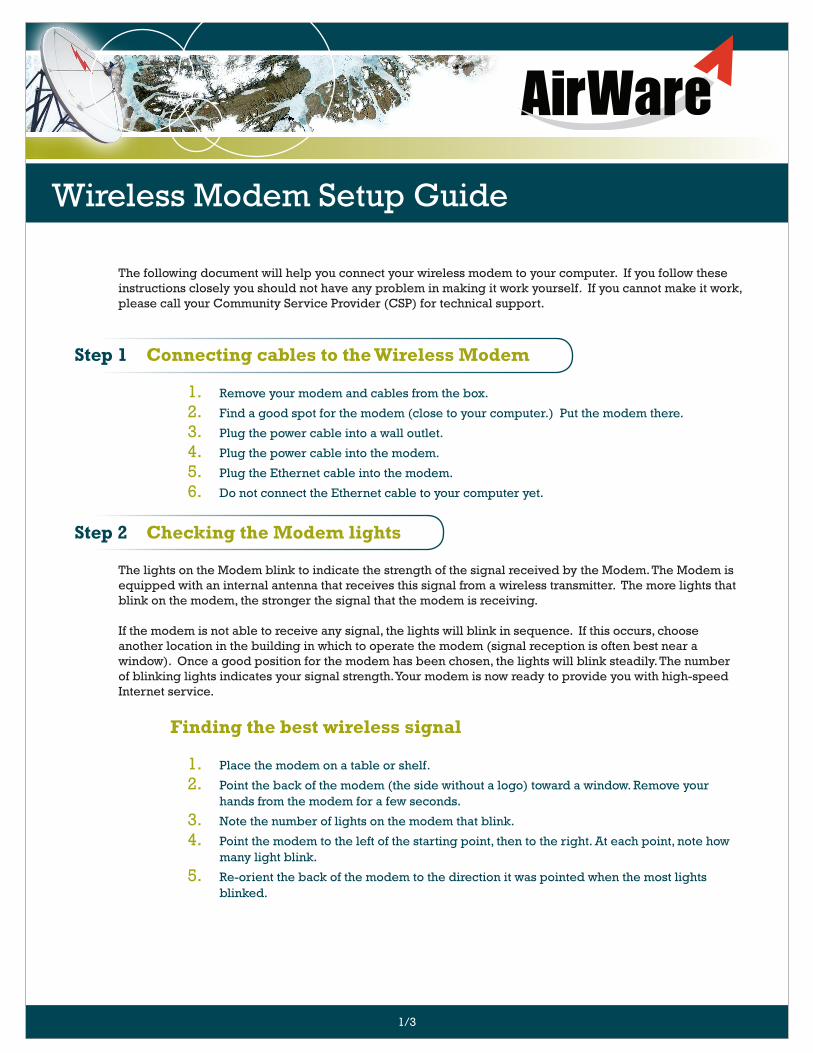
The following document will help you connect your wireless modem to your computer. If you follow these instructions closely you should not have any problem in making it work yourself. If you cannot make it work, please call your Community Service Provider (CSP) for technical support.
Step 1 Connecting cables to the Wireless Modem
Remove your modem and cables from the box.
Find a good spot for the modem (close to your computer.) Put the modem there.
Plug the power cable into a wall outlet.
Plug the power cable into the modem.
Plug the Ethernet cable into the modem.
Do not connect the Ethernet cable to your computer yet.
Step 2 Checking the Modem lights
The lights on the Modem blink to indicate the strength of the signal received by the Modem. The Modem is equipped with an internal antenna that receives this signal from a wireless transmitter. The more lights that blink on the modem, the stronger the signal that the modem is receiving.
If the modem is not able to receive any signal, the lights will blink in sequence. If this occurs, choose another location in the building in which to operate the modem (signal reception is often best near a window). Once a good position for the modem has been chosen, the lights will blink steadily. The number of blinking lights indicates your signal strength. Your modem is now ready to provide you with high-speed Internet service.
Finding the best wireless signal
Place the modem on a table or shelf.
Point the back of the modem (the side without a logo) toward a window. Remove your hands from the modem for a few seconds.
Note the number of lights on the modem that blink.
Point the modem to the left of the starting point, then to the right. At each point, note how many light blink.
Re-orient the back of the modem to the direction it was pointed when the most lights blinked.
�.2.3.4.5.6.
�.2.
3.4.
5.

�/3
Step 3 Connecting the Ethernet cable to the Computer
Make sure the computer is powered off.
Plug the Ethernet cable into the computer.
Power on the computer.
When the modem obtains Ethernet communication with your computer the lights stop blinking and remain on.
Step 4 Setting the computer’s IP Address
For many people, their computer will already be set up to connect to the wireless network. Before doing any of the items mentioned below, turn on your computer and try to surf the Internet. Things might “just work.” If not, you may need to modify your settings. Some users need to set up their computer to receive an IP address automatically. The method for doing such is outlined below for the most common operating systems in use today.
Windows 95/98/ME/NT
From the Start menu select Settings. Then select Control Panel
In the window that appears, double click the Network icon.
Select the TCP/IP entry for the network card. Do not select PPP if it is there.
Click Properties.
Select the IP Address tab.
Activate the Obtain an IP Address automatically radio button.
Click OK and close the Control Panel.
Restart your computer.
Windows 2000
From the Start menu, select Settings then Network and Dial-up Connections.
Right click the connection you want to alter, that is, the name of your network card. From the pop-up menu, select Properties. Do not select PPP if it is there.
The Local Area Connection Properties window appears. Select the Internet Protocol (TCP/IP) item. Click Properties.
Activate the Obtain an IP Address automatically radio button.
Click OK and close the Control Panel.
Windows XP
From the Start menu select Settings. Then select Network Connections.
Right click the connection you want to alter, that is, the name of your network card. From the pop-up menu, select Properties. Do not select PPP if it is there.
The Local Area Connection Properties window appears. Select the Internet Protocol (TCP/IP) item. Click Properties.
Activate the Obtain an IP Address automatically radio button.
Click OK and close the Control Panel.
�.2.3.4.
�.2.3.4.5.6.7.8.
�.2.
3.
4.5.
�.2.
3.
4.5.
3/3
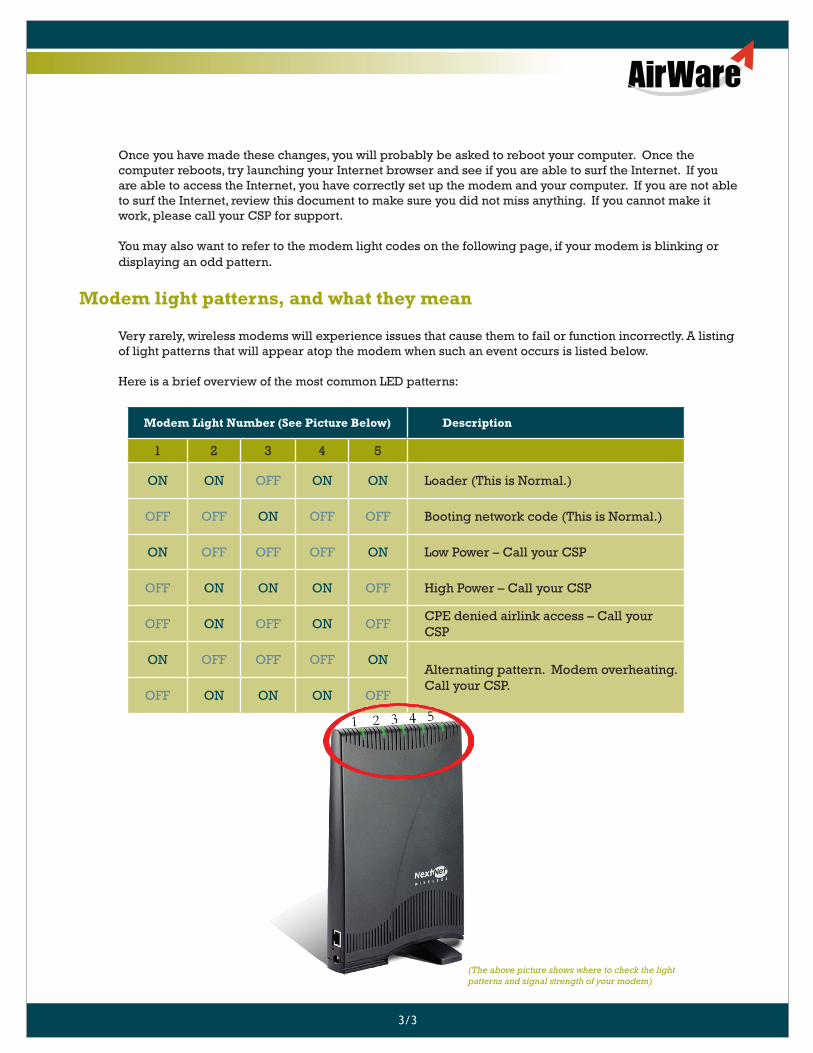
Once you have made these changes, you will probably be asked to reboot your computer. Once the computer reboots, try launching your Internet browser and see if you are able to surf the Internet. If you are able to access the Internet, you have correctly set up the modem and your computer. If you are not able to surf the Internet, review this document to make sure you did not miss anything. If you cannot make it work, please call your CSP for support.
You may also want to refer to the modem light codes on the following page, if your modem is blinking or displaying an odd pattern.
Modem light patterns, and what they mean
Very rarely, wireless modems will experience issues that cause them to fail or function incorrectly. A listing of light patterns that will appear atop the modem when such an event occurs is listed below.
Here is a brief overview of the most common LED patterns:
Modem Light Number (See Picture Below) Description
� 2 3 4 5
ON ON OFF ON ON Loader (This is Normal.)
OFF OFF ON OFF OFF Booting network code (This is Normal.)
ON OFF OFF OFF ON Low Power – Call your CSP
OFF ON ON ON OFF High Power – Call your CSP
OFF ON OFF ON OFFCPE denied airlink access – Call your CSP
ON OFF OFF OFF ONAlternating pattern. Modem overheating.Call your CSP.
OFF ON ON ON OFF
(The above picture shows where to check the light patterns and signal strength of your modem)