Embed Size (px)
Citation preview

Wireless Battery Video Doorbell
Quick Start Guideline Please read it carefully before using the product, and keep this handy
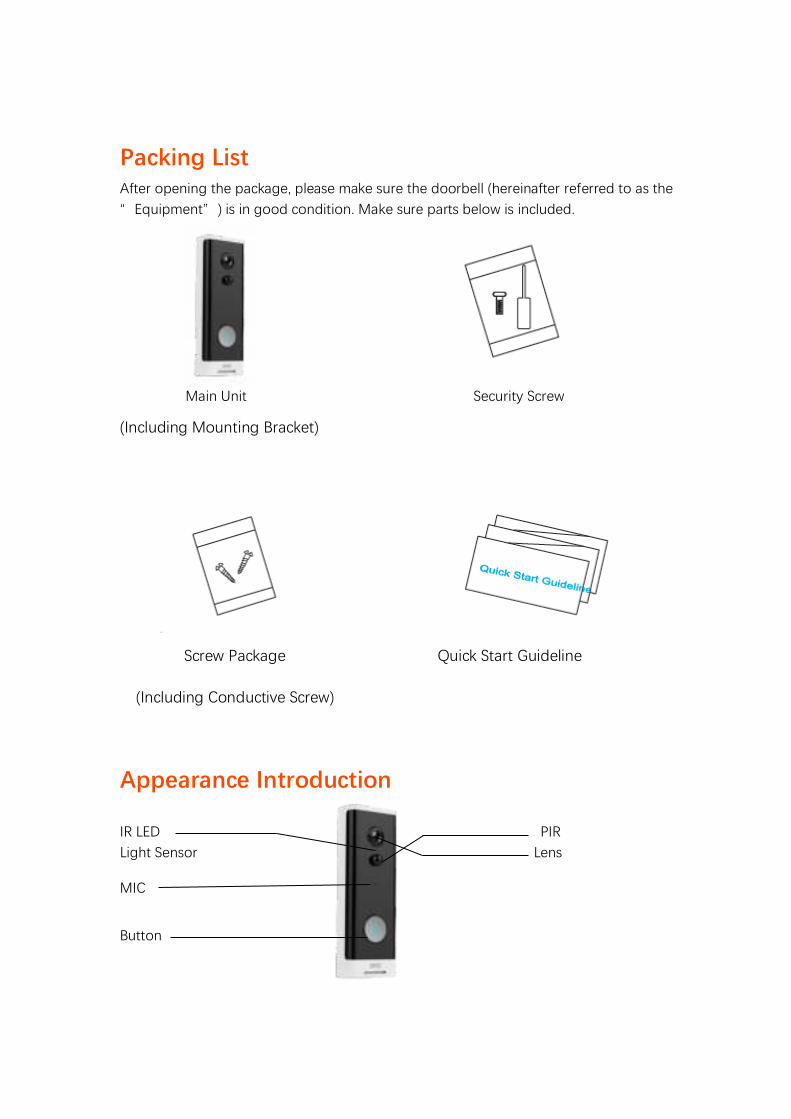
Packing List After opening the package, please make sure the doorbell (hereinafter referred to as the “ Equipment” ) is in good condition. Make sure parts below is included.
Main Unit Security Screw
(Including Mounting Bracket)
Screw Package Quick Start Guideline
(Including Conductive Screw)
Appearance Introduction
IR LED PIR Light Sensor Lens MIC
Button
IR LED The ambient light is not enough, this can increase picture
brightness.
Light sensor Used to collect environmental light status, when ambient light
drops down to 2 Lux, the IR LED will turn on automatically.
MIC Audio Capture
Button Doorbell button
PIR When object movement detected in front of the device, the
device will send notification to your phone automatically.
Lens Video image capture
Indicator Light Blinking blue light: Configuration status;
Red light ON: Failed to connect to WiFi; Blue light ON: Connect to phone successfully; Red and blue flash: Connect to WiFi successfully
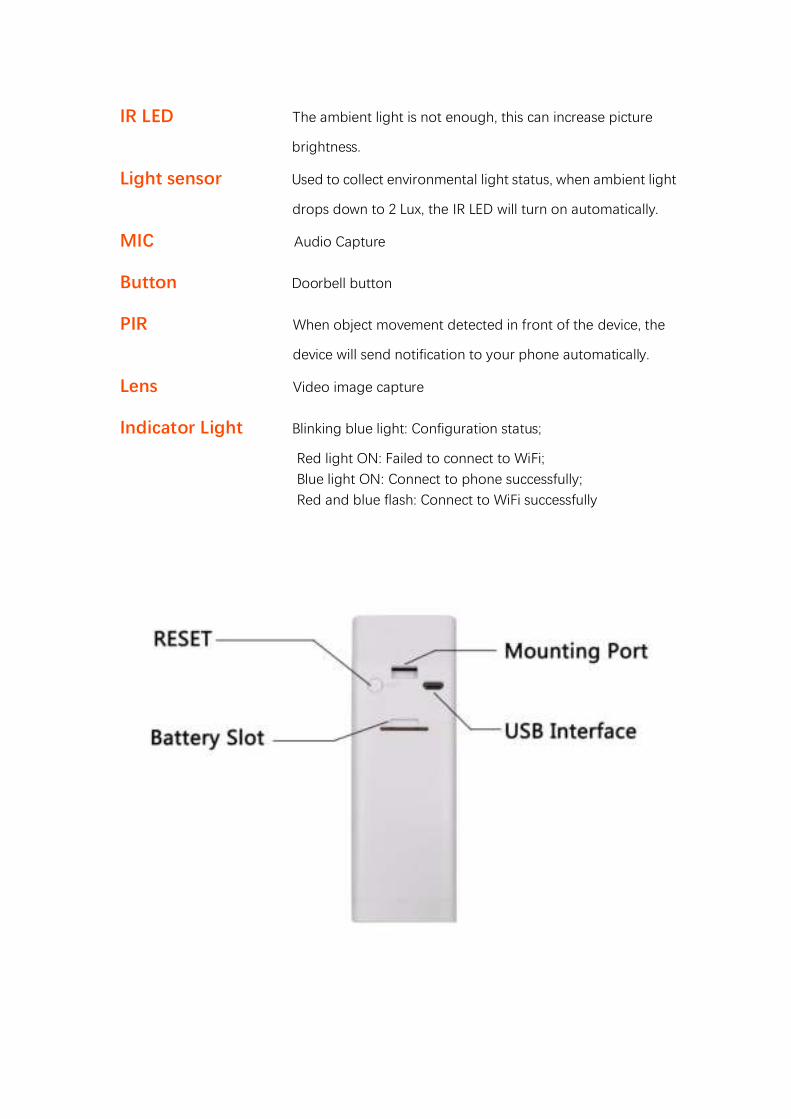
RESET Button To reset the device, long press this button for 5 second
Battery Slot Support 2 * 18650 battery
USB Interface Micro USB port charging
Mounting Port Use this port to mount the camera to bracket
Setup the Device
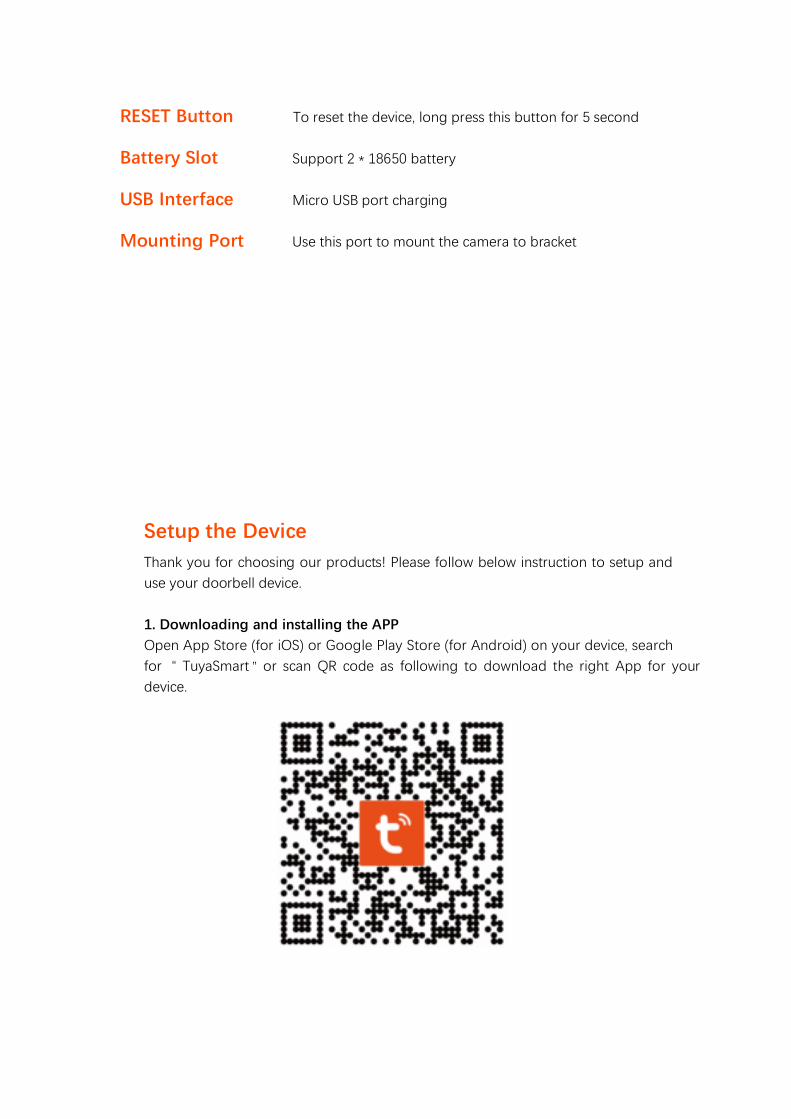
Thank you for choosing our products! Please follow below instruction to setup and use your doorbell device. 1. Downloading and installing the APP Open App Store (for iOS) or Google Play Store (for Android) on your device, search for “ TuyaSmart or scan QR code as following to download the right App for your device.
”
2. Setting up the APP Before you begin; ➢ Make sure the TuyaSmart APP is installed to your device ➢ Make sure that your device is connected to a 2.4GHz Wi-Fi networks, 5GHz
network is NOT compatible.
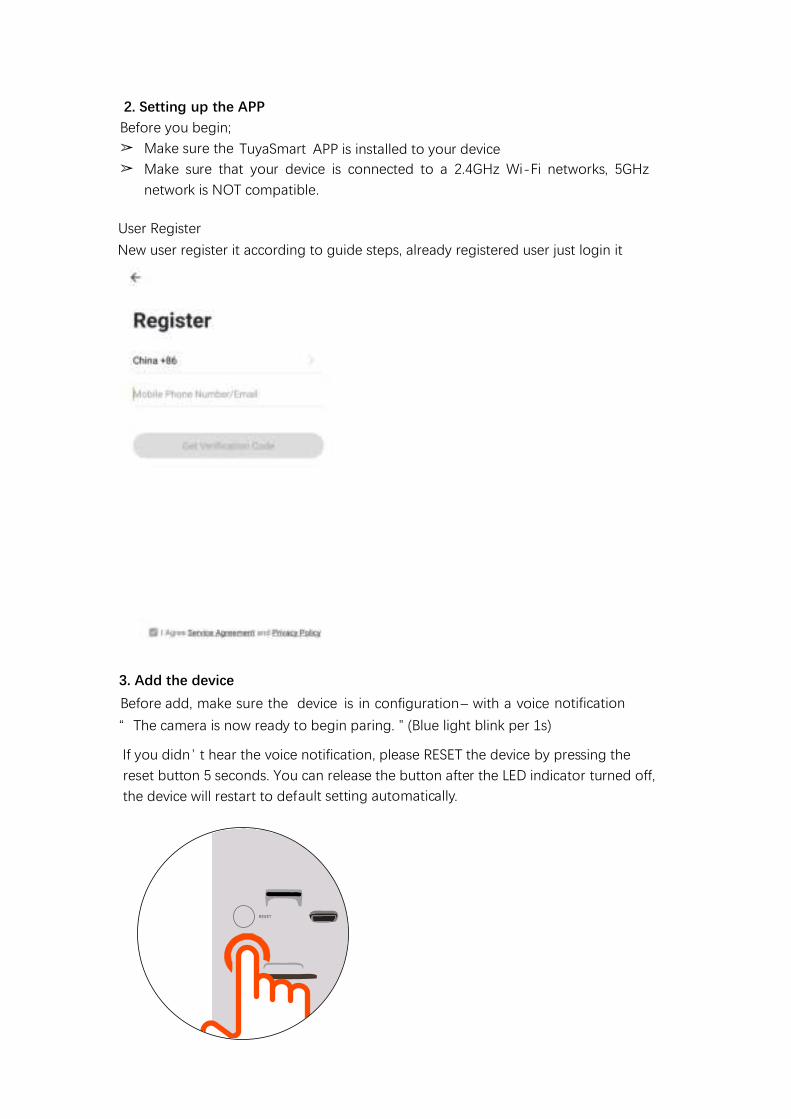
User RegisterNew user register it according to guide steps, already registered user just login it
3. Add the device
Before add, make sure the device is in configuration – with a voice notification
“ The camera is now ready to begin paring. ” (Blue light blink per 1s)
If you didn’ t hear the voice notification, please RESET the device by pressing the reset button 5 seconds. You can release the button after the LED indicator turned off, the device will restart to def . ault setting automatically
RESET
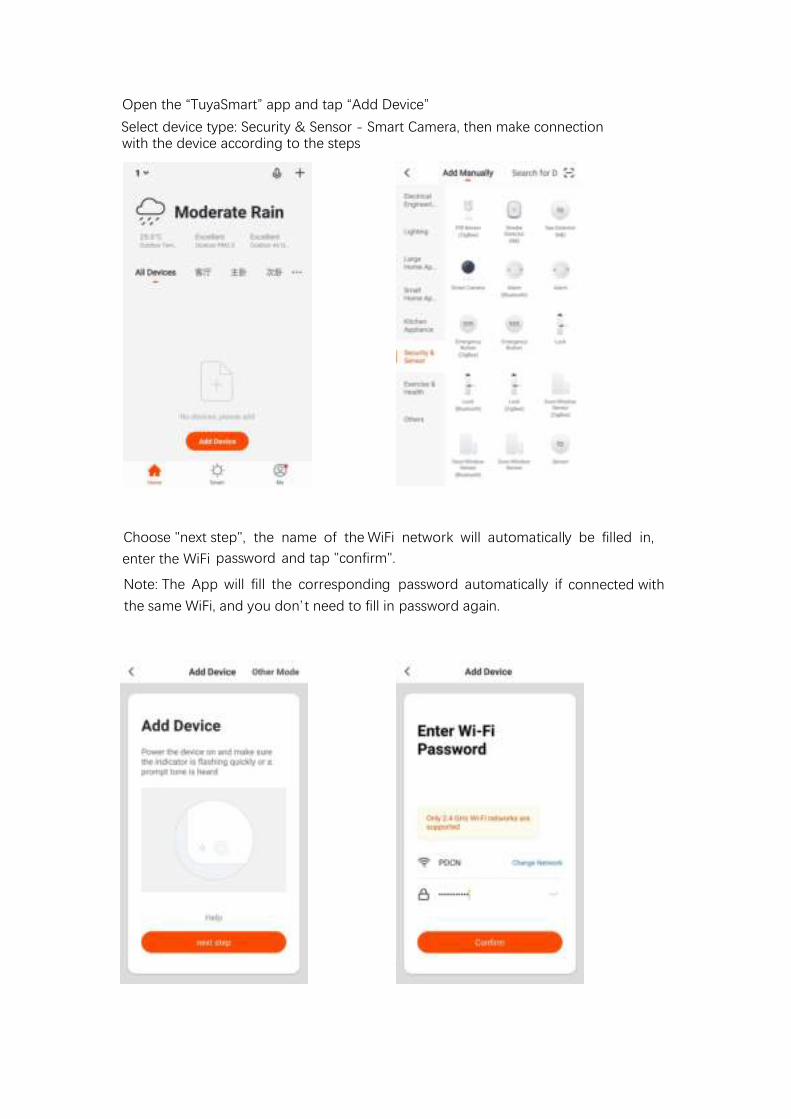
Choose "next step", the name of the WiFi network will automatically be filled in, enter the WiFi password and tap "confirm".
Note: The App will fill the corresponding password automatically if
Select device type: Security & Sensor - Smart Camera, then make connection
Open the “TuyaSmart” app and tap “Add Device”
with the device according to the steps
connected with
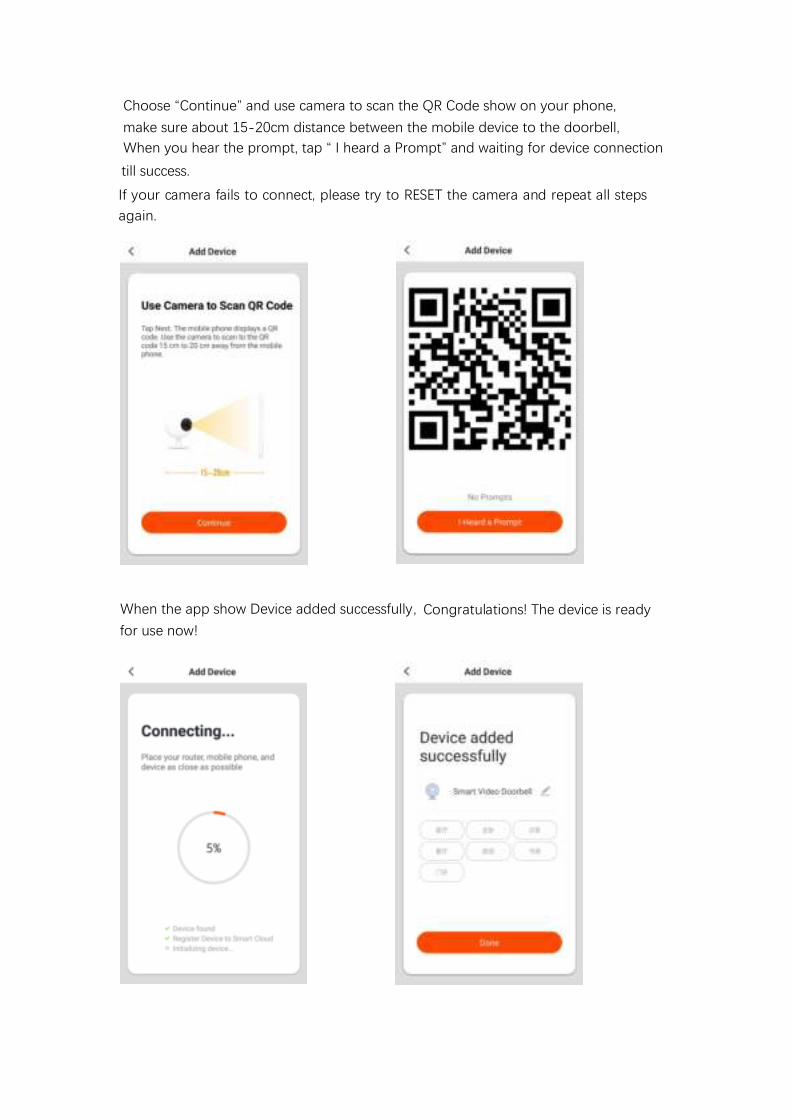
If your camera fails to connect, please try to RESET the camera and repeat all steps again.
Choose “Continue” and use camera to scan the QR Code show on your phone, make sure about 15-20cm distance between the mobile device to the doorbell,
till success.
When you hear the prompt, tap “ I heard a Prompt” and waiting for device connection
When the app show Device added successfully, Congratulations! The device is ready
for use now!
4. WiFi Doorbell Functions
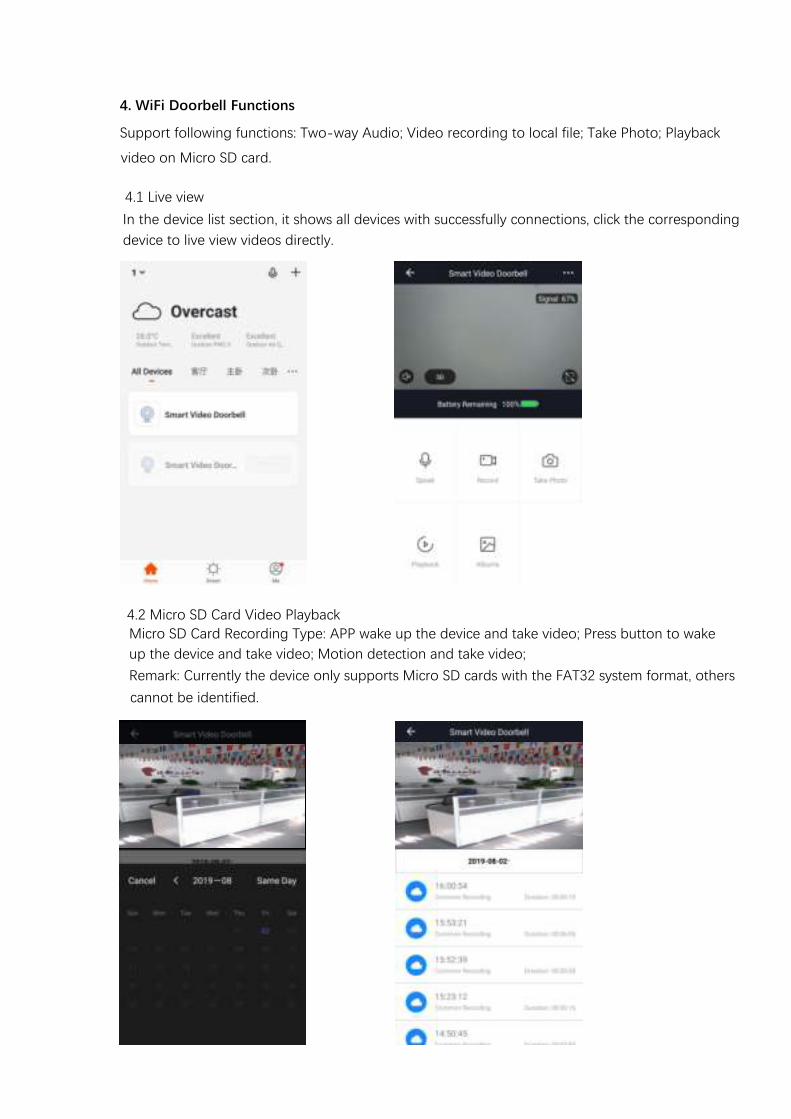
In the device list section, it shows all devices with successfully connections, click the corresponding device to live view videos directly.
4.1 Live view
4.2 Micro SD Card Video Playback
Support following functions: Two-way Audio; Video recording to local file; Take Photo; Playback
video on Micro SD card.
Micro SD Card Recording Type: APP wake up the device and take video; Press button to wake up the device and take video; Motion detection and take video;Remark: Currently the device only supports Micro SD cards with the FAT32 system format, otherscannot be identified.
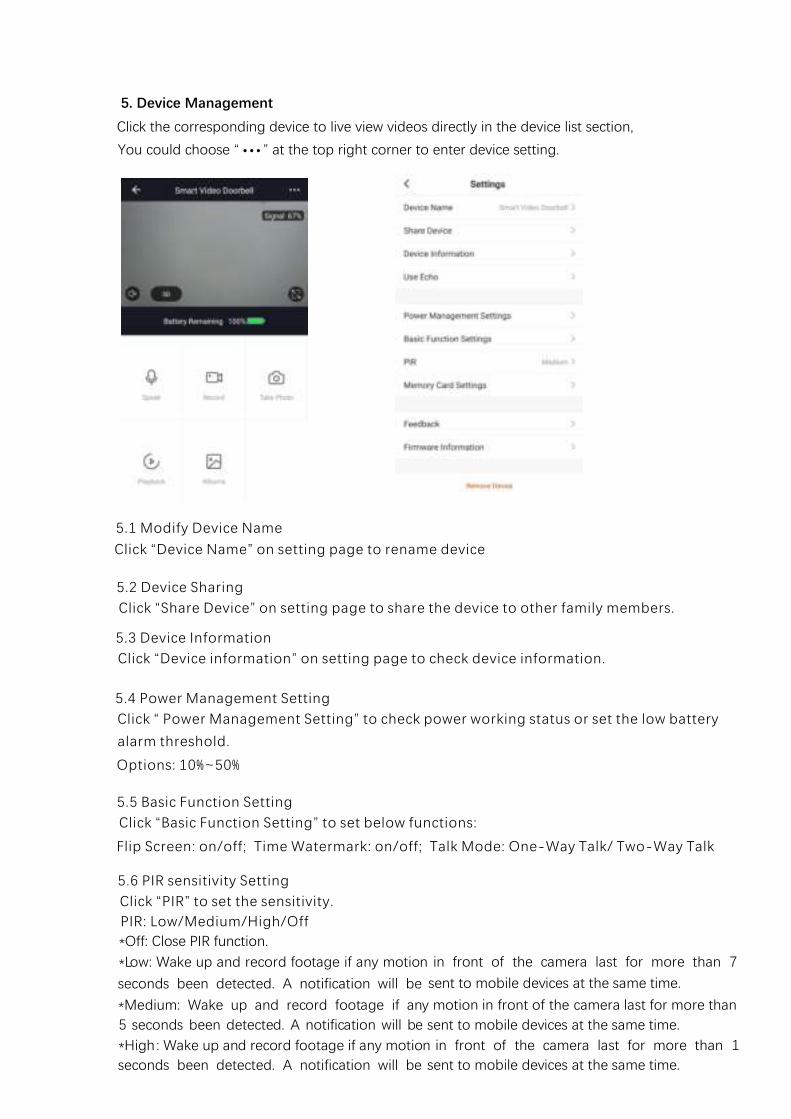
5. Device Management
You could choose “ ” at the top right corner to enter device setting....Click the corresponding device to live view videos directly in the device list section,
5.1 Modify Device NameClick “Device Name” on setting page to rename device
5.2 Device SharingClick “Share Device” on setting page to share the device to other family members.
5.4 Power Management SettingClick “ Power Management Setting” to check power working status or set the low battery
alarm threshold.
Options: 10%~50%
5.5 Basic Function Setting Click “Basic Function Setting” to set below functions:
Flip Screen: on/off; Time Watermark: on/off; Talk Mode: One-Way Talk/ Two-Way Talk
5.6 PIR sensitivity SettingClick “PIR” to set the sensitivity.PIR: Low/Medium/High/Off
5.3 Device InformationClick “Device information” on setting page to check device information.
*Off: Close PIR function. in front of the camera last for more than 7
seconds been detected. A notification will be sent to mobile devices at the same time.
*Low: Wake up and record footage if any motion
*Medium: Wake up and record footage if any motion in front of the camera last for more than 5 seconds been detected. A notification will be sent to mobile devices at the same time. *High: Wake up and record footage if any
motion in front of the camera last for more than 1
seconds been detected. A notification will be mobile devices at the same time.sent to
6. Note for using a. When device is powered by rechargeable lithium batteries. With fully charged, the battery life approximately could be around six months. The mobile device APP will send notification when battery voltage is low. Please charge the device in time if you get the notification. b. Keep the camera within your router’ s range. Make sure to pick a place where is covered by your WiFi signal. Thick or insulated doors can greatly reduce the strength of your WiFi signal even if your router is close by. Trial test before installing the camera is recommended. c. The device is designed base on low power consumption component, it could be remotely wake up from the APP, by PIR human motion detection, or doorbell press. The device will work for 30 seconds after wake up each time then back to standby.
5.7 Memory Card SettingsClick “Memory Card Setting” to check Micro SD card status, include total capacity,used and remaining capacity or format memory card.
Note: In crowded environment, it is recommended to close or set the device to LOW sensitivity to reduce unwanted wake up and notification push to extend battery life.
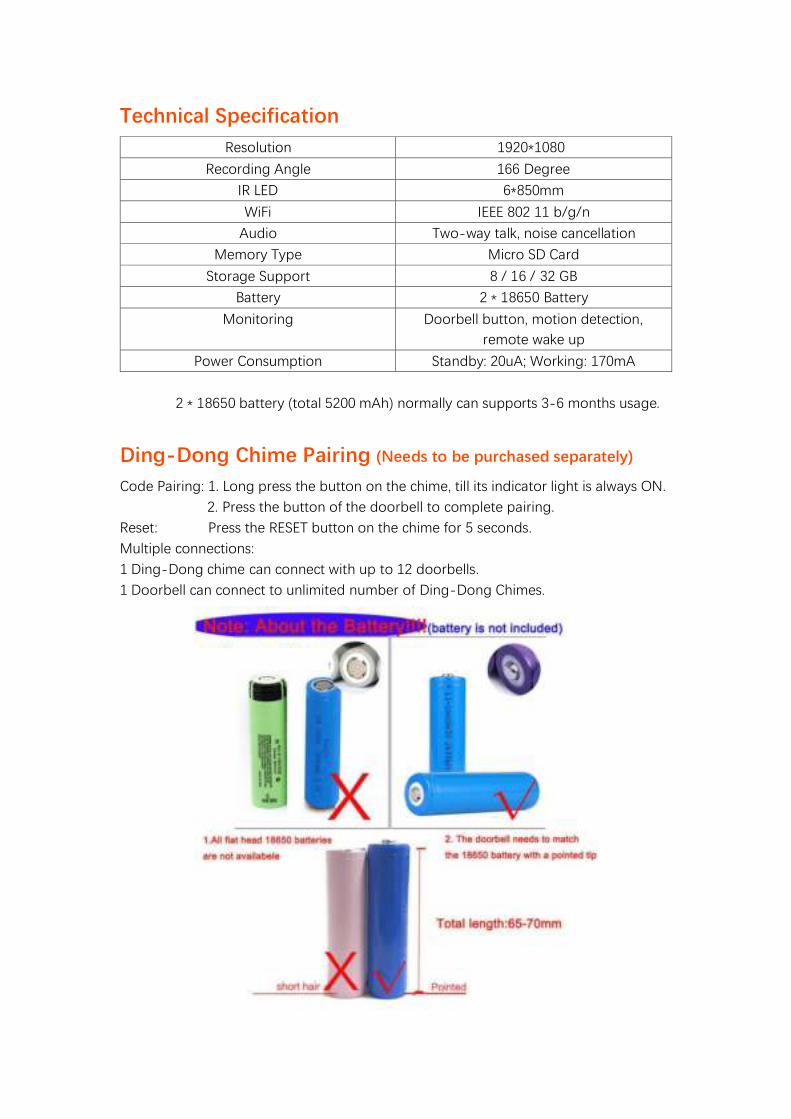
Technical Specification Resolution 1920*1080
Recording Angle 166 Degree IR LED 6*850mm WiFi IEEE 802 11 b/g/n
Audio Two-way talk, noise cancellation Memory Type Micro SD Card
Storage Support 8 / 16 / 32 GB Battery 2 * 18650 Battery
Monitoring Doorbell button, motion detection, remote wake up
Power Consumption Standby: 20uA; Working: 170mA
2 * 18650 battery (total 5200 mAh) normally can supports 3-6 months usage.
Ding-Dong Chime Pairing (Needs to be purchased separately)
Code Pairing: 1. Long press the button on the chime, till its indicator light is always ON. 2. Press the button of the doorbell to complete pairing. Reset: Press the RESET button on the chime for 5 seconds. Multiple connections: 1 Ding-Dong chime can connect with up to 12 doorbells. 1 Doorbell can connect to unlimited number of Ding-Dong Chimes.
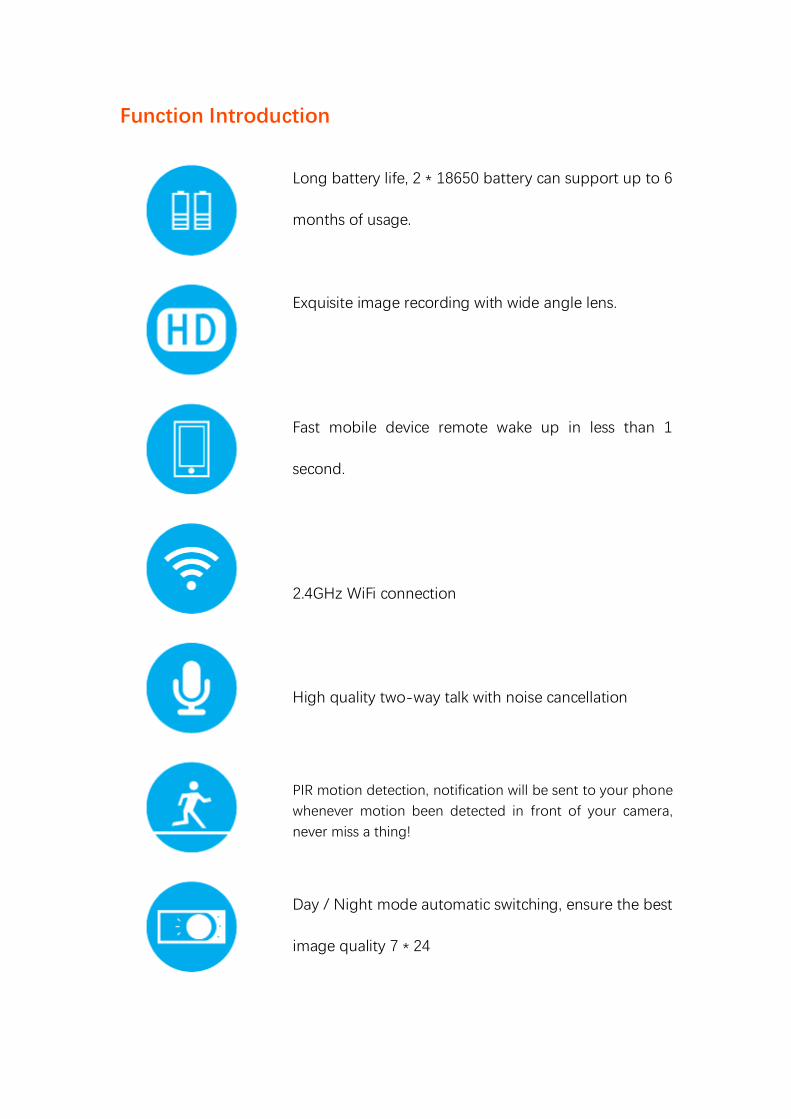
Function Introduction
Long battery life, 2 * 18650 battery can support up to 6
months of usage.
Exquisite image recording with wide angle lens.
Fast mobile device remote wake up in less than 1
second.
2.4GHz WiFi connection
High quality two-way talk with noise cancellation
PIR motion detection, notification will be sent to your phone whenever motion been detected in front of your camera, never miss a thing!
Day / Night mode automatic switching, ensure the best
image quality 7 * 24