Embed Size (px)
Citation preview
010-ELV-06| 600 | 704 |
Tech Support: [email protected]
WHEEL SENSORSTREET BIKES
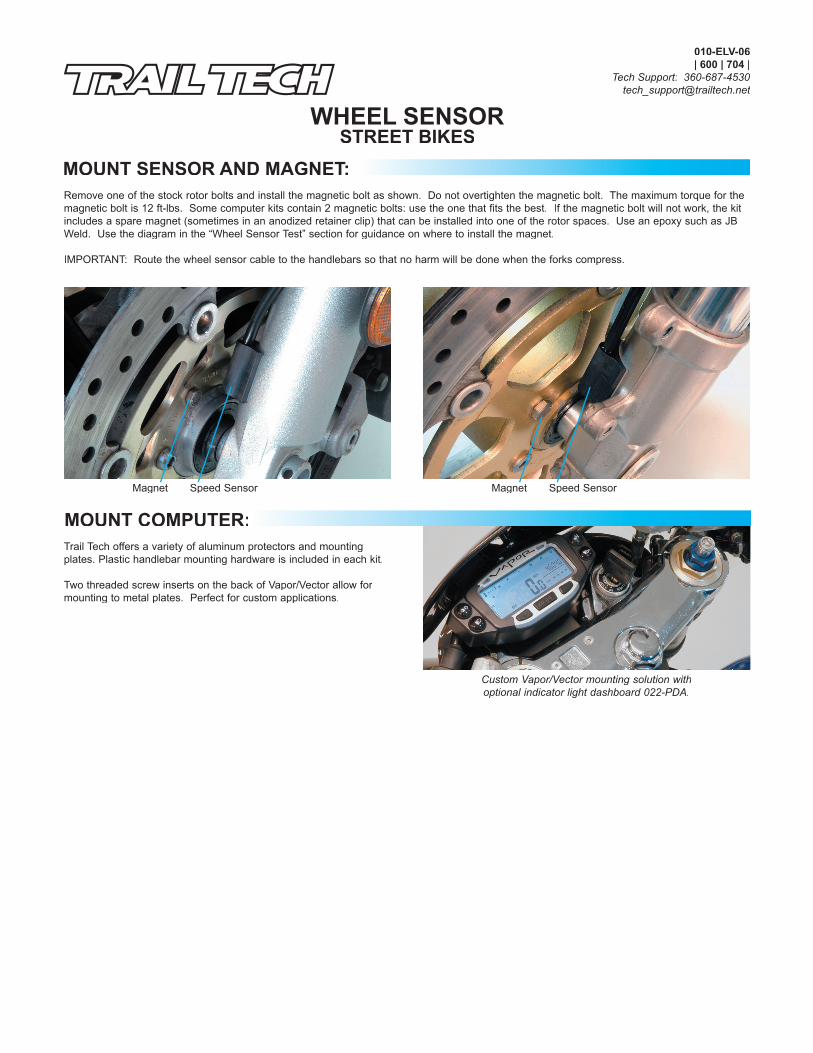
MOUNT SENSOR AND MAGNET:Remove one of the stock rotor bolts and install the magnetic bolt as shown. Do not overtighten the magnetic bolt. The maximum torque for the magnetic bolt is 12 ft-lbs. Some computer kits contain 2 magnetic bolts: use the one that fits the best. If the magnetic bolt will not work, the kit includes a spare magnet (sometimes in an anodized retainer clip) that can be installed into one of the rotor spaces. Use an epoxy such as JB Weld. Use the diagram in the “Wheel Sensor Test” section for guidance on where to install the magnet.
IMPORTANT: Route the wheel sensor cable to the handlebars so that no harm will be done when the forks compress.
Custom Vapor/Vector mounting solution with optional indicator light dashboard 022-PDA.
MOUNT COMPUTER:Trail Tech offers a variety of aluminum protectors and mounting plates. Plastic handlebar mounting hardware is included in each kit.
Two threaded screw inserts on the back of Vapor/Vector allow for mounting to metal plates. Perfect for custom applications.
Magnet Speed Sensor Magnet Speed Sensor
X = 2131X = 5 x 2110
4.95
(new wheel size) (actual miles) x (current wheel size)(current miles)=
X = 105504.95
WHEEL SENSOR
MEASURE WHEEL SIZE:
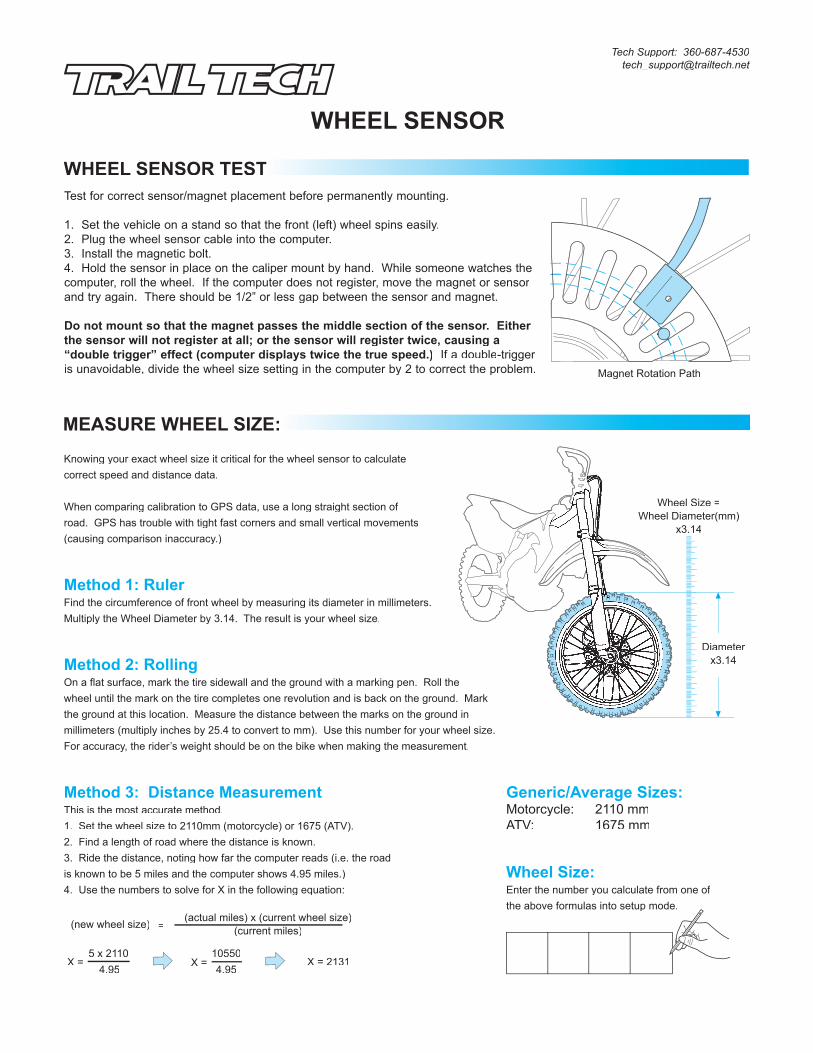
WHEEL SENSOR TEST:Test for correct sensor/magnet placement before permanently mounting.Test for correct sensor/magnet placement before permanently mounting.T
1. Set the vehicle on a stand so that the front (left) wheel spins easily.2. Plug the wheel sensor cable into the computer.3. Install the magnetic bolt. 4. Hold the sensor in place on the caliper mount by hand. While someone watches the computer, roll the wheel. If the computer does not register, move the magnet or sensor and try again. There should be 1/2” or less gap between the sensor and magnet.
Do not mount so that the magnet passes the middle section of the sensor. Either the sensor will not register at all; or the sensor will register twice, causing a “double trigger” effect (computer displays twice the true speed.) If a double-trigger is unavoidable, divide the wheel size setting in the computer by 2 to correct the problem. Magnet Rotation Path
Tech Support: [email protected]
Knowing your exact wheel size it critical for the wheel sensor to calculate correct speed and distance data.
When comparing calibration to GPS data, use a long straight section of road. GPS has trouble with tight fast corners and small vertical movements (causing comparison inaccuracy.)
On a flat surface, mark the tire sidewall and the ground with a marking pen. Roll the wheel until the mark on the tire completes one revolution and is back on the ground. Mark the ground at this location. Measure the distance between the marks on the ground in millimeters (multiply inches by 25.4 to convert to mm). Use this number for your wheel size. For accuracy, the rider’s weight should be on the bike when making the measurement.
Method 2: Rolling
Find the circumference of front wheel by measuring its diameter in millimeters. Multiply the Wheel Diameter by 3.14. The result is your wheel size.
Method 1: Ruler
Enter the number you calculate from one of the above formulas into setup mode.
Method 3: Distance MeasurementThis is the most accurate method.1. Set the wheel size to 2110mm (motorcycle) or 1675 (ATV).2. Find a length of road where the distance is known.3. Ride the distance, noting how far the computer reads (i.e. the road is known to be 5 miles and the computer shows 4.95 miles.)4. Use the numbers to solve for X in the following equation:
Wheel Size =Wheel Diameter(mm)
x3.14
DiameterDiameterx3.14x3.14
Wheel Size:
Motorcycle:ATV:
2110 mm1675 mm
Generic/Average Sizes: