Embed Size (px)
Citation preview
Welcome!
WebJunction CQ Training - Creating an Event Listing
Why & How
Welcome
Today we will review:
• Elements of an Event Listing
• Recent examples of Event Listings on the live site
• Workflow of creating & surfacing Event Listings
Events
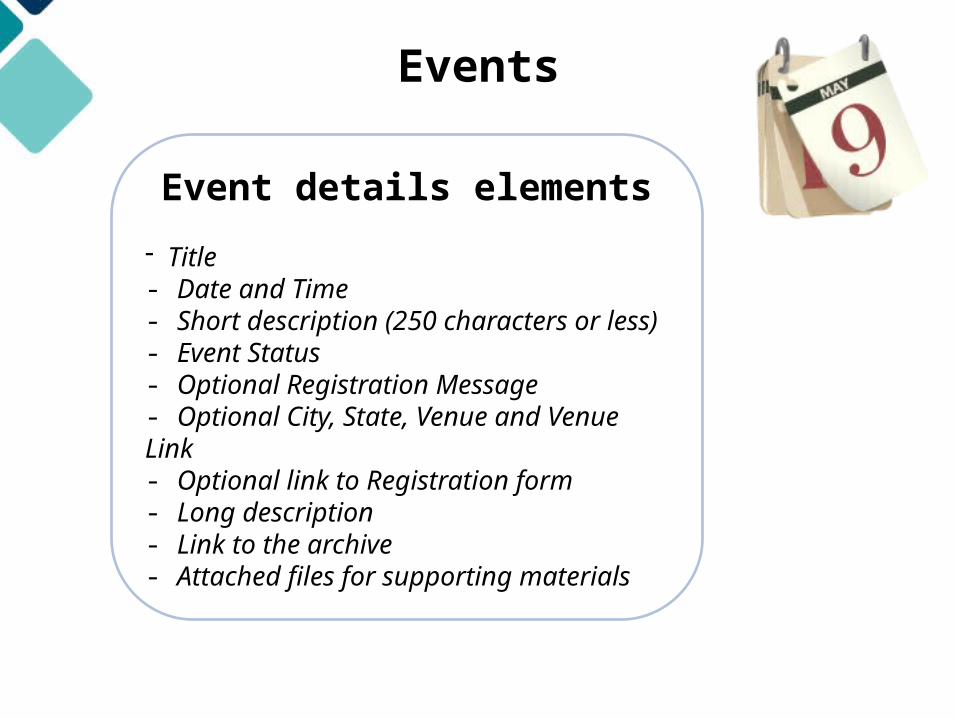
Event details elements
- Title - Date and Time - Short description (250 characters or less) - Event Status - Optional Registration Message - Optional City, State, Venue and Venue Link - Optional link to Registration form - Long description - Link to the archive - Attached files for supporting materials
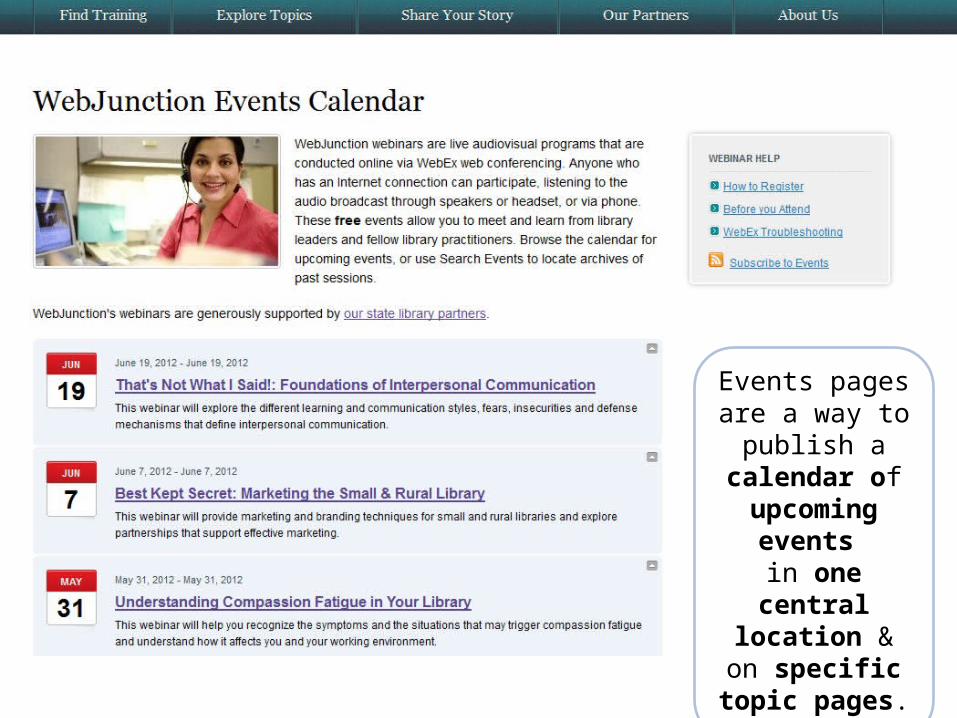
Events pages are a way to publish a
calendar of upcoming events
in one central location & on specific topic
pages.
Examples
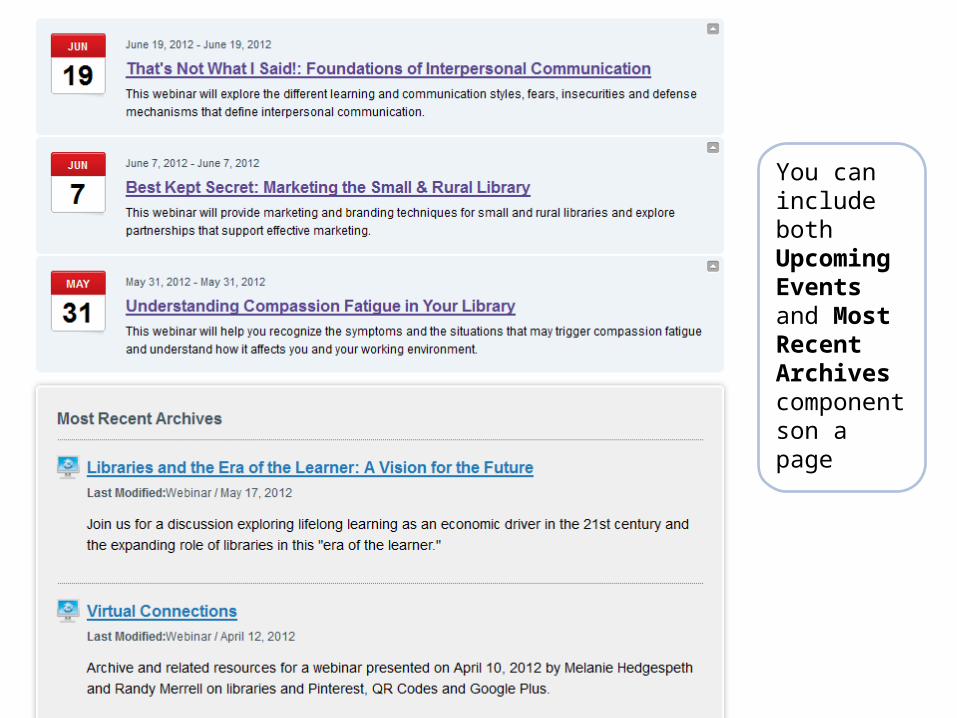
You can include both Upcoming Events and Most Recent Archives componentson a page
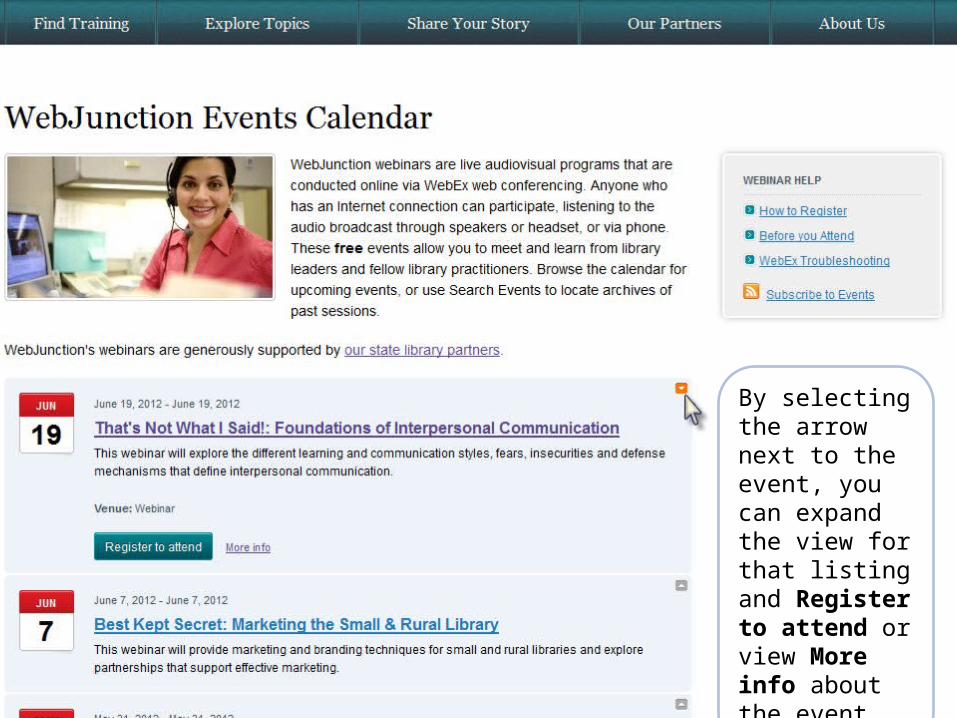
By selecting the arrow next to the event, you can expand the view for that listing and Register to attend or view More info about the event
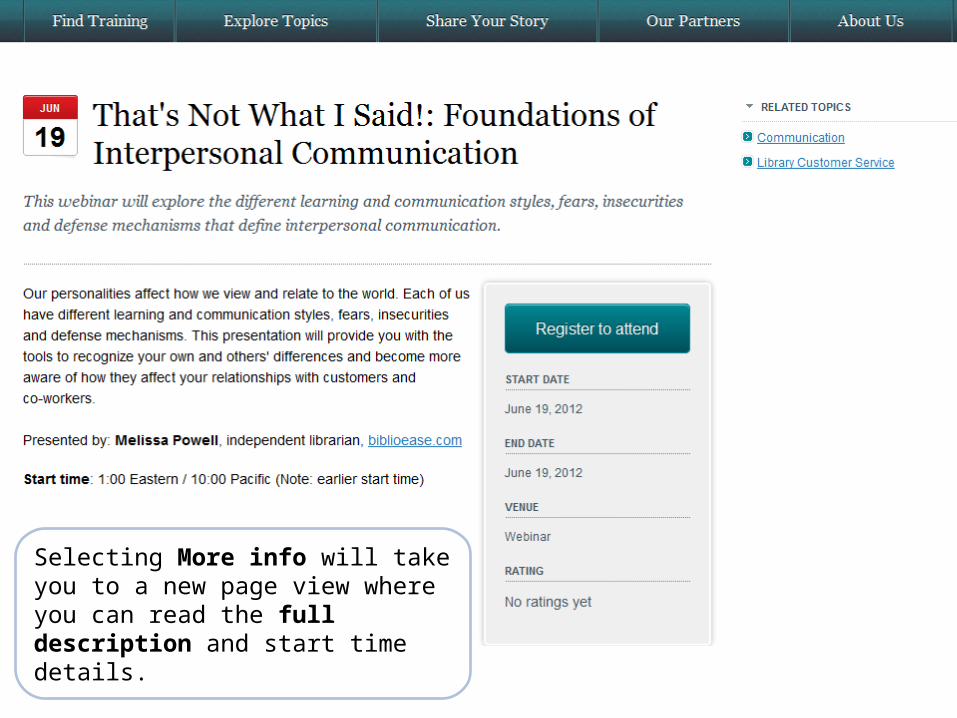
Selecting More info will take you to a new page view where you can read the full description and start time details.
Examples
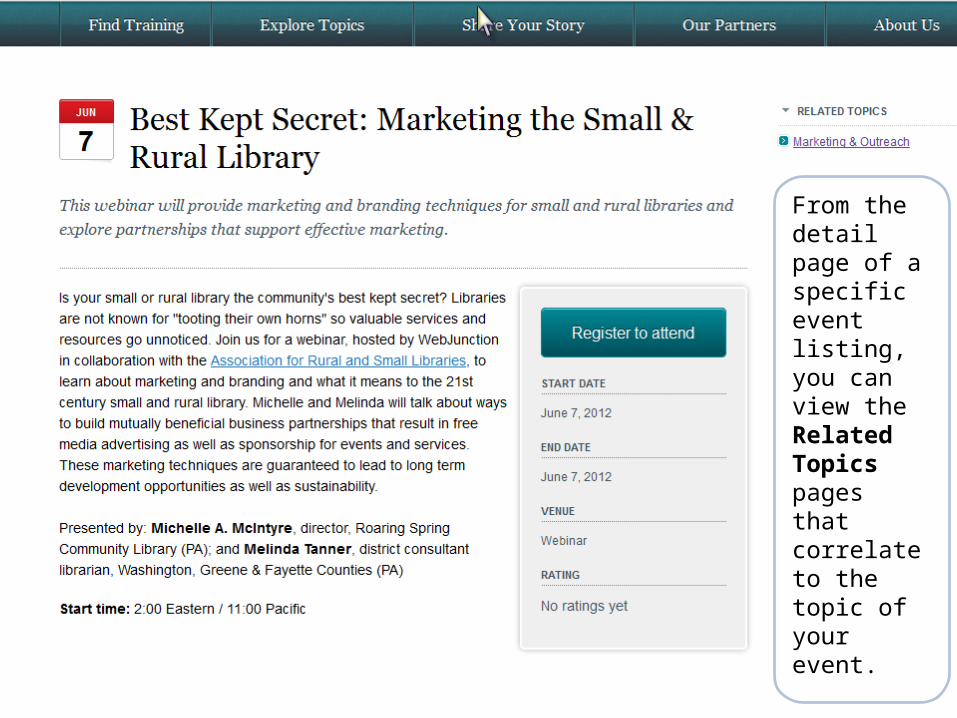
From the detail page of a specific event listing, you can view the Related Topics pages that correlate to the topic of your event.
Examples
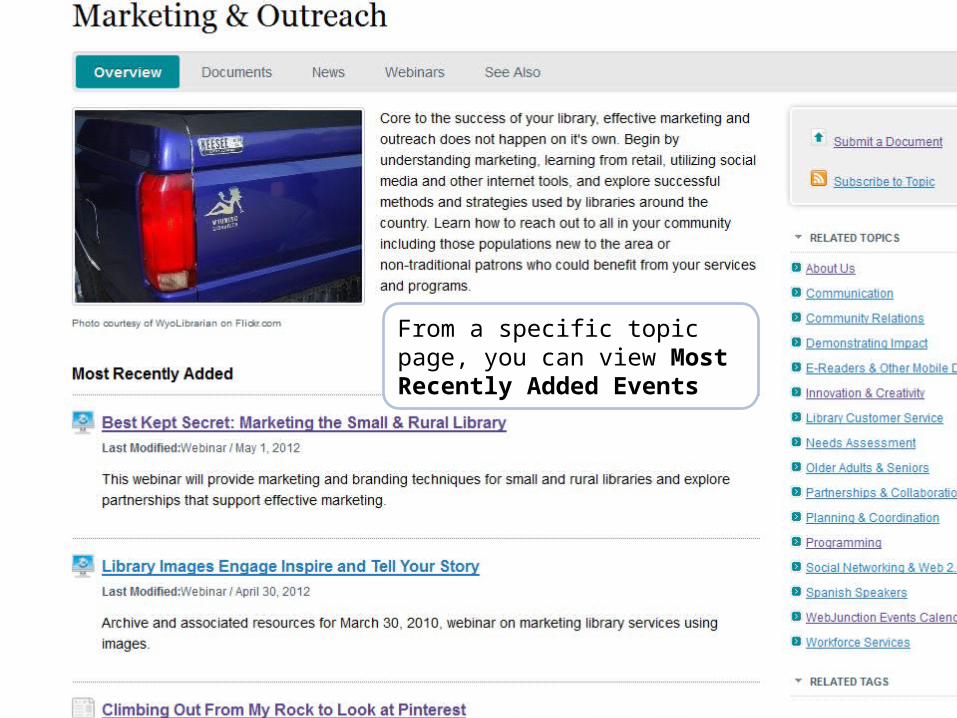
From a specific topic page, you can view Most Recently Added Events
Examples
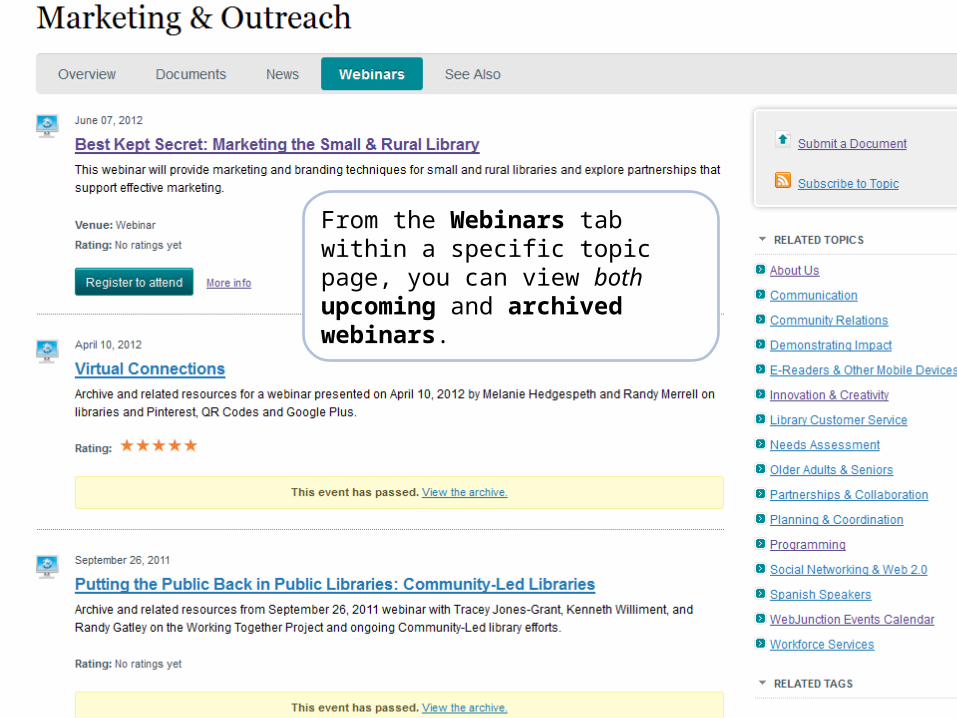
From the Webinars tab within a specific topic page, you can view both upcoming and archived webinars.
Examples
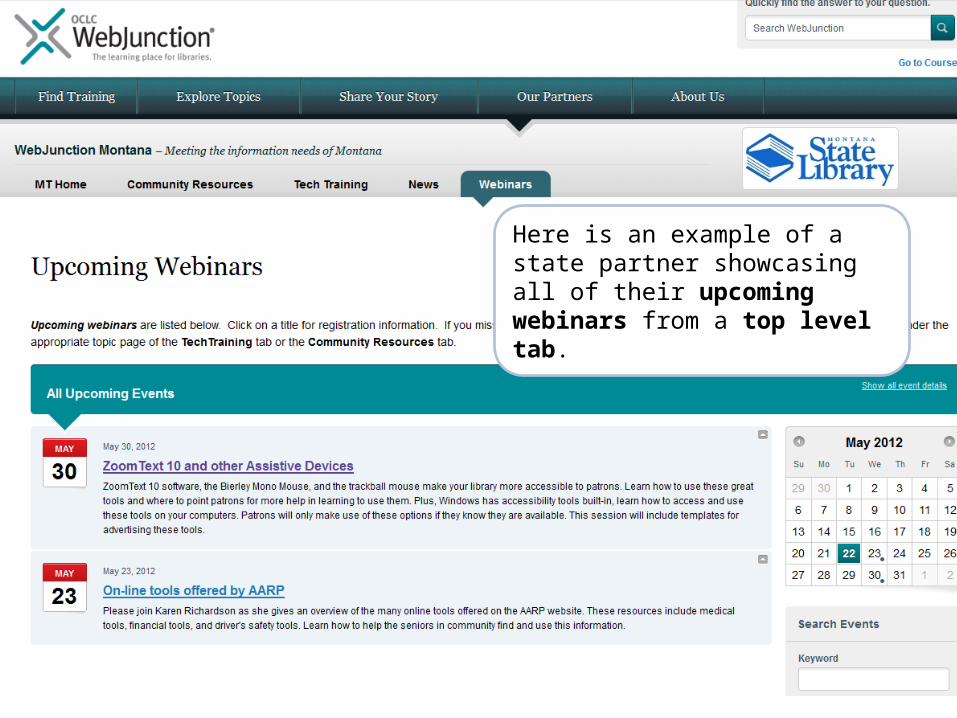
Here is an example of a state partner showcasing all of their upcoming webinars from a top level tab.
Examples
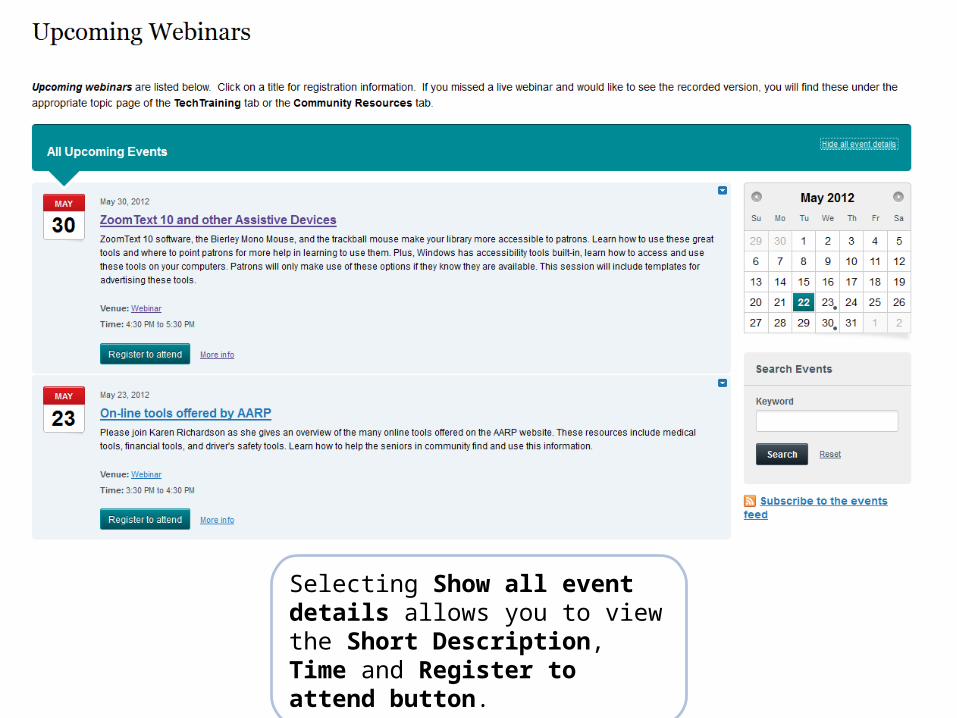
Selecting Show all event details allows you to view the Short Description, Time and Register to attend button.
Examples
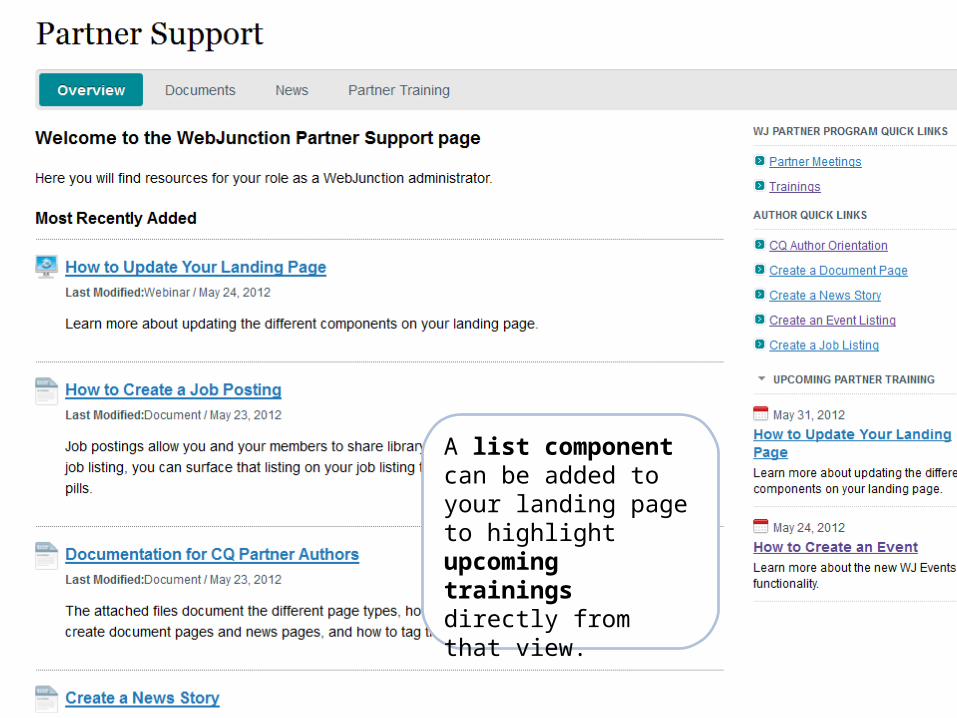
A list component can be added to your landing page to highlight upcoming trainings directly from that view.

The steps to publish an event page are:
• Create the event from the sample page• Create a unique title for page• Tag the page• Edit the content• Preview and activate
Today’s Exercise
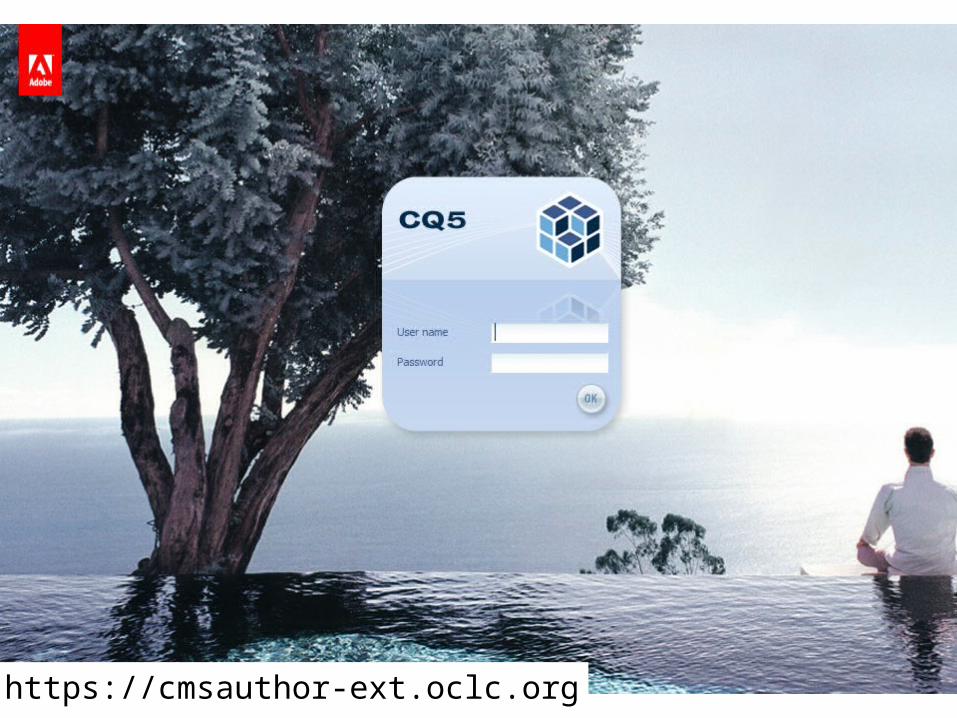
URL: https://cmsauthor-ext.oclc.org

Create an Event Listing
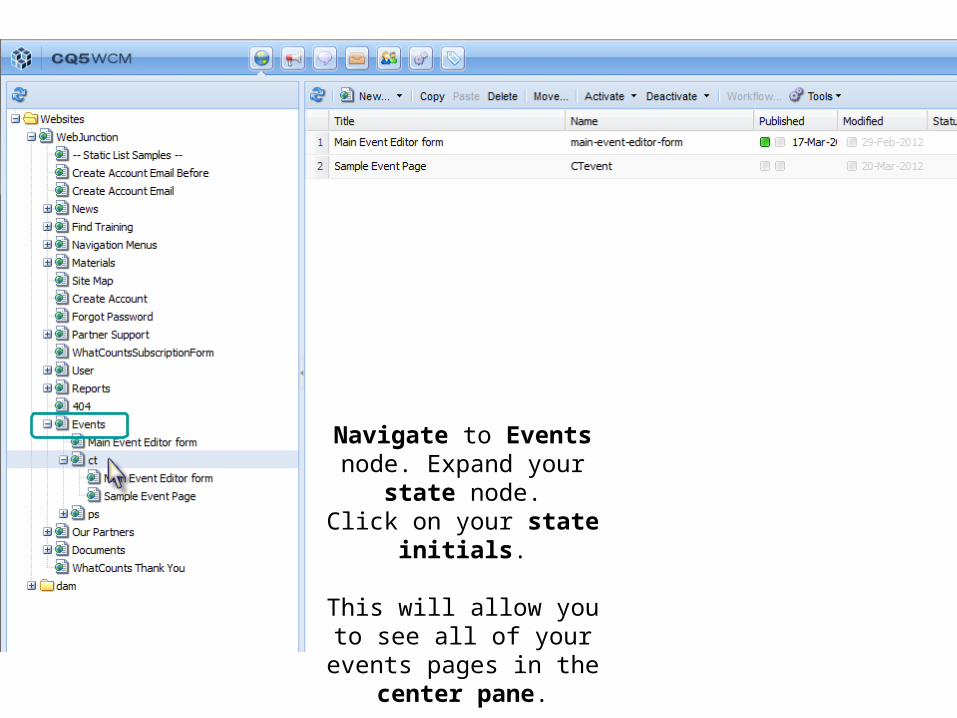
Navigate to Events node. Expand your state node.
Click on your state initials.
This will allow you to see all of your events pages in the
center pane.
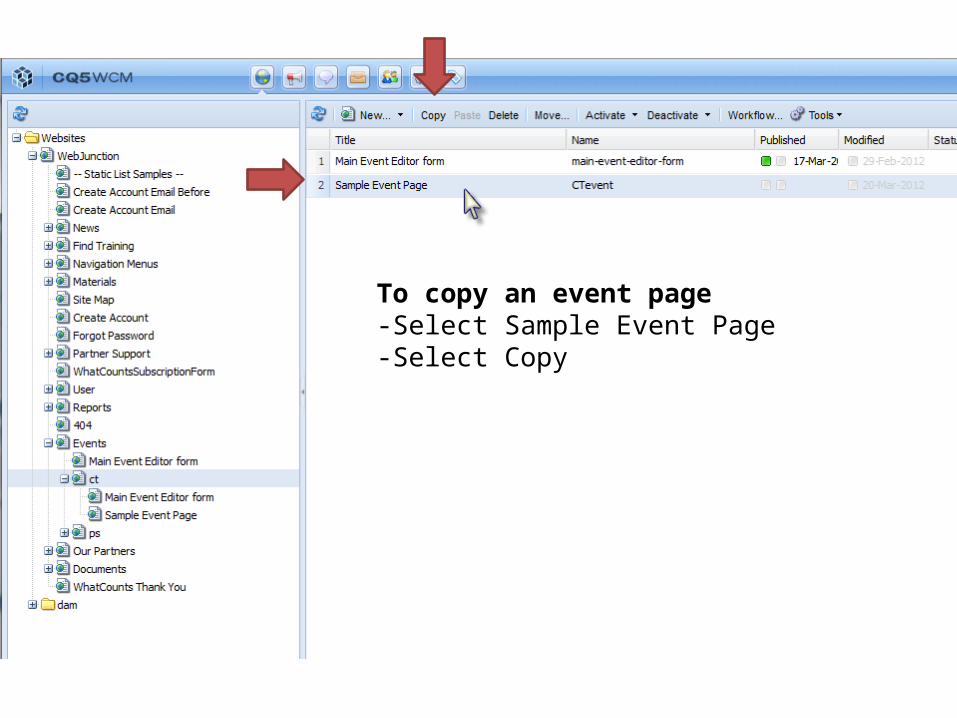
To copy an event page-Select Sample Event Page-Select Copy
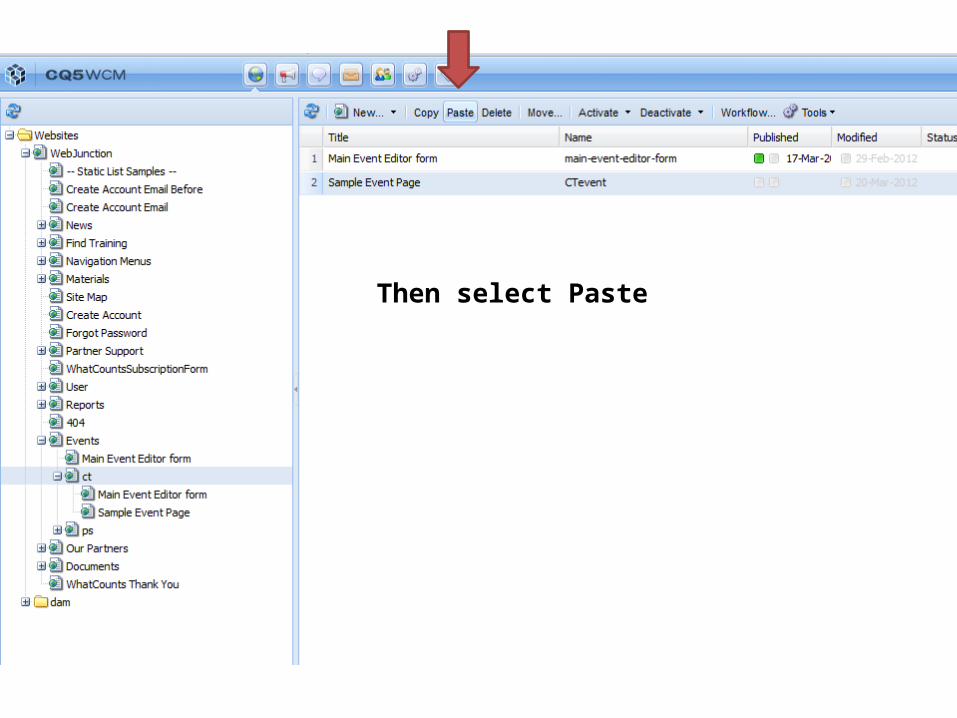
Then select Paste
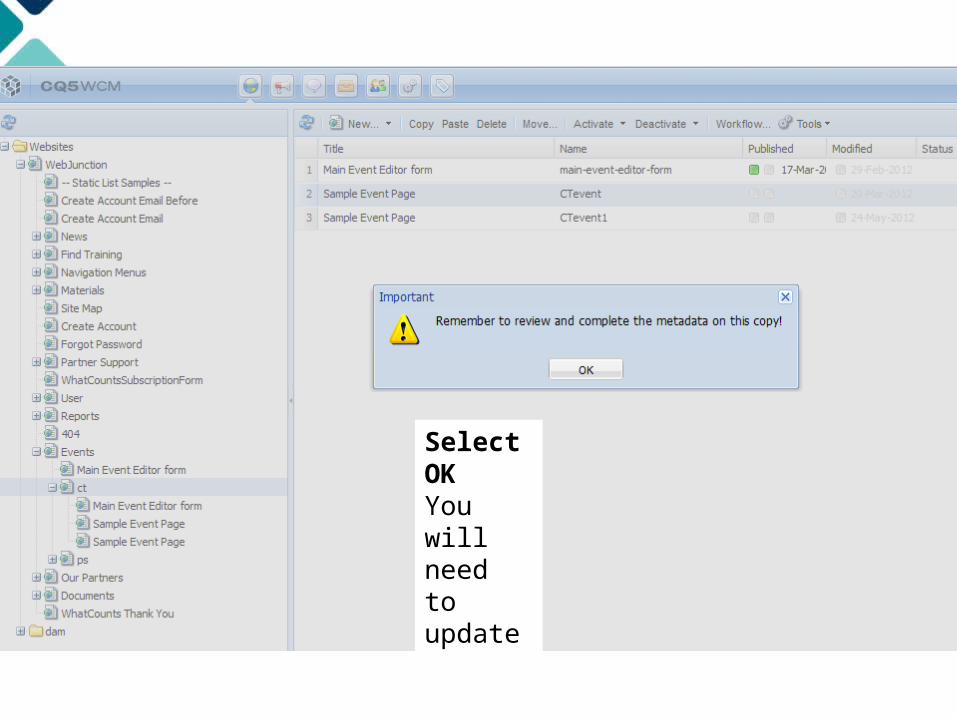
Select OKYou will need to update
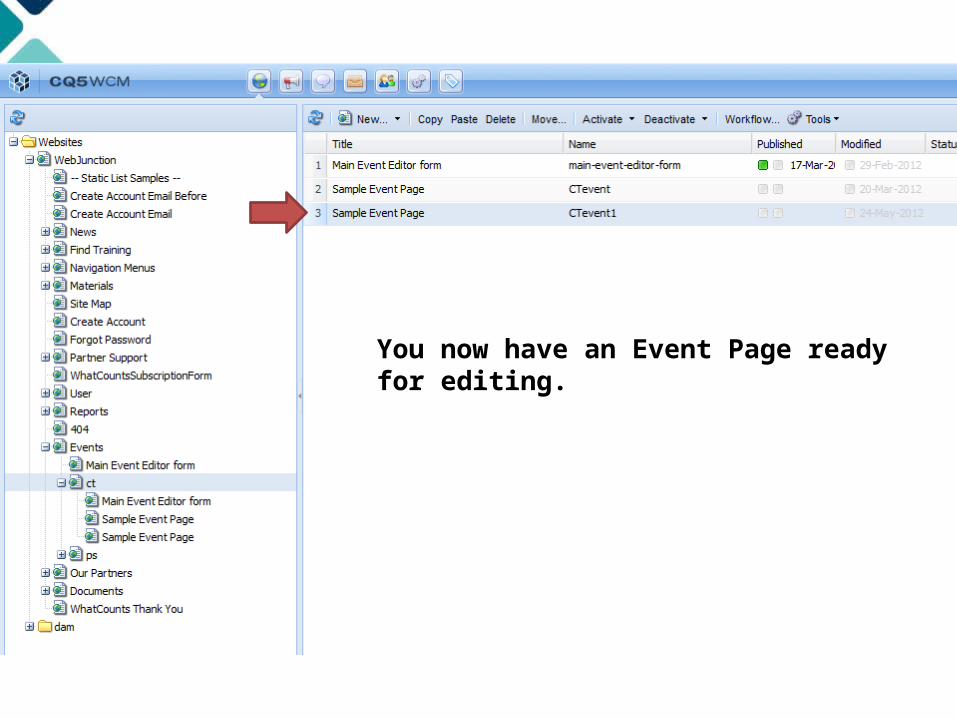
You now have an Event Page ready for editing.
Edit Event Page Properties
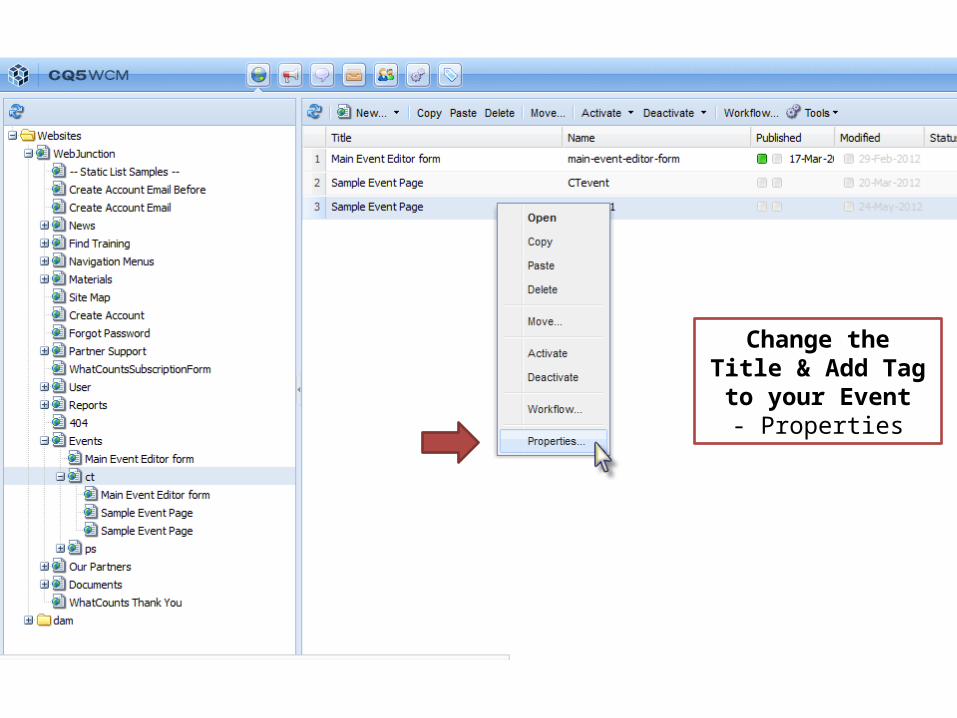
Change the Title & Add Tag to your Event
- Properties
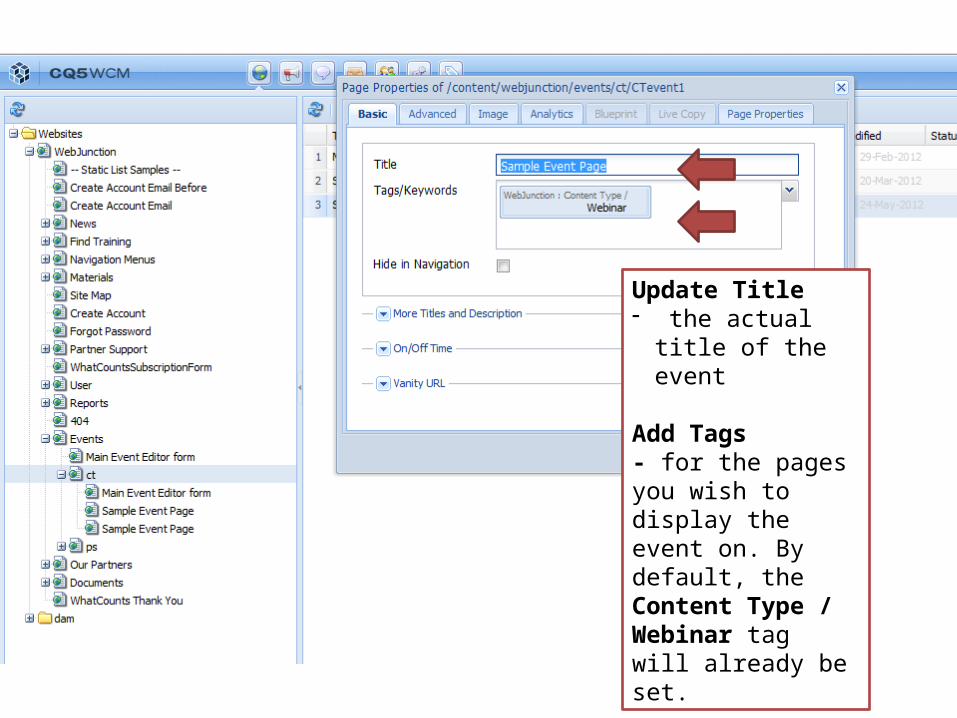
Update Title - the actual title of
the event
Add Tags- for the pages you wish to display the event on. By default, the Content Type / Webinar tag will already be set.
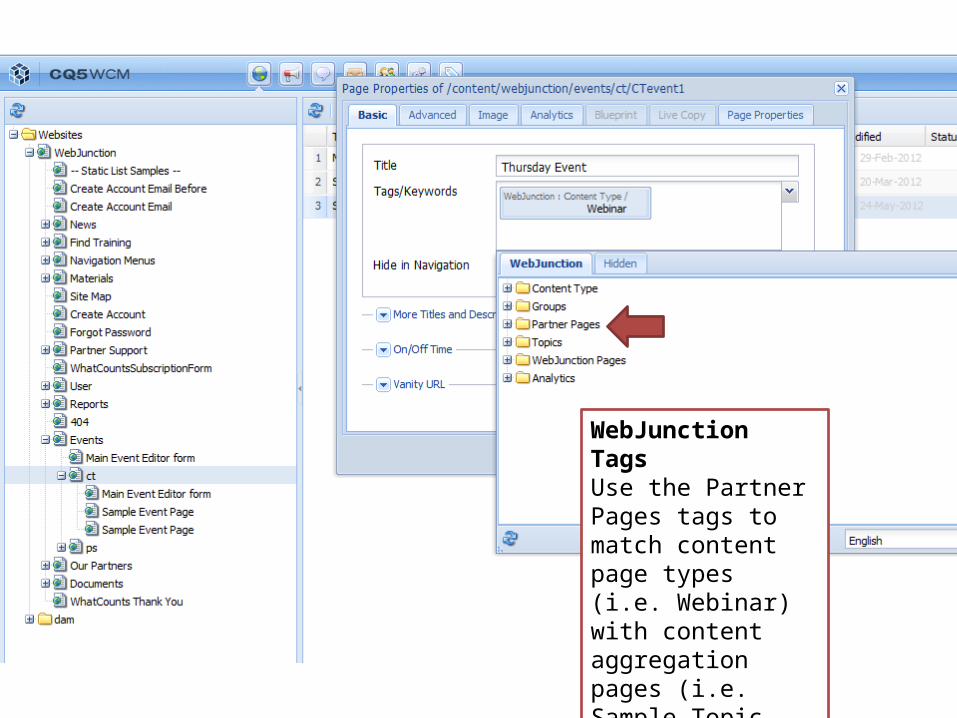
WebJunction TagsUse the Partner Pages tags to match content page types (i.e. Webinar) with content aggregation pages (i.e. Sample Topic Page)
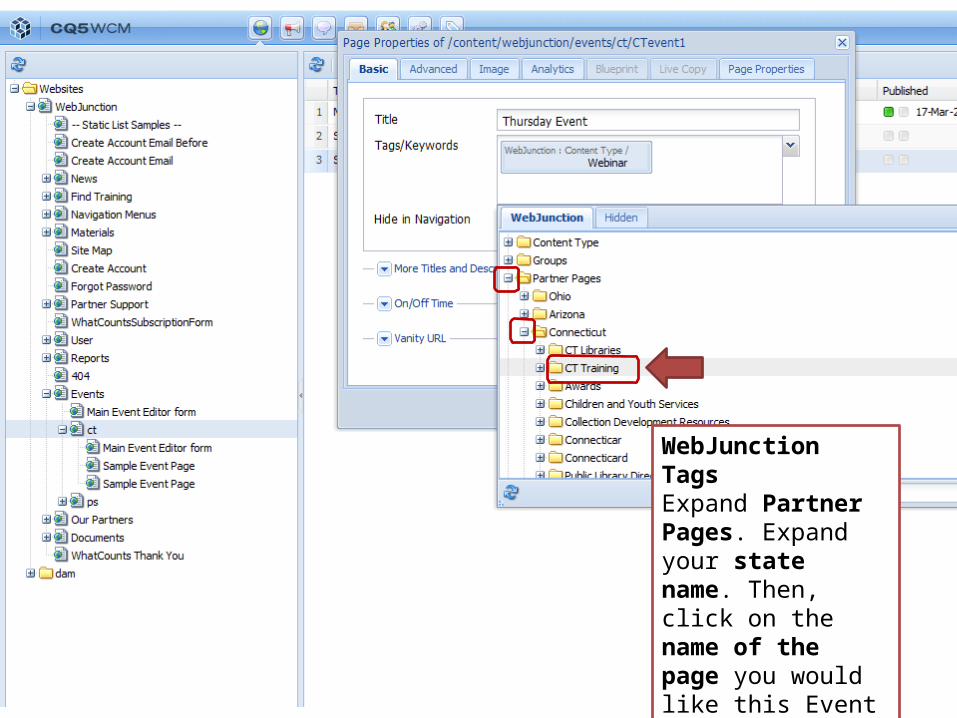
WebJunction TagsExpand Partner Pages. Expand your state name. Then, click on the name of the page you would like this Event to surface (i.e. CT Training)
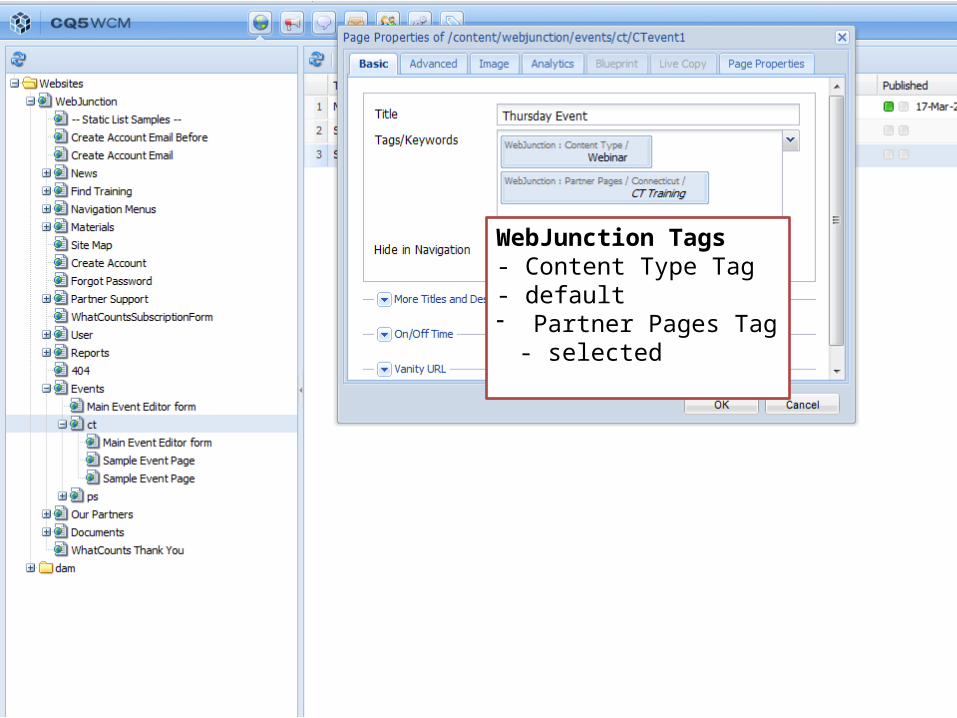
WebJunction Tags- Content Type Tag - default- Partner Pages Tag -
selected
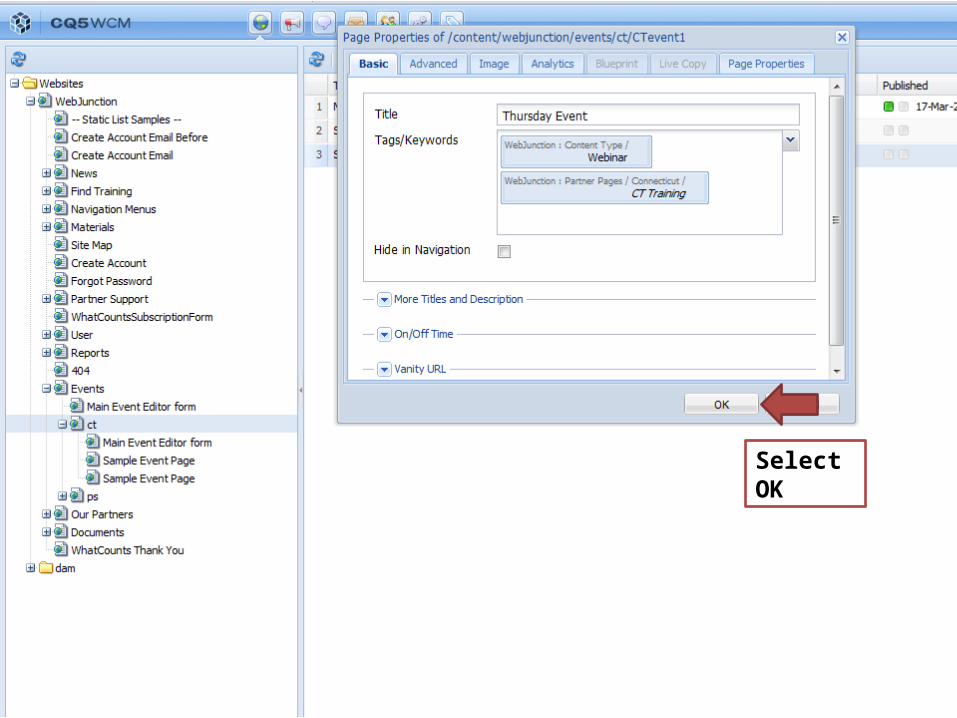
Select OK
Edit Your Event Page Content
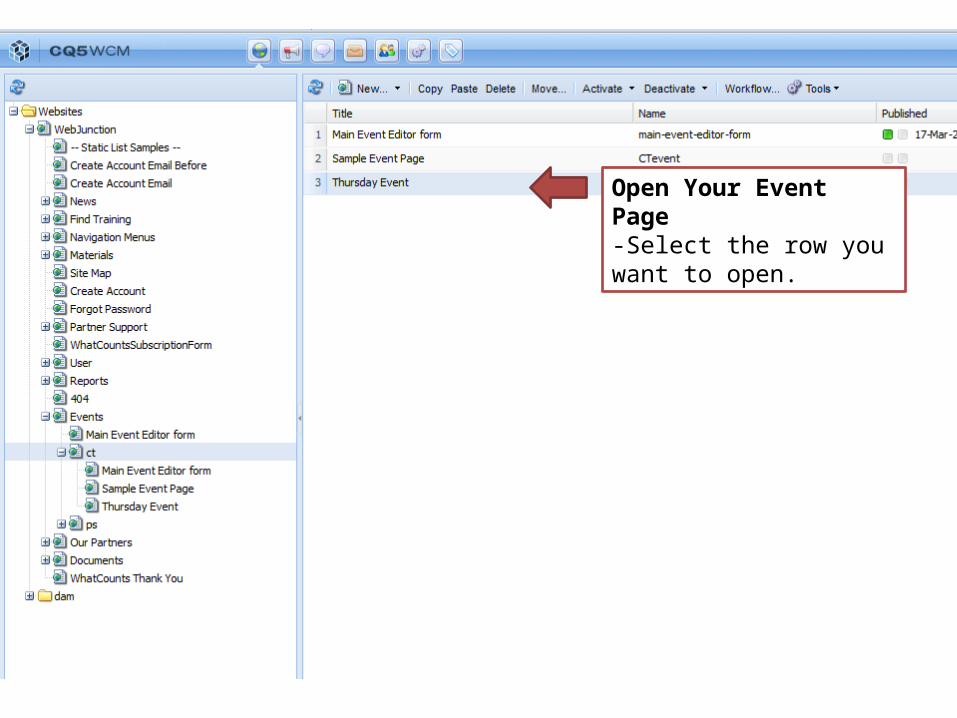
Open Your Event Page -Select the row you want to open.
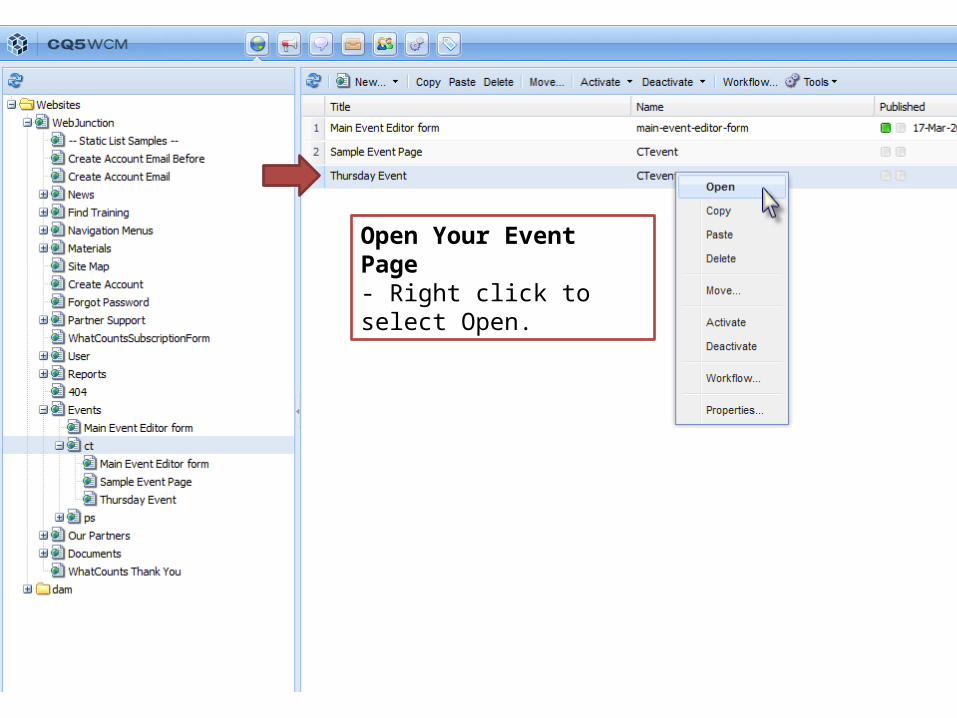
Open Your Event Page - Right click to select Open.
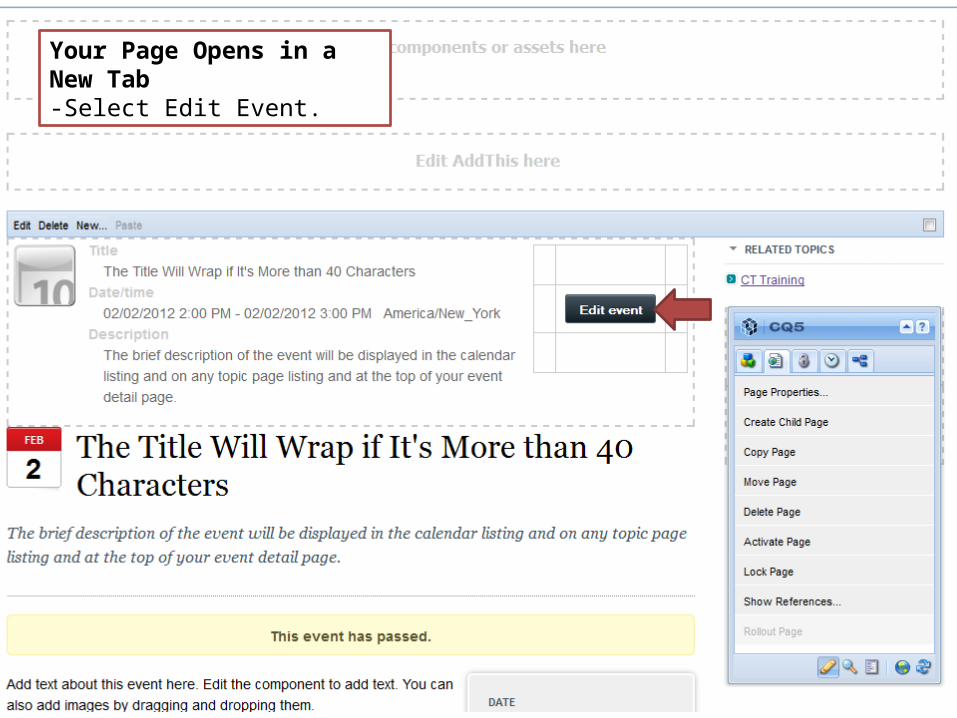
Your Page Opens in a New Tab-Select Edit Event.

Enter your Event info (required)-Title-Event Date (From/End)-Timezone-Brief Description-Event Status (Ex. Open)
Select Edit to begin editing the copy text
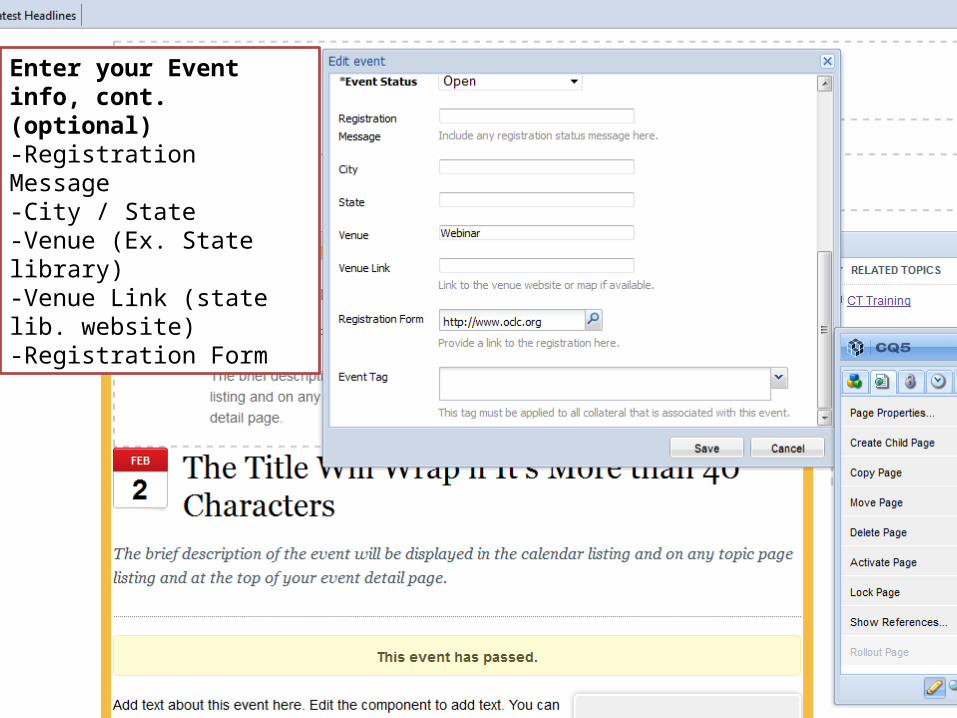
Enter your Event info, cont.(optional)-Registration Message-City / State-Venue (Ex. State library)-Venue Link (state lib. website)-Registration Form
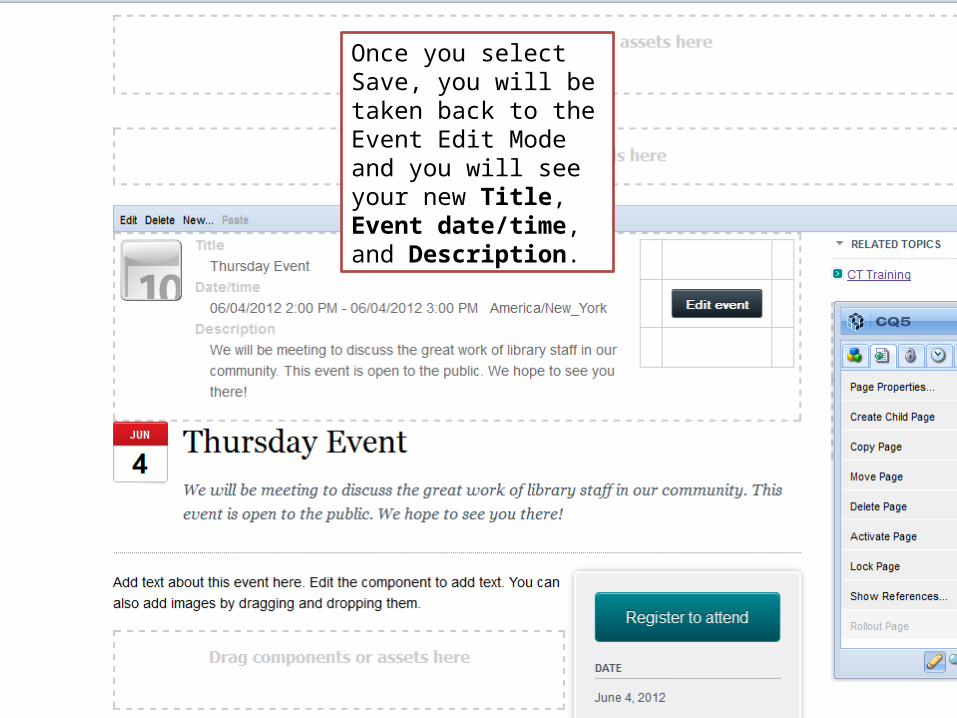
Once you select Save, you will be taken back to the Event Edit Mode and you will see your new Title, Event date/time, and Description.
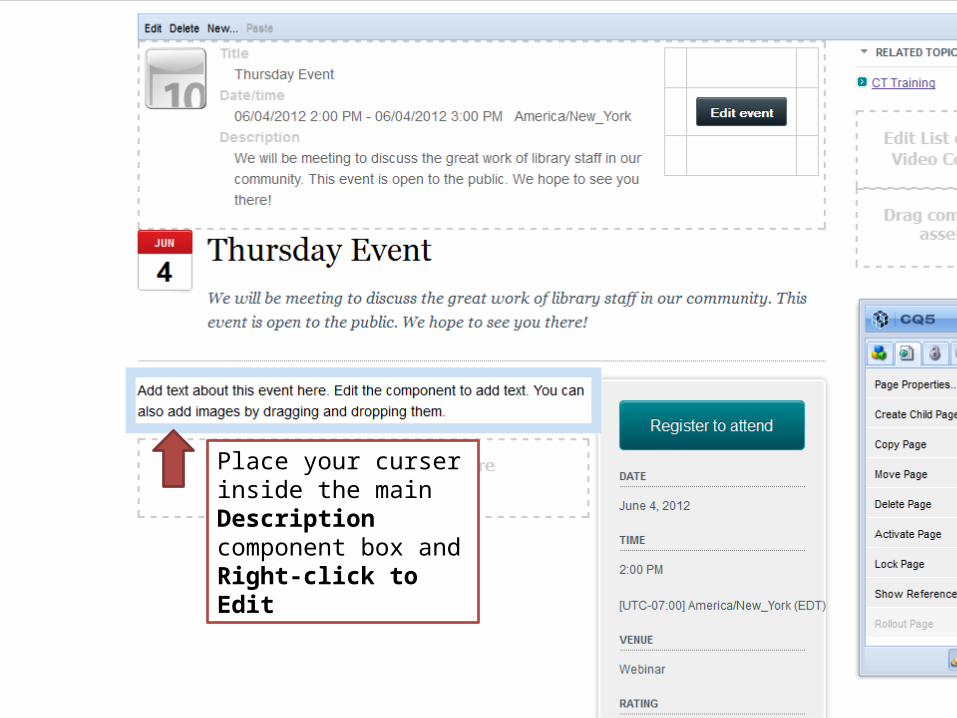
Place your curser inside the main Description component box and Right-click to Edit
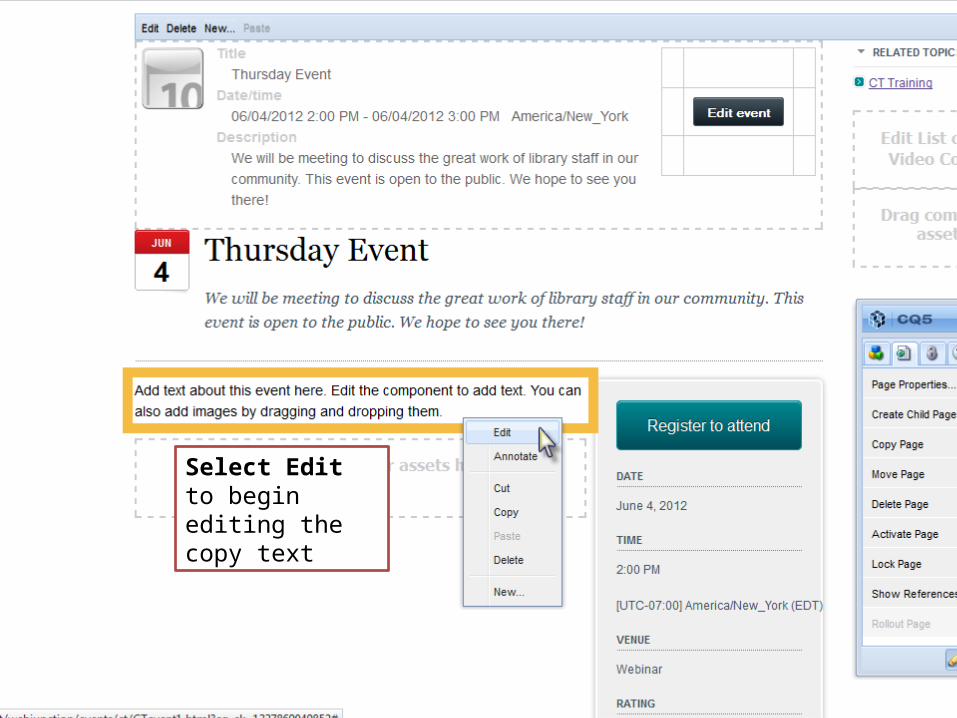
Select Edit to begin editing the copy text
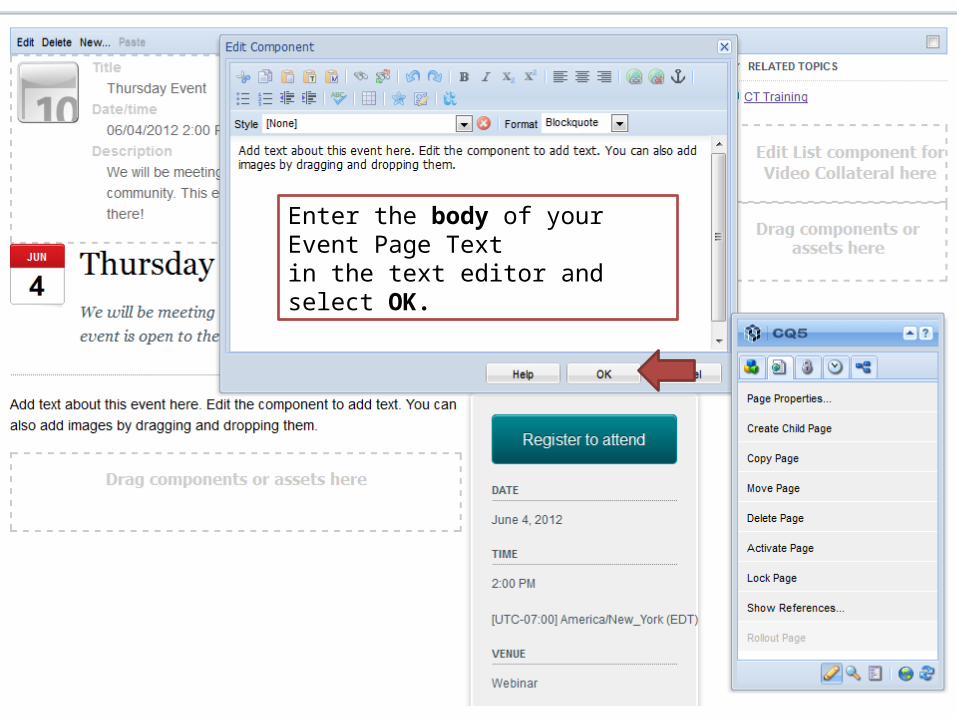
Enter the body of your Event Page Text in the text editor and select OK.

After you select OK, you will see your updated text.
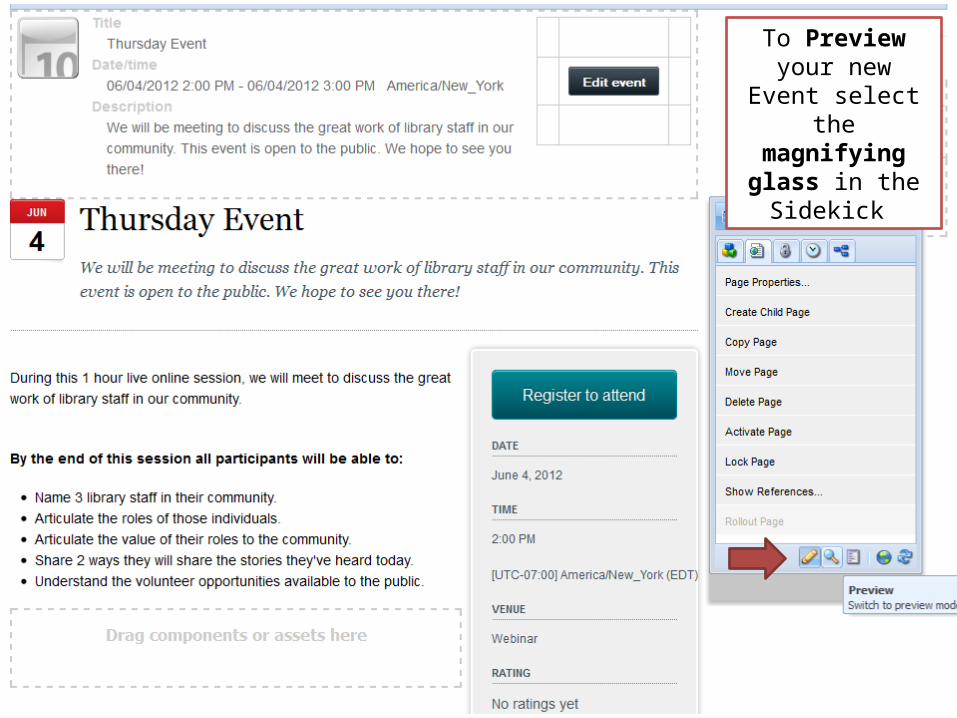
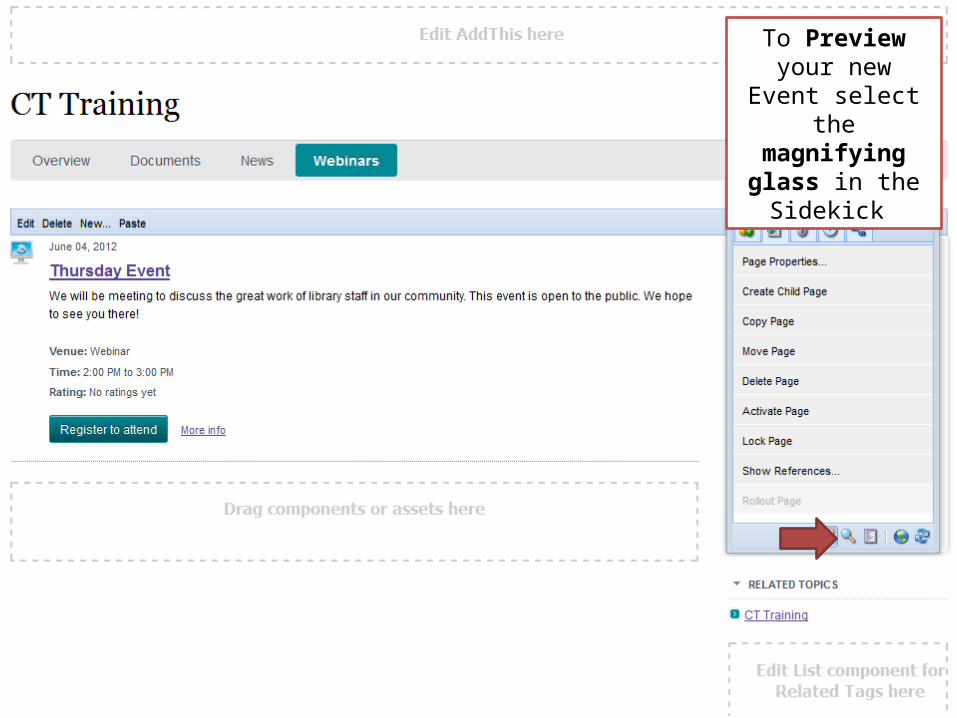
To Preview your new Event select the magnifying
glass in the Sidekick
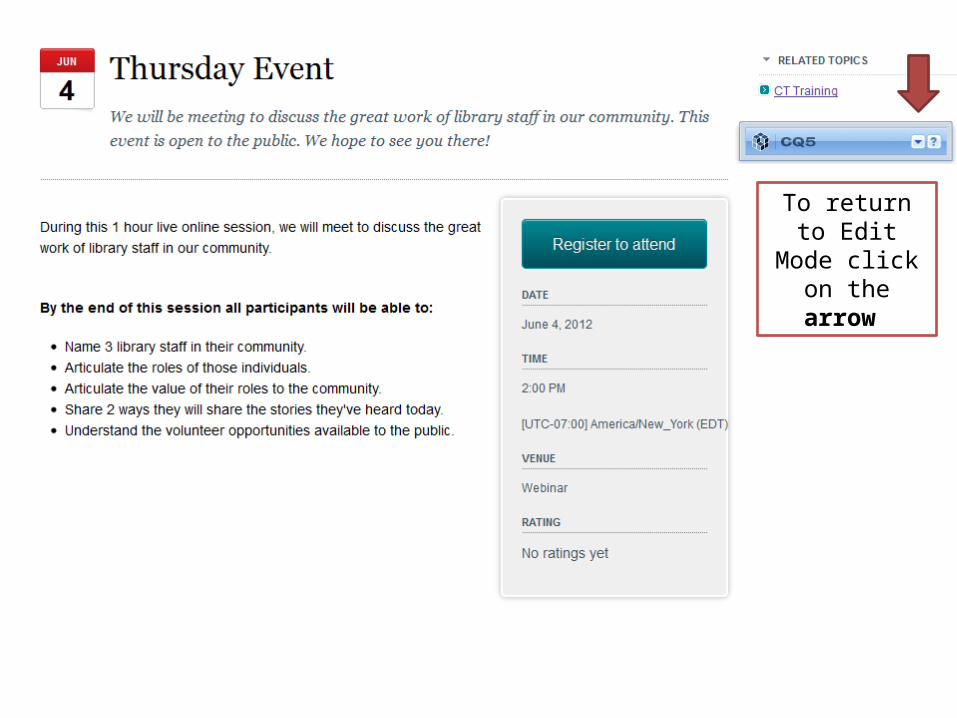
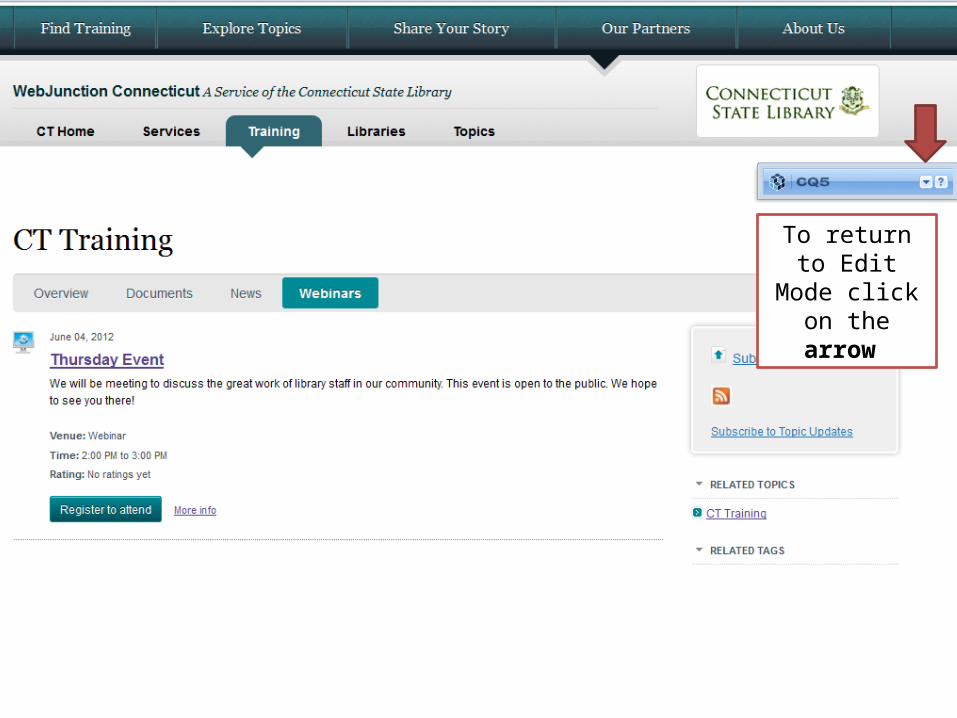
To return to Edit Mode click on
the arrow

To return to Navigation View close the tab
Confirm Event Surfaced
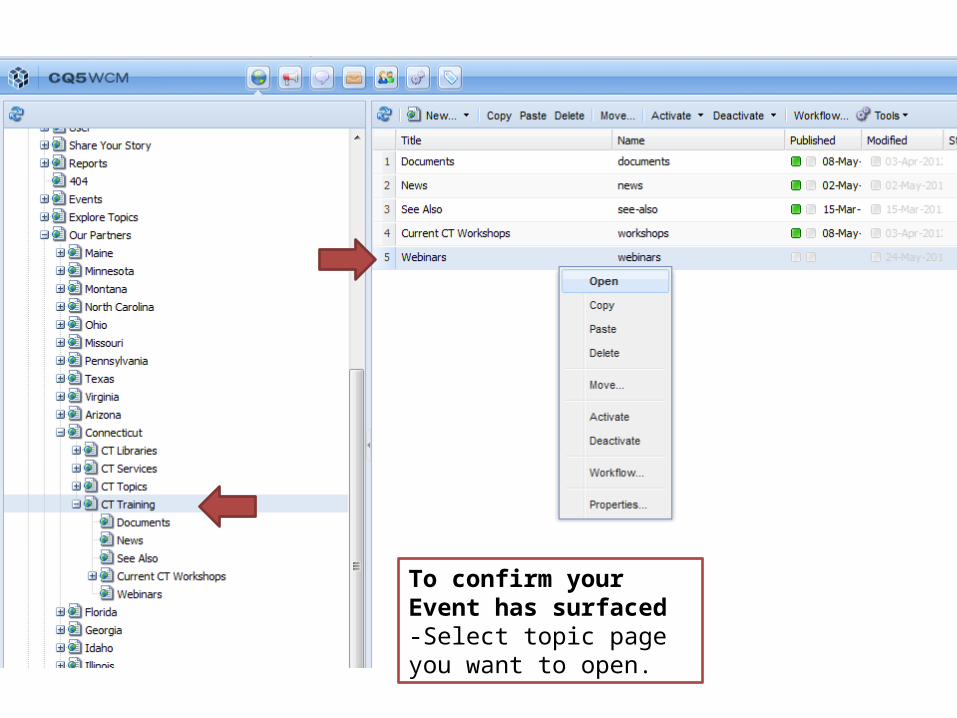
To confirm your Event has surfaced-Select topic page you want to open.
To Preview your new Event select the magnifying
glass in the Sidekick
To return to Edit Mode click on
the arrow
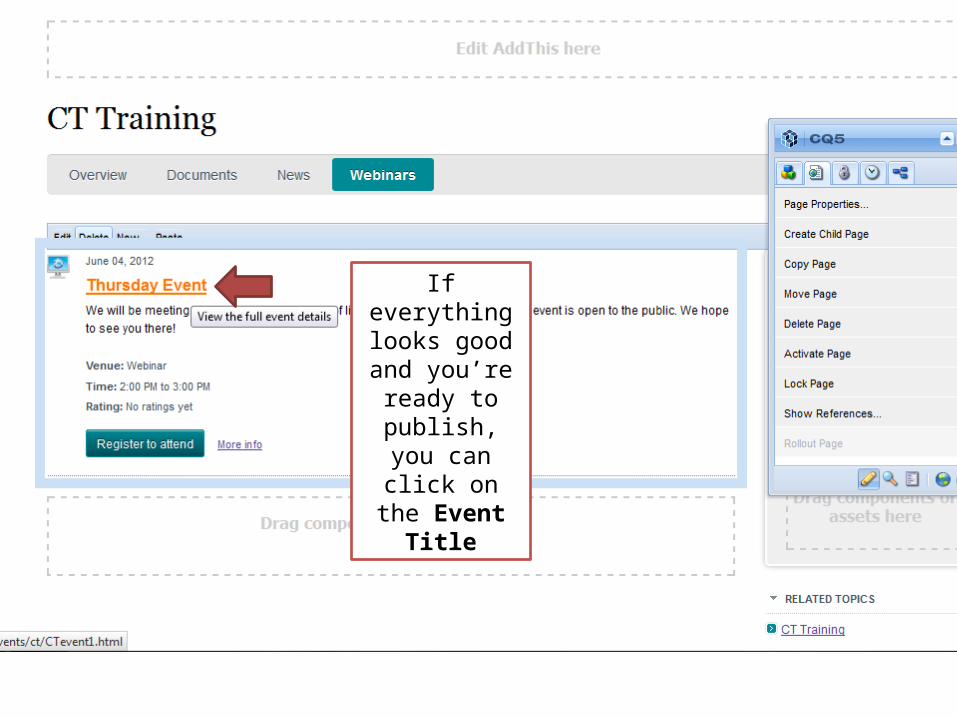
If everything looks good and you’re ready to publish, you can
click on the Event Title
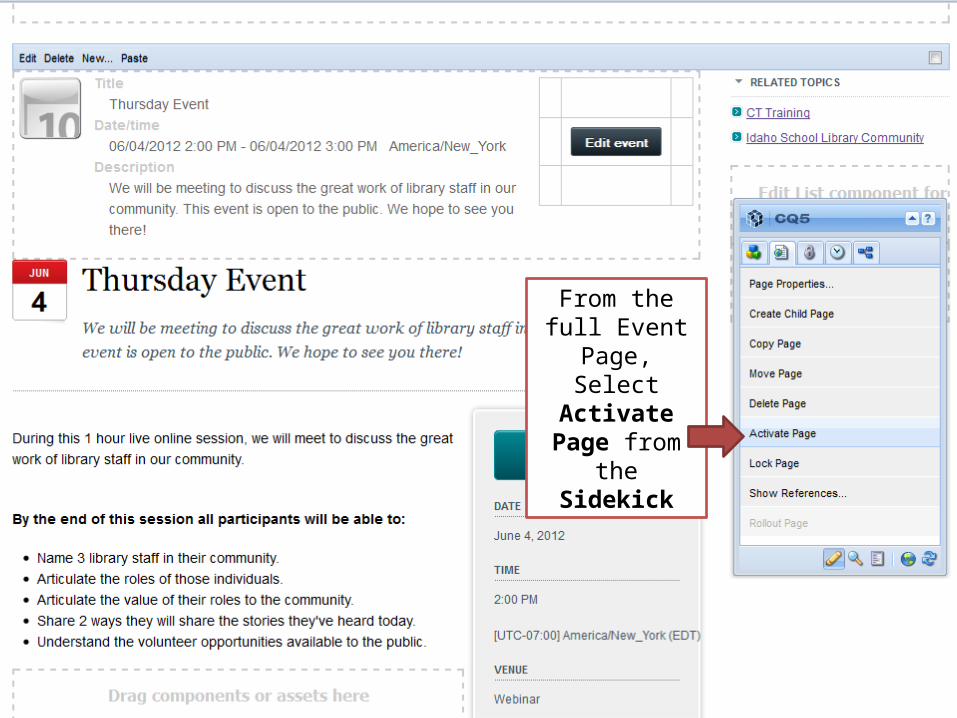
From the full Event Page,
Select Activate Page from the
Sidekick
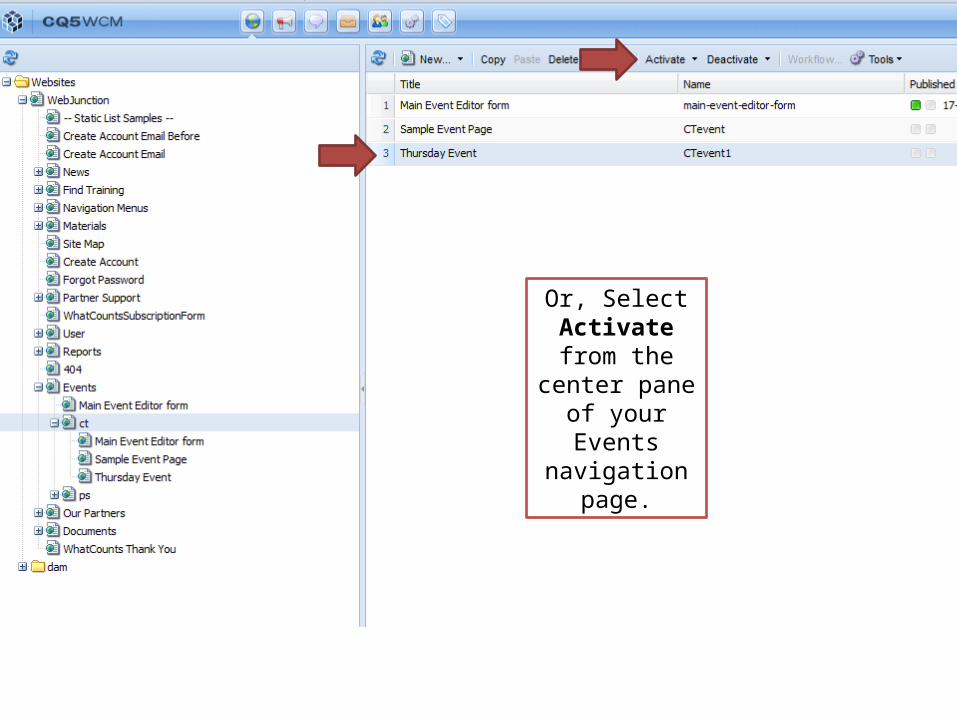
Or, Select Activate from
the center pane of your Events
navigation page.


![New Welcome to NZ Airports Association · 2016. 11. 23. · intelligence” (CQ) and become a welcoming experience for travellers. “CQ is as important as IQ and EQ [emotional intelligence]](https://img.pdfslide.us/doc/110x75/604667104d69e977300e9e0f/new-welcome-to-nz-airports-association-2016-11-23-intelligencea-cq-and.jpg)