Embed Size (px)
Citation preview
- 1 -
Week 1 “Getting Started”
Howdy, and welcome to WEEK 1 of our Weave & Stitch Along! This week, we're GETTING
STARTED, and the main objective is to EXPLORE!
Have your original TURTLE Loom or your Zoom/square loom ready with a woven motif on it, and
have some threads and/or yarns ready to try out our first stitch: The "RUNNING STITCH".
You may follow these written instructions, or watch the video for Week 1 on YouTube (see
resources below).
Goals - Get comfortable with embroidering on your pin loom
- Learn the “Running Stitch”
- Explore different yarns, threads, colors
- Explore different methods, different stitching directions, different ways to hold the loom, and
different ways to move the needle
General Materials - A pin loom (either the original TURTLE Loom™ or a 4” square pin loom with 31 x 31 threads, like
the Schacht Zoom loom), readily woven.
- A tapestry needle, size 16, or any other needle of your liking (metal or plastic)
- Scissors
Materials Needed for This Week Note: You don’t have to use the same yarns/threads that are used in the demonstration. Use your own
stash or choices for both the canvas weaving and the embroidery. The yarns used in the video and in this
worksheet are used to demonstrate variety and serve as reference.
- 2 -
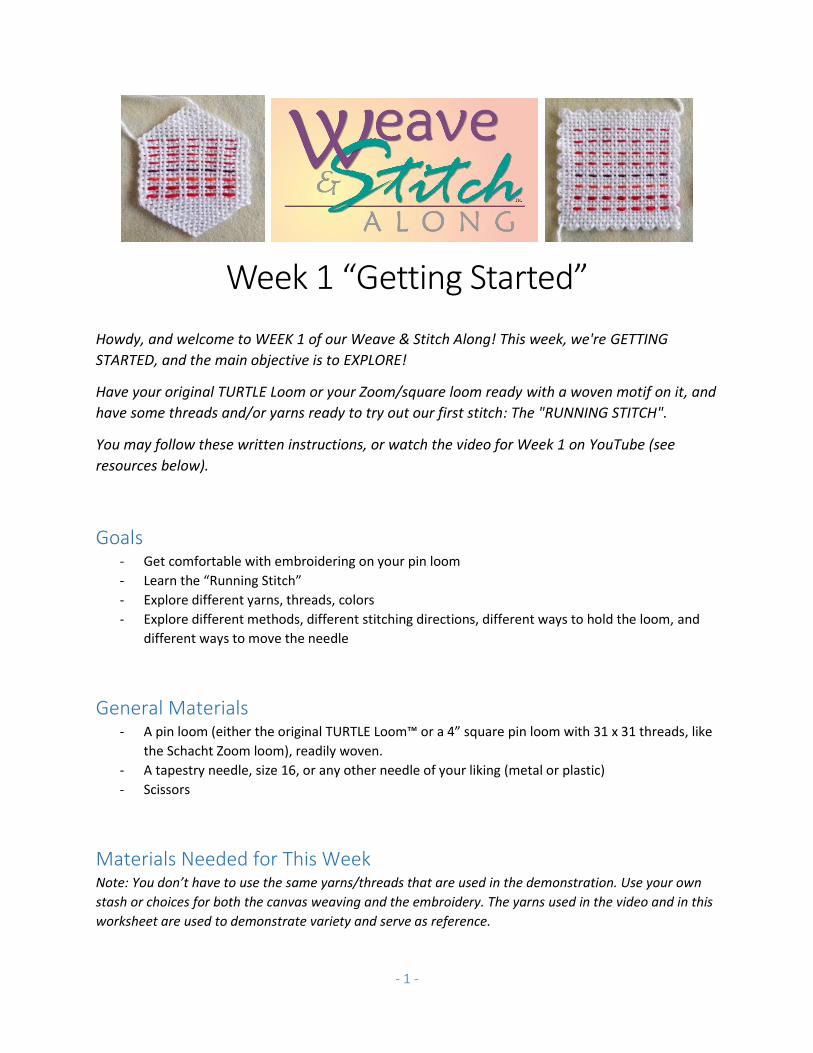
You will need 8 different strands (any mix of different materials or colors), each 12” long (use a ruler to
quickly measure the length).
Here is an overview of the yarns/threads that were used in the video:
1 DMC Perle Cotton, weight 5
2 DMC Embroidery Floss
3 Lion Brand Bonbon, 96% Acrylic, 4% Other Fiber, Color 660 Celebrate
4 Lion Brand Bonbon, 100% Cotton, Color 630 Beach
5 Sock Yarn (unknown brand)
6 Lion Brand Bonbon, 100% Acrylic, Color 610 Brights
7 Yarn Bee Soft Secret
8 DMC Tapestry Wool
This Week’s Stitch: The Running Stitch The Running Stitch is similar to what you already know from weaving: It’s going “under, over, under,
over, …” except you work over several threads, and - since you already have a woven fabric to work on
and not just warps - the embroidery will rest on top of the fabric.
How to work the Running Stitch is explained below and in the video. You can also look at the charts and
instructions for “Running Stitch” on the DMC Embroidery Stitches web page
(https://www.dmc.com/us/p-uncategorizedembroidery-stitches.html)
A Note About Tension Pull the yarn/thread just enough so that it rests on the fabric. If you pull too hard, the canvas threads
will be distorted. If you don’t pull enough, you will see loops.
Always remember: Practice makes perfect!
- 3 -
How-To Instructions
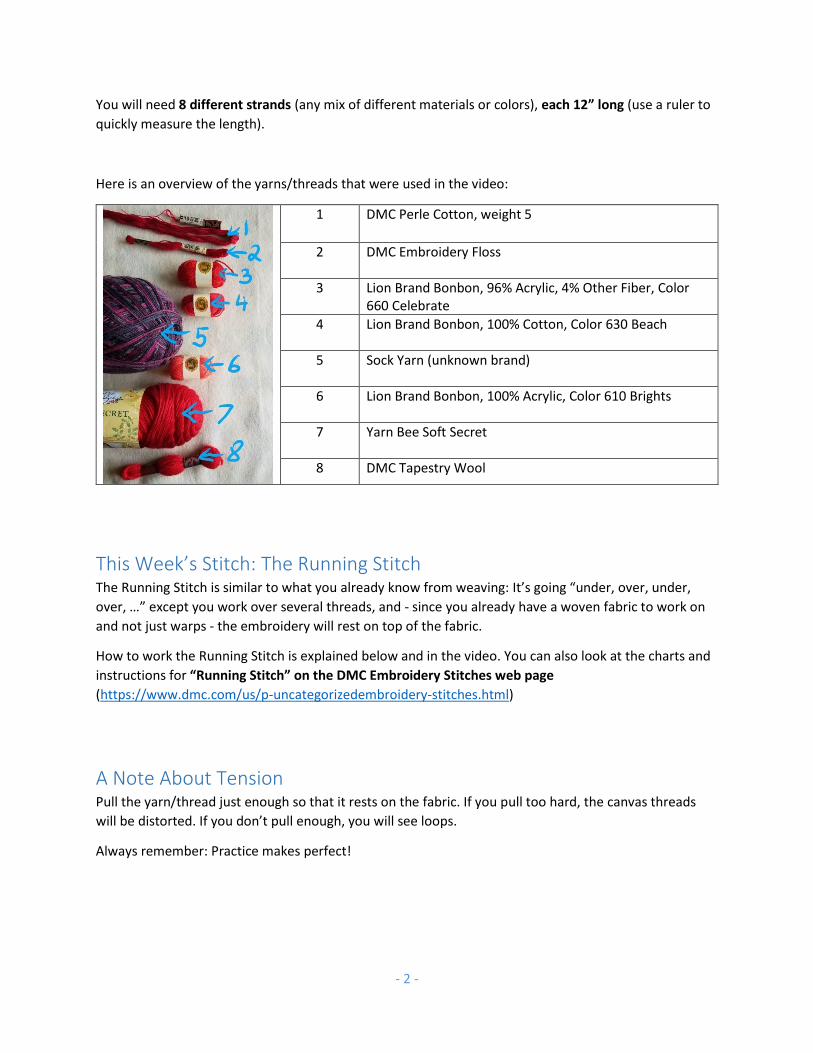
Instructions Zoom/Square Loom TURTLE/Hexagon Loom
Choose your first yarn/thread sample. Make a slip knot on one end, about 1” away from the end. Thread the other end through your needle. Find the right location to get started (see individual notes to the right). Tip: Widen the hole a little bit with the needle so that you can find it easily when you stitch up from the bottom for the first time. Stitch from the bottom up through the hole, being careful to not pull the slip knot through the hole.
Start at the top right, 5 threads down, 2 threads to the left.
Start at the top right black nail, right under the thread that goes around the black nail, 3 threads to the left.
Count 2 threads to the left and stitch from the top down.
Pull the yarn/thread just enough so that it is snug on the canvas, without pulling the canvas threads. Count 2 threads to the left and stitch from the bottom up again.
- 4 -
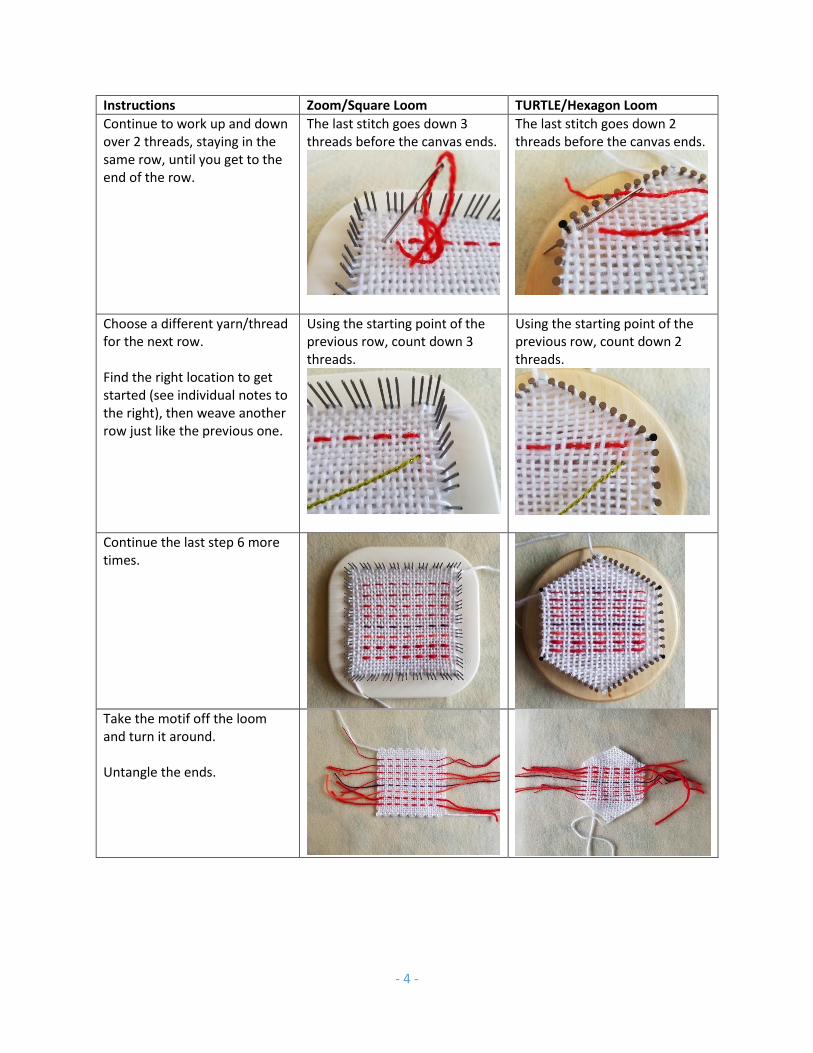
Instructions Zoom/Square Loom TURTLE/Hexagon Loom
Continue to work up and down over 2 threads, staying in the same row, until you get to the end of the row.
The last stitch goes down 3 threads before the canvas ends.
The last stitch goes down 2 threads before the canvas ends.
Choose a different yarn/thread for the next row. Find the right location to get started (see individual notes to the right), then weave another row just like the previous one.
Using the starting point of the previous row, count down 3 threads.
Using the starting point of the previous row, count down 2 threads.
Continue the last step 6 more times.
Take the motif off the loom and turn it around. Untangle the ends.
- 5 -
Instructions Zoom/Square Loom TURTLE/Hexagon Loom
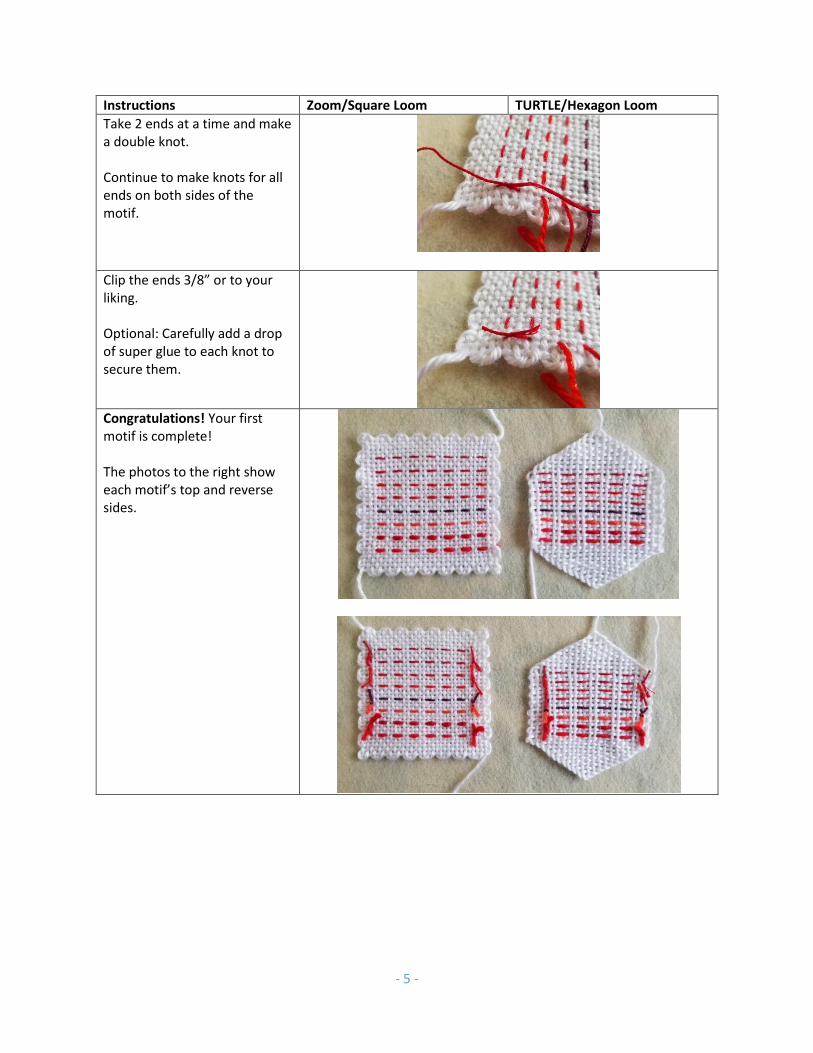
Take 2 ends at a time and make a double knot. Continue to make knots for all ends on both sides of the motif.
Clip the ends 3/8” or to your liking. Optional: Carefully add a drop of super glue to each knot to secure them.
Congratulations! Your first motif is complete! The photos to the right show each motif’s top and reverse sides.
- 6 -
Now What? There’s nothing wrong with making more than one motif: Try different materials, try different ways to
hold the loom, try different directions while embroidering. Explore!
There’s also nothing wrong with taking all week (or longer) to get your first motif done! The most
important thing is that you enjoy what you’re doing.
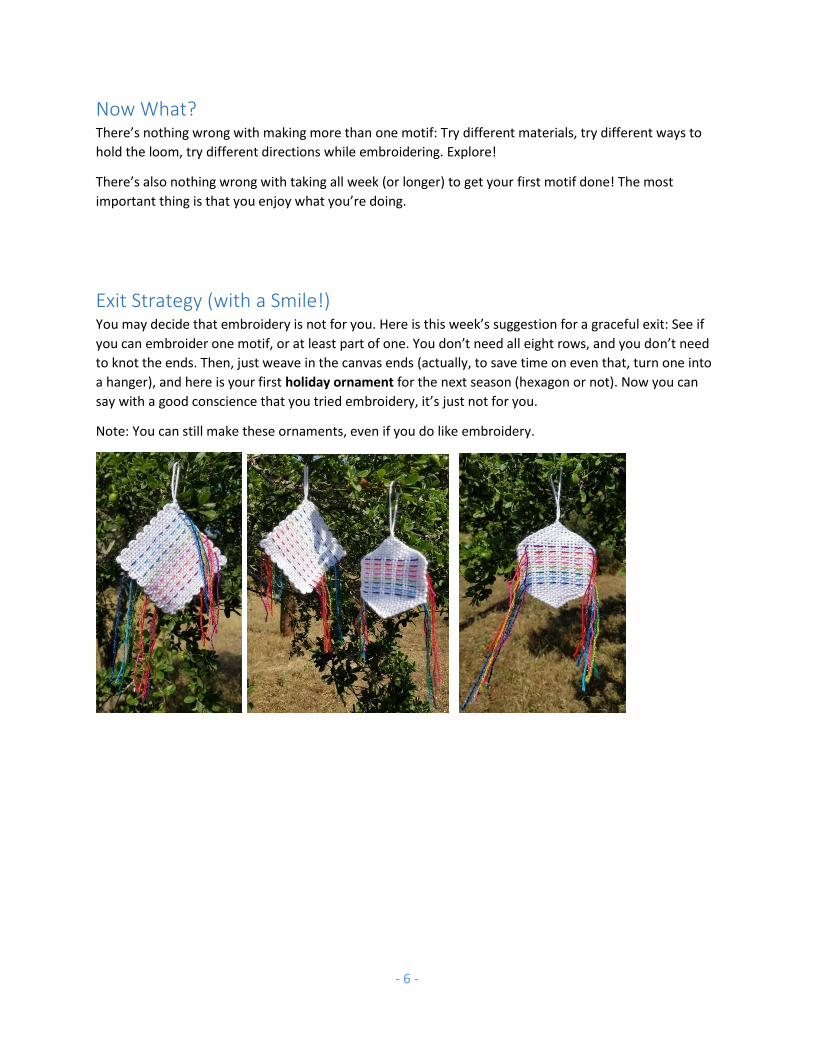
Exit Strategy (with a Smile!) You may decide that embroidery is not for you. Here is this week’s suggestion for a graceful exit: See if
you can embroider one motif, or at least part of one. You don’t need all eight rows, and you don’t need
to knot the ends. Then, just weave in the canvas ends (actually, to save time on even that, turn one into
a hanger), and here is your first holiday ornament for the next season (hexagon or not). Now you can
say with a good conscience that you tried embroidery, it’s just not for you.
Note: You can still make these ornaments, even if you do like embroidery.
- 7 -
Trouble Shooting To avoid that the embroidery yarn/thread gets stuck on the pins … On the hexagon loom:
Slide the canvas all the way up to the heads of the nails … On the Zoom loom: Gather the
embroidery yarn/thread in the center of your work between stitches.
If you made a mistake … if you notice it right away, pull out the needle, then pull out the
embroidery yarn/thread by pulling on the slip knot end, and work that row again.
If you are not sure what happened and how to fix it, contact me at [email protected]
Resources The video instructions for this week are on YouTube at https://youtu.be/sEQ4waXwCm8
Information about this Weave & Stitch Along can be found on our blog at www.turtleloom.com
DMC Embroidery Stitch Guide https://www.dmc.com/us/p-uncategorizedembroidery-stitches.html
Rev. 20180604-1
© 2018 TexasGabi
The content of this document is for personal use only and may not be reproduced in any form without
written permission of the author.