Embed Size (px)
Citation preview
Western Digital
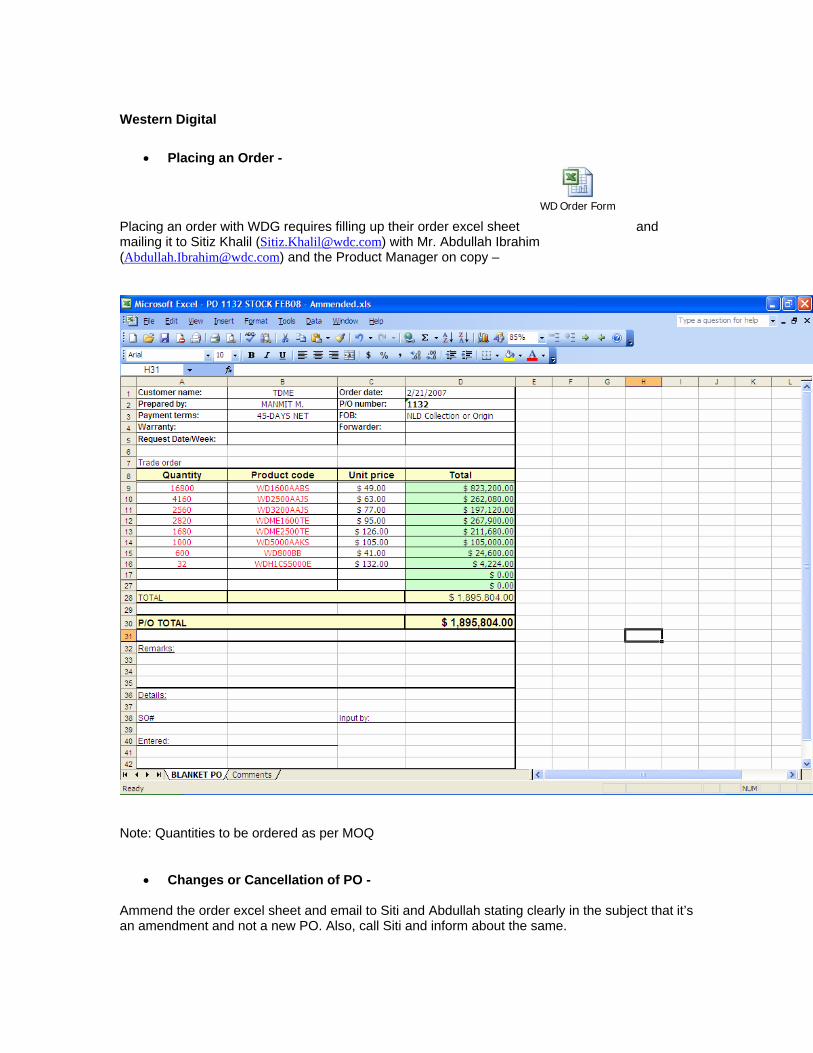
• Placing an Order -
Placing an order with WDG requires filling up their order excel sheet WD Order Form
and mailing it to Sitiz Khalil ([email protected]) with Mr. Abdullah Ibrahim ([email protected]) and the Product Manager on copy –
Note: Quantities to be ordered as per MOQ
• Changes or Cancellation of PO - Ammend the order excel sheet and email to Siti and Abdullah stating clearly in the subject that it’s an amendment and not a new PO. Also, call Siti and inform about the same.
For cancellation, send email to both.
Reporting
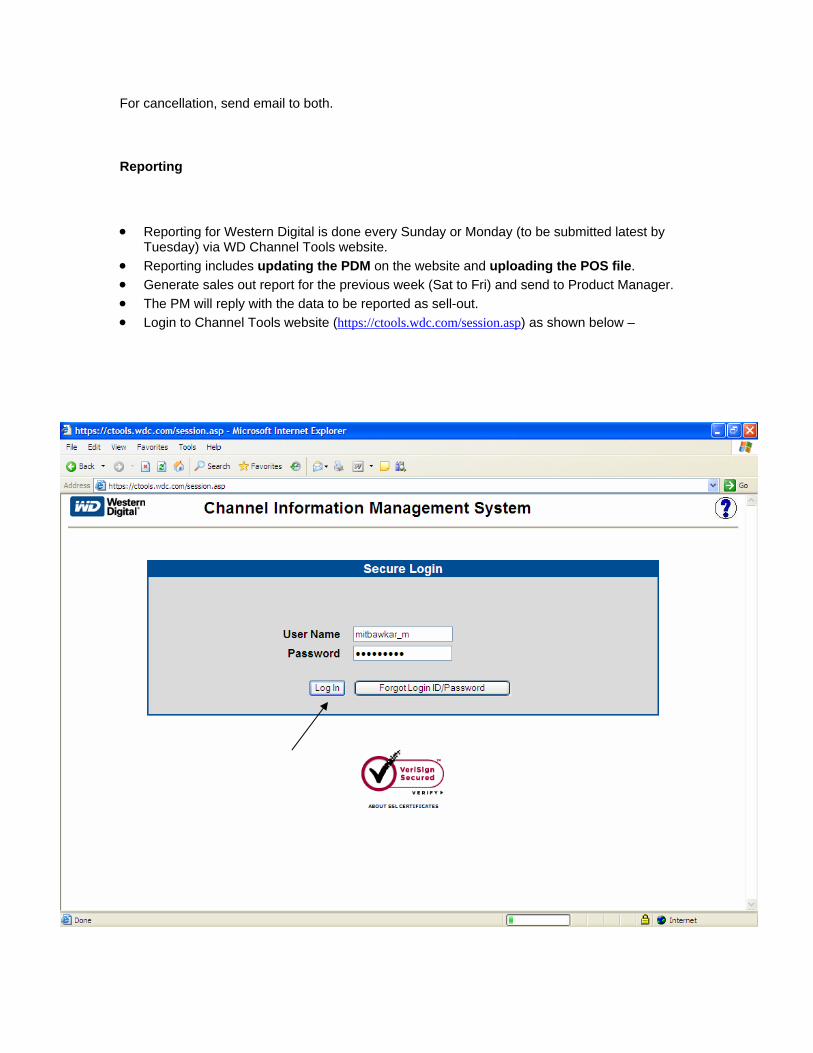
• Reporting for Western Digital is done every Sunday or Monday (to be submitted latest by Tuesday) via WD Channel Tools website.
• Reporting includes updating the PDM on the website and uploading the POS file. • Generate sales out report for the previous week (Sat to Fri) and send to Product Manager. • The PM will reply with the data to be reported as sell-out. • Login to Channel Tools website (https://ctools.wdc.com/session.asp) as shown below –
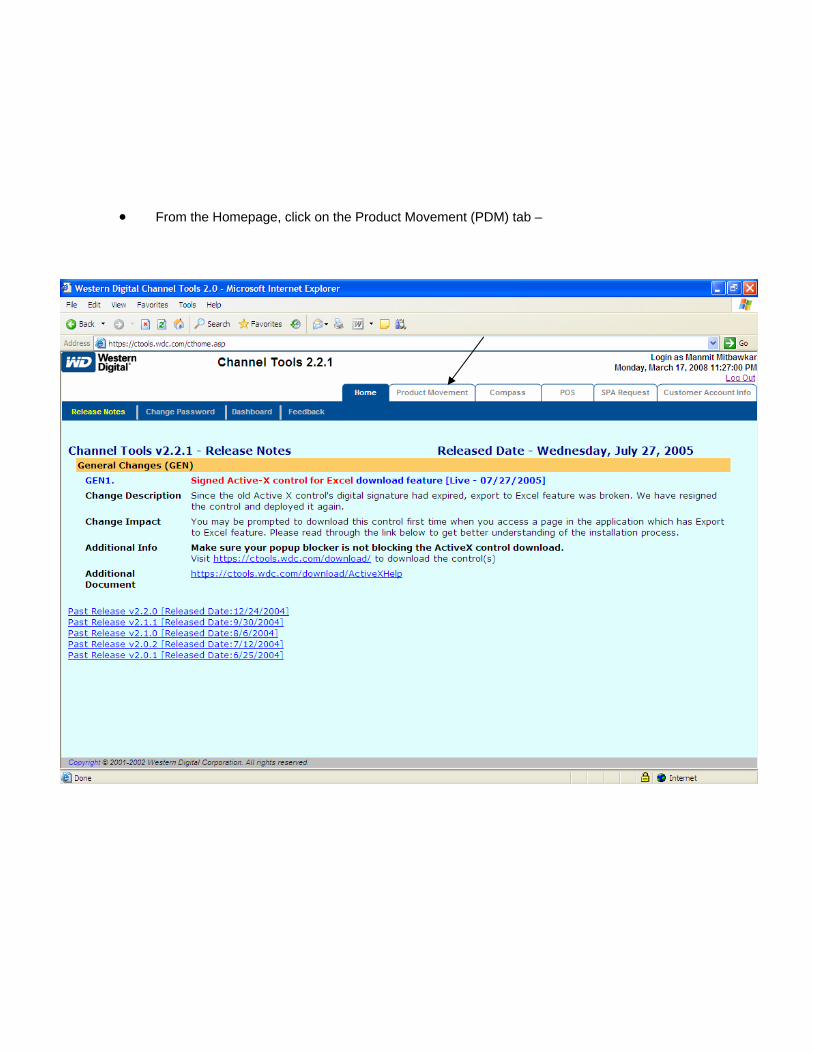
• From the Homepage, click on the Product Movement (PDM) tab –
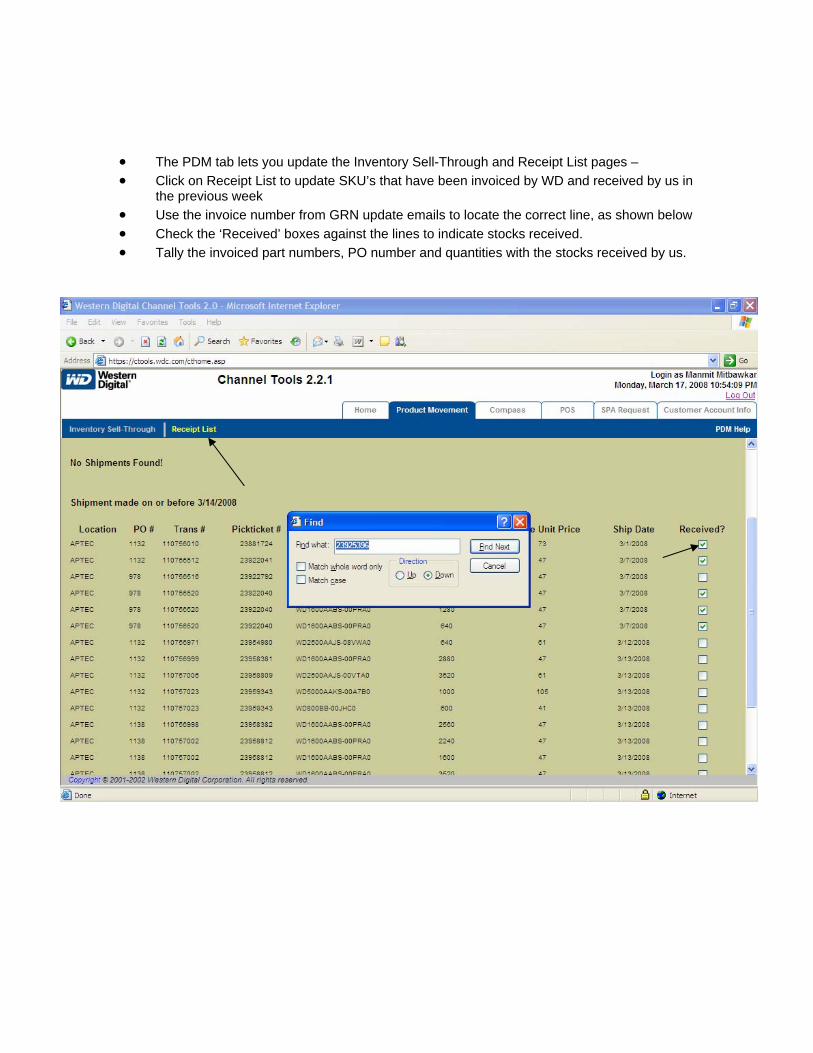
• The PDM tab lets you update the Inventory Sell-Through and Receipt List pages – • Click on Receipt List to update SKU’s that have been invoiced by WD and received by us in
the previous week • Use the invoice number from GRN update emails to locate the correct line, as shown below • Check the ‘Received’ boxes against the lines to indicate stocks received. • Tally the invoiced part numbers, PO number and quantities with the stocks received by us.
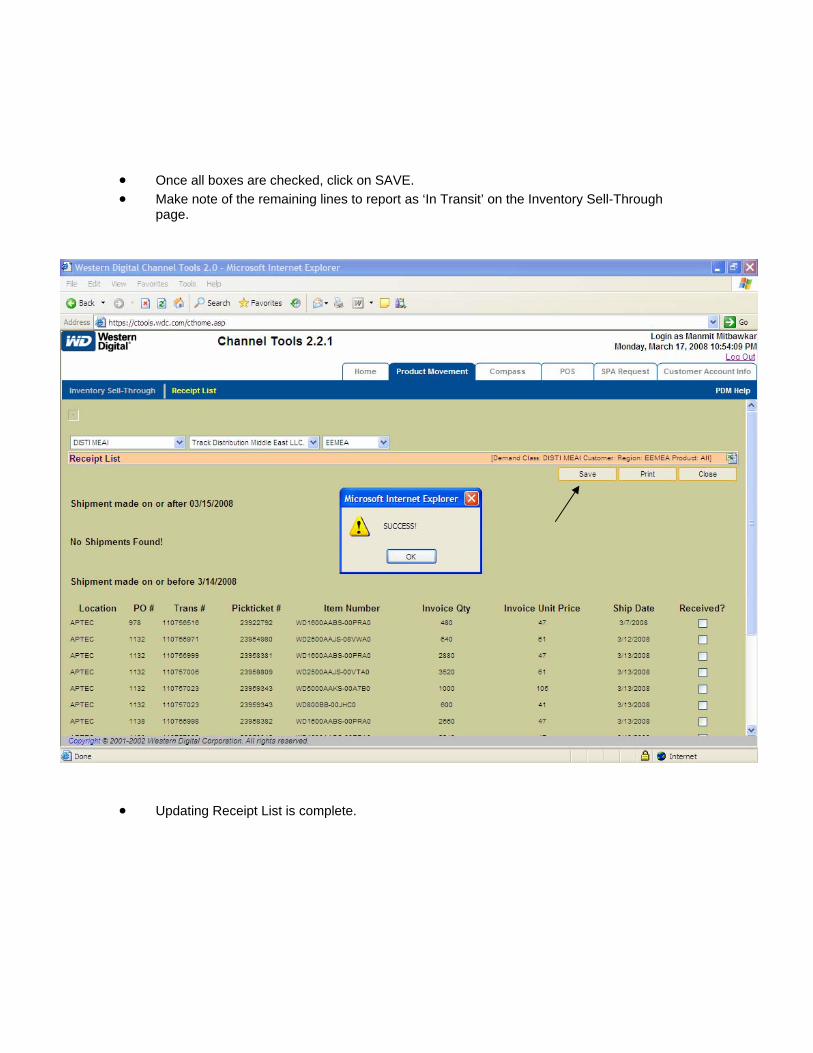
• Once all boxes are checked, click on SAVE. • Make note of the remaining lines to report as ‘In Transit’ on the Inventory Sell-Through
page.
• Updating Receipt List is complete.
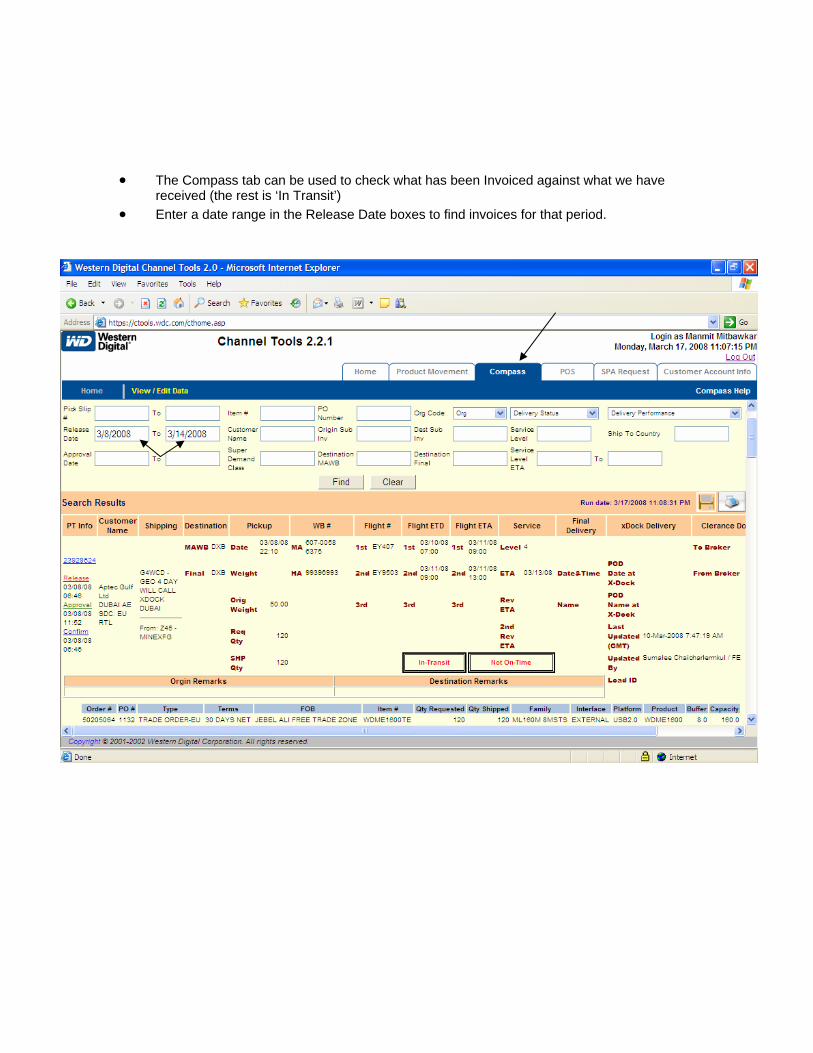
• The Compass tab can be used to check what has been Invoiced against what we have
received (the rest is ‘In Transit’) • Enter a date range in the Release Date boxes to find invoices for that period.
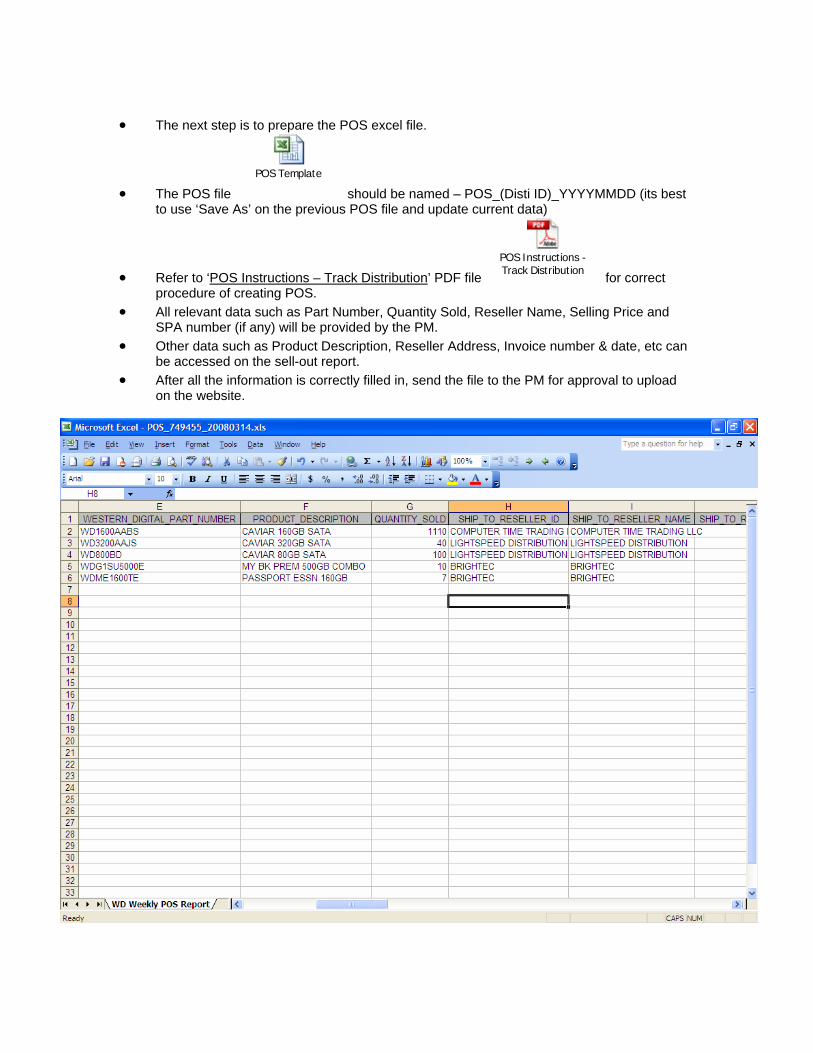
• The next step is to prepare the POS excel file.
• The POS file POS Template
should be named – POS_(Disti ID)_YYYYMMDD (its best to use ‘Save As’ on the previous POS file and update current data)
• Refer to ‘POS Instructions – Track Distribution’ PDF file POS Instructions - Track Distribution for correct
procedure of creating POS. • All relevant data such as Part Number, Quantity Sold, Reseller Name, Selling Price and
SPA number (if any) will be provided by the PM. • Other data such as Product Description, Reseller Address, Invoice number & date, etc can
be accessed on the sell-out report. • After all the information is correctly filled in, send the file to the PM for approval to upload
on the website.
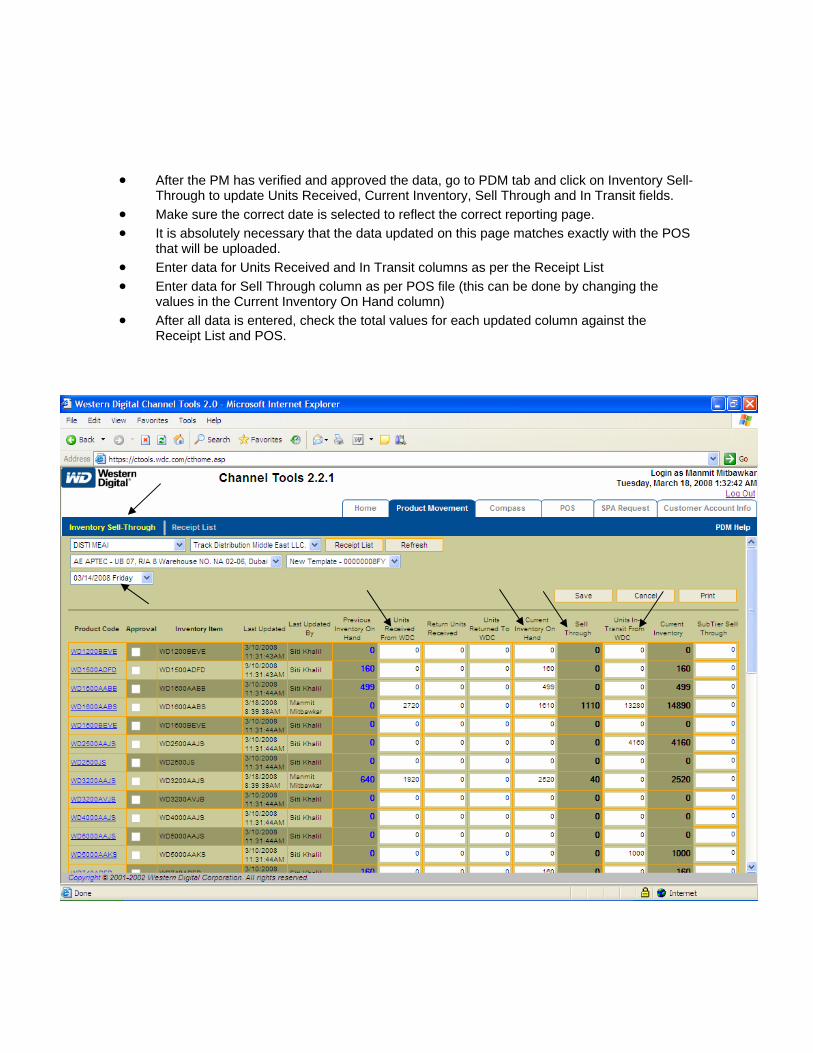
• After the PM has verified and approved the data, go to PDM tab and click on Inventory Sell-
Through to update Units Received, Current Inventory, Sell Through and In Transit fields. • Make sure the correct date is selected to reflect the correct reporting page. • It is absolutely necessary that the data updated on this page matches exactly with the POS
that will be uploaded. • Enter data for Units Received and In Transit columns as per the Receipt List • Enter data for Sell Through column as per POS file (this can be done by changing the
values in the Current Inventory On Hand column) • After all data is entered, check the total values for each updated column against the
Receipt List and POS.
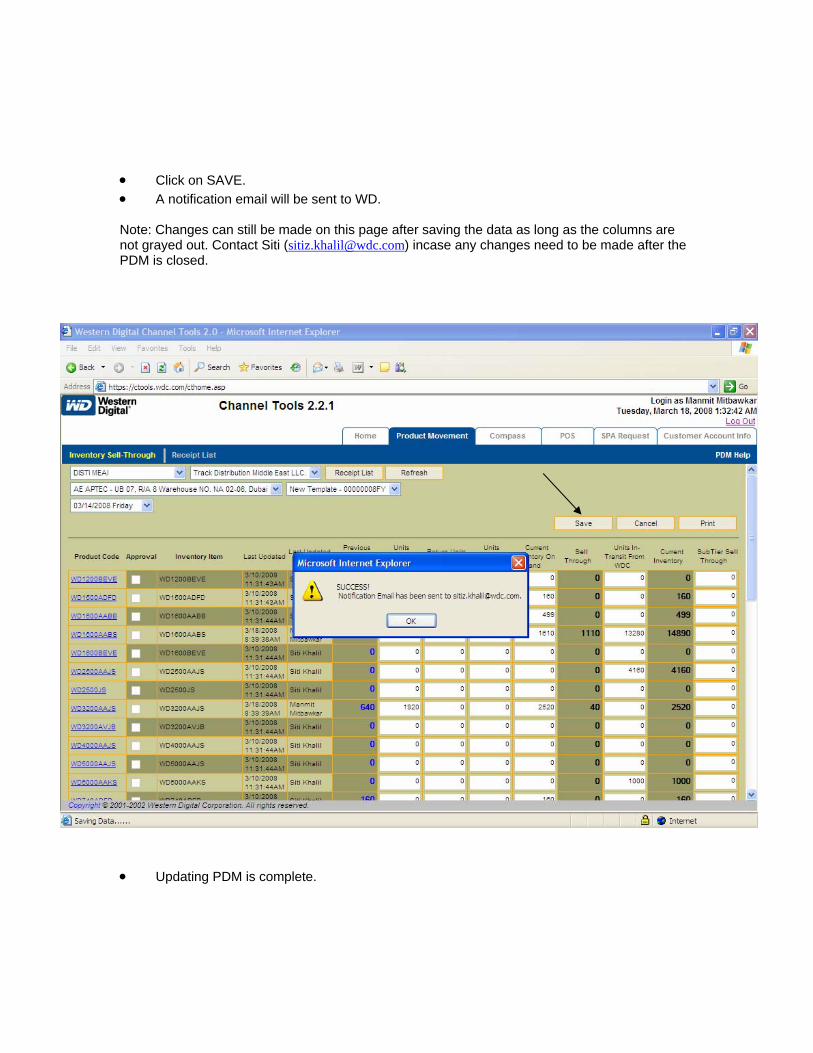
• Click on SAVE. • A notification email will be sent to WD. Note: Changes can still be made on this page after saving the data as long as the columns are not grayed out. Contact Siti ([email protected]) incase any changes need to be made after the PDM is closed.
• Updating PDM is complete.
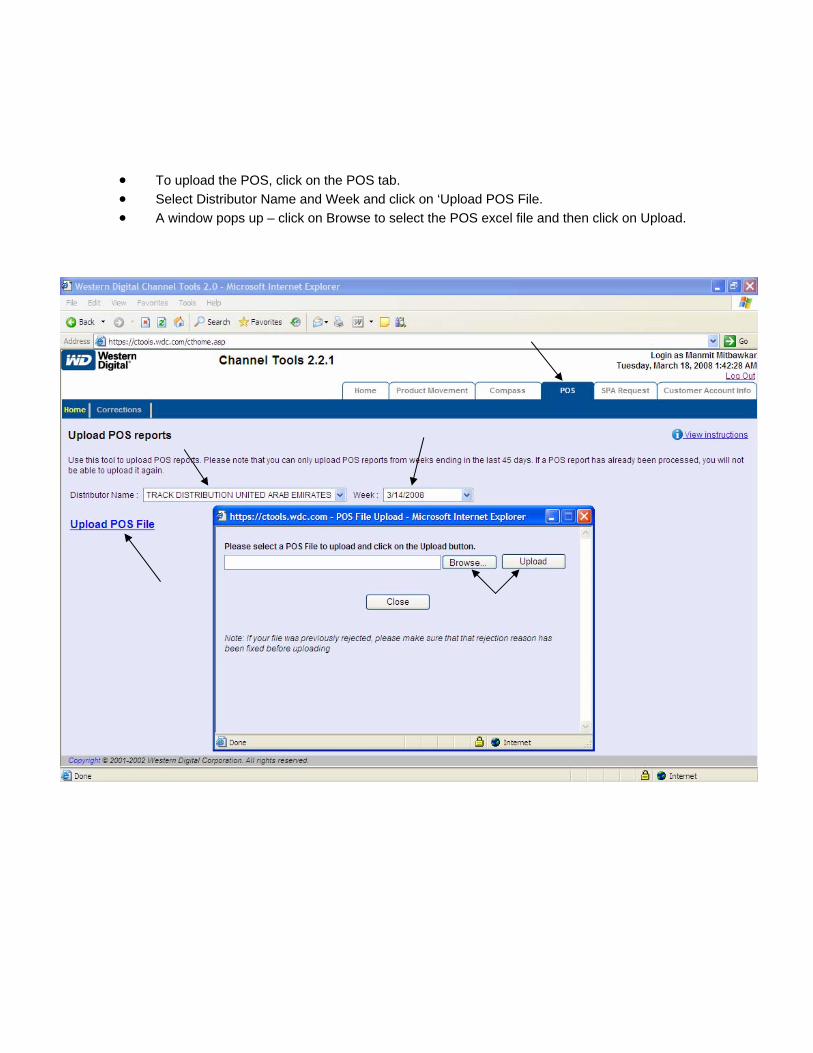
• To upload the POS, click on the POS tab. • Select Distributor Name and Week and click on ‘Upload POS File. • A window pops up – click on Browse to select the POS excel file and then click on Upload.
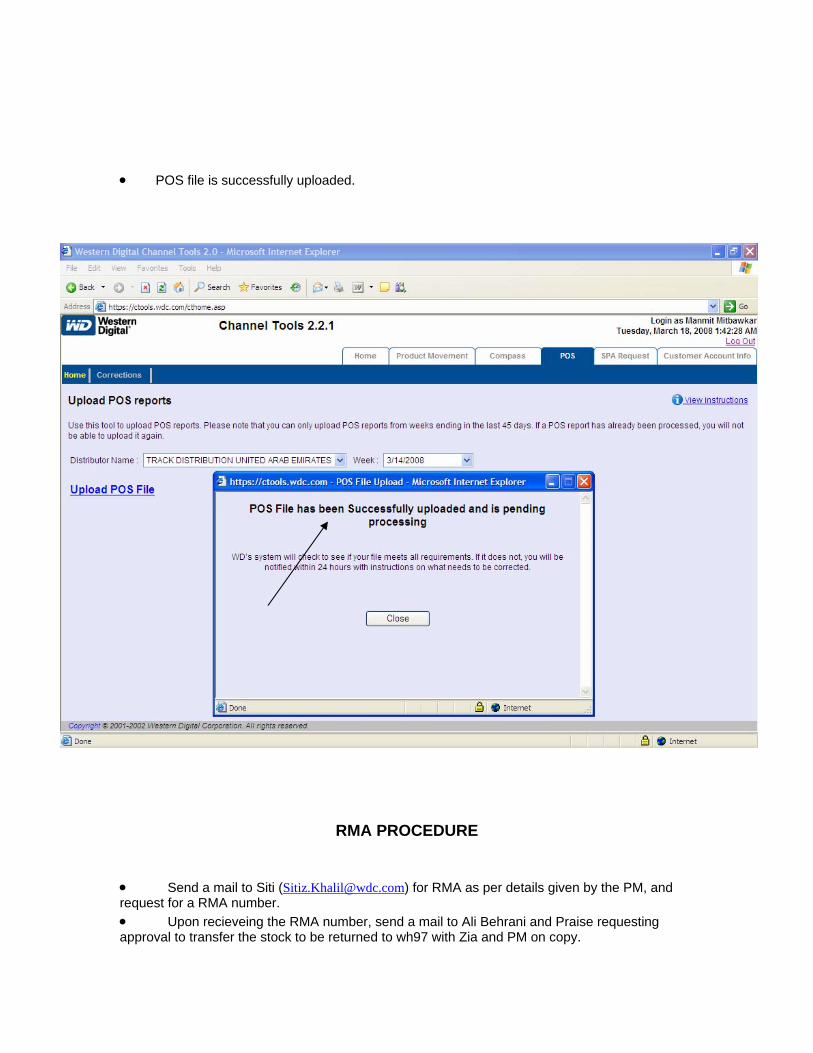
• POS file is successfully uploaded.
RMA PROCEDURE
• Send a mail to Siti ([email protected]) for RMA as per details given by the PM, and request for a RMA number. • Upon recieveing the RMA number, send a mail to Ali Behrani and Praise requesting approval to transfer the stock to be returned to wh97 with Zia and PM on copy.
• Once approved, Zia will do the stock transfer, and confirm the same to Praise. • Praise will move the stock to wh97. • Upon confirmation from Praise, create a negative PO with the subject part number and quantity in wh97. • Forward the PO number to Nisha and/or Zia to do negative GRN. • Once –ve GRN is done, stock is ready to be shipped to the supplier. • Get confirmation from logistics team that stock is shipped back to supplier, with the RMA number clearly mentioned on the packaging. • Supplier will then send a credit note for the returned stock.