Embed Size (px)
Citation preview

ILIFESAVING SOCIETY WATER SMART ACTIVITY GUIDE
WATER SMART®
ACTIVITY GUIDE

WATER SMART® ACTIVITY GUIDE
Published by the Lifesaving Society. Second Printing, July 2014.
Copyright 2014 by the Royal Life Saving Society Canada. Reproduction, by any means, of materials contained in this book is prohibited unless authorized by the publisher. Requests should be directed to the Alberta and Northwest Territories office (see back cover for address).
The Lifesaving Society is Canada’s lifeguarding expert. The Society works to prevent drowning and water-related injury through its training programs, Water Smart®® public education initiatives, water-incident research, aquatic safety management services, and lifesaving sport.
Annually, well over 1,000,000 Canadians participate in the Society’s swimming, lifesaving, lifeguard, and leadership training programs. The Society sets the standard for aquatic safety in Canada and certifies Canada’s National Lifeguards.
The Society is an independent, charitable organization educating Canadian lifesavers since the first Lifesaving Society Bronze Medallion Award was earned in 1896.
The Society represents Canada internationally as an active member of the royal Life Saving Society and the International Life Saving Federation. The Society is the Canadian governing body for lifesaving sport - a sport recognized by the International Olympic Committee and the Commonwealth Games Federation.
Water Smart®, Swim for Life, Swim to Survive, and Lifesaving Society are registered trademarks of the Royal Life Saving Society Canada. Trademarks other than those owned by the Lifesaving Society used in this document belong to their registered owners.
WATER SMART®
ACTIVITY GUIDE


iLIFESAVING SOCIETY WATER SMART ACTIVITY GUIDE
Almost 500 Canadians die every year in water-related incidents. Most of these are pre-ventable and occur in unsupervised settings, which is why more Canadians need the basic swimming and lifesaving skills to save themselves in an aquatic emergency.
The Lifesaving Society has a long and proud history of teaching swimming and lifesav-ing to Canadians.
We trace our roots to the late 19th century in London, England where we began as The Swimmers’ Life Saving Society. In 1894, Arthur Lewis Cochrane brought the lifesaving skills he learned in his homeland to Canada. And he passed them along to students at Upper Canada College in Toronto, Ontario. In June 1896, 18 of his students were the first recipients of our distinguished Bronze Medallion award. Under the patronage of King Edward VII in 1904, we became The Royal Life Saving Society.
In the 1950s, we were the first Canadian organization to adopt mouth-to-mouth as the method of choice over manual methods of artificial respiration. We started our first CPR training program in the 1960s. In the 1980s, we initiated a project to design an economical CPR training manikin (ACTAR 911™), and we launched our Water Smart® drowning prevention campaign.
In the 1990s, the Society introduced innovative new programs including Boat Operator Accredited Training, the Junior Lifeguard Club and the Canadian Swim Patrol Programs, and we launched our Aquatic Safety Management Service. We expanded our First Aid training programs and completely revamped the Bronze medal and the National Life-guard training program to suit the needs of the new century.
In 2001, we defined the Canadian Swim to Survive® Standard and subsequently launched our Swim to Survive program to teach Canadians the minimum essential skills they need to survive an unexpected fall into deep water. Our learn-to swim pro-gram – Swim for Life® – is our latest drowning prevention initiative.
Today, we are known to Canadians simply as the Lifesaving Society, a national volun-teer organization and registered charity. And while we’ve expanded our strengths over the past century to include research and public education, we haven’t forgotten the ideals that formed the foundation of our organization.
The Lifesaving Society has always been – and will continue to be – Canada’s lifeguard-ing experts.
Canada’s lifeguardingexperts
– saving lives for over 100 years.

iiLIFESAVING SOCIETY WATER SMART ACTIVITY GUIDE

iiiLIFESAVING SOCIETY WATER SMART ACTIVITY GUIDE
Contents
Page
Canada’s Lifeguarding Experts i
Introduction iv
How to Organize a Water Smart® Event 1
As Part of Your Swim for Life Lessons - Water Smart® Days 1
Reaching Out to the Community - Host a Special Event 3
Getting the Right Message Out 5
Make Water Smart® Choices 6
Water Smart® Messages 6
Safe Fishing and Boating Tips 7
Ice Smart Safety Tips 8
Water Smart® Activities 10
Focus on General Safe Behaviour 10
Focus on Swimming in Open Water 25
Focus on Safe Fishing and Boating 32
Ice Safety / Cold Weather 42
Focus on Water Rescue 49
Resources 59

ivLIFESAVING SOCIETY WATER SMART ACTIVITY GUIDE
The Water Smart® Activity Guide provides you with the Lesson Plans for the Water Smart® Experience. It includes everything you need to teach the Water Smart® Experience at your pool – whether as part of Water Smart® Day in your Swim for Life lessons or as a Water Smart® Education event such as for National Drowning Prevention Day. The Guide includes: Water Smart® messages, lesson plans for many Water Smart® Activities and references to great Lifesaving Society resources to use to educate your students about personal safety skills and Water Smart® choices.
The Lifesaving Society Mission and our commitment to drowning prevention education requires that we include education about Water Smart® choices as part of our delivery system. The Water Smart® Experience is intended to provide Canadians with the informa-tion to make smart risk choices to avoid injury in, on and around the water and ice. The skills taught in our skill awards provide your customers and community with the neces-sary education for self rescue and rescue of others. Both types of education are necessary to fulfill our mission.
The Water Smart® Experience is a hands-on, experiential approach to teaching Wa-ter Smart® choices and behaviours. It does not include evaluation criteria to pass or fail participants. All that is required is participation in the Water Smart® Activities and understanding of the Lifesaving Society Water Smart® messages. This provides partici-pants with the education to change their behaviour, make Water Smart® risk choices, and ultimately avoid injury in, on and around water and ice.
The Water Smart® Activity Guide is full of various Activities aimed at teaching people to make better, safer choices when in, on and around water and ice. These Activities follow an experiential model of learning (Demonstrate, Discuss, Do), giving people clear experi-ences that reinforce “why” they should make safe choices in the future.
The Water Smart® Activities Guide provides clear, concise Water Smart® messages, derived from the Lifesaving Society’s drowning research. These Water Smart® messages have been developed specifically to change behaviour, for specific target groups. Use these Water Smart® messages as a key element in your Water Smart® Experience. Life-guards and Instructors can use these Water Smart® messages by focusing on the need to change behaviour, which is different than just creating awareness or providing informa-tion. They can also reach beyond the Water Smart® Experience to use these Water Smart® messages and Activities during public swims and other events at your facility.
The Water Smart® Activity Guide and the Water Smart® Experience are only the begin-ning. You will bring them to life, creating a dynamic opportunity for you to reach out to your community. In so doing, you and your facility are active partners with the Lifesaving Society in meeting our vision to saves lives, enhance quality of life and empower com-munities.
Introduction

vLIFESAVING SOCIETY WATER SMART ACTIVITY GUIDE

1LIFESAVING SOCIETY WATER SMART ACTIVITY GUIDE
There are two main ways to set up a Water Smart® Day. Organize it as part of the Water Smart® Experience portion of your Swim for Life lesson set or as a special event in conjunc-tion with Drowning Prevention Day or other special facility event. Either way that it is set up, remember that the purpose of Water Smart® Experience is to pass information on to as many people as possible. Water Smart® is taught with the “Demonstrate, Discuss, Do” model, so keep the Activities active, wet, suitable for a wide range of swimming abilities and FUN!
Topics for your Water Smart® Event can include:
- Boating: trip planning, safety equipment, entering and exiting a boat, HELP and Huddle position, capsized and swamped boat skills, Boat Operator Accredited Train ing (BOAT) course or host a test center for the Pleasure Craft Operator (PCO) card.
- Protect your neck: check before diving, entries from a height, feet first-first time.
- Within arms’ reach: the 12 second drill, backyard and hotel pool safety, roles for caregivers, local water hazards.
- Waterfront safety: currents, undertows, waves, avoiding boat conflicts, the sinkable inflatable
- Pool equipment safety: diving boards, ropes, swings, slides
- Ice safety: testing the ice, self rescue, safety equipment, rescues from a safe loca- tion
- Getting help: Calling EMS, assessment skills
- Low risk rescues: throwing rescue, reaching rescue
- Lifejackets: usage, care of
- Community specific concerns or events
As Part of Your Swim for Life Lessons – Water Smart® Days
The Water Smart® Experience portion of the Swim for Life program is a hands-on experiential approach to teaching Water Smart® choices and behaviours. It does not include evaluation criteria to pass or fail participants. All that is required is participation. The focus is to provide information and experiences that help people make smart choices to avoid injury in, on and around water and ice.
The session can be delivered in conjunction with any of the Swim for Life or Canadian Swim Patrol awards. General practice is to program a Water Smart® Day on one lesson of a lesson set, (e.g. lesson 5, preferably not the last day of lessons). It can be offered using a station ap-proach and can include the candidate’s family members. Parents’ day is the perfect opportu-
Water Smart®How To Organize A Water Smart® Event

2LIFESAVING SOCIETY WATER SMART ACTIVITY GUIDE
nity to include family in the events planned for your Water Smart® Day.
Planning Considerations:
Before the lesson set starts:
1. Choose a theme and the Activities to be done that day.
2. Make and gather up any materials needed for those Activities.
3. Set a date for Water Smart® Day.
On the first day of lessons:
1. Advertise and explain to the participants when and what Water Smart® Day is all about.
2. Have the theme and Activities outlined for the instructors so they have enough time to understand the Activities that will be done.
The week before the Water Smart® Day:
1. Advertise the event around the facility.
2. Ensure that the instructors understand how the Activities work.
3. Ensure that the participants know to come at the normal lesson time and meet with their instructor at their normal meeting place.
4. Know where the Activity are going to be set up at the facility. To maximize the Activities, have two versions of each activities – one targeting deep water swimmers, and one targeting shallow water swimmers.
5. Arrange to have the instructors arrive early to help with set up.
6. Ensure that the instructors know which Activities they are doing with each class, and which variation of the Activities they are doing incase there are special considerations for the participants that are in their class.
7. If there are more classes than there are Activities (this may happen based on how the lesson set is programmed – a lot of deep water or shallow water classes at the same time) plan who is going to which station first.
The day of your event:
1. Have all of the Activities set up approximately 5-10 minutes before the start of the first lesson.
2. Advertise that today is Water Smart® Day.
3. Have fun with the classes!
4. (Optional) One station can be for feedback from patrons (i.e. lesson/Water Smart® Day). Ask for feedback from the instructors to determine what Activity/variations/ set up options would work better

3LIFESAVING SOCIETY WATER SMART ACTIVITY GUIDE
Reaching Out to the Community – Host a Special Event
Make a Water Smart® statement in your community by hosting a Water Smart® event at your facility or within the community. There are many ways for you to get your Water Smart® message out to the community. Host a special Water Smart® event at your facil-ity; invite your local school, service club (i.e. Rotary Club or Boys and Girls Club). Celebrate National Drowning Prevention Day (the fourth Saturday in July or any day that works well with your facility), with displays and Water Smart® Activities. Incorporate Water Smart® with all of your special events.
Create special themes that will attract certain people. Focus on certain target groups such as backyard pool owners, male boaters and fishermen, parents of toddlers or small chil-dren, or any drowning profile group that is relevant to your area. Work with other mem-bers of your community that interact with your target group (i.e. businesses, unions, and recreation clubs).
Examples:
• For backyard pool and hot tub owners you can set up a clinic that provides up-to-date information on local regulations, teaches safety considerations, and how to maintain “healthy water”. You could sell the Lifesaving Society Private Pool Safety Standards, play relevant videos (i.e. Sudden Impact), and use the Within Arms Reach poster, brochure and video.
• For male boaters and fishermen, you can use a “Choose It. Use It” theme, show the video Saved by the Jacket video to reinforce the need to use lifejackets. Become a BOAT Test Centre to host a BOAT course and the Pleasure Craft Operator (PCO) card test. Use the Activities listed in the sections: Focus on Ice Safety / Cold Weather or Focus on Safe Fish-ing and Boating.
• For parents of toddlers and small children emphasize the Within Arms’ Reach message by showing the video and give out the companion pamphlet. Reinforce the need for using lifejackets that correctly fit their children by hosting a “bring in your lifejacket” information session. Teach a CPR course that focuses on infant and child techniques.
Consider some of these options for programming:
The Water Smart® Passport: Using the Activities in this guide set up stations or displays where community members can tour and participate at their own leisure. Issue each participant with a Water Smart® passport to encourage them to go through all of the stations and Activities. Participants will receive a sticker or stamp in their passport for every station they visit. Once the pass-port is filled, the participants can submit their passport in a draw for a prize!
Water Smart® Power Hour:

4LIFESAVING SOCIETY WATER SMART ACTIVITY GUIDE
Is your facility running day camps this summer? Are your counselors looking for Activities that are fun, worthwhile, and educational? Try holding a Water Smart® Power Hour. Set aside a time in your busy camp day for individual Water Smart® Activities to make campers water conscious.
If it is Sunday – It’s Water Smart® Day at the pool: Water Smart® Days can be run throughout the summer with each day concentrating on a different Water Smart® module. Plan for demonstrations, displays and use the Water Smart® Activities contained in this guide.
Planning Considerations:
Before the set date: 1. Choose the Activities to be done that day (either theme based, or ones that target your specific audience). 2. Make and gather up any materials needed for those Activities. 3. Set a date for the event. 4. Advertise using local papers, radio stations, posters, and flyers. Allow at least 2-3 weeks to get the information to the various agencies to ensure proper coverage and plugging. 5. Have the Activities outlined for the event leaders: - Assign which activity they will be leading so they have enough time to under stand how to lead the activities and what information gets passed on to the participants. - Assign 1 or 2 people to be “greeters” who can organize the participants in to manageable groups that rotate through the Activities. 6. (Optional) Determine door prizes, or other goodies that can be given out for “Thank – You’s”
The week before event: 1. Ensure advertising has been posted and distributed. 2. Ensure the event leaders understand how their activities works. 3. Assign areas of the pool that will be the stations where the different Activities will be done. Make sure there is a logical flow from one station to another to ensure it is easy to get from one station to the next. To maximize the participation, have two ways each activity can be done - one targeting deep water/comfortable swimmers, and one targeting shallow water/weak swimmers. 4. Arrange to have the activity leaders arrive early to help with set up. 5. Ensure that the activity leaders know which activity they are doing and possible variations incase there are special considerations for a group of participants.
The day of the event: 1. Have all of the Activities set up approximately 5-10 minutes before the start of the event. 2. Advertise what is happening today and the time frame for the events. E.g. when Buddy, the Lifeguard Dog is making an appearance, how long the Activities are be ing done for, and so forth. 3. Have fun!

5LIFESAVING SOCIETY WATER SMART ACTIVITY GUIDE
4. (Optional) One station can be for feedback from patrons, (i.e. lesson/Water Smart® Day). Ask for feedback from the instructors to determine what Activities/variations/ set up options would work better.
Getting the Right Message Out
The Lifesaving Society has been conducting drowning and water related injury research for over 13 years. The information collected has shown who is drowning and which age group is at most risk, what Activities they are engaged in, where they are drowning and any fac-tors that may have contributed to their death, such as not wearing a lifejacket or consuming alcohol.
Through this research the Lifesaving Society has created Water Smart® messages to best help people make good Water Smart® choices. These key messages have been included with this Water Smart® Activity Guide to help instructors focus on what information to teach. The fol-lowing Lifesaving Society resources include additional information that will provide back-ground information that would be useful during your Water Smart® events:
• Canadian Lifesaving Manual BOAT Study Guide
• Minimum Ice Thickness Card
• Within Arms’ Reach brochure and video
• Ice the Winter Killer
• Lifesaving First Aid and Aquatic Emergency Care Manual
• Canadian First Aid Manual
• Drowning Reports/Lifesaving Reports – available on www.lifesaving.org
• Water Smart Fact Sheets - available on www.lifesaving.org

6LIFESAVING SOCIETY WATER SMART ACTIVITY GUIDE
Make Water Smart® Choices
Most drownings are a result of choices we make about Activity in, on or around the water and ice. Water Smart® choices are decisions each of us can make to control the risk of aquatic Activity and enjoy the water. The Lifesaving Society does not use the word “acci-dent” in our Water Smart® messages because it implies that drownings are unexpected and unpreventable. Lifesaving Society research shows that the vast majority of drownings are not accidents. These incidents are predictable, preventable and represent choices.
Drowning is the second most common cause of unintentional injury death for Canadians under the age of 55 and more than half of these deaths occur during the 3 months of June, July and August.
Water Smart® Messages
•Alwaysswimwithabuddyandbeeachother’slifeguard.Friendscanchallengepoorriskchoices or help rescue each other.
•Ifyouarenotwithinarms’reach,you’vegonetoofar.Alwayscloselysuperviseyoungchildren. Be your child’s lifeguard.
Almost all drownings of preschool children can be prevented by following a simple rule - never leave young children unsupervised around water. Whether it is in the bath, around the pool, at the lake or any water body; young children should be constantly supervised by a responsible caregiver. Nine out of ten preschooler deaths were the result of supervision failure – includes even “momentary absences” such as answering the telephone.
• Get trained. Learn to swim and learn lifesaving skills. The Lifesaving Society Swim for Life program teaches critical self rescue and swimming skills, and the Canadian Lifesav-ing Program teaches lifesaving skills to rescue others. Most drowning victims (67%) were less than 15 metres from a point of safety. Many were closer at only 2 - 3 metres. Simple reaching and throwing assists can make all the difference in these circumstanc-es.
• Protect your neck - Diving into shallow water can shatter lives. Feet First, First Time. Never dive into shallow water. Over 30 young men are paralyzed each year in Canada as a result of striking the bottom or some submerged object. In addition, another 15 to 20 die from broken necks. Over 50% of the aquatic spinal injuries are alcohol related. Div-ing into water less than 6 feet (1.8 metres) deep resulted in 90% of the spinal injuries. Almost 90% of the victims with serious spinal injuries will need to use a wheelchair for the rest of their lives.
Water Smart®Make Water Smart® Choices
7LIFESAVING SOCIETY WATER SMART ACTIVITY GUIDE
• Do not combine alcohol and aquatic Activity. Alcohol impairs your judgment and abil-ity to self rescue. Approximately half (48%) of the Alberta adult drownings and 60% of boating deaths involved alcohol.
Water Smart® Messages, continued …
• Swim at a marked swimming beach. Go to a marked swimming area and keep within the boundaries. Non-swimmers should wear a lifejacket in the water. Floating toys require close supervision. Also beware of special hazards such as currents and offshore winds. The safest environment is a lifeguarded pool or beach. Almost all (99%) drown-ings happen in unsupervised areas.
• Do not tempt moving water. Do not enter moving water to swim. Stay away from the river edge especially if the river bank has a steep slope. One missed step can result in a quick slide into the water. Lifesaving Society drowning research found that 71% of drowning victims did not plan to enter the water. If you get caught in the current, do not fight it. Aim slightly down stream and swim across the current to shore. Wait until you can crawl onto shore to stand up. Do not enter the water to attempt a rescue. Send someone to call emergency services and at-tempt a rescue from shore. Reach with a long object such as branch or throw a buoyant object to the victim. Do not become another victim. The currents in moving water greatly increases the risk for a person in the water. It also makes a rescue attempt much more difficult and dangerous. The current will carry them away from the point of entry and away from shore. It is often impossible to swim against the current and panicked swimmers try to swim back against the current and quickly become too tired to support themselves. In addition the cold water further reduces a person’s ability to swim and self-rescue. Another risk of rivers is hazards in the water such as submerged rocks and logs that can injure or trap a person under water. Wading in a river can also result in the wader’s foot being trapped between rocks or other debris. In this situation the current can force the wader under water, even in very shallow water.
Safe Fishing and Boating Tips:
• Get trained to operate your boat. If you drive a boat with a motor, you need to get card-ed! Boat operators need to know safe boating practices including the “rules of the road”, safety equipment requirements and safe operating skills. Federal regulations require anyone born after March 31, 1983 and everyone operating small powerboats (< 4m in

8LIFESAVING SOCIETY WATER SMART ACTIVITY GUIDE
length) to have a Pleasure Craft Operator (PCO) card. By 2009, the regulation affects all powerboat operators regardless of their age or the size of craft. A Pleasure Craft Operator (PCO) card is the necessary proof of competence. You can ob-tain the PCO card from the Lifesaving Society. Take the BOAT (Boat Operator Accredited Training™) course or challenge the test.
• Don’t drink and drive...your boat or personal water craft. 60% of boating related injuries involve alcohol. The same rules for drinking and driving your car apply to your boat.
• Know before you go! Check the weather and create a simple safety checklist. Avoid storm conditions and get off the water if you spot a storm coming – one third of dead boaters did not. Create simple safety checklist which includes checking the weather, checking safety equipment, your route and water conditions, tools and fuel, and boat condition. Tell someone where you are going and when to expect you back.
• Follow the rules of the road. Be courteous to others using the waterways and obey all boating rules. Be watchful of swimmers and other boaters, and always have a spotter for water skiers and tube riders.
• Choose It. Use It. Wear your lifejacket and insist that everyone in your boat use one. Wearing a lifejacket while boating is a Water Smart® choice that can help protect against hypothermia and help the boater rescue him/herself during an incident. Lifesaving Society’s drowning statistics show that only one in ten boaters were wearing a lifejacket and half did not have one in the boat. Falling out of a boat into cold water will trigger gasping, uncontrolled breathing causing you to breathe water. It may be the last breath you ever take. Put on a lifejacket and you will be prepared to survive. The lifejacket will help you hold your head out of the water and support you while waiting for help.
• Drive your boat responsibly. Most boating fatalities involve power boats (75%). Keep low to avoid capsizing or falling overboard. Look before you act, stay low, drive at moderate speeds, don’t overload your boat, be aware of changing weather conditions and drive with extreme caution and proper lights after dark. Capsizing, swamping or falling overboard were involved in three quar-ters of fatal boating incidents.
Ice Smart Safety Tips:
• Use designated ice surfaces. Many communities have designated ponds for Activity such as skating that are tested and maintained by knowledgeable personnel.
• Measure ice thickness in several locations. Local conditions such as currents and water depths can affect ice thickness. Consult knowledgeable local individuals. The recom-mended minimum ice thickness for new clear hard ice is:
9LIFESAVING SOCIETY WATER SMART ACTIVITY GUIDE
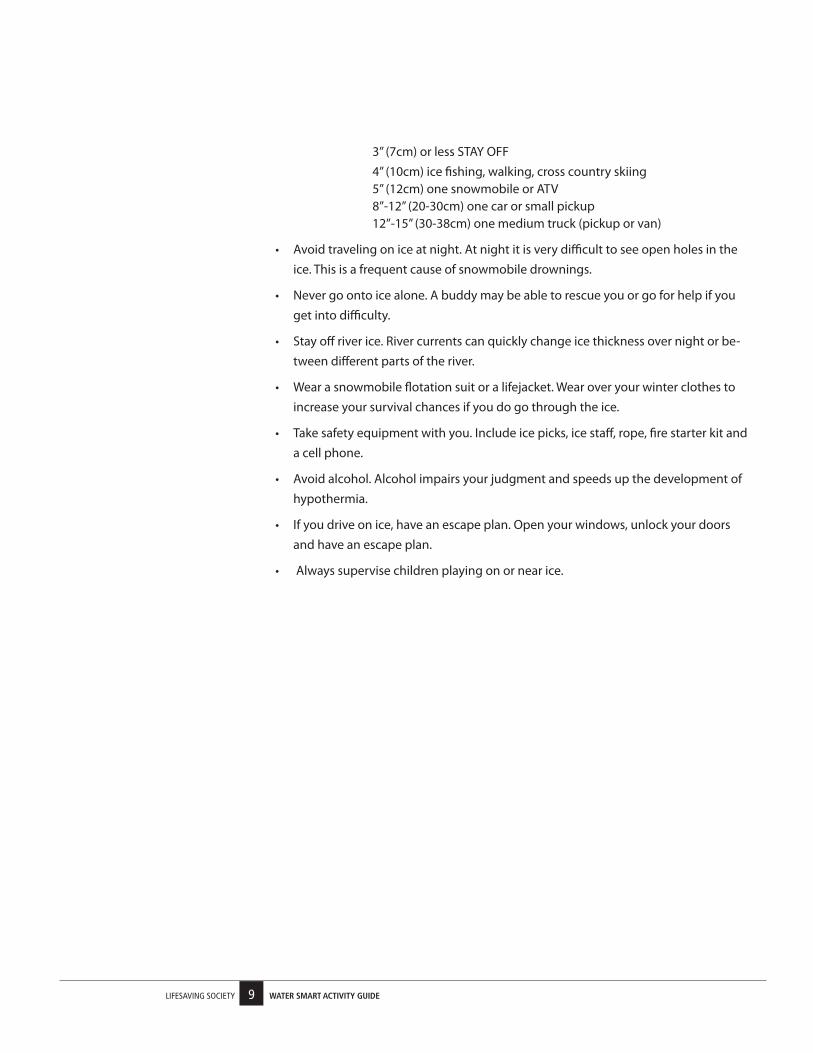
3” (7cm) or less STAY OFF 4” (10cm) ice fishing, walking, cross country skiing 5” (12cm) one snowmobile or ATV 8”-12” (20-30cm) one car or small pickup 12”-15” (30-38cm) one medium truck (pickup or van)
• Avoid traveling on ice at night. At night it is very difficult to see open holes in the ice. This is a frequent cause of snowmobile drownings.
• Never go onto ice alone. A buddy may be able to rescue you or go for help if you get into difficulty.
• Stay off river ice. River currents can quickly change ice thickness over night or be-tween different parts of the river.
• Wear a snowmobile flotation suit or a lifejacket. Wear over your winter clothes to increase your survival chances if you do go through the ice.
• Take safety equipment with you. Include ice picks, ice staff, rope, fire starter kit and a cell phone.
• Avoid alcohol. Alcohol impairs your judgment and speeds up the development of hypothermia.
• If you drive on ice, have an escape plan. Open your windows, unlock your doors and have an escape plan.
• Always supervise children playing on or near ice.

10LIFESAVING SOCIETY WATER SMART ACTIVITY GUIDE
Water Smart
Outcome Reinforce the necessity of walking.
Discuss This activity occurs on deck. The bowling mat is set up so that the pins are propped up on the wall. Each person is given a water balloon to draw a face on. They “bowl” it towards the pins. The winner is the one whose balloon does not break. Please note that since there are pins on the edge of the mat the balloon will break if they hit the wall.
Do Have them try bowling from near and far distances. For smaller children make sure that they are close enough to the mat that their balloon will hit the back of the mat.
Resources Water Balloons
Bowling pins
Bowling mat (a water side walk, or any old piece of plastic that you can place a few rows of tacks in to make sure that the water balloons break)
Markers
Towels (to dry off balloons)
Water Smart® ActivityBowling
General Safe
Behaviour

11LIFESAVING SOCIETY WATER SMART ACTIVITY GUIDE
Water Smart
Outcome To review site safety rules.
Do While playing tag, if the person who is “it” tags someone that person has to yell out a rule. If they fumble trying to come up with a rule they become “it”.
- Try this holding onto a Buddy around the waist, if the “it” catches the person in back around the waist, the front person is let go to become “it” – only if a rule can not be shouted out.
- Two people are designated “it” they hold hands and try to tag everyone else – anyone tagged joins the “blob” until one person is left.
- Do this activity focusing only on the need of a buddy when going swimming by not including the need to answer a safe water rule.
Resources None
Water Smart® ActivityShout Tag, Buddy Tag, Blog Tag
General Safe
Behaviour

12LIFESAVING SOCIETY WATER SMART ACTIVITY GUIDE
Water Smart
Outcome To teach a method to protect your neck when diving.
Do In standing position, have participants display a streamlined position with their arms. Ask participants to position their head inside their arms; their arms should cover and protect their ears. When participants dive in, have them life up their hands. As a result their bodies will follow, limiting the depth of the dives. Practice diving in deep water at least 2.5m in depth. Remember to review the concept of feet first – first time.
Resources None
References Canadian Lifesaving Manual, p. 2-4
Water Smart® ActivityLock Hands, Lock Head, Steer Up
General Safe
Behaviour

13LIFESAVING SOCIETY WATER SMART ACTIVITY GUIDE
Water Smart
Outcome Reinforce the necessity of “Within Arms’ Reach.”
Do Starting from one end of the pool, ask children or parents to get a piece of equipment or toy located at the other end of the pool. Begin timing them as they get up to retrieve the piece of equipment. Stop them at the 12 second mark. Educate them that by this time, a child in their care could have already drowned.
Doing this activity with older children helps them understand that when they are caring for a younger child that they need to keep them “Within Arms’ Reach”.
Resources None
References Video – Within Arms’ Reach
Pamphlet – Within Arms’ Reach
Water Smart® ActivityTwelve Second Rule
General Safe
Behaviour

14LIFESAVING SOCIETY WATER SMART ACTIVITY GUIDE
Water Smart
Outcome Reinforce common pool rules.
Do With everyone standing on the edge, say a statement on the Teacher’s Key. For every safe statement everyone enters the pool, for every sorry item the group yells out sorry!
Any type of entry is acceptable. You can also do this with lifejackets, depending on what entries need to be evaluated.
Teachers Key: Safe and Sorry
• Before I go swimming I have a shower (safe)
• I jump, swim and dive on other swimmers (sorry)
• I swim 1 length to go into the deep end (safe)
• I dive only in deep water (safe)
• I eat gum and candy in the pool (sorry)
• I run on deck (sorry)
• I always swim with a buddy (safe)
• Anyone under 7 years stays with an adult in the water (safe)
• I listen to the lifeguard (safe)
• I stay for a long time in the hot tub (sorry)
• I do what ever I want when I go swimming (sorry)
• I learn the safety rules for all equipment befor playing on them (safe)
Resources Teachers’ Key
Water Smart® ActivitySafe and Sorry
General Safe
Behaviour

15LIFESAVING SOCIETY WATER SMART ACTIVITY GUIDE
Water Smart
Outcome To acquaint participants to the site.
Do The activity leader has a set of cards containing clues about specific areas on site. The cards are hidden around the facility and the cards give clues as to the location of the next hidden card. You can have a reward at the last station.
You can either go one at a time or as a group from station to station depending on the ages of the participants.
Resources Laminated cards (or cards in Ziploc Baggies)
Water Smart® ActivityTreasure Hunt
General Safe
Behaviour

16LIFESAVING SOCIETY WATER SMART ACTIVITY GUIDE
Water Smart
Outcome To reinforce the need to wear an appropriate fitting lifejacket.
Do Have two piles of various sizes of lifejackets. One pile should have sizes that will NOT fit properly, and one pile that does. Have them run/swim/hop in the water or use a swimming drill over to the pile and get a lifejacket. Discuss how hard it was to move in a lifejacket that does not fit properly. Do the activity again, this time with the pile of properly fitting lifejackets.
Choose a lifejacket for each child that does not fit and have them jump into the pool. Then have them try to put on the lifejacket. How well did it work? Now give them a lifejacket that does fit properly, have them put it on and then jump into the pool. Which way was easier? Why do we put a lifejacket on before we get into a boat?
Resources Laminated Cards ( or cards in Ziploc Baggies)
References BOAT Study Guide, p. 12, 57-59
Canadian Lifesaving Manual, p. 1-4; 2-2 to 2-6
Video – Saved By the Jacket
Water Smart® ActivityAppropriate Lifejacket
General Safe
Behaviour

17LIFESAVING SOCIETY WATER SMART ACTIVITY GUIDE
Water Smart
General Safe
Behaviour
Outcome To encourage participants to check for hazards in supervised and unsupervised areas.
Do Create a checklist of safety items to look for in an aquatic environment. See if the participants can identify the item on the checklist. Discuss the importance of these items and why it is necessary to have them.
• Use pictures of other water bodies or facilities
• Try to obscure some of the items.
• Ask where they would find an assist? Where or how would they be able to get help? What are some of the potential hazards for this particular location?
Equipment Checklist:
• Spinal board
• First aid kit
• Reaching aid
• Throwing aid
• Showers
• Water clarity
• Good lighting
• Clear sinage
• Lifeguard/parent supervision
• Washrooms/changerooms
• Sinage stating Health Board regulations
• Areas that denote safe diving
• Bather load sign(s)
Resources Facility safety equipment
References Canadian Lifesaving Manual, p. 2-4 to 2-7
Water Smart® ActivityEye Spy
General Safe
Behaviour

18LIFESAVING SOCIETY WATER SMART ACTIVITY GUIDE
Water Smart
Outcome To reinforce site rules.
Do The participants ask one at a time “Lifeguard, may I Swim?” The “Lifeguard” (activity leader) reads out a question from the key – if answered correctly they get to swim, if not they stay where they are. The first to reach the finish line wins.
Any method of movement is allowed, as well as the use of lifejackets.
Teachers’ Key Lifeguard May I:
• Do you have your Buddy with you?
• Have you checked the water for hazards?
• What is the weather like?
• Does the water feel warm?
• Point to where you can safely dive
• Where is it safe for you to swim?
• Do your parents know where you are?
• Is the water calm?
• Do you know where the lifeguard is?
• Did you bring a reaching or throwing assist?
• What do you bring with you on a sunny day to the beach?
• Do you know what to do if you get caught in the weeds?
• Do you know where a phone and first aid kit are?
• When at a waterpark or water slide do you go one at a time?
• Are you a strong swimmer?
• What do you do if someone needs help?
Resources Teachers’ Key
References Video – Within Arms’ Reach
Pamphlet – Within Arms’ Reach
Water Smart® ActivityLifeguard May I?
General Safe
Behaviour

19LIFESAVING SOCIETY WATER SMART ACTIVITY GUIDE
Water Smart
Outcome To determine whether a body of water is deep enough to execute a dive safely.
Discuss Over 90% of all spinal injuries occur in less the 1.8m (6 feet) of water. Safe diving depth is 2.5 m. Pick spots around the area where you will test the water depth with your participants.
Do Have the group check the depth and determine where it is safe to dive.
Provide pictures of cross sections of water bodies provide a scale ratio and with a ruler determine where it would be safe to dive at that location.
Include unseen hazards such as rocks, drop offs and sand bars.
Resources Pylons or area markers
References Canadian Lifesaving Manual, p. 1-5; 2-4 & 2-5
Water Smart® ActivityFeet First, First Time
General Safe
Behaviour

20LIFESAVING SOCIETY WATER SMART ACTIVITY GUIDE
Water Smart
For a lifejacket to truly work well, it must be properly fitted and worn properly. To get it right, people need to be shown what to do. The lifejacket “safety check” has individuals take these three steps:
• Check the label – choose the right size based on the child’s weight.
• Fasten all buckles, ties and zippers.
• Make sure it’s a snug fit, by lifting the lifejacket at the shoulder (it should not slip over the chin, ears or face).
Outcome To provide basic yet critical information on how to choose the right size of lifejacket.
To practice following the lifejacket “safety check.”
Demonstrate Explain that “Proper Fit = Comfort = Safety.”
Demonstrate the lifejacket “safety check” on one of the participants:
• Check the label – choose the right size based on the child’s weight.
• Fasten all buckles, ties and zippers.
• Make sure it’s a snug fit, by lifting the lifejacket at the shoulder (it should not slip over the chin, ears or face).
• Have someone put on a lifejacket that is too large, demonstrate how easily that person will slip out of the lifejacket if they were in water.
• Have participants go and choose a properly fitted lifejacket, have them practice following the lifejacket “safety check”.
Discuss Note: Explain why lifejackets for small children are different than for adults.
Give each participant an “I Got Caught Wearing My Lifejacket” recognition card for participating.
Do Use a variety of styles of lifejackets.
• Have individuals try the lifejacket on with clothing, a sweater or a coat on.
• Make it a “get-wet” activity by having participants complete the “Trust Test.”
• Invite your patrons to bring their own lifejackets to a public swim or special event. Staff members can do a “safety check” to ensure that the lifejackets fit properly (over clothes or just in a bathing suit).
• Include this activity at a booth, at a safety fair or at the library.
• Take the lifejackets to an elementary school or to a summer day-camp.
ActivityChoosing A Well Fitted Lifejacket
General Safe
Behaviour

21LIFESAVING SOCIETY WATER SMART ACTIVITY GUIDE
Water Smart
Resources Lifejackets (variety of sizes and styles)
Bathroom scale
Lifejackets Save Lives Rack Card: Buckle up all snaps, ties and zippers
Lifesaving Society “I Got Caught Wearing My Lifejacket” recognition cards
General Safe
Behaviour

22LIFESAVING SOCIETY WATER SMART ACTIVITY GUIDE
Water Smart
It may seem obvious that people will automatically have trust in their lifejacket, but they don’t. To truly develop a trust factor in his/her lifejacket, a person must first experience how the lifejacket works.
Outcome To develop an awareness of how a lifejacket helps.
To develop trust in the lifejacket.
Do Have each participant don a well fitted lifejacket while wearing some clothing based on label size and snug fit. The participants will enter shallow or waist-deep water (with a buddy) and explore walking in the water. When they are comfortable, move the participants to shallower water and have each person try to sit on the bottom and notice how their lifejacket supports them (in a vertical position). Buddies may need to provide some support. As their degree of comfort increases, move to deeper water.
Give out “I Got Caught Wearing My Lifejacket” recognition cards to reward participants.
Go through the same process with lifejackets that are too big. Have them notice how difficult it is to float in these lifejackets.
Have participants try floating or swimming on their backs and/or front.
Have participants complete the Lifesaving Society Swim Test, performed as a sequence of skills:
• Safe entry into shallow water;
• Swim 25 meters without stopping or resting, any style;
• Exit the pool from deeper water;
• Jump (feet first entry) into deep water; and
• Recover, and tread water for 30 seconds (maintaining mouth & nose above water).
Invite your patrons to bring their own lifejackets to a public swim or special event and take the “Trust Test”.
Some participants will require extra “emotional” support during this activity. Instructors may want to work closely with that individual or assign older participants as that person’s buddy.
Resources Lifejackets (variety of sizes)
Extra clothing that can get wet
Bathroom scale
Lifesaving Society “I Got Caught Wearing My Lifejacket” recognition cards
ActivityTake The “Trust Test”
General Safe
Behaviour

23LIFESAVING SOCIETY WATER SMART ACTIVITY GUIDE
Water Smart
Wearing a lifejacket significantly increases the chances of surviving an initial fall into water and the “cold-shock” phase of immersion. Once a person has regained his/her ability to breathe, he/she will need to get out of the water. Fortunately, safety is usually only 2-15 metres away. Knowing how to swim with a lifejacket will give the victim an advantage. Any style or skill level will do; all the person needs to do is stay calm and go the distance.
Outcome To develop swimming skills while wearing a lifejacket
Do After completing the “Trust Test”, have participants go into water that is above their heads, and have them complete modified treading water and roll into deep water practice activities from the Swim to Survive Activity Guide.
• How long can you tread water?
• How high can you tread water?
• Show what you know – Feet First Entries
• Side Rolls or Forward Rolls
Then, have participants complete the Lifesaving Society Swim to Survive Standard, performed as a sequence of skills:
• Roll into deep water;
• Tread water for one minute; and
• Swim 50 metres, any style.
Do the “Trust Test” before asking people to try any of these Activities. Make sure that everyone is comfortable with being in deep water while wearing their lifejacket. Pre-screening for previous experience or swimming ability may be necessary.
Resources Lifejackets (variety of sizes)
Extra clothing that can get wet
Bathroom scale
Lifesaving Society “I Got Caught Wearing My Lifejacket” recognition cards
Swim to Survive Activity Guide
ActivitySwim To Safety
General Safe
Behaviour
24LIFESAVING SOCIETY WATER SMART ACTIVITY GUIDE
Water Smart
A good public education program compels people to take action. Asking people to take a pledge helps to bring them from awareness, to a commitment, to personal action. Pledges help to reinforce and anchor beliefs that “wearing a lifejacket is important.” A person’s pledge reflects a decision to “make the right choice” when faced with peer pressure or competing priorities.
Outcome To encourage people to insist that others wear lifejackets and to be good role models.
Do Use as part of the conclusion on a session on lifejackets. Have participants in the session repeat one of the following statements after you:
• “I promise to wear my lifejacket when out in a boat.”
• “I promise to make my child wear his/her lifejacket.”
Create an “I Declare” page that can be added to your display. Encourage people to sign it and then post it on your notice board the features information on lifejackets.
Resources Your original pledge statement that can be signed or read and declared out loud.
Activity“I Declare” - Make A Personal Pledge To Wear A Lifejacket
General Safe
Behaviour

25LIFESAVING SOCIETY WATER SMART ACTIVITY GUIDE
Water Smart
Outcome Simulate swimming through waves.
Do Everyone lines up facing a wall in the shallow end, holding onto their flutter board. Using the flutter board, everyone makes waves as one person swims/moves his/herself through the waves. Once a person has reached the end, everyone hands down their flutter board and the next person swims/moves through.
They can swim with lifejackets on; you can compare how it was to go through with and without the lifejacket on. You can have them run through, walk through or any way that is comfortable for them.
Watch the size of the waves with the lower levels – theoretically small kids will only be able to make small waves.
Resources Flutter boards
References Canadian Lifesaving Manual, p.2-5; 3-10 & 3-11
Water Smart® ActivityWave Machine
Swimming in
Open Water

26LIFESAVING SOCIETY WATER SMART ACTIVITY GUIDE
Water Smart
Outcome To experience currents.
Do Everyone holds hands and runs around in a circle as fast as they can. Then they let go and back float or try to stand as the current tries to pull them down. Works best in the corner of shallow water.
With large groups you can form two circles – one on the inside, and one on the outside. They can either run in the same direction or in opposite ones – compare the kind of currents that are formed.
Resources None
References Canadian Lifesaving Manual, p.2-5; 3-10 & 3-11
Water Smart® ActivitySwept Away
Swimming in
Open Water

27LIFESAVING SOCIETY WATER SMART ACTIVITY GUIDE
Water Smart
Outcome Experience drop offs.
Do Set up some large mats in deeper water so that they over hang into the water from off of the deck. Have each child walk off the mats, falling into the water.
Spin each child three times before walking onto the mats.
• Have the instructor guide the participant off of the “drop off”.
• Lifejackets can be used as well for those not skilled enough for deep water.
• Ensure that there is a large area for the drop off zone that is free of hazards and obstacles.
Resources Mats
Lifejackets (optional)
References Canadian Lifesaving Manual, p. 2-5
Water Smart® ActivityDrop Offs
Swimming in
Open Water

28LIFESAVING SOCIETY WATER SMART ACTIVITY GUIDE
Water Smart
Outcome To identify the symptoms and treatment of heat exhaustion.
Do Set up a relay using whatever stroke or drills you want, including distances. In order for the racer to tag the next person they need to choose a symptom or a treatment for heat exhaustion. Lifejackets are always an option for weaker swimmers. Review the correct answers prior to doing the activity – or do it as a group if your numbers are small. With the cards on one side of the pool, the instructor picks a card and says what it is (sign or treatment for hypothermia) and then as a group, they swim the width of the pool.
Any skill or combinations of skills can be used for this activity. Choose skills that the participants need to work on to maximize the activity.
Review the first answer and add on another answer, then swim, then add on a third answer reviewing the first two and so forth, until you have covered all of the information.
Teachers’ Key Heat Exhaustion:
Heat Exhaustion Signs/Symptoms:
• Flushed skin
• Sweating
• Skin hot to touch
• Headache
• Thirst
• Dizzy
• Nausea
First Aid:
• cool down immediately
• give cool liquids
Resources Flash cards
Lifejackets (optional)
Teachers’ Key
References Canadian Lifesaving Manual, p 8-2
Lifesaving First Aid and Aquatic Emergency Care Manual, p. 74
Canadian First Aid Manual, p. 74
Water Smart® ActivityHeat Exhaustion Relay
Swimming in
Open Water

29LIFESAVING SOCIETY WATER SMART ACTIVITY GUIDE
Water Smart
Outcome To learn how to prepare for warm weather Activities.
Do The instructor calls out an item you may or may not need for outdoor Activities in the summer. The kids enter the pool (jumping, rolling, diving, etc.) only on an item that is needed. Again – lifejackets are always an option for weaker swimmers.
Can be done as a relay as well as having the kids tag the next in their group by offering a way to stay safe in warm weather. This may be a more appropriate way to do this for more experienced swimmers.
Teachers’ Key Safe and Sorry:
• Wear sunscreen (safe)
• When diving look and listen before surfacing (safe)
• Wear a winter coat (sorry)
• Wear a hat (safe)
• Drink plenty of water (safe)
• Drink a lot of pop (sorry)
• Drink hot chocolate (sorry)
• Limit time in the sun between 11 am and 4 pm (safe)
• Check the weather (safe)
• Know proper hand signal when water skiing (safe)
• Swim wherever you want to (sorry)
• When snorkelling display a divers flag (safe)
• Bring a wind breaker (safe)
• Wear fur lined boots (sorry)
• Swim in shark infested waters (sorry)
• Have a water fight outside (safe)
• Swim by yourself (sorry)
• Wear sunglasses (safe)
• Check the water for hazards (safe)
Resources Teachers’ Key
References Canadian Lifesaving Manual, p. 8-21 to 8-23
Water Smart® ActivitySafe and sorry
Swimming in
Open Water

30LIFESAVING SOCIETY WATER SMART ACTIVITY GUIDE
Water Smart
Outcome Simulate swimming through weeds.
Do Hide treasure in the weeds and have children look for it all.
Can be done in shallow to chest deep water depending on the age of the children (no deeper than shoulder height of the shortest person to properly explore).
Resources Hoops with garbage bag “weeds” cut part way to create weed strips
Treasure
References Canadian Lifesaving Manual, p. 2-5
Water Smart® ActivityTreasure Hunt
Swimming in
Open Water
31LIFESAVING SOCIETY WATER SMART ACTIVITY GUIDE
Water Smart
Outcome To emphasize the importance of wearing a lifejacket and the hazards of inflatables.
Do Have all participants don lifejackets and hop on board the air mattress in shallow water. Have everyone lean to one side, to see how tippy the inflatable is.
Tow the participants and let the air out of the mattress to simulate a leak. What happens? Good thing you have your lifejacket on!
Try a variety of inflatables, and try them in either the wave or current Activity – how hard is it to stay with your inflatable now? Can you get back on?
Ensure participants are in a depth of water that they feel comfortable in before trying any of the variations.
Resources Lifejackets (various sizes)
Inflatable air mattress
References BOAT Study Guide, p. 12; 57-59
Canadian Lifesaving Manual, p. 1-4; 2-2 to 2-6
Water Smart® ActivityThe Sinkable Inflatable
Swimming in
Open Water

32LIFESAVING SOCIETY WATER SMART ACTIVITY GUIDE
Water Smart
Outcome To determine whether a body of water is deep enough to execute a dive safely.
Do Set up a relay using any kind of movement to get from point A to point B. In order for the racer to tag the next person they need to choose a piece of equipment that is required by law for a motorized watercraft 6m or less.
Can be done in shallow or deep water.
Use all of the equipment or just some of it, or
Use flash cards that have pictures of the required equipment,
Have them tell the activity leader what is the required equipment.
Teachers’ Key Equipment:
• Bailing Bucket
• Oars
• Whistle
• Flashlight
• Lifejacket, right size for everyone in the boat
• Buoyant Heaving Line
• Navigation Lights
Resources Bailing Bucket
Oars
Whistle
Flashlight
Lifejacket
Buoyant Heaving Line
Navigation Lights (green, blue, and white objects tied together to represent the
lights, or flashlights with coloured gels)
Miscellaneous items not required when boating
Teachers’ Key
References BOAT Study Guide, p. 16
Canadian Lifesaving Manual, p. 2-3
Water Smart® ActivityEquipment Relay
Safe Fishing
and Boating

33LIFESAVING SOCIETY WATER SMART ACTIVITY GUIDE
Water Smart
Outcome Understand the parts of a float plan and why they are done.
Do A map of the site is given, highlighting certain locations. At each stopping area an activity is done, (diving in the deep end, floats in the shallow, whatever you want to do) and an item that needs to be included in a float plan is on a flash card at that location. At the end of the tour, quiz everyone on the items that are needed for a float plan.
You can do this without the skill check at each station if you want. This just gives you an opportunity to check (not teach!) some skills while you pass on information.
Have them design their own float plan based on the stations you have set up for this days’ activities, and go to the stations in that order.
Teachers’ Key Float Plan:
• Boat details
• Owner’s name and address
• Equipment details
• No. of people on board
• Safety equipment on board
• Trip details (start & end points, date & time of departure/arrival, route, layovers)
• Emergency contacts
Resources Map
Flash Cards
Teachers’ Key
References BOAT Study Guide, p. 16; 43
Canadian Lifesaving Manual, p. 2-3 & 2-4
Water Smart® ActivityFloat Plan Scavenger Hunt
Safe Fishing
and Boating

34LIFESAVING SOCIETY WATER SMART ACTIVITY GUIDE
Water Smart
Outcome To learn how to prepare for a safe boating trip.
Do Choose what kind of an entry you want everyone to practice and call out items on the key. For safe items, they enter the pool, and for unsafe items, they yell out sorry...
Teachers’ Key Before I Go Boating I Check The....
• Fridge (sorry)
• Lifejackets (safe)
• Fishing gear (safe)
• Local hazards (safe)
• Bird cage (sorry)
• Gas (safe)
• Weather (safe)
• Boat (safe)
• All safety gear (safe)
Resources Teachers’ Key
References BOAT Study Guide, p. 16; 40 - 47
Canadian Lifesaving Manual, p. 2-3 & 2-4
Water Smart® ActivityPre-Trip Check (Safe or Sorry)
Safe Fishing
and Boating

35LIFESAVING SOCIETY WATER SMART ACTIVITY GUIDE
Water Smart
Outcome Learn the Cardinal Buoy System.
Do Set up an obstacle course and have everyone navigate the course using the Cardinal Buoy System.
If you want to try this with lower levels, you will have to guide them through the course. Any set of buoys work for this activity, although try not to use too many different kinds of buoys at one time as it gets complicated and time consuming.
If you do not have a way to weigh the buoys down, then this can be done dry.
Teachers’ Key Buoys:
• Black top, yellow bottom = keep north
• Yellow top, black bottom = keep south
• Yellow middle = keep east
• Black middle = keep west
Resources Map
Cardinal Buoys (or whatever kind of buoys you want to teach). You need approximately 2.5 lbs to stop them from moving around during the activity.
Teachers’ Key
References BOAT Study Guide, p. 34
Water Smart® ActivityBuoys Obstacle Course
Safe Fishing
and Boating

36LIFESAVING SOCIETY WATER SMART ACTIVITY GUIDE
Water Smart
Outcome Use a heaving line and be able to hit a target 4 out of 5 times.
Do Have all students line up 3-5m from the target. Using the heaving lines, hit the target 4 out of 5 times.
Challenge your students to try farther back if 5m is too close.
For more variations, see variations from the rescue section on throwing assists.
Resources Buoyant heaving lines or throw bags
Orange manikin target (or anything you want to use as a target)
References BOAT Study Guide, p. 13
Canadian Lifesaving Manual, p. 4-12 to 4-15
Water Smart® ActivityHeaving Line
Safe Fishing
and Boating

37LIFESAVING SOCIETY WATER SMART ACTIVITY GUIDE
Water Smart
Outcome Learn how to do a self rescue when a boat capsizes, reinforces how to enter a boat.
Do All participants put on a lifejacket and enter the boat – you can take them for a short ride, and then capsize the boat when all participants are ready. Have all participants try to get on top of the boat while wearing a lifejacket.
Try also righting the boat by having all students on one side to flip it over.
Now see if they can get into the boat and hand paddle to “shore”.
Do this activity without the lifejacket. Which was harder, why do you want to wear your lifejacket?
These can also be done starting from a capsized position.
Challenge your students to try farther back if 5m is too close.
Ensure that all participants are warned of the capsize before you do it, and make sure they are told to jump away from the boat as it capsizes so as not to get trapped underneath. For smaller children, pool mats or small inflatable boats may be better as you can control these better.
Resources Canoe or dinghy (Pool mats can also be used if there is no space for a boat)
Lifejackets (various sizes)
References BOAT Study Guide, p. 13
Canadian Lifesaving Manual, p. 4-12 to 4-15
Water Smart® ActivityCapsize
Safe Fishing
and Boating

38LIFESAVING SOCIETY WATER SMART ACTIVITY GUIDE
Water Smart
Outcome To reinforce the need to wear an appropriate fitting lifejacket.
Do Have two piles of various sizes of lifejackets. One pile should have sizes that will NOT fit properly, and one pile that does. Have them run/swim/hop in the water or use a swimming drill over to the pile and get a lifejacket.
Discuss How hard it was to move in a lifejacket that does not fit properly. Do the activity again, this time with the pile of properly fitting lifejackets.
Choose a lifejacket for each child that does not fit and have them jump into the pool. Then have them try to put on the lifejacket. How well did it work? Now give them a lifejacket that does fit properly, have them put it on and then jump into the pool. Which way was easier? Why do we put a lifejacket on before we get into a boat?
Resources Lifejackets (various sizes)
Note: Make sure that everyone has a properly fitting lifejacket the last time they do it to make sure the right way is reinforced.
References BOAT Study Guide, p. 12; 57-59
Canadian Lifesaving Manual, p. 1-4; 2-2 to 2-6
Video – Saved by the Jacket
Water Smart® ActivityAppropriate Lifejacket
Safe Fishing
and Boating
39LIFESAVING SOCIETY WATER SMART ACTIVITY GUIDE
Water Smart
Outcome Learn the terminology used for basic parts of a boat.
Do The posters are placed on the appropriate part of the pool (for aft and stern they can be placed on a flutter board and float around in the pool). You then call out a direction and the participants move in any appropriate and safe manner to get to where that location is posted.
This can be done in shallow or deep water, with or without lifejackets.
Teachers’ Key Boat Directions:
• BOW = front of the boat
• PORT = left side (when facing the bow)
• STARBOARD = right side (when facing the bow)
• STERN = back of the boat
Resources Posters – laminated (bow, starboard, port, stern)
Teachers’ Key
References BOAT Study Guide, p. 3
Water Smart® ActivityCaptain’s Daughter
Safe Fishing
and Boating

40LIFESAVING SOCIETY WATER SMART ACTIVITY GUIDE
Water Smart
Outcome To acquaint participants with proper boating etiquette.
Do Give each participant a toy boat and put the red fun foam on the left side of the boat, and green fun foam on the right. Have participants move through the water with their boats using the navigation lights as a key on how to give way, pass, and steer clear of each other. Make sure the boats and foam are large enough to be easily seen.
Any method of movement can be used, any depth of water can be used, and this can be done with or without lifejackets.
If water space is limited, this can be done dry as well, walking, using tricycles or bikes. Add in the sound signaling device and have them practice the sound signals as well.
Have someone “capsize” and go through the rescue procedures for that boat.
Teachers’ Key Share the Water:
• Find a copy of the “get it right rules for powerboats” that shows who has right of way using navigation lights. Lifesaving Society BOAT Study Guide, page 21.
Resources Lifejackets (various sizes) *optional
Teachers’ Key
Toy Boats
Fun foam – red and green or coloured sponges
References BOAT Study Guide, p. 21
Water Smart® ActivityShare the Water
Safe Fishing
and Boating

41LIFESAVING SOCIETY WATER SMART ACTIVITY GUIDE
Water Smart
Outcome To reinforce general safe boating principles.
Do The participant asks “Harbour Master, may I?” and the “Harbour Master” (activity leader) asks them a question off of the Teachers’ Key. If the participant answers correctly, they move forward a little bit, and for every wrong answer they go back to the beginning (or stay where they are). The first one to the finish line wins.
This can be done in shallow or deep water, with any method of propulsion being used and with or without lifejackets.
Teachers’ Key Harbor Master, may I?:
• Do you have your license?
• Are you bringing alcohol?
• How did you check the weather? (coast guard, T.V., internet, radio)
• Did you check your equipment and boat?
• Are you wearing your lifejacket properly?
• Who did you give your trip plan to? (a responsible person)
• Are you going alone?
• Do you have all of the equipment you need?
• How many lifejackets are you bringing? (one for everyone in the boat and one extra)
• Are you going near a swimming area?
• Do you have navigation lights?
• What hazards are you going to look for? (buoys, markers, weather, other boaters)
• What is the speed limit close to shore?
• Are you going to stay low while in your boat?
• Name two signaling devices. (flares, whistle, fog horn, flashlight)
Resources Teacher’s Key
References BOAT Study Guide, p. 40-47
Canadian Lifesaving Manual, p. 2-3; 2-4; 3-4; 3-5
Water Smart® ActivityHarbour Master, May I?
Safe Fishing
and Boating

42LIFESAVING SOCIETY WATER SMART ACTIVITY GUIDE
Water Smart
Outcome To teach participants how to rescue themselves in the event they fall through ice.
Do Set the mats up so that they are overlapping an edge, and place the flutter boards on the edge of the mats. Starting in the water, the group goes one at a time to try and kick the flutter boards out of the way and roll over the mats out of the pool.
Inexperienced swimmers can wear lifejackets.
In an open water environment, one large mat can be held by the activity leader and one at a time the participants get onto the mat and roll along the mat towards the activity leader.
Participants join hands making a circle around one player creating a “circle of ice” and the one in the middle attempts to swim out of the ring using a flutter kick going over the arms of those making the circle, and without letting their face go under water.
Participants can try to rescue from a safe zone as well – make sure to include in the equipment objects that would be found in an outdoor environment (sticks, paddles, rope, clothing or towels)
The activity leader should spot the participant.
Ensure that there is a large area surrounding the drop off area so that there is nothing that can injure the participant.
Ensure a safe depth in case the person falls in head or belly first.
Resources Mats and flutter boards
Options include water sidewalks, or position a flutter board in an inner tube.
References Canadian Lifesaving Manual, p 2-6; 3-8 & 3-9
Ice Myths and Cold Realities: www.lifesaving.org/download/Ice%20Myths.pdf
Ice the Winter Killer, p. 57-59
Water Smart® ActivityBreakthrough
Ice Safety /
Cold Weather

43LIFESAVING SOCIETY WATER SMART ACTIVITY GUIDE
Water Smart
Outcome Reinforce the necessity of clothing layers and choosing warm clothing.
Do The group is divided into two teams. Whoever is going first goes to the bag of clothing in any manner and chooses an article that is appropriate for winter. They go back and tag the next player. The first team to get all appropriate clothing and finish first wins. The clothing does not have to be properly worn.
Lower levels – use only mitts, scarves, hats and socks. Upper levels can use long johns, sweaters, sweat shirts, etc. If there is no shallow water available, lifejackets can be worn, and the clothing carried from point A to point B.
If the clothing being used is not the appropriate size for the participants, especially pants, this can cause a lot of problems. If needed, use the variation that just requires the article to be carried form point A to point B, or leave it up to the participants’ discretion.
Resources Two bins of various clothing items.
Water Smart® ActivityDressed for Success
Ice Safety /
Cold Weather

44LIFESAVING SOCIETY WATER SMART ACTIVITY GUIDE
Water Smart
Outcome Reinforce cold weather hazards and treatments.
Do The group is divided into two groups. The participants move from start to finish in any manner and pick a flash card that shows a sign or symptom, then swim back to the starting point and place the card in the appropriate pile (Hypothermia sign, Hypothermia symptom, Frostbite sign, Frostbite symptom) to tag the next person. The team to finish first without making a mistake wins.
Any skill or combinations of skills can be used for this activity. Choose skills that the kids need to work on to maximize the activity if being done in conjunction with a lesson set. Review the correct answers prior to doing the activity – or do it as a group if your numbers are small. With the cards on one side of the pool, the instructor picks a card and says what it is (sign or treatment for hypothermia or frostbite) and then as a group, swim the width of the pool. Review the first answer and add on another answer, then swim, then add on a third answer, reviewing the first two, and so forth, until you have covered all of the information either for one of the conditions or both. If you want you can have all participants act out the signs and symptoms and the treatment instead of using flash cards.
Teachers’ Key Frostbite:
Signs and Symptoms of Frostbite:
• Pain
• Altered sensation (burning sensation, pins and needles, numbness)
• White area on the skin
First Aid:
• Gently reheat the affected area with body heat or immerse in warm water
• Remove from the cold environment
Resources Laminated flash cards of signs and symptoms
References Canadian Lifesaving Manual, p.8-23
Lifesaving First Aid and Aquatic Emergency Care Manual, p. 77
Canadian First Aid Manual, p. 76
Water Smart® ActivityFrostbite Signs and Symptoms Relay
Ice Safety /
Cold Weather

45LIFESAVING SOCIETY WATER SMART ACTIVITY GUIDE
Water Smart
Outcome Reinforce what needs to be done for outdoor activities.
Do Call out a statement on the Teachers’ key (include how be prepared, keep safe and survival skills). For statements that are safe, they enter the pool, and for statements that are not safe they yell sorry.
Any entry can be used with the appropriate depth of water. Open water variations can include running in and out of the water, move from point A to point B when the answer is “safe” and not moving when the answer is “sorry” (much like red light green light, or as a relay).
Ensure safe diving depth of ≥ 2.5m for all head first entries.
Teachers’ Key Safe or Sorry:
• Check the weather (safe)
• Wear my bathing suit (sorry)
• Wear winter boots (safe)
• Bring my teddy bear (sorry)
• Use designated ice surfaces for Activities such as skating (safe)
• Dress in layers (safe)
• Bring a picnic basket (sorry)
• Bring a buddy (safe)
• Wear a hat and scarf (safe)
• Bring extra fuel when snowmobiling (safe)
• Wear sandals (sorry)
• Check ice thickness in several locations (safe)
• Stay on paths and in areas that I know are safe (safe)
• When driving on ice I leave my windows open and doors unlocked (safe - escape plan)
Resources Teachers’ Key
Water Smart® ActivitySafe or Sorry
Ice Safety /
Cold Weather

46LIFESAVING SOCIETY WATER SMART ACTIVITY GUIDE
Water Smart
Outcome Reinforce the effects of wind chill.
Do Participants dip one of his/her hands into the water, and puts it in front of the fan. Notice the perceived change in temperature. Talk about wind chill and understand that wind can severely affect how cold it feels outside and increase the risk of frostbite and hypothermia.
Instead of just putting the hand in water, you can have participants go into the pool, then quickly come over to the fan to experience wind chill with the entire body. This may be more effective especially with older participants. You can also go one step further and have them now try to put on a lifejacket while they are cold and their fingers do not work as well. How would this affect them putting on a lifejacket in a capsize situation?
Resources Fan (an industrial fan works really well)
Lifejackets (various sizes)
Bowl of water
Paper towel
Water Smart® ActivityWind Chill
Ice Safety /
Cold Weather

47LIFESAVING SOCIETY WATER SMART ACTIVITY GUIDE
Water Smart
Outcome Reinforce the effects of cold.
Do Participants dip one of his/her hands into the water and note the perceived temperature. Then they put it into the ice for a few seconds and then place that hand into the water again. Which time did the water feel warmer? What did they learn?
Try putting on a lifejacket after doing this one too, or having them write their name.
Teachers’ Key Hypothermia:
Signs and symptoms of hypothermia:
• Shivering, feeling cold
• Fatigue
• Decreased consciousness, confusion, disorientation, unconsciousness
First Aid:
• Remove from the cold environment
• Warm victims head, neck, chest, back and groin by giving warm beverages, wrapping in blankets, immersing in warm water.
• Make sure they are still breathing, and have a pulse
• Contact EMS if condition is severe
Resources Bowl of water
Bowl of ice (or cold water)
Paper towel
Teachers’ Kit
References Canadian Lifesaving Manual, p. 2-6; 3-8 & 8-24
Lifesaving First Aid and Aquatic Emergency Care Manual, p. 74
Canadian First Aid Manual, p. 75
Water Smart® ActivityHypothermia
Ice Safety /
Cold Weather

48LIFESAVING SOCIETY WATER SMART ACTIVITY GUIDE
Water Smart
Outcome Reinforce Safe Snowmobiling attitudes.
Do Questions are asked from the Teachers’ Key (based off of the “Ice Myths and Cold Realities” publication). For every correct answer, the participant is allowed to do a swim skill (i.e. enter into the water, hand stand, scull, tread water etc.). The participant that has the most correct answers is the winner (popsicle sticks or tokens can be used to keep score).
Can also be played like red light / green light, and the first participant to get to the finish line wins. Determine how many “steps” a person is allowed to take for a right answer, and whether they stay put or go back.
Teachers’ Key Safe Snowboarding:
• Ice forms at the same thickness everywhere on a body of water. (FALSE)
• Thick ice is strong. (FALSE - with spring melts; layers with snow)
• Always snowmobile with a buddy. (TRUE)
• Snow on top of ice makes it stronger and freeze faster. (FALSE - snow insulates)
• For the same thickness, all ice has the same strength. (FALSE - spring ice, and layered ice are different than clear hard ice)
• Always wear a snowmobiling flotation suit or lifejacket. (TRUE)
• Extreme cold means safe, thick ice. (FALSE - cold snaps can crack the ice)
• Stay off of river ice. (TRUE - currents change ice thickness overnight and in different areas)
• Alcohol helps keep you warm on cold winter nights. (FALSE - alcohol stimulates blood vessel dilation and impairs judgment)
• Spring ice is rotten ice. (TRUE)
• If you know where you are going and what the ice is like, it is safe to travel across the ice at night. (FALSE - 62% of all snowmobiling drownings happen at night)
• The better you swim, the better the chances of rescuing yourself if you fall through the ice. (FALSE - in as little as 5 minutes the cold water makes it hard to move)
• Take safety equipment like ice picks, ice staff, rope, fire starter kit and a cell-phone. (TRUE)
Resources Teachers’ Key
Tokens or popsicle sticks (optional)
Water Smart® ActivitySafe Snowboarding Obstacle Course
Ice Safety /
Cold Weather

49LIFESAVING SOCIETY WATER SMART ACTIVITY GUIDE
Water Smart
Outcome Hit the target four out of five times.
Do Each child stands approximately 3-5 meters away and throws an assist at the target. The goal is to hit the target four out of five times.
Change the distances so that they are more challenging / age appropriate. You can also use different throwing assists (smaller ones for smaller hands) such as water wings.
If this activity is done on dry land, face a corner. The clean up is typically faster on dry land. However for stronger swimmers, partnering up to rescue their partner is pretty fast too.
Try it with two teams, each team has their own pile of assists with participants starting out in the water treading, someone begins by swimming to the wall, getting out, selecting an assist and bringing in another team member, then that person selects an assist and brings in the next person on their team, until all members are in safely.
For younger children, have the child provide the aid to the parent to hit a target with, or do the relay with one caregiver trying to “save” the Tot and the other caregiver (or activity leader if there is only one caregiver).
Add pictures of distressed victims on flutter boards.
For all of these options you can time the participants to see who can get the best time.
You can also include reaching and rescue assists that are not good, and rate them (are they buoyant? Easy to extend or throw? Easy for the victim to grab? Readily available?).
Another way this can be done is by exploring the area that you are at and trying to find assists that are close by and trying them out – which ones worked? Which ones did not?
With weaker swimmers make sure that they are wearing a lifejacket if they are in the water.
Resources Lifejackets (various sizes)
Noodles
Ropes
Aqua jogger belts
Orange manikin for target (Or pool mat, or flutter boards with faces on them, or hula hoop)
NO FLUTTER BOARDS! (Do you take one with you to the lake?)
References Canadian Lifesaving Manual, p. 4-5; 4-6; 4-12 to 4-15
Water Smart® ActivityThrowing Assist
Focus on
Water Rescue
50LIFESAVING SOCIETY WATER SMART ACTIVITY GUIDE
Water Smart
Outcome Reinforce how to do HELP and Huddle.
Do One person is “It”, whoever they tag has to hold the HELP position. To become unfrozen, a HUDDLE has to be formed. This can be done in shallow or deep water.
If your numbers are low have the participant count to ten then unfreeze, or HUDDLE with only two people.
Small children may not be able to hold this for very long – see if they can hold it (or even just a back float) for 2-5 seconds, and then release, or have them do a HUDDLE with their parent and hold it for the ten seconds and release.
Instead of having the focus on HELP and Huddle, you can have a tagged person exit the pool, put on a lifejacket properly, and re-join the class. When they get tagged again, they exit to take it off, and then rejoin the class.
If there is no easy access to an area where the lifejackets can be taken off safely, and the people are stronger swimmers, then they can try taking it off in the water, or again floating on their back, undoing the lifejacket, and then doing it up again.
Make sure that the younger children have the lifejacket done up properly before entering the water, and make sure all are comfortable with the variation before you do it.
Resources Lifejackets (various sizes)
References Canadian Lifesaving Manual, p. 3-8 & 3-9
Water Smart® ActivityHelp and Huddle Tag
Focus on
Water Rescue

51LIFESAVING SOCIETY WATER SMART ACTIVITY GUIDE
Water Smart
Outcome Learn how to recognize a distressed, weak, tired, and unconscious victim.
Do While the person who is “It” hides their eyes, assign a victim type to the rest of the group. All of the students do the same victim except for one student. The goal is to figure out which is the person doing the “victim type that does not belong”.
This activity can also be done in a charades style with everyone simulating the same victim type and one person guessing what they are.
Resources None
References Canadian Lifesaving Manual, p. 4-3 & 4-4
Water Smart® ActivityLook Alert - “One of These Things” Does Not Belong
Focus on
Water Rescue

52LIFESAVING SOCIETY WATER SMART ACTIVITY GUIDE
Water Smart
Outcome Reinforce when it is appropriate to call 911.
Do The instructor calls out a situation where you may or may not call 911. Students enter the water in any safe manner when a situation is appropriate to call 911. If the situation is not appropriate to call 911, students yell sorry...
Any deep water entries or shallow water entries are acceptable to do this activity allowing for proper depth (head first diving in ≥ 2.5 m).
Teachers’ Key When to Call:
• Fire next door (safe)
• Hit your elbow (sorry)
• Dog has run away (sorry)
• You are lost (safe)
• You see a car accident (safe)
• Your bubble gum lost its flavor (sorry)
• You’ve lost your favorite toy (sorry)
• Someone stole your mother’s car (sorry)
• Broke a nail (sorry)
• Someone falls down the stairs (safe)
• Can’t wake up your parents (safe)
• You see someone sneeking around your house at night (safe)
• You get detention at school (sorry)
• You see a capsized boat in a lake (safe)
Resources Teachers’ Key
References Canadian Lifesaving Manual, p. 3-3
Lifesaving First Aid and Aquatic Emergency Care Manual, p. 10
Canadian First Aid Manual, p. 3; 8
Water Smart® Activity“When to Call” - Safe or Sorry
Focus on
Water Rescue

53LIFESAVING SOCIETY WATER SMART ACTIVITY GUIDE
Water Smart
Outcome To emphasize the importance of laying down when using a reaching assist.
Do Attach a broom to the bop bag. The bop bag will simulate a rescuer performing a reaching assist while standing. Have participants lie on the ground face first, and have them grab onto the broom stick and pull. What happens to the bop bag? What do rescuers need to keep in mind when they perform reaching assists?
Resources Bop bag (or other adaptation)
Broom stick
References Canadian Lifesaving Manual, p. 4-15
Water Smart® ActivityReach Out
Focus on
Water Rescue

54LIFESAVING SOCIETY WATER SMART ACTIVITY GUIDE
Water Smart
Outcome Increase awareness of fitness in lifesaving.
Do Participants perform a 25m head up approach, head first surface dive, pick up the brick/ring, surface, and support the object for 30 seconds. Participants will then return to the beginning with the brick/ring. Challenge may be timed to see who is the fastest.
For weaker swimmers, do in shallow water, and have them approach in any way they want. Attach the object to a hula hoop (or just use a hula hoop), and have them drag the hula hoop to the starting point. If no shallow water is available, the participant can swim out to a hula hoop (un-weighted) and tow it back to the starting point, either wearing a lifejacket or not.
For a greater challenge add empty bleach containers to the hula hoop to increase drag resistance.
Resources Pool rings
5 lb brick
10 lb brick
20 lb brick
References Canadian Lifesaving Manual, p. 4-15
Water Smart® ActivityBrick Carry
Focus on
Water Rescue

55LIFESAVING SOCIETY WATER SMART ACTIVITY GUIDE
Water Smart
Outcome To reinforce what information the 911 Operator will ask for.
Do Set up a relay using whatever stroke or drills that you want. In order for the racer to tag the next person they need to answer the question you give them from the Teachers’ Key. The participant will invent the answer for a fictitious situation or you can use the situations for the message relay.
Wearing lifejackets, using full stroke or stroke drills, short distances are better than long ones.
You can do this as safe or sorry with the younger children to help them know the pool’s address and their family telephone number.
Teachers’ Key 911 Calls Relay:
• Who are you?
• What happened?
• How many people are hurt?
• Where are you?
• When did this happen?
• Why are you calling?
• When do you hang up?
Resources Teachers’ Key
Note: For younger children, do not have them call out their own home address.
References Canadian Lifesaving Manual, p. 3-3
Lifesaving First Aid and Aquatic Emergency Care Manual, p. 10
Canadian First Aid Manual, p. 3; 8
Water Smart® Activity911 Calls Relay
Focus on
Water Rescue
56LIFESAVING SOCIETY WATER SMART ACTIVITY GUIDE
Water Smart
Outcome Learn how to identify what are rescue hazards.
Do Set up a relay using whatever stroke or drills that you want. In order for the racer to tag the next person they need to choose a card that is a hazard. Any method of completing the distance works – jumping, hopping, walking, etc. If you do not want to use flash cards, have the participant tell the activity leader what a hazard is.
This can also be done in true “safe or sorry” fashion with entries and no flash cards.
Teachers’ Key Flash card suggestions:
• Water conditions (waves, currents, deep water, ice)
• Live electrical wires
• Debris on land or in the water (broken glass, submerged garbage)
• Weather conditions (windy, cold, hot)
Resources Flash cards of what things are dangerous and not dangerous.
References Canadian Lifesaving Manual, p. 4-10 & 4-11
Water Smart® ActivityHazards Safe and Sorry Relay
Focus on
Water Rescue

57LIFESAVING SOCIETY WATER SMART ACTIVITY GUIDE
Water Smart
Outcome To learn to choose buoyant objects.
Do A variety of sinking and floating toys are put on the edge one less than there are students in the class. Everyone races a short distance to choose a floating object from the pile. The student without a floating object is out. Take away another floating object and repeat. The last student with a floating object is the winner.
You can just have the student discover what floats and what sinks. You can even have them try to get an object to float. Let them understand that floating objects can help them out when they are tired.
You can also try it as “tuna tag” – buoyant objects are safe areas and you cannot be tagged as long as you are holding onto a buoyant object.
Resources Flutter boards
Noodles
Sinking toys
Sponges
Water Smart® ActivityBuoyant Object Musical Charis
Focus on
Water Rescue

58LIFESAVING SOCIETY WATER SMART ACTIVITY GUIDE
Water Smart
Outcome Reinforce how to ensure accuracy when directing someone to call 911.
Do The class is divided into relay teams of three or four people. Describe an accident scene to the first people. They swim a set distance, and to tag the next person on their team they call for help and then give instructions to the next person in the relay to call 911 for an ambulance and describe the situation. This goes until the last person has gone, and the winning team is the one with the most accurate message.
Any distance or type of swim can be used, and you can incorporate entries as well.
Ensure proper diving depth if allowing participants to dive (head first diving in ≥ 2.5 m).
Teachers’ Key Message Relay:
• “There has been a car accident on ‘anywhere street’, there are two people hurt, one has a head injury, the other is unconscious.”“There is a fire at ‘Some Famous Person Elementary School’, everyone has been evacuated to the community league hall.”
• “There has been a robbery at 8999 111 Avenue – the famous Pink Panther Diamond has been stolen.”
Resources Teachers’ Key
References Canadian Lifesaving Manual, p. 3-3
Lifesaving First Aid and Aquatic Emergency Care Manual, p. 10
Canadian First Aid Manual, p. 3; 8
Water Smart® ActivityMessage Relay
Focus on
Water Rescue

59LIFESAVING SOCIETY WATER SMART ACTIVITY GUIDE
Toolkit: Water Smart Toolkit (Avaliable in hard copy or on the website under Members Only)
Posters: “Get Caught Wearing Your Lifejacket”
“Cold Water is Deadlier than you Think”
Rack Cards: Boating Safety – Be prepared for the unexpected
Waterfront Safety – In and around lakes, rivers and oceans
Water Smart® Resources available from the Lifesaving Society:
Water Smart® Guide – Key Themes and Messages
DVD - Water Smart
DVD - Within Arms’ Reach
DVD - Saved by the Jacket
DVD - Cold Water Boot Camp
Within Arms’ Reach Brochure
Ice Thinkness Cards
Water Smart® Fact Sheets (download from www.lifesaving.org)
Water Smart Background Information (available in this Activity Guide)
ResourcesAvailable Lifesaving Society Resources

Publications of the Lifesaving Society are available from any Branch office. Inquiries from outside Canada should be directed to the National Office.
Alberta & Northwest Territories Branch13123 - 156 StreetEdmonton, Alberta T5V 1V2Telephone: (780) 415-1755Fax: (780) 427-9334E-mail: [email protected]: www.lifesaving.org
British Columbia & Yukon Branch112 - 3989 Henning DriveBurnaby, British Columbia V5C 6N5Telephone: (604) 299-5450Fax: (604) 299-5795E-mail: [email protected]: www.lifesaving.bc.ca
Manitoba Branch504-138 Portage Avenue EastWinnipeg, Manitoba R3C 0A1Telephone: (204) 956-2124Fax: (204) 944-8546E-mail: [email protected]: www.lifesaving.mb.ca
National Office287 McArthur AvenueOttawa, Ontario K1L 6P3Telephone: (613) 746-5694Fax: (613) 746-9929E-mail: [email protected]: www.lifesaving.ca
New Brunswick Branch55 Whiting Road, Unit 34Fredericton, New Brunswick E3B 5Y5Telephone: (506) 455-5762Fax: (506) 450-7946E-mail: [email protected]: www.lifesavingnb.ca
Newfoundland & Labrador BranchP.O. Box 8065, Station “A”St. John’s, Newfoundland A1B 3M9Telephone: (709) 576-1953Fax: (709) 738-1475E-mail: [email protected]: www.lifesavingnl.ca
Nova Scotia Branch5516 Spring Garden Road, 4th FloorHalifax, Nova Scotia B3J 1G6Telephone: (902) 425-5450Fax: (902) 425-5606E-mail: [email protected]: www.lifesavingsociety.ns.ca
Ontario Branch400 Consumers RoadToronto, Ontario M2J 1P8Telephone: (416) 490-8844Fax: (416) 490-8766E-mail: [email protected]: www.lifesavingsociety.com
Prince Edward Island BranchP.O. Box 2411Charlottetown, Prince Edward Island C1A 8C1Telephone: (902) 368-7757Fax: (902) 368-1593E-mail: [email protected]: www.lifesavingpei.ca
Quebec Branch4545 Pierre de Coubertin AvenueP.O. Box 1000, Station “M”Montreal, Quebec H1V 3R2Telephone: (514) 252-3100 or 1-800-265-3093Fax: (514) 254-6232E-mail: [email protected]: www.lifesaving.qc.ca
Saskatchewan Branch2224 Smith StreetRegina, Saskatchewan S4P 2P4Telephone: (306) 780-9255Fax: (306) 780-9498E-mail: [email protected]: www.lifesavingsociety.sk.ca