Embed Size (px)
Citation preview

12/29/2015 Bedienungsanleitung < Service & Zubehör < Volkswagen Deutschland
30/98
If this brake fluid is not available and it is necessary to use another high-quality brake fluid instead, brake fluid that is compliant withDIN ISO 4925 CLASS 4 or US standard FMVSS 116 DOT 4 can be used.
Not all brake fluids that are compliant with DIN ISO 4925 CLASS 4 or US standard FMVSS 116 DOT 4 have the same chemical composition.Some of these brake fluids may contain chemicals that can damage or destroy brake system components over time.
Volkswagen therefore recommends the use of brake fluid that is compliant with VW standard 501 14 to ensure sustained optimal operation of thebrake system.
Brake fluid that is compliant with VW standard 501 14 fulfils the requirements of DIN ISO 4925 CLASS 4 or US standard FMVSS 116 DOT 4.
Brake fluid levelThe brake fluid level must always be between the MIN and MAX marking on the brake fluid container or above the MIN marking → .
The brake fluid level cannot be checked accurately in all models as engine components may partially conceal the brake fluid container. If thebrake fluid level cannot be read exactly, please go to a qualified workshop.
The brake fluid level drops slightly when the vehicle is being used as the brake pads wear and the brakes are automatically adjusted.
Changing the brake fluidThe brake fluid should be changed by a qualified workshop. Volkswagen recommends using a Volkswagen dealership for this purpose. Onlybrake fluid that conforms with the required specification should be used.
Brake failure or reduced braking effect can be caused by the brake fluid level being too low or by brake fluid that is too old or unsuitable.
The brake system and brake fluid level must be checked regularly.
The brake fluid should be changed regularly.
Heavy use of the brakes may cause a vapour lock if the brake fluid is left in the system for too long. Vapour locks reduce levels of brakingpower, considerably increase braking distance and can cause the brake system to fail completely.
Please ensure that the correct brake fluid is used. Only use brake fluid that is explicitly compliant with VW standard 501 14.
Any other brake fluid or a low-quality one can affect the functioning of the brakes and reduce their effectiveness.
If a brake fluid compliant with VW standard 501 14 is not available, use a high-quality brake fluid compliant with DIN ISO 4925 CLASS 4 orthe US standard FMVSS 116 DOT 4, but only in exceptional circumstances.
The refilled brake fluid must be new.
WARNING
Brake fluid is toxic.
In order to reduce the risk of poisoning, never use bottles or other containers to store brake fluid. These containers could encourage otherpeople to drink out of them, even if they are labelled otherwise.
Brake fluid must always be stored in its original sealed container and kept out of the reach of children.
WARNING

12/29/2015 Bedienungsanleitung < Service & Zubehör < Volkswagen Deutschland
31/98
Brake fluid can pollute the environment. Any spilt service fluids must be cleaned up and disposed of properly.
IntroductionThis chapter contains information on the following subjects: → An economic driving style → Driving in a fuel-efficient manner
Fuel consumption, environmental impact and wear on the engine, brakes and tyres depend largely on three factors:
Personal driving style.
Conditions of use, such as weather and road surface.
Technical conditions.
A few simple measures can help save fuel by up to 25%, depending on how you drive.
An economic driving style
First read and observe the introductory information and safety warnings → Introduction
Changing gear earlierIn principle, the highest gear is always the most economical gear. A rule of thumb for most vehicles: at a speed of 30 km/h (19 mph) drive in3rd gear, at 40 km/h (25 mph) in 4th gear and at 50 km/h (31 mph) in 5th gear.
If the traffic and driving situation allows it, skipping gears when changing up a gear will also save fuel.
Do not drive gears to their upper limit. Use first gear only for pulling away then quickly change up to second gear. Avoid using the kickdownfunction in vehicles with an automatic gearbox.
Vehicles with a gear display help to improve fuel economy by indicating the optimum time to change gear.
Rolling to a stopTaking your foot off the accelerator will interrupt the supply of fuel to the engine and decrease fuel consumption.
Therefore, in situations such as approaching a red traffic light, let the vehicle roll without applying the accelerator. Only press on the clutch pedalto disengage if the vehicle becomes too slow or if the stopping distance is longer. The engine will then run at idling speed.
Brake fluid that has leaked or been spilt can damage the vehicle paintwork, plastic parts and tyres. Brake fluid that has leaked or been spiltshould be cleaned off the vehicle paintwork and other components immediately.
NOTICE
Driving with respect for the environment
Adapt your speed and distance from the vehicles ahead to suit visibility, weather, road and traffic conditions.
WARNING

12/29/2015 Bedienungsanleitung < Service & Zubehör < Volkswagen Deutschland
32/98
Switch off the engine in situations when the vehicle might be stationary for a long time, e.g. at a level crossing. In vehicles with an activestart/stop system, the engine will switch off automatically when the vehicle is stationary.
Thinking ahead when driving, and driving with the flow of trafficApplying the brake and accelerator too often will significantly increase fuel consumption. By thinking ahead when driving and by maintaining asufficient distance from the vehicle in front, simply keeping your foot off the accelerator will stop the speed from fluctuating. This means thatactive braking and accelerating is not always necessary.
Driving smoothly and evenlySmoothness is even more important than speed. The more evenly you drive, the lower your fuel consumption will be.
When driving on a motorway, it is much more effective to drive at a constant moderate speed than to drive with constant acceleration andbraking. As a rule, driving with a constant style will get you to your destination just as quickly.
The cruise control system will help you to maintain a constant driving style.
Active cylinder management (ACT®)
Depending on the vehicle equipment level, the vehicle may have active cylinder management (ACT®).
Active cylinder management (ACT®) can automatically deactivate individual engine cylinders in driving situations that require low powerconsumption. When a cylinder is deactivated, no fuel is injected into that cylinder, which can lead to an overall reduction in fuel consumption. Thenumber of active cylinders can be shown on the instrument cluster display → Instruments .
Using additional equipment in moderationIt is always important to be comfortable in your vehicle, but it is also important to consider the environment.
Some equipment will increase fuel consumption when switched on:
The cooling function of the air conditioning system: if the air conditioning system is set to a very high or low temperature it will require a lot ofenergy, which is generated by the engine. Therefore the temperature setting in the vehicle should not vary too much from the outsidetemperature. It may be a good idea to air the vehicle before setting off and then to travel a short distance with the windows open. The airconditioning system should then be switched on once the windows have been closed.
Keep the windows closed when driving at high speeds. Having the windows open increases fuel consumption.
Switch the seat heating off as soon as it has served its purpose.
Switch the rear window heating off as soon as the rear window has defogged and is clear of ice.
Other factors that increase fuel consumption (examples):Fault in engine management.
Driving in hilly regions.
Driving with a trailer.
Driving in a fuel-efficient manner

12/29/2015 Bedienungsanleitung < Service & Zubehör < Volkswagen Deutschland
33/98
Fig. 126 Fuel consumption in litres per 100 km at two different outside temperatures
First read and observe the introductory information and safety warnings → Introduction
By adopting an economical driving style and anticipating the traffic situation ahead, you can easily reduce fuel consumption by 10-15%.
Cars use most fuel when accelerating. If you think ahead when driving, you will need to brake less and thus accelerate less. Wherever possible,let the car roll slowly to a stop, for instance when you can see that the next traffic lights are red.
Avoid short journeysDirectly after a cold start, the engine has a very high fuel consumption. The engine reaches its working temperature after a few kilometres, whenfuel consumption will return to a normal level.
The engine and catalytic converter need to reach their proper working temperature in order to minimise fuel consumption and emissions. Theoutside temperature is a key factor.
The different rates of fuel consumption for the same distance at both +20°C (+68°F) and at -10°C (+14°F) are shown in → Fig. 126 .
Therefore, avoid making too many short journeys and car share whenever possible.
Under the same conditions, the vehicle will use more fuel in winter than in summer.
Not only is it illegal in some countries to warm up the cold engine by running it while the vehicle is stationary, it is also technically unnecessaryand a waste of fuel.
Adjust the tyre pressureThe correct tyre pressure reduces rolling resistance and therefore also fuel consumption.
Make sure that any new tyres purchased have optimum rolling resistance.
Using low viscosity engine oilsFully synthetic low viscosity engine oils reduce fuel consumption. Low viscosity engine oils decrease frictional resistance in the engine andspread better and more quickly, especially for cold starts. They are especially effective in vehicles that make a lot of short journeys.
Always ensure that the engine oil level is correct and that you keep to the service intervals (oil change intervals).
When buying engine oil, always ensure that it complies with engine oil norms and has been approved by Volkswagen.

12/29/2015 Bedienungsanleitung < Service & Zubehör < Volkswagen Deutschland
34/98
Avoid unnecessary loadsLighter vehicles are more economical and have lower environmental impact. An extra 100 kg, for example, can increase fuel consumption by upto 0.3 l/100km.
Remove all unnecessary objects and loads from the vehicle.
Remove any unnecessary special equipment and accessoriesThe more aerodynamic a vehicle, the lower its fuel consumption. Special equipment and accessories, such as roof carriers or bicycle carriers,make the vehicle less aerodynamic.
You should therefore remove any special equipment and luggage carriers that are not in use, especially if you are going to be driving at highspeeds.
IntroductionThis chapter contains information on the following subjects: → Warning and indicator lamps → Information on steering
The power steering is not hydraulic. It is an electromechanical system. The advantage of this steering system is that no hydraulic hoses,hydraulic oil, pumps, filter or other parts are required. The electromechanical system reduces fuel consumption. A hydraulic system requiresconstant oil pressure in the system, whereas an electromechanical steering system only needs an energy supply while steering.
The power steering provided by the electromechanical steering system automatically adjusts to the vehicle speed, steering wheel torque andsteering wheel angle. The electromechanical steering only functions when the engine is running.
Additional information and warnings:Starting and stopping the engine → Starting and stopping the engine
Battery → Vehicle battery
Tow-starting and towing → Tow-starting and towing
Warning and indicator lamps
First read and observe the introductory information and safety warnings → Introduction
Lit up Possible cause Action
Steering
The steering wheel is very difficult to turn if the steering assistance is not working. This can have a serious impact on your driving safety.
The power steering only functions when the engine is running.
Never allow the vehicle to roll if the engine is switched off.
Never remove the vehicle key from the ignition lock when the vehicle is in motion. The steering lock may be activated and you will no longerbe able to steer the vehicle.
WARNING

12/29/2015 Bedienungsanleitung < Service & Zubehör < Volkswagen Deutschland
35/98
Lit up Possible cause Action
Electromechanical steering not functioning.The steering should be checked by a qualified workshop as soonas possible.
Electromechanical steering function reduced.
The steering should be checked by a qualified workshop as soonas possible. If the yellow warning lamp remains off after the ignition has beenrestarted and you have driven a short distance, you do not need toconsult a qualified workshop.
The vehicle battery has been disconnected andreconnected.
Drive a short distance at a speed of 15 – 20 km/h (9 – 12 mph).
Flashes Possible cause Action
Steering column twisted. Turn the steering wheel back and forth.
Steering column is not unlocked/locked.
Switch the ignition off and then on again. Follow any messagesthat are on the instrument cluster display. Do not drive on if the steering column remains locked when theignition is switched on. Seek expert assistance.
Several warning and indicator lamps will light up briefly as a functional check when the ignition is switched on. They will go out after a fewseconds.
Information on steering
First read and observe the introductory information and safety warnings → Introduction
The steering should be locked every time you leave the vehicle to make it more difficult for the vehicle to be stolen.
Mechanical steering column lockThe steering column is locked if the vehicle key is removed from the ignition lock when the vehicle is stationary.
Activating the steering lock Deactivating the steering lock
Park the vehicle → Braking, stopping and parking .Turn the steering wheel slightly to take the load off the steering lockmechanism.
Remove the vehicle key. Insert the vehicle key into the ignition lock.
Hold the steering wheel in this position and turn the ignition on.
Failure to observe illuminated warning lamps and text messages can lead to your vehicle breaking down in traffic, and can cause accident andserious injury.
Never ignore any illuminated warning lamps or text messages.
Stop the vehicle as soon as possible and when safe to do so.
WARNING
Failure to observe illuminated indicator lamps and text messages can lead to your vehicle being damaged.
NOTICE

12/29/2015 Bedienungsanleitung < Service & Zubehör < Volkswagen Deutschland
36/98
Turn the steering wheel slightly until the steering lock clicks into place.
Electromechanical steeringThe power steering provided by the electromechanical steering system automatically adjusts to the vehicle speed, steering wheel torque andsteering wheel angle. The electromechanical steering only functions when the engine is running.
You will need considerably more strength than normal to steer the vehicle if the power steering is reduced or has failed completely.
Counter steering assistanceCounter steering assistance provides the driver with power steering in critical driving situations. Additional steering power helps the driver whencounter steering → .
Progressive steeringDepending on the vehicle equipment level, progressive steering can adjust the force of the steering movement in a driving situation. Progressivesteering only functions when the engine is running.
In urban traffic, less steering input is required when parking, manoeuvering, or turning sharply.
When driving on country roads or on the motorway, the progressive steering provides a more sporty, direct steering response, and a dynamicfeel.
IntroductionThis chapter contains information on the following subjects: → Indicator lamps → Start/stop system → Hill Hold Assist
Additional information and warnings:Volkswagen information system → Volkswagen information system
Infotainment system → Infotainment system
Braking, stopping and parking → Braking, stopping and parking
Battery → Vehicle battery
Wheels and tyres → Wheels and tyres
Accessories, modifications, repairs and renewal of parts → Accessories, modifications, repairs and renewal of parts
Jump starting → Jump starting
In conjunction with the ESC, counter steering assistance provides the driver with assistance when steering in critical driving situations. Thedriver must steer the vehicle at all times. Counter steering assistance does not steer the vehicle.
WARNING
Driver assist systemsPull-away assist systems
12/29/2015 Bedienungsanleitung < Service & Zubehör < Volkswagen Deutschland
37/98
Indicator lamps
First read and observe the introductory information and safety warnings → Introduction
Lit up Possible cause Action
The start/stop system is available. The engine is switchedoff automatically.
Take your foot off the brake to start the engine again → Start/stopsystem .
It is not possible for the start/stop system to switch theengine on or off automatically. OR: the engine was restarted automatically.
Check whether all technical requirements have been fulfilled. Ifnot, remedy any shortfalls → Start/stop system .
The engine is starting. –
Several warning and indicator lamps will light up briefly as a functional check when the ignition is switched on. They will go out after a fewseconds.
Start/stop system
The intelligent technology used in the pull-away assist systems cannot overcome the laws of physics, and functions only within the limits of thesystem. Never let the extra convenience afforded by pull-away assist systems tempt you into taking any risks when driving – this can causeaccidents.
Unintentional vehicle movements can cause serious injury.
The pull-away assist systems cannot replace the driver’s full concentration.
Always adapt your speed and driving style to suit visibility, weather, road and traffic conditions.
A pull-away assist system cannot hold the vehicle in all hill start situations or brake it sufficiently on all slopes going downhill (e.g. if theground is slippery or icy).
WARNING
Failure to observe illuminated warning lamps and text messages can lead to your vehicle breaking down in traffic, and can cause accident andserious injury.
Never ignore any illuminated warning lamps or text messages.
Stop the vehicle as soon as possible and when safe to do so.
WARNING
Failure to observe illuminated indicator lamps and text messages can lead to your vehicle being damaged.
NOTICE

12/29/2015 Bedienungsanleitung < Service & Zubehör < Volkswagen Deutschland
38/98
Fig. 127 In the upper part of the centre console: button for the start/stop system
First read and observe the introductory information and safety warnings → Introduction
If the start/stop system is activated, the engine will be switched off automatically when the vehicle is stationary. When required, the enginerestarts automatically.
The function is automatically activated every time the ignition is switched on. The instrument cluster display will show information about thecurrent status.
You can find additional information on the start/stop mode by pressing the button in the Vehicle status menu in the infotainmentsystem.
Always switch off the start/stop system manually when driving through water.
Vehicles with a manual gearboxWhen the vehicle is stationary, disengage the gear and release the clutch pedal. The engine is stopped.
Depress the clutch pedal to restart the engine.
Vehicles with an automatic gearboxWhen the vehicle is stationary, press and hold the brake pedal. The engine is stopped.
Take your foot off the brake pedal, or depress the accelerator, to restart the engine.
Important preconditions for automatic engine switch-offThe driver is wearing their seat belt.
The driver door is closed.
The bonnet is closed.
The factory-fitted towing bracket is not attached electrically to a trailer.
A minimum engine temperature has been reached.
The vehicle has been moved since the engine was last switched off.
For vehicles with Climatronic: the temperature inside the vehicle is within the pre-set temperature range.
For vehicles with Climatronic: neither a very high nor a very low temperature has been set.
The defrost function of the air conditioning system is not switched on.
The charging state of the vehicle battery is sufficient.
The temperature of the vehicle battery is not too low or too high.
The vehicle is not on a steep incline.

12/29/2015 Bedienungsanleitung < Service & Zubehör < Volkswagen Deutschland
39/98
For vehicles with an automatic gearbox: the front wheels are not angled too sharply.
Reverse gear is not engaged.
When the conditions for automatic engine switch-off are only fulfilled when the vehicle is stationary, the engine can also switch off subsequently:
When the driver creates the required conditions by performing an action, e.g. by switching off the defrost function.
If the button in the upper section of the centre console is pressed twice → Fig. 127 .
When selector lever position P is selected in vehicles with an automatic gearbox.
Conditions for an automatic restartThe engine can start automatically under the following conditions:
In vehicles with a manual gearbox: the clutch pedal is released.
In vehicles with an automatic gearbox: the brake pedal is depressed.
If the temperature inside the vehicle substantially increases or decreases.
If the vehicle rolls on.
If the voltage of the vehicle battery falls.
If the steering wheel is moved.
Conditions that make a key start necessaryThe engine has to be started manually with the vehicle key in the following conditions:
If the driver unfastens their seat belt.
If the driver door is opened.
If the bonnet is opened.
Activating and deactivating the start/stop system manually
Press button in the upper part of the centre console → Fig. 127 .
If the start/stop system has been deactivated, the indicator lamp in the button lights up.
The engine will start if the vehicle is in stop mode when the system is deactivated manually.
In some cases, it will be necessary to restart the engine manually with the vehicle key. Follow any corresponding messages on the
The brake servo and the electromechanical steering will not function if the engine is switched off.
Never allow the vehicle to roll if the engine is switched off.
The start/stop system must be switched off if work is to be carried out in the engine compartment.
WARNING
If the start/stop system is used in very high outside temperatures over a long period, the vehicle battery can be damaged.
NOTICE
12/29/2015 Bedienungsanleitung < Service & Zubehör < Volkswagen Deutschland
40/98
instrument cluster display.
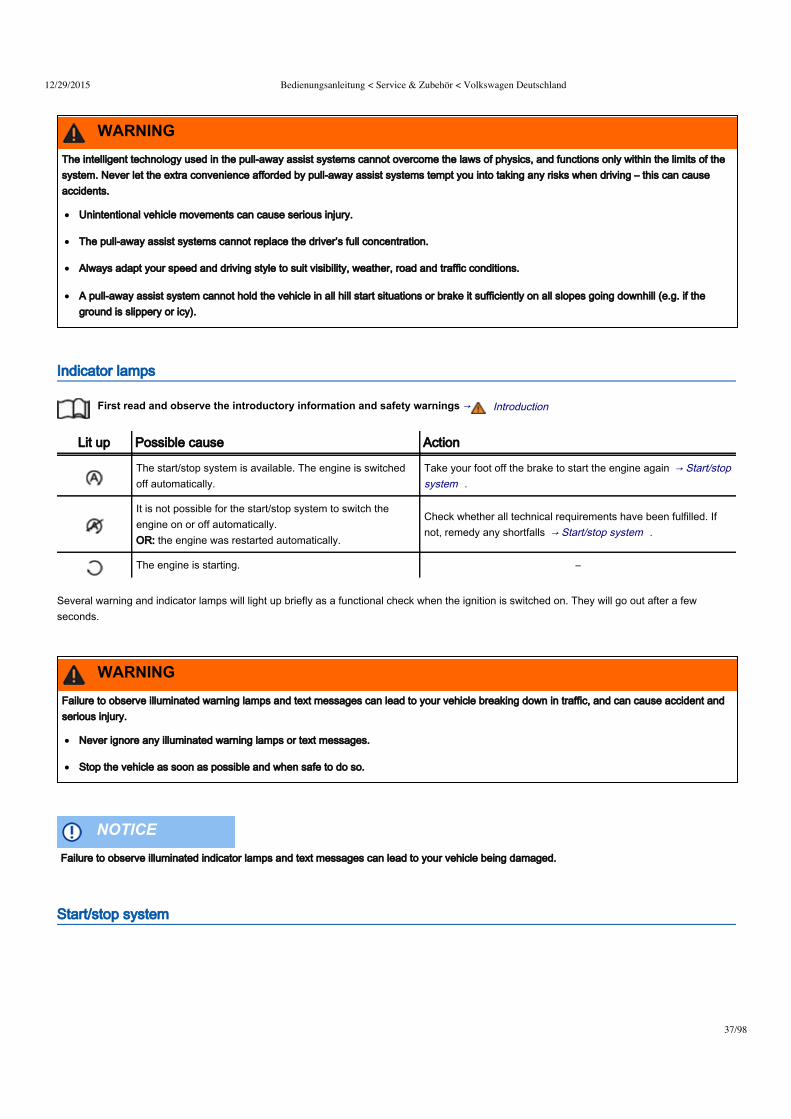
Hill Hold Assist
First read and observe the introductory information and safety warnings → Introduction
The Hill Hold Assist function actively holds the vehicle when pulling away on an incline.
The Hill Hold Assist function is automatically activated if the following conditions are met
Conditions 1 to 3 must be met at the same time: Manual gearbox Automatic gearbox
1. On an incline, the stationary vehicle must be held in position with the footbrake until the vehicle starts moving.
2. The engine is running smoothly.
3.Fully depress the clutch pedal and move the gear stick to the firstgear position if you want to drive forwards up a hill or to the Rposition if you want to reverse up a hill.
The driving mode R, D or S has been selected.
In order to start moving, remove your foot from the brake pedal,then release the clutch pedal (clutch engages) and press theaccelerator simultaneously. The brake will gradually be released asthe clutch is engaged. If the accelerator is not immediatelydepressed, the brake disengages autonomously after a fewseconds.
To start moving, remove your foot from the brake pedal and pressthe accelerator immediately. The brake will gradually be releasedas the vehicle pulls away.
The Hill Hold Assist function will be deactivated immediately:As soon as one of the conditions indicated on → The Hill Hold Assist function is automatically activated if the following conditions are met isnot fulfilled.
If the driver door is opened.
If the engine is not running smoothly or there is an engine fault.
If the engine is switched off or has stalled.
Vehicles with automatic gearbox: if the selector lever in is the neutral position N.
IntroductionThis chapter contains information on the following subjects: → Operating ParkPilot → ParkPilot signal tones and displays → ParkPilot menu → Vehicle path display → Towing a trailer
The ParkPilot assists the driver when manoeuvring and parking.
The ultrasound sensors in the bumpers transmit and receive ultrasound waves. The electronic system uses the ultrasound waves (i.e.transmission, reflection from the obstacle and reception) to calculate the distance between the bumper and the obstacle.
ParkPilot

12/29/2015 Bedienungsanleitung < Service & Zubehör < Volkswagen Deutschland
41/98
Additional information and warnings:Exterior views → Exterior views
Infotainment system → Infotainment system
Braking, stopping and parking → Braking, stopping and parking
Reversing camera (Rear View) → Reversing camera (Rear View)
Cleaning and caring for the vehicle exterior → Caring for and cleaning the vehicle exterior
Accessories, modifications, repairs and renewal of parts → Accessories, modifications, repairs and renewal of parts
The ParkPilot technology cannot overcome the laws of physics, and functions only within the limits of the system. The ParkPilot cannot replacethe full concentration of the driver.
Unintentional vehicle movements can cause serious injury.
Always adapt your speed and driving style to suit visibility, weather, road and traffic conditions.
Ultrasound sensors have blind spots in which obstacles and people cannot be detected.
Always check the area around the vehicle as the ultrasound sensors will not always detect infants, animals and objects.
Certain surfaces of objects and clothes cannot reflect the signals from the ultrasound sensors. The system is unable to detect these objectsor people wearing this type of clothing, or they may be detected incorrectly.
External sources of sound can affect the signals of the ultrasound sensors. This may prevent the system from recognising people or objects.
WARNING
Automatic activation of the ParkPilot only occurs at very low speeds. An inappropriate driving style can cause accidents and serious injuries.
Always bear in mind the time delay between the signals.
WARNING
12/29/2015 Bedienungsanleitung < Service & Zubehör < Volkswagen Deutschland
42/98
If an ultrasound sensor fails, the corresponding area of the ultrasound sensor cluster is switched off and cannot be reactivated until the
fault has been rectified. Consult a qualified workshop in the event of a system fault. Volkswagen recommends using a Volkswagen dealership forthis purpose. The steering input will no longer determine the display and signal tones which are displayed or given and the vehicle path displaywill disappear.
Any fault in the ParkPilot will be indicated by a tone lasting approximately 3 seconds when first switched on, and by the indicator lamp
flashing in the button.
Volkswagen recommends that drivers practise using the ParkPilot in a traffic-calmed area or car park to allow them to familiarise
themselves with the system and its functions.
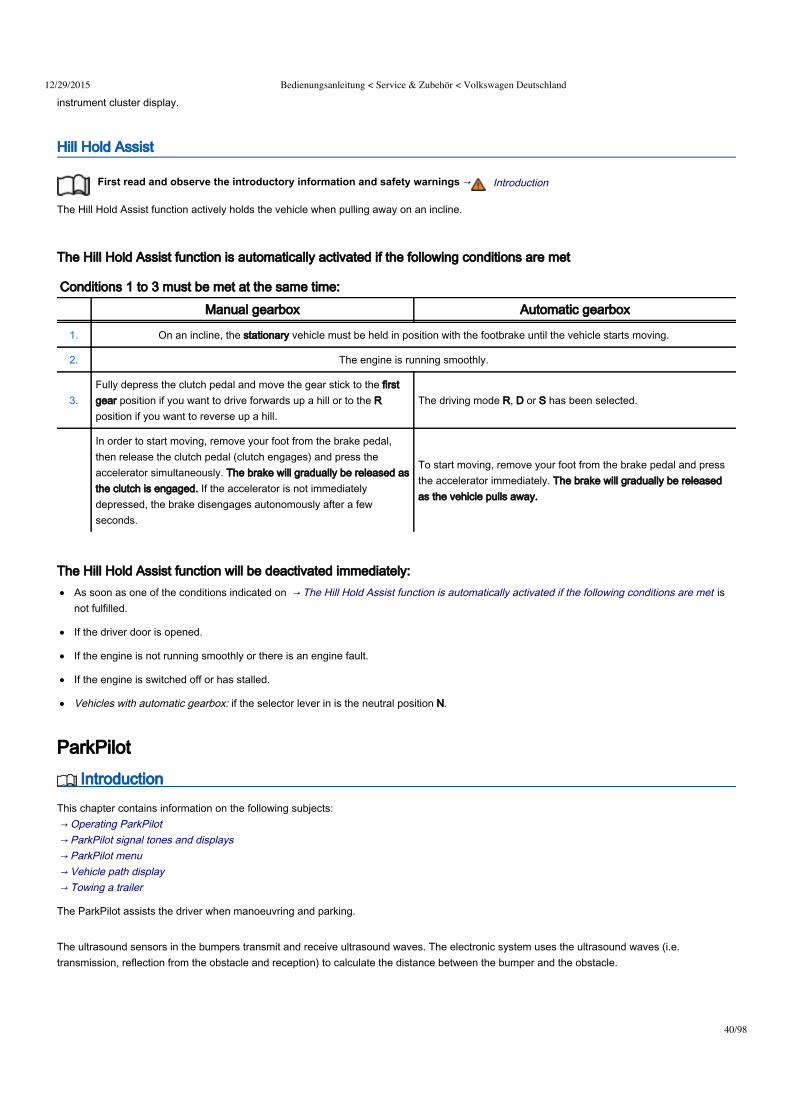
Operating ParkPilot
Fig. 128 In the front and rear bumpers: ParkPilot ultrasound sensors
Various factors can negatively impact the ParkPilot functions or lead to damage to the vehicle and objects in the area surrounding the vehicle.
The ultrasound sensors may not always be able to detect objects such as trailer drawbars, thin bars, fences, posts, trees and open oropening tailgates. This can result in damage to your vehicle.
If the ParkPilot has detected an obstacle and issued a warning, the obstacle may move out of the detection range of the ultrasound sensorsas the vehicle approaches it, particularly if the object is very high or very low. These objects are no longer registered.
The vehicle can sustain considerable damage if the warning given by the ParkPilot is ignored.
The ultrasound sensors can be displaced or damaged through impacts, e.g. when parking.
The ultrasound sensors must be kept clean and free of ice and snow, and must not be covered up by stickers or other objects, as this willprevent the system from working properly.
The ultrasound sensors should only be sprayed briefly when cleaning with pressure hoses and steam cleaners. A distance of more than10 cm between the ultrasound sensors and the steam/hose nozzle must be observed.
Sources of noise can lead to errors in the ParkPilot system, e.g. rough asphalt, cobblestones, induction loops, building equipment, orinterference from other vehicles.
In some cases water and ice on the ultrasound sensors could be registered as an obstruction.
Any equipment that has been retrofitted to the vehicle, e.g. bicycle carriers, can prevent the ParkPilot from functioning properly.
NOTICE

12/29/2015 Bedienungsanleitung < Service & Zubehör < Volkswagen Deutschland
43/98
Fig. 129 In the upper section of the centre console: button for switching the ParkPilot on and off
First read and observe the introductory information and safety warnings → Introduction
The ParkPilot uses ultrasound sensors to determine the distance from the front or rear bumpers to an obstacle. There are 4 ultrasound sensorsfor the ParkPilot located in both the front A and rear B bumpers → Fig. 128 (arrows).
The intermittent tones and the steady signal tones given by the front ParkPilot are as standard of a higher pitch than those given by the rearParkPilot.
The warning signals can be adjusted in the infotainment system menu → ParkPilot menu .
Switching ParkPilot on and off
Function What to do when the ignition is switched on
Switching on the ParkPilot manually Press the button once.
Switching off the ParkPilot manually Press the button again.
Switching off the ParkPilot displaymanually (sound output remainsactive)
Press a function selection button on the factory-fitted infotainment system.
OR: touch the X function button.
Switching on the ParkPilotautomatically
Select reverse gear or move the selector lever to position R.
OR: with some equipment levels, slowly drive forward at a speed lower than 10 – 15 km/h (6 – 9 mph).The obstacle is detected at a distance of approximately 95 cm when automatic activation is switched onin the infotainment system. A miniature view will be displayed.
Switching off the ParkPilotautomatically
Move the selector lever to position P.
OR: accelerate forwards to a speed greater than approximately 10 – 15 km/h (6 – 9 mph).
Temporarily muting ParkPilot With some equipment levels, touch the function button.
Changing from the miniature view tofull-screen:
Select reverse gear or move the selector lever to position R.
OR: touch the miniature view function button.
Switching to the reversing camerapicture as required:
Select reverse gear or move the selector lever to position R.
OR: touch the function button.
The indicator lamp in the button → Fig. 129 lights up while the function is active.
Automatic activationDepending on the equipment level, a miniature view will appear on the left-hand side of the screen when the ParkPilot is activated automatically
→ Fig. 131 .

12/29/2015 Bedienungsanleitung < Service & Zubehör < Volkswagen Deutschland
44/98
→ Fig. 131 .
Automatic activation of the ParkPilot when driving slowly towards an obstacle located in front of the vehicle only works when the speed falls
below approximately 10 – 15 km/h (6 – 9 mph) for the first time. If the ParkPilot was switched off using the button, performing one of thefollowing actions with the ignition switched on can automatically reactivate the ParkPilot:
If the vehicle is accelerated to a speed greater than 10 – 15 km/h (6 – 9 mph) and then drops below that speed again.
OR: if the selector lever is moved to position P and then out of that position again.
OR: if automatic activation is activated and deactivated in the infotainment system menu.
Automatic activation with the miniature view can be activated and deactivated in the infotainment system menu → ParkPilot menu .
When automatic activation is activated, signal tones are sounded from a distance of approximately 50 cm from the obstacle.
ParkPilot signal tones and displays
Fig. 130 ParkPilot display in the front and rear view
Fig. 131 Miniature view display in the front and rear view
First read and observe the introductory information and safety warnings → Introduction
Key to elements in the colour display: → Fig. 130 and → Fig. 131 Meaning
Monitored area behind the vehicle
Failure to observe the illuminated text messages can lead to the vehicle being damaged.
NOTICE

12/29/2015 Bedienungsanleitung < Service & Zubehör < Volkswagen Deutschland
45/98
Scanned area in front of the vehicle.
System fault in the scanned area.
The yellow segment represents an obstacle in the vehicle’s path.
Red segment depicts an obstacle close to the vehicle.
The grey segment represents an obstacle outside of the vehicle's path.
With some equipment levels, the areas to the front and rear of the vehicle that are scanned by ultrasound sensors are shown on the screen of thefactory-fitted infotainment system when switched on → Fig. 130 . The positions of potential obstacles are displayed relative to the vehicle → .
Signal tonesWhen the vehicle approaches an obstacle located in the range of the ultrasound sensors signal tones are given. An intermittent signal tone isgiven if a sufficiently short distance between the vehicle and an obstacle is detected. The shorter the distance, the shorter the intervals. Thesignal tone will sound continuously if the obstacle is very close.
When there is an imminent risk of collision at the front area of the vehicle, the signal tones are sounded at the front. When there is a risk ofimminent collision at the rear area of the vehicle, the signals tones are sounded at the rear.
If you continue to drive the vehicle closer to the obstacle despite the continuous signal tone, the system will no longer be able to measure thedistance.
The intermittent signal tone will become quieter after a few seconds if the distance remains the same. The volume will remain constant if thesignal tone is continuous. The intermittent signal tone switches off automatically as soon as the vehicle moves away from an obstacle again. Ifthe vehicle moves towards an obstruction again, the intermittent signal tones are given automatically.
DisplayWith some equipment levels,the graphic on the screen displays the scanned areas in several segments. The closer the vehicle drives towards anobstacle, the closer the segment will move to the vehicle in the display. The collision area has been reached when the penultimate segment isdisplayed, if not before. Do not drive on!
The yellow segments turn grey if an obstacle ends up outside of the vehicle's path due to a steering input.
Vehicles with ParkPilot at the front and rearArea of the vehicle Distance of the vehicle from
an obstacleSignal tone Segment colour when obstacle is
detectedMonochrome
displayColour display
Rear centre
Obstacle notin the
vehicle’spath
approx. 31 – 160 cm
– Dark grey GreyRear side approx. 31 – 60 cm
Front centre approx. 31 – 120 cm
Front side approx. 31 – 60 cm
Rear centre
Obstacle inthe vehicle’s
path
approx. 31 – 160 cm
Intermittent tone Light grey YellowRear side approx. 31 – 60 cm
Front centre approx. 31 – 120 cm
Front side approx. 31 – 60 cm
Obstacle outside of the collision approx. 0 – 30 cm Intermittent tone White Red

12/29/2015 Bedienungsanleitung < Service & Zubehör < Volkswagen Deutschland
46/98
areaa)
Obstacle in the collision areaa) approx. 0 – 30 cm Constant tone White Red
It can take a few seconds before the area scanned by the sensors is displayed on the screen of the factory-fitted infotainment system.
a) The distance range for the constant tone to the rear of the vehicle is slightly larger for vehicles with a factory-fitted towing bracket.
ParkPilot menu
First read and observe the introductory information and safety warnings → Introduction
ParkPilot settings in the infotainment system menuSwitch on ignition.
If necessary, switch on the infotainment system.
Press the button.
Touch the function button.
Touch the Parking and manoeuvering function button.
Select the required settings in the ParkPilot menu.
Function button: action
ParkPilot aktive : if the checkbox in the function button is unticked , the ParkPilot will be switched off until the ignition is switched
off. The function Activate automatically cannot be excluded.
Activate automatically : if the checkbox in the function button is ticked , the miniature view will be switched on automatically when
you approach an obstacle to the front of the vehicle slowly. Touch Activate automatically again to switch off this function. Afterdeactivation, the ParkPilot will not be activated automatically when the vehicle approaches an obstacle located to the front.
Front volume : different volumes can be set separately for the signal tones for the front by touching the - or + function buttons, or byadjusting the control.
Front tone setting : different pitches can be set for the signal tones for the front by touching the - or + function buttons, or byadjusting the control.
Rear volume : different volumes can be set for the signal tones for the rear by touching the - or + function buttons, or by adjusting
Do not allow the images shown on the screen to distract you from the traffic around you.
WARNING
Failure to observe the illuminated text messages can lead to the vehicle being damaged.
NOTICE

12/29/2015 Bedienungsanleitung < Service & Zubehör < Volkswagen Deutschland
47/98
the control.
Rear tone setting : different pitches can be set for the signal tones for the rear by touching the - or + function buttons, or byadjusting the control.
Audio lowering : setting the level to which the infotainment system volume should be reduced when the ParkPilot is active.
Off: the volume in the infotainment system is not reduced.
Low: the volume in the infotainment system is reduced slightly.
Medium: the volume in the infotainment system is reduced to medium.
High: the volume in the infotainment system is reduced to a minimum.
Muting the ParkPilot signal tones
With some equipment levels, you can mute the signal tones from the ParkPilot by touching the function button on the infotainment systemscreen. Touch the function button again to switch the signal tone back on.
The mute setting will be cancelled if the ParkPilot system is switched off and on again. Error warnings cannot be switched off.
If the ParkPilot display has been switched off manually and ParkPilot remains active, the mute setting is also cancelled.
The mute setting is active if the ParkPilot was switched on using the button with the selector lever in position P.
Vehicle path display
Fig. 132 ParkPilot screen displays: vehicle path displays without steering input
Fig. 133 ParkPilot screen displays: vehicle path displays with steering input
First read and observe the introductory information and safety warnings → Introduction
Depending on the equipment and the market, the vehicle path may not be displayed on the infotainment system screen.

12/29/2015 Bedienungsanleitung < Service & Zubehör < Volkswagen Deutschland
48/98
Key to main elements in the colour display (depending on equipment)> → Fig. 132 and → Fig. 133 Meaning
Vehicle path display.
The yellow segment represents an obstacle in the vehicle’s path.
Red segment represents an obstacle close to the vehicle.
The grey segment represents an obstacle outside of the vehicle's path.
Vehicle path display
Function What to do when the ignition is switched on
Front vehicle pathdisplay
Forward gear engaged.
OR: move the gear lever to neutral, or move the selector lever to N.
OR: depending on the vehicle equipment level, roll forwards.
Rear vehicle pathdisplay
Select reverse gear or move the selector lever to position R.
OR: depending on the vehicle equipment level, roll backwards.
The vehicle path display changes in relation to the steering input. Obstacles that are located in the vehicle's path during a steering input aredisplayed in yellow and red segments.
Obstacles that are no longer in the vehicle's path after a steering input are displayed as follows:
The segments are shown in red when the distance to an obstacle is less than approximately 30 cm.
The segments are shown in grey when the distance to an obstacle is greater than approximately 30 cm.
When the selector lever is in position P and the ParkPilot is activated all segments representing an obstacle are displayed in grey and the vehiclepath display is hidden.
Towing a trailerThe vehicle path display is not shown when towing a trailer.
Towing a trailer
If an ultrasound sensor fails, the vehicle path display is switched off and cannot be reactivated until the fault has been rectified.
The steering wheel angle will no longer determine the segments displayed and the signal tones given.
NOTICE

12/29/2015 Bedienungsanleitung < Service & Zubehör < Volkswagen Deutschland
49/98
Fig. 134 ParkPilot screen display when towing a trailer
First read and observe the introductory information and safety warnings → Introduction
With some equipment levels, only the scanned area to the front of the vehicle is shown on the infotainment system screen in vehicles with afactory-fitted towing bracket and a trailer with an electrical connection to the vehicle → Fig. 134 .
The distances for the rear of the vehicle are not displayed on the infotainment system screen, nor are they indicated by signal tones.
IntroductionThis chapter contains information on the following subjects: → General information → Camera → Operating the reversing camera → Parking
A camera in the tailgate → Fig. 135 helps the driver when reverse parking or manoeuvring the vehicle. The camera picture and the orientationlines projected by the system are displayed on the screen of the factory-fitted infotainment system.
The functions and displays of the reversing camera may differ between vehicles, depending on whether or not they are fitted with ParkPilot.
Additional information and warnings:Exterior views → Exterior views
Infotainment system → Infotainment system
ParkPilot → ParkPilot
Accessories, modifications, repairs and renewal of parts → Accessories, modifications, repairs and renewal of parts
Reversing camera (Rear View)
12/29/2015 Bedienungsanleitung < Service & Zubehör < Volkswagen Deutschland
50/98
The camera must give a clear and accurate image, i.e. there must be good visibility and the camera lens must be clean .
There must be a clear and unobstructed view of the area behind the vehicle.
The rear of the vehicle must not be heavily loaded.
General information
First read and observe the introductory information and safety warnings → Introduction
Requirements for parking and manoeuvring while using the reversing camera
Checklist
Using the reversing camera to estimate the distance from obstacles (people, vehicles etc.) is inaccurate and could cause accidents and severeinjuries.
The camera lens enlarges and distorts the field of vision and the objects on the screen will not be depicted as precisely and accurately asthey are in reality.
Certain objects, for example narrow posts or railings, may be difficult or impossible to see on the screen because of its low resolution orpoor light conditions.
The reversing camera has blind spots within which obstacles and people cannot be detected.
Keep the camera lens clean, free of snow and ice and do not cover it.
WARNING
The reversing camera technology cannot overcome the laws of physics, and functions only within the limits of the system. Always take carewhen using the reversing camera; otherwise you could cause accidents or injuries. The system is not a substitute for the full concentration ofthe driver.
Always adapt your speed and driving style to suit visibility, weather, road and traffic conditions.
Keep looking in the direction in which you are parking and at the relevant area surrounding the vehicle. The front of the vehicle swings outmore than the rear of the vehicle.
Do not allow the images shown on the screen to distract you from the traffic around you.
Always monitor the area around the vehicle as small children, animals and objects will not always be detected by the reversing camera.
The reversing camera may not be able to display all areas clearly.
The reversing camera should only be used when the tailgate is fully closed.
WARNING
The reversing camera shows only two-dimensional images on the screen. The lack of depth of field means that potholes and protrudingobjects on the ground may only be detected with difficulty, or may not be detected at all.
The reversing camera may not always be able to detect objects such as thin rails, fences, posts, trees etc. This could result in damage toyour vehicle.
NOTICE
12/29/2015 Bedienungsanleitung < Service & Zubehör < Volkswagen Deutschland
51/98
The driver must be familiar with the system.
The vehicle must be undamaged. The system must be checked by a qualified workshop if the position or angle of the camera haschanged, e.g. following a rear impact.
Volkswagen recommends that you practise parking and manoeuvring with the reversing camera in a traffic-calmed area or car park with goodvisibility and weather conditions, so that you can familiarise yourself with the system, orientation lines and their functions in a safe environment.
Reversing camera settings
Various settings, including brightness, contrast and colour, can be adjusted by touching the relevant function buttons - or + , or by movingthe corresponding slider.
Stop the vehicle in a safe place.
Apply the handbrake firmly.
Switch on ignition.
If necessary, switch on the infotainment system.
Select reverse gear or move the selector lever to position R.
Touch the function button.
Select the required settings in the menu.
Camera
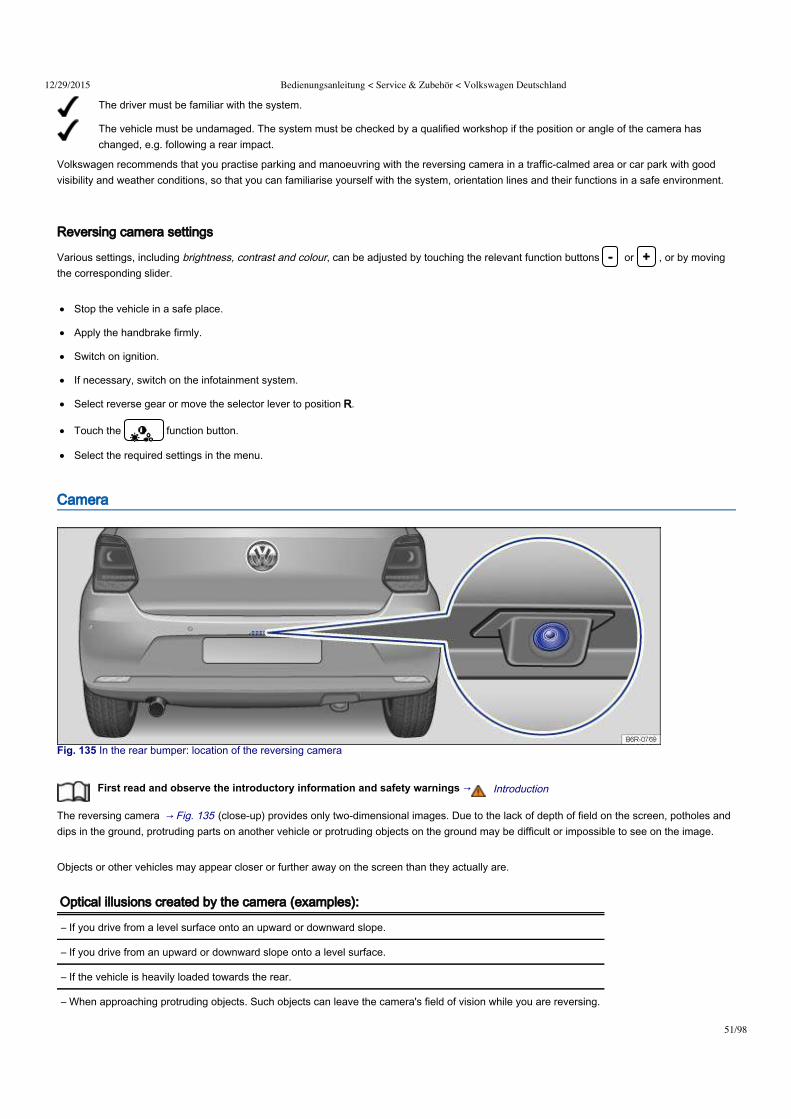
Fig. 135 In the rear bumper: location of the reversing camera
First read and observe the introductory information and safety warnings → Introduction
The reversing camera → Fig. 135 (close-up) provides only two-dimensional images. Due to the lack of depth of field on the screen, potholes anddips in the ground, protruding parts on another vehicle or protruding objects on the ground may be difficult or impossible to see on the image.
Objects or other vehicles may appear closer or further away on the screen than they actually are.
Optical illusions created by the camera (examples):
– If you drive from a level surface onto an upward or downward slope.
– If you drive from an upward or downward slope onto a level surface.
– If the vehicle is heavily loaded towards the rear.
– When approaching protruding objects. Such objects can leave the camera's field of vision while you are reversing.

12/29/2015 Bedienungsanleitung < Service & Zubehör < Volkswagen Deutschland
52/98
Cleaning the camera lensKeep the camera lens → Fig. 135 (close-up) clean and free of ice and snow:
Stop the vehicle in a safe place.
Secure the vehicle against rolling off.
Moisten the lens with a commercially available alcohol-based glass cleaner and clean the lens with a dry cloth → .
Remove snow with a brush.
Remove ice with a de-icer spray → .
Operating the reversing camera
Fig. 136 Infotainment system screen display: reversing camera switched on
First read and observe the introductory information and safety warnings → Introduction
Key to diagram → Fig. 136 :
Symbol Meaning
Depending on the vehicle equipment level: switch on ParkPilot display.
Depending on the vehicle equipment level: switch off ParkPilot display.
Closing current display.
Depending on vehicle equipment level: switch the ParkPilot tone on or off.
Setting display: brightness, contrast, colour.
Depending on vehicle equipment level: display ParkPilot.
Switching the reversing camera on and off.The reversing camera switches on and off automatically.
Function What to do when the ignition is switched on
Vehicles without ParkPilot Vehicles with ParkPilot
Never use an abrasive cleaning product to clean the lens.
Never use warm or hot water to remove snow and ice from the lens of the camera. This could damage the lens.
NOTICE

12/29/2015 Bedienungsanleitung < Service & Zubehör < Volkswagen Deutschland
53/98
Vehicles without ParkPilot Vehicles with ParkPilot
Switching on thedisplay automatically.
Select reverse gear or move the selector lever to position R.
The reversing camera display is displayed on the infotainment system screen.
The ParkPilot miniature view is also displayed on the leftside of the infotainment system screen.
Switching the displayoff automatically.
Switch off the ignition.
OR: drive forwards faster than 10 km/h (6 mph) or for longer than 10 seconds.
OR: approximately 10 seconds after shifting out of reverseor of gear position R.
OR: immediately after shifting out of reverse or of gearposition R.
Hiding the imagefrom the reversingcamera.
Press one of the infotainment system buttons or touch the function button on the screen.
OR: touch the function button.
ParkPilot full-screen mode is displayed.
Showing thereversing cameraimage again.
Take the car out of reverse or shift to another gear position then switch back into reverse or to gear position R.
OR: touch the function button.
Parking
Fig. 137 Infotainment system screen display: parking using the reversing camera A: searching for a parking bay, B: driving into selected parkingbay, C: manoeuvring
First read and observe the introductory information and safety warnings → Introduction
Key to diagram → Fig. 137 :
Meaning
—Lateral green lines: rearward extension of the vehicle. The displayed green lines represent the area up to approximately 2 metresto the rear of the vehicle.
—Horizontal red line: indicates the safety clearance. The horizontal red line ends approximately 0.4 metres behind the vehicle on theroad.
① Road.
② Selected parking space.
③ Lines showing side limits of the selected parking space.
④ Rear limit of the parking space, e.g. kerb.
All references to the length of orientation lines apply to a vehicle that is standing on a horizontal surface.

12/29/2015 Bedienungsanleitung < Service & Zubehör < Volkswagen Deutschland
54/98
Parking using the reversing camera
Step Complete the following steps:
A1.
The requirements for parking while using the reversing camera must be fulfilled → Requirements for parking andmanoeuvring while using the reversing camera .
2. Position the vehicle in front of the parking space ② → Fig. 137 A.
B
3. Select reverse gear or move the selector lever to position R.
4.
Reverse slowly and steer the vehicle B to ensure that the lateral green lines are aligned with the selected parking space②.
Pay attention to the Check roadway. → message.
5. Position the vehicle in the selected parking space so that the lateral green lines are aligned with the side limits ③.
C 6. At the very latest, stop the vehicle C when the horizontal red line reaches the rear limit, e.g. the kerb ④.
IntroductionThis chapter contains information on the following subjects: → Display and indicator lamps → Using the Cruise Control System (CCS)
The Cruise Control System (CCS) helps to maintain a specific preset speed during forward travel at approx. 20 km/h (12 mph) and higher.
The CCS only slows the vehicle by easing off the accelerator, not by actively braking. The CCS cannot maintain a constant speed when travellingdownhill. The vehicle speed can increase under its own weight. Shift down gear and brake the vehicle using the foot brake → .
Additional information and warnings:Changing gear → Changing gear
Adaptive Cruise Control (ACC) → Adaptive Cruise Control (ACC)
Accessories, modifications, repairs and renewal of parts → Accessories, modifications, repairs and renewal of parts
Cruise Control System (CCS)

12/29/2015 Bedienungsanleitung < Service & Zubehör < Volkswagen Deutschland
55/98
Display and indicator lamps
Fig. 138 Instrument cluster display: CCS status display
First read and observe the introductory information and safety warnings → Introduction
CCS displaysStatus → Fig. 138 :
CCS switched off temporarily. The stored speed is shown in small numbers or displayed in a darker shade.
System fault. Go to a qualified workshop.
CCS switched on. Speed memory is empty.
CCS is active. Stored speed in large figures.
Indicator lamp
Lit up Possible cause
The use of the Cruise Control System can lead to accidents and serious injuries if traffic does not allow you to drive at a safe distance from thevehicle in front at a constant speed.
Never use the CCS in heavy traffic, on steep or winding roads, or on slippery road surfaces e.g. on snow, ice, wet roads, loose chippings, oron flooded roads.
Never use the CCS when driving off-road or on unsurfaced roads.
Adapt your speed and distance from the vehicles ahead to suit visibility, weather, road and traffic conditions.
Always switch cruise control off after use to avoid unintentional operation.
It is dangerous to use a set speed that is too high for the prevailing road, traffic or weather conditions.
The CCS cannot maintain a constant speed when travelling downhill. The vehicle speed can increase under its own weight. Shift down agear or brake the vehicle using the foot brake.
WARNING

12/29/2015 Bedienungsanleitung < Service & Zubehör < Volkswagen Deutschland
56/98
Cruise Control System (CCS) is controlling the speed.
Several warning and indicator lamps will light up briefly as a functional check when the ignition is switched on. They will go out after a fewseconds.
Displays can vary as different versions of the instrument cluster are available.
Using the Cruise Control System (CCS)
Fig. 139 On the left of the steering column: switch and buttons for operating the CCS
Fig. 140 Lefthand side of the multifunction steering wheel: buttons for operating the CCS
Failure to observe illuminated warning lamps and text messages can lead to your vehicle breaking down in traffic, and can cause accident andserious injury.
Never ignore any illuminated warning lamps or text messages.
WARNING
Failure to observe illuminated indicator lamps and text messages can lead to your vehicle being damaged.
NOTICE

12/29/2015 Bedienungsanleitung < Service & Zubehör < Volkswagen Deutschland
57/98
First read and observe the introductory information and safety warnings → Introduction
Function Switch position, switch operation on theturn signal lever → Fig. 139 or button onthe multifunction steering wheel → Fig. 140
Action
Switching on the CCS.Move switch ② on the turn signal lever to position
, or press the button on themultifunction steering wheel.
The system is switched on. No speed has yet beenstored and the speed is not yet being controlled.
Activating the CCS.Press button ③ on the turn signal lever at the area
marked , or press the button on the multifunction steering wheel.
The current speed is stored and controlled.
Switching off the CCS controltemporarily.
Move switch ② on the turn signal lever to position
, or press the button onthe multifunction steering wheel.
OR: briefly press the button in themultifunction steering wheel. OR: depress the brake pedal.
Control is switched off temporarily. The speed isstored in the memory.
Resuming CCS control.Press button ① on the turn signal lever at the area
marked , or press the button on the multifunction steering wheel.
The stored speed is reactivated and controlled.
Increasing the set speed (duringCCS control).
Press button ① in the area marked ,
or briefly press the button on themultifunction steering wheel to increase the speedin small increments of 1 km/h (1 mph) and to storethe speed.
The vehicle accelerates actively until it reaches thenew set speed.
Press the button on the multifunctionsteering wheel briefly to increase the speed inincrements of 10 km/h (5 mph) and to store thespeed.
Press button ① on the turn signal lever in the areamarked , or press and hold the
button on the multifunction steering wheel toincrease the speed continuously until the button isreleased and to store the speed.
Decreasing the set speed (duringCCS control).
Press button ③ on the turn signal lever in the areamarked , or briefly press the
button on the multifunction steeringwheel to reduce the speed in small increments of1 km/h (1 mph) and to store the speed.
The system will decrease the speed until the newset speed is reached by easing off the accelerationwithout a braking intervention.
Press the button on the multifunction steeringwheel briefly to reduce the stored speed inincrements of 10 km/h (5 mph) and to store thespeed.
Press button ③ on the turn signal lever in the area
marked , or press and hold the button on the multifunction steering wheel toreduce the speed continuously until the button is

12/29/2015 Bedienungsanleitung < Service & Zubehör < Volkswagen Deutschland
58/98
released and to store the speed.
Switching off the CCS.
Move switch ② to position.
OR: briefly press the button twice in themultifunction steering wheel with active regulation. OR: in any operating mode, hold down the
button in the multifunction steering wheelfor an extended period.
The system is switched off. The stored speed will bedeleted.
The mph figures given in brackets in the table relate exclusively to instrument clusters with mile readings.
Driving downhill with CCSIf the CCS cannot maintain the vehicle speed when driving downhill, brake the vehicle with the foot brake and shift down gear if necessary.
Automatic switch-offThe control will be switched off automatically or switched off temporarily:
If the system detects a fault that could impair the function of the CCS.
If the vehicle speed is higher than the stored speed for an extended period with the accelerator pedal depressed.
If the brake pedal or clutch pedal is depressed.
If you change gear on a manual gearbox.
With an automatic gearbox, when the selector lever is moved out of position D or S.
If the vehicle was braked with the City Emergency Brake function → City Emergency Brake function .
If regulation related to the driving dynamics is taking place, e.g. by TCS and ESC.
If the airbag is triggered.
If the CCS or ACC were switched on when the ignition was switched off, the CCS or ACC will be switched on automatically the next time
the ignition is switched on. However, no speed is stored.
IntroductionThis chapter contains information on the following subjects: → Displays, warning and indicator lamps → Radar sensor → Operating Adaptive Cruise Control (ACC) → Switch off the Adaptive Cruise Control (ACC) temporarily in the following situations → Special driving situations
The Adaptive Cruise Control (ACC) combines cruise control and distance control → .
The Adaptive Cruise Control (ACC) can be used to set and maintain a speed of between 30 km/h (20 mph) and 160 km/h (100 mph). TheAdaptive Cruise Control (ACC) also maintains a set time interval to the vehicle in front. The time interval is set by the driver.
In vehicles with an automatic gearbox, the ACC can brake the vehicle until it comes to a complete standstill behind a vehicle in front that isstopping. The vehicle automatically triggers the brake after around 2 seconds.
Adaptive Cruise Control (ACC)

12/29/2015 Bedienungsanleitung < Service & Zubehör < Volkswagen Deutschland
59/98
The system tells the driver to take controlThere are system-specific limits on the ACC when driving. This means that the driver may have to control the speed and distance between thevehicle and other vehicles in certain circumstances.
The driver is told to take control of the vehicle via a message on the instrument cluster display prompts a braking intervention, and a signaltone → Displays, warning and indicator lamps .
Additional information and warnings:Exterior views → Exterior views
Volkswagen information system → Volkswagen information system
Infotainment system → Infotainment system
Cruise Control System (CCS) → Cruise Control System (CCS)
Accessories, modifications, repairs and renewal of parts → Accessories, modifications, repairs and renewal of parts
If the ACC does not function as described in this chapter, do not use the ACC and have the system checked by a qualified workshop.
Volkswagen recommends using a Volkswagen dealership for this purpose.
The intelligent technology used in the ACC cannot overcome the laws of physics, and functions only within the limits of the system. Careless orunintentional use of the Adaptive Cruise Control (ACC) can cause accidents and lead to serious injury. The system is not a substitute for the fullconcentration of the driver.
Adapt your speed and distance from the vehicles ahead to suit visibility, weather, road and traffic conditions.
Do not use the ACC in poor visibility, on steep or winding roads, or on slippery road surfaces e.g. on snow, ice, wet roads, loose chippingsor flooded roads.
Never use the ACC off-road or on non-surfaced roads. The ACC is designed for use on surfaced roads only.
The ACC does not react to stationary obstacles, e.g. the tail end of a traffic jam, a vehicle that has broken down, or vehicles waiting at trafficlights.
The ACC does not react to persons, animals or vehicles crossing or approaching in the same lane.
If the ACC speed reduction is insufficient, you should brake the vehicle by depressing the foot brake.
Brake the vehicle by depressing the brake if the vehicle rolls inadvertently on after the driver has been prompted to take control of thevehicle.
If the instrument cluster display indicates that the driver should take control of the vehicle, you have to regulate the distance yourself.
The driver must be prepared to take control of the vehicle (by accelerating or braking) at all times.
WARNING
Switch off the ACC if you suspect that the radar sensor has been damaged. This can help to prevent secondary damage. Have the radar sensorrealigned.
Repair work on the radar sensor will require special knowledge and tools. Volkswagen recommends using a Volkswagen dealership for thispurpose.
NOTICE

12/29/2015 Bedienungsanleitung < Service & Zubehör < Volkswagen Deutschland
60/98
The ACC restricts the speed to 160 km/h (100 mph).
If the ACC is active, unfamiliar noises may be heard during the automatic braking procedure. These are caused by the braking system.
Displays, warning and indicator lamps
Fig. 141 On the instrument cluster display: ACC deactivated temporarily; vehicle detected ahead, time interval set
Fig. 142 On the instrument cluster display: ACC active: vehicle detected ahead, time interval is being set
First read and observe the introductory information and safety warnings → Introduction
DisplaysDisplay fields → Fig. 141 or → Fig. 142 :
Vehicle ahead when ACC is inactive.
Selected distance range when ACC is inactive.
Vehicle detected ahead. ACC is active.
Setting the time interval to the vehicle in front while travelling at stored speed.
Time interval to the vehicle in front while travelling at stored speed has been set.

12/29/2015 Bedienungsanleitung < Service & Zubehör < Volkswagen Deutschland
61/98
Warning and indicator lamps
Lit up Possible cause → Action
ACC speed reduction between the vehicle ahead isinsufficient.
Brake! Depress the brake pedal. The system tells the driver totake control.
ACC currently not available.
Switch off the engine and restart it while stationary. Inspect theradar sensor (for dirt, ice etc.). Go to a qualified workshopimmediately and have the system checked if it is constantlyunavailable.
ACC is active. No vehicle has been detected ahead. Theset speed is kept constant.
–
When displayed in bold/white: a) ACC active. Vehicledetected ahead. ACC regulates the speed and thedistance from the vehicle ahead. –
When displayed in non-bold/grey: a) ACC not active.System switched on, does not regulate.
ACC is active. –
Several warning and indicator lamps will light up briefly as a functional check when the ignition is switched on. They will go out after a fewseconds.
When the ACC is switched on, some ACC-related displays in the instrument cluster can be overwritten by other functions, incoming
telephone calls for example.
a) The design of the instrument cluster display will vary from vehicle to vehicle.
Radar sensor
Failure to observe the warning lamps and text messages could lead to accidents and serious injuries.
Never ignore any illuminated warning lamps or text messages.
WARNING
Failure to observe illuminated indicator lamps and text messages can lead to your vehicle being damaged.
NOTICE

12/29/2015 Bedienungsanleitung < Service & Zubehör < Volkswagen Deutschland
62/98
Fig. 143 In the front bumper: radar sensor
First read and observe the introductory information and safety warnings → Introduction
A radar sensor is fitted to the front bumper to monitor the traffic situation → Fig. 143 ① . Vehicles travelling ahead can thus be detected up to adistance of approximately 120 m.
The efficacy of the radar sensor can be impaired by contamination such as slush or snow, or by environmental conditions such as heavy rain orspray. This means that the Adaptive Cruise Control (ACC) also will not work. The instrument cluster display shows the message ACC: no sensorview!. Clean the radar sensors as required → .
The ACC is automatically available again as soon as the radar sensor is no longer impaired. The message on the instrument cluster display goesout, and the ACC can be reactivated.
Strong reflected radiation of the radar signal, e.g. in multi-storey car parks, or when near metallic objects such as rails in the road or metal platesused in roadworks, can impair the function of the ACC.
The area in front of and around the radar sensor → Fig. 143 ① must not be covered by objects such as stickers, auxiliary headlights or the like,as this can impair the function of the ACC.
Any structural modifications to the vehicle, e.g. lowering the vehicle or making alterations to the front end trim, can impair the function of the ACC.Structural modifications should therefore only be carried out by a qualified workshop. Volkswagen recommends using a Volkswagen dealershipfor this purpose.
Incorrectly performed repairs to the front end of the vehicle can alter the position of the radar sensor and therefore impair the function of the ACC.Repair work should therefore only be carried out by a qualified workshop. Volkswagen recommends using a Volkswagen dealership for thispurpose.
Operating Adaptive Cruise Control (ACC)
Switch off the ACC if you suspect that the radar sensor has been damaged or its position has been altered. This can help to prevent secondarydamage. Have the radar sensor realigned.
The radar sensor could be moved if it is hit, for example in parking manoeuvres. Readjusting the sensor could impair the performance of thesystem or cause it to be switched off.
Repair work on the radar sensor will require special knowledge and tools. Volkswagen recommends using a Volkswagen dealership for thispurpose.
Remove snow with a brush, and remove ice preferably with a solvent-free de-icer spray.
NOTICE

12/29/2015 Bedienungsanleitung < Service & Zubehör < Volkswagen Deutschland
63/98
Operating Adaptive Cruise Control (ACC)
Fig. 144 Lefthand side of the multifunction steering wheel: buttons for operating the Adaptive Cruise Control (ACC)
First read and observe the introductory information and safety warnings → Introduction
When the Adaptive Cruise Control (ACC) is switched on, the green indicator lamp in the instrument cluster lights up, and the speed memoryand the status of the Adaptive Cruise Control are shown in the display → Fig. 141 .
Conditions for starting the Adaptive Cruise ControlThe selector lever must be in position D or S or be in the Tiptronic gate. A forward gear, but not first gear, must be selected in the manualgearbox.
In vehicles with a manual gearbox, the actual speed should be minimum 25 km/h (16 mph) if no speed is stored.
Controlling speedWhen switched on, the speed can be stored and set. The stored speed can vary from the speed actually being driven if the distance is beingactively controlled.
Function Button on the multifunctionsteering wheel → Fig. 144
Action
Switching on the ACC. Press the button on themultifunction steering wheel.
The system is switched on. No speed has yet been stored and thespeed is not yet being controlled.
Activating the ACC. Press the button on themultifunction steering wheel.
The current speed is stored and controlled. If ACC is already switched on: Press briefly: reduces the speed by 1 km/h (1 mph) and stores it. Press and hold: the stored speed is reduced incrementally by 1km/h (1 mph) for as long as the button is held. A reduction inspeed is achieved by accelerator release or automatic braking.
Switching off ACC temporarily.
Press the button on themultifunction steering wheel. OR: depress the brake pedal. OR: depress the clutch for longerthan 30 seconds.
Control is switched off temporarily. The speed is stored in thememory.
Resuming ACC control. Press the button on the
The stored speed is reactivated and controlled. If no speed has yet been stored, the ACC adopts and regulatesthe current speed at which the vehicle is being driven. If ACC is already switched on:

12/29/2015 Bedienungsanleitung < Service & Zubehör < Volkswagen Deutschland
64/98
multifunction steering wheel. Press briefly: increases the speed by 1 km/h (1 mph) and stores it.Press and hold: the stored speed is increased incrementally by 1km/h (1 mph) for as long as the button is held.
Accelerating (during ACC control). Press the button on themultifunction steering wheel.
Press briefly: increases the speed by 10 km/h (5 mph) and storesit. Press and hold: the stored speed is increased incrementally by 10km/h (5 mph) for as long as the button is held.
Decelerating (during ACC control). Press the button on themultifunction steering wheel.
Press briefly: reduces the speed by 10 km/h (5 mph) and stores it.Press and hold: the stored speed is reduced incrementally by 10km/h (5 mph) for as long as the button is held. A reduction inspeed is achieved by accelerator release or automatic braking.
Switching off the ACC. Press the button on themultifunction steering wheel.
The system is switched off. The stored speed will be deleted.
The mph figures given in brackets in the table relate exclusively to instrument clusters with mile readings.
Setting the distance levelThe speed-dependent distance from the vehicle in front can be set to one of 5 levels in the infotainment system → Menu and system settings(SETUP) .
In wet road conditions, you should always set a larger distance than when driving in dry road conditions.
The following distances can be pre-selected:
Very small
Small
Medium
Large
Very large
The distance level to the vehicle ahead is set using the button on the multifunction steering wheel → Fig. 144 . The ACC display appears
when the button is pressed → Displays, warning and indicator lamps . To set the distance level, press the button.
When the highest level is reached, the distance returns to the lowest level when the button is pressed again.
The distance level can also be set using the or buttons on the multifunction steering wheel immediately after the button on themultifunction steering wheel → Fig. 144 has been pressed.
The button and the and Driver assistance function buttons in the infotainment system can be used to set the distancelevel that should be selected when the ACC is switched on → Menu and system settings (SETUP) .
The following conditions can prevent the Adaptive Cruise Control (ACC) from reacting:If the accelerator is depressed.
If no gear is selected.
If the ESC is taking corrective action.
If the driver has not fastened their seat belt.

12/29/2015 Bedienungsanleitung < Service & Zubehör < Volkswagen Deutschland
65/98
If there is a fault in several brake lights on the vehicle or on a trailer with an electrical connection to the vehicle.
If the vehicle is reversing.
If the vehicle is travelling faster than approximately 160 km/h (100 mph).
The set speed will be deleted if the ignition or the ACC is switched off.
The ACC is automatically deactivated when the traction control system (TCS) is deactivated.
In vehicles with a start/stop system, the engine is switched off automatically during the stationary phase of ACC and is then restarted for
moving off.
Switch off the Adaptive Cruise Control (ACC) temporarily in the following situations
First read and observe the introductory information and safety warnings → Introduction
The Adaptive Cruise Control (ACC) should be switched off in the following situations due to system limitations → :
When turning off roads, driving around roundabouts, narrow curves, joining motorways, exiting from motorways or driving through road works,to prevent the vehicle from unnecessarily accelerating to the set speed in these situations
When driving through a tunnel as this situation could impair the system function.
On roads with more than one lane, if other vehicles are driving more slowly in the fast lane. The slower vehicles in the other lane would beovertaken from the right side in this case.
In heavy rain, snow or spray as vehicles travelling ahead cannot be monitored sufficiently or maybe cannot be monitored at all.
Failure to switch off the Adaptive Cruise Control in the above-mentioned situations can cause a violation of legal requirements.
Special driving situations
If you do not maintain the minimum distance to a vehicle in front and the difference in speed between the two vehicles is so great that thebraking action of the ACC is insufficient, you are in danger of colliding with the vehicle in front. You should reduce the vehicle speedimmediately with the foot brake.
The ACC may not be able to recognise all driving situations correctly.
Leaving your foot on the accelerator will mean that the ACC will not brake automatically. This is because manual acceleration overrides thesystem.
You should always be prepared to brake the vehicle yourself.
Observe country-specific regulations regarding the minimum distance.
WARNING
Failure to switch off the ACC in the above-mentioned situations can cause accidents and result in serious injuries.
Always switch off the ACC in critical driving situations.
WARNING

12/29/2015 Bedienungsanleitung < Service & Zubehör < Volkswagen Deutschland
66/98
Fig. 145 A: vehicle in a bend B: motorbike in front is outside the range of the radar sensor
Fig. 146 C: vehicle is changing lanes. D: turning vehicle, stationary vehicle
First read and observe the introductory information and safety warnings → Introduction
The Adaptive Cruise Control (ACC) has physical and system-related limits. As such, certain ACC system reactions may occur, from the driver'sperspective, unexpectedly or with some delay. You should therefore always be prepared to take full control of the vehicle if necessary.
The following traffic situations, for example, require particular vigilance:
Deceleration to standstill (only vehicles with automatic gearbox)If a vehicle travelling ahead brakes to a standstill, the ACC will also brake your vehicle to a standstill. The vehicle is then held stationary forapproximately two seconds. Then the vehicle automatically triggers the brake.
OvertakingIf the turn signal is activated when starting an overtaking manoeuvre, the Adaptive Cruise Control (ACC) accelerates the vehicle automaticallyand thus reduces the distance to the vehicle in front.
If you move your vehicle into the overtaking lane and there is no vehicle ahead of you, the ACC will automatically increase the speed to your setlevel and maintain it.
Acceleration can be stopped at any point by depressing the brake pedal or pressing the button on the multifunction steering wheel → Operating Adaptive Cruise Control (ACC) .
When driving through bendsWhile driving through bends, the radar sensor may sometimes lose the vehicle travelling ahead or may react to a vehicle in the next lane → Fig. 145 A. In such situations, the vehicle might decelerate unnecessarily or not react to the vehicle in front. In this case the driver must
override the ACC by depressing the accelerator, or interrupt the braking procedure by depressing the brake pedal or pressing the buttonon the multifunction steering wheel → Operating Adaptive Cruise Control (ACC) .
Driving in tunnelsThe radar sensor function may be restricted in tunnels. Switch off the ACC in tunnels.
Narrow vehicles and a zig-zag traffic situation

12/29/2015 Bedienungsanleitung < Service & Zubehör < Volkswagen Deutschland
67/98
Narrow vehicles and a zig-zag traffic situationNarrow vehicles and vehicles travelling slightly to the left or right of your vehicle will only be detected by the radar sensor once they have enteredthe radar range → Fig. 145 B. This applies in particular to narrow vehicles such as motorbikes. If required, brake the vehicle yourself.
Vehicles with special load or special equipmentAny load or accessories on other vehicles that protrude from the side, rear or over the roof of the vehicle may not be detected by the ACC.
Switch off the ACC when the vehicle ahead has special load or special equipment or while overtaking such vehicles. If required, brake the vehicleyourself.
When other vehicles change lanesVehicles that are very close when they move into your lane can only be detected by the radar sensors when they have moved into the sensorrange. This will result in a late reaction by the Adaptive Cruise Control (ACC) → Fig. 146 C. If required, brake the vehicle yourself.
Stationary vehiclesThe ACC does not detect stationary objects during a journey, such as stationary traffic or a vehicle that has broken down.
If a stationary vehicle is hidden behind a vehicle that has been detected by the Adaptive Cruise Control and this vehicle turns off the road orchanges lane, the Adaptive Cruise Control will not be able to react to the stationary vehicle → Fig. 146 D. If required, brake the vehicle yourself.
Oncoming vehicles and vehicles crossing your pathThe Adaptive Cruise Control does not react to approaching vehicles or vehicles crossing your path.
Metal objectsMetal objects such as tracks in the road or metal plates used in roadworks, can confuse the radar sensor and cause incorrect reactions from theAdaptive Cruise Control.
Possible radar sensor function impairmentsThe Adaptive Cruise Control will switch off temporarily if the radar sensor function is impaired, e.g. due to heavy rain, spray, snow, ice or mud. Acorresponding message will appear on the instrument cluster display. Clean the radar sensors as required.
The Adaptive Cruise Control will automatically be available again as soon as the radar sensors are no longer impaired. The message on theinstrument cluster display goes out, and the Adaptive Cruise Control can be reactivated.
Strong reflected radiation of the radar signal, e.g. in multi-storey car parks, can impair the function of the radar sensor.
Towing a trailerThe Adaptive Cruise Control operates with reduced dynamics when the vehicle is towing a trailer.
Overheated brakesIf the brakes overheat, e.g. following heavy braking or when driving down steep inclines for long periods, the Adaptive Cruise Control may bedeactivated temporarily. A corresponding message will appear on the instrument cluster display. It is then not possible to activate the AdaptiveCruise Control.

12/29/2015 Bedienungsanleitung < Service & Zubehör < Volkswagen Deutschland
68/98
As soon as the temperature of the brakes has decreased sufficiently, the Adaptive Cruise Control can be activated again. The message on theinstrument cluster display goes out. If the message ACC not available does not go out for a long time, there is a fault. Go to a qualified workshop.Volkswagen recommends using a Volkswagen dealership for this purpose.
IntroductionThis chapter contains information on the following subjects: → Displays → Radar sensor → Operating the area monitoring system (Front Assist) → Temporarily switch off the area monitoring system (Front Assist) in the following situations → City Emergency Brake function → System limits
The area monitoring system (Front Assist) helps to avoid rear-end collisions.
Front Assist can warn the driver about imminent collisions, prepare the vehicle for emergency braking in case of danger, assist with braking, andinitiate automatic braking.
Front Assist is not a substitute for the full concentration of the driver.
Additional information and warnings:Exterior views → Exterior views
Volkswagen information system → Volkswagen information system
Infotainment system → Infotainment system
Cruise Control System (CCS) → Cruise Control System (CCS)
Adaptive Cruise Control (ACC) → Adaptive Cruise Control (ACC)
Area monitoring system (Front Assist) → Area monitoring system (Front Assist)
Accessories, modifications, repairs and renewal of parts → Accessories, modifications, repairs and renewal of parts
Distance warningIf the system detects danger from driving too close to the vehicle in front, within the speed range of approx. 60 km/h (37 mph) up to 210 km/h(130 mph), the system can warn the driver by showing a corresponding message on the instrument cluster display → Fig. 147 .
The warning period varies according to the traffic situation and the driver's response.
Advance warningIf the system detects a danger of collision with the vehicle ahead, within the speed range of approx. 30 km/h (18 mph) up to 210 km/h (130 mph),the system can warn the driver by emitting a signal tone and showing a corresponding message on the instrument cluster display → Fig. 148 .
If the message ACC ready for start appears on the instrument cluster display and the vehicle in front moves off, your vehicle will move offautomatically. In some cases the radar sensor may be unable to detect obstacles that are located in the vehicle's path. This can result inserious injury and accidents.
Always check the road ahead before the vehicle pulls away. If necessary, cancel the pulling away procedure by depressing the brake pedal.
WARNING
Area monitoring system (Front Assist)

12/29/2015 Bedienungsanleitung < Service & Zubehör < Volkswagen Deutschland
69/98
the system can warn the driver by emitting a signal tone and showing a corresponding message on the instrument cluster display → Fig. 148 .
The warning period varies according to the traffic situation and the driver's response. At the same time it prepares the vehicle for possibleemergency braking → .
Urgent warningIf the driver fails to respond to the advance warning, within a speed range of approx. 30 km/h (18 mph) to 210 km/h (130 mph), the system caninitiate a quick jolt of the brake in order to draw the driver's attention to the increasing danger of a collision.
Automatic brakingIf the driver does not react to the acute warning, within a speed range of approx. 5 km/h (3 mph) to 210 km/h (130 mph), the vehicle can brakeautomatically using brake pressure with gradually increasing intensity. By reducing speed during a possible collision the system can help tominimise the consequences of an accident.
Brake assistanceIf Front Assist detects that the driver is not braking sufficiently when there is a risk of collision, the system can increase the braking force andthereby help to prevent a collision within a speed range of approx. 5 km/h (3 mph) to 210 km/h (130 mph). Brake assistance works only for aslong as the brake pedal is pressed hard.
The brake pedal feels harder when Front Assist triggers the brakes.
Automatic braking intervention by Front Assist can be stopped by depressing the clutch, the accelerator, or through a steering
intervention.
Deactivate Front Assist if it does not function as described in this chapter, e.g. if multiple unwanted interventions occur. Have the system
checked by a qualified workshop. Volkswagen recommends using a Volkswagen dealership for this purpose.
Displays
The intelligent technology used in Front Assist cannot overcome the laws of physics, and functions only within the limits of the system. Thedriver is always responsible for braking in time. If Front Assist issues a warning, immediately apply the foot brake to slow the vehicle down oravoid the obstacle, depending on the traffic situation.
Adapt your speed and distance from the vehicles ahead to suit visibility, weather, road and traffic conditions.
Front Assist cannot prevent accidents and serious injuries on its own.
Front Assist can issue unnecessary warnings and carry out unwanted braking interventions in certain complex driving situations, e.g. attraffic islands.
Front Assist can issue unnecessary warnings and carry out unwanted braking interventions when its function is impaired, e.g. if the positionof the radar sensor has been soiled or changed.
The Front Assist does not react to persons, animals or vehicles crossing or approaching in the same lane.
The driver must be prepared to take full control of the vehicle at all times.
WARNING

12/29/2015 Bedienungsanleitung < Service & Zubehör < Volkswagen Deutschland
70/98
Fig. 147 On the instrument cluster display: distance warning display
Fig. 148 The display in the instrument cluster: advance warning display
First read and observe the introductory information and safety warnings → Introduction
Distance warningIf the safe distance to the vehicle in front drops below the minimum level, a distance warning will appear on the instrument cluster display → Fig. 147 (close-up).
Increase the distance.
Advance warningThe system detects a potential collision with a vehicle in front → Fig. 148 .
Brake or take avoiding action! Depress the brake pedal if necessary.
When Front Assist is switched on, the display in the instrument cluster can be overwritten by displays related to other functions, e.g. an
Failure to observe illuminated warning lamps and displays can cause accidents and serious injuries.
Never ignore illuminated warning lamps and displays.
WARNING

12/29/2015 Bedienungsanleitung < Service & Zubehör < Volkswagen Deutschland
71/98
incoming telephone call.
Radar sensor
Fig. 149 In the front bumper: radar sensor
First read and observe the introductory information and safety warnings → Introduction
A radar sensor is fitted to the front bumper to monitor the traffic situation → Fig. 149 ① . Vehicles travelling ahead can thus be detected up to adistance of approximately 120 m.
The efficacy of the radar sensor can be impaired by contamination such as slush or snow, or by environmental conditions such as heavy rain orspray. In this case the area monitoring system (Front Assist) will not work. The instrument cluster display shows the message Front Assist: nosensor view!. Clean the radar sensors as required → .
Front Assist will automatically be available again as soon as the radar sensor is no longer impaired. The message on the instrument clusterdisplay goes out.
Strong reflected radiation of the radar signal, e.g. in multi-storey car parks, or when near metallic objects such as rails in the road or metal platesused in roadworks, can impair the function of Front Assist.
The area in front of and around the radar sensor → Fig. 149 ① must not be covered by objects such as stickers, auxiliary headlights or the like,as this can impair the function of Front Assist.
Any structural modifications to the vehicle, e.g. lowering the vehicle or making alterations to the front end trim, can impair the function of FrontAssist. Structural modifications should therefore only be carried out by a qualified workshop. Volkswagen recommends using a Volkswagendealership for this purpose.
Incorrectly performed repairs to the front end of the vehicle can alter the position of the radar sensor and therefore impair the function of FrontAssist. Repair work should therefore only be carried out by a qualified workshop. Volkswagen recommends using a Volkswagen dealership forthis purpose.

12/29/2015 Bedienungsanleitung < Service & Zubehör < Volkswagen Deutschland
72/98
Operating the area monitoring system (Front Assist)
First read and observe the introductory information and safety warnings → Introduction
The area monitoring system (Front Assist) is automatically active once the ignition is switched on → Starting and stopping the engine .
The prior warning and distance warning are automatically deactivated when Front Assist is deactivated.
Volkswagen recommends that Front Assist is switched on at all times. Exceptions → Temporarily switch off the area monitoring system (FrontAssist) in the following situations .
Activating and deactivating the area monitoring systemUsing the button for driver assist systems, select the corresponding menu option → Volkswagen information system .
OR: activate or deactivate the system using the button and the and Driver assistance function buttons in theinfotainment system → Menu and system settings (SETUP) .
Activating and deactivating advanced warning
The advanced warning can be activated or deactivated using the button and the and Driver assistance functionbuttons in the infotainment system → Menu and system settings (SETUP) .
The system also retains the programmed setting when the ignition is next switched on.
Volkswagen recommends that the advance warning system is switched on at all times.
Activating or deactivating the distance warning
The distance warning display can be activated or deactivated using the button and the and Driver assistance functionbuttons in the infotainment system → Menu and system settings (SETUP) .
The system also retains the programmed setting when the ignition is next switched on.
Volkswagen recommends that the distance warning is switched on at all times.
Temporarily switch off the area monitoring system (Front Assist) in the following situations
Switch off Front Assist if you suspect that the radar sensor has been damaged or its position has been altered. This can help to preventsecondary damage. Have the radar sensor realigned.
The radar sensor could be moved if it is hit, for example in parking manoeuvres. Readjusting the sensor could impair the performance of thesystem or cause it to be switched off.
Repair work on the radar sensor will require special knowledge and tools. Volkswagen recommends using a Volkswagen dealership for thispurpose.
Remove snow with a brush, and remove ice preferably with a solvent-free de-icer spray.
NOTICE
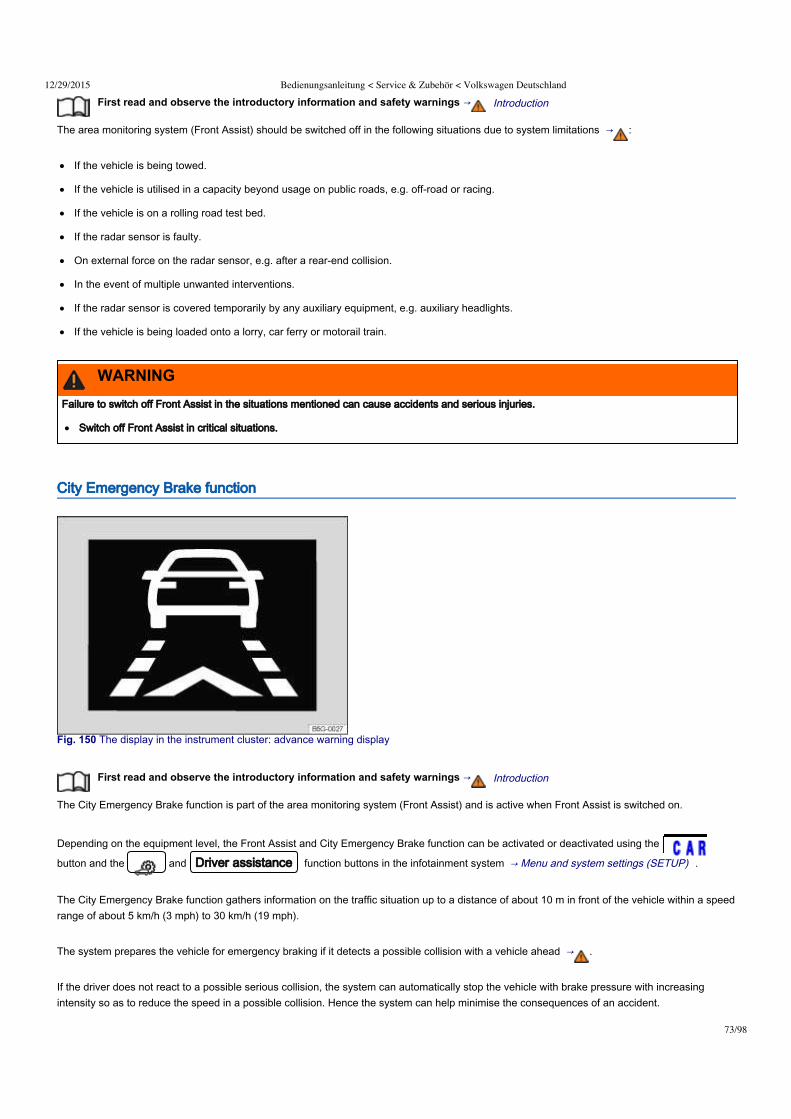
12/29/2015 Bedienungsanleitung < Service & Zubehör < Volkswagen Deutschland
73/98
First read and observe the introductory information and safety warnings → Introduction
The area monitoring system (Front Assist) should be switched off in the following situations due to system limitations → :
If the vehicle is being towed.
If the vehicle is utilised in a capacity beyond usage on public roads, e.g. off-road or racing.
If the vehicle is on a rolling road test bed.
If the radar sensor is faulty.
On external force on the radar sensor, e.g. after a rear-end collision.
In the event of multiple unwanted interventions.
If the radar sensor is covered temporarily by any auxiliary equipment, e.g. auxiliary headlights.
If the vehicle is being loaded onto a lorry, car ferry or motorail train.
City Emergency Brake function
Fig. 150 The display in the instrument cluster: advance warning display
First read and observe the introductory information and safety warnings → Introduction
The City Emergency Brake function is part of the area monitoring system (Front Assist) and is active when Front Assist is switched on.
Depending on the equipment level, the Front Assist and City Emergency Brake function can be activated or deactivated using the button and the and Driver assistance function buttons in the infotainment system → Menu and system settings (SETUP) .
The City Emergency Brake function gathers information on the traffic situation up to a distance of about 10 m in front of the vehicle within a speedrange of about 5 km/h (3 mph) to 30 km/h (19 mph).
The system prepares the vehicle for emergency braking if it detects a possible collision with a vehicle ahead → .
If the driver does not react to a possible serious collision, the system can automatically stop the vehicle with brake pressure with increasingintensity so as to reduce the speed in a possible collision. Hence the system can help minimise the consequences of an accident.
Failure to switch off Front Assist in the situations mentioned can cause accidents and serious injuries.
Switch off Front Assist in critical situations.
WARNING

12/29/2015 Bedienungsanleitung < Service & Zubehör < Volkswagen Deutschland
74/98
DisplayAutomatic deceleration by the City Emergency Brake function will be shown by the advance warning display in the instrument cluster → Fig. 150 .
The brake pedal feels harder when the City Emergency Brake function triggers the brakes.
Automatic brake intervention by the City Emergency Brake function can be stopped by using the clutch, the accelerator or steering
intervention.
The City Emergency Brake function can brake the vehicle to a standstill. The vehicle will not be held for any extended period by the
braking system. Depress the brake.
Switch off Front Assist and the City Emergency Brake function in the event of multiple unwanted interventions. Go to a qualified workshop.
Volkswagen recommends using a Volkswagen dealership for this purpose.
Multiple unwanted interventions can lead to automatic deactivation of the City Emergency Brake function.
System limits
First read and observe the introductory information and safety warnings → Introduction
The area monitoring system (Front Assist) has physical and system-related limits. The driver may therefore feel that, in certain circumstances,some Front Assist reactions occur unexpectedly or with a delay. You should therefore always be prepared to take full control of the vehicle ifnecessary.
The following conditions can prevent Front Assist from reacting, or cause a delay in its reaction:In tight bends.
If the accelerator is fully depressed.
If Front Assist is switched off or there is a fault.
If TCS is manually switched off.
If the ESC is taking corrective action.
The intelligent technology used in the City Emergency Brake cannot overcome the laws of physics, and functions only within the limits of thesystem. The driver is always responsible for braking in time.
Adapt your speed and distance from the vehicles ahead to suit visibility, weather, road and traffic conditions.
The City Emergency Brake function cannot prevent accidents and serious injuries by itself.
The City Emergency Brake function can carry out unwanted brake interventions in certain complex driving situations, e.g. at building sitesand metal tracks.
The City Emergency Brake can issue unnecessary warnings and carry out unwanted braking interventions when its function is impaired, e.g.if the position of the radar sensor has been soiled or changed.
While the vehicle is in motion, the City Emergency Brake function does not react to persons, animals and vehicles crossing or approachingin the same lane.
WARNING

12/29/2015 Bedienungsanleitung < Service & Zubehör < Volkswagen Deutschland
75/98
If there is a fault in several brake lights on the vehicle or on a trailer with an electrical connection to the vehicle.
If the radar sensor is dirty or covered.
If there are metal objects, e.g. tracks in the road or metal plates used in roadworks.
If the vehicle is reversing.
Under hard acceleration.
In snow or heavy rain.
In case of narrow vehicles, e.g. motorbikes.
If vehicles are travelling slightly to the left or right of your vehicle.
If vehicles are crossing in front of your vehicle.
If there is oncoming traffic.
When loads or attachment parts on other vehicles protrude to the side, rear or above the normal dimensions of the vehicle.
IntroductionThis chapter contains information on the following subjects: → Function and operation by the user
The Driver Alert System informs the driver if their driving shows signs of tiredness.
Additional information and warnings:Infotainment system → Infotainment system
Accessories, modifications, repairs and renewal of parts (information stored in the control units) → Accessories, modifications, repairs andrenewal of parts
The Driver Alert System has been developed for use only while driving on highways and good roads.
If there is a system fault, proceed to a qualified workshop immediately to have the system checked.
Function and operation by the user
Driver Alert System (recommendation for rest breaks)
Do not let the extra convenience afforded by the Driver Alert System tempt you into taking any risks when driving – this can cause accidents.During a long trip, plan regular and sufficient breaks.
The driver is responsible at all times for their fitness to drive.
Never drive a vehicle when you are tired.
The system cannot always detect the driver's level of alertness. Observe the information in the section Function limitations → Functionlimitations .
In certain situations, the system may wrongly interpret intentional driving manoeuvres as a lack of alertness from the driver.
No urgent warning will be given in the event of the phenomenon known as microsleep.
Follow the information on the instrument cluster display and respond according to the commands.
WARNING
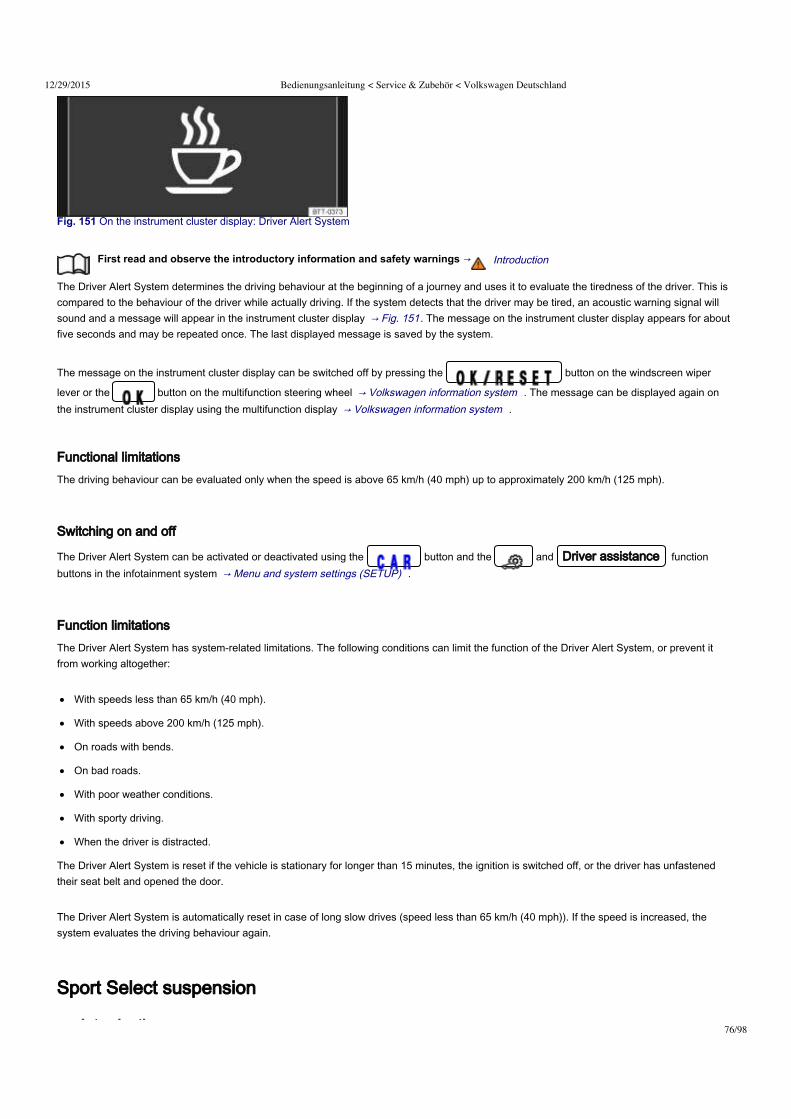
12/29/2015 Bedienungsanleitung < Service & Zubehör < Volkswagen Deutschland
76/98
Fig. 151 On the instrument cluster display: Driver Alert System
First read and observe the introductory information and safety warnings → Introduction
The Driver Alert System determines the driving behaviour at the beginning of a journey and uses it to evaluate the tiredness of the driver. This iscompared to the behaviour of the driver while actually driving. If the system detects that the driver may be tired, an acoustic warning signal willsound and a message will appear in the instrument cluster display → Fig. 151 . The message on the instrument cluster display appears for aboutfive seconds and may be repeated once. The last displayed message is saved by the system.
The message on the instrument cluster display can be switched off by pressing the button on the windscreen wiper
lever or the button on the multifunction steering wheel → Volkswagen information system . The message can be displayed again onthe instrument cluster display using the multifunction display → Volkswagen information system .
Functional limitationsThe driving behaviour can be evaluated only when the speed is above 65 km/h (40 mph) up to approximately 200 km/h (125 mph).
Switching on and off
The Driver Alert System can be activated or deactivated using the button and the and Driver assistance functionbuttons in the infotainment system → Menu and system settings (SETUP) .
Function limitationsThe Driver Alert System has system-related limitations. The following conditions can limit the function of the Driver Alert System, or prevent itfrom working altogether:
With speeds less than 65 km/h (40 mph).
With speeds above 200 km/h (125 mph).
On roads with bends.
On bad roads.
With poor weather conditions.
With sporty driving.
When the driver is distracted.
The Driver Alert System is reset if the vehicle is stationary for longer than 15 minutes, the ignition is switched off, or the driver has unfastenedtheir seat belt and opened the door.
The Driver Alert System is automatically reset in case of long slow drives (speed less than 65 km/h (40 mph)). If the speed is increased, thesystem evaluates the driving behaviour again.
Introduction
Sport Select suspension

12/29/2015 Bedienungsanleitung < Service & Zubehör < Volkswagen Deutschland
77/98
IntroductionThis chapter contains information on the following subjects: → Display and warning lamp → Function and operation
Additional information and warnings:Accessories, modifications, repairs and renewal of parts → Accessories, modifications, repairs and renewal of parts
If the Sport Select chassis does not work as described in this chapter, have the Sport Select chassis checked at a qualified workshop.
Display and warning lamp
First read and observe the introductory information and safety warnings → Introduction
Lit up Possible cause Action
Fault in Sport Select suspension.
The Sport Select chassis should be checked by a qualifiedworkshop as soon as possible. If the yellow warning lamp remains off after the ignition has beenrestarted and you have driven a short distance, you do not need toconsult a qualified workshop.
Several warning and indicator lamps will light up briefly as a functional check when the ignition is switched on. They will go out after a fewseconds.
Function and operation
Setting the Sport Select suspension while the vehicle is in motion can distract you from the road and lead to accidents.
WARNING
Failure to observe illuminated warning lamps and text messages can lead to your vehicle breaking down in traffic, and can cause accident andserious injury.
Never ignore any illuminated warning lamps or text messages.
WARNING
Failure to observe illuminated indicator lamps and text messages can lead to your vehicle being damaged.
NOTICE

12/29/2015 Bedienungsanleitung < Service & Zubehör < Volkswagen Deutschland
78/98
Fig. 152 In the upper section of the centre console: button for setting the "Sport Select" chassis
First read and observe the introductory information and safety warnings → Introduction
It is possible to choose between 2 different chassis settings, each of which has different characteristics.
Chassis setup Recommended driving situations
NORMAL Balanced setting, e.g. for everyday use.
SPORT Gives the vehicle a sporty driving feel and is suited to a sporty driving style.
The chassis setting can be changed while the vehicle is stationary or on the road. The selected chassis setting is immediately selected.
Selecting a chassis settingEnsure that the ignition is switched on.
Press the → Fig. 152 button for setting the SPORT chassis setting until it lights up.
The NORMAL chassis setting is active whenever the is not lit up. The selected chassis setting will remain set even after theignition has been switched off.
Adjusting the chassis setting could alter the vehicle handling. The Sport Select chassis should never tempt you into taking any risks whendriving.
Always adapt your speed and driving style to suit visibility, weather, road and traffic conditions.
WARNING
Failure to observe illuminated warning lamps and text messages can lead to your vehicle breaking down in traffic, and can cause accident andserious injury.
Never ignore any illuminated warning lamps or text messages.
Stop the vehicle as soon as possible and when safe to do so.
WARNING
Failure to observe illuminated indicator lamps and text messages can lead to your vehicle being damaged.
NOTICE

12/29/2015 Bedienungsanleitung < Service & Zubehör < Volkswagen Deutschland
79/98
If there is a fault in the Sport Select chassis, the instrument cluster display shows a symbol with text Fault: damper setting.
IntroductionThis chapter contains information on the following subjects: → Indicator lamp → Tyre Pressure Loss Indicator
Additional information and warnings:Volkswagen information system → Volkswagen information system
Transporting → Driving tips
Braking, stopping and parking → Braking, stopping and parking
Cleaning and caring for the vehicle exterior → Caring for and cleaning the vehicle exterior
Wheels and tyres → Wheels and tyres
Accessories, modifications, repairs and renewal of parts → Accessories, modifications, repairs and renewal of parts
Consumer information → Consumer information
Under-inflated tyres will increase fuel consumption and tyre wear.
When new tyres are driven at high speeds for the first time, they can expand slightly and trigger a one-off pressure warning.
Old tyres should only be replaced by tyres that have been approved by Volkswagen for the vehicle type.
Do not rely solely on the tyre monitoring system. Check your tyres regularly to ensure that they are properly inflated and have no signs of
damage, such as punctures, cuts, cracks, and blisters. Remove any objects that become embedded in the tyre tread but have not penetrated intothe body of the tyre itself.
Indicator lamp
First read and observe the introductory information and safety warnings → Introduction
Tyre monitoring system
The tyre monitoring technology cannot overcome its own systemic limitations, and functions only within the limits of the system. Incorrecthandling of the wheels and tyres can lead to a sudden loss of pressure in the tyres, tread separation and even tyre blow-out.
Check tyre pressures regularly and always maintain the specified tyre pressure value → Wheels and tyres . If the tyre pressure is too low, itis possible that the tyre temperature will increase to such an extent that the tread peels off and the tyre bursts.
Always maintain the correct cold tyre pressure as specified on the label → Wheels and tyres .
Check tyre inflation pressure regularly when the tyres are cold. Adjust tyre pressure in the cold tyre to the recommended tyre pressure forthe tyres installed on your vehicle as necessary → Wheels and tyres .
Check your tyres regularly for signs of wear or damage.
Never exceed the top speed and load permitted for the fitted tyres.
WARNING

12/29/2015 Bedienungsanleitung < Service & Zubehör < Volkswagen Deutschland
80/98
Lit up Possible cause → Action
The tyre pressure of one tyre or several tyres hasdecreased considerably in comparison to the tyrepressure set by the driver, or the structure of the tyre isdamaged. An acoustic warning will also be sounded,and a corresponding message may appear in theinstrument cluster display.
Do not drive on! Reduce speed immediately. Stop the
vehicle as soon as possible and when safe to do so. Do notundertake any extreme steering or braking manoeuvres! Check all wheels and tyre pressures, and correct if necessary → Wheels and tyres . The damaged tyre should be replaced.The Tyre Pressure Loss Indicator will have to be re-synchronised after changing the tyre pressure, or afterchanging one or more wheels → Tyre Pressure Loss Indicator .
Flashes Possible cause → Action
System faulty. Indicator lamp flashes for around a minute and thenlights continuously.
If the tyre pressure is correct, but the indicator lamp is stillflashing and eventually lights up steadily after the ignition isswitched off and back on again, please go to a qualifiedworkshop. Have the system checked.
Several warning and indicator lamps will light up briefly as a functional check when the ignition is switched on. They will go out after a fewseconds.
Differing tyre pressures or tyre pressures that are too low can cause tyre failure, the loss of vehicle control, accidents, serious injury and death.
If the indicator lamp lights up, stop the vehicle as soon as possible and check all the tyres → Wheels and tyres .
Different tyre pressures or tyre pressures that are too low can increase wear on the tyres, reduce vehicle stability and increase the brakingdistance.
Differing tyre pressures or tyre pressures that are too low can cause sudden tyre failure and lead to a tyre burst and the loss of control overthe vehicle.
The driver is responsible for the correct tyre pressure of all tyres on the vehicle. The recommended tyre pressure can be found on the label → Wheels and tyres .
The tyre monitoring system cannot function correctly until all cold wheels have the correct tyre pressure → Wheels and tyres .
The use of incorrect tyre pressures can cause accidents and tyre damage. Pressure in all tyres must always be appropriate to the vehicleload → Wheels and tyres .
Always inflate all tyres to the correct tyre pressure before every journey → Wheels and tyres .
If driven with insufficient pressure, the tyre flexes more. This could warm up the tyre to such an extent that the tread may separate and thetyre could burst. This could cause the driver to loose control of the vehicle.
High speeds and overloading of the vehicle may cause the tyres to heat up to such an extent that the tyre bursts, leading you to lose controlof the vehicle.
If the tyre pressure is too low or too high, the tyres will wear prematurely and the vehicle will not handle well.
If the tyre is not flat and it is not necessary to change the wheel immediately, drive at low speed to the nearest qualified workshop and checkand correct the tyre pressure → Wheels and tyres .
WARNING

12/29/2015 Bedienungsanleitung < Service & Zubehör < Volkswagen Deutschland
81/98
If the tyre pressure is too low and this is detected when the ignition is switched on, the yellow indicator lamp lights up . An acoustic
warning is also given, and a text notification may also be shown.
If a system fault is detected while the ignition is switched on, the yellow indicator lamp flashes for around one minute and then lights
up steadily. A text notification may also be displayed.
Driving on unpaved roads for long periods, or a sporty driving style, can temporarily deactivate the Tyre Pressure Loss Indicator. The
indicator lamp shows the functional fault, but disappears if the road conditions or driving style change.
Tyre Pressure Loss Indicator
Fig. 153 In the stowage compartment on the front passenger side: button for the Tyre Pressure Loss Indicator
First read and observe the introductory information and safety warnings → Introduction
The Tyre Pressure Loss Indicator uses data from the ABS sensors and other functions to check the speed of rotation and the rollingcircumference of the individual wheels. Any change in the rolling circumference of one or more wheels is shown by the Tyre Pressure LossIndicator in the instrument cluster.
Changes in the rolling circumferenceThe rolling circumference of a tyre can change:
If the tyre pressure has been changed manually.
If the tyre pressure is too low.
If the tyre has structural damage.
Failure to observe illuminated warning lamps and text messages can lead to your vehicle breaking down in traffic, and can cause accident andserious injury.
Never ignore any illuminated warning lamps or text messages.
Stop the vehicle as soon as possible and when safe to do so.
WARNING
Failure to observe illuminated indicator lamps and text messages can lead to your vehicle being damaged.
NOTICE

12/29/2015 Bedienungsanleitung < Service & Zubehör < Volkswagen Deutschland
82/98
If the vehicle is loaded more heavily on one side.
If the wheels on one axle are loaded more heavily, e.g. high load level.
If snow chains have been fitted.
If a temporary spare wheel has been fitted.
If one wheel per axle has been changed.
In certain circumstances, the Tyre Pressure Loss Indicator may become slow or may not display anything, e.g. with a sporty driving style, inwinter driving conditions, on unpaved roads, or when driving with snow chains.
Synchronising the Tyre Pressure Loss IndicatorThe Tyre Pressure Loss Indicator will have to be re-synchronised after changing the tyre pressure, or after changing one or more wheels. Thisalso applies when wheels are swapped, e.g. from the front to the rear.
The saved values must be reset before the system can be resynchronised.
Switch on ignition.
Press and hold the → Fig. 153 button until an acoustic confirmation signal is emitted.
Once the saved values have been reset, the system calibrates itself independently to the fitted tyres and the tyre pressures filled by the driverduring normal vehicle operation. The calibrated values are adopted and monitored after a long journey at various speeds.
If the wheels are loaded more heavily than normal, e.g. if the vehicle is carrying heavy payload, the tyre pressure must be raised to therecommended full-load tyre pressure before synchronisation → Wheels and tyres .
The Tyre Pressure Loss Indicator stops working if there is a fault in the ESC or ABS → Braking, stopping and parking .
If a warning is given about tyre pressure being too low, the vehicle must remain stationary for approximately one minute and should not be
moved. Alternatively, the ignition can be switched off and then back on again. Only then can the Tyre Pressure Loss Indicator be synchronisedusing the tyre monitoring button → Fig. 153 .
When using snow chains, an incorrect display may be shown as the snow chains increase the tyre circumference.
IntroductionThis chapter contains information on the following subjects: → Controls for the air conditioning system → Controls for the heating and fresh air system → Information on the air conditioning system → Vents
→ Air recirculation mode
Incorrect use of the setting button can cause the Tyre Pressure Loss Indicator to issue false warnings or to issue no warning despitedangerously low tyre pressure. Make certain the tyre pressure of all tyres is correct before using the setting button.
WARNING
Air conditioning systemHeating, ventilating, cooling

12/29/2015 Bedienungsanleitung < Service & Zubehör < Volkswagen Deutschland
83/98
→ Air recirculation mode
The dust and pollen filterThe dust and pollen filter with activated charcoal reduces the level of impurities in the outside air entering the vehicle.
The dust and pollen filter must be changed regularly to avoid impairing the performance of the air conditioning system.
The dust and pollen filter must be changed more frequently than stated in the service schedule if the efficiency of the filter declines prematurelydue to the vehicle being used in areas with high levels of air pollution.
Start/stop systemThe following settings prevent the start/stop system from switching off the engine automatically (for heating and fresh air system or airconditioning system only (manual)):
The blower control → Fig. 154 or → Fig. 156 is set to position 3 or higher.
AND: The temperature selector is turned as far as it will go to position and the air distribution regulator is turned to position .
OR: The temperature selector is turned as far as it will go to position and the air distribution regulator is not in position . The coolingsystem and air recirculation function are switched on.
Cancelling one of these settings means that the engine can be switched off by the start/stop system → Pull-away assist systems .
Additional information and warnings:Exterior views → Exterior views
Windscreen wipers/washer → Windscreen wipers and washer
Cleaning and caring for the vehicle exterior → Caring for and cleaning the vehicle exterior
Poor visibility through all windows increases the risk of collisions and accidents, which can cause serious injuries.
Always ensure that all windows are free of ice, snow and mist to ensure good visibility.
Maximum heat output, which is needed to defrost the windows as quickly as possible, is only available when the engine has reached itsoperating temperature. Do not start your journey until you have good visibility.
Always ensure that the heating and fresh air system or the air conditioning system and the heated rear window are used correctly in order tohave good visibility.
Never use the air recirculation mode for an extended period. If the cooling system is switched off, the windows can mist up very quickly in airrecirculation mode and reduce visibility considerably.
Always switch off the air recirculation mode when it is not required.
WARNING
Stale air can quickly make the driver tired and affect their concentration, which in turn can cause collisions, accidents and serious injuries.
Never switch off the blowers or switch on the air recirculation mode for an extended period as this prevents fresh air from entering thevehicle interior.
WARNING

12/29/2015 Bedienungsanleitung < Service & Zubehör < Volkswagen Deutschland
84/98
If the cooling system is switched off, the outside air that is drawn into the vehicle is not dehumidified. To prevent the windows misting over,
Volkswagen recommends that you leave the air conditioning (compressor) switched on. To do this press the / button. The indicator lampin the button must light up.
Maximum heat output, which is needed to defrost the windows as quickly as possible, is only available when the engine has reached its
operating temperature.
Keep the air intake slots in front of the windscreen free of snow, ice and leaves to ensure heating and cooling is not impaired, and to
prevent the windows from misting over.
After starting the engine with a discharged vehicle battery or after an emergency start, system settings (time, date, personal convenience
settings and programming) may have been changed or deleted. Check and correct the settings as necessary once the vehicle battery has beensufficiently charged.
Controls for the air conditioning system
Fig. 154 In the centre console: air conditioning controls (manual)
Switch off the air conditioning system if you suspect that it has been damaged. This can help to prevent secondary damage. The airconditioning system should be checked by a qualified workshop.
Repairs to the air conditioning system require specialist knowledge and special tools. Volkswagen recommends using a Volkswagendealership for this purpose.
NOTICE

12/29/2015 Bedienungsanleitung < Service & Zubehör < Volkswagen Deutschland
85/98
Fig. 155 In the centre console: Climatronic controls
First read and observe the introductory information and safety warnings → Introduction
Press the corresponding button to switch a function on or off. When a function is switched on, an indicator lamp lights up in the button (heatingand fresh air system, air conditioning system (manual)), or the activated function is shown in the display field → Fig. 155 ④ (Climatronic). Pressthe button again to switch the function off.
Button, control Additional information. Air conditioning system (manual) → Fig. 154 and Climatronic → Fig. 155 .
Temperature ①.Turn the regulator to set the temperature as required.
...
Blowers ②. Air conditioning system (manual): setting 0: blower and system switched off. Setting 4: highest blower setting.
, Climatronic: the strength of the blower is regulated automatically. Turn the regulator to set the blowers manually.
Air distribution ③.Air conditioning system (manual): turn the control to direct the airflow as required.
Climatronic: the airflow is automatically set to comfortable. It can also be switched on manually using the buttons.
④ Climatronic: display of the set temperature as well as functions that are switched on.
Air conditioning system (manual): defrost function. Air distribution to the windscreen. In this position, the air
recirculation mode is switched off automatically, or not switched on at all. Press the / button and increasethe strength of the blower in order to remove condensation, frost etc. from the windscreen as quickly as possible.
Climatronic: defrost function. The air drawn in from outside the vehicle is directed at the windscreen and the airrecirculation mode is switched off automatically. In order to demist the windscreen as quickly as possible, the airwill be dehumidified at temperatures above about +3°C (+38°F) and the blower will be set to a high speed.
Air distribution to the upper body via the air vents in the dash panel.
, Air distribution to the footwell.
Air conditioning system (manual): air distribution to the windscreen and the footwell.
Climatronic: air distribution to the windscreen.
Air conditioning system (manual), Climatronic: air recirculation mode → Air recirculation mode .
Air conditioning system (manual), Climatronic: press the button to switch the cooling system on or off.
Climatronic: automatic temperature, blower and air distribution control.
Rear window heating
The button for rear window heating is in the upper section of the centre console. The rear window heating only functions when the engine

12/29/2015 Bedienungsanleitung < Service & Zubehör < Volkswagen Deutschland
86/98
is running and will switch off automatically after approximately 10 minutes.
Controls for the heating and fresh air system
Fig. 156 In the centre console: rotary controller of the heating and fresh air system with controls
First read and observe the introductory information and safety warnings → Introduction
Button, control Additional information. Heating and fresh air system → Fig. 156
Temperature ①. Turn the regulator to set the temperature as required. The required interior temperature cannot be lower than theoutside temperature as the heating and fresh air system cannot cool or dehumidify the air. ...
Blowers ②.Setting 0: blower and heating and fresh air system switched off. Setting 4: highest blower setting.
Air distribution ③. Turn the control to direct the airflow exactly as required.
Air distribution to the windscreen.
Air distribution to the upper body via the air vents in the dash panel.
Air distribution to the footwell.
Air distribution to the windscreen and the footwell.
Air recirculation mode → Air recirculation mode .
Settings for optimal road visibilitySwitch off air recirculation mode → Air recirculation mode .
Set blower → Fig. 156 ② to level 1 or 2.
Set the temperature selector → Fig. 156 ① to the required position.
Stale air can quickly make the driver tired and affect their concentration, which in turn can cause collisions, accidents and serious injuries.
Never switch off the blowers or switch on the air recirculation mode for an extended period as this prevents fresh air from entering thevehicle interior.
WARNING

12/29/2015 Bedienungsanleitung < Service & Zubehör < Volkswagen Deutschland
87/98
Open and position all vents on the dash panel → Settings for optimal road visibility .
Turn the air distribution controller → Fig. 156 ③ to the desired position.
Information on the air conditioning system
First read and observe the introductory information and safety warnings → Introduction
The cooling system for the vehicle interior only works when the engine is running and the blower is switched on.
The air conditioning system operates most effectively with the windows and the electric panorama sliding and tilting glass roof closed. However, ifthe vehicle has heated up after standing in the sun for some time, the air inside can be cooled more quickly by opening the windows and theelectric panorama sliding and tilting glass roof for a short time.
Settings for optimal road visibilitySwitching the cooling system on not only reduces the temperature of the vehicle interior, but also the humidity. This improves comfort for thevehicle occupants and prevents the windows from misting when the outside humidity is high.
Air conditioning system (manual)
Switch off air recirculation mode → Air recirculation mode .
Set the blowers to the required level.
Open and position all vents on the dash panel → Vents .
Turn the air distribution controller to the desired position.
Press the button to switch the cooling system on. The indicator lamp in the button lights up.
Climatronic
Press the button.
Set the temperature to +22°C (+72°F).
Open and position all vents on the dash panel → Vents .
Changing the temperature scale for the ClimatronicIn vehicles with a factory-fitted radio or navigation system, the temperature scale can be switched between Celsius and Farenheit either in theinfotainment system or in the control unit in the Climatronic.
In vehicles without a factory-fitted radio or navigation system, you can only change the temperature scale via the control unit in the Climatronic.
Switching the temperature scale via the infotainment system: → Infotainment system . All temperature displays are changed in the vehicle.
Switching the temperature scale via the control unit: press and hold and buttons. Only the temperature in thecontrol unit is changed.
The cooling system cannot be switched on
Stale air can quickly make the driver tired and affect their concentration, which in turn can cause collisions, accidents and serious injuries.
Never switch off the blowers or switch on the air recirculation mode for an extended period as this prevents fresh air from entering thevehicle interior.
WARNING

12/29/2015 Bedienungsanleitung < Service & Zubehör < Volkswagen Deutschland
88/98
The cooling system cannot be switched onThe following criteria may prevent the cooling system from being switched on:
The engine is not running.
The blower is switched off.
The air conditioning system fuse has blown.
The ambient temperature is lower than approximately +3 (+38°F).
The compressor has been temporarily switched off because the coolant temperature is too high.
There is a different fault in the vehicle. The air conditioning system should be checked by a qualified workshop.
Things to noteIf the humidity and temperature outside the vehicle are high, condensation can drip off the evaporator in the cooling system and form a poolunderneath the vehicle. This is normal and does not indicate a leak.
The windscreen may mist up after starting the engine due to residual humidity in the air conditioning system. Switch the defrost function
on in order to clear the windscreen of condensation or mist as quickly as possible.
Vents
Fig. 157 In the dash panel: vents
First read and observe the introductory information and safety warnings → Introduction
The vents → Fig. 157 ① should be left open to ensure that the vehicle interior is sufficiently heated, ventilated and cooled.
Turn the relevant thumb wheel (magnified view) in the required direction to open and close the vents. When the mark on the thumb wheel is inposition , the vent is closed.
Adjust the direction of the airflow by moving the grille.
Additional vents can be found in the instrument panel → Fig. 157 ② , in the footwells and in the rear area of the vehicle interior.
Do not cover the ventilation openings underneath the loading edge and in the area above the first aid kit as this prevents stale air from
escaping the vehicle.
Do not place any food, medicine or any other temperature-sensitive items in front of the vents. Heat-sensitive food, medicine and other itemscould be either damaged or rendered useless.
NOTICE

12/29/2015 Bedienungsanleitung < Service & Zubehör < Volkswagen Deutschland
89/98
Air recirculation mode
First read and observe the introductory information and safety warnings → Introduction
General notes
There are different types of air recirculation, depending on the level of equipment:
Air recirculation mode
The air recirculation mode prevents outside air from entering the vehicle.
If the outside temperature is very high, the air recirculation mode should be selected for a short time in order to cool the vehicle interior morequickly.
The air recirculation mode will switch off in the following situations for safety reasons → .
Switching off manually: the button is pressed (with Climatronic) or the air distribution regulator is turned to position (withair conditioning system (manual)).
Switching off automatically : a sensor identifies the risk of the windows misting.
Switching the air recirculation mode on and off
Switching on: press the button repeatedly until the symbol in the display field lights up.
Switching off: press the button repeatedly until the symbol in the display field is no longer lit up.
Climatronic: when reverse gear is selected, air recirculation mode is switched on briefly to prevent exhaust fumes from entering the
vehicle interior.
Introduction
Stale air can quickly make the driver tired and affect their concentration, which in turn can cause collisions, accidents and serious injuries.
Never use the air recirculation mode for an extended period as no fresh air will enter the vehicle interior.
If the cooling system is switched off, the windows can mist up very quickly in air recirculation mode and reduce visibility considerably.
Always switch off the air recirculation mode when it is not required.
WARNING
In vehicles with an air conditioning system, do not smoke when the air recirculation mode is switched on. The smoke drawn into the coolingsystem can leave a residue on the evaporator and the dust and pollen filter (Climatronic with activated charcoal) producing a lasting, unpleasantodour.
NOTICE
At the filling stationFilling the tank
12/29/2015 Bedienungsanleitung < Service & Zubehör < Volkswagen Deutschland
90/98
IntroductionThis chapter contains information on the following subjects: → Indicator lamps and fuel gauge → Filling the tank with petrol or diesel → Capacities → Checks when filling the tank
The fuel cap is located at the rear right-hand side of the vehicle.
Additional information and warnings:Exterior views → Exterior views
Fuel → Fuel
Preparation for working in the engine compartment → Preparation for working in the engine compartment
Filling the tank incorrectly and incorrectly handling fuel can cause explosions, fire and serious burns and injuries.
Always ensure that the tank cap is properly closed, to prevent the evaporation and spillage of fuel.
Fuel is highly explosive and inflammable and can cause serious burns and other injuries.
Fuel can spill out if the engine is not switched off or the filler nozzle is not fully inserted into the fuel filler neck when filling the tank. This cancause fires, explosions and serious burns and injuries.
When filling the tank with fuel, the engine and the ignition must be switched off for safety reasons.
When filling the tank, always switch off your mobile telephone and two-way radio or any other radio equipment. Electromagnetic radiationcan generate sparks which can in turn start a fire.
Never get back into the vehicle while filling the tank. If in exceptional cases you have to enter the vehicle, close the door and touch a metalobject before touching the filler nozzle again. This will remove any electrostatic charge from you. Failure to do so could generate a spark.Sparks can cause a fire when filling the tank.
Never fill the tank or fill up a spare canister near open flames, sparks or glowing matter (e.g. cigarettes).
Electrostatic discharge and electromagnetic radiation must be avoided when filling the tank.
Follow all applicable safety information provided by the filling station when filling the tank.
Never spill fuel in the vehicle or in the luggage compartment.
WARNING

12/29/2015 Bedienungsanleitung < Service & Zubehör < Volkswagen Deutschland
91/98
Fuels can pollute the environment. Any spilt service fluids must be cleaned up and disposed of properly.
The tank flap cannot be opened manually. Seek expert assistance if necessary.
Indicator lamps and fuel gauge
Fig. 158 In the instrument cluster: A: fuel gauges for petrol and diesel (variant 1), B: fuel gauges for petrol and diesel (variant 2)
For safety reasons, Volkswagen does not recommend carrying a spare fuel canister in the vehicle. Fuel can spill out of the full or empty canisterand catch fire, especially in the event of an accident. This could cause explosions, fire and injuries.
If, in exceptional circumstances, you have to transport a spare fuel canister, please note the following:- When refilling never place the canister in or on top of the vehicle, for example in the luggage compartment. There may be anelectrostatic charge during refilling causing the fuel fumes to ignite.
- Always place the spare fuel canister on the ground.
- When filling a spare fuel canister, place the filler nozzle as far as possible into the filler opening.
- If the spare fuel canister is made of metal, the filler nozzle must have constant contact with the canister in order to avoid staticcharging.
- Please follow all legislation concerning the use, stowage and transport of a spare fuel canister.
- Ensure that the spare fuel canister is accordance with the industry standard, such as ANSI or ASTM F852-86.
WARNING
Remove spilt fuel from all vehicle components as quickly as possible in order to avoid damage to the wheel housing, tyres and vehicle paint.
Filling the tank with petrol in a vehicle fitted with a diesel engine or with diesel in vehicle equipped with a petrol engine can cause seriousand expensive engine damage and damage to the fuel system that is not covered by any Volkswagen guarantee. Do not start the engineunder any circumstances if you have refilled using the incorrect fuel. Seek expert assistance. The substances in these fuels can causeserious damage to the fuel system and to the engine itself if it is switched on.
Vehicles with a diesel engine should under no circumstances be filled and driven with petrol, kerosene, heating oil or any other fuels thathave not been expressly approved for diesel engines. Other fuels can cause extensive and expensive damage to the engine and to the fuelsystem which will not be covered by any Volkswagen warranty.
NOTICE

12/29/2015 Bedienungsanleitung < Service & Zubehör < Volkswagen Deutschland
92/98
First read and observe the introductory information and safety warnings → Introduction
Lit up Needle position → Fig. 158 Possible cause → Action
Reserve marking or redmarking (arrow)
Fuel tank almost empty. Reserve is used up → Capacities .
Fill the tank as soon as possible → .
– Water in fuel in vehicles with a diesel engine.Switch off the engine and seek expertassistance → Fuel .
Several warning and indicator lamps will light up briefly as a functional check when the ignition is switched on. They will go out after a fewseconds.
The small arrow next to the petrol pump symbol → Fig. 158 in the display instrument shows you the side of the vehicle on which the tank
flap is located.
Filling the tank with petrol or diesel
Fig. 159 In the righthand side of the vehicle at the rear: tank flap open
Driving the vehicle when the fuel level is too low could lead to your vehicle breaking down in traffic, accidents and serious injuries.
When the fuel level is too low, the fuel supply to the engine could be irregular, especially when driving up or down hills and inclines.
The steering, all driver assist systems and brake support systems will not function if the engine sputters or stops completely due to a lack offuel or irregular fuel supply.
Always fill the tank when it is still 1/4 full. This reduces the risk of running out of fuel and breaking down.
WARNING
To avoid damage to your vehicle, always observe the indicator lamps and associated warning texts.
Do not run the tank empty. Irregular filling periods can cause backfiring and allow unburnt fuel to enter the exhaust system. This could causedamage to the catalytic converter!
NOTICE

12/29/2015 Bedienungsanleitung < Service & Zubehör < Volkswagen Deutschland
93/98
Fig. 160 Open tank flap with tank cap attached to the holder
First read and observe the introductory information and safety warnings → Introduction
Switch off the engine, ignition and the mobile telephone before filling the tank and leave them switched off during the process.
Opening the tank cap
Unlock the vehicle using the vehicle key or the button in the driver door → Central locking system .
The tank flap is at the rear of the vehicle on the right.
Press on the tank flap in the direction of the arrow → Fig. 159 . The tank flap will spring open slightly.
Open the tank flap fully.
Turn the tank cap anticlockwise and hook it on top of the tank flap → Fig. 160 .
Filling the tankThe correct fuel grade for your vehicle is shown on a sticker on the inside of the tank flap → Fuel .
The fuel tank is full when the (properly operated) automatic filler nozzle clicks off for the first time → .
Do not continue filling the tank after it switches off. The expansion space in the fuel tank will otherwise fill up and the fuel could spill out. Thiscould also happen when the fuel warms up and expands.
Closing the tank capTurn the tank cap clockwise into the fuel filler neck until it perceptibly engages.
Close the tank flap so that it engages audibly. The tank flap must be flush with the vehicle bodywork.
Spilt fuel can pollute the environment.
Capacities
Do not continue filling the tank once the filler nozzle stops automatically. The fuel tank could be overfilled. This can cause fuel to splash out andoverflow. This can cause fires, explosions and serious injuries.
WARNING
Remove spilt fuel from the vehicle paint as quickly as possible in order to avoid damage to the wheel housing, tyres and vehicle paint.
NOTICE

12/29/2015 Bedienungsanleitung < Service & Zubehör < Volkswagen Deutschland
94/98
Windscreen washer fluid level Windscreen wipers and washer Windscreen wipers Windscreen washer .
Engine oil level Engine oil Engine oil Engine compartment Engine oil_5 Oil see Engine oil_5 .
Engine coolant level Coolant Coolant Engine compartment Coolant_4 Engine coolant see Coolant_4 .
Brake fluid level Braking, stopping and parking Brakes Parking .
Tyre pressure Wheels and tyres Wheels and tyres Tyres see Wheels and tyres_0 .
First read and observe the introductory information and safety warnings → Introduction
Fuel tank capacity
Petrol and diesel enginesApprox. 45.0 l,
of which approx. 7.0 l is reserve
Checks when filling the tank
First read and observe the introductory information and safety warnings → Introduction
Checklist
Never carry out any work on the engine or in the engine compartment if you are not familiar with the requisite procedures and general safetyrequirements, or if you only have access to incorrect operating equipment, service fluids, and unsuitable tools → Preparation for working in theengine compartment . The work should be carried out by a qualified workshop if you are uncertain. Please ensure that the following are checkedregularly, preferably every time you fill the tank:
Vehicle lighting necessary for traffic safety:
- Turn signals
- Side lights, dipped beam headlights and main beam headlights
- Tail light cluster
- Brake lights
- Rear fog light
Information on changing bulbs → Changing a bulb .
Introduction
This chapter contains information on the following subjects: → Petrol → Diesel
Different engines require different fuels. The factory-fitted sticker on the inside of the tank flap indicates the fuel type that is required for yourparticular vehicle.
Volkswagen recommends using low-sulphur or sulphur-free fuels, to help reduce fuel consumption and prevent damage to the engine.
If the engine is not running smoothly or begins to judder, this can indicate poor or inadequate fuel quality, e.g. water in the fuel. If thesesymptoms appear, reduce the vehicle speed immediately and drive to the nearest qualified workshop at medium engine speeds, avoiding highengine loading. If these symptoms occur immediately after the vehicle has been refuelled, switch the engine off as soon as it is safe to do so andseek expert assistance. This can help to prevent secondary damage.
Fuel

12/29/2015 Bedienungsanleitung < Service & Zubehör < Volkswagen Deutschland
95/98
Additional information and warnings:⇒ BookletService schedule,
Filling the tank → Filling the tank
Engine management and exhaust system → Engine management system and exhaust purification system
Petrol
First read and observe the introductory information and safety warnings → Introduction
Petrol typesVehicles with a petrol engine must be run on unleaded petrol in compliance with the European standard EN 228 or the German standard EDIN 51626-1 → . Fuels with a maximum ethanol content of 10% (E10) can be used for refuelling.
Petrol types are categorised according to their octane number, e.g. 91, 95 or 98 RON (RON = research octane number). The vehicle may befilled with petrol that has a higher octane number than the engine requires. However, this does not provide any advantage in terms of fuelconsumption or engine output. Where petrol complying with the EN 228 standard is not available, Volkswagen dealerships will have informationon which fuels are suitable for the vehicle. Volkswagen recommends using petrol with a low sulphur content or sulphur-free petrol for petrolengines.
Petrol additivesThe quality of petrol influences the running properties, performance and service life of the engine. This is why the vehicle should be refuelled withgood quality petrol that has already been mixed with the proper additives by the manufacturer. Optimally adjusted petrol additives help to preventcorrosion, help keep the fuel system clean, and hinder the build-up of deposits in the engine.
If faults potentially related to fuel characteristics arise while the is vehicle in motion, we recommend that you go to a qualified workshop to havethe fault analysed. Volkswagen recommends using a Volkswagen dealership for this purpose. Special cleaning service additives are availablefrom Volkswagen dealerships. These can help remedy malfunctions caused by deposits in the engine and fuel system. Only use Volkswagen-approved service additives in the approved quantity.
Incorrect handling of fuel can cause explosions, fire and serious burns and injuries.
Fuel is highly explosive and inflammable.
Never handle fuel near open flames, sparks or glowing matter (e.g. cigarettes).
Keep naked flames, hot parts and sparks at a safe distance.
Switch off your mobile telephone or two-way radio when dealing with fuel. Electromagnetic radiation can generate sparks which can in turnstart a fire.
Avoid electrostatic discharge and electromagnetic radiation in the direct vicinity of fuels.
Never spill fuel in the vehicle or in the luggage compartment.
Comply with any relevant safety information and legislation concerning the handling of fuels.
WARNING

12/29/2015 Bedienungsanleitung < Service & Zubehör < Volkswagen Deutschland
96/98
The use of unsuitable petrol additives can cause considerable damage to the engine and catalytic converter. Metallic additives should be avoidedat all times. Petrol additives that are intended to improve knock resistance or increase the octane number can also contain metallic additives.Therefore fuel additives sold separately should generally not be used → .
Diesel
First read and observe the introductory information and safety warnings → Introduction
DieselDiesel must comply with European standard EN 590.
The fuel quality affects the running properties, performance and service life of the engine. This is why the vehicle should be refuelled with goodquality diesel that has already been mixed with quality-enhancing additives by the manufacturer. Where diesel complying with the specifiedstandard is not available, Volkswagen dealerships will have information on what kind of diesel is suitable for the vehicle.
The service intervals are shorter if you use diesel with a high sulphur content ⇒ BookletService schedule, → Winter diesel . A Volkswagendealership will be able to tell you which countries have diesel with a high sulphur content.
Separately available fuel additives, thinners, or similar agents may not be mixed with the diesel. If faults potentially related to fuel characteristicsarise while the is vehicle in motion, we recommend that you go to a qualified workshop to have the fault analysed. Volkswagen recommendsusing a Volkswagen dealership for this purpose. Special service additives are available from Volkswagen dealerships to help remedymalfunctions relating to fuel quality. Only use Volkswagen-approved service additives in the approved quantity. Incorrect additives/quantitiescould cause serious damage to the vehicle.
Winter dieselWhen using summer-grade diesel, difficulties may be experienced at temperatures below 0°C (+32°F) because the fuel thickens due to paraffinseparation. For this reason winter-grade diesel which can be used at temperatures below -20°C (-4°F) is available in countries such as Germanyduring the cold months → .
In countries with different climatic conditions the diesel sold generally has different temperature characteristics. Check with a Volkswagen dealer
Before filling up with petrol, check whether the fuel corresponds to the vehicle's requirements according to the fuel standard information atthe pump.
Only use fuel that complies with the EN 228 standard and has the correct octane number. Otherwise, the engine and the fuel system cansuffer considerable damage. The engine can also lose power or fail.
If, in an emergency, you have to use petrol with an octane number lower than the recommended number, drive at medium engine speedsand avoid high engine loading. Avoid high engine speeds and heavy engine loads. Failure to do so can result in engine damage. Fill thetank with petrol with the correct octane number as soon as possible.
The use of unsuitable petrol additives can cause considerable damage to the engine and catalytic converter.
Fuels that are identified at the fuel pump as containing metallic additives may not be used. LRP fuel (lead replacement petrol) also containshigh concentrations of metallic additives. Risk of engine damage!
Just one tankful of leaded fuel, or fuel containing other metallic additives, can seriously impair the efficiency of the catalytic converter andcan also cause considerable damage to the catalytic converter and engine.
NOTICE

12/29/2015 Bedienungsanleitung < Service & Zubehör < Volkswagen Deutschland
97/98
or filling stations in the country concerned regarding the type of diesel fuels available.
It is not unusual for a cold diesel engine to be louder in cold temperatures that in warm weather. In addition, exhaust emissions may be tingedwith blue while the engine starts and reaches operating temperature.
Filter preheaterDiesel vehicles are equipped with a filter pre-heater system. This ensures that the fuel system remains operational even down to approximately-24°C (-11°F) provided that winter-grade diesel which is safe down to -20°C (-4°F) is used.
However, if the fuel has waxed to such an extent that the engine will not start at temperatures below -24°C (-11°F) simply place the vehicle in awarm garage or workshop for a while.
Supplementary heaterVehicles fitted with certain types of diesel engine may also be equipped with a fuel-driven supplementary heater. This heater is powered with fuelfrom the vehicle tank. This can cause odour and water vapour to escape from the vehicle, and there may be a greater quantity of smoke. This isquite normal when the system is in use, and does not indicate damage or a fault in the system.
The supplementary heater will be switched off automatically if the level in the fuel tank is low (reserve level).
Never use a start booster. Start boosters may explode or cause the engine to suddenly run at high revs, which can cause serious injuries andengine damage.
WARNING
Before filling up with diesel, check whether the fuel corresponds to the vehicle's requirements according to the fuel standard information atthe pump.
Only use fuel that complies with the specified standard and has the correct cetane number. Significant malfunctions could otherwise result.
Your vehicle is not suitable for use with biodiesel and must not be filled up or driven with biodiesel. Failure to observe this point can result indamage to the fuel system and engine.
Some diesel manufacturers blend biodiesel with diesel fuel in compliance with European Standard 590 or an equivalent standard (inGermany). Use of this diesel is allowed and will not damage the engine or fuel system.
Spilt diesel fuel should be wiped off vehicle paint, tyres and plastic parts immediately. The vehicle components affected should be washedthoroughly with soap and warm water in order to prevent leaks and serious damage.
The diesel engine has been developed for use with diesel only. For this reason, petrol, heating oil or other unsuitable fuels may not be used.These fuels can cause serious damage to the fuel system and engine.
The service life of the diesel particulate filter can be reduced considerably if diesels with a high sulphur content are used. A Volkswagendealership will be able to tell you which countries have diesel with a high sulphur content.
NOTICE
In cold weather do not mix petrol into the diesel, as this could cause massive damage to the engine's injection system.
NOTICE

12/29/2015 Bedienungsanleitung < Service & Zubehör < Volkswagen Deutschland
98/98

12/29/2015 Bedienungsanleitung < Service & Zubehör < Volkswagen Deutschland
1/74
Introduction
This chapter contains information on the following subjects: → Warning lamp → Preparing the vehicle for working in the engine compartment → Opening and closing the bonnet
Always park the vehicle on a level and stable surface before carrying out any work in the engine compartment.
The engine compartment of a motor vehicle is a hazardous area. Never carry out any work on the engine or in the engine compartment if you arenot familiar with the requisite procedures and general safety requirements, or if you only have access to incorrect operating equipment, servicefluids, and unsuitable tools → . The work should be carried out by a qualified workshop if you are uncertain. Serious injuries can be caused ifwork is carried out incorrectly.
Additional information and warnings:Exterior views → Exterior views
Windscreen wipers/washer → Windscreen wipers and washer
Starting and stopping the engine → Starting and stopping the engine
Brake fluid → Braking, stopping and parking
Checks when filling the tank → Filling the tank
Engine oil → Engine oil
Engine coolant → Coolant
Battery → Vehicle battery
Accessories, modifications, repairs and renewal of parts → Accessories, modifications, repairs and renewal of parts
Cleaning and maintenanceIn the engine compartmentPreparation for working in the engine compartment
Unintentional vehicle movements during service work can cause serious injury.
Never work underneath a vehicle if it is not secured against rolling away. If you are working underneath the vehicle while the wheels are onthe ground, the vehicle must be on a level, the wheels must be blocked and the vehicle key must be removed from the ignition lock.
If you have to work underneath the vehicle, use suitable stands to provide extra support for the vehicle. The vehicle jack is not sufficient forthis task and can fail, which can lead to serious injuries.
The start/stop system must have been deactivated.
WARNING

12/29/2015 Bedienungsanleitung < Service & Zubehör < Volkswagen Deutschland
2/74
The engine/motor compartment of any motor vehicle is a dangerous area. Serious injuries can be sustained here.
The utmost care and attention must be paid when carrying out any work and you must follow the general safety rules. Never take any risks.
Never do any work on the engine or in the engine compartment unless you know exactly how to carry it out. If you are uncertain of what todo, the work should be carried out by a qualified workshop. Serious injuries can result from work that has not been carried out properly.
Never open the bonnet if you see steam or coolant escaping from the engine compartment. Hot steam or coolant can cause serious burns.Always wait until you can no longer see or hear steam or coolant coming from the engine compartment.
Always allow the engine to cool down before opening the bonnet.
Hot parts of the engine or exhaust system can burn the skin.
The following points should be noted before opening the bonnet once it has cooled down.- Apply the handbrake fully and move the selector lever to position P or move the manual gear lever to the neutral position.
- Remove the vehicle key from the ignition lock.
- Always keep children away from the engine compartment and never leave the vehicle unattended.
The engine cooling system is under pressure when the engine is hot. Never open the cap of the coolant expansion tank when the engine ishot. Coolant may spray out and cause serious burns and injuries.
- Turn the cap slowly and very carefully anti-clockwise while exerting gentle downward pressure on the cap.
- Always protect the face, hands and arms from hot coolant or steam with a large, thick cloth.
When refilling, do not spill any service fluids on engine components or on the exhaust system. The spilt service fluids can start a fire.
WARNING
High voltages in the electrical system can cause electric shocks, burns, serious injuries and death!
Never short circuit the electric system. The vehicle battery could explode.
Please note the following guidelines to help reduce the risk of an electric shock and serious injuries while the engine is running or beingstarted:
- Never touch the electrical wiring of the ignition system.
- Never touch the electrical cable and connections of the gas discharge bulb.
WARNING

12/29/2015 Bedienungsanleitung < Service & Zubehör < Volkswagen Deutschland
3/74
Service fluids leaks are harmful to the environment. So you should regularly check the ground underneath your vehicle. If there are spots
of oil or other fluids on the ground, the vehicle should be inspected by a qualified workshop. Any spilt service fluids must be disposed of properly.
There are rotating components in the engine compartment that can cause serious injury.
Never place your hand near these components or in the radiator fan. Touching the rotary blades can result in serious injuries. The fan istemperature-controlled and can start automatically, even if the engine has been switched off and the vehicle key has been removed from theignition lock.
If any work has to be performed when the engine is started or with the engine running, there is an additional, potentially fatal, safety riskfrom the rotating parts, such as the drive belts, alternator, radiator fan, etc., and from the high-voltage ignition system. Always be particularlycareful.
- Always ensure that no body parts, jewellery, ties, loose items of clothing or long hair can be caught up in rotating engine components.Before starting work, remove any jewellery and ties, tie up long hair and pull clothes in tightly to avoid them getting caught in theengine compartment.
- Always depress the accelerator carefully and never without due consideration. The vehicle can start to move even if the handbrake isapplied.
Always ensure that you have not left any objects, such as cleaning cloths and tools, in the engine compartment. Any forgotten items cancause malfunctions, engine damage and fires.
WARNING
Additional insulating materials such as covers in the engine compartment could disrupt the operation of the engine, cause damage and lead tosevere injuries.
Never cover the motor with any insulating materials.
WARNING
Service fluids and some materials in the engine compartment are highly flammable and can cause fires and serious injuries!
Never smoke while working on the vehicle.
Never work near naked flames or sparks.
Never spill fluids onto the engine. They could ignite on hot engine components and hence cause injuries.
Please note the following when carrying out any work on the fuel system or the electrical system:- Always disconnect the vehicle battery. Ensure that the vehicle is unlocked when the vehicle battery is disconnected as otherwise theanti-theft alarm will be activated.
- Never work in the direct proximity of heating systems, water heaters or any other open flames.
Always have a fully functional and tested fire extinguisher to hand.
WARNING
When refilling or changing service fluids, please ensure that the fluids are in the correct container. Incorrect service fluids can cause seriousfunctional problems and engine damage.
NOTICE

12/29/2015 Bedienungsanleitung < Service & Zubehör < Volkswagen Deutschland
4/74
Park the vehicle on a level and stable surface.
Depress and hold the brake pedal until the engine has stopped.
Apply the handbrake firmly Braking, stopping and parking Brakes Parking .
Select the neutral position or move the selector lever to P Changing gear Changing gear Automatic gearbox see Automatic gearbox_0Automatic gearbox see Changing gear_0 Automatic gearbox Manual gearbox see Changing gear_0 Manual gearbox .
Stop the engine and remove the key from the ignition Starting and stopping the engine Engine and ignition Ignition see Engine andignition_0 .
Allow the engine to cool sufficiently.
Children and other people should be kept well away from the engine compartment.
Ensure that the vehicle cannot roll away unexpectedly.
Warning lamp
First read and observe the introductory information and safety warnings → Introduction
Display Possible cause Action
With corresponding display: bonnet not properly closed. Do not drive on!
Close the bonnet.
Several warning and indicator lamps will light up briefly as a functional check when the ignition is switched on. They will go out after a fewseconds.
Depending on the vehicle equipment level, a symbol may be shown in the instrument cluster display to indicate that the bonnet is open or notclosed properly. These symbols are also visible when the ignition is switched off. The display will go out approximately 15 seconds after all doorshave been closed and the vehicle has been locked.
Preparing the vehicle for working in the engine compartment
First read and observe the introductory information and safety warnings → Introduction
Checklist
The following steps should always be carried out in the specified order before working in the engine compartment → :
Failure to observe illuminated warning lamps and text messages can lead to your vehicle breaking down in traffic, and can cause accident andserious injury.
Never ignore any illuminated warning lamps or text messages.
Stop the vehicle as soon as possible and when safe to do so.
WARNING

12/29/2015 Bedienungsanleitung < Service & Zubehör < Volkswagen Deutschland
5/74
Opening and closing the bonnet
Fig. 161 A: release lever in the footwell on the driver side. B: release lever on the bonnet
Fig. 162 C: holder for the bonnet stay in the lock carrier. D: bonnet secured with the bonnet stay
First read and observe the introductory information and safety warnings → Introduction
Opening the bonnetEnsure that the windscreen wiper arms are positioned on the windscreen before opening the bonnet → .
Open driver door and pull the release lever in the direction of the arrow → Fig. 161 ① . The bonnet is released from its lock by a springmechanism → .
Lift the bonnet slightly and at the same time push the release lever in the direction of the arrow → Fig. 161 ② to open the bonnet completely.
Take the bonnet stay out of the holder → Fig. 162 ③ in the direction of the arrow and hook it into the opening in the bonnet → Fig. 162 ④ .
Closing the bonnetLift the bonnet slightly → .
Unhook the bonnet stay out of the opening → Fig. 162 ④ and insert it in the holder → Fig. 162 ③ .
Let the bonnet drop into the catches from a height of approximately 30 cm – do not press it down!
If the bonnet is not closed, open it again and close it properly.
The bonnet sits flush with the body parts around it when it is closed properly. The indicator lamp in the instrument cluster will no longer be lit up
→ Warning lamp .
Ignoring any of the items on this important safety checklist can lead to severe injuries.
Always follow the instructions in the checklist and observe the general safety procedures.
WARNING
12/29/2015 Bedienungsanleitung < Service & Zubehör < Volkswagen Deutschland
6/74
→ Warning lamp .
IntroductionThis chapter contains information on the following subjects: → Warning and indicator lamps → Engine oil specification → Checking the engine oil level and refilling engine oil → Engine oil consumption → Changing engine oil
Additional information and warnings:⇒ BookletService schedule,
Preparation for working in the engine compartment → Preparation for working in the engine compartment
Accessories, modifications, repairs and renewal of parts → Accessories, modifications, repairs and renewal of parts
If the bonnet is not closed properly, it can open suddenly while you are driving and completely obscure your view of the road. This can lead toaccidents and serious injuries.
After closing the bonnet, always check that it is properly secured. The bonnet must be flush with the surrounding body panels.
If you notice that the bonnet is not closed properly while the vehicle is in motion, stop the vehicle as soon as possible and close the bonnet.
Therefore the bonnet should only be opened or closed when you are sure that nobody is in its path.
WARNING
The bonnet should only be opened when the wiper arms are flush to the windscreen and when they are switched off in order to avoiddamage to the bonnet and the windscreen wiper arms.
Always fold the windscreen wiper arms back onto the windscreen before driving away.
NOTICE
Engine oil
Incorrect handling of engine oil can cause serious burns and injuries.
Always wear eye protection when handling engine oil.
Engine oil is toxic and must be stored out of the reach of children.
Engine oil must be kept in the closed original container. This also applies to used oil until it is disposed of.
Never use empty food containers, bottles or other containers to store engine oil as other people may then drink the engine oil.
Regular contact with engine oil can damage the skin. Skin that has been in contact with engine oil should be washed thoroughly with waterand soap.
Engine oil becomes extremely hot when the engine is running and can scald skin severely. Always allow the engine to cool down.
WARNING

12/29/2015 Bedienungsanleitung < Service & Zubehör < Volkswagen Deutschland
7/74
Leaking or spilt engine oil can pollute the environment. Spilt service fluids must be collected then disposed of properly and in an
environmentally responsible way.
Warning and indicator lamps
First read and observe the introductory information and safety warnings → Introduction
Lit up Possible cause Action
Engine oil level is too low.Switch off the engine. Check the engine oil level → Checking theengine oil level and refilling engine oil .
Flashes Possible cause Action
Engine oil pressure is too low.
Do not drive on!
Switch off the engine. Check the engine oil level. - Do not drive on or remain at idling speed if the warning lamp isflashing even if the engine oil level is correct. The engine couldotherwise be damaged. Seek expert assistance.
Fault in the engine oil system.Go to a qualified workshop. The engine oil sensor should bechecked.
Several warning and indicator lamps will light up briefly as a functional check when the ignition is switched on. They will go out after a fewseconds.
Engine oil specification
First read and observe the introductory information and safety warnings → Introduction
The engine oil used must correspond exactly to specifications.
The correct engine oil is important for the function and service life of the engine. A special high quality multigrade oil has been filled at the factoryand this can normally be used as an all-season oil.
If possible, only use Volkswagen-approved engine oil → . To comply with the requirements of the flexible service, only use approved flexibleservice engine oil that complies with the corresponding VW standard (). The engine oils listed are multigrade high-lubricity oils.
Engine oils are constantly being developed and improved. A Volkswagen dealership is always kept up to date on innovations. Volkswagen
Failure to observe illuminated warning lamps and text messages can lead to your vehicle breaking down in traffic, and can cause accident andserious injury.
Never ignore any illuminated warning lamps or text messages.
Stop the vehicle as soon as possible and when safe to do so.
WARNING
Failure to observe illuminated indicator lamps and text messages can lead to your vehicle being damaged.
NOTICE

12/29/2015 Bedienungsanleitung < Service & Zubehör < Volkswagen Deutschland
8/74
therefore recommends having engine oil changes done by a Volkswagen dealership.
The quality of the engine oil is not only tailored to the requirements of engines and exhaust gas treatment systems, but also to fuel quality. Due tothe way in which a combustion engine works, engine oil always comes into contact with combustion residues and fuel, which has a knock-oneffect on the ageing process of the oil.
The quality of fuels can vary greatly between individual markets and this must be taken into account when selecting the correct engine oil.
The use of engine oils compliant with the VW 504 00 und VW 507 00 specifications requires a fuel quality compliant with EN 228 (petrol) andEN 590 (diesel). Engine oils compliant with VW 504 00 und VW 507 00 are therefore unsuitable for use in a large number of markets.
Permitted engine oil specifications → Alternative engine oilspecifications →
Engine type Flexible service QI6(LongLife)
Fixed service QI1, QI2, QI3, QI4,QI7 (based on time/distance
travelled)
Only in the EU, Switzerland,Norway, Japan and Australia
a)
Petrol engines VW 504 00 VW 502 00 VW 504 00
Diesel engines with dieselparticulate filter
VW 507 00 VW 507 00 -----
Diesel engines without dieselparticulate filter
VW 507 00 VW 505 01 VW 507 00
a) Alternative engine oil specifications may only be used in fixed services QI1, QI2, QI3, QI4 and QI7, and only when fuel of a quality compliantwith EN 228 (petrol) and EN 590 (diesel), or fuel of an equivalent quality, is available in the particular country.
Checking the engine oil level and refilling engine oil
Do not add any additional lubricants to the engine oil. Any damage caused by the use of such additives is not covered by the warranty.
Only engine oil specifications that have been approved for use with the engine should be used. Using other engine oils can cause enginedamage.
Another engine oil can be used in the event of an emergency if the listed engine oils () are not available. To avoid damaging the engine, amaximum quantity of 0.5 litres of the following engine oil may be used only once until the next oil change:
- Petrol engines: standards ACEAA3/B4 or API SN (API SM).
- Diesel engines: standards ACEA C3 or API CJ-4.
NOTICE

12/29/2015 Bedienungsanleitung < Service & Zubehör < Volkswagen Deutschland
9/74
With the engine at operating temperature, park the vehicle on a level surface to ensure that the engine oil reading is correct.
Switch off the engine and wait a few minutes for the engine oil to flow back into the sump.
Open the bonnet Additional information and warnings:.
Identify the engine oil filler cap and oil dipstick. The engine oil filler opening bears the symbol on the cap and the oil dipstick has acoloured handle. If you cannot find the cap and dipstick please contact a qualified workshop.
Pull the dipstick out of the guide tube and wipe it off with a clean cloth.
Insert the oil dipstick into the guide tube again as far as it will go. If there is a marking on the oil dipstick, this marking must fit in thecorresponding groove at the top end of the guide tube when inserting.
After reading the oil level, push the oil dipstick back into the guide tube as far as it will go.
Unscrew the engine oil filler opening cap .
Using only the engine oil approved by Volkswagen expressly for this engine, top up the oil in small gradual amounts (no more than 0.5 l).
In order to avoid overfilling, wait for approximately one minute after each refill step to allow the engine oil to flow into the oil sump up to
Fig. 163 Oil dipstick with markings
Fig. 164 In the engine compartment: engine oil filler cap
First read and observe the introductory information and safety warnings → Introduction
Checklist
Carry out the steps in the specified order → :
Pull the dipstick out again and read the engine oil level on the dipstick as follows: : do not refill oil . Continue to step 15. : oil can berefilled (approximately 0.5 l). Continue to step 8 or 15. : oil must be refilled (approximately 1.0 l). Continue to step 8.
12/29/2015 Bedienungsanleitung < Service & Zubehör < Volkswagen Deutschland
10/74
the marking on the engine oil dipstick.
Read the engine oil level from the dipstick again before refilling with a further small quantity of engine oil. Never overfill engine oil .
After the refilling procedure, the engine oil level should be at least in the centre of area , but never above area .
After refilling, screw the engine oil filler cap back on correctly.
Reinsert the oil dipstick correctly into the guide tube as far as it will go.
Close the bonnet correctly Additional information and warnings:.
The engine oil level must never be above area → Fig. 163 . Otherwise oil can be drawn in through the crankcase breather and escape
into the atmosphere via the exhaust system.
Engine oil consumption
First read and observe the introductory information and safety warnings → Introduction
Engine oil consumption can vary from engine to engine and can change during the working life of an engine.
Depending on how you drive and the conditions in which the car is used, oil consumption can be up to 1.0 litre/2,000 km – and is likely to behigher for the first 5,000 km for new vehicles. The engine oil level must therefore be checked at regular intervals, preferably when refuelling andbefore long journeys.
When the engine is working hard the oil level must be kept within area → Fig. 163 , for instance during long motorway cruising in summer,trailer towing or climbing mountain passes.
Changing engine oil
First read and observe the introductory information and safety warnings → Introduction
The engine oil must be changed regularly in accordance with the data given in the service schedule.
The engine oil and filter should always be changed, and used oil disposed of, by a qualified workshop due to the special tools and knowledgerequired. Volkswagen recommends using a Volkswagen dealership for this purpose.
More details on the service intervals can be found in the service schedule.
Engine oil can ignite if it comes into contact with hot engine components. It can cause fires, burns and other serious injuries.
If engine oil is spilt on cold engine parts it can heat up and ignite when the engine is running.
Always ensure that the engine oil filler cap is securely tightened after refilling, and that the dipstick is properly inserted back into the guidetube. This will prevent the engine oil from draining out on to hot engine components when the engine is running.
WARNING
Do not start the engine if the engine oil level is above area → Fig. 163 . Seek expert assistance. The catalytic converter and the enginecould otherwise be damaged.
When refilling or changing service fluids, please ensure that the fluids are in the correct container. Incorrect service fluids can cause seriousfunctional problems and engine damage.
NOTICE

12/29/2015 Bedienungsanleitung < Service & Zubehör < Volkswagen Deutschland
11/74
Additives in the engine oil can cause new engine oil to discolour quickly. This is normal and does not mean that the engine oil should be changedmore frequently.
Before changing the engine oil, first find out where old oil can be disposed of properly near you.
Used oil must be disposed of in accordance with regulations governing the protection of the environment. Never dispose of old oil in
locations such as gardens, woods, sewerage systems, on streets and roads, or in rivers and waterways.
Introduction
This chapter contains information on the following subjects: → Warning lamp and coolant temperature display → Coolant specification → Checking the coolant level and refilling coolant
Never carry out any work on the engine coolant system if you are not familiar with the necessary procedures and if only unsuitable tools as wellas incorrect operating equipment and fluids are available → ! The work should be carried out by a qualified workshop if you are uncertain.Volkswagen recommends using a Volkswagen dealership for this purpose.
Serious injuries can be caused if work is carried out incorrectly.
Additional information and warnings:Towing a trailer → Towing a trailer
Preparation for working in the engine compartment → Preparation for working in the engine compartment
Accessories, modifications, repairs and renewal of parts → Accessories, modifications, repairs and renewal of parts
If, in exceptional cases, you have to carry out an oil change yourself, please note the following:
Always wear eye protection.
Always allow the engine to cool down completely to avoid burns.
Avoid raising your arms when removing the oil drain plug with your fingers to help prevent oil from running down your arm.
Use a suitable container when draining the used oil. It must be at least large enough to hold the entire quantity of engine oil required forrefilling.
Never store engine oil in empty food containers, bottles or any other non-original containers as people finding these containers may notknow that they contain engine oil.
Engine oil is toxic and must be stored out of the reach of children.
WARNING
Coolant

12/29/2015 Bedienungsanleitung < Service & Zubehör < Volkswagen Deutschland
12/74
Coolant and coolant additives can pollute the environment. Spilt operating fluids must be collected and disposed of properly and with
respect for the environment.
Warning lamp and coolant temperature display
Fig. 165 Coolant temperature display in instrument cluster: cold; normal; warning
First read and observe the introductory information and safety warnings → Introduction
A display for the coolant temperature may be, depending on the vehicle equipment, located in instrument cluster. In normal driving conditions, theneedle will be in the middle section of the scale. The temperature may also rise when the engine is working hard, especially at high ambienttemperatures.
Flashes Needle position → Fig. 165
Possible cause Action
Warning area
Coolant temperature too high.
Do not drive on!
Stop the vehicle as soon as it is possible and safe to do so.Stop the engine, let the engine cool down until the needle isback in the normal area. Check the coolant level → Checkingthe coolant level and refilling coolant .
Normal area
Coolant level too low.
After the engine has cooled down, check the coolant level andrefill engine coolant if the level is too low → Checking thecoolant level and refilling coolant . There is a fault if the coolant level is correct.
-- Fault in the coolant system. Do not drive on!
Seek expert assistance.
Engine coolant is toxic.
Engine coolant should only be kept in sealed original containers in a safe place.
Never store engine coolant in empty food containers, bottles or any other non-original containers as people finding these containers maythen drink the engine coolant.
The engine coolant must be stored out of the reach of children.
Please note that the amount of correct coolant additive used must be sufficient for the lowest ambient temperature that you expect thevehicle to be exposed to.
Coolant can freeze at extremely cold outside temperatures, causing the vehicle to break down. Vehicle occupants with inadequate winterclothing could then freeze to death as the heating will also no longer function.
WARNING

12/29/2015 Bedienungsanleitung < Service & Zubehör < Volkswagen Deutschland
13/74
--
Cold areaThe engine has not yet reachedoperating temperature.
Avoid high engine revs and heavy engine loads until the engineis warm.
Several warning and indicator lamps will light up briefly as a functional check when the ignition is switched on. They will go out after a fewseconds.
Coolant specification
First read and observe the introductory information and safety warnings → Introduction
The cooling system is filled at the factory with a mixture of specially prepared water and at least 40% coolant additive G 13 (TL-VW 774 J). Thecoolant additive is dyed purple. This mixture of water and coolant additive gives the necessary frost protection down to -25°C (-13°F) and protectsthe alloy parts of the cooling system against corrosion. The mixture also prevents scaling and raises the boiling point of the coolant.
In order to protect the coolant system, the proportion of coolant additive must always be at least 40%, even if anti-freeze is not required in warmweather and warm climates.
If greater frost protection is required in very cold climates, the proportion of anti-freeze additive can be increased. However, the percentage ofcoolant additive should not exceed 60%, as this would reduce the frost protection and the cooling effect.
When refilling the coolant, a mixture of distilled water and at least 40% coolant additive - G 13 - or - G 12 plus-plus - (TL-VW 774 G) (both ofwhich are dyed purple) must be used in order to obtain the optimum corrosion protection → . Mixing - G 13 - with the coolant additives -G 12 plus - (TL-VW 774 F), - G 12 - (dyed red) or - G 11 - (dyed blue-green) will significantly decrease the level of corrosion protection andshould therefore be avoided → .
Failure to observe illuminated warning lamps and text messages can lead to your vehicle breaking down in traffic, and can cause accident andserious injury.
Always heed illuminated warning lamps and text messages.
Never ignore any illuminated warning lamps or text messages.
Stop the vehicle as soon as possible and when safe to do so.
WARNING
Failure to observe illuminated indicator lamps and text messages can lead to your vehicle being damaged.
NOTICE
Insufficient anti-freeze in the coolant system can cause the engine to break down and cause serious injuries.
Please note that the amount of correct coolant additive used must be sufficient for the lowest ambient temperature that you expect thevehicle to be exposed to.
Coolant can freeze at extremely cold outside temperatures, causing the vehicle to break down. Vehicle occupants with inadequate winterclothing could then freeze to death as the heating will also no longer function.
WARNING

12/29/2015 Bedienungsanleitung < Service & Zubehör < Volkswagen Deutschland
14/74
Coolant and coolant additives can pollute the environment. Spilt service fluids must be collected then disposed of properly and in an
environmentally responsible way.
Checking the coolant level and refilling coolant
Fig. 166 In the engine compartment: mark on the coolant expansion tank
Fig. 167 In the engine compartment: coolant expansion tank cap
First read and observe the introductory information and safety warnings → Introduction
The engine coolant warning lamp in the expansion tank lights up if the level of engine coolant in the tank is much below the minimum marking(MIN).
PreparationPark the vehicle on a firm and level surface.
Never mix genuine coolant additives with other coolants that have not been approved by Volkswagen. Mixing other coolants could causeserious damage to the engine and cooling system.
If the liquid in the coolant expansion tank is not pink (colouring results from mixing the purple coolant additive with distilled water) but forexample brown, - G 13 - has been mixed with an unsuitable coolant additive. The coolant must be changed as soon as possible if this is thecase. Failure to observe this point can result in serious faults or engine damage.
NOTICE

12/29/2015 Bedienungsanleitung < Service & Zubehör < Volkswagen Deutschland
15/74
Allow the engine to cool down → .
Open the bonnet → Additional information and warnings: .
The coolant expansion tank has the symbol on its cap → Fig. 167 .
Checking the coolant levelCheck the coolant level at the side marking of the engine coolant expansion tank when the engine is cold → Fig. 166 .
Refill the coolant if the liquid level in the expansion tank is below the minimum marking (MIN). When the engine is warm, the engine coolantlevel may be slightly above the maximum (MAX) mark.
Refilling coolantAlways protect your hands and arms from hot coolant or steam by placing a suitable cloth on the cap of the coolant expansion tank.
Unscrew the cap carefully → .
Refill only new coolant according to the Volkswagen specification ( → Coolant specification ) → .
Only top up coolant if there is coolant residue in the expansion tank. If this is not observed, the engine could be damaged. If you cannot seeany coolant in the expansion tank do not drive on. Seek professional assistance.
If you can see coolant residue in the expansion tank, top up coolant until the level remains stable.
The coolant level must be between the marks on the engine coolant expansion tank → Fig. 166 . Do not fill up over the top line of the markedarea → !
Close the cap tightly.
If in an emergency you do not have access to the coolant of the required specification ( → Coolant specification ), do not use any othercoolant additive. Instead, initially refill with distilled water → only. Then add the correct proportion of coolant additive as soon as possible → Coolant specification .
Hot steam or engine coolant can cause serious burns.
Never open the bonnet if you can see or hear steam or engine coolant coming out of the engine compartment. Always wait until you can nolonger see or hear steam or coolant escaping.
Always allow the engine to cool down completely before carefully opening the bonnet. Hot components can burn the skin.
The following points should be noted before opening the bonnet once it has cooled down.- Apply the handbrake fully and move the selector lever to position P or move the manual gear lever to the neutral position.
- Remove the vehicle key from the ignition lock.
- Always keep children away from the engine compartment and never leave the vehicle unattended.
The engine cooling system is under pressure when the engine is hot. Never open the cap of the coolant expansion tank when the engine ishot. Coolant may spray out and cause serious burns and injuries.
- Turn the cap slowly and very carefully anti-clockwise while exerting gentle downward pressure on the cap.
- Always protect the face, hands and arms from hot coolant or steam with a large, thick cloth.
When refilling, do not spill any service fluids on engine components or on the exhaust system. The spilt service fluids can start a fire. Incertain circumstances, the ethylene glycol in the engine can catch fire.
WARNING

12/29/2015 Bedienungsanleitung < Service & Zubehör < Volkswagen Deutschland
16/74
IntroductionThis chapter contains information on the following subjects: → Warning lamp → Checking the electrolyte level of the vehicle battery → Charging, replacing, disconnecting and connecting the vehicle battery
The vehicle battery is a component of the electrical system in the vehicle.
Never carry out any work on the electrical system if you are not familiar with the necessary procedures and the general safety requirements andonly unsuitable tools are available → . The work should be carried out by a qualified workshop if you are uncertain. Volkswagen recommendsusing a Volkswagen dealership for this purpose. Serious injuries can be caused if work is carried out incorrectly.
Location of the vehicle batteryThe vehicle battery is located in the engine compartment or in the spare wheel well under the temporary spare wheel.
Explanation of the warnings on the vehicle battery
Symbol Meaning
Always wear eye protection!
Electrolyte is very corrosive and caustic. Always wear protective gloves and eye protection!
No fires, sparks, naked lights or smoking!
A highly explosive mixture of gases is given off when the vehicle battery is charging!
Always keep children away from acid and the vehicle battery!
Additional information and warnings:Pull-away assist systems → Pull-away assist systems
Preparation for working in the engine compartment → Preparation for working in the engine compartment
Refill only with distilled water. All other types of water can cause corrosion in the engine due to the chemical components contained therein.This can also lead to engine failure. If any other type of water is refilled, the fluid in the engine cooling system should be completely replacedimmediately by a qualified workshop.
Do not fill coolant above the top of the marked area → Fig. 166 . Otherwise the excess coolant will be pressed out of the cooling systemwhen the engine is hot and could cause damage.
If a large amount of coolant has been lost, do not refill the coolant until the engine has cooled completely. Heavy coolant loss is an indicationof leaks in the engine cooling system. The engine cooling system should be checked by a qualified workshop as soon as possible. Failure todo so can result in engine damage.
Do not top up with coolant if there is no more coolant in the coolant expansion tank. Air could enter the cooling system. Do not drive on!Seek expert assistance. Failure to do so can result in engine damage.
When refilling service fluids, please ensure that the correct container is filled. The use of incorrect operating fluids could result in seriousmalfunctions and engine damage!
NOTICE
Vehicle battery

12/29/2015 Bedienungsanleitung < Service & Zubehör < Volkswagen Deutschland
17/74
Accessories, modifications, repairs and renewal of parts → Accessories, modifications, repairs and renewal of parts
Jump starting → Jump starting
⇒ BookletService schedule,
After starting the engine with a discharged vehicle battery, or after the battery has been changed, system settings (time, date, personal
convenience settings and programming) may have been changed or deleted. Check and correct the settings as necessary once the vehiclebattery has been sufficiently charged.
Warning lamp
First read and observe the introductory information and safety warnings → Introduction
Lit up Possible cause Action
Fault in the alternator.
Go to a qualified workshop. Have the electrical system checked. Switch off any electrical consumers that are not required. The vehiclebattery will not be charged by the alternator while the vehicle is inmotion.
Several warning and indicator lamps will light up briefly as a functional check when the ignition is switched on. They will go out after a few
Any work on the vehicle battery and the electrical system can cause serious chemical burns, fire or electric shocks. Always read the followingwarnings and safety information before carrying out any kind of work:
Switch off the ignition and all electrical consumers before carrying out any work on the vehicle battery and also disconnect the negativecable from the vehicle battery.
Children should always be kept away from electrolyte and the vehicle battery.
Always wear eye protection.
Electrolyte is very aggressive. It can burn the skin and can cause blindness. When working with the battery, ensure that your hands, armsand face in particular are protected from acid spillages.
Do not smoke during the work, and never work near naked flames or sparks.
When handling cables and electrical equipment, avoid generating sparks and electrostatic charge.
Never short circuit the battery poles.
Never use a damaged vehicle battery. It can explode. Damaged vehicle batteries must be replaced as soon as possible.
Damaged or frozen vehicle batteries must be replaced immediately. Discharged vehicle batteries can even freeze at temperatures of around0°C (+32°F).
In vehicles with the vehicle battery in the luggage compartment: ensure that the gas discharge hose is connected properly to the vehiclebattery.
WARNING
Do not allow direct sunlight onto the vehicle battery for an extended period as the UV rays could damage the battery housing.
If the vehicle is left standing in cold conditions for a long period, protect the vehicle battery from frost. If it freezes it will be damaged.
NOTICE

12/29/2015 Bedienungsanleitung < Service & Zubehör < Volkswagen Deutschland
18/74
seconds.
Checking the electrolyte level of the vehicle battery
Fig. 168 In the engine compartment: possible position of the window on top of the vehicle battery
First read and observe the introductory information and safety warnings → Introduction
The electrolyte level of the vehicle battery should be checked regularly in high-mileage vehicles, in hot countries and in older vehicle batteries.The vehicle battery is otherwise maintenance-free.
Vehicles with a start/stop system → Pull-away assist systems are fitted with special vehicle batteries. For technical reasons, it might not bepossible to check the electrolyte level in these vehicle batteries.
In vehicles with the vehicle battery in the spare wheel well, it is not possible to check the electrolyte level without first removing vehicle parts.Seek expert assistance.
Preparations for vehicles with the battery in the engine compartmentPreparing the vehicle for working in the engine compartment → Preparation for working in the engine compartment .
Open the bonnet → Additional information and warnings: .
Pushing the cover asideDepending on the engine fitted to the vehicle, the vehicle battery cover may have a different design:
Failure to observe illuminated warning lamps and text messages can lead to your vehicle breaking down in traffic, and can cause accident andserious injury.
Never ignore any illuminated warning lamps or text messages.
Stop the vehicle as soon as possible and when safe to do so.
WARNING
Failure to observe illuminated indicator lamps and text messages can lead to your vehicle being damaged.
NOTICE

12/29/2015 Bedienungsanleitung < Service & Zubehör < Volkswagen Deutschland
19/74
Press the tabs on the battery cover to the side (using a screwdriver if necessary) and fold the cover to the side.
Checking the electrolyte levelEnsure that enough light is available for you to see the colours clearly. Never use naked flames or glowing matter (e.g. cigarettes) as a lightsource.
The colour display in the round window → Fig. 168 on the top side of the vehicle battery will change according to the electrolyte level.
Colour display Action
Light yellow or without colourThe electrolyte level of the vehicle is too low. The vehicle battery should be checked andreplaced by a qualified workshop if necessary.
Black The electrolyte level of the vehicle battery is correct.
Charging, replacing, disconnecting and connecting the vehicle battery
First read and observe the introductory information and safety warnings → Introduction
Charging the batteryThe vehicle battery should be charged by a qualified workshop, as the technology used in factory-fitted batteries requires voltage-limited charging → . Volkswagen recommends using a Volkswagen dealership for this purpose.
Replacing a vehicle batteryThe battery has been developed to suit the conditions of its location and has special safety features. If a vehicle battery has to be replaced,discuss the electromagnetic compatibility, size and necessary servicing, output and safety requirements for the new vehicle battery with aVolkswagen dealership before purchase. Volkswagen recommends that the vehicle battery is changed by a Volkswagen dealership.
Only maintenance-free vehicle batteries compliant with the standards TL 825 06 and VW 7 50 73 should be used. These standards must bedated July 2012 or later.
Vehicles with start/stop system are equipped with a special vehicle battery. These vehicle batteries may only be replaced by a vehicle batterywith the same specifications.
Disconnecting the vehicle battery
Any work on the vehicle battery can cause serious chemical burns, explosions and electric shocks.
Always wear eye protection and protective gloves.
Electrolyte is very aggressive. It can burn the skin and can cause blindness. When working with the battery, ensure that your hands, armsand face in particular are protected from acid spillages.
Never tilt the vehicle battery. Electrolyte may spill out of the battery vents and cause chemical burns.
Never open a vehicle battery.
If acid is splashed onto your skin or into your eye, rinse immediately for several minutes with cold water. Then consult a doctor immediately.
If acid is swallowed, consult a doctor immediately.
WARNING

12/29/2015 Bedienungsanleitung < Service & Zubehör < Volkswagen Deutschland
20/74
Please note the following if the vehicle battery has to be disconnected from the electrical system in the vehicle:
Switch off all electrical consumers and the ignition.
Unlock the vehicle before disconnecting the battery in order to avoid triggering the alarm.
First disconnect the negative cable and then the positive cable → .
Connecting the vehicle batterySwitch off all electrical consumers and the ignition before reconnecting the vehicle battery.
First reconnect the positive cable and then the negative cable → .
Various indicator lamps may light up after the vehicle battery has been connected and the ignition is switched on. They should go out if you drivea short distance at 15–20 km/h (10–12 mph). If the indicator lamps remain lit up, the vehicle should be checked by a qualified workshop.
If the vehicle battery was disconnected for long periods, the system may not able to calculate or correctly display the time when the next serviceis due → Instruments . Comply with the maximum permissible service intervals ⇒ BookletService schedule, .
Automatic switch-off for electrical consumersThe intelligent vehicle electrical system automatically implements a range of measures to prevent the battery from discharging under high loads:
The idling speed is increased so that the alternator provides more electricity.
The performance of large electrical consumers may be reduced or they may be switched off completely.
The power supply to the 12-volt socket and the cigarette lighter is interrupted temporarily while the engine is being started.
The vehicle electrical system cannot always prevent the vehicle battery from discharging. For example when the ignition is switched on for anextended period with the engine off, or when the side or parking lights are on when the vehicle is parked for an extended period.
What can cause the vehicle battery to discharge?Long periods at a standstill in which the engine is not running, especially if the ignition is switched on.
The use of electrical consumers when the engine is switched off.
Incorrectly attaching the battery and using incorrect vehicle batteries can cause short circuits, fire and serious injuries.
Always use maintenance-free and leak proof batteries which have the same properties, specifications and dimensions as the factory-fittedvehicle battery. The specification is listed on the battery housing.
WARNING

12/29/2015 Bedienungsanleitung < Service & Zubehör < Volkswagen Deutschland
21/74
Dispose of the vehicle battery as required by legislation. Batteries may contain toxic substances such as sulphuric acid and lead.
Electrolyte can pollute the environment. Clean up any service fluid leakages and dispose of them properly.
IntroductionThis chapter contains information on the following subjects: → Washing the vehicle → Washing the vehicle with a high-pressure cleaner → Cleaning windows and exterior mirrors → Cleaning and changing windscreen wiper blades → Waxing and polishing the vehicle → Cleaning and caring for chrome and aluminium trim parts → Cleaning and caring for the decorative film → Cleaning wheels → Care of rubber seals → De-icing door lock cylinders → Underseal → Cleaning the engine compartment
Regular and expert care helps to maintain the value of the vehicle. Proper maintenance may also be one of the requirements for the approval ofwarranty claims in the event of corrosion or paint defects.
Suitable care products are available from Volkswagen dealers.
Additional information and warnings:Exterior views → Exterior views
A highly explosive mixture of gases is given off when the vehicle battery is being charged.
Vehicle batteries should only be charged in well-ventilated spaces.
Never charge a vehicle battery once it has been frozen. Discharged vehicle batteries can even freeze at temperatures of around0°C (+32°F).
The vehicle battery has to be replaced if it has ever been frozen.
Incorrectly connected cables can cause a short circuit. First connect the positive cable and then the negative cable.
WARNING
Never make or break connections between vehicle batteries if the ignition is switched on or the engine is running. Never use a vehiclebattery that does not correspond with the vehicle's specifications. The vehicle's electrical system or electronic components could bedamaged, which could lead to electrical faults, for example in the start/stop system.
Never connect equipment that provides electricity, such as solar panels or a battery charger, to the 12-volt socket or to the cigarette lighterto charge the vehicle battery. This can damage the vehicle electrical system.
NOTICE
Vehicle care and maintenanceCaring for and cleaning the vehicle exterior

12/29/2015 Bedienungsanleitung < Service & Zubehör < Volkswagen Deutschland
22/74
Preparation for working in the engine compartment → Preparation for working in the engine compartment
Cleaning and caring for the interior → Cleaning and caring for the interior
Accessories, modifications, repairs and renewal of parts → Accessories, modifications, repairs and renewal of parts
In the interests of environmental protection, the vehicle should only be washed in specially provided wash bays. This prevents waste
water contaminated with oil, grease or fuel from entering the sewerage system. In some countries, washing vehicles anywhere else may beprohibited.
Environmentally-friendly care products should be used.
Leftover car care products should not be disposed of with ordinary household waste. Read the manufacturer's instructions.
Washing the vehicle
First read and observe the introductory information and safety warnings → Introduction
The longer substances such as insects, bird droppings, resinous tree sap, road dirt, industrial deposits, tar, soot or road salt and other corrosivematerials remain on the vehicle, the more damage they do to the paintwork. High temperatures (for instance in strong sunlight) accelerate thecorrosion process. The underside of the vehicle should also be cleaned thoroughly and regularly.
Car care products can be toxic and hazardous. Unsuitable care products and incorrect application of care products can cause accidents,serious injuries, burns or poisoning.
The care product must be kept in its original sealed container.
Read the manufacturer's instructions.
Never store car care products in empty food containers, bottles or any other non-original containers as people finding these containers maynot know that they contain care products.
Keep children away from care products.
The products can give off harmful fumes during use. They should therefore only be used outside or in well-ventilated spaces.
Never use fuel, turpentine, engine oil, nail varnish remover or other volatile fluids to wash, clean or care for your vehicle. These substancesare toxic and highly inflammable.
WARNING
Incorrect care and cleaning of vehicle parts can impair the safety features of the vehicle and thus cause serious injury.
Vehicle parts must be cleaned according to the manufacturer's instructions.
Only use approved or recommended cleaning products.
WARNING
Cleaning agents that contain solvents attack the material and can cause damage.
NOTICE

12/29/2015 Bedienungsanleitung < Service & Zubehör < Volkswagen Deutschland
23/74
Car washesPlease observe the signs on the automatic car wash. Before using an automatic car wash take the usual precautions, such as closing all windowsand folding in the exterior mirrors, in order to avoid damage to the vehicle. You must consult the car wash operator if there are special parts onyour vehicle such as spoilers, roof luggage carrier systems or radio aerials → .
The paint is so hard-wearing that the car can normally be washed without problems in an automatic car wash. However, the effect on the paintdepends to a large extent on the design of the car wash. Volkswagen recommends the use of car washes without brushes.
To remove any wax residue from the windows and to stop wipers rubbing, please note the following points → Cleaning windows and exteriormirrors .
Washing the car by handWhen washing by hand, first soften the dirt with plenty of water and rinse off as well as possible.
Then clean the vehicle with a soft sponge, a glove or a brush using only light pressure. Start with the roof and work from the top to the bottom.Use a shampoo for very stubborn dirt only.
The sponge or glove should be wrung out thoroughly at regular intervals.
Clean the wheels, sill panels etc. last. Use a second sponge for this purpose.
Parts of the vehicle with sharp edges can cause injury.
Protect your hands and arms from cuts on sharp parts, for example when cleaning the underbody or the inside of the wheel housings.
WARNING
After the car has been washed, the braking effect could set in later than normal and extend the braking distance as the brake discs and brakepads will be wet, or iced up in winter.
You can dry and de-ice the brakes by performing careful braking manoeuvres. Make sure that you do not endanger any other road users orviolate any legal regulations when doing so.
WARNING
The water should be no warmer than +60°C (+140°F).
Do not wash the vehicle in direct sunlight in order to avoid damage to the vehicle paintwork.
Never clean with insect sponges, rough kitchen sponges or similar products as these can damage the surface.
Never clean the headlights with a dry cloth or sponge. Always use a wet cloth or sponge. It is best to use soapy water.
Washing the vehicle in cold weather: if the vehicle is rinsed with a hose, do not direct the water at the lock cylinders or the gaps around thedoors, boot, or bonnet. The locks and seals could freeze.
NOTICE
12/29/2015 Bedienungsanleitung < Service & Zubehör < Volkswagen Deutschland
24/74
Washing the vehicle with a high-pressure cleaner
First read and observe the introductory information and safety warnings → Introduction
Follow the instructions provided by the manufacturer when cleaning your vehicle using a high-pressure cleaner. This applies in particular to thepressure and the spraying distance → .
Maintain sufficient distance from soft materials such as rubber hoses, insulation and the ParkPilot sensors. The ParkPilot sensors are located inthe rear bumper → .
Never use concentrated jet nozzles or dirt blasters → .
Observe the following guidelines before driving the vehicle into an automatic car wash in order to avoid damage to the vehicle:
Ensure that the gap between the guide rails in the car wash is sufficient for the vehicle track. If the track is too narrow your wheels and tyreswill be damaged.
Switch off the rain/light sensor before driving the vehicle into an automatic car wash.
Check that the car wash is tall and wide enough for your vehicle.
Fold in the exterior mirrors. Electrically folding exterior mirrors must be moved electrically. Do not fold them in and out by hand.
In order to prevent damage to the paintwork on the bonnet, fold the windscreen wipers back onto the windscreen after drying the wiperblades. Do not let it drop!
Lock the tailgate to prevent it from opening accidentally in the car wash.
NOTICE
The incorrect use of a high-pressure cleaner can cause visible and invisible long-term damage to tyres and other materials. This can causeaccidents and serious injuries.
Maintain sufficient distance between the washer jet and the tyres.
Never clean the tyres with concentrated jet nozzles (dirt blasters). The tyres may incur visible and invisible damage even if cleaned brieflywith the spray at a distance.
WARNING
After the car has been washed, the braking effect could set in later than normal and extend the braking distance as the brake discs and brakepads will be wet, or iced up in winter.
You can dry and de-ice the brakes by performing careful braking manoeuvres. Make sure that you do not endanger any other road users orviolate any legal regulations when doing so.
WARNING

12/29/2015 Bedienungsanleitung < Service & Zubehör < Volkswagen Deutschland
25/74
Cleaning windows and exterior mirrors
First read and observe the introductory information and safety warnings → Introduction
Cleaning windows and exterior mirrorsMoisten the windows and exterior mirrors with commercially available, alcohol-based glass cleaner.
Dry the glass surfaces with a clean chamois leather or a lint-free cloth. Chamois leathers that have been used on painted surfaces are notsuitable for use on glass surfaces. They will be soiled with wax deposits which could smear the surfaces.
Use window cleaner or a silicone remover to clean off rubber, oil, grease and silicone deposits → .
Removing waxCar washes and care products could leave wax deposits on the glass surfaces. Wax residue can only be removed using a special cleaningproduct or cleaning cloths. Wax deposits on the windscreen can cause the wiper blades to rub. Volkswagen recommends using a glass cleaningcloth - G 052 522 A1 - to remove wax deposits from the windows and exterior mirrors each time the vehicle is washed.
A window cleaner specifically for removing wax will stop the blades rubbing if added to the windscreen wash water. Dilute the cleaner asinstructed. Grease removing cleaners will not remove wax deposits → .
Special cleaners, glass cleaners and glass cleaning cloths are available from Volkswagen dealerships.
Removing snowUse a small brush to remove snow from the windows and exterior mirrors.
Removing iceThe best method for removing ice is to use a de-icer spray. If you use an ice scraper, do not move it to and fro, but push it in one direction only.Moving the ice scraper backwards can cause dirt to scratch the window.
The water may be no warmer than +60°C (+140°F).
Do not wash the vehicle in direct sunlight in order to avoid damage to the vehicle paintwork.
The ParkPilot sensors in the bumpers must be kept clean and free of ice to guarantee correct function. When cleaning with pressure hosesor steam cleaners, the sensors should only be sprayed briefly and the steam/hose nozzle must be kept more than 10 cm away.
When cleaning the decorative films with high-pressure hoses or steam cleaners, the decorative films should only be sprayed briefly atmaximum water pressure of 100 bar, and the steam/hose nozzle must be kept at a distance of more than approximately 40 cm.
Do not clean windows that are iced over or covered in snow with a high-pressure cleaner.
Washing the vehicle in cold weather: if the vehicle is rinsed with a hose, do not direct the water at the lock cylinders or the gaps around thedoors, boot, or bonnet. The locks and seals could freeze.
NOTICE

12/29/2015 Bedienungsanleitung < Service & Zubehör < Volkswagen Deutschland
26/74
Cleaning and changing windscreen wiper blades
Fig. 169 Changing the windscreen wiper blades
Fig. 170 Changing the rear window wiper blade
First read and observe the introductory information and safety warnings → Introduction
The factory-fitted windscreen wiper blades are coated with graphite. The graphite coating ensures that the windscreen wiper blade moves quietlyover the windscreen. If the graphite coating is damaged, the windscreen wiper will become louder.
Dirty or misted windows reduce visibility and increase the risk of accidents and severe injuries.
Only drive when you have a clear view through all windows.
Ice, snow and mist must be removed from the inside and outside of all windows.
WARNING
Never combine the recommended cleaning agents with other cleaning agents for use in the windscreen washer fluid. This can cause theingredients to separate and block the windscreen washer jets.
Never use warm or hot water to remove snow and ice from windows and mirrors. This can cause the glass to crack.
The heating elements for the rear window heater are on the inside of the rear window. Never apply stickers over the heating elements andnever clean the inside of the rear window with corrosive or acidic detergents or any other chemicals.
Aerials located on the inside of the windows can be damaged by corrosive or acidic detergents, any other chemicals or if hard objects chafeagainst the window. Never apply stickers over the window aerials and never clean the aerials with corrosive or acidic detergents or anyother chemicals.
NOTICE

12/29/2015 Bedienungsanleitung < Service & Zubehör < Volkswagen Deutschland
27/74
Check the condition of the wiper blades on a regular basis. Rubbing wiper blades should be changed if damaged or cleaned if dirty → .
Damaged wiper blades should be replaced immediately. Windscreen wiper blades can be bought from a qualified workshop.
Cleaning windscreen wiper bladesNote for the front windscreen wipers: move the wiper arms to the service position before lifting them → Windscreen wipers and washer .
When lifting the wiper arm hold it only by the wiper blade mounting.
Clean the windscreen wiper blade carefully using a damp cloth → .
Place the windscreen wiper arm back onto the windscreen.
Changing the windscreen wiper bladesMove the wiper arms to the service position before lifting → Windscreen wipers and washer .
When lifting the wiper arm hold it only by the wiper blade mounting.
Press and hold the release button → Fig. 169 ① and simultaneously pull off the wiper blade in the direction of the arrow.
Insert a new wiper blade with the same length and design onto the wiper arm. Push it on until it engages.
Place the windscreen wiper arm back onto the windscreen.
Changing the wiper blade for the rear windowWhen lifting the wiper arm hold it only by the wiper blade mounting.
Lift and fold back the wiper arm.
Press and hold the release button → Fig. 170 ① .
Tilt the wiper blade in the direction of the wiper arm → Fig. 170 (arrow ) and pull it off in the direction of the arrow at the same time. Youmay need to use some force to do this.
Insert a new wiper blade with the same length and design onto the wiper arm against the direction of the arrow. Push it on until it engages → Fig. 170 . The wiper blade must be in the tilted position (arrow ).
Place the wiper arm back onto the rear window.
Waxing and polishing the vehicle
First read and observe the introductory information and safety warnings → Introduction
Worn or dirty windscreen wiper blades reduce visibility and increase the risk of accidents and severe injuries.
Windscreen wiper blades should therefore always be changed if they are damaged or worn and no longer clean the windscreen properly.
WARNING
Damaged or dirty windscreen wipers can scratch the windscreen.
Detergents containing solvents, hard sponges and other sharp objects can damage the graphite coating.
Do not use fuel, nail varnish remover, paint thinner or similar products to clean the windows.
NOTICE

12/29/2015 Bedienungsanleitung < Service & Zubehör < Volkswagen Deutschland
28/74
WaxingWaxing protects the paintwork. If water no longer clearly forms small drops and runs off the paintwork when the vehicle is clean, to re-wax thevehicle with a good wax solution.
Even if a wax solution is used regularly in the car wash, Volkswagen recommends protecting the paint with a coat of hard wax at least twice ayear.
PolishingPolishing is only necessary if the paint has lost its shine, and the gloss cannot be brought back by applying wax.
The car must be waxed after polishing if the polish used does not contain wax compounds to seal the paint.
Cleaning and caring for chrome and aluminium trim parts
First read and observe the introductory information and safety warnings → Introduction
Use a damp, clean, lint-free and soft cloth to clean the surfaces.
For heavy soiling use a special solvent-free cleaning product.
Polish the chrome and aluminium trim parts using a soft, dry cloth.
Cleaning and caring for the decorative film
In order to avoid damage, painted parts with a matt finish, unpainted plastic parts, headlight lenses and the tail lights should not be treatedwith polish or hard wax.
Do not polish the paint if the vehicle is in a sandy or dusty environment or if it is dirty.
NOTICE
To ensure that the chrome and aluminium parts are not damaged:
Do not clean or polish in direct sunlight.
Do not clean or polish in sandy or dusty environments.
Do not use any abrasive care products (e.g. cream cleaners).
Never clean with insect sponges, rough kitchen sponges or similar products.
Do not polish any dirty surfaces.
Do not use solvent-based cleaning products.
Do not use hard wax.
NOTICE
Chrome rims or wheel covers may also have an additional varnish finish and should not be treated using chrome or aluminium cleaning agentsor chrome or aluminium polish. A normal commercially available paint cleaning product should be used instead.
NOTICE
12/29/2015 Bedienungsanleitung < Service & Zubehör < Volkswagen Deutschland
29/74
Cleaning and caring for the decorative film
First read and observe the introductory information and safety warnings → Introduction
Decorative film is a design feature and is made up of soft polyvinyl chloride (PVC).
In the areas of the vehicle where there is decorative film, the underlying paint layer is protected from weather and environmental conditions.
If the decorative film remains on the vehicle for a long time, the paintwork on the areas protected by the film may begin to look different from thepaint work on uncovered areas. This can usually be rectified by polishing.
Volkswagen recommends consulting Volkswagen Partner or workshop to find suitable care products.
Durability of the decorative filmEnvironmental conditions such as sunlight, moisture, pollution, stone impact, etc. affect the durability and colour of the decorative film. Signs ofwear and age are normal and do not indicate a defect in quality.
After the decorative film is fitted, bubble formation may appear due to strong summer heat for example. These bubbles will usually go awaywithout intervention. This will not limit the serviceability of the film in any way.
Decorative film can show signs of wear and ageing after one year to three years, especially if exposed to direct sunlight.
Decorative film may become faded within one year in very hot climates, particularly when there is a build-up of heat due to exposure to sunlight.
Cleaning the decorative filmDecorative film is suitable for automatic car washes provided you do not select a programme with hot wax.
Please carefully note the information and notes on washing the vehicle → Washing the vehicle and on washing using a high-pressure cleaner → Washing the vehicle with a high-pressure cleaner .
When using presprays, high-pressure sprays and vapour jets always maintain a distance of at least 40 cm between the spray nozzle and thedecorative film, and do not exceed a maximum water pressure of 100 bar → .
Insect residue, bird droppings, road dirt, industrial deposits, tar, soot, road salt and other aggressive deposits can cause damage to thedecorative film.
The longer the aggressive deposits remain on the decorative film, the worse the negative impact will be. High temperatures (for instance in strongsunlight) accelerate the corrosion process. Immediately wash the vehicle thoroughly using warm water or soapy water → .
Remove stubborn impurities carefully using white spirits, and then rinse using warm water. Do not use aggressive substances such as petrol,thinner or solvents.
Care of the decorative filmThe care instructions for vehicle paintwork largely also apply to decorative film → Waxing and polishing the vehicle .
Treat the decorative film regularly, every 3 months (no longer) with liquid hot wax. Hot wax smooths the surface and has a dirt-repellent effect.
Only use soft microfibre clothes to apply it.

12/29/2015 Bedienungsanleitung < Service & Zubehör < Volkswagen Deutschland
30/74
Volkswagen recommends consulting Volkswagen Partner or workshop to find suitable care products.
If the surface of the decorative film is damaged, e.g. by the impact of gravel, the damage can only be rectified by replacing the whole
decorative film element. Volkswagen recommends having the work carried out by a qualified workshop.
Cleaning wheels
First read and observe the introductory information and safety warnings → Introduction
Cleaning steel wheelsAn industrial cleaner is needed to remove accumulated brake dust. Steel wheels should therefore be cleaned regularly with a separate sponge.
Any damage to the paint on steel wheels should be touched up before the metal starts to rust.
Caring for and cleaning alloy wheelsWash grit and brake dust from alloy wheels approximately every 2 weeks. Then use an acid-free detergent to clean the wheels. Volkswagenrecommends applying a hard wax compound to the wheels approximately every 3 months.
It is important to remove road salt and brake dust by washing the wheels at regular intervals, to deter corrosion to the alloy.
Always use an acid-free detergent for alloy wheels. Car polish or other abrasive agents should not be used on the wheels.
If the protective coating is damaged, e.g. by stone impact, the damaged area should be repaired immediately.
Care of rubber seals
First read and observe the introductory information and safety warnings → Introduction
The rubber seals on the doors, windows etc. will seal better, remain flexible and last longer if they are treated at regular intervals with a suitablecare product.
Use a soft cloth to remove dust and dirt from the rubber seals.
De-icing door lock cylinders
First read and observe the introductory information and safety warnings → Introduction
Always direct the nozzle perpendicular to the decorative film edges and surface.
When cleaning the decorative films with high-pressure hoses or steam cleaners, the decorative films should only be sprayed briefly atmaximum water pressure of 100 bar, and the steam/hose nozzle must be kept at a distance of more than approximately 40 cm.
Depending on the condition of the brushes and car wash, fine scratches may appear in the decorative film.
Remove any dirt from the decorative film as promptly as possible, using suitable cleaning agents, to avoid long-term damage to the film.
NOTICE

12/29/2015 Bedienungsanleitung < Service & Zubehör < Volkswagen Deutschland
31/74
Volkswagen recommends the use of genuine Volkswagen spray with lubricating and anti-corrosive properties to de-ice the lock cylinders.
Underseal
First read and observe the introductory information and safety warnings → Introduction
The underside of the vehicle is coated to protect it from corrosion and damage. The protective coating on the underside of the vehicle could bedamaged when driving. Volkswagen therefore recommends that the protective coating on the underside of the vehicle and on the running gearshould be checked regularly and repaired if necessary.
Cleaning the engine compartment
First read and observe the introductory information and safety warnings → Introduction
The engine compartment of any motor vehicle is a hazardous area → Preparation for working in the engine compartment .
The engine compartment should be cleaned by a qualified workshop. Corrosion protection could be removed and electrical componentsdamaged if the compartment is cleaned incorrectly. Furthermore, water could enter the vehicle interior directly via the plenum chamber → .
If the engine compartment is very dirty, we recommend that you always go to a qualified workshop to have it cleaned by a professional mechanic.Volkswagen recommends using a Volkswagen dealership for this purpose.
Plenum chamberThe plenum chamber is located in the engine compartment between the windscreen and the engine and has a perforated cover. Air from outsideis drawn in from the plenum chamber and is passed into the vehicle interior via the heating and fresh air system and the air conditioning system.
Leaves and other loose objects must be removed from the cover of the plenum chamber at regular intervals using a vacuum cleaner or by hand.
Do not use lock de-icers containing substances that dissolve grease, as this can cause the door lock cylinder to rust.
NOTICE
Underseal and anti-corrosion coatings can ignite on the hot exhaust system or on other hot engine parts.
Never apply underseal or anti-corrosion coatings to the exhaust pipes, catalytic converter, heat shields or other vehicle components thatbecome hot.
CAUTION
All work in the engine compartment carries the risk of injury, scalding, accidents and fire.
Before carrying out any work make sure that you are familiar with the requisite procedures and general safety regulations → Preparation forworking in the engine compartment .
Volkswagen recommends having the work carried out by a qualified workshop.
WARNING