Embed Size (px)
Citation preview
FCC and IndustryCanada(IC) Warning:
• This device complies with Part 15 of the FCC Rules. Operation is subjectto the following two conditions: (1) This device may not cause harmfulinterference, and (2) this device must accept any interference received,including interference that may cause undesired operation.
• The term “IC:” before the radio certification number only signifies thatindustry Canada technical specifications were met.
• Any changes or modifications to this product not expressly approved byWARN Industries could void the user’s authority to operate this product.
As you read these instructions, you will seeWARNINGS, CAUTIONS, NOTICES and NOTES.Each message has a specific purpose. WARNINGSare safety messages that indicate a potentiallyhazardous situation, which, if not avoided could resultin serious injury. CAUTIONS are safety messages thatindicate a potentially hazardous situation which, if notavoided, may result in minor or moderate injury. ACAUTION may also be used to alert against unsafepractice. CAUTIONS and WARNINGS identify thehazard, indicate how to avoid hazard, and advise ofthe probable consequence of not avoiding the hazard.NOTICES are messages to avoid property damage.NOTES are additional information to help youcomplete a procedure. PLEASE WORK SAFELY!
GENERAL SAFETY PRECAUTIONS
WARNING
WARNING
WARNING
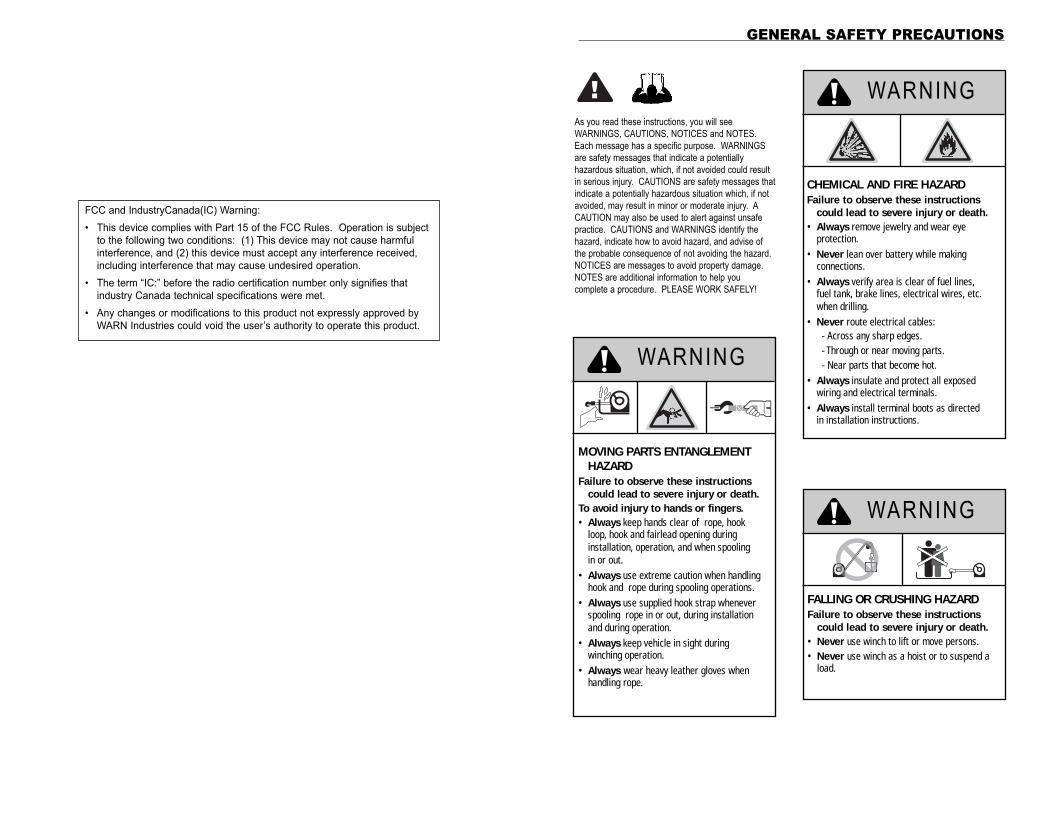
FALLING OR CRUSHING HAZARD
Failure to observe these instructions
could lead to severe injury or death.
• Never use winch to lift or move persons. • Never use winch as a hoist or to suspend a
load.
MOVING PARTS ENTANGLEMENT
HAZARD
Failure to observe these instructions
could lead to severe injury or death.
To avoid injury to hands or fingers.
• Always keep hands clear of rope, hookloop, hook and fairlead opening duringinstallation, operation, and when spooling in or out.
• Always use extreme caution when handlinghook and rope during spooling operations.
• Always use supplied hook strap wheneverspooling rope in or out, during installationand during operation.
• Always keep vehicle in sight duringwinching operation.
• Always wear heavy leather gloves whenhandling rope.
CHEMICAL AND FIRE HAZARD
Failure to observe these instructions
could lead to severe injury or death.
• Always remove jewelry and wear eye protection.
• Never lean over battery while making connections.
• Always verify area is clear of fuel lines,fuel tank, brake lines, electrical wires, etc.when drilling.
• Never route electrical cables:- Across any sharp edges. - Through or near moving parts.- Near parts that become hot.
• Always insulate and protect all exposedwiring and electrical terminals.
• Always install terminal boots as directed in installation instructions.
CAUTION CAUTION
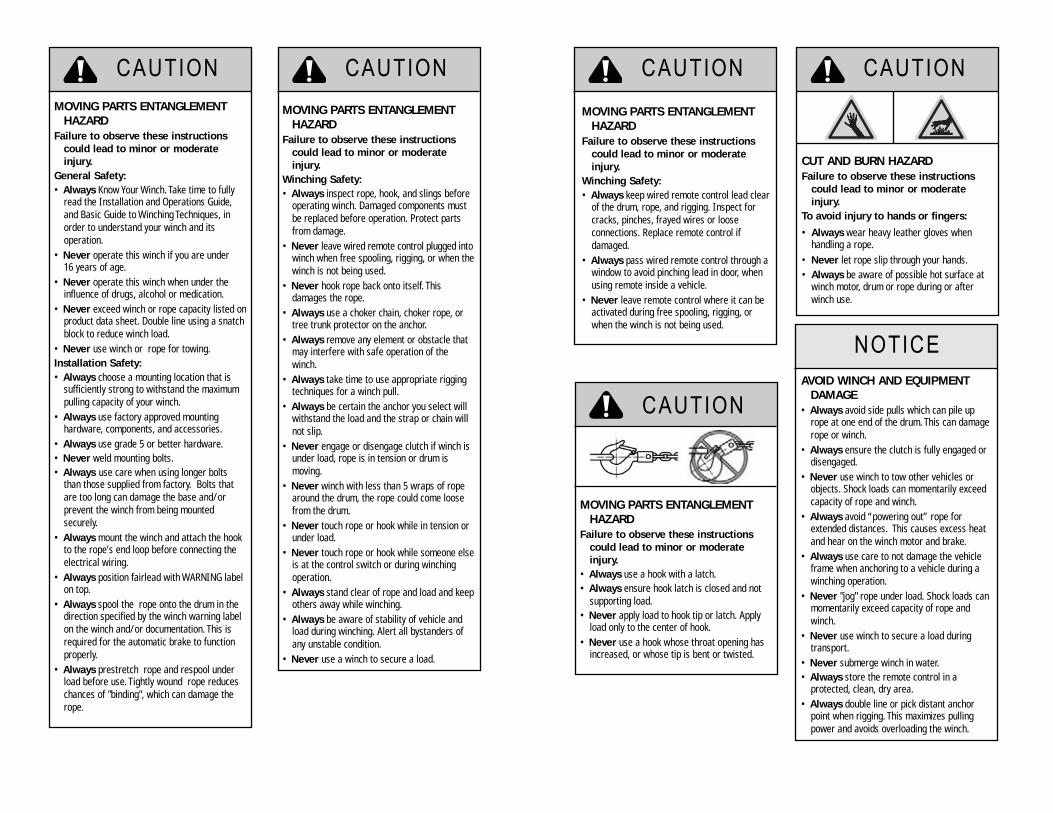
MOVING PARTS ENTANGLEMENT
HAZARD
Failure to observe these instructions
could lead to minor or moderate
injury.
General Safety:
• Always Know Your Winch. Take time to fullyread the Installation and Operations Guide,and Basic Guide to Winching Techniques, inorder to understand your winch and itsoperation.
• Never operate this winch if you are under 16 years of age.
• Never operate this winch when under the influence of drugs, alcohol or medication.
• Never exceed winch or rope capacity listed onproduct data sheet. Double line using a snatchblock to reduce winch load.
• Never use winch or rope for towing.Installation Safety:
• Always choose a mounting location that is sufficiently strong to withstand the maximumpulling capacity of your winch.
• Always use factory approved mountinghardware, components, and accessories.
• Always use grade 5 or better hardware.• Never weld mounting bolts.• Always use care when using longer bolts
than those supplied from factory. Bolts thatare too long can damage the base and/orprevent the winch from being mountedsecurely.
• Always mount the winch and attach the hookto the rope’s end loop before connecting theelectrical wiring.
• Always position fairlead with WARNING labelon top.
• Always spool the rope onto the drum in thedirection specified by the winch warning labelon the winch and/or documentation. This isrequired for the automatic brake to functionproperly.
• Always prestretch rope and respool underload before use. Tightly wound rope reduceschances of "binding", which can damage therope.
MOVING PARTS ENTANGLEMENT
HAZARD
Failure to observe these instructions
could lead to minor or moderate
injury.
Winching Safety:
• Always inspect rope, hook, and slings beforeoperating winch. Damaged components mustbe replaced before operation. Protect partsfrom damage.
• Never leave wired remote control plugged intowinch when free spooling, rigging, or when thewinch is not being used.
• Never hook rope back onto itself. Thisdamages the rope.
• Always use a choker chain, choker rope, ortree trunk protector on the anchor.
• Always remove any element or obstacle thatmay interfere with safe operation of thewinch.
• Always take time to use appropriate riggingtechniques for a winch pull.
• Always be certain the anchor you select willwithstand the load and the strap or chain willnot slip.
• Never engage or disengage clutch if winch isunder load, rope is in tension or drum ismoving.
• Never winch with less than 5 wraps of ropearound the drum, the rope could come loosefrom the drum.
• Never touch rope or hook while in tension orunder load.
• Never touch rope or hook while someone elseis at the control switch or during winchingoperation.
• Always stand clear of rope and load and keepothers away while winching.
• Always be aware of stability of vehicle andload during winching. Alert all bystanders ofany unstable condition.
• Never use a winch to secure a load.
CAUTIONCAUTION
NOTICE
CAUTION
MOVING PARTS ENTANGLEMENT
HAZARD
Failure to observe these instructions
could lead to minor or moderate
injury.
Winching Safety:
• Always keep wired remote control lead clearof the drum, rope, and rigging. Inspect forcracks, pinches, frayed wires or looseconnections. Replace remote control ifdamaged.
• Always pass wired remote control through a window to avoid pinching lead in door, whenusing remote inside a vehicle.
• Never leave remote control where it can beactivated during free spooling, rigging, orwhen the winch is not being used.
CUT AND BURN HAZARD
Failure to observe these instructions
could lead to minor or moderate
injury.
To avoid injury to hands or fingers:
• Always wear heavy leather gloves whenhandling a rope.
• Never let rope slip through your hands.• Always be aware of possible hot surface at
winch motor, drum or rope during or afterwinch use.
MOVING PARTS ENTANGLEMENT
HAZARD
Failure to observe these instructions
could lead to minor or moderate
injury.
• Always use a hook with a latch.• Always ensure hook latch is closed and not
supporting load.• Never apply load to hook tip or latch. Apply
load only to the center of hook.• Never use a hook whose throat opening has
increased, or whose tip is bent or twisted.
AVOID WINCH AND EQUIPMENT
DAMAGE
• Always avoid side pulls which can pile uprope at one end of the drum. This can damagerope or winch.
• Always ensure the clutch is fully engaged ordisengaged.
• Never use winch to tow other vehicles orobjects. Shock loads can momentarily exceedcapacity of rope and winch.
• Always avoid “powering out” rope forextended distances. This causes excess heatand hear on the winch motor and brake.
• Always use care to not damage the vehicleframe when anchoring to a vehicle during awinching operation.
• Never "jog" rope under load. Shock loads canmomentarily exceed capacity of rope andwinch.
• Never use winch to secure a load during transport.
• Never submerge winch in water.• Always store the remote control in a
protected, clean, dry area.• Always double line or pick distant anchor
point when rigging. This maximizes pullingpower and avoids overloading the winch.
OVERVIEW
The WARN Wireless Control gives you the ability to operatethe winch using a wireless hand held remote. The wirelesscontrol system integrates with the standard handlebar switchand remote so that the operator may use either the wired orwireless controls at any time.
To use the wireless system, the operator first activates thesystem by pressing and holding both buttons on the wirelessremote for 3 seconds. This transfers control of the winch tothe wireless control system. The GREEN indicator light onthe handheld remote glows when the system is active andready to use. Deactivate the system by pressing bothbuttons on the wireless transmitter simultaneously andholding for 3 seconds until GREEN light turns off.
After 2 minutes of idle time, the wireless system de-activates.
SAFETY
When installing your winch and winch control system, readand follow all mounting and safety instructions. Always usecaution when working with electricity and remember to verifythat no exposed electrical connections exist beforeenergizing your winch circuit.
SPECIFICATIONS
Part numbers for complete system:PN 74500 (wireless control upgrade kit)
PN 74600 (kit supplied with new ATV winch)
Transmission range:15-27 m (50-90 ft.)
Receiver Operating voltage:8 to 24 VDC
Receiver Fuse type and current rating:ATC 7.5 amp
Batteries for hand held remote:two alkaline, 12 volt, type 23
WIRELESS CONTROL KIT INCLUDES:
Wireless Receiver (1)
Wireless Transmitter (1)
Wiring Harness (1)
Holster Assembly (1)
Hardware Kit (1)
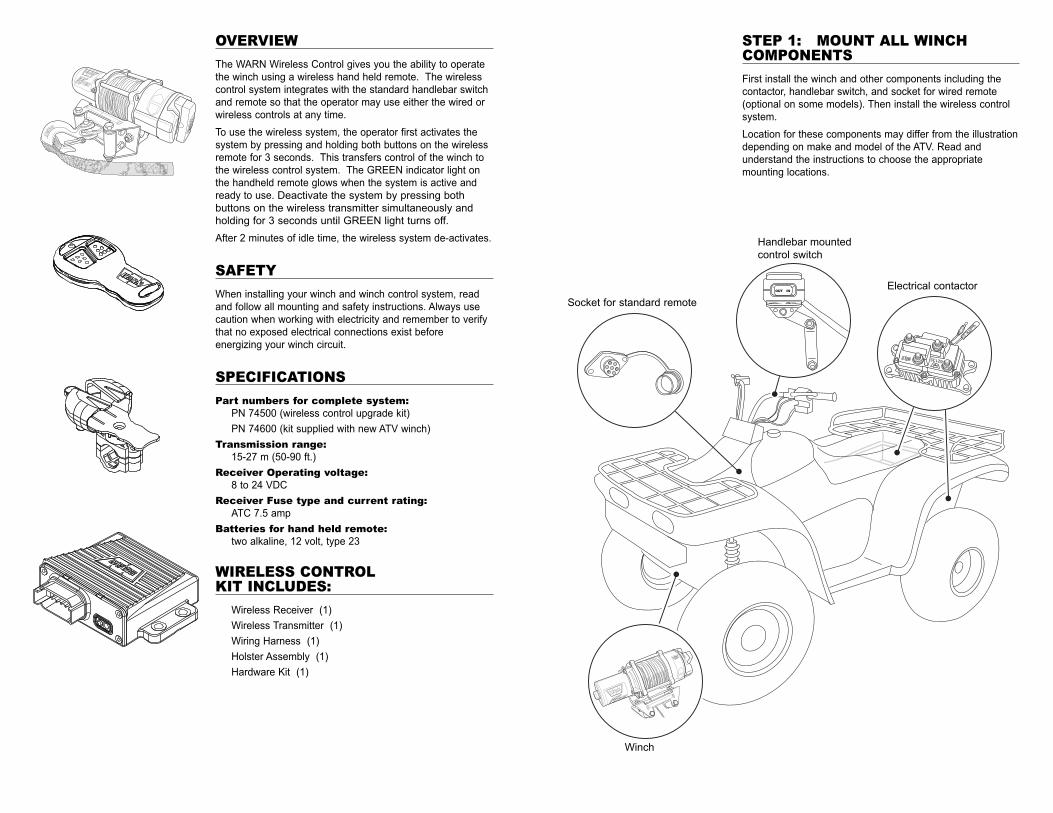
STEP 1: MOUNT ALL WINCHCOMPONENTS
First install the winch and other components including thecontactor, handlebar switch, and socket for wired remote(optional on some models). Then install the wireless controlsystem.
Location for these components may differ from the illustrationdepending on make and model of the ATV. Read andunderstand the instructions to choose the appropriatemounting locations.
Socket for standard remote
Winch
Electrical contactor
Handlebar mountedcontrol switch
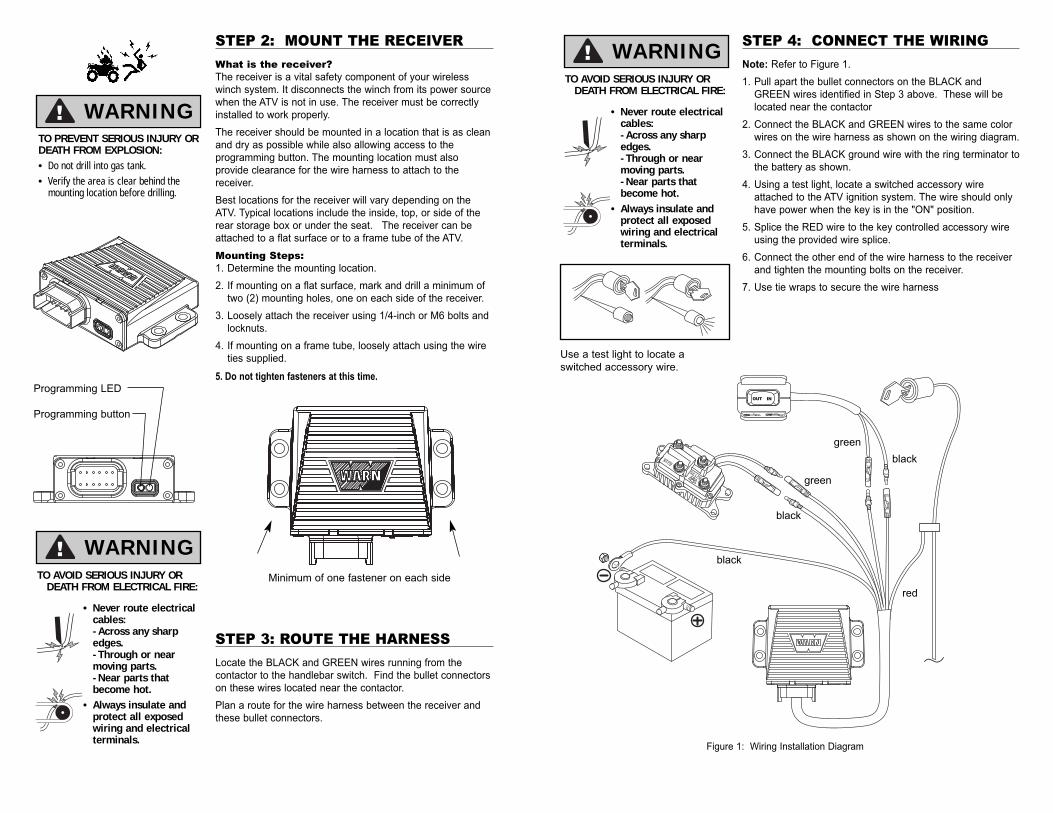
STEP 2: MOUNT THE RECEIVER
What is the receiver?The receiver is a vital safety component of your wirelesswinch system. It disconnects the winch from its power sourcewhen the ATV is not in use. The receiver must be correctlyinstalled to work properly.
The receiver should be mounted in a location that is as cleanand dry as possible while also allowing access to theprogramming button. The mounting location must alsoprovide clearance for the wire harness to attach to thereceiver.
Best locations for the receiver will vary depending on theATV. Typical locations include the inside, top, or side of therear storage box or under the seat. The receiver can beattached to a flat surface or to a frame tube of the ATV.
Mounting Steps:1. Determine the mounting location.
2. If mounting on a flat surface, mark and drill a minimum oftwo (2) mounting holes, one on each side of the receiver.
3. Loosely attach the receiver using 1/4-inch or M6 bolts andlocknuts.
4. If mounting on a frame tube, loosely attach using the wireties supplied.
5. Do not tighten fasteners at this time.Programming LED
Programming button
Minimum of one fastener on each side
STEP 3: ROUTE THE HARNESS
Locate the BLACK and GREEN wires running from thecontactor to the handlebar switch. Find the bullet connectorson these wires located near the contactor.
Plan a route for the wire harness between the receiver andthese bullet connectors.
WARNINGTO PREVENT SERIOUS INJURY ORDEATH FROM EXPLOSION:
• Do not drill into gas tank.
• Verify the area is clear behind themounting location before drilling.
WARNING
• Never route electricalcables:-Across any sharpedges.-Through or nearmoving parts.-Near parts thatbecome hot.
• Always insulate andprotect all exposedwiring and electrical terminals.
TO AVOID SERIOUS INJURY ORDEATH FROM ELECTRICAL FIRE:
STEP 4: CONNECT THE WIRING
Note: Refer to Figure 1.
1. Pull apart the bullet connectors on the BLACK andGREEN wires identified in Step 3 above. These will belocated near the contactor
2. Connect the BLACK and GREEN wires to the same colorwires on the wire harness as shown on the wiring diagram.
3. Connect the BLACK ground wire with the ring terminator tothe battery as shown.
4. Using a test light, locate a switched accessory wireattached to the ATV ignition system. The wire should onlyhave power when the key is in the "ON" position.
5. Splice the RED wire to the key controlled accessory wireusing the provided wire splice.
6. Connect the other end of the wire harness to the receiverand tighten the mounting bolts on the receiver.
7. Use tie wraps to secure the wire harness
Use a test light to locate aswitched accessory wire.
Figure 1: Wiring Installation Diagram
green
black
black
black
green
red
WARNING
• Never route electricalcables:-Across any sharpedges.-Through or nearmoving parts.-Near parts thatbecome hot.
• Always insulate andprotect all exposedwiring and electrical terminals.
TO AVOID SERIOUS INJURY ORDEATH FROM ELECTRICAL FIRE:

STEP 5: MOUNT THE HOLSTER
For ATV use, the typical location for the holster is on the lefthandlebar.
· The holster clamp must be mounted before assembly
· Do not tighten over any hoses, cables, or wiring.
· For ATVs, it is recommended that the holster be clampedon the left handlebar. The clamp is designed to preventrotation. If necessary, a piece of electrical tape around thehandlebar may be used to prevent slipping.
· For UTVs, the holster may be mounted on the dash orother convenient surface using two #10 or M5 machinescrews and locknuts.
· Assemble the holster as shown. Holster may be orientedin any one of eight positions.
STEP 6: SYSTEM CHECK
1. Insure that wiring to all components is correct and all loosewires are securely tie wrapped.
2. Insure that there are no exposed terminals or wiring.Cover any bare terminal with terminal boots, heat shrinktubing or electrical tape.
3. Turn ATV ignition switch to the ON position.
4. Check winch for proper operation using the handlebarswitch. The wire rope should spool in and out in thedirection indicated on the switch. If winch functionscorrectly, proceed to the next step. Otherwisetroubleshoot.
5. Press and hold both buttons on the wireless handheldremote until the GREEN indicator light comes on. Thewireless system is now active and ready to use.
6. By pressing the buttons on the remote, verify that thewinch powers IN and powers OUT properly.
REPLACING BATTERIES
If the indicator light on the handheld remote flashes REDduring winching, the batteries are low and should bereplaced.
1. Remove the two screws from the handheld remote.
2. Separate the top and bottom sections of the remote usinga coin or screw driver.
3. Remove the old batteries and dispose in accordance withlocal environmental regulations.
4. Insert new alkaline batteries as shown with the positiveterminals facing the switches. Do not mix old and newbatteries.
5. Join the top and bottom sections making sure that theysnap together and rubber seal remains intact.
6. Secure with the two screws.
WARNINGTO AVOID SERIOUS INJURY OR
DEATH:
• Always use caution when moving or repositioning any vehicle controlsso as to not compromise the safeoperation of the winch or vehicle.Select a mounting position that willprovide clearance for all vehiclecontrols.
• Never attempt to bypass receiver by connecting switches directly tocontactor.
ALWAYS KNOW YOUR WINCH:Before doing a system check, taketime to fully understand yourwinch and the winching operationby reviewing the Basic Guide toWinching Techniques, includedwith your winch.
CAUTION
OUT IN
LED indicator light
Power IN
Power OUT
Press and holdboth buttons for
3 seconds toactivate wireless
system.
TROUBLESHOOTING
If the winch does not power in or out when remote buttons are pushed:
1. Check that the wireless system has been activated (GREEN LED on remote is ON).
2. Check all electrical connections. Verify that connections follow the wiring diagram andinstructions.
3. Insure that 10 seconds have passed since the standard wired control system was last used.
OPERATION
LED Indicator Light
Steady GREEN - system active and ready to use
Steady RED - winch powering in or out
Flashing RED during winching - battery low
Turn on sequence:
1. Activate the system by pressing both buttons on thewireless transmitter simultaneously and holding for 3seconds until GREEN light illuminates.
2. The winch system is now operational.
3. Press the power IN button or power OUT button asneeded.
Turn off sequence:
1. Deactivate the system by pressing both buttons on thewireless transmitter simultaneously and holding for 3seconds until GREEN light turns off.
CAUTION
This WARN Wireless Control
System has been designed
to minimize interference
from other sources of radio.
TO AVOID MINOR OR MODERATEINJURY:
• Always be aware that obstacles andother radio transmission sources mayaffect performance.
• Always insure the matching WARNtransmitter is closer to its receiverthan other transmitters in use duringwinching.
Press and hold bothbuttons for 3 seconds
to deactivate thewireless system.
CAUTION
TO AVOID MINOR OR MODERATEINJURY:
• Always use handlebar switch or wired remote when intermittently“jogging” winch.
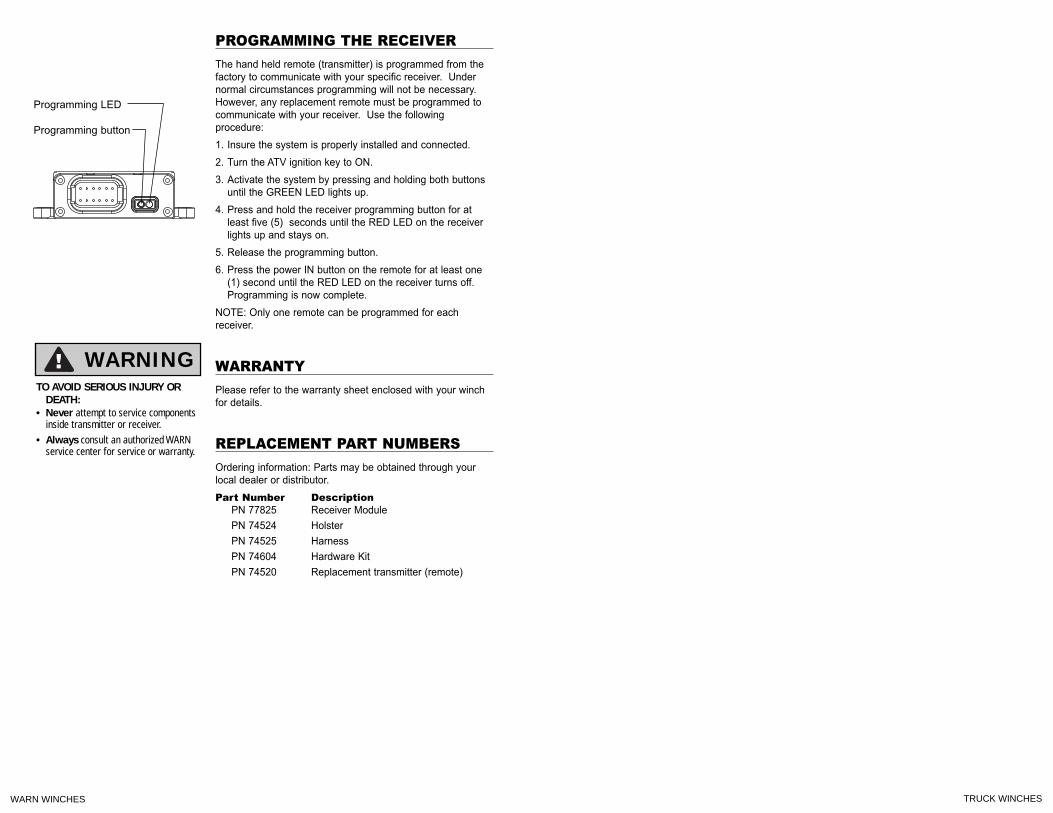
Programming LED
Programming button
PROGRAMMING THE RECEIVER
The hand held remote (transmitter) is programmed from thefactory to communicate with your specific receiver. Undernormal circumstances programming will not be necessary.However, any replacement remote must be programmed tocommunicate with your receiver. Use the followingprocedure:
1. Insure the system is properly installed and connected.
2. Turn the ATV ignition key to ON.
3. Activate the system by pressing and holding both buttonsuntil the GREEN LED lights up.
4. Press and hold the receiver programming button for atleast five (5) seconds until the RED LED on the receiverlights up and stays on.
5. Release the programming button.
6. Press the power IN button on the remote for at least one(1) second until the RED LED on the receiver turns off.Programming is now complete.
NOTE: Only one remote can be programmed for eachreceiver.
WARRANTY
Please refer to the warranty sheet enclosed with your winchfor details.
REPLACEMENT PART NUMBERS
Ordering information: Parts may be obtained through yourlocal dealer or distributor.
Part Number DescriptionPN 77825 Receiver Module
PN 74524 Holster
PN 74525 Harness
PN 74604 Hardware Kit
PN 74520 Replacement transmitter (remote)
WARNINGTO AVOID SERIOUS INJURY OR
DEATH:
• Never attempt to service componentsinside transmitter or receiver.
• Always consult an authorized WARNservice center for service or warranty.
WARN WINCHES TRUCK WINCHES