Embed Size (px)
Citation preview

Wall Mounts
1/21/2015

The new wall mount style allows for the touch screen to remain steady while in use. In order to create a proper fit there are few items that may be needed
1. (4) 4mm x 18mm (as large as 20mm) screws2. (4) ¼” Plastic spacers3. Screwdriver Magnitizer4. Velcro for speaker
Power Cable
Dell USB Cable
Dell Display Cable
Speaker (USB / Audio Cable)
1/21/2015
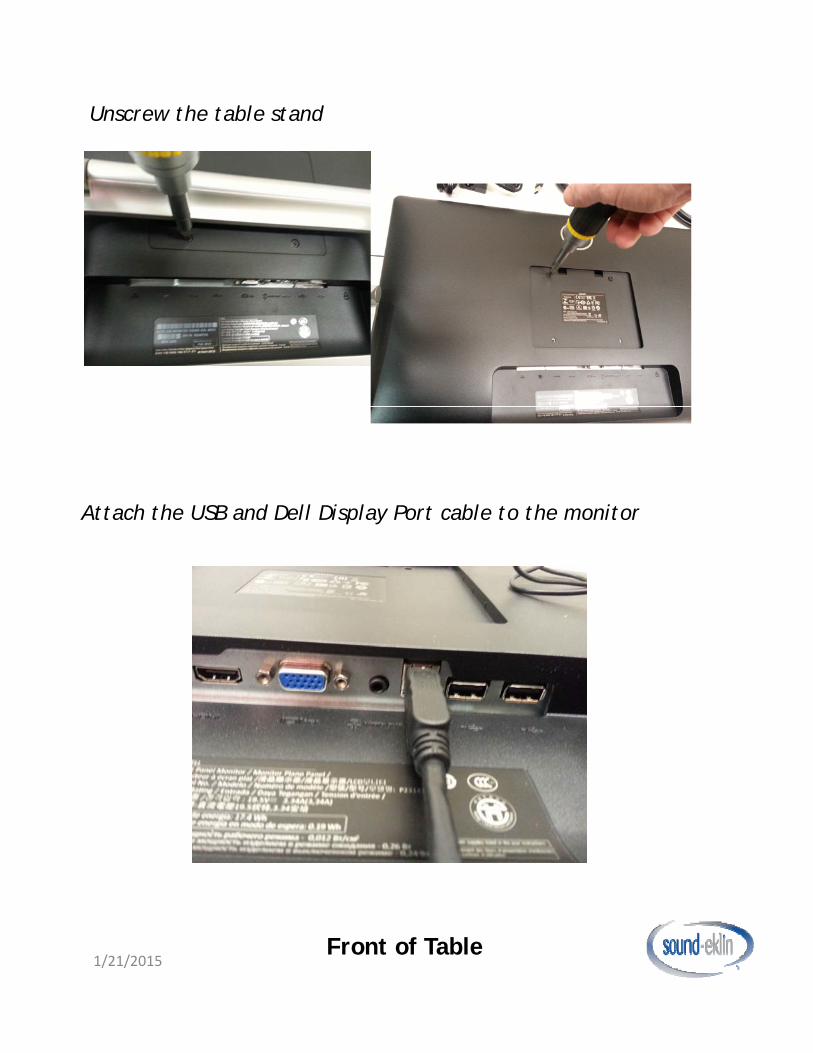
Unscrew the table stand
Attach the USB and Dell Display Port cable to the monitor
Front of Table1/21/2015
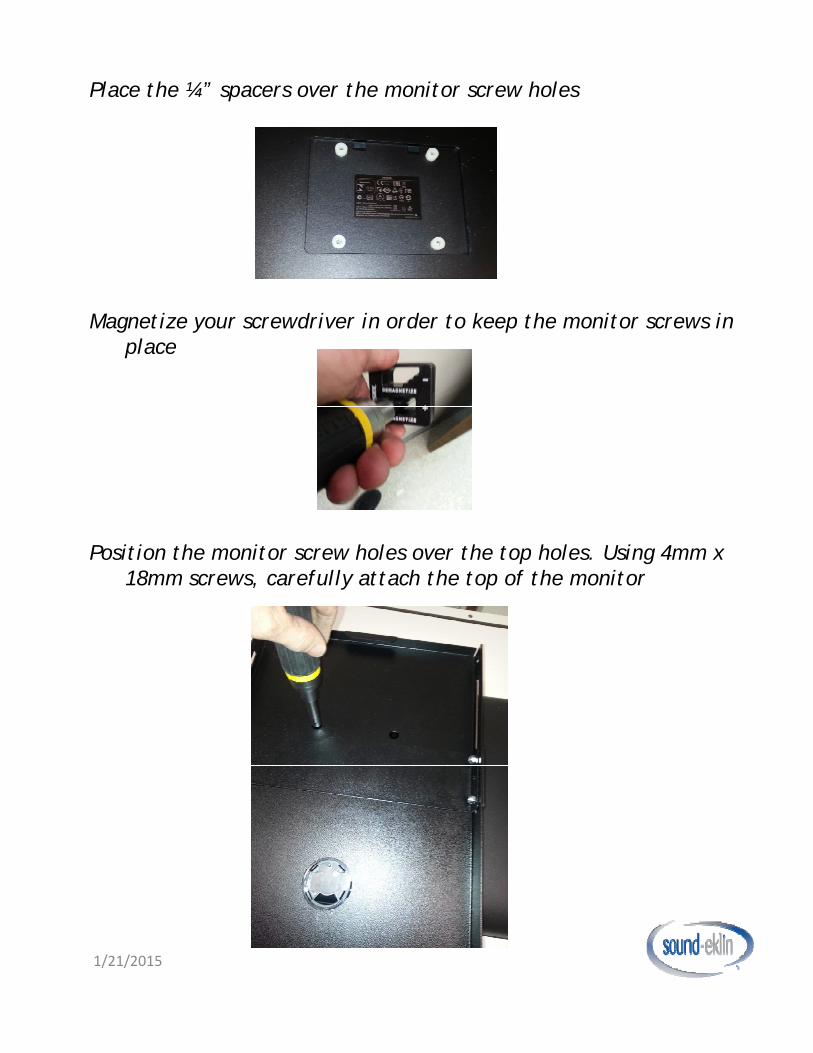
Place the ¼” spacers over the monitor screw holes
Magnetize your screwdriver in order to keep the monitor screws in place
Position the monitor screw holes over the top holes. Using 4mm x 18mm screws, carefully attach the top of the monitor
1/21/2015
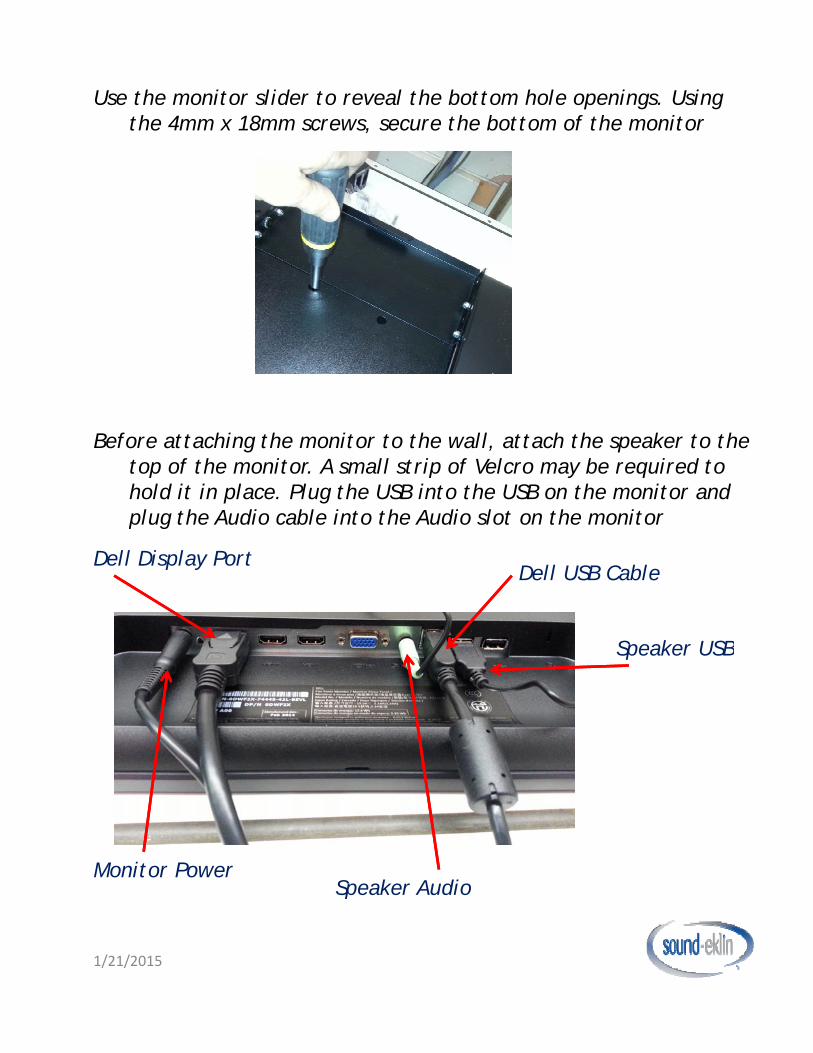
Use the monitor slider to reveal the bottom hole openings. Using the 4mm x 18mm screws, secure the bottom of the monitor
Before attaching the monitor to the wall, attach the speaker to the top of the monitor. A small strip of Velcro may be required to hold it in place. Plug the USB into the USB on the monitor and plug the Audio cable into the Audio slot on the monitorp g
Speaker USB
Dell Display PortDell USB Cable
Speaker USB
Speaker AudioMonitor Power
1/21/2015
Speaker Audio
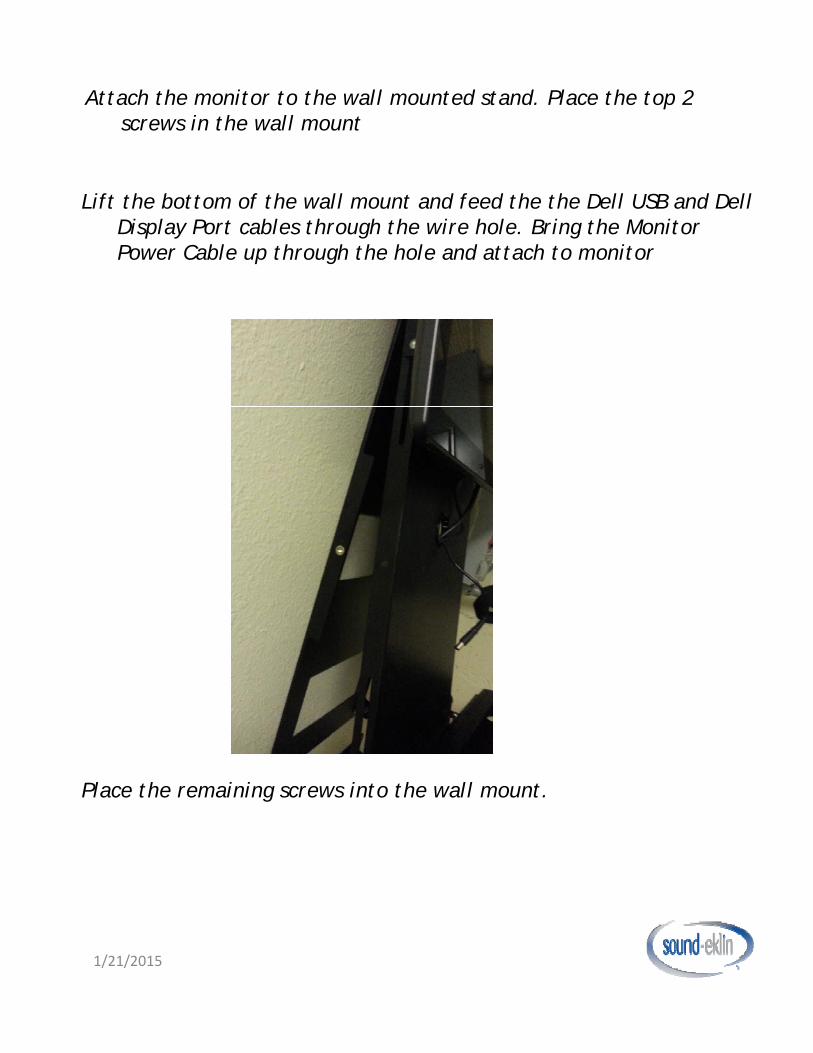
Attach the monitor to the wall mounted stand. Place the top 2 screws in the wall mount
Lift the bottom of the wall mount and feed the the Dell USB and Dell Display Port cables through the wire hole. Bring the Monitor Power Cable up through the hole and attach to monitor
Place the remaining screws into the wall mount.
1/21/2015