Embed Size (px)
Citation preview

rm1a. MODEL# GYM1720
Vo! Good Automatic Yogurt Maker with Digital Timer
---
Time �

© 2016 Gourmia
www.Gourmia.com
The Steelstone Group
Brooklyn, NY
All rights reserved. No portion of this manual may be reproduced by any means whatsoever
without written permission from The Steelstone Group, except for the inclusion of quotations in a
media review.
Although every precaution has been taken in the preparation of this manual, The Steelstone
Group assumes no responsibility for errors or omissions. Nor is any liability assumed for damages
resulting from the use of the information contained herein. Although every effort has been made
to ensure that the information contained in this manual is complete and accurate, The Steelstone
Group is not engaged in rendering professional advice or services to the individual consumer;
further, The Steelstone Group shall not be held responsible for any loss or damage allegedly
arising from any information or suggestion in this manual.
10 9 8 7 6 5 4 3 2
1
Printed in China

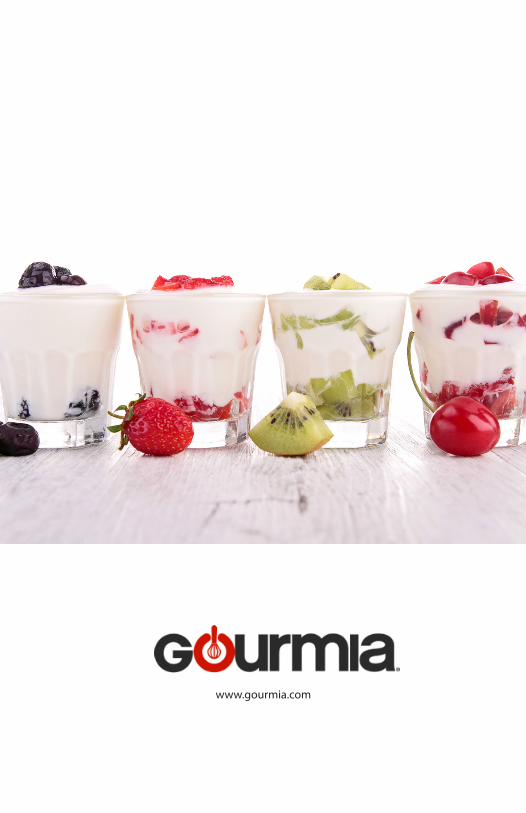
Enjoy the Natural Goodness of Homemade
Yogurt from Gourmia!
With the purchase of the Yo! Good Yogurt Maker, you are entering the creamy,
healthful and delicious world of homemade yogurt! And, with the confidence of using
your own fresh ingredients, you can now enjoy your own yogurt made whenever you
like. The Yo! Good Yogurt Maker truly makes it easy!
Start your journey preparing fresh plain yogurt and build your custom choices from
there…blueberry yogurt, raspberry yogurt, lemon yogurt, chocolate yogurt, plum
yogurt, nectarine yogurt…the list goes on and on! One of the nicest features of your
Yo! Good Yogurt Maker is that the cups can be individualized, so you can make a
variety of yogurt flavors at the same time. It’s cost efficient because you can use your
own ingredients, and it’s the perfect way to offer variety to your family.
The following pages of this manual give you full and complete instructions for all the
functions and features of your Yo! Good Yogurt Maker. Inside these pages, you’ll find
safety information, instructions for operating, assembly, and maintenance of your Yo!
Good Yogurt Maker. You’ll also find helpful guidelines for making yogurt and recipes
to get you started. Please read all safety instructions and complete directions carefully
for safe usage at all times.
Thank you for your purchase! We hope you will enjoy all the innovative products
brought to you by our family at Gourmia.

.. --
Time �

5
SAFETY FIRST p. 6
FEATURES & FUNCTIONS p. 9
ASSEMBLY & OPERATING p. 10
YOGURT MAKING HINTS & TIPS p. 12
DELICIOUS YOGURT ADD-INS p. 15
MAINTENANCE & SERVICE p. 16
TABLE OF CONTENTS

SAFE
TY F
IRST
6
IMPORTANT SAFEGUARDSWhen operating this electric appliance, basic safety instructions should always be
followed. Refer to the following for these instructions.
1. READ ALL SAFETY & USAGE INSTRUCTIONS BEFORE USING Yo! Good
Yogurt Maker.
2. AVOID ELECTRICAL SHOCK. Do not immerse cord, plug or the Yogurt Maker Base in water or other liquid.
3. Use pot holders, if needed, when handling the Yogurt Cups or EasyVue Lid.
4. UNPLUG Yogurt Maker from outlet when not in use or before cleaning. DO NOT add or remove parts or accessories while hot. Do not let cord hang over edge of table or counter or touch hot surfaces.
5. Children should not use Yogurt Maker unsupervised; close supervision is required when appliance is used near or with children.
6. Operate the Yogurt Maker on a level surface well away from any hot gas or electrical burner.
7. Do not operate the Yogurt Maker outdoors.
8. DO NOT add unauthorized accessory attachments. Such use may result in electric shock or injury.
9. Use only the factory cord supplied; NEVER add extension cords. When done using, switch control to OFF then pull plug from outlet.
10. DO NOT operate the Yogurt Maker when empty.
11. Do not use the Yogurt Maker for any use other than intended. Do not use on or near a stovetop or other heat source.

SAFETY FIRST
7
FOR HOUSEHOLD USE ONLYElectrical Polarized Plug: This Yogurt Maker has a polarized plug (one blade is wider than the other). To reduce the risk of electrical shock, the plug is intended to be used by inserting it into the electrical outlet only one way. If the plug does not fit securely into the outlet, turn the plug and re-insert. Do not modify this plug. If the plug does not fit the outlet securely, call a qualified electrician for assistance. DO NOT use this plug with extension cords of any kind.
SAVE THESE INSTRUCTIONS

8
A
B
C
D

9
FEATURES & FUNCTIONS
A. Yo! Good Yogurt Maker Base- The Base for the Yo! Good Yogurt Maker holds the
Individual Cups and the EasyVue Lid. The internal electronic unit heats to the exact
temperature for cooking the yogurt and holds it perfectly for optimal results.
B. EasyVue Lid- The Yo! Good Yogurt Maker comes with a clear lid designed to make
viewing especially easy. The Lid sits easily on top of the Yo! Good Yogurt Maker and is
made to withstand the gentle heat of the unit. Check the Maintenance section (p. 16)
for information on care and cleaning.
C. Individual Yogurt Cups & Lids- Twelve 6-ounce Yogurt Cups and accompanying
Lids are included with the Yo! Good Yogurt Maker. These cups are specially designed
for the Yo! Good Yogurt Maker and, as such, should be used only with this Yogurt
Maker. Other cups of any kind should not be substituted for use in this Yogurt Maker.
D. LCD Display Control Panel- The LCD Display Control Panel holds the electronic
instructions for cooking the yogurt. Set the time as desired and the Yo! Good Yogurt
Maker easily does the rest.
1. LCD Display
2. Start/Stop Button
3. Time Button
See complete instructions for the LCD Display Control Panel in the section “Assembly & Operating” (p. 11).
FEATURES & FUNCTIONS

10
ASSEMBLY BEFORE USE
1. Place the Yo! Good Yogurt Maker Base on a level, flat surface that is clean
and dry.
2. Wash the Individual Yogurt Cups, Lids and EasyVue Lid in warm, sudsy
water and dry thoroughly.
3. Read safety instructions.

1111
ASSEMBLY &
OPERATINGOperating the Yo! Good Yogurt Maker
1. Fill the Individual Yogurt Cups with your prepared yogurt mixture. Place
the Cups in the Yo! Good Yogurt Maker Base.
2. Do not place the Lids on the Individual Yogurt Cups. Set aside for later use.
3. Place the EasyVue Lid on the Base, covering the filled Cups.
4. Plug the Yo! Good Yogurt Maker into an outlet.
5. Refer to your yogurt recipe for length of time to heat yogurt.
6. The LCD Display will flash “00” hours.
7. Press the Time button to set the cooking time: 1 hour minimum to 15 hours maximum.
8. Press the “Start/Stop” button. The LCD Display will start the countdown.
9. While the Yo! Good Yogurt Maker is cooking the yogurt, do not move the Base or Individual Cups, as any movement will affect the texture of the yogurt when done.
10. When done, the timer will BEEP five times and the Yogurt Maker will automatically turn OFF.
11. Remove the EasyVue Lid, using pot holders if needed, and remove the Individual Yogurt Cups. Cover each Cup with a Lid and refrigerate until use.

12
Yogurt Making Hints & TipsPrepare delicious, natural homemade yogurt!
» Your homemade yogurt is truly unique! The flavor and consistency will always depend on the culture used, the fruit or other ingredients added and the type of yogurt you choose to make. Yogurt consistency ranges from thin and pourable to thick and creamy, all depending on the ingredients and cultures you choose and the length of time you cook the yogurt. So, how can you shape the results you want? Check out our easy hints and tips that follow:
» Yogurt needs an active “starter” or “culture” to ferment properly as it cooks. You can use either a purchased culture or purchased yogurt that contains live, active bacteria. The culture used determines the end result and flavor so you may have to experiment a bit to find the flavor you like best.
» Fermenting times vary, depending on the culture you use. Some cultures can be used only once and take about 8-12 hours to ferment. Others, which are typically reusable, take up to 16 hours when first used and, when used again, take only 6-8 hours.

13
» When using store-bought yogurt as your culture, the average fermentation time is 6 hours. Check your recipe for accuracy.
» When it comes to texture, everyone has different preferences. If you prefer a thin, pourable yogurt, you do not need to heat the milk first (although it must be pasteurized whole or skim milk).
» If you want a thick consistency, we recommend heating the milk first to 180°F (unless your culture recommends a lower temperature). This allows the protein to break down in the milk, resulting in a thickening during fermentation.
» If you choose to heat the milk, hold the temperature to 180°F (or lower if your culture recommends) for about 20 minutes. Cool the milk until it reaches 110°F.
» You can now add the culture to the milk without destroying the culture. Whisk well to incorporate.
» Thickening the yogurt first will reduce the hours needed to ferment. Check your recipe for best results.
» Other thickening agents can help produce the consistency desired. Do not add more than one to your yogurt mixture:
Dry milk powder – add ½ cup dry milk powder to 4 cups milk.
Cornstarch – 2 tablespoons to 4 cups milk.
Tapioca starch – 2 tablespoons to 4 cups milk.
If you don’t prefer the whey that collects on the top of your yogurt after fermenting, pour it off and use it in other recipes.
YOGURT MAKING HINTS &
TIPS

14

15
DELICIOUS YOGURT ADD-INS
» After fermenting is done, stir in any of the following ingredients to your prepared yogurt. Use the following measurements per cup so that everyone can enjoy favorite flavors:
Delicious Yogurt Add-Ins
Food Add In
HOMEMADE
Dark Chocolate Yogurt
Shaved dark chocolate 2 tsp.
Peachy Keen Yogurt
Chopped fresh peaches 1/4- 1/2 cup
Lemon Lime Yogurt
Fresh lemon juice 1 tsp.
Fresh lime juice 1 tsp.
Honey 2 tsp.
Yum Plum Yogurt
Chopped purple plums (pitted) 2 plums
Fresh Strawberry Yogurt
Chopped fresh strawberries 2 tbsp.
Honey 2 tsp.
Blackberry Cinnamon Yogurt
Chopped fresh blackberries 2 tbsp.
Sugar 2 tsp.
Ground Cinnamon 1 pinch
Pure Vanilla Yogurt
Pure vanilla extract 1 tsp.
Honey 2 tsp.
Mocha Coffee Yogurt
Almond Extract 1 tsp.
Coffee powder 1 tsp.
Shaved dark chocolate 2 tsp.

16
MAINTENANCE
ALWAYS allow the Yogurt Maker to cool completely before cleaning.
Unplug the Yogurt Maker before cleaning.
After each use, clean the EasyVue Lid in warm, soapy water and dry with a soft cloth. Use a damp cloth to clean the Yogurt Maker Base. Dry thoroughly. DO NOT immerse the Yogurt Maker Base in water. Use non-abrasive cleaners or soft soap only.
Do not place Yogurt Maker Base, EasyVue Lid or Individual Cup Lids in dishwasher. Wash these items in warm, sudsy water and dry thoroughly. Individual Glass Cups may be placed in the dishwasher or hand-washed.

17
MAINTENANCE &
SERVICEWARRANTY & SERVICE
This Limited Warranty is for one full year from the date of purchase. It is
applicable to the original purchaser only and is not transferable to a third party
user. Repair or replacement of defective parts is solely at the seller’s discretion.
In the event that repair isn’t possible, the seller will replace the product/part. If
product repair/replacement won’t suffice, the seller has the option of refunding
the cash value of the product or component returned.
Product defects not covered under the Warranty provisions include normal wear
and damage incurred from use or accidental negligence, misuse of instruction
specifications or repair by unauthorized parties. The manufacturing company
is not liable for any incidental or consequential damages incurred by such
circumstances.
For Customer Service or Questions, Please call: 888-552-0033
www.gourmia.com
www.gourmia.com