Embed Size (px)
Citation preview
Send document comments to ucs -doc feedback@c i sco .com
CiscOL-22182-01
C H A P T E R 2
VMware ESXi InstallationThis chapter contains two procedures:
• Installation on an Internal Drive, page 2-1
• SAN Boot Installation, page 2-9
Installation on an Internal Drive This section describes how to install VMware ESXi and required drivers on an internal drive by using the virtual media feature.
Note Not all optional hardware components are qualified for use with VMware at this time. For the exact VMware ESX versions and the hardware components supported on this server, see the hardware and software interoperability matrix for the C-Series servers on Cisco.com: http://www.cisco.com/en/US/products/ps10477/prod_technical_reference_list.html
Note UCS C200 and C210 Servers only: VMWare ESX/ESXi Server software does not support the use of the integrated software RAID with the ICH10R controller. You must use a different RAID option. See Appendix A, “RAID Controller Considerations”.
Prerequisites
The following items or actions are required before you begin this procedure:
Note Refer to the licensing procedures for your VMware software at http://www.vmware.com/support/licensing/ before you begin this OS installation procedure. VMware requires you to combine the licenses for multiple processors.
• A configured IP address for the management port of the server. You use this port and IP address to access the Cisco Integrated Management Controller (CIMC) utility.
• The VMware installation media, either CD/DVD or an ISO image. Also, the activation keys for this software installation.
Note If your server has an LSI MegaRAID controller, configure RAID settings for the drives in your server. If you do not configure your LSI MegaRAID LUNs before installing the OS, disk discovery failures might occur during the installation and you see error messages such as “No Device Found.”
2-1o UCS C-Series Servers VMware Installation Guide
Send document comments to ucs -doc feedback@c i sco .com
Chapter 2 VMware ESXi InstallationInstallation on an Internal Drive
Procedure
Use the following procedure to install the software and drivers:
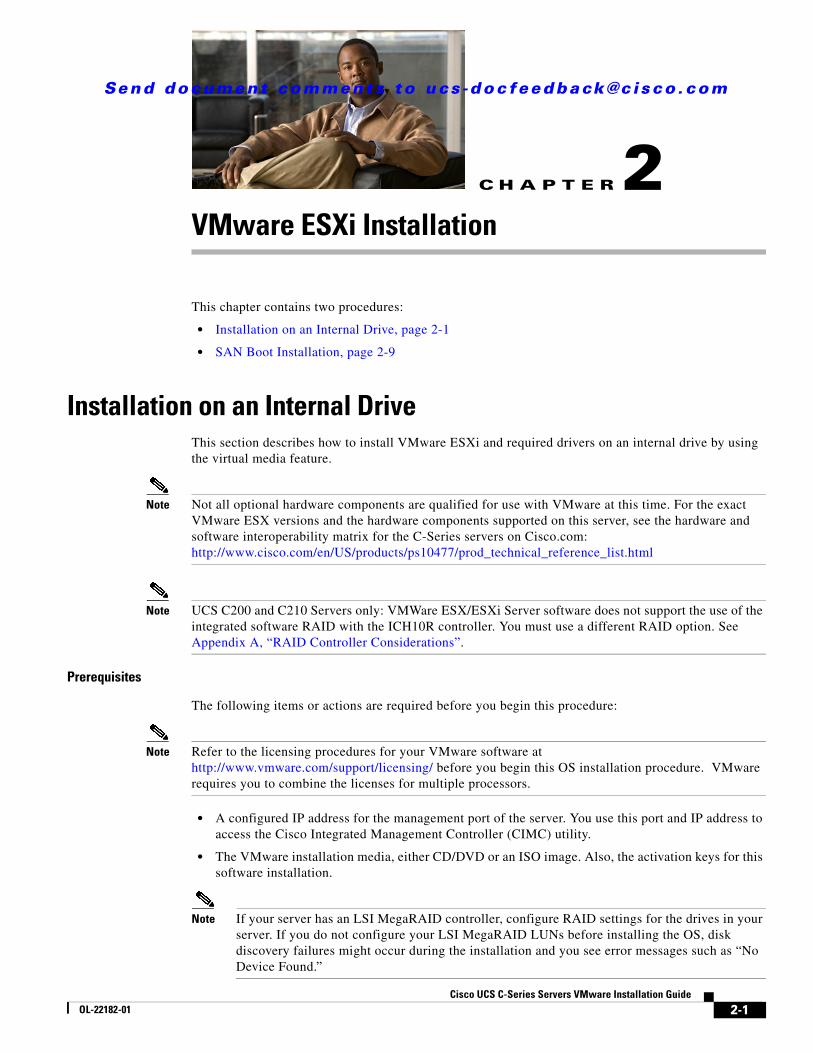
Step 1 Use a browser to connect to CIMC Manager using the CIMC IP address.
Step 2 Log in to CIMC Manager using your administrator user ID and password.
The default user ID is admin; the default password is password.
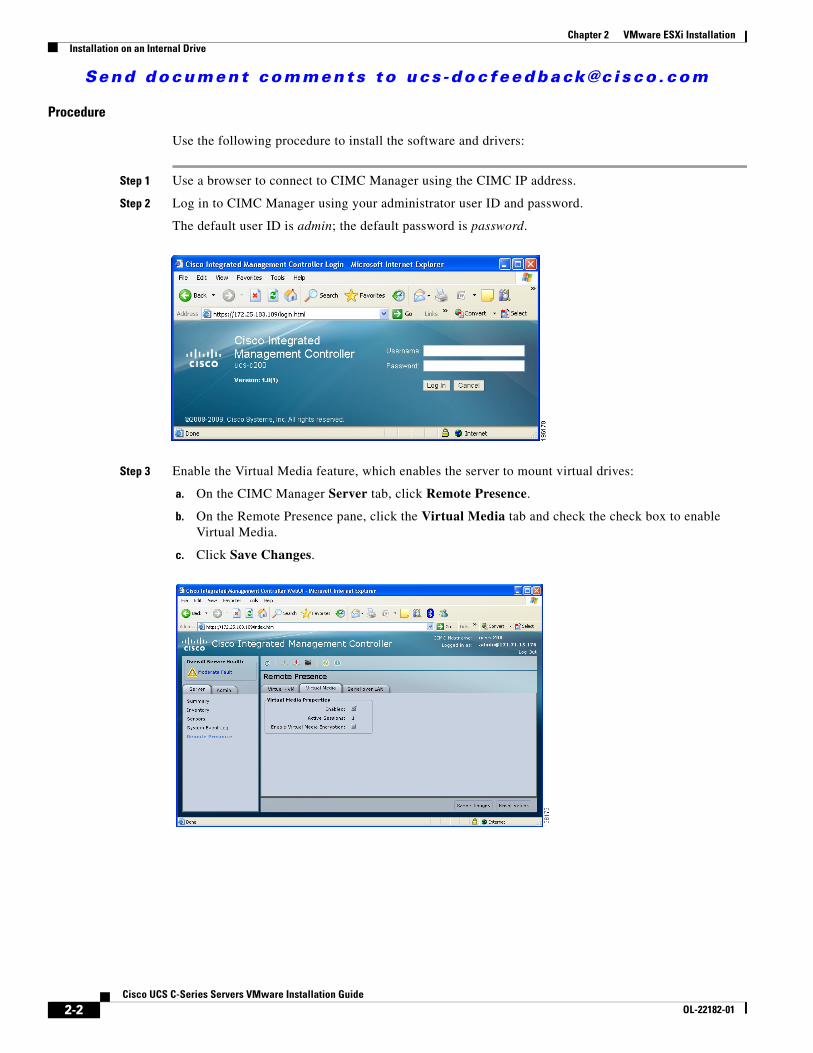
Step 3 Enable the Virtual Media feature, which enables the server to mount virtual drives:
a. On the CIMC Manager Server tab, click Remote Presence.
b. On the Remote Presence pane, click the Virtual Media tab and check the check box to enable Virtual Media.
c. Click Save Changes.
2-2Cisco UCS C-Series Servers VMware Installation Guide
OL-22182-01
Chapter 2 VMware ESXi InstallationInstallation on an Internal Drive
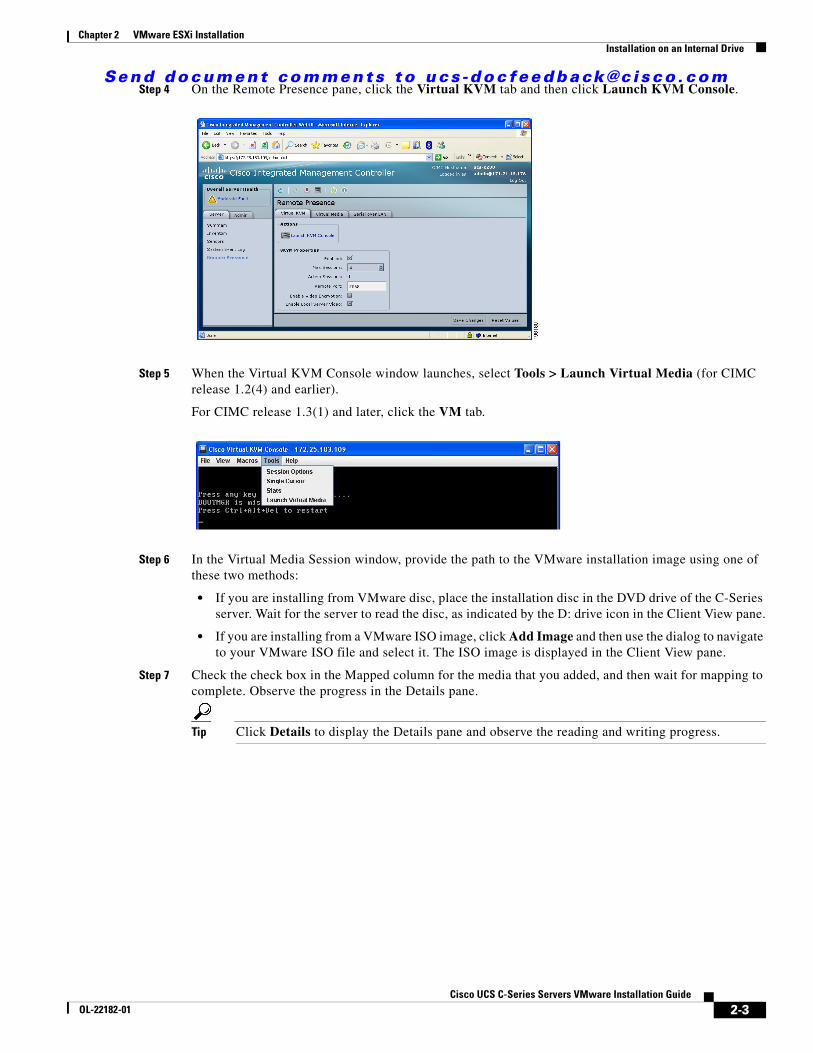
Send document comments to ucs -doc feedback@c i sco .comStep 4 On the Remote Presence pane, click the Virtual KVM tab and then click Launch KVM Console.
Step 5 When the Virtual KVM Console window launches, select Tools > Launch Virtual Media (for CIMC release 1.2(4) and earlier).
For CIMC release 1.3(1) and later, click the VM tab.
Step 6 In the Virtual Media Session window, provide the path to the VMware installation image using one of these two methods:
• If you are installing from VMware disc, place the installation disc in the DVD drive of the C-Series server. Wait for the server to read the disc, as indicated by the D: drive icon in the Client View pane.
• If you are installing from a VMware ISO image, click Add Image and then use the dialog to navigate to your VMware ISO file and select it. The ISO image is displayed in the Client View pane.
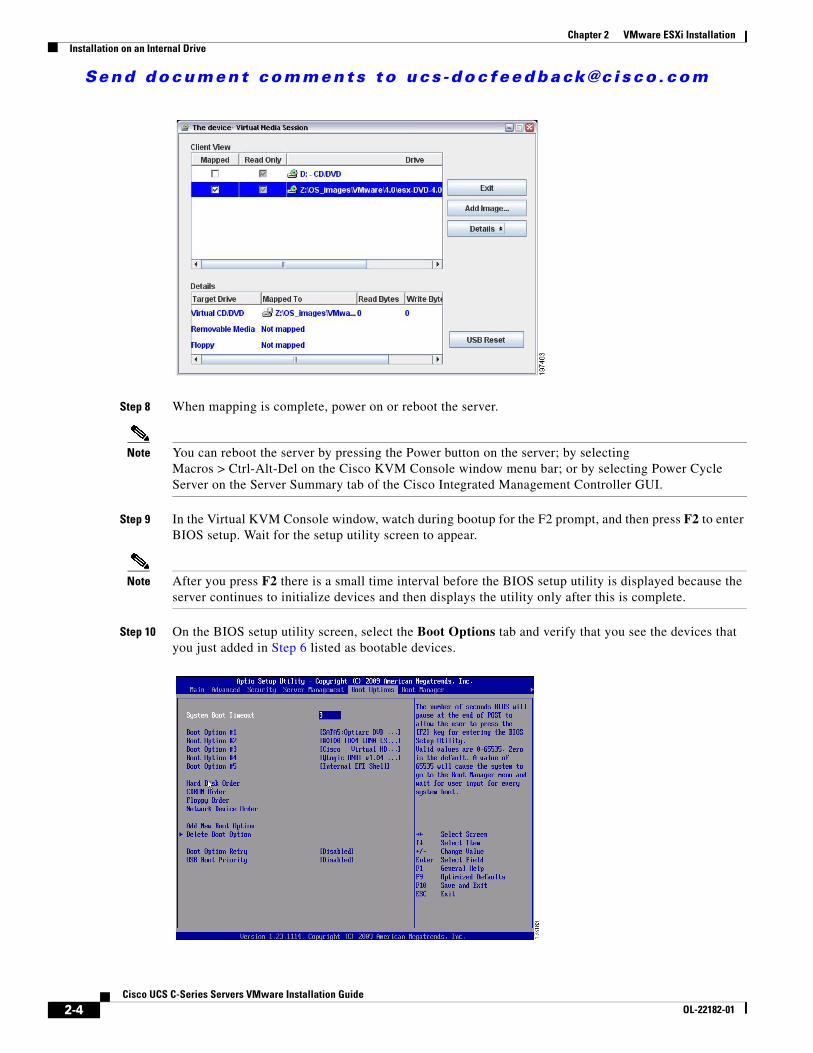
Step 7 Check the check box in the Mapped column for the media that you added, and then wait for mapping to complete. Observe the progress in the Details pane.
Tip Click Details to display the Details pane and observe the reading and writing progress.
2-3Cisco UCS C-Series Servers VMware Installation Guide
OL-22182-01
Send document comments to ucs -doc feedback@c i sco .com
Chapter 2 VMware ESXi InstallationInstallation on an Internal Drive
Step 8 When mapping is complete, power on or reboot the server.
Note You can reboot the server by pressing the Power button on the server; by selecting Macros > Ctrl-Alt-Del on the Cisco KVM Console window menu bar; or by selecting Power Cycle Server on the Server Summary tab of the Cisco Integrated Management Controller GUI.
Step 9 In the Virtual KVM Console window, watch during bootup for the F2 prompt, and then press F2 to enter BIOS setup. Wait for the setup utility screen to appear.
Note After you press F2 there is a small time interval before the BIOS setup utility is displayed because the server continues to initialize devices and then displays the utility only after this is complete.
Step 10 On the BIOS setup utility screen, select the Boot Options tab and verify that you see the devices that you just added in Step 6 listed as bootable devices.
2-4Cisco UCS C-Series Servers VMware Installation Guide
OL-22182-01
Send document comments to ucs -doc feedback@c i sco .com
Chapter 2 VMware ESXi InstallationInstallation on an Internal Drive
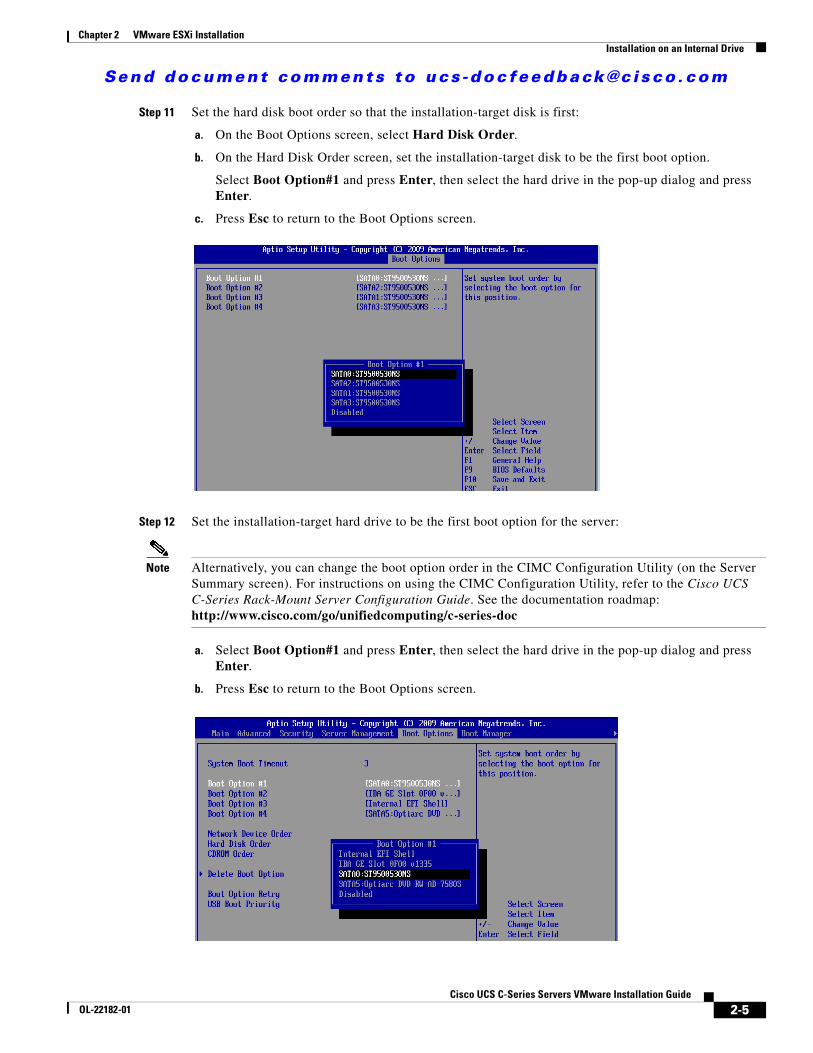
Step 11 Set the hard disk boot order so that the installation-target disk is first:
a. On the Boot Options screen, select Hard Disk Order.
b. On the Hard Disk Order screen, set the installation-target disk to be the first boot option.
Select Boot Option#1 and press Enter, then select the hard drive in the pop-up dialog and press Enter.
c. Press Esc to return to the Boot Options screen.
Step 12 Set the installation-target hard drive to be the first boot option for the server:
Note Alternatively, you can change the boot option order in the CIMC Configuration Utility (on the Server Summary screen). For instructions on using the CIMC Configuration Utility, refer to the Cisco UCS C-Series Rack-Mount Server Configuration Guide. See the documentation roadmap:http://www.cisco.com/go/unifiedcomputing/c-series-doc
a. Select Boot Option#1 and press Enter, then select the hard drive in the pop-up dialog and press Enter.
b. Press Esc to return to the Boot Options screen.
2-5Cisco UCS C-Series Servers VMware Installation Guide
OL-22182-01
Send document comments to ucs -doc feedback@c i sco .com
Chapter 2 VMware ESXi InstallationInstallation on an Internal Drive
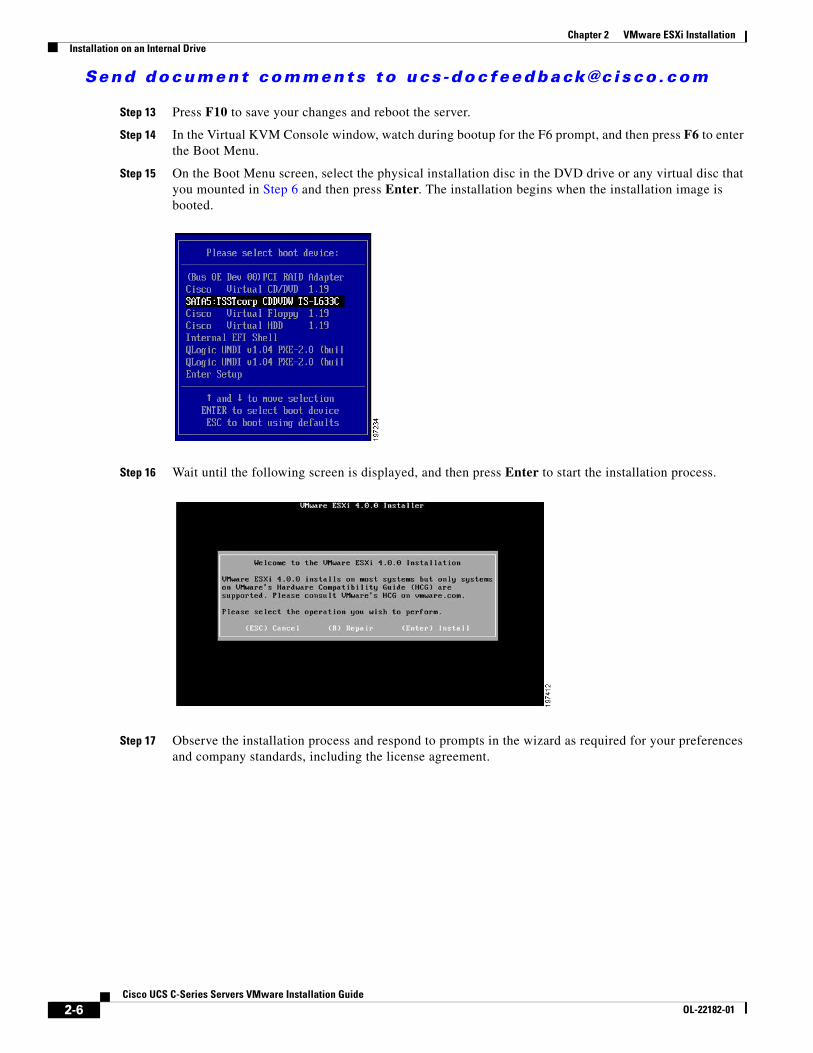
Step 13 Press F10 to save your changes and reboot the server.
Step 14 In the Virtual KVM Console window, watch during bootup for the F6 prompt, and then press F6 to enter the Boot Menu.
Step 15 On the Boot Menu screen, select the physical installation disc in the DVD drive or any virtual disc that you mounted in Step 6 and then press Enter. The installation begins when the installation image is booted.
Step 16 Wait until the following screen is displayed, and then press Enter to start the installation process.
Step 17 Observe the installation process and respond to prompts in the wizard as required for your preferences and company standards, including the license agreement.
2-6Cisco UCS C-Series Servers VMware Installation Guide
OL-22182-01
Send document comments to ucs -doc feedback@c i sco .com
Chapter 2 VMware ESXi InstallationInstallation on an Internal Drive
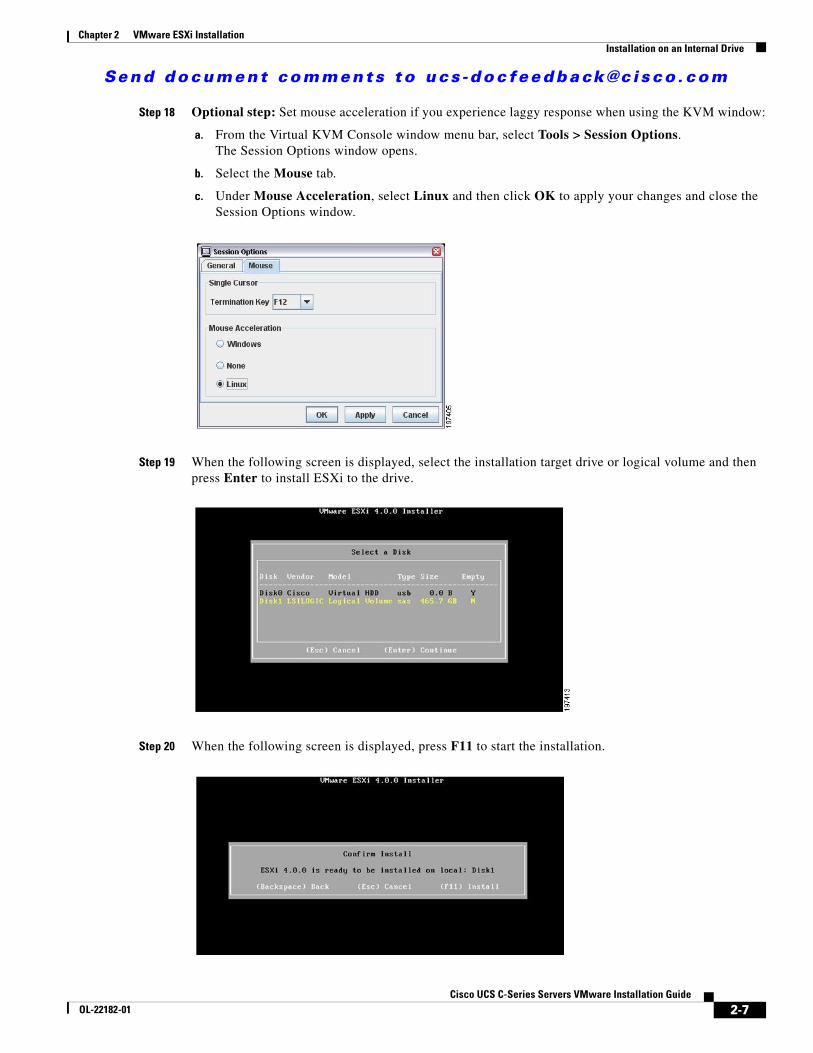
Step 18 Optional step: Set mouse acceleration if you experience laggy response when using the KVM window:
a. From the Virtual KVM Console window menu bar, select Tools > Session Options. The Session Options window opens.
b. Select the Mouse tab.
c. Under Mouse Acceleration, select Linux and then click OK to apply your changes and close the Session Options window.
Step 19 When the following screen is displayed, select the installation target drive or logical volume and then press Enter to install ESXi to the drive.
Step 20 When the following screen is displayed, press F11 to start the installation.
2-7Cisco UCS C-Series Servers VMware Installation Guide
OL-22182-01

Send document comments to ucs -doc feedback@c i sco .com
Chapter 2 VMware ESXi InstallationInstallation on an Internal Drive
Note Do not press Enter to reboot at the next screen until after you remove or unmap the installation media.
Step 21 When the installation is complete, the following screen is displayed.
• If you installed from physical disc, eject that disc, then press Enter to boot the target installation drive with ESXi.
• If you installed from an ISO installation image, use the Virtual Media Session window to unmap the installation ISO that you mapped in Step 7, then press Enter to boot the target installation drive with ESXi.
After the target server reboots and loads ESXi, the following screen is displayed. You can press F2 to access the ESXi Console utility when you see the following screen.
2-8Cisco UCS C-Series Servers VMware Installation Guide
OL-22182-01
Send document comments to ucs -doc feedback@c i sco .com
Chapter 2 VMware ESXi InstallationSAN Boot Installation
SAN Boot InstallationThis section describes how to install VMware ESXi and required drivers on a bootable SAN LUN (a logical disk, or RAID volume).
Note Not all optional hardware components are qualified for use with VMware at this time. For the exact VMware ESX versions and the hardware components supported on this server, see the hardware and software interoperability matrix for the C-Series servers on Cisco.com: http://www.cisco.com/en/US/products/ps10477/prod_technical_reference_list.html
Note UCS C200 and C210 Servers only: VMWare ESX/ESXi Server software does not support the use of the integrated software RAID with the ICH10R controller. You must use a different RAID option. See Appendix A, “RAID Controller Considerations”.
Prerequisites
The following items or actions are required before you begin this procedure:
Note Refer to the licensing procedures for your VMware software at http://www.vmware.com/support/licensing/ before you begin this OS installation procedure. VMware requires you to combine the licenses for multiple processors.
• A configured IP address for the management port of the server. You use this port and IP address to access the Cisco Integrated Management Controller (CIMC) utility.
• The VMware installation media, either CD/DVD or an ISO image. Also, the activation keys for this software installation.
• Configure a LUN or RAID volume on your SAN, then connect to the SAN and verify that one (and only one) path exists from the SAN HBA to the LUN.
If you are using an LSI RAID controller, see the LSI documentation and the help documentation within the utility for your controller. See RAID Controller Considerations, page A-1.
Note To launch the option ROM-based utilities for you controller, you press a key combination when prompted during bootup. For information about determining which controller is in your server and how to disable quiet boot so that you can see the prompts, see RAID Controller Considerations, page A-1.
Note If your server has an LSI MegaRAID controller, configure RAID settings for the drives in your server. If you do not configure your LSI MegaRAID LUNs before installing the OS, disk discovery failures might occur during the installation and you see error messages such as “No Device Found.”
2-9Cisco UCS C-Series Servers VMware Installation Guide
OL-22182-01

Send document comments to ucs -doc feedback@c i sco .com
Chapter 2 VMware ESXi InstallationSAN Boot Installation
Procedure
Use the following procedure to install the software and drivers:
Step 1 Use a browser to connect to CIMC Manager using the CIMC IP address.
Step 2 Log in to CIMC Manager using your administrator user ID and password.
The default user ID is admin; the default password is password.
Step 3 Enable the Virtual Media feature, which enables the server to mount virtual drives:
a. On the CIMC Manager Server tab, click Remote Presence.
b. On the Remote Presence pane, click the Virtual Media tab and check the check box to enable Virtual Media.
c. Click Save Changes.
2-10Cisco UCS C-Series Servers VMware Installation Guide
OL-22182-01
Send document comments to ucs -doc feedback@c i sco .com
Chapter 2 VMware ESXi InstallationSAN Boot Installation
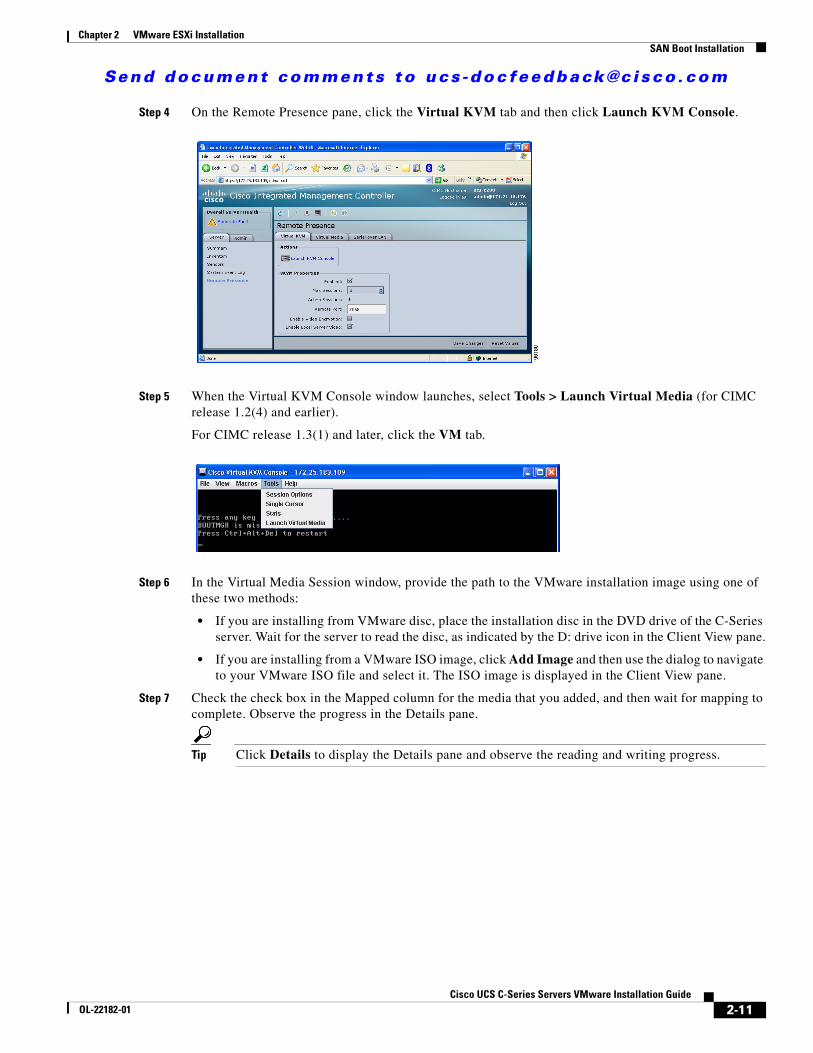
Step 4 On the Remote Presence pane, click the Virtual KVM tab and then click Launch KVM Console.
Step 5 When the Virtual KVM Console window launches, select Tools > Launch Virtual Media (for CIMC release 1.2(4) and earlier).
For CIMC release 1.3(1) and later, click the VM tab.
Step 6 In the Virtual Media Session window, provide the path to the VMware installation image using one of these two methods:
• If you are installing from VMware disc, place the installation disc in the DVD drive of the C-Series server. Wait for the server to read the disc, as indicated by the D: drive icon in the Client View pane.
• If you are installing from a VMware ISO image, click Add Image and then use the dialog to navigate to your VMware ISO file and select it. The ISO image is displayed in the Client View pane.
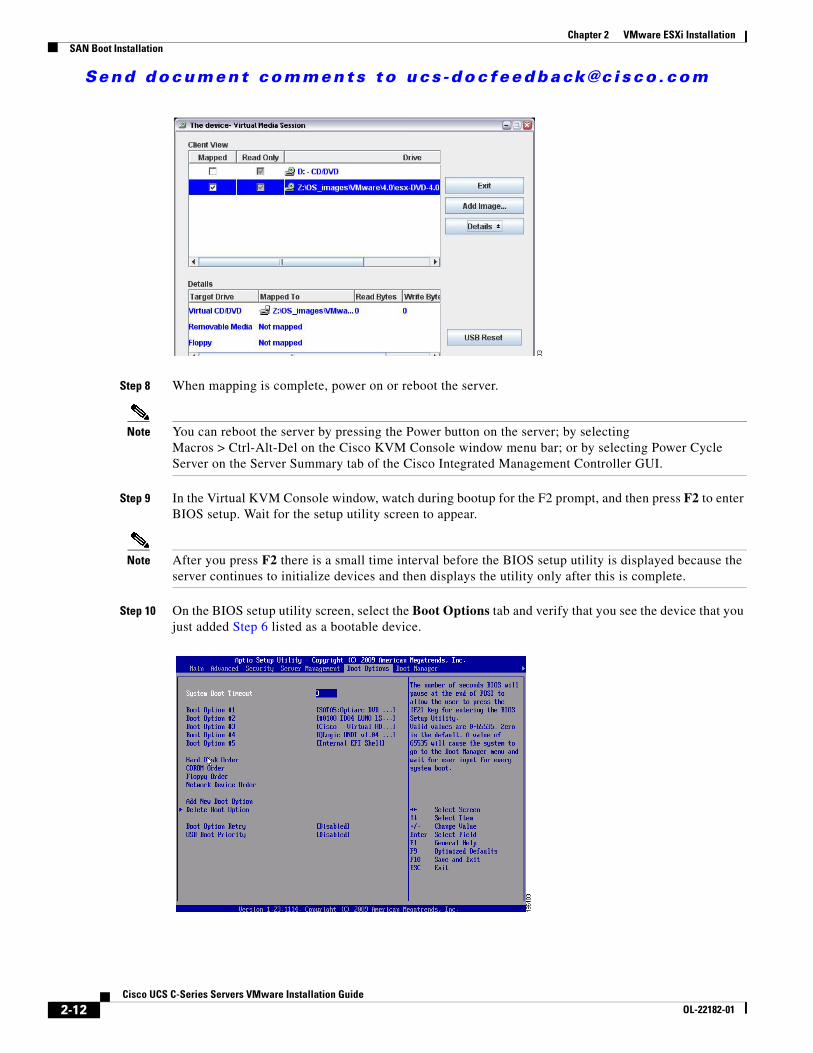
Step 7 Check the check box in the Mapped column for the media that you added, and then wait for mapping to complete. Observe the progress in the Details pane.
Tip Click Details to display the Details pane and observe the reading and writing progress.
2-11Cisco UCS C-Series Servers VMware Installation Guide
OL-22182-01
Send document comments to ucs -doc feedback@c i sco .com
Chapter 2 VMware ESXi InstallationSAN Boot Installation
Step 8 When mapping is complete, power on or reboot the server.
Note You can reboot the server by pressing the Power button on the server; by selecting Macros > Ctrl-Alt-Del on the Cisco KVM Console window menu bar; or by selecting Power Cycle Server on the Server Summary tab of the Cisco Integrated Management Controller GUI.
Step 9 In the Virtual KVM Console window, watch during bootup for the F2 prompt, and then press F2 to enter BIOS setup. Wait for the setup utility screen to appear.
Note After you press F2 there is a small time interval before the BIOS setup utility is displayed because the server continues to initialize devices and then displays the utility only after this is complete.
Step 10 On the BIOS setup utility screen, select the Boot Options tab and verify that you see the device that you just added Step 6 listed as a bootable device.
2-12Cisco UCS C-Series Servers VMware Installation Guide
OL-22182-01
Send document comments to ucs -doc feedback@c i sco .com
Chapter 2 VMware ESXi InstallationSAN Boot Installation
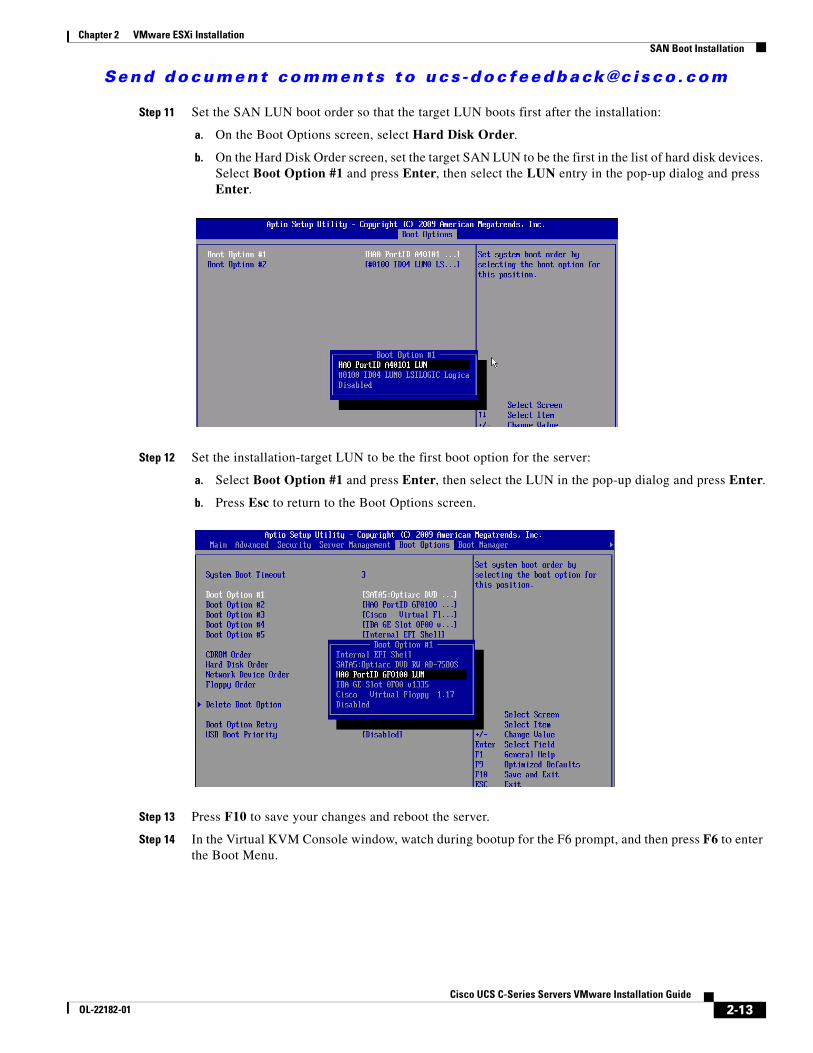
Step 11 Set the SAN LUN boot order so that the target LUN boots first after the installation:
a. On the Boot Options screen, select Hard Disk Order.
b. On the Hard Disk Order screen, set the target SAN LUN to be the first in the list of hard disk devices. Select Boot Option #1 and press Enter, then select the LUN entry in the pop-up dialog and press Enter.
Step 12 Set the installation-target LUN to be the first boot option for the server:
a. Select Boot Option #1 and press Enter, then select the LUN in the pop-up dialog and press Enter.
b. Press Esc to return to the Boot Options screen.
Step 13 Press F10 to save your changes and reboot the server.
Step 14 In the Virtual KVM Console window, watch during bootup for the F6 prompt, and then press F6 to enter the Boot Menu.
2-13Cisco UCS C-Series Servers VMware Installation Guide
OL-22182-01
Send document comments to ucs -doc feedback@c i sco .com
Chapter 2 VMware ESXi InstallationSAN Boot Installation
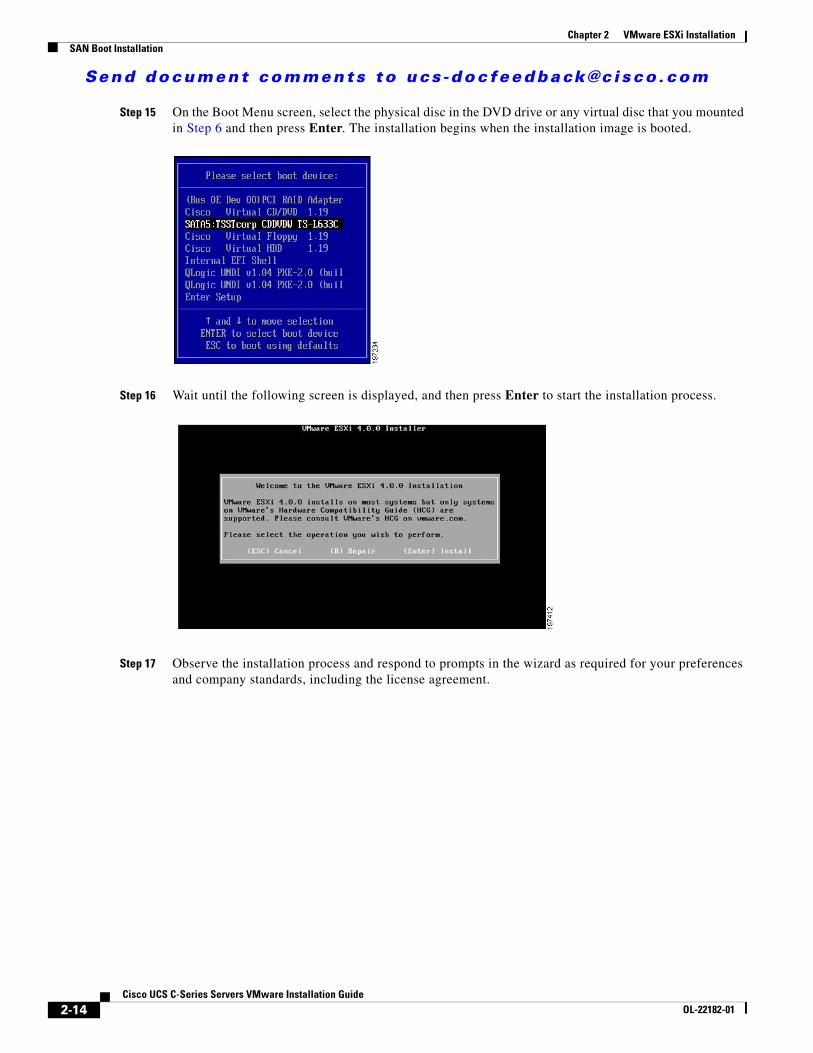
Step 15 On the Boot Menu screen, select the physical disc in the DVD drive or any virtual disc that you mounted in Step 6 and then press Enter. The installation begins when the installation image is booted.
Step 16 Wait until the following screen is displayed, and then press Enter to start the installation process.
Step 17 Observe the installation process and respond to prompts in the wizard as required for your preferences and company standards, including the license agreement.
2-14Cisco UCS C-Series Servers VMware Installation Guide
OL-22182-01

Send document comments to ucs -doc feedback@c i sco .com
Chapter 2 VMware ESXi InstallationSAN Boot Installation
Step 18 Optional step: Set mouse acceleration if you experience laggy response when using the KVM window:
a. From the Virtual KVM Console window menu bar, select Tools > Session Options. The Session Options window opens.
b. Select the Mouse tab.
c. Under Mouse Acceleration, select Linux and then click OK to apply your changes and close the Session Options window.
Step 19 When the following screen is displayed, select the installation target LUN or logical volume and then press Enter to install ESXi to the drive.
Step 20 When the following screen is displayed, press F11 to start the installation.
2-15Cisco UCS C-Series Servers VMware Installation Guide
OL-22182-01

Send document comments to ucs -doc feedback@c i sco .com
Chapter 2 VMware ESXi InstallationSAN Boot Installation
Note Do not press Enter to reboot at the next screen until after you remove or unmap the installation media.
Step 21 When the installation is complete, the following screen is displayed.
• If you installed from physical disc, eject that disc, then press Enter to boot the target installation drive with ESXi.
• If you installed from an ISO installation image, use the Virtual Media Session window to unmap the installation ISO that you mapped in Step 7, then press Enter to boot the target installation drive with ESXi.
After the target server reboots and loads ESXi, the following screen is displayed. You can press F2 to access the ESXi Console utility when you see the following screen.
2-16Cisco UCS C-Series Servers VMware Installation Guide
OL-22182-01