Embed Size (px)
Citation preview
Bell Tea and Coffee Company
Barista Trainers’ Resource Manual
I´ve attached my view of what is Need to have-Green, Nice to have - Yellow, and No need to have - Red.
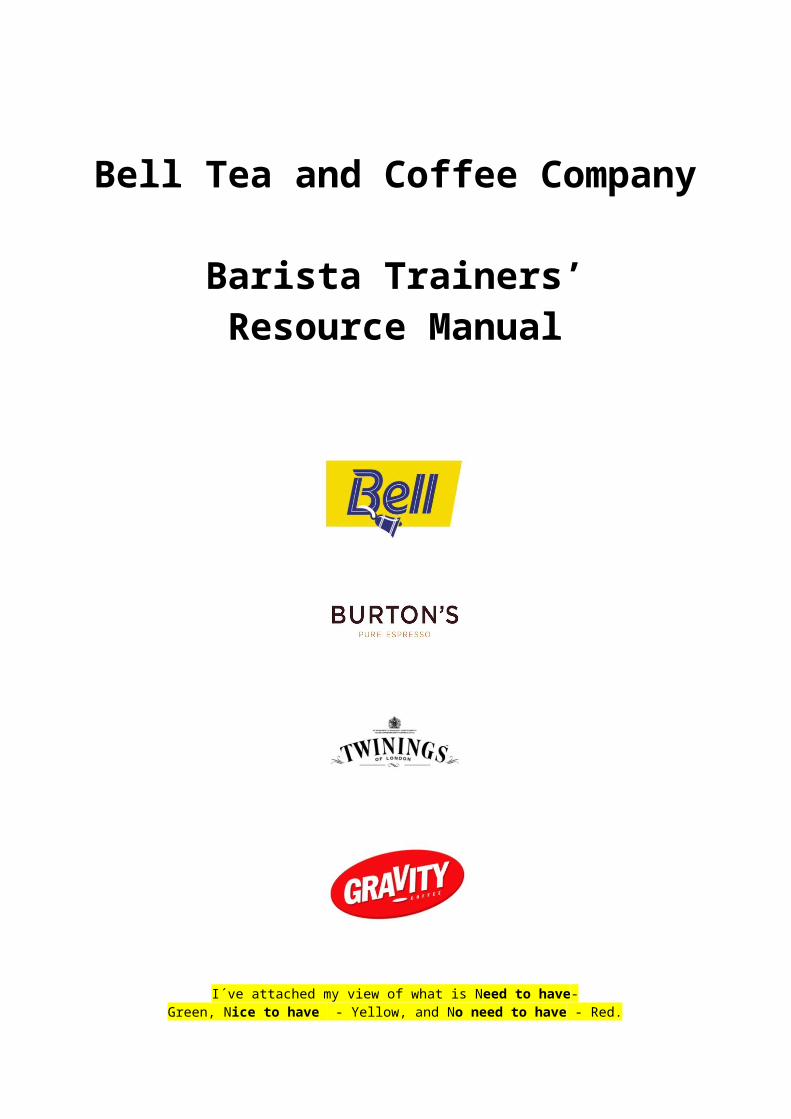
Contents __________________________________________________________________
Page Number
Table of Contents 2
Barista Training Structure & Resource Manual 3
About the Training System 4
Teaching Advice 5
The FoundationsThe Foundation 6Espresso Equipment Mechanics 8Dosing 10Tamping 12Extraction Precision 13Beverage Formula 15Milk Fundamentals 18Maintenance 20
CertificationThe Institution 23Tea Memoirs 24Coffee Memoirs 27Guaranteed Superiority 29Milk Design 31Production 33Ergonomics and Station Management 35Crisis Control and the Classified Data 37
Assessment Information and Guidelines 41
Action and Responsibilities 43
Barista Training Evaluation Guidelines 44
Assessment Instrument Sample 45
Barista Training Evaluation Instrument Sample - The Foundations 48
Barista Training Evaluation Instrument Sample – Certification 49
Bell Tea – Burton Hollis Barista Training Structure & Resource
Manual
2
The Bell Tea – Burton Hollis Barista Training Resource Manual and new training structure has been developed for ease of learning and to decrease the variation in the information being
taught from trainer to trainer.
Both Bell Tea and Burton Hollis are experts in our fields and part of our expertise is ensuring that we continue to offer new initiatives. We understand that over the past few years there has been a change in the cafe industry with a new importance placed on the barista and not
just the product alone. We realise that part of being the authority in the coffee and tea industry, is ensuring we are also leading the way. Most coffee companies; Burton Hollis
included, have trained the same way for many years with little incentive to customers or their baristas. This new course gives an incentive to students looking to better their skills by
offering a certificate in Barista Skills.
As a staff member who conducts training sessions you will need to learn this structure, how to teach it and how to assess students wanting a certificate. It is fundamental as a barista trainer
to understand what you are teaching and why as a company we have chosen this method of training. Understanding this will support our beliefs and assure our customers that we are the
experts.
The Bell Tea – Burton Hollis training course is broken down into two sessions, The Foundations and Certification. Each session is then broken down into eight modules. All training sessions should ideally be conducted at a Centre of Gravity training centre and should take about 1½ hours from start to finish. This will be dependent on the number of trainees in the class. The training may take place at the customer’s café; however it is recommended that sessions be
conducted where possible, at a training centre.
As a barista trainer you will be given a Barista Training Kit containing: Burton Hollis barista manual, tamper, tamper mat, cleaning brush, screwdriver, backwash disc, 1 litre milk jug, 0.6 litre milk jug, thermometer, Cafiza espresso machine cleaner, samples of green and roasted beans, stopwatch, shot glasses and this resource manual. Each Centre of Gravity will also
have one in house – ready for training sessions conducted in house.
The products in the kit should be kept in an excellent presentable condition as sample products of the accessories we recommend and offer for sale. If items begin to look tired and old – request replacements, especially backwash discs and cleaning brushes. All replacement
items are available from Burton Hollis with the exception of the following items, where suppliers are in brackets; Screwdrivers (Mitre 10), Stopwatches (Dick Smiths, replacement
batteries can also be purchased from Dick Smiths), Shot Glasses and Thermometers (Southern Hospitality).
About the Training System
3
This manual will explain how our training system is structured, the information which is required to be taught, as well as offer you as a barista trainer, a resource to refer to for
additional information on the subjects we teach.
As already mentioned the Barista Training System is broken down into two sessions. Each session is then divided into eight modules. The information that is required to be taught is covered in the manual in bold print. Additional information is added to each module where
applicable in normal print.
The Foundations training is recommended for all new Burton Hollis customers, people new to the industry, cafe staff who want to become baristas and anybody new to espresso coffee.
They might be a new staff member at one of our customers’ cafes or even a new staff member at Bell Tea or Burton Hollis, or a new cafe owner who may or may not have learnt to make
coffee before.
The Foundations incorporates an introduction to the company and espresso coffee. It takes an informative look at espresso production, the role of the barista, beverage recipes, milk
fundamentals and basic machinery mechanics and cleaning.
Certification training is aimed at baristas who would like to further their knowledge but more importantly their practical barista skills. It is recommended for anyone that has been taught to make coffee either with Burton Hollis or another coffee company. The training will look at how as a company we maintain our high level of quality and takes an informative look at both tea and coffee and how and where it is produced. In addition to product knowledge Certification
training also shares some of the ‘classified data’ or trade secrets within the industry and assists students in managing the entire barista station from serving techniques to stock
management. On completion of Certification training the student may book a time to sit their assessment at
a time convenient to both the student and trainer. The assessment is completely practical and may be conducted at either a Centre of Gravity or the student’s place of work. Upon passing
the assessment the student will be presented with a certificate.
A barista who has not completed any training with Burton Hollis but would like to sit the assessment to achieve the qualification may do so. This is on the proviso that the barista
trainer/assessor has discussed the required skill level with them and feels they have the skills to pass and they must also be working in an account supplying Burton Hollis coffee. However it
is generally recommended that they at least complete Certification training.
Teaching AdviceA few teaching tips follow; which you may like to consider when conducting a training session.
4
1. During training sessions it is important to encourage students and ensure praise is given.
2. Any criticism should be constructive. 3. Encourage students to ask questions – no question is a stupid question.4. It is important to consider the different learning styles of each student.
I. A student who learns by reading or writing may prefer to take notes – clear this at the beginning of the session by letting students know that they are welcome to write notes if they wish.
II. A visual person will learn mostly by watching you demonstrate the skills III. A kinaesthetic style learner will prefer to be hands on. To prevent these students
becoming stressed or nervous about not having time to practise reassure them and let them know there will plenty of opportunities to have a go
5. During a training session, help students retain information by asking questions and getting the students to answer them – for example:
After telling the students the two different types of handle – hold up the single handle and say ‘so this handle is called the ____________? And let the students answer.
Or after explaining the four key points of great espresso – ask the students – “the four key things we must consider when making espresso are ______________?
You can also use question to get students to predict what the next step or steps in the process will be e.g. So what’s the next thing we do?
6. When doing demonstrations of skills at the espresso machine, invite the students to come in close to the machine – it helps to involve them in the lesson and they are able to observe things more clearly.
THE FOUNDATIONSMODULE 1 – THE FOUNDATION
The foundation module is a general introduction to: the student(s) and trainer, the company, our brands, and our barista training course. This module also briefly explains what a barista is and what the position means in New Zealand. It will also give the students an understanding of
5
espresso. Invite students to take a seat in the board room/meeting room or at a table in the cafe (if the training is being done onsite) and complete this module seated with them.
1. Introduce yourself as the barista trainer & your position at Burton Hollis – then ask each student to introduce themselves if necessary.
2. Introduce Burton Hollis – Burton Hollis are a New Zealand coffee roasting company. We are experts in our field and have a wealth of experience within the café and hospitality industry, from roasting and blending, to more practical aspects such as this training course.
3. Burton Hollis was established in 1989 by David Burton – who is the blend master at Burton Hollis - David has helped create the benchmark for great coffee in NZ.
4. Bell Tea purchased Burton Hollis in 2006. Bell Tea is a New Zealand owned company and has been around since 1898. Bell Tea stands as one of the earliest icons of Kiwiana; alongside Edmonds Cookbook, Weetbix and the Buzzy bee.
5. Bell Tea manufactures and markets Twinings in New Zealand and is also New Zealand’s leading tea manufacturer. Twinings is our tea for the hospitality sector.
6. Discuss our brands – Burton’s, Gravity, Burton Hollis, Pronto, Routin, Bell, Twinings, Amber Tips, Tiger, and Burton Hollis Hot Chocolate. Burton Hollis are the sole NZ distributors for La Cimbali, Jura and Nitro espresso machines
a. Many students will be unaware that that we offer more than just the brand they use at the café that they work in. Discussing the other brands the company offers will help introduce them to these brands and other products.
7. Burton Hollis own the Centre of Gravity Café Training Centres - located in Auckland, Wellington (and soon Christchurch)
8. Overview of The Foundations 1 - an introduction to coffee and tea, the machine and grinder, how to make an espresso, how to steam milk, machine cleaning & what is required to become a great barista.
9. A barista is someone who is skilled and knowledgeable in the art of espresso, tea and hot beverages and their production, not just someone who makes a cup of coffee.
In Italy the term barista is earned though proven skill and experience and is known to be an honourable and respected profession.
Not everyone who steps onto a coffee machine will be a natural – just like not everyone with a drivers licence is a great driver!
Different employers, coffee companies, countries and baristas have varying opinions in how to make great espresso and we are not by any means saying that they are wrong – just that there are different ways of making coffee.
Customers are demanding consistency in quality and appearance – it has been all too common in the past to blame the coffee - this is just not possible anymore; with our outstanding Quality and Assurance programme and testing procedures it guarantees every roast that is delivered to you is of the highest standard
10. Espresso is the essence extracted by forcing hot pressurised water through fresh coffee grounds at high pressure, producing an intensely
6
aromatic and flavoursome beverage. The key points that we need to consider: espresso also demands that finely ground coffee, ground to the correct size, be brewed at the correct temperature (88°-92°c) and pressure (9 bars); to extract only the most desired qualities of the coffee bean in a set amount of time (20-25secs). There are four key points – grind (both the size and the amount), time, pressure and temperature
The meaning of the word itself varies from country to country. In Italy espresso is understood to mean ‘quickly’ whilst in France it is understood as ‘especially made’. At BURTON HOLLIS we believe every cup of espresso is brewed perfectly for the guest just before it is consumed.
MODULE 2 – ESPRESSO EQUIPMENT MECHANICS
The Espresso Equipment Mechanics module gives the student a basic understanding of the espresso machine and grinder and what the different parts of the machines are called and
used for. Before beginning this module – invite the students to move to the espresso machine/coffee station. Invite the students to move in closely if they are standing away from the machine – this helps to encourage their involvement and helps students to feel more at
ease.
7
1. Espresso Machine – the espresso machine has three main functions (point out the parts of the machine that provide these functions as you discuss them)
a. Provides steam for heating and texturing milk (steam wand)b. Distributes hot water for drinks such as long blacks and tea (hot water tap)c. Provides hot pressurised water for producing espresso (group head)
2. The machines we see today will be one of three types – discuss which type the students will be working on for the training session and within their cafe
a. Super-automatic – the operator/barista presses the button and the machine makes the coffee! These are often the ones you see in petrol stations
b. Fully-automatic – This machine is one of the two types seen most often in cafes and restaurants – The buttons on the machine are programmed to deliver a specific amount of water which when passed through the coffee grounds will deliver the correct amount for an espresso. There are more components on these machines and the volumetric buttons need to programmed by a service tech or representative
c. Semi-automatic – These machines are simple – the barista starts making a coffee and turns it off when the espresso is made.
3. Point out the following basic parts (and their functions) of the espresso machine. (these are the names you – as a trainer – should call the parts of the machine)
a.Steam wand – provides steam for heating milkb.Steam knob – turns the steam on and offc. Group head – distributes pressurised waterd.Shower, spreader and group screw – the 3 small parts that together ensure
the water is distributed through the group head evenlye.Handles - removable part of machine which is packed with ground coffee and
slotted into the group to allow us to extract the espressof. Buttons/knobs for extraction – activate the pump; if an automatic the machine
has buttons so the water volume is set. Or if a semi automatic the machine will have knobs which the barista controls
g.On 1 & on 2/off Knob – machine should be on number 2 at all timesh.Cup warmer – area on top of the machine to keep the cups warm ready for
servicei. Drip tray – the removable tray under the group heads where the cups are placed
to collect extracted coffeej. Drain catchments – the area the water runs into from the drip tray before
entering the drain hosek.Pressure gauge – displays the bar & steam pressure of the machine – not the
temperature
4. The coffee grinder has just one main function - it grinds coffee beans
a.It also holds coffee beans waiting to be ground and also holds the ground coffee ready to be dosed
5. Point out the following basic parts and their functions of the grinder
a.On/Off Switch: starts the grinder grinding beans b.Lever Return: drops ground coffee from in the hopper c. Bean Hopper: holds the beans ready for when ground coffee is needed & feeds
the beans into the bladesd.Bean Hopper Gate: shuts off the beans in the hopper preventing them from
being fed into the blades
8
e.Grinder Blades/Burrs: Grind the beansf. Grind adjustment collar: Moves the blades closer or further apart which in turn
decreases or increases the size of the grind.g.Grind adjustment tab: Locks the grind adjustment collar in place and when
pressed allows the collar to moveh.Grounds Hopper: Houses the ground coffeei. Resting Hold: rest area for placing the handle on when dosing the ground coffeej. Indicator Light: indicates whether the grinder is on/offk.Dose adjustment screw: adjusts the height of the levelling plate which in turn
alters the dose of each pull of the lever return
MODULE 3 – DOSING
The Dosing module introduces students to the different methods used to dose coffee into the group handles and explains when each method should be used. Demonstrate dosing, tamping
and extraction from start to finish before inviting each student to have a go.
1. Dosing is placing the correct amount of coffee required into the handle of the coffee machine in order to make an espresso. Much like making a cake, and measuring each of the ingredients - we must measure a set amount of coffee.
9
2. There are two handle sizes - a Single and Double – point out the different spouts
3. There are different basket sizes – single, double (& triple – if applicable)
4. There are two types of dosing that we use on a day to day basis
a. The standard/measured method should be used when it is busy - it is when the grinder is set to dose a set amount - when you pull the lever a certain amount of coffee is dropped into your handle – it should be set so that you pull twice for a single and three times for a double (four for a triple – if applicable)
b. The levelling method should be used during quiet times – this method relies on the barista to dose the correct amount and is the method we will use during training sessions.
5. Only grind as much coffee as you need – coffee should be extracted within 20 minutes of grinding. Once ground coffee begins to be effected by the environment through the process of oxidisation. It can be likened to say an apple when cut starts to go brown – even though we can’t see it occurring like with an apple it does happen. Or it can be likened to a loaf of bread which will stay more fresh when left whole, but once sliced goes stale more quickly, and if left out of the bag even faster. The main problem for us with coffee is that it begins to affect the flavour.
NB If the café the student works for does not have a La Cimbali espresso machine - discuss type of machine and grinder at their café and discuss with them the variation of basket size on their machine. Other brands of grinder may also have different dosing methods – tell them to discuss this with the owner of the café or barista trainer
6. Standard/Measured Method – discuss briefly (especially if this is the method predominantly used in café the student works in)
a. Before dosing the handle and basket should be hot, dry and clean a.There should always be a clean, dry tea towel available to wipe out the handles
beside the coffee machine – ideally hanging on the waste tubeb. It is not necessary to wash the handle each time you use it - it will cause water
to drip into your resting hold and dry area around the grinder making a sludgy mess.
c. The standard/measured method requires the grounds hopper to be filled up so that each of the dosing segments in the grinder is full – point these out to the students
b. Prepare to dose basket by ensuring the grounds hopper has an sufficient amount of coffee in it
c. To dose a single shot hold the handle firmly in the left hand and place handle in the resting hold
a. If the student seems unbalanced when holding the handle – encourage them to hold the handle more firmly, closer to the basket.
d. To dose a single shot pull the lever on the grinder once, then release the lever and pull again and release for a second time
e. To dose a double or triple shot again hold the handle firmly in your left hand and place handle in the resting hold and pull the lever three times for a double (or four for a triple if applicable)
f. Briefly - Pull twice for a single, three for a double (and four a triple)g. You are now ready to tamp the coffee
10
7. Levelling
a. The handle and basket should be hot, dry and clean b. Prepare to dose your basket by ensuring the grounds hopper has an
sufficient amount of coffee in it c. For a single shot – dose enough coffee so you have a small mountain of
coffee just above the rim of the basket; then run your index finger across the top wiping the mountain back into the grounds hopper leaving a valley/impression in the coffee left in the basket
d. For a double shot – dose enough coffee so you have a mountain of coffee above the rim of the basket; then holding the handle of the grounds hopper run your index finger across the mountain ensuring the coffee fills the basket right to the edges
e. You are now ready to tamp the coffee
NB - The easiest way to remember how much coffee there needs to be in a single shot is to make sure there is a valley through the coffee. For a double there should be a mountain – it does sound childish but all you need to remember is mountains and valleys – and the triple shot works exactly the same as a double with a mountain
MODULE 4 – TAMPING
The Tamping module introduces students to tamping and its importance when making great espresso.
1. Tamping is the physical act of compressing the ground coffee into the group basket after dosing.
2. To tamp coffee ready for extraction:a.Rest the handle on the tamper mat – for a single it is sometimes easier to
rest the handle on the edge of the bench.
11
b.Hold tamp in your preferred hand then press down creating a 90° angle between the bench and your forearm and using your shoulder muscle and not your wrist
c. Press lightly only - straight down. Concentrate on being level. d.The first tamp is ensure a level biscuit with even pressuree.Withdraw tamp f. Check the biscuit is even/level g.Now tamp again with pressureh.Finish by twisting the tamper 360° to polish the top of the coffee. i. Gently flick the handle upside-down – this will remove any loose grinds j. Brush the excess grinds from the edges of the basket, this ensures the
handle seals properly in the group head.k.Note the dosing line in the basket – it should be just visible, if there is too
much coffee in the basket there will not be enough room for the coffee to expand up in the group once it becomes wet.
l. If the student is pressing down using their lower arm muscles – encourage them to keep their wrist and forearm as straight as possible – at a 90° angle to the bench and using the strength from your shoulder and bicep to create the downward pressure
m. The reason we recommend tamping this way is because the action of making coffee is extremely repetitive and it can cause OOS – Occupational Overuse Syndrome. Some people may refer to it as RSI – OOS is the same thing and is just the new name for RSI
n.Polishing the top smoothes and seals the top of the coffee surfaceo.Being quick and efficient when dosing and tamping prevents the handle from cooling
offp.The reason why we no longer tap is because
a. tapping loosens the coffee from around the edge of the basket and creates a channel giving the water an easier course to follow than through the coffee
b. Over the years we have seen how much damage is done to tampers, which is caused when a barista hits the wrong point. Baristas often tamp using the bottom of the tamper and when the bottom has been damaged it is impossible to polish the top of the biscuit. In addition to this over time if the tamper is used incorrectly, it creates a ridge around the edge of the tamper and reduces the diameter considerably. Both of these issues mean that the quality of the espresso is being compromised.
q.The tamper mat should be free of coffee grinds - if coffee grounds collect on the mat they will stick to the spouts on the handle and cause grounds to be washed into the bottom of your cup as you are extracting the espresso shot – brush it down regularly throughout service.
MODULE 5 – EXTRACTION PRECISION
The Extraction Precision module demonstrates the correct technique for producing the perfect espresso.
1. To take an extraction:a. Flush/purge the group before placing handle in the groupb. Slot the handle into the groupc. Place the vessel under the handle
12
d. Activate the pump immediately i. If coffee is left too long in the group it can affect the flavour ii. Discuss how to activate the pump different machines – semi or automaticiii. It is important before every extraction to flush/purge the groups to wash
away the grinds from the previous extraction – demonstrate this with a white cup/bowl
iv. The flushing/purging of the groups helps to stabilise the temperature – this is especially important on La Cimbali machines. Because they are made to be so efficient during busy times when they sit idle they can build up excess heat
2. Once the pump is activated - the espresso at first will drip from the spout/handle, it will be thick and viscous like golden syrup; then it will speed up and become a steady stream, the colour will then start to change from a deep caramel it begins to lighten, then before it begins to look pale and the stream begins to look thin and watery it should be stopped
i. Once the pour becomes thin and watery and starts to wiggle it is too late and the pour is now over extracted
ii. We need to pre-empt/anticipate this stage and turn the pump off before this happens
3. Remember the science behind an espresso is 25-30ml for a single or 50-60ml for a double of espresso in 20-25secs
i. From the time the pump is turned until the time the pump is turned off ii. If the pour runs very quickly and is thin and watery; and you have more than
30mls (single) or 50mls(double) in less than 20secs – this is called under-extraction
iii. Demonstrate good/over extraction using 3 shot glass technique 1. Dose a double handle & slot the handle into the group2. Place a shot glass under each spout & manually start the pump3. Time the extraction – at 25-30 secs4. Remove one shot glass and place an empty one in its place5. At 32-35 secs stop the pump6. Visually compare the shots in each glass 7. Smell each extraction 8. Discuss the taste, colour & consistency of each extraction
4. Changing the GRIND a. If the pour is over or under extracted and you have tamped correctly & dosed the
bucket to the correct level the grind size must be changed to ensure the correct extraction time
b. To make the pour faster – press down the grind adjustment tab & turn the grind adjustment collar to a higher number – or anticlockwise
c. To make the pour slower – press down the grind adjustment tab & turn the grind adjustment collar to a lower number – or clockwise
d. The easiest way to remember this is to think of it like the Speedo in a car. To make a car go faster you step on the gas making the number bigger - to make the car go more slowly you hit the brakes making the number smaller
Basic Mechanics
i. Clean and dry handleii. Dose Valley or Mountainiii. Tampiv. Purge/Flush the groupv. Slot in handlevi. Extract espresso immediately
13
Demonstrate & Practise
Demonstrate dosing, using the levelling method, tamping and extraction – from start to finish & then have each student practise three times each. Ensure each student is doing each step correctly and offering advice and assistance throughout
MODULE 6 – THE BEVERAGES
The Beverages module looks at the basic beverages a barista must make on a day to day basis. It takes an in depth look at how to prepare the perfect cup of tea, the coffee recipes
including flavoured coffees, along with the caffeine free beverages such as hot chocolate and chai lattes.
1. A barista must learn the recipes and production techniques for all the beverages - recommend that the student over the next few weeks, taste different beverages and learn the ingredients for each coffee to get a feel for what they are making.
14

2. The espresso machine will make an espresso and provide steam to steam our milk but it will not make the coffee for us – that is the job of the barista.
3. At the end of the session each student will be given a handout which outlines each of the simple day to day beverages: espresso, double espresso, long black, flat white, latte, mochaccino, cappuccino, tea, herbal tea,
a.Some of the less popular ones are: Ristretto, Macchiato, Piccolo/Cortado, Nude Cappuccino, Americano, Dry Cappuccino, Affogato
b.There is some variation of coffee recipes within New Zealand i.e. Flat Whites are generally a single shot in Auckland but in Wellington are always served as doubles.
c. There is still variation from café to café even within one city - the best way to teach this variation is to reinforce that coffee is not black and white and to be open minded.
d.Remember part of the meaning behind the word barista is “especially made” so the customer should get a drink made for them; not the way you want them to drink it, if they want a ½ strength trim milk cappuccino with no choc – who are we to judge
e.Soy milk – is a dairy free alternative to regular cow’s milk and is made from soybeans.
f. At Burton Hollis we don’t feel it is serving our industry any justice by making rules about how people should drink their coffee.
g.As a barista they must make changes to adjust to how the café they are working in make coffee and how the customer would like it made for them
4. The decaffeinated coffee we use at Burton Hollis has the caffeine removed by the Swiss Water Decaffeination Process. This process uses only water to remove the caffeine. Other methods use chemicals such as Methylene Chloride to remove the caffeine. More information regarding this process can be found on the Swiss Water website at www.swisswater.com
5. Coffee Recipes
a. Espresso – Single or Double shot of espresso poured into a demitasse cup or shot glass; a single – 25-30ml poured in 20-25secs; a double – approx 60ml poured in 20-25secs; other names include: short black, single shot
b. Long Black – ½ to 2/3 of a cup of hot water with a double shot poured over the top; generally served in a cappuccino/flat white cup
c. Cappuccino – A single shot poured into a cappuccino cup with a blend of velvety and creamy milk added. Garnished with chocolate or cinnamon
d. Flat White – This varies around NZ – In Wellington it is standard to serve this drink as a double however in most other parts of NZ it is served as a single – So a single/double shot with velvety milk added; generally served in a cappuccino/flat white cup.
e. Latte –A double shot poured into a bowl/glass or cup with velvety milk added – it should be creamier than a flat white; bowls are becoming less fashionable and people are mostly drinking lattes in glasses
f. Mochaccino – A single shot poured into a cappuccino cup/glass with creamy chocolate milk added. Garnish with chocolate sauce/powder; when served in a bowl or glass is referred to as a Mocha Latte
g. Ristretto – A single or double shot deliberately poured short – only the first 10-15secs of the pour and served in a demitasse cup or shot glass; sometimes called a restricted shot
h. Macchiato – A single or double shot of espresso stained/marked with milk – There are many variations long, short, latte – however the true meaning of the Italian word which means stained or marked.
i. Naked/Nude Cappuccino – a cappuccino served with no cinnamon or chocj. Piccolo – a single shot of espresso served in a demitasse cup or glass and topped
with velvety milk.
15
k. Americano – Weak long black served with or without cold milk l. Dry Cappuccino – A cappuccino made with just creamy/foam part of the milkm. Affogato – Ice Cream topped with espresso – In Italian means drowned n. Mocha Latte – A large mochaccino served in a latte sized vessel
Tea
1. Ideally should always be made with water freshly boiled from a kettle & not water from the espresso machine. We understand however that this is not always practical and the water from the espresso machine will have to be used
a. In order to get the very best flavour from the tea the water must contain oxygen. Water that has been boiled more than once will have lost some of this oxygen.
b. The water from the espresso machine is only 88-92c and is constantly boiled to keep up pressure for the machine which is less than ideal.
c. Oxygen is important because it helps develop the tea and bring out the flavour of the tea when brewing
2. Before making a pot of tea the teapot should be warmed ready for use – this can be achieved by either storing the pots on top of the espresso machine with the ceramic cups. Or by filling with hot water and emptying before use – this can be a very time consuming method if it is busy
3. Place the correct measurement of tea leaves/teabags into the pot and cover with water
a. The volume of tea required will depend on the tea type – but 1 bag per person if using tea bags
b. If the café does a lot of tea it may be necessary to install a hot water system for ready boiled water. If too much hot water is taken from the coffee machine it may mean there is a lack of pressure required for making coffees.
4. On average the tea should be brewed between 3-5 minutes (cup or pot) to release the flavour and antioxidants.
5. Stir the bags or leaves before serving. Bags can be squeezed before removing.
6. Black teas should be served with a small jug of milk on the side – herbal or fruit teas are generally drunk without milk.
7. Teas we serve in cafes fall into 1 or three categories black, green or fruit/herbal.
a. There is also white teas but it is considered very premium and is expensive which is due to its production and delicate taste – it not very common in NZ.
b. Herbal or fruit teas are not strictly teas as they generally don’t come from the tea plant – Camellia Sinensis
c. They are an infusion of fruit or herbs which are generally drunk without milk.d. Fruit/herbals such as the Twinings Classic herbal range are caffeine free and full of
antioxidantse. NZ’s tea consumption is 70% black tea with the most common types being English
Breakfast, Earl Grey, Darjeeling, and Ceylonf. Store tea in a dark, airtight container at room temperature to maintain freshness.
Tea can last 1-2 years in good storage.
Basic Mechanics:
16

i. Preheat teapotii. Add correct amount of tea leaves or bagiii. Top with freshly boiled wateriv. Stir leaves or bag(s) v. Leave to brew for 3-5mins (tea should the first beverage made in the order to allow
brew time)vi. Serve
Flavoured Coffees, Hot Chocolate & Chai – make a sample of a flavoured coffee, a hot chocolate and a chai latte for the students to taste
1. Burton Hollis stock Philibert Routin Syrups – they are all natural syrups with no artificial flavourings or preservatives.
2. These are available in 1 litre bottles and a variety of flavours - they come with pumps
3. Just add 1 pump/8mls of concentrate per 150ml of milk into your favourite coffee and top with milk as usual
a. They are made using water from the French alps and are flash pasteurised and homogenised
b. Flavours currently available are: Amaretto, Butterscotch, Caramel, Chai, Chocolate, Hazelnut, Vanilla – 1 litre bottles only
4. These syrups are used to make flavoured coffees such as caramel or vanilla lattes
5. Chai Latte is a blend of tea concentrate, ginger, cinnamon and cloves and is a great caffeine free alternative to coffee – just place 1 pump/8mls of concentrate per 200ml of milk into your preferred vessel and top with velvety milk – can also be garnished with cinnamon
a. More concentrate can be added of any of the syrups for a stronger flavour
6. Burton Hollis has its own brand of hot chocolatea. The easiest way to make hot chocolates is to use a pre made syrup – to make the
syrup use two parts Burton Hollis chocolate powder to 1 part water b. Add 1cm of chocolate in the bottom of a latte glass and top with creamy milk –
garnish with chocolate powder and chocolate sauce
MODULE 7 – MILK FUNDAMENTALS
The Milk Fundamentals module introduces the student to the basics of steaming perfect milk without bubbles. It also covers how to achieve correctly textured milk for the various
beverages and how to ensure the milk is steamed to the right temperature. Ensure the students are still standing nice and close to the machine – if not invite them to stand closer
again. It is important during The Foundations training not to teach students to try to attempt fern leaves/rosettes. Pour heart designs only for this first session of training only. Students copy the trainer and if they see you pouring the ferns they will try to copy the movement.
17
1. First select the right sized jug for the job - consider the size of the beverage you are going to make
2. Ideally extracting the espresso and steaming the milk should be done at the same time – if you need to do one before the other while you are still learning. Steam the milk first and then make the espresso last
3. Prepare your milk ready for steaming & set up your saucer etc... Then steam your milk and make the espresso last.
a. When filling your jug with milk – consider that milk can expand to twice its height in the jug
b. Purge the steam wand - this is to remove any water that has condensed within the steam wand. Condensing occurs when the steam in the wand cools and becomes water.
c. The steam wand is the part that gets really hot *demonstrate the steam not actually burning your hands
4. Hold the jug in which ever hand feels most comfortable 5. Pull the wand out and place it in the milk at about a 90° angle/straight down
into the jug – then tilt it slightly to the left or right6. Immerse the wand into the milk so that the nozzle is just below the surface –
no deeper than the line of the steam tip – the nozzle should now be pointing at the side of the jug
7. With your free hand – turn the knob 180° and begin stretching immediately.
a. It is important to turn it a full 180° because if it is only turned partially it will cause a terrible screeching sound
b. The same sound will be heard if you try and heat milk that has already been steamed or is too hot to steam again.
c. By turning the knob on a La Cimbali more than 180c will not produce more steam/pressure – it will only take longer to turn it off – and probably burn the milk in the process – LC have been made this way specifically to make a barista’s job easier!!
d. Some other brands of machine will require that you turn the knob several times to achieve optimum levels of steam (refer back to the student’s brand of machine if necessary).
8. For the first part – we talk about stretching the milk this adds air to the milk – the nozzle needs to just breaking the surface. A small sssp ssssp noise will be heard – to achieve this the jug must be lowered slowly
9. For a flat white, hot chocolate. mocha or latte – you should stretch the milk for just a few seconds
10. For a cappuccino – he milk should be stretched until you begin to feel the milk beginning to warm against your hand
11. Then lift the jug a little so that the nozzle is immersed slightly deeper in the milk and move the jug so that the wand is touching the side of the jug
12. This is called rolling the milk13. Continue rolling the milk until it is too hot to hold your hand against the
jug14. The trick to great velvety milk is to never let the nozzle break the
surface of the milk once the milk is warm. If you continue to add air to the milk once it is warm you will end up with bubbly milk
a. It is a very common problem when people first start making coffee to reach up to turn the steam knob off and the hand holding the jug lowers/relaxes and the nozzle breaks the surface causing the milk to bubble up.
b. It is not ideal to reuse milk that has already been heated – very small amounts will be fine as long as plenty of fresh milk is added basic rule is add 3 times the amount of hot milk you have with fresh
18
c. If any milk does build up on the wand it can be removed quite easily with a nylon pad
15. Milk should never be heated over 75°c – ideally aim for 65-70°c a. Once up to this temperature the sugar and protein begin to burn and scald the
milk
16. Always wipe your steam wand after each usea. The build up of milk on the steam wand is extremely unhygienic – bacteria will
form on the milk if it is left to build up on the wand.17. Demonstrate blending/surfing the layers of milk together
a. When milk is left to sit after steaming it separates into layers demonstrate this by pouring surfed milk into a glass and leaving it to settle
b. If we don’t blend/surf the layers together it causes the watery milk in the jug to come out first as we are pouring because it is heavier. The light velvety milk is left in the jug because it is light and airy.
Basic Mechanics
i. Select correct size jug for the job and add correct amount of milkii. Purge steam wandiii. Place steam nozzle under surface of milkiv. Turn on steamv. Stretch for correct length of time for beveragevi. Roll/Spin the milk for the entire processvii. Once hot the jug is hot to touchviii. Turn steam off without the nozzle coming out of the milk.
Demonstrate & Practise
Demonstrate steaming a jug of milk several times talking the students through your actions and then give each student the opportunity to practise steaming several jugs each of cappuccino milk and flat white milk. The student should feel confident with steaming a jug of milk before moving on. Next demonstrate making a pot of tea giving the students the opportunity to make a pot each.
MODULE 8 – MAINTENANCE
The Maintenance covers the general cleaning and day to day maintenance of the espresso machine and grinder. It incorporates back washing and flooding the groups as well as chemical cleaning.
1. The espresso machine should be cleaned daily: back washed with water, groups flooded and seals scrubbed, steam tips removed and cleaned, steam
19
wands cleaned, hot water rinsed down the drain, handles and baskets separated and cleaned
2. Demonstrate the cleaning technique on one group and then ask the students to practise on the group(s)
3. Every 2-3 days the machine should be: chemical cleaned/backwashed, soak the handles steam nozzles, showers and spreaders in chemical
a.Never soak the plastic part of the handles in chemical cleaner; it is caustic and overtime will disintegrate them.
b.Never put your handles in the dishwasher – it can cause the metal inside the plastic handle to rust and expand resulting in the cracking of the plastic handles.
c. Soaking parts overnight i.e. like the shower, spreader etc will not do the parts any harm however putting them back together the night before means the machine is ready for service in the morning
4. Always season/put shots through the espresso machine first thing in the morning and run plenty of hot water through the machine.
a.Only use a nylon scrub pad to clean the group head and handles for ease of cleaning – steel wool or gold/silver curly scrubbers will damage the machine
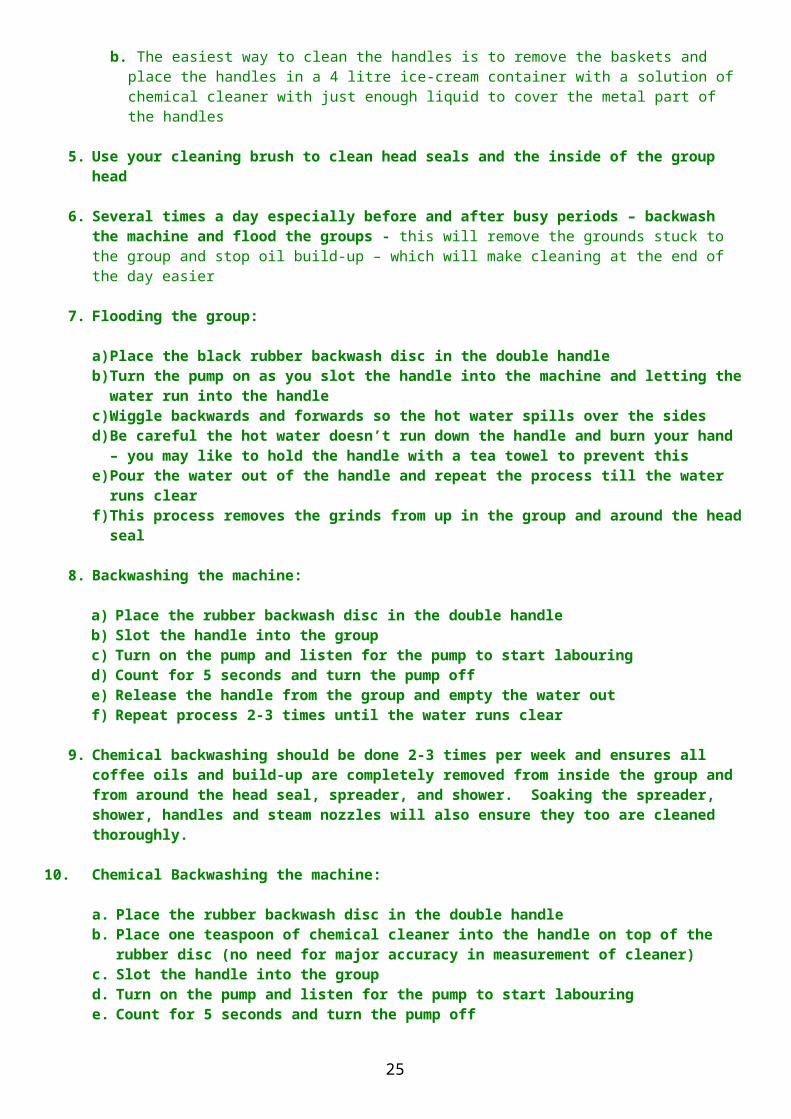
b. The easiest way to clean the handles is to remove the baskets and place the handles in a 4 litre ice-cream container with a solution of chemical cleaner with just enough liquid to cover the metal part of the handles
5. Use your cleaning brush to clean head seals and the inside of the group head
6. Several times a day especially before and after busy periods – backwash the machine and flood the groups - this will remove the grounds stuck to the group and stop oil build-up – which will make cleaning at the end of the day easier
7. Flooding the group:
a)Place the black rubber backwash disc in the double handleb)Turn the pump on as you slot the handle into the machine and letting the
water run into the handlec)Wiggle backwards and forwards so the hot water spills over the sidesd)Be careful the hot water doesn’t run down the handle and burn your hand –
you may like to hold the handle with a tea towel to prevent thise)Pour the water out of the handle and repeat the process till the water runs
clearf) This process removes the grinds from up in the group and around the head
seal
8. Backwashing the machine:
a) Place the rubber backwash disc in the double handleb) Slot the handle into the groupc) Turn on the pump and listen for the pump to start labouringd) Count for 5 seconds and turn the pump offe) Release the handle from the group and empty the water outf) Repeat process 2-3 times until the water runs clear
9. Chemical backwashing should be done 2-3 times per week and ensures all coffee oils and build-up are completely removed from inside the group and from around the head seal, spreader, and shower. Soaking the spreader,
20
shower, handles and steam nozzles will also ensure they too are cleaned thoroughly.
10. Chemical Backwashing the machine:
a. Place the rubber backwash disc in the double handleb. Place one teaspoon of chemical cleaner into the handle on top of the
rubber disc (no need for major accuracy in measurement of cleaner)c. Slot the handle into the groupd. Turn on the pump and listen for the pump to start labouringe. Count for 5 seconds and turn the pump offf. Repeat this 2-3 times without removing the handle as with regular
backwashingg. Leave chemical cleaner for 1-2 minutes in the system h. Move on to the next group and repeat before going back to rinse the first
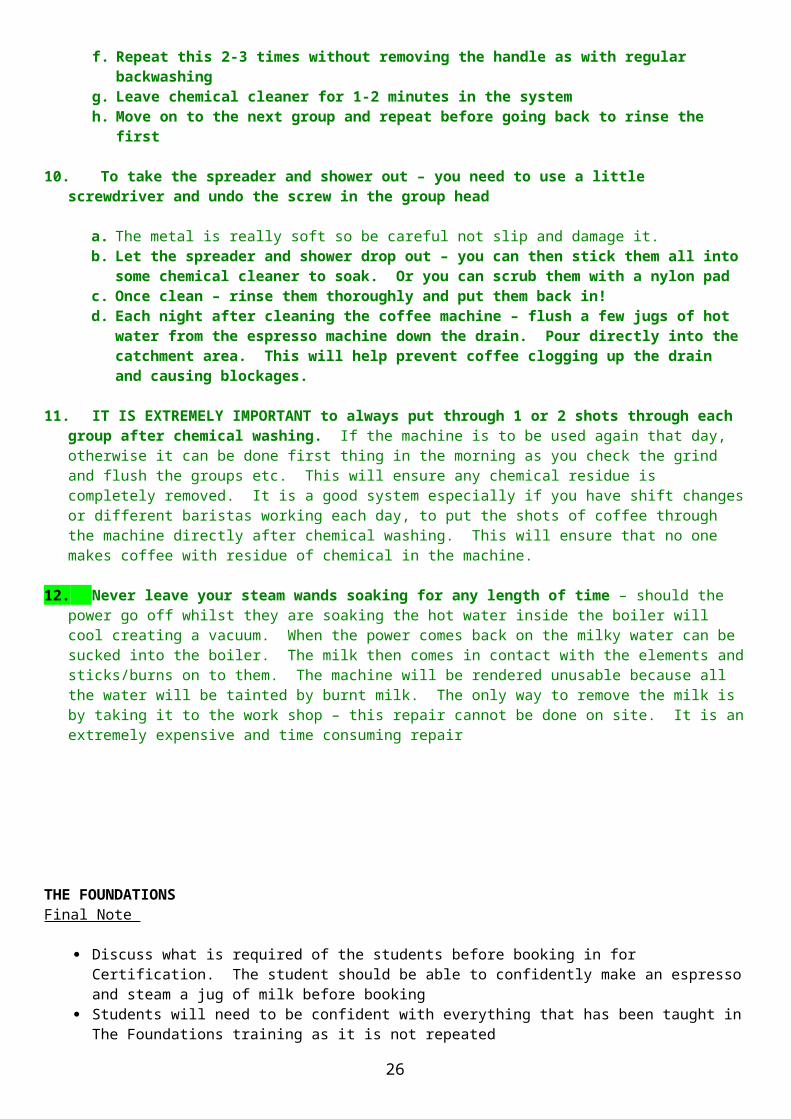
10. To take the spreader and shower out – you need to use a little screwdriver and undo the screw in the group head
a. The metal is really soft so be careful not slip and damage it.b. Let the spreader and shower drop out – you can then stick them all into
some chemical cleaner to soak. Or you can scrub them with a nylon pad c. Once clean – rinse them thoroughly and put them back in!d. Each night after cleaning the coffee machine – flush a few jugs of hot water
from the espresso machine down the drain. Pour directly into the catchment area. This will help prevent coffee clogging up the drain and causing blockages.
11. IT IS EXTREMELY IMPORTANT to always put through 1 or 2 shots through each group after chemical washing. If the machine is to be used again that day, otherwise it can be done first thing in the morning as you check the grind and flush the groups etc. This will ensure any chemical residue is completely removed. It is a good system especially if you have shift changes or different baristas working each day, to put the shots of coffee through the machine directly after chemical washing. This will ensure that no one makes coffee with residue of chemical in the machine.
12. Never leave your steam wands soaking for any length of time – should the power go off whilst they are soaking the hot water inside the boiler will cool creating a vacuum. When the power comes back on the milky water can be sucked into the boiler. The milk then comes in contact with the elements and sticks/burns on to them. The machine will be rendered unusable because all the water will be tainted by burnt milk. The only way to remove the milk is by taking it to the work shop – this repair cannot be done on site. It is an extremely expensive and time consuming repair
THE FOUNDATIONS Final Note
Discuss what is required of the students before booking in for Certification. The student should be able to confidently make an espresso and steam a jug of milk before booking
Students will need to be confident with everything that has been taught in The Foundations training as it is not repeated
21
If the student is unsure about whether they are ready to do the second Certification training – tell them to discuss it with their sales rep or the barista trainer and they will help them decide if they are ready
After The Foundations training, our recommendation is that the student makes coffee with supervision from a more experienced barista before going it alone with making coffees for customers
We recommend that they complete Certification training before making coffee unassisted
Once the student has completed the second Certification training they may then book in for their practical assessment – at time convenient to both the assessor and the student
The practical test can be sat at either their own café or the training centre The assessment at the end of Certification will require good barista skills and we will not
assist students so that they pass.
CERTIFICATION
MODULE 1 – The Institution
The Institution module introduces the barista to the Burton Hollis Roasting Plant. It discusses how coffee beans arrive at the factory and the process the beans go through before being
delivered to their cafe. It will also introduce some of the members of staff they may deal with
22
i.e. the customer care team and technical team. This module will also briefly summarise the information covered in The Foundations. Invite students to take a seat in the board
room/meeting room or at a table in the cafe (if the training is being done onsite) and complete the first four modules seated with them.
1. BH roast their coffee in NZ, Manukau, Auckland
2. Coffee arrives at BH as Green Beans in huge jute sacks generally weighing 60kg. John Burton, David’s brother is a green bean broker – he imports the beans for us. David and John have formed some direct relationships with coffee growers – for example Sigri Estate in Papua New Guinea
3. The green beans that we use in our blends are then each placed in a section of the green bean silo – this is a storage unit for our green beans. The green bean silo is connected to the roaster
4. This roaster is from Germany and is called a Probat roaster and can roast 120kg at one time. A computer connected to this roaster is programmed to send the required quantities and varieties of green beans for each blend to the roaster when activated. Green beans enter the roaster by being blown through the pipes from the green bean silo.
5. A roast can take anywhere between 15-30mins. For light roasts - a short roasting time. For dark roasts - a longer roasting time
6. The cooling tray ensures the beans are cooled quickly after it is removed from the roaster. This locks in the flavour and helps with the consistency and stops the roasting process as coffee continues to roast from its own internal heat long after it has been removed from the roaster.
7. De-Stoner – All our coffee beans are taken through a de-stoner to remove any stones just before they are packed at the roastery. Because of the way coffee is processed in some countries, there can sometimes be stones in the jute sacks of green beans. Stones can badly damage the grinder. The blades will become blunt, compromising their cutting ability.
8. The large 2kg and 3kg bags of beans for our hospitality customers at Burton Hollis are still packaged & sealed by hand
MODULE 2 – Tea Memoirs
The Tea Memoirs module will take an in depth look at tea, where it comes from how it is grown and the different varieties available. The module will also discuss the similarities and
differences between tea and coffee and the history surrounding two of the country’s most popular beverages. Continue this module seated in the board room/meeting room or at a table
in the cafe (if the training is being done onsite)
1. Matt Greenwood – is the Tea Guy at Bell Tea - our resident expert tea taster. He is responsible for maintaining and delivering great tea to thousands of tea drinkers in
23
NZ. And also played a significant role in the development of Bell’s first new product in 100 years – Bell Pure Ceylon.
2. Matt has noted that coffee and tea share many similarities besides being two of New Zealand’s most popular beverages
a. Both contain caffeine, in fact there is more caffeine in a tea leaf than a coffee bean. However as a drink - there is generally twice the amount of caffeine in a cup of espresso coffee as in a cup of tea.
b. Tea and Coffee are both produced in beautiful, often remote, and generally very poor parts of the world. They can both be very important to the economies of those regions.
c. Both are grown between the tropics of Cancer and Capricorn. There are many countries that are well known for producing both good quality tea and coffee. Some examples of these are: Kenya, Tanzania, Brazil, Papua New Guinea, India and Indonesia
d. One of the most important parts of the process to deliver great tasting tea and coffee is the skill of blending the tea leaves and coffee beans. At Bell and Burton Hollis both Matt Greenwood and David Burton strive to create blends that are greater than the sum of their parts.
e. One of our favourite phrases to encapsulate these 2 great hot beverages - Coffee talks and Tea listens
3. There are also some distinct differences between coffee and tea
a. Tea is roasted or fired on a tea estate in the producing country; whereas coffee is roasted in consuming countries, as the freshness of the roasted bean is critical.
b. Coffee tasters "cup" their coffees black and extremely strong in order to deconstruct the mouth feel and flavour profiles. Tea tasters, tend to "taste" much closer to how the consumer will drink their tea and will often taste with milk if appropriate.
c. The visual appearance of the liquor is much more important in tea than coffee. d. Coffee is traded on the futures market with a market size at least 10 times that of
the physical market itself and therefore prices are influenced strongly by speculators. Tea is only bought at market where every contract made is physically delivered to the buyer. Thus the tea market is most strongly influenced by those people within the industry
4. Tea
a. All tea comes from the Camellia sinensis plant - of which there are two main varieties. A China seed called ‘sinensis’ or ‘china’ and a variety from Assam in North East India called ‘Assamica’. Sinensis means China in Latin.
b. There are 4 main types of tea, white, green, oolong and black – these teas all come from the same Camellia Sinensis plant but are processed in different ways.
c. White tea is considered very premium and is expensive which is due to its production and delicate taste – it not very common in NZ.
d. We generally only serve green, black and occasionally oolong in NZ e. Tea is predominately grown in the tropics needing on average 1100 mm of rain a
year and plenty of sunshinef. China and India are the two largest producers of tea in the worldg. China produces over ¾ of the world’s green tea and the two largest exporters of
black tea are Sri Lanka (Ceylon Tea) and Kenya where tea is very important to their economies
24
h. The tea bush will grow to a height of 30-40 feet if allowed but will be kept to a height of 3-4 feet to allow for plucking
i. The best quality teas in the world are still hand pluckedj. Only the top two leaves and the bud of the shoot are pickedk. The average size of the tea plantation ranges from a small family
holding to large estate of 1000 hectares or more. Many tea plantations are communities in their own right proving much of the social infrastructure that goes with that such as housing, schooling medical care etc,
5. Tea is processed in six steps – Plucking, Withering, Rolling Oxidation, Firing, and Sorting
a. Plucking: On average leaves are plucked from a bush every 7-12 days. After plucking leaves are transported as quickly as possible to the tea factory. Leaves are withered or naturally dried before being rolled or cut (processed).
b. Withering: Leaves are laid out on large troughs and dried naturally to reduce moisture
c. Rolling: There are a variety of ways of processing the leaf to achieve the shape and size desired. To make green tea the leaves would be fired or steamed to make green tea at this stage
d. Oxidation: To make black tea the processed teas are left to react with air and the leaf changes from green to brown
e. Firing: Unlike coffee, tea is fired or roasted on a tea estate in the country of production
f. Sorting: The fired (dried) tea leaves are then sorted into different size grades for market (sale)
g. Tea is often then blended in the country it is exported toh. Exposure to heat hardens the leaf and locks in the flavour and
antioxidants and allows the tea to keep for two years or more – providing it is stored correctly.
5. History of Tea – Worldwide and New Zealand
a. Tea was reportedly discovered in 2737 BC in the Unan province in China when the then Emperor Shen Nung “the divine healer” was boiling some water to give him inspiration to speak to his people and a few leaves from a nearby Camellia plant landed into the imperial ‘billy can’. His advisers were about to throw out this polluted water when the Emperor decided to taste it, impressed by the pleasant aromas. And so the first cup of teas was brewed.
b. The original English pronunciation of the word tea was ‘tay’ and this comes from the Amoy dialect of China for which the word for tea is ‘te’. It was from the port of Amoy (now Xiamen) that tea was exported to Europe. The other common word for tea is ‘cha’ and this originated from the Cantonese dialect of Chinese.
c. Until the 3rd century AD the beverage was prepared as a medicine or tonic with the fresh green leaves of wild tea trees
d. The first ever book about tea was written by Lu Yu in about 800AD and became known as ‘the classic of tea’ – the first ever barista training.
e. Tea was traded as early as 476 AD in the form of compressed cakes made from steamed green leaves as a barter trade with the Turks
f. Tea was first exported from China to Japan by Buddhist monks in 729AD – the first ever exported tea
g. Until the Ming dynasty 1368-1644AD all tea produced in China was green tea. As foreign trade increased merchants needed tea for longer periods and Chinese growers developed new types of black tea and flower scented tea
h. Tea first reached European shores in the early 17th Century through Dutch and Portuguese traders.
25
i. The first recorded appearance of tea in Britain was in London in 1658 when Thomas Garraway advertised that the new drink would cure almost every known ailment.
j. Tea really took hold in Britain in 1662 when King Charles the 2nd; marries the Portuguese princess Catherine of Grogbarganza already a confirmed tea drinker. Tea was part of her marriage dowry. In those days tea was a drink for the rich. And the high cost of teas was due to the heavy taxes imposed by Charles 2nd. The cheapest tea at that time was about a week’s wages.
k. In 1706 Thomas Twining, the founder of Twinings opened the first coffee house in London but it wasn’t long before it became famous for selling loose leaf tea
l. Coffee houses were considered male only domain whilst tea houses served men and woman and became meeting places
m. During the 18th century tea became Britain’s most popular drink replacing ale for breakfast and gin at other times of the day and by 1784 taxes had been reduced and so it became truly a drink for everybody
n. Tea became established in New Zealand during the 19th century and really took off when Norman Harper Bell arrived in Dunedin from Melbourne in 1894.
o. In 1898 Bell Tea was registered as a company and the rest is historyp. Tea sustained the NZ soldiers during the wars and became an essential
part of ‘smoko’ for workers. The right to a tea break was a hard fought one.
MODULE 3 – Coffee Memoirs
The Coffee Memoirs module takes an in depth look at coffee, where it comes from, how it is grown and the different varieties available. Continue this module seated in the board
room/meeting room or at a table in the cafe (if the training is being done onsite)
26
1. Growing Information
a. Coffee is grown in a band around the equator between the tropics of Cancer and Capricorn.
b. Coffee is grown in over 50 countries in the world and supports the livelihood of over 20 million people.
c. Coffee is the second-largest traded commodity in the world after oil.d. It is grown in an orchard, plantation or estate e. Coffee plants, grow small cherries which are harvested when ripe and
processed in various methods to remove the skin and pulp from around the seed
f. Green beans are the seed from the inside of these cherries – Pass around green bean sample
g. There are many species of coffee plant but the main two used for growing coffee are – Arabica (coffee/coffea Arabica) and Robusta (coffee/coffea canephora/canefora)
h. Coffee is sorted and graded according to its qualityi. Robusta is a lower quality coffee used primarily in instant coffees and
cheap commercial blendsj. There are a few specialty Robusta coffees, which can enhance the Arabica blends
and increase the intensity of the crema in espresso coffee. Not all Robusta are badk. Although Arabica is the preferred coffee there are also some extremely poor quality
Arabica.
2. History of Coffee – World Wide and New Zealand
a. It is believed that coffee originated in Ethiopia – the first coffee beverage was like a wine using the juice from the fermented coffee berries. Arab traders are credited with taking coffee out of Ethiopia, across the Gulf of Arden, to the port of Mocha in Yemen.
b.The popular myth about where coffee was first discovered is a about a goat herder, Kaldi. Kaldi the Abyssinian (which would now be known as an Ethiopia) goat herder noticed one day that his goats were dancing and prancing after they had eaten a strange berry. Not to be left out of the fun, Kaldi ate the same berries and was soon dancing with his herd. A wandering Abbot (head monk) saw the goat and Kaldi and thought the fruit may help his fellow monks stay awake during prayers. So the Abbot returned to his group with the berries in hand.
c. The first espresso machines, which utilised steam pressure were invented in 1906 – however this method tended to burn the fragile coffee oils
d. In 1947 a first spring piston machine was invented – this delivered constant pressurised water at a suitable brewing temperature
e. It wasn’t till the 1960’s that machines as we know them - pump driven - were invented
f. Coffee has been roasted here in New Zealand for at least the past 50 years; but it was generally used for making Kona or Filter Coffee rather than espresso
g.Kona Coffee is made in a unit which has two glass bowls – one on top of the other - connected by a narrow tube; and sometimes called a vacuum brewer. Water is placed in the bottom bowl and coffee grounds in the top. The unit is then placed over heat and when the water boils it causes the water to expand forcing hot water up the tube and over the coffee grounds. Once the bottom bowl is emptied and the coffee has brewed it is removed from the heat, this creates a vacuum and sucks the liquid back to the bottom bowl through a strainer which collects the coffee grounds.
h.The espresso coffee as we know it – with beautiful textured milk and superb espresso; didn’t emerge in NZ until the late 1980’s and early 1990’s.
27

i. The café scene died out somewhat in the 60’s possibly with the introduction of instant coffee.
j. It wasn’t until the late 1980’s when the café scene began to become fashionable again that things began to change – which is when BH was established
k.The flat white is an Australasian phenomenon with much debate surrounding its creation – Australia claim it as their own – as they did with Phar Lap, Split Ends and various other NZ treasures – BUT…the story we know is that the flat white was a New Zealand first thing - it comes from the fact that during the 80's we made Cappuccinos that were very fluffy and high, then during the 90's people started coming back from Europe wanting proper Cappuccinos, since we already had a product called a Cappuccino we had to call a proper Cappuccino something else, so a Flat White is a real Cappuccino and our Cappuccinos are unique
MODULE 4 – Guaranteed Superiority
The Guaranteed Superiority module discusses how Burton Hollis maintain their consistently superior coffee. It takes an in depth look at the coffee roasting and testing techniques used
along with the ways we blend and taste the coffees.
28
1. Roasting & Quality Assurance
a.BH uses a traditional drum roaster – a drum roaster is exactly that a large drum or cylinder which is heated from beneath with gas burners and then rotates to roast the beans
b.Drum Roasting is more expensive, complicated and time consuming however it guarantees the delivery of a consistent complex, deep flavour profile with all the sweetness synonymous in all our BH and Gravity blends
c. The roaster roasts coffee anywhere between 8-12 hours per day – sometimes more when it is very busy
d.A roast can take anywhere between 15-30mins depending on the type of roast – bring out the samples of light, medium and dark roasted beans
e.Each roast is measured using both temperature and the length of time it is in the roaster - very similar to cooking a cake – but we must also consider airflow, cooling, moisture, roast development, blend composition or origin
f. The ability to create and roast the perfect espresso blend is an art. The ability to reproduce this blend consistently and repeatedly is a science
g.The smoke that comes out of the roaster goes into an after burner – this heats the smoke with a gas flame up to 750°c – to burn the smoke so that only heat comes out the chimney
h.There are other types of roasters which are being used to roast coffee here in New Zealand. A roast in a fluid bed roaster only takes about 5-6mins.
i. Drum roasters ensure a more complex blend and flavour profile is possible because the roaster has the ability to change my different elements – temperature, air flow and time frame of the roast – with a fluid bed roaster these factors must be kept the same and so the flavour profile is much more one dimensional and flat
j. You could compare a fluid bed roaster with a conventional oven verses a microwave. Would you roast your chicken in a microwave?
k.Once roasted – all coffee at Burton Hollis is analysed on the Agtronl. An Agtron Spectrophotometer or Agtron for short was designed
specifically to analyse the degree of roastm. The degree of roast is closely related to the visible colour.n.Agtron uses very specific wavelengths of light to illuminate the sample
surface and measure the reflected energy. The results of analysis are displayed as a single "Agtron" number.
o.All our roasts at BH are tested on the Agtron machine to ensure that they fit within our specifications for the perfect roast and insure consistency.
2. Blending
a. Blending coffee is the combining of two or more different beans b. When we talk about a single origin we are referring not only to the place
the beans were grown eg: Kenya, Columbia or Brazil but also a the type of bean from within that country eg Mysore & Monsoon Malabar are both from India
c. David is the BH blend master – he creates blends using his expertise and vast knowledge of coffee origins and their characteristics to create a particular taste profile
d. Again it can be likened to baking a cake – although all cakes may have flour, butter & sugar, the ingredients are all added in different quantities to create a different taste
e. Generally when we are creating a blend we start at the end and work backwards, we decide on what we want from a coffee so that we have a target to aim for then work with the coffees that we think/know will give the desired out come
29
f. For example when David created his special blend he was looking to create a coffee which was nice and strong but didn’t leave a heavy after taste so that it encouraged people to have a second cup of coffee.
g. We use each bean for what it can bring to a blend – it may bring body, sweetness or aftertaste
3. Tasting/Cupping
a. Cupping is the process used to taste different coffees. b. We have cupping sessions to help staff learn more about origins and
their different tastes, as well as for quality assurance and to assess blend composition when creating new blends
c. Different areas of the tongue recognise different taste sensations d. Coffee can be rated in five different categories aroma, taste, finish, body
and acidity.e. At BH we cup our roasts daily to ensure that they are within our roast
parameters as well as checking them on the agtron which ensures each and every roast is consistently at its very best!
MODULE 5 – Milk Design
The Milk Design module demonstrates the basic milk designs and the skills required to achieve these designs. The module will require the barista trainer to gauge the student’s current skill level and begin the lesson at that level. The module will also look at some common problems that arise when trying to achieve good designs. The student will by the end of this module –
be able to pour at least a heart pattern, and potentially a fern leaf, however this will be
30
dependent on the student’s skill level. Move to the espresso machine for the remainder of the training session.
1. From the first The Foundations training all students should now be able to:
a. make the perfect espresso using correct dosing & tamping techniquesb. successfully steam a jug of milk c. pour each of the basic beverages - flat white, mochaccino, latte, hot
chocolate & cappuccinod. clean the espresso machine
2. Milk designs have become really popular over the last few years. It requires the barista to have excellent barista skills – both in the ability to steam milk and pour espresso shots consistently. It is a fallacy that milk design takes too much time or that the café is too busy to produce great looking coffees. Pouring milk to produce a Rosetta or a fern leaf as we generally call them in NZ does not take more time – it is just a different way to pour the milk.
3. To gauge the current skill level of the student barista ask them to make a flat white and cappuccino and assess where you should begin the milk design lesson. Discuss any suggestions to each student to improve on their technique with dosing and tamping.
4. It is important that the student understands the importance of changing the grind and how and when to change it
a. If the pour is over or under extracted and you have tamped correctly & dosed the bucket to the correct level the grind size must be changed to ensure the correct extraction time
b. To make the pour faster – press down the grind adjustment tab & turn the grind adjustment collar to a higher number – or anticlockwise
c. To make the pour slower – press down the grind adjustment tab & turn the grind adjustment collar to a lower number – or clockwise
d. The easiest way to remember this is to think of it like the Speedo in a car. To make a car go faster you step on the gas making the number bigger - to make the car go more slowly you hit the brakes making the number smaller
5. At different times of year – changes can occur with the milk causing problems for baristas
a. The milk that our milkman supplies us can and will vary from day to day. b. Many things can affect the milk such as the grass the cows are eating -
spring grass vs. winter grass; and at certain times of the year alternate feeds such as silage or hay which will also affect the milk.
c. In addition to feed changes - cows are also dried off (removed from the milking circuit and are not milked at all) at certain times of year – to give birth to calves.
d. Generally if there is a problem with the milk itself as opposed to the barista the milk will not steam well and will bubble up after it has been steamed – usually after it has been sitting for 5-10secs.
e. There are a couple of ways to deal with this – either steam your milk first before taking your extraction, the bubbles settle on the top and can be scooped off or try changing the milk you are using, talk to the milkman and explain the problem . Often it is only certain batches that are affected. Changing the lid colour/type of the milk used can alleviate the problem (changing to white top if you use blue top or vice versa)
31

f. Generally the problem doesn’t last for long – a few days to a week – it doesn’t tend to change the flavour of the coffee or milk just the texture or body and its appearance
4. The two most common designs on the tops of coffees are a heart or fern leaf
a. Milk design requires the flow of milk to be strong enough to reach the bottom of the cup and rebound off the bottom of the vessel and be pushed back up to the surface of the espresso.
b. When we pour too slowly – which is often the biggest error people make – it stops the flow of milk and doesn’t allow it rebound back to the surface of the espresso
c. The heart is simple and once this is mastered it makes the fern leaf very easy to achieve
5. Demonstrate and explain how to pour a heart a. First steam a perfect jug of milkb. Then at a medium speed pour directly into the centre of the cup – a
white milk circle should appear – don’t move your wrist or the jug c. As the milk reaches the top of the cup run the milk back through the
centre of the designd. If the student is capable of doing the heart - move on to teaching the
fern leaf
6. If student is more advanced demonstrate and explain how to pour a fern leafa. First steam a perfect jug of milkb. Begin to pour the milk directly into the centre of the cup at a medium
speedc. Once the cup is half full and the a white milk circle appears gently roll
your wrist side to side whilst moving the pouring arm back towards your body
i. A key point here is the rolling of the wrist – be sure to roll from the wrist not the elbow
ii. It is also important to consider the grip on the jug is relaxed – this encourages the jug to sway from side to side in a less forced movement
d. As the milk reaches the top of the cup run the milk back through the centre of the design
7. Assist each student to pour a heart &/or fern leaf – until they can comfortably pour a design unassisted
8. There are many creations that can be presented on the tops of coffees and hot chocolates. Encourage students to experiment with different techniques and discover their own designs.
a. When making Cappuccinos or Mochaccinos add chocolate sprinkles on top of the coffee shot before adding the milk – it gives a great pattern on top of the coffee
b. For a simple design on top of Chai Lattes – add the milk to the chai syrup stopping 1cm from the top of the glass/cup - before the milk has time to set, sprinkle a line of cinnamon across the middle of the milk and then spin the cup or glass. It will leave a swirl design on the top of the coffee
c. A relatively new design technique called etching – is creating pictures within the top of the coffee
d. Demonstrate etching with a toothpick – it is quite similar to seeing pictures in the clouds – you have to use your imagination a little to see ideas
e. Chocolate syrup can also be used to create designs however this can be extremely time consuming – and always not everybody likes chocolate on the top
32
of their latte or flat white – so restrict this to cappuccinos, hot chocolates or mochaccinos
MODULE 6 – Production
The Production module looks at how to improve the barista’s speed and serving techniques. The module will also discuss some of the more obscure beverages ordered. If the barista is
confident with their speed and serving techniques recommend they use tips as suggestions for teaching other staff within their working environment.
1. Once the skill of making one or two beverages at once is mastered, the next step is teaching the student to make complete orders both quickly, correctly and of a high quality.
2. The order that beverages are made in - is very important.
a. Tea should always be made first, followed by white coffees (lattes, flat whites, cappuccinos etc..) and finishing with black coffees (short & long blacks)
b. Why? Tea first so it can brew for a full 3-5mins whilst the coffees are being made, white coffees should be made next so that the black coffees are made last and the crema on the top doesn’t dissipate
c. An easy way to remember is TLC – Teas then Lattes & white coffees which will protect the Crema on the black coffees
d. White coffees should be made in the following order – cappuccinos, hot chocolates, mochaccinos, lattes then flat whites – this order is based on the froth depth required for each beverage
3. Takeaway coffees – first or last?
a. Coffees should always be made in the order that they were taken. People will know the order they were served and it will only annoy people if you make someone else’s order first– however sometimes when it is very busy it does help to tag takeaway coffees on to other orders so it pushes them through more quickly. The reason being that often people waiting for takeaway coffees have limited time and waiting always seems to take a long time especially if time is limited.
4. Making a large order - make the order using TLC method and ask for help to get them out quickly if more than 6 beverages are to be made.
5. To increase speed:
a. Make chocolate syrup rather than have a separate chocolate milk jug. There is no need to steam chocolate milk separately when there is a big order – just steam a jug of milk and add chocolate syrup and/or espresso to the cup/glass before adding the steamed milk
b. The recipe for chocolate syrup is simple – to make 1 litre of syrup use 4 metric cups of chocolate powder, add 2½ metric cups of hot water from the espresso machine and mix thoroughly – using this method a single serve will be 1½cm of syrup to 400ml of milk
6. When making coffee it is important to ask for extra help when getting behind.
a. Although dependant on the individual cafe set up and staff numbers we recommend that the barista is just that and remains behind the espresso machine and not running coffees etc....
33
b. Support should be requested when there are more than 6 coffees waiting to be made – the first step is to ask someone to run the coffees out to the tables
c. If there is someone running coffees to the tables and orders are still building with more than 10 coffees waiting to be made, we recommend getting another person to help – get one person dosing handles and taking extractions, the second person steaming milk and pouring, and the third person running the drinks to the table
d. At Burton Hollis we think the time someone has to wait for their coffee to arrive, whether they are sitting in the café or taking away should never be more than 5mins
e. When it is very busy don’t fill beverages right to the brim. If they spill while being delivered to customers it will mean having to remake them.
7. Serving Techniques
a. The way we serve a coffee is important because customers always will always appreciate money well spent.
b. Discuss the difference between a hot chocolate spilt down the side of the cup with no garnish for $4 versus a beautifully presented hot chocolate with a design on the top, marshmallows on the side with a napkin for $4 – which would you rather receive.
c. At Burton Hollis we believe it is never acceptable to deliver a coffee to a customer that has spilled down the side of the cup and into the saucer – it is unprofessional – no matter how busy it is.
d. Either remake the coffee or take the coffee back to the production area – take a new clean saucer, wipe the side and bottom of the cup with a clean napkin and place the coffee back onto the saucer before delivering it back to the table
e. If it spills again; cut back on the drinking if your DT’s are that bad – but seriously if it happens again – remake it – it was probably poorly made any way – if the milk was steamed and poured well into a flat white it shouldn’t spill – the foam should be thick enough so as to prevent this from happening
f. When helping someone run coffees out to customers – you can get the plates ready for the coffees whilst you are waiting for the barista to make them
g. Demonstrate how to plate up a coffee – with sugar (if not already on the table), spoon, napkin etc.
h. Clear empty plates or cups from a table;– it is a great opportunity to up sell by asking the customer if there is anything more they would like to order – like another coffee!
i. Try not to reach across people as you deliver drinks or clear the table j. Discuss serving ideas such as a treat on the side ie. choc coffee bean, choc fish or
marshmallow or a tiny piece of one of the cafes in house slices
8. Other unusual coffees and ideas for a coffee of the week/specialty coffees a. Piccolo/Cortado – a single shot of espresso served in a demitasse cup or glass and
topped with velvety milk. Generally half espresso half milk, piccolo in Italian means small while Cortado is Spanish and means cut.
b. Americano – Long Black with cold milk c. Affogato – Ice Cream topped with espresso – In Italian means drowned d. Dry Cappuccino – A cappuccino made with just creamy/foam part of the milke. Mocha Latte – A large mochaccino served in a latte sized vesself. Naked/Nude Cappuccino – a cappuccino served with no cinnamon or choc
34
MODULE 7 - Ergonomics & Station Management
The Ergonomics Module looks at how to improve the barista’s speed by discussing the flow of their work station. The module will also discuss some of the more obscure beverages ordered. If the barista is confident with their speed and serving techniques recommend they use tips as
suggestions for teaching other staff within their working environment.
1. The layout of the coffee station needs to be carefully considered to ensure there is good flow from beginning to end – discuss with the students ways to improve their own stations
a. It helps improve the speed & efficiency of not just the barista, but other staff and the café itself
2. Briefly discuss the students café and how if possible they can improve the layout at their cafe – for example having the waste tube in an accessible place – not behind the barista so that they have to twist back to bang out the waste
a. Consider the position of the machine – it should be positioned so that the barista looks out into the café while they are making coffee – not with their back facing the customer. The barista can then see what is going on in the café and the customer can talk to them whilst their coffee is being made or greet/farewell them as they walk in or leave the cafe
b. Consider bench height – This can be difficult if the barista is extra tall or short but for the majority a good height is around 800-900mm. This is based on the height of La Cimbali machines, which is between 465mm-565mm
c. If one end of the espresso machine must be against a wall have the grinder on the wall side to leave ample space for production and service on the other end of the machine
d. The grinder requires ideally 500mm on one side of the machine e. 200mm bench space for production - can be in front of the machine or to the side
opposite the end of the grinderf. Space within an arm’s length for takeaway cups and lids, choc shaker, syrup,
saucers, marshmallows, napkins etcg. Sink for cleaning cloth, jugs and dishes – if no sink within a metre of the machine
– have bucket of clean water under the bench which needs to replenished regularly to wash out cloth
h. The grinder should be away from the production/serving end because it is messy and it will help to ensure good flow – the grinder is at the beginning of the process and production is at the end
i. A fridge – ideally directly under the coffee machine but within a metre of the machine - to store milk
j. Storage space for extra product needs to also ideally be within 1 metre – coffee, ceramic cups, takeaway cups and lids, decaf, marshmallows etc.
k. Space on the floor for the Coffee Waste Tube
3. The action of making coffee is extremely repetitive so it is important to consider OOS – Occupational Overuse Syndrome when setting up your coffee station
a. We discussed the correct tamping technique in The Foundations training to assist in the prevention of OOS, this however this also needs to be considered across the entire station
b. OOS is a collective term for a range of conditions, including injury, characterised by discomfort or persistent pain in muscles, tendons and other soft tissues. Some people may refer to it as RSI – OOS is the same thing and is the new name for RSI.
35
c. Early symptoms of OOS include: muscle discomfort, fatigue, aches and pains. Soreness, hot and cold feelings, muscle tightness, numbness and tingling, stiffness, and muscle weakness
d. It is recommended by occupational health and safety to have a short break in work accompanied by muscle relaxation. Micropauses allow for restoration of blood flow in muscles which have been tense for some time. Micropauses are recommended, typically, for 5-10 seconds every three minutes. Unless the muscles relax fully, Micropauses are of no value.
4. Stock Management is an important part of a barista job. It pays to have more than one staff member who can place a coffee order – this will ensure there is someone to do the order if the member of staff who normally does it is away.
a. Discuss ordering techniques with the students – then complete the subject so that it is relevant to both them and their cafe.
b. To work out the amount of stock to keep on hand first consider: storage space, shelf life, delivery times and days.
c. Consider the products required: coffee, decaf, sugar, milk, waste tube liners, hot chocolate, syrups, equal, marshmallows, takeaway cups & lids, takeaway trays, teas, stir sticks, chemical cleaner
d. Create an order sheet – listing the products required from BH down the left hand column
e. In the next column write the number currently in stockf. Write an example from the class on the white board – so Joe Bloggs has a café
which uses 12kg of coffee per week and they order once on a Wednesday. So on Wednesday morning first thing or last thing Tuesday night count how many bags of coffee are left. Always have an extra bag in rotation for cafes doing less than 12kg per week – over 12 have 2 bags and over 25kg have 3 bags.
g. In the next column write down the amount you go through per week & add on the extra bag/s required as discussed
h. Work out the difference between the two columns - this will be the number you will need to order
i. If unsure discuss this either with the owner of the café, sales rep or barista trainerj. The reason for ordering enough coffee so that there is enough to last until the day
after the order arrives is because, if there is a problem with the courier and the coffee is late to be delivered, it will save the stress of nearly running out.
k. Many employers will not recommend ordering extra bags of coffee – we highly recommend you do so - discuss the reasons why with your employer – especially if know that you often run out of coffee.
l. Remember the customer is charged for one hour couriers - if they run out of product and this will be far more costly than ordering an extra bag of coffee in the long run
36
MODULE 8 – Crisis Control & the Classified Data
The Crisis Control and Classified Data Module will discuss some of the ways of dealing with the problems that arise at the coffee station. It will discuss when to call Burton Hollis for
assistance and also looks at some of trade secrets to improve barista skills and techniques.
1. Crisis Control – When there is a problem with our coffee within the cafe – we need to consider all aspects of the problem rather than assume it is the machine or the coffee - more often than not it is actually the inexperience of the person using the machine.
a. It often is incorrect grind size, over packing the basket/handle or over/under extraction. Discuss with the student the need to talk to the head barista – if it is not them, sales rep or trainer if there is a problem and you are not sure how to fix it
b. There may be instances when problems occur and you are unsure whether to call BH or not. Call our customer care team immediately and they will put you in touch with a technician who will either come out to the café or talk through the problem on the phone.
c. Discuss any problems the student may have had and/or discuss one or two of the following emergencies
d. “My machine has just blown up there is steam pouring out from everywhere” The Emergency pressure valve has blown – steam has suddenly started shooting out from every which way on the espresso machine – mostly out of the top back left hand corner. The easiest way to deal with this is to turn the on/off switch to #1 – this will turn the element off and prevent the pressure from building up in the boiler. Call BH immediately!
e. “Water is leaking from under the machine” – before you call the technician, take the drip tray out and feel to see if there is water sitting in the catchment area. If there is then try this first. Poke a teaspoon into the drain and see there is something blocking it – sometimes there is a build of coffee grinds blocking the hole but if it doesn’t clear this way - you can still fix it. First get someone to help you. You will also need a bucket and a tea towel. Get under the machine and find the end of the drain hose. Then get the person helping to hold a tea towel over the catchment while you blow up the end of the drain, you don’t have to touch your mouth to it just cup your hand around the hose and blow into your hand. Once you have given one big blow, quickly put the end of the hose into the bucket or you will end up with a mouthful of coffee grinds! Generally this works first time – if not blow again. Once the water starts flowing out – pour some jugs of hot water from the machine down the drain. This problem is caused by coffee solidifying in the drain. Each evening pour at least 1 litre of hot water down the drain – especially in summer!
f. If there isn’t water in the catchment when you take the drip tray off – then call BH and talk to a technician.
g. There’s no steam when you turn the steam wand on – check that the on/off switch is set to number 2* if not turn to it number 2 & wait for 5-10mins if this doesn’t work call Burton Hollis for assistance. The cause of the problem can be one of several problems. Has it been steaming fine and suddenly there is no steam coming out of the steam wand? If yes – look at the on/off switch – what number is it on? If it is on Number 1 – turn it to Number 2 and wait – within 10minutes the pressure should be back to normal. This has occurred because someone has accidentally turned the machine to Number 1 which turns the element off – which results in the pressure being lost!
h. It may be that you have a blocked steam wand – remove the tip and soak it with hot water and/or Cafiza, whilst it is off check the pressure of the steam. Remove any milk residue from the tip with a tooth pick.
37
i. If the wand appears blocked or you find small pieces of green rubber in the milk you are steaming – don’t panic – this sometimes happens when new rubber gaskets are put in the steam assembly. As they wear it causes the rubber to shed and it ends up in the steam tip!
j. If the grinder handle/lever return doesn’t spring back after it is pulled – it is most likely that the lever return spring is broken – call BH – it is easy to fix but will most likely require a technician
k. “My steam knob keeps falling off in my hand” – the D clip inside the knob is worn – ask CCT to send you a new one with your next coffee order. Simply remove the old one and push on the new one – problem solved. Unless of course the old clip is missing – check on the stem of the steam assembly!
l. There is dirty water leaking around the handles during extraction – try flooding the groups to remove any build of coffee stuck to the head seals & make sure the handle is pulled around tightly when you slot it into the group. If this doesn’t solve the problem it may be that your head seals or baskets need replacing. If your waste tube has a damaged or missing plastic hosing protecting the metal bar it will cause the top of your baskets to become flat – check your baskets and call Burton Hollis for assistance.
m. There is no hot water coming out of the tap on the espresso machine – check that the on/off switch is set to number 2 – if not turn to it number 2 & wait for 5-10mins if this doesn’t work call Burton Hollis for assistance
n. The grinder isn’t working & the indicator light is not on. First check that the grinder is plugged in and turned on – if it is, feel the body of the grinder? Is it hot? If it is it could be that the grinder has over heated & the safety feature has cut in to prevent the motor burning out. Wait for 5-10mins while the grinder to cools down – check that it is not blocked with coffee. If this doesn’t fix the problem call Burton Hollis for assistance. BURTON HOLLIS NUMBER ph 0800-232-670
2. Coffee Issues
a. Coffee is pouring too slowly – grind is too small – increase the size of the grind by turning the grinder adjustment collar anticlockwise or making the number bigger. It may also be that you have over-dosed and packed too much coffee into the basket – check that the dosing line is just visible
b. Coffee pouring too fast – grind is too big – decrease the size of the grind by turning the grinder adjustment collar clockwise or making the number smaller. It may also be that you have under-dosed and that there is not enough coffee in the basket check that the level of coffee is up to the dosing line
c. Coffee not coming out both spouts on the double pour – machine is not level or uneven tamping
d. Coffee has metallic taste – check that the machine has been rinsed of chemical cleaner thoroughly
e. Coffee tastes burnt, could it be that the beans have been roasted too long – certainly not from Burton Hollis - feel the grind as it comes out of the grinder – if it is hot it may be that the blades are worn and need replacing
i. Burton Hollis have very strict Q&A procedures and we roast 90kg of coffee at a time, if your coffee was burnt so would a lot of other customers. We wouldn’t send 90kg of burnt coffee out to customers – it would ruin our great reputation. This has been a very common complaint in the past – to blame the coffee when it doesn’t taste right. We are also one of the few companies in NZ with an agtron machine.
f. When grinder blades are blunt, it cause the coffee to heat up due to the increased friction and this in turn can change the end flavour no matter what the beans are to be used for filter, plunger or espresso coffee
3. Classified Data
38
a. Part of making coffee in a commercial environment is being able to do all the things we have taught at speed without compromising the quality. It is all about routine, routine, routine!
b. Get into a good routine and rhythm, watch other baristas – there are secrets and shortcuts that will make your day run more smoothly. It doesn’t mean that you have to compromise the quality of the coffee – but it does mean you will have to improve your speed and practise.
c. We likened to driving – even though someone can be taught to drive well – it won’t necessarily make them a good driver. Some will be better than others and have a real flair in the art of making coffee!
4. To improve your barista skills - look at:
a.Some of the things we have already discussed – like the best layout for your coffee machine and grinder, good flow so that you can move more quickly
b.During quiet times take the time to: back wash your group heads, stock up on any products that are low, wipe down the bench, clean the grinds from around the grinder, clean the steam wand more thoroughly, empty the waste bin, stock up on crockery,
c. When steaming milk – use the right sized jug for the type of coffee you are makingd. It is possible to reuse already heated milk by adding more fresh milk – a basic rule
of thumb is add enough cold milk so that the milk/jug feels cool to touch. e. It is also a myth that the grind should never be changed – it is true that it should
never be changed by someone who doesn’t know what they are doing; however it is vital that it be checked regularly and changed when necessary
f. Store your ceramic cups on top of the machine to ensure they are heated – this will save customer complaints – like the coffee is too cold, time - heating each cup with hot water which in turn will save money – on electricity heating the water in the boiler being used for heating cups.
g.Try to use the steam wand on the opposite side from the grinder – if it gets busy and someone comes to help pull shots, you won’t get in their way trying to steam milk
h.For takeout coffees – if the customer has sugar - add it in for them – it is a nice gesture and saves the customer having to do it. It is simple for the barista to do – just put the sugar in with the espresso shot and the heat will dissolve it and blend it through the whole beverage when you add the steamed milk. Syrup flavours can also be added the same away
i. Clean crockery – using the chemical cleaner used to clean the machine or a bleach solution
j. Clean teapots – using the steam wands for the outside and polishing and chemical cleaner on the inside??
k.Make sure you have a cleaning regime written down for the espresso machine – set days that it is chemical cleaned – that way it will ensure it is cleaned if the person who usually cleans it is off that day
l. Ensure under the machine, top of the machine, & the fridge are cleaned regularly m. While you are waiting for the chemical to do its thing, for a couple of
minutes inside each group head when chemical back washing, move to the next group head and get it soaking too.
n.Use a small clean and dry paint brush to clean the loose grinds from around the grinder. The end of a teaspoon also works very well to get the grinds out from behind the resting hold
o.Keep cups on the top of the machine – downward facing to stop coffee grounds or dust dropping inside them
p.Keep the drip tray clean of coffee grounds – this will prevent them getting stuck to the bottom of the cups when taking an extraction. If they do get stuck to the bottom they leave dirty marks on the saucer for the customer
39

q.Grind that is left over at the end of the day can be taken home and used in a plunger or save it to use to run shots through the machine in the morning
r. During a quiet time make up chocolate syrup for making hot chocolates and mochaccinos. It saves having to have a chocolate milk jug and time having to make up chocolate milk the night before.
s. Keep busy – there is always something to do on a coffee station: fold serviettes, clear tables, stock your station – ceramic cups, takeaway cups, hot choc, marshmallow, sugars etc….,
CERTIFICATIONFinal Word
The student can book in for their practical test – at time convenient to both the assessor and the student
Discuss what is required of the students when they sit the practical exam – the practical may be done either at Centre of Gravity or at their own café.
The practical consists of making a list of at least 6 coffees, within five minutes, ensuring that all techniques are used correctly.
Students will also be required to demonstrate the importance of working in a clean environment by beginning and ending with a clean station.
If the student is unsure about whether they are ready to do the practical test – talk to their sales rep or the barista trainer before booking.
Once the student has passed the practical test they will be issued with a certificate
Assessor Guidelines
40
The following set of guidelines, accompany the Barista Assessment Form which you will use to assess the trainee’s barista skills.
These guidelines elaborate the judgement criteria on the Assessment Form. If you are unsure about any of the criteria, refer to these guidelines for more information. The student is
required to make a minimum of ten coffees in a ten minute timeframe.
Make an espresso Work station is clean and organised-Steam wand should be clean of milk residue and wiped with a clean cloth after use. -Bench top and grates should be clean and free of coffee grounds and milk residue. -Milk jugs should be clean on the outside without residue spilled down the sides.-Grinder should be clear of excessive amounts of ground coffee.
Handle is cleaned and dried well-A dry tea towel should be available to wipe out old grinds and remove any moisture from the basket before use.-Once dried, basket should be free of any ground coffee and completely dry.
Dosing is correctly carried outValley (single shot)
-Handle should be dosed with a small mountain of coffee above the edge of the basket.-The excess should be then be wiped back into the grounds hopper.-The final level should be slightly below the edge of the basket but not level with the edge.
Mountain (double shot)-Handle should be dosed with a mountain of coffee above the edge of the basket.-With a rounded finger, the coffee should be dosed to form a small mountain above the edge of the basket.- It is not acceptable to be level with the edge.
Tamping produces compacted and level coffee biscuit-Biscuit must be level without any imperfections caused by a damaged or wet tamper.-Coffee is compacted with an obvious amount of firm pressure from the arm and not just the wrist.
Any ground coffee is removed from side of handle-The handle should be completely free of coffee grounds.
Group head is flushed-Pump is activated until water runs without steam to reduce the heat build-up and residue from previous shot.
Espresso extraction time is 20-25 seconds-The time taken from the activation of the pump until the end of the extraction should be between 20-25 seconds.
Make a milk based coffee
Steam wand is purged -Steam knob is turned on completely – one full 180˚and any condensed water is cleared.
Milk is stretched immediately-The stretching phase of the milk steaming is started within 3 seconds of the steam being turned on.
Milk is stretched for correct length of time-Milk should not be stretched once it is warm.
41
-The length of time it is stretched for will depend on the type of beverage being made. This should be a maximum of between 4-8 seconds, depending on the amount of milk being steamed.
Milk is spun in the jug-The milk should be rolling/spun in the jug for the entire steaming process.
Milk is steamed to correct temperature between 65-70˚C-Temperature should be measured with a thermometer and must be between 65-70˚C.-The temperature of each jug of milk prepared during the assessment should be measured.
Creamy milk without bubbles shows milk is steamed correctly -There should be no visible bubbles.-It is acceptable to ‘drop’ the jug on the bench once only to disperse any visible bubbles on the surface.-The criterion is not met if the milk requires the surface to be scooped to remove bubbles. -The trainee may scoop/pour off excess froth that is not required.
Steam wand is wiped and purged-The steam wand should be wiped with a clean cloth after each use.-The wand should also be purged after each use to remove milk residue.
Milk is blended to a consistent texture-Before adding the milk to the espresso, the milk should be blended thoroughly.
Milk is added to espresso immediately after extraction-The espresso should not be left to sit once extracted.-The milk should be steamed first and the extraction done second if the trainee is not doing them at the same time.
Depth of froth is appropriate for coffee type-Froth depth will be dependent on the vessel being used for each beverage. The depth of froth should be approximately as follows: Latte, Hot Chocolate and Mochaccino 10-22mm, Flat White 7-12mm, Cappuccino 20-30mm.
Beverages are made in the appropriate order-Beverages should be made in the correct order – teas first, followed by white coffees, mochaccinos and hot chocolates and finishing with black coffees. -When making more than one white coffee, the order should be cappuccino, latte then flat white.
Evaluation GuidelinesThe following set of guidelines, accompany the Barista Training Evaluation Form which you will
use to communicate the trainee barista skills back to the owner or manager of the cafe the trainee barista is from.
42

The Barista Training Evaluation Form should be completed by the barista trainer. It can either be completed during the training as the student practises each learned skill. Alternatively at
the end of the session ask each student to run through the skills they have learnt and evaluate them as they demonstrate. The completed form should then be posted or hand delivered by the barista trainer or sales representative directly to the owner or manager of the trainee. A
copy of the form should be made and placed in the customers file with the sales representative as a reference for meetings or customer reviews.
The top of the form is self explanatory and should be completed in full. The main part of the form contains four sections Espresso, Equipment, Milk and Beverages. Each section contains points relating to various skills. Each point may be ticked either ‘good’ or ‘needs work’. The
points are self explanatory and should be ticked where applicable in the appropriate box.
CommentsThis space on the form should be used to comment on the following:
i. Confidence level of the traineeii. Motivation level of the traineeiii. Trainee arrived late to the training sessioniv. Trainee seemed disinterested in learning or involving themselves in the lesson
RecommendationsThis space on the form should be used to communicate your recommendations for the student to the owner or manager. Trainee.....
i. Is ready to make coffee for customers unassistedii. is ready to make coffee unassisted during quiet times onlyiii. is ready to make coffee for staff members onlyiv. should be supervised at all times
It may also be used to suggest when they might be ready to advance to Certification training or be ready to sit their assessment:
i. Reassess on next visitii. Needs a few weeks more practiseiii. Is ready to book next Certification or Assessment now
* BTD – Barista Trainer Demonstrated OnlyYou will notice at the bottom of the first column - the above note. At times during the training you will find that you demonstrate a particular skill to a student but do not offer them the opportunity to attempt the skill themselves. Beside the particular skill write in BTD, the cafe owner will then be able to see that the student has some understanding of the skill. This will most likely be seen with the beverages and pouring milk in The Foundations. You will only demonstrate pouring in The Foundations training, rather than actually teaching it.
Barista Assessment Form
Name of trainee: ____________________________
Name of assessor: __________________________
Venue: _________________________________ Date: ______________
43
Goal Outcome Judgement Criteria Comments
Make an espresso
Prepare dry coffee biscuit
Work station is clean & prepared for service/assessment
Handle is cleaned and dried well
Dosing is correctly carried out -Valley (single shot) -Mountain (double shot)
Tamping produces compacted and level coffee biscuit
Any ground coffee is removed from side of handle
Group head is flushed
Espresso extraction time is 20-25 seconds
Make a milk-based coffee
Steam the milk
Steam wand is purged
Milk is stretched immediately
Milk is stretched for correct length of time
Milk is spun in jug
Milk is steamed to correct temperature between 65-70 ‘ C
Creamy milk without bubbles shows milk is steamed correctly
Pour the milk
Milk is blended to a consistent texture
Steam wand is wiped and purged
Milk is added to espresso immediately after extraction
Speed of pouring is appropriate for type of coffee
Depth of froth is appropriate for coffee type
Heart pattern on top of coffee is well executed and recognisable
Number of coffees made:
44
Goal Outcome Judgement Criteria Comments
Espresso: ________
Cappuccinos: _________
Lattes: ________
Flat whites: _________
Other coffee type/s and number: ______________________________
Prepare a pot of tea
Make other beverages
Teapot is pre-heated before use
Tea is stirred after adding water
Tea is brewed for 3-5 minutes
Tea is served correctly with or without milk
Beverages are made appropriate order
Other beverages made and number: __________________________________
ASSESSMENT RESULTS SHEET
Name of trainee: __________________________
Name of assessor: __________________________
Date: ______________
Were all criteria met? Yes No
If no, in what area/s is re-assessment needed?
45
Signature of assessor: ______________________________
46