Embed Size (px)
DESCRIPTION
CITS VIBE deskaid
Citation preview
UMVibeUMVibe is collaboration software that allows you to create and work in secure “virtual meeting spaces.” These meeting spaces allow for teams to group-author documents, share a project calendar, manage tasks, build workflows, share blogs and wikis, and conduct private online discussions. Team members can work together either in real time or asynchronously, without being in the same room, the same state, or even the same country.
To access UMVibe, enter https://vibe.umaryland.edu into the browser address bar. The log-in screen will appear. Enter your UMID and UMID password, and click OK. Once this is done, the UMVibe Landing Page will appear.
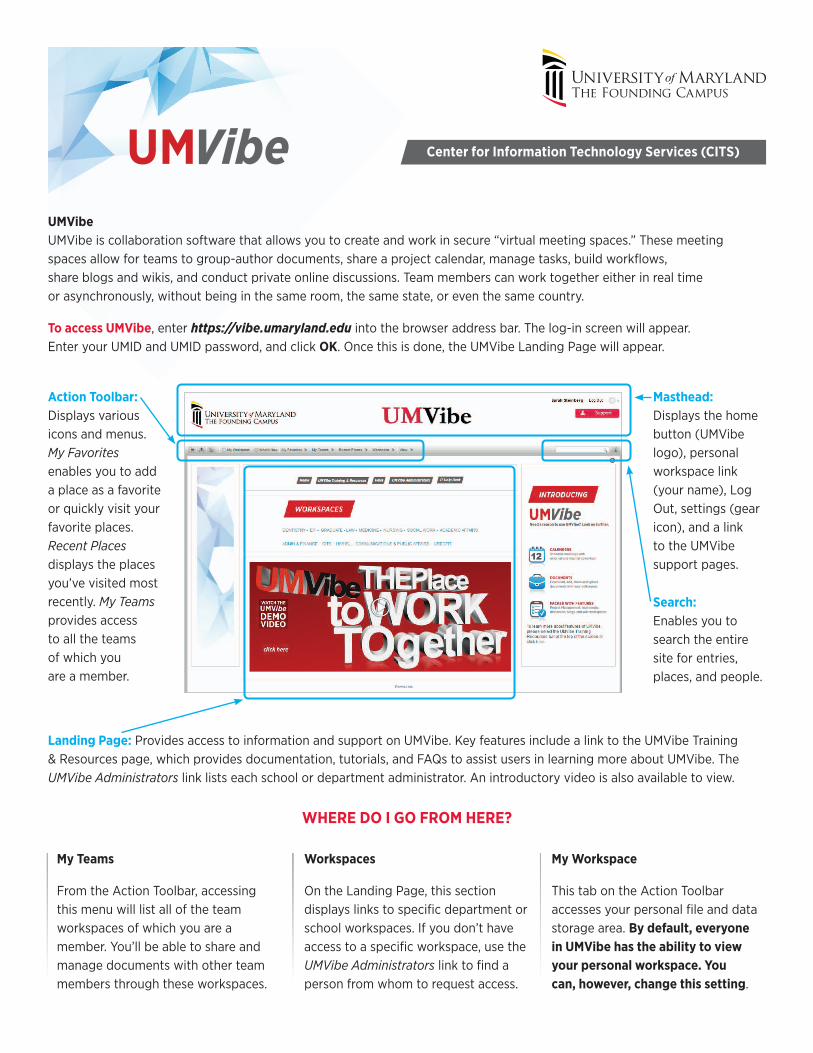
Landing Page: Provides access to information and support on UMVibe. Key features include a link to the UMVibe Training & Resources page, which provides documentation, tutorials, and FAQs to assist users in learning more about UMVibe. The UMVibe Administrators link lists each school or department administrator. An introductory video is also available to view.
Action Toolbar: Displays various icons and menus. My Favorites enables you to add a place as a favorite or quickly visit your favorite places. Recent Places displays the places you’ve visited most recently. My Teams provides access to all the teams of which you are a member.
Masthead: Displays the home button (UMVibe logo), personal workspace link (your name), Log Out, settings (gear icon), and a link to the UMVibe support pages.
Search: Enables you to search the entire site for entries, places, and people.
My Teams
From the Action Toolbar, accessing this menu will list all of the team workspaces of which you are a member. You’ll be able to share and manage documents with other team members through these workspaces.
Workspaces
On the Landing Page, this section displays links to specific department or school workspaces. If you don’t have access to a specific workspace, use the UMVibe Administrators link to find a person from whom to request access.
My Workspace
This tab on the Action Toolbar accesses your personal file and data storage area. By default, everyone in UMVibe has the ability to view your personal workspace. You can, however, change this setting.
WHERE DO I GO FROM HERE?
Center for Information Technology Services (CITS)

Workspace FoldersThere are multiple types of folders that you can include in a workspace (both personal and team). They enable you to organize the various kinds of information that are located in the workspace.
All folders are basically different ways to view/hold data. How you enter data is the same in each folder, even if certain fields may not be available in one folder versus another. Some of the more commonly used folders include:
Adding a New EntryTo add a new entry to any folder type:• Navigate to the workspace where you want to add an
entry, and then navigate to the folder in question (Calendar, File, etc.).
• Click the New Entry button. • Fill in the applicable fields for the entry. • Click OK.
Adding FavoritesIf you are a member of many teams but only access certain team workspaces on a regular basis, you can facilitate this by adding them to My Favorites: • Navigate to the workspace you want to add.• Click My Favorites. • Select Add This Place.
Edit Favorites will allow you to change the order of your favorites and delete any that you no longer want listed as a favorite.
Viewing Team MembersThere are two easy ways to view team members in a workspace:
1. In the content area of a workspace, all members of the team are listed in the Team Members section.
2. Under the View menu, select Who Has Access. All team members will be listed. If you have the proper rights, you can also change a member’s access level by clicking on the Configure Access Control button.
TEAM MEMBER
For further information, please visit the UMVibe Training & Resources support page at www.umaryland.edu/vibe/training.html.
BlogThe Blog folder is a good way for you to express your thoughts about topics that are important to you. It can be used to allow you to update your team on your individual progress on a project.
CalendarAs with all folders, a Calendar folder can be created in any workspace. This enables you to keep a personal calendar in your personal workspace, and then a team calendar can be created to keep track of events specific to that team.
DiscussionThis folder type allows you to initiate and/or participate in various discussion threads. Users post their comments and all members can view and respond. The folder is sorted with the most recent discussions appearing first.
FilesThe Files folder provides an easy way to store and keep track of your files. Specifically in a team workspace, this makes it easy to share files with your teammates.
TasksThis folder contains a series of task entries. The folder also displays a summary of task priority and status.
WikiA Wiki folder allows for related entries that are co-authored by folder participants. The one difference with a Wiki folder compared to other folders is that there is no folder hierarchy within the folder. All entries are considered equal.
Sharing FilesUMVibe enables members of a team to upload and share documents and files to a team workspace.
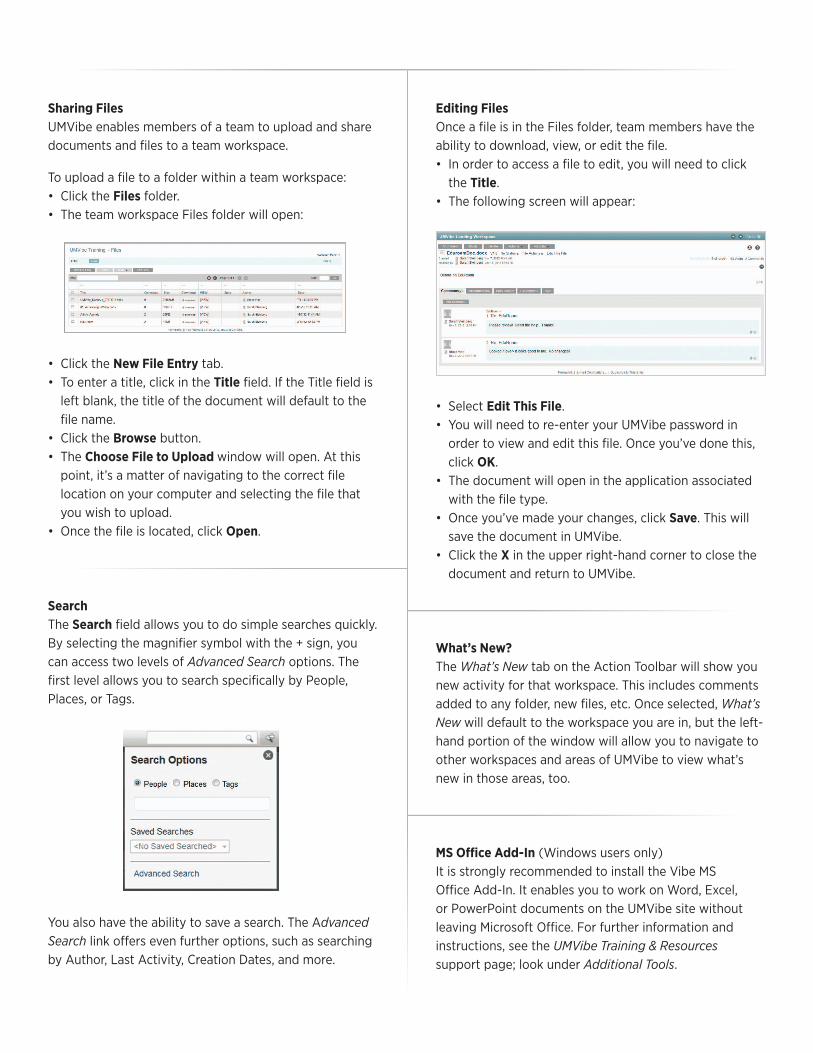
To upload a file to a folder within a team workspace:• Click the Files folder.• The team workspace Files folder will open:
• Click the New File Entry tab.• To enter a title, click in the Title field. If the Title field is
left blank, the title of the document will default to the file name.
• Click the Browse button. • The Choose File to Upload window will open. At this
point, it’s a matter of navigating to the correct file location on your computer and selecting the file that you wish to upload.
• Once the file is located, click Open.
SearchThe Search field allows you to do simple searches quickly. By selecting the magnifier symbol with the + sign, you can access two levels of Advanced Search options. The first level allows you to search specifically by People, Places, or Tags.
You also have the ability to save a search. The Advanced Search link offers even further options, such as searching by Author, Last Activity, Creation Dates, and more.
Editing FilesOnce a file is in the Files folder, team members have the ability to download, view, or edit the file. • In order to access a file to edit, you will need to click
the Title. • The following screen will appear:
• Select Edit This File.• You will need to re-enter your UMVibe password in
order to view and edit this file. Once you’ve done this, click OK.
• The document will open in the application associated with the file type.
• Once you’ve made your changes, click Save. This will save the document in UMVibe.
• Click the X in the upper right-hand corner to close the document and return to UMVibe.
What’s New?The What’s New tab on the Action Toolbar will show you new activity for that workspace. This includes comments added to any folder, new files, etc. Once selected, What’s New will default to the workspace you are in, but the left-hand portion of the window will allow you to navigate to other workspaces and areas of UMVibe to view what’s new in those areas, too.
MS Office Add-In (Windows users only)It is strongly recommended to install the Vibe MS Office Add-In. It enables you to work on Word, Excel, or PowerPoint documents on the UMVibe site without leaving Microsoft Office. For further information and instructions, see the UMVibe Training & Resources support page; look under Additional Tools.
Creating a Team WorkspaceA team workspace is the primary tool within UMVibe that will enable a group of people to work collaboratively on a project. Any UMVibe user can create a team workspace.
• On the Action Toolbar, click the Browse Hierarchy button.
• Click the arrow to the left of Home Workspace. • Click the Team Workspaces link. • In the upper left corner of the Content Area, click the
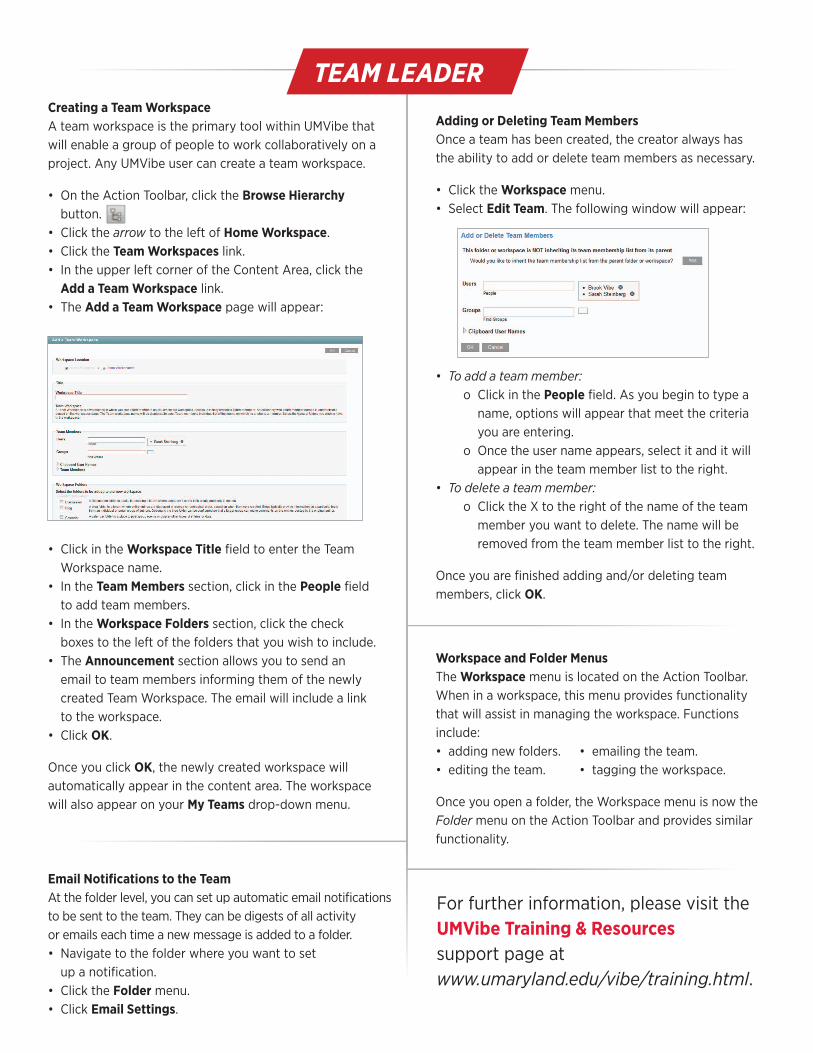
Add a Team Workspace link. • The Add a Team Workspace page will appear:
• Click in the Workspace Title field to enter the Team
Workspace name.• In the Team Members section, click in the People field
to add team members. • In the Workspace Folders section, click the check
boxes to the left of the folders that you wish to include. • The Announcement section allows you to send an
email to team members informing them of the newly created Team Workspace. The email will include a link to the workspace.
• Click OK.
Once you click OK, the newly created workspace will automatically appear in the content area. The workspace will also appear on your My Teams drop-down menu.
Email Notifications to the TeamAt the folder level, you can set up automatic email notifications to be sent to the team. They can be digests of all activity or emails each time a new message is added to a folder. • Navigate to the folder where you want to set
up a notification.• Click the Folder menu.• Click Email Settings.
Adding or Deleting Team MembersOnce a team has been created, the creator always has the ability to add or delete team members as necessary.
• Click the Workspace menu.• Select Edit Team. The following window will appear:
• To add a team member: o Click in the People field. As you begin to type a
name, options will appear that meet the criteria you are entering.
o Once the user name appears, select it and it will appear in the team member list to the right.
• To delete a team member: o Click the X to the right of the name of the team
member you want to delete. The name will be removed from the team member list to the right.
Once you are finished adding and/or deleting team members, click OK.
Workspace and Folder MenusThe Workspace menu is located on the Action Toolbar. When in a workspace, this menu provides functionality that will assist in managing the workspace. Functions include:• adding new folders. • emailing the team.• editing the team. • tagging the workspace.
Once you open a folder, the Workspace menu is now the Folder menu on the Action Toolbar and provides similar functionality.
TEAM LEADER
For further information, please visit the UMVibe Training & Resources support page at www.umaryland.edu/vibe/training.html.