Embed Size (px)
Citation preview
DOC 01/16
Version 7 Install & Quick Start
Alarm Notification Software
For Windows 10, Windows 8, Server 2012, Windows 7,
Server 2008, Server 2003, Windows XP
____________________________________
Copyright ©1993 – 2016 Specter Instruments
All Rights Reserved
No part of this publication may be reproduced, transmitted, transcribed, stored in
a retrieval system, or translated into any language or computer language, in any form or by any means, electronic, mechanical, magnetic, optical, chemical,
manual, or otherwise, without written permission of Specter Instruments, 4020
S. Industrial Drive, Suite 120, Austin, Texas 78744.
The software described in this document is furnished under a license agreement
or nondisclosure agreement. The software may be used or copied only in
accordance with the terms of agreement.
DISCLAIMER
SPECTER INSTRUMENTS MAKES NO REPRESENTATION OR
WARRANTIES WITH RESPECT TO THE CONTENTS HEREOF AND SPECIFICALLY DISCLAIMS ANY IMPLIED WARRANTIES OF
MERCHANTABILITY OR FITNESS FOR ANY PURPOSE. Further, Specter
Instruments reserves the right to revise this publication and to make changes from time to time in the content hereof without obligation of Specter
Instruments to notify any person of such revision or changes.
NOTICE TO USER
This manual should not be construed as any representation or warranty with
respect to the software named herein. Occasionally changes or variations exist in the software that are not reflected in the manual. Generally, if such changes
or variations are known to exist and to affect the product significantly, a release note or README.DOC file accompanies the manual and distribution disk(s).
In that event, be sure to read the release note or README.DOC file before
using the product.
TRADEMARKS
WIN-911®, WIN-411®, TeleDAC®, WEB-911 XTools™, Mobile-911™, Mobile-911 View™ are trademarks of Specter Instruments.
Windows XP, Server 2003®, 2000®, NT®, Vista®, Server 2008®, Windows 7
Server 2012®, Windows 10 are trademarks of Microsoft Corporation. Microsoft® and MS® are registered trademarks of Microsoft Corporation.
IBM® is a registered trademark of International Business Machines Corporation.
Hayes® is a registered trademark of Hayes Microcomputer Products, Inc. Cepstral® is a registered trademark of Cepstral, LLC
iOS® is a registered trademark of Apple Incorporated
Android® is a registered trademark of Google Incorporated BlackBerry® is a trademark of Research In Motion Limited
Dialogic® is a registered trademark of Dialogic Corporation
RSView SE, RSView32, FactoryTalk View and PanelView are registered trademarks of Rockwell Automation, Inc.
Wonderware®, InTouch® and ArchestrA® are trademarks of Wonderware
Corporation.
Intellution®, Dynamics®, iFIX and FIX® are trademarks of GE.
viewLinc® is a registered trademark of Veriteq.

WIN-911 Version 7 Install & Quick Start DOC 01/16 Contents • i
Contents
1. Introduction 1
About this Manual 1 System Description 1 What’s New? 2 Standard Products 3 WIN-911/Basic 3 WIN-911/PRO 4 WIN-911/L 5 Feature Upgrades 6 WIN-911/FT 6 WIN-911/PV 6 WEB-911 XTools 7 Mobile-911 7 Hardware Requirements 8 Software Maintenance and Support 9 WIN-911 Standard Product Installation 10 Installing WIN-911 V7 10 Installing ME ActiveX 11 The WIN-911 Feature Upgrade Installation 13 Installing Mobile-911 13 Installing Mobile-911 for Apple iOS 15 Installing Mobile-911 for Android 16 Installing Mobile-911 for BlackBerry 16 Installing WEB-911 Services 17 Installing WEB-911 XTools Client 19 Installing WIN-911 Premium Voices 21 WIN-911 Licensing & CopyShield Administration 22 Requesting a License 22 CopyShield License Install (Import a License File) 25 CopyShield License Install (Manually Install a License) 28 WIN-911 Version Upgrade 32 WIN-911 Feature Upgrade 33 Remove WIN-911 V7 34
ii • Contents WIN-911 Version 7 Install & Quick Start DOC 01/16
Remove Mobile-911 35 Remove WIN-911 ME OCX 36 Remove WEB-911 Services 36 Remove XTools Client 37 Remove Premium Voice 37
2. Overview: A Must Read Chapter! 39
WIN-911 Architecture 39 What is the Design Advantage? 39 The WIN-911 System Components 40 Applications 40 Service 41 Modules 41 WIN-911 Peripherals 43 WIN-911 Applets 43 WIN-911 Tools 45 WEB-911 XTools 47 WIN-911 Premium Voices 48 Sound Card Selection 48 Voice Dialout Card Selection 48 Voice Telephony Option One: TAPI 49 Voice Telephony Option Two: Dialogic 49 Voice Selection 49 Voice 49 Voice Pager 49 Dialout Announcer 50 Pager Modem Selection 50 Pager Selection 50 Dial-out Alphanumeric 50 Dial-out Numeric 51 Local Alpha and Numeric 51 E-Mail 52 SMS 52 Acknowledgement Message 53 Health Status Message 54 Alarm Request Message 55 SMS 411-Report 56 Mobile-911 57 IP 58 Alarm Messages 58 Acknowledgements/Expected Responses 59 Primary/Secondary Remote Computers 59 Health Status 60
WIN-911 Version 7 Install & Quick Start DOC 01/16 Contents • iii
ASCII Outputs Integrate to Other Windows Applications 61 The Sound Clips 61 Sound Source 63 Wave Files Only 63 Text To Speech Wave Files 64 Runtime Voice Synthesis 64 What is the Direct Connect? 64 WIN-911 as a Service 65
3. WIN-911 Demonstration 67
Demo of WIN-911 Capabilities 67 Playing with Sound 68 Creating a Demo OPC Server 69 Installing KEPServerEX & OPC Demo 69 Setting up the OPC Demo 69 Exploring the WIN-911 Configurator 72 Running the DEMO 73 Typical Example of WIN-911 Voice Dial-Out 74 Overview 74 Demonstration 75 Typical Example of WIN-411 Inquiry 76 Overview 76 Demonstration 76
4. WEB-911 XTools Demonstration 79
Demo of WEB-911 XTools Capabilities 79 Creating a WEB-911 XTools Demo 80 Installing WEB-911 Services 80 Installing WEB-911 XTools Client 82 Setting up WEB-911 XTools 85 Exploring WEB-911 XTools 86 XContacts 86 XGroup 87 XSchedule 87 XActivate 87 XStandby 87 XApply 87 WEB-911 XTools Options 88

iv • Contents WIN-911 Version 7 Install & Quick Start DOC 01/16
WIN-911 Version 7 Install & Quick Start DOC 01/16 1. Introduction • 1
1. Introduction
About this Manual This manual is an Install & Quick Start guide for setting up the
WIN-911 software and discussing the basic principles of remote
alarming. All four of these chapters are contained in the
complete digital documentation and help file that can be
accessed electronically after the WIN-911 setup is complete.
System Description WIN-911 is the most advanced and proven alarming software
available using Microsoft's multimedia capability with standard
telephone, cellular networks and Internet systems. The WIN-
911 package has three standard package offerings: WIN-
911/PRO, WIN-911/Basic, and WIN-911/L (Lite). The WIN-
911 package also offers four feature upgrade packages WIN-
911/FT, WIN-911/PV, WEB-911/XC, and Mobile-911. Some
feature upgrades are included in the standard packages; see
‘Current Price List’ at www.win911.com for details. WIN-911
is a complete software solution for alerting personnel of alarms
or out-of-tolerance conditions. Data values are compared to
predefined limits or received from data source(s) and reported
through Windows multimedia capabilities in either visual,
audio, email, or dial-out messaging. Data can be accessed via
three mediums: 1) generic connections can be established with
Microsoft Windows OLE for Process Control and/or 2)

2 • 1. Introduction WIN-911 Version 7 Install & Quick Start DOC 01/16
Dynamic Data Exchange, or 3) a custom developed Direct
Connect can be established with Wonderware's System
Platform & InTouch, GE's iFIX, Rockwell Automation's
FactoryTalk View A&E, FactoryTalk View HMI,
FactoryTalk View ME & RSView32 and Veriteq's viewLinc databases. WIN-411 allows the user to inquire from any touch-
tone telephone or SMS capable cell phone, the status of analog
or digital values. If the data server allows, it will even enable
the user to make changes over the telephone using voice
telephony. WEB-911 XTools are a suite of ActiveX modules
that allow configuration changes to be made from remote
systems. Mobile-911 consist of both the Mobile-911 smart
phone application and MobileView, a web-based alarm monitor
window. Mobile-911 allows for powerful organization of
multiple alarm messages and provides a convenient way to
acknowledge each alarm back to WIN-911 in the form of a
smartphone application or a web-based monitor window.
WIN-911 V7 and support software is distributed on a USB flash
drive or via an Internet download at www.win911.com.
What’s New?
WIN-911 Software is pleased to introduce the following
additions to WIN-911:
Support for Windows 10
Support for Windows 8 and Windows 8.1
Support for Windows Server 2012 and 2012 R2
Printer and Logger Improvements
New WIN-911 Premium Voices offered in 46 Languages
WIN-911 Version 7 Install & Quick Start DOC 01/16 1. Introduction • 3
Standard Products The WIN-911 software package can be licensed to any one of
the three Standard Products listed below. See the ‘Current Price
List’ at www.win911.com for details.
WIN-911/Basic
WIN-911 Alarm Software for 1-way alarm notification will allow you to:
Complement and enhance any Windows compliant industrial
control application by giving it alarm and reporting capabilities.
Notify personnel using Email, Paging and 1-way SMS.
Utilize the Windows multimedia capability to alert users of out-
of-tolerance conditions.
Easily create both sound and visual messages and associate
these with values found in your HMI/SCADA package and/or
Windows OPC and DDE.
Report alarms by visual "color coded" CRT messages, audio
alert sounds (including speech), email, pager, and SMS
messages, as well as send ASCII messages to remote mounted
displays.
Group and classify alarms (including priority levels), allowing
different action responses as your needs dictate.
Alert users if servers or source of data becomes disconnected or
inoperable.
Sort and view alarm data by any field (date, priority, group, tag
name, etc.) at runtime with the Alarm Log Manager formatted
alarm logger.
Alert HMI and/or other applications of WIN-911’s operational
status by serving a constantly changing “heartbeat” via WIN-
911’s System Health Poke.
Alert HMI and/or other applications of WIN-911’s paging
modules operational status.
4 • 1. Introduction WIN-911 Version 7 Install & Quick Start DOC 01/16
WIN-911/PRO
WIN-911 Alarm Software for 1-way and 2-way alarm notification will also allow you to:
Notify and acknowledge alarms by telephone/voice dial-up.
Acknowledge alarms by replying with an SMS text message.
Modify existing WIN-911 configurations on the fly from a
networked location.
Change the current state of WIN-911 from a networked
location.
Offers professional sounding voices as an alternative to the
standard Microsoft choices.
Inquire of other plant conditions using WIN-411 Reports after
WIN-911 has reported an out-of-tolerance alarm.
Call or text message the computer at any time from a touch-tone
telephone to check on current operating conditions.
Change any digital or analog value from a touch-tone telephone.
(Changes are only possible if the configuration allows.) The
following security is available for selecting a point to change:
1. Special Access Code for changes per user.
2. Selection of a numeric password for each point to change.
3. High/Low limits for analog changes for individual points.
4. Confirmation of intended change of value prior to the actual
change.
5. Watchdogs that can prevent access to reports on data source
loss.
Supports state-of-the-art performance in voice technology for
alarm and report annunciation. Variable rate and pitch control
allows fine-tuning of the audio to match exact user needs.
WIN-911 Version 7 Install & Quick Start DOC 01/16 1. Introduction • 5
WIN-911/L
WIN-911 Lite will allow you WIN-911 PRO functionality with the following restrictions:
Alarms can accommodate a total of 24 digital and unlimited
watchdog alarms. Filter and Analog alarms are not supported in
Lite Mode.
User can select a single type of remote notification, such as:
Voice Telephony, 2-way SMS, Numeric or Alphanumeric
pagers, Voice Pagers, E-Mail, or Mobile-911.
Lite mode does not include WIN-411 reporting capability, but
users can acknowledge alarms from the voice telephony, 2-way
SMS, or the Mobile-911 connection.
Premium Voice is not included.
XTools are not supported
6 • 1. Introduction WIN-911 Version 7 Install & Quick Start DOC 01/16
Feature Upgrades The following Feature Upgrades may be purchased and licensed
in addition to some of the Standard Products. See ‘Current
Price List’ at www.win911.com for details.
WIN-911/FT
WIN-911 FactoryTalk Alarm and Events Client offers a seamless connection to FactoryTalk's Alarm & Event servers:
Required, if trying to subscribe to alarms in FactoryTalk's
Alarm and Event server.
Subscribes to FactoryTalk alarms based on a user defined filter
criteria.
Alarm properties and configuration are maintained at the PLC
level, instead of in WIN-911.
WIN-911/PV
WIN-911 Premium Voices provide a more natural sounding voice as an alternative to the standard Microsoft choices. WIN-911 Premium Voices can be added to any WIN-911/PRO, Basic or Lite package:
The Premium Voice package offers male and female voices in
46 different languages (each language pack sold separately).
WIN-911/PV US English language pack includes 5 voices:
Allison, Ava, Samantha, Susan, and Tom.
The Premium Voice package also allows the user to adjust the
rate and pitch of the premium voice.
SAPI 5.0 or 5.1 speech engines can be used with WIN-911’s
Text-to-Speech.
WIN-911 Version 7 Install & Quick Start DOC 01/16 1. Introduction • 7
WEB-911 XTools
WEB-911 XTools is a suite of ActiveX controls that allow you to modify existing WIN-911 configurations on the fly including:
A networked solution to edit Contacts, Schedules, and
Notification Methods by leveraging Microsoft .NET and
Internet Information Services.
A networked solution for switching WIN-911 between an
Active and Standby state.
The capability to install the XTools client in any ActiveX
container, including most SCADA nodes.
Mobile-911
Mobile-911 consist of both the Mobile-911 smart phone application and MobileView, a web-based alarm monitor window. Mobile-911 allows for powerful organization of multiple alarm messages and provides a convenient way to acknowledge each alarm back to WIN-911 in the form of a smartphone application or a web-based monitor window.
Mobile-911 is compatible with Apple iOS, Google Android and
Blackberry devices.
Mobile-911 pushes alarms to your mobile device over Apple’s
Push Notification service, Google’s Cloud to Device Messaging
Service or RIM's Push Service.
An Internet connection is required on both your Mobile-911
Server machine and your mobile device.
MobileView displays alarms in an alarm summary accessed
through a web browser using a secure log in. This allows the
user to access and acknowledge alarms from anywhere that has
an Internet connection.
8 • 1. Introduction WIN-911 Version 7 Install & Quick Start DOC 01/16
Hardware Requirements WIN-911 PRO, Basic, Lite, PV, WEB-911 Service, XTools
Client, ME ActiveX and Mobile-911 Server will run on any
Windows based compatible computer capable of running
Microsoft Windows XP Service Pack 3, Server 2003 Service
Pack 1 or later, Server 2003 R2, Windows 7, Windows Server
2008, Windows Server 2008 R2, Windows 8, Windows 8.1,
Windows Server 2012, Windows Server 2012 R2, Windows 10.
ME ActiveX will also run in Windows CE in a PanelView 6.
They do not support Windows Server 2000, NT, ME, 98, 95 or
older, or Windows for Workgroups.
It is recommended that the computer system for WIN-911 be at
least a Pentium 4 based computer system running at 2.1 GHz.
The system should have a display with a resolution of 800x600
or greater. The system should have at least 2GB of memory.
Additional memory is recommended if additional programs are
to be run simultaneously. The minimum configuration should
have at least 1 gigabyte of free disk space. Be aware that sound
files require between 11 to 44 kilobytes of disk space per second
of recording. Microsoft .NET 4.0 and IIS are required for some
features.
If dial-out paging is required, a dedicated data modem and
phone line is needed. If voice dial-outs or dial-ins are required
you will need one of the following devices: 1) a TAPI voice
modem or, 2) a Dialogic Telephonic Card and a dedicated
analog voice line. If both paging and voice connections are
required, two dedicated lines are needed. If SMS messaging is
to be used, a GSM, CDMA or HSPA modem is required with an
activated cellular account. See the recommend modem list for
all GSM, CDMA, and HSPA modems at www.win911.com.
If alarm history printing is desired, a dedicated printer port and
printer are required. A simple printer should suffice since no
graphics are used. WIN-911 Software recommends that a dot
matrix printer be used, or similar such device capable of printing
a "line-at-a-time" as opposed to one that requires an entire page
be defined before it will begin to print (such as lasers and ink-
jets).
Note: When the WIN-911 Alarm Printer owns a printer, no
other task can access it. The Alarm Printer does not use the
Windows device drivers for printing; printing is done through
WIN-911 Version 7 Install & Quick Start DOC 01/16 1. Introduction • 9
standard ASCII output. Other Printing tasks require a
separate printer port and printer.
WEB-911 XTools require Microsoft .NET 4.0 and Internet
Information Services to be on the WIN-911 server machine.
Microsoft .NET 4.0 must be installed on all WEB-911 XTools
client machines. See, “Installing WEB-911 Services” &
"Installing WEB-911 XTools Client."
Mobile-911 Server requires Microsoft .NET 4.0 and may
require Internet Information Services if installing MobileView.
Mobile-911 Server is not required to be installed on the same
machine as WIN-911. Mobile-911 Server may also require an
internet connection.
Software Maintenance and Support Registered users are given a Software Maintenance and Support
number when the software is licensed. This Software
Maintenance number is required to receive telephone and email
support. For telephone support call WIN-911 Software at 512-
326-1011 x3 or toll free in the US and Canada at 1-800-331-
8740 x3, and have your Software Maintenance number ready.
Support hours are Monday through Friday, 8:00 AM to 5:00 PM
(GMT -06:00) Central Time. Telephone and email support after
the expiration of the support agreement will require renewing
your Software Maintenance agreement. Email support will be
directed through your Software Maintenance and Support page
at: www.win911.com menu option Customer Login (upper-
right corner). Installation guides, informational documentation,
as well as solutions to common problems can be found under
menu option Support | Knowledgebase.
In addition to technical support, participants are entitled to
software version upgrades as they become available, relocks and
software newsletters, with updates.
To renew your Software Maintenance and Support
agreement call WIN-911 Sales at 512-326-1011 x2 or toll free
in the US and Canada at 1-800-331-8740 x2. Invoices are
sent out prior to expiration also.

10 • 1. Introduction WIN-911 Version 7 Install & Quick Start DOC 01/16
WIN-911 Standard Product Installation
Installing WIN-911 V7
Insert the WIN-911 Software USB drive. Browse the drive and
open Setup.exe.
Select WIN-911.
Click, Next. If prompted to install .NET 4.0 follow the on
screen instructions. Then continue through the License
Agreement and Customer Information.
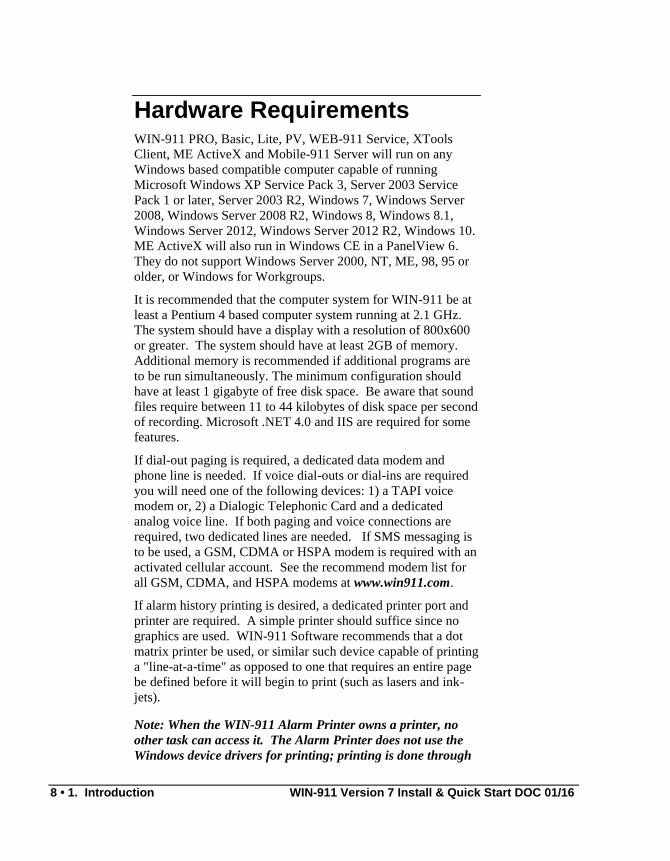
WIN-911 Version 7 Install & Quick Start DOC 01/16 1. Introduction • 11
Select Typical to run the default installation. This will install to
the default location C:\%Program Files%\Specter
Instruments\WIN-911 V7. The following program features
will be installed: WIN-911 V7, Tools, and Application Demos.
Select *LITE* Mode to run the default installation with LITE
mode limitations. See “WIN-911/L” section above for a list of
limitations.
Select Custom to change any of the default installation settings,
such as the WIN-911 install path.
Select Next, click Install, then Finish.
Note: WIN-911 V7 is fully functional for a 30-day DEMO
period from the time of installation. After the DEMO
period expires WIN-911 must be licensed. See ‘WIN-911
Licensing and CopyShield Administration’ for details.
Installing ME ActiveX
The ME ActiveX is required for the ME Direct Connect. This
ActiveX control sends alarms from the ME application to WIN-
911. For this reason, the ME ActiveX control must be installed
on all PC clients as well as all development machines (View
Studio). If the client resides on a PanelView or CE system, a
12 • 1. Introduction WIN-911 Version 7 Install & Quick Start DOC 01/16
.CAB file must be installed. The .CAB file can be found by
browsing the WIN-911 Install CD: \Support\CE\WIN-
911_ME_Alarming_CE.cab
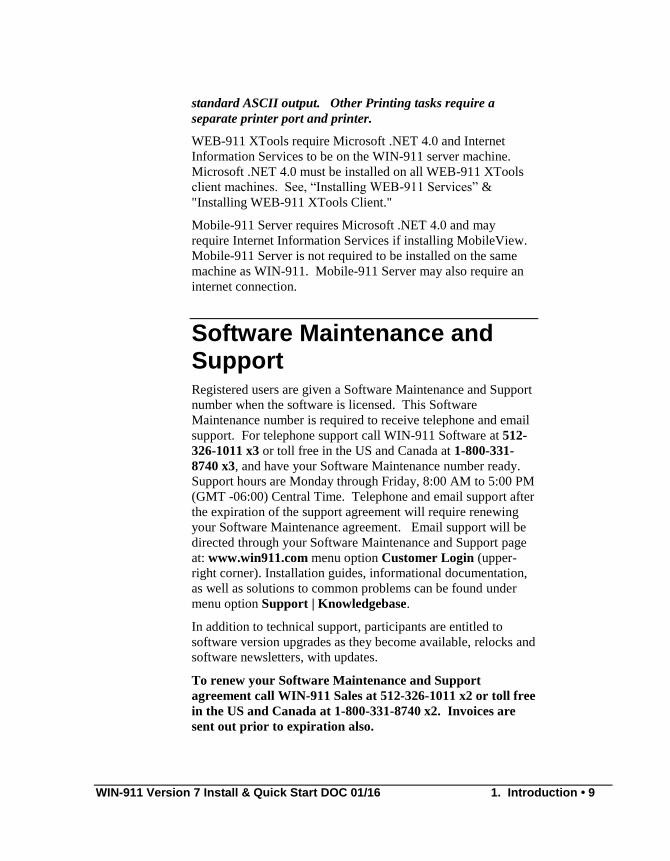
Insert the WIN-911 Software USB drive. Browse the drive and
open Setup.exe.
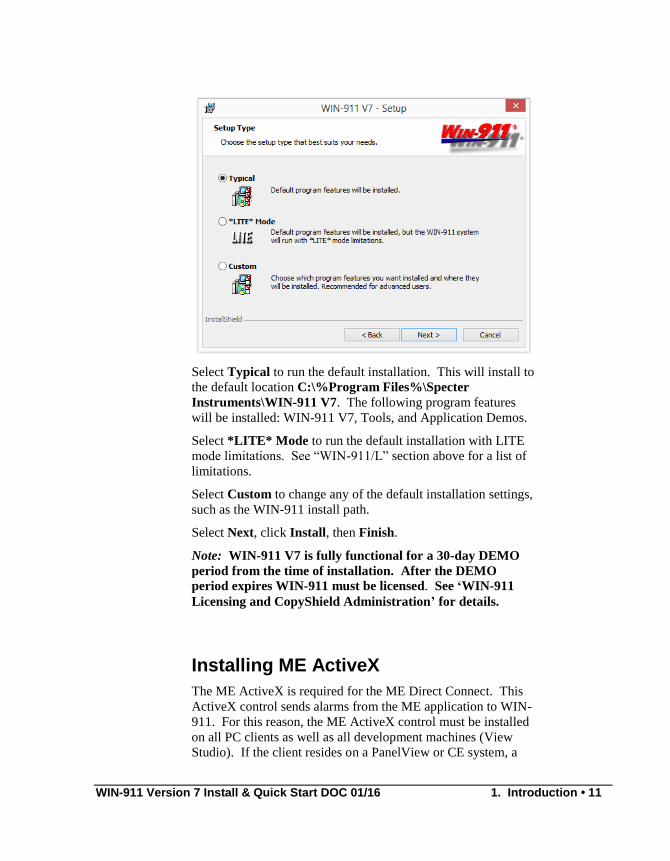
Select ME ActiveX.
Select Next, click Install, then Finish.
The ME Active X install requires Microsoft Visual C++ 2010
Redistributable Package (x86). If prompted to install, select
Install. If the redistributable is already installed select Repair.
Once installed, the ME ActiveX control can be found under
Objects | ActiveX Control... in FactoryTalk View Studio.
WIN-911 Version 7 Install & Quick Start DOC 01/16 1. Introduction • 13
The WIN-911 Feature Upgrade Installation
Installing Mobile-911
Mobile-911 requires Microsoft Framework .NET 4.0. If
installed, it can be found in Add or Remove Programs. If .NET
4.0 Framework is not installed, Mobile-911 will direct you to
the install. The Mobile-911 server also requires Internet
Information Services if the Mobile View Server option is
selected to be installed.
The Mobile-911 Server can be installed either on the same
machine as WIN-911 or another machine with a networked
connection to the WIN-911 computer. The Mobile-911 Server
machine must have access to the internet. Setup instructions can
be accessed electronically after the Mobile-911 installation is
complete.
Server setup instructions can also be found on our website:
www.win911.com under Support | Knowledgebase.
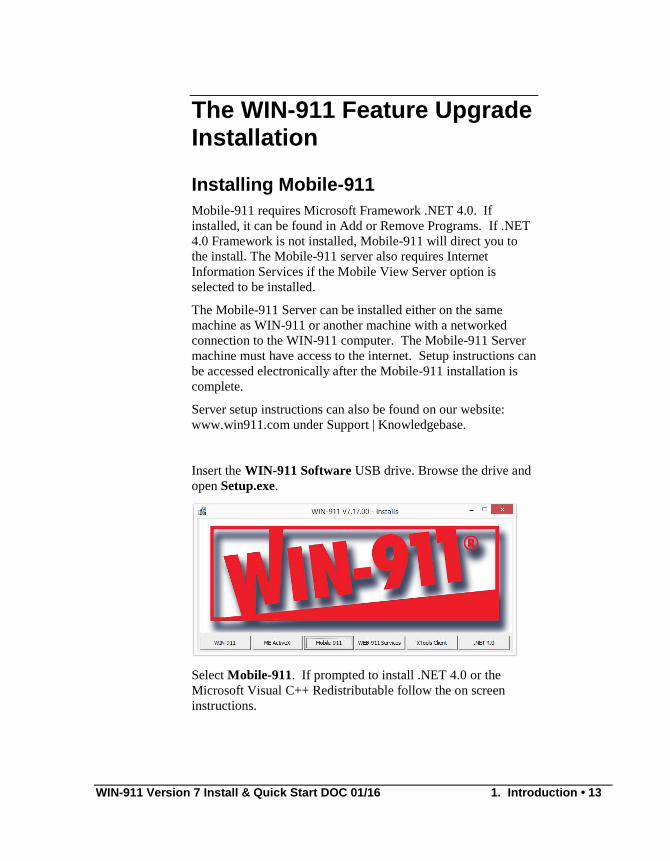
Insert the WIN-911 Software USB drive. Browse the drive and
open Setup.exe.
Select Mobile-911. If prompted to install .NET 4.0 or the
Microsoft Visual C++ Redistributable follow the on screen
instructions.
14 • 1. Introduction WIN-911 Version 7 Install & Quick Start DOC 01/16
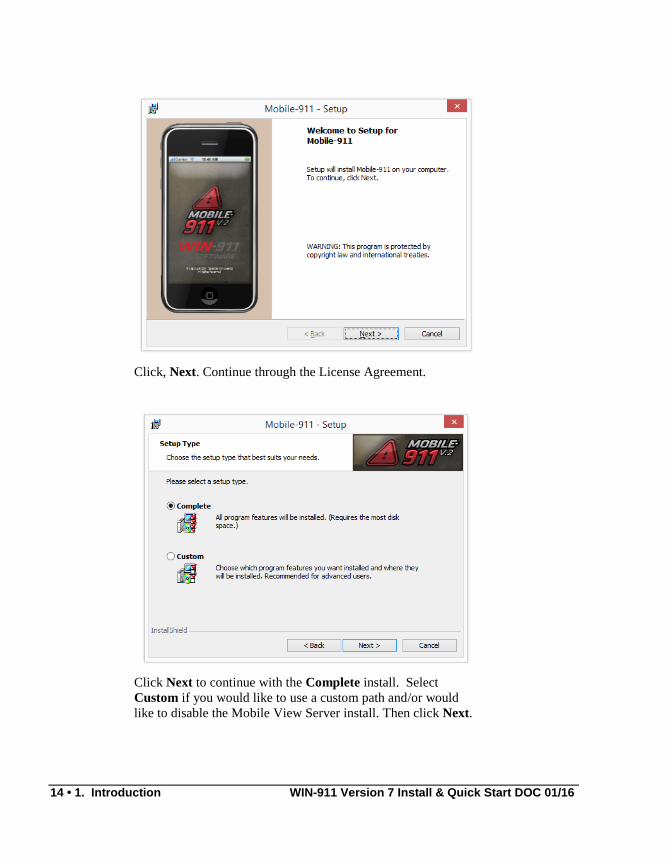
Click, Next. Continue through the License Agreement.
Click Next to continue with the Complete install. Select
Custom if you would like to use a custom path and/or would
like to disable the Mobile View Server install. Then click Next.
WIN-911 Version 7 Install & Quick Start DOC 01/16 1. Introduction • 15
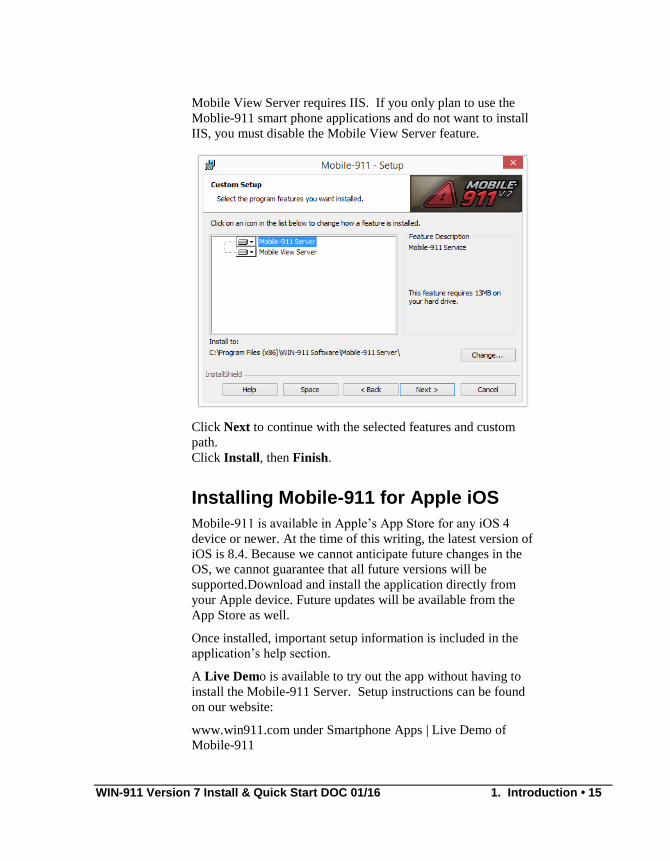
Mobile View Server requires IIS. If you only plan to use the
Moblie-911 smart phone applications and do not want to install
IIS, you must disable the Mobile View Server feature.
Click Next to continue with the selected features and custom
path.
Click Install, then Finish.
Installing Mobile-911 for Apple iOS
Mobile-911 is available in Apple’s App Store for any iOS 4
device or newer. At the time of this writing, the latest version of
iOS is 8.4. Because we cannot anticipate future changes in the
OS, we cannot guarantee that all future versions will be
supported.Download and install the application directly from
your Apple device. Future updates will be available from the
App Store as well.
Once installed, important setup information is included in the
application’s help section.
A Live Demo is available to try out the app without having to
install the Mobile-911 Server. Setup instructions can be found
on our website:
www.win911.com under Smartphone Apps | Live Demo of
Mobile-911
16 • 1. Introduction WIN-911 Version 7 Install & Quick Start DOC 01/16
Installing Mobile-911 for Android
Mobile-911for Android is available for Android 2.2 and newer.
At the time of this writing, the latest version of Android is 5.1.
Because we cannot anticipate future changes in the OS, we
cannot guarantee that all future versions will be supported.
Mobile-911 requires the Google Play and a touch screen.
Mobile-911 is available in the Google Play. Future versions will
be released through Play as well.
Once installed, important setup information is included in the
application’s help section.
A Live Demo is available to try out the app without having to
install the Mobile-911 Server. Setup instructions can be found
on our website:
www.win911.com under Smartphone Apps | Live Demo of
Mobile-911
Installing Mobile-911 for BlackBerry
Mobile-911 is available on BlackBerry’s App World for
BlackBerry OS 5, 6 or 7. Download and install the application
directly from your BlackBerry device. Future updates will be
available from BlackBerry's App World as well.
Once installed, important setup information is included in the
application’s help section.
A Live Demo is available to try out the app without having to
install the Mobile-911 Server. Setup instructions can be found
on our website:
www.win911.com under Smartphone Apps | Live Demo of
Mobile-911
WIN-911 Version 7 Install & Quick Start DOC 01/16 1. Introduction • 17
Installing WEB-911 Services
WEB-911 Services requires WIN-911 Version 7.14.00 or newer
to be installed first. It also requires Internet Information
Services (IIS) and Microsoft Framework .NET 4.0.
IIS must be installed prior to installing WEB-911 Services. IIS
can be found in Administrative Tools. If IIS is not installed, run
the IIS install from Add or Remove Programs -> Add/Remove
Windows Components. The operating system install disk is
required to complete the IIS installation.
Microsoft Framework .NET 4.0, if installed, can be found in
Add or Remove Programs. If .NET 4.0 is not installed, WEB-
911 Services will install it for you.
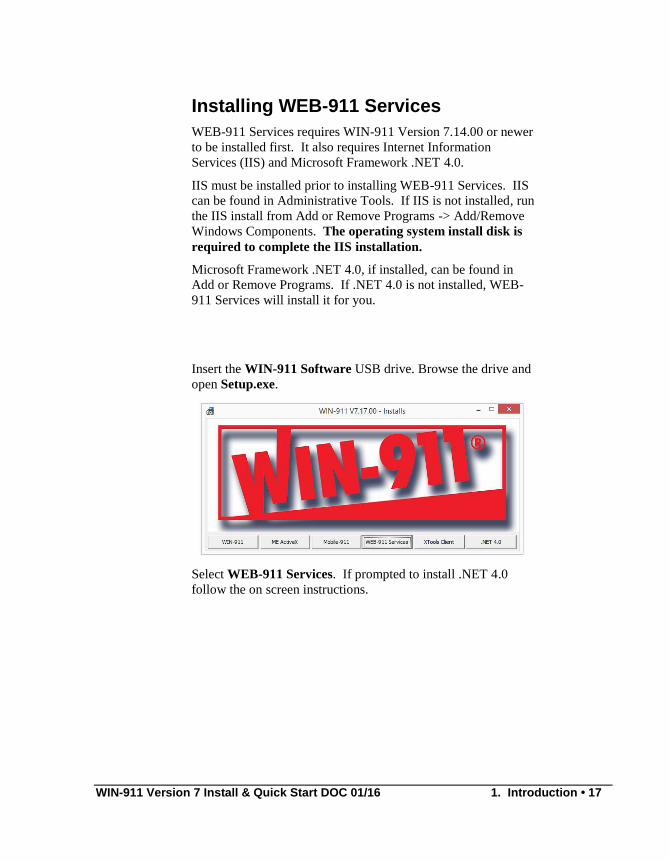
Insert the WIN-911 Software USB drive. Browse the drive and
open Setup.exe.
Select WEB-911 Services. If prompted to install .NET 4.0
follow the on screen instructions.

18 • 1. Introduction WIN-911 Version 7 Install & Quick Start DOC 01/16
Click, Next. Continue through the License Agreement.
Click Next to continue with the default path. Select Change…
if you would like to use a custom path, and then click Next.
Click Install, then Finish.
Note: WEB-911 Services will run in a 30-day DEMO period
from the time it is installed. After the WEB-911 Service
DEMO period expires WEB-911 Services must be licensed.
See ‘WIN-911 Feature Upgrade’ for details.
WIN-911 Version 7 Install & Quick Start DOC 01/16 1. Introduction • 19
Installing WEB-911 XTools Client
The WEB-911 XTools Client requires Microsoft Framework
.NET 4.0. If installed, it can be found in Add or Remove
Programs. If .NET 4.0 Framework is not installed, WEB-911
XTools Client will direct you to the install
The WEB-911 XTools Client can be installed on any machine
on the network. The XTools controls can be inserted into any
ActiveX container.
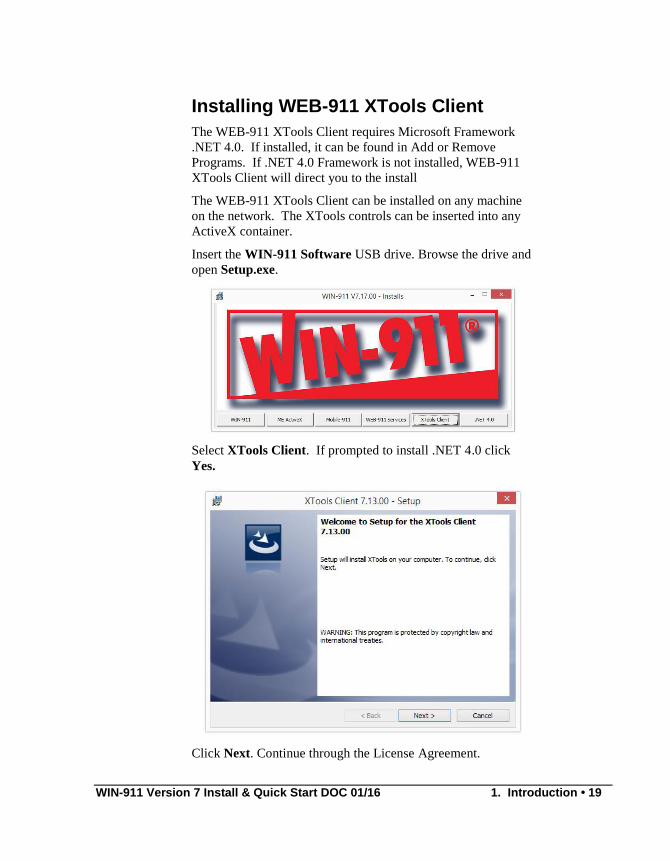
Insert the WIN-911 Software USB drive. Browse the drive and
open Setup.exe.
Select XTools Client. If prompted to install .NET 4.0 click
Yes.
Click Next. Continue through the License Agreement.
20 • 1. Introduction WIN-911 Version 7 Install & Quick Start DOC 01/16
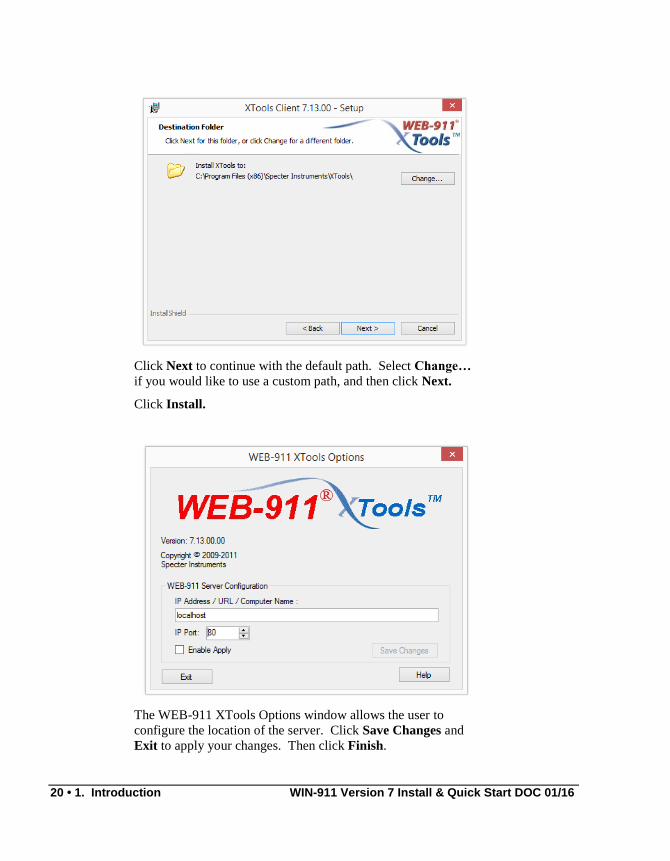
Click Next to continue with the default path. Select Change…
if you would like to use a custom path, and then click Next.
Click Install.
The WEB-911 XTools Options window allows the user to
configure the location of the server. Click Save Changes and
Exit to apply your changes. Then click Finish.
WIN-911 Version 7 Install & Quick Start DOC 01/16 1. Introduction • 21
Note: WEB-911 Services will run in a 30-day DEMO period
from the time it is installed. After the WEB-911 Service
DEMO period expires WEB-911 Services must be licensed.
See ‘WIN-911 Feature Upgrade’ for details.
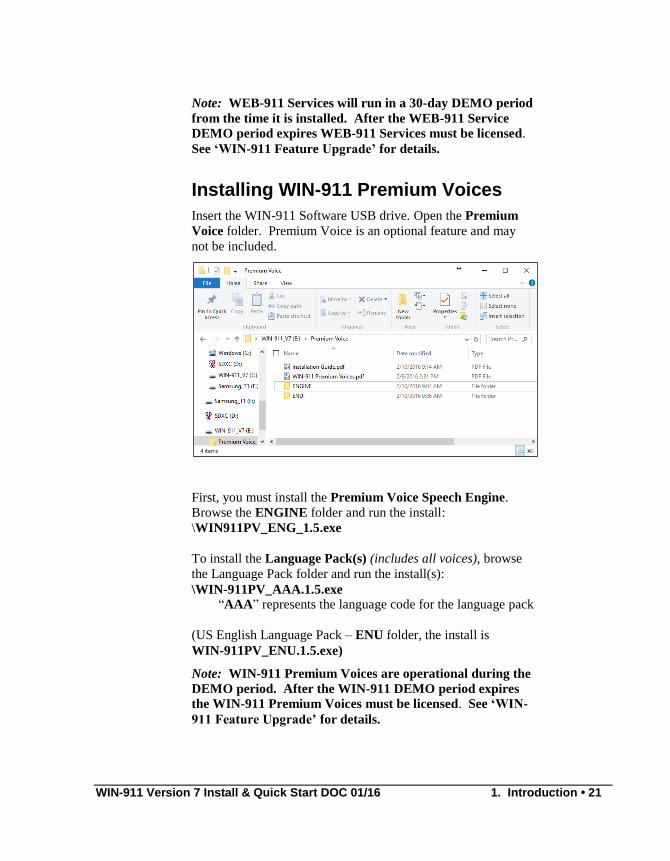
Installing WIN-911 Premium Voices
Insert the WIN-911 Software USB drive. Open the Premium
Voice folder. Premium Voice is an optional feature and may
not be included.
First, you must install the Premium Voice Speech Engine.
Browse the ENGINE folder and run the install:
\WIN911PV_ENG_1.5.exe
To install the Language Pack(s) (includes all voices), browse
the Language Pack folder and run the install(s):
\WIN-911PV_AAA.1.5.exe
“AAA” represents the language code for the language pack
(US English Language Pack – ENU folder, the install is
WIN-911PV_ENU.1.5.exe)
Note: WIN-911 Premium Voices are operational during the
DEMO period. After the WIN-911 DEMO period expires
the WIN-911 Premium Voices must be licensed. See ‘WIN-
911 Feature Upgrade’ for details.
22 • 1. Introduction WIN-911 Version 7 Install & Quick Start DOC 01/16
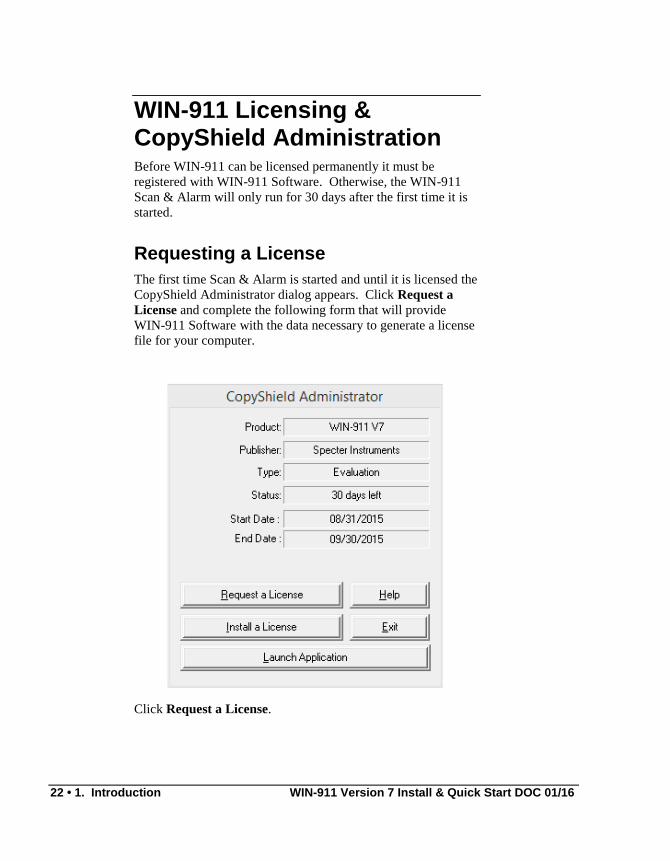
WIN-911 Licensing & CopyShield Administration Before WIN-911 can be licensed permanently it must be
registered with WIN-911 Software. Otherwise, the WIN-911
Scan & Alarm will only run for 30 days after the first time it is
started.
Requesting a License
The first time Scan & Alarm is started and until it is licensed the
CopyShield Administrator dialog appears. Click Request a
License and complete the following form that will provide
WIN-911 Software with the data necessary to generate a license
file for your computer.
Click Request a License.
WIN-911 Version 7 Install & Quick Start DOC 01/16 1. Introduction • 23
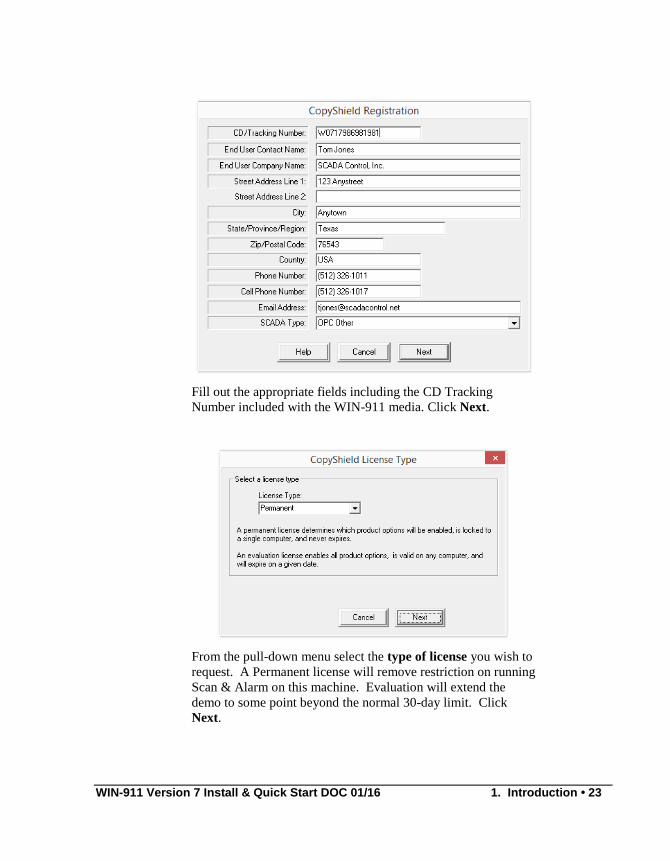
Fill out the appropriate fields including the CD Tracking
Number included with the WIN-911 media. Click Next.
From the pull-down menu select the type of license you wish to
request. A Permanent license will remove restriction on running
Scan & Alarm on this machine. Evaluation will extend the
demo to some point beyond the normal 30-day limit. Click
Next.
24 • 1. Introduction WIN-911 Version 7 Install & Quick Start DOC 01/16
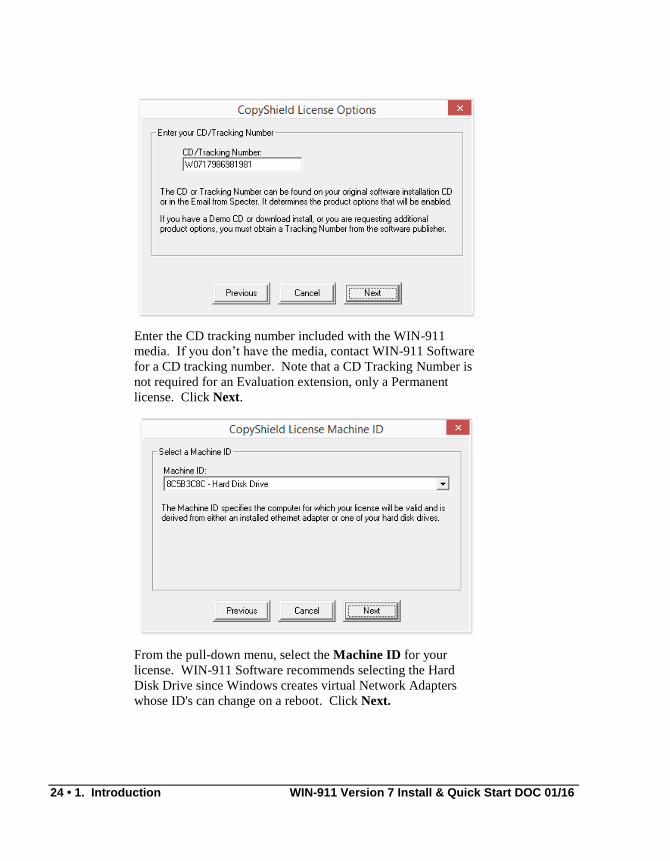
Enter the CD tracking number included with the WIN-911
media. If you don’t have the media, contact WIN-911 Software
for a CD tracking number. Note that a CD Tracking Number is
not required for an Evaluation extension, only a Permanent
license. Click Next.
From the pull-down menu, select the Machine ID for your
license. WIN-911 Software recommends selecting the Hard
Disk Drive since Windows creates virtual Network Adapters
whose ID's can change on a reboot. Click Next.
WIN-911 Version 7 Install & Quick Start DOC 01/16 1. Introduction • 25
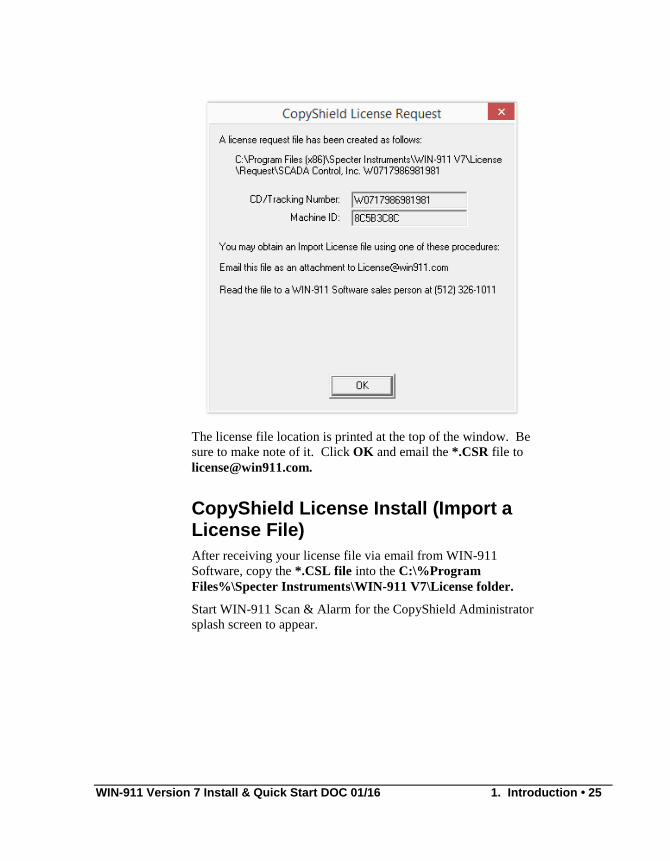
The license file location is printed at the top of the window. Be
sure to make note of it. Click OK and email the *.CSR file to
CopyShield License Install (Import a License File)
After receiving your license file via email from WIN-911
Software, copy the *.CSL file into the C:\%Program
Files%\Specter Instruments\WIN-911 V7\License folder.
Start WIN-911 Scan & Alarm for the CopyShield Administrator
splash screen to appear.

26 • 1. Introduction WIN-911 Version 7 Install & Quick Start DOC 01/16
From the CopyShield Administrator click Install a License.
Click Import a License File.
WIN-911 Version 7 Install & Quick Start DOC 01/16 1. Introduction • 27
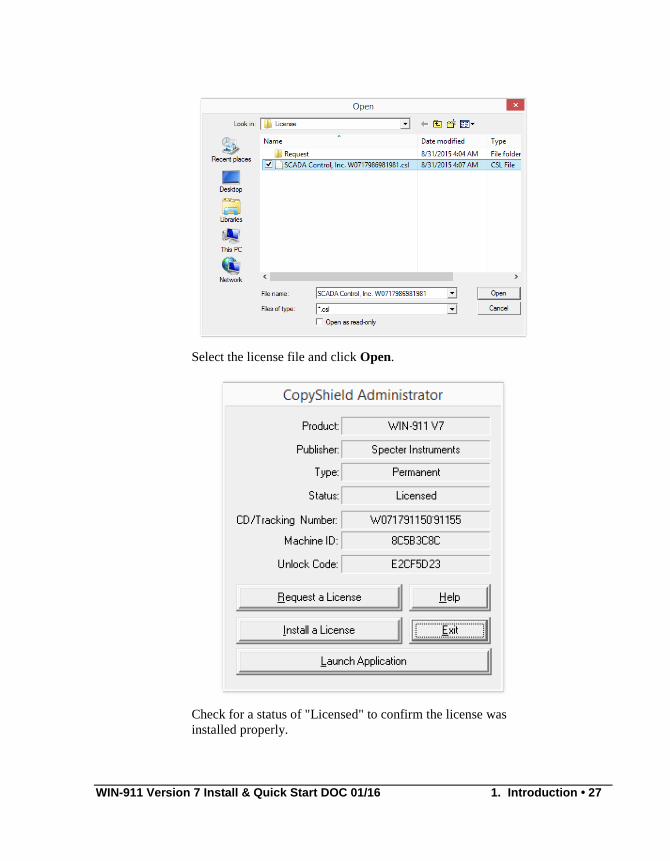
Select the license file and click Open.
Check for a status of "Licensed" to confirm the license was
installed properly.
28 • 1. Introduction WIN-911 Version 7 Install & Quick Start DOC 01/16
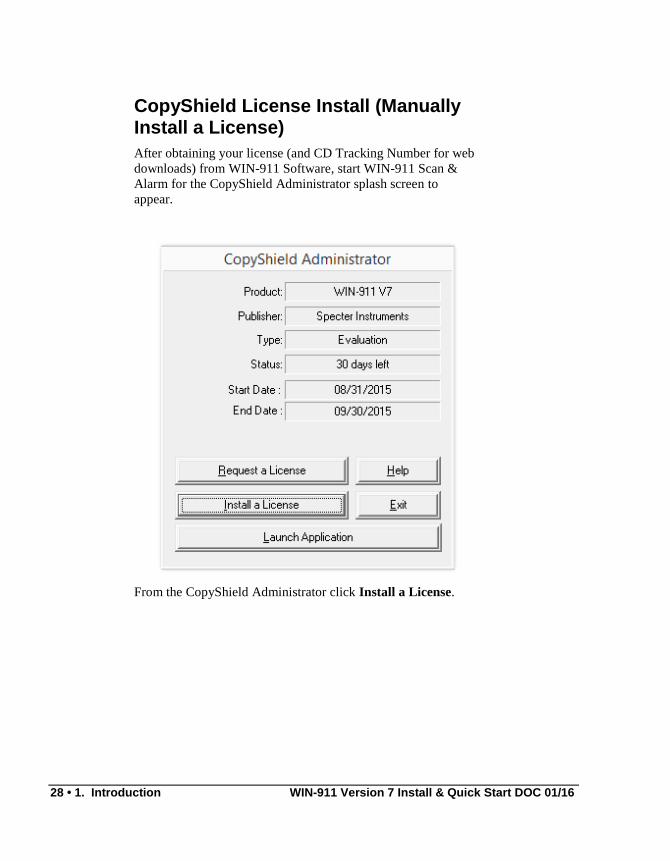
CopyShield License Install (Manually Install a License)
After obtaining your license (and CD Tracking Number for web
downloads) from WIN-911 Software, start WIN-911 Scan &
Alarm for the CopyShield Administrator splash screen to
appear.
From the CopyShield Administrator click Install a License.
WIN-911 Version 7 Install & Quick Start DOC 01/16 1. Introduction • 29
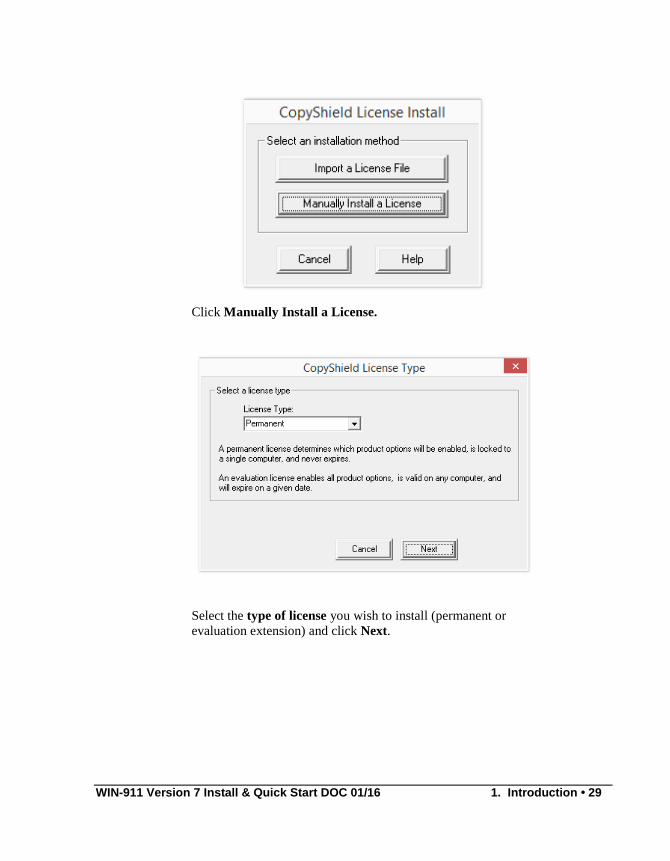
Click Manually Install a License.
Select the type of license you wish to install (permanent or
evaluation extension) and click Next.
30 • 1. Introduction WIN-911 Version 7 Install & Quick Start DOC 01/16
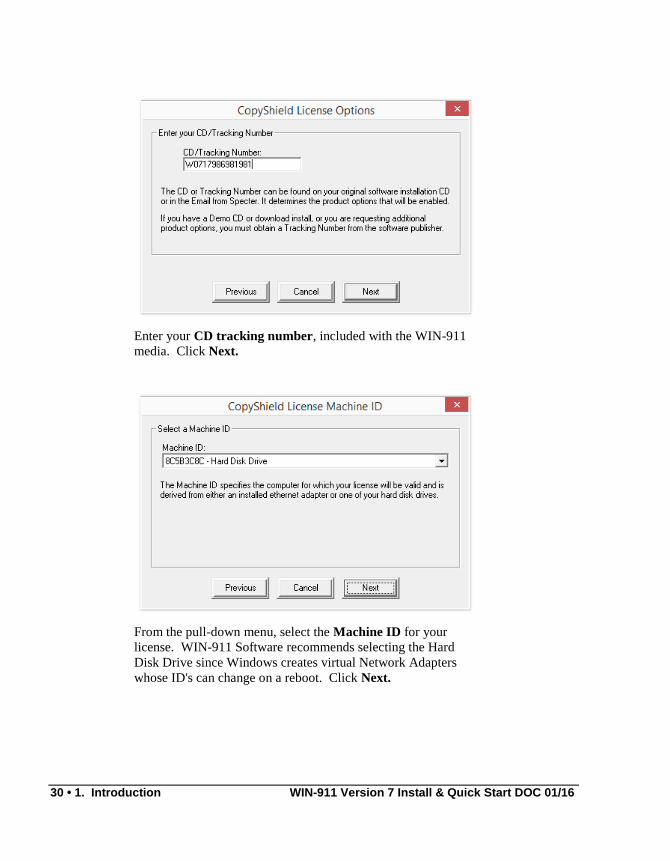
Enter your CD tracking number, included with the WIN-911
media. Click Next.
From the pull-down menu, select the Machine ID for your
license. WIN-911 Software recommends selecting the Hard
Disk Drive since Windows creates virtual Network Adapters
whose ID's can change on a reboot. Click Next.
WIN-911 Version 7 Install & Quick Start DOC 01/16 1. Introduction • 31
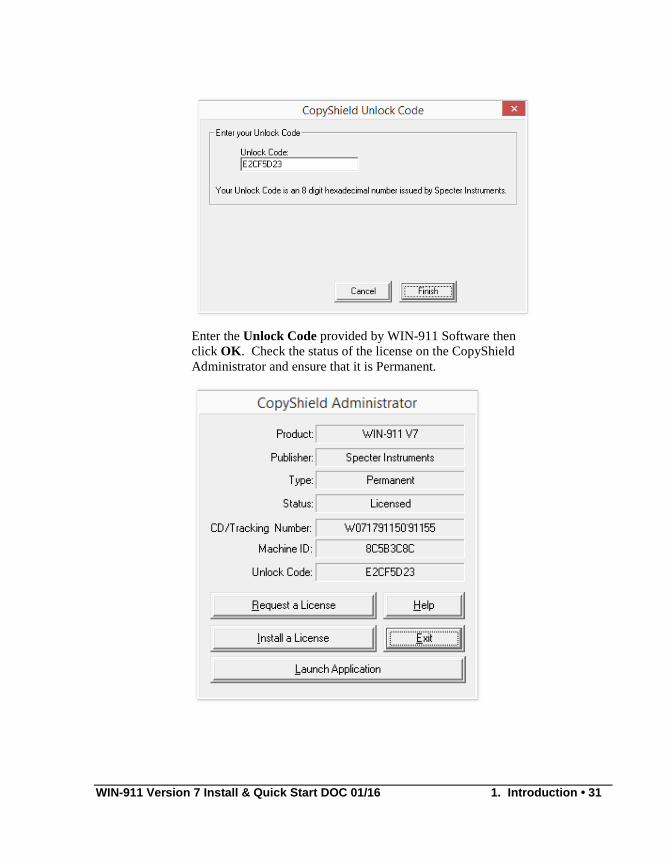
Enter the Unlock Code provided by WIN-911 Software then
click OK. Check the status of the license on the CopyShield
Administrator and ensure that it is Permanent.
32 • 1. Introduction WIN-911 Version 7 Install & Quick Start DOC 01/16
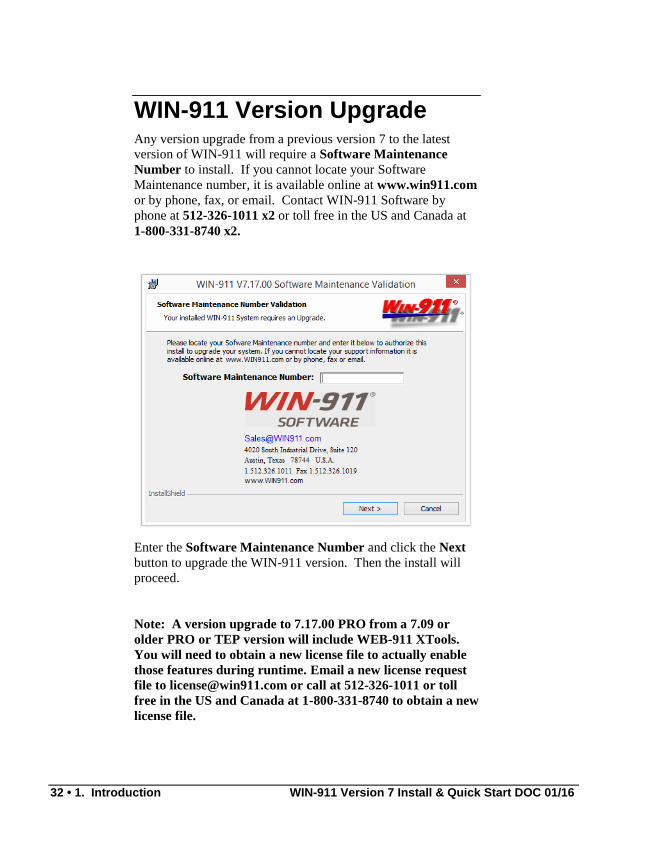
WIN-911 Version Upgrade Any version upgrade from a previous version 7 to the latest
version of WIN-911 will require a Software Maintenance
Number to install. If you cannot locate your Software
Maintenance number, it is available online at www.win911.com
or by phone, fax, or email. Contact WIN-911 Software by
phone at 512-326-1011 x2 or toll free in the US and Canada at
1-800-331-8740 x2.
Enter the Software Maintenance Number and click the Next
button to upgrade the WIN-911 version. Then the install will
proceed.
Note: A version upgrade to 7.17.00 PRO from a 7.09 or
older PRO or TEP version will include WEB-911 XTools.
You will need to obtain a new license file to actually enable
those features during runtime. Email a new license request
file to [email protected] or call at 512-326-1011 or toll
free in the US and Canada at 1-800-331-8740 to obtain a new
license file.
WIN-911 Version 7 Install & Quick Start DOC 01/16 1. Introduction • 33
WIN-911 Feature Upgrade Once your system has been licensed it can be upgraded to
support more features (perhaps by adding Telephony, Premium
Voice, 2-way SMS Messaging, WEB-911 XTools or even
Mobile-911) with a newer license. Start Scan & Alarm with
the Shift or Ctrl key depressed. This will cause the CopyShield
Administrator to appear. Contact WIN-911 Software Sales
Department at 512-326-1011 x2 or toll free in the US and
Canada at 1-800-331-8740 x2 with the original CD Tracking
Number (and Purchase Order number or Credit Card) to
retrieve a subsequent license to enable more features for your
WIN-911 system. The CD Tracking Number is viewable in
the WIN-911 Configurator | Help | About.
Note: A version upgrade to 7.17.00 PRO from a 7.09 or
older PRO or TEP version will include WEB-911 XTools.
You will need to obtain a new license file to actually enable
those features during runtime. Email a new license request
file to [email protected] or call at 512-326-1011 or toll
free in the US and Canada at 1-800-331-8740 to obtain a new
license file.
34 • 1. Introduction WIN-911 Version 7 Install & Quick Start DOC 01/16
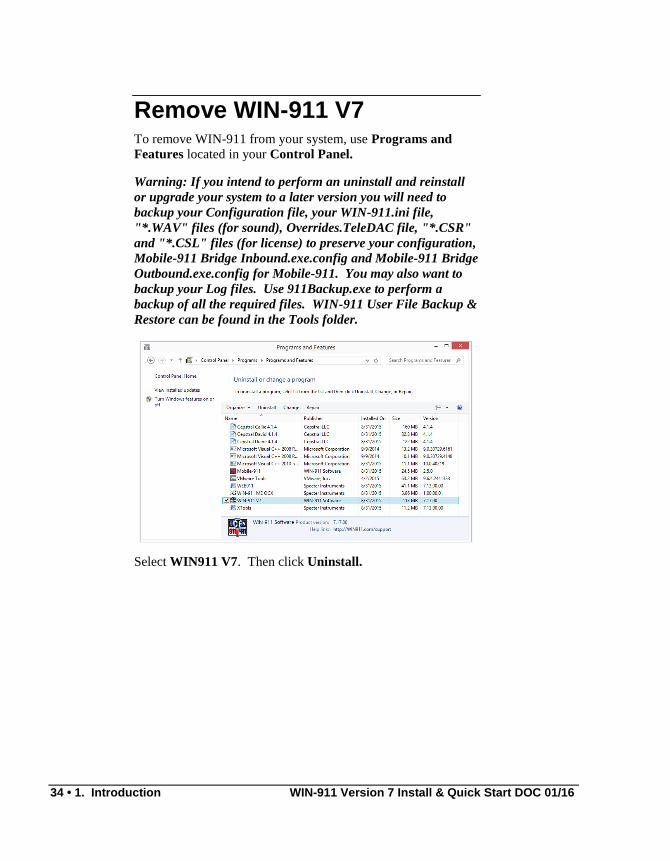
Remove WIN-911 V7 To remove WIN-911 from your system, use Programs and
Features located in your Control Panel.
Warning: If you intend to perform an uninstall and reinstall
or upgrade your system to a later version you will need to
backup your Configuration file, your WIN-911.ini file,
"*.WAV" files (for sound), Overrides.TeleDAC file, "*.CSR"
and "*.CSL" files (for license) to preserve your configuration,
Mobile-911 Bridge Inbound.exe.config and Mobile-911 Bridge
Outbound.exe.config for Mobile-911. You may also want to
backup your Log files. Use 911Backup.exe to perform a
backup of all the required files. WIN-911 User File Backup &
Restore can be found in the Tools folder.
Select WIN911 V7. Then click Uninstall.
WIN-911 Version 7 Install & Quick Start DOC 01/16 1. Introduction • 35
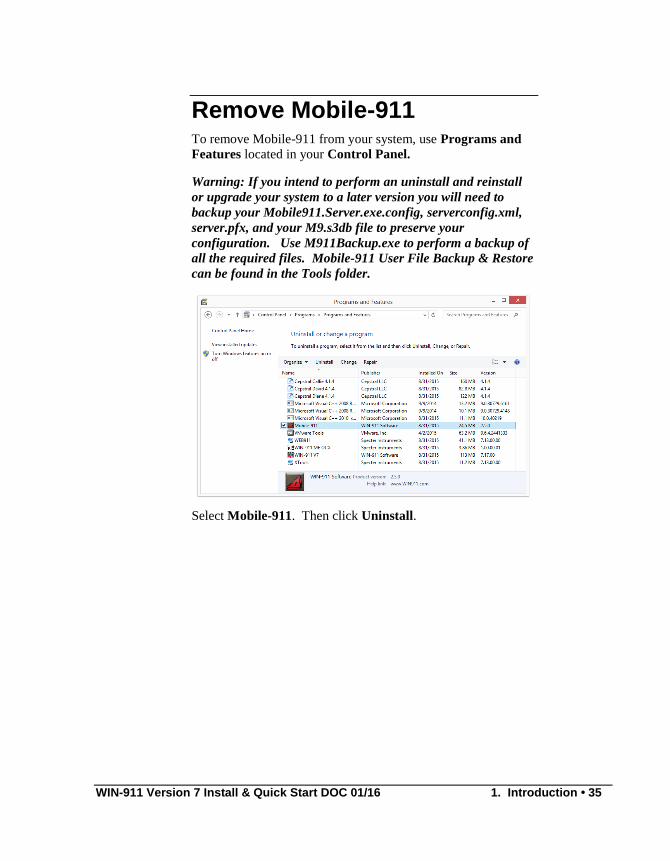
Remove Mobile-911 To remove Mobile-911 from your system, use Programs and
Features located in your Control Panel.
Warning: If you intend to perform an uninstall and reinstall
or upgrade your system to a later version you will need to
backup your Mobile911.Server.exe.config, serverconfig.xml,
server.pfx, and your M9.s3db file to preserve your
configuration. Use M911Backup.exe to perform a backup of
all the required files. Mobile-911 User File Backup & Restore
can be found in the Tools folder.
Select Mobile-911. Then click Uninstall.
36 • 1. Introduction WIN-911 Version 7 Install & Quick Start DOC 01/16
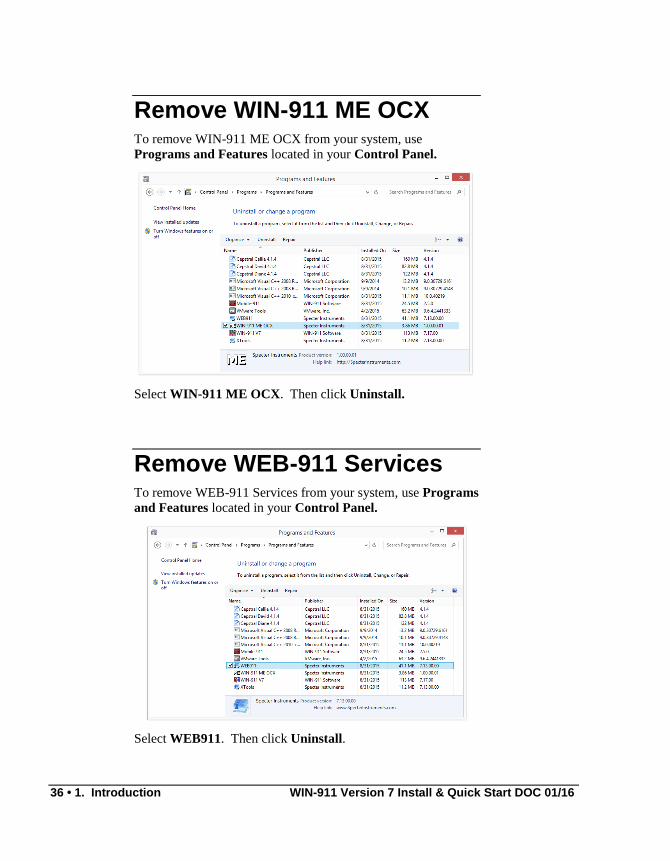
Remove WIN-911 ME OCX To remove WIN-911 ME OCX from your system, use
Programs and Features located in your Control Panel.
Select WIN-911 ME OCX. Then click Uninstall.
Remove WEB-911 Services To remove WEB-911 Services from your system, use Programs
and Features located in your Control Panel.
Select WEB911. Then click Uninstall.
WIN-911 Version 7 Install & Quick Start DOC 01/16 1. Introduction • 37
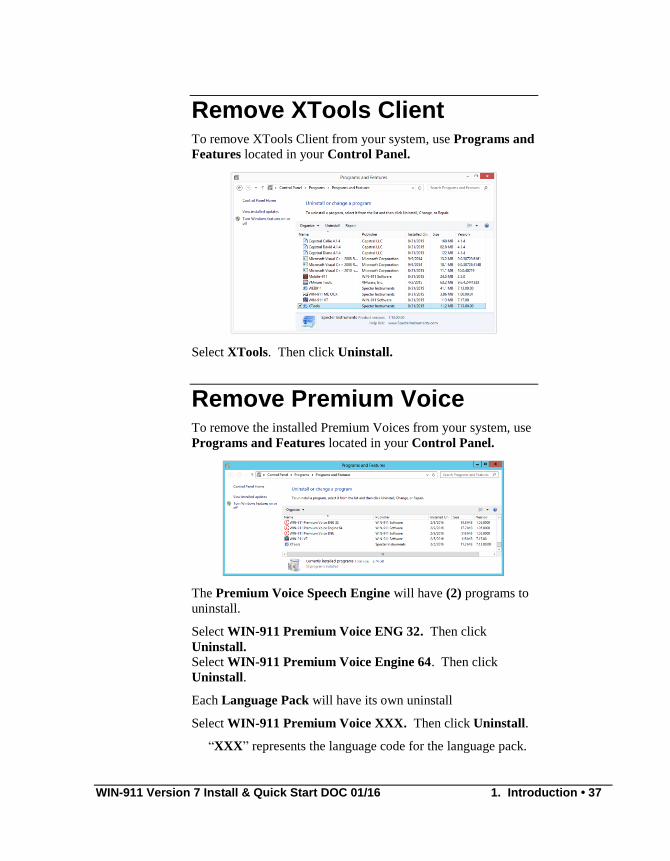
Remove XTools Client To remove XTools Client from your system, use Programs and
Features located in your Control Panel.
Select XTools. Then click Uninstall.
Remove Premium Voice To remove the installed Premium Voices from your system, use
Programs and Features located in your Control Panel.
The Premium Voice Speech Engine will have (2) programs to
uninstall.
Select WIN-911 Premium Voice ENG 32. Then click
Uninstall. Select WIN-911 Premium Voice Engine 64. Then click
Uninstall.
Each Language Pack will have its own uninstall
Select WIN-911 Premium Voice XXX. Then click Uninstall.
“XXX” represents the language code for the language pack.

38 • 1. Introduction WIN-911 Version 7 Install & Quick Start DOC 01/16

WIN-911 Version 7 Install & Quick Start DOC 01/16 2. Overview: A Must Read Chapter! • 39
2. Overview: A Must Read Chapter!
WIN-911 Architecture
What is the Design Advantage?
WIN-911 is primarily composed of three applications that form
the operational nucleus: 1) WIN-911 Configurator, 2) Scan &
Alarm, and 3) Alarm Log Manager. Scan & Alarm (also known
as TeleDAC.exe) can be linked to many dynamically linked
libraries (*.DLL), depending on the requirements of your
configuration.
One of the most powerful features of the WIN-911's design is its
use of Microsoft standards. The heart of the system is a database file. The configurations are built with the standard Microsoft Access Database (Office 97) file format: (*.MDB).
40 • 2. Overview: A Must Read Chapter! WIN-911 Version 7 Install & Quick Start DOC 01/16
The WIN-911 System Components
Applications
WIN-911 is comprised of three applications used to configure,
view history and run Scan and Alarm.
The WIN-911 Configurator is a comprehensive, yet easy to
use tool which will allow the user to develop WIN-911
applications with confidence and efficiency. The result of the
configuration process is a configuration Microsoft database
(*.MDB) and initialization file: WIN-911.ini.
The Scan & Alarm (TeleDAC.exe) module is the engine that
connects the WIN-911 functions with the outside world. It is the
OPC/DDE/Direct Connect Client connection that performs
logical functions such as: comparing current values with alarm
limits or conditions, keeping track of acknowledgments, and
updating the alarm history log files. It will read the *.MDB and
WIN-911.ini file and automatically start or stop the associated
modules which are required for the application. In summary,
Scan & Alarm:
1. Selects the modules required for the run-time
application
2. Automatically starts each module selected in the proper
sequence
3. Attaches to all OPC, DDE, and Direct Connect Servers
4. Bypasses and restores data points from the active
callout list
5. Overrides and restores names from the contact lists
6. Shows and hides the Status Display for startup
summary information
7. Monitors data points for alarm conditions
8. Automatically shuts down each module

WIN-911 Version 7 Install & Quick Start DOC 01/16 2. Overview: A Must Read Chapter! • 41
The Scan & Alarm system can be started by the Run program,
double clicking on the TeleDAC.exe, Restart.exe, or using the
Windows Startup program or a third party's startup program. To
shutdown Scan & Alarm, right-click on the thumbnail icon on
the desktop in the system tray and left-click Exit WIN-911 or
run the Shutdown.exe applet. A confirmation-of-intent will
appear requiring the operator to select Exit before the program
will shutdown.
The Alarm Log Manager can display archived alarming data,
sort the data by any column and append comments to individual
events. To use this application, WIN-911 must be configured
with the Monthly MDB log file format.
Service
WIN-911 provides a service wrapper that allows Scan & Alarm
to emulate a Window’s system service.
The 911SRV is a service module that will transform Scan &
Alarm from an application into a service. This option can be
selected from within the WIN-911 Configurator in the Global
Options, Initialization tab.
Modules
WIN-911 is comprised of the following modules which run
independently while working seamlessly together:
The WIN911 Announcer is optional and is only used when
the user has selected the local sound option. A computer sound
card is required for this option and should not be confused with
the telephony card that is required for the voice functions.
The WIN911 Alarm Monitor is optional and is only used
when the user wishes to see a visual display of either the entire
history of alarms and errors, or just a summary of current
alarms. It is also required if an operator needs the capability to
acknowledge alarms at the computer and send manual email,
SMS and pages.
The WIN911 Alarm Printer is optional and is only required
when the user has selected the alarm printer option. Both a
Local LPT port and a dedicated printer is required.

42 • 2. Overview: A Must Read Chapter! WIN-911 Version 7 Install & Quick Start DOC 01/16
Two modules, WIN911 Dialout Pager and WIN911 Local Pager, are optional and started when the user configures pager
connections. Both communicate with the Scan & Alarm
module and manage all paging activity. This includes
managing pager connections and their schedules.
WIN911 Dialout Pager processes alphanumeric and/or numeric
paging that requires a commercial paging service.
WIN911 Local Pager processes alphanumeric and/or numeric
paging that connects directly to a paging transmitter via a serial
COM port and does not require a paging service interface.
Two modules, WIN911 Voice and WIN911 TAPI, are
optional and are only used when voice connections (Voice,
Voice Pager, and Dialout Announcer or 411 Reports) are
configured. Both communicate with the Scan & Alarm module
and manage all voice dial-out, dial-in, and call progress duties
such as assembling the voice messages and recognizing touch-
tone security codes.
The WIN911 SMS is optional and only required when SMS
connections have been assigned or SMS 411-Reports have been
created. It communicates with the Scan & Alarm module and
manages communications to cell devices via a cellular modem.
The WIN911 E Mail is optional and is only required when
email connections have been assigned to phonebook entries that
have group assignments. It communicates with the Scan &
Alarm module and manages communications to the
SMTP/POP3 server.
The Mobile-911 is optional and is only required when Mobile-
911 connections have been assigned to phonebook entries.
This module communicates with the Mobile-911 Server to send
messages to and receive messages from applications running on
smart devices such as cell phones and tablets. The Mobile-911
Server also sends and receives messages to and from
MobileView.
The WIN911 Alarm Logger is optional. It is only required
when the user wishes to archive an alarm group's events on a
daily/monthly log of any alarm activity, error messages, phone
and pager activity, and diagnostic logging.
WIN-911 Version 7 Install & Quick Start DOC 01/16 2. Overview: A Must Read Chapter! • 43
The WIN911 IP is optional and is only required when the user
has selected the IP option. Either a RAS connection or an IP
Address must be defined.
WIN-911 Peripherals
WIN-911 Applets
WIN-911 Version 7 includes six small application programs
(applets) that interact with the main Scan & Alarm executable to
modify the program on the fly or shut it down altogether. These
can be used with scripting to better control WIN-911 from a
SCADA application. Previous versions of WIN-911 required a
shutdown and restart for modifications to be applied, resulting
in a window of uncovered alarm monitoring.
The Standby applet (yellow icon) acts in a global manner to
disable all WIN-911 monitored data points from active callout
consideration. This modifies the program operation without
having to shutdown Scan & Alarm to modify the configuration.
Hence, no loss of alarm coverage.
Warning: This applet can be configured not to require a user
Ack code for execution. If you do not wish to use this function
please delete it to avoid unauthorized manipulation of the alarm
system.
Warning: If 911SRV.exe Service wrapper is controlling
TeleDAC.exe, “Interact with Desktop” must be enabled.
The Activate applet (green icon) restores WIN-911 from
Standby mode. See the Standby applet.
Warning: This applet can be configured not to require a user
Ack code for execution. If you do not wish to use this function
please delete it to avoid unauthorized manipulation of the alarm
system.
Warning: If 911SRV.exe Service wrapper is controlling
TeleDAC.exe, “Interact with Desktop” must be enabled.
44 • 2. Overview: A Must Read Chapter! WIN-911 Version 7 Install & Quick Start DOC 01/16
The Bypass applet (green and yellow icon) suppresses
selected alarms from being notified. This modifies the program
operation without having to shutdown Scan & Alarm to modify
the configuration. Hence, no loss of alarm coverage.
Warning: This applet can be configured not to require a user
Ack code for execution. If you do not wish to use this function
please delete it to avoid unauthorized manipulation of the alarm
system.
Warning: If 911SRV.exe Service wrapper is controlling
TeleDAC.exe, “Interact with Desktop” must be enabled.
The Override applet (blue and yellow icon) suppresses
selected individuals in a group phone list from being called in
the event of an alarm. This modifies the program operation
without having to shutdown Scan & Alarm to modify the
configuration. Hence, no loss of alarm coverage.
Warning: This applet can be configured not to require a user
Ack code for execution. If you do not wish to use this function
please delete it to avoid unauthorized manipulation of the alarm
system.
Warning: If 911SRV.exe Service wrapper is controlling
TeleDAC.exe, “Interact with Desktop” must be enabled.
The Shutdown applet (red icon) allows other applications to
shutdown Scan & Alarm so that start/stop operations can be
completely automated. By default Scan & Alarm requires
confirmation before it will perform a shutdown, but this applet
shuts down Scan & Alarm in a single step.
Warning: This applet can be configured not to require a user
Ack code for execution. If you do not wish to use this function
please delete it to avoid unauthorized manipulation of the alarm
system.
Warning: If 911SRV.exe Service wrapper is controlling
TeleDAC.exe, “Interact with Desktop” must be enabled.
WIN-911 Version 7 Install & Quick Start DOC 01/16 2. Overview: A Must Read Chapter! • 45
The Restart applet (red and green icon) allows the user to
silently shutdown and restart WIN-911 Scan & Alarm through
the execution of a single applet. This module can be used to
apply modifications made to the configuration to take affect.
The shutdown and restart (or start if Scan & Alarm is not
running during execution) is "silent,” meaning that it occurs
with minimal GUI activity. The only events that will be visible
will occur as a result of errors during the restart phase.
Otherwise, the shutdown and restart cycle will be invisible to
the user.
Restart also has the ability to start Scan and Alarm with a
particular configuration file. This can be done by running a
command line for Restart.exe. For example, “/OPC
Demo.mdb,” leaving out the quotations.
Note: If Scan & Alarm is controlled by the 911SRV Service
Wrapper, the Restart applet will only function in XP & Server
2003. “Allow Non-Admin Service Restarts” in the Global
Options | Initialization tab must be checked for a non-admin to
restart the Service.
Warning: This applet can be configured not to require a user
Ack code for execution. If you do not wish to use this function
please delete it to avoid unauthorized manipulation of the alarm
system.
WIN-911 Tools
WIN-911 Version 7 includes four applications that make
managing the WIN-911 system easy and intuitive.
The Product Components Version is a valuable trouble-
shooting device for determining the version of every WIN-911
Software component and support software on the system. This
program is particularly useful when updating a system from a
previous version. If different versions of the components are
co-mingled WIN-911 may not run properly.
The DDE Client is a tool for trouble shooting DDE servers. It
can connect to a server, read and write a DDE value. This tool
can verify syntax, display current values, and determine value
format.

46 • 2. Overview: A Must Read Chapter! WIN-911 Version 7 Install & Quick Start DOC 01/16
Backing up or restoring your WIN-911 system has never been
easier with the WIN-911 User File Backup/Restore tool.
With a click of the mouse all of the files needed to preserve
your configuration for backing up and/or reinstalling your
WIN-911 software are stored in the default location:
XP & Server 2003
C:\Documents and Settings\User name\Local Settings\Temp\911
Windows 7 & Server 2008
C:\Users\User name\AppData\Local\Temp\911
The same program can both backup and restore user-generated
files with the two icons provided.
The 911Heath verifies functionality of several WIN-911
components. The modules TeleDAC (Scan & Alarm), Mobile-
911, WIN911 SMS, and WIN911 IP each writes a status
message to the registry. 911Health reads the registry message
and serves it to an OPC Server that the user configures. These
status messages can be used to alert users and other programs
of problems WIN-911 may experiencing.
TeleDACisActive is a console app used for programmatically
reading the Active/Standby state of WIN-911. This applet is
particularly useful when writing scripts to manage WIN-911
redundancy. When WIN-911 is deployed in a redundant
configuration the primary WIN-911 will be running in "Active"
mode and the secondary WIN-911 machine will be running in
"Standby" mode. TeledacIsActive returns a Result Code of 1 or
0. When WIN-911 is Active this program will return a "1" and
when it is in Standby it will return a "0".
CustomCSV is a tool used to partially import large galaxies
from Wonderware System Platform/ArchestrA. This tool
allows you to list the object names the user would like imported
into WIN-911 without having to browse the whole ArchestrA
galaxy. This can dramatically speed up the importing
processes, especially in large galaxies. CustomCSV allows you
to drop in a list of objects that could have been copied from a
spreadsheet or word document. Then a .CSV file is created for
WIN-911 to use on import.
WIN-911 Version 7 Install & Quick Start DOC 01/16 2. Overview: A Must Read Chapter! • 47
WEB-911 XTools WEB-911 XTools includes six ActiveX controls that interact
with one or more WIN-911 systems to modify configurations on
the fly.
The XContacts control allows the user to edit Contact’s
names, access codes, acknowledge codes, and notifications.
This control has the option to save and apply the changes when
the user exits.
The XGroups control allows the user to add or delete Contacts
from a Group or change the Contacts order in the call-out list.
This control has the option to save and apply the changes when
the user exits.
The XSchedule control allows the user to modify a single
notification’s schedule or modify multiple notifications at one
time.
This control has the option to save and apply the changes when
the user exits.
The XActivate control allows the user to change Scan & Alarm
from Standby to Active mode.
The XStandby control allows the user to change Scan & Alarm
from Active to Standby mode
The XApply control allows the user to apply the changes made
by the other XTools. This allows for multiple edits to be made
in multiple XTools before a single apply is made.
48 • 2. Overview: A Must Read Chapter! WIN-911 Version 7 Install & Quick Start DOC 01/16
WIN-911 Premium Voices
WIN-911 Premium Voices provide a more natural sounding
voice as an alternative to the standard Microsoft choices. WIN-
911 Premium Voices can be added to any WIN-911 PRO/Basic
or Lite package. WIN-911 Premium Voice packages are
offered in 46 different languages (each language pack sold
separately).
Sound Card Selection WIN-911 is designed to support standard, commercially
available sound cards, which are made to support Microsoft
Windows XP, 7 and 8 or Server 2003, 2008 and 2012
multimedia functionality. Higher quality cards will produce
better quality sounds and tend to give you better performance in
harsh industrial environments.
Note: If you are using the Telephone Dial-Out option, you
must adhere to specific sound file formats. See Chapter 3,
Playing with Sound for details.
WIN-911 uses a sound card to perform "Local Audio"
annunciation as well as previewing speech during development.
If local sounds are not required, the sound card is not needed in
the runtime mode.
Voice Dialout Card Selection A special Microsoft compatible card capable of playing voice
messages over the telephone line is needed for the voice dial-out
and dial-in options to function. There are two hardware options
for conducting telephony calls: 1) TAPI compliant modem or, 2)
a Dialogic Telephonic.
Refer to www.win911.com -> Support -> Knowledgebase ->
Article: 060001 - Dialogic Card Installation, for details about
the Dialogic voice board.
WIN-911 Version 7 Install & Quick Start DOC 01/16 2. Overview: A Must Read Chapter! • 49
Voice Telephony Option One: TAPI
This option requires a TAPI voice modem and driver. For a list
of recommended modems see, www.win911.com -> Support ->
Knowledgebase -> Article: 060014 - Recommended Voice
Modem List.
Note: Some TAPI devices may require a sound device
Voice Telephony Option Two: Dialogic
This option requires a Dialogic card and Dialogic software. For
information on the Dialogic cards, see www.win911.com ->
Support -> Knowledgebase -> Article: 080002 - Dialogic Card
Information Sheet.
Voice Selection
Voice
This option requires the Voice Card. The alarms will be dialed
out to a telephone number; in the event of an "off-hook"
condition, WIN-911 will ask for the contact’s Access Code.
Once a valid Access Code has been entered, WIN-911 will
announce the current alarms with the option to repeat if
necessary. When the contact continues WIN-911 will then ask
for an Acknowledgement Code. Finally, when the correct
Acknowledgment Code is received, the current alarm will be
acknowledged and the line will hang up.
Voice Pager
This option requires the Voice Card (just as it would with a
voice telephone connection). The alarms will be dialed out to a
telephone number. In the event of an "off-hook" condition,
WIN-911 will announce the current alarms and the line will
hang up.
50 • 2. Overview: A Must Read Chapter! WIN-911 Version 7 Install & Quick Start DOC 01/16
Dialout Announcer
This option requires the Voice Card (just as it would with a
voice telephone connection). The alarms will be dialed out to a
telephone number or intercom extension; after the number of
seconds specified by the user, WIN-911 will announce the
current alarms and hang up. This connection type differs from
the Voice Pager in that it does not require a dial tone or answer
indication before alarms will be announced. It is designed for
use with internal phone systems’ public address extensions that
do not provide a standard answer indication like a ring cadence
break or voice menu.
Pager Modem Selection A data modem is necessary to use the pager option of WIN-911.
Due to the current state-of-the-art modem used in typical pager
services, most modem connections are still at 1200 or 2400
baud. Any Hayes compatible modem capable of operating at
the baud rate of your pager service will be sufficient. If a higher
speed modem is used, an appropriate setup may be needed to
facilitate communications at lower baud rates.
Note: As a general rule, the more complex the modem, the
more difficult the modem setup may become!
Note: The data modem used for paging is separate hardware
from either the TAPI modem or Dialogic card that will
perform your voice calls. Paging and voice functions are
independent of each other and require separate phone lines
and hardware.
Pager Selection
Dial-out Alphanumeric
The pager option is designed to work with all alphanumeric
pager units such as the units manufactured by NEC and
Motorola. These units are typically capable of displaying 2 to 4
lines of 20 characters each. WIN-911's maximum message size
is 199 characters.
WIN-911 Version 7 Install & Quick Start DOC 01/16 2. Overview: A Must Read Chapter! • 51
A pager service is required that supports the TAP protocol, or
private pager hardware that will allow messages to be sent via a
personal computer. Examples of such service providers are
Metrocall Corporation, Arch Wireless, or Motorola's People
Finder. WIN-911 supports alphanumeric pager services through
Motorola's TAP protocol (Telocator Alphanumeric Protocol).
The standard TAP protocol, as implemented in the United
States, specifies communication parameters of seven bit ASCII
with even parity. If the pager service or paging equipment does
not support the TAP protocol, the WIN-911 alphanumeric
paging option may require special setup.
Dial-out Numeric
Any standard numeric pager, which requires a phone number to
be called, and then a numeric message keyed on any touch-tone
telephone, will work.
Local Alpha and Numeric
WIN-911 supports local alphanumeric and numeric pagers via
serial port connection to a transmitter. Pages are processed
using the TAP or COMP2 protocols.
WIN-911 supports alphanumeric pager hardware through
Motorola's TAP (Telocator Alphanumeric Protocol) and
COMP2 protocol. Only one protocol can be selected for use. If
the default TAP protocol is selected, the communication
parameters are specified by default to be 7 data bits, even parity,
and one stop bit. If COMP2 is selected the parameters are
specified to be 8 data bits, even parity, and one stop bit.
Note: Numeric pagers are a class of pager manufactured by
various vendors and capable of displaying up to 20 digits.
This type of pager will not support alpha characters in its
message stream.
52 • 2. Overview: A Must Read Chapter! WIN-911 Version 7 Install & Quick Start DOC 01/16
E-Mail The email option requires an email account and connection via
LAN (or WAN) connection. Messages can be sent directly to
the account of a recipient or to a paging company that will in
turn send a page or fax.
Note: In an effort to reduce the number of phone lines WIN-
911 needs to accomplish its alarm notification, users who wish
to implement both dialout paging and email should use their
email account to deliver messages to the pager provider or be
sure the email connection is via LAN/WAN.
SMS The SMS option requires a GSM, CDMA or HSPA modem with
an active cellular account. The user is responsible for activating
the modem with a wireless service provider. An unlimited SMS
messaging plan is recommended. Some SMS messaging
features will need to be licensed. The WIN-911/Basic package
will support 1-way SMS alarm messages as well as status
checks sent via SMS. The WIN-911/PRO package supports
everything the WIN-911/Basic package does and also includes
2-way messaging. The 2-way messaging feature gives the user
the ability to acknowledge an alarm with a specifically
formatted SMS message. 2-way messaging also gives the user
SMS 411-Reports. The acknowledgement criteria, health status
criteria, alarm request criteria and SMS 411-Reports are
discussed below. For information explaining SMS message
configuration and formatting see the "SMS Definition" section
under "WIN-911 Global Menus.”
For a list of recommended GSM modems see,
www.win911.com -> Support -> Knowledgebase -> Article:
080007 - Recommended GSM Modem List.
For a list of recommended CDMA modems see,
www.win911.com -> Support -> Knowledgebase -> Article:
090008 - Recommended CDMA Modem List.
WIN-911 Version 7 Install & Quick Start DOC 01/16 2. Overview: A Must Read Chapter! • 53
Acknowledgement Message
WIN-911 can be licensed to accept incoming acknowledgement
messages. This allows users to singularly acknowledge an alarm
message via SMS. In order for WIN-911 to understand and
accept the alarm acknowledgement, the sender and the message
must meet a few requirements:
1. The sender's phone number must be configured in the
'Phone Book' with an 'SMS' connection.
2. The sender's name must be in the 'Selected Name List'
in the Group for that particular alarm.
3. The first 6 characters of the acknowledgement message
MUST be the 'ticket number' associated with that
alarm. The 'ticket number' is the 6-digit number found
at the beginning of the SMS alarm message.
4. The numeric 'Ack' code must be the last characters in
the message. An 'Ack" code can be anywhere from 1-
15 digits.
5. The 'Ack' code and the phone number configured in
WIN-911 must match the 'Ack' code sent in the SMS
acknowledgement message and the phone number it
was sent from must match the 'Ack' code and phone
number configured in the 'Phone Book' in WIN-911.
Note: Some users may be able to use the Reply or Forward
function to automatically enter the 6-digit ticket number. This
would then only require the user to enter in their
acknowledgement code at the end of the message. Make sure
when using Reply or Forward that no extra characters are placed
in front of the alarm message (e.g. RE: or FW:). Once the
acknowledgement is received and accepted by WIN-911 all
contacts in the Group's 'Selected Name List' for that alarm
should receive a confirmation that the alarm has been
acknowledged. If WIN-911 rejects the acknowledgement, the
user who sent the acknowledgement should receive a failed
acknowledgement message back.
54 • 2. Overview: A Must Read Chapter! WIN-911 Version 7 Install & Quick Start DOC 01/16
Health Status Message
The 'Health Status' message feature allows all configured SMS
users to check the health of WIN-911 by simply sending the
required message. This feature is supported by both 1-way and
2-way SMS licenses. In order for WIN-911 to understand and
accept the 'Health Status' message, the sender and the message
must meet a few requirements:
1. The sender's phone number must be configured in the
'Phone Book' with an 'SMS' connection.
2. The sender's name must be in a 'Selected Name List'
for at least one Group.
3. The SMS message needs to have the text STATUS
and only the text STATUS in the message. This string
is not case sensitive.
Once the status message is received WIN-911 will reply to the
sender with the message OK if WIN-911 is running or
STANDBY if WIN-911 is in Standby mode. WIN-911 will
reply with the message INVALID/MANUAL SMS
RECEIVED if the sender did not send the proper message. If a
response is not received, this may be caused by one or more of
the following:
The sender did not meet the required criteria listed
above
The computer is not running or is non-responsive
Cellular modem is not functioning properly
The cellular network is not functioning properly
WIN-911 is not running
The SMS DLL is not functioning properly
WIN-911 Version 7 Install & Quick Start DOC 01/16 2. Overview: A Must Read Chapter! • 55
Alarm Request Message
The 'Alarm Request' message allows all configured SMS users
to request alarm information at any given time. This feature is
ONLY supported with a 2-way SMS license. In order for WIN-
911 to understand and accept the ‘Alarm Request’, the sender
and the message must meet a few requirements:
1. The sender's phone number must be configured in the
'Phone Book' with a 'SMS' connection.
2. The sender's name must be in a 'Selected Name List'
for at least one Group.
3. The SMS message needs to only contain one of the
following text strings:
REQUEST ACTIVE ACKED
REQUEST ACTIVE UNACKED
REQUEST INACTIVE UNACKED
REQUEST UNACKED
REQUEST ACTIVE
REQUEST ALL
Once the request message is received and all three criteria are
met, WIN-911 will reply to the sender with one SMS message
per alarm that meets the request.
If no response is received, confirm WIN-911 is still healthy by
sending a Health Status message (described in the previous
section).
If WIN-911 replies with the message NO ALARMS, then no
alarms met the sender's request.
If WIN-911 replies with the message INVALID/MANUAL
SMS RECEIVED then the sender did not send one of the six
messages described above. Double check the sent text for
errors.
If WIN-911 replies with the message EVENT REQUEST
REJECTED PER LICENSE then the sender met all the
criteria described above, but the sender is not licensed for 2-way
SMS messaging.
56 • 2. Overview: A Must Read Chapter! WIN-911 Version 7 Install & Quick Start DOC 01/16
SMS 411-Report
The 'SMS 411-Report' feature allows all configured SMS users
to get the current status of any data point. Simply configure a
report in WIN-911 and access the report later by sending the
required message. This feature is only supported with a 2-way
SMS license. In order for WIN-911 to understand and accept
the 'SMS 411-Report' message, the sender and the message must
meet a few requirements:
1. The sender's phone number must be configured in the
'Phone Book' with an 'SMS' connection.
2. The SMS message needs to have the text
'411:<report number>' in the message. For example,
to request report 21 send the following:
411:21
3. If the sender would like to request a single 411-Report
Item the SMS message needs to have the text
'411:<report number>:<report item>' in the
message. For example, to request the 5th item in
report 21 send the following:
411:21:5
Once the 411-Report request is received, WIN-911 will reply to
the sender with one SMS message per report item.
If no response is received, confirm WIN-911 is still healthy by
sending a Health Status message (described in the previous
section).
If WIN-911 cannot determine which report was requested,
possibly because of a formatting error or because that report
does not exist, it will respond with BAD411-REPORT:<report
number>.
If WIN-911 cannot determine which report item was requested,
possibly because of a formatting error or because that report
item does not exist, it will respond with BAD411-ITEM:<item
number>.
If WIN-911 is not licensed for 2-way SMS it will respond with
411 REQUEST REJECTED PER LICENSE.
WIN-911 Version 7 Install & Quick Start DOC 01/16 2. Overview: A Must Read Chapter! • 57
Mobile-911
The Mobile-911 option requires the Mobile-911 Server be
installed somewhere on WIN-911's network. WIN-911/PRO is
required for this option. Mobile-911 also requires a client side
installation, whether it is an app installed on an iOS, Android or
BlackBerry device or the MobileView web based monitor
system.
The Mobile-911 app gives the user the ability to acknowledge
an alarm, create and view reports, check health status and
request alarm information. Push notifications are used to send
information to the app so the device must have a data plan in
order to receive the push notifications. Push notification will
also require the Mobile-911 Server to have access to the
Internet.
A "Live Demo" is available to try out the app without having to
install the Mobile-911 Server. Setup instructions can be found
on our website:
www.win911.com under Smartphone Apps |Live Demo of
Mobile-911
A more detailed explanation of the Mobile-911 app and its
functionality can be found in the Help of the installed
application.
Mobile-911 View allows the user to view alarm information
through a web browser. The user also has the ability to
acknowledge alarms and view reports. If MobileView is
installed, the Mobile-911 Server will require Internet
Information Services (IIS). The Mobile-911 Server will also be
required to access the Internet if the user is trying to view
alarms from outside the Mobile-911 local area network.
A more detailed explanation of the MobileView and its
functionality can be found in the Help.
58 • 2. Overview: A Must Read Chapter! WIN-911 Version 7 Install & Quick Start DOC 01/16
IP
The WIN-911 IP connection is designed to send alarm messages
over a network through a TCP socket. It is compatible with
RAS and Ethernet connections. In order to utilize this feature,
users must develop their own application to accept alarm
messages and handle them accordingly. Their application can
also monitor health status information that WIN-911 stores in
the registry. The WIN-911 IP connection adds a tremendous
amount of extensibility to WIN-911.
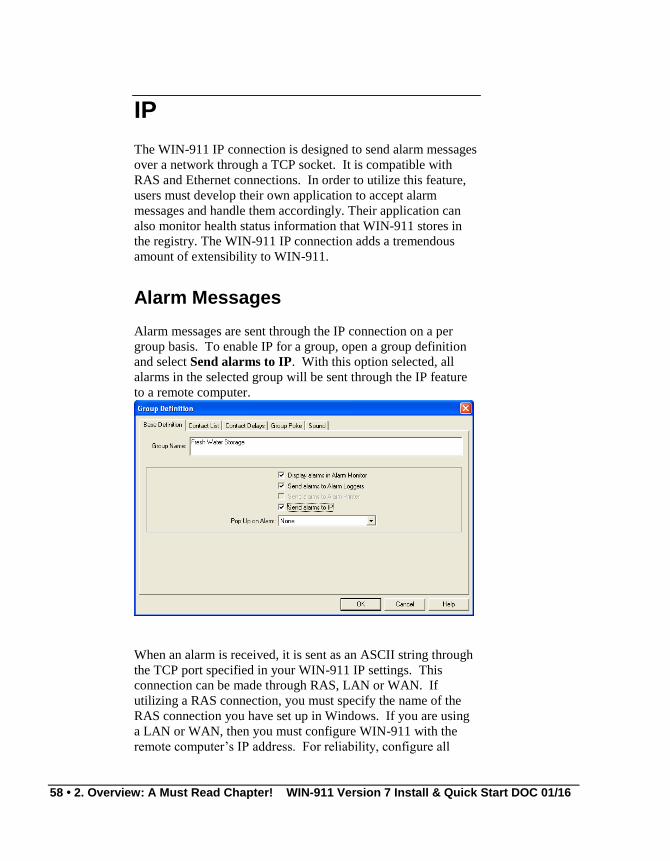
Alarm Messages
Alarm messages are sent through the IP connection on a per
group basis. To enable IP for a group, open a group definition
and select Send alarms to IP. With this option selected, all
alarms in the selected group will be sent through the IP feature
to a remote computer.
When an alarm is received, it is sent as an ASCII string through
the TCP port specified in your WIN-911 IP settings. This
connection can be made through RAS, LAN or WAN. If
utilizing a RAS connection, you must specify the name of the
RAS connection you have set up in Windows. If you are using
a LAN or WAN, then you must configure WIN-911 with the
remote computer’s IP address. For reliability, configure all
WIN-911 Version 7 Install & Quick Start DOC 01/16 2. Overview: A Must Read Chapter! • 59
remote computers as well as the local computer with static IP
addresses. If you must use DHCP, reserve an IP address for
each machine. WIN-911 cannot resolve hostnames with WINS
or DNS.
The beauty of the WIN-911 IP connection is that it is highly
configurable. When an alarm is received it is formatted and
then sent over the network as ASCII text. Each message starts
with a configurable message prefix and ends with a configurable
suffix. The contents of the message can contain any number of
fields. These fields may be labeled with their field names and
are also delimited by a user defined delimiter. When developing
your application, determine which fields are required and use
the message format settings to properly parse alarms.
Acknowledgements/Expected Responses
Once an alarm message is sent, WIN-911 can be configured to
await a response from the remote computer to confirm that the
message was delivered. WIN-911 can also acknowledge alarms
based on whether or not the Expected Response was received.
Primary/Secondary Remote Computers
The WIN-911 IP connection has redundancy features built into
it. In addition to a primary remote machine, you may configure
a secondary remote machine. When a configurable amount of
failures has been reached, WIN-911 will attempt to use the
secondary connection. Failing to establish a TCP socket
connection or any other type of failure associated with TCP will
cause WIN-911 to attempt the secondary connection. Also, if
you’ve enabled WIN-911 to wait for an Expected Response,
then a failure occurs when that response is not received for an
alarm. Once WIN-911 fails over to the secondary connection, it
will send alarms to that secondary connection until the
connection is closed. When a new connection is attempted,
WIN-911 will first attempt the primary remote computer.
60 • 2. Overview: A Must Read Chapter! WIN-911 Version 7 Install & Quick Start DOC 01/16
Health Status
Health status information can be monitored by the user’s
application to monitor the health of both WIN-911 and the
hardware being used to send alarm messages via IP. Two
values need to be monitored and compared in the registry to
understand the current health of WIN-911:
1. HKLM\SOFTWARE\Specter Instruments\WIN911
IP\Health.
2. HKLM\SOFTWARE\Specter Instruments\WIN911
IP\Time.
Health stores the most current state of WIN-911. Time stores
the time stamp of the most current state stored in the Health.
The Health value should be updated approximately once a
second. If the Time value is more than a few seconds old, the
application should assume the Health value is bad. The three
possible Health values and the format for the Time value is
described below.
Health:
OK – Healthy. WIN-911 and its hardware is
functioning properly.
FAIL – All message attempts have failed for a
particular alarm. This included attempts made to the
secondary remote machine if configured.
STOP – The WIN911 IP DLL has been stopped by the
shutdown of WIN-911.
Time:
YEAR:DAYOFYEAR:HOUR:MINUTE:SECOND
– For example:, 2009:033:14:30:25 (Feb 2, 2009
2:30:25 PM GMT)
WIN-911 Version 7 Install & Quick Start DOC 01/16 2. Overview: A Must Read Chapter! • 61
ASCII Outputs Integrate to Other Windows Applications The ASCII OPC/DDE Poke feature is an easy to use function
enabling the WIN-911 software modules to be integrated into
other Microsoft Windows applications. This standard option
will allow the TEXT Alarm Messages to be displayed within
other programs, and it will allow these programs to
"Acknowledge" the WIN-911 alarms. Pager and voice
operational status can be monitored by other programs through
the use of the Pager, Voice, and System Health. An example of
the Pager Health poke might include a situation where a digital
OPC/DDE tag belonging to an HMI package is poked a zero (0)
when the pager applet is functional. If the modem stops
responding, a failure is generated and a digital one (1) is poked,
replacing the zero and indicating the loss of functionality.
The Sound Clips Note: WIN-911 provides two options for voice sources 1) Pre-
developed .wav files developed with Text-to-Speech and/or
human voice recording, or 2) Runtime Voice Synthesis. Those
using the Runtime Voice Synthesis do not need to manage
sound files because there are none. With this option all
speech is generated during runtime as it is needed.
WIN-911 uses Microsoft's multimedia feature to offer sound to
enhance your alarm reporting needs. If you are not familiar
with this capability, a review of the Windows documentation is
advisable. In Windows the Sound Recorder icon is generally
found under the "Accessories" folder. The "Help" information
found here is usually all that is needed for review. Text-to-
Speech may also be used with the WIN-911 Configurator to
generate the "*.WAV" files. Third party sound software tools
are available which will allow even more editing features.
In using voice to alert users of an alarm condition, WIN-911 has
striven to conserve as much disk space as possible, considering
the large memory appetite of sound clips (*.WAV files). The
62 • 2. Overview: A Must Read Chapter! WIN-911 Version 7 Install & Quick Start DOC 01/16
typical example of a verbal alarm message might be: "AREA
3,” "The Oven Temperature,” "Is,” "Above the High Limit.”
Each message within quotations is a separately recorded sound
clip.
The "Is" and "Was" sounds are used in most common alarm
messages, although they can be turned off. Continuing the
above example: If the temperature decreased into the normal
range and the alarm was unacknowledged, the verbal message
would be: "AREA 3,” "The Oven Temperature,” "Was,”
"Above the High Limit.” Upon the operator acknowledging the
alarm via a telephone, the message would be: "AREA 3,” "The
Oven Temperature,” "Is,” "Normal.” If the alarm is
acknowledged via the personal computer keyboard, the
acknowledgment is silent. Using "Is" and "Was" as global
sound clips greatly reduces the need for additional custom
messages.
The sound clips (*.wav files) furnished with this package are a
sampling of miscellaneous industrial sounds such as Bells,
Sirens, Alert Horns, and Whistles. These sounds are recorded in
an 8-bit format. These .wav files are located on the install CD
in “\Support\Sound Effects” and must be manually copied into
the C:\Program Files\Specter Instruments\WIN-911 V7\Sound
Files for use. It may be helpful at this time to play back a
sampling of these clips, to verify your sound card is operational
and the WIN-911 sound files are installed properly.
Note: Users of the Dialogic card and TAPI voice telephony
can only play uniformly formatted "*.WAV" files that
conform to the following parameters: PCM, 11 kHz or 8 kHz
sample rate (one or the other but NOT both), 8 bit, and Mono.
Check each of the existing files with Sound Check and convert
them as needed.
Note: Runtime Voice Synthesis does not play pre-recorded
sound files that require format management.
One of the strong benefits of the WIN-911 offering is the ability
for you to customize the alarm sounds to fit your exact
application. Use of a microphone and the sound card recording
options are all that is necessary.
WIN-911 Version 7 Install & Quick Start DOC 01/16 2. Overview: A Must Read Chapter! • 63
Helpful Hints:
1. Don't try to record sound clips for your application
until you are familiar with the WIN-911 requirements.
Use the demo clips furnished to learn.
2. Typically, you will have a "pause" or "dead space" at
the beginning and at the end of each sound clip. WIN-
911 patches several clips together to form a message,
and the dead spaces will not allow a smooth speech
pattern. To cure this, use the sound recorder's edit
features to cut out the dead space found at both ends of
the sound clip.
3. Using higher sample rates will use more disk space and
use more system resources, but it will offer better
quality.
4. Just as with the sound card, a higher quality
microphone produces better sound clips.
Sound Source WIN-911 Version 7 infuses Text-to-Speech (TTS) technology
for generating sound files quickly and concisely. The TTS
engine reads ASCII text strings and generates voice messages to
verbalize the contents of the string. Scan & Alarm gives the
user the option to use one of three sound sources to best fit the
user's needs: Wave Files Only, Text To Speech Wave Files, and
Runtime Voice Synthesis.
Wave Files Only
When this option is selected WIN-911’s original and default
mode of playing voice announcements and telephony is invoked
and Scan & Alarm uses only pre-recorded wave files. Wave
Files Only allows the user to use wave files created outside of
WIN-911.
64 • 2. Overview: A Must Read Chapter! WIN-911 Version 7 Install & Quick Start DOC 01/16
Text To Speech Wave Files
When this option is selected TTS technology is invoked. It will
be used by the configurator to generate sound files for use by
Scan & Alarm. This option provides the developer with two
ways to generate wave files. One way is automated and can be
done with the “Sound Build” button or is part of the
Configurator shutdown. The other is manually, using the
“Convert Text to Wave” dialog.
Runtime Voice Synthesis
When this option is selected TTS technology is invoked at
runtime. It can be used directly by Scan & Alarm to generate
the speech as it is needed without the requirement of sound files.
What is the Direct Connect? The Direct Connect option provides a means of bypassing
Windows DDE/OPC and connecting directly to viewLinc,
System Platform, FIX®, Wonderware®, FactoryTalk View,
RSView SE, and RSView32. Unlike the DDE/OPC option
(which is a generic data exchange medium), the Direct Connect
is a custom data source developed with the use of toolkits
provided by the perspective HMI developers. System Platform/
FIX/ Wonderware/ FactoryTalk View & View ME/ RSView32/
RSView SE/ viewLinc users will find this option time saving
during configuration because WIN-911 does not require the re-
entry of redundant information. Instead, WIN-911 references
much of the information required for a configuration directly
from the HMI. More importantly, the user will find this mode
of operation delivers superior performance in the following
areas: 1) Speed of connection and data point updates; 2) Data
security and integrity; 3) Set points and alarm limits can be
changed dynamically at the source.
A configuration can be run in the Direct Connect mode
exclusively or simultaneously with DDE/OPC connections. It is
important to note, however, that some of the terms (Application,
WIN-911 Version 7 Install & Quick Start DOC 01/16 2. Overview: A Must Read Chapter! • 65
Topic, and Item name) are components of Microsoft's DDE or
OPC Foundation’s OPC address nomenclature. In a Direct
Connect Data Source, Application and Topic Names are
replaced with an invocation string that sets the mode of
operation. When a Direct Connect mode is selected, the
appropriate strings are automatically appended.
WIN-911 as a Service WIN-911 Scan & Alarm can be configured to emulate a service
when started with the 911SRV service wrapper. As a service,
WIN-911 will be started automatically during the startup of the
operating system and will run in the background regardless of
who (if anybody) is logged in. WIN-911 behaves in much the
same way as it does when running as an application except that
you cannot exit WIN-911 in the usual manner.
A few limitations include the following:
DDE data sources are not supported
Network OPC is not supported (only local)
RSView SE Direct Connect data source is not supported
RSView32 Direct Connect data source is not supported
When “Interact with Desktop” is enabled in Windows XP and
Server 2003, WIN-911 will function in the same manner except
you cannot exit Scan & Alarm in the usual manner. You would
have to go through the Service Control Manager to shut it down.
When “Interact with Desktop” is disabled or you are running as
a service in Windows 7, Server 2008 Windows 8 and Server
2012, the user cannot use the WIN-911 Alarm Monitor. This
prevents the user from acknowledging alarms or sending manual
messages via the Alarm Monitor. The tray icon is not displayed
so the user must Restart WIN-911 using the Restart.exe applet.
Bypass, Override, Active and Standby will also become
unusable since there is no application window to interact with.

66 • 2. Overview: A Must Read Chapter! WIN-911 Version 7 Install & Quick Start DOC 01/16

WIN-911 Version 7 Install & Quick Start DOC 01/16 3. WIN-911 Demonstration • 67
3. WIN-911 Demonstration
Demo of WIN-911 Capabilities The following OPC demonstration provides a basic
understanding and working example of the WIN-911 system.
These examples are self-contained and do not require additional
software not included in the WIN-911 install or on the WIN-911
USB drive (KEPServerEX for OPC). If voice telephony is
desired for the demo, then you will need a TAPI modem or
Dialogic card and a phone line. If you wish to demonstrate
paging you will need a standard Hayes® compatible modem and
phone line with a pager service provider and if you wish to
demonstrate email you will need a LAN connection and email
servers. This demo will run with WIN-911 in DEMO mode (for
30 days).
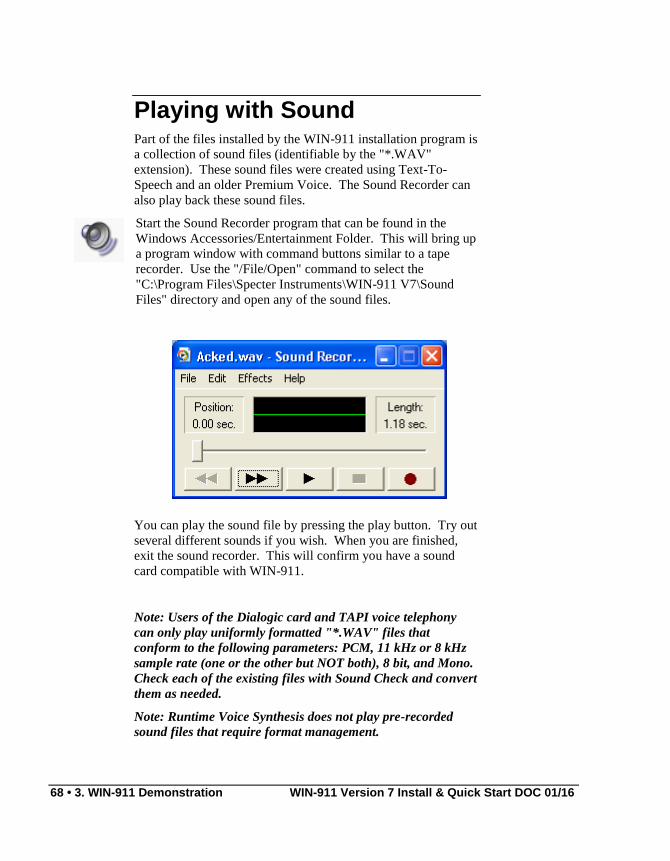
68 • 3. WIN-911 Demonstration WIN-911 Version 7 Install & Quick Start DOC 01/16
Playing with Sound Part of the files installed by the WIN-911 installation program is
a collection of sound files (identifiable by the "*.WAV"
extension). These sound files were created using Text-To-
Speech and an older Premium Voice. The Sound Recorder can
also play back these sound files.
Start the Sound Recorder program that can be found in the
Windows Accessories/Entertainment Folder. This will bring up
a program window with command buttons similar to a tape
recorder. Use the "/File/Open" command to select the
"C:\Program Files\Specter Instruments\WIN-911 V7\Sound
Files" directory and open any of the sound files.
You can play the sound file by pressing the play button. Try out
several different sounds if you wish. When you are finished,
exit the sound recorder. This will confirm you have a sound
card compatible with WIN-911.
Note: Users of the Dialogic card and TAPI voice telephony
can only play uniformly formatted "*.WAV" files that
conform to the following parameters: PCM, 11 kHz or 8 kHz
sample rate (one or the other but NOT both), 8 bit, and Mono.
Check each of the existing files with Sound Check and convert
them as needed.
Note: Runtime Voice Synthesis does not play pre-recorded
sound files that require format management.
WIN-911 Version 7 Install & Quick Start DOC 01/16 3. WIN-911 Demonstration • 69
Creating a Demo OPC Server Included in the WIN-911 software package is a “Promotional”
copy of KEPServerEX and an OPC Project (WIN-911 OPC
DEMO.opf) which will offer the feel of "real-world" events.
These events will trigger alarm conditions and initiate responses
in the Monitor.
Note: KEPServerEX is not required to run WIN-911; it merely
offers easy access to "user defined" OPC values, and provides
an OPC Server.
It is recommended that you first read Chapter 1 of this manual.
The WIN-911 package must be installed. The demonstrations
are much more impressive if a sound card is installed.
However, the visual features of WIN-911 can be seen without a
sound card.
The demo mode of WIN-911 will fully support all alarming
options. To demonstrate the pager option, you must have a data
modem installed (either internal or serial port) or a local paging
system. The demo mode is unlimited with respect to Tagnames,
Groups and phone book telephone/pager entries, but will time
out in 30 days.
Installing KEPServerEX & OPC Demo
From the Support Folder of the WIN-911 USB drive open the
OPC Server Demo sub-folder and double-click on the
KEPServerEx5.exe to run the setup. Step through the setup
dialog to complete the software installation.
Setting up the OPC Demo To run the OPC demo developed by Specter, you must copy the
WIN-911 OPC Demo project from the C:\Program Files\Specter
Instruments\WIN-911 V7\Tools folder. Copy the WIN-911
OPC DEMO.opf file to C:\%Program Files%\Kepware
\KEPServerEX 5\Projects folder.
Start KEPServer by opening the KEPServerEX 5 Configuration
in the Windows Start menu.
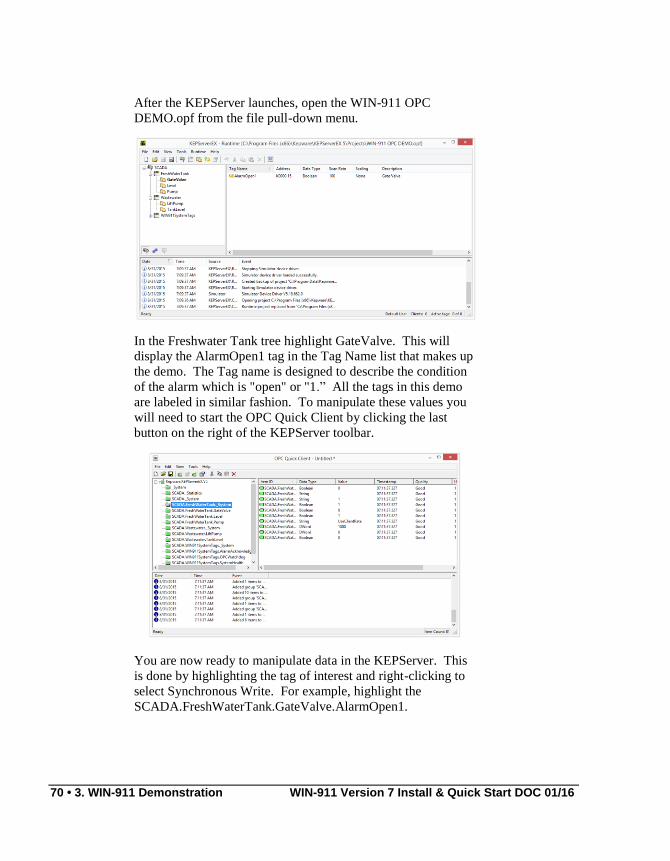
70 • 3. WIN-911 Demonstration WIN-911 Version 7 Install & Quick Start DOC 01/16
After the KEPServer launches, open the WIN-911 OPC
DEMO.opf from the file pull-down menu.
In the Freshwater Tank tree highlight GateValve. This will
display the AlarmOpen1 tag in the Tag Name list that makes up
the demo. The Tag name is designed to describe the condition
of the alarm which is "open" or "1.” All the tags in this demo
are labeled in similar fashion. To manipulate these values you
will need to start the OPC Quick Client by clicking the last
button on the right of the KEPServer toolbar.
You are now ready to manipulate data in the KEPServer. This
is done by highlighting the tag of interest and right-clicking to
select Synchronous Write. For example, highlight the
SCADA.FreshWaterTank.GateValve.AlarmOpen1.
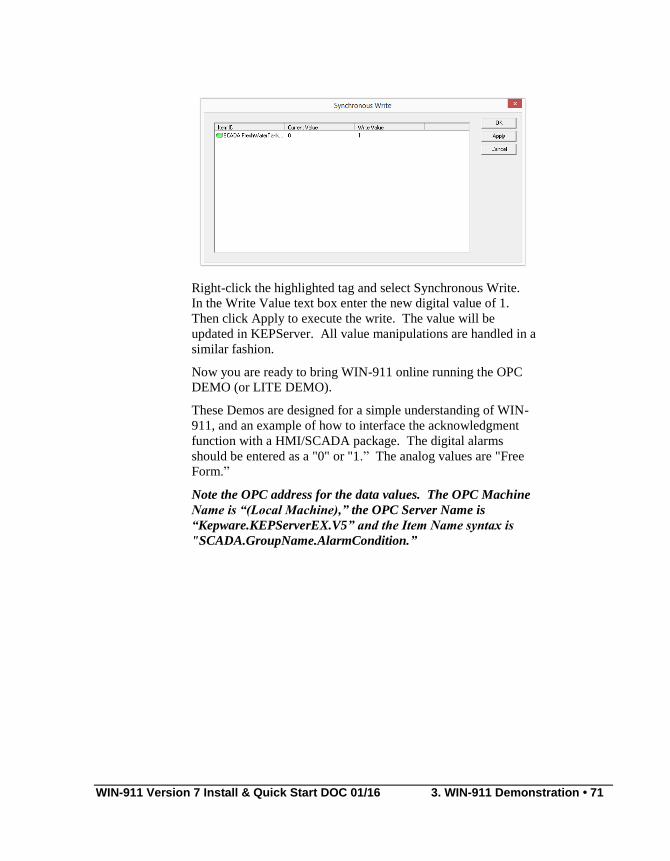
WIN-911 Version 7 Install & Quick Start DOC 01/16 3. WIN-911 Demonstration • 71
Right-click the highlighted tag and select Synchronous Write.
In the Write Value text box enter the new digital value of 1.
Then click Apply to execute the write. The value will be
updated in KEPServer. All value manipulations are handled in a
similar fashion.
Now you are ready to bring WIN-911 online running the OPC
DEMO (or LITE DEMO).
These Demos are designed for a simple understanding of WIN-
911, and an example of how to interface the acknowledgment
function with a HMI/SCADA package. The digital alarms
should be entered as a "0" or "1.” The analog values are "Free
Form.”
Note the OPC address for the data values. The OPC Machine
Name is “(Local Machine),” the OPC Server Name is
“Kepware.KEPServerEX.V5” and the Item Name syntax is
"SCADA.GroupName.AlarmCondition.”
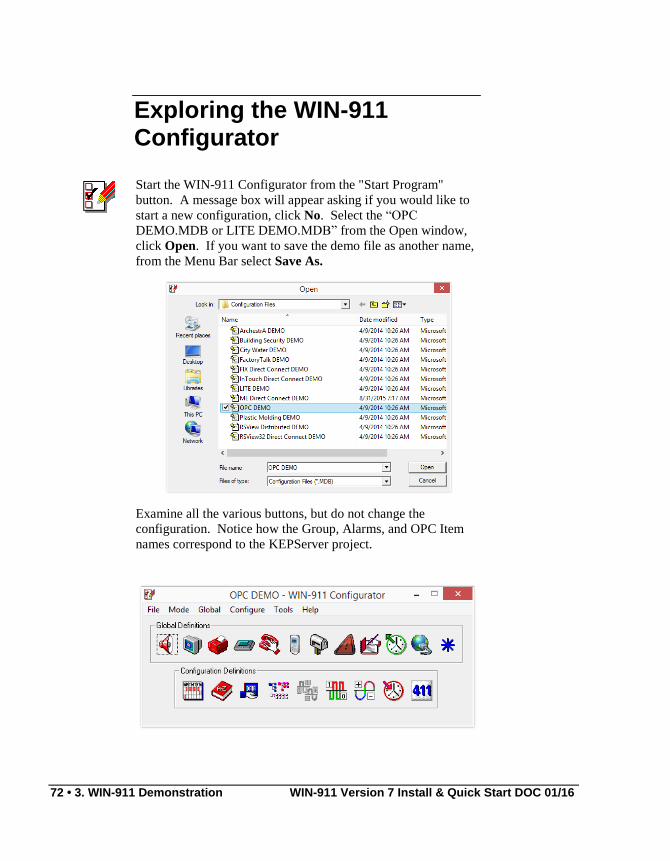
72 • 3. WIN-911 Demonstration WIN-911 Version 7 Install & Quick Start DOC 01/16
Exploring the WIN-911 Configurator
Start the WIN-911 Configurator from the "Start Program"
button. A message box will appear asking if you would like to
start a new configuration, click No. Select the “OPC
DEMO.MDB or LITE DEMO.MDB” from the Open window,
click Open. If you want to save the demo file as another name,
from the Menu Bar select Save As.
Examine all the various buttons, but do not change the
configuration. Notice how the Group, Alarms, and OPC Item
names correspond to the KEPServer project.
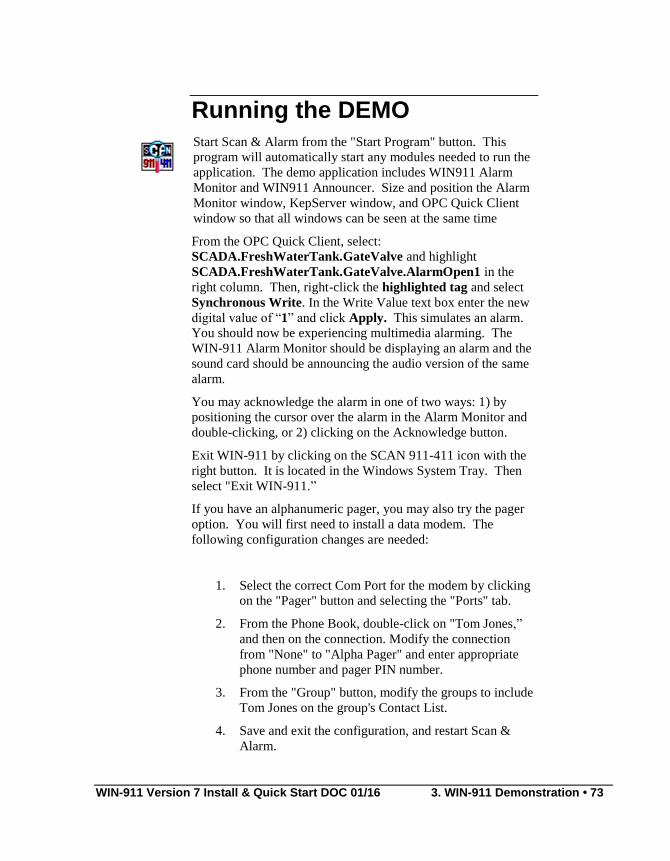
WIN-911 Version 7 Install & Quick Start DOC 01/16 3. WIN-911 Demonstration • 73
Running the DEMO
Start Scan & Alarm from the "Start Program" button. This
program will automatically start any modules needed to run the
application. The demo application includes WIN911 Alarm
Monitor and WIN911 Announcer. Size and position the Alarm
Monitor window, KepServer window, and OPC Quick Client
window so that all windows can be seen at the same time
From the OPC Quick Client, select:
SCADA.FreshWaterTank.GateValve and highlight
SCADA.FreshWaterTank.GateValve.AlarmOpen1 in the
right column. Then, right-click the highlighted tag and select
Synchronous Write. In the Write Value text box enter the new
digital value of “1” and click Apply. This simulates an alarm.
You should now be experiencing multimedia alarming. The
WIN-911 Alarm Monitor should be displaying an alarm and the
sound card should be announcing the audio version of the same
alarm.
You may acknowledge the alarm in one of two ways: 1) by
positioning the cursor over the alarm in the Alarm Monitor and
double-clicking, or 2) clicking on the Acknowledge button.
Exit WIN-911 by clicking on the SCAN 911-411 icon with the
right button. It is located in the Windows System Tray. Then
select "Exit WIN-911.”
If you have an alphanumeric pager, you may also try the pager
option. You will first need to install a data modem. The
following configuration changes are needed:
1. Select the correct Com Port for the modem by clicking
on the "Pager" button and selecting the "Ports" tab.
2. From the Phone Book, double-click on "Tom Jones,”
and then on the connection. Modify the connection
from "None" to "Alpha Pager" and enter appropriate
phone number and pager PIN number.
3. From the "Group" button, modify the groups to include
Tom Jones on the group's Contact List.
4. Save and exit the configuration, and restart Scan &
Alarm.

74 • 3. WIN-911 Demonstration WIN-911 Version 7 Install & Quick Start DOC 01/16
Note: If at any time you do not have a WIN-911 manual
handy, just select the HELP button on the Configurator (it is
an exact duplicate of the manual), utilize the contact sensitive
help buttons, or click on the WIN-911 Digital Documentation
icon to direct you to the exact reference in the manual.
Continue with the manual and try out some of the options as you
read. WIN-911 was designed to meet the alarm reporting needs
of most industrial applications.
Note: Refer to the next two sections of this chapter: "Typical
Example of WIN-911 Voice Dial-Out" and "Typical Example
of WIN-411 Inquiry" for a continuation of these demos.
Typical Example of WIN-911 Voice Dial-Out
Overview
The following is an example of what can be expected using the
WIN-911 Dial-Out Option. Note that the Dialogic and TAPI
options vary slightly at the beginning of the message. With the
Dialogic option, connection detect circuitry recognizes a human
voice on the line and automatically knows when the phone has
been answered. The TAPI option simply loops a salutation until
the recipient enters their access code, which indicates to WIN-
911 that the phone has been answered. Afterwards the two
voice modules function the same.
Upon an alarm (which was configured for a Dial-Out), WIN-
911 examines the phone book to determine if the first listed
person is "on duty" (at this day and time). Assume Tom Jones
was selected and he was scheduled to be "on call.”
The phone rings at Tom Jones' home, and reports: "This is the
Water District Monitoring System, with a call for Mr. Jones....
Please enter your access code followed by the pound key."
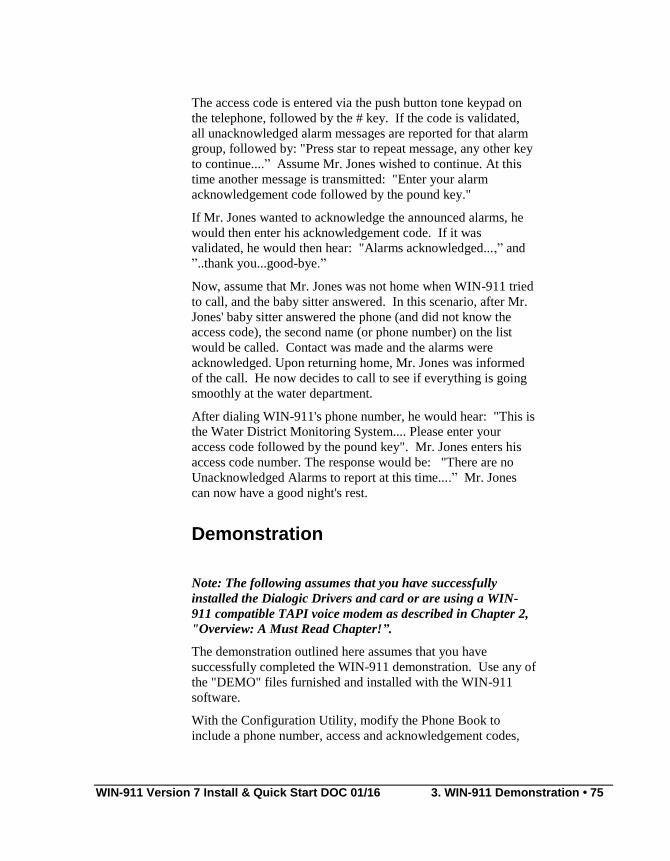
WIN-911 Version 7 Install & Quick Start DOC 01/16 3. WIN-911 Demonstration • 75
The access code is entered via the push button tone keypad on
the telephone, followed by the # key. If the code is validated,
all unacknowledged alarm messages are reported for that alarm
group, followed by: "Press star to repeat message, any other key
to continue....” Assume Mr. Jones wished to continue. At this
time another message is transmitted: "Enter your alarm
acknowledgement code followed by the pound key."
If Mr. Jones wanted to acknowledge the announced alarms, he
would then enter his acknowledgement code. If it was
validated, he would then hear: "Alarms acknowledged...,” and
”..thank you...good-bye.”
Now, assume that Mr. Jones was not home when WIN-911 tried
to call, and the baby sitter answered. In this scenario, after Mr.
Jones' baby sitter answered the phone (and did not know the
access code), the second name (or phone number) on the list
would be called. Contact was made and the alarms were
acknowledged. Upon returning home, Mr. Jones was informed
of the call. He now decides to call to see if everything is going
smoothly at the water department.
After dialing WIN-911's phone number, he would hear: "This is
the Water District Monitoring System.... Please enter your
access code followed by the pound key". Mr. Jones enters his
access code number. The response would be: "There are no
Unacknowledged Alarms to report at this time....” Mr. Jones
can now have a good night's rest.
Demonstration
Note: The following assumes that you have successfully
installed the Dialogic Drivers and card or are using a WIN-
911 compatible TAPI voice modem as described in Chapter 2,
"Overview: A Must Read Chapter!”.
The demonstration outlined here assumes that you have
successfully completed the WIN-911 demonstration. Use any of
the "DEMO" files furnished and installed with the WIN-911
software.
With the Configuration Utility, modify the Phone Book to
include a phone number, access and acknowledgement codes,
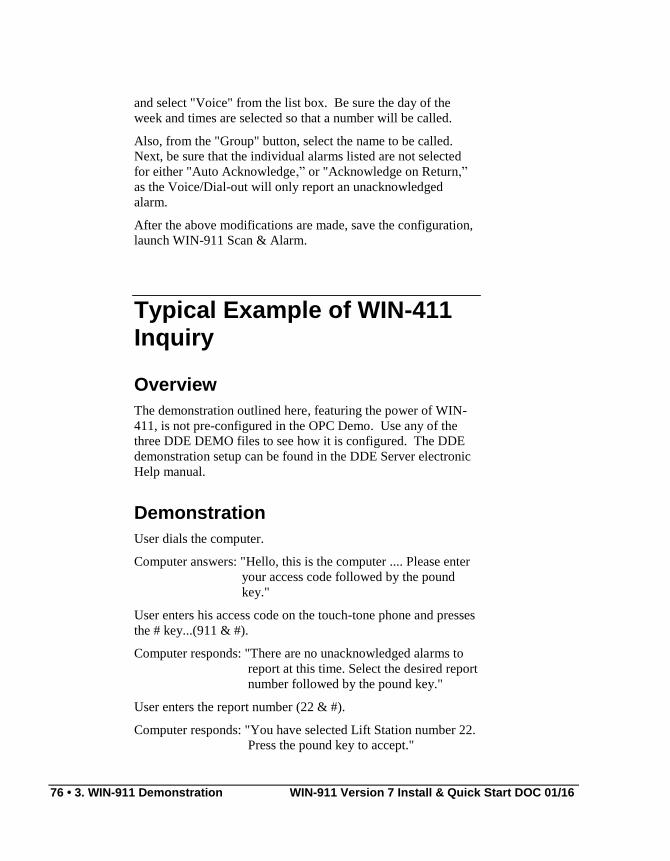
76 • 3. WIN-911 Demonstration WIN-911 Version 7 Install & Quick Start DOC 01/16
and select "Voice" from the list box. Be sure the day of the
week and times are selected so that a number will be called.
Also, from the "Group" button, select the name to be called.
Next, be sure that the individual alarms listed are not selected
for either "Auto Acknowledge,” or "Acknowledge on Return,”
as the Voice/Dial-out will only report an unacknowledged
alarm.
After the above modifications are made, save the configuration,
launch WIN-911 Scan & Alarm.
Typical Example of WIN-411 Inquiry
Overview
The demonstration outlined here, featuring the power of WIN-
411, is not pre-configured in the OPC Demo. Use any of the
three DDE DEMO files to see how it is configured. The DDE
demonstration setup can be found in the DDE Server electronic
Help manual.
Demonstration
User dials the computer.
Computer answers: "Hello, this is the computer .... Please enter
your access code followed by the pound
key."
User enters his access code on the touch-tone phone and presses
the # key...(911 & #).
Computer responds: "There are no unacknowledged alarms to
report at this time. Select the desired report
number followed by the pound key."
User enters the report number (22 & #).
Computer responds: "You have selected Lift Station number 22.
Press the pound key to accept."
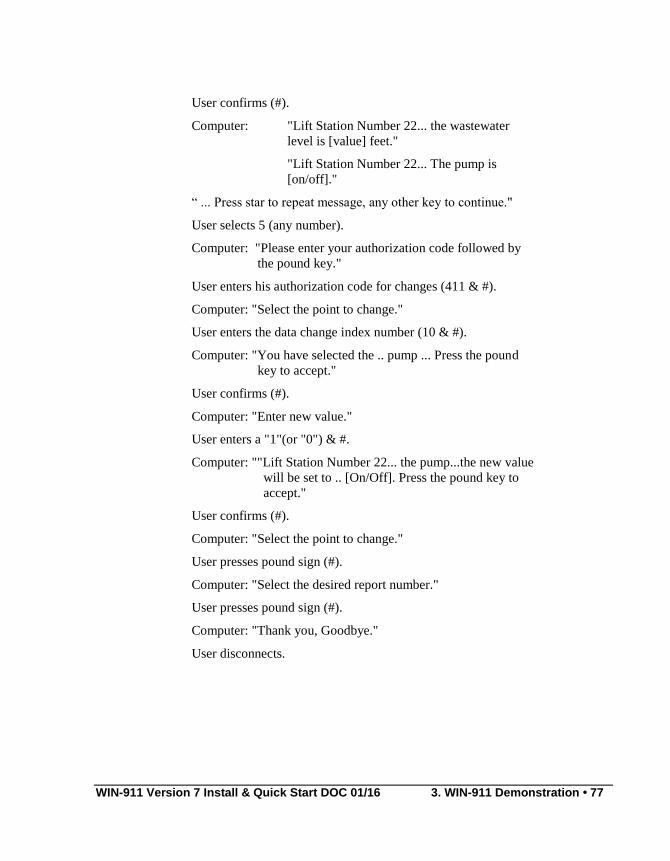
WIN-911 Version 7 Install & Quick Start DOC 01/16 3. WIN-911 Demonstration • 77
User confirms (#).
Computer: "Lift Station Number 22... the wastewater
level is [value] feet."
"Lift Station Number 22... The pump is
[on/off]."
“ ... Press star to repeat message, any other key to continue."
User selects 5 (any number).
Computer: "Please enter your authorization code followed by
the pound key."
User enters his authorization code for changes (411 & #).
Computer: "Select the point to change."
User enters the data change index number (10 & #).
Computer: "You have selected the .. pump ... Press the pound
key to accept."
User confirms (#).
Computer: "Enter new value."
User enters a "1"(or "0") & #.
Computer: ""Lift Station Number 22... the pump...the new value
will be set to .. [On/Off]. Press the pound key to
accept."
User confirms (#).
Computer: "Select the point to change."
User presses pound sign (#).
Computer: "Select the desired report number."
User presses pound sign (#).
Computer: "Thank you, Goodbye."
User disconnects.

78 • 3. WIN-911 Demonstration WIN-911 Version 7 Install & Quick Start DOC 01/16
WIN-911 Version 7 Install & Quick Start DOC 09/15 4. WEB-911 XTools Demonstration • 79
4. WEB-911 XTools Demonstration
Demo of WEB-911 XTools Capabilities The WEB-911 XTools demonstrations provide a basic
understanding and working example of the WIN-911 system
and its suite of ActiveX controls. These examples are self-
contained and do not require additional software not included in
the WIN-911 install or on WIN-911 USB drive (KEPServer for
OPC). If voice telephony is desired for the demo, then you will
need a TAPI modem or Dialogic card and a phone line. If you
wish to demonstrate paging you will need a standard Hayes®
compatible modem and phone line with a pager service provider
and if you wish to demonstrate email you will need a LAN
connection and email servers. This demo will run with WIN-
911 in DEMO mode (for 30 days).
80 • 4. WEB-911 XTools Demonstration WIN-911 Version 7 Install & Quick Start DOC 09/15
Creating a WEB-911 XTools Demo Included in the WIN-911 software package is the install for
WEB-911 Service and WEB-911 XTools Client. The WEB-911
XTools Service requires Internet Information Services to be
installed prior to its install. The WEB-911 XTools Client can be
installed on remote machines, but for this demo we will install
the client locally.
The demo mode of WIN-911 will fully support WEB-911
XTools. The demo mode is unlimited with respect to
Tagnames, Groups and phone book telephone/pager entries, but
will time out in 30 days. If WIN-911 is licensed, it must be
licensed for WEB-911 XTools for the demo to still function.
The WEB-911 XTools demo uses the OPC Demo configuration
and assumes the user has followed the OPC Demo setup
explained in Chapter 3.
Continue with, ‘Installing WEB-911 Services’ and ‘Installing
WEB-911 XTools Client’ if you have not already done so in
Chapter 1. Otherwise go on to ‘Setting up WEB-911 XTools’.
Installing WEB-911 Services
Prior to installing WEB-911 Services, WIN-911 version 7.14.00
or newer must be installed. WEB-911 Services also requires
Internet Information Services (IIS) and Microsoft Framework
.NET 4.0. IIS can be found in Administrative Tools. If IIS is
not installed run the IIS install from Add or Remove Programs -
>Add/Remove Windows Components. The operating system
install disk is required to complete this installation. If installed,
Microsoft Framework .NET 4.0 can be found in Add or Remove
Programs. If .NET 4.0 is not installed, WEB-911 Services will
install it for you.
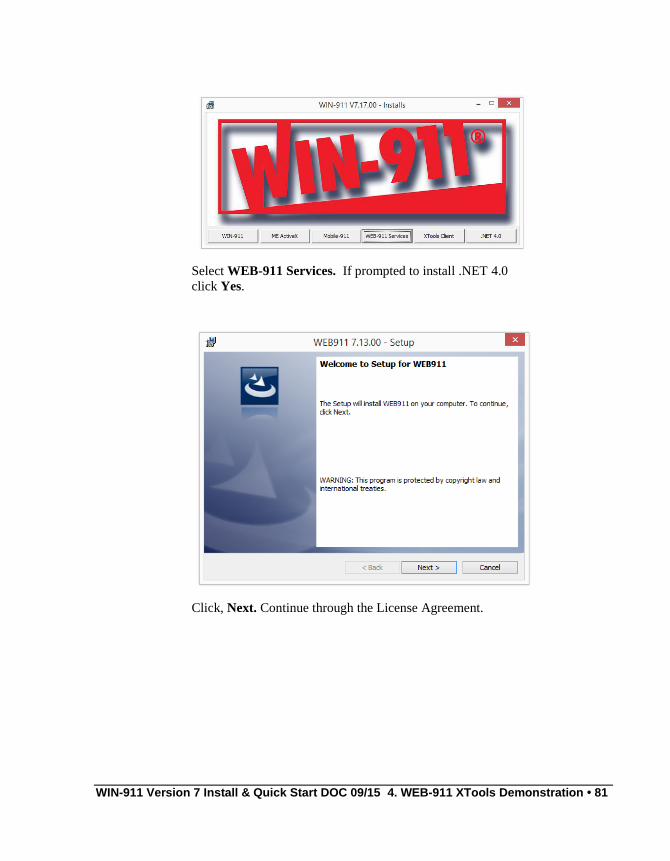
WIN-911 Version 7 Install & Quick Start DOC 09/15 4. WEB-911 XTools Demonstration • 81
Select WEB-911 Services. If prompted to install .NET 4.0
click Yes.
Click, Next. Continue through the License Agreement.
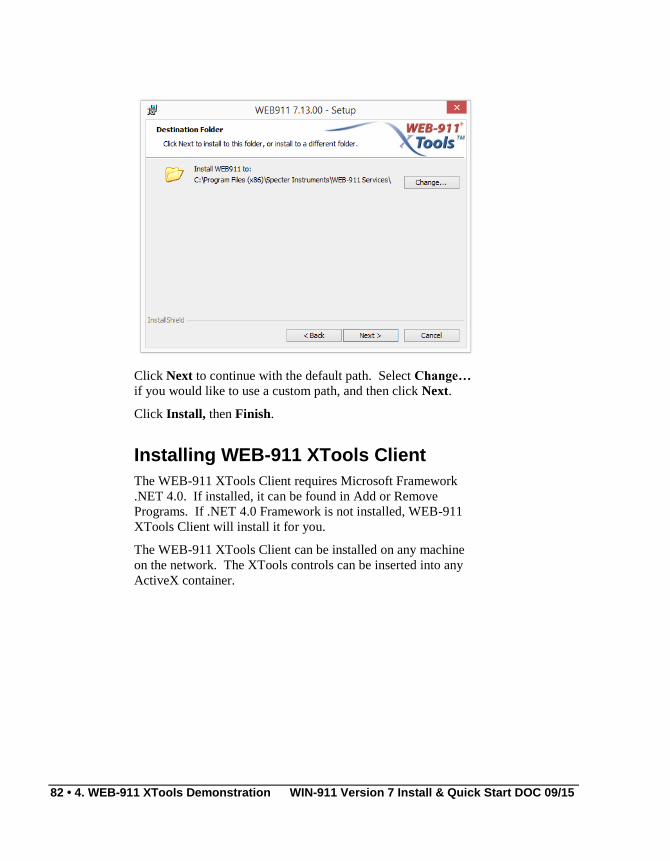
82 • 4. WEB-911 XTools Demonstration WIN-911 Version 7 Install & Quick Start DOC 09/15
Click Next to continue with the default path. Select Change…
if you would like to use a custom path, and then click Next.
Click Install, then Finish.
Installing WEB-911 XTools Client
The WEB-911 XTools Client requires Microsoft Framework
.NET 4.0. If installed, it can be found in Add or Remove
Programs. If .NET 4.0 Framework is not installed, WEB-911
XTools Client will install it for you.
The WEB-911 XTools Client can be installed on any machine
on the network. The XTools controls can be inserted into any
ActiveX container.
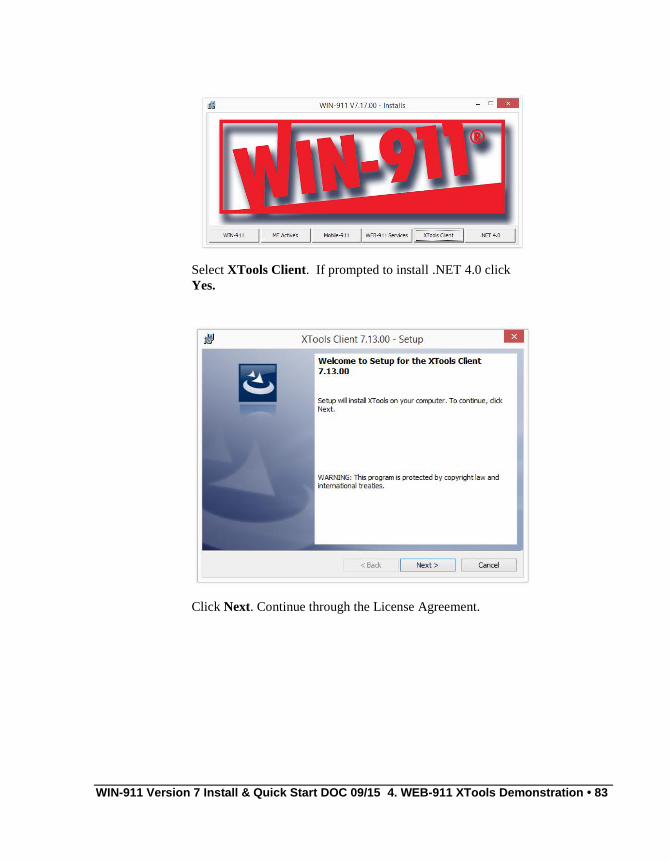
WIN-911 Version 7 Install & Quick Start DOC 09/15 4. WEB-911 XTools Demonstration • 83
Select XTools Client. If prompted to install .NET 4.0 click
Yes.
Click Next. Continue through the License Agreement.
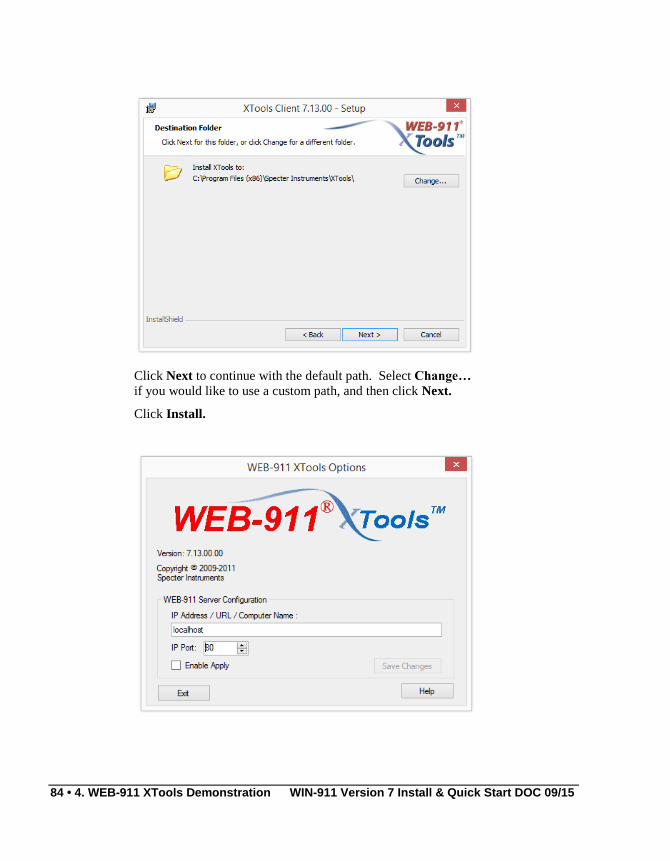
84 • 4. WEB-911 XTools Demonstration WIN-911 Version 7 Install & Quick Start DOC 09/15
Click Next to continue with the default path. Select Change…
if you would like to use a custom path, and then click Next.
Click Install.
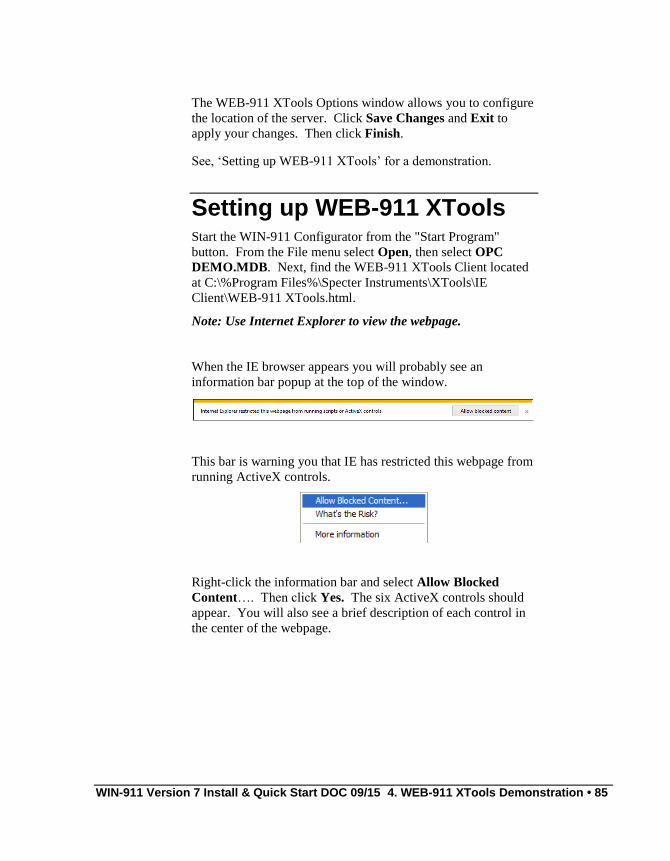
WIN-911 Version 7 Install & Quick Start DOC 09/15 4. WEB-911 XTools Demonstration • 85
The WEB-911 XTools Options window allows you to configure
the location of the server. Click Save Changes and Exit to
apply your changes. Then click Finish.
See, ‘Setting up WEB-911 XTools’ for a demonstration.
Setting up WEB-911 XTools Start the WIN-911 Configurator from the "Start Program"
button. From the File menu select Open, then select OPC
DEMO.MDB. Next, find the WEB-911 XTools Client located
at C:\%Program Files%\Specter Instruments\XTools\IE
Client\WEB-911 XTools.html.
Note: Use Internet Explorer to view the webpage.
When the IE browser appears you will probably see an
information bar popup at the top of the window.
This bar is warning you that IE has restricted this webpage from
running ActiveX controls.
Right-click the information bar and select Allow Blocked
Content…. Then click Yes. The six ActiveX controls should
appear. You will also see a brief description of each control in
the center of the webpage.

86 • 4. WEB-911 XTools Demonstration WIN-911 Version 7 Install & Quick Start DOC 09/15
Each control needs to be activated by clicking it once. After
each control is activated you should be able to access all four
controls with a single click.
Exploring WEB-911 XTools You can now explore the XContacts, XGroup, XSchedule,
XActivate, XStandby and XApply controls.
Note: The initial connection to the server may take a few
seconds.
If at anytime you need help, you can access the WEB-911
XTools help file through the Help buttons on each control.
XContacts
This control allows the user to edit the phonebook.
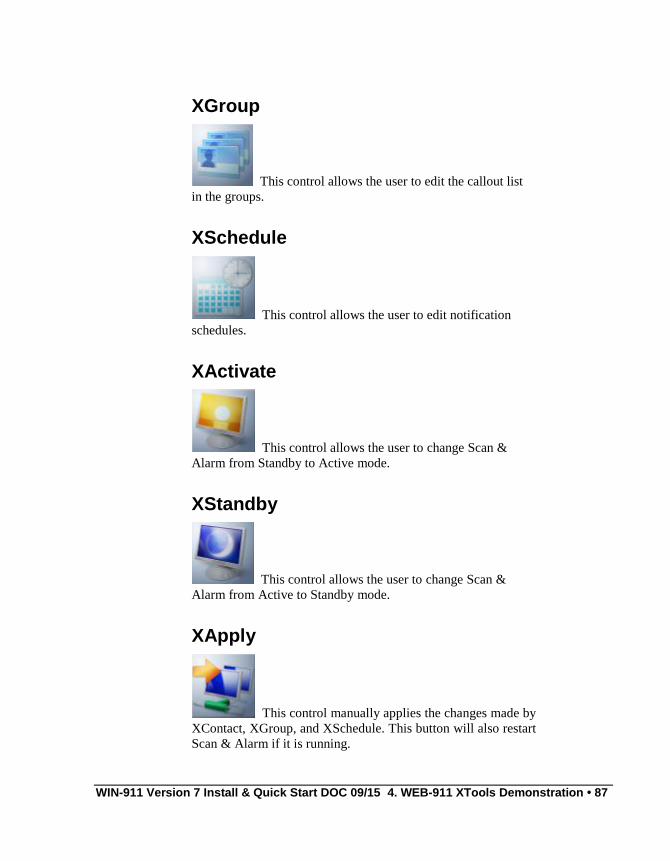
WIN-911 Version 7 Install & Quick Start DOC 09/15 4. WEB-911 XTools Demonstration • 87
XGroup
This control allows the user to edit the callout list
in the groups.
XSchedule
This control allows the user to edit notification
schedules.
XActivate
This control allows the user to change Scan &
Alarm from Standby to Active mode.
XStandby
This control allows the user to change Scan &
Alarm from Active to Standby mode.
XApply
This control manually applies the changes made by
XContact, XGroup, and XSchedule. This button will also restart
Scan & Alarm if it is running.
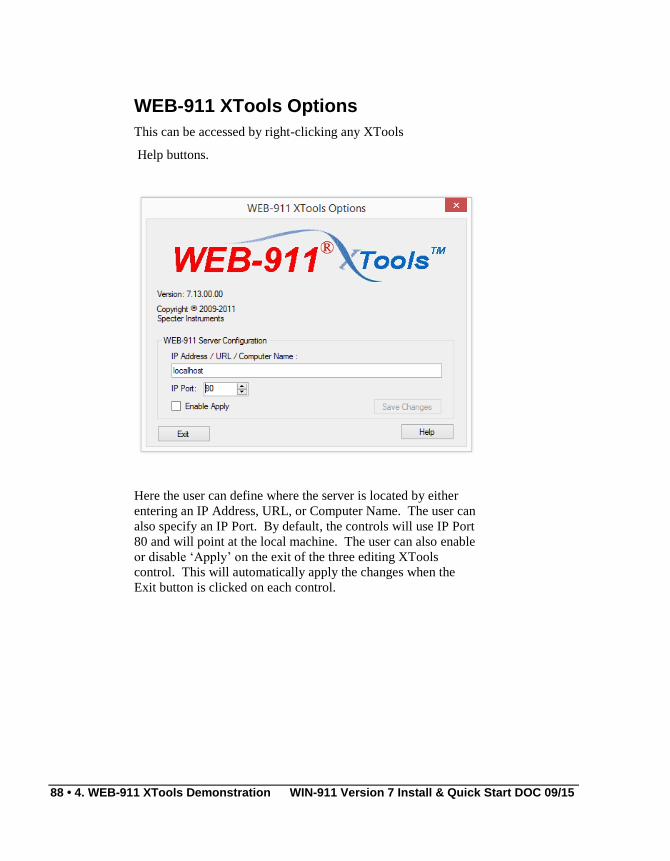
88 • 4. WEB-911 XTools Demonstration WIN-911 Version 7 Install & Quick Start DOC 09/15
WEB-911 XTools Options
This can be accessed by right-clicking any XTools
Help buttons.
Here the user can define where the server is located by either
entering an IP Address, URL, or Computer Name. The user can
also specify an IP Port. By default, the controls will use IP Port
80 and will point at the local machine. The user can also enable
or disable ‘Apply’ on the exit of the three editing XTools
control. This will automatically apply the changes when the
Exit button is clicked on each control.