Embed Size (px)
Citation preview

Electric Bike User Manual
westhillbikes.com
HAVE A QUESTION? NEED HELP?Contact us on Facebook for a quick reply.
RANGER | CLASSICST
VENTURE
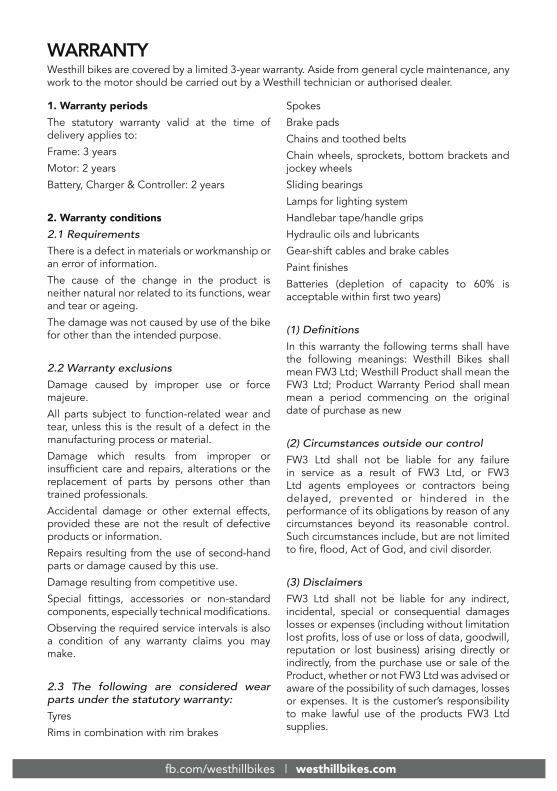
WARRANTYWesthill bikes are covered by a limited 3-year warranty. Aside from general cycle maintenance, any work to the motor should be carried out by a Westhill technician or authorised dealer.
1. Warranty periodsThe statutory warranty valid at the time of delivery applies to:
Frame: 3 years
Motor: 2 years
Battery, Charger & Controller: 2 years
2. Warranty conditions2.1 Requirements
There is a defect in materials or workmanship or an error of information.
The cause of the change in the product is neither natural nor related to its functions, wear and tear or ageing.
The damage was not caused by use of the bike for other than the intended purpose.
2.2 Warranty exclusions
Damage caused by improper use or force majeure.
All parts subject to function-related wear and tear, unless this is the result of a defect in the manufacturing process or material.
Damage which results from improper or
replacement of parts by persons other than trained professionals.
Accidental damage or other external effects, provided these are not the result of defective products or information.
Repairs resulting from the use of second-hand parts or damage caused by this use.
Damage resulting from competitive use.
Observing the required service intervals is also a condition of any warranty claims you may make.
2.3 The following are considered wear parts under the statutory warranty:
Tyres
Rims in combination with rim brakes
Spokes
Brake pads
Chains and toothed belts
Chain wheels, sprockets, bottom brackets and jockey wheels
Sliding bearings
Lamps for lighting system
Handlebar tape/handle grips
Hydraulic oils and lubricants
Gear-shift cables and brake cables
Batteries (depletion of capacity to 60% is
In this warranty the following terms shall have the following meanings: Westhill Bikes shall mean FW3 Ltd; Westhill Product shall mean FW3 Ltd; Product Warranty Period shall mean mean a period commencing on the original date of purchase as new
(2) Circumstances outside our control
FW3 Ltd shall not be liable for any failure in service as a result of FW3 Ltd, or FW3 Ltd agents employees or contractors being
performance of its obligations by reason of any circumstances beyond its reasonable control. Such circumstances include, but are not limited
(3) Disclaimers
FW3 Ltd shall not be liable for any indirect, incidental, special or consequential damages losses or expenses (including without limitation
reputation or lost business) arising directly or indirectly, from the purchase use or sale of the Product, whether or not FW3 Ltd was advised or aware of the possibility of such damages, losses or expenses. It is the customer’s responsibility to make lawful use of the products FW3 Ltd supplies.
fb.com/westhillbikes | westhillbikes.com
the
delayed, prevented or hindered in the
3
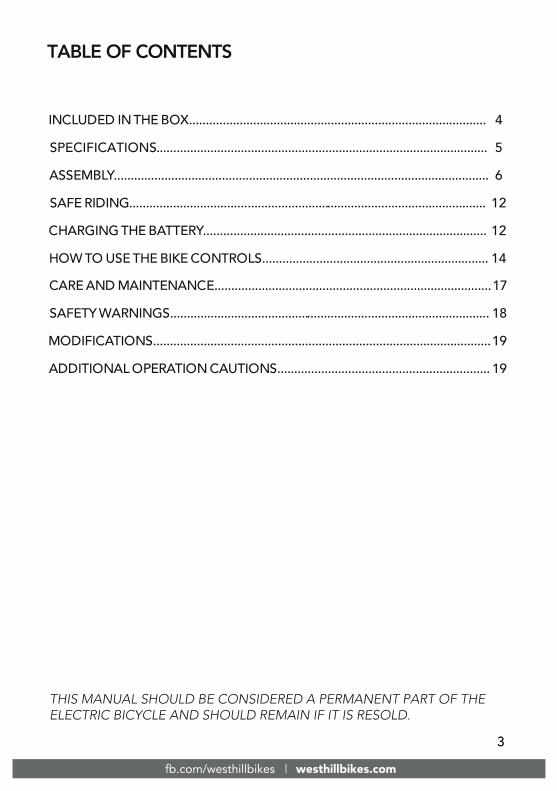
THIS MANUAL SHOULD BE CONSIDERED A PERMANENT PART OF THEELECTRIC BICYCLE AND SHOULD REMAIN IF IT IS RESOLD.
fb.com/westhillbikes | westhillbikes.com
3
TABLE OF CONTENTS
INCLUDED IN THE BOX........................................................................................
SPECIFICATIONS .......... ....... .................................................................................
ASSEMBLY........................................
...................................
.......................................................................
SAFE RIDING ...... .................................................................
CHARGING THE BATTERY....................................................................................
HOW TO USE THE BIKE CONTROLS...................................................................
CARE AND MAINTENANCE..................................................................................
SAFETY WARNINGS...............................................................................................
MODIFICATIONS....................................................................................................
ADDITIONAL OPERATION CAUTIONS...............................................................
4
5
6
12
12
14
17
18
19
19
fb.com/westhillbikes | westhillbikes.com
4
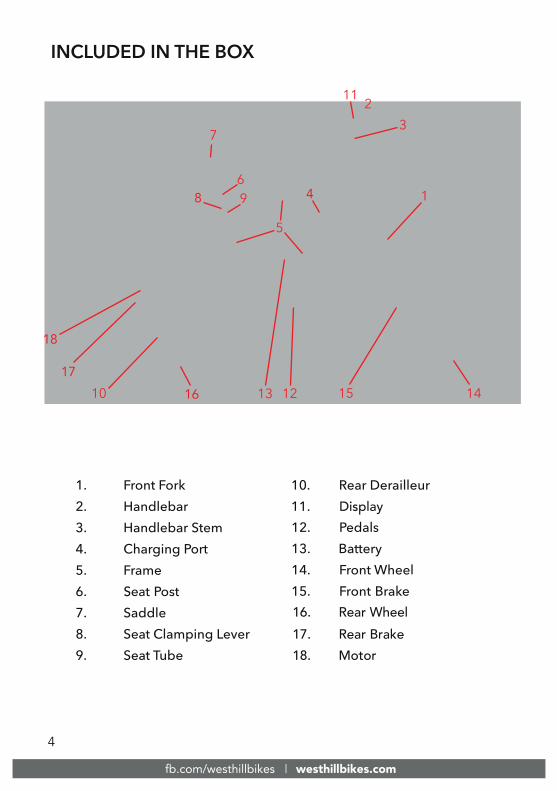
Seat
Display
Rear Wheel16.17. Rear Brake18. Motor
1716
18
8 4

fb.com/westhillbikes | westhillbikes.com
5
SPECIFICATIONSMODEL VENTURE RANGER CLASSICST LINK
Bike
Wheel Size 27.5” 700c 26” 20”
Frame Size 18” / 46 cm 19” / 48 cm 16.5” / 42 cm 13” / 33 cm
Max Rider Weight 120kg 120kg 120kg 120kg
Max Speed 25km/h 15.5mph 25km/h 15.5mph 25km/h 15.5mph 25km/h 15.5mph
Range Per Charge up to 60 miles* up to 60 miles* up to 60 miles* up to 50 miles*
Weight 24kg** 24kg** 24kg** 21kg**
Tyres Kenda K1047 (54-584) 27.5x2.1”Puncture Resistant TPI 60
K-1129 20x1.75” Puncture Resistant TPI 60
Kenda K935 700x40C Puncture Resistant TPI 60
Kenda K935 26x40C Puncture Resistant TPI 60
Gears Shimano Alivio 27 Speed (3x9) 7 Speed 14-34T
Shimano Acera Megarange7 Speed 14-34TShimano Acera Megarange
7 Speed 14-34TShimano Acera Megarange
Brakes Tektro Mechanical Disc Brakes
Tektro HydraulicDisc Brakes
Tektro HydraulicDisc Brakes
Tektro HydraulicDisc Brakes
Display
Battery
Capacity 400WH (10.4Ah) 500WH available (14Ah)
400WH (10.4Ah) 500WH available (14Ah)
400WH (10.4Ah) 500WH available (14Ah)
300 WH (7.8Ah)400WH available (10.2Ah)
Type LG Lithium-ion LG Lithium-ion LG Lithium-ion LG Lithium-ion
Rated Voltage 36V 36V 36V 36V
Motor
Make Bafang Bafang Bafang Bafang
Type Brushless Brushless Brushless Brushless
Rated Power 250W 250W 250W 250W
Rated RPM 325 - 245 RPM 325 - 245 RPM 325 - 245 RPM 325 - 245 RPM
Rated Voltage 36V 36V 36V 36V
Rated Output Torque 65nm 65nm 65nm 65nm
Controller
Controller Sine Wave Sine Wave Sine Wave Sine Wave
Under Voltage Value 31.5V 31.5V 31.5V 31.5V
Over Current Value 15A 15A 15A 15A
Charger
Current 2 Amps 2 Amps 2 Amps 2 Amps
Input 41.9V 41.9V 41.9V 41.9V
Type Smart Charger Smart Charger Smart Charger Smart Charger
Charge Time 4-6h 4-6h 4-6h 4-6h
KT-LCD7 with USB Port KT-LCD7 with USB Port KT-LCD7 with USB Port KT-LCD7 with USB Port
* The range will be different for every user and will be affected by a number of factors listed below.* Factors that effect this: battery size, rider weight, weather conditions, terrain, temperature, gradience, tyre pressure, total load, battery age, battery misuse (please see battery care and maintenance information: https://westhillbikes.com/battery-care-maintenance).** The weight includes the battery and has been rounded to the nearest whole number.
fb.com/westhillbikes | westhillbikes.com
6
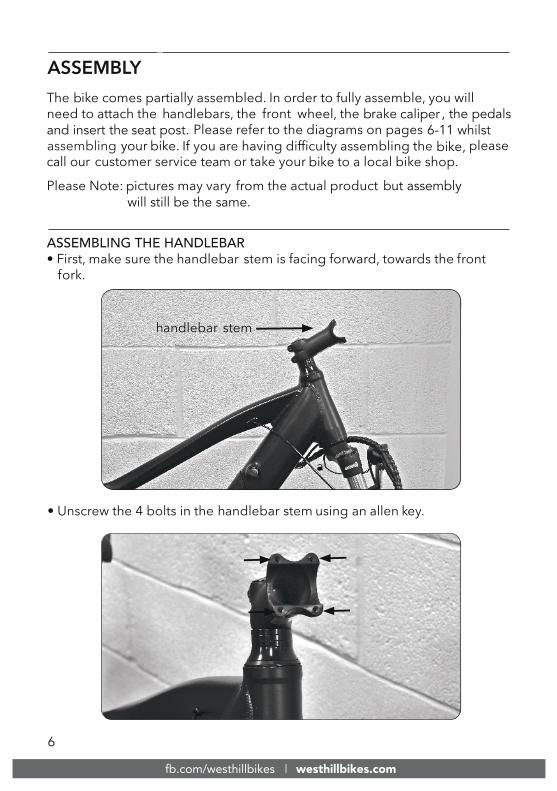
ASSEMBLING THE HANDLEBARh f
fs
but assemblywill still be the same.p
h s
your bike. bike,bike
, the pedals
teamcall our
caliperbwf and insert the seat post. 6-11 whilst
h s
fb.com/westhillbikes | westhillbikes.com
7
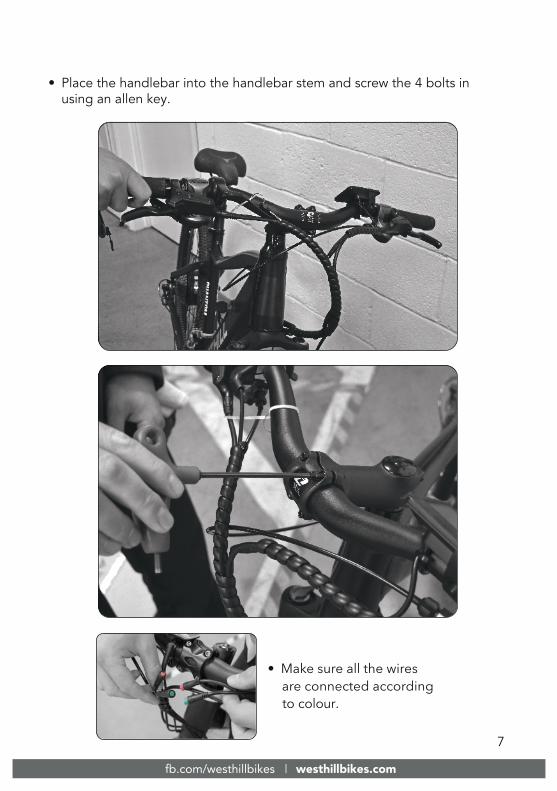
to colour.
Place the handlebar into the handlebar stem and screw the 4 bolts inusing an allen key.
fb.com/westhillbikes | westhillbikes.com
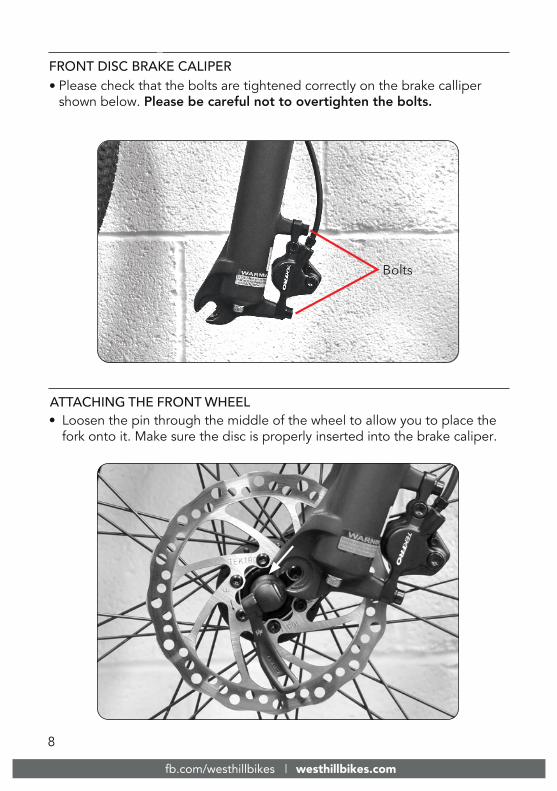
FRONT DISC BRAKE CALIPERPlease check that the bolts are tightened correctly on the brake calliper shown below. Please be careful not to overtighten the bolts.
Loosen the pin through the middle of the wheel to allow you to place thefork onto it. Make sure the disc is properly inserted into the brake caliper.
8
fb.com/westhillbikes | westhillbikes.com
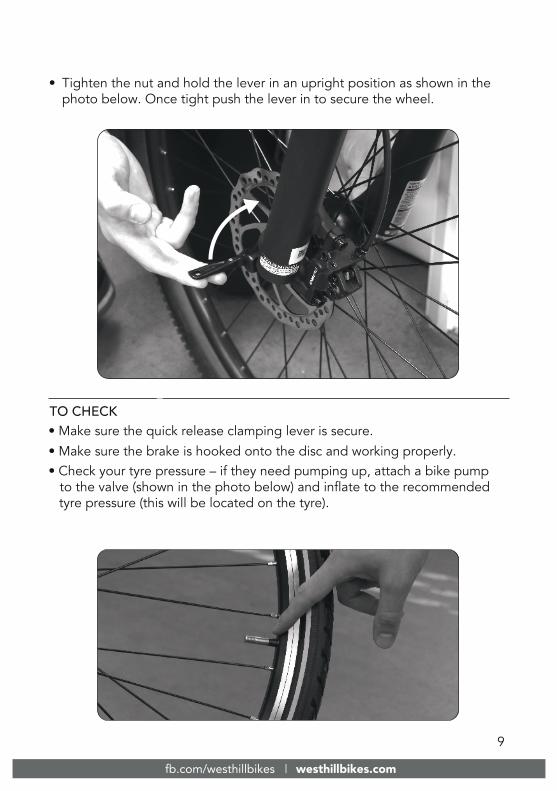
TO CHECK
Tighten the nut and hold the lever in an upright position as shown in thephoto below. Once tight push the lever in to secure the wheel.
Check your tyre pressure – if they need pumping up, attach a bike pumpto the valve (shown in the photo below) and inflate to the recommended tyre pressure (this will be located on the tyre).
Make sure the quick release clamping lever is secure.Make sure the brake is hooked onto the disc and working properly.
9
fb.com/westhillbikes | westhillbikes.com
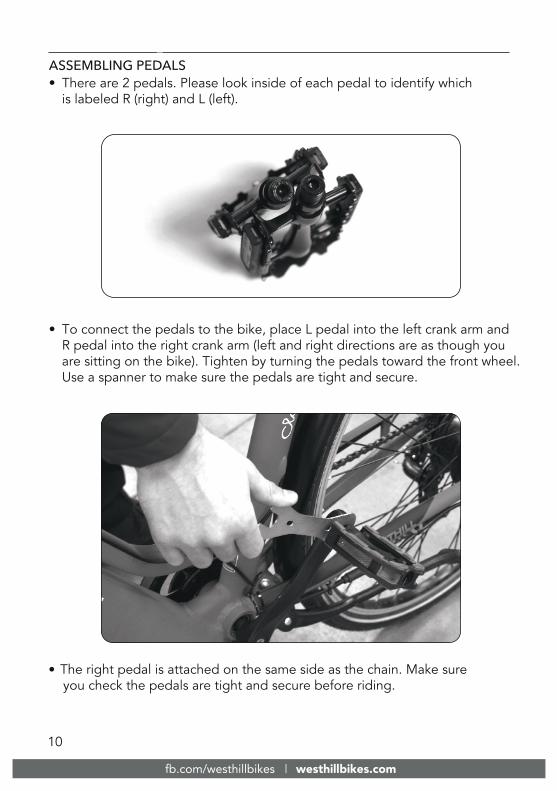
There are 2 pedals. Please look inside of each pedal to identify which is labeled R (right) and L (left).
To connect the pedals to the bike, place L pedal into the left crank arm and R pedal into the right crank arm (left and right directions are as though you are sitting on the bike). Tighten by turning the pedals toward the front wheel. Use a spanner to make sure the pedals are tight and secure.
The right pedal is attached on the same side as the chain. Make sure you check the pedals are tight and secure before riding.
10
fb.com/westhillbikes | westhillbikes.com
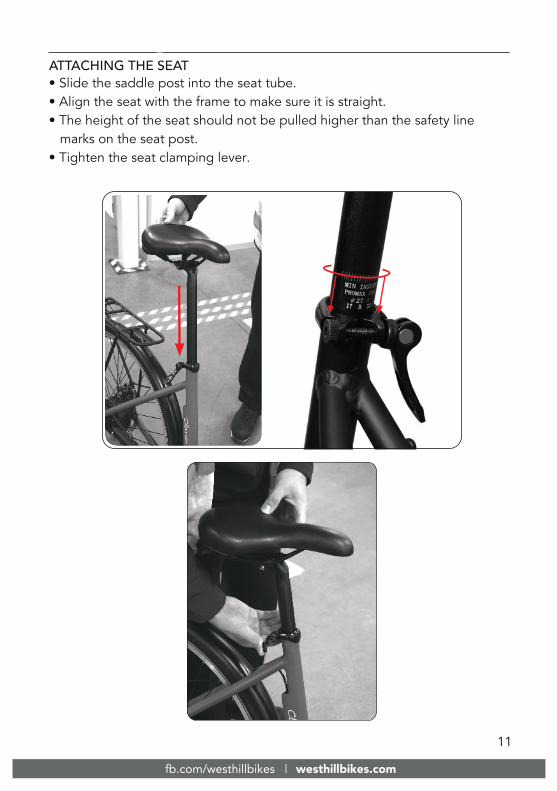
ATTACHING THE SEAT• Slide the saddle post into the seat tube.• Align the seat with the frame to make sure it is straight.• The height of the seat should not be pulled higher than the safety line marks on the seat post.• Tighten the seat clamping lever.
11
fb.com/westhillbikes | westhillbikes.com
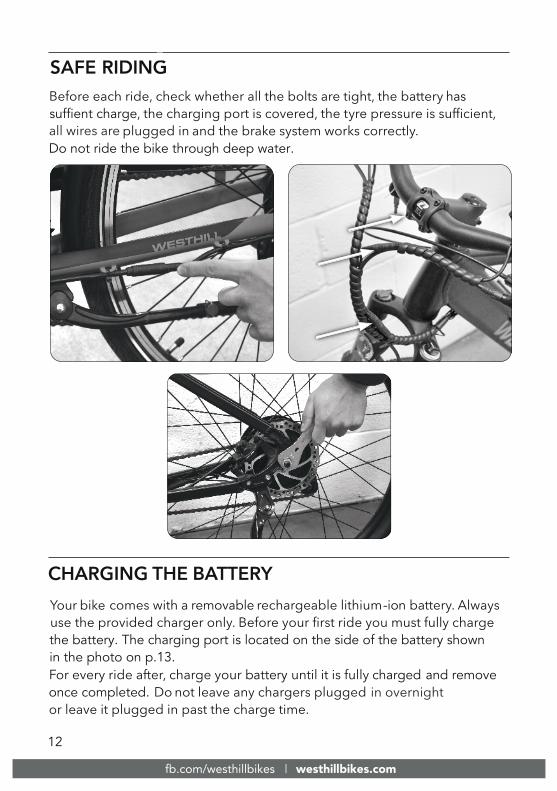
SAFE RIDINGhas
Do not ride the bike through deep water.
suffient charge
-ionremovable
once completed.and remove battery charged
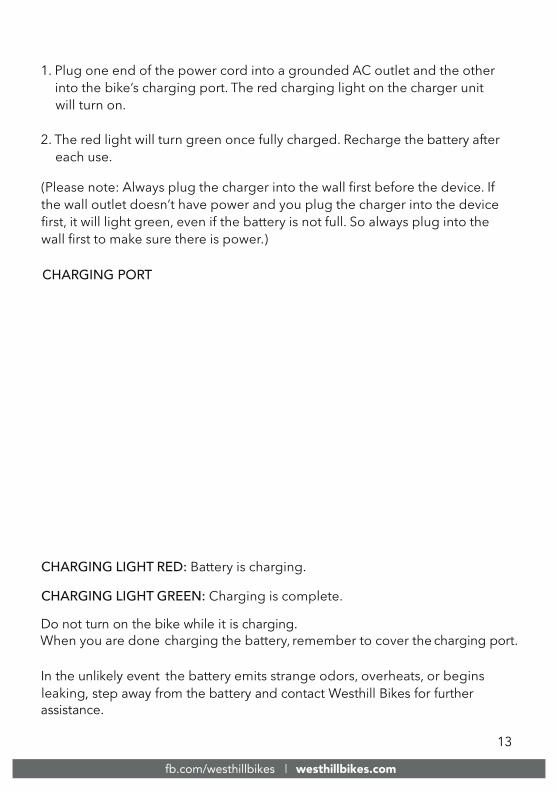
in the photo on p.13.the battery. The charging port is located on the side of the battery shown
12
fb.com/westhillbikes | westhillbikes.com
CHARGING PORT
In the unlikely event, step away from the battery and contact Westhill Bikes for further
assistance.
Do not turn on the bike while it is charging.charging port.
battery
13
fb.com/westhillbikes | westhillbikes.com
FUNCTIONS AND DISPLAY
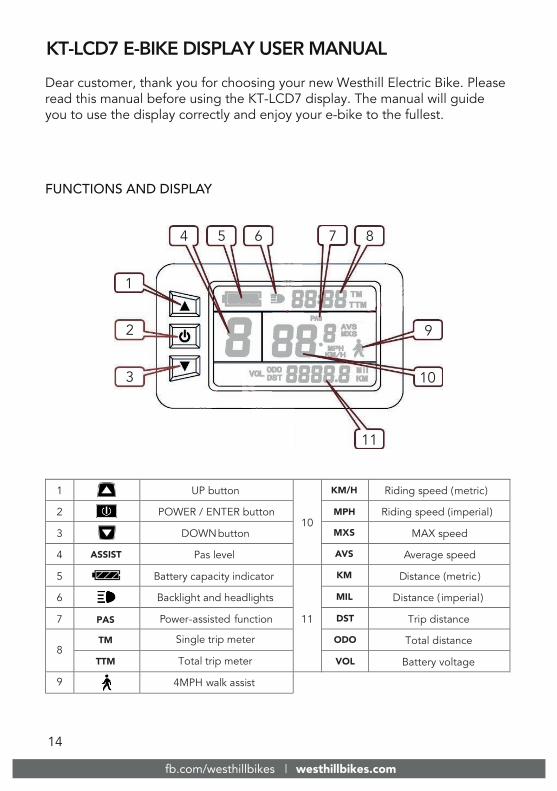
KT-LCD7 E-BIKE DISPLAY USER MANUALDear customer, thank you for choosing your new Westhill Electric Bike. Please read this manual before using the KT-LCD7 display. The manual will guideyou to use the display correctly and enjoy your e-bike to the fullest.
1 UP button
10
Riding speed (metric)
2 imperial)
3 DOWN button MAX speed
4 ASSIST
PAS
TM
DST
ODO
VOL
AVS
MXS
KM
MIL
KM/H
MPH
TTM
Pas level Average speed
5 Battery capacity indicator
11
Distance (metric )
6 Backlight and headlights Distance ( imperial )
7 Trip distance
8
Power-assisted function
Total distance
9
Battery voltage
Riding speed (
Single trip meter
Total trip meter
4MPH walk assist
POWER / ENTER button
1
2
3
4 5 6 7 8
9
10
11
14
fb.com/westhillbikes | westhillbikes.com
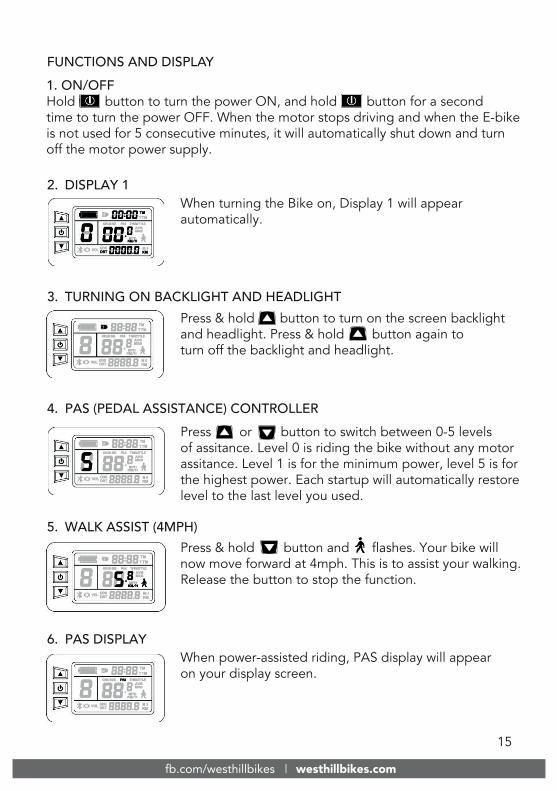
Press or button to switch between 0-5 levels of assitance. Level 0 is riding the bike without any motor assitance. Level 1 is for the minimum power, level 5 is for the highest power. Each startup will automatically restore level to the last level you used.
When power-assisted riding, PAS display will appear on your display screen.
Press & hold button to turn on the screen backlight and headlight. Press & hold button again toturn off the backlight and headlight.
Press & hold button and flashes. Your bike will now move forward at 4mph. This is to assist your walking.Release the button to stop the function.
3. TURNING ON BACKLIGHT AND HEADLIGHT
4. PAS (PEDAL ASSISTANCE) CONTROLLER
2. DISPLAY 1
5. WALK ASSIST (4MPH)
6. PAS DISPLAY
When turning the Bike on, Display 1 will appear automatically.
FUNCTIONS AND DISPLAY1. ON/OFFHold button to turn the power ON, and hold button for a second time to turn the power OFF. When the motor stops driving and when the E-bike is not used for 5 consecutive minutes, it will automatically shut down and turn off the motor power supply.
15
fb.com/westhillbikes | westhillbikes.com
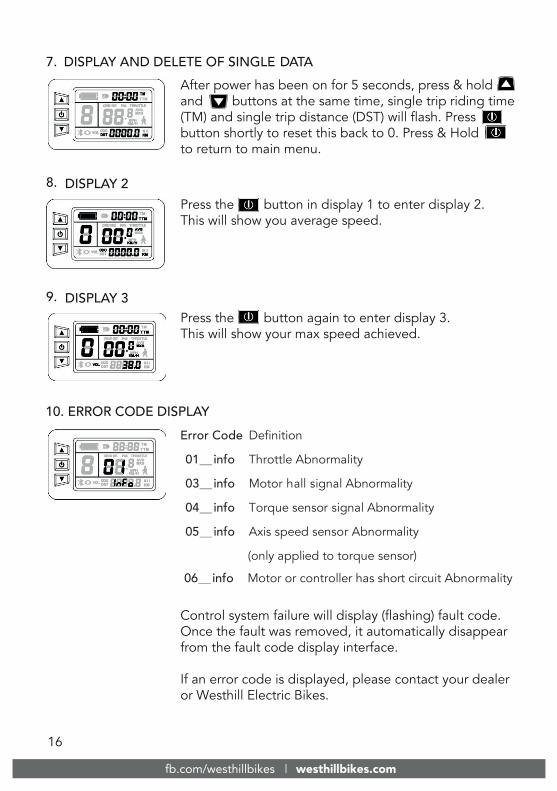
After power has been on for 5 seconds, press & hold and buttons at the same time, single trip riding time (TM) and single trip distance (DST) will flash. Pressbutton shortly to reset this back to 0. Press & Holdto return to main menu.
Control system failure will display (flashing) fault code. Once the fault was removed, it automatically disappear from the fault code display interface.
If an error code is displayed, please contact your dealer or Westhill Electric Bikes.
Press the button in display 1 to enter display 2. This will show you average speed.
Press the button again to enter display 3. This will show your max speed achieved.
7. DISPLAY AND DELETE OF SINGLE DATA
8. DISPLAY 2
9. DISPLAY 3
10. ERROR CODE DISPLAY Error Code Definition
01_ info Throttle Abnormality 03_ info Motor hall signal Abnormality
04_ info Torque sensor signal Abnormality
05_ info Axis speed sensor Abnormality
(only applied to torque sensor)
06_ info Motor or controller has short circuit Abnormality
16
fb.com/westhillbikes | westhillbikes.com
The range of the battery is up to 60 miles per charge.
riding
(15.5mph)
120kg (19 stone).and will void your warranty.limit can
of factors
Battery size, tyre pressure, temperature, battery age and weather conditions.
BATTERY RANGE
Regularthe life of your battery.
prolong
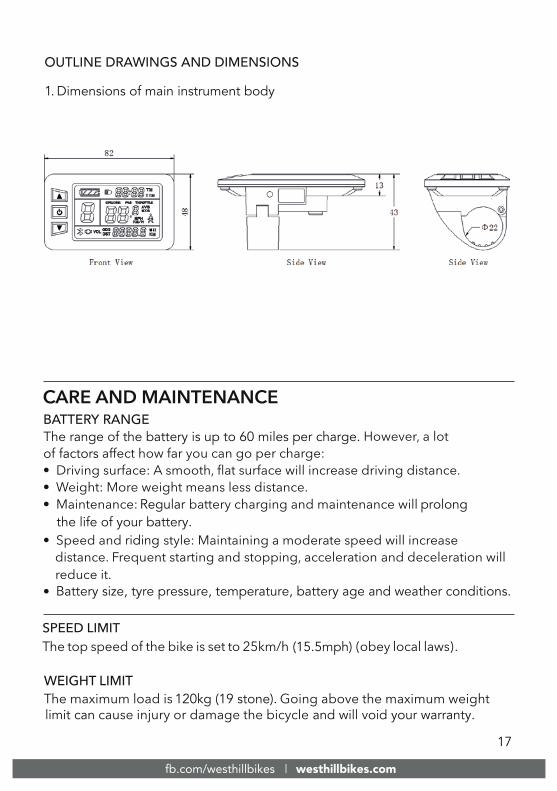
OUTLINE DRAWINGS AND DIMENSIONS
1. Dimensions of main instrument body
17
fb.com/westhillbikes | westhillbikes.com
CLEANING THE BIKE
CustomerYou can remove the battery but never disassemble it.
on +44 (0)1823 672 970.
the tyres (30-70 PSI dependingon which bike you have & how firm you want your ride to be).
battery
tyreTYRE PRESSURE
alcohol. Consult your doctor if taking prescription medication.
Store the battery indoors in a room temperature environment.
Do not use excessive water to clean the bike as this could damage thecomponents, resulting in personal injury or malfunction of the bicycle. Lubricatethe chain after every wash if you can to keep it smooth and rust free.Suitable products are available via westhillbikes.com.
bike.
18

fb.com/westhillbikes | westhillbikes.com
the bike.
any electricalparts without contacting the Customer Service (+44 (0)1823 672 970).
isBe aware of your surroundings.
19

westhillbikes.com
Westhill Bikes Warranty
Register Now Through Facebook
Register Now Through Our Website
The other way to register your new bike is through Facebook. Simply visit our
Simply visit westhillbikes.com/warranty-registration and fill in your information.
page www.fb.com/westhillbikes or scan the QR code below with your mobile
phone and message us with this information:
Your name:
Your email address:
Your postal address:
Bike model & colour:
Purchase date:
Where y ou purchased from:
Be sure to register right away so your bike is covered!
Don’t have Facebook? Email the above details to [email protected] to activate your warranty.