Embed Size (px)
Citation preview
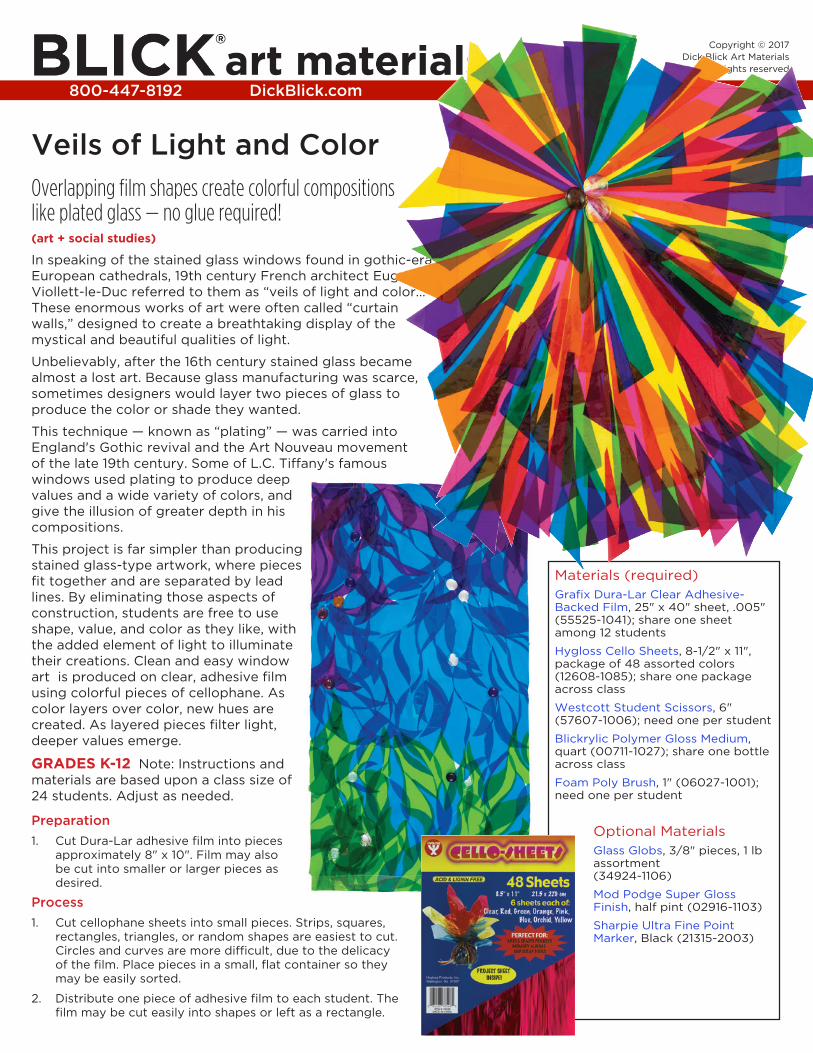
Veils of Light and Color Overlapping film shapes create colorful compositions like plated glass — no glue required!(art + social studies)
In speaking of the stained glass windows found in gothic-era European cathedrals, 19th century French architect Eugene Viollett-le-Duc referred to them as “veils of light and color...” These enormous works of art were often called “curtain walls,” designed to create a breathtaking display of the mystical and beautiful qualities of light.
Unbelievably, after the 16th century stained glass became almost a lost art. Because glass manufacturing was scarce, sometimes designers would layer two pieces of glass to produce the color or shade they wanted.
This technique — known as “plating” — was carried into England's Gothic revival and the Art Nouveau movement of the late 19th century. Some of L.C. Tiffany's famous windows used plating to produce deep values and a wide variety of colors, and give the illusion of greater depth in his compositions.
This project is far simpler than producing stained glass-type artwork, where pieces fit together and are separated by lead lines. By eliminating those aspects of construction, students are free to use shape, value, and color as they like, with the added element of light to illuminate their creations. Clean and easy window art is produced on clear, adhesive film using colorful pieces of cellophane. As color layers over color, new hues are created. As layered pieces filter light, deeper values emerge.
GRADES K-12 Note: Instructions and materials are based upon a class size of 24 students. Adjust as needed.
Preparation
1. Cut Dura-Lar adhesive film into pieces approximately 8" x 10". Film may also be cut into smaller or larger pieces as desired.
Process
1. Cut cellophane sheets into small pieces. Strips, squares, rectangles, triangles, or random shapes are easiest to cut. Circles and curves are more difficult, due to the delicacy of the film. Place pieces in a small, flat container so they may be easily sorted.
2. Distribute one piece of adhesive film to each student. The film may be cut easily into shapes or left as a rectangle.
Copyright © 2017Dick Blick Art Materials
All rights reserved
800-447-8192 DickBlick.com
Materials (required)Grafix Dura-Lar Clear Adhesive-Backed Film, 25" x 40" sheet, .005" (55525-1041); share one sheet among 12 students
Hygloss Cello Sheets, 8-1/2" x 11", package of 48 assorted colors (12608-1085); share one package across class
Westcott Student Scissors, 6" (57607-1006); need one per student
Blickrylic Polymer Gloss Medium, quart (00711-1027); share one bottle across class
Foam Poly Brush, 1" (06027-1001); need one per student
Optional MaterialsGlass Globs, 3/8" pieces, 1 lb assortment (34924-1106)
Mod Podge Super Gloss Finish, half pint (02916-1103)
Sharpie Ultra Fine Point Marker, Black (21315-2003)
Process, continued
3. Carefully peel away backing paper to expose the adhesive. For best results, peel half of the paper up and fold back so half of it remains covered and allows for a place to rest the hand. Adhesive is very sticky.
4. Layer the cut-out shapes so they overlap one another. Shape patterns can be very random or thoughtfully planned with repetition and color placement. Here are some hints:
• Keep shapes in a container until it's time to place them, so they don't accidentally stick to the film and have to be pulled up.
• Work with a piece of white paper underneath so it is easier to see the colors as they overlap.
• Fill the entire piece of film with shapes, so that no adhesive is left exposed.
• It's okay for pieces to not be completely attached or loose. They will be secured in the next step.
5. In a separate container, mix a solution of two parts polymer gloss medium and one part water. Brush over the top of the cellophane pieces. This will add gloss and secure any loose ends.
6. Allow to dry and display in a sunny window. Scrap pieces of adhesive film can be used to help hang the "veils."
Options: — Use other transparent objects, such as beads, glass globs,
tissue papers, or repurposed plastics to make a mixed media composition.
— If the design is fairly simple, trace the edges of the shapes with a permanent black marker to resemble stained glass that has been leaded or foiled.
National Core Arts Standards - Visual Arts
Creating Anchor Standard 1: Generate and conceptualize artistic ideas and work.
Presenting Anchor Standard 5: Develop and refine artistic techniques and work for presentation.
Responding Anchor Standard 7: Perceive and analyze artistic work.
Connecting Anchor Standard 10: Synthesize and relate knowledge and personal experiences to make art.
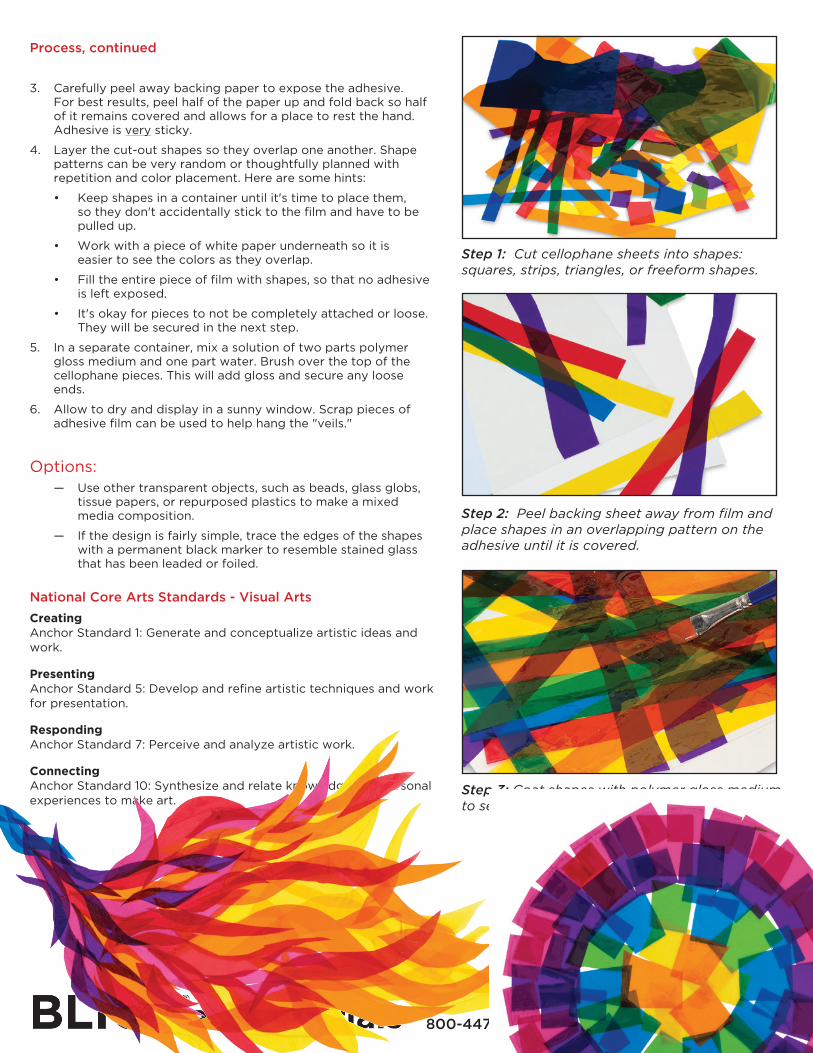
Step 2: Peel backing sheet away from film and place shapes in an overlapping pattern on the adhesive until it is covered.
Step 3: Coat shapes with polymer gloss medium to secure any loose pieces.
Step 1: Cut cellophane sheets into shapes: squares, strips, triangles, or freeform shapes.
2.800-447-8192 DickBlick.com