Embed Size (px)
DESCRIPTION
Visual basic
Citation preview

Page 1
Microsoft Visual Basic .NET Projects for the Classroom
Written by Alfred C Thompson II
Distributed by Mainfunction.com

Page 2
Introduction ...........................................................................................................4
Introduction to the Visual Basic .NET edition ....................................................4
Why we have done these books........................................................................4
Who are we .......................................................................................................4
How to Use This Book.......................................................................................5
Future Developments ........................................................................................6
Wingdings Instructor Notes ...............................................................................7
Wingdings Student Project................................................................................9
Thermometer Program Instructor Notes..........................................................11
Thermometer Program Student Project...........................................................13
Dice Display Instructor Notes..........................................................................15
Dice Display Student Project ..........................................................................17
Guessing Game 1 Instructor Notes .................................................................18
Guessing Game 1 Student Project ..................................................................20
Guessing Game 2 Instructor Notes .................................................................22
Guessing Game 2 Student Project ..................................................................24
Flip Book Program Instructor Notes ................................................................26
Flip Book Program Student Project .................................................................28
Simple House Drawing Instructor Notes..........................................................30
Simple House Drawing Student Project ...........................................................32
Spaceship Invaders Instructor Notes................................................................34
Spaceship Invaders Student Project ...............................................................37
Tic Tac Toe Instructor Notes..........................................................................39
Tic Tac Toe Student Project ..........................................................................41
Picture Display Program Instructor Notes .......................................................43
Picture Display Program Student Project .........................................................45
Multiple Choice Grading Program Instructor Notes ..........................................47
Multiple Choice Grading Program Student Project ...........................................49
Multiple Choice Grading Program with Structures Instructor Notes..................51
Multiple Choice Grading Program with Structures Student Project ..................53
Check Book Balancing Program Instructor Notes ............................................55
Check Book Balancing Program Student Project .............................................58

Page 3
Drawing Program Instructor Notes ..................................................................60
Drawing Program Student Project ....................................................................62
Roman Numeral Conversion Instructor Notes..................................................64
Roman Numeral Conversion Student Project..................................................66
Palindromes Instructor Notes..........................................................................68
Palindromes Student Project .........................................................................70
Conway’s Game of Life Instructor Notes ..........................................................72
Conway’s Game of Life Student Project..........................................................75
Checkers Game Program Instructor Notes ......................................................77
Checkers Game Program Student Project .......................................................80
Page 4
Introduction Introduction to the Visual Basic .NET edition The original version of this book was released in 1998 in both print and web versions. The version of Visual Basic at that time was 5.0. No changes were required for Visual Basic version 6.0 which followed. The projects in this book continued to be used by teachers in classrooms around the world. Visual Basic .NET, also called Visual Basic 7.0, is a major change in the way Visual Basic programs are designed and programmed. The differences go far beyond the significant changes to the Interactive Development Environment. These changes suggested the need to update this book, especially the Instructors Notes, to reflect the programming changes required by changes to the Visual Basic .NET language. All screen captures were created with Visual Studio .NET running on the Windows XP operating system. The sample solutions, available through [email protected], were written from the beginning using Visual Studio .NET and were not upgrades from solutions written in earlier versions of Visual Basic. This was done to insure that all solutions were pure .NET implementations rather then carrying old paradigms into a new architecture.
Why we have done these books. This book includes a set of Visual Basic .NET projects available through Mainfunction.com. This book is designed to supplement and enhance existing and developing curriculum at the secondary and post secondary level. There is a growing need for trained programmers in the work force. Visual Basic is one of the programming languages in highest demand. Some companies are paying bonuses for trained Visual Basic programmers. More and more schools recognize the need for Visual Basic training for School to Work programs and are developing courses to fill that need. College preparatory schools are finding that Visual Basic is an ideal first programming language for their students. In any programming course, there is a need to projects that both develop necessary skills and hold student interest. The projects in this book are designed to supply additional projects for instructors to use.
Who are we Mainfunction offers news, curriculum, grants and resources for secondary computer science, engineering and information technology educators. It's about using technology in innovative ways to further computer science and information technology instruction. Visit us on the World Wide Web at http://www.mainfunction.com or direct to the teacher section at http://educators.mainfunction.com.

Page 5
How to Use This Book
Target Audience This project book has been written to be used in the context of a first programming course using Visual Basic .NET. It is assumes no previous programming knowledge on the part of a student. It is designed for instructors to use as a supplement to their primary instructional resources. As such, it assumes that the student has available to them an instructor and a textbook for use as reference.
Projects All projects have two sections. The first section for teacher use and the second for student use. The instructor section includes the following sections:
• ABILITY LEVEL – Required ability level for students attempting project. • APPROXIMATE COMPLETION TIME – An estimate of how long students will
require completing the project. • OBJECTIVES – What skills and information are being reinforced by the
project. • SKILLS NEEDED – A list of prerequisite knowledge and skills for students
who undertake the project. • MATERIALS NEEDED – What resources and materials the project requires
supporting student work on the project. • TEACHING SUGGESTIONS – Suggestions on ways to introduce the project,
common problems encountered by students, and other information related to the project.
• RESOURCES – Any additional resources involved in the project. • SUGGESTED EVALUATION – Indications of what to look for and grade in
student projects. • SUGGESTED SOLUTION – A narrative programming solution to the project.
Coded and commented sample solutions in Visual Basic .NET are available by sending email to [email protected].
The student sections may be reproduced and distributed to students. These sections include:
• ABILITY LEVEL – Required ability level for students attempting project. • APPROXIMATE COMPLETION TIME – An estimate of how long students will
require completing the project. • OBJECTIVES – What skills and information are being reinforced by the
project. • OVERVIEW OF PROJECT – A summary of what the project involves. • PROJECT INSTRUCTIONS – A list of general instructions for completing the
project. • ADDITIONAL RESOURCES - Any additional resources involved in the
project.

Page 6
• SUGGESTED SOLUTION – A suggestion of one possible solution. This usually comes in the form of a screen capture of a completed solution form. Students should be encouraged to develop alternative solutions. Some instructors may choose not to distribute a solution so as not to limit student creativity. Others may wish to insist on a specific form appearance so that students do not waste time on the appearance of the form over the code solution.
• PROJECT EXTRAS – A list of optional additions to the project. These suggestions will be used by students desiring to do more then the minimum requirements of the project.
Ability Levels All projects in this book have a suggested ability level. The levels, beginner, intermediate and advanced are rather broad. The explanations below are intended to help the instructor select the projects that are appropriate for their students.
Beginner Assumes little or no previous experience with programming or Visual Basic .NET before the instructor’s introduction of the project. May understand basic concepts but be unsure of implementation details.
Intermediate Understands basic concepts including objects, events, properties of objects, and form design. Understands assignment statements, loops, and decision statements. Understands simple text file input and output. Understands variable and object arrays.
Advanced Understands record types and advanced data structures. Understands file input and output. Uses multiple forms, subroutines and functions. Is able to design solutions to complex problems.
Future Developments Mainfunction intends to add projects to the resource database on a regular basis. We encourage you to submit your favorite projects. All projects will be credited to the submitter. Please visit http://educators.mainfunction.com and register as a teacher to contribute.

Page 7
Wingdings Instructor Notes ABILITY LEVEL: Beginner APPROXIMATE COMPLETION TIME: 20 Minutes OBJECTIVES: • Use an assignment statement to modify object properties SKILLS NEEDED: • Basic understanding of object properties MATERIALS NEEDED: • Visual Basic .NET TEACHING SUGGESTIONS: The purpose of this project is to give students a chance to see objects respond to events. It relies on the most basic of object properties (font and text) and the event (click) that students are most used to using. Explain the difference between design time and run time changes to properties. Tell then that, while the user can not directly change the text or other properties of some objects, a program can be programmed to allow the user to indirectly change many of these properties. Pay careful attention to the explanation of assignment statements. Some students will have trouble grasping that the copy moves from right to left. They are used to thinking from left to right. RESOURCES: • Textbook SUGGESTED EVALUATION: This program should respond to a click of a command button and copy a string from one box to another. Consider giving that as the C level and ask students to add other features for more credit. See the student section for suggestions of additional features.

Page 8
SUGGESTED SOLUTION: Have the students create a label and a text box. Have them change the font of the label box to Wingdings. Wingdings are a standard font included with Windows. If this font is not available, use any font that includes something other then normal English characters. The command click routine will include a simple assignment statement to copy the contents of the text box into the text property of the label box.
Page 9
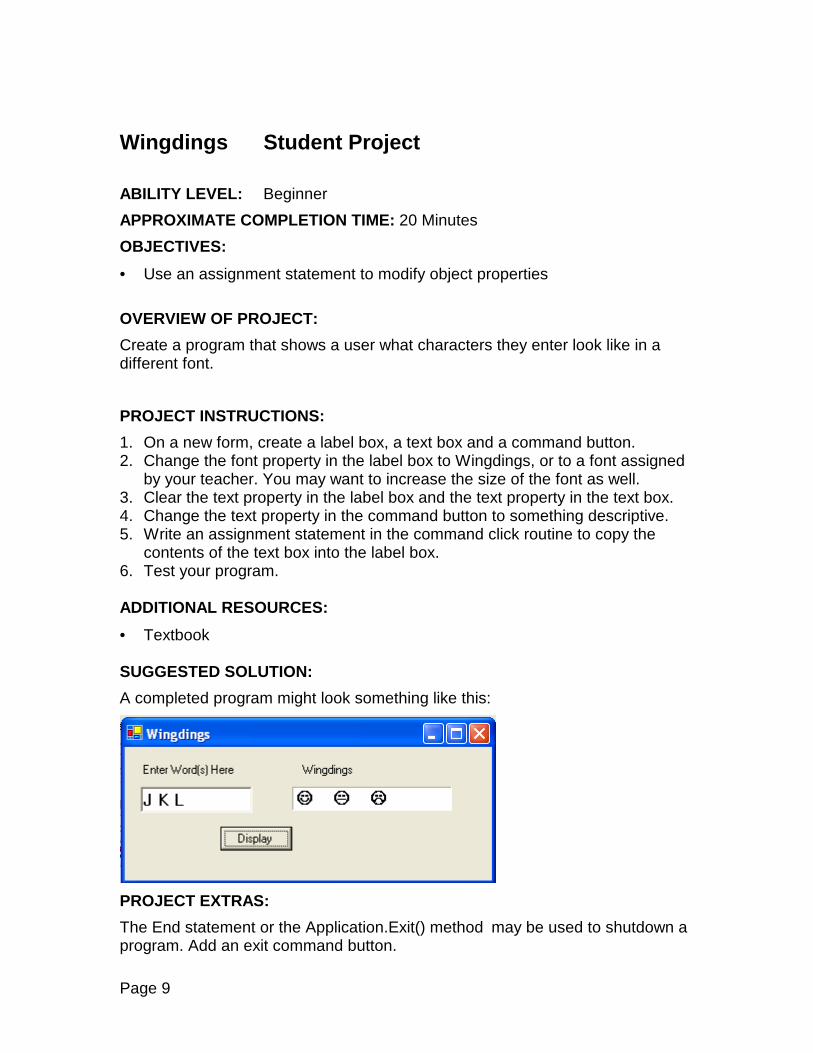
Wingdings Student Project ABILITY LEVEL: Beginner APPROXIMATE COMPLETION TIME: 20 Minutes OBJECTIVES: • Use an assignment statement to modify object properties OVERVIEW OF PROJECT: Create a program that shows a user what characters they enter look like in a different font. PROJECT INSTRUCTIONS: 1. On a new form, create a label box, a text box and a command button. 2. Change the font property in the label box to Wingdings, or to a font assigned
by your teacher. You may want to increase the size of the font as well. 3. Clear the text property in the label box and the text property in the text box. 4. Change the text property in the command button to something descriptive. 5. Write an assignment statement in the command click routine to copy the
contents of the text box into the label box. 6. Test your program. ADDITIONAL RESOURCES: • Textbook SUGGESTED SOLUTION: A completed program might look something like this:
PROJECT EXTRAS: The End statement or the Application.Exit() method may be used to shutdown a program. Add an exit command button.

Page 10
Copying nothing in to a text property empties it. Using a pair of double quotes with no space between them indicates nothing. Use that to create a Clear button that empties both the text and label boxes. Create a number of label boxes with different fonts and font sizes. Copy the text string in to all the label boxes. Copy the text box into the label box in response to some other event. For example, on mouse move over the label box.

Page 11
Thermometer Program Instructor Notes ABILITY LEVEL: Beginner APPROXIMATE COMPLETION TIME: 1 hour OBJECTIVES: • Use mathematical formulas in a program • Use a scroll bar object SKILLS NEEDED: • Understanding of object properties • Understanding of mathematical operations MATERIALS NEEDED: • Visual Basic .NET TEACHING SUGGESTIONS: Most introductory programming texts use temperature conversion as an early project or example. Asking a student to write a simple input a number, convert the value and display the result program is that it does not really use the power of the computer. This project uses scroll bars as an input device to make the example more visually interesting and to introduce a powerful user interface tool. The student may set the initial value of the bar either in the property box at design time or in the form load routine with an assignment statement. Unless the student includes program code at form load, the label boxes will not display the results of a conversion until the scroll bar is moved. This can be a useful introduction to concepts of initialization in general. Scroll bars must have their minimum and maximum values set to work properly with this project. The minimum value is set at the top of the bar. The maximum is at the bottom. This is the opposite of what one sees with a thermometer. Unlike earlier versions of Visual Basic, Visual Basic .NET does not allow a programmer to set the minimum value larger then the maximum value. This means that a user will see lower temperatures at the top of the scrollbar and higher temperatures at the bottom of the scrollbar unless the program changes the value of the scrollbar before it displays the temperature it represents.

Page 12
RESOURCES: • Textbook SUGGESTED EVALUATION: A complete thermometer program should:
• Change the values in the Fahrenheit and centigrade labels with the movement of a scroll bar
• Exit the program cleanly SUGGESTED SOLUTION: Private Sub vScrollBar1_Scroll(ByVal sender As Object, _
ByVal e As System.Windows.Forms.ScrollEventArgs) _ Handles vScrollBar1.Scroll
Dim degF As Int16 degF = 200 - vScrollBar1.Value Dim degC As Double degC = (5.0 / 9.0) * (degF - 32.0) lblF.Text = degF.ToString() lblC.Text = Convert.ToInt16(degC).ToString() End Sub

Page 13
Thermometer Program Student Project ABILITY LEVEL: Beginner APPROXIMATE COMPLETION TIME: 1 hour OBJECTIVES: • Use a scroll bar object OVERVIEW OF PROJECT: Create a scroll bar to represent a thermometer. As the slider on the scroll bar is moved display temperature in both Fahrenheit and centigrade in boxes on a form. PROJECT INSTRUCTIONS: 1. On a new form, create a scroll bar. 2. Set the minimum and maximum properties for the scroll bar. 3. Create label boxes to display Fahrenheit and centigrade temperatures. 4. Create label boxes to label the temperature boxes. 5. Copy the value of the scroll bar into the Fahrenheit label box in the routine
reacting to changes to the scroll bar. 6. Change the value in the centigrade box by using the formula for converting
Fahrenheit to centigrade when the Fahrenheit value changes. 7. Create an exit button or menu option with the appropriate code to end the
program. ADDITIONAL RESOURCES: • Textbook SUGGESTED SOLUTION:

Page 14
The formula for converting Fahrenheit to centigrade is: C = (F – 32) * (5 / 9) PROJECT EXTRAS: Add a background to the form. Perhaps a weather related picture. Set different background colors for the Fahrenheit and centigrade labels. Label the slider bar with degree markings on either side. Add buttons to move the slider to “freezing” and/or “boiling.”

Page 15
Dice Display Instructor Notes ABILITY LEVEL: Beginner APPROXIMATE COMPLETION TIME: 1 hour OBJECTIVES: • Understand and use string functions • Understand and use mathematical functions SKILLS NEEDED: • Understanding of basic variable types – double, integer and string MATERIALS NEEDED: • Visual Basic .NET • Paint Program TEACHING SUGGESTIONS: The two critical parts of this project are picking the random number and loading the appropriate picture into each picture box. The RND method returns a real number (Visual Basic .NET type Single) that is greater then zero but less then 1. To produce the random integers required by this project, students may use this formula:
rDie = CInt(Int((6 * Rnd()) + 1))
Multiplying the value returned by Rnd results in a value greater then zero but less then six because Rnd will never be equal to one. The CInt method truncates the Single precision result of the multiplication and provides an integer between one and five. Since the range we need is from 1 to 6 the programmer adds 1. Explain to the class that using variables in place of the numeric constants 1 and 6 creates a more general formula. SUGGESTED SOLUTION: Six 1 inch by 1 inch die face images should be prepared for students to use. Visual Basic .NET objects are measured in pixels by default. There are 96 pixels in an inch. Black and white images will take up the least room and load quickest. Place the images where students can either use them directly or copy them to their own workspaces. Optionally, students can create their own dice images but they must be careful to create them same size as the picture. The easiest way to load these images is to create the images with names that are identical except for an identifying number. For example, DIE1.BMP,

Page 16
DIE2.BMP… DIE6.BMP. Use the ToString method and a random number in range to concatenate a file name into a string variable for the Image.FromFile method.
The image above is one possible form solution. The code below will select image files from the folder with the executable file. Dim rDie As Int16 = CInt(Int((6 * Rnd()) + 1))
Dim newDie As String = Application.StartupPath + "\Die" + _ rDie.ToString() + ".bmp"
picDice1.Image = Image.FromFile(newDie) rDie = CInt(Int((6 * Rnd()) + 1))
newDie = Application.StartupPath + "\Die" + rDie.ToString() + _ ".bmp"
picDice2.Image = Image.FromFile(newDie)
RESOURCES: • Textbook SUGGESTED EVALUATION: A complete dice display program will:
• Display at least two die images • Die images will change randomly in response to button clicks • Die images will generally represent different values • The program will exit in response to a button click

Page 17
Dice Display Student Project ABILITY LEVEL: Beginner APPROXIMATE COMPLETION TIME: 1 hour OBJECTIVES: • Understand and use string functions • Understand and use mathematical functions OVERVIEW OF PROJECT: Many games depend on the roll of a pair of dice. The object of this program is to simulate the roll of dice. The program will display dice images showing the value of dice values. The project assumes standard six sided dice but can be expanded to other sizes if desired. PROJECT INSTRUCTIONS: 1. Create a form with two picture boxes and two command buttons. 2. Set the height and width of both picture boxes to 96 pixels by 96 pixels. 3. Set the text property of one button to Exit and write code so that the program
terminates when the button is pushed. 4. Set the text property of the second button to “Roll” and write code so that
pictures of dice in each picture box ADDITIONAL RESOURCES: • Textbook • Paint program SUGGESTED SOLUTION: Use the Rnd method and a formula to pick a random number between one and six. Use that number to build the name of a bit map image (BMP) file and use Image.FromFile method to display that image in a picture box. Do this for each picture box in the form when the display dice button is clicked. PROJECT EXTRAS: Display more then two dice. Display the total of the dice in a label box. Create and use your own die images.

Page 18
Guessing Game 1 Instructor Notes ABILITY LEVEL: Beginner APPROXIMATE COMPLETION TIME: 1 hour OBJECTIVES: • Understand and use form level (global) variables SKILLS NEEDED: • Understanding of basic events and object properties MATERIALS NEEDED: • Visual Basic .NET TEACHING SUGGESTIONS: Scope of variables is one of the more confusing computer science concepts to be explained in an introductory programming course. The values stored in local variables are lost whenever a subroutine is existed. Variables used by several routines or that must be saved for different calls to the same routine must be created differently. Visual Basic .NET has several options for extending the scope of variables. Declaring a variable in a form’s Declarations section makes a variable and its value available to all subroutines. These are called form level variables. We can also say that the scope of the variable is global to all routines in the form. A name used as a global variable may only be used for one unique variable. If you only need a variable in one routine but want to have it keep its value between runs of the routine you want it to be static. Declare a static variable in the subroutine that uses it using the static reserved word rather than the Dim reserved word. Names used as static variables may be used in any number of routines but changes to any of those variables will have no effect on the variables of that name in any other subroutine. This makes programs more difficult to understand and to debug. You will want to discourage students from using duplicate names for static variables. SUGGESTED SOLUTION: The guessing game where a player is told that their guess is too high or too low lends itself to simulating a binary search. Using a binary search, any number in the range of 1 to 100 may be determined in no more then seven guesses. Use form level variables to keep track of the highest and lowest possible numbers, as well as the current guess.

Page 19
Set a guess that is too high as the new top of range. Set a guess that is too low as the new bottom of range. The next guess should be in the middle of the new range of possibilities. A subroutine for resetting the game can be a useful addition to this project. A static variable in this routine can be used to count the number of games played. RESOURCES: • Textbook SUGGESTED EVALUATION: Test the full range of the program and insure that it will properly guess both one and one hundred. Also, try 49 and 51. The program should properly reach any number. A good program will not duplicate guesses or guess numbers higher or lower than have already been rejected. A new game should reset all settings so that counts and ranges are set the same for all games.

Page 20
Guessing Game 1 Student Project ABILITY LEVEL: Beginner APPROXIMATE COMPLETION TIME: 1 hour OBJECTIVES: • Understand and use form level (global) variables OVERVIEW OF PROJECT: The object of this project is to write a computer program that will allow the computer to guess a number that you have selected. The computer will make a guess and you, the player, will tell the computer if it guessed too high, too low, or that it guessed the number. The program will also allow the player to start a new game or to exit the program. PROJECT INSTRUCTIONS: 1. Create a form with a labeled box to display the computers guess. 2. Create a new game and an exit button. 3. Create objects to indicate if the guess was too high, too low, or right on target. 4. Create program code to respond to the player’s indication by selecting and
displaying a new computer guess. 5. When the computer guesses the player’s number, reset the so that a new
game may begin. ADDITIONAL RESOURCES: • Textbook SUGGESTED SOLUTION:
This solution uses buttons to indicate the success of the computer’s guess. The new game button will reset the guess to 50 and set any counters back to zero.

Page 21
PROJECT EXTRAS: Display the number of guesses the computer required to find the players number. Declare victory automatically when the last possible guess is made. Keep and report counts of how many guesses were too high and too low.

Page 22
Guessing Game 2 Instructor Notes ABILITY LEVEL: Beginner APPROXIMATE COMPLETION TIME: 2 hours OBJECTIVES: • Understand and use IF blocks • Understand and use ElseIf • Understand and use data validation SKILLS NEEDED: • Understanding of basic events and object properties • Familiarity with the RND method and generating random numbers in a range. • Optionally: Understanding of exception handling MATERIALS NEEDED: • Visual Basic .NET TEACHING SUGGESTIONS: Nested IF statements and the use of the ElseIf in IF blocks allow a programmer to evaluate a number of possibilities. In this program, there are three possibilities for the program to consider. The number the player guesses may be too high, too low or the number the computer is looking for. The programmer has several options available to evaluate these possibilities. One is to have three totally independent IF blocks, one for each case. Three independent IF blocks are easy to set up but are not as efficient as a program could be. The program must evaluate all three statements even if the first one satisfies the problem. Using nested blocks and the ElseIf statement is more efficient because comparisons are only made until one statement evaluates to true. If the programmer knows the likely probability of the various options, they may order the IF checks to have the most probably check made first and the least likely check performed last. Block IF statements require End If statements. Forgetting an End If statement is one of the most common errors made with IF blocks. A second source of confusion is the difference between ElseIf (as one word) and having an If as the first line of the Else clause. In the second case, there must be a matching End If for the IF statement. A number of ElseIf clauses may be part of the initial IF statement.

Page 23
Suggest that students use indents to identify the sections of block IF statements. This will make it easier to match End If to If. Students often just add End If statements at the end of a section to silence error messages. This more often results in logic errors then in a correctly working program. This project is a good one to use when introducing exception handling with try/catch/finally. A good program must validate the guess. A try clause can be opened before the text is converted to an integer to catch conversion problems. Then an if statement can check that the number entered is between 1 and 100. An exception will be thrown if the number is out of range. If the number is out of range or not an integer (a double or a non number) an exception is thrown and handled by the catch clause. Regardless of an exception or a valid guess the text box should be cleared and returned to focus. This is handled in the finally clause. SUGGESTED SOLUTION: Use the RND method to select a random number, for the computer. For example: compNumber = (Rnd() * 100) + 1
The following section of code compares the player’s guess (in myGuess) to the computer's number (in compNumber) with the results reported to the user via message boxes. If myGuess = compNumber Then MessageBox.Show("You have guessed the computer's number in " _ + noGuesses.ToString() + " guesses.") noGuesses = 0 NewGame() ElseIf myGuess > compNumber Then MessageBox.Show("Your guess is too high") Else MessageBox.Show("Your guess is too low") End If This example assumes a static counter variable, called noGuesses, which is incremented at each guess. RESOURCES: • Textbook SUGGESTED EVALUATION: The program must correctly identify a numbers relationship to the number “guessed” by the computer. It must not give several conflicting messages for the same guess.

Page 24
Guessing Game 2 Student Project ABILITY LEVEL: Beginner APPROXIMATE COMPLETION TIME: 45 minutes OBJECTIVES: • Understand and use IF blocks • Understand and use ElseIf • Understand and use data validation OVERVIEW OF PROJECT: Create a program to have the computer pick a random number and allow a player to guess the number. The program will tell the user if their guess is correct or, if incorrect, if the guess is too high or too low. The program should allow the player to start new games or exit the game completely. PROJECT INSTRUCTIONS: 1. In the Form Load routine, use the RND method to pick a random number
between one and a hundred. 2. Create a text box for the player to enter their guess and a button for the user
to tell the computer the guess is ready to evaluate. 3. Evaluate the player’s guess and display a message to tell the user if their
guess is correct or, if incorrect, if the guess is too high or too low. 4. Display an error message if the user’s guess is larger than 100 or less than
one. 5. In the subroutine for the “New Game” button, clear the text box and assign a
new value to the computer’s number. Reset any counters in use. 6. Add an exit button with code to shutdown the program. ADDITIONAL RESOURCES: • Textbook SUGGESTED SOLUTION: One possible game board is displayed below. Display messages to the player using label text properties, picture boxes or message boxes.

Page 25
PROJECT EXTRAS: Count and display how many attempts the player takes to guess the computer’s number. Allow the player a limited number of guesses. After the number of guesses has been exceeded, display the computer’s number.

Page 26
Flip Book Program Instructor Notes ABILITY LEVEL: Beginner APPROXIMATE COMPLETION TIME: 1 hour OBJECTIVES: • Use a timer object SKILLS NEEDED: • Basic understanding of object properties • Understanding of static variables MATERIALS NEEDED: • Visual Basic .NET • Graphic editor such at Paintbrush TEACHING SUGGESTIONS: Animation attracts the interest of most people. This project uses a simple form of animation, the flipbook. Flipbooks use a series of pictures. Each picture is slightly different from its predecessor. The rapid changing of pictures results in the appearance of movement. This is a natural application for a timer. Two properties are most important in timer objects: enabled and interval. Timer routines must be enabled to execute. Once they are enabled, timer routines execute after the passage of time indicated by the interval time. The time is set in milliseconds. Students may draw their own animation files or use a set provided by the instructor. If Paint is used to draw images the image attributes should be set to use pixels so that the picture size can be easily determined for the forms picture object. RESOURCES: • Textbook SUGGESTED EVALUATION: This program should start a timer that loads or displays a series of pictures. The animation should be easily started and stopped. The program should also exit cleanly.

Page 27
SUGGESTED SOLUTION: Create a series of picture files using a graphical editor. The names of these files should have names that are identical except for an identifying number. For example, Dribble1.bmp, Dribble2.bmp… Dribble7.bmp Initially the timer object enabled property should be set to false. The timer interval should be set to some fraction of a second. Experimentation will help determine the optimum time that will be dependent on the size and loading time of the pictures used. A static counter variable should be incremented in the timer routine. Use the ToString method and the counter to concatenate a file name into a string variable for the Image.FromFile method. Once the counter reaches its maximum value, and the last picture has been displayed, the counter should be reset to zero or one depending on how the first image file has been named. Use a command button to enable and disable the timer by changing the value of the Enabled property. This will cause the animation to start and stop. Note: Visual Basic .NET picture support includes bitmap (.bmp) files, icon (.ico) files, run-length encoded (.rle) files, metafile (.wmf) files, enhanced metafiles (.emf), GIF files, and JPEG (.jpg) files.

Page 28
Flip Book Program Student Project ABILITY LEVEL: Beginner APPROXIMATE COMPLETION TIME: 1 hour OBJECTIVES: • Use a timer • Understand and use static variables OVERVIEW OF PROJECT: Create a program that displays an animated flipbook. PROJECT INSTRUCTIONS: 1. Create a picture box on a form 2. Create a series of pictures that vary slightly from each other. 3. Create a command button or buttons to start and stop the timer. 4. Write code in the timer event to load the display the picture series. 5. Program a way to cleanly exit the program. ADDITIONAL RESOURCES: • Textbook • Graphic editor such as Paintbrush SUGGESTED SOLUTION: A completed program might look something like this:

Page 29
PROJECT EXTRAS: Add the ability to accept the name of the first file in a picture series to be displayed. Add the ability of the user to change the timer interval so that the animation speeds up or slows down. Add a second picture box and display two series at the same time. Alternatively, display the same series twice.

Page 30
Simple House Drawing Instructor Notes ABILITY LEVEL: Beginner APPROXIMATE COMPLETION TIME: 2 hours OBJECTIVES: • Understand Drawing objects and properties • Understand events SKILLS NEEDED: • Understanding of a coordinate system MATERIALS NEEDED: • Visual Basic .NET TEACHING SUGGESTIONS: Understanding the coordinate system used by Visual Basic .NET is key to this project. The top left-hand corner is 0,0 and the X and Y values of the bottom right corner are positive integers whose value varies based on the size of the form. This means that adding to X moves to the right. Adding to Y moves down and subtracting from Y moves up. It is very common for students to confuse X and Y. Reversing X and Y often results in figures drawn sideways. The graphics library includes methods for drawing lines, rectangles, eclipses, and polygons as well as pie shapes and filled curves. These methods are used with a graphics object that must be instantiated before the methods can be used. The following statement creates a graphics object named g.
Dim g As Graphics = Me.CreateGraphics()
Outlined objects are drawn using a pen whose width and color may be set by the program. Filled objects are drawn using a brush whose color can also be specified. For example: Dim myPen As New Pen(Color.Blue, 2) Dim myBrush As New SolidBrush(Color.White) The program should respond to a MouseDown event on the form. Select the base classes from the code window’s left drop down menu and the MouseDown event from the right drop down menu to have the IDE open the appropriate method. The event parameter will return the mouse location. The following code will save this information so that it can be passed to other methods. This example also creates the graphics object that is passed to the DrawHouse method.

Page 31
Private Sub Form1_MouseDown(ByVal sender As Object, _
ByVal e As System.Windows.Forms.MouseEventArgs) _ Handles MyBase.MouseDown
Dim g As Graphics = Me.CreateGraphics() DrawHouse(g, e.X, e.Y) End Sub Encourage students to plan their houses before writing the code. Graph paper can be useful for plotting out the locations of various objects to be drawn. RESOURCES: • Textbook SUGGESTED EVALUATION: A complete house-drawing program should:
• Draw a house with a roof, a door and two windows. • Draw a circle representing the sun in the sky. • Add additional objects of the students choosing. • Clear the form at the user's request. • Exit cleanly at the user’s request. SUGGESTED SOLUTION: Clear screen would be implemented by drawing a filled rectangle over the whole form using the form’s background color using code similar to that below. Dim g As Graphics = Me.CreateGraphics() Dim myBrush As New SolidBrush(Me.BackColor) g.FillRectangle(myBrush, 0, 0, Me.Width, Me.Height) The code for drawing the house could be implemented as a number of methods. One method could draw the roof, another the main house and others drawing individual windows and the door. These methods would be called by a master method.

Page 32
Simple House Drawing Student Project ABILITY LEVEL: Beginner APPROXIMATE COMPLETION TIME: 2 hours OBJECTIVES: • Understand objects and properties • Understand events • Understand graphic methods and their use OVERVIEW OF PROJECT: The object of this program is to draw a simple picture of a house on a form. Draw the house in a location indicated by the user clicking the mouse button. PROJECT INSTRUCTIONS: 1. On a new form, create two command buttons. 2. In the MouseDown routine for the form draw a filled box starting at the
location indicated by the X and y valued returned to the routine. 3. Next, draw a triangle as a roof. 4. Draw a tall rectangle in the center or the bottom of the house to represent a
door. 5. Draw two white rectangles to represent windows on the house. 6. Somewhere above the house, draw a filled yellow circle for the sun. 7. If the exit button is pressed, shut down the program. ADDITIONAL RESOURCES: • Textbook • Graph paper

Page 33
SUGGESTED SOLUTION:
PROJECT EXTRAS: Draw other objects around the house. For example, a chimney, ornate windows, clouds in the sky, step stones up to the door, or a smile on the sun. Change the text property in the forms title bar. Make the bottom of the form green and the top part of the form blue. Fill in the roof.

Page 34
Spaceship Invaders Instructor Notes ABILITY LEVEL: Intermediate APPROXIMATE COMPLETION TIME: 3-4 hours OBJECTIVES: • Use timers • Use the message box method • Understand and use event handlers • Create and use arrays of objects SKILLS NEEDED: • Understanding of looping constructs • Understanding of arrays MATERIALS NEEDED: • Visual Basic .NET TEACHING SUGGESTIONS: Two properties are most important in timer objects: enabled and interval. Timer routines must be enabled to execute. Once they are enabled, timer routines execute after the passage of time indicated by the interval time. The time is set in milliseconds. This value is a double which means that very large blocks of time can be used. This is different from Visual Basic 6.0 where the largest timer interval was just over a minute. Multiple timer objects may be created. This program uses a very simple form of animation. Changing the Top property moves picture boxes. Discuss the difference between moving each object individually and creating an array of object references so that a loop can be used to move the objects. Also explain how many object event combinations can be added to a method using the Handles clause. Once this simple program is completed, encourage students to develop their own original games using the same concepts. RESOURCES: • Textbook SUGGESTED EVALUATION:
Page 35
Picture boxes should move at a uniform rate down the form. Clicking of a box should result in its immediately being placed at the top of the form. The player should have the option of at least three different speeds. Displays should accurately report the number of boxes clicked and missed. The game should have a clear end. Restarting the game should reset all counters and start with the boxes at the top of the screen. SUGGESTED SOLUTION: Create a frame for the boxes to move on. While boxes may be created directly on the form, creating the boxes on top of a frame will make defining the range of the box movement easier. Create an initial picture box and define all properties before creating additional objects. Be sure to set the picture property. Double click on the picture box to create a click response method. This method will cast the object passed to it as sender to a picture box to provide access to the top property. The method should not move the object if the game has been paused by disabling the timer. This code may look like the following. Private Sub picTarget_Click(ByVal sender As System.Object, ByVal e As System.EventArgs) Handles picTarget.Click Dim this As PictureBox = sender If Timer1.Enabled Then this.Top = 10 End If End Sub
A timer will be added to the form. The timer tick method will add a value to the top property to move the object down the form. Two variables will control the movement of the boxes. The first is the timer interval. The distance the box moves each interval is the second variable. The larger the distance moved each interval or the shorter the time between movements the faster the boxes will move. Encourage students to experiment with both settings, once the program works, to find optimum settings. Selecting only one of those variables for use in changing speed during a program run will simplify the program. The timer routine is the workhorse of this program. In the timer routine, write a loop that incrementally moves each box by adding to its top value. After moving the box, compare it’s location to the bottom of the frame. If the top value of the box is larger then the height of the frame added to the top of the frame then that box has dropped below the frame and “escaped.” If this is the case, increment the count of escaped boxed and update the display. Also, move the box back to the top of the frame (set the boxes top to the value of the top of the frame). After each escape, check the escape counter to determine if enough boxes have escaped to end the game. If enough boxes have escaped, display a message box displaying only the yes and no buttons and asking the player if they want to continue with a new game. If the user selects the no button, the End statement or the Application.Exit() method may be used to exit the game. If the player selects

Page 36
the yes button, call the new game routine to initialize the display and counter variables. The picture box click routine moves the box to the top of the frame, increments the hit counter and updates the counter display. Test the program with a single object before moving to the next step. Copy the original picture box and paste several copies on the form. Add the name of these new objects to the handles clause for the picture click method. This will cause these objects to respond to a mouse click the same way as the original object. The objects can be moved individually using their name but an array of references to objects can make this process more efficient. Dim an array of picture boxes in the declarations section of the program. Open the region created by the form designer and find the call to InitializeComponents. Following that statement assign each picture object to an element of the picture box array. The timer tick method can use a loop and the array to move the objects. Create label boxes for the status display information. Declare form level variables to hold the number of boxes hit and escaped. Another form level variable can control the speed of box movement will facilitate changing that rate through program action. Allow the user to select different box speeds by using a group of menu options. Label them slow, medium and fast. In the click routine for each option set a specific value to the distance to move each box on each timer event. A move involved and flexible method would be a scroll bar. Use a scroll bar by having the change event place the scroll bar value into the from level variable controlling box speed. Be sure the set reasonable minimum and maximum values for the scroll bar.

Page 37
Spaceship Invaders Student Project ABILITY LEVEL: Intermediate APPROXIMATE COMPLETION TIME: 3-4 hours OBJECTIVES: • Use timers • Use the message box method • Understand and use event handlers • Create and use arrays of objects SKILLS NEEDED: • Understanding of looping constructs • Understanding of arrays OVERVIEW OF PROJECT: Have a number of picture boxes move down a form. If the user clicks on a picture box, move that box back to the top of the screen. Count and display the number of times a box is clicked. When a box moves below the bottom of the screen, count that box as having ‘gotten away.” After a specific number of boxes getting away, stop the game and allow the user to continue playing or exit the program. Allow the user to quit the game and exit the program. PROJECT INSTRUCTIONS: 1. Create an object array of picture boxes across the screen. 2. Add a picture or icon file to the picture property of each picture box. 3. Create a timer object. Each time the timer event occurs, move each box down
by adding to its Top property value. 4. In the timer event, check to see if a box moves below the bottom of the
screen. Increment and display a counter variable if the box escapes. Move escaped boxes back to the top of the screen.
5. If the number of escaped boxes exceeds a specific number, for example ten, call the message box method to ask the user if they wish to play a new game.
6. If the user wishes to play a new game, reset all counters and reposition the boxes at the top of the form. If they do not want to continue, exit the program.
7. Program the picture click routine to move any picture clicked on back to the top of the screen by resetting its Top property value.
8. Add an option, either by buttons, by menu items or by some other way, to allow the user to select the speed the boxes move.
9. Allow the user to exit the program.

Page 38
ADDITIONAL RESOURCES: • Textbook SUGGESTED SOLUTION: The image in this example was created using Paint. Either an original image may be drawn or a previously created or acquired image may be used.
PROJECT EXTRAS: Add more spaceships. Allow the user to select different icons for the picture boxes. Create your own characters for the picture boxes. Put a different picture in each box. Make the pictures move horizontally across the screen rather then down the screen. Make the pictures speed up the longer the game runs. Use a scroll bar to change the speed of the boxes. Add a pause command.

Page 39
Tic Tac Toe Instructor Notes ABILITY LEVEL: Intermediate APPROXIMATE COMPLETION TIME: 1 hour 30 minutes OBJECTIVES: • Understand arrays of control references and their use in IF statements • Understand and use nested IF statements • Use Boolean variables SKILLS NEEDED: • Understanding of Boolean operators • Understanding of control properties and arrays of control references • Understanding of multi line and nested IF blocks MATERIALS NEEDED: • Visual Basic .NET TEACHING SUGGESTIONS: Students can add nine controls to a form at design time or they can have the controls added at run time. A more advanced project would involve creating the playing board at run time rather then at design time. Visual Basic allows for the creation of arrays of controls at runtime. Each element in the array is actually a reference to an object with its own properties. Each object is instantiated using a new statement. The newly created object is added to the list of controls for the form using the Add method. For example, the temp object is added to a form with the following statement” Me.Controls.Add(temp)
The reference is assigned to an element in the array allowing it to be used in a loop. An event handler can be assigned using the AddHandler statement which associates an object and event combination with a method. The following statement adds a method named lblSquare_Click to the myBoard(I) object. AddHandler myBoard(I).Click, AddressOf lblSquare_Click Remind students that the name of the event handler does not have to include the name of the event. This project will use a Boolean flag to keep track of whose turn it is. The flag can be easily changed using the assignment flag = NOT flag. Explain that students
Page 40
do not need to write an IF statement to first check the current value and that the NOT statement will reverse the value what ever it is. RESOURCES: • Textbook SUGGESTED EVALUATION: A complete Tic Tac Toe program should handle the following cases correctly:
• moves may not be made on occupied squares • a winning game should be recognized • no additional moves should be permitted after a game has been won • the winner (X or O) should be properly identified • tie games should be recognized • the board should be cleared either automatically after a game is over or
manually by user request SUGGESTED SOLUTION: One solution would be to use text properties in label boxes. A second alternative would be to use the Image.FromFile method to load appropriate pictures into picture boxes. A .BMP image of 1 inch by 1 inch created with PaintBrush will fit neatly in a 96 by 96 pixel picture box. Assigning the Image property to Nothing will clear the picture box. Alternatively, a “blank” image may be loaded. When an object is clicked, first verify that the object is empty. Display a message box or sound the beep if the box is not empty. If the box is empty, display the symbol of the current player and set the objects tag to indicate who has moved into it. Check to see if there is now a winner. Declare a winner when three boxes in a row, column or diagonal are occupied by the same non-zero code. Declare the player who last moved the winner. If there is no winner, check to see if all the boxes are occupied. Declare a draw if all boxes are occupied and there is no winner. In case of a draw or a winner being declared, clear the board after the user acknowledges the message. Create a subroutine to clear the board. Call this subroutine from the declare winner code, declare draw code and the clear board or new game button or menu item. Clear the board by resetting the display and setting all the object tags back to zero. Change the player indicator variable after each move has been made and evaluated. Students will often assume that any three squares in a row with identical values indicates a winner forgetting that all empty squares have the same value.

Page 41
Tic Tac Toe Student Project ABILITY LEVEL: Beginner APPROXIMATE COMPLETION TIME: 1 hour 30 minutes OBJECTIVES: • Understand arrays of control references and their use in IF statements • Understand and use nested IF statements • Use Boolean variables OVERVIEW OF PROJECT: Create a version of Tic Tac Toe that allows two players to play against each other. The game should report winners, losers, and draws. The program must not allow illegal moves or additional moves after a game has been won. PROJECT INSTRUCTIONS: 1. Create nine objects to represent the locations for the playing board. 2. Draw lines around the playing objects. 3. Add two buttons or menu options: One for exiting the program and one for
clearing the board. 4. In the object click handler, write program code to verify the box is available. 5. If an open box is clicked on, display an X or O depending on which player
made the move. 6. After each move, check to see if there is a winner or a drawn game. Report
that the game is over if there is a winner or a draw. If there is a winner, no additional moves should be allowed.
7. If the clear game button is pressed reset all playing squares to empty. 8. If the exit game is pressed, shut down the game. ADDITIONAL RESOURCES: • Textbook SUGGESTED SOLUTION: Assuming the label box control array is named Label1 and the boxes in the array are arranged from 0 in the top left to 8 in the bottom right corners the following IF statement will identify a win across the top of the board. IF Label1(0).Text <> “” and Label1(0). Text = Label1(1). Text and Label1(1). Text = Label1(2). Text then Winner = True

Page 42
This will set the Boolean variable Winner to True if the top three boxes have the same non zero value. The value of Winner should have been set to False before the checks for a winner are made. Once all eight possible winning combinations are checked, the program can take appropriate action if Winner is True. The value of a Player flag indicates which player to report as the winner and must be switched after each move. Checking the text in all nine label boxes can identify a draw. If all the text properties have a value and there is no winner then the game is a draw. A completed game form may look like the following:
PROJECT EXTRAS: Use the Beep statement to notify a user when they click on an occupied box. Display a count of the number of draws and the number of times each player wins a game. Have the game board clear automatically once the game is over. Ask the players if they wish to play a new game at the end of every game. Add the playing squares at run time and have the program place them in the correct location.

Page 43
Picture Display Program Instructor Notes ABILITY LEVEL: Intermediate APPROXIMATE COMPLETION TIME: 1 hour OBJECTIVES: • Use the open file dialog box SKILLS NEEDED: • Basic understanding of object properties MATERIALS NEEDED: • Visual Basic .NET • Graphic editor such as Paintbrush • Picture files TEACHING SUGGESTIONS: Visual Basic .NET provides a number of useful dialog boxes. These boxes may be used for opening and saving files, setting print options, and selecting colors and fonts. The open file dialog box is typical of these useful tools. Setting the filter for the open dialog box will probably give students the most trouble. Go over several examples and point them to the help file for reference. Students will have a tendency to define more dialog properties then necessary. While the picture box has a SizeMode property that can be set to AutoSize, the form does not automatically resize to hold objects in it. The size of the form may be changed under program control. The objects on a form may also be moved to accommodate changes in the size or number of other objects on a form. Objects on a form should have some distance between them. Explain that students need to make room for borders when they move objects around the form. Also explain how the Anchor property is used to keep objects in the same location relative to the sides of the form as its size changes. RESOURCES: • Textbook SUGGESTED EVALUATION: This program should show the open file dialog box with the proper filer for picture files enabled. The file requested by the user should be displayed full size. The form should be resized to include the whole picture. Objects on the form should be relocated as needed so that the picture does not cover them.

Page 44
SUGGESTED SOLUTION: Create a picture box in the top left-hand corner of the form. Be sure to set the SizeMode property to AutoSize so that the box will expand or collapse to fit the picture loaded. Add a common dialog object. Create boxes to display the height and width of the picture with appropriate labels for each box. Create an open file menu option under a file menu. In the open menu click routine, assign a filter string to the filter property of the open file dialog box. Once a file has been selected, load the file into the picture box using the Image.FromFile method. Call a routine to adjust the size of the form to hold the picture. Also, move the display boxes as required so that the picture box does not obscure them. Lastly, copy the pictures height and width into the appropriate boxes. Note: Visual Basic .NET picture support includes bitmaps (.bmp), icons (.ico), run-length encoded files (.rle), and metafile (.wmf) files.

Page 45
Picture Display Program Student Project ABILITY LEVEL: Intermediate APPROXIMATE COMPLETION TIME: 1 hour OBJECTIVES: • Use the open file dialog box OVERVIEW OF PROJECT: Create a program that opens and displays a picture. The program will also display size information about the picture. This program may be used to display the size of pictures in pixels so that picture boxes may be created for them in other programs. PROJECT INSTRUCTIONS: 1. Create a picture box with the SizeMode property set to AutoSize. 2. Create a menu option to open a file that will use the open file dialog box. 3. Set the filter and initial directory properties for an open file dialog box. 4. Load the picture file selected by the open dialog box into the picture box. 5. Adjust the size of the form, if necessary, to hold the whole picture. Move any
objects covered by the picture. 6. Copy the picture height and width information into properly labeled objects. 7. Program a way to cleanly exit the program. ADDITIONAL RESOURCES: • Textbook • Graphic editor such as Paintbrush • Picture files

Page 46
SUGGESTED SOLUTION: One possible solution would look like this.
PROJECT EXTRAS: Display the full name and path of the file opened. Convert the size in pixels into inches for a second display. Define different filters so that a user can choose to see just one file type at a time.

Page 47
Multiple Choice Grading Program Instructor Notes ABILITY LEVEL: Intermediate APPROXIMATE COMPLETION TIME: 2 hours OBJECTIVES: • Read and parse a sequential data file SKILLS NEEDED: • Understanding of loops • Understanding of string manipulation functions • Understanding of decision making statements MATERIALS NEEDED: • Visual Basic .NET • Data file with names and answers TEACHING SUGGESTIONS: Reading data in from a sequential file has many benefits for both students and instructors. Tops among them may be easy reproducibility for testing purposes. Once a set of data is developed and tested, it can be used to prove other programs by comparing results with what is expected. For this reason, as well as to avoid problems caused by faulty data sets, having all students use a common data file is generally desirable. While loops are a natural tool for reading sequential data files. Introduce the concept of end of file markers and the EOF built-in method. Make students aware that if they want to know how many records they have read, they have to keep track of record numbers themselves. Some students will be made aware of how many records are in a test set and write programs that use the FOR-NEXT loop which they may find easier. Their lives will be complicated if they their program will be evaluated using a second, different, file then the file they use for development. This has the advantage of more accurately simulating real word conditions. In the real world, programmers can rarely count on knowing the size of the data set their programs will use. Students should have been exposed to the notion that a lower case letter is not equal to an uppercase letter in Visual Basic .NET by this time. They may need a reminder at this time. Mixing the case of answers in the data set or using uppercase in the main data set and providing a lower case answer key will show them the need to match cases. The Lcase and Ucase built-in functions will prove useful here.
Page 48
List boxes are a convenient tool for displaying variable amounts of data. A result string can be created by concatenation different strings and added to a list box. The vbTab constant can be used to separate strings when building a string to add to a list box. Be aware that some students may use parallel list boxes to create columns. If the font attributes are not the same, those boxes may have alignment problems. They must also be sure to clear the right boxes at the right times. RESOURCES: • Textbook • Text editor for creating a data file SUGGESTED EVALUATION: A complete program should:
• Read and display all names in the data file • Properly score each students set of answers • Display the proper grade for each student • Calculate and display the average number of correct answers for the whole
data file. • Exit the program cleanly SUGGESTED SOLUTION: Prepare an ASCII text data file for students to use. The file should have at least 10 entries. The program should use a While loop checking on the state of End of File (EOF) to read the data file. The program should count each student as it reads its record. A variable should be used to add the total correct answers for each student. Use this variable with the student counter variable to calculate the average number of correct answers. Displaying the average as part of the same routine that counts students and adds totals avoids the need for form level variables. Care must be taken when determining when to open and close the data file. Trying to open a file that is not closed, or trying to read a file that is not yet open or has been opened and closed, are common errors. For this reason, it is recommended that the open and close be done in the same routine. Alternately, the file should be opened once in Form Load and not closed until the exit program routine is called.

Page 49
Multiple Choice Grading Program Student Project ABILITY LEVEL: Intermediate APPROXIMATE COMPLETION TIME: 2 hours OBJECTIVES: • Read and parse a sequential data file OVERVIEW OF PROJECT: Create a program to correct and grade a set of multiple choice test results. Read a set of correct answers, from a data file or a text box depending on what your instructor has specified, and compare it with the answers in a data file. The data file will have two fields, separated by a comma, for each student. The first field will contain the student’s name. The second field will contain a set of answers to a multiple-choice test. For each student, compare the answer key answers to the answers from the student’s record. Keep a count of the number of answers from the student’s record that match the answers in the answer key. For each student, display the student’s name, the number of correct answers, and a letter grade. Calculate the letter grade scale based on information provided by the instructor. Calculate the average number of correct answers for the class and report it in a separate picture box. PROJECT INSTRUCTIONS: 1. Create a listbox or other object large enough to display the names, correct
count and letter grade of each student. 2. Create code behind a command button to read the data file and report results
a. Open the data file b. Read the answer key c. Read a students record d. Compare student’s answers to answer key and count correct answers e. Display student’s name, number correct and letter grade f. Count number of students and build running total of correct answers g. Loop until all student records have been read and processed
3. Calculate and report average number of correct answers 4. Create an exit button with the appropriate code to end the program ADDITIONAL RESOURCES: • Textbook • Instructor supplied data file

Page 50
SUGGESTED SOLUTION:
PROJECT EXTRAS: Report the average letter grade as well as the average number of correct answers. Keep track of the highest and lowest scoring students and report them in a separate box.

Page 51
Multiple Choice Grading Program with Structures Instructor Notes ABILITY LEVEL: Intermediate APPROXIMATE COMPLETION TIME: 2 hours OBJECTIVES: • Use a User Defined type with the Structure statement SKILLS NEEDED: • Understanding of sequential files • Understanding of arrays • Understanding of string manipulation functions • Understanding of decision making statements MATERIALS NEEDED: • Visual Basic .NET • Data file with names and answers TEACHING SUGGESTIONS: User defined types allow the programmer to group related data elements and manipulate them as a single item. They are very often used to define record types for files but may be used in other ways as well. In this case we want students to group names, as read from a data file, and number of correct answers, as calculated by the program. User defined types are declared in the Declarations section and are available throughout the program. We will also want the program to rate each student in the data file based on information that it will not have until all data records have been read. Creating an array of a user defined type allows us to manipulate the data without having to read the file a second time. While the rating of students as average, above average, or below average may be done in the same routine as the initial reading of the data file, having students code a separate routine reinforces the use of local as opposed to form level or global variables. RESOURCES: • Textbook • Text editor for creating a data file

Page 52
SUGGESTED EVALUATION: A complete program should:
• Read and display all names in the data file • Properly score each students set of answers • Display the proper grade for each student • Calculate and display the average number of correct answers for the whole
data file. • Rate all students as having an average, above average, or below average
number of correct answers. • Exit the program cleanly. • Make proper use of form level and local variables. SUGGESTED SOLUTION: Prepare an ASCII text data file for students to use. The file should have at least 10 entries. The student record array should be defined at the form level to allow its use across a number of routines. A form level variable should also be defined to hold the count of elements in the array that is being used. An alternative solution would be for the name after the last used to be set to some known flag value. The program should use a Do While loop checking on the state of End of File (EOF) to read the data file. The program should count each student as it reads its record. This counter variable should also be used as an index into the array of student records. A variable should be used to add the total correct answers for each student. This variable will be used with the student counter variable to calculate the average number of correct answers. This count should be entered in a field of the student record array. Care must be taken when determining when to open and close the data file. Trying to open a file that is not closed or trying to read a file that is not yet open or has been opened and closed are common errors. For this reason, it is recommended that the open and close be done in the same routine. Alternately, the file should be opened once in Form Load and not closed until the exit program routine is called.

Page 53
Multiple Choice Grading Program with Structures Student Project ABILITY LEVEL: Intermediate APPROXIMATE COMPLETION TIME: 2 hours OBJECTIVES: • Use a structure OVERVIEW OF PROJECT: Create a program to correct and grade a set of multiple choice test results. Read a set of correct answers, from a data file or a text box depending on what your instructor has specified, and compare it with the answers in a data file. The data file will have two fields for each student. The first field will contain the student’s name. Second field will contain a set of answers to a multiple-choice test. For each student, compare the answer key answers to the answers from the student’s record. Keep a count of the number of answers from the student’s record that match the answers in the answer key. For each student, display the student’s name, the number of correct answers, and a letter grade. Calculate the letter grade scale based on information provided by the instructor. Store the student’s name and the number of correct answers in an array of a structure type. Calculate the average number of correct answers for the class and report it in a separate box. Using the array of student records, display a list for all students. Report if a student had an average, above average or below average number of correct answers. PROJECT INSTRUCTIONS: 1. Create a structure to hold a string name field and a numeric count field. 2. Create a list box large enough to display the names, correct count and letter
grade of each student. 3. Create code behind a command button to read the data file and report results
a. Open the data file b. Read the answer key c. Read a students record d. Compare student’s answers to answer key and count correct answers e. Display student’s name, number correct and letter grade f. Count number of students and build running total of correct answers g. Loop until all student records have been read and processed
4. Calculate and report average number of correct answers

Page 54
5. Create code behind a command button to loop through all student records and display if each student has an average, below average or above average number of answers correct.
6. Create an exit button with the appropriate code to end the program ADDITIONAL RESOURCES: • Textbook • Instructor supplied data file SUGGESTED SOLUTION:
PROJECT EXTRAS: Report the average letter grade as well as the average number of correct answers. Keep track of the highest and lowest scoring students and report them in a separate box.

Page 55
Check Book Balancing Program Instructor Notes ABILITY LEVEL: Intermediate APPROXIMATE COMPLETION TIME: 3 hours OBJECTIVES: • Read and write to a random access file SKILLS NEEDED: • Understanding of object properties • Understanding of looping constructs. MATERIALS NEEDED: • Visual Basic .NET TEACHING SUGGESTIONS: Some of the vocabulary in this project may need explaining if some students are unfamiliar with checks and balancing checkbooks. Specifically, you will want to make sure they understand what a check clearing means. If the check box object has not been introduced to students, this program has a natural use for it. Students may confuse the Checked and CheckedState. The Checked property is a Boolean. The CheckedState property has three options (checked, unchecked and indeterminate) and students will have problems if they try to assign it directly to a Boolean variable. Writing random access files require a structure also knows as a user defined type. This type must be defined at the beginning of the program outside any functions or subroutines so that it can be used throughout the program. Some students have trouble with the concept of a user-defined type. Often a student will attempt to use the type name as a variable rather then declaring a new variable of that record type. Remember that is a structure is to be used to read a random access file, any strings in the structure must be declared as fixed length strings. The following code creates a structure with fixed-length strings. Structure checkType <VBFixedString(30)> Public payee As String Public amount As Decimal Public number As Integer Public cleared As Boolean End Structure

Page 56
RESOURCES: • Textbook SUGGESTED EVALUATION: This program should accept an unlimited number of checks. It should properly record the information for each check. The program should read the entire data file when balancing the checkbook. When balancing the checkbook, the program should properly recognize and handle both cleared and uncleared checks. The program should display the correct new balance for the account. All uncleared, and only uncleared, checks should be displayed. SUGGESTED SOLUTION: Students have a number of options regarding where in their program to open and close the file. Some options are more efficient then others. Many will automatically open the file, write a record, and immediately close the file. While this is very inefficient, it is not necessarily wrong. It does have some advantages in a learning situation. This solution forces the student to be careful about when they open, read and close files. Attempting to read or close a closed file, or open an open file will cause errors. The most efficient solution will open the file at form load and close it only at program exit. Using random files makes this very easy. Use a global variable to keep track of the current number of records in the data file. The write check command, implemented in a command button for example, should build an output record by copying information from text boxes. Convert the check number and amount to appropriate number values. Numeric values take less storage space then string values. This will also avoid having to make these conversions whenever arithmetic operations are made. An If block should determine the status (cleared or uncleared) of the check and save this information as a Boolean value. Increment the record counter and use it to write the record to the end of the file. If a solution involving repeated opens and closes of the file is selected, use the size of the record and the size of the file to determine the number of records in the file if needed. For example, assuming an integer variable called LastCheck is used as the record counter and the variable Check is of the record type defined for the file, the following code will return the current number of records in the file.
LastCheck = LOF(1) / Len(Check)
LOF is a built-in method that returns the size of a file in bytes. Len returns the length of the variable Check. There are several advantages of using the Len method. It spares the programmer the need to know exactly the storage requirements for each variable type. It also automatically keeps the program correct if the record length is changed at a future time.

Page 57
Balancing the checkbook involves accepting and initial balance from the user. The beginning balance is often entered into a text box but an input box may also be used. Once the initial balance has been determined, read the data file. Use a For loop, using the loops counter to indicate record number, to read each record. The count of records in the file is the loop terminator. Inside the loop, the cleared indicator for each record read is checked. Display uncleared checks, perhaps by building strings and adding items to a list box. Subtract the amount of any cleared checks from the current balance. Redisplay the current balance either every time it changes or after the read loop completes. Close the data file on program exit, if it has not been previously cleared.

Page 58
Check Book Balancing Program Student Project ABILITY LEVEL: Intermediate APPROXIMATE COMPLETION TIME: 3 hours OBJECTIVES: • Read and write to a random access file OVERVIEW OF PROJECT: Create a program that allows a user to balance a checkbook. Accept information about checks from the user. For each check, accept the number of the check, the payee of the check (who is the check made out to), the amount of the check, and whether or not the check has cleared the bank. Enter several checks and then balance the checkbook. Balancing the checkbook consists of accepting the initial balance of the checkbook and then calculating the current balance of the account. Reading the check information from the data file supplies the information needed to balance the checkbook. Subtract the amount of any check that has cleared from the beginning balance. Display the number, payee and amount of any check that has not cleared. PROJECT INSTRUCTIONS: 1. Create a form to accept the number, payee, and amount of a check. Also, find
out if the check has cleared. 2. Add a command button, or other object, to write the check information to a file
when the user is ready. 3. Add a second form or second section to the main form to accept the starting
balance, display the current balance, and display the number, payee and amount of checks outstanding.
4. Add a command button, or other object, to balance the checkbook using the information provided on the form and read from the data file.
5. Add a way to exit cleanly from the program, making sure the data file is closed properly first.
ADDITIONAL RESOURCES: • Textbook

Page 59
SUGGESTED SOLUTION: Consider using a check box for the user to indicate if the check has cleared. Checking the Checked property of a check box is often easier then parsing a textual answer from a text box. A completed program might look something like this:
PROJECT EXTRAS: Use the Format method to format all money amounts as currency when they are displayed. Add error checking to make sure that the user can not enter non-numeric values into text boxes accepting money amounts. Use several forms for this project. Perhaps one form to select what operation to follow, one to enter checks and one to balance the checkbook. Give the user the option to clear the data file or to use an existing file. Give the user the option to select a data file to open or create. Allow the user to enter a check number and then display that checks information so that it may be edited. For example, changing an uncleared check to cleared.

Page 60
Drawing Program Instructor Notes ABILITY LEVEL: Advanced APPROXIMATE COMPLETION TIME: 3 hours OBJECTIVES: • Understand graphic objects • Understand handling events including mouse and paint events • Use the ellipse, rectangle and line methods to draw objects on a form SKILLS NEEDED: • Understanding of arrays • Understanding of the scope of variables • Understanding of control structures (IF or SELECT CASE) MATERIALS NEEDED: • Visual Basic .NET TEACHING SUGGESTIONS: Several picture boxes will be used to display colors and drawing options in this program. The objects that will have shapes drawn on them should have these objects drawn in response to the Paint event. This will ensure that these shapes are drawn not only when the form is first loaded but redrawn when the form is hidden and returns to the front of the screen. Students will need to have the Paint event explained to them. They may also need to have adding handlers and the concepts around events explained if they have not used them in earlier projects. Global variables may also be used to keep track of related pieces of information. For example, using class variables to keep the X and Y coordinates registered by a mouse down event handler allows the programmer to use them with the X and Y coordinates registered by a mouse up event. Having both sets of coordinates allows the program to set the beginning and ending of lines or boxes to draw. The click event handler for color boxes and shape boxes should set variables that that are used by the MouseUp handler to set the pen or brush color, set the pen thickness and select what object is drawn. The easiest way to clear the form is to draw a filled rectangle of the form’s background color that covers the whole form. Objects, such as the color selection boxes and any control buttons will not be covered by this filled rectangle. RESOURCES: • Textbook

Page 61
SUGGESTED EVALUATION: A complete drawing program should:
• Allow a user to select one of at least 4 object types to draw • Include a set of color selection boxes initialized with different background
colors that allow a user to select colors to use for drawing objects • Draw selected objects using the selected color at locations indicated by the
user • Clear the form on a users request • Exit the program cleanly SUGGESTED SOLUTION: Use global variables to track the current color to use, the object to draw and the beginning location selected by a user. A set of colored picture boxes will allow for selection of drawing colors using the click event and saving the background color associated with that box. Line thickness and shape selections can be accomplished with similar boxes that respond to a click event. Students may use any number of object types in their programs. Check boxes or label boxes may also be used. Any object that may be selected and which may be used to display a color or an object may be used. Lines are drawn with the DrawLine method. Circles and ellipses are easily drawn using the DrawEllipse and FillEllipse methods. The DrawRectangle and FillRectangle methods are used for rectangles. Other shapes can be done with the DrawPolygon and FillPolygon methods. Those methods require more effort and several mouse up and down events. Students who attempt these options should plan for them carefully. Students should be encouraged to be creative in both the objects supported by their program and the implementation of those objects.

Page 62
Drawing Program Student Project ABILITY LEVEL: Advanced APPROXIMATE COMPLETION TIME: 3 hours OBJECTIVES: • Understand graphic objects • Understand handling events including mouse and paint events • Use the ellipse, rectangle and line methods to draw objects on a form OVERVIEW OF PROJECT: The object of this program is to create a drawing program that allows a user to select colors to use and objects to draw. The user will select a colored object to indicate which color to use for drawing. A second set of objects will display objects the program will draw for the user. After selecting a color and an object, the user will use the mouse to show the program where to draw the object. The user must have at least four objects to draw. PROJECT INSTRUCTIONS: 1. Create a number of boxes on the form and set their background colors. 2. Create a second set of objects to indicate shapes that the program will draw. 3. Use the Paint event for the shape objects to draw examples in each box. 4. Create global variables to store the shapes and colors selected by the user.
The user will click on the appropriate sample boxes choose a shape or color. 5. Create program code on the form to draw objects of the selected shape and
color in response to mouse actions. 6. Add a program option to clear the form. 7. Create an exit button or exit menu item with the appropriate code to end the
program. ADDITIONAL RESOURCES: • Textbook SUGGESTED SOLUTION: In the solution below, the square at the bottom of the color array shows the currently selected color. Change the background of that square when a new selection is made. This sample also includes an extra option that lets the user select the thickness of lines drawn.

Page 63
PROJECT EXTRAS: • Create additional shape options for the user. For example, triangles or
pentagons. • Create the color and/or shape selection objects on their own forms. • Change the color of the shapes to match the currently selected color • Allow the user to select different pen thicknesses

Page 64
Roman Numeral Conversion Instructor Notes ABILITY LEVEL: Advanced APPROXIMATE COMPLETION TIME: 3-4 Hours OBJECTIVES: • Use complex decision making structures SKILLS NEEDED: • Understanding of decision making structures • Understanding of string handling functions MATERIALS NEEDED: • Visual Basic .NET • Roman numeral conversion chart TEACHING SUGGESTIONS: This is as much logic puzzle as a programming problem. Occasionally a student will suggest a single If statement for each number. The prospect of 4,999 statements doesn’t always daunt them. Reminding them that the program must convert both ways resulting in 9,998 lines will usually convince them that this in not a practical solution. The number 4,999 was chosen for a practical reason. Roman numerals at five thousand and above involve characters with lines above them. Those characters are not in the ASCII character set. Four thousand nine hundred ninety nine is a number large enough to provide a challenge to most students. Students should be reminded to validate the data. What will happen if a real number or a non digit is entered in the Arabic data box? Or if an invalid character is entered in the Roman number box? How is upper and lower case handled? You may want to remind students of the ToUpper method of the string class. Encourage students to think out how they convert these numbers by hand. When converting from Arabic to Roman, most people use a method involving subtracting the highest possible number associated with a symbol. That symbol is set aside and the next symbol is examined. This continues until no more symbols are needed and a Roman numeral has been built. This suggests several possible algorithms. Converting from Roman to Arabic is even easier. Evaluate the string from left to right converting each symbol to its numeric value and adding it to a counter. The tricky part is handling cases of leading symbols whose value is subtracted from

Page 65
its larger neighbor. Compare each symbol with the symbol to its right to determine the appropriate number. RESOURCES: • Textbook SUGGESTED EVALUATION: Verify that the program works for a wide range of numbers. The number 1994 and 4999 provide good tests as they involve a number of leading subtraction symbols. Verify that a number converted in one direction results in the same number when converted back. SUGGESTED SOLUTION: Create two text boxes to accept numbers to convert. Below each, create a command button labeled for the appropriate conversion. Converting from Arabic to Roman Use the Convert class to copy the number in the text box into an integer variable. If the number is greater than or equal to 4,000, subtract 1000 from the number and append an M character to the string used to build the Roman numeral. Do the same for 3,000 and on down to 1,000. Compare the number to 900, if still greater then subtract 900 and append CM to the end of the string. Continue the same pattern to 500, 400, 300, 200, 100, 90, 50, 40, 30, 20, 10, 9, 5, 4, 3, 2, and 1. At this point, the whole number will be accounted for and the program should display the result. Converting from Roman to Arabic Initialize a counter variable. Also, initialize a string variable that will be used to hold the previous character for characters after the first. Start a loop to examine each character in the string entered into the text box. If the letter is an I add one to a counter. If it is a V, add 5 if the previous character was not an I. If the previous character was an I then that one should have been subtracted rather than added. Compensate for that addition by adding 3 to the counter rather then 5. Follow this format for the remaining characters up to M for a thousand. Remember that there is only one possible character to subtract before each symbol. The I comes before X (10) as well as V (5). The X comes before L (50) and C (100). The C comes before both D (500) and M (1000). After evaluating all characters, display the resulting number in the appropriate box.

Page 66
Roman Numeral Conversion Student Project ABILITY LEVEL: Advanced APPROXIMATE COMPLETION TIME: 3-4 Hours OBJECTIVES: • Use complex decision making structures OVERVIEW OF PROJECT: This program will convert regular numbers into roman numerals and convert Roman numerals into regular numbers. The program will read in a number or string of characters as appropriate. The user will indicate which conversion is to take place. The number will then be converted and displayed properly. The program must correctly convert numbers up to 4,999. PROJECT INSTRUCTIONS: 1. Create two text boxes on a form. Label them. 2. Create two command buttons. One to convert an Arabic number into a
Roman numeral. The second, to convert a Roman numeral into an Arabic number.
3. Write the code to convert each number type to the other type. 4. Place the converted number in the appropriate box. 5. Add an option to exit the program. ADDITIONAL RESOURCES: • Textbook • The following Roman numeral conversion chart
1 I 40 XL 2 II 50 L 4 IV 90 XC 5 V 100 C 6 VI 500 D 9 IX 900 CM
10 X 1,000 M

Page 67
SUGGESTED SOLUTION: A completed program might look something like this:
PROJECT EXTRAS: Numbers over five thousand require symbols with lines above them. Create picture files that contain individual characters including the characters at 5,000 and above. Use these picture files to display numbers greater then 5,000. If the user enters Roman numerals in lower case, redisplay them as upper case.

Page 68
Palindromes Instructor Notes ABILITY LEVEL: Advanced APPROXIMATE COMPLETION TIME: 2-3 Hours OBJECTIVES: • Advanced string manipulation SKILLS NEEDED: • Understanding off loops • Understanding of string manipulation functions MATERIALS NEEDED: • Visual Basic .NET TEACHING SUGGESTIONS: Extra characters, characters outside the range of characters you are interested in, and differing case of characters are the biggest obstacle in determining palindromes. Be sure that students are away of what characters and characteristics of a character matter. The traditional BASIC Mid function or the String.SubString method can be used in this program. Make sure that students know which index to start with for the method they use. The Mid function assumes the first character is at location 1 while the SubString method starts at zero. This determines how Length is used to terminate a loop as well. Consider reviewing user written functions if necessary. Functions make this project much easier. Valid test data is a necessity for any program. Consider supplying good test data to students to ensure that they are able to test their program effectively. If you do not supply test data, emphasize the importance of selecting good test data. RESOURCES: • Textbook SUGGESTED EVALUATION: Test a number of strings with known solutions to ensure that all cases are found. The classic palindrome “Madam I’m Adam” makes a good test of a longer palindrome. In the sentence "Hello Madam, I'm Adam and this is my friend Bob", the following sub-strings of length 3 are palindromes:

Page 69
ada - from the word "Madam" mim - from the words "Madam, I'm" ada - from the word "Adam" ama - from the words "Adam and" isi - from the words "this is" sis - from the words "this is" bob - from the word "bob"
SUGGESTED SOLUTION: Removing extra characters is the first stop. Use the UCase method to set the string in the input text box to all upper case. Use the Length property to determine the length of the string and set-up a loop that examines each character. Concatenate every valid character, between A and Z or 0 to 9, into a string variable. This will discard the characters outside the valid range. Create a Boolean method to evaluate a string as a possible palindrome. Initialize one counter to one. Initialize a second counter to the length of the string. Use these counters to compare the first and last character. If they are the same, increment the first counter and decrement the second. If they are not the same, set a flag indicating that the string is not a palindrome. Continue comparing characters until the center of the string is reached or a mismatch is found. If the center is reached without a mismatch, return True as the value of the method. If a mismatch is found, return False as the method value. If no sub-string length is entered, submit the whole input string to the check palindrome method. Display the appropriate message based on the return from the method. If a sub-string length is entered, create a routine to select sub-strings and send them to the check palindrome method. The loop will start at the beginning of the string and increment up to the length of the string minus the one less then the length of the sub-string length. Use the SubString method or Mid function to select a series of sub-strings of the requested length. Send these sub-strings to the check palindrome method. If a sub-string returns True, display the sub-string in the picture box. If no palindromes are found, display an error message.

Page 70
Palindromes Student Project ABILITY LEVEL: Advanced APPROXIMATE COMPLETION TIME: 2-3 Hours OBJECTIVES: • Advanced string manipulation OVERVIEW OF PROJECT: A palindrome is a word or phrase that reads the same backwards as forwards. Some common examples are "Mom", "Dad", "Bob" or even the sentence "Madam, I'm Adam." When determining a palindrome, the case of letters is ignored, as is any spacing or punctuation if the phrase happens to be a sentence. The goal of this program is to determine if a word or phrase is a palindrome and to determine if any sub-strings of words or phrases are palindromes. For example, are there any groups of three letters that are a palindrome? Only the 26 letters (a...z) and 10 numbers (0...9) are to be considered. PROJECT INSTRUCTIONS: 1. Create a text box to accept the possible palindrome. 2. Create a second text box to accept the size of palindromes to find. 3. Create a picture box to display the palindromes found in the input text box. 4. Write code in a command button routine to check for palindromes. 5. If sub string palindromes were requested, display any palindromes found in a
list box. (Clear the list box before adding new palindromes.) 6. Display a message box if no palindromes were found. 7. Create an end program option. ADDITIONAL RESOURCES: • Textbook SUGGESTED SOLUTION: Consider creating a Boolean method to examine a string and return True if the string is a palindrome. Examine the whole string by sending the contents of the text box to this method. Search for smaller palindromes by sending a number of sub-strings to the method using a loop. A completed program might look something like this:
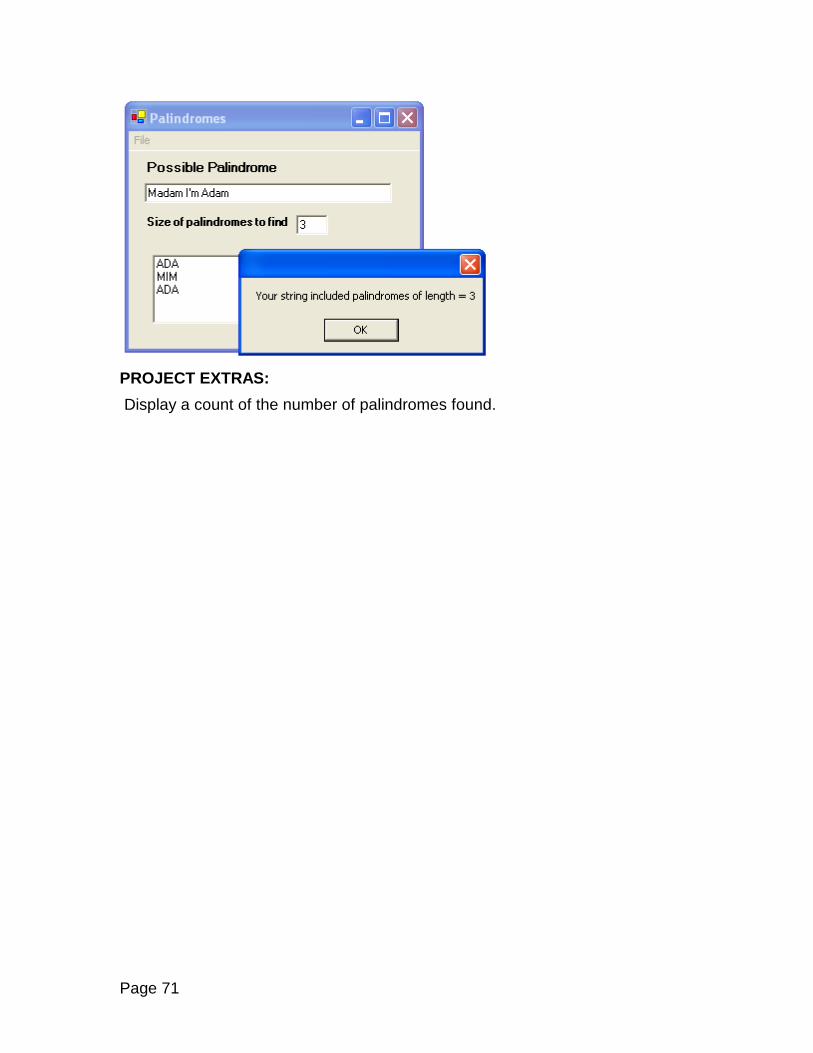
Page 71
PROJECT EXTRAS: Display a count of the number of palindromes found.
Page 72
Conway’s Game of Life Instructor Notes ABILITY LEVEL: Advanced APPROXIMATE COMPLETION TIME: 4 - 5 hours OBJECTIVES: • Loading and manipulating object arrays • Evaluating complex conditions using nested IF blocks SKILLS NEEDED: • Understanding of array processing • Understanding of decision structures • Understanding of Boolean operations MATERIALS NEEDED: • Visual Basic .NET TEACHING SUGGESTIONS: John Conway’s Game of Life was one of the first “artificial life” programs. It remains one of the most popular life simulations for computer programmers. There are many sites on the World Wide Web devoted to it. You may want to suggest that interested students do some independent research on the topic. One of the things they may find are interesting patterns for use with the game. There are also a number of shareware and freeware versions of the game already written and available on the Internet. These may serve as inspiration for more advanced or interested students. The rules of the game (outlined in the student’s section) are simple. The implementation can get involved. Students may come up with overly complicated solutions so you should review them before they get too far along in program development. Explain the benefits of using constants for important variables to allow program growth and change. For example, by using constants to indicate the number of columns and rows the board may be expanded and contracted just by changing those values in one place. These constants are throughout the program. Students may attempt to create all the cells needed manually. This should be discouraged as it often leads to serious problems in debugging, severely limits program expandability, and misses an opportunity to let the computer do more of the work. Having the program create and position objects in the grid does require more up front planning but that is probably more an advantage than disadvantage.

Page 73
This project lends itself to the use of different functions or methods to handle parts of the process. For example, counting the number of neighbors a cell has is more easily tested if done in a function. RESOURCES: • Textbook SUGGESTED EVALUATION: A complete Life program should:
• Allow a user to select initial cells to contain “life.” • Generate and display a new life generation. • Allow the user to clear the board • Allow the user to exit the game. SUGGESTED SOLUTION: Checks for neighbors may be implemented several ways. One way, often chosen by new programmers, is to treat corner cells, top and bottom rows, and left and right columns as special cases. This adds considerable complexity and creates many additional opportunities for errors. Creating a sort of neutral zone around the edge of the board allows the programmer to treat all cells identically. The top and bottom rows and left and right columns are initialized as empty cells and rendered invisible (Visible property set false). This means those cells will never be changed or have live in them. The programmer can set up a simple set of If statements to check all cells. A third option is to use a try/catch structure and return a value indicating a cell is empty if an exception is generated when an attempt to read a cell outside the range of the array. This uses the built-in exception handling that is part of all C# arrays. Once the number of neighbors has been determined, the status of the current cell is easily determined. Students should use an array separate from the array holding the current state of the board to hold the state for the next generation. Not using a separate array allows any changes made to affect the evaluation of other cells. When a user sets or clears the life in a cell, the programmer must be careful to change both the visible indication of life (background color or picture) and the internal indication (object tag value, status array, etc.) to maintain a consistent state. Failure to do this results in undetermined results that may be hard to debug. Here are a few interesting shapes to start. Students and instructor alike will easily discover others.

Page 74
Page 75
Conway’s Game of Life Student Project ABILITY LEVEL: Advanced APPROXIMATE COMPLETION TIME: 4 - 5 hours OBJECTIVES: • Loading and manipulating object arrays • Evaluating complex conditions using nested IF blocks OVERVIEW OF PROJECT: John Conway’s Game of Life was one of the first “artificial life” programs. It remains one of the most popular life simulations for computer programmers. The game is played on a collection of cells. Each cell has eight neighboring cells. Each cell either is occupied by a “life” or is empty. The state of a cell for a new generation is determined by a few simple rules.
1. If a life has no neighbors or only one, it dies of loneliness. 2. If a life has four or more neighbors, it dies of overcrowding. 3. If a life has either two or three neighbors, it survives to the next
generation. 4. If a cell has no life in it but has exactly three neighbors, a new life is born.
Create a program to allow a user to set up a game board with initial life values and generate new generations of the board. PROJECT INSTRUCTIONS: 1. Create an object to use to display a “life.” 2. Create a board by loading new copies of the initial object in grid form. 3. Write code using the rules in the overview to determine which live cells “die”
or “survive”. 4. Write code using the rules in the overview to determine which cells have lives
“born” into them. 5. Create an option to generate a new life generation using the code that
determines life status. 6. Create a clear option with the appropriate code to empty all cells. 7. Create an exit option with the appropriate code to end the program. ADDITIONAL RESOURCES: • Textbook

Page 76
SUGGESTED SOLUTION:
PROJECT EXTRAS: Add a button to have the program automatically generate and display several generations. Use different colors for new life and life that has “survived” from the previous generation. Allow the user to select a color for the life or background colors. Use files to save, load, and edit interesting patterns.

Page 77
Checkers Game Program Instructor Notes ABILITY LEVEL: Advanced APPROXIMATE COMPLETION TIME: 6-8 hours OBJECTIVES: • Use complex and nested decision constructs • Understanding of graphics methods • Understanding of event handlers SKILLS NEEDED: • Understanding of looping constructs • Understanding of variable and object arrays MATERIALS NEEDED: • Visual Basic .NET TEACHING SUGGESTIONS: The game of checkers is familiar to most students. They will find programming the rules of checkers surprisingly complex and it may be useful to use a simplified set of rules if time is a problem. Have students write out the rules they will be using. Make sure they have them all listed before they start designing their program. A sample list follows.
1. Pieces at the top of the board may only move downward. 2. Pieces at the bottom of the board may only move upward. 3. Pieces may only move into empty squares. 4. Pieces may only move diagonally. 5. Pieces must move to an adjacent square or by jumping an opponent’s
piece to the next square past that piece on the same diagonal. 6. Remove jumped pieces from the board.
Encourage students to have the computer duplicate an original square object. The same loop that creates the board can be used to set the initial values for tracking piece locations. Students must give careful consideration to how they will check for valid moves. This is especially true for moves involving the top and bottom rows of the board. Encourage them to desk check their algorithms before implementation.

Page 78
Review with students the advantages of nesting If statements. If they don’t nest decision constructs, they will find that they need a more complex set of flags and indicators for this program. Suggest to students that they provide some indication to the user of what piece they have selected for movement. They should also allow the user to deselect a piece if it has not been moved. If students will be drawing discs on picture boxes using the FillCircle method, explain the paint event. The paint event occurs when part or all of an object is exposed after being moved or enlarged. A paint event also occurs after a window that was covering the object has been moved. If a Paint event handler is not written, students may find parts of their display missing if the form is covered or minimized at any time. RESOURCES: • Textbook • Checker board and pieces to demonstrate the game and its rules SUGGESTED EVALUATION: Completed programs must follow all the rules listed in the teaching suggestions section. Be sure to test jumps and moves in a number of directions. Attempt to make moves into and out of the end rows. SUGGESTED SOLUTION: The first step is the creation of the playing board. Create one square using a picture box. Set the initial properties so that they can be copied into dynamically loaded objects. Set the border style to none so that boxes will appear seamlessly next to one another. To keep track of what boxes have what pieces on them, create an integer array. Create 63 more elements in the board square array and move them into position. As squares are moved into position, change the BackColor of alternate squares in each row. Set the array holding contents of squares in odd numbered squares in the first 24 squares to indicate the first color. Set the odd numbered squares in the last 24 squares to hold the other color. Flag odd numbered squares in the middle of the board as empty. Writing the code that colors the squares and initializes the board-tracking array as a method separate from the routine that loads the full object array. This allows that method to be called as a “New Game” routine. Drawn objects in picture boxes may disappear if the board is hidden by another window. Write a Paint event handler to redraw the picture boxes on the board. This method will examine the flag for a square and draw the appropriate disk in occupied squares. These event handlers will be called automatically when the form is first loaded.
Page 79
Draw disks on a picture box using the FillCircle method. Create a SolidBrush object and set it to the appropriate color for the piece being drawn. Colors for the different playing pieces. The PictureBox properties of Height and Width can be used to specify the rectangle for the playing piece to be drawn. Clicking on a square starts an important and involved set of events. Create a form class variable to hold a flag indicating if a piece has been selected for movement. Determining if a valid square has been clicked on requires a number of checks. 1. If a piece has already been selected, clicking on a square with a piece on it is
not valid. 2. If a piece has not been selected, clicking of a square that is empty or has a
piece of the wrong color, that is not a valid click. 3. If a piece has been selected and the square clicked on is flagged as an
invalid square, not on the proper set of diagonals, that is not a valid click. 4. If a piece has already been selected and an empty square on the proper set
of diagonals has been clicked check the following cases. 5. Is the square adjacent and in the right direction? 6. If the square is not adjacent, is there a piece owned by the opponent between
the square the piece is on and the square selected? Once a valid move has been selected, move the piece appropriately. Remove the disk from its original location by clearing the box and re-setting the flag in the board array. Draw a new disk in the new square and set the board array to indicate what color disk occupies it. If an opponent’s piece was jumped, clear the square the piece was on and refresh the picture box to indicate that square is now empty. Switch a current player flag after each valid move. Turn off the piece selected flag if a player clicks on the currently selected piece to allow a player to deselect a piece. One way to indicate the currently selected piece is to redraw the disk a different, but related, color. Deselecting a piece implies that it must be redrawn in its primary color after it has been deselected. This program serves easily as a base for writing a more complete checkers program.
Page 80
Checkers Game Program Student Project ABILITY LEVEL: Advanced APPROXIMATE COMPLETION TIME: 6-8 hours OBJECTIVES: • Use complex and nested decision constructs • Understanding of graphics methods • Understanding of event handlers OVERVIEW OF PROJECT: Create a program that allows two players to play a simple form of checkers. Draw a 64 square board with alternating color squares. Place different colored discs on the dark squares in the top and bottom three rows. Allow the user to select a disc and move it to diagonally adjacent squares or to “jump” opponent’s discs on diagonally adjacent squares. Discs may only move to empty squares. Jumps may only be made over opponent’s discs. A piece (disc) that is jumped must be removed from the board. The program should refresh its display if the board is resized or temporarily hidden and unhidden. Allow the user to reset the board. Resetting the board puts all pieces back on their original squares. Allow the user to quit the game and exit the program. PROJECT INSTRUCTIONS: 1. Write out a list of rules the program will enforce on piece movement. 2. Create an 8 by 8 board consisting of squares of different background colors. 3. Create a subroutine to populate the board with different color pieces as with a
game of checkers. 4. Create code behind the object array representing the board squares to allow
the user to select a playing piece. 5. Create code to allow the user to indicate a location to move a selected piece. 6. Create code to verify that a target square is a valid move according to the
rules of the game. 7. If an opponent’s piece is jumped by a player’s move, remove that piece from
the board and identify that pieces square as empty. 8. Create an option for the game to be reset to its initial set-up. 9. Write program code to redraw pieces on the board if a paint event occurs. 10. Allow the user to exit the program. ADDITIONAL RESOURCES:
• Textbook • Checker board and pieces to desk check algorithms

Page 81
SUGGESTED SOLUTION: A completed program might look something like this:
PROJECT EXTRAS: Allow the users to select the colors of:
• The discs used • The squares on the board • The form background
Determine the end of the game when there are no remaining moves. Keep a running count of how many discs each player has on the board. Make a more complete game of checkers by allowing pieces that reach the end of the board to become “kings” and move backwards. Provide an identification of kings on discs as appropriate.