Embed Size (px)
Citation preview
21
V-Ray for SketchUp OS X Install Guide
Table of Contents
Installing V-Ray for SketchUp…………………………………………………………………………………………..2
Reprograming a Dongle………………………………………………………………………………………………….10
Setting Up Additional Users with a Floating License Server…………………………………………….19
Additional Information ……………………………………………………………………………………..………..…20
Common Troubleshooting ……………………………………………………………………………………..………22
21
Installing V-Ray for SketchUp
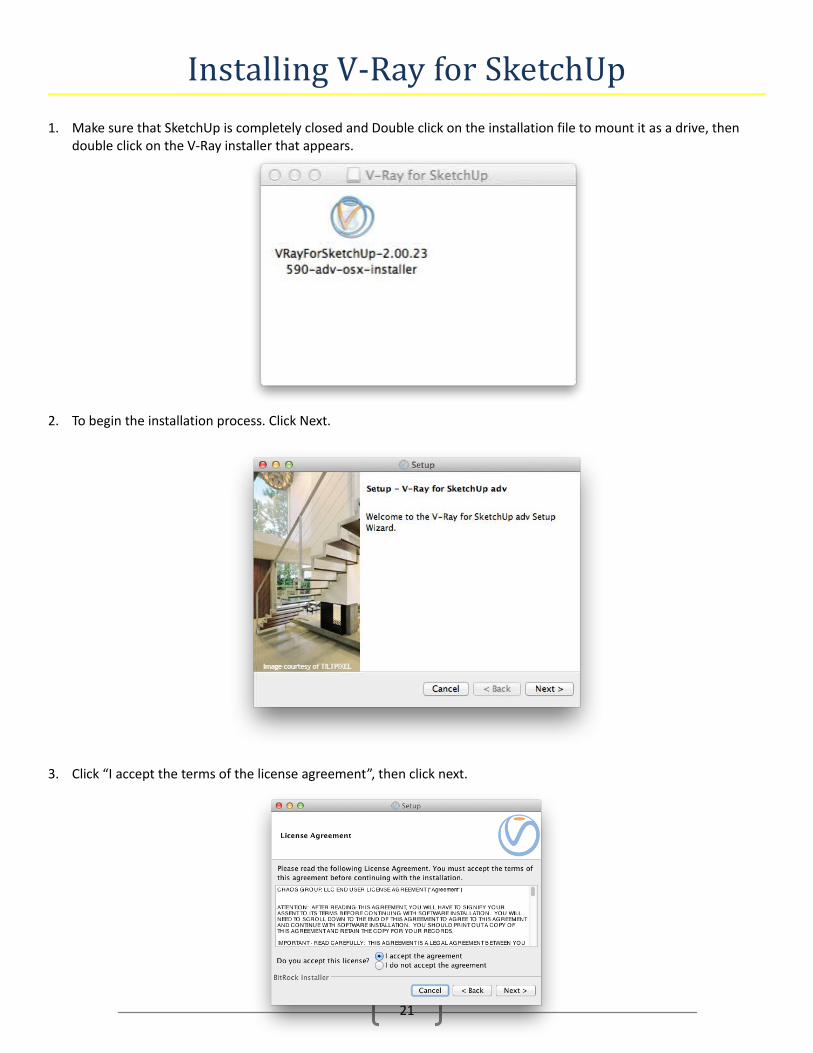
1. Make sure that SketchUp is completely closed and Double click on the installation file to mount it as a drive, then double click on the V-Ray installer that appears.
2. To begin the installation process. Click Next.
3. Click “I accept the terms of the license agreement”, then click next.
21
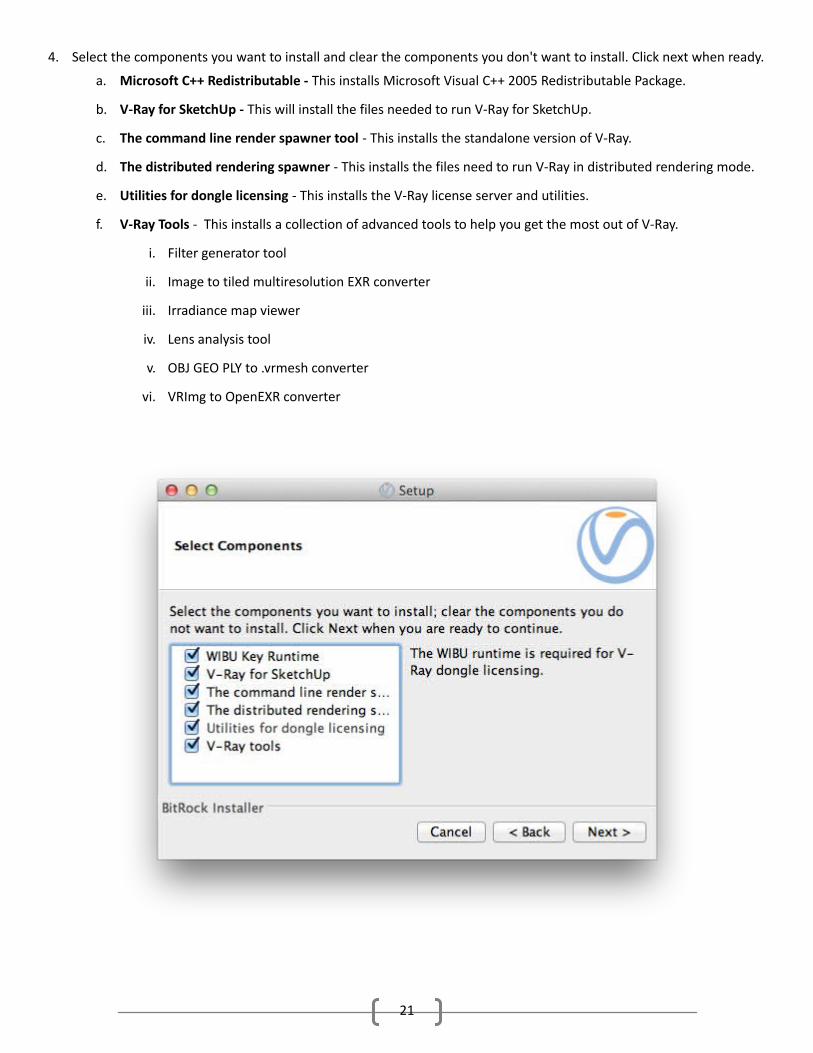
4. Select the components you want to install and clear the components you don't want to install. Click next when ready.
a. Microsoft C++ Redistributable - This installs Microsoft Visual C++ 2005 Redistributable Package.
b. V-Ray for SketchUp - This will install the files needed to run V-Ray for SketchUp.
c. The command line render spawner tool - This installs the standalone version of V-Ray.
d. The distributed rendering spawner - This installs the files need to run V-Ray in distributed rendering mode.
e. Utilities for dongle licensing - This installs the V-Ray license server and utilities.
f. V-Ray Tools - This installs a collection of advanced tools to help you get the most out of V-Ray.
i. Filter generator tool
ii. Image to tiled multiresolution EXR converter
iii. Irradiance map viewer
iv. Lens analysis tool
v. OBJ GEO PLY to .vrmesh converter
vi. VRImg to OpenEXR converter
21
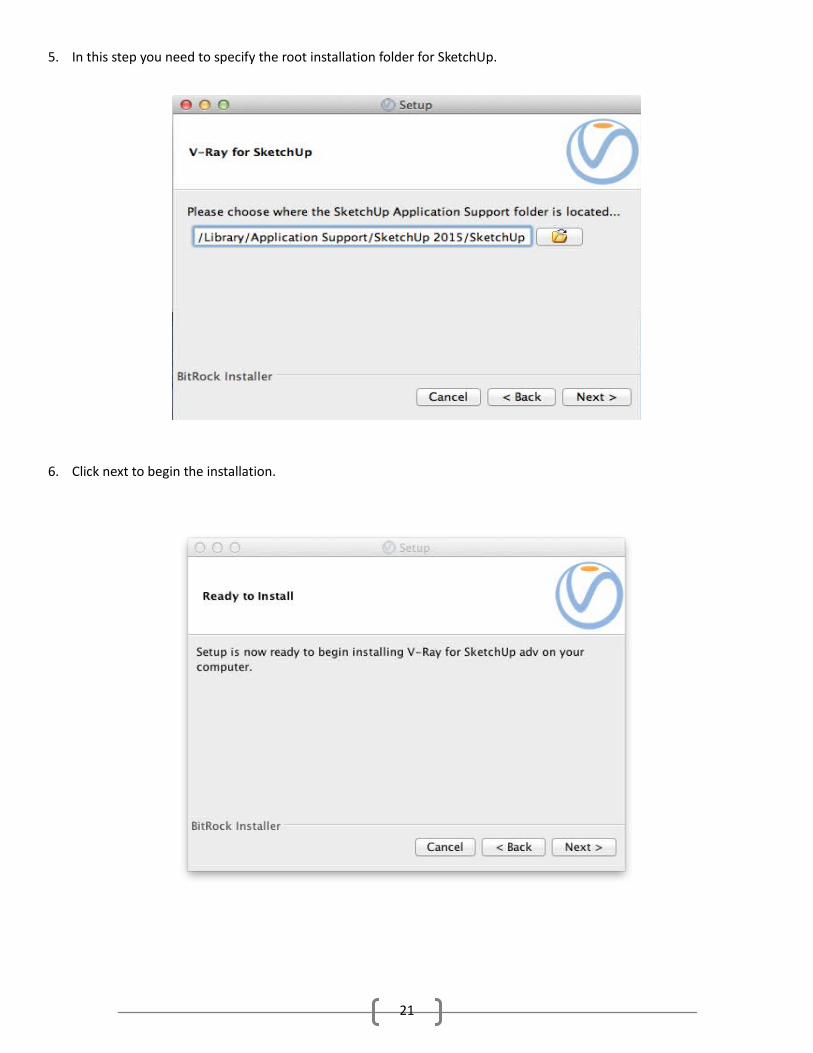
5. In this step you need to specify the root installation folder for SketchUp.
6. Click next to begin the installation.
21
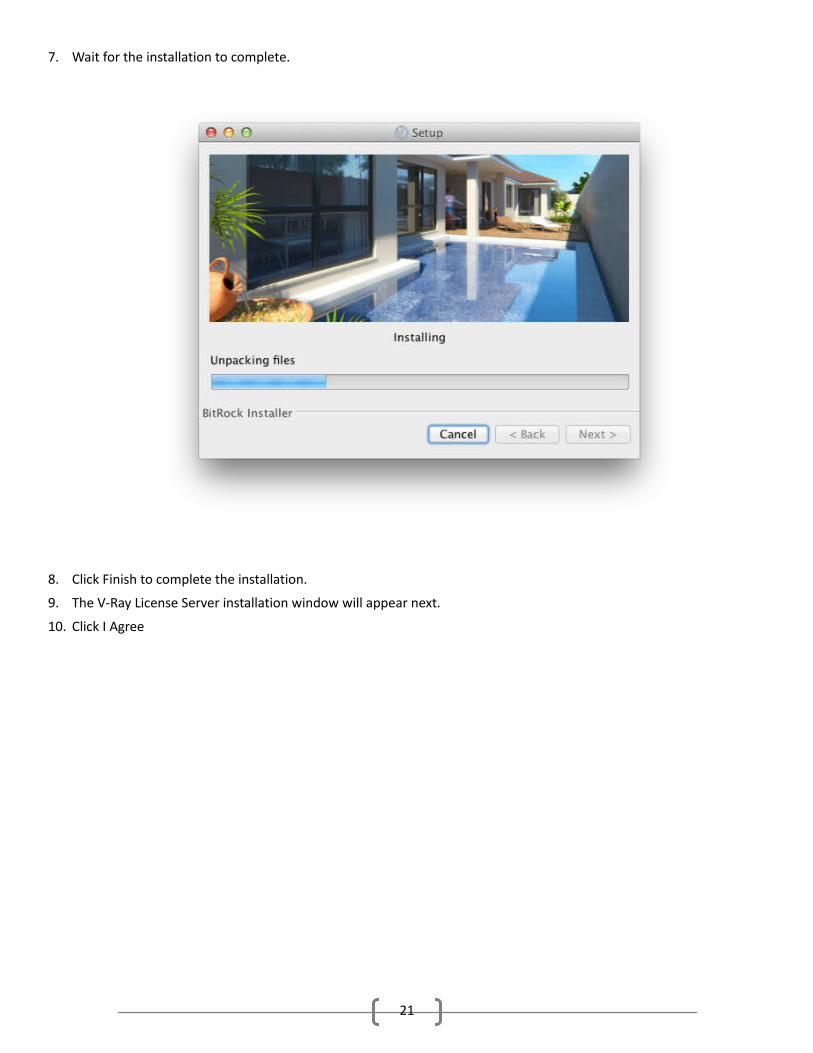
7. Wait for the installation to complete.
8. Click Finish to complete the installation.
9. The V-Ray License Server installation window will appear next.
10. Click I Agree
21
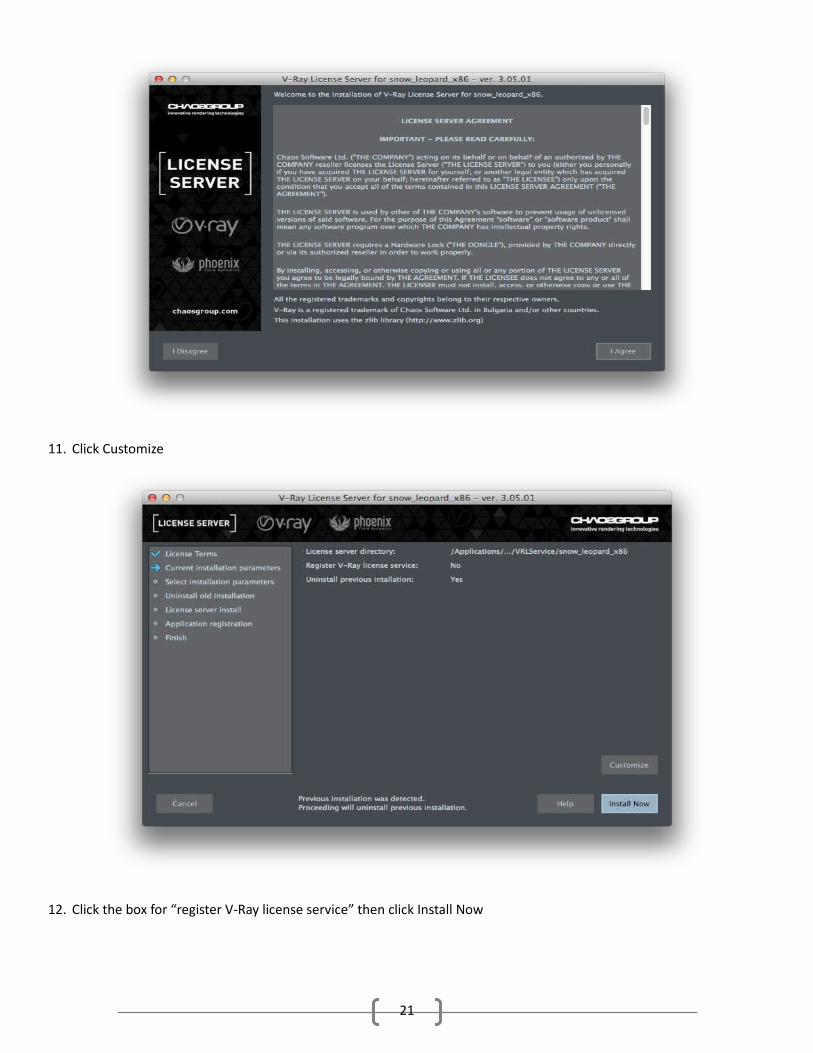
11. Click Customize
12. Click the box for “register V-Ray license service” then click Install Now
21
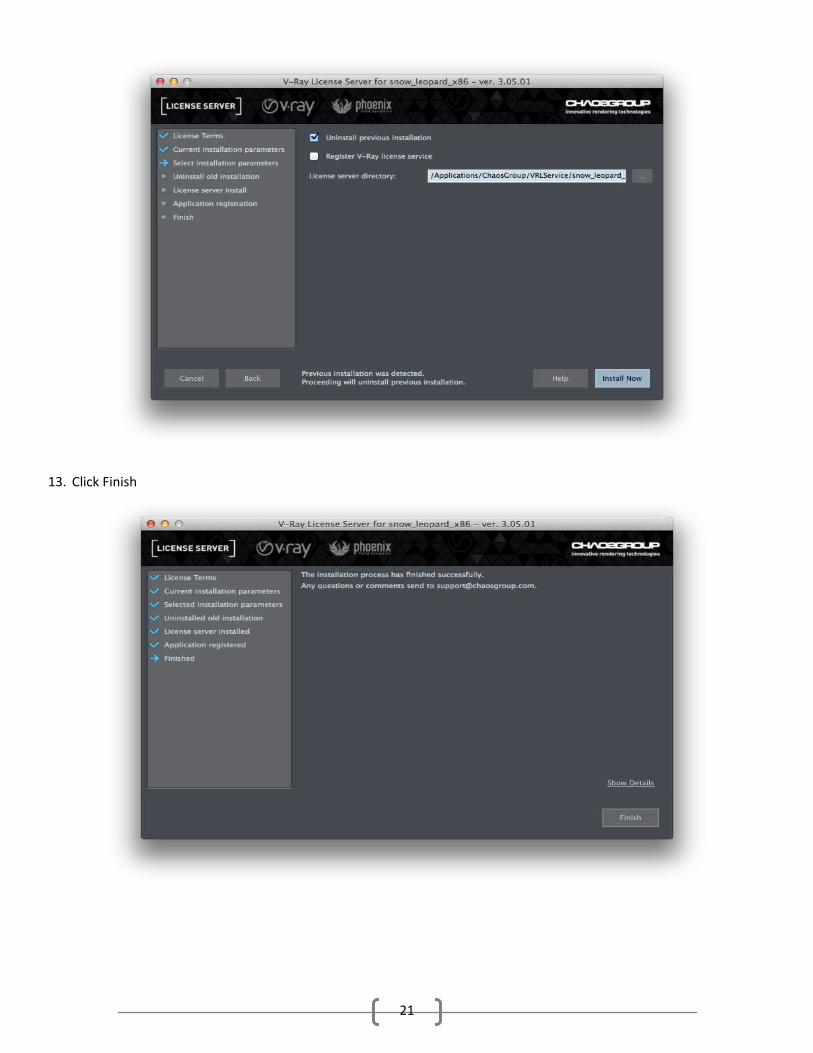
13. Click Finish
21
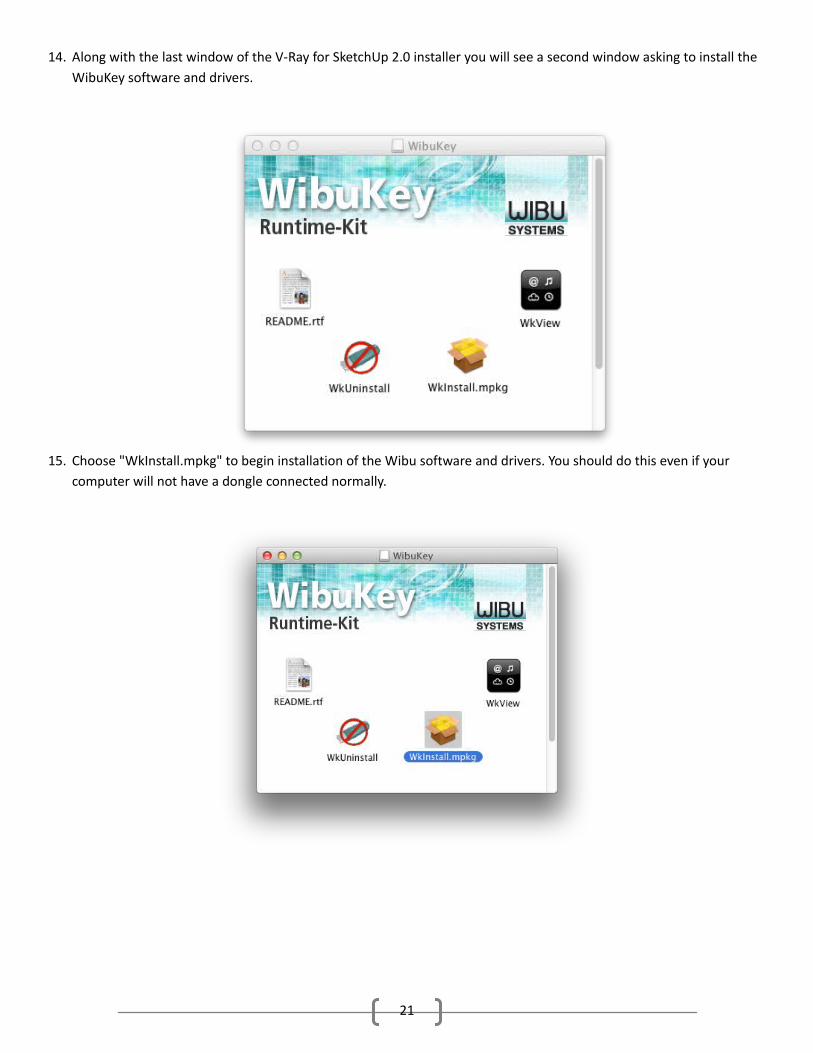
14. Along with the last window of the V-Ray for SketchUp 2.0 installer you will see a second window asking to install the WibuKey software and drivers.
15. Choose "WkInstall.mpkg" to begin installation of the Wibu software and drivers. You should do this even if your computer will not have a dongle connected normally.
21
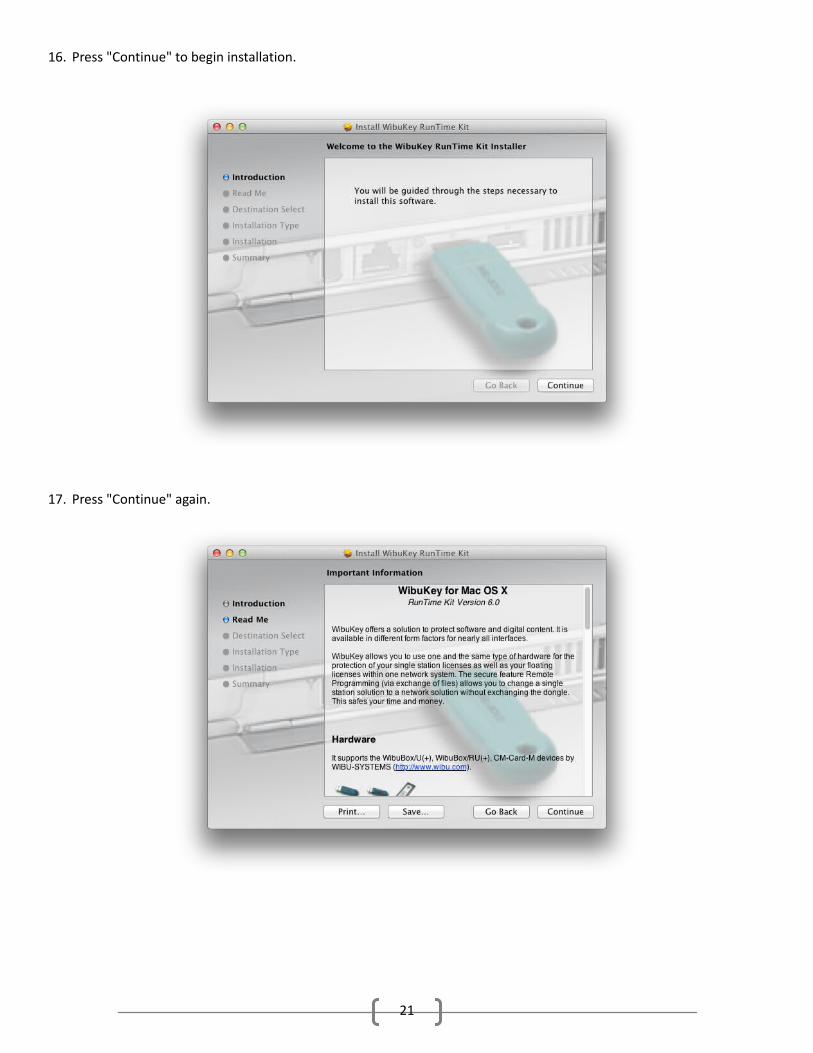
16. Press "Continue" to begin installation.
17. Press "Continue" again.
21
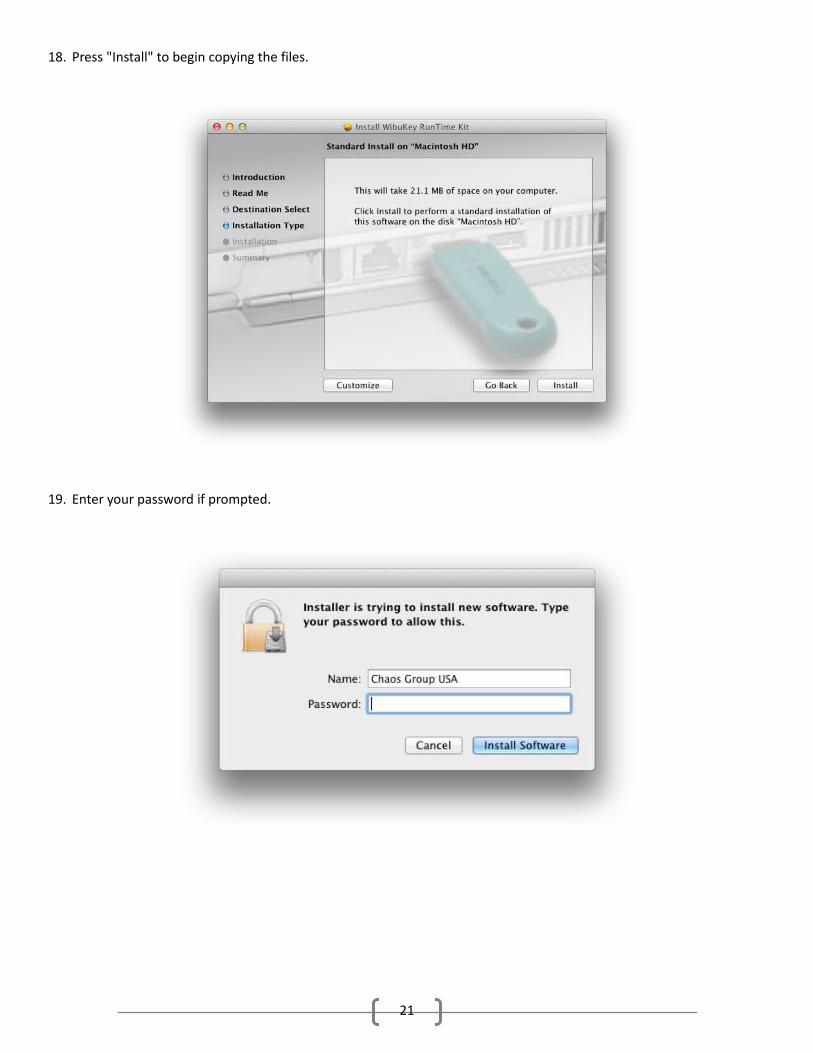
18. Press "Install" to begin copying the files.
19. Enter your password if prompted.
21
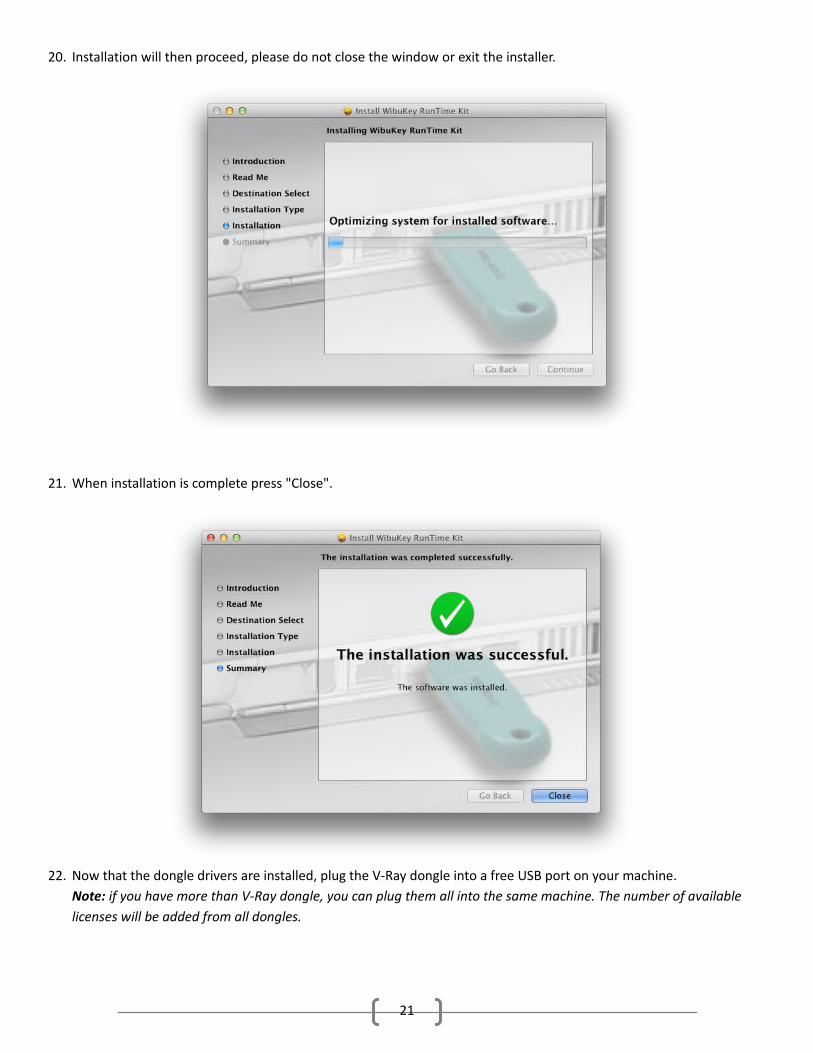
20. Installation will then proceed, please do not close the window or exit the installer.
21. When installation is complete press "Close".
22. Now that the dongle drivers are installed, plug the V-Ray dongle into a free USB port on your machine.Note: if you have more than V-Ray dongle, you can plug them all into the same machine. The number of available licenses will be added from all dongles.
21
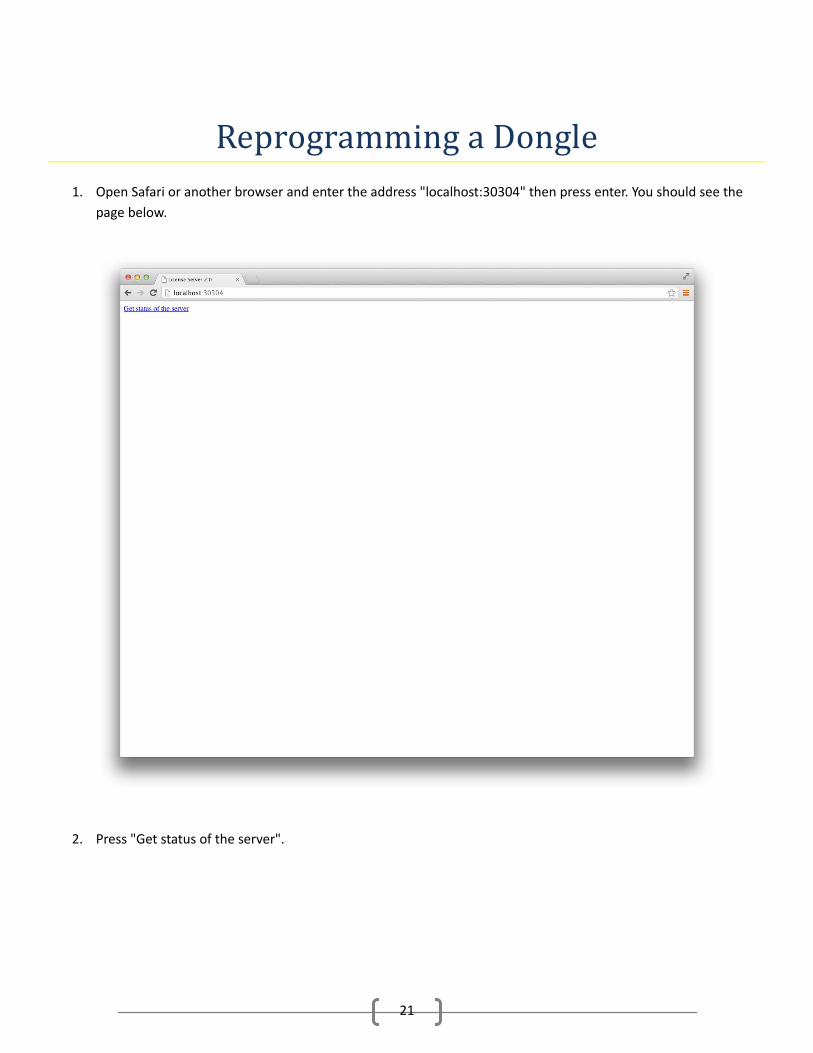
Reprogramming a Dongle1. Open Safari or another browser and enter the address "localhost:30304" then press enter. You should see the
page below.
2. Press "Get status of the server".
21
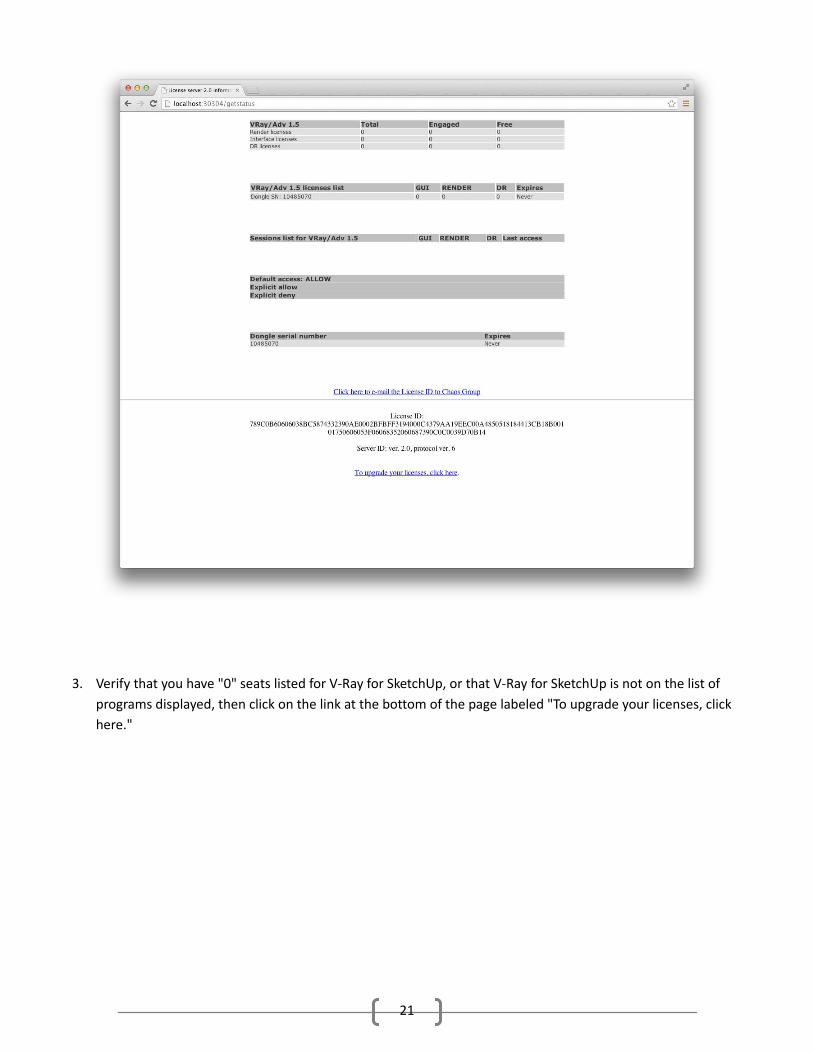
3. Verify that you have "0" seats listed for V-Ray for SketchUp, or that V-Ray for SketchUp is not on the list of programs displayed, then click on the link at the bottom of the page labeled "To upgrade your licenses, click here."
21
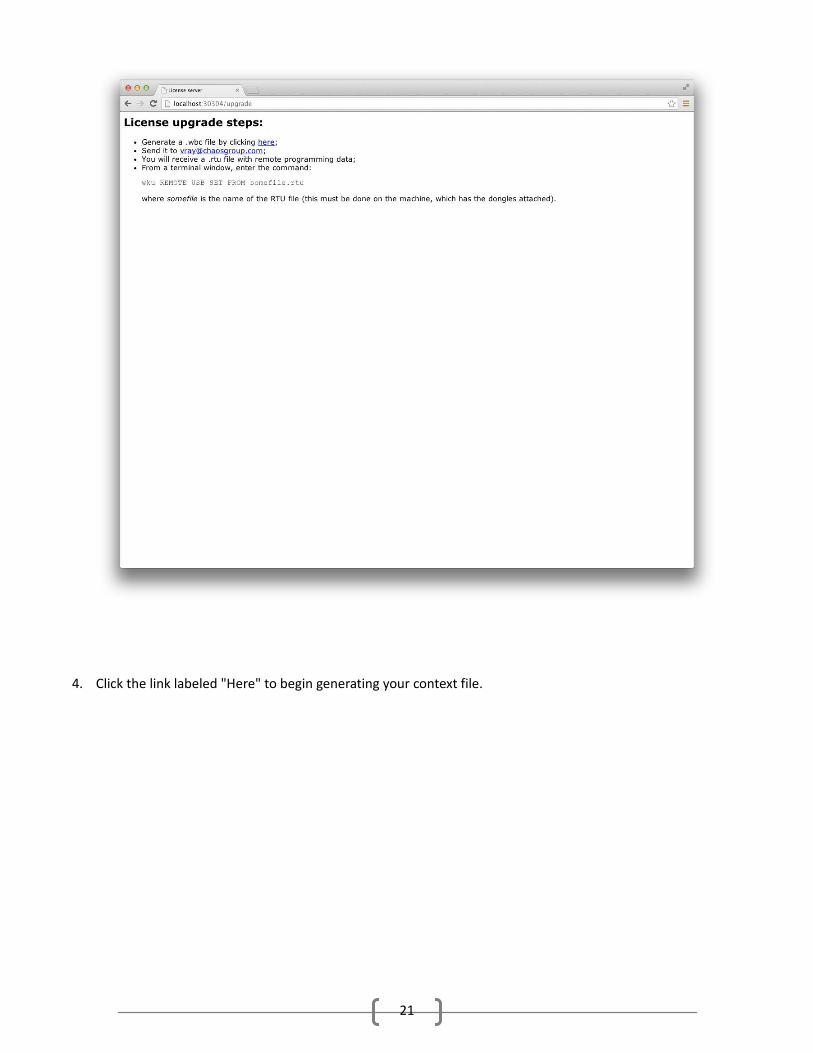
4. Click the link labeled "Here" to begin generating your context file.
21
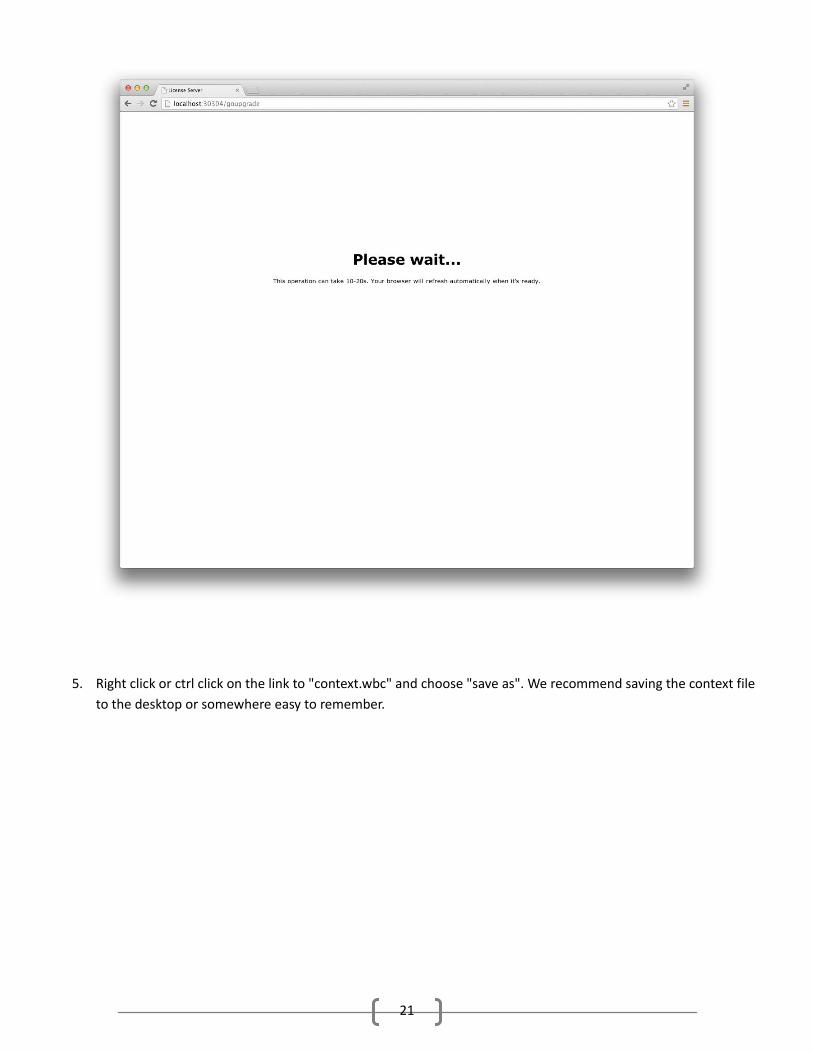
5. Right click or ctrl click on the link to "context.wbc" and choose "save as". We recommend saving the context file to the desktop or somewhere easy to remember.
21
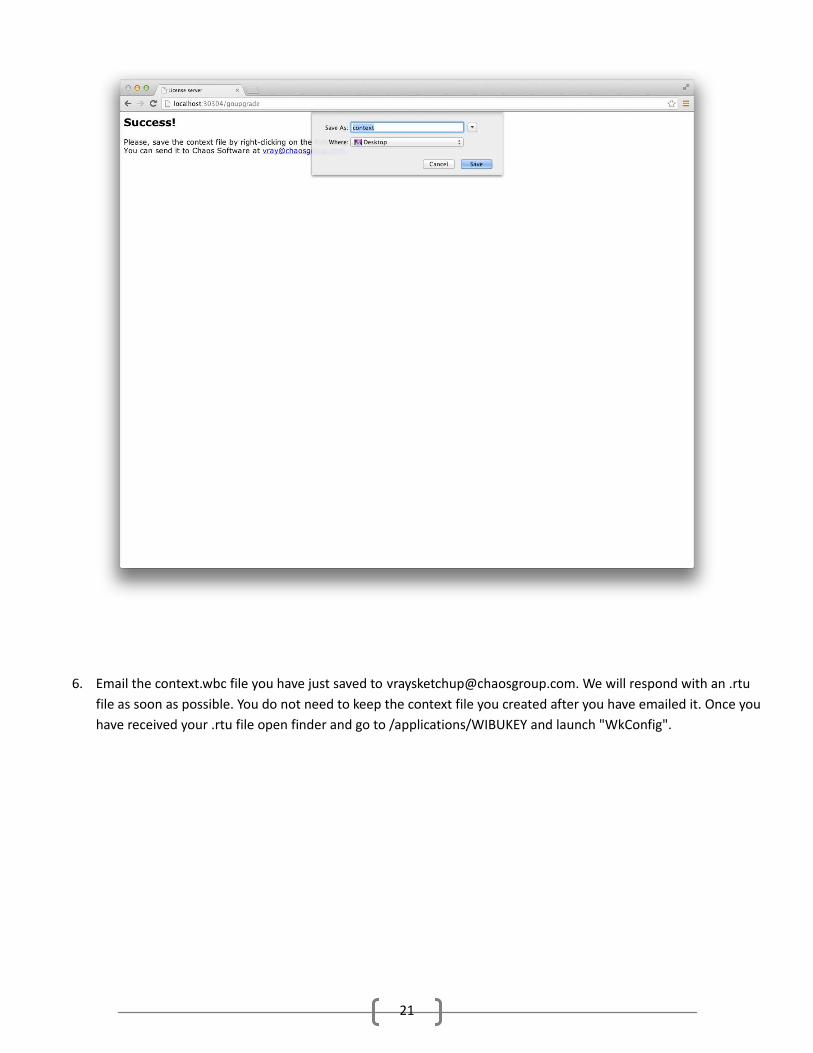
6. Email the context.wbc file you have just saved to [email protected]. We will respond with an .rtu file as soon as possible. You do not need to keep the context file you created after you have emailed it. Once you have received your .rtu file open finder and go to /applications/WIBUKEY and launch "WkConfig".
21
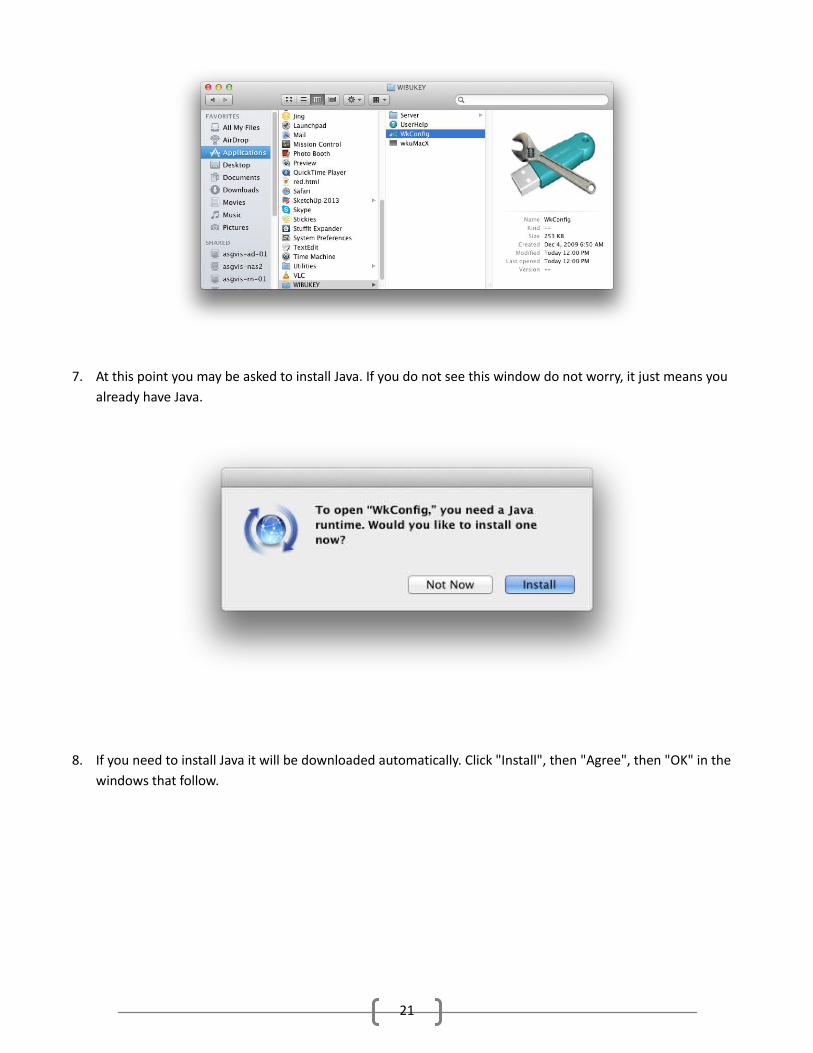
7. At this point you may be asked to install Java. If you do not see this window do not worry, it just means you already have Java.
8. If you need to install Java it will be downloaded automatically. Click "Install", then "Agree", then "OK" in the windows that follow.
21
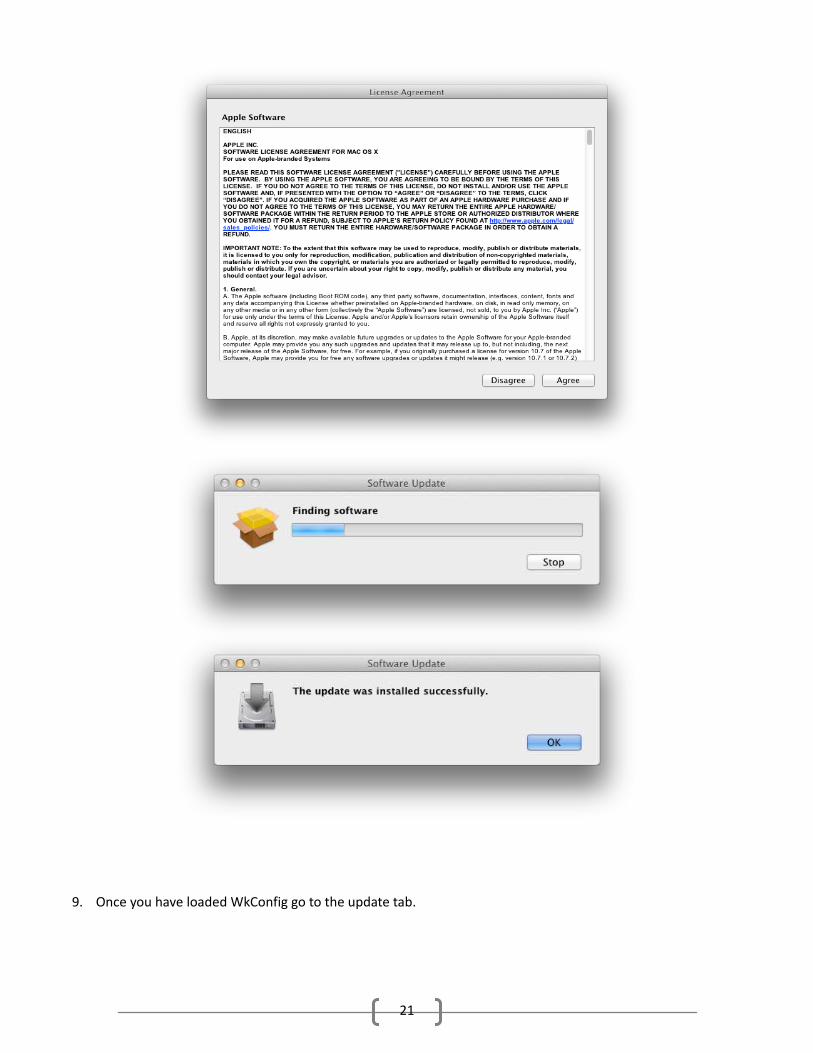
9. Once you have loaded WkConfig go to the update tab.
21
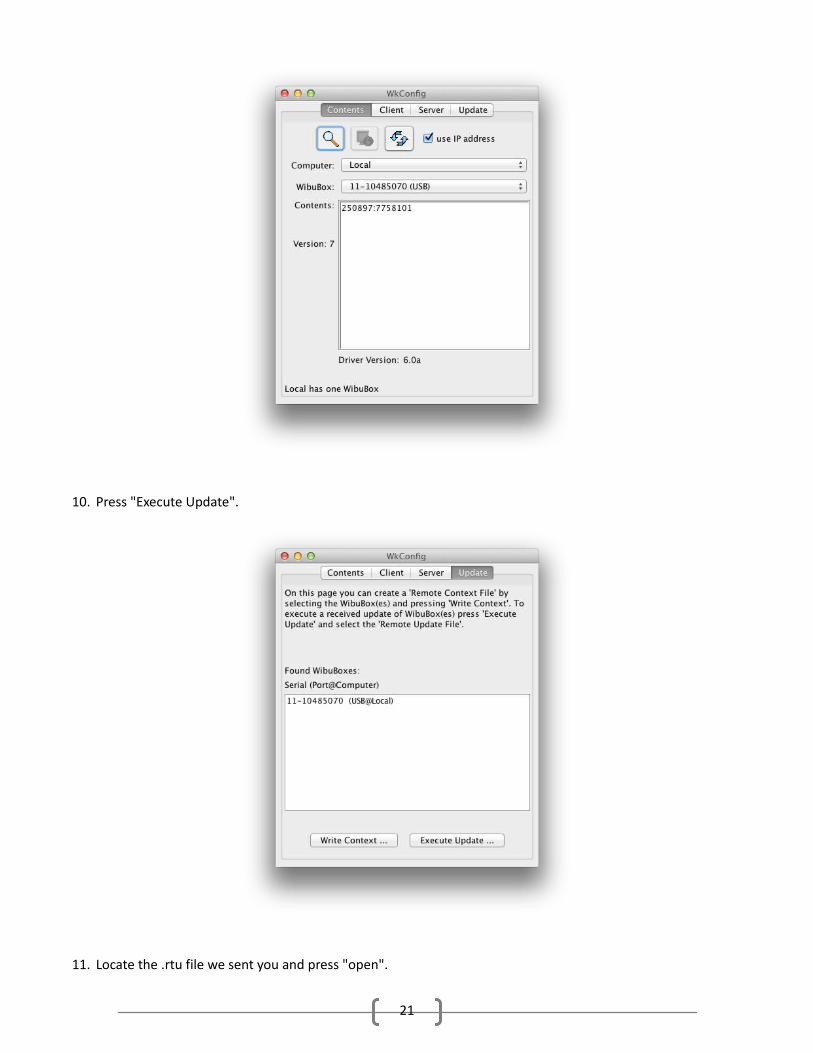
10. Press "Execute Update".
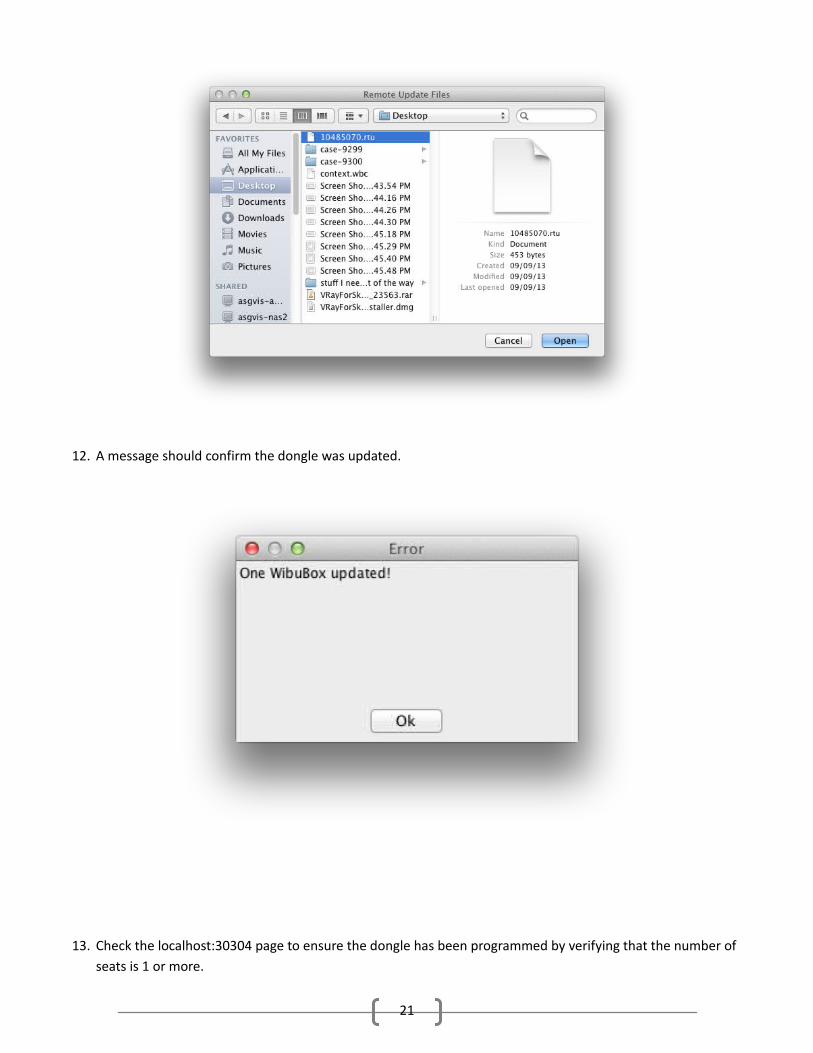
11. Locate the .rtu file we sent you and press "open".
21
12. A message should confirm the dongle was updated.
13. Check the localhost:30304 page to ensure the dongle has been programmed by verifying that the number of seats is 1 or more.
21
Setting Up Additional Users with a FloatingLicense
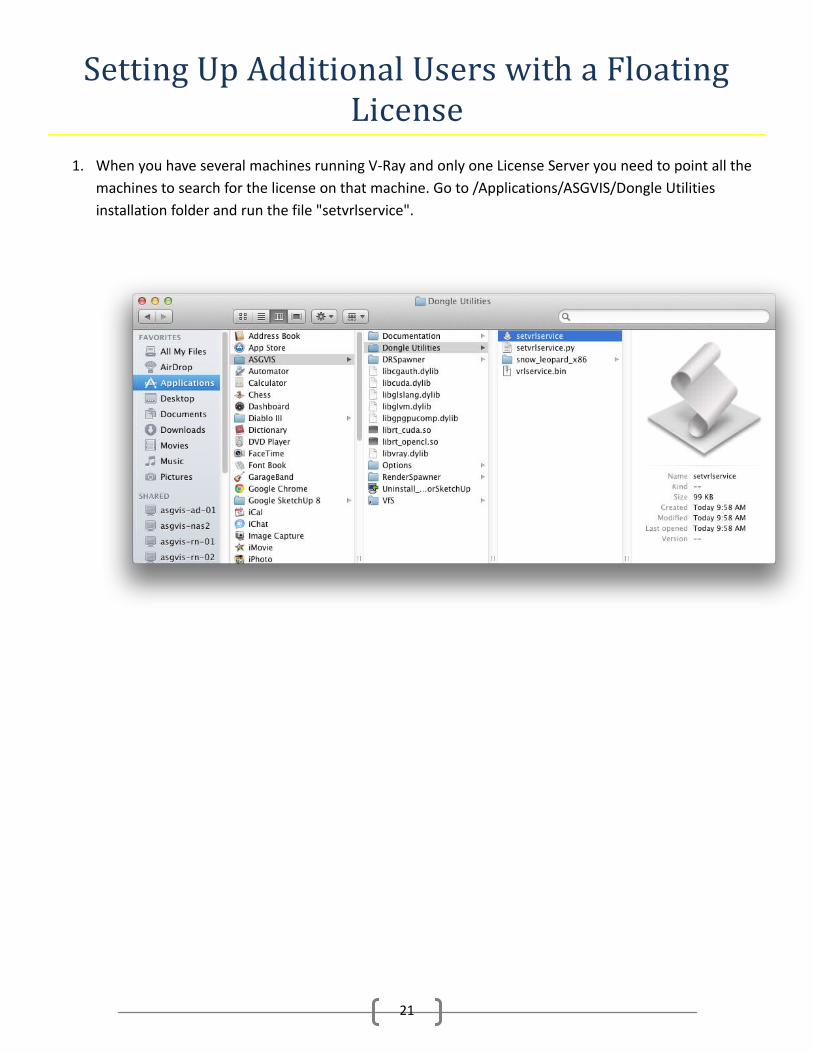
1. When you have several machines running V-Ray and only one License Server you need to point all the machines to search for the license on that machine. Go to /Applications/ASGVIS/Dongle Utilities installation folder and run the file "setvrlservice".
21
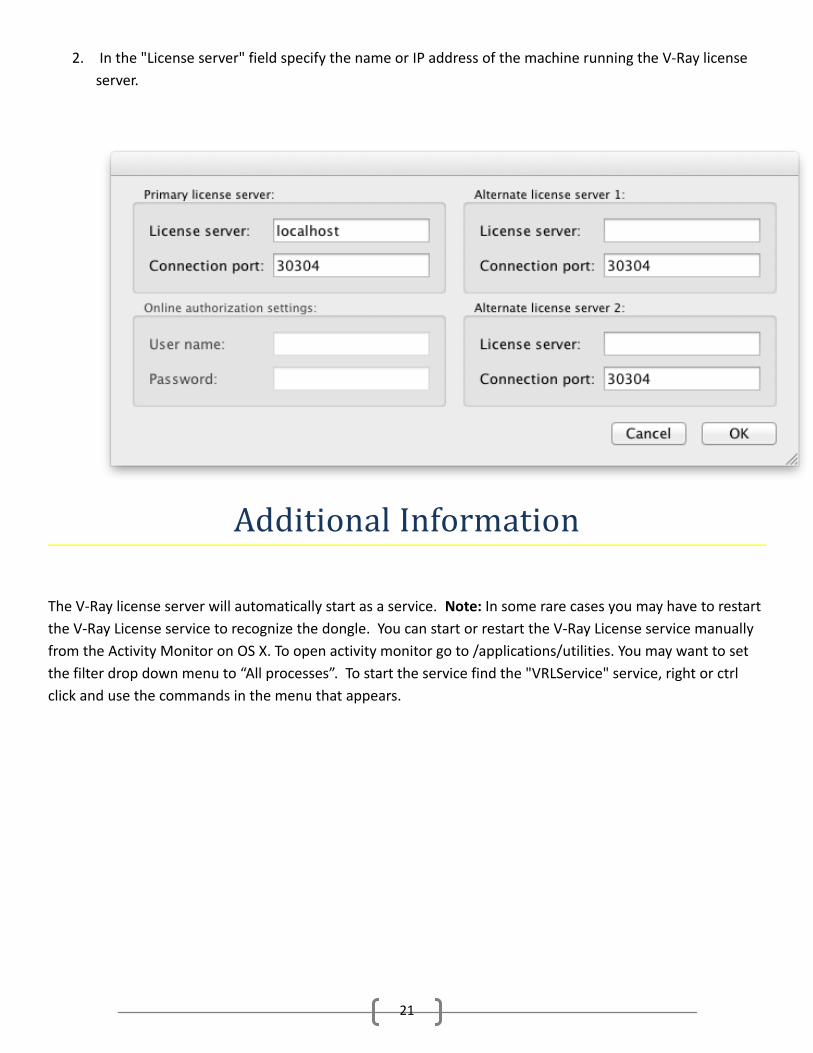
2. In the "License server" field specify the name or IP address of the machine running the V-Ray license server.
Additional Information
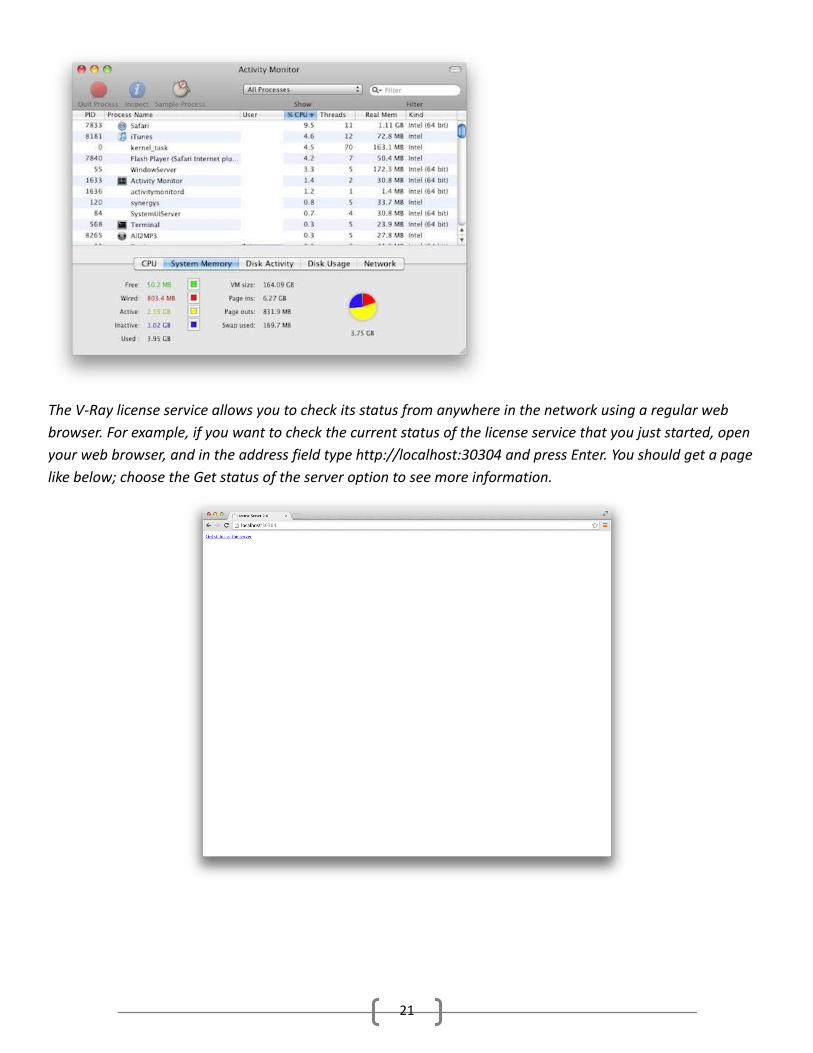
The V-Ray license server will automatically start as a service. Note: In some rare cases you may have to restart the V-Ray License service to recognize the dongle. You can start or restart the V-Ray License service manually from the Activity Monitor on OS X. To open activity monitor go to /applications/utilities. You may want to set the filter drop down menu to “All processes”. To start the service find the "VRLService" service, right or ctrl click and use the commands in the menu that appears.
21
The V-Ray license service allows you to check its status from anywhere in the network using a regular web browser. For example, if you want to check the current status of the license service that you just started, open your web browser, and in the address field type http://localhost:30304 and press Enter. You should get a page like below; choose the Get status of the server option to see more information.
21
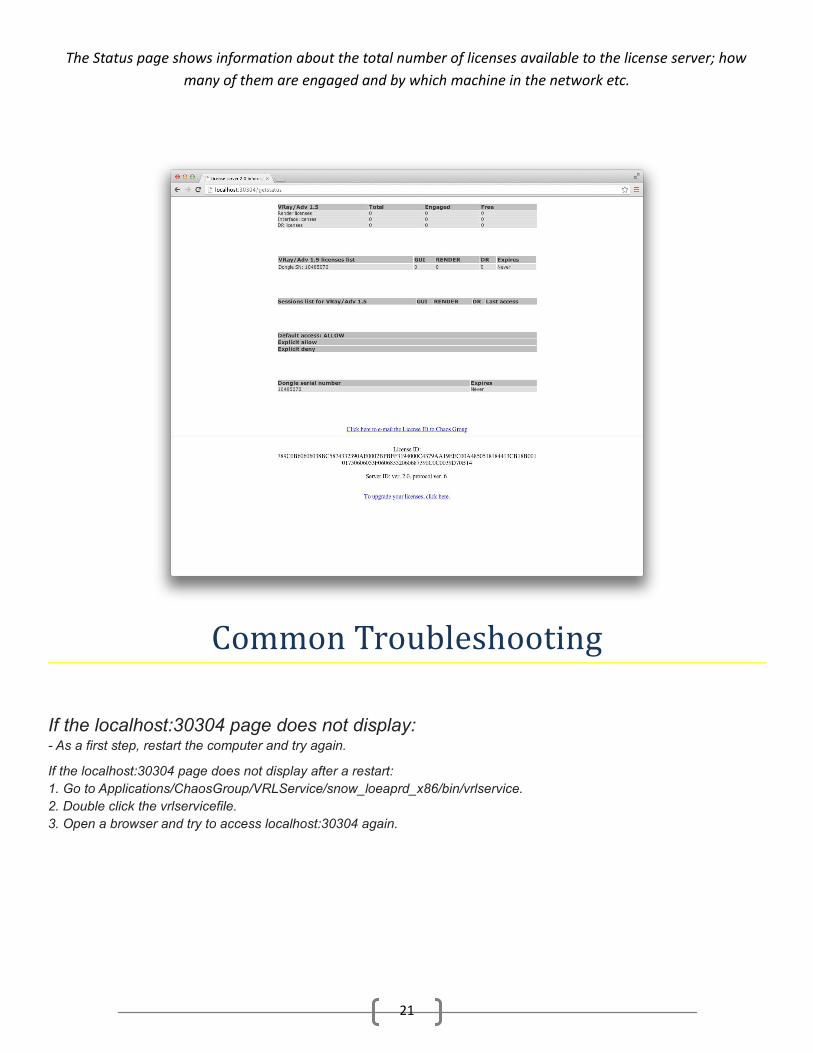
The Status page shows information about the total number of licenses available to the license server; howmany of them are engaged and by which machine in the network etc.
Common Troubleshooting
If the localhost:30304 page does not display:- As a first step, restart the computer and try again.
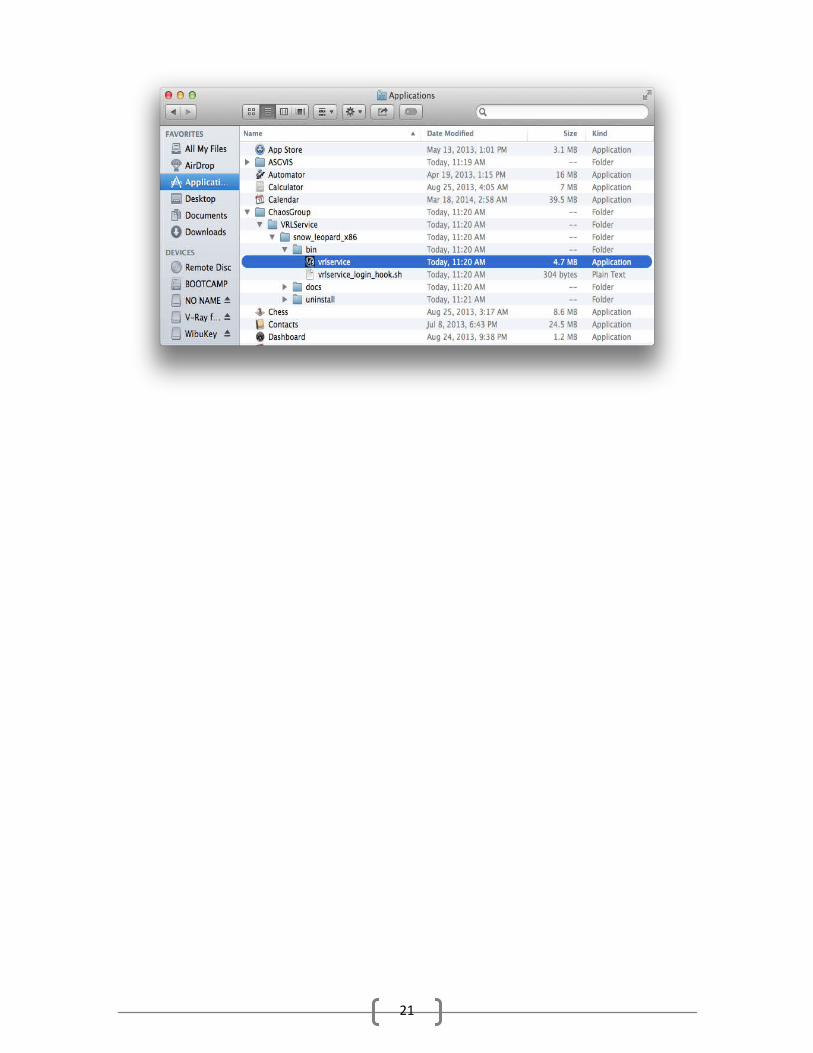
If the localhost:30304 page does not display after a restart:1. Go to Applications/ChaosGroup/VRLService/snow_loeaprd_x86/bin/vrlservice. 2. Double click the vrlservicefile.3. Open a browser and try to access localhost:30304 again.
21