Embed Size (px)
Citation preview
Using the NXT Light Sensor

2
Connect One Light Sensor – 1
From My Files use Left / Right NXT buttons and get to View menu and push Orange button.
From View menu use Left / Right NXT buttons and get to Reflected Light menu.
From Reflected Light menu use Left / Right NXT buttons to find correct port and push the Orange button.

3
Connect One Light Sensor - 2
Discuss types of readings
Example – Compare the floor with the blue tape
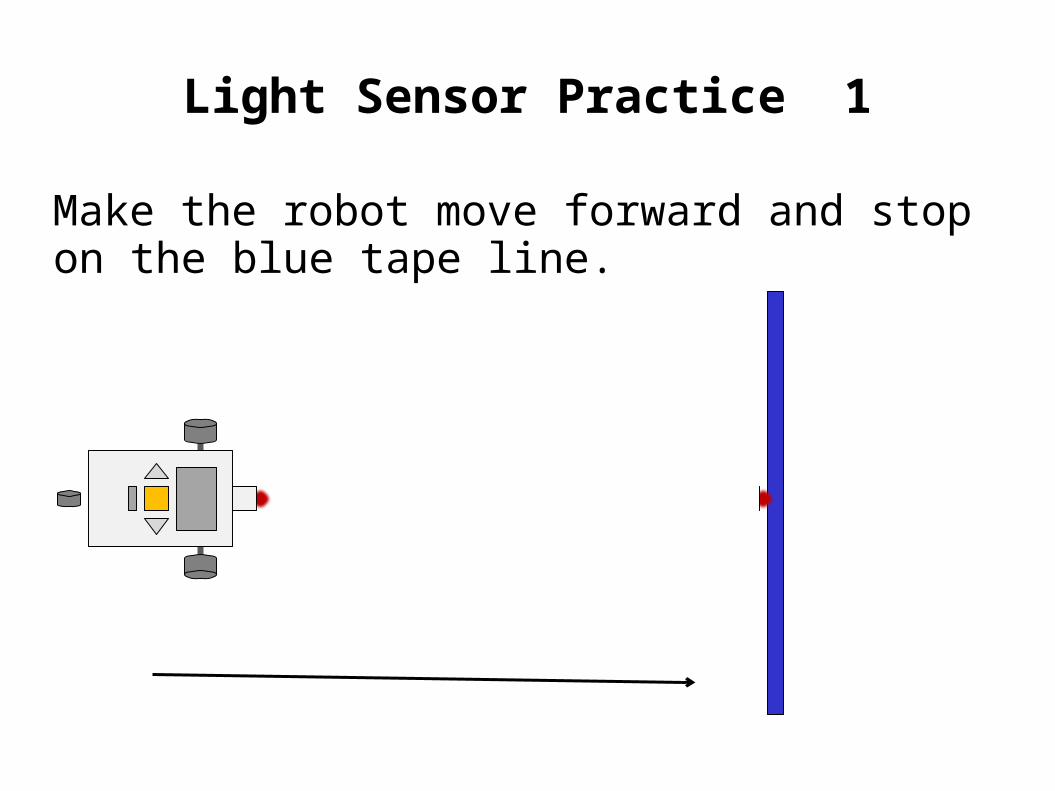
Light Sensor Practice 1
Make the robot move forward and stop on the blue tape line.
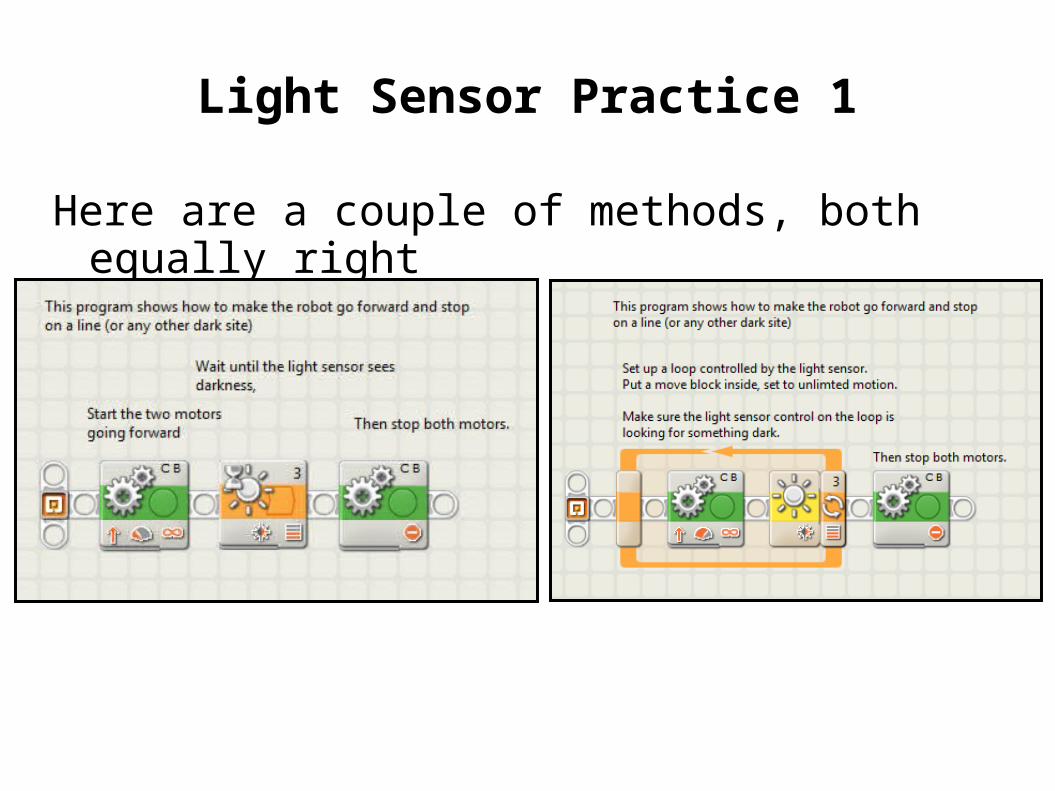
Light Sensor Practice 1
Here are a couple of methods, both equally right
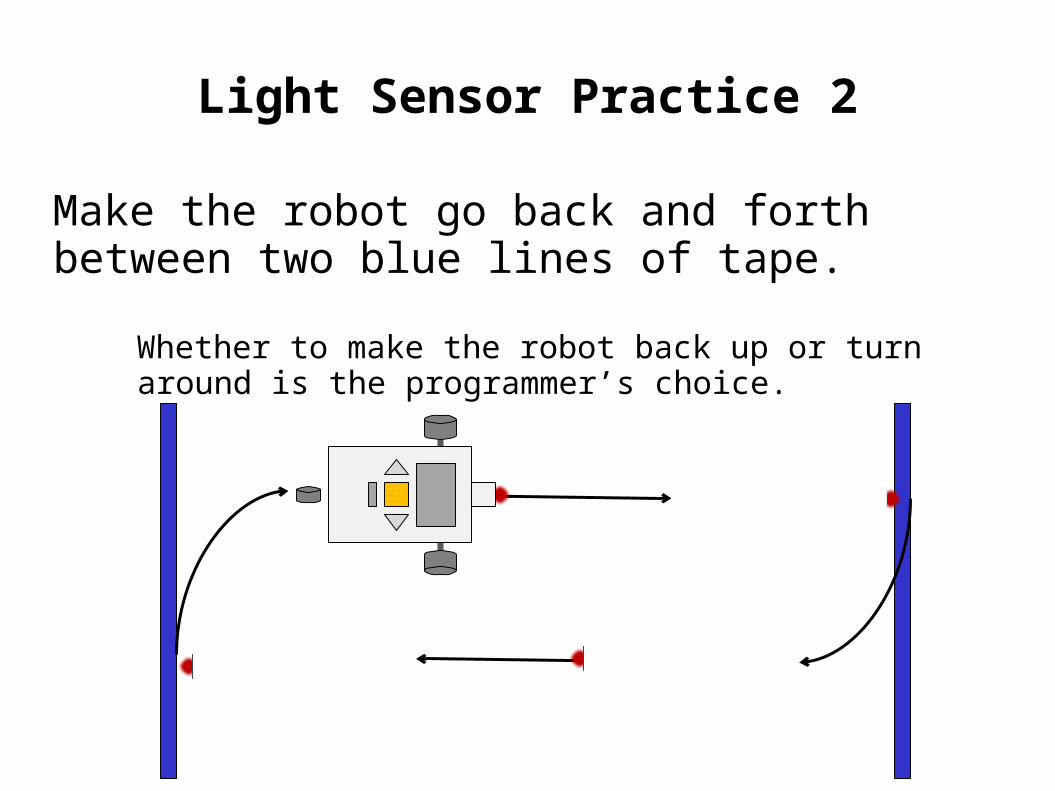
Light Sensor Practice 2
Make the robot go back and forth between two blue lines of tape.
Whether to make the robot back up or turn around is the programmer’s choice.

7
Help the Robot Escape a Box - 1
Could we use the light sensor and our turns to help the robot escape from a mostly closed box?
Set up a pattern of blue tape that looks something like this:

8
Help the Robot Escape a Box - 2
Write a program so the robot:
• Moves Forward• Finds the blue border, • Turns away• And repeats the process until it escapes out the opening
From starting anywhere inside the box.

9
Help the Robot Escape a Box - 3
Here’s a program that can work, many others will, too.
Escaping the infinite Spirograph… 1
Some boxes and programmed turn combinations will make the robot get stuck in a pattern: an infinite Spirograph.
To get out of this situation:Connect a random value to the steering command for the robot’s turn away from the blue line.
This will make each turn different. It will result in some missed opportunities, but also avoids repeated missed escape opportunities.

Escaping the infinite Spirograph… 2
random control added to the turn in this program.
12
Lines as Guides
How might we use a line to make the robot go where we want it to?

13
Lines as Guides
How might we use a line to make the robot go where we want it to?
Need to develop some method to select one action from several options.

14
New Tool for Decisions

15
New Tool for DecisionsThis view is good for
Either / Ordecisions

16
New Tool for DecisionsThis view is good for
Multiple Choice
17
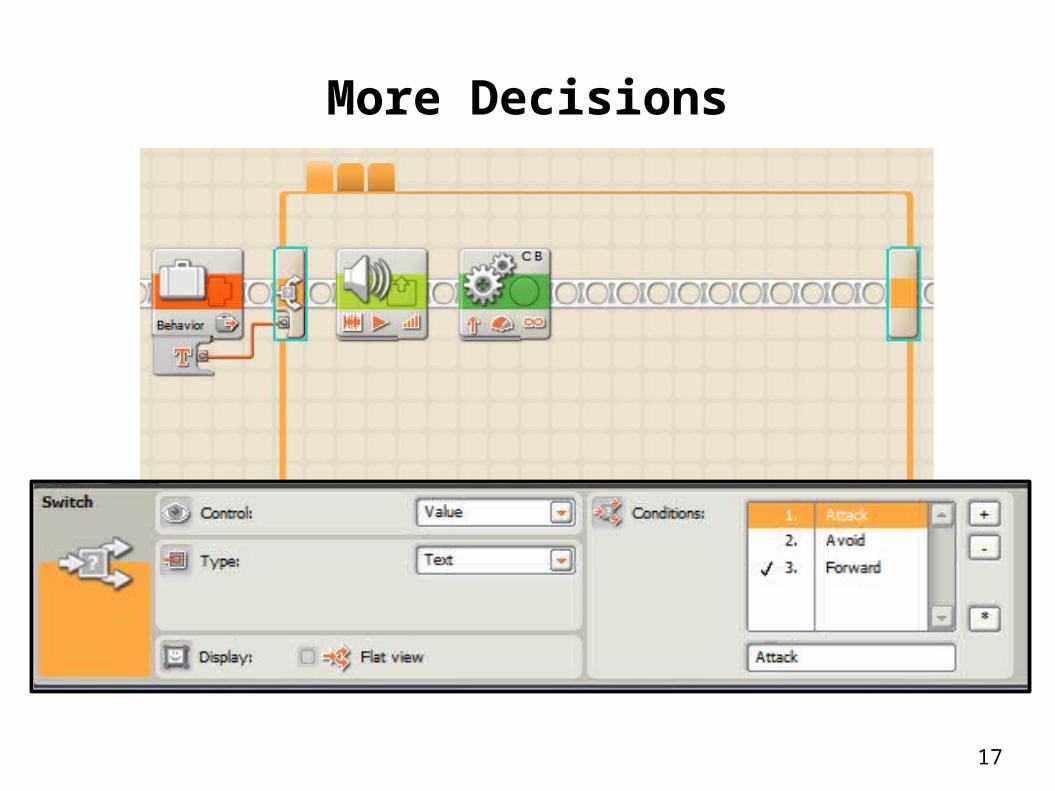
More Decisions

18
Body Forward mat
19
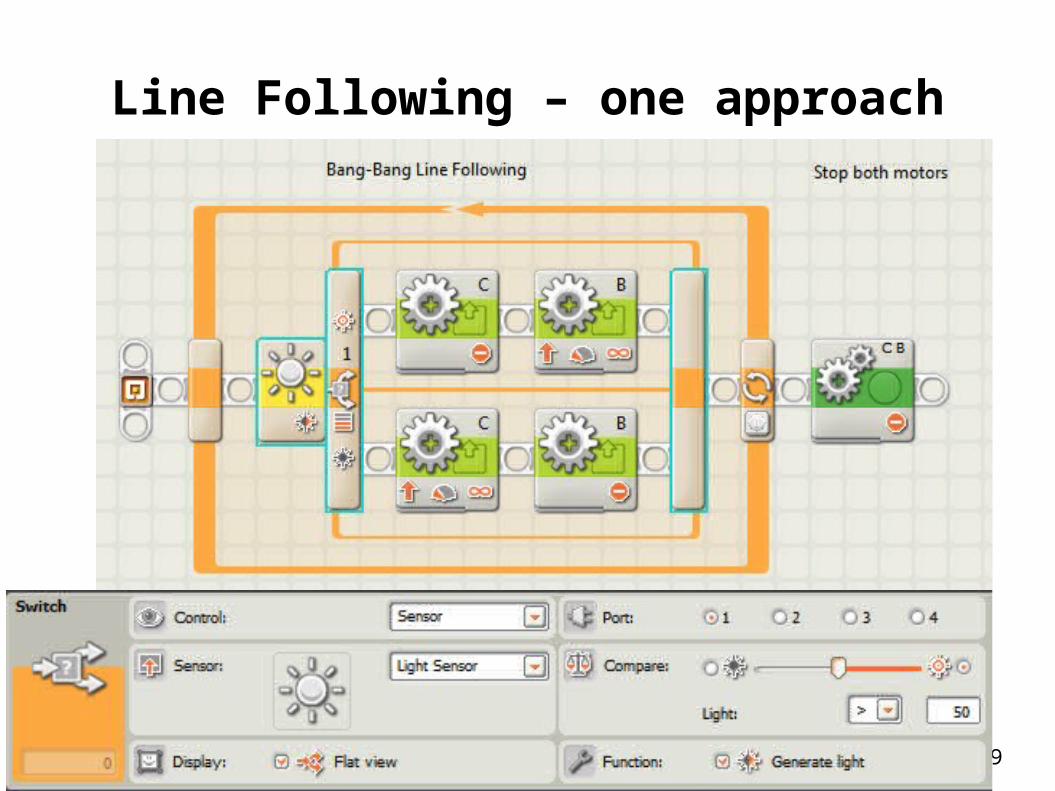
Line Following – one approach

Smooth it Out
Once line following has been attained and the robots are waddling around the room on their blue lines, challenge the students to smooth out the robot’s motion.
Hint: motor power and braking decisions might make a difference.
Audible Feedback -1
To make line following more interesting: • connect a data line from the light sensor’s output block to the volume control of a sound block
• Set the sound block to play a tone for about 1/100th of a second
• In both sides of the bang bang line following program
Fair warning… this could get loud.

Audible Feedback -2 Here’s an example

23
Line Following – one approach
The value we choose for the decision is called the Threshold Value.
In this case it = 50
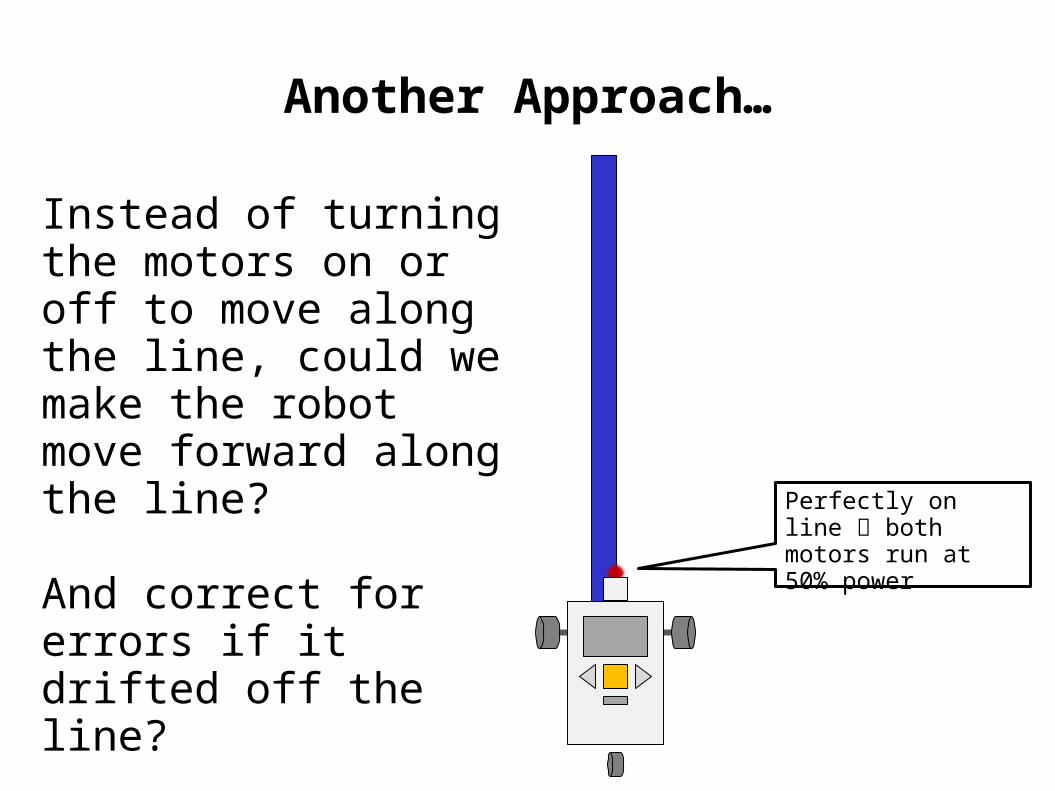
Another Approach…
Instead of turning the motors on or off to move along the line, could we make the robot move forward along the line?
And correct for errors if it drifted off the line?
Perfectly on line both motors run at 50% power
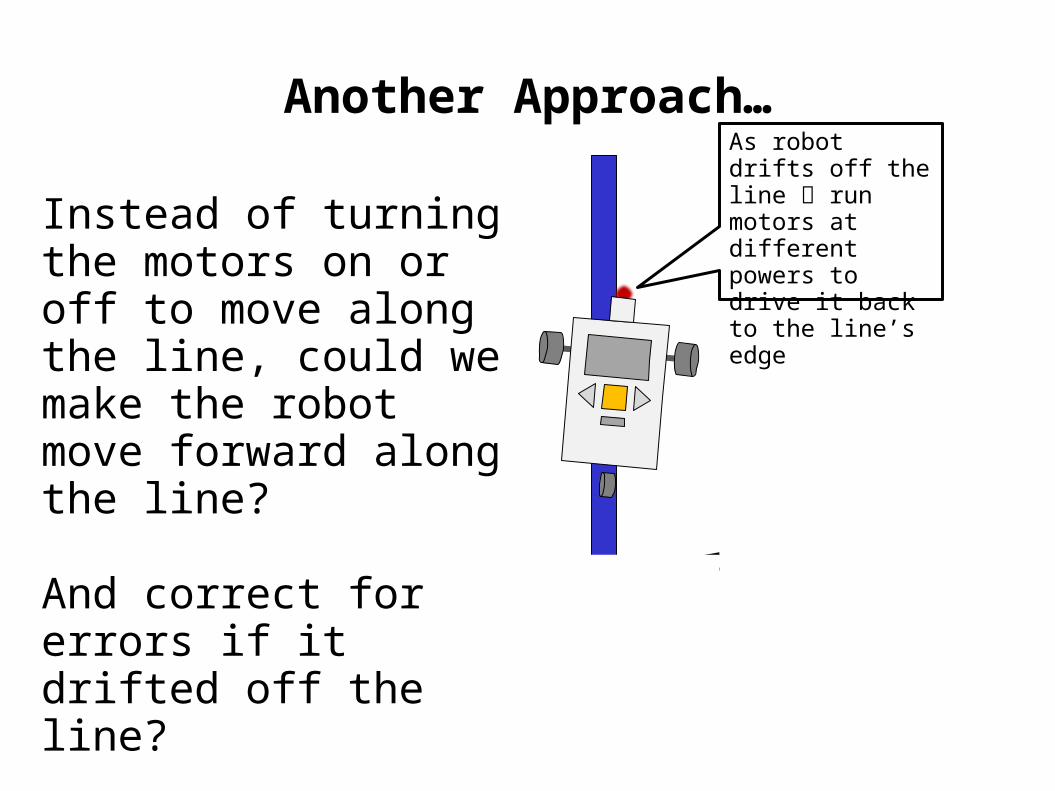
Another Approach…
Perfectly on line both motors run at 50% power
As robot drifts off the line run motors at different powers to drive it back to the line’s edge
Instead of turning the motors on or off to move along the line, could we make the robot move forward along the line?
And correct for errors if it drifted off the line?

Take a closer look
Edge of line should give a light sensor reading of about 50
Light sensor = 50

Take a closer look
Light sensor = 50
Light sensor = 30
Light sensor = 70
Threshold Value = 50
Actual Values

Define the Error
Light sensor = 50
Light sensor = 30
Light sensor = 70
Threshold Value = 50
Actual Values
Error = Threshold - Actual
Error = - 20
Error = 0
Error = 20
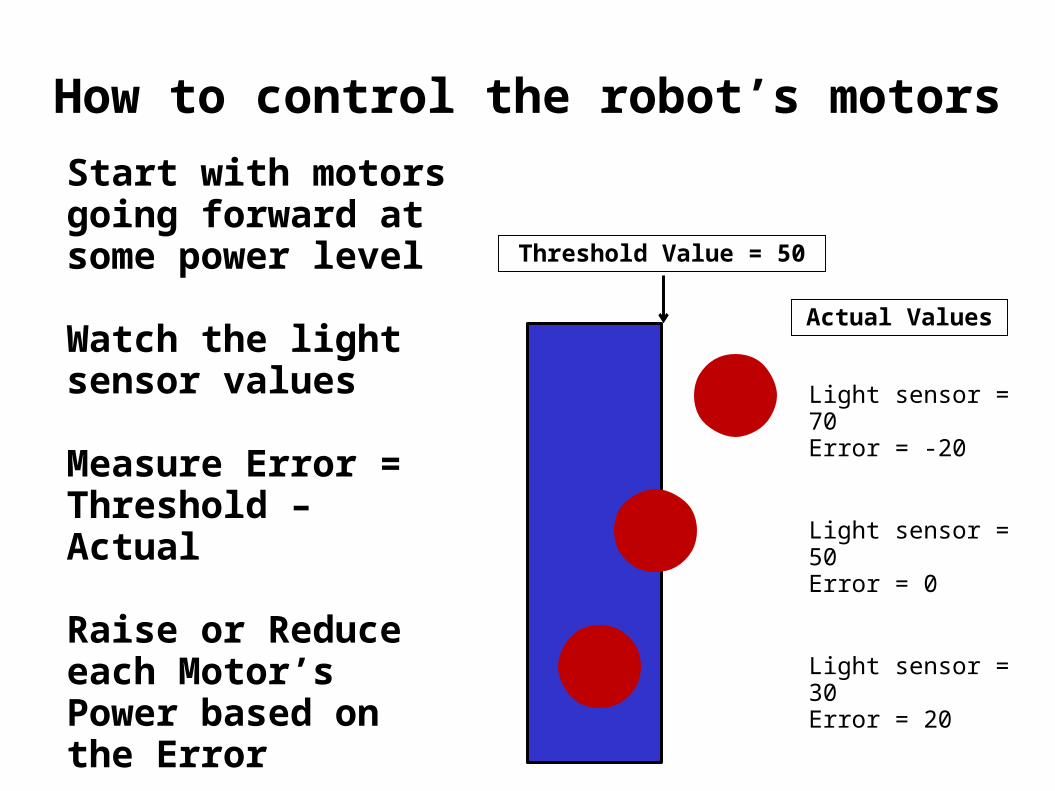
How to control the robot’s motors
Light sensor = 50Error = 0
Light sensor = 30Error = 20
Light sensor = 70Error = -20
Threshold Value = 50
Actual Values
Start with motors going forward at some power level
Watch the light sensor values
Measure Error = Threshold – Actual
Raise or Reduce each Motor’s Power based on the Error
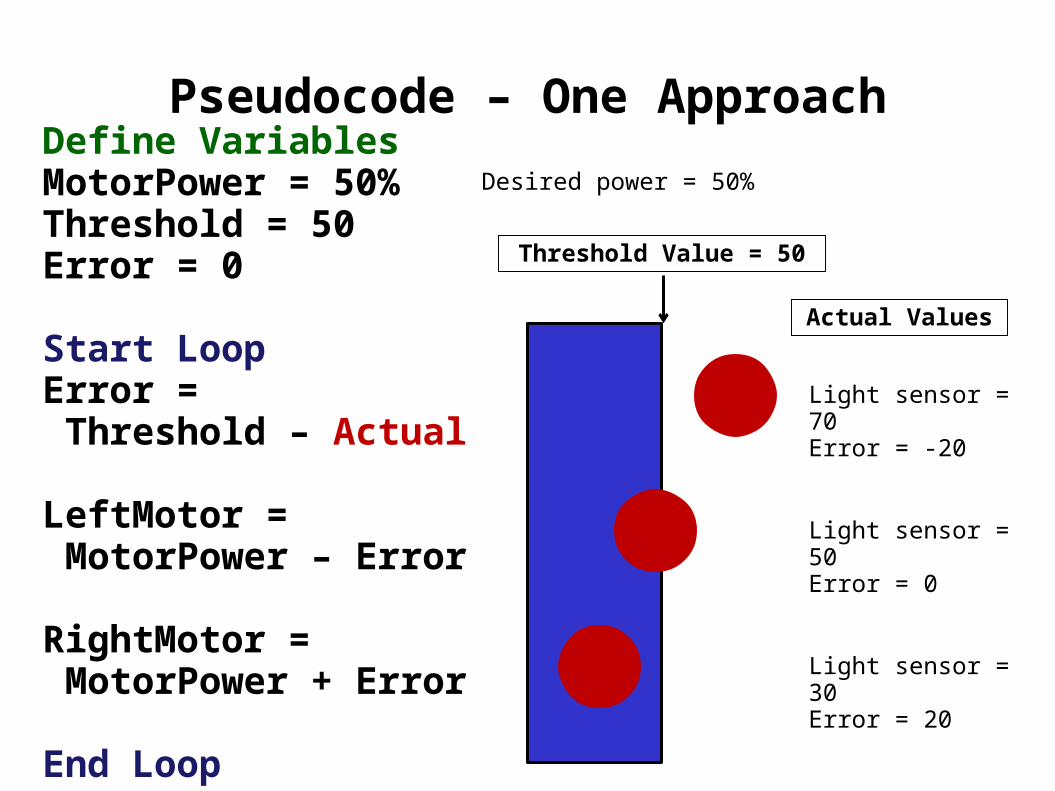
Pseudocode – One Approach
Light sensor = 50Error = 0
Light sensor = 30Error = 20
Light sensor = 70Error = -20
Threshold Value = 50
Actual Values
Define VariablesMotorPower = 50%Threshold = 50Error = 0
Start LoopError = Threshold – Actual
LeftMotor = MotorPower – Error
RightMotor = MotorPower + Error
End Loop
Desired power = 50%

Sample Proportional Program
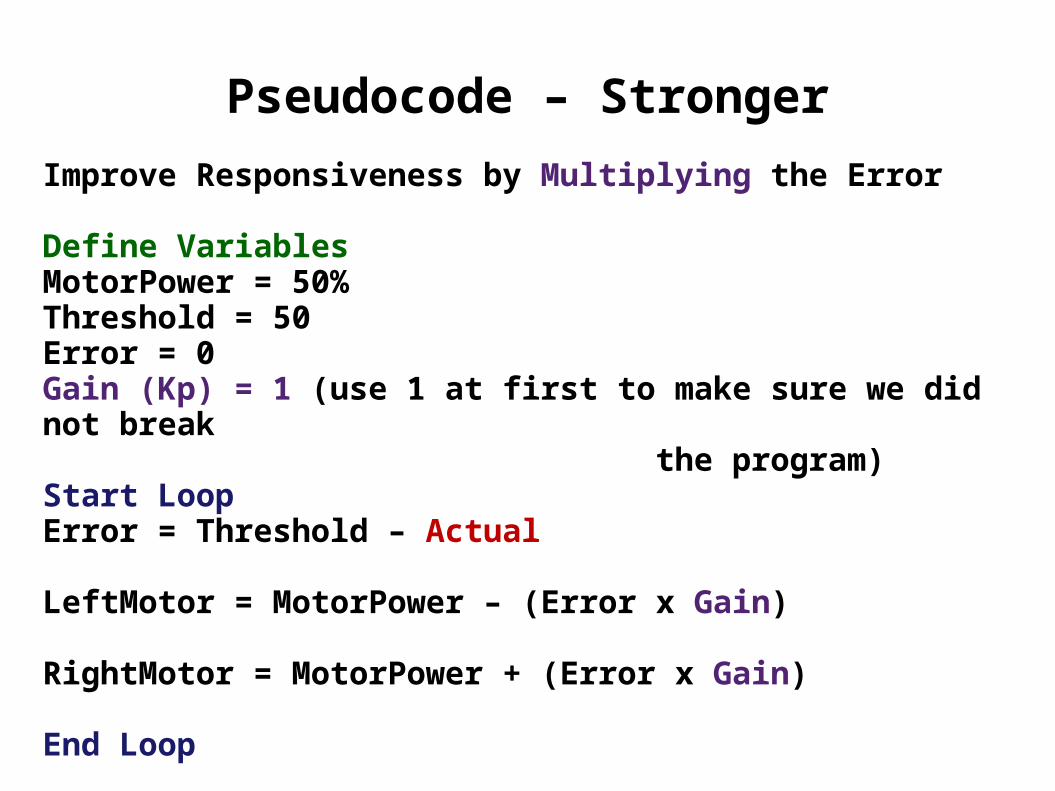
Pseudocode – Stronger
Improve Responsiveness by Multiplying the Error
Define VariablesMotorPower = 50%Threshold = 50Error = 0Gain (Kp) = 1 (use 1 at first to make sure we did not break the program)Start LoopError = Threshold – Actual
LeftMotor = MotorPower – (Error x Gain)
RightMotor = MotorPower + (Error x Gain)
End Loop

Sample Proportional with Gain Program
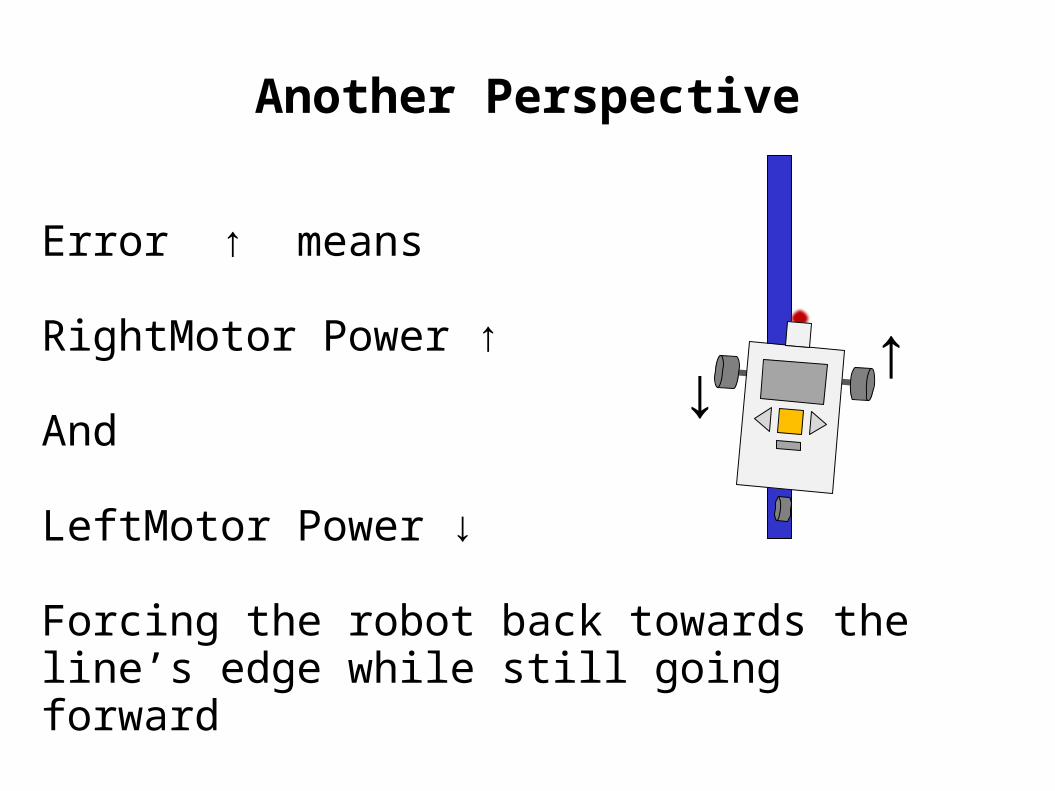
Error ↑ means
RightMotor Power ↑
And
LeftMotor Power ↓
Forcing the robot back towards the line’s edge while still going forward
Another Perspective
↑↓

Error ↓ means
RightMotor Power ↓
And
LeftMotor Power ↑
Forcing the robot back towards the line’s edge while still going forward
Another Perspective
↑↓

Other Improvements
Beyond using proportional control can also:
• Add the old Error and new Error each loop and use that growth to control the motor power levels• This tells how far off the line the robot has drifted
(integration)
• Watch the Error change between each loop and use that to control motor power levels• This tells how fast the error is being corrected
(differentiation)

37
More Complex Line Following
Learn how to combine all three methods in Mr. Jim Sluka's Tutorial on PID Controller for Mindstorms
http://www.inpharmix.com/jps/PID_Controller_For_Lego_Mindstorms_Robots.html
PID = Proportional, Integral, Derivative
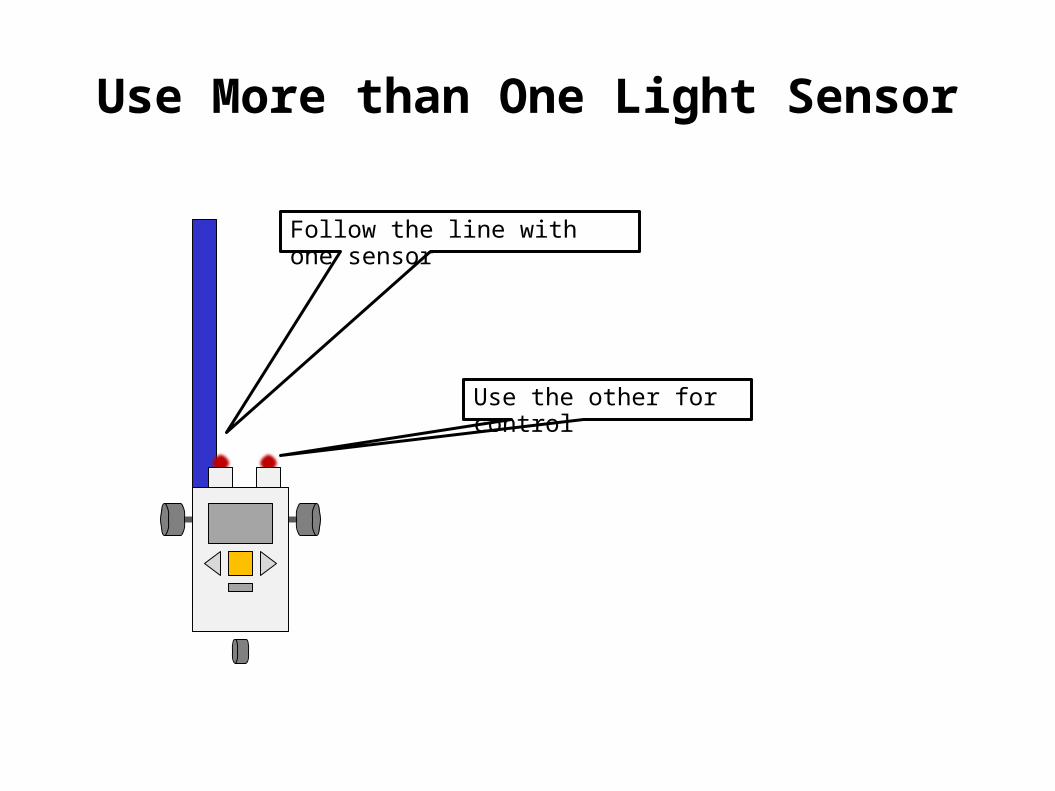
Use More than One Light Sensor
Follow the line with one sensor
Use the other for control

Use More than One Light Sensor
Stop when this one reaches the line

Example

Using the NXT Light Sensor