Embed Size (px)
Citation preview
Using the GEOS-5 AGCMCarlos Cruz
Climate In a Box WorkshopSeptember 21-22, 2010
Goddard Space Flight CenterGreenbelt, MD
Outline● Introduction to the GEOS-5 AGCM● Obtaining the code
– Code versions
● Compilation and installation– Code structure
● Experimental setup– Setting up GEOS5 on the CIB platform
● Hands-on
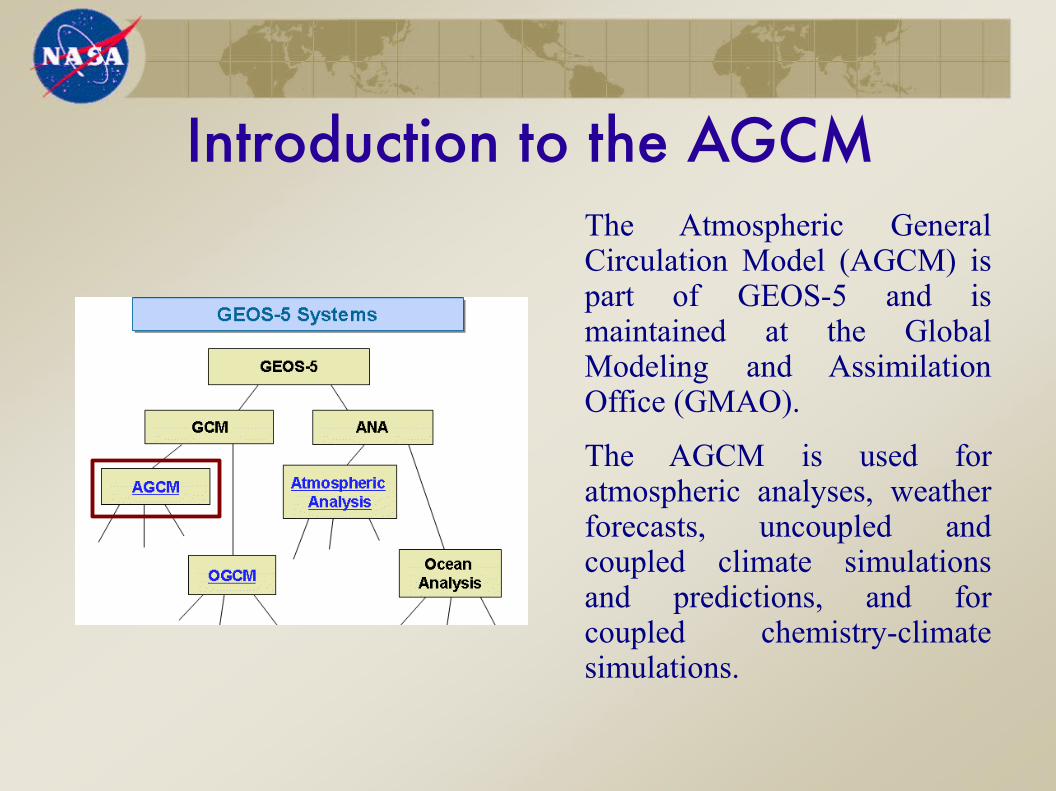
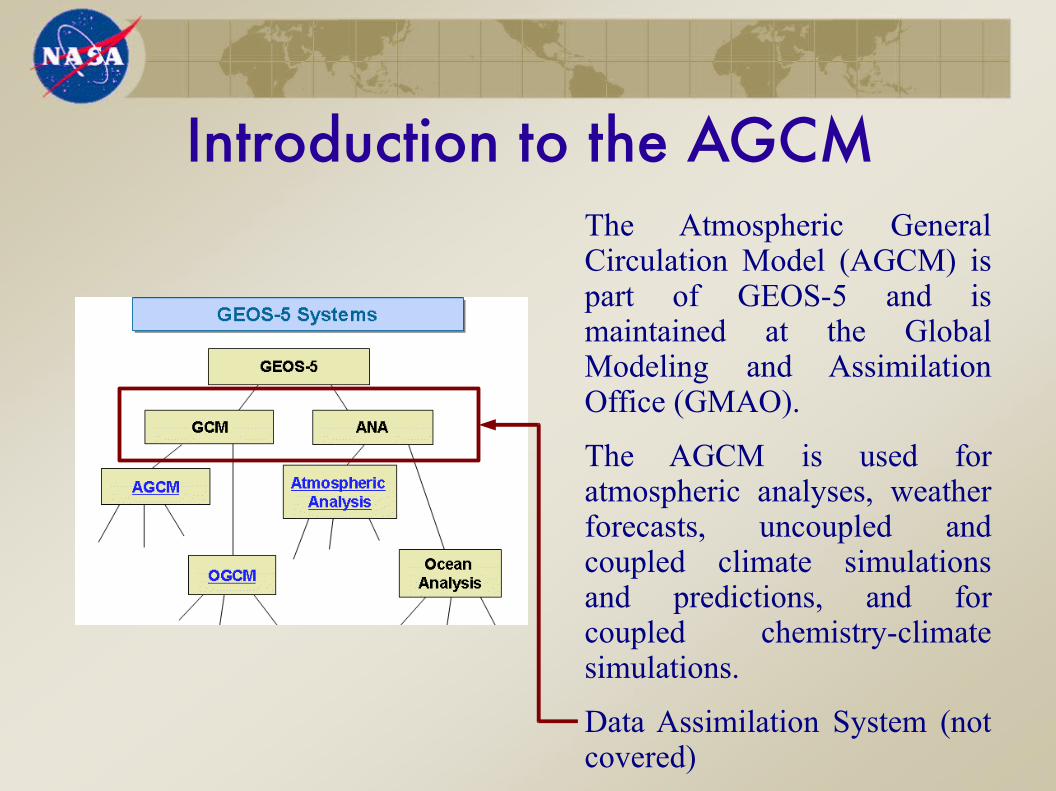
The Atmospheric General Circulation Model (AGCM) is part of GEOS-5 and is maintained at the Global Modeling and Assimilation Office (GMAO).
The AGCM is used for atmospheric analyses, weather forecasts, uncoupled and coupled climate simulations and predictions, and for coupled chemistry-climate simulations.
Introduction to the AGCM
Introduction to the AGCMThe Atmospheric General Circulation Model (AGCM) is part of GEOS-5 and is maintained at the Global Modeling and Assimilation Office (GMAO).
The AGCM is used for atmospheric analyses, weather forecasts, uncoupled and coupled climate simulations and predictions, and for coupled chemistry-climate simulations.
Data Assimilation System (not covered)
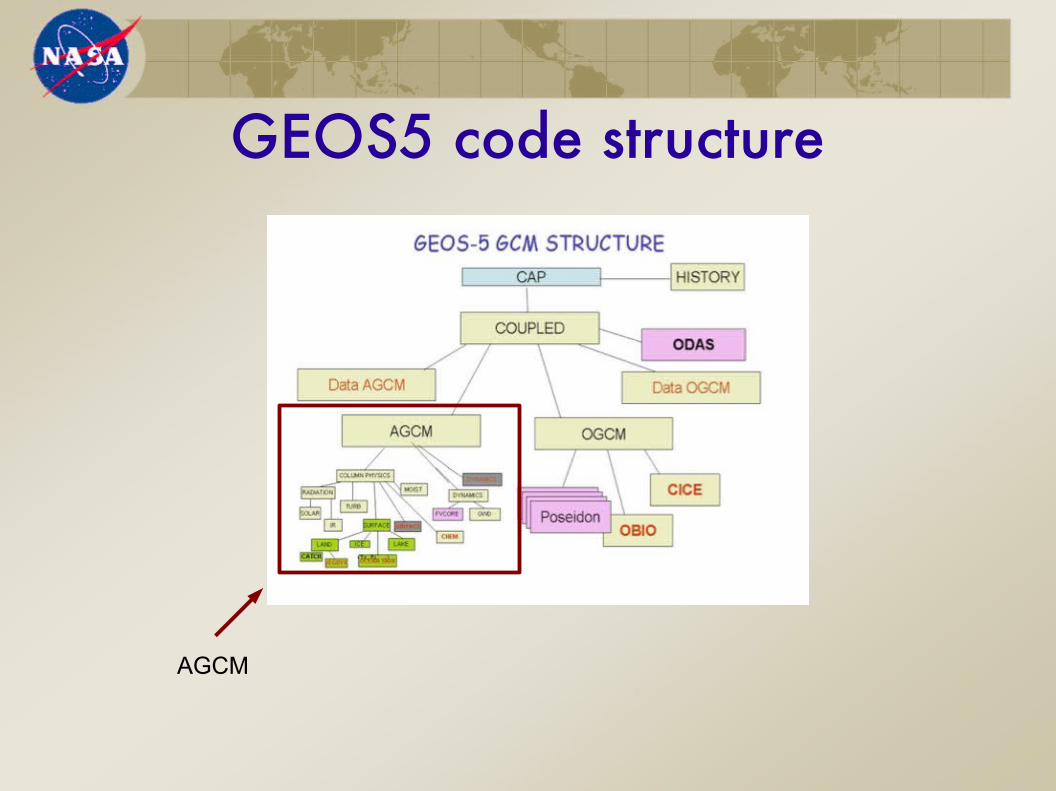
GEOS5 code structure
AGCM
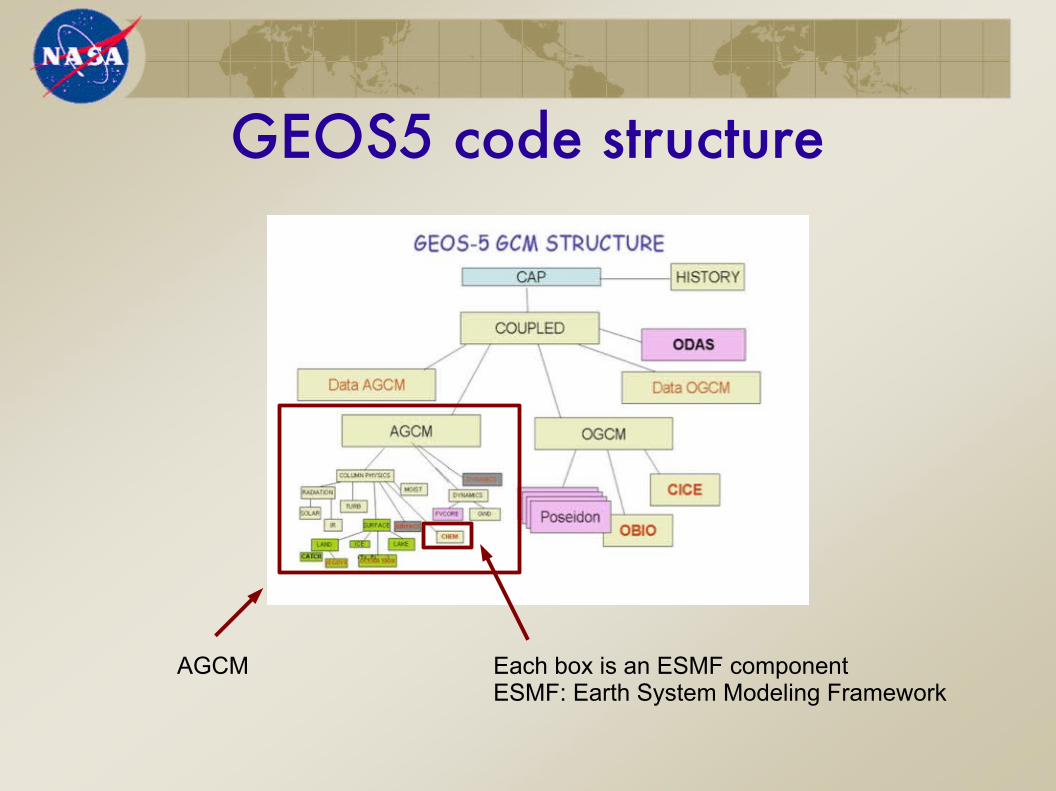
GEOS5 code structure
AGCM Each box is an ESMF componentESMF: Earth System Modeling Framework
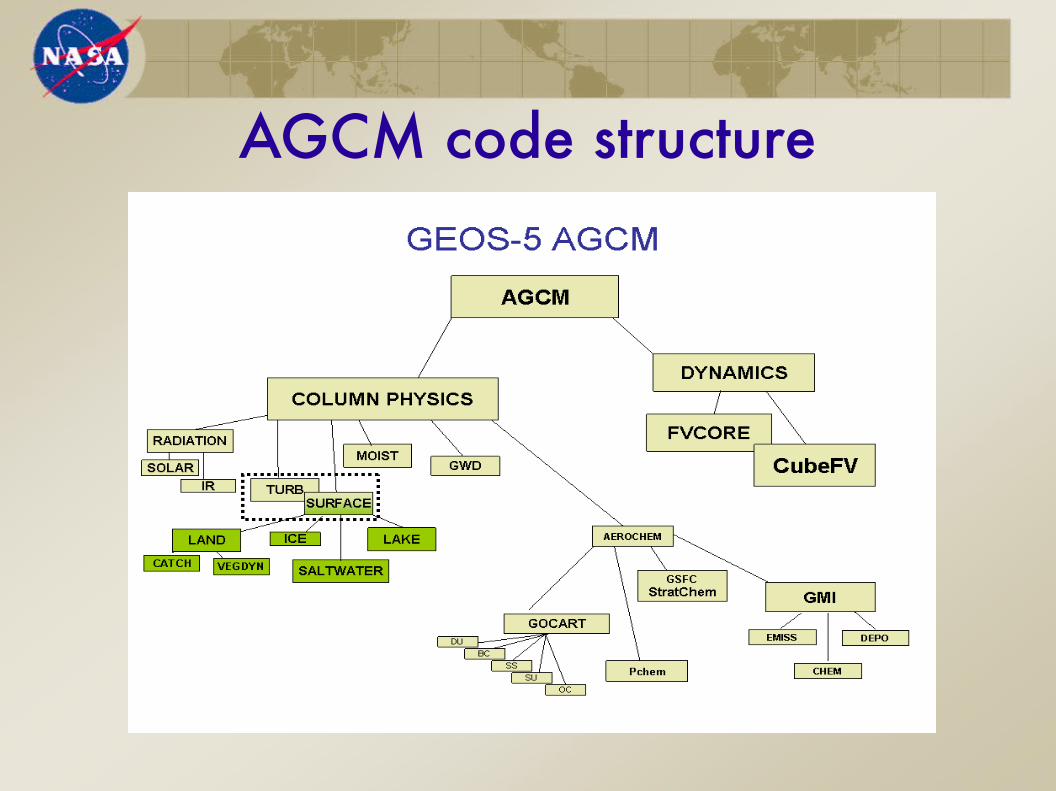
AGCM code structure
Obtaining the code● Categories of users:
(1) Those who will use the model as a “black box”
(2) Those who will modify the code.
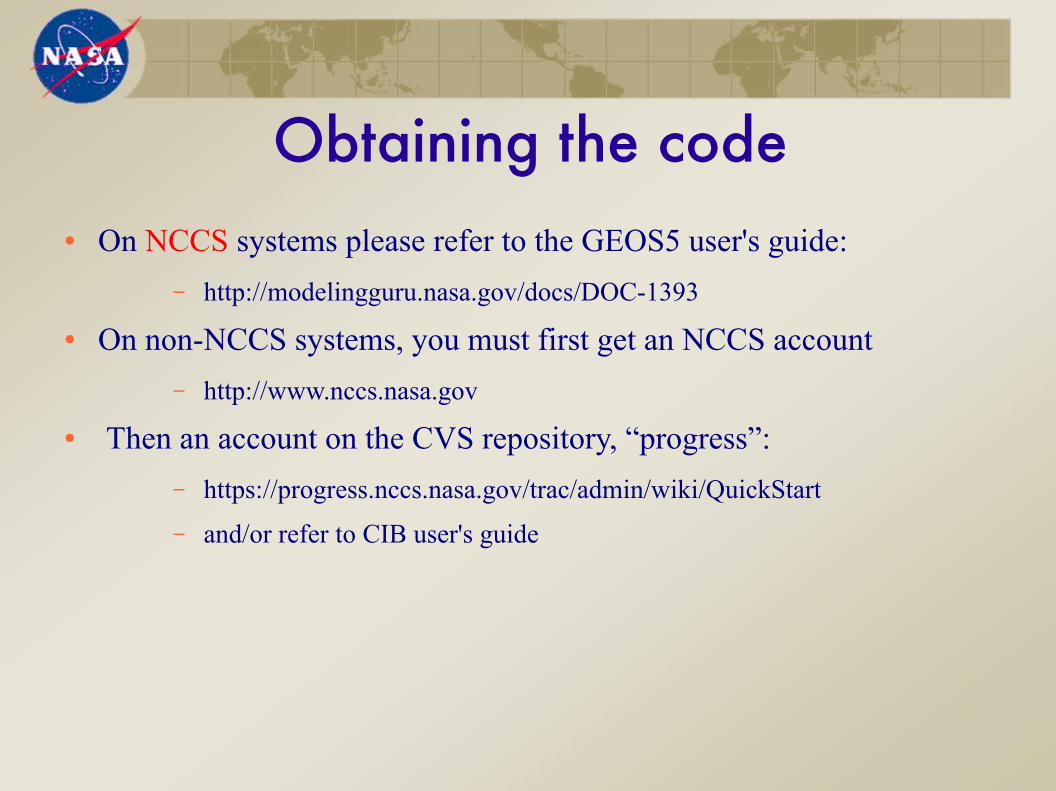
Obtaining the code● On NCCS systems please refer to the GEOS5 user's guide:
– http://modelingguru.nasa.gov/docs/DOC-1393
● On non-NCCS systems, you must first get an NCCS account
– http://www.nccs.nasa.gov
● Then an account on the CVS repository, “progress”:
– https://progress.nccs.nasa.gov/trac/admin/wiki/QuickStart
– and/or refer to CIB user's guide
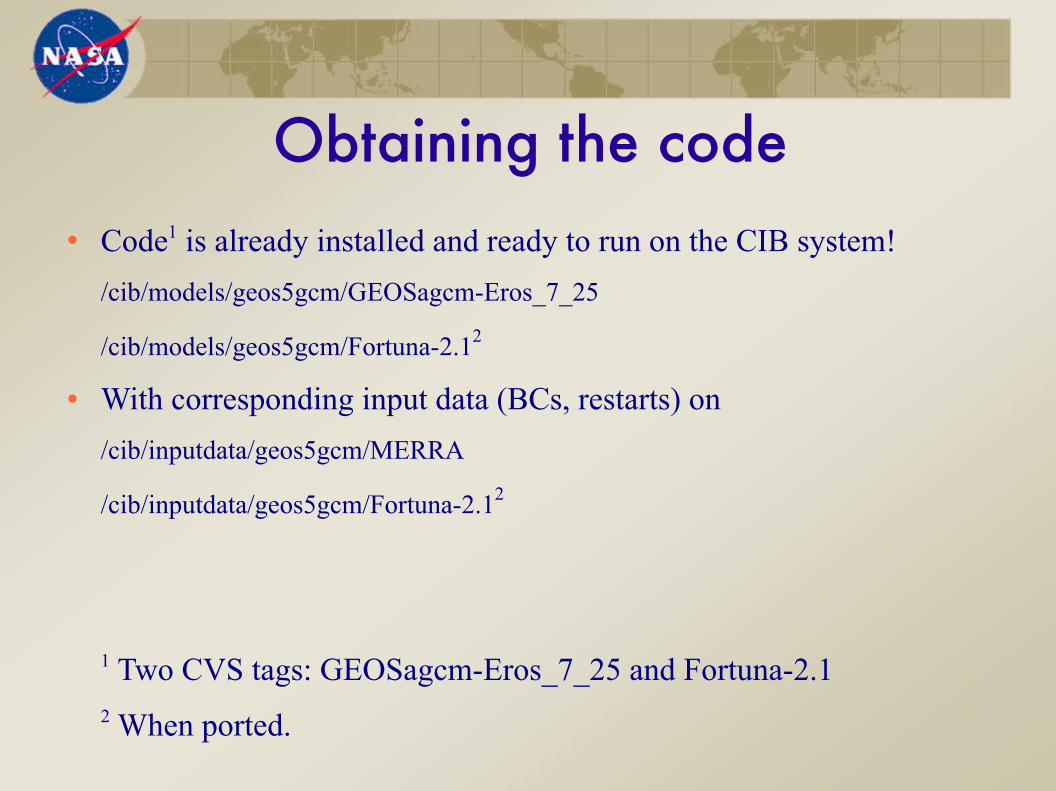
Obtaining the code● Code1 is already installed and ready to run on the CIB system!
/cib/models/geos5gcm/GEOSagcm-Eros_7_25
/cib/models/geos5gcm/Fortuna-2.12
● With corresponding input data (BCs, restarts) on
/cib/inputdata/geos5gcm/MERRA
/cib/inputdata/geos5gcm/Fortuna-2.12
1 Two CVS tags: GEOSagcm-Eros_7_25 and Fortuna-2.12 When ported.
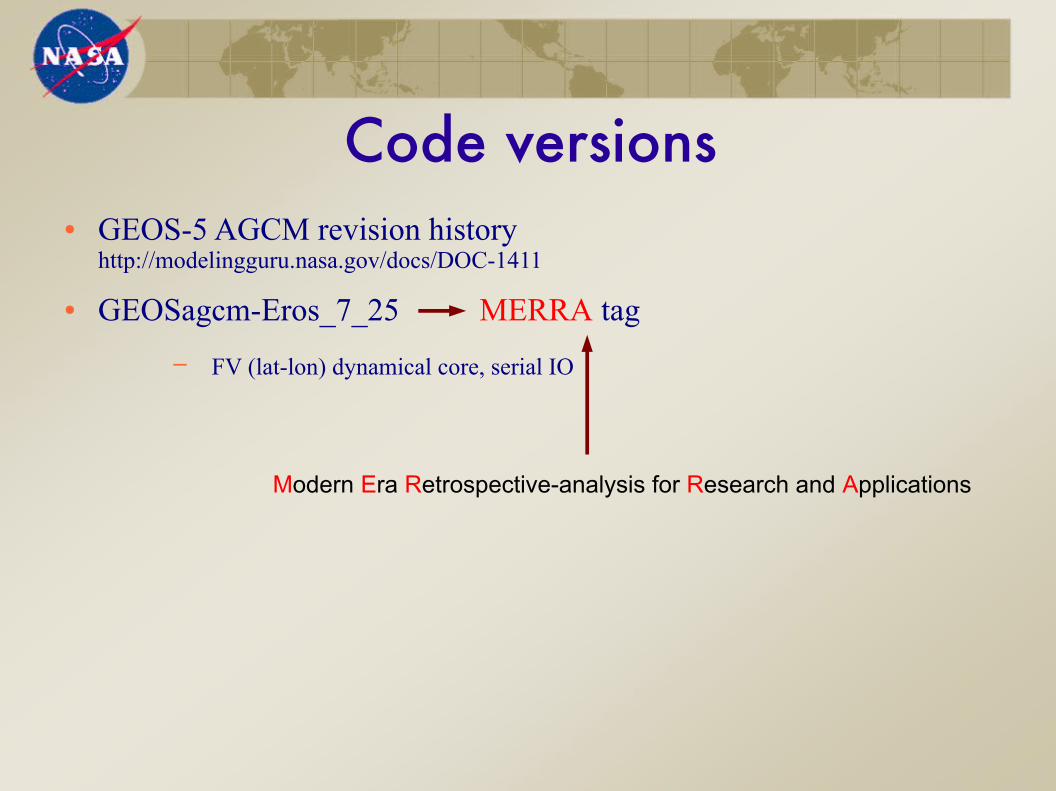
Code versions● GEOS-5 AGCM revision history
http://modelingguru.nasa.gov/docs/DOC-1411
● GEOSagcm-Eros_7_25 MERRA tag
– FV (lat-lon) dynamical core, serial IO
Modern Era Retrospective-analysis for Research and Applications
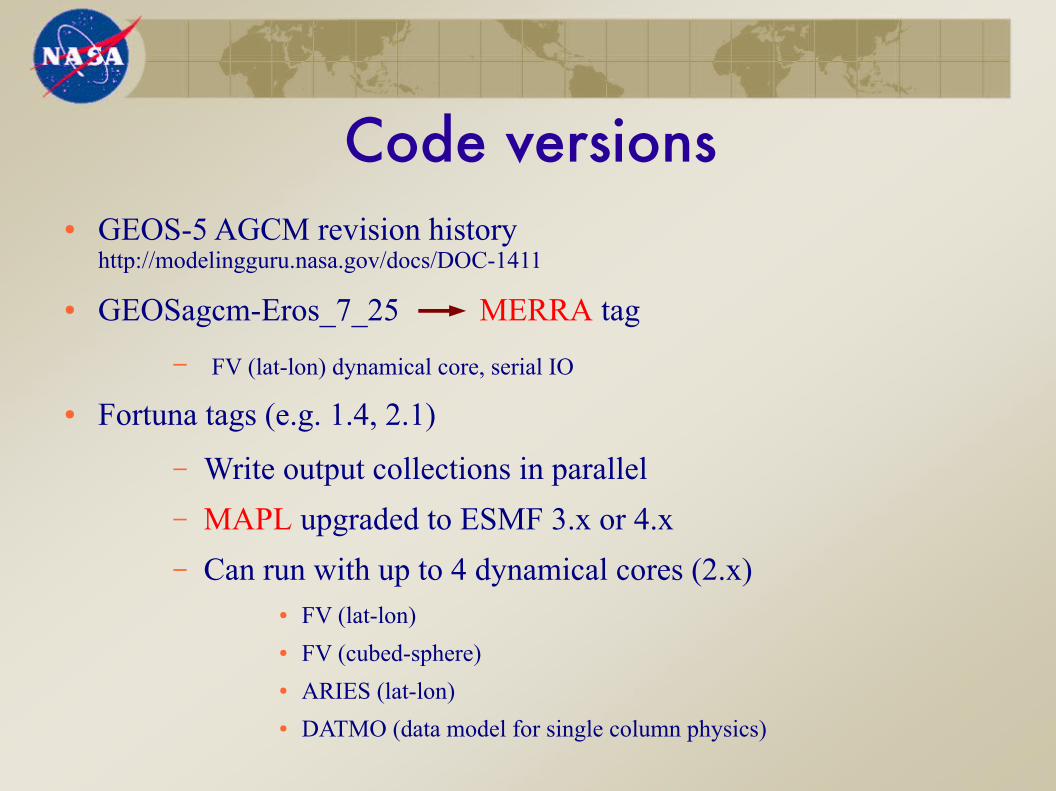
Code versions● GEOS-5 AGCM revision history
http://modelingguru.nasa.gov/docs/DOC-1411
● GEOSagcm-Eros_7_25 MERRA tag
– FV (lat-lon) dynamical core, serial IO
● Fortuna tags (e.g. 1.4, 2.1)
– Write output collections in parallel
– MAPL upgraded to ESMF 3.x or 4.x
– Can run with up to 4 dynamical cores (2.x)● FV (lat-lon)● FV (cubed-sphere)● ARIES (lat-lon)● DATMO (data model for single column physics)
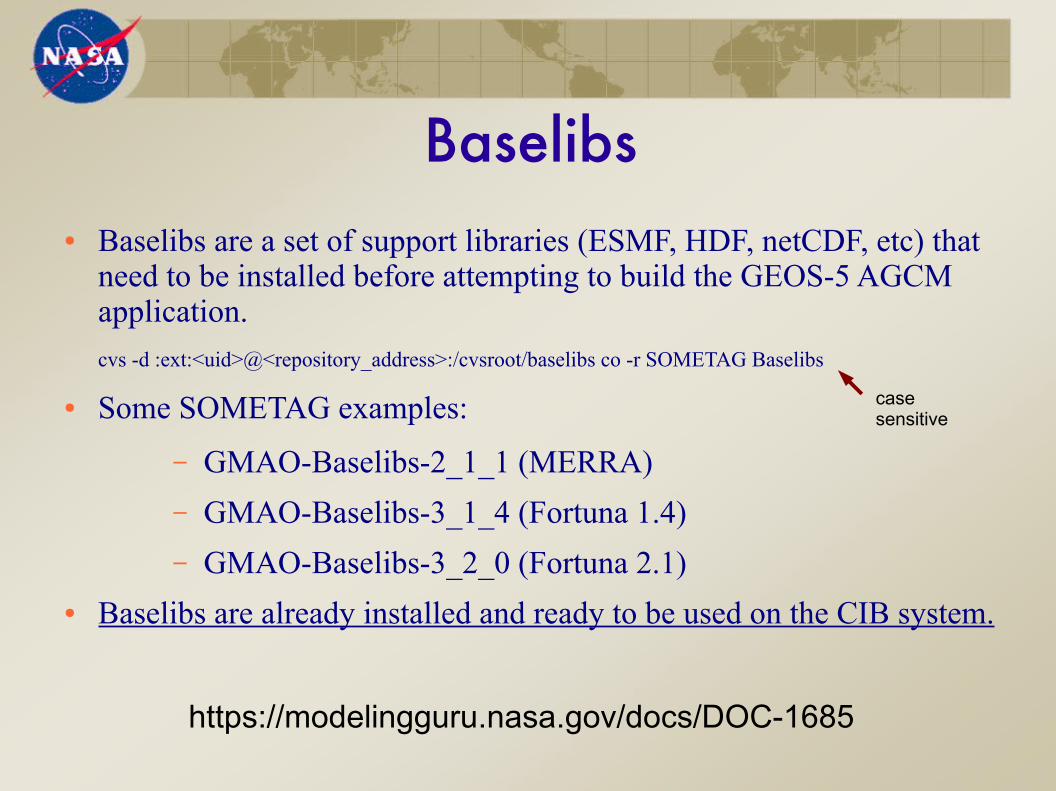
Baselibs● Baselibs are a set of support libraries (ESMF, HDF, netCDF, etc) that
need to be installed before attempting to build the GEOS-5 AGCM application.
cvs -d :ext:<uid>@<repository_address>:/cvsroot/baselibs co -r SOMETAG Baselibs
● Some SOMETAG examples:
– GMAO-Baselibs-2_1_1 (MERRA)
– GMAO-Baselibs-3_1_4 (Fortuna 1.4)
– GMAO-Baselibs-3_2_0 (Fortuna 2.1)● Baselibs are already installed and ready to be used on the CIB system.
casesensitive
https://modelingguru.nasa.gov/docs/DOC-1685
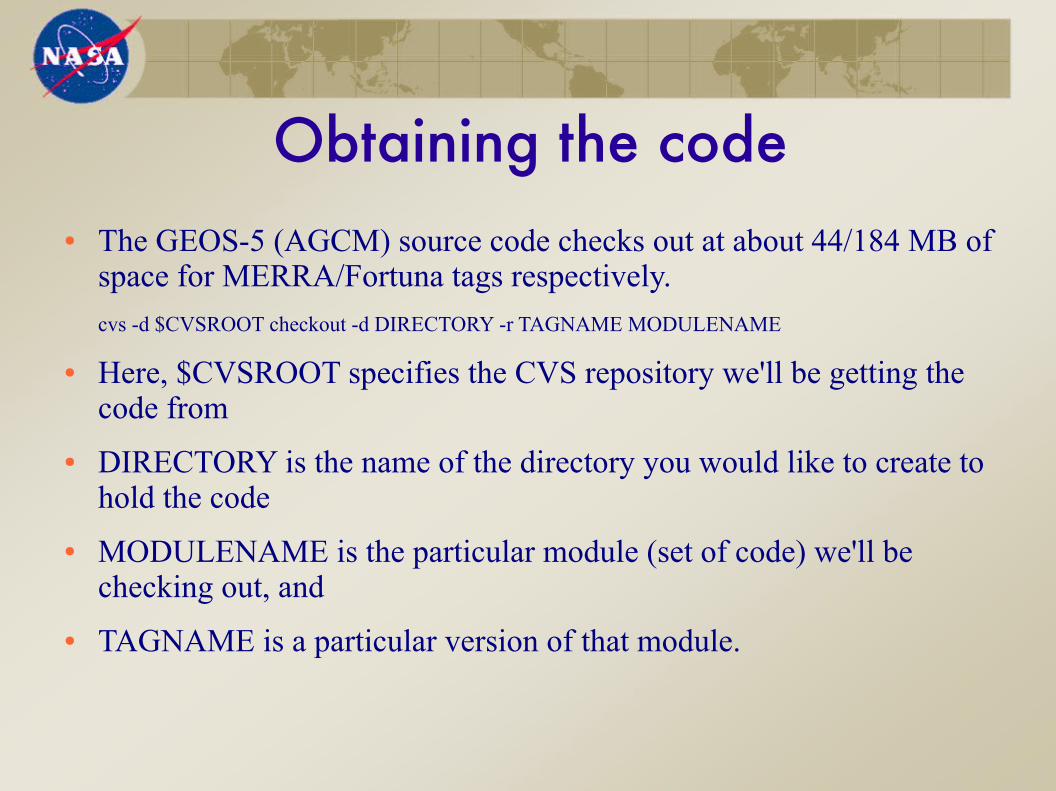
Obtaining the code● The GEOS-5 (AGCM) source code checks out at about 44/184 MB of
space for MERRA/Fortuna tags respectively.
cvs -d $CVSROOT checkout -d DIRECTORY -r TAGNAME MODULENAME
● Here, $CVSROOT specifies the CVS repository we'll be getting the code from
● DIRECTORY is the name of the directory you would like to create to hold the code
● MODULENAME is the particular module (set of code) we'll be checking out, and
● TAGNAME is a particular version of that module.
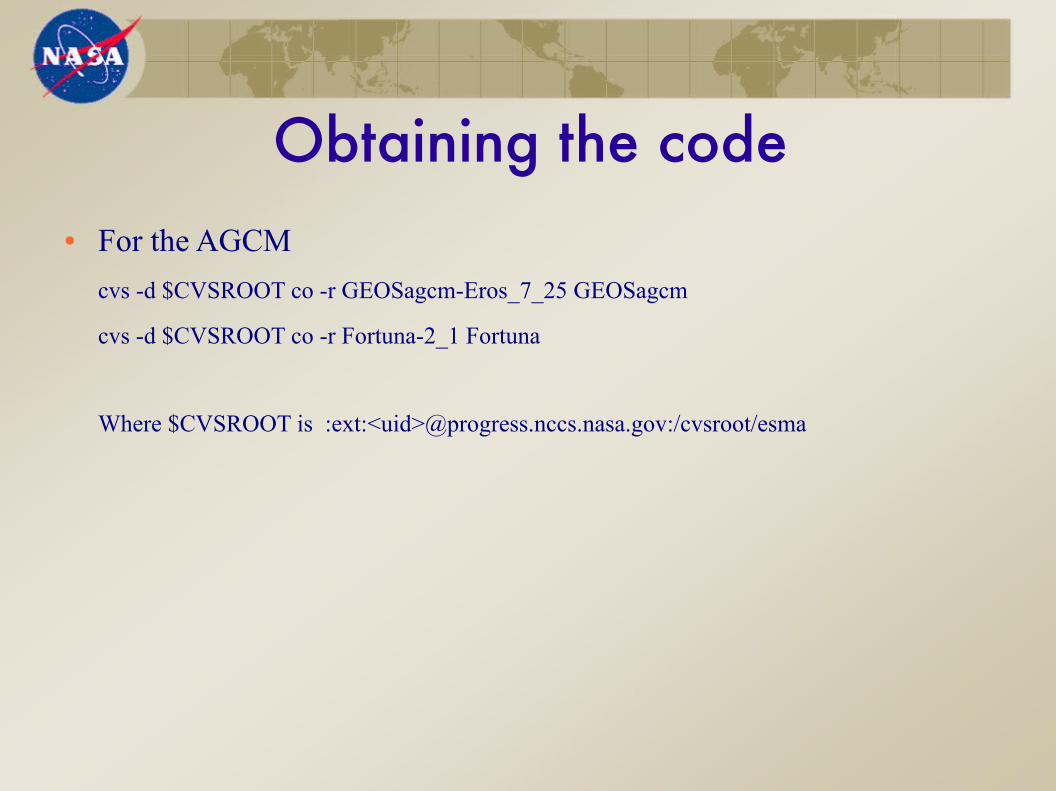
Obtaining the code● For the AGCM
cvs -d $CVSROOT co -r GEOSagcm-Eros_7_25 GEOSagcm
cvs -d $CVSROOT co -r Fortuna-2_1 Fortuna
Where $CVSROOT is :ext:<uid>@progress.nccs.nasa.gov:/cvsroot/esma
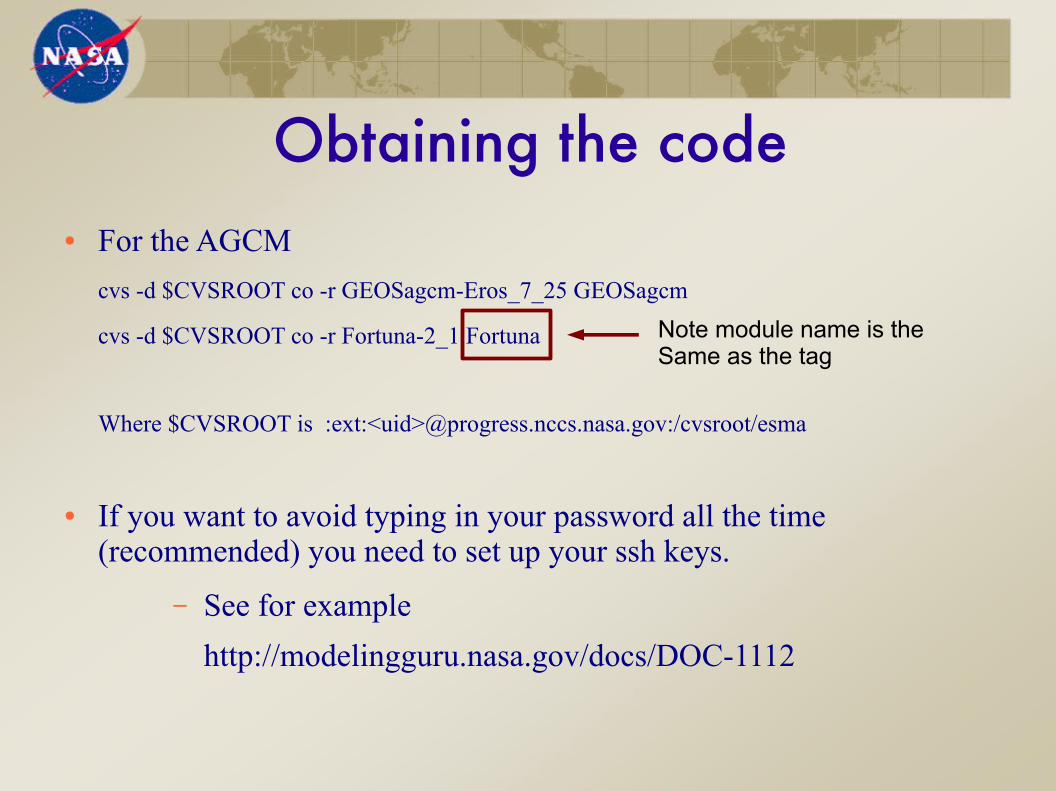
Obtaining the code● For the AGCM
cvs -d $CVSROOT co -r GEOSagcm-Eros_7_25 GEOSagcm
cvs -d $CVSROOT co -r Fortuna-2_1 Fortuna
Where $CVSROOT is :ext:<uid>@progress.nccs.nasa.gov:/cvsroot/esma
● If you want to avoid typing in your password all the time (recommended) you need to set up your ssh keys.
– See for example
http://modelingguru.nasa.gov/docs/DOC-1112
Note module name is theSame as the tag
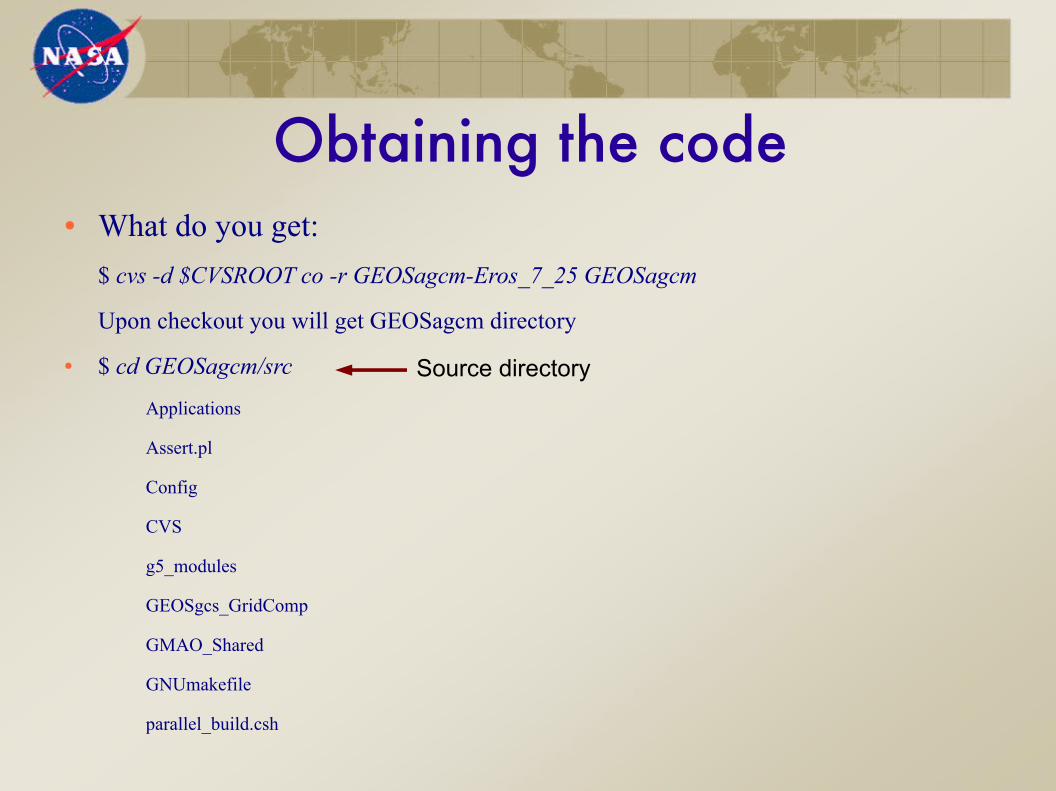
Obtaining the code● What do you get:
$ cvs -d $CVSROOT co -r GEOSagcm-Eros_7_25 GEOSagcm
Upon checkout you will get GEOSagcm directory
● $ cd GEOSagcm/src
Applications
Assert.pl
Config
CVS
g5_modules
GEOSgcs_GridComp
GMAO_Shared
GNUmakefile
parallel_build.csh
Source directory
● So, the first thing to do is to set up your environment to use the appropriate compilers and libraries.
Compilation and Installation
● The module package allows dynamic modification of a user’s programming environment via module files.
● The module command can be used to:
– Manage multiple versions of compilers, applications, tools and libraries
– Manage software where complex changes to the environment are necessary
– Manage software where name conflicts with other software would cause problems
● The module package is available automatically for interactive and batch use on the CIB system.
Modules

● On the CIB system there's a helper script to help set up the module environment:
cp /cib/libraries/archives/set_mode.bash ~/
● To use:
. set_mode <module_set>
– Where <module_set> is a short string that specifies a
particular module environment
– Examples of <module_set> : Fort21, MerraI9
Compilation and Installation
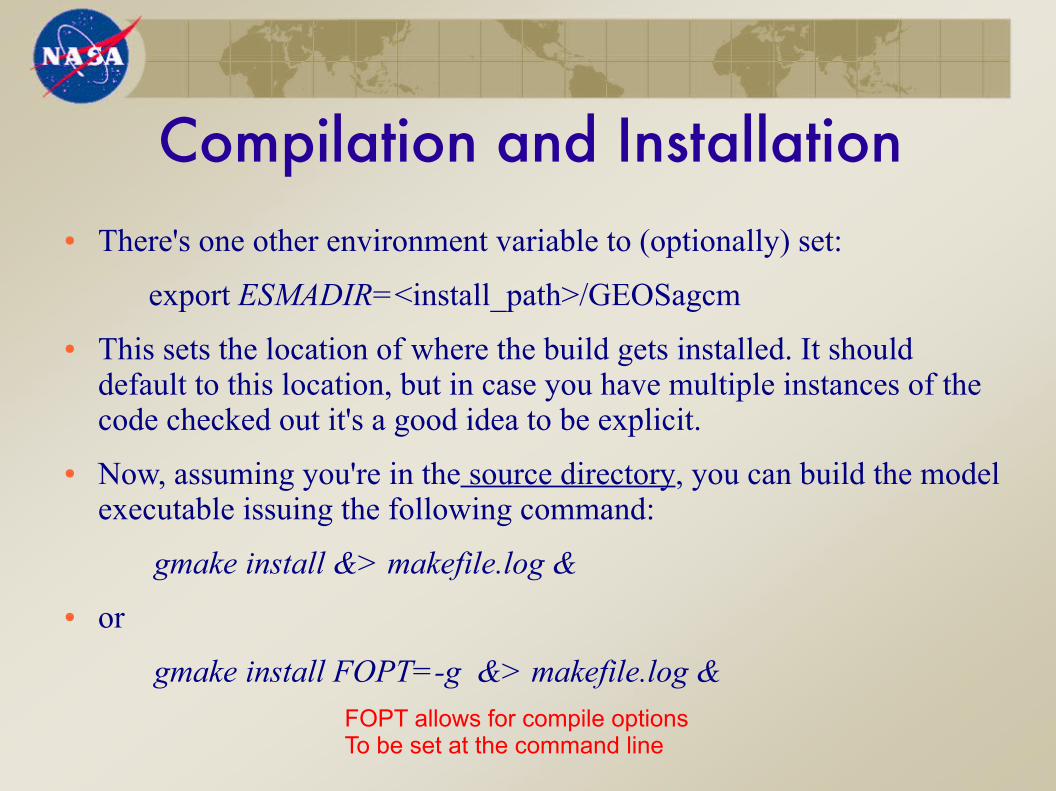
Compilation and Installation● There's one other environment variable to (optionally) set:
export ESMADIR=<install_path>/GEOSagcm
● This sets the location of where the build gets installed. It should default to this location, but in case you have multiple instances of the code checked out it's a good idea to be explicit.
● Now, assuming you're in the source directory, you can build the model executable issuing the following command:
gmake install &> makefile.log &
● or
gmake install FOPT=-g &> makefile.log &
FOPT allows for compile optionsTo be set at the command line
Building the code● So, gmake install builds the executable
● But note there are dependencies
– Generated during the build process (.d files)
– May reduce recompilation times after changes● Errors/Warnings
– Most are harmless, else if there is a fatal error the
compilation will fail● To speed up the compilation (45 mins) you may want to use
parallel_build.csh.

Code structure● If installation is successful, step back up out of the source directory
and you should see the following sub-directories:
Config
CVS
Linux
src
bin
Config
doc
etc
include
lib
Executables are here. Look for GEOSgcm.x
rc and tmpl files
Break
Experimental Setup● Once model has been installed, some ENV variables may be helpful
setenv GEOSUTIL <install_path>/GEOSagcm/src/GMAO_shared/GEOS_Util
setenv PATH .:<install_path>/GEOSagcm/Linux/bin:$PATH
GEOSUTIL contains various utilities used to manipulate diagnostics.
● Now we need to create an experiment directory (scratch) that will contain GEOSgcm.x, restarts, BCs and resource files.
● Finally we need a run script.
On a Linux cluster managed by a job queueing system the run
script sets up all ENV variables, module ENV, creates links to
data directories and executes the model. Additionally it may
perform post-processing and data archival.
● gcm_setup under src/Applications/GEOSgcm_App
Experimental Setup● Once model has been installed, some ENV variables may be helpful
setenv GEOSUTIL <install_path>/GEOSagcm/src/GMAO_shared/GEOS_Util
setenv PATH .:<install_path>/GEOSagcm/Linux/bin:$PATH
GEOSUTIL contains various utilities used to manipulate diagnostics.
● Now we need to create an experiment directory (scratch) that will contain GEOSgcm.x, restarts, BCs and resource files.
● Finally we need a run script.
On a Linux cluster managed by a job queueing system the run
script sets up all ENV variables, module ENV, creates links to
data directories and executes the model. Additionally it may
perform post-processing and data archival.
● gcm_setup Does not work on CIB platform but it can be adapted.
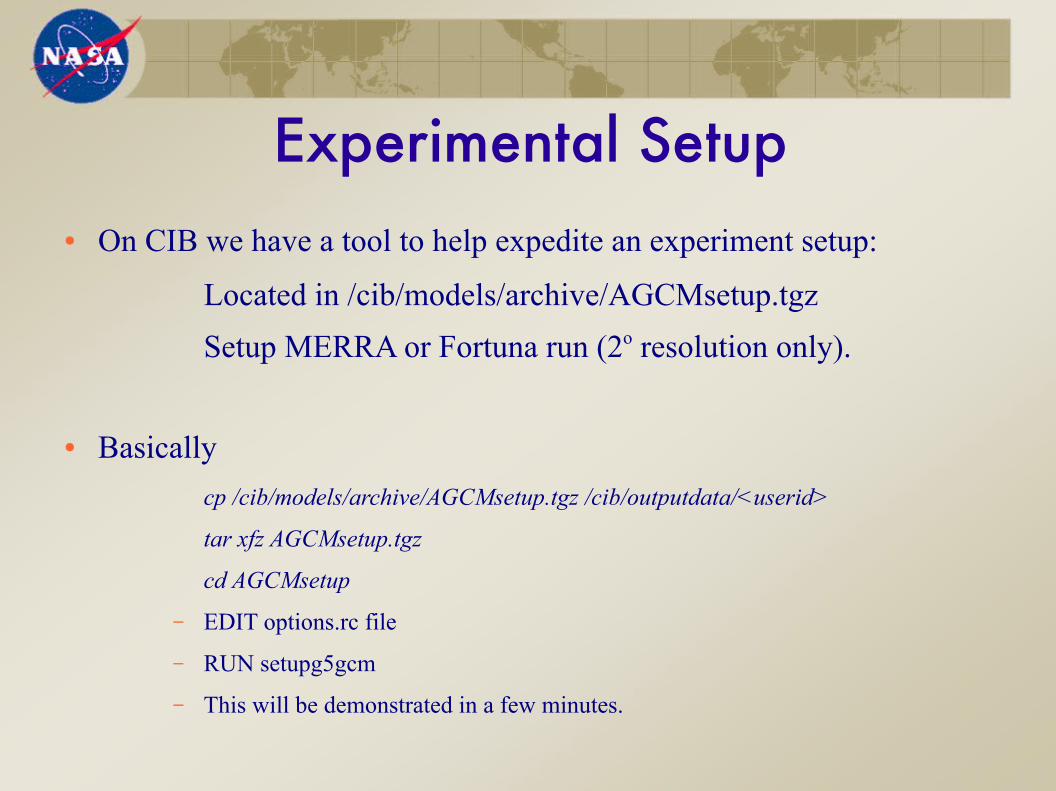
Experimental Setup● On CIB we have a tool to help expedite an experiment setup:
Located in /cib/models/archive/AGCMsetup.tgz
Setup MERRA or Fortuna run (2o resolution only).
● Basically
cp /cib/models/archive/AGCMsetup.tgz /cib/outputdata/<userid>
tar xfz AGCMsetup.tgz
cd AGCMsetup
– EDIT options.rc file
– RUN setupg5gcm
– This will be demonstrated in a few minutes.
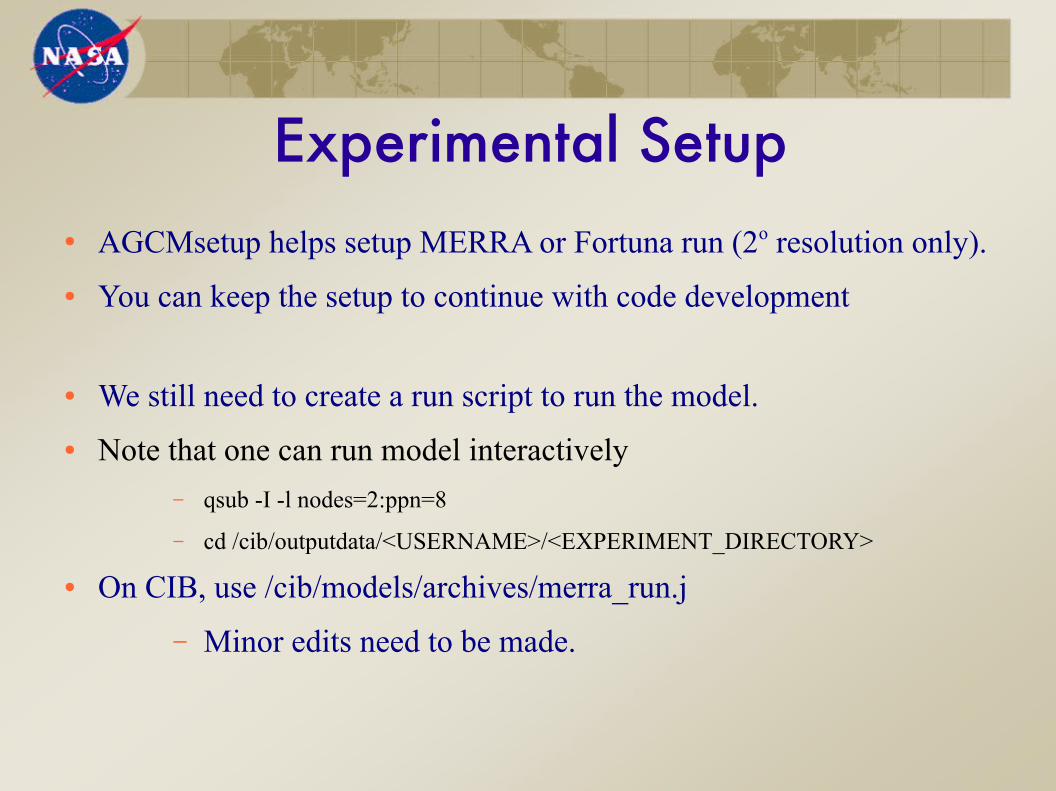
Experimental Setup● AGCMsetup helps setup MERRA or Fortuna run (2o resolution only).
● You can keep the setup to continue with code development
● We still need to create a run script to run the model.
● Note that one can run model interactively
– qsub -I -l nodes=2:ppn=8
– cd /cib/outputdata/<USERNAME>/<EXPERIMENT_DIRECTORY>
● On CIB, use /cib/models/archives/merra_run.j
– Minor edits need to be made.
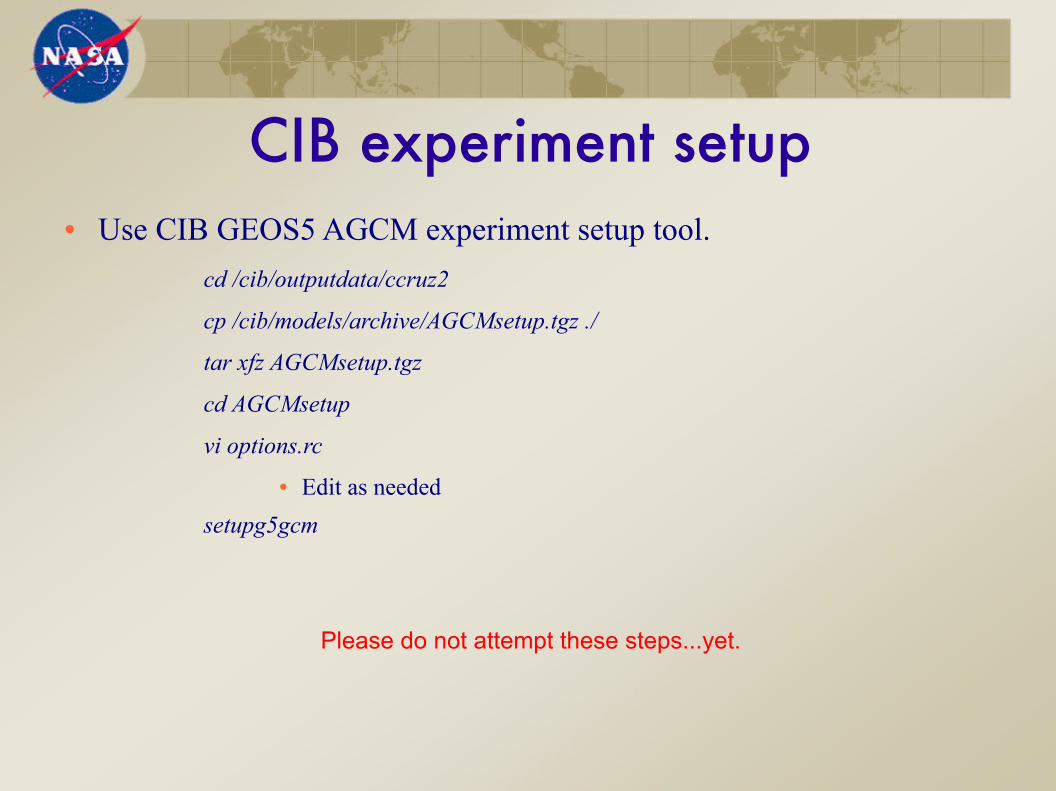
CIB experiment setup● Use CIB GEOS5 AGCM experiment setup tool.
cd /cib/outputdata/ccruz2
cp /cib/models/archive/AGCMsetup.tgz ./
tar xfz AGCMsetup.tgz
cd AGCMsetup
vi options.rc
● Edit as needed
setupg5gcm
Please do not attempt these steps...yet.
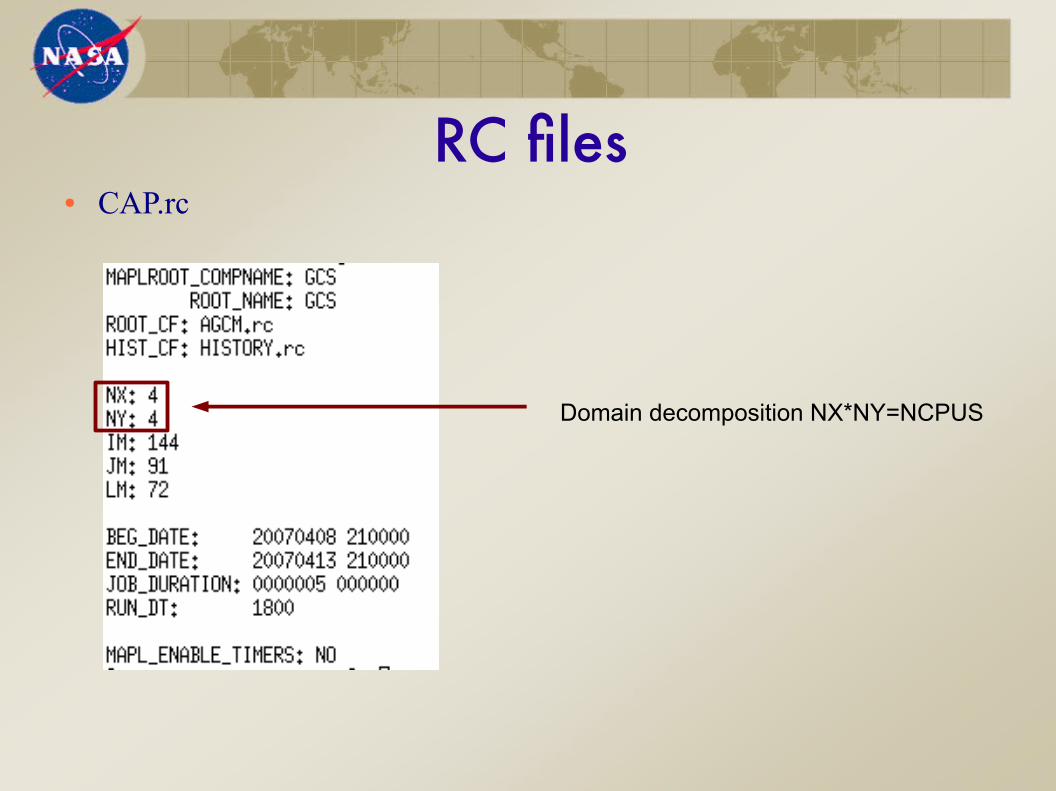
RC fles● CAP.rc
Domain decomposition NX*NY=NCPUS

RC fles● CAP.rc
Resolution
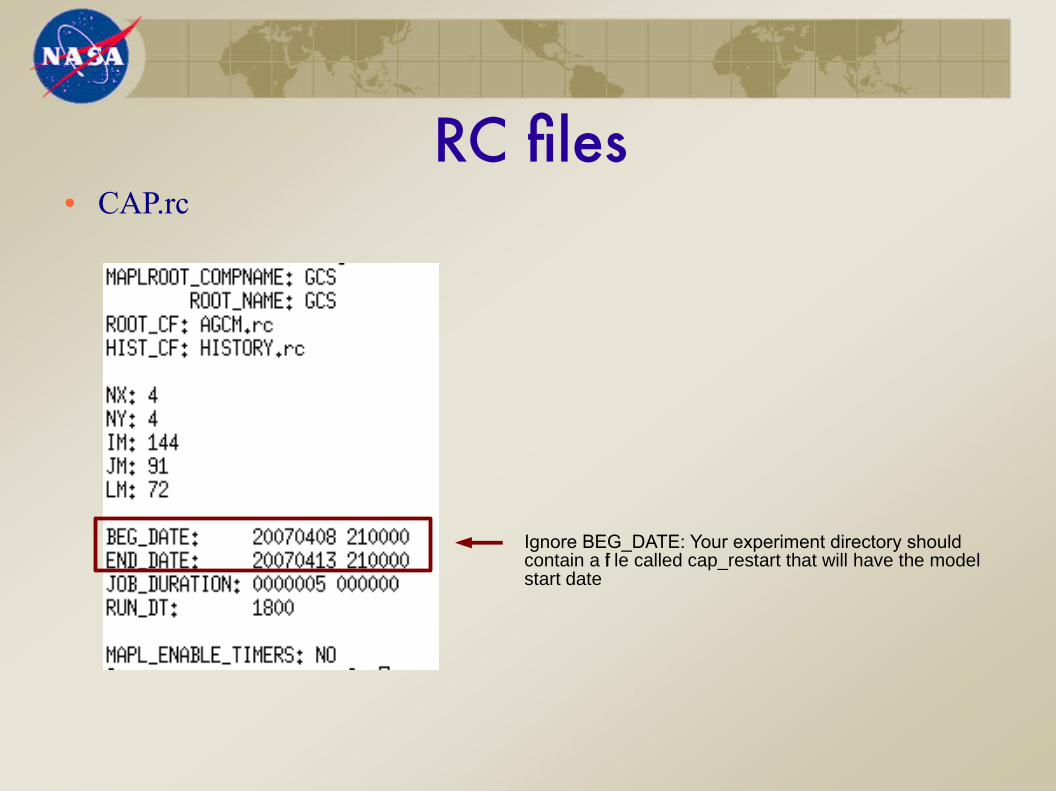
RC fles● CAP.rc
Ignore BEG_DATE: Your experiment directory shouldcontain a fi le called cap_restart that will have the model start date
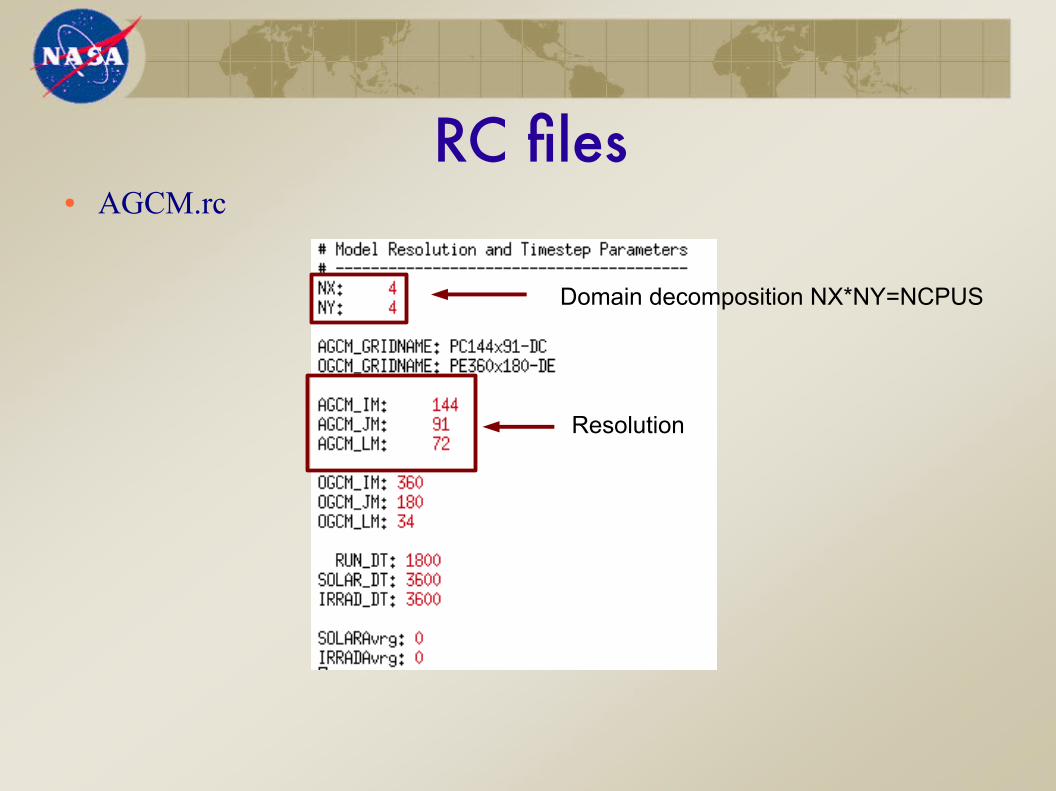
RC fles● AGCM.rc
Domain decomposition NX*NY=NCPUS
Resolution
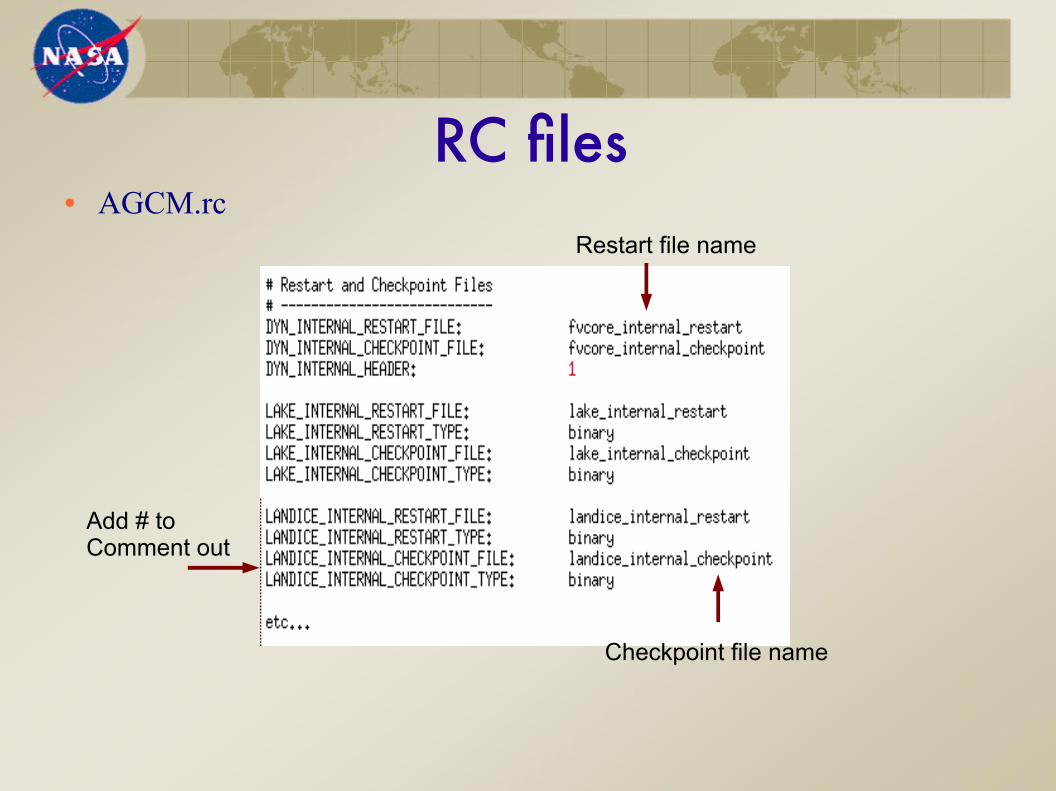
RC fles● AGCM.rc
Checkpoint file name
Restart file name
Add # toComment out
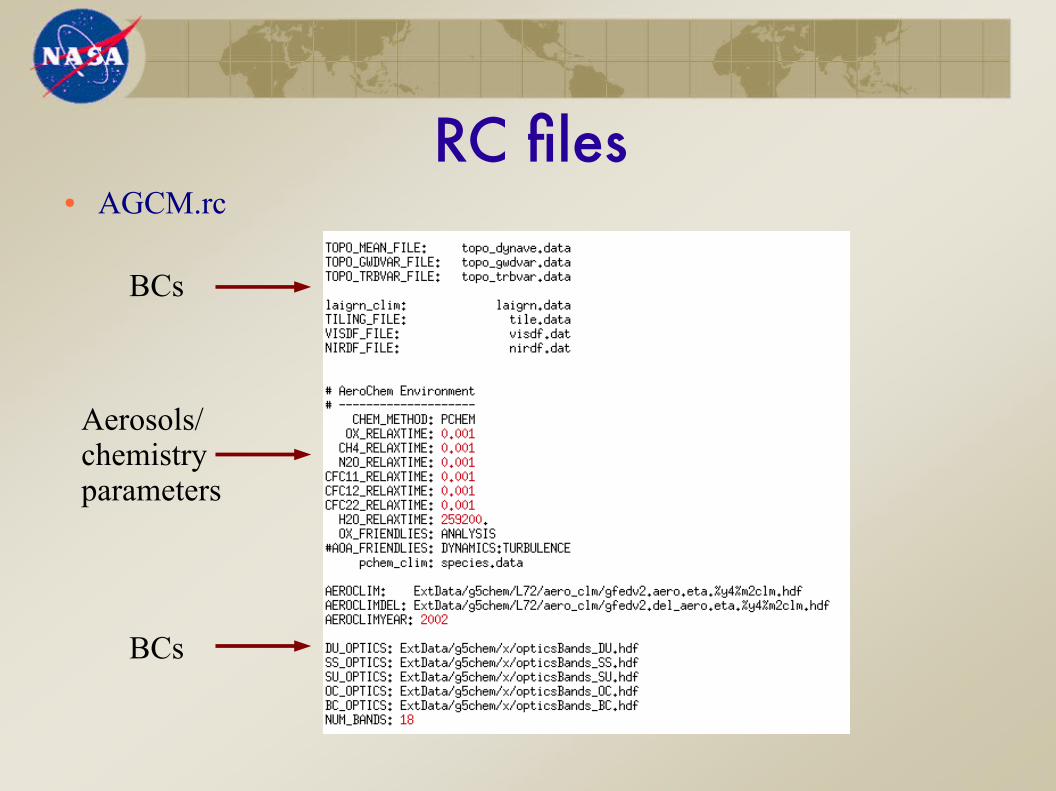
RC fles● AGCM.rc
BCs
Aerosols/chemistryparameters
BCs
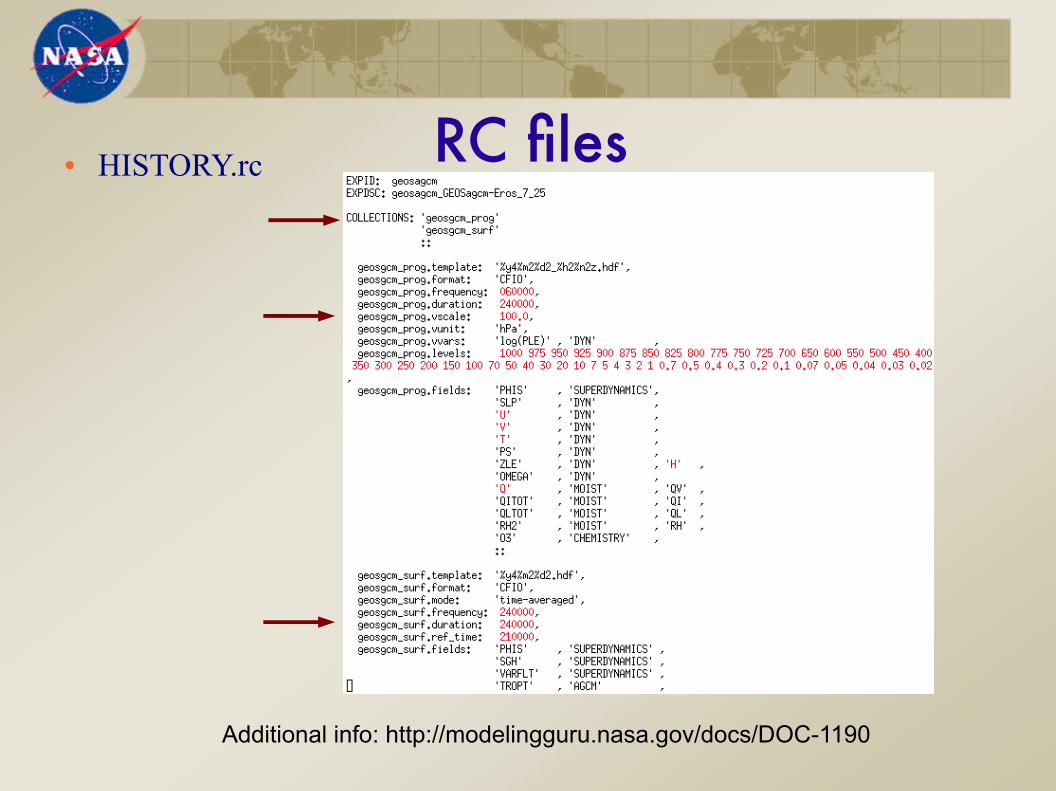
RC fles● HISTORY.rc
Additional info: http://modelingguru.nasa.gov/docs/DOC-1190
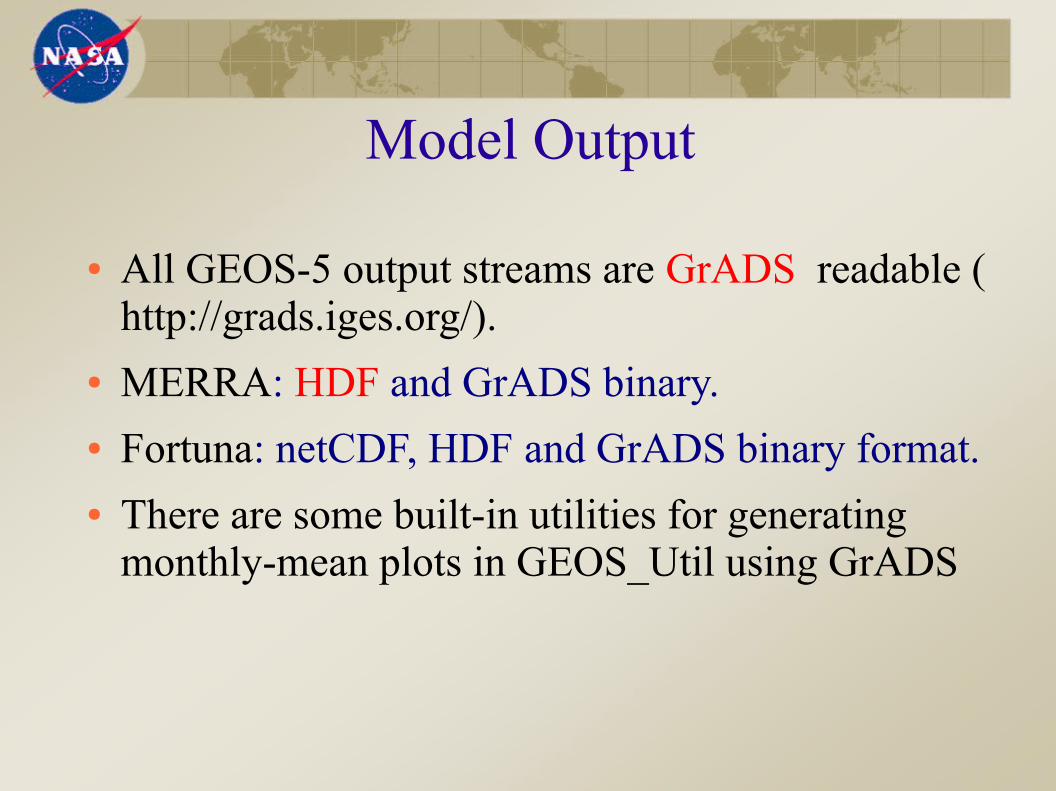
Model Output
● All GEOS-5 output streams are GrADS readable (http://grads.iges.org/).
● MERRA: HDF and GrADS binary.● Fortuna: netCDF, HDF and GrADS binary format.● There are some built-in utilities for generating
monthly-mean plots in GEOS_Util using GrADS
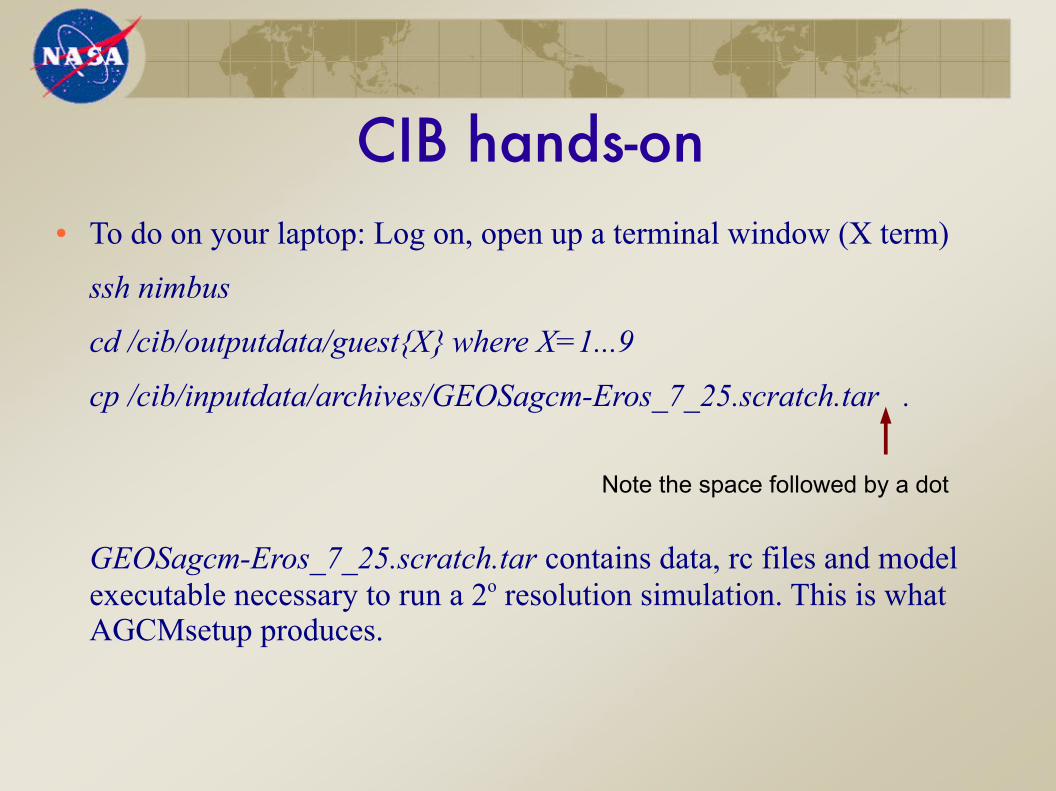
CIB hands-on● To do on your laptop: Log on, open up a terminal window (X term)
ssh nimbus
cd /cib/outputdata/guest{X} where X=1...9
cp /cib/inputdata/archives/GEOSagcm-Eros_7_25.scratch.tar .
GEOSagcm-Eros_7_25.scratch.tar contains data, rc files and model executable necessary to run a 2o resolution simulation. This is what AGCMsetup produces.
Note the space followed by a dot
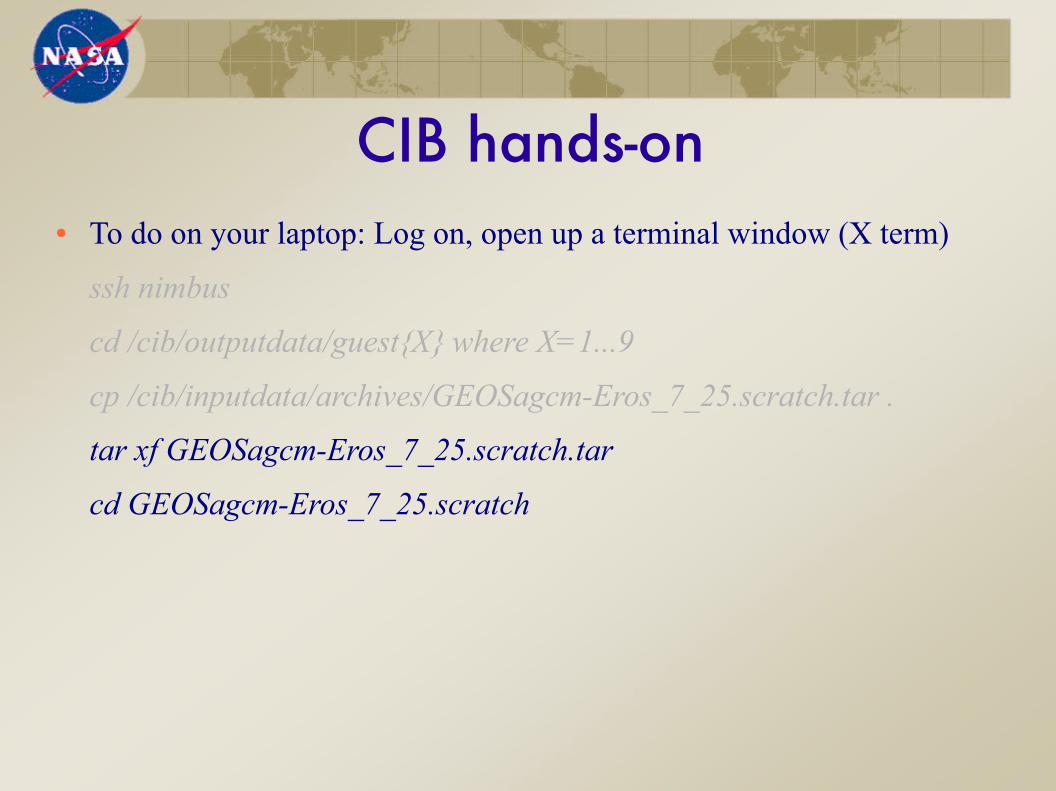
CIB hands-on● To do on your laptop: Log on, open up a terminal window (X term)
ssh nimbus
cd /cib/outputdata/guest{X} where X=1...9
cp /cib/inputdata/archives/GEOSagcm-Eros_7_25.scratch.tar .
tar xf GEOSagcm-Eros_7_25.scratch.tar
cd GEOSagcm-Eros_7_25.scratch

CIB hands-on● To do on your laptop: Log on, open up a terminal window (X term)
ssh nimbus
cd /cib/outputdata/guest{X} where X=1...9
cp /cib/inputdata/archives/GEOSagcm-Eros_7_25.scratch.tar .
tar xf GEOSagcm-Eros_7_25.scratch.tar
cd GEOSagcm-Eros_7_25.scratch
cp /cib/models/archives/merra_env.bash .
. merra_env.bash
Note the dot followed by a space
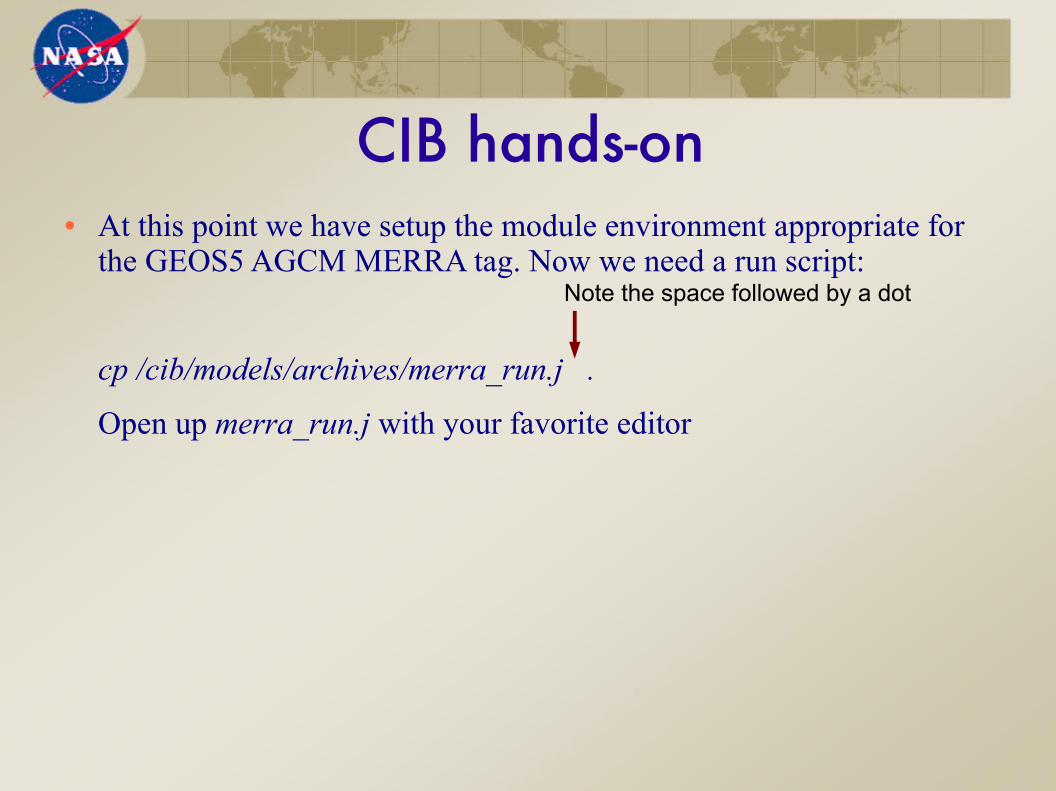
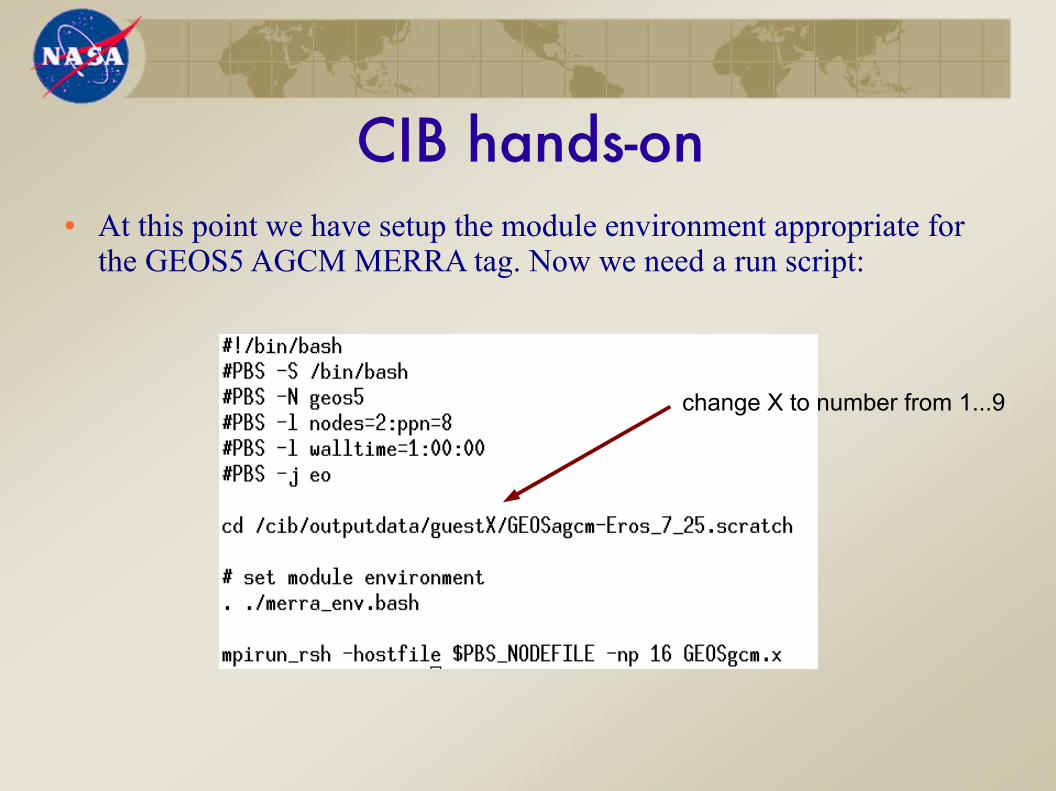
CIB hands-on● At this point we have setup the module environment appropriate for
the GEOS5 AGCM MERRA tag. Now we need a run script:
cp /cib/models/archives/merra_run.j .
Open up merra_run.j with your favorite editor
Note the space followed by a dot
CIB hands-on● At this point we have setup the module environment appropriate for
the GEOS5 AGCM MERRA tag. Now we need a run script:
change X to number from 1...9
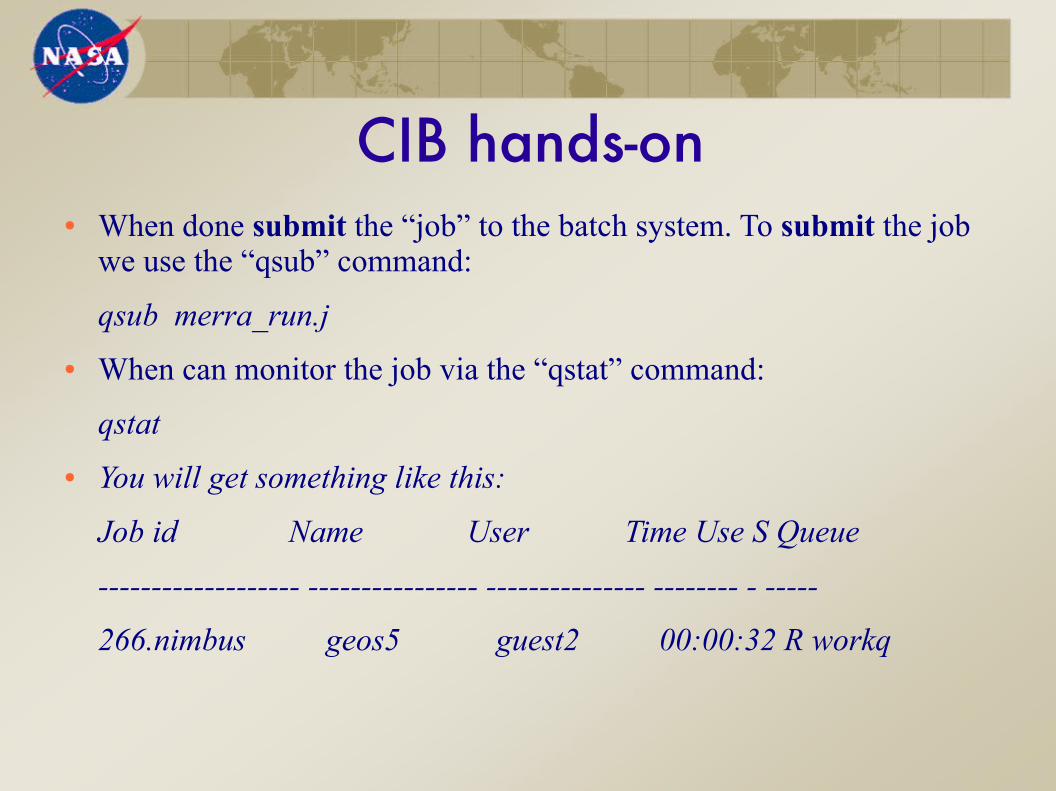
CIB hands-on● When done submit the “job” to the batch system. To submit the job
we use the “qsub” command:
qsub merra_run.j
● When can monitor the job via the “qstat” command:
qstat
● You will get something like this:
Job id Name User Time Use S Queue
------------------- ---------------- --------------- -------- - -----
266.nimbus geos5 guest2 00:00:32 R workq
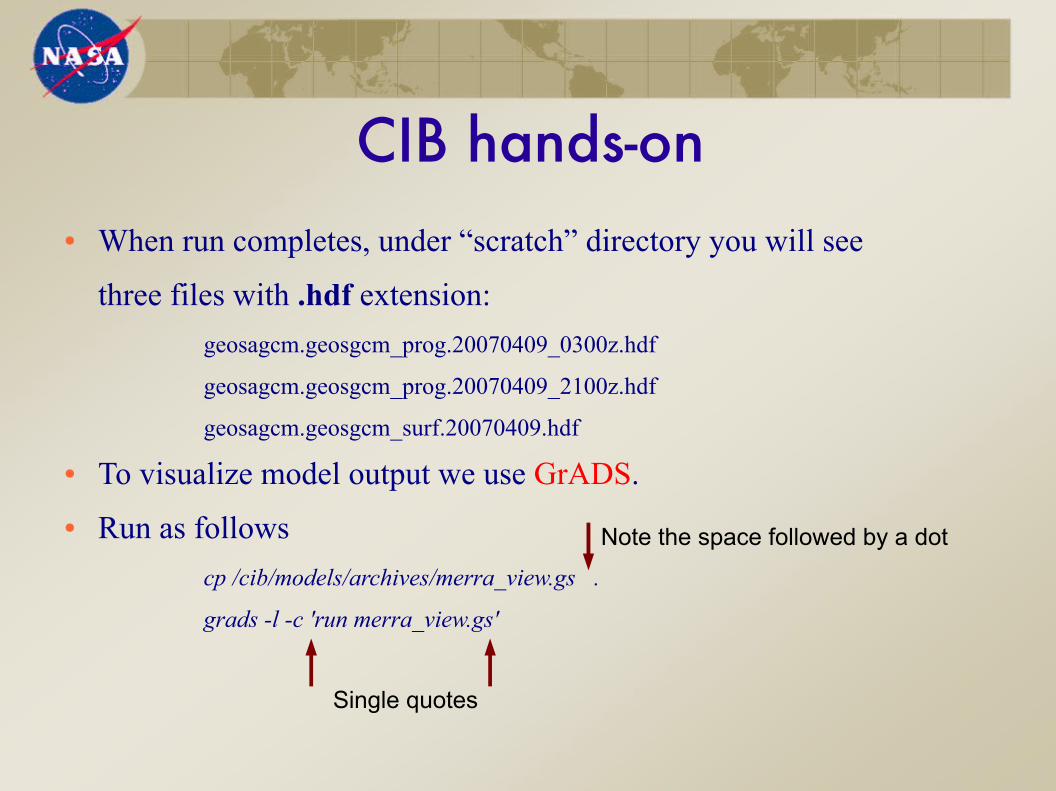
CIB hands-on● When run completes, under “scratch” directory you will see
three files with .hdf extension:
geosagcm.geosgcm_prog.20070409_0300z.hdf
geosagcm.geosgcm_prog.20070409_2100z.hdf
geosagcm.geosgcm_surf.20070409.hdf
● To visualize model output we use GrADS.
● Run as follows
cp /cib/models/archives/merra_view.gs .
grads -l -c 'run merra_view.gs'
Note the space followed by a dot
Single quotes

Questions?
Extra slides
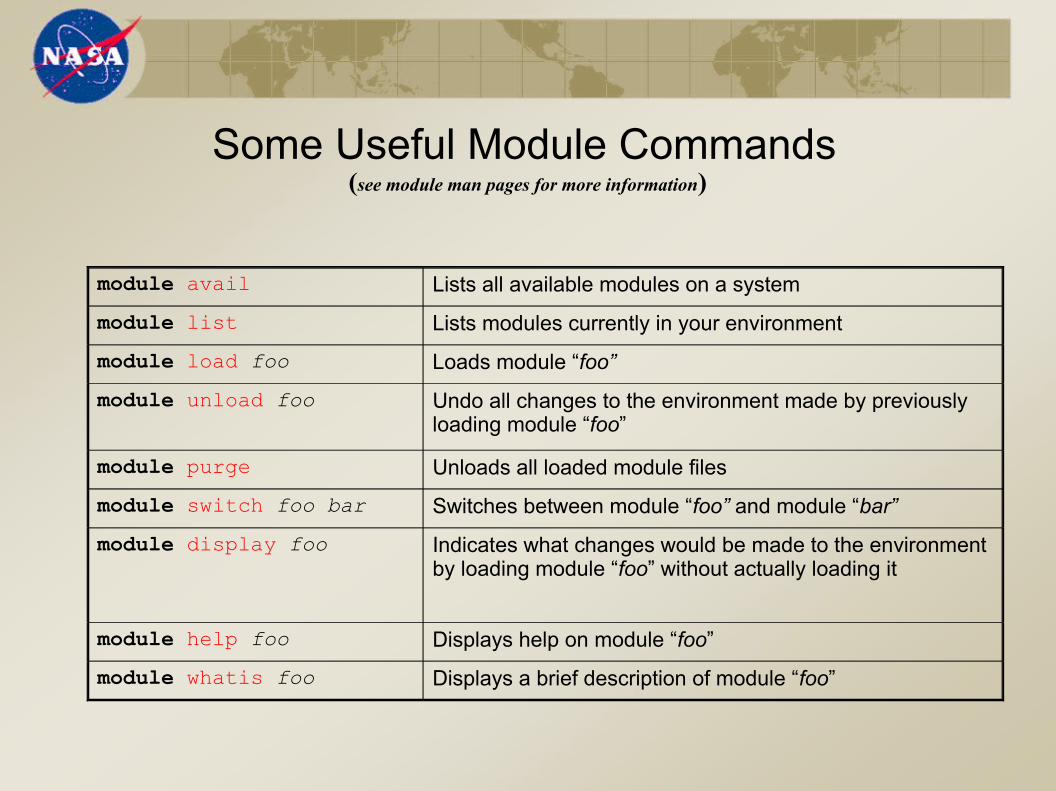
Some Useful Module Commands (see module man pages for more information)
module avail Lists all available modules on a system
module list Lists modules currently in your environment
module load foo Loads module “foo”
module unload foo Undo all changes to the environment made by previously loading module “foo”
module purge Unloads all loaded module files
module switch foo bar Switches between module “foo” and module “bar”
module display foo Indicates what changes would be made to the environment by loading module “foo” without actually loading it
module help foo Displays help on module “foo”
module whatis foo Displays a brief description of module “foo”
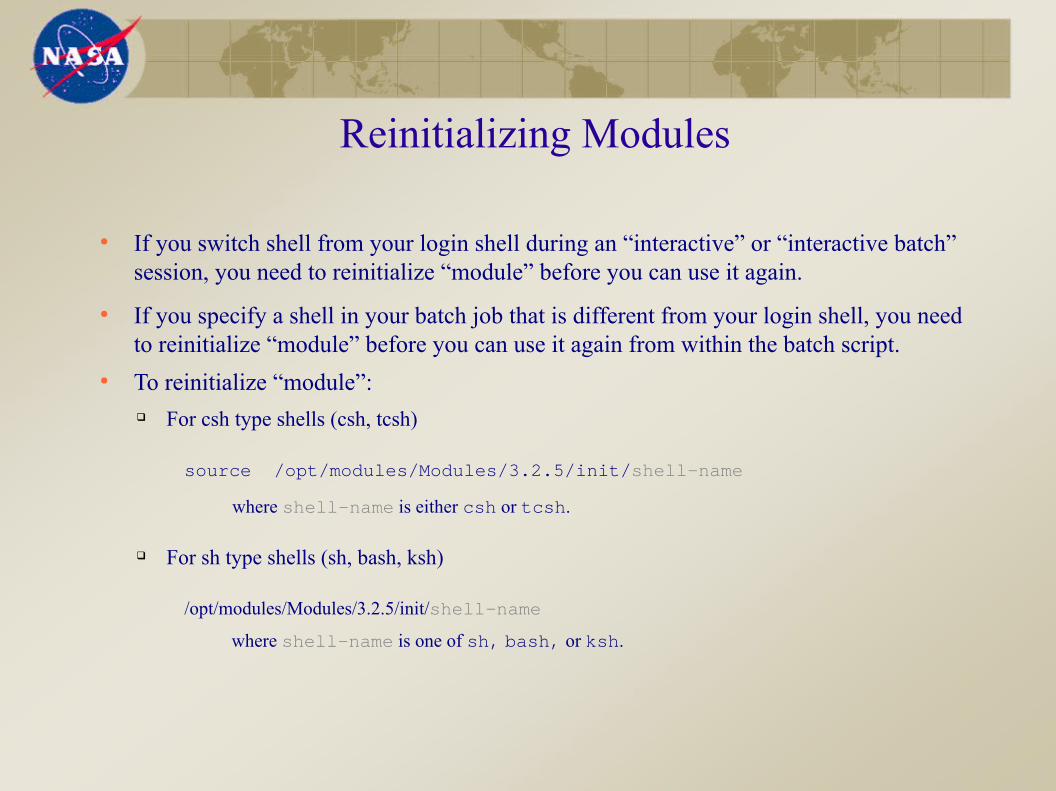
Reinitializing Modules
● If you switch shell from your login shell during an “interactive” or “interactive batch” session, you need to reinitialize “module” before you can use it again.
● If you specify a shell in your batch job that is different from your login shell, you need to reinitialize “module” before you can use it again from within the batch script.
● To reinitialize “module”: For csh type shells (csh, tcsh)
source /opt/modules/Modules/3.2.5/init/shell-name
where shell-name is either csh or tcsh.
For sh type shells (sh, bash, ksh)
/opt/modules/Modules/3.2.5/init/shell-name
where shell-name is one of sh, bash, or ksh.