Embed Size (px)
Citation preview
SANDeploy Technical Reference Series
Using SANDeploy iSCSI SAN for Windows Server
2008 Clustering
Friday, October 8, 2010
www.sandeploy.com
Copyright © SANDeploy Limited 2008-2011. All right reserved.
SANDeploy Technical Reference Series
Table of Contents
Overview ....................................................................................................................................................... 3
Configuring on Domain Controller ............................................................................................................... 6
Network Adapter ...................................................................................................................................... 6
Install Active Directory ............................................................................................................................. 7
Install DNS .............................................................................................................................................. 17
Configuring on SANDeploy Server ............................................................................................................. 28
Network Adapter .................................................................................................................................... 28
Preparing Quorum Volume .................................................................................................................... 29
Preparing Standard Volume ................................................................................................................... 33
Preparing iSCSI Target ............................................................................................................................ 37
Configuring on Cluster Node 1 ................................................................................................................... 40
Network Adapter .................................................................................................................................... 40
Join to the domain ................................................................................................................................. 42
Log in to iSCSI disks ................................................................................................................................ 47
Installing Failover Clustering Service ..................................................................................................... 55
Configuring on Cluster Node 2 ................................................................................................................... 61
Network Adapter .................................................................................................................................... 61
Join to the domain ................................................................................................................................. 63
Log in to iSCSI disks ................................................................................................................................ 67
Installing Failover Clustering Service ..................................................................................................... 75
Configuring Failover Clustering .................................................................................................................. 80
Validate a Configuration ........................................................................................................................ 80
Create a Failover Cluster ........................................................................................................................ 89
Contact ........................................................................................................................................................ 98
SANDeploy Technical Reference Series
Overview
High-availability clusters (also known as HA Clusters or Failover Clusters) are computer clusters that are
implemented primarily for the purpose of providing high availability of services which the cluster
provides. They operate by having redundant computers or nodes which are then used to provide service
when system components fail. Normally, if a server with a particular application crashes, the application
will be unavailable until someone fixes the crashed server. HA clustering remedies this situation by
detecting hardware/software faults, and immediately restarting the application on another system
without requiring administrative intervention, a process known as Failover. As part of this process,
clustering software may configure the node before starting the application on it. For example,
appropriate file systems may need to be imported and mounted, network hardware may have to be
configured, and some supporting applications may need to be running as well.
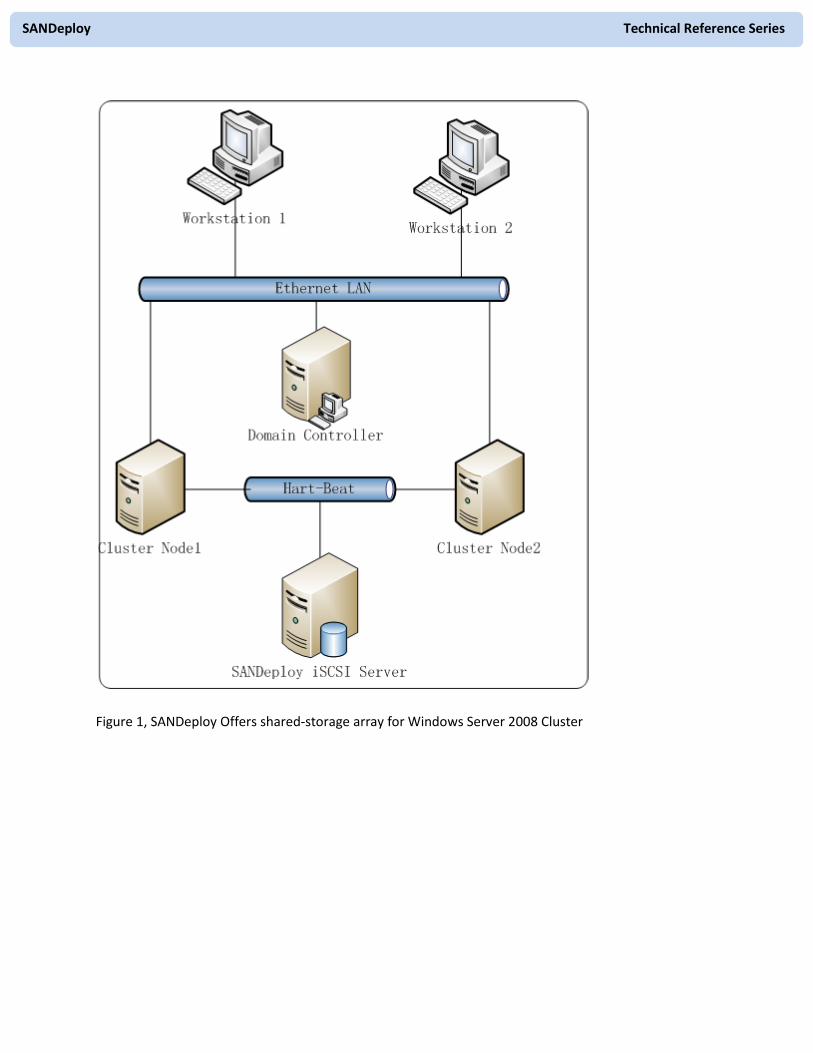
A SCSI-3 compatible external storage is necessary for using Windows Server 2008 Clustering.
SANDeploy offers a SCSI-3 compatible iSCSI storage service, that enable to create an external shared
storage in Microsoft Windows environment without extra hardware needed.
SANDeploy Technical Reference Series
Figure 1, SANDeploy Offers shared-storage array for Windows Server 2008 Cluster
SANDeploy Technical Reference Series
This document gives users detailed step-by-step instructions on configuring SANDeploy iSCSI SAN for
Windows Server 2008 or Windows Server 2008 R2 failover clusters. Failover clustering needs two or
more computers use a few external storages such as iSCSI disks. With SANDeploy, you can quickly create
a series of shared disks for clustering. Before to do so, prepare the following three computers or virtual
machine in Hyper-v:
Name IP Address Detail
08DC 192.168.0.100 / 192.168.100.100 Domain Controller
08Node1 192.168.0.101 / 192.168.100.101 Failover Node 1
08Node2 192.168.0.102 / 192.168.100.102 Failover Node 2
SANServer 192.168.0.3 / 192.168.100.3 SANDeploy Server
SANDeploy Technical Reference Series
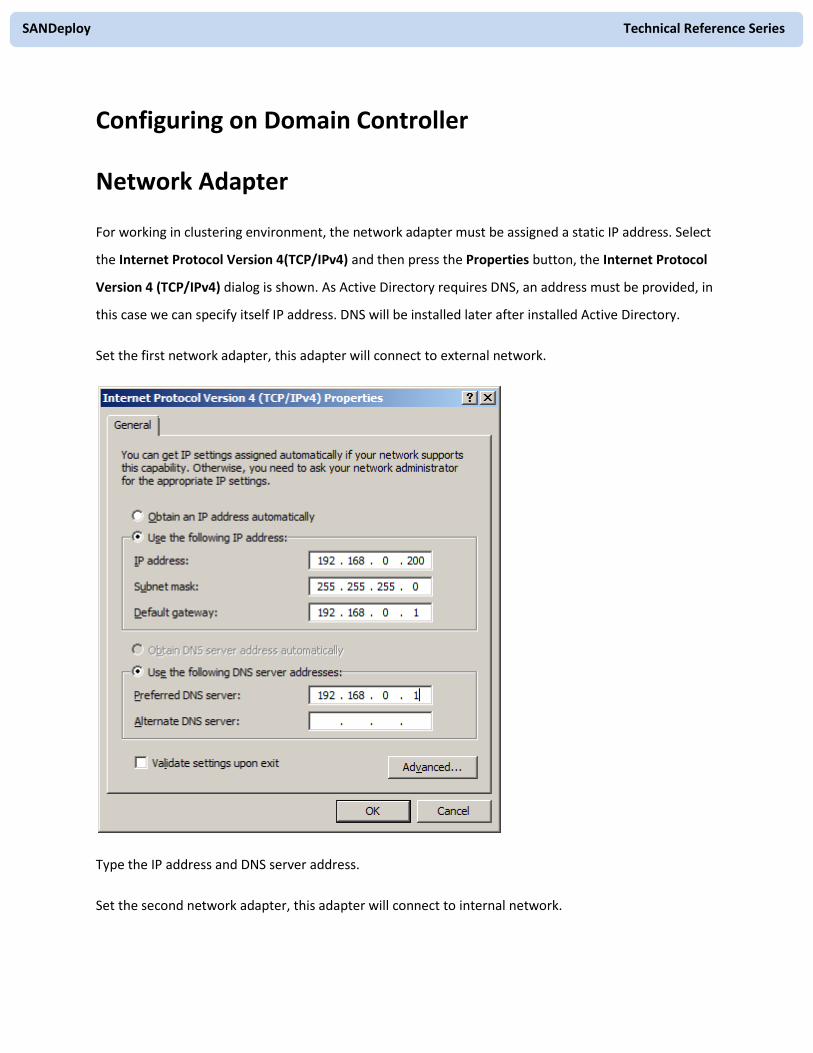
Configuring on Domain Controller
Network Adapter
For working in clustering environment, the network adapter must be assigned a static IP address. Select
the Internet Protocol Version 4(TCP/IPv4) and then press the Properties button, the Internet Protocol
Version 4 (TCP/IPv4) dialog is shown. As Active Directory requires DNS, an address must be provided, in
this case we can specify itself IP address. DNS will be installed later after installed Active Directory.
Set the first network adapter, this adapter will connect to external network.
Type the IP address and DNS server address.
Set the second network adapter, this adapter will connect to internal network.

SANDeploy Technical Reference Series
Type the IP address and DNS server address.
Press the OK button to continue.
Install Active Directory
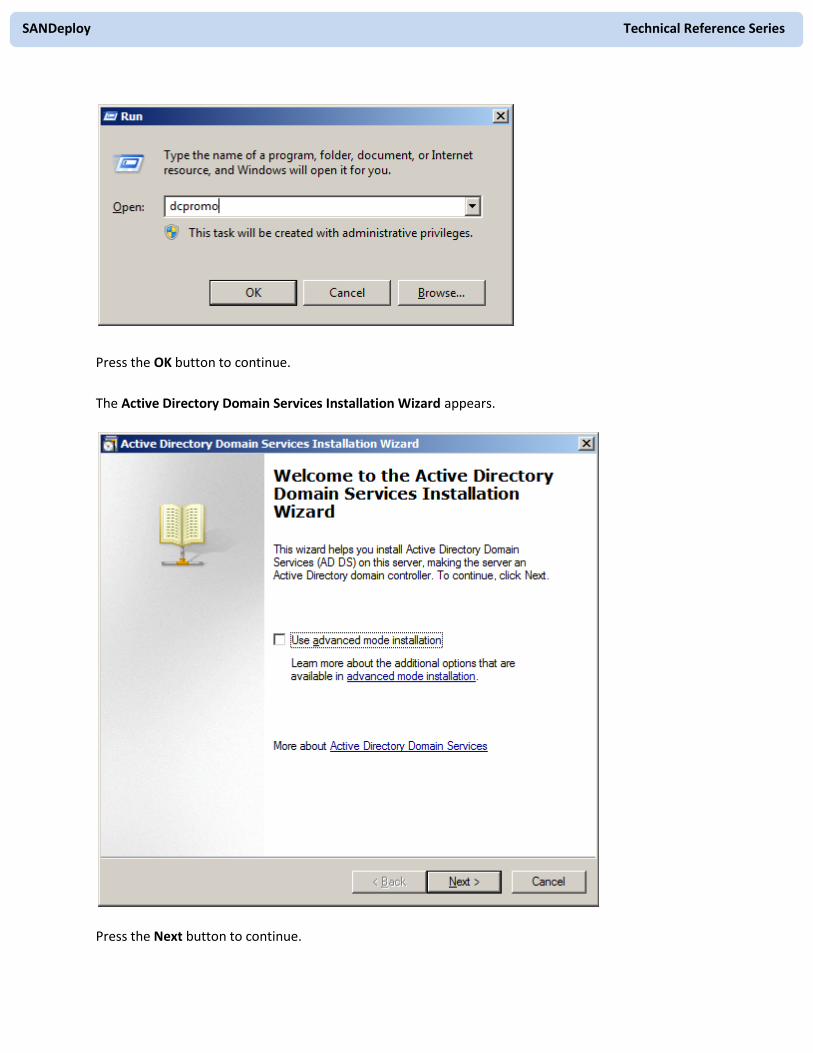
Select Start->Run and type dcpromo in the Open input box.
SANDeploy Technical Reference Series
Press the OK button to continue.
The Active Directory Domain Services Installation Wizard appears.
Press the Next button to continue.

SANDeploy Technical Reference Series
The Active Directory Domain Services Installation Wizard is shown, before to do next, please read the
introducing instructions carefully.
Press the Next button to continue.
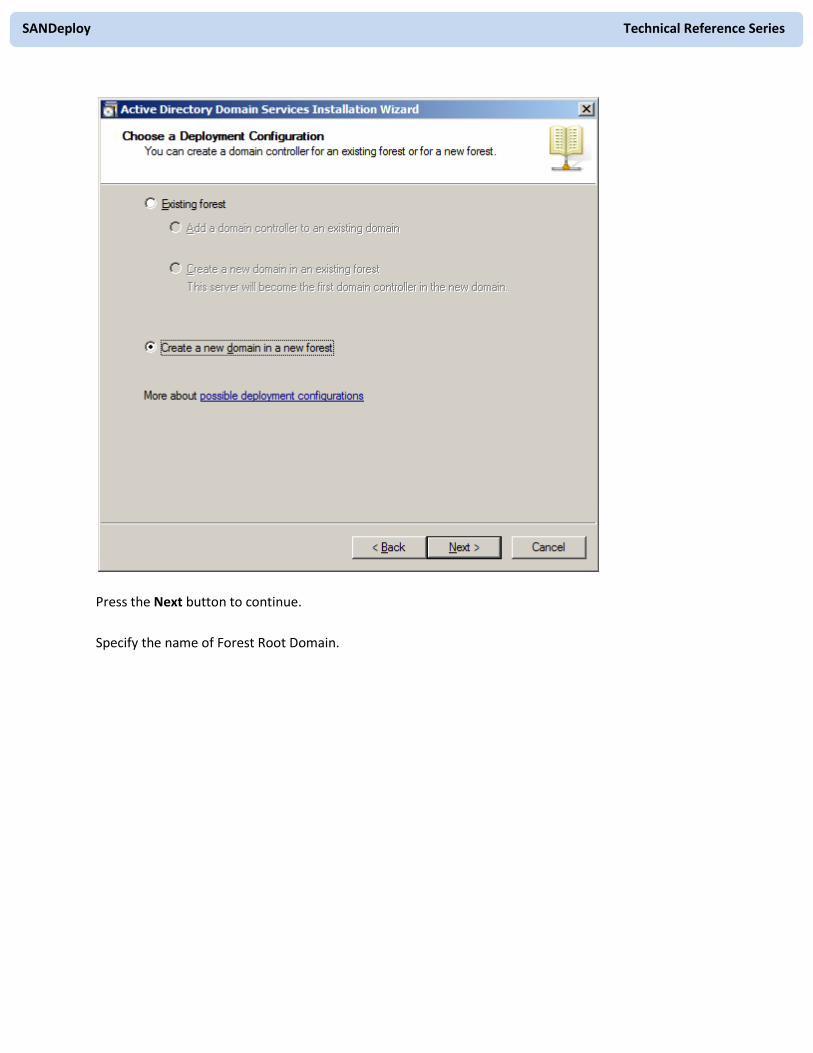
Because we are creating Active Directory, Select the Create a new domain in a new forest option.
SANDeploy Technical Reference Series
Press the Next button to continue.
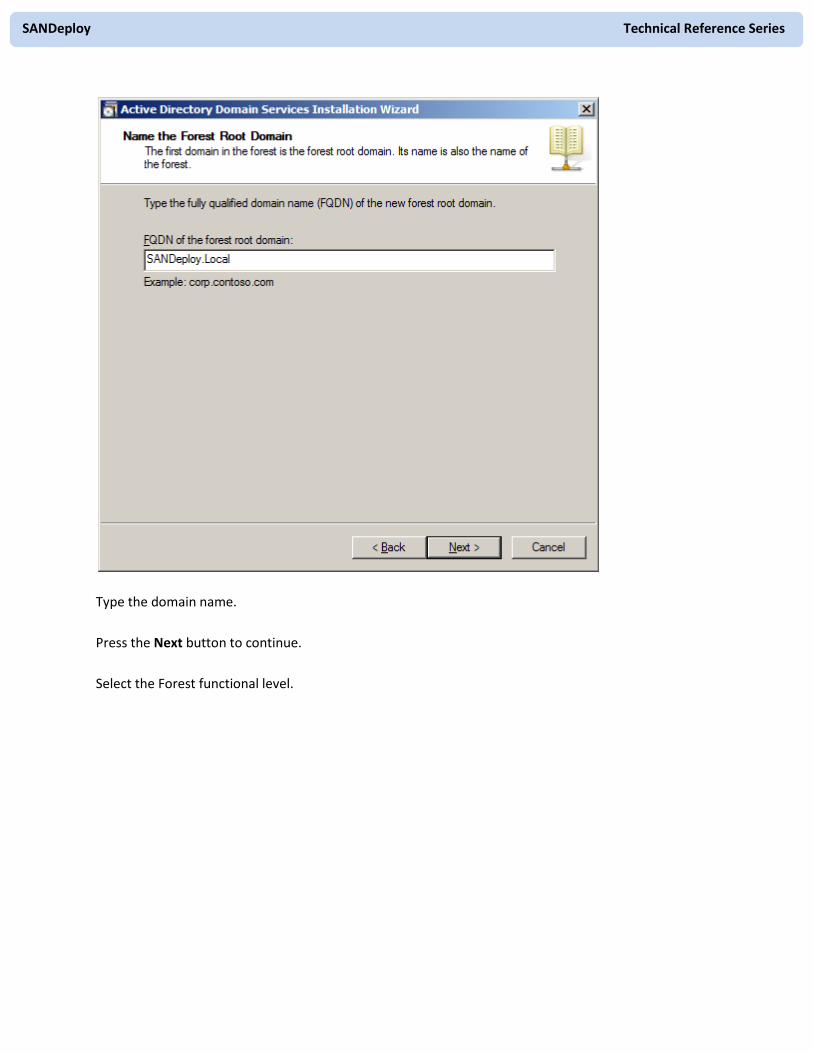
Specify the name of Forest Root Domain.
SANDeploy Technical Reference Series
Type the domain name.
Press the Next button to continue.
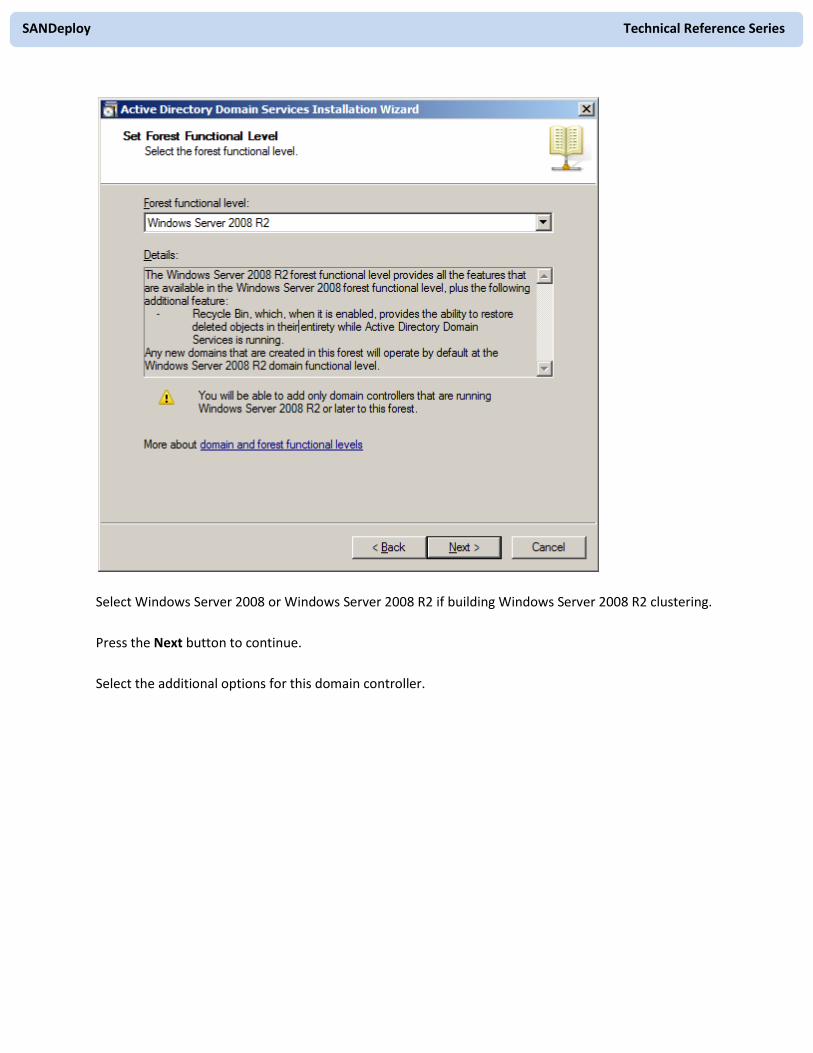
Select the Forest functional level.
SANDeploy Technical Reference Series
Select Windows Server 2008 or Windows Server 2008 R2 if building Windows Server 2008 R2 clustering.
Press the Next button to continue.
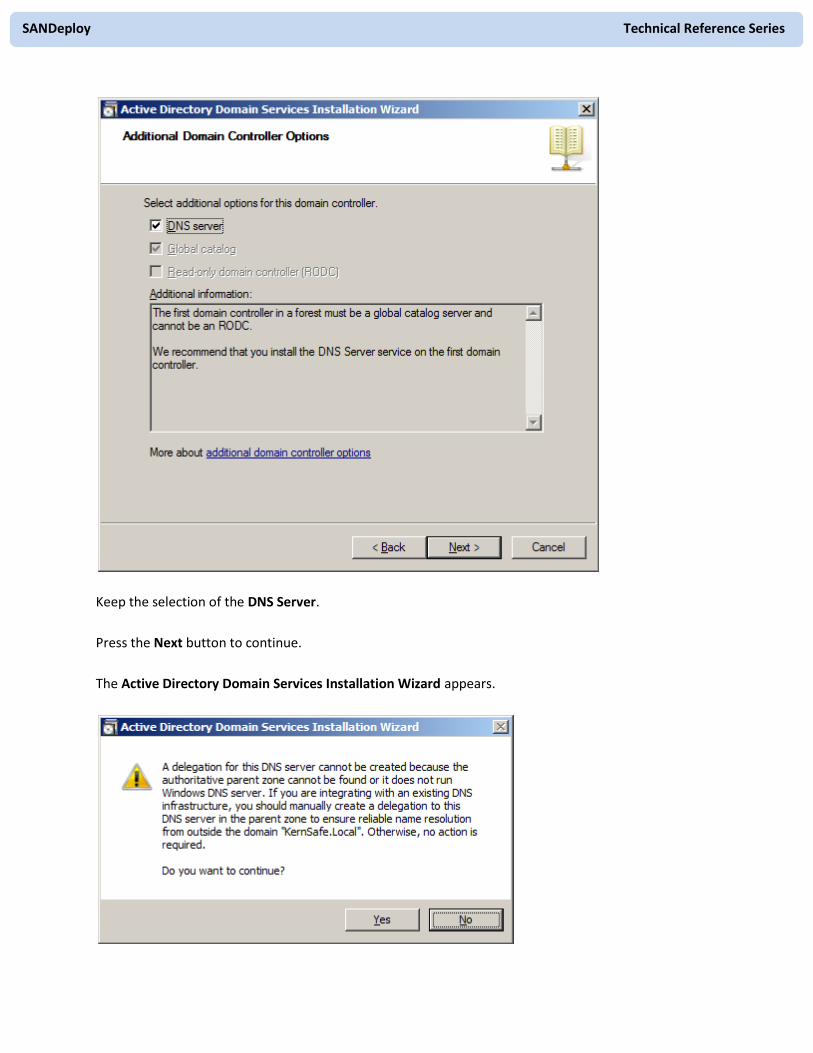
Select the additional options for this domain controller.
SANDeploy Technical Reference Series
Keep the selection of the DNS Server.
Press the Next button to continue.
The Active Directory Domain Services Installation Wizard appears.
SANDeploy Technical Reference Series
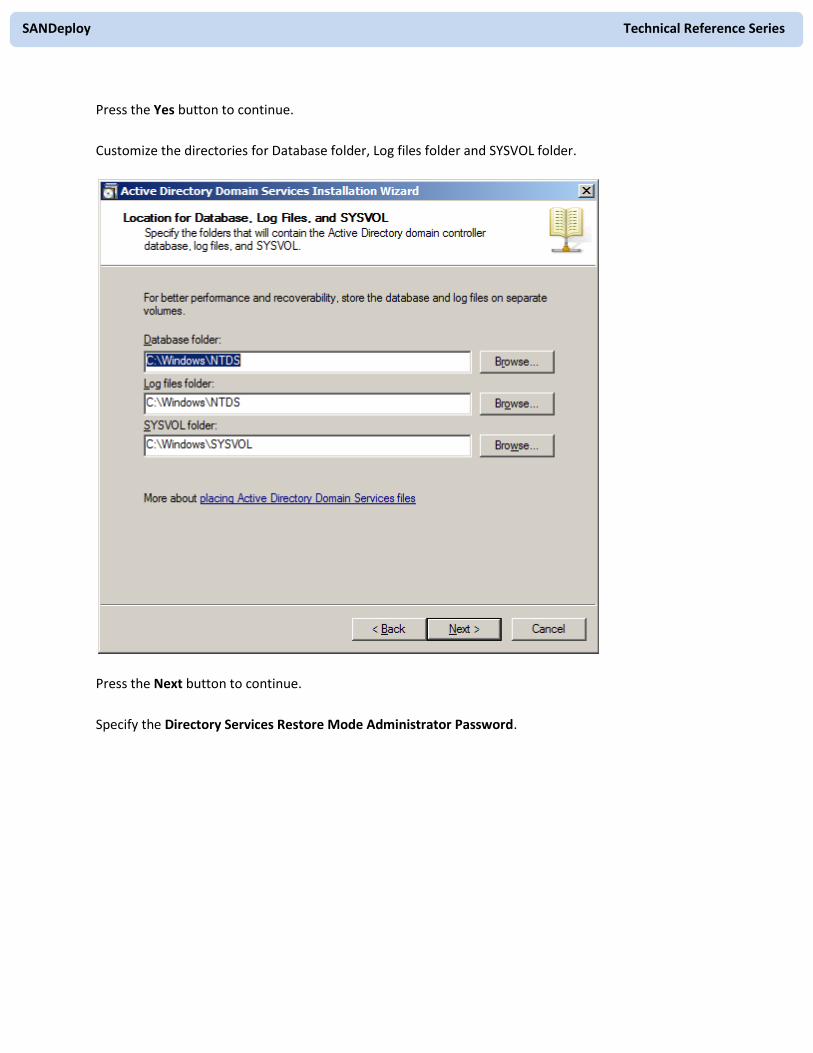
Press the Yes button to continue.
Customize the directories for Database folder, Log files folder and SYSVOL folder.
Press the Next button to continue.
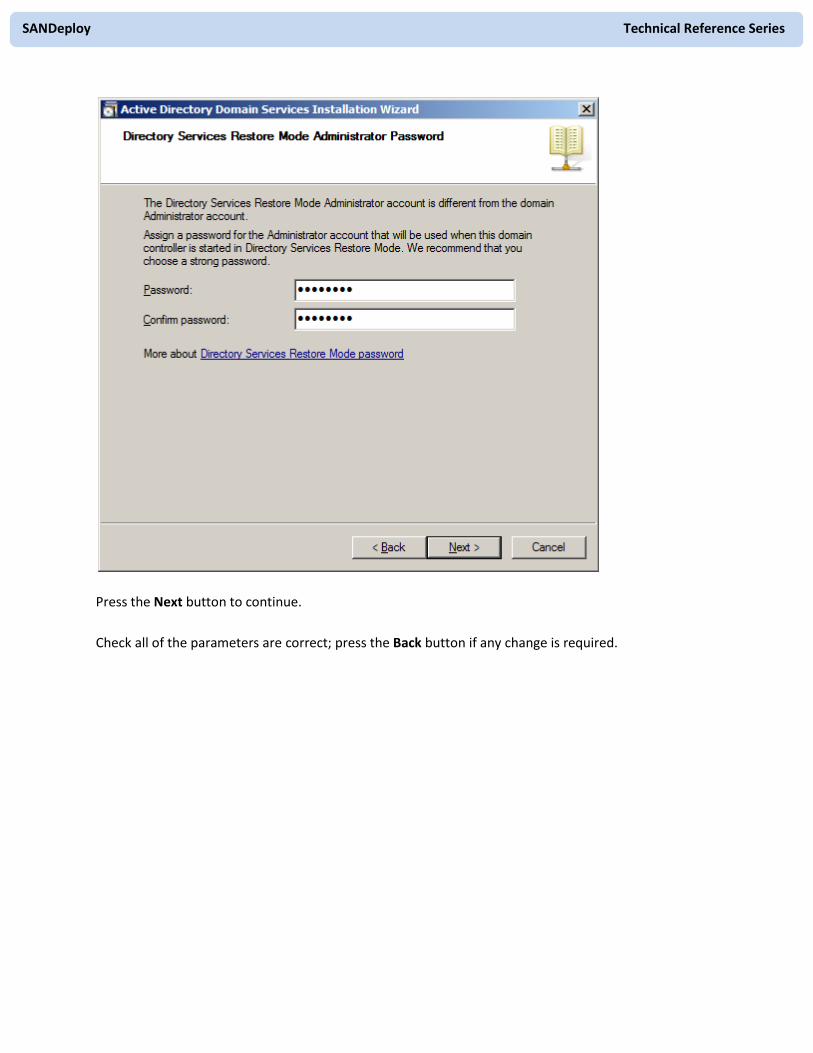
Specify the Directory Services Restore Mode Administrator Password.
SANDeploy Technical Reference Series
Press the Next button to continue.
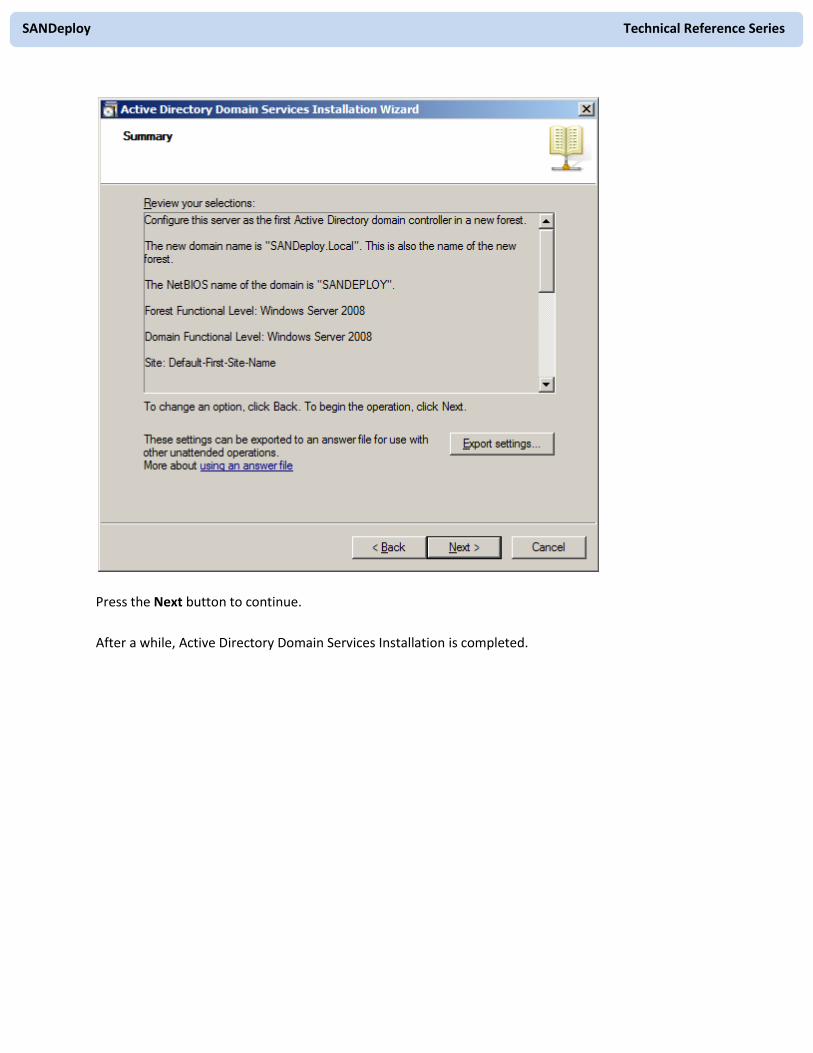
Check all of the parameters are correct; press the Back button if any change is required.
SANDeploy Technical Reference Series
Press the Next button to continue.
After a while, Active Directory Domain Services Installation is completed.
SANDeploy Technical Reference Series
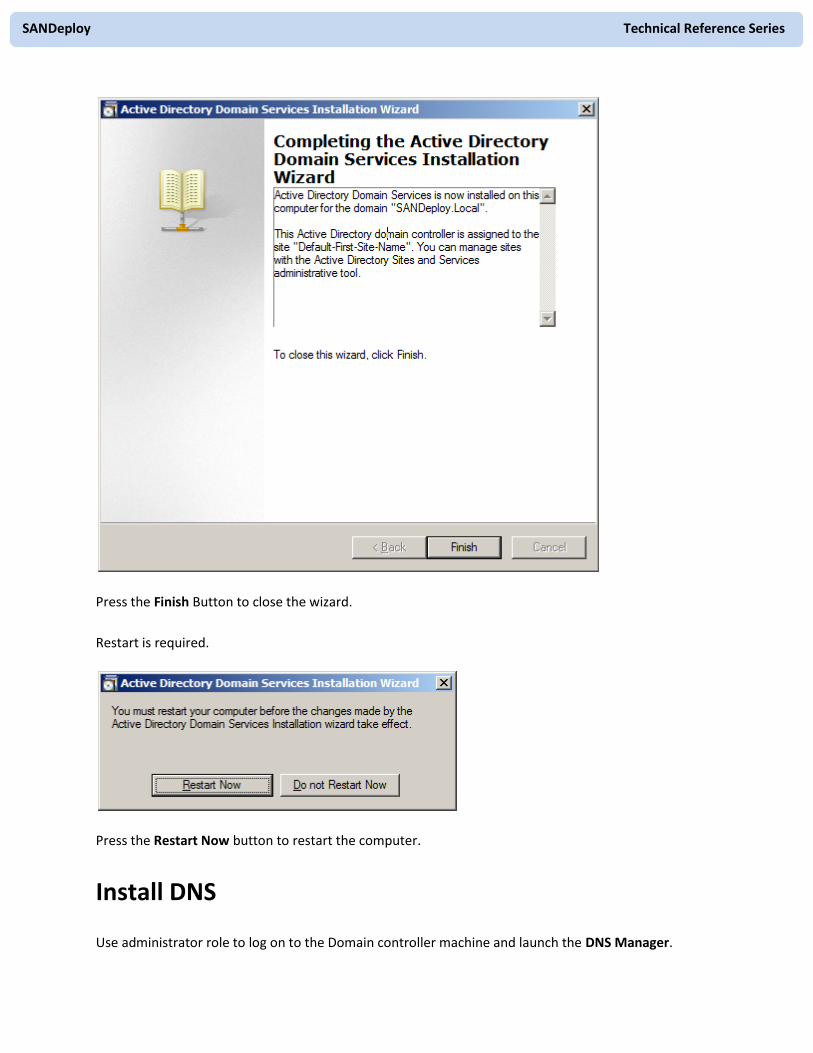
Press the Finish Button to close the wizard.
Restart is required.
Press the Restart Now button to restart the computer.
Install DNS
Use administrator role to log on to the Domain controller machine and launch the DNS Manager.
SANDeploy Technical Reference Series
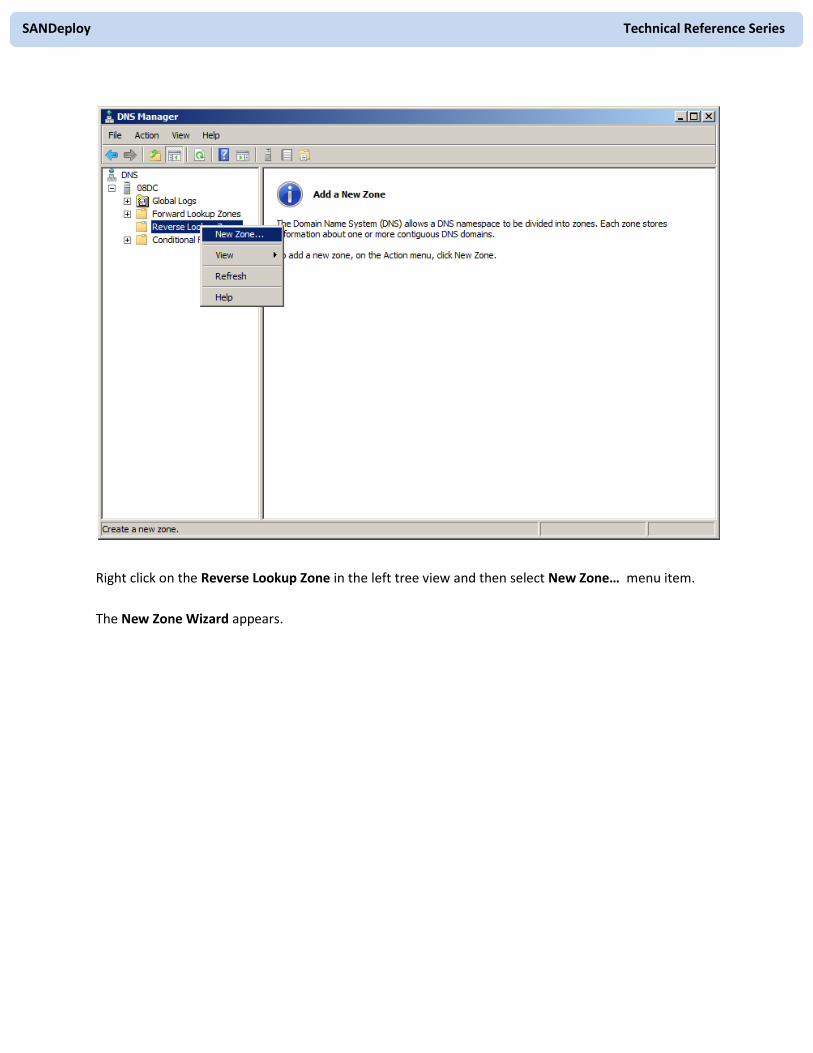
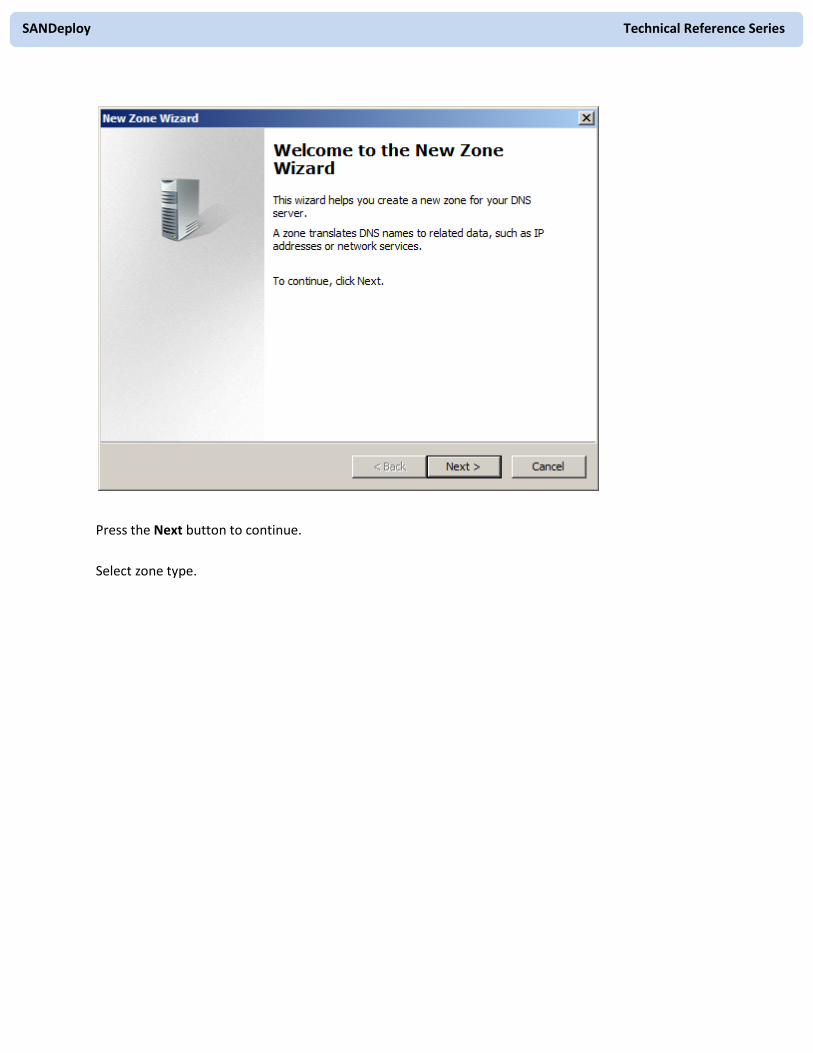
Right click on the Reverse Lookup Zone in the left tree view and then select New Zone… menu item.
The New Zone Wizard appears.
SANDeploy Technical Reference Series
Press the Next button to continue.
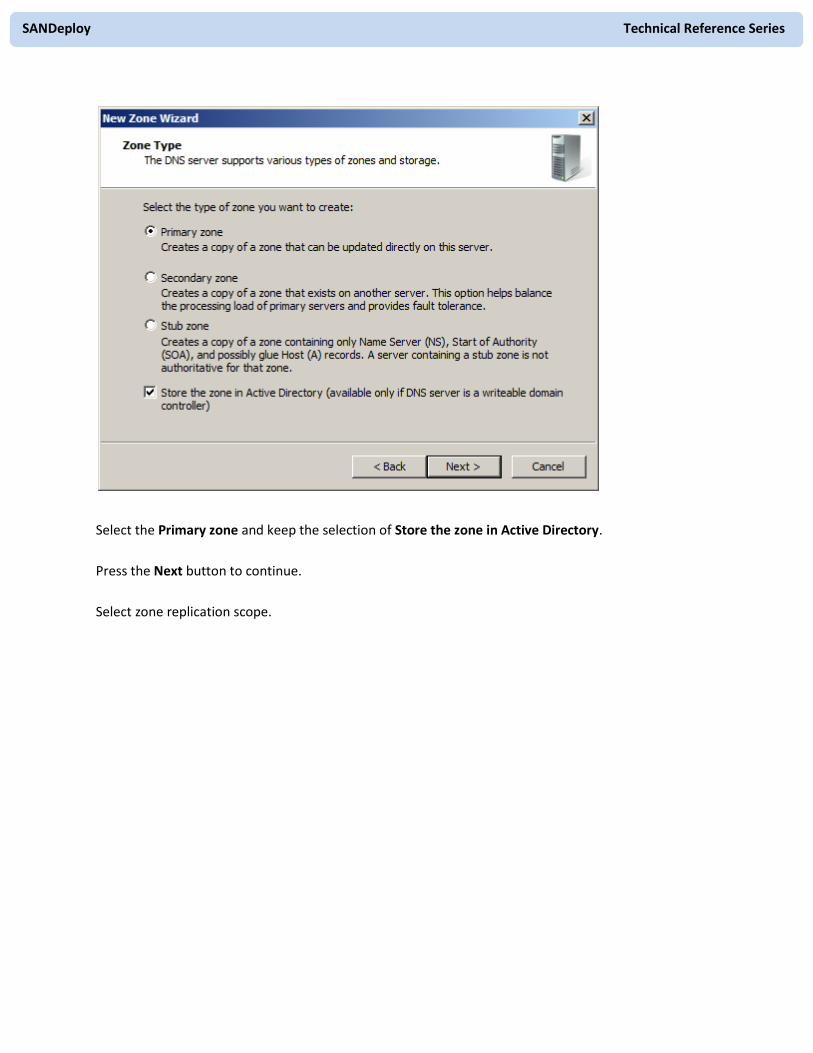
Select zone type.
SANDeploy Technical Reference Series
Select the Primary zone and keep the selection of Store the zone in Active Directory.
Press the Next button to continue.
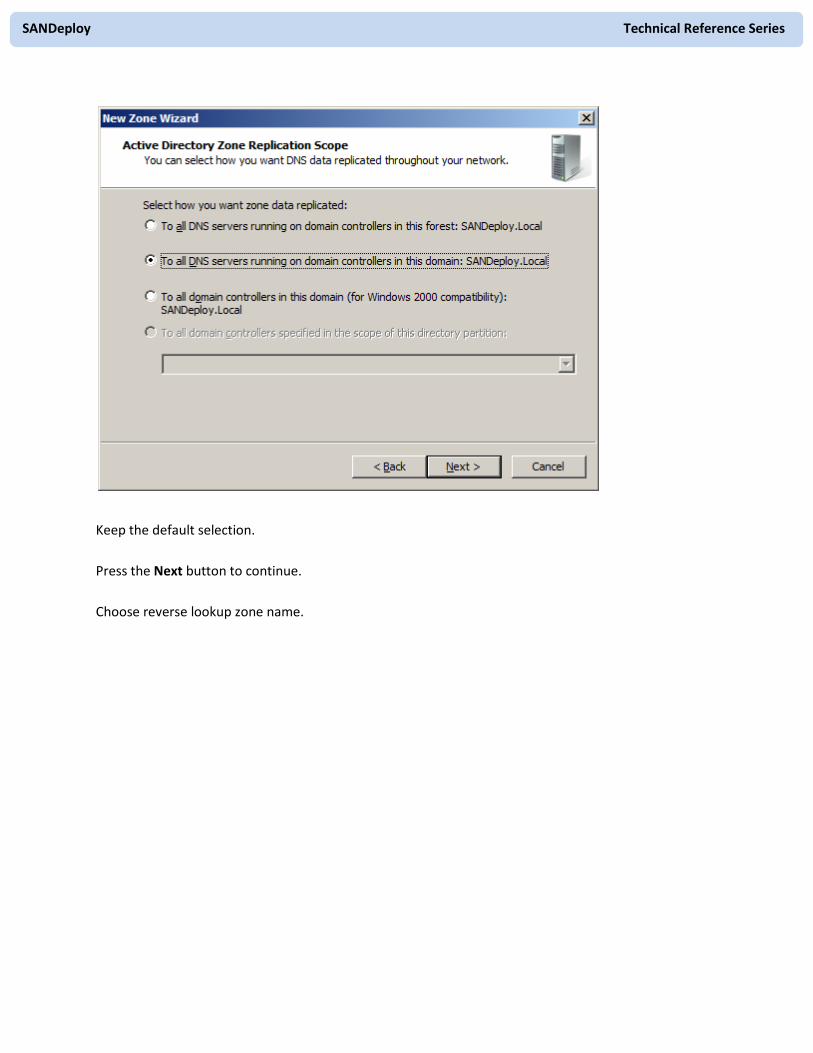
Select zone replication scope.
SANDeploy Technical Reference Series
Keep the default selection.
Press the Next button to continue.
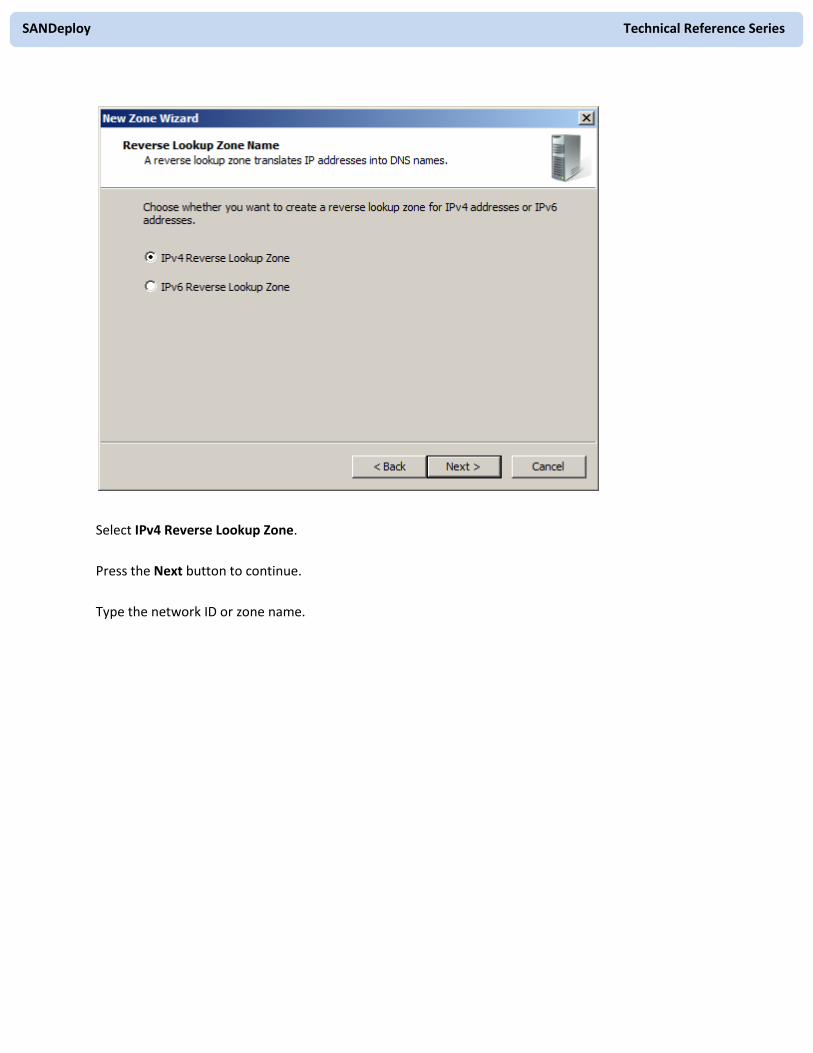
Choose reverse lookup zone name.
SANDeploy Technical Reference Series
Select IPv4 Reverse Lookup Zone.
Press the Next button to continue.
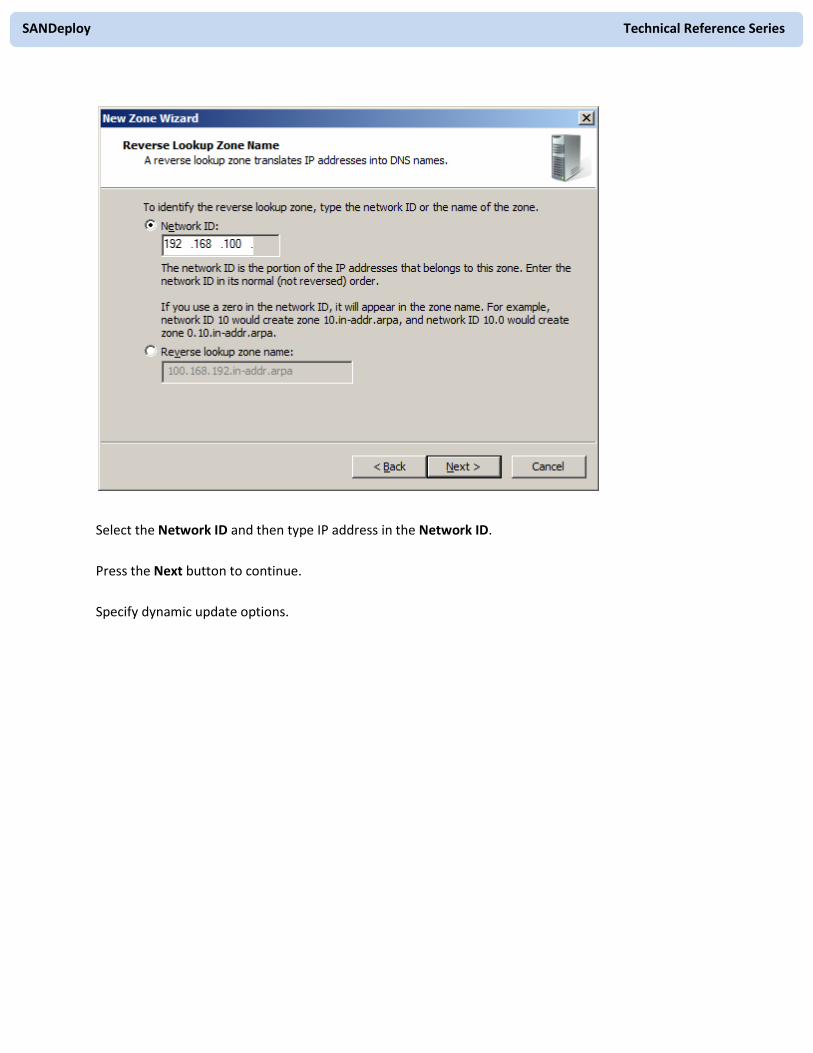
Type the network ID or zone name.
SANDeploy Technical Reference Series
Select the Network ID and then type IP address in the Network ID.
Press the Next button to continue.
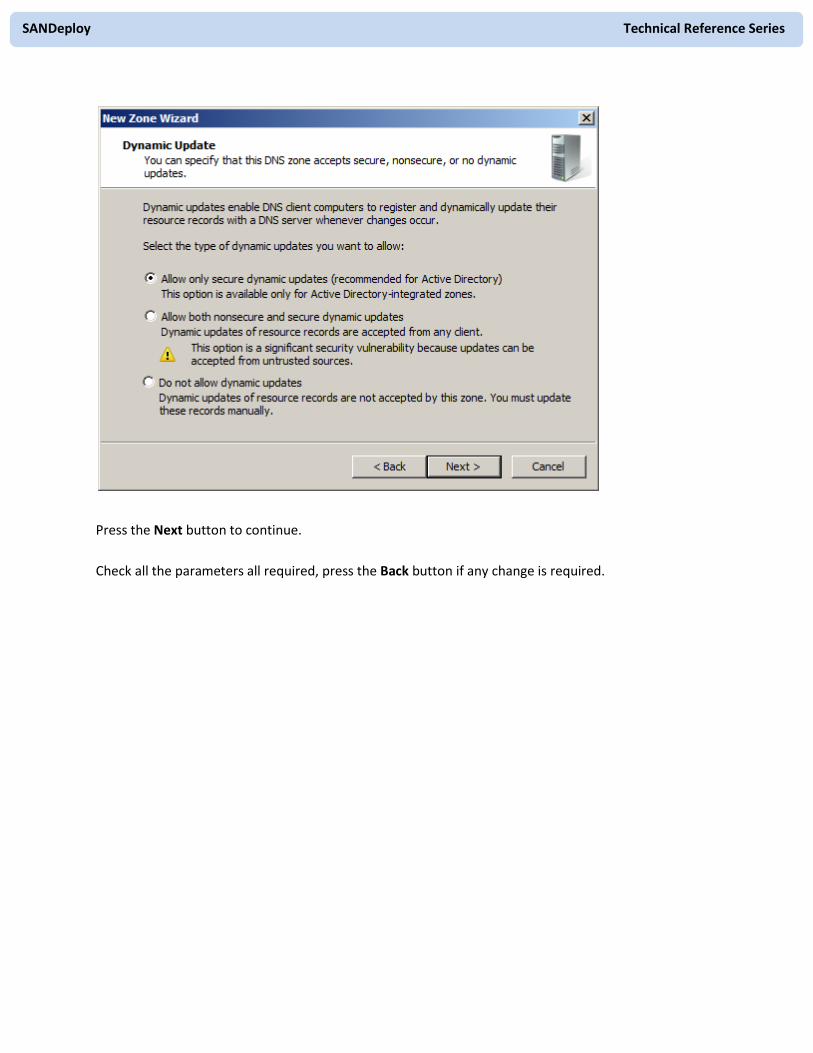
Specify dynamic update options.
SANDeploy Technical Reference Series
Press the Next button to continue.
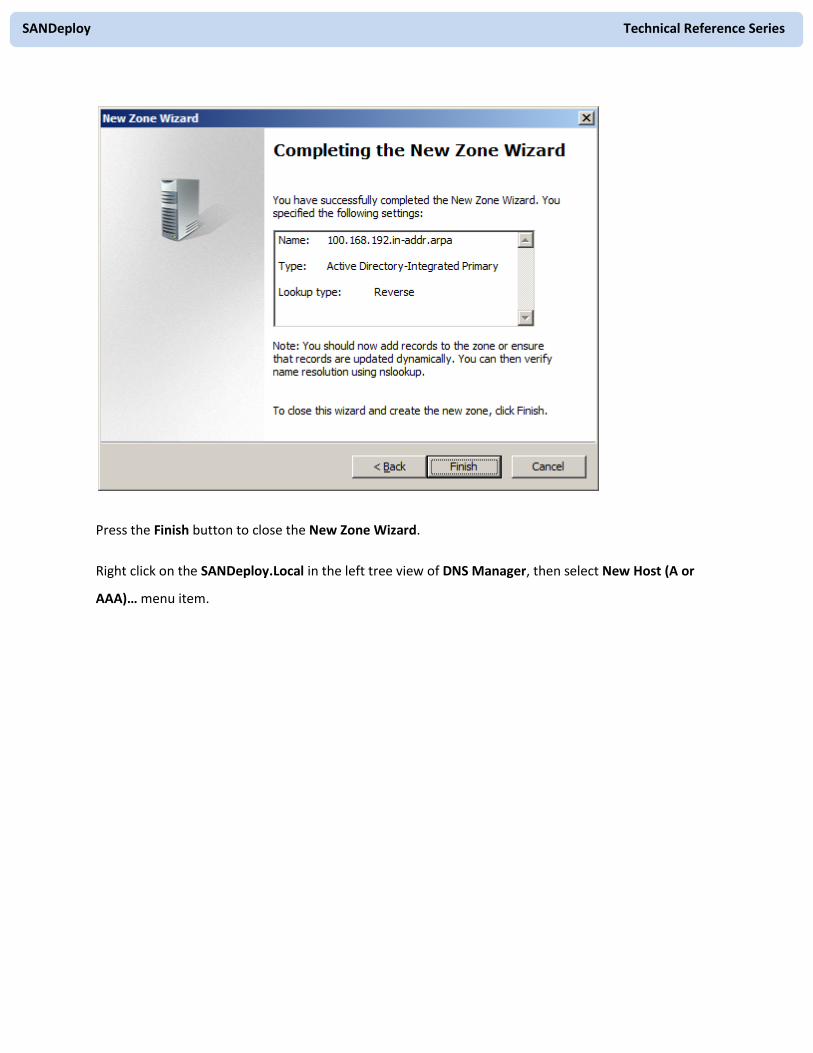
Check all the parameters all required, press the Back button if any change is required.
SANDeploy Technical Reference Series
Press the Finish button to close the New Zone Wizard.
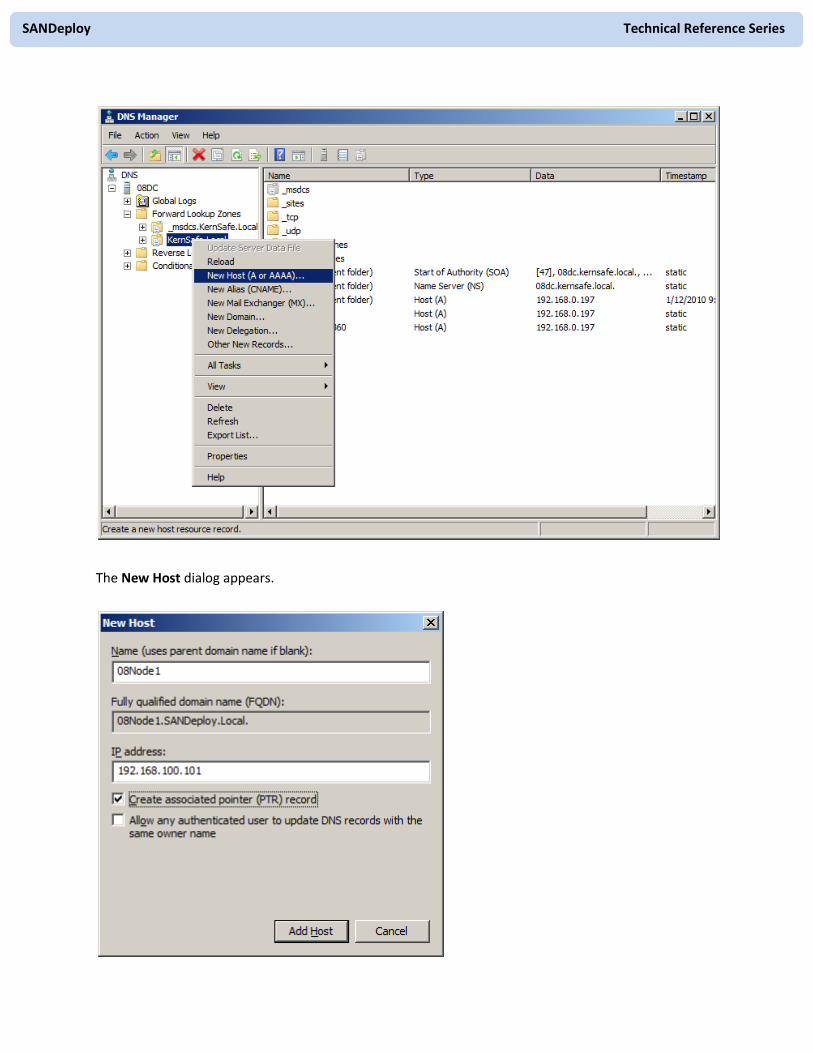
Right click on the SANDeploy.Local in the left tree view of DNS Manager, then select New Host (A or
AAA)… menu item.
SANDeploy Technical Reference Series
The New Host dialog appears.
SANDeploy Technical Reference Series
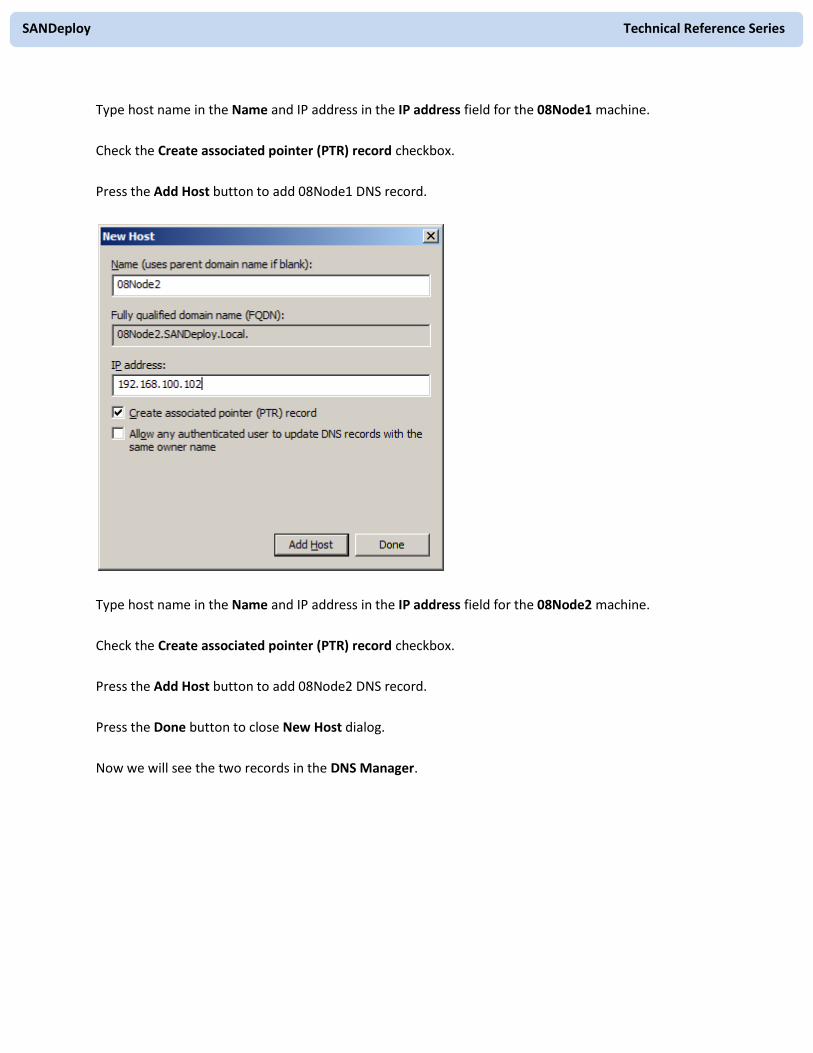
Type host name in the Name and IP address in the IP address field for the 08Node1 machine.
Check the Create associated pointer (PTR) record checkbox.
Press the Add Host button to add 08Node1 DNS record.
Type host name in the Name and IP address in the IP address field for the 08Node2 machine.
Check the Create associated pointer (PTR) record checkbox.
Press the Add Host button to add 08Node2 DNS record.
Press the Done button to close New Host dialog.
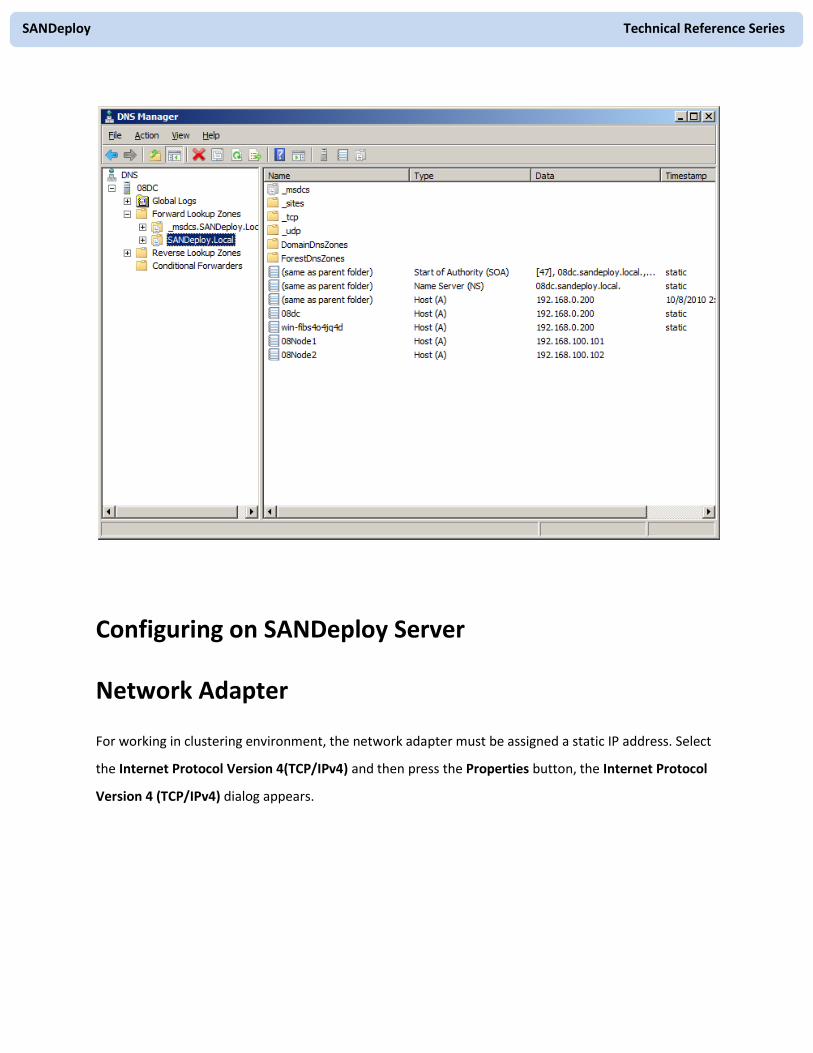
Now we will see the two records in the DNS Manager.
SANDeploy Technical Reference Series
Configuring on SANDeploy Server
Network Adapter
For working in clustering environment, the network adapter must be assigned a static IP address. Select
the Internet Protocol Version 4(TCP/IPv4) and then press the Properties button, the Internet Protocol
Version 4 (TCP/IPv4) dialog appears.

SANDeploy Technical Reference Series
Set the second network adapter of Domain Controller as shown in the figure. IP address is set as
192.168.100.3 and Subnet mask is set as 255.255.255.0.
Preparing Quorum Volume
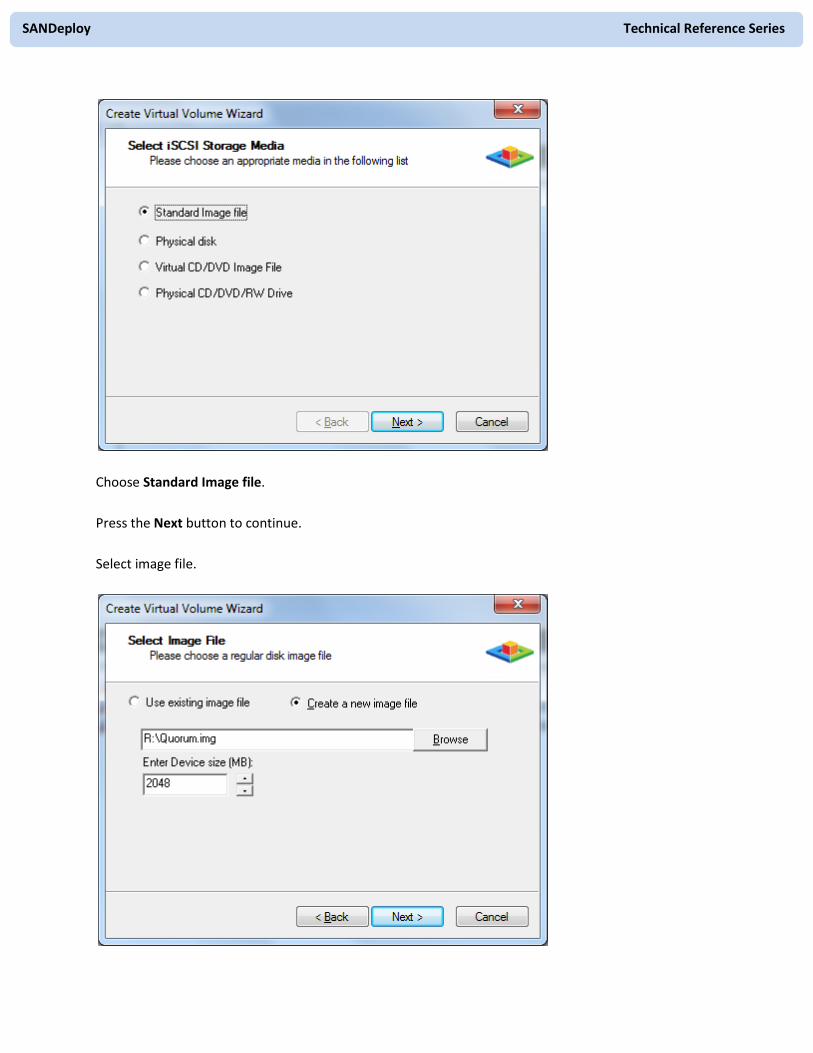
Click Start->Administrative Tools->SANDeploy Server (SANDeploy Boot Server) to launch the SANDeploy
management console, right click on the Virtual Volumes tree node, and then select the Create Virtual
Volume… menu item. the Create Virtual Volume Wizard appears.
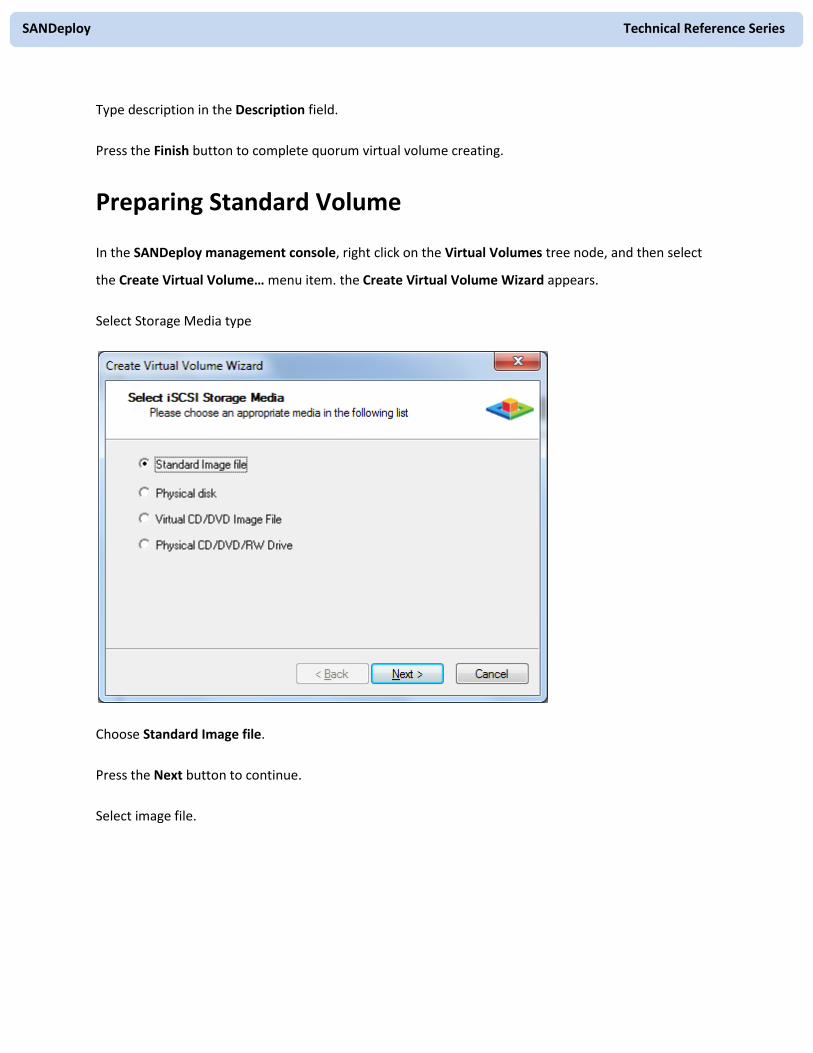
Select Storage Media type
SANDeploy Technical Reference Series
Choose Standard Image file.
Press the Next button to continue.
Select image file.
SANDeploy Technical Reference Series
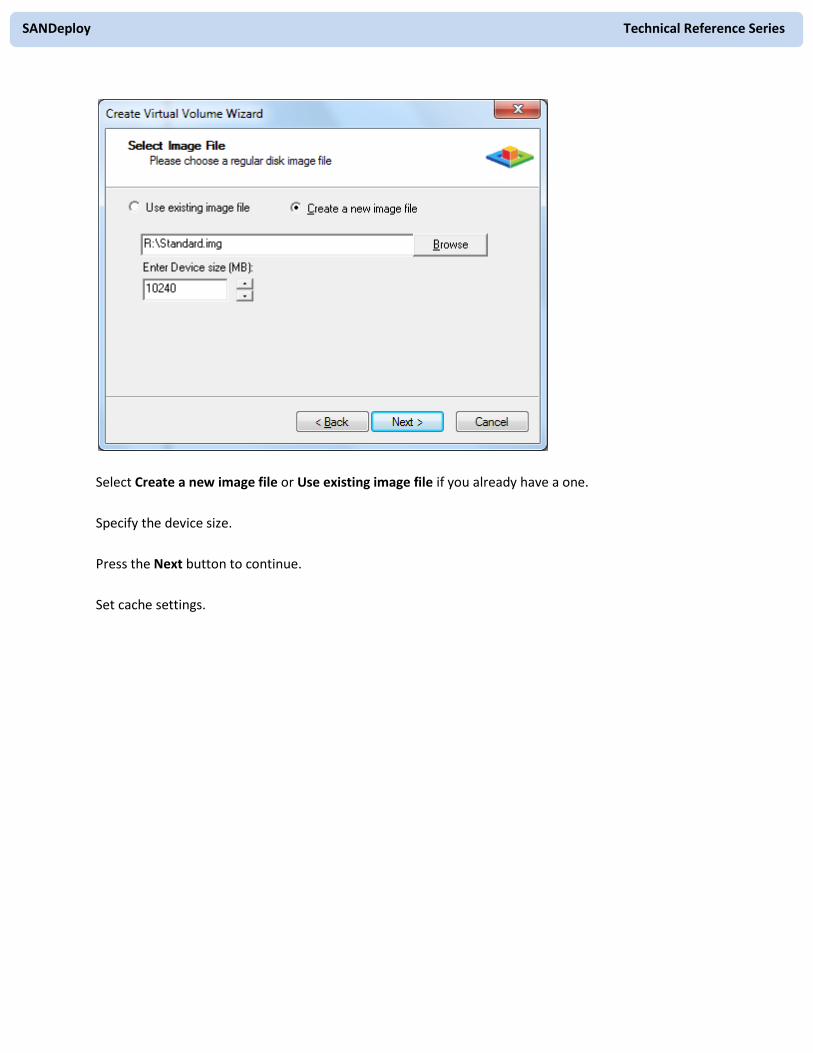
Select Create a new image file or Use existing image file if you already have a one.
Specify the device size.
Press the Next button to continue.
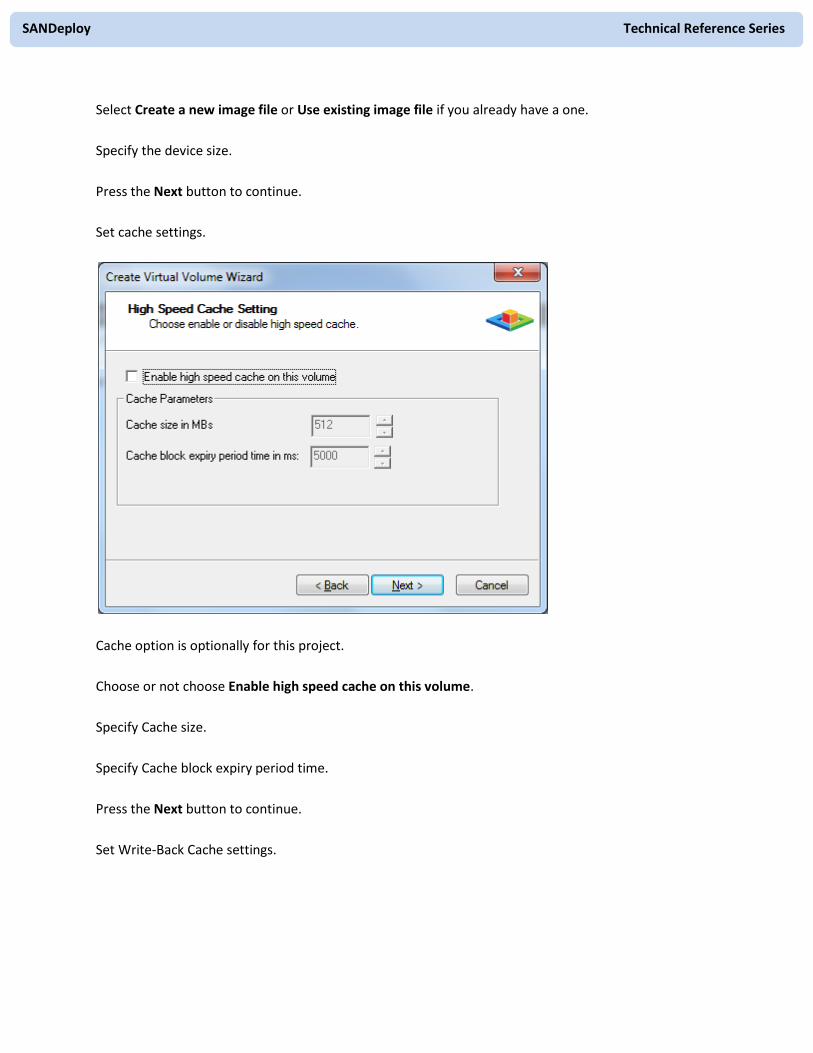
Set cache settings.
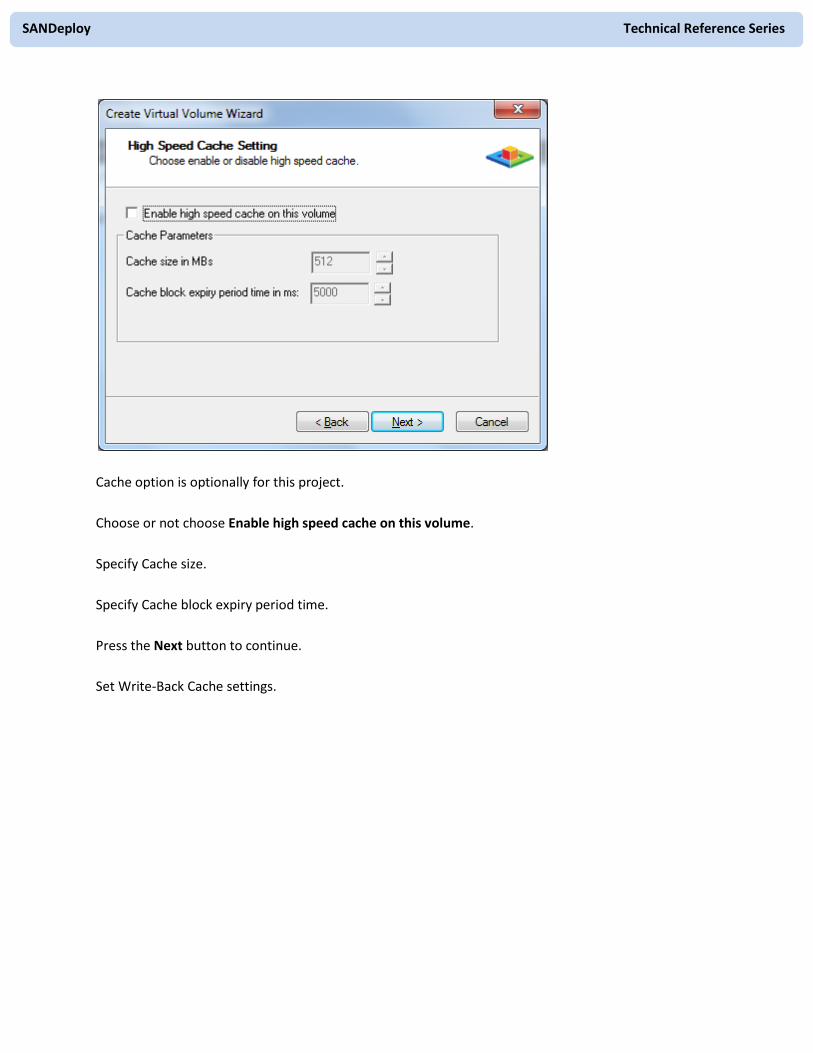
Cache option is optionally for this project.
Choose or not choose Enable high speed cache on this volume.
Specify Cache size.
Specify Cache block expiry period time.
Press the Next button to continue.
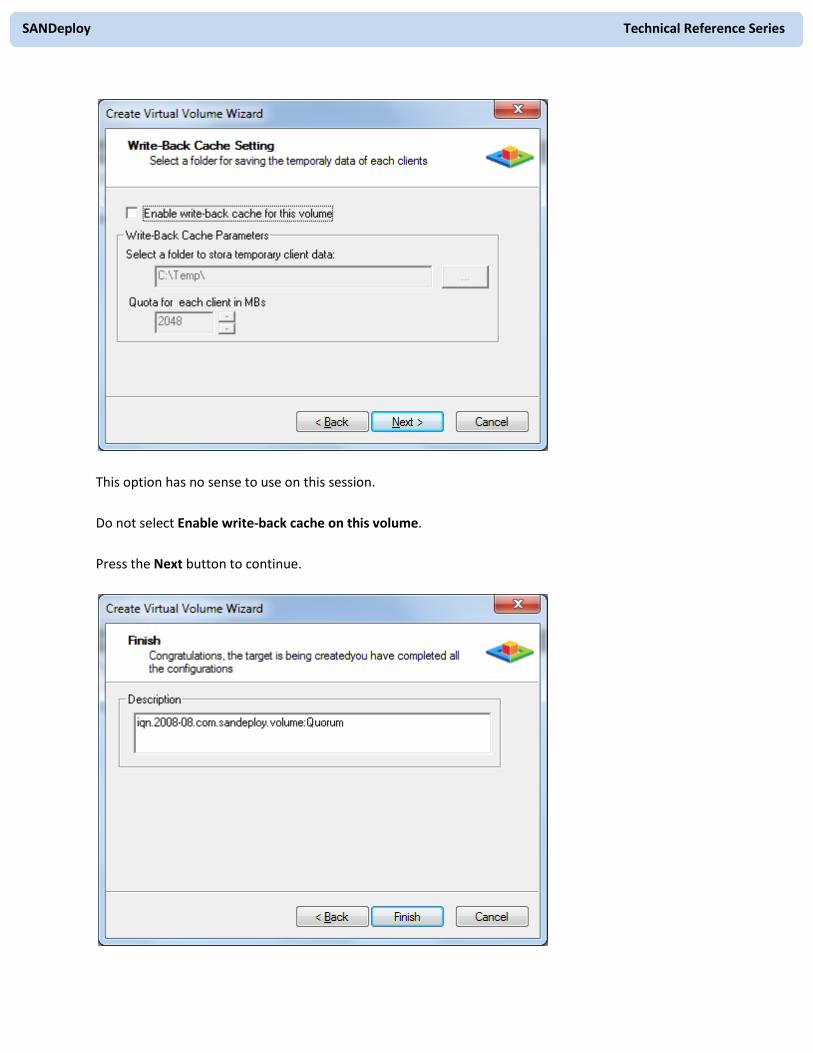
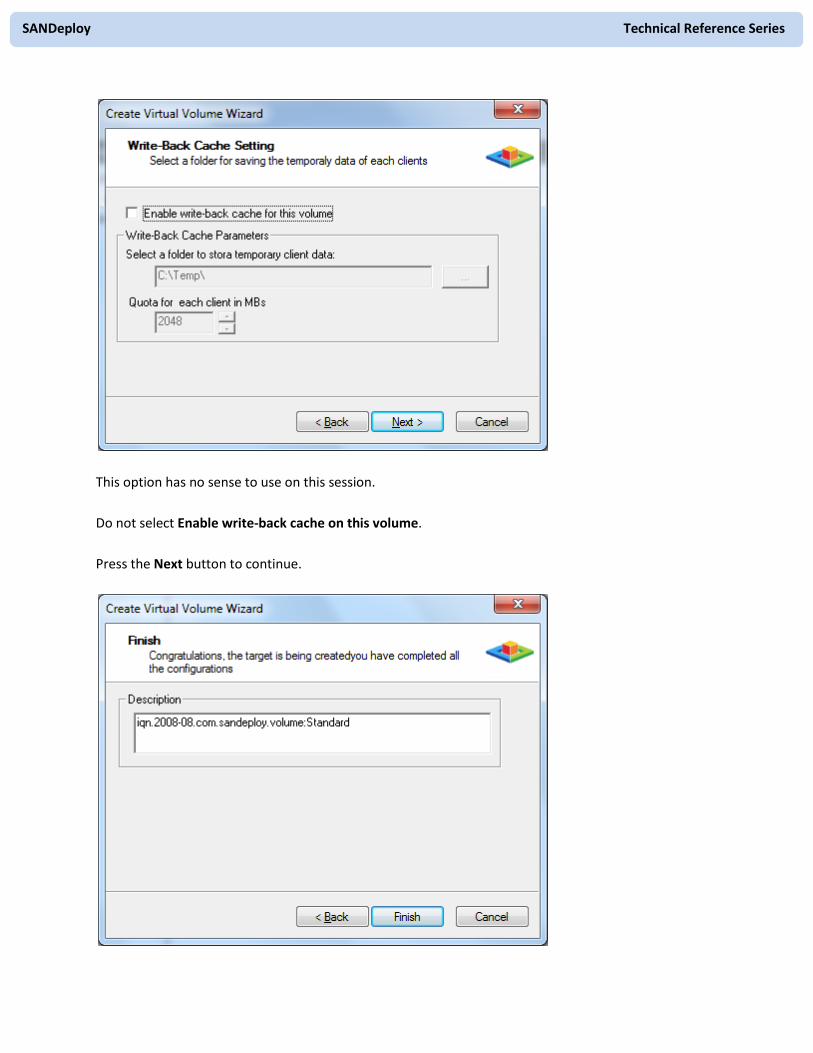
Set Write-Back Cache settings.
SANDeploy Technical Reference Series
This option has no sense to use on this session.
Do not select Enable write-back cache on this volume.
Press the Next button to continue.
SANDeploy Technical Reference Series
Type description in the Description field.
Press the Finish button to complete quorum virtual volume creating.
Preparing Standard Volume
In the SANDeploy management console, right click on the Virtual Volumes tree node, and then select
the Create Virtual Volume… menu item. the Create Virtual Volume Wizard appears.
Select Storage Media type
Choose Standard Image file.
Press the Next button to continue.
Select image file.
SANDeploy Technical Reference Series
Select Create a new image file or Use existing image file if you already have a one.
Specify the device size.
Press the Next button to continue.
Set cache settings.
SANDeploy Technical Reference Series
Cache option is optionally for this project.
Choose or not choose Enable high speed cache on this volume.
Specify Cache size.
Specify Cache block expiry period time.
Press the Next button to continue.
Set Write-Back Cache settings.
SANDeploy Technical Reference Series
This option has no sense to use on this session.
Do not select Enable write-back cache on this volume.
Press the Next button to continue.

SANDeploy Technical Reference Series
Type description in the Description field.
Press the Finish button to complete quorum virtual volume creating.
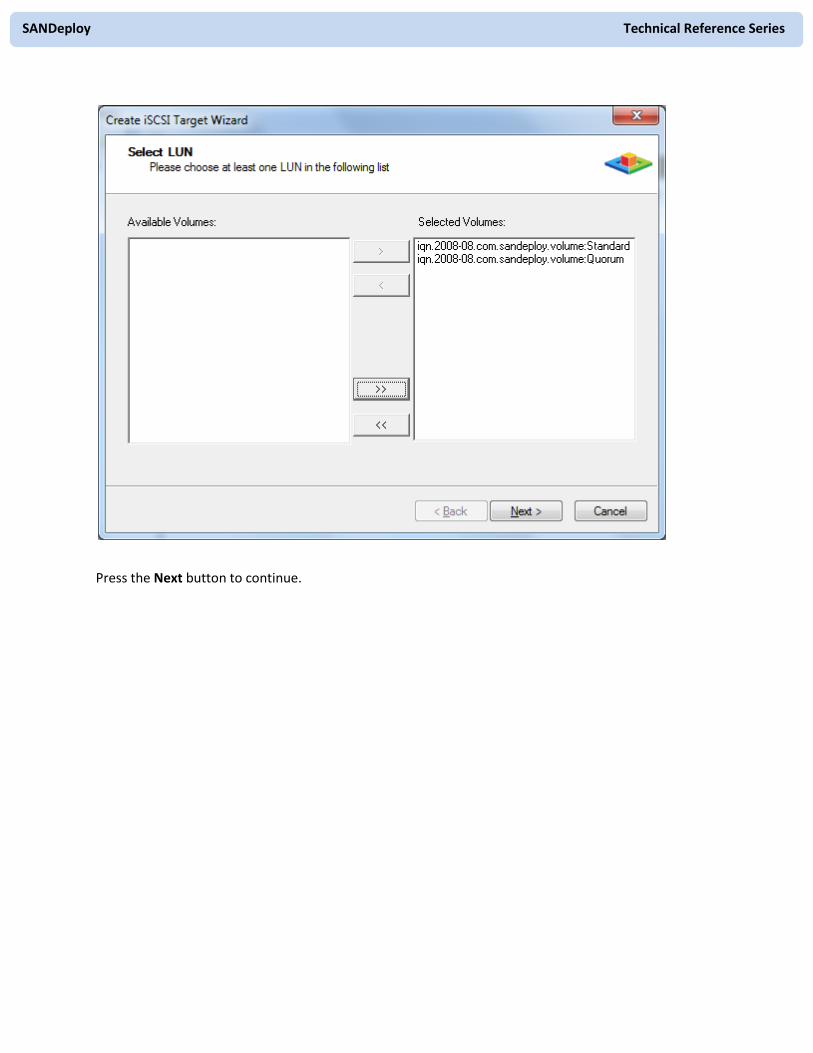
Preparing iSCSI Target
In the SANDeploy Management Console, right click on the iSCSI Targets node of left tree, then select
the Create Target… menu item. The Create iSCSI Target Wizard appears.
Select LUNs.
Select the two volumes that we just created a few minutes ago.
SANDeploy Technical Reference Series
Press the Next button to continue.
SANDeploy Technical Reference Series
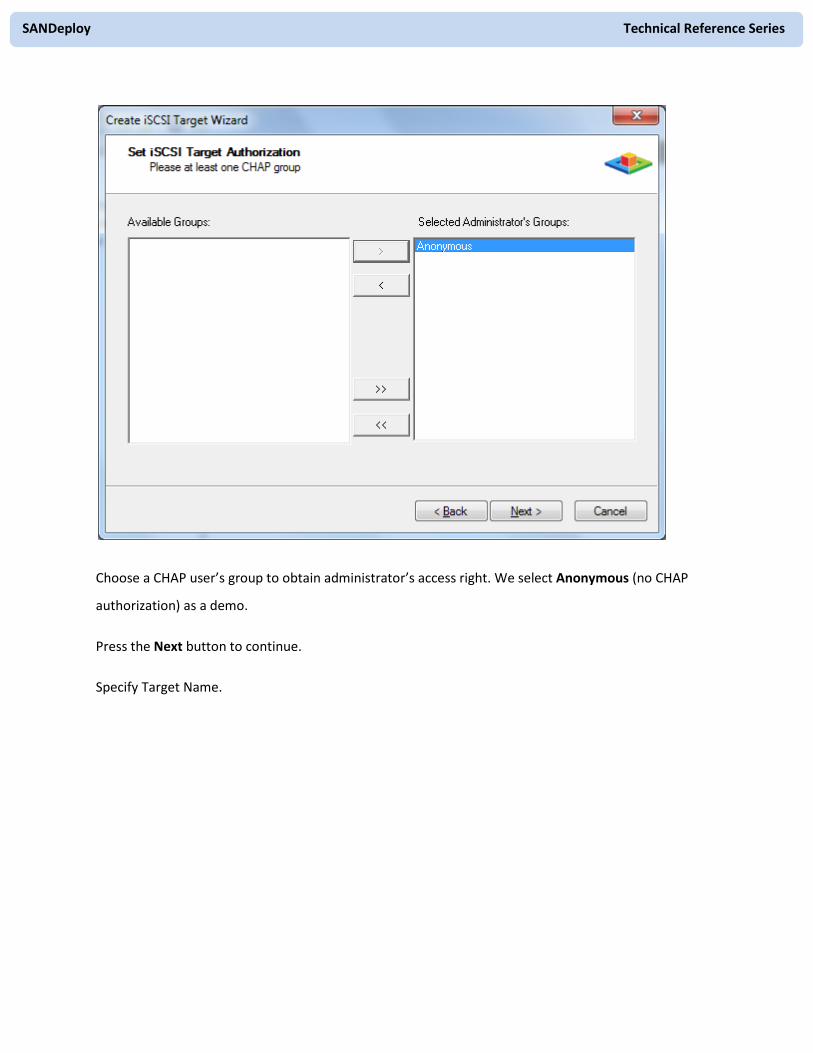
Choose a CHAP user’s group to obtain administrator’s access right. We select Anonymous (no CHAP
authorization) as a demo.
Press the Next button to continue.
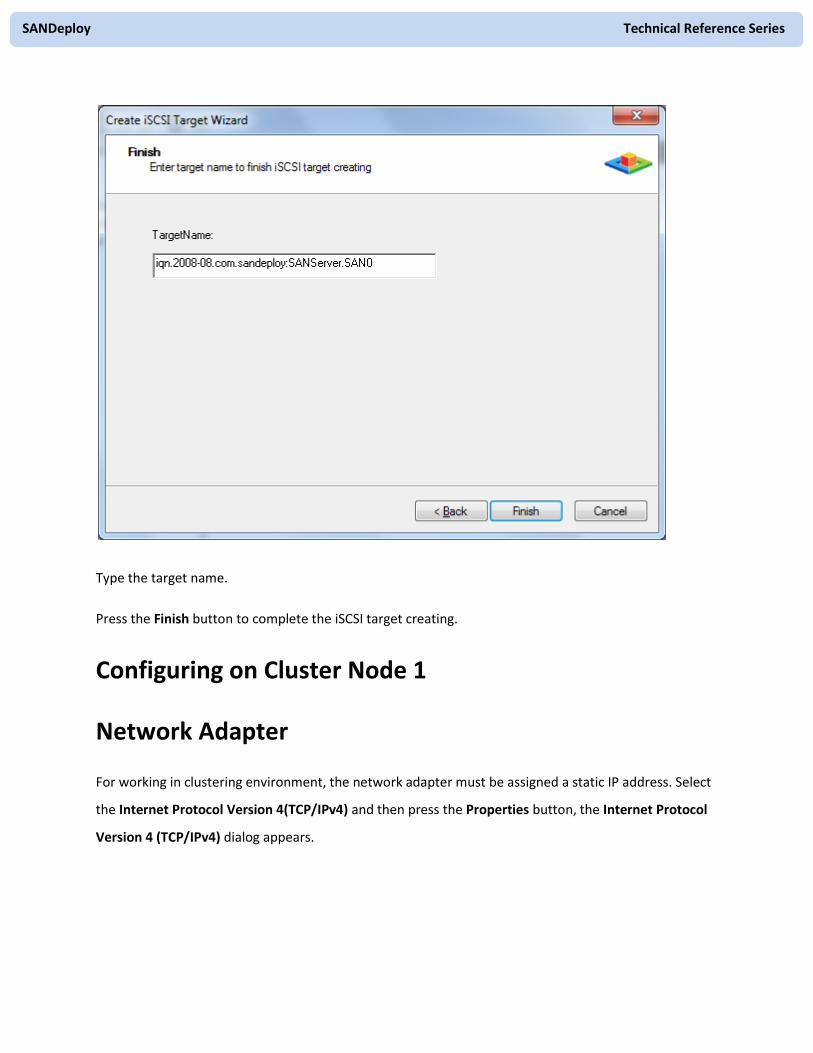
Specify Target Name.
SANDeploy Technical Reference Series
Type the target name.
Press the Finish button to complete the iSCSI target creating.
Configuring on Cluster Node 1
Network Adapter
For working in clustering environment, the network adapter must be assigned a static IP address. Select
the Internet Protocol Version 4(TCP/IPv4) and then press the Properties button, the Internet Protocol
Version 4 (TCP/IPv4) dialog appears.

SANDeploy Technical Reference Series
Type in the IP address, Subnet mask, Default gateway and Preferred NDS server.
Set the second network adapter of 08Node1.

SANDeploy Technical Reference Series
Type in the IP address and Subnet mask.
Press the OK button to change IP address.
Join to the domain
Press the OK button to change IP address.
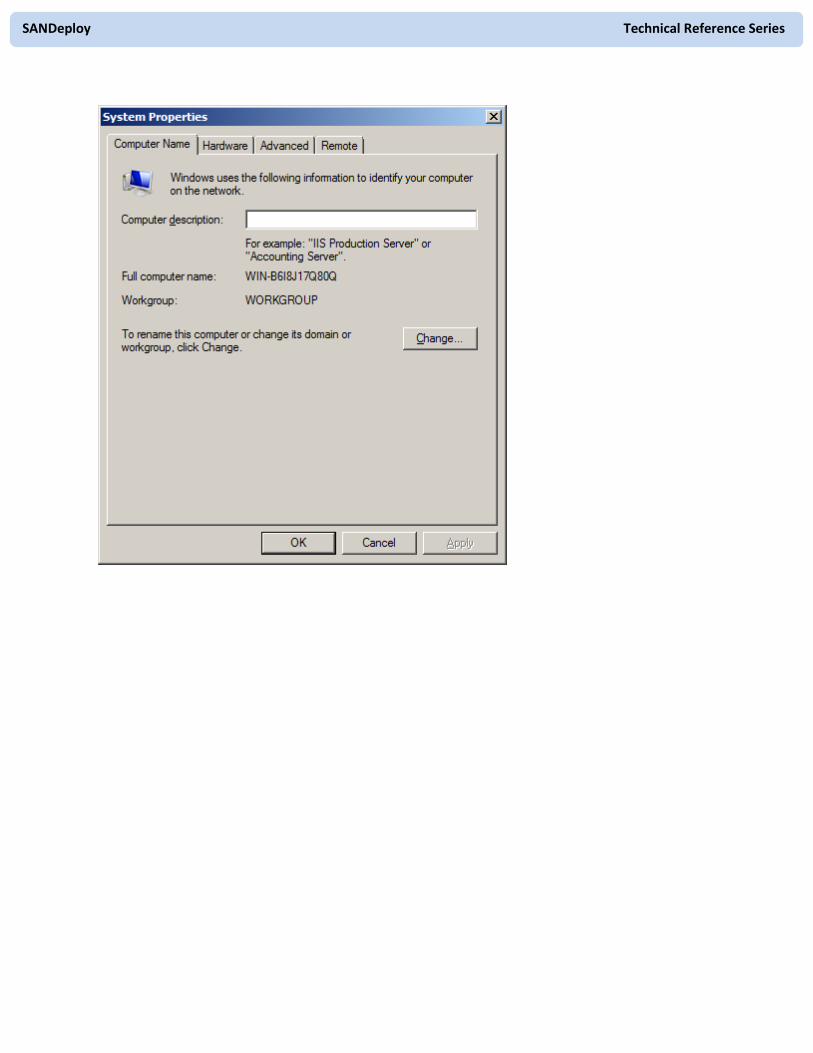
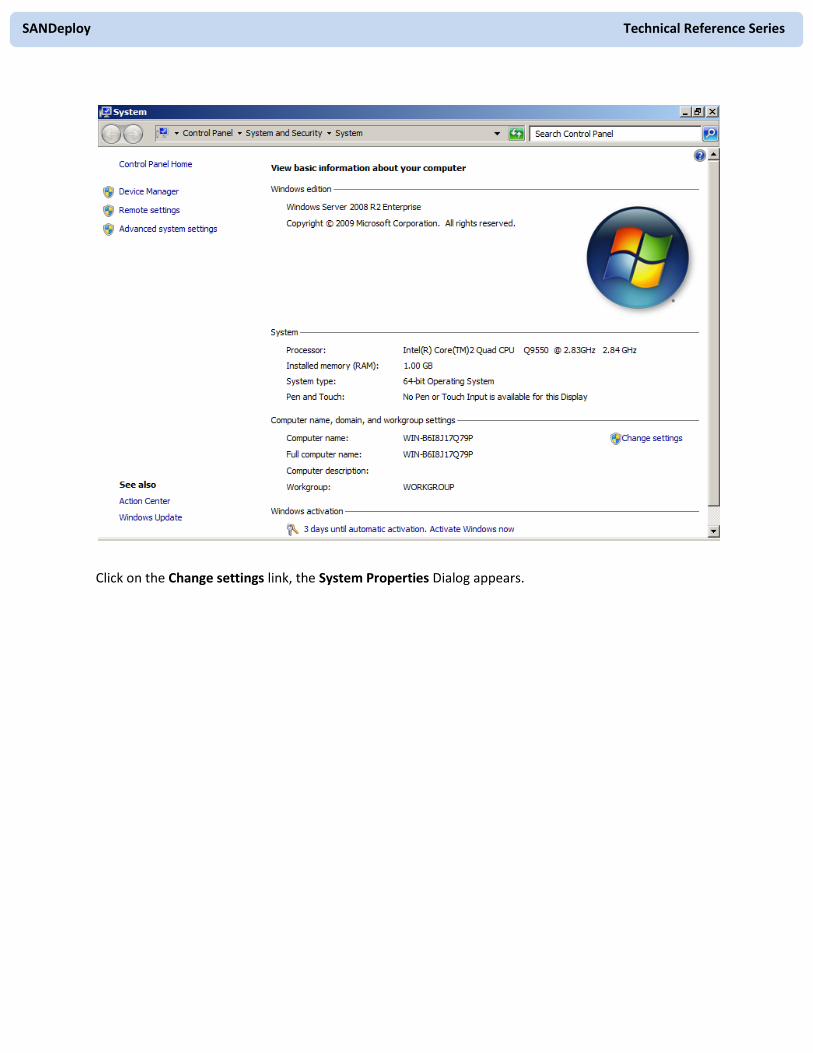
Open System Properties page.

SANDeploy Technical Reference Series
Click on the Change settings link, the System Properties Dialog appears.
SANDeploy Technical Reference Series
SANDeploy Technical Reference Series
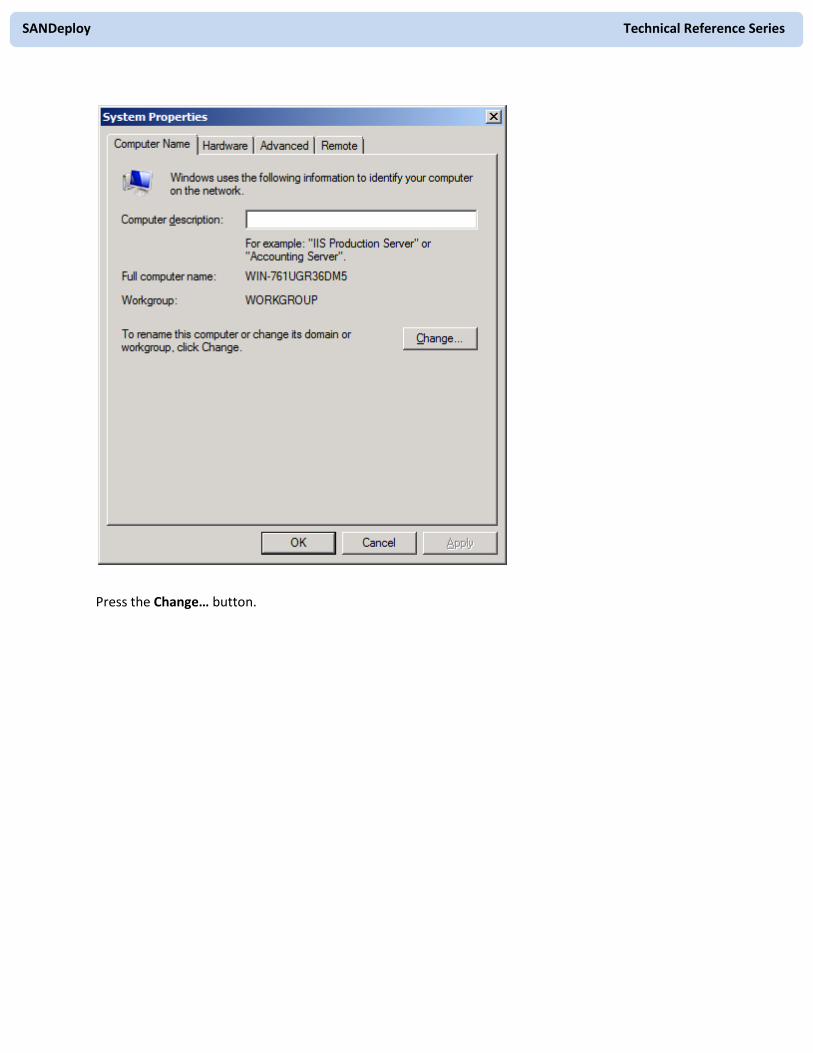
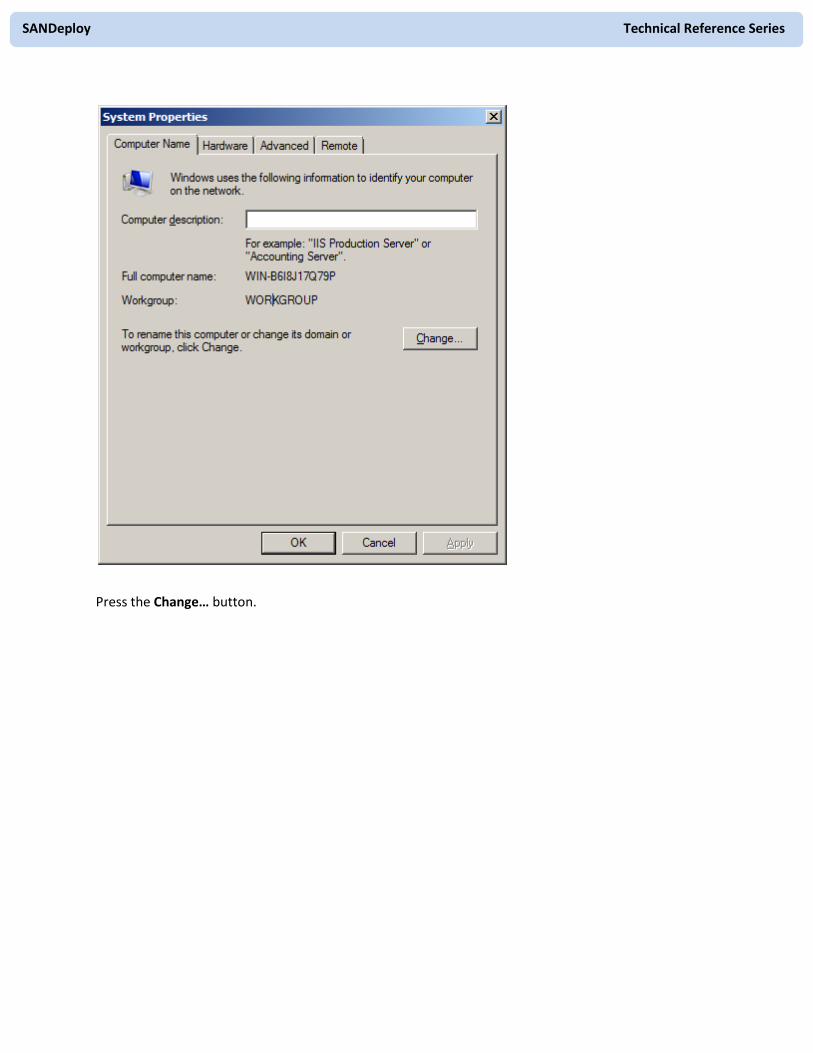
Press the Change… button.
SANDeploy Technical Reference Series
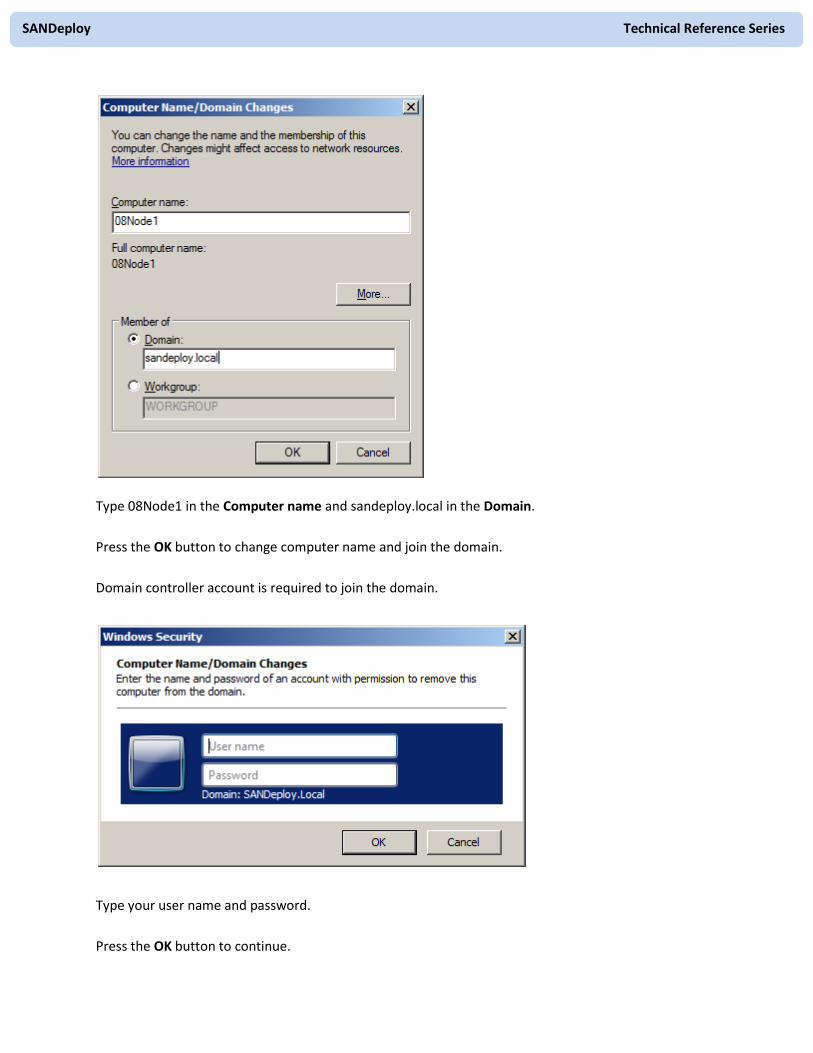
Type 08Node1 in the Computer name and sandeploy.local in the Domain.
Press the OK button to change computer name and join the domain.
Domain controller account is required to join the domain.
Type your user name and password.
Press the OK button to continue.

SANDeploy Technical Reference Series
If successful, the Computer Name/Domain Changes notification dialog is shown as below.
Press the OK button to continue.
Restart is required.
Press the Restart Now button to restart the computer.
Log in to iSCSI disks
Lunch the Administrative Tools -> Microsoft iSCSI initiator.

SANDeploy Technical Reference Series
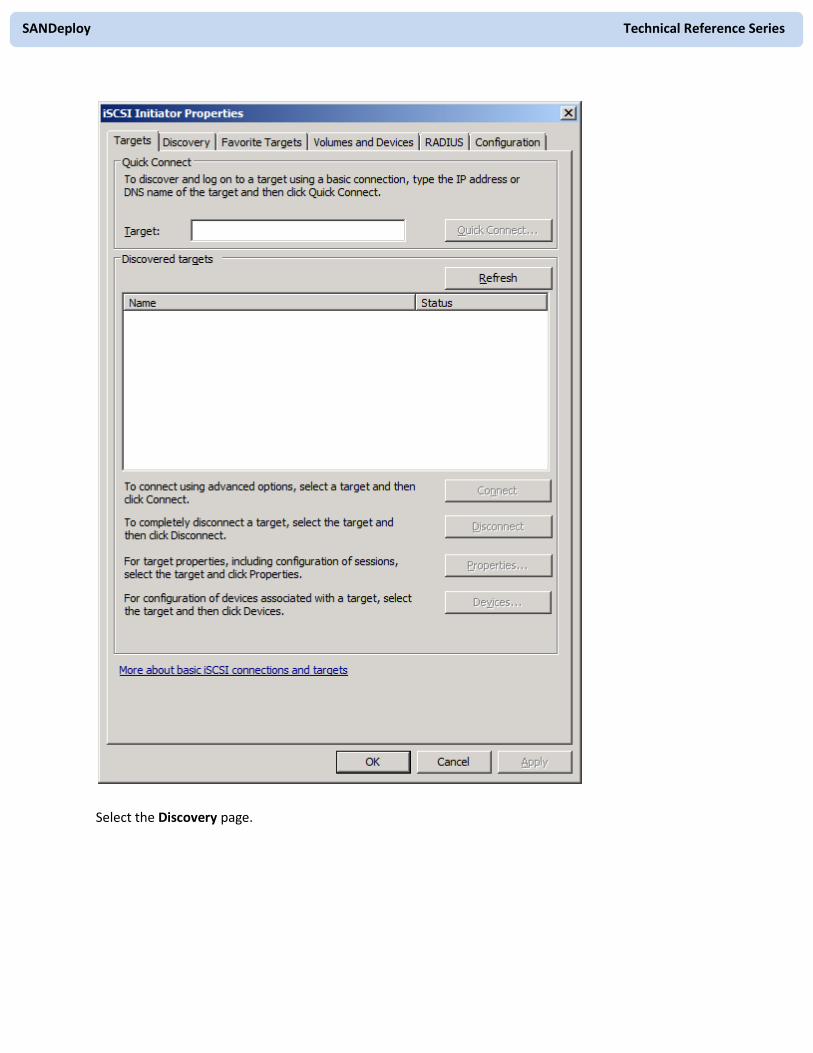
Select the Discovery page.
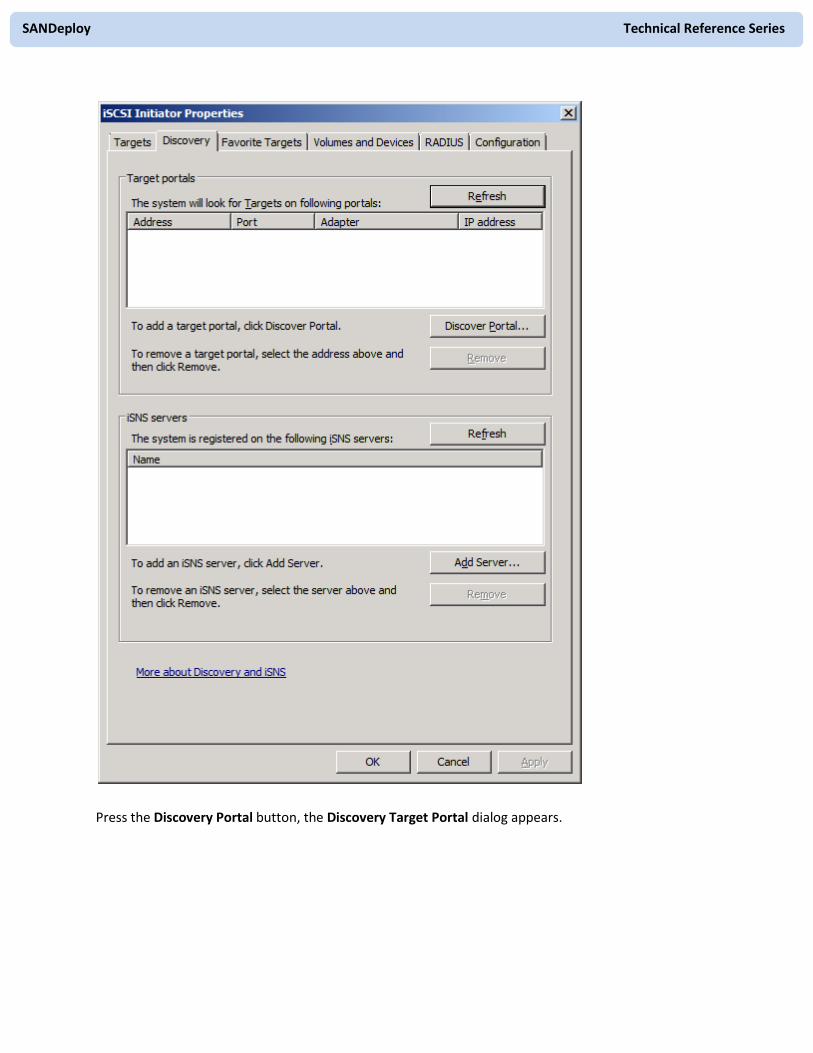
SANDeploy Technical Reference Series
Press the Discovery Portal button, the Discovery Target Portal dialog appears.
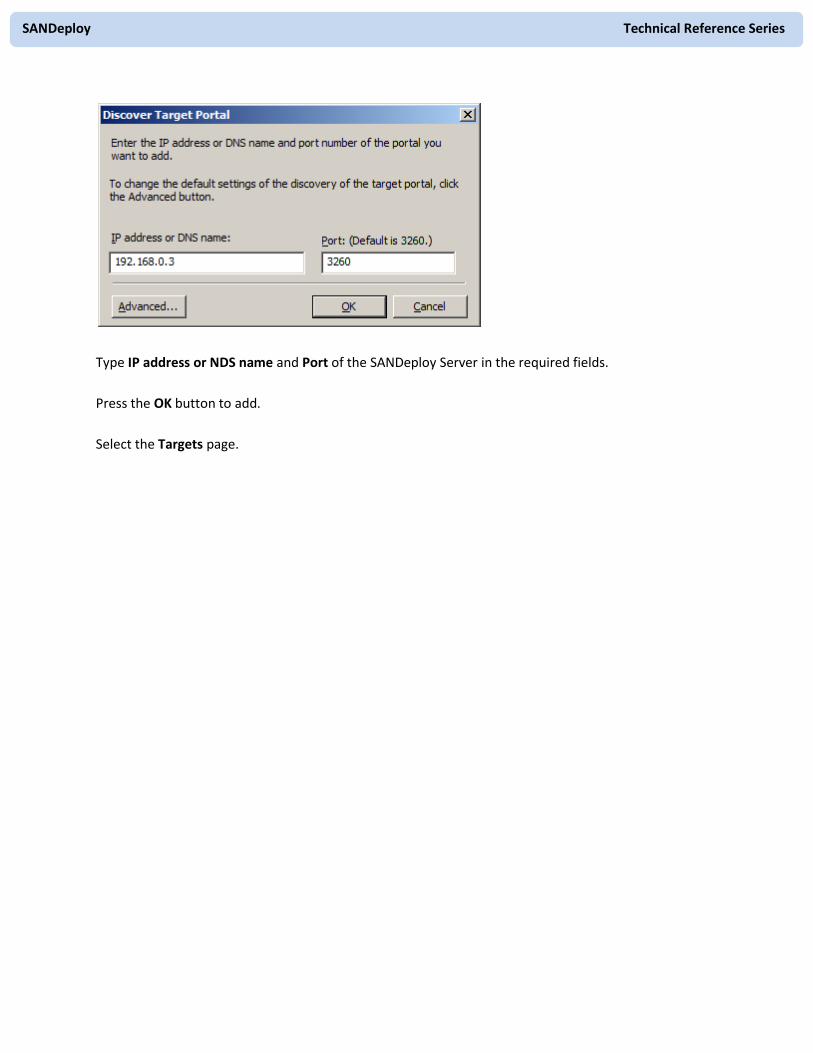
SANDeploy Technical Reference Series
Type IP address or NDS name and Port of the SANDeploy Server in the required fields.
Press the OK button to add.
Select the Targets page.
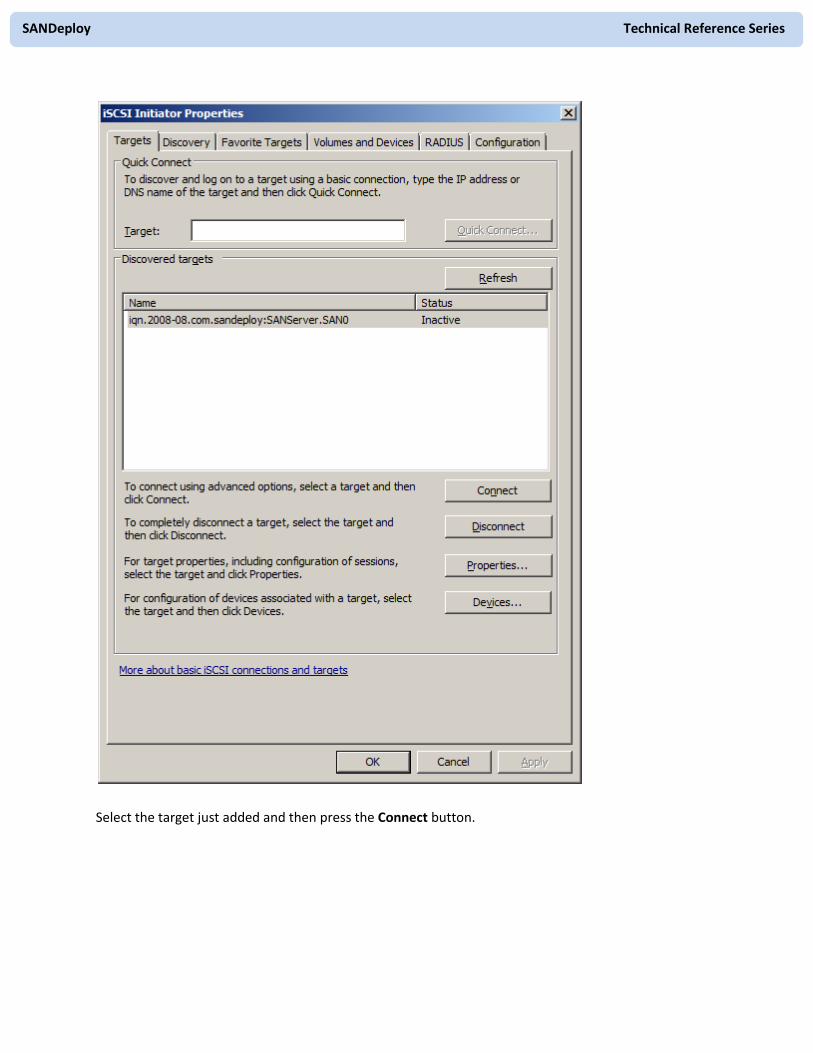
SANDeploy Technical Reference Series
Select the target just added and then press the Connect button.

SANDeploy Technical Reference Series
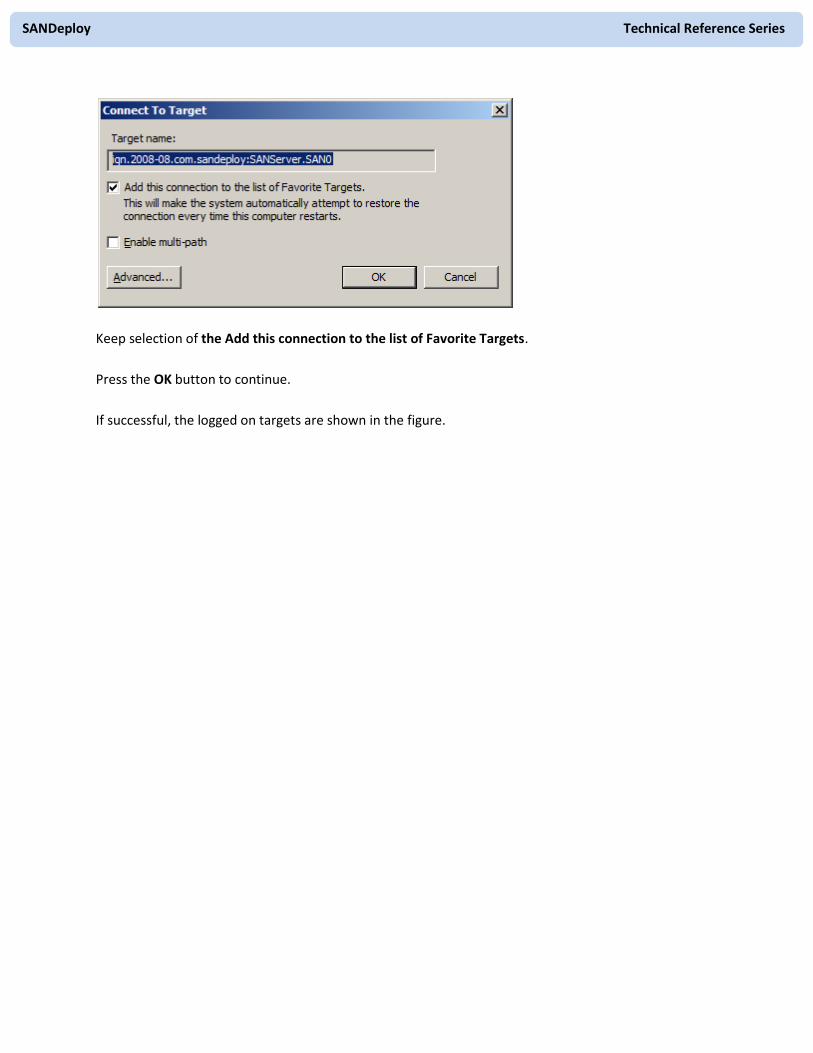
Keep selection of the Add this connection to the list of Favorite Targets.
Press the OK button to continue.
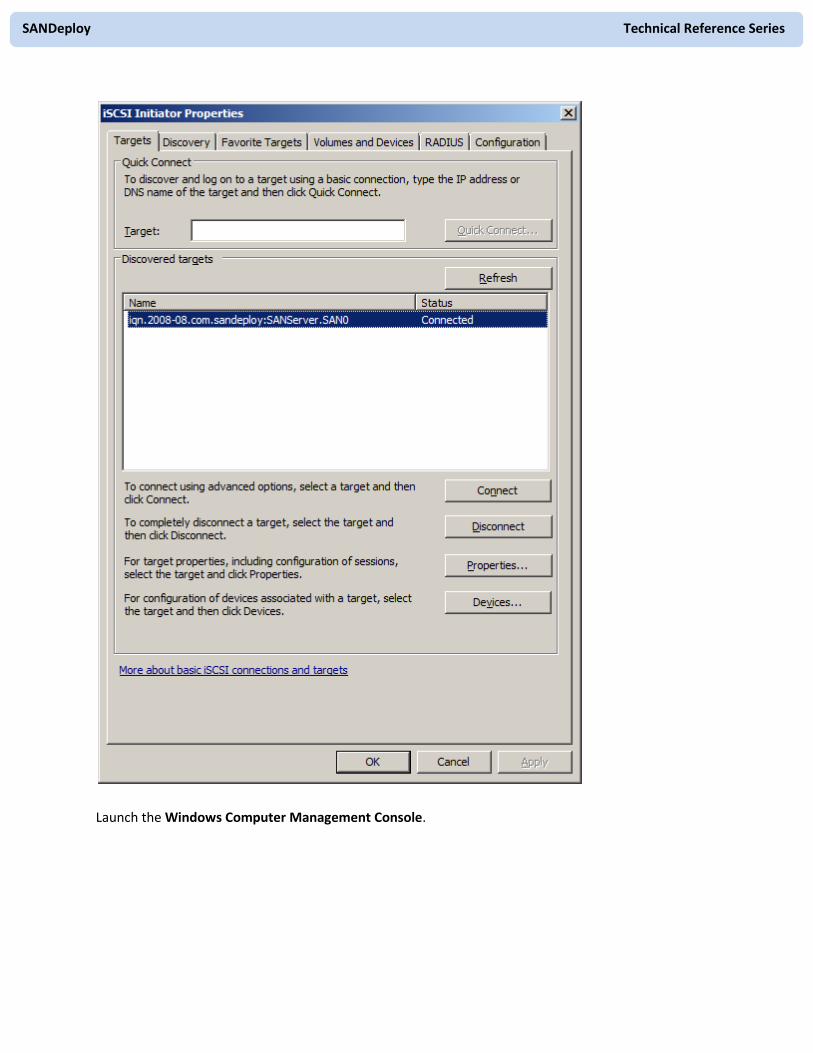
If successful, the logged on targets are shown in the figure.
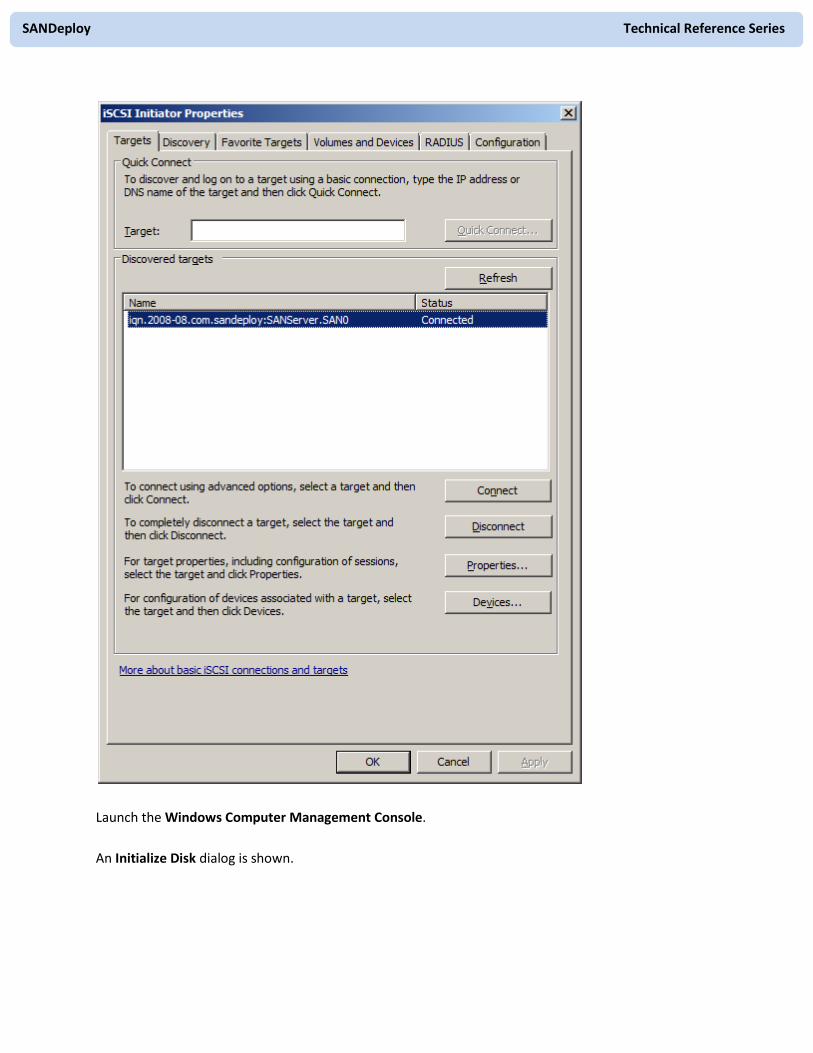
SANDeploy Technical Reference Series
Launch the Windows Computer Management Console.
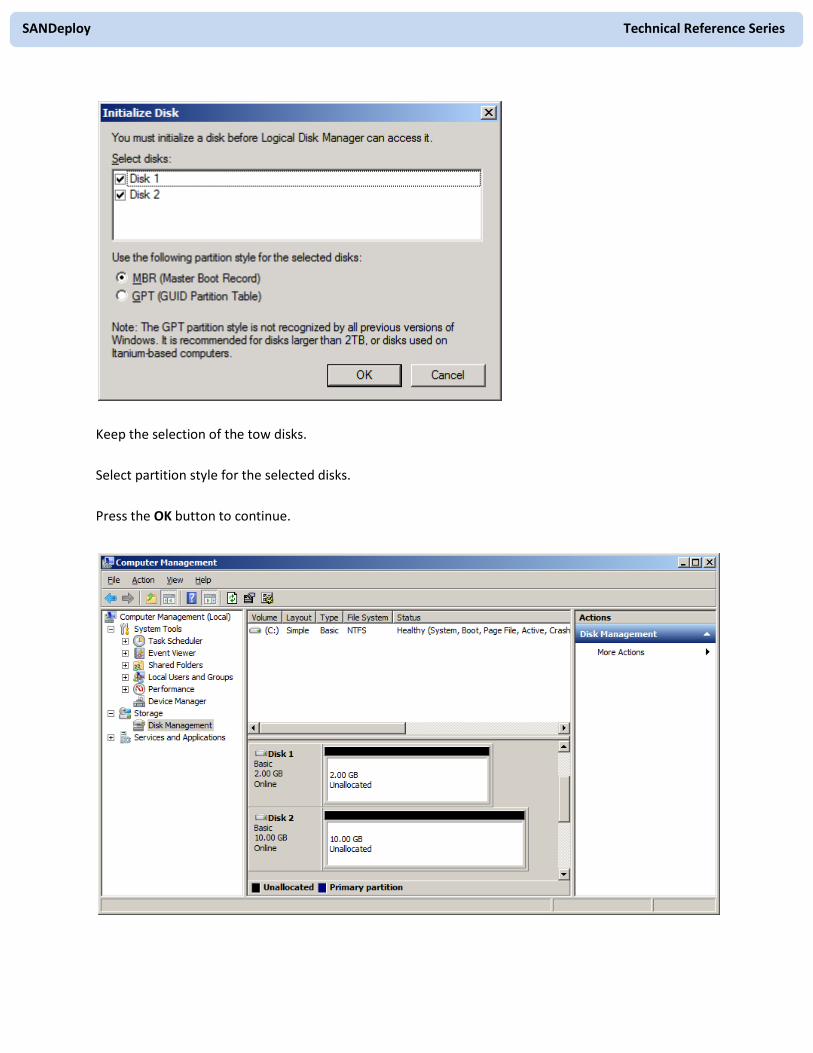
An Initialize Disk dialog is shown.
SANDeploy Technical Reference Series
Keep the selection of the tow disks.
Select partition style for the selected disks.
Press the OK button to continue.
SANDeploy Technical Reference Series
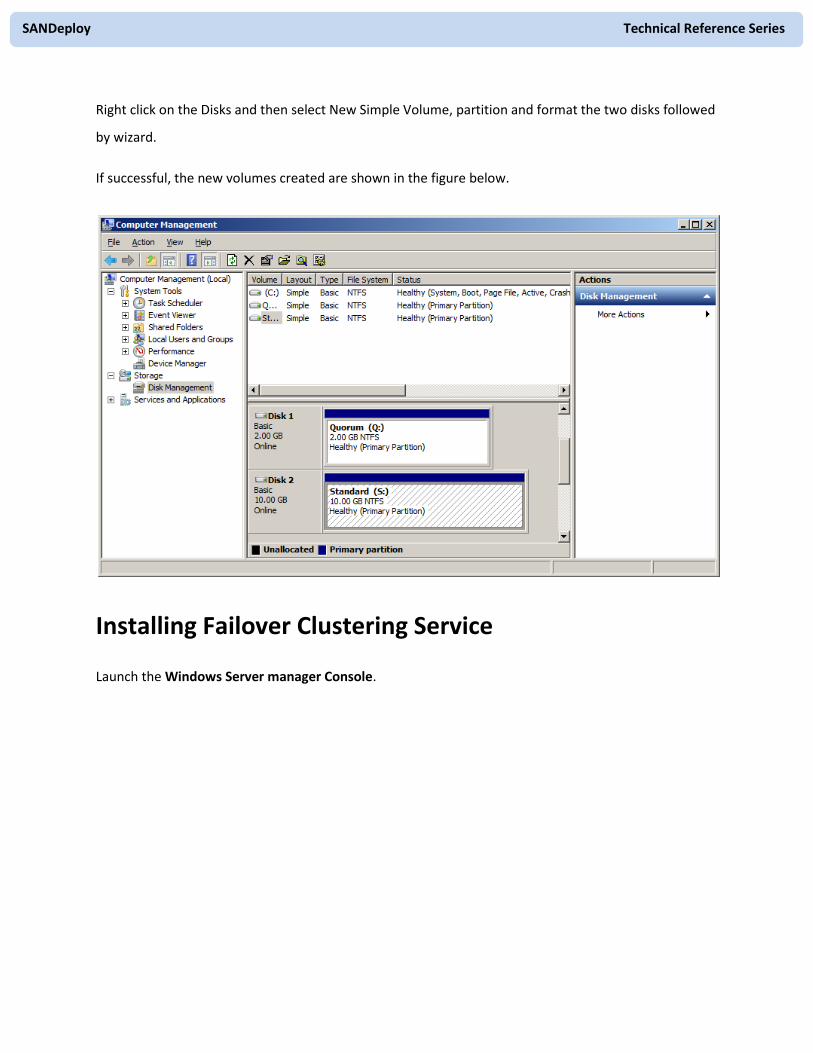
Right click on the Disks and then select New Simple Volume, partition and format the two disks followed
by wizard.
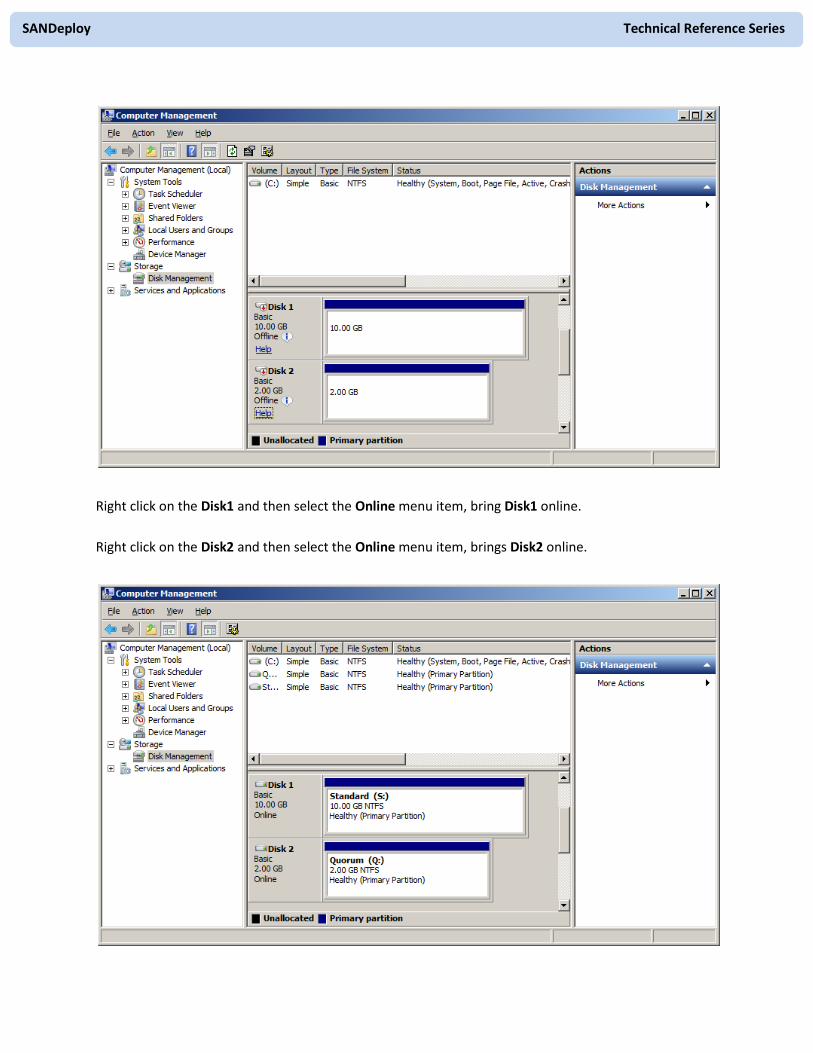
If successful, the new volumes created are shown in the figure below.
Installing Failover Clustering Service
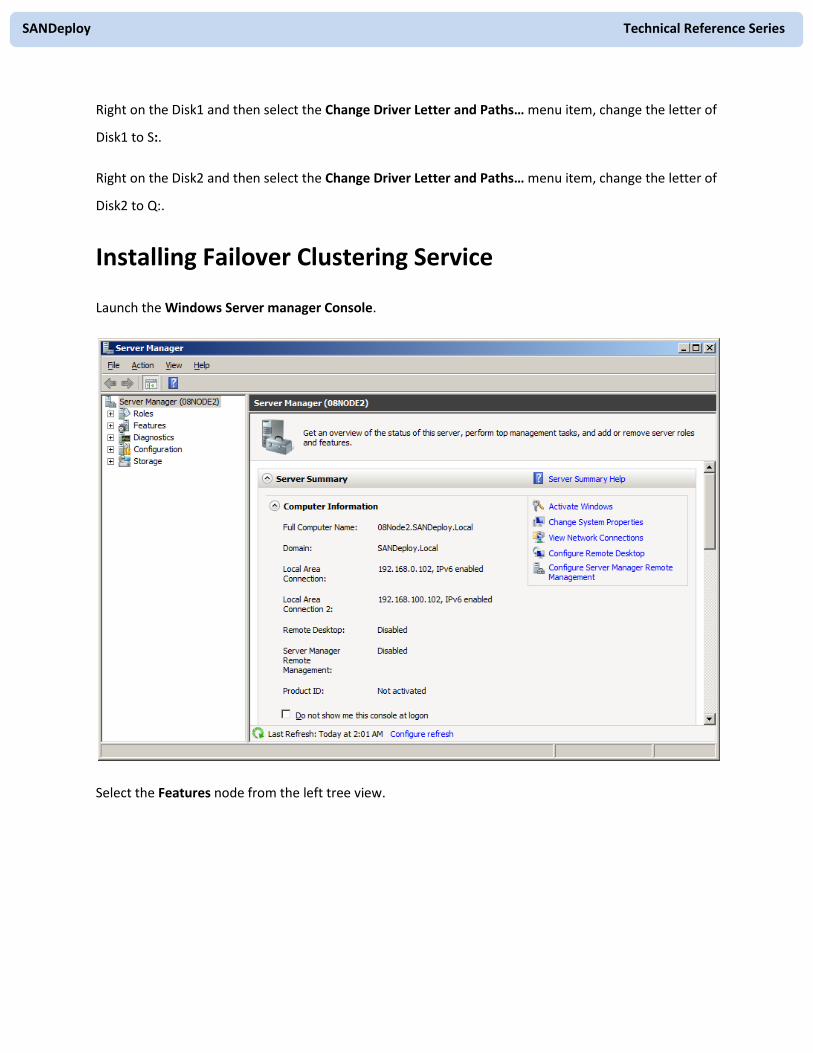
Launch the Windows Server manager Console.

SANDeploy Technical Reference Series
Select the Features node from the left tree view.
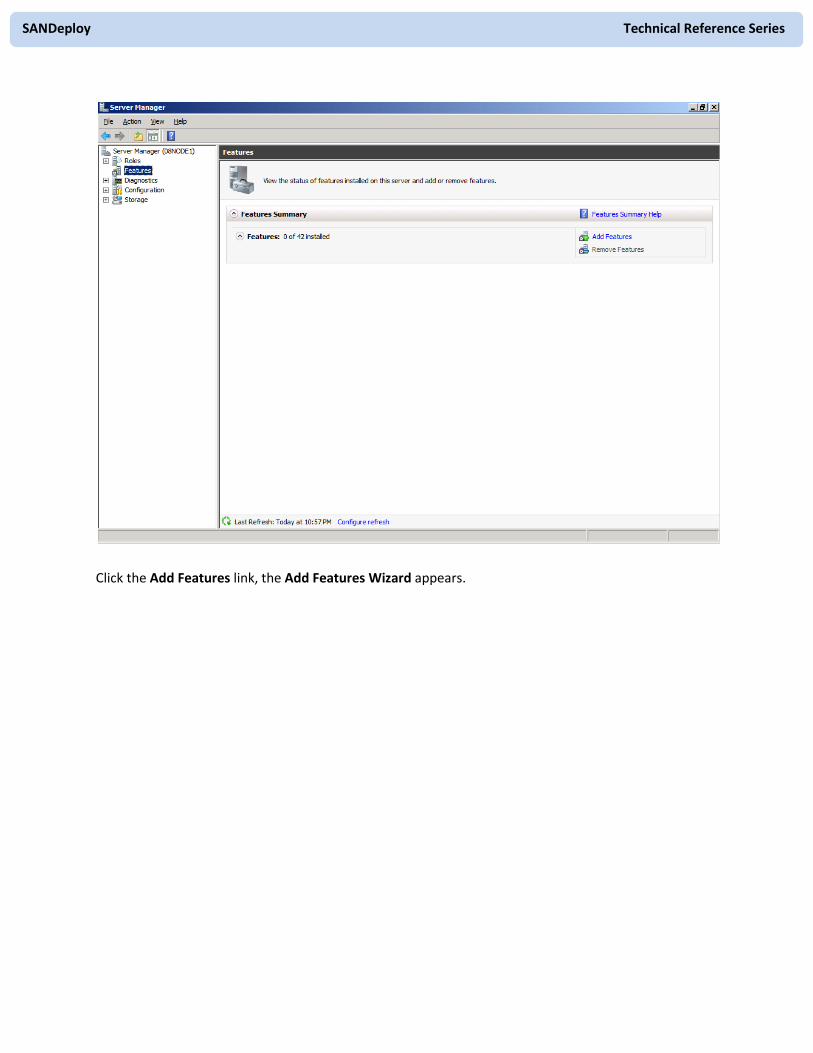
SANDeploy Technical Reference Series
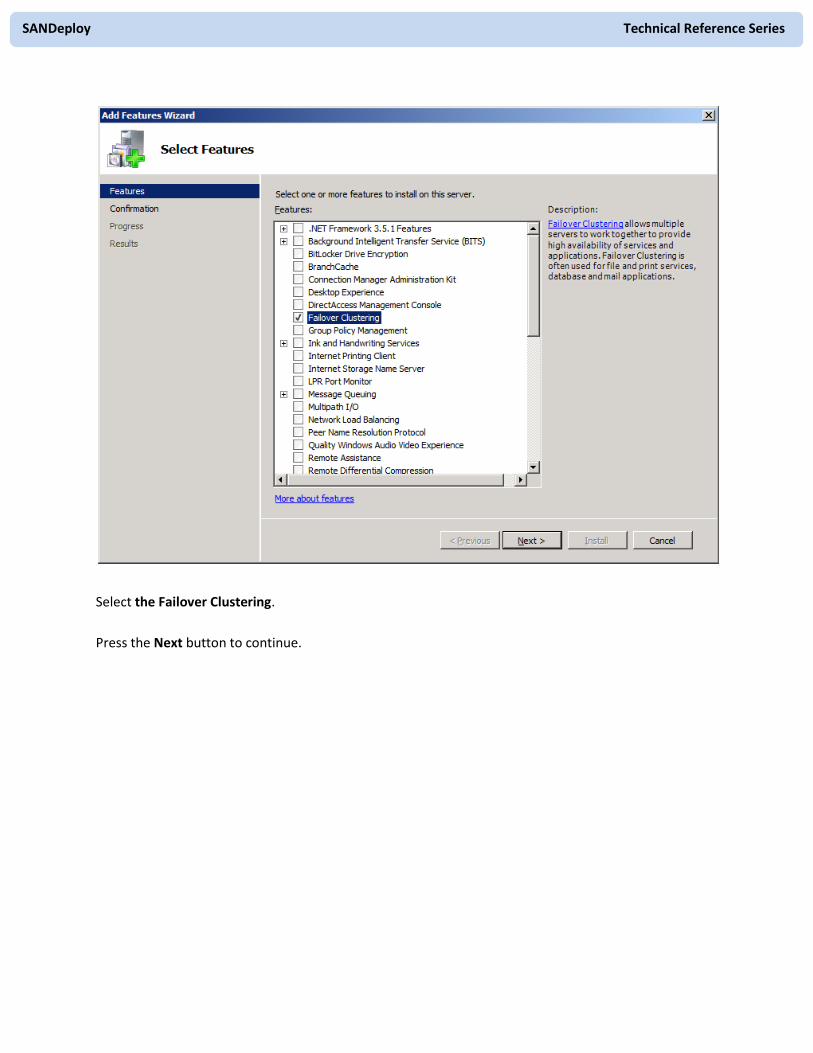
Click the Add Features link, the Add Features Wizard appears.
SANDeploy Technical Reference Series
Select the Failover Clustering.
Press the Next button to continue.
SANDeploy Technical Reference Series
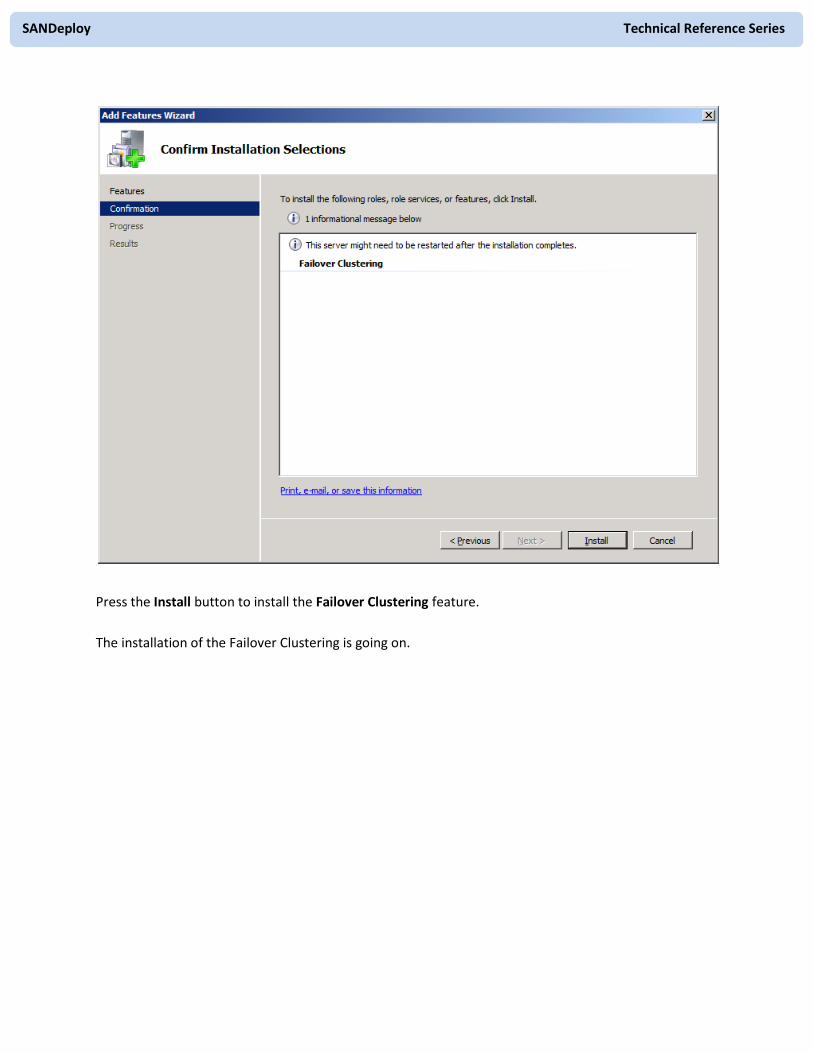
Press the Install button to install the Failover Clustering feature.
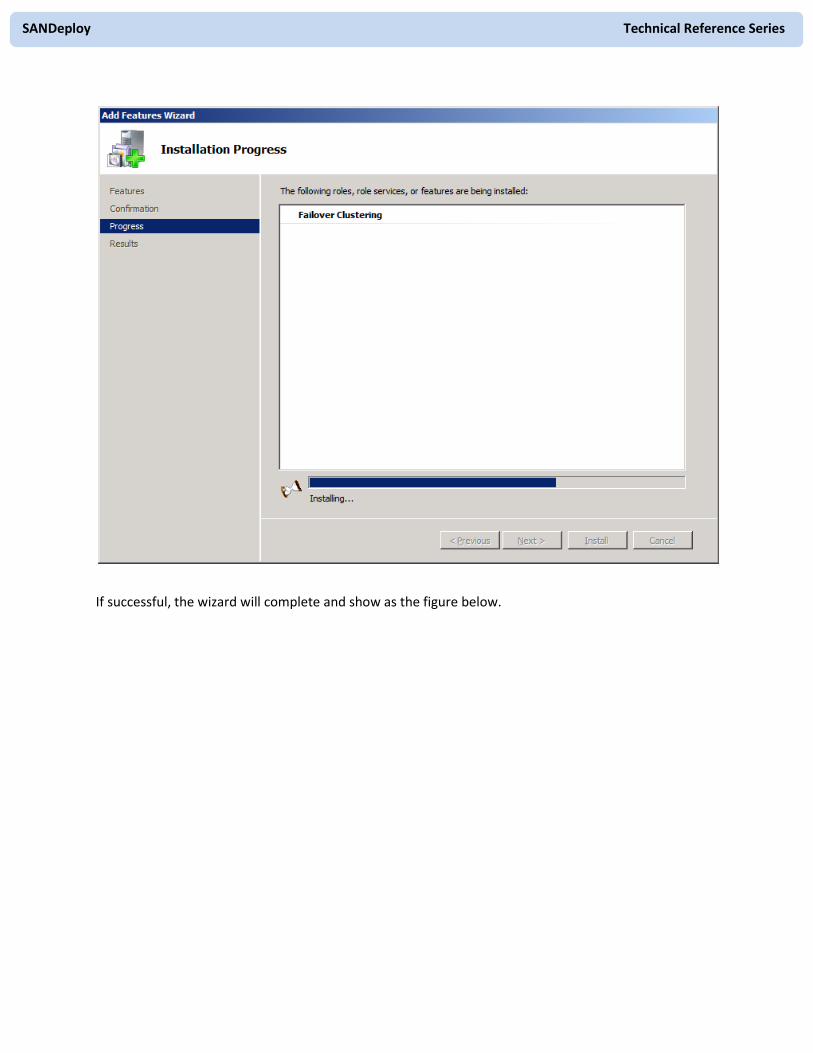
The installation of the Failover Clustering is going on.
SANDeploy Technical Reference Series
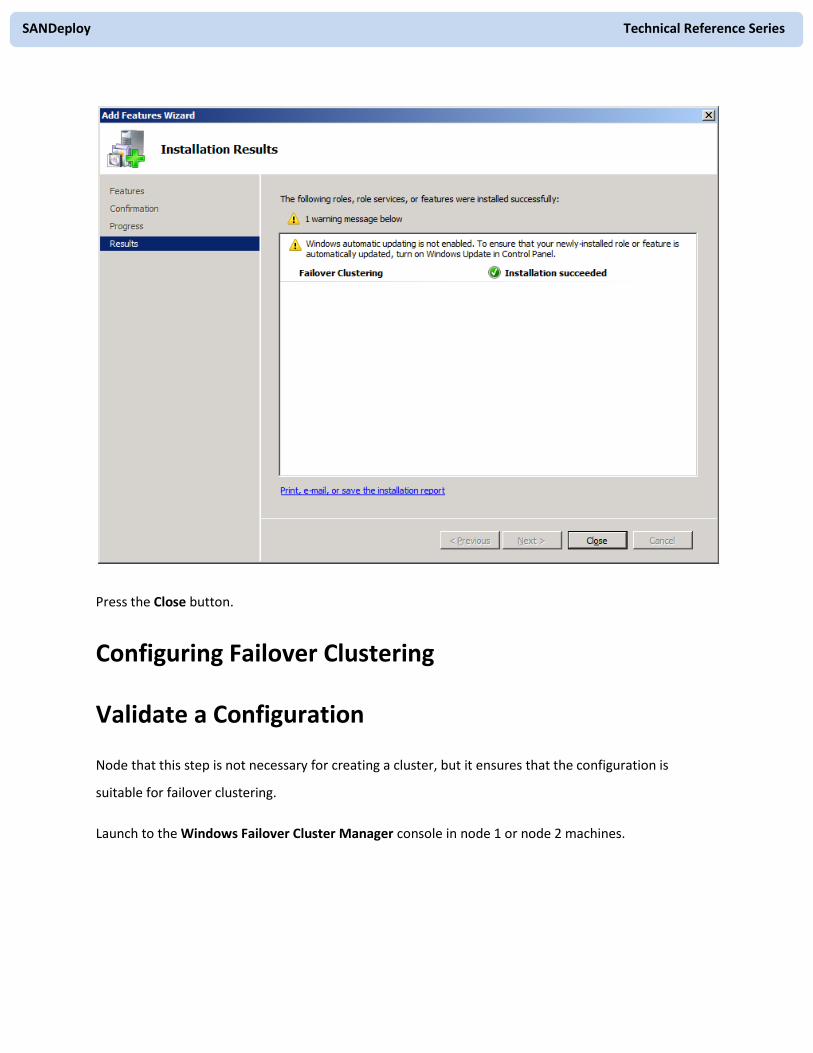
If successful, the wizard will complete and show as the figure below.
SANDeploy Technical Reference Series
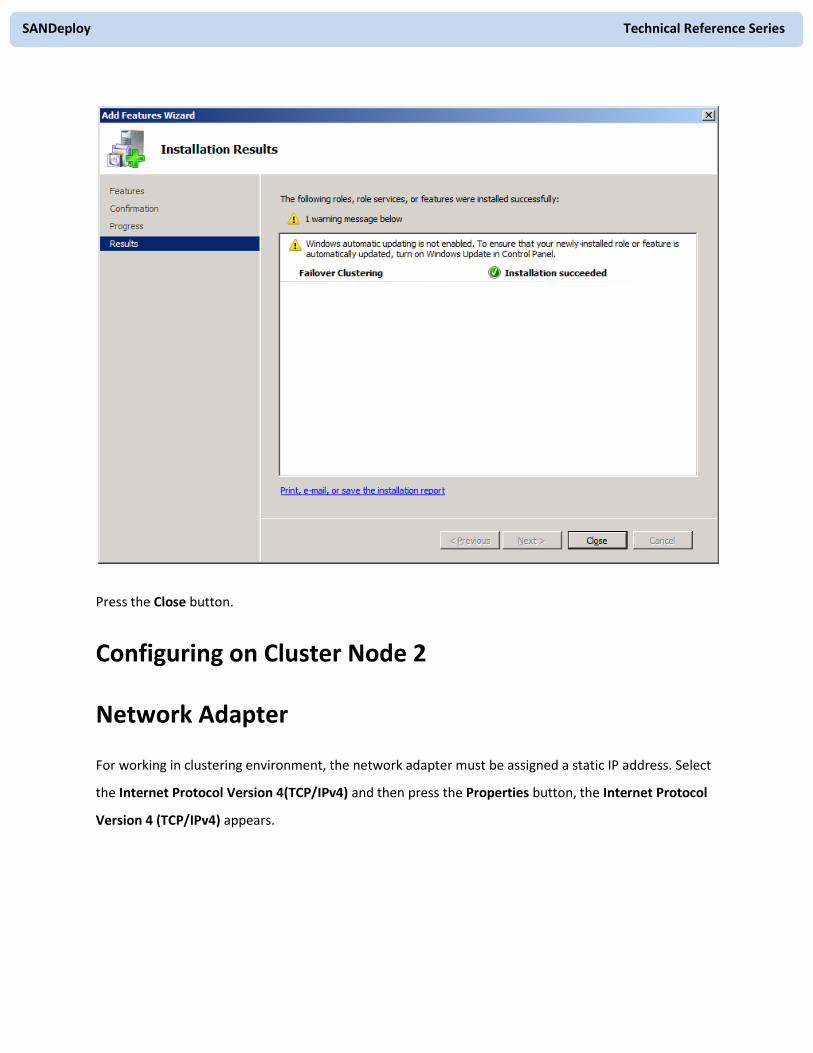
Press the Close button.
Configuring on Cluster Node 2
Network Adapter
For working in clustering environment, the network adapter must be assigned a static IP address. Select
the Internet Protocol Version 4(TCP/IPv4) and then press the Properties button, the Internet Protocol
Version 4 (TCP/IPv4) appears.
SANDeploy Technical Reference Series
Type in the IP address, Subnet mask, Default gateway and Preferred NDS server.
Set the second network adapter of 08Node2.
SANDeploy Technical Reference Series
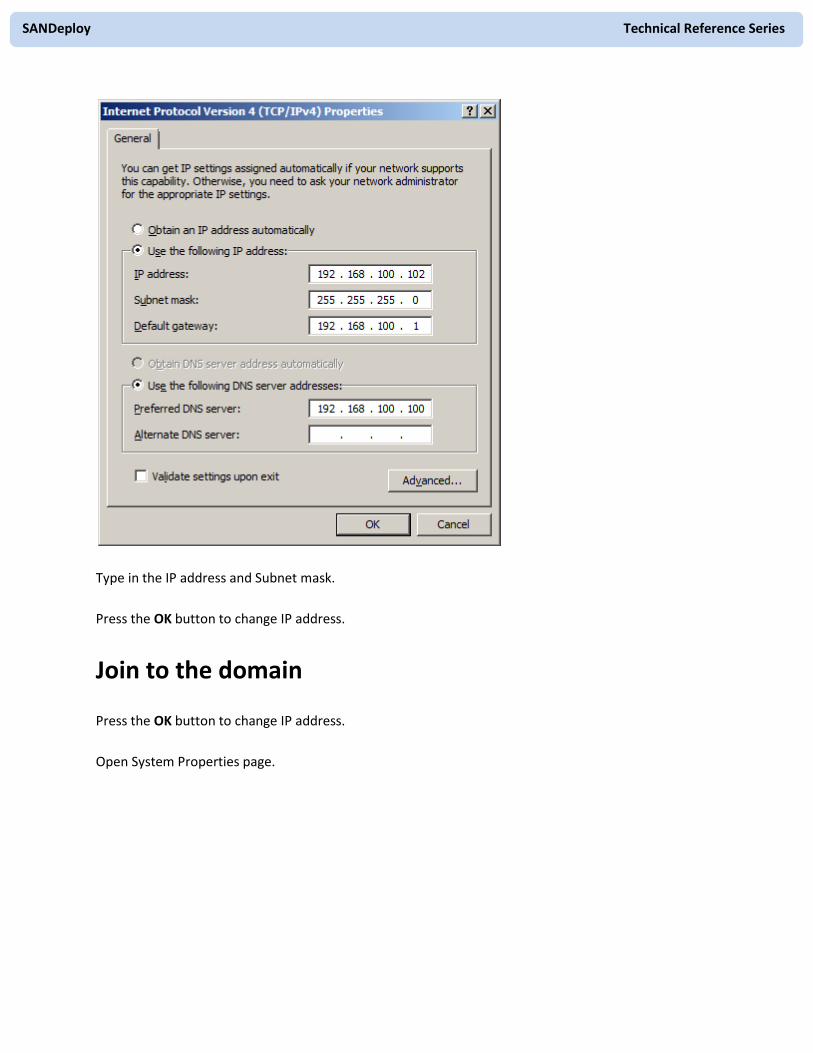
Type in the IP address and Subnet mask.
Press the OK button to change IP address.
Join to the domain
Press the OK button to change IP address.
Open System Properties page.
SANDeploy Technical Reference Series
Click on the Change settings link, the System Properties Dialog appears.
SANDeploy Technical Reference Series
Press the Change… button.

SANDeploy Technical Reference Series
Type 08Node2 in the Computer name and sandeploy.local in the Domain.
Press the OK button to change computer name and join the domain.
Domain controller account is required to join the domain.
Type your user name and password.
Press the OK button to continue.

SANDeploy Technical Reference Series
If successful, the Computer Name/Domain Changes notification dialog is shown as below.
Press the OK button to continue.
Restart is required.
Press the Restart Now button to restart the computer.
Log in to iSCSI disks
Lunch the Administrative Tools -> Microsoft iSCSI initiator.
SANDeploy Technical Reference Series
Select the Discovery page.

SANDeploy Technical Reference Series
Press the Discovery Portal button, the Discovery Target Portal dialog is shown.

SANDeploy Technical Reference Series
Type IP address or NDS name and Port of the SANDeploy Server in the required fields.
Press the OK button to add.
Select the Targets page.

SANDeploy Technical Reference Series
Select the targets just added and then press the Connect button.
SANDeploy Technical Reference Series
Keep selection of the Add this connection to the list of Favorite Targets.
Press the OK button to continue.
If successful, the logged on targets are shown in the figure.
SANDeploy Technical Reference Series
Launch the Windows Computer Management Console.
SANDeploy Technical Reference Series
Right click on the Disk1 and then select the Online menu item, bring Disk1 online.
Right click on the Disk2 and then select the Online menu item, brings Disk2 online.
SANDeploy Technical Reference Series
Right on the Disk1 and then select the Change Driver Letter and Paths… menu item, change the letter of
Disk1 to S:.
Right on the Disk2 and then select the Change Driver Letter and Paths… menu item, change the letter of
Disk2 to Q:.
Installing Failover Clustering Service
Launch the Windows Server manager Console.
Select the Features node from the left tree view.

SANDeploy Technical Reference Series
Click the Add Features link, the Add Features Wizard is shown.

SANDeploy Technical Reference Series
Select the Failover Clustering.
Press the Next button to continue.

SANDeploy Technical Reference Series
Press the Install button to install the Failover Clustering feature.
The installation of the Failover Clustering is going on.

SANDeploy Technical Reference Series
If successful, the wizard will complete and show as the figure below.
SANDeploy Technical Reference Series
Press the Close button.
Configuring Failover Clustering
Validate a Configuration
Node that this step is not necessary for creating a cluster, but it ensures that the configuration is
suitable for failover clustering.
Launch to the Windows Failover Cluster Manager console in node 1 or node 2 machines.
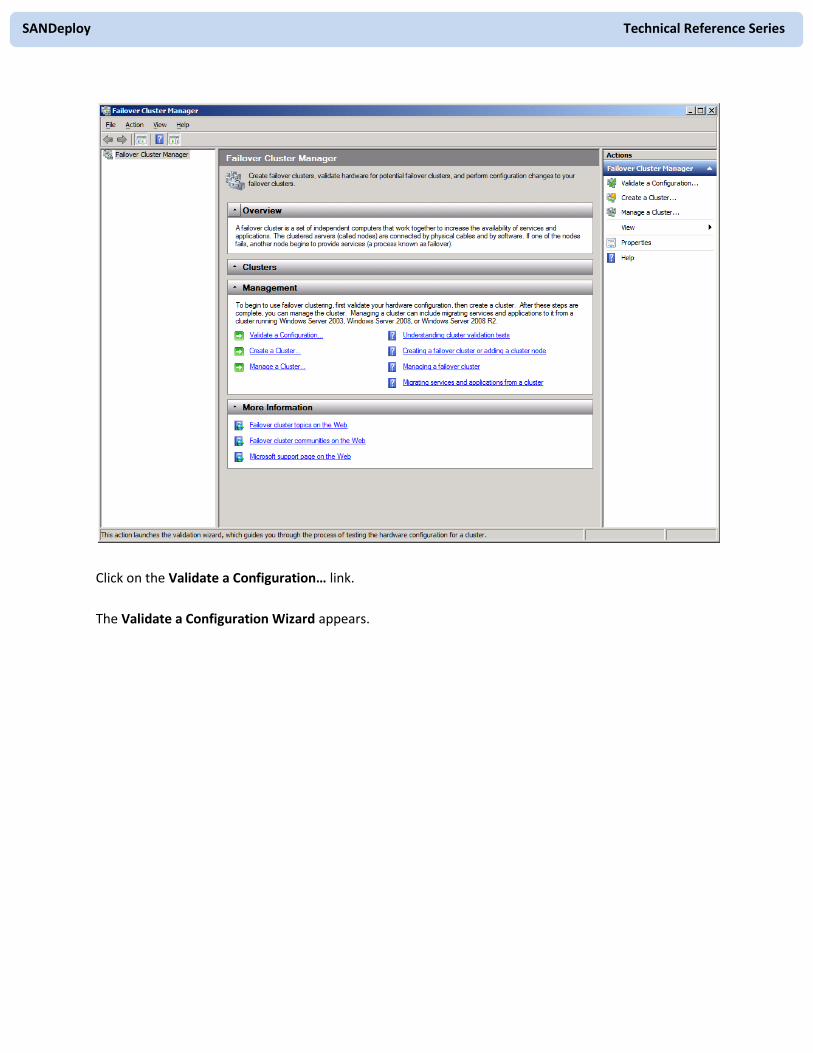
SANDeploy Technical Reference Series
Click on the Validate a Configuration… link.
The Validate a Configuration Wizard appears.
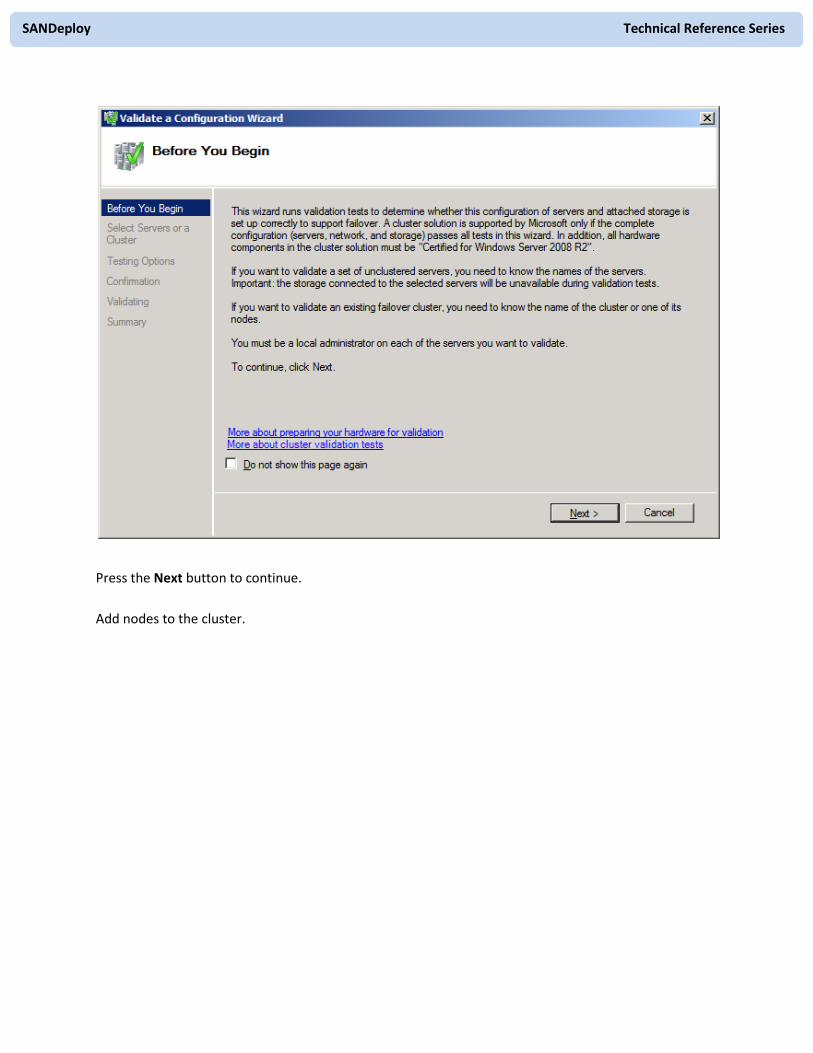
SANDeploy Technical Reference Series
Press the Next button to continue.
Add nodes to the cluster.
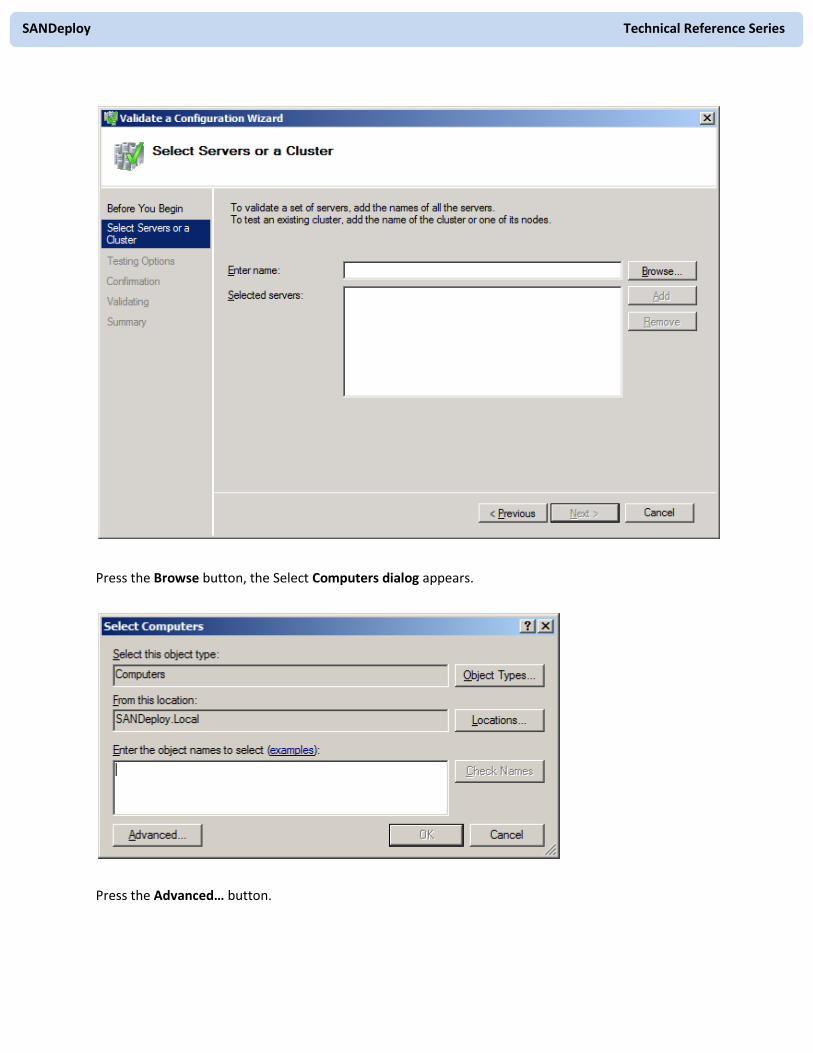
SANDeploy Technical Reference Series
Press the Browse button, the Select Computers dialog appears.
Press the Advanced… button.
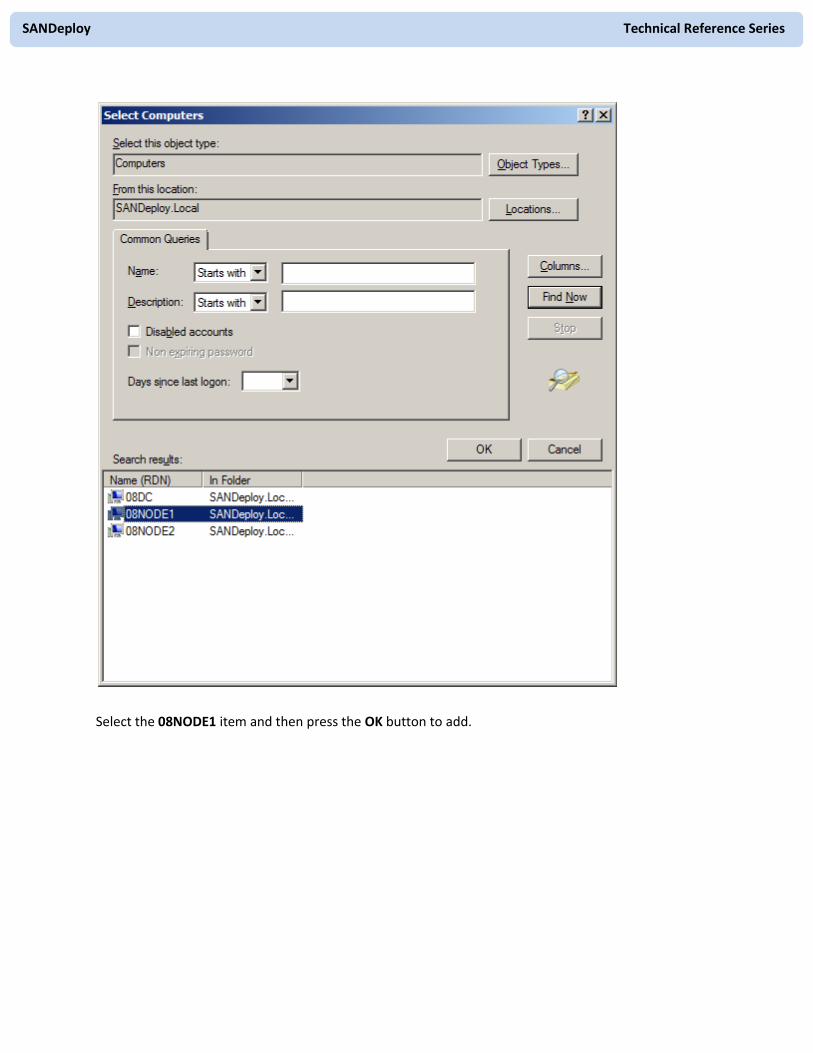
SANDeploy Technical Reference Series
Select the 08NODE1 item and then press the OK button to add.
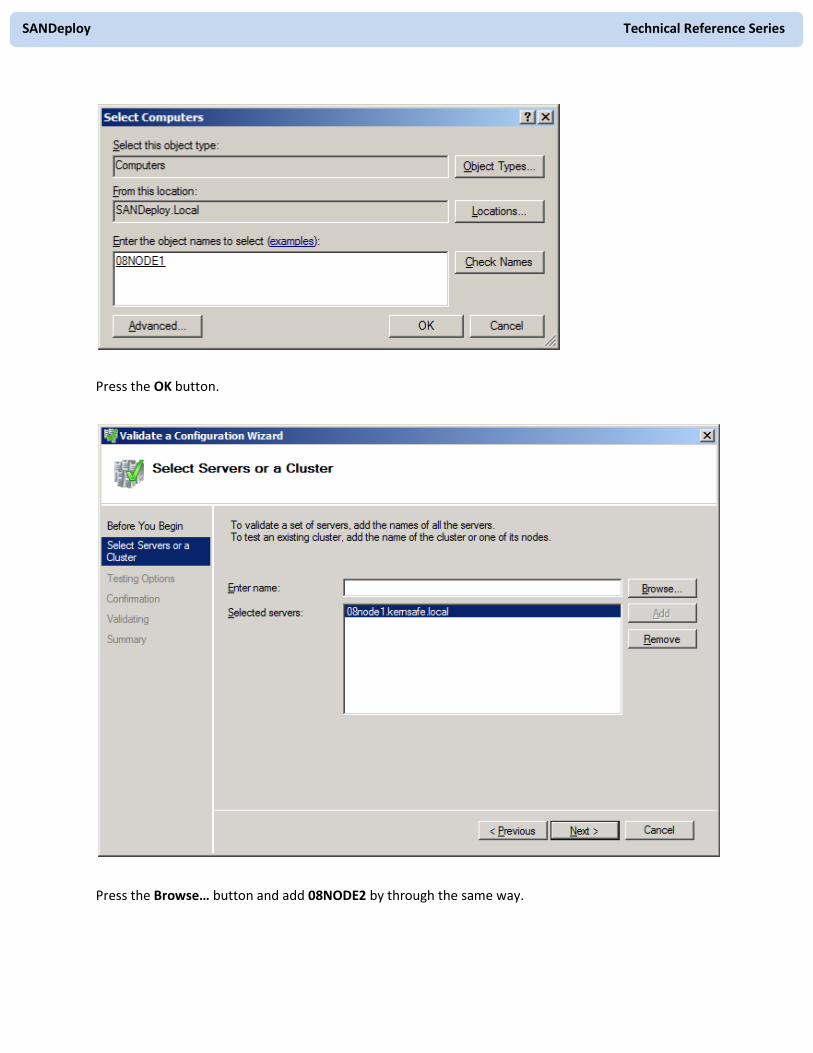
SANDeploy Technical Reference Series
Press the OK button.
Press the Browse… button and add 08NODE2 by through the same way.
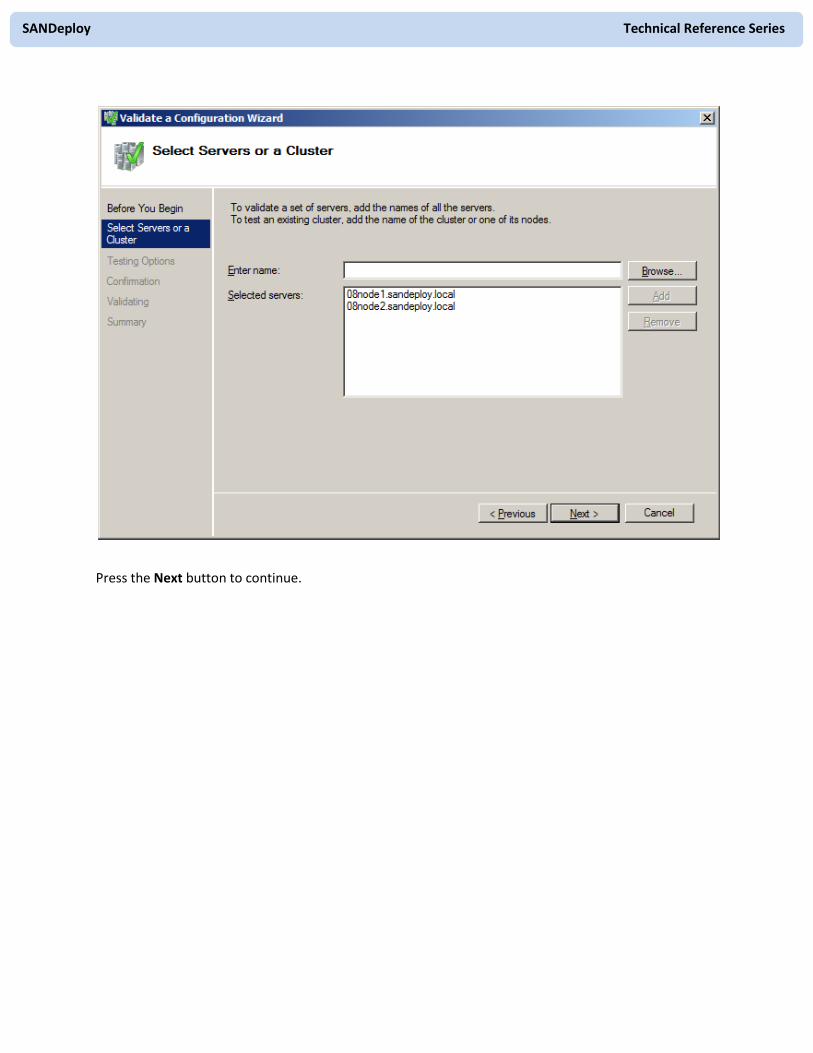
SANDeploy Technical Reference Series
Press the Next button to continue.
SANDeploy Technical Reference Series
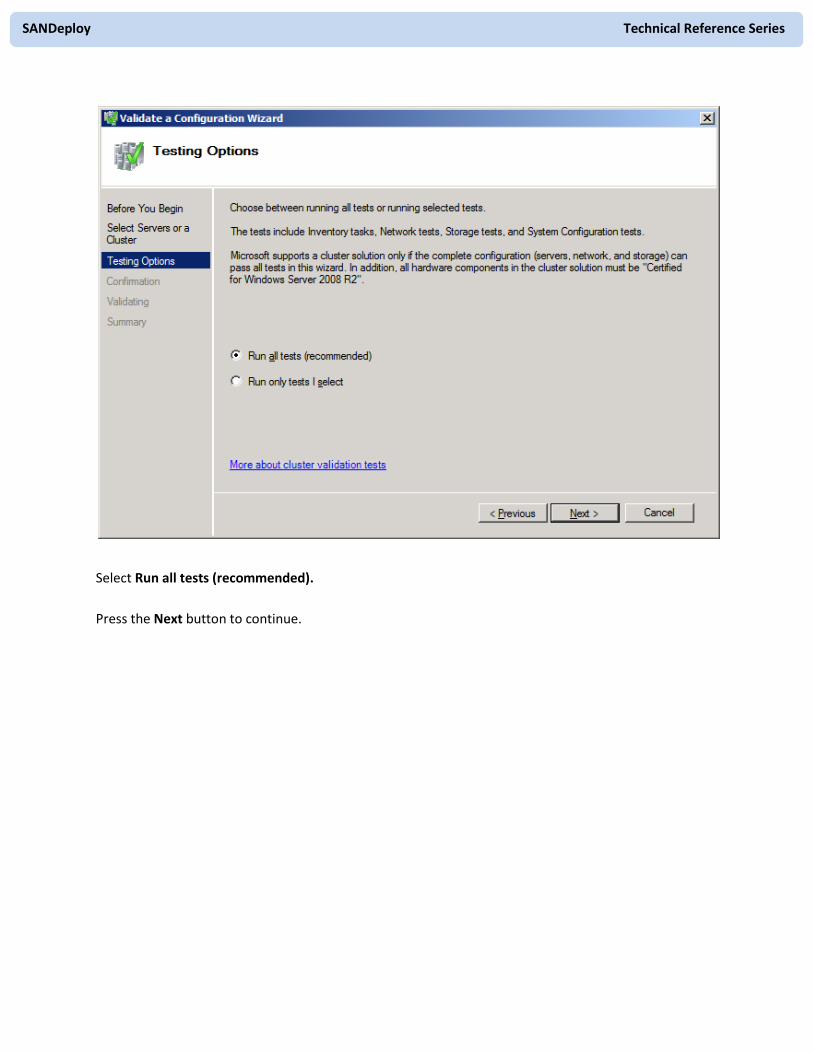
Select Run all tests (recommended).
Press the Next button to continue.
SANDeploy Technical Reference Series
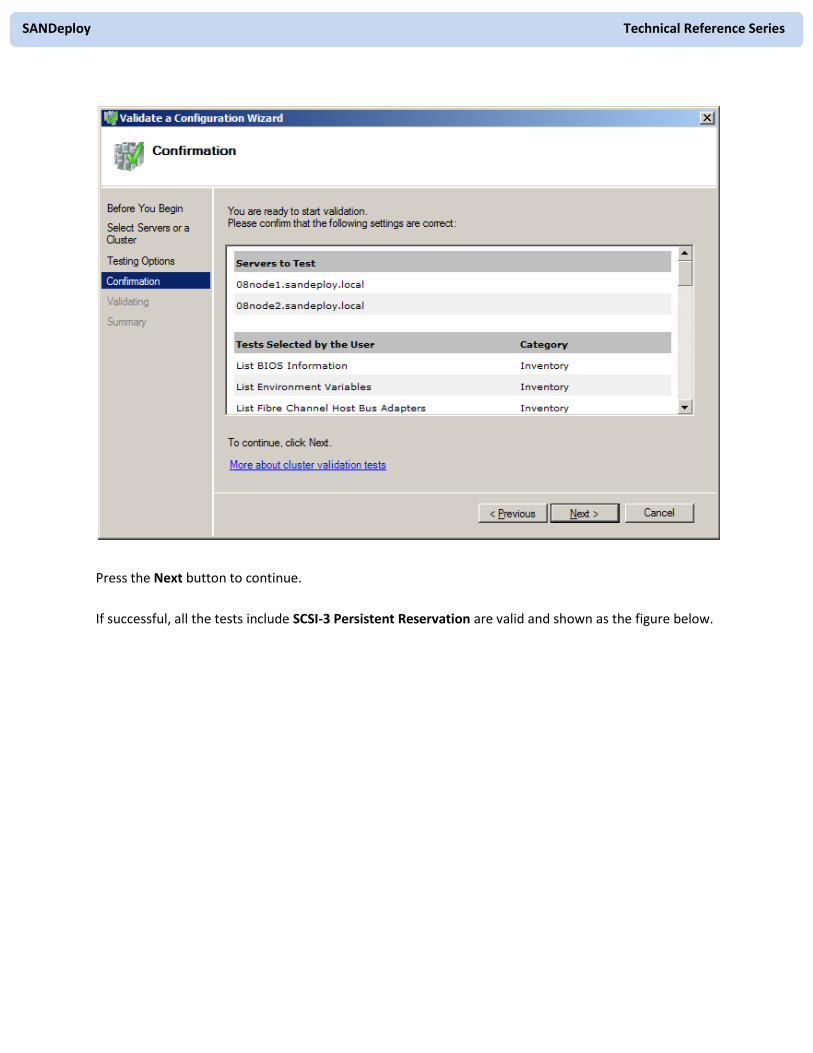
Press the Next button to continue.
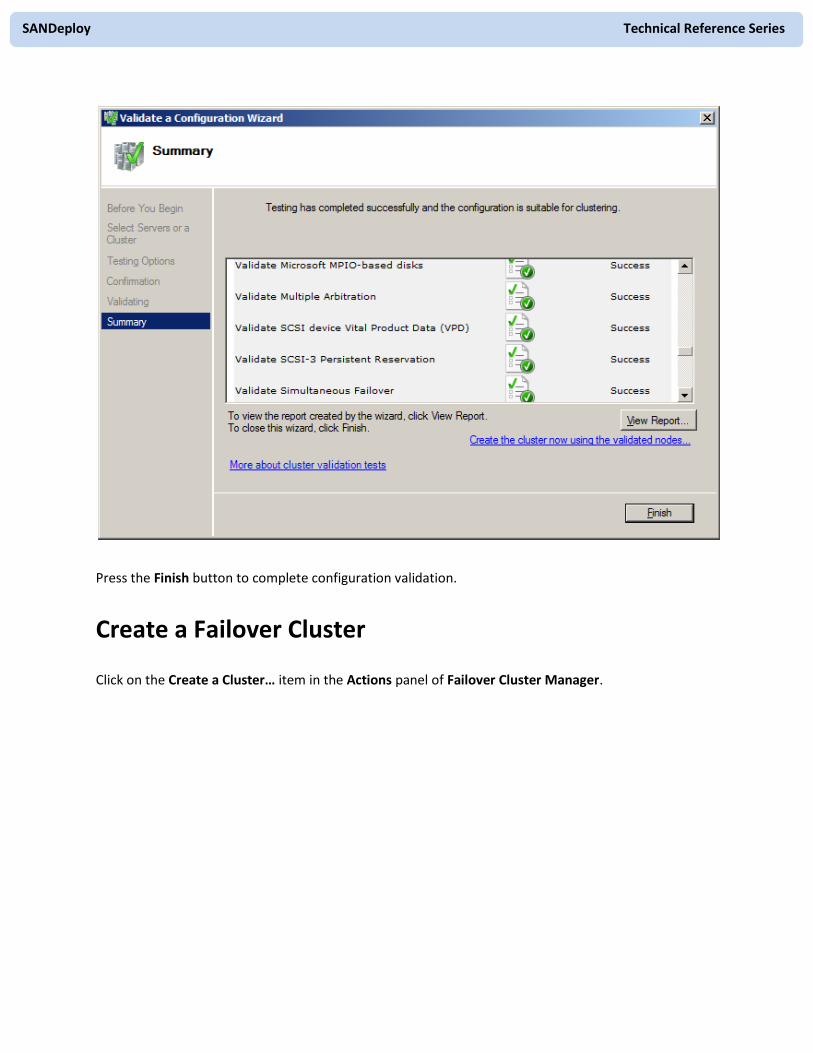
If successful, all the tests include SCSI-3 Persistent Reservation are valid and shown as the figure below.
SANDeploy Technical Reference Series
Press the Finish button to complete configuration validation.
Create a Failover Cluster
Click on the Create a Cluster… item in the Actions panel of Failover Cluster Manager.

SANDeploy Technical Reference Series
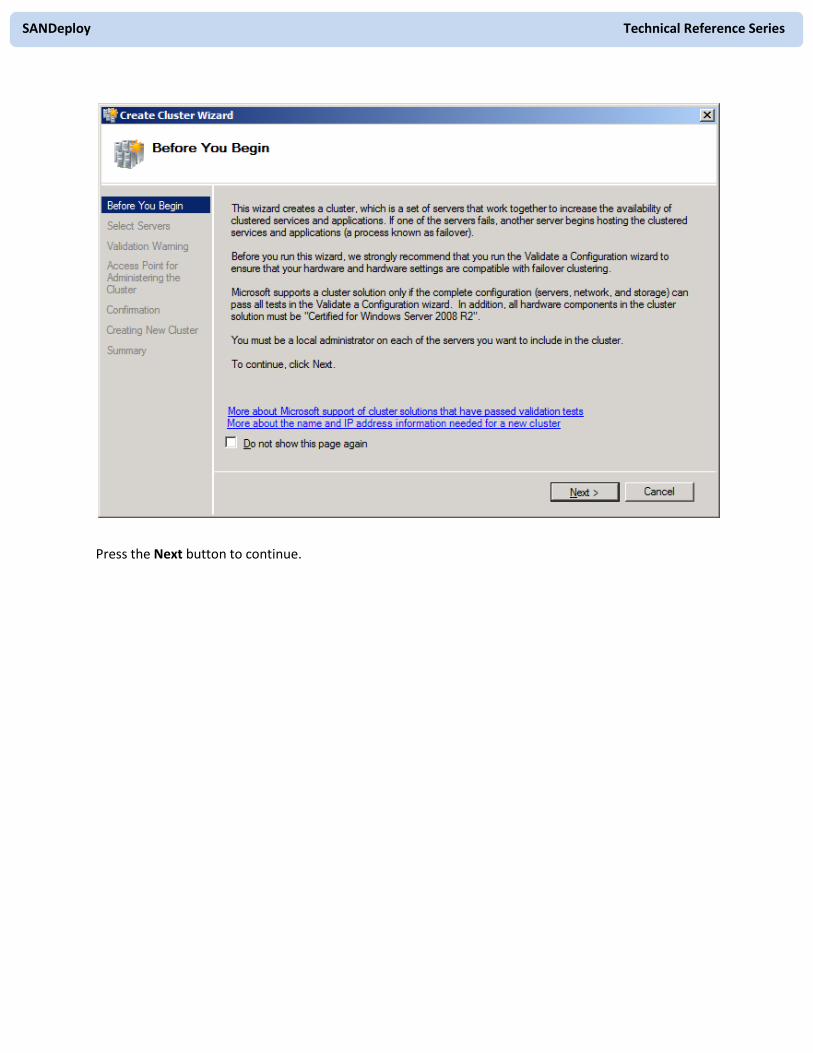
The Create Cluster Wizard appears.
SANDeploy Technical Reference Series
Press the Next button to continue.
SANDeploy Technical Reference Series
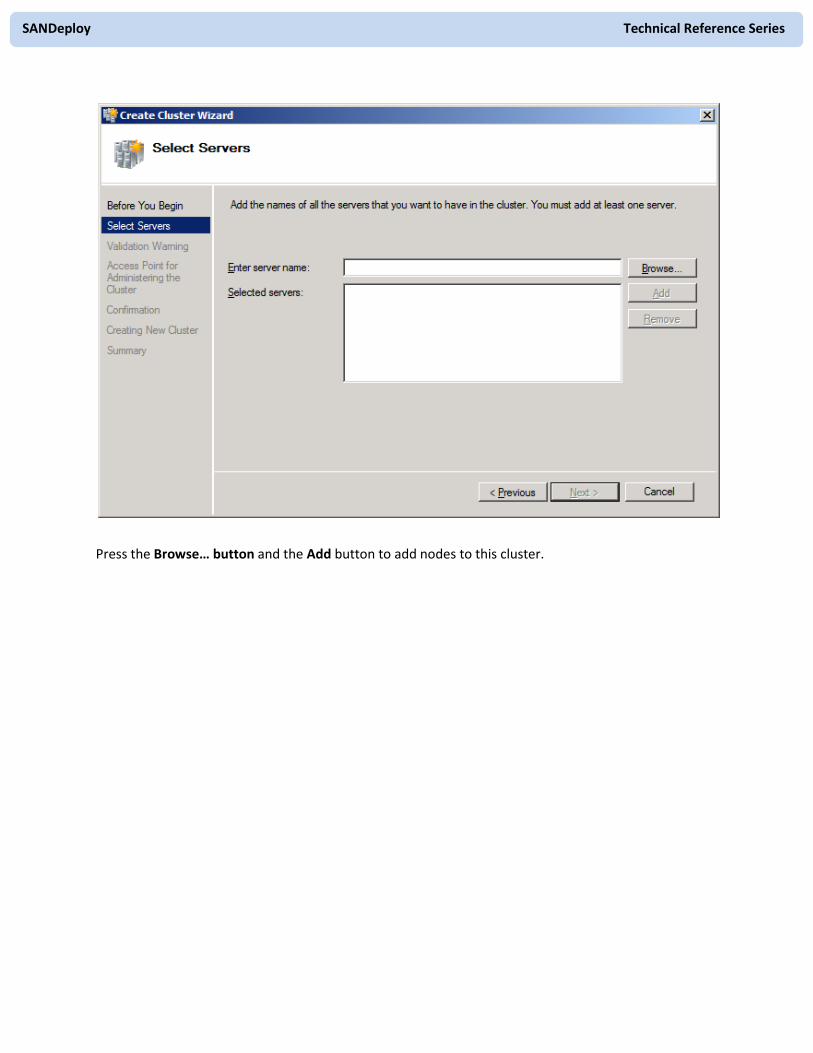
Press the Browse… button and the Add button to add nodes to this cluster.
SANDeploy Technical Reference Series
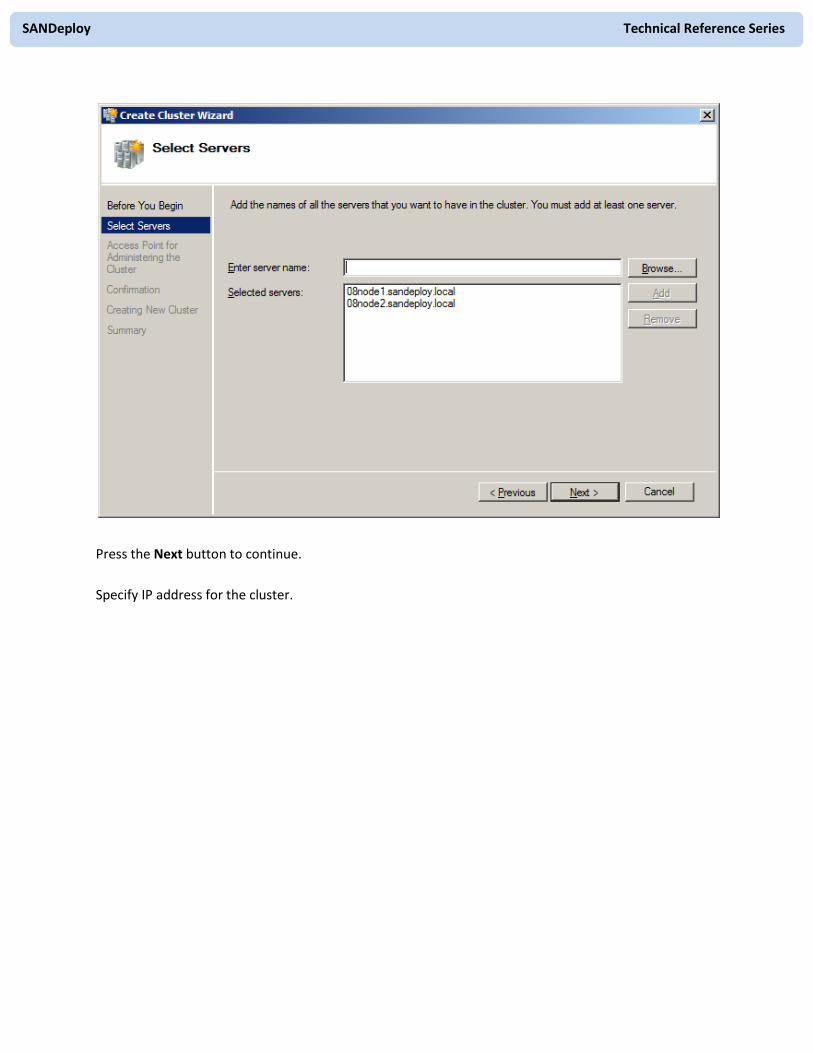
Press the Next button to continue.
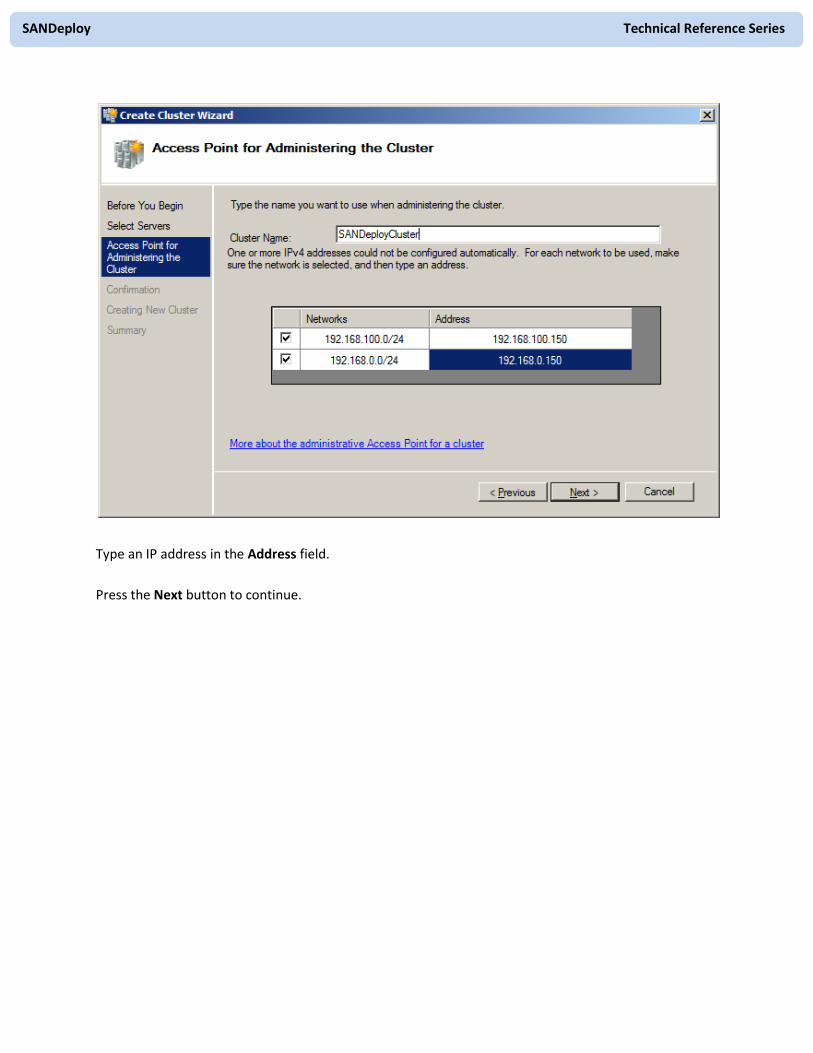
Specify IP address for the cluster.
SANDeploy Technical Reference Series
Type an IP address in the Address field.
Press the Next button to continue.
SANDeploy Technical Reference Series
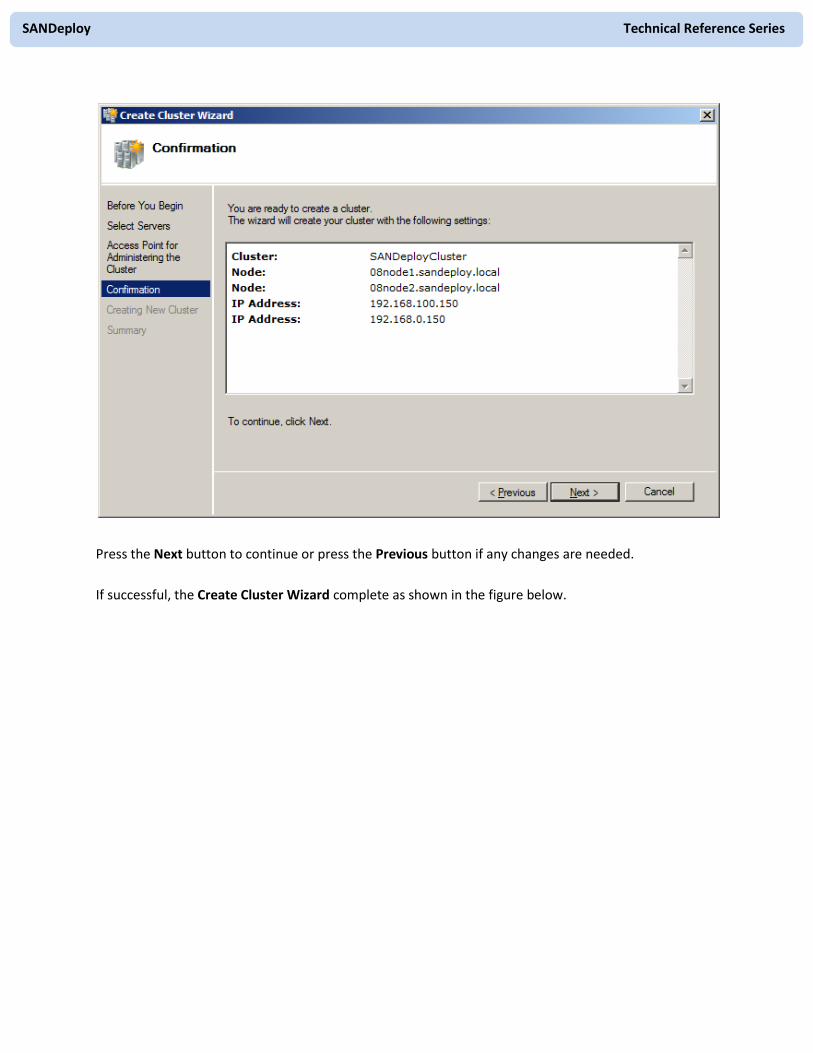
Press the Next button to continue or press the Previous button if any changes are needed.
If successful, the Create Cluster Wizard complete as shown in the figure below.
SANDeploy Technical Reference Series
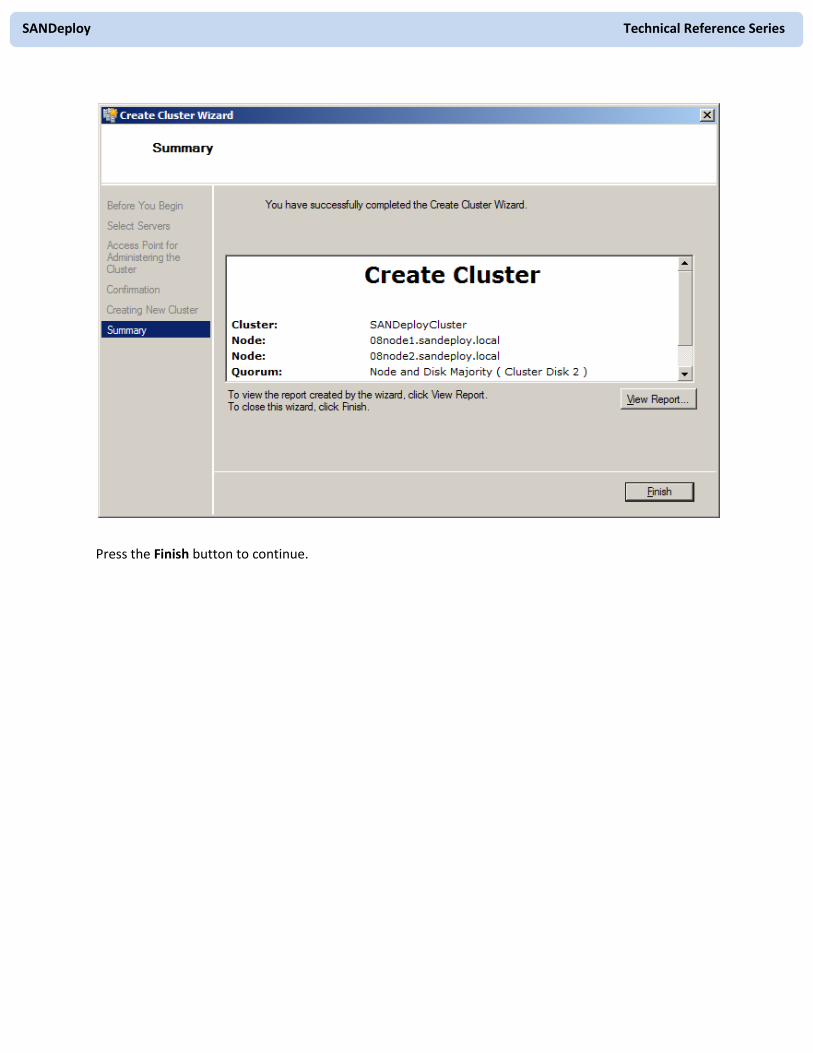
Press the Finish button to continue.
SANDeploy Technical Reference Series
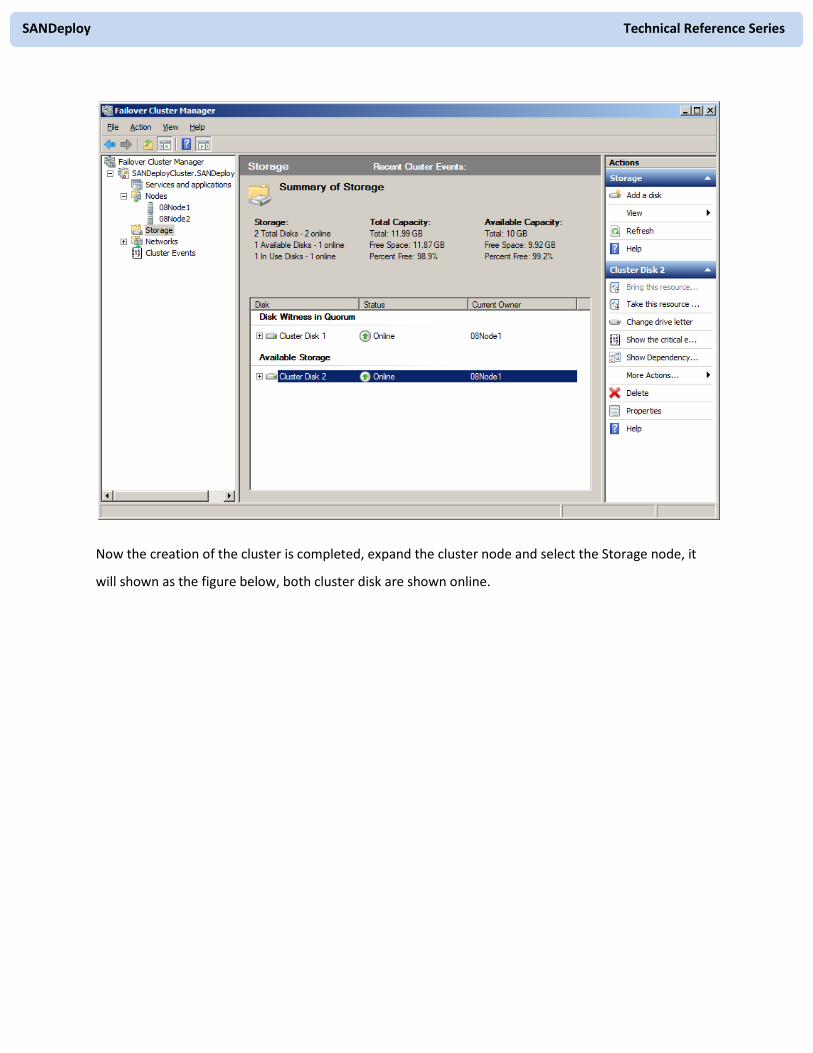
Now the creation of the cluster is completed, expand the cluster node and select the Storage node, it
will shown as the figure below, both cluster disk are shown online.

SANDeploy Technical Reference Series
Contact
Support: [email protected] Sales: [email protected] Home Page: http://www.sandeploy.com/ Product Page: http://www.sandeploy.com/products.html
SANDeploy Limited.
www.sandeploy.com
Copyright © SANDeploy Limited 2008-2011. All right reserved.