Embed Size (px)
Citation preview

Using Office365 Calendar to send meeting invitations
This guide details how to schedule a meeting, for example, with your tutor or lecturer.
Please note that this guide is designed for students who have an Office365 Mailbox.
1. In your University Office 365 email, click on the “Calendar” link on the Menu bar
2. Then click on the “new event" link
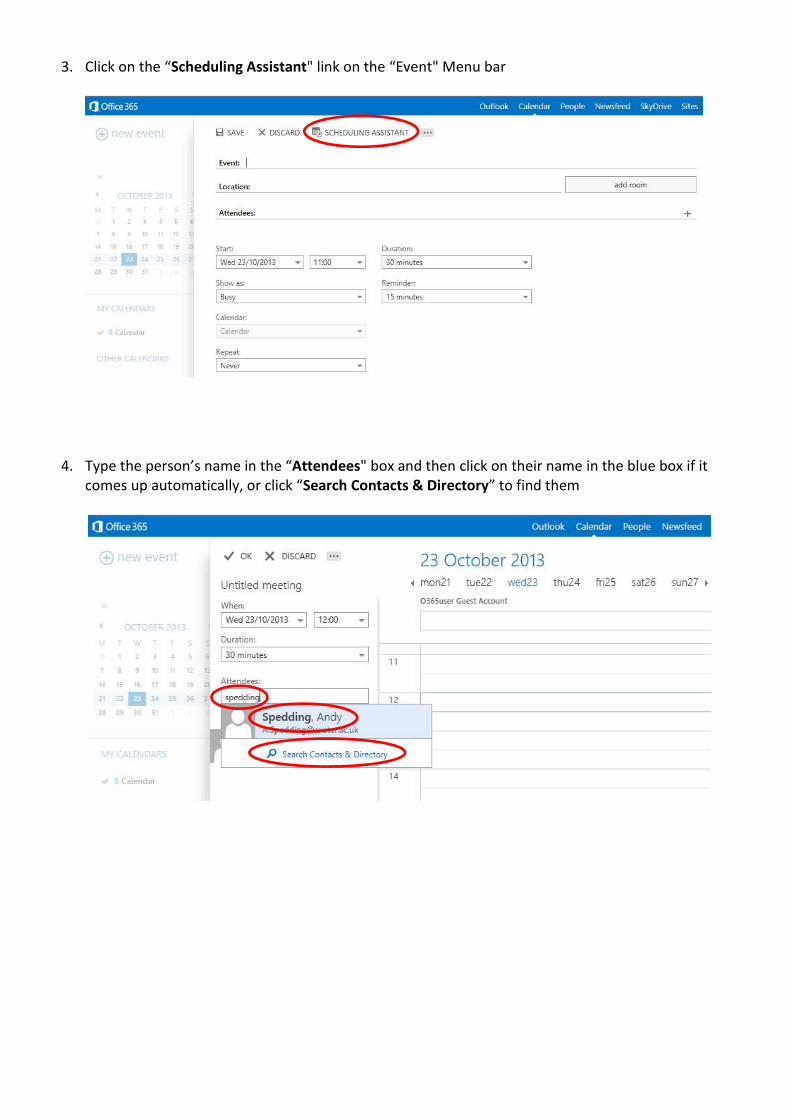
3. Click on the “Scheduling Assistant" link on the “Event" Menu bar
4. Type the person’s name in the “Attendees" box and then click on their name in the blue box if it
comes up automatically, or click “Search Contacts & Directory” to find them
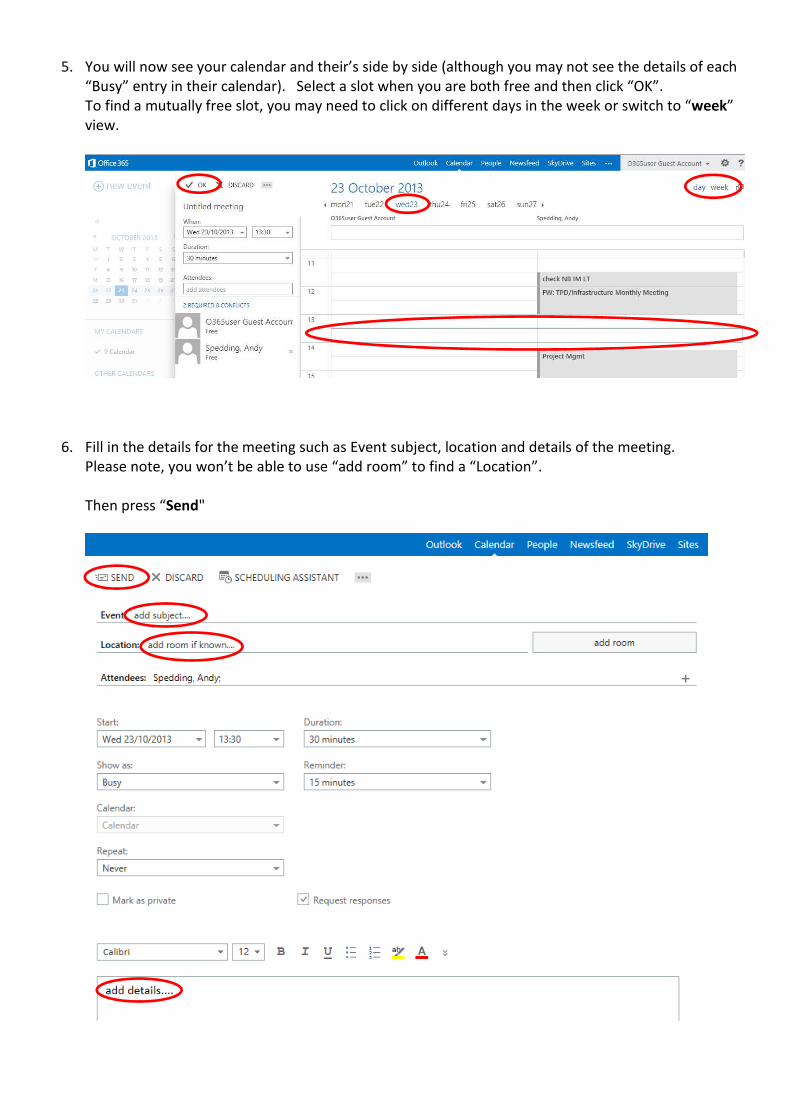
5. You will now see your calendar and their’s side by side (although you may not see the details of each
“Busy” entry in their calendar). Select a slot when you are both free and then click “OK”.
To find a mutually free slot, you may need to click on different days in the week or switch to “week”
view.
6. Fill in the details for the meeting such as Event subject, location and details of the meeting.
Please note, you won’t be able to use “add room” to find a “Location”.
Then press “Send"

7. You will then get an email showing that they have either accepted the meeting or have declined with
a reason, in which case you will need to reschedule