Embed Size (px)
Citation preview

Using MinGW GnuCOBOL Guide (draft)
Using MinGW GnuCOBOL Guide
cobc (GnuCOBOL) 3.0-RC1.0 Copyright (C) 2018 Free Software Foundation, Inc.Written by Keisuke Nishida, Roger While, Ron Norman, Simon Sobisch, Edward Hart.
This document was prepared by: Arnold J. Trembley ([email protected])and last updated Friday, 01 February 2019.
This manual will describe how to use MinGW GnuCOBOL for COBOL programmers who intend to build working COBOL applications for Windows. This includes how to install the GnuCOBOL compiler, how to compile GnuCOBOL programs, and how to prepare COBOL programs for distribution to a target Windows machine without installing the GnuCOBOL compiler. Other topics include how to manage source code using Fossil, and how to debug COBOL programs in the absence of a debugger utility.
This manual does not address COBOL applications development using GnuCOBOL built for Windows Visual Studio. If you are able to build GnuCOBOL from source for Visual Studio, you will be able to use all the Visual Studio tools for editing, compiling, and debugging.
Similarly, this manual does not address COBOL applications development using GnuCOBOL on Linux/Unix systems, including Apple Mac.
The MinGW (Minimalist Gnu for Windows) build of GnuCOBOL was chosen because in many ways it is easier to install in a Windows environment than a CygWIN or Visual Studio build of GnuCOBOL.
Page 1

Using MinGW GnuCOBOL Guide (draft)
Installing MinGW GnuCOBOL on Windows (OCIDE)
The quickest way to install MinGW GnuCOBOL is to download and install OpenCobolIDE (OCIDE)by Colin Duquesnoy.
OpenCobolIDE is a GUI (Graphical User Interface) IDE (Interactive Development Environment) written in Python and used to edit, compile, and test GnuCOBOL programs. There are versions compatible with Unix/Linux, Windows, and Mac OSX. Installing the Windows version of OpenCobolIDE will also install an embedded copy of GnuCOBOL with Berkeley Database for Indexed Sequential file access. OCIDE preferences can be changed to use any GnuCOBOL compiler installed on the PC, include Visual Studio, CygWIN, or 64-bit builds of GnuCOBOL.
The OpenCobolIDE install package for Windows can be downloaded from this site:https://launchpad.net/cobcide/4.0/4.7.6/+download/OpenCobolIDE-4.7.6_Setup.exe
Additional information about OpenCobolIDE can be found here:http://OpenCobolIDE.readthedocs.io/en/latest/download.html
Compiling and running GnuCOBOL programs is done in the COBOL menu of the OCIDE editor.
As of 30 December 2016, OpenCobolIDE (also known as OCIDE) version 4.7.6 contains MinGW GnuCOBOL 2.2.0 (06Sep2017), built with Oracle Berkeley Database (BDB) for native COBOL indexed sequential file access (ISAM). The compiler is embedded with OpenCobolIDE and is ready-to-run. Note: As of October, 2017, the author of OpenCobolIDE has announced that no additional enhancements will be made.
There are some license restrictions on distributing programs built with Oracle Berkeley Database (BDB). Some programmers may prefer a version of GnuCOBOL with no ISAM support, or a version built with VBISAM 2.01, which has no restrictions on redistribution. Currently BDB is likely to be slightly more robust and error-free than VBISAM 2.0.
Page 2

Using MinGW GnuCOBOL Guide (draft)
Installing MinGW GnuCOBOL on Windows (other)
As of 23 April 2018, the most current version is GnuCOBOL 3.0 RC1 (Release Candidate 1). You can download prebuilt MinGW GnuCOBOL 3.0 binaries from my website.
Based on recommendations from Simon Sobisch, I have changed the packaging of the compiler to use open source 7-Zip self-extracting archives which provide better compression ratios.
Due to a security restriction from my web hosting service I cannot host “.exe” files. So the new files have been renamed with “.7z” as their file extension. After downloading they can be opened using 7-Zip, or the windows file extensions can be renamed from “.7z” to “.exe”, allowing them to be used as self-extracting archives.
7-Zip is open source software available from http://www.7-zip.org/
The newest MinGW binaries for GnuCOBOL 3.0 RC1 (23Apr2018) can be downloaded from the following addresses:
https://www.arnoldtrembley.com/GC30XRC1-BDB-rename-7z-to-exe.7z
https://www.arnoldtrembley.com/GC30XRC1-NODB-rename-7z-to-exe.7z
https://www.arnoldtrembley.com/GC30XRC1-VBI-rename-7z-to-exe.7z
The “BDB” version uses Oracle Berkeley Database for native Indexed Sequential file access (ISAM). The “NODB” version has no ISAM support. The “VBI” version uses VBISAM 2.01 for ISAM support.
These builds of GnuCOBOL can be freely distributed under the Gnu Public License (GPL3) and Lesser Gnu Public License (LGPL3).
If you rename the file extension from “.7z” to “.exe” and run the self-extracting file it will install the compiler similar to a normal windows setup.exe file. It will prompt you for the folder you want to create. I recommend you name that folder something like “C:\GnuCOBOL” or “C:\GC 30 ”, the latter if you might support more than one version of GnuCOBOL on the same development PC. But you can install the compiler to any drive and folder you prefer.
Page 3

Using MinGW GnuCOBOL Guide (draft)
In the future, new binaries and GnuCOBOL documentation will be added to the following page:
https://www.arnoldtrembley.com/GnuCOBOL.htm
If you install the OpenCobolIDE (OCIDE) setup file, the GnuCOBOL 2.2 RC1 compiler itself will be found typically at the following Windows path:
Directory of C:\Program Files (x86)\OpenCobolIDE\GnuCOBOL
03/25/2017 09:39 PM <DIR> .03/25/2017 09:39 PM <DIR> ..03/30/2017 10:29 PM <DIR> bin01/16/2017 10:03 PM <DIR> config01/16/2017 10:03 PM <DIR> copy01/16/2017 10:03 PM <DIR> extras01/16/2017 10:03 PM <DIR> include01/16/2017 10:03 PM <DIR> lib01/16/2017 10:03 PM <DIR> libexec12/30/2016 03:03 PM 506 AUTHORS.txt12/30/2016 03:03 PM 5,813 bintest.cbl12/30/2016 03:03 PM 3,677 ChangeLog.txt12/30/2016 03:03 PM 138,797 ChangeLog_cobc.txt12/30/2016 03:03 PM 85,554 ChangeLog_libcob.txt12/30/2016 03:03 PM 11,083 cobc-help.txt12/30/2016 03:03 PM 111,018 config.log12/30/2016 03:03 PM 35,821 COPYING.txt12/30/2016 03:03 PM 23,411 COPYING_DOC.txt12/30/2016 03:03 PM 7,802 COPYING_LESSER.txt12/30/2016 03:03 PM 2,271 gcmf.cmd12/30/2016 03:03 PM 2,029 gcx.cmd12/30/2016 03:03 PM 225,821 GnuCOBOL 2.0 Manual.pdf12/30/2016 03:03 PM 3,534 GnuCOBOL-README.txt12/30/2016 03:03 PM 15,336 NEWS.txt12/30/2016 03:03 PM 240 README.rst12/30/2016 03:03 PM 1,346 set_env.cmd12/30/2016 03:03 PM 1,156 summary.log12/30/2016 03:03 PM 2,247 testfunc.cob12/30/2016 03:03 PM 1,527 TestGC.cmd12/30/2016 03:03 PM 181,162 testsuite.log12/30/2016 03:03 PM 1,486 THANKS.txt 24 File(s) 861,682 bytes
Page 4

Using MinGW GnuCOBOL Guide (draft)
If you install an additional version of GnuCOBOL (such as GnuCOBOL 2.2), you can change the settings in OpenCobolIDE to point to another GnuCOBOL compiler using the “Compiler” tab of the OCIDE “preferences” screen:
In the sample above you change every occurrence of "C:\Program Files (x86)\OpenCobolIDE\GnuCOBOL" to “C:\GC 30 ”, assuming that is the path to your alternate GnuCOBOL compiler. This is basically setting the ENVIRONMENT variables need to run the compiler and compiled programs. You can also set additional PATH variables after the GnuCOBOL \bin folder.
In OCIDE you can also set up your default compile options in the “preferences/compiler” screen,and the folder to store executable COBOL programs. I use“C:\GC exe ” to store my executables, but you can choose your own path and folder.
As a general rule, I think it is good practice to store your compiled COBOL .exe and .dll files in a different folder, and NOT in the GnuCOBOL compiler folder. Your COBOL source code files
Page 5

Using MinGW GnuCOBOL Guide (draft)
should also be stored in their own folder, separate from the compiler folder.
If you change your OCIDE preferences to use a different GnuCOBOL compiler at a different location, you will also need to the change the “Working Directory” under the Preferences “Run” tab.
For example, if you have GnuCOBOL 3.0 installed in a folder named “C:\GC 30 ” then you would change the working directory to “C:\GC30\bin”. This is the required PATH change that would need if you compile GnuCOBOL programs in a cmd.exe window, outside of OCIDE.
After changing settings, don’t forget to click on “Check Compiler” under the “compiler” tab to make sure all the changes work.
Page 6

Using MinGW GnuCOBOL Guide (draft)
If you scroll down within the compiler tab of OCIDE preferences, you can also set GnuCOBOL compiler flags and additional paths for copybooks and supporting libraries.
You always have the option to restore default preferences. I use -Wall to turn off some warning messages. I added “-fnotrunc” as an extra compiler flag, because it improves performance using binary integer arithmetic. And I added “C:\GCcobsrc” as the PATH to my copybooks. I alsostore COBOL source code in that folder, to keep them separate from the executables.
When you are in the OCIDE editor, you have options in the “File” menu to import or export OCIDE preferences. This can be handy if you use more than one version of MinGW GnuCOBOL installed on your Windows development PC, or if you want to experiment with different preferences and quickly restore prior settings.
Page 7

Using MinGW GnuCOBOL Guide (draft)
How to Compile MinGW GnuCOBOL programs outside of OCIDE
If you installed GnuCOBOL as part of OpenCobolIDE (OCIDE), you can edit, compile, and test programs within the OCIDE GUI windows.
If you installed GnuCOBOL without OCIDE, or if you want to compile programs outside of OCIDE,then here is one way to do it:
Download and install one of my pre-built MinGW GnuCOBOL compilers. I recommend one of my GnuCOBOL 3.0 versions, and extract it into a folder named C:\GC30. You can name the folder whatever you like, and the path does not have to be on your C: drive.
I think it’s easier if you create a folder to hold your COBOL source code and copybooks, and for that I created a folder named C:\GCcobsrc. The name of the folder is up to you, but this is what I will use for my examples.
I also recommend making a separate folder to hold your executeble programs (.exe and .dll). In my case that folder is named C:\GCexe.
Now, open a cmd.exe window, and navigate to your C:\GC30 folder (or whatever name you chose for the compiler). If the compiler has been installed correctly there should be a file named “set_env.cmd”. This is basically the same as a .bat file from earlier versions of MS-DOS and Windows. You can view this file, but you should probably not change it.
Type “set_env” as the command and press enter. You should see something like this when you are done:
Page 8

Using MinGW GnuCOBOL Guide (draft)
Microsoft Windows [Version 6.1.7601] Thu 05/31/2018 23:04:09C:\GC30>set_env
Setting environment for GnuCOBOL 3.0 RC1 (23APR2018) with MinGW binaries(GCC 6.3.0, PDcurses 4.0.2, GMP 6.1.2, BDB 6.2.32.NC)
cobc (GnuCOBOL) 3.0-rc1.0Copyright (C) 2018 Free Software Foundation, Inc.License GPLv3+: GNU GPL version 3 or later <http://gnu.org/licenses/gpl.html>This is free software; see the source for copying conditions. There is NOwarranty; not even for MERCHANTABILITY or FITNESS FOR A PARTICULAR PURPOSE.Written by Keisuke Nishida, Roger While, Ron Norman, Simon Sobisch, Edward HartBuilt May 10 2018 01:42:31Packaged Apr 22 2018 22:26:37 UTCC version (MinGW) "6.3.0"
Microsoft Windows [Version 6.1.7601] Thu 05/31/2018 23:04:14C:\GC30>
This should also set your PATH and environment variables as follows:
c:\GC30>pathPATH=c:\GC30\bin;C:\ProgramData\Oracle\Java\javapath;...
c:\GC30>set | moreCOB_CFLAGS=-I"c:\GC30\include"COB_CONFIG_DIR=c:\GC30\configCOB_COPY_DIR=c:\GC30\copyCOB_LDFLAGS=-L"c:\GC30\lib"COB_LIBRARY_PATH=c:\GC230\extrasCOB_MAIN_DIR=c:\GC30\
These Environment Variables are temporary, and they will be forgotten when the CMD.EXE shellwindow is closed.
It is also possible to permanently set your PATH and Environment variables for GnuCOBOL, but the method is slightly different in Windows XP, Windows 7, and Windows 10. https://www.computerhope.com/issues/ch000549.htm
Persistent PATH and Environment variables may need to be changed if you move your GnuCOBOL compiler to a different location or install a newer version with a different name.
Page 9

Using MinGW GnuCOBOL Guide (draft)
If you do as I suggest and store your COBOL source code files and copybooks in one folder (\Gccobsrc) and your executables in a different folder (\Gcexe), then you will want to write your own bat/cmd scripts for compiling programs.
Start by making a copy of “gcx.cmd” found in your GnuCOBOL folder. Here is the key section:
echo Compile the fixed-format "%1" program as executable main program (-x),echo enable most warnings (-W), with no binary truncation (-fnotrunc) echo. echo cobc -x -W -fnotrunc -t %temp%\%1.lst -o %temp%\%1.exe %1.cob echo. cobc -x -W -fnotrunc -t %temp%\%1.lst -o %temp%\%1.exe %1.cob echo.echo GnuCOBOL Compile Returncode = %errorlevel%GOTO ALLDONE
You should choose either to use only .cbl (preferred) or .cob for your COBOL source code file extension. It will make writing your script easier if you use one or the other, but not both.
The “-x” option says to make an “exe” file. In the “gcm.cmd” file, you would use “-m” to create a “dll” file for a dynamically callable subprogram, or for a main program run under the “cobcrun.exe” runtime library. In either case you might prefer to use the “-Wall” option when you compiler to reduce the number of warning messages. You may also want to compiler with the “-debug” option.
“-fnotrunc” improves arithmetic performance for USAGE IS COMP data items.
“-t %temp%\%1.lst” is where to store the compile listing report (.lst). You may want to save the compile listing in a permanent folder instead.
“-o %temp%\%1.exe” is where to store the .exe file. You will want to store in your \GCexe folder. If you intend to compile “free format” COBOL source code, look at the gcmf.cmd file which compiles a free-format program into a .dll file.
You can create a list of all GnuCOBOL compile time options by typing “cobc -help” instead of compiling. You can direct it to a text file using “cobc -help > cobc-help.txt”.
Page 10

Using MinGW GnuCOBOL Guide (draft)
Permanent PATH and Environment Variables
If you choose to make your GnuCOBOL PATH and Environment Variables permanent, be careful how you do it. You could create problems for your system. Here are a couple of ways.
The first method is specific to Windows 7, but it is very similar in Windows XP through Windows10. Open the Control panel, then open “System” and navigate to “Advanced Systems Settings”. Then select the “Advanced” Button, and then select “Environment Variables”.
Control Panel/System/Advanced System Settings/Advanced/Environment Variables
You should see a window that looks like this:
Page 11

Using MinGW GnuCOBOL Guide (draft)
You should make your changes only in the top or “User” window, instead of the “System variables” window. In my example, I always have c:\bat in my user PATH, which is appended to the System PATH when I open a cmd.exe window. C:\bat is where I store .bat or .cmd files and command line utilities for my personal system.
You can update the PATH in the “System variables” window, but if making a mistake there could cause Windows to be unable to boot, or unable to use some of its programs.
For Environment variables, use the “New” button to add new variables, or use the “Edit” buttonto make changes to existing PATH or Environment Variables. But if at all possible, only make your changes in the “User” window.
You can also use the SETX command in a cmd.exe window to make permanent changes to your PATH and environment variables. The SETX command can be put into .bat or .cmd scripts.
Here is an example of how you might do that:
remecho setx PATH %~dp0bin remecho setx COB_CONFIG_DIR %~dp0config setx COB_CONFIG_DIR %~dp0config remecho setx COB_COPY_DIR %~dp0copy setx COB_COPY_DIR %~dp0copy remecho setx COB_LIBRARY_PATH %~dp0bin setx COB_LIBRARY_PATH %~dp0bin
In the example above, “%~dp0” would be replaced by the current directory, which means you should run this bat or cmd file from the C:\GC30 folder (or whatever you named your compiler folder). You can also code specific folders, i.e.: SETX PATH C:\GC22B\bin.
Be careful using SETX to change your PATH. If you misspell something, you may need to use the Control Panel app to correct it. SETX by default should only change your USER PATH, and user variables, not the SYSTEM PATH or variables. You can use “setx /?” in your cmd.exe window to get the help file for the SETX command.
SETX changes do not affect the current cmd.exe window. You must close the cmd.exe window and open a new one for the SETX environment changes to take effect.
Page 12

Using MinGW GnuCOBOL Guide (draft)
Editing GnuCOBOL programs
You can use any Windows text editor to edit GnuCOBOL source code files. You can also use OCIDE’s built-in editor.
Windows Notepad and Wordpad are not ideal for editing COBOL source code. Windows Wordpad also handles text files with Unix “LF” line terminators, which cause problems in Notepad.
There are other editors for Windows, such as Notepad++ and PSPad, which both have plugins for COBOL syntax. PSPad has a customization options and macros, and can be set up to submit COBOL source programs for compilation.
If you are most familiar with Unix tools, you can download Windows versions of vi, Vim, or emacs and use those.
If you are more familiar with IBM Mainframe text editors, such as TSO/ISPF or XEDIT for VM/CMS, you can download Windows programs that work in the same way:
http://www.spflite.com/ SPFLite emulates the ISPF editor from IBM z/OS TSO/ISPF.
http://hessling-editor.sourceforge.net/
The Hessling Editor emulates IBM XEDIT and has a built-in REXX interpreter for creating macros. It has many customization options using its PROFILE command or REXX (Restructured eXtended eXecutor).
Page 13

Using MinGW GnuCOBOL Guide (draft)
How to debug MinGW GnuCOBOL programs
There is an interactive debugger in development for GnuCOBOL, but it is not quite ready yet. I am not yet able to build a Debugger version of GnuCOBOL, and additional tools may be requiredto animate a debugging session.
So until that solution is ready, there are other ways to debug a GnuCOBOL program. Here is onetechnique I have used:
First, add the following to your program’s WORKING-STORAGE section:
**************************************************************** * DATA FOR BREAKPOINT PROCESSING * ****************************************************************
01 WS-BREAKPOINT-DATA. 05 WS-BP-ACCEPT-BYTE PIC X(01) VALUE SPACES. 88 88-WSBP-CONTINUE VALUES ARE SPACE, "Y", "y". 88 88-WSBP-STOP VALUES ARE "N", "n". 05 WS-BP-PARA-NAME PIC X(36) VALUE SPACES. 05 WS-BP-MESSAGE PIC X(70) VALUE SPACES.
Note that this is in COBOL fixed format and it could be put into a copybook.
These are data fields that will be used by the PROCESS-BREAKPOINT paragraph.
Page 14

Using MinGW GnuCOBOL Guide (draft)
Then add the following procecure division paragraph near the end of your program:
**************************************************************** * PROCESS BREAKPOINT * ****************************************************************
PROCESS-BREAKPOINT. DISPLAY SPACE. IF WS-BP-PARA-NAME = SPACES MOVE "(Unknown Paragraph)" TO WS-BP-PARA-NAME END-IF DISPLAY "PARAGRAPH: " WS-BP-PARA-NAME. IF WS-BP-MESSAGE = SPACES CONTINUE ELSE DISPLAY WS-BP-MESSAGE MOVE SPACES TO WS-BP-MESSAGE END-IF MOVE "?" TO WS-BP-ACCEPT-BYTE. PERFORM UNTIL 88-WSBP-CONTINUE OR 88-WSBP-STOP DISPLAY "Continue Processing? (Y/N) or Press ENTER" ACCEPT WS-BP-ACCEPT-BYTE END-PERFORM IF 88-WSBP-STOP DISPLAY "Program Cancelled by User Request " STOP RUN ELSE DISPLAY SPACE END-IF.
The PROCESS-BREAKPOINT paragraph is also in fixed format, and it could be make into a copybook. If you normally use procedure division sections, you may want to make PROCESS-BREAKPOINT a section by itself, to isolate it from your normal code.
Page 15

Using MinGW GnuCOBOL Guide (draft)
Then whenever you want to find out what is happening in your program, you can move the current paragraph name into WS-BP-PARA-NAME, and move in any special message into WS-BP-MESSAGE. The special message could include the line number, the expected results, or a comment that this point in the procedure division was reached. Then display any data values or messages for the current location in the program and then PERFORM PROCESS-BREAKPOINT. You can perform it from multiple locations in your program.
The PROCESS-BREAKPOINT paragraph requires a user response to continue, and allows a request to terminate the program immediately. Note that it will erase WS-BP-MESSAGE after it displays it, so it is up to the programmer to initialize it properly before each call to PROCESS-BREAKPOINT.
And naturally you want to remove the breakpoint 01 record and procedure division code (and all other debugging code) from your program once you have finished testing.
Adding PROCESS-BREAKPOINT and its 01 record is called “instrumenting” your code. It is somewhat primitive, but it can be an effective way to debug your program.
How to debug your program using a log file
Another way to debug code without an interactive debugger is to add a log file to your program.This would be an output-only line sequential file. Open the file at the start of your program and close it at the end. Whenever an important event occurs that you want to track, write a message to your log file. Then run the program and review the log file afterwards.
If the log file gets too big, you can put the WRITE statement in a paragraph by itself, add a counter to track how many log records are written, and add an IF statement to terminate the program if the log record count exceeds some maximum number.
These methods may appear crude, but they can help you solve your problem when you don’t have an interactive debugger available.
Page 16

Using MinGW GnuCOBOL Guide (draft)
How to Install COBOL programs on other PC’s
This is a simple outline for building a redistributable runtime package, without the ability to compile.
Basically, build a folder that contains the contents of the “gnucobol\bin” folder (for example “C:\GC30DIST”). Create a separate “apps” folder, and copy your .exe and .dll files there. You should also copy any files that are needed, including .cmd files for PATH and environment variables, README, etc.
Then the folder can be packaged as a setup.exe file using the freeware INNO installer tool, or as a 7-Zip archive or self-extracting file.
When I built a simple test using Eliza.cbl, I was able to create a minimal install folder with the following files:
https://www.arnoldtrembley.com/Eliza-setup-rename-7z-to-exe.7z
Directory of C:\eliza-run
10/24/2017 11:23 PM <DIR> .10/24/2017 11:23 PM <DIR> ..10/24/2017 11:23 PM 35,880 eliza.cbl10/02/2017 01:17 AM 78,196 eliza.exe10/12/2017 07:42 PM 51,336 eliza-P-Lucida-Console-10.pdf09/09/2017 05:43 PM 404,398 libcob-4.dll05/29/2017 03:00 PM 118,444 libgcc_s_dw2-1.dll09/07/2017 09:14 PM 484,270 libgmp-10.dll08/31/2013 07:39 PM 1,023,944 libiconv-2.dll04/30/2014 06:33 AM 124,498 libintl-8.dll09/07/2017 09:19 PM 126,583 pdcurses.dll10/24/2017 11:22 PM 1,696 README.txt
I simply tested until I no longer had any errors for missing library routines, which were copied from the C:\GnuCOBOL\bin folder. If I were to do this for a larger package, I would need to include “cobcrun.exe” from the \bin folder (for .dll main programs) and either “libvbisam-1.dll” or “libdb-6.2.dll” from the C:\GnuCOBOL\bin folder, for either VBISAM or Berkeley DataBase support for Indexed Sequential files.
Page 17

Using MinGW GnuCOBOL Guide (draft)
How to manage COBOL source code on Windows
[This section is not done yet, because I want to add more on the browser screens.]
If you do a lot of COBOL development you will probably want a version control system to manage your source code. There are many reasons why you might need a version control system. You may need to recover a prior version of your COBOL program. You may also need tomanage multiple versions of the same program for different customers. This can be cumbersome to do with only the native Windows file system.
The basic functions a Version Control program or system must support are:
1. Create a source code reposity2. Add source code files to the repository3. Update changes to source code files in the repository4. Extract current or prior versions of source files from the repository5. List source files6. Administer the repository
You must also be able to back up and restore your source code repository.
Fossil-scm is a lightweight version control program that can support multiple users on multiple servers. This document will show how use it for a single user on one computer.
The website has documentation on how to use Fossil. Here are some useful links:
https://www.fossil-scm.org/
https://www.fossil-scm.org/index.html/uv/download.html
https://www.fossil-scm.org/index.html/doc/trunk/www/quickstart.wiki
Page 18

Using MinGW GnuCOBOL Guide (draft)
I downloaded Fossil for Windows version 2.3 created 2017-07-21. Fossil seems to get updated fairly often. As of 31 May 2018 the current version of Fossil is 2.6. You must unzip the “fossil.exe” file and copy it to any folder that is in your PATH for cmd.exe windows, so you can always run it. In my case, I have a folder named c:\bat where I store .bat/.cmd files and text files of notes. I also store command line programs in that folder. Since C:\bat is always in my command line PATH, that was a convenient folder to hold “fossil.exe”.
You can save the Fossil quick start guide from the website, and other help files. Here are the most important documentation URL’s in addition to the quickstart.wiki:
https://www.fossil-scm.org/index.html/doc/trunk/www/permutedindex.html
https://www.fossil-scm.org/index.html/help
https://www.fossil-scm.org/index.html/doc/trunk/www/fiveminutes.wiki
The last link above is for “Up and Running in 5 minutes as a single user”.
You may want to download the the documentation pages for the most common fossil commands: Init, Add, Checkout, Commit, Delete, and Timeline.
I chose to create my repository in my C:\GCcobsrc folder, and I named it PROD. I thought I might also want to create a separate repository named TEST, but that has not been needed yet.
Then I opened a cmd.exe window and navigated to C:\GCcobsrc as the current directory and typed the following command to create my repository:
C:\GCcobsrc>fossil init prod.fossilproject-id: bddf5e33e3660b61f239670de0e6f399d9a28a7aserver-id: a344cdeaae24bb2d542a1bb080ebd88169390ee5admin-user: Arnold (initial password is "adaade")
Note that the repository file should have a Windows File extension of “.fossil”, and the full path to my fossil repository file is C:\GCcobsrc\prod.fossil.
The next step is to open the repository so we can do things with it:
C:\GCcobsrc>fossil open prod.fossilproject-name: <unnamed>repository: C:/GCcobsrc/prod.fossillocal-root: C:/GCcobsrc/
Page 19

Using MinGW GnuCOBOL Guide (draft)
config-db: C:/Users/Arnold/AppData/Local/_fossilproject-code: bddf5e33e3660b61f239670de0e6f399d9a28a7acheckout: 19fb252be2818e67f9c156f49634d1f084016ae7 2017-08-27 01:30:41 UTCtags: trunkcomment: initial empty check-in (user: Arnold)check-ins: 1
The next step is to add source code files to the repository:
C:\GCcobsrc>fossil add exectips.cobADDED exectips.cob
In the example above, I added one COBOL source code file named “exectips.cob”. You can add multiple files with one command, for example “fossil add *.cob”, which will add all the .cob programs in the current folder.
But adding programs is not enough. That just makes them eligible for tracking. To really complete the ADD you need to commit the program to the repository:
C:\GCcobsrc>fossil ci -m "FV TIPS project"./exectips.cob contains CR/LF line endings. Use --no-warnings or the "crlf-glob" setting to disable this warning.Commit anyhow (a=all/c=convert/y/N)? aNew_Version: 487cb3d67aca8d7b4b24e838957f0dcac79e488235103787007c81ccc000dad1
Note that “ci” is an abbreviation of Check-In, which is a synonym for the “Commit” command.
This command requires some explanation. You don’t need to tell Fossil which files to commit. Itwill commit all the files it knows about that have changed. In my example, I only added one file so there was only one file to commit. If I had 100 files already in the repository and I only changed one file, the “fossil ci” commit request would only commit the one file that had changes.
The “-m” option is the comment for the modules committed (or the whole project). In this example, the comment was “FV TIPS project”. The comment will be applied to all files committed. If you want comments to apply to individual files, commit single files with unique comments.
If you want to turn off the warning for CR/LF line endings, you will need to use the web interface and Admin commands to change some settings. That will be discussed later.
At some point I added more source files and even changed one. Here is the command to list themodules in the repository:
Page 20
Using MinGW GnuCOBOL Guide (draft)
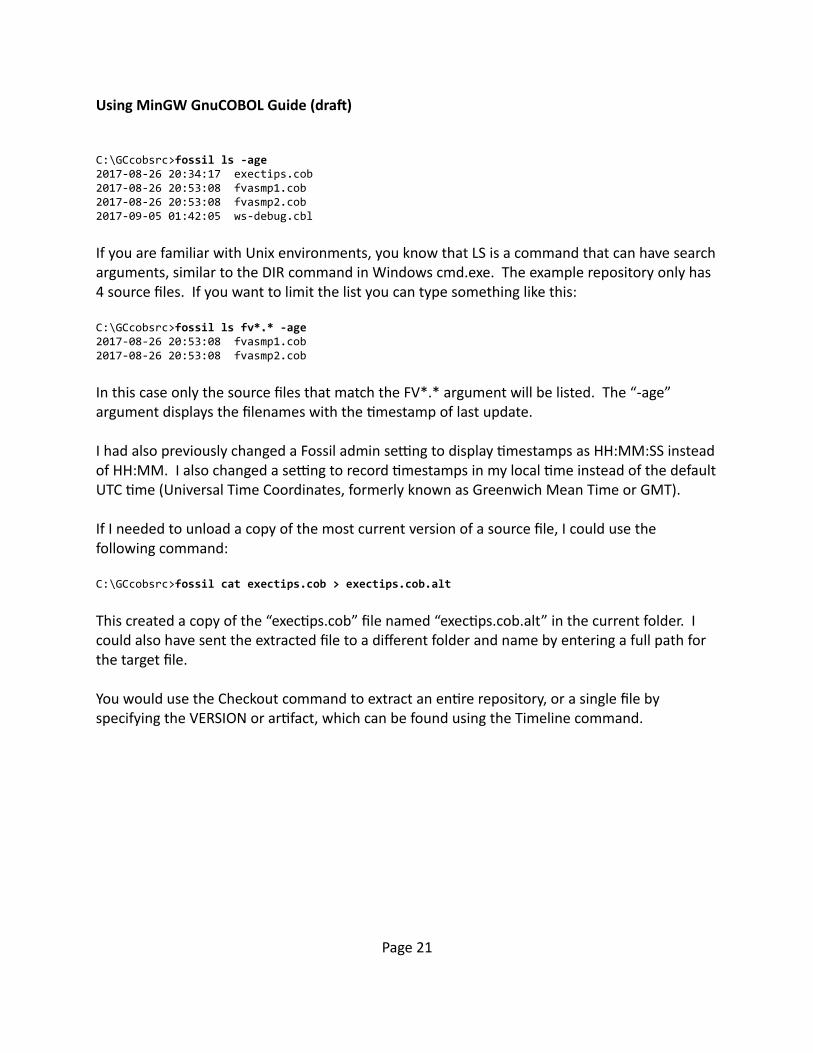
C:\GCcobsrc>fossil ls -age2017-08-26 20:34:17 exectips.cob2017-08-26 20:53:08 fvasmp1.cob2017-08-26 20:53:08 fvasmp2.cob2017-09-05 01:42:05 ws-debug.cbl
If you are familiar with Unix environments, you know that LS is a command that can have searcharguments, similar to the DIR command in Windows cmd.exe. The example repository only has 4 source files. If you want to limit the list you can type something like this:
C:\GCcobsrc>fossil ls fv*.* -age2017-08-26 20:53:08 fvasmp1.cob2017-08-26 20:53:08 fvasmp2.cob
In this case only the source files that match the FV*.* argument will be listed. The “-age” argument displays the filenames with the timestamp of last update.
I had also previously changed a Fossil admin setting to display timestamps as HH:MM:SS insteadof HH:MM. I also changed a setting to record timestamps in my local time instead of the defaultUTC time (Universal Time Coordinates, formerly known as Greenwich Mean Time or GMT).
If I needed to unload a copy of the most current version of a source file, I could use the following command:
C:\GCcobsrc>fossil cat exectips.cob > exectips.cob.alt
This created a copy of the “exectips.cob” file named “exectips.cob.alt” in the current folder. I could also have sent the extracted file to a different folder and name by entering a full path for the target file.
You would use the Checkout command to extract an entire repository, or a single file by specifying the VERSION or artifact, which can be found using the Timeline command.
Page 21

Using MinGW GnuCOBOL Guide (draft)
To enter the fossil web interface, type the following command:
C:\GCcobsrc>fossil uiListening for HTTP requests on TCP port 8080Launch webbrowser: start http://localhost:8080/timeline?c=current &Type Ctrl-C to stop the HTTP server
This will open up your default web browser for managing your repository file. Since the repository is on my local computer, it is not connected to the internet. You should see a screen that looks like this:
Page 22

Using MinGW GnuCOBOL Guide (draft)
Click on the “timeline” menu option and (if you have committed any files) you should see a screen that looks like this:
Note the identifiers between brackets (one example is [59b113fd2b]). It can be used to extract an older version of a source file.
There are extensive help screens on the website (see Home, then Help), and you can change Fossil settings using options under the “Admin” tabl.
When you are finished with the web browser interface, click on the “logout” icon to exit. (Showwhat the logout screen looks like.) Then go back to your cmd.exe window, and type CTRL-C to turn off the fossil web-server.
BE SURE TO CLOSE your fossil repository when you’re done. It must be closed before you backup the repository file:
Page 23

Using MinGW GnuCOBOL Guide (draft)
C:\GCcobsrc>fossil uiListening for HTTP requests on TCP port 8080Launch webbrowser: start http://localhost:8080/timeline?c=current &Type Ctrl-C to stop the HTTP server^CC:\GCcobsrc>fossil close
Here is an example from Admin Log section of Admin options. This is where you can change your Fossil loggin options.
Page 24

Using MinGW GnuCOBOL Guide (draft)
Additional Resources and Comments
[This section is not done yet.]
Here are links to GnuCOBOL manuals and the GnuCOBOL sourceforge site and forums.
https://sourceforge.net/p/open-cobol/code/HEAD/tree/external-doc/guide/PDFs/
http://www.applewood.linkpc.net/files/GnuCobol/
Future enhancements to this guide.
Using subprograms, including nested programs, static subprograms, and dynamic subprograms (.dll files). How to staticially link separately compiled subprograms (it’s tricky). Possibly some discussion of “chaining” as another way to invoke subprograms. Examples of nested programs, embedding subprograms in the main program source file, or as copybooks.
Using Line Sequential files, Unix line terminators versus Windows, etc.
More discussion of the Berkeley Database (BDB) versus VBISAM licensing issues.
Page 25


![GnuCOBOL 2.0 Release Candidate 2 [06NOV2016] Build Guide ... · OpenCOBOL-1.1-06FEB2009-Build-Guide-For-MinGW.pdf ... I used Gary Cutler's document as a guide when building GnuCOBOL](https://img.pdfslide.us/doc/110x75/5ec2e00922cd6a3ea04f4b81/gnucobol-20-release-candidate-2-06nov2016-build-guide-opencobol-11-06feb2009-build-guide-for-mingwpdf.jpg)
![GnuCOBOL Quick Reference 2.2 OCT2017 Qu… · GnuCOBOL 2.2 Final [7Sept2017] Quick Reference 1 1. CDF When the compiler is operating in Fixed Format Mode, all CDF statements must](https://img.pdfslide.us/doc/110x75/5f06bd7c7e708231d4197f03/gnucobol-quick-reference-22-oct2017-qu-gnucobol-22-final-7sept2017-quick-reference.jpg)


![GnuCOBOL Programmer’s Guide 2.2 NOV2017... · GnuCOBOL Programmer’s Guide For Version 2.2 Final [7Sept2017] Gary L. Cutler (cutlergl@gmail.com). For updates Vincent B. Coen (vbcoen@gmail.com)](https://img.pdfslide.us/doc/110x75/5b9bcac809d3f29b498b7d09/gnucobol-programmers-guide-22-nov2017-gnucobol-programmers-guide-for.jpg)

![GnuCOBOL Quick Reference 2.2... · GnuCOBOL 2.2 Final [7Sept2017] Quick Reference 1 1. CDF When the compiler is operating in Fixed Format Mode, all CDF statements must begin in column](https://img.pdfslide.us/doc/110x75/5f9d03a864d1c361ab7c8315/gnucobol-quick-reference-22-gnucobol-22-final-7sept2017-quick-reference.jpg)

![GnuCOBOL 3.1-rc1 [30JUN2020] Build Guide for MinGW - … · 2020. 10. 19. · GnuCOBOL 3.1-rc1 Build Guide for MinGW (draft) page 5 of 33 Then verify that a directory named "C:\MinGW\MSYS\1.0\etc"](https://img.pdfslide.us/doc/110x75/60bd83696cedc831f2552fbd/gnucobol-31-rc1-30jun2020-build-guide-for-mingw-2020-10-19-gnucobol-31-rc1.jpg)


![GnuCOBOL Programmer’s Guide - gnucobol.sourceforge.io 2.2... · GnuCOBOL Programmer’s Guide For Version 2.2 Final [7Sept2017] Gary L. Cutler (cutlergl@gmail.com). For updates](https://img.pdfslide.us/doc/110x75/6014e13bc4f07645be7fe1e1/gnucobol-programmeras-guide-22-gnucobol-programmeras-guide-for-version.jpg)
![GnuCOBOL 3.1-rc1 [30JUN2020] Build Guide for MinGW ... · GnuCOBOL 3.1-rc1 Build Guide for MinGW (draft) page 3 of 33 Installing MinGW and the MSYS bash shell When you run “mingw-get-setup.exe”](https://img.pdfslide.us/doc/110x75/5f176d1fdb7ed34690714b05/gnucobol-31-rc1-30jun2020-build-guide-for-mingw-gnucobol-31-rc1-build-guide.jpg)

![GnuCOBOL 3.1-dev [25AUG2019] Build Guide for MinGW ... · First, create a wrapper folder to hold MinGW and keep it separate from any other MinGW installation on the same PC. For this](https://img.pdfslide.us/doc/110x75/5ec2e09562912e60384753dd/gnucobol-31-dev-25aug2019-build-guide-for-mingw-first-create-a-wrapper-folder.jpg)
![GNU COBOL Programmer’s Guide - GnuCOBOL Guides COBOL 2.1 23NOV2013... · GNU COBOL Programmer’s Guide For Version 2.1 [23NOV2013] Gary L. Cutler (cutlergl@gmail.com)](https://img.pdfslide.us/doc/110x75/5c341cb209d3f212298baa4b/gnu-cobol-programmers-guide-gnucobol-guides-cobol-21-23nov2013-gnu.jpg)
![GnuCOBOL Sample Programs 2.2...GnuCOBOL 2.2 Final [7Sept2017] Sample Programs 3 2. COBDUMP COBDUMP is a useful little utility subroutine to produce a formatted hexadecimal and character](https://img.pdfslide.us/doc/110x75/5fedd6c8419b0c037a0961a6/gnucobol-sample-programs-22-gnucobol-22-final-7sept2017-sample-programs-3.jpg)