Embed Size (px)
Citation preview

Using Microsoft Word’s Mail Merge Features
Lunch and Learn: March 15, 2005
Basic Overview
Word’s Mail Merge functions enable you to be more productive and take away some of the time-consuming repetition in your projects.
Common uses are: Labels Form letters Envelopes
Ultimately, you only need two things: Source data Target destination
Basic Overview
For the purposes of this workshop, we will be using the process for labels. Options offered for envelopes, letters and other mail merge paths are very similar to those for labels.
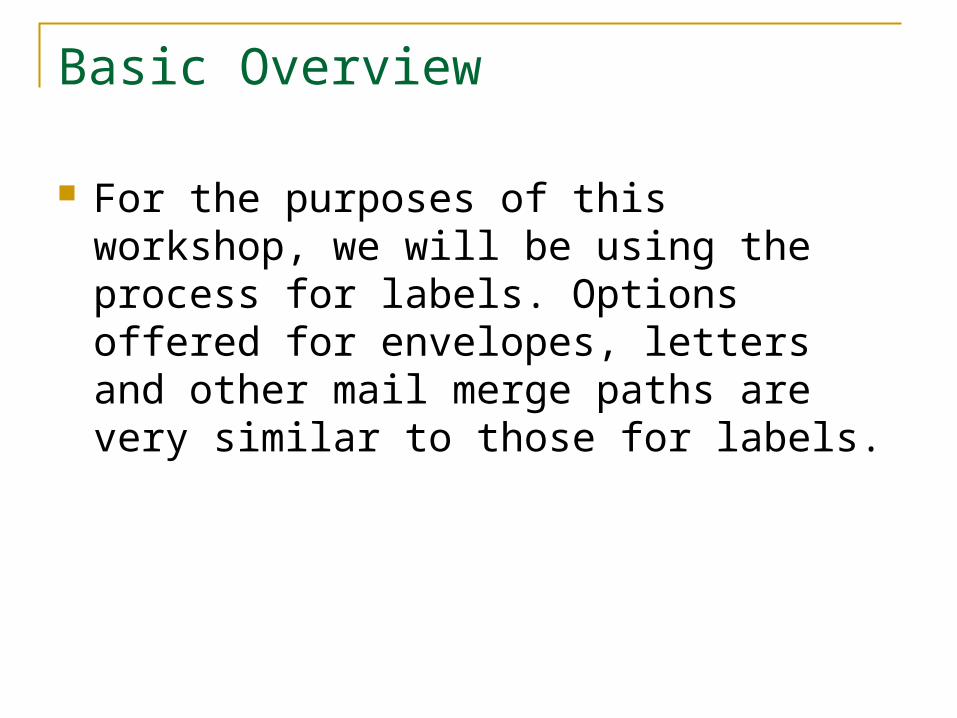
Label Example
Turn on the Mail Merge Wizard.
Label Example
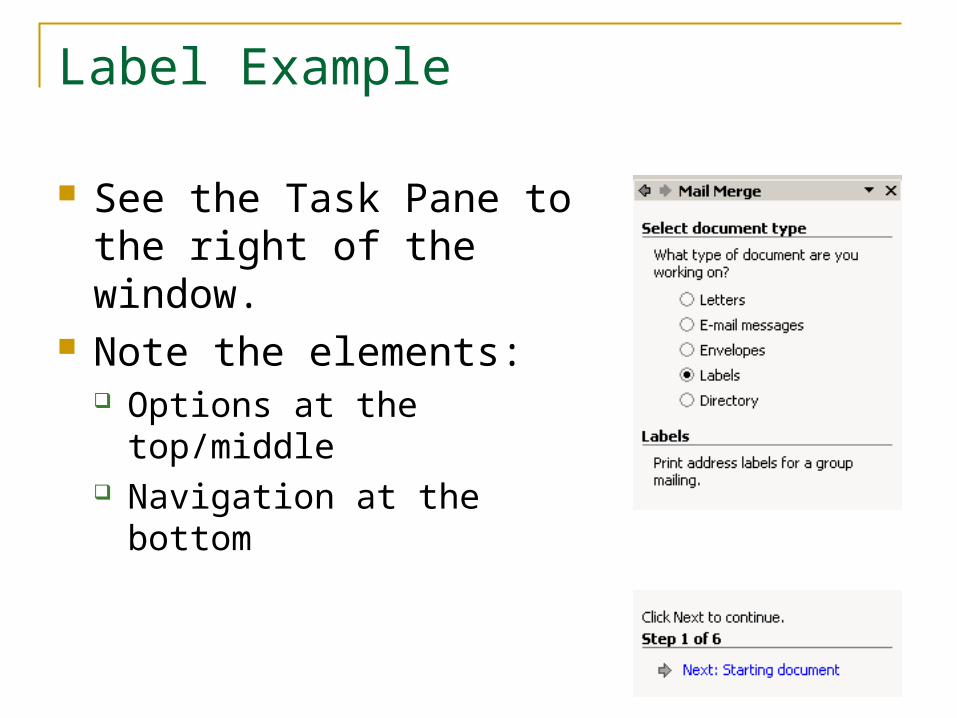
See the Task Pane to the right of the window.
Note the elements: Options at the top/middle Navigation at the bottom
Label Example
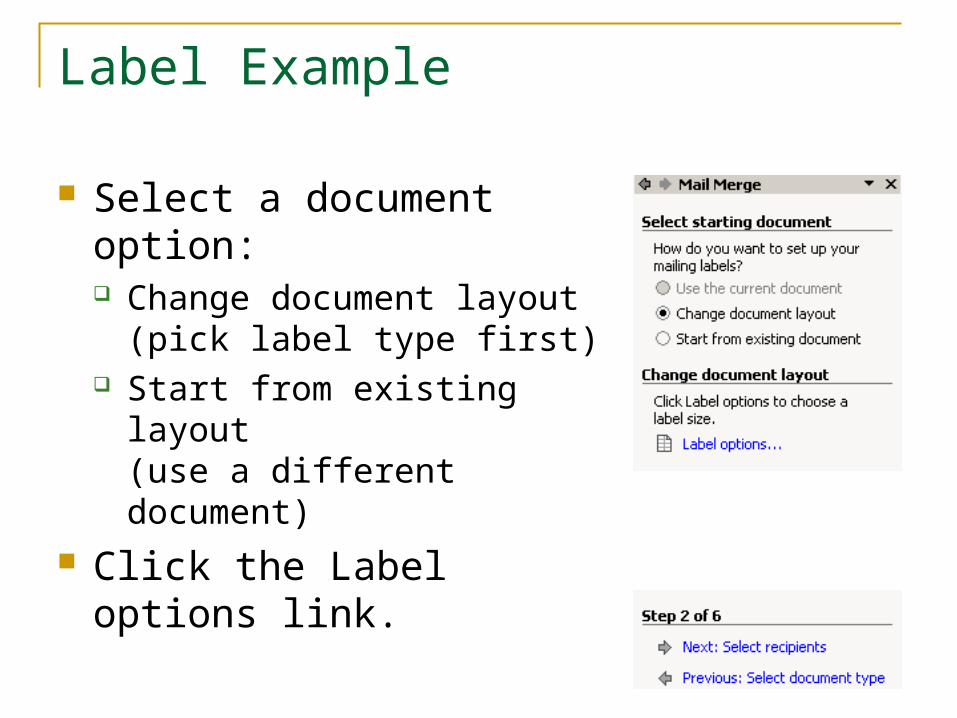
Select a document option: Change document layout
(pick label type first) Start from existing layout
(use a different document) Click the Label options
link.
Label Example
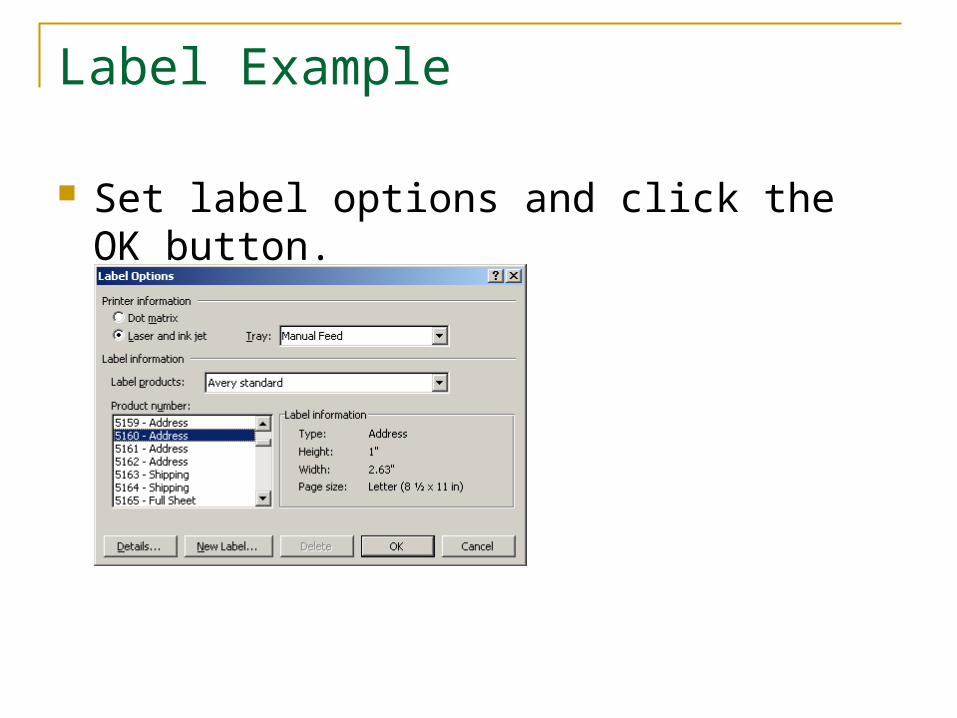
Set label options and click the OK button.
Label Example
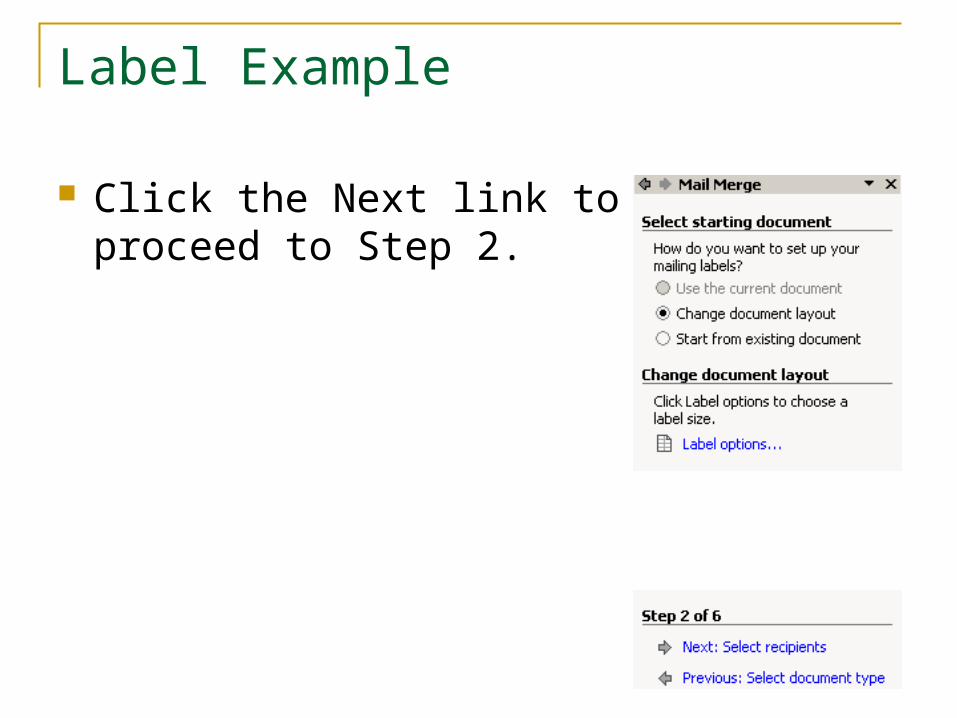
Click the Next link to proceed to Step 2.
Label Example
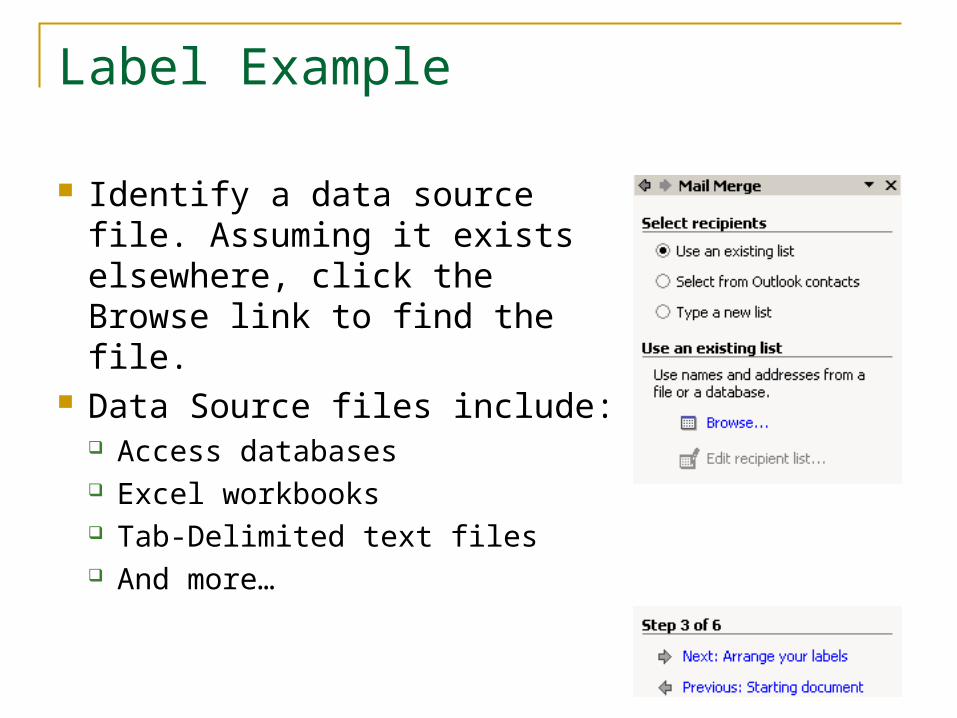
Identify a data source file. Assuming it exists elsewhere, click the Browse link to find the file.
Data Source files include: Access databases Excel workbooks Tab-Delimited text files And more…
Label Example
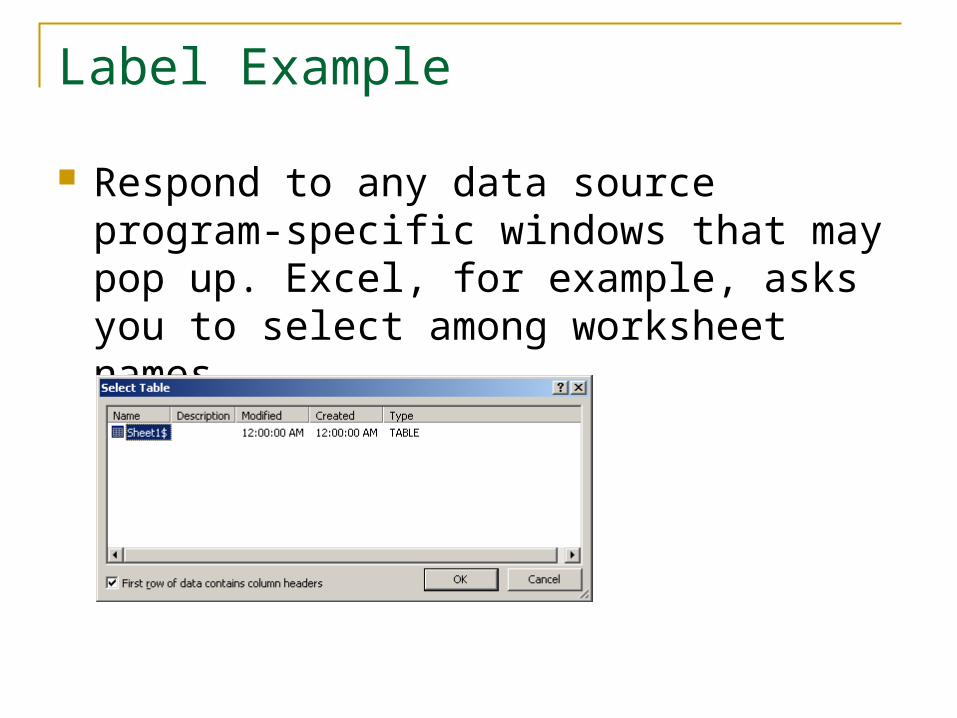
Respond to any data source program-specific windows that may pop up. Excel, for example, asks you to select among worksheet names.

Label Example
Sort or filter as needed and then click the OK button.
Sort by clicking the gray column header.Filter by clicking the drop-down arrow and selecting options.
Sort by clicking the gray column header.Filter by clicking the drop-down arrow and selecting options.
Label Example
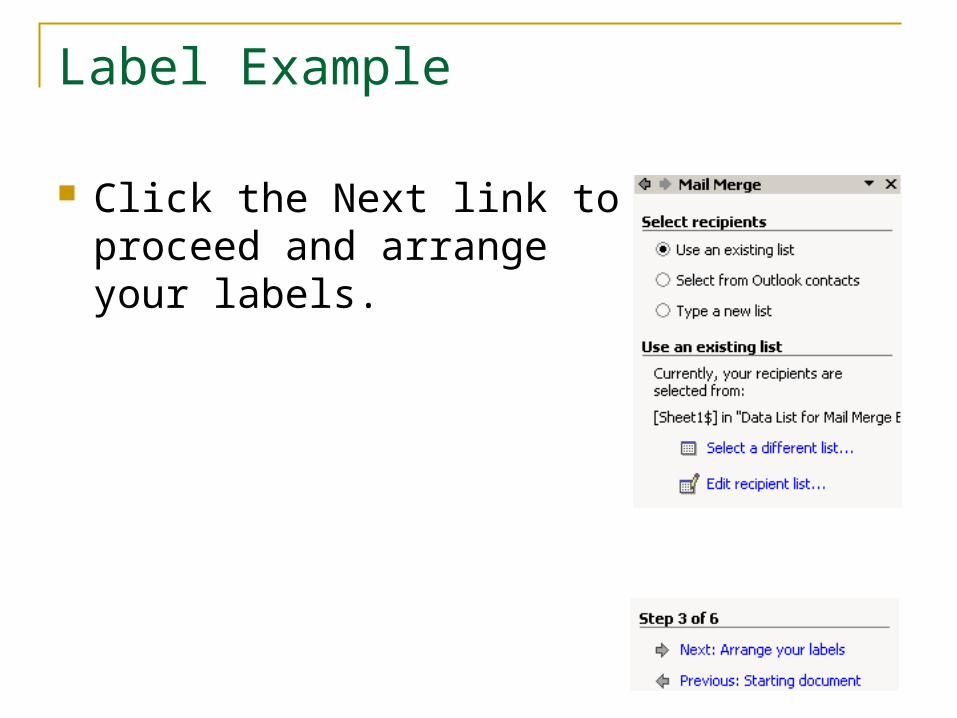
Click the Next link to proceed and arrange your labels.
Label Example
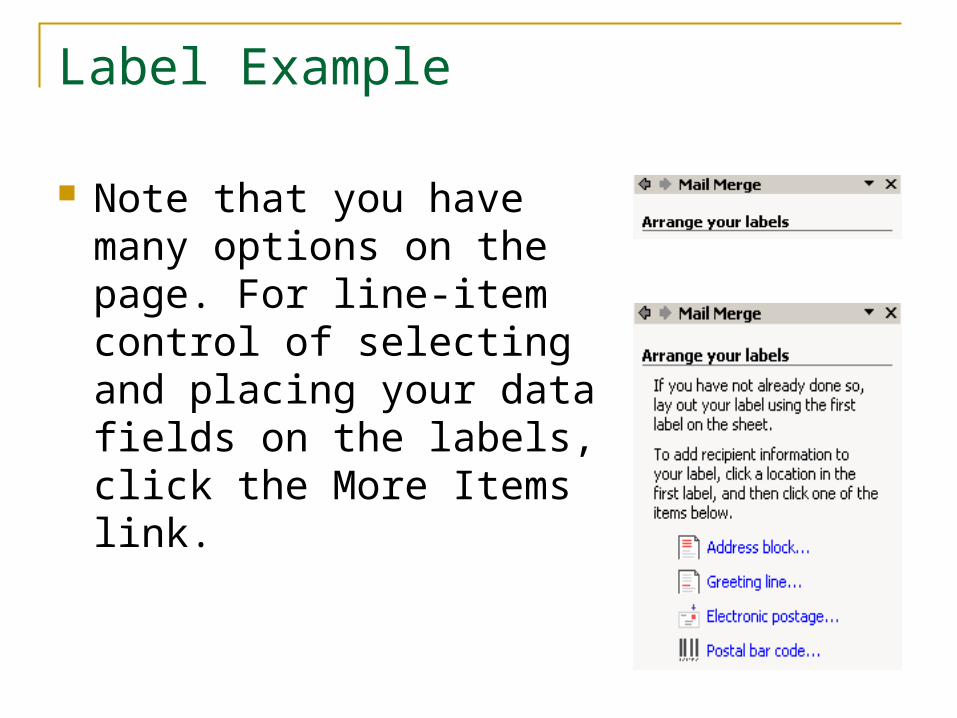
Note that you have many options on the page. For line-item control of selecting and placing your data fields on the labels, click the More Items link.
Label Example
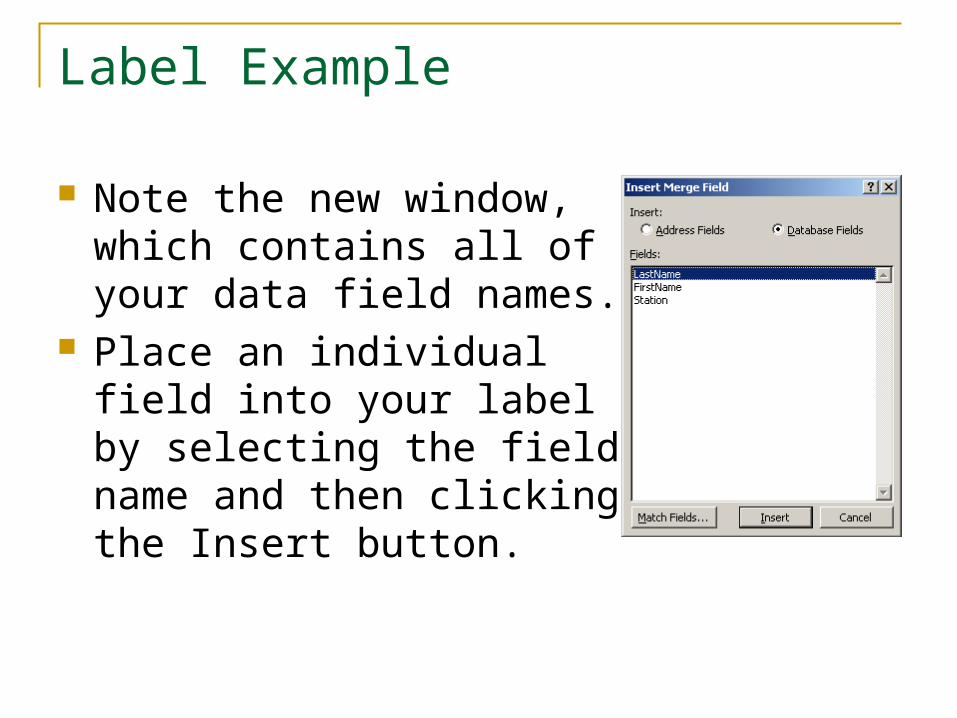
Note the new window, which contains all of your data field names.
Place an individual field into your label by selecting the field name and then clicking the Insert button.
Label Example
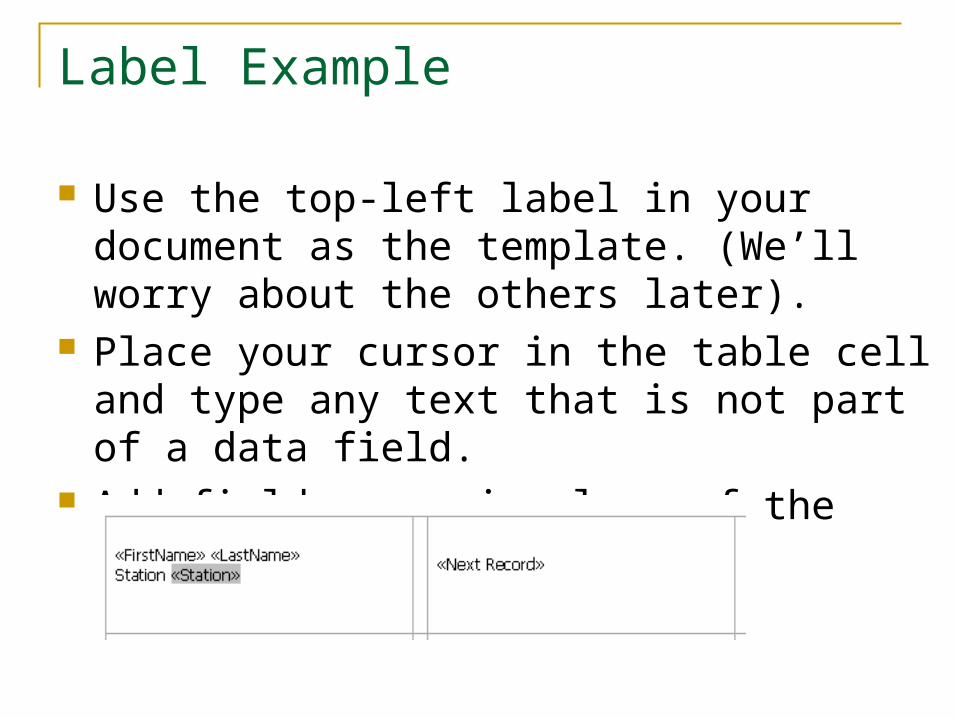
Use the top-left label in your document as the template. (We’ll worry about the others later).
Place your cursor in the table cell and type any text that is not part of a data field.
Add field names in place of the data they represent.
Label Example
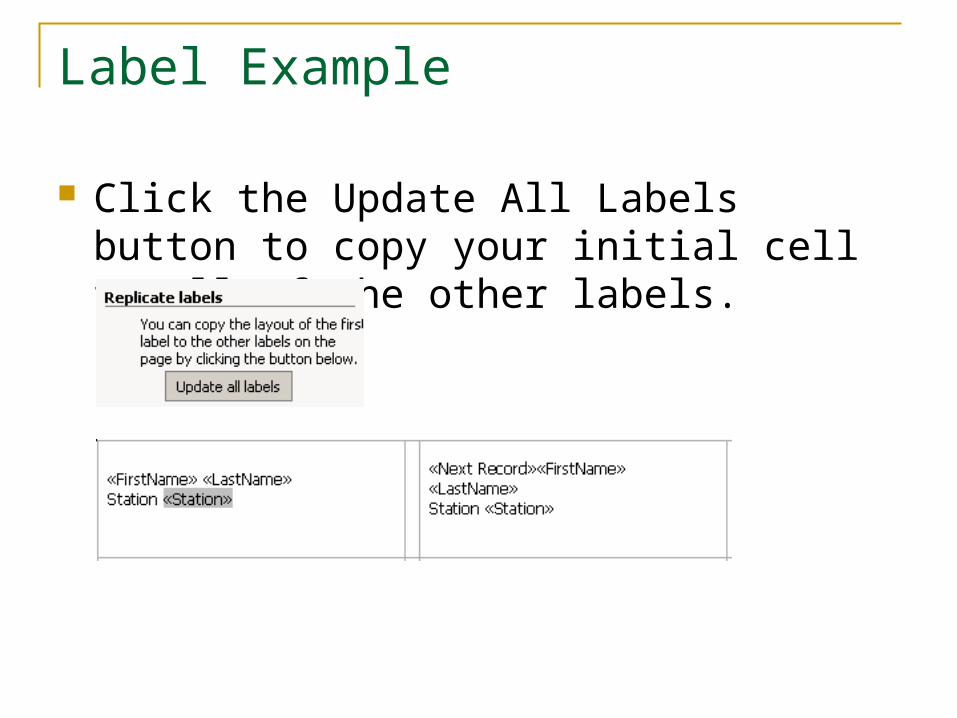
Click the Update All Labels button to copy your initial cell to all of the other labels.
Label Example
Click the Next link to preview your labels.
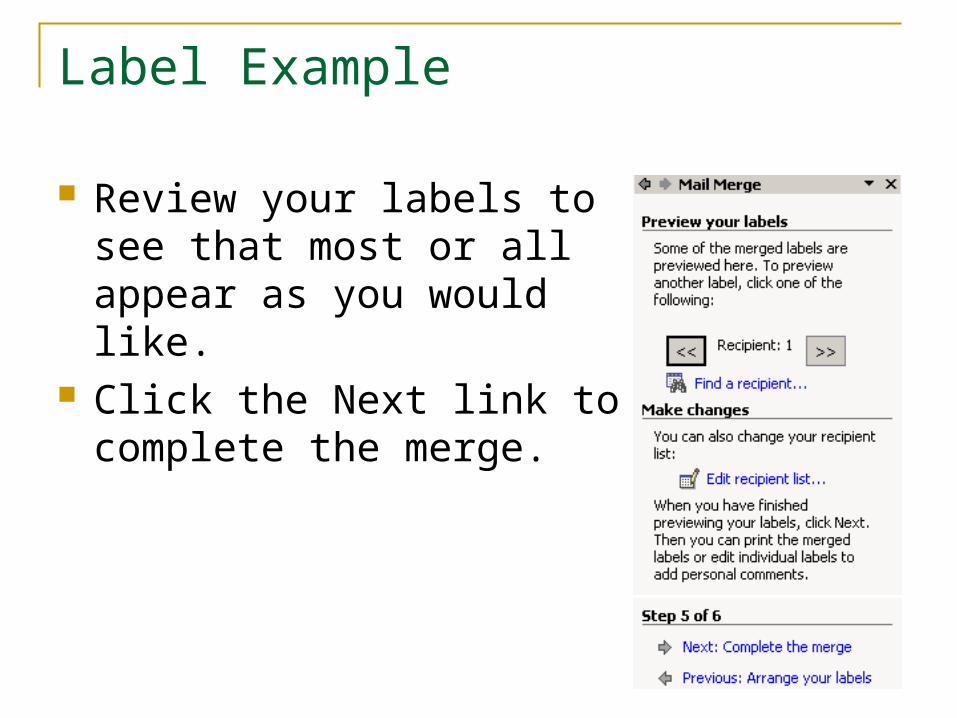
Label Example
Review your labels to see that most or all appear as you would like.
Click the Next link to complete the merge.
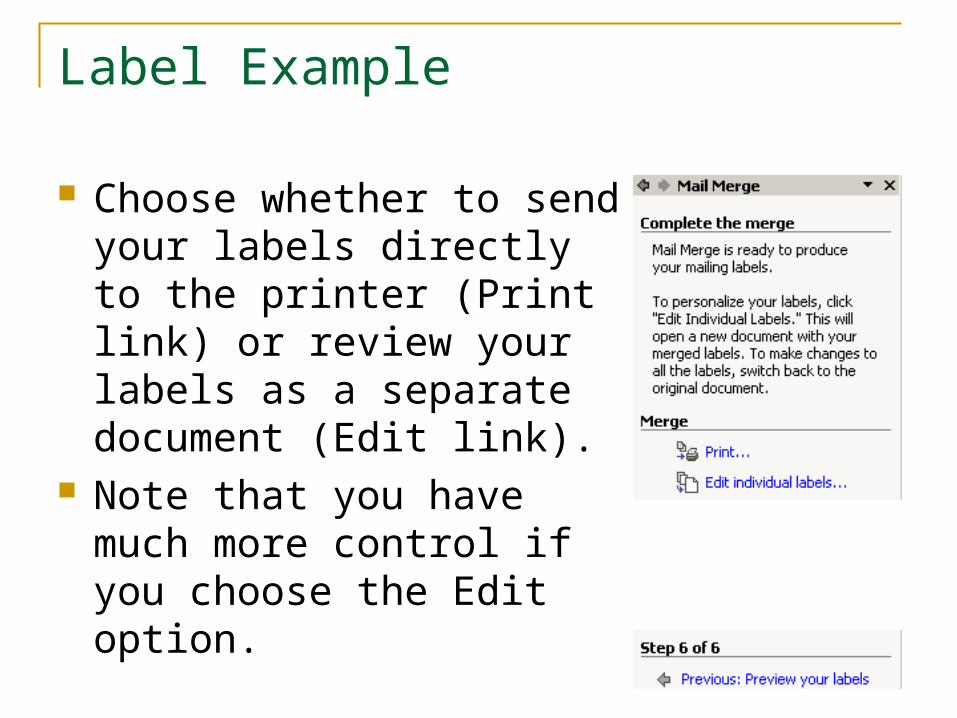
Label Example
Choose whether to send your labels directly to the printer (Print link) or review your labels as a separate document (Edit link).
Note that you have much more control if you choose the Edit option.
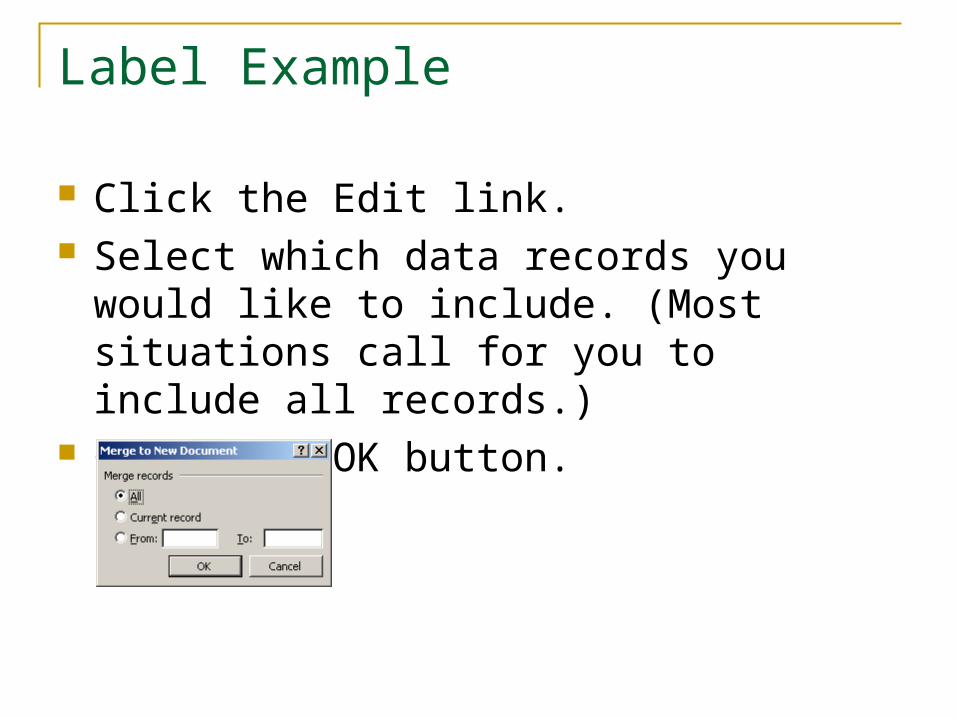
Label Example
Click the Edit link. Select which data records you would
like to include. (Most situations call for you to include all records.)
Click the OK button.
Label Example
Edit and format your document however you see fit.
Save your document if you may need it again in the future.