Embed Size (px)
Citation preview

KGNмлулttwhон±!!
USER MANUAL

2016DVD Operation
2122

Power cord
Remote control/batteries
0
12 3
45 6
7 8 9
OK
P.MODE S.MODE
SLEEP
SOURCE
MENU
INFO
EXIT
MUTE
VOL
CH
ASPECT
X
TITLE/SIZE SUBTITLE
/TTX /CANCEL
DVD.SETUP
/FAV /EPG
MENU/SUBPAGE
/HOLD /REVEAL
AUDIO/INDEX
USB/SD
GOTOSLOW
A-B
REPEAT
/ADD/ERASE
Sound mode button
DVD stop / Favorite program button
Mute button
Channel list / USB/SD Card function select buttton
Sleep function button NICAM function button
Information display button
Numeric buttons
Confirm button
DVD A-B repeat / BLUE buttonDVD repeat playback / YELLOW button
DVD title / Teletext size buttonDVD previous / Teletext on/off / mix buttonDVD rewind / Teletext cancel button
Volume adjusting button Channel select button
0
1 2 34 5 67 8 9
OK
P.MODE S.MODE SLEEP
SOURCE MENU
INFO EXIT
MUTE
VOL CH
ASPECT
XTITLE/SIZE SUBTITLE/TTX /CANCEL
DVD.SETUP/FAV/EPG
MENU/SUBPAGE/HOLD /REVEAL AUDIO/INDEX
CH.LISTUSB/SD
/ADD/ERASE
Power/Standby button Picture mode button
Remote control indicator
Return channel buttonMenu buttonSignal source select button Navigation buttons (Up, Down, Left, Right)
Menu exit button
DVD setup menu buttonDisplay mode select button DVD open/close / Favorite program add/delete button
DVD next / Teletext hold buttonDVD goto / RED button
DVD slow / GREEN button
DVD play/pause / Electronic program guide button
DVD forward / Teletext reveal button
Subtitle button
Disc menu / Teletext subpage buttonAudio language select / Teletext index button GOTO SLOW REPEAT A-B
S.MODE: Sound mode button, setting the sound mode.P.MODE: Picture mode button, setting the picture mode.
SLEEP: Sleep button, setting TV power off time.I/II: Press the I/II button to choose a different audio channel.
ASPECT:ADD/ERASE:
Press the ASPECT button to select the picture display ratio: 16:9 / 4:3.
INFO:
MUTE
Press the INFO button for information.
0,1-9: TV channel selection button.
SOURCE: Signal source selection button (TV/AV/S-VIDEO/YPBPR1/YPBPR2/VGA/HDMI1/HDMI2/HDMI3/DVD).
OK:
CH.LIST:
Confirm button, confirm all the changes and settings.
Press the EPG button for detailed information about the channel.
Press the CH.LIST button to display the channel list.USB/SD: Press the USB/SD button to choose USB or SD card function.
Press the FAV button to start the “Favorite List” for selecting your favorite program.Press the ADD/ERASE button to add or delete your favorite program.
Remote sensor.Power indicator.
Power on/off button.8. SD/MMC/MS card slot.9. USB port.10. STOP button.11. OPEN/CLOSE button.12. PLAY/PAUSE button.
Insert DVD with Label to the Front
1 2
8
9
10
11
12

ON/OFFAC IN TVCOAXS-VIDEOY1 Pb1 Pr1 RL1 R1
C-VIDEOY2 Pb2 Pr2 LL2 R2HDMI2 HDMI3HDMI1
Power on/off button.AC power input terminal.
Component video & audio input terminals (Y Pb Pr/L/R 1/2).S-VIDEO input.Composite video & audio input terminals (AV).9. Coaxial audio signal out plug.10.11.
HDMI input. USB SERVICE input (Serviceable only for updating the firmware).
USBSERVICE
9
10 11
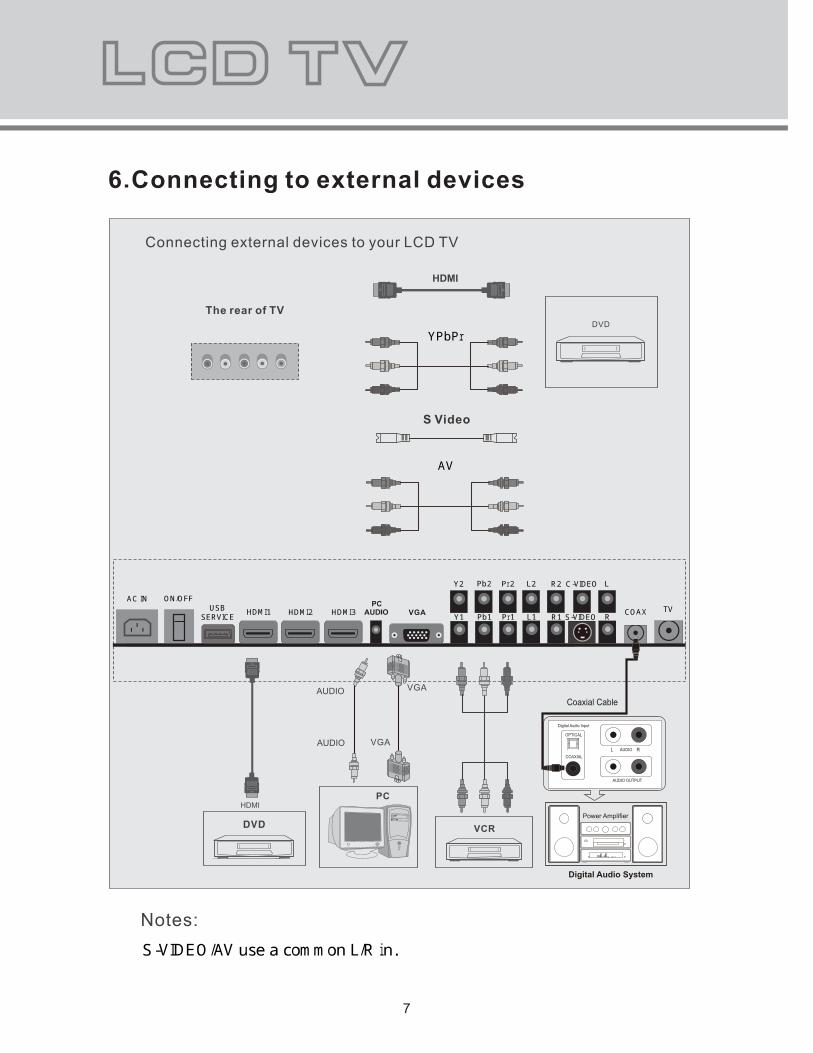
YPbPr
AV
ON/OFFAC IN TVCOAXS-VIDEOY1 Pb1 Pr1 RL1 R1
C-VIDEOY2 Pb2 Pr2 LL2 R2HDMI2 HDMI3HDMI1 USBSERVICE
S-VIDEO/AV use a common L/R in.
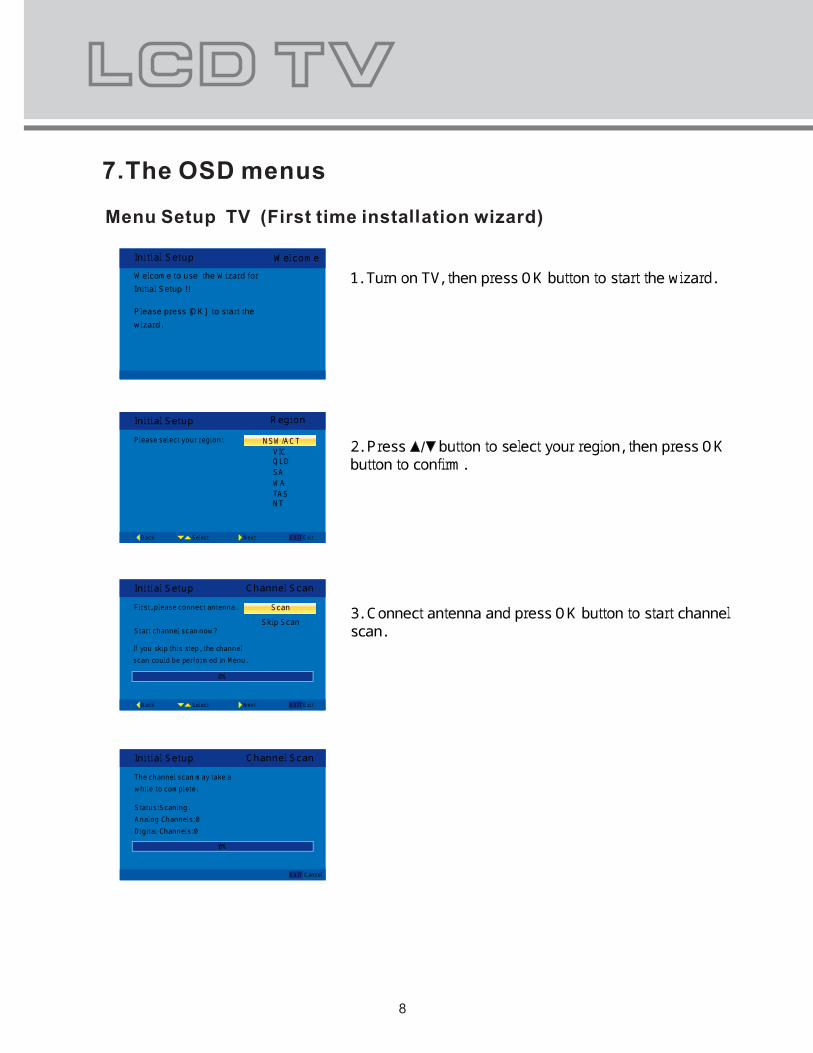
1. Turn on TV, then press OK button to start the wizard.
2. Press button to select your region, then press OK button to confirm.
3. Connect antenna and press OK button to start channel scan.
Initial Setup WelcomeWelcome to use the Wizard forInitial Setup !!Please press [OK] to start thewizard.
Initial SetupPlease select your region:
RegionNSW/ACT VIC QLD SA WA TAS NT
Back Select Next EXIT Exit
Initial Setup
Back Select Next EXIT Exit
Channel ScanFirst, please connect antenna.Start channel scan now?If you skip this step, the channelscan could be performed in Menu.
ScanSkip Scan
0%
Initial Setup
EXIT Cancel
Channel ScanThe channel scan may take a while to complete.Status:Scaning.Analog Channels:0Digital Channels:0
0%
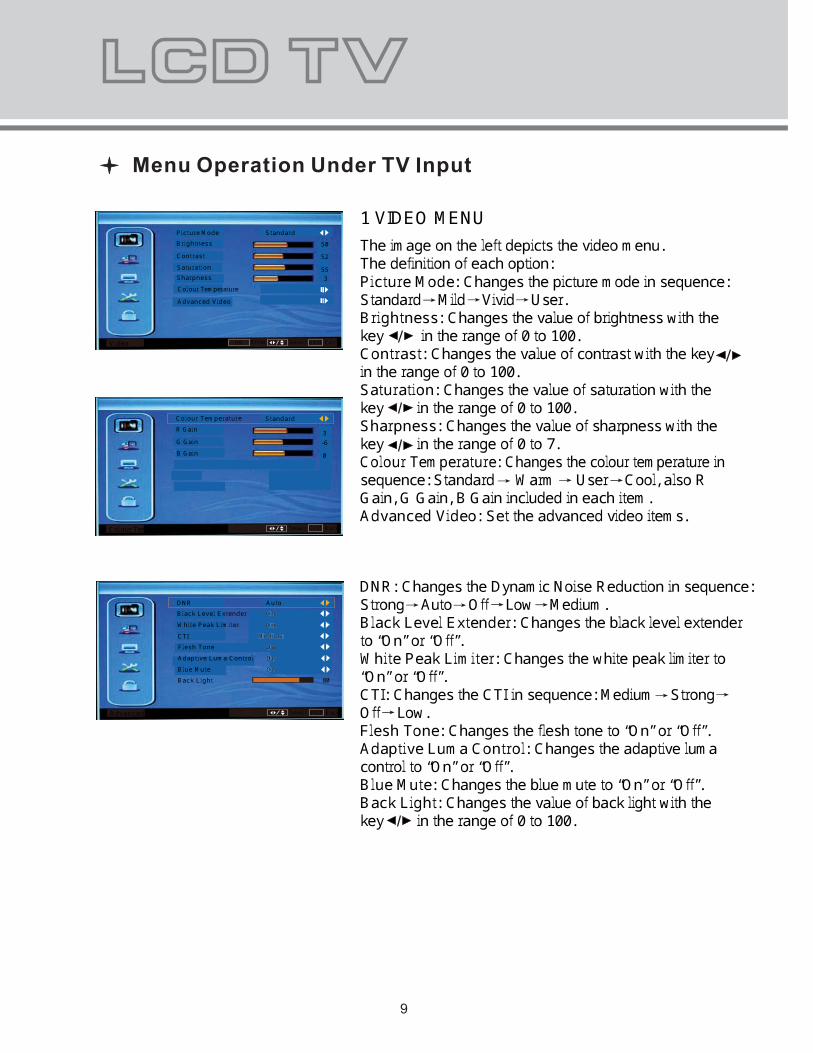
1 VIDEO MENUThe image on the left depicts the video menu.The definition of each option:Picture Mode: Changes the picture mode in sequence: Standard Mild Vivid User.Brightness: Changes the value of brightness with thekey in the range of 0 to 100.Contrast: Changes the value of contrast with the key in the range of 0 to 100.Saturation: Changes the value of saturation with thekey in the range of 0 to 100.Sharpness: Changes the value of sharpness with thekey in the range of 0 to 7.Colour Temperature: Changes the colour temperature insequence: Standard Warm User Cool, also R Gain, G Gain, B Gain included in each item.Advanced Video: Set the advanced video items.
DNR: Changes the Dynamic Noise Reduction in sequence:Strong Auto Off Low Medium.Black Level Extender: Changes the black level extenderto “On” or “Off”.White Peak Limiter: Changes the white peak limiter to “On” or “Off”.CTI: Changes the CTI in sequence: Medium Strong Off Low.Flesh Tone: Changes the flesh tone to “On” or “Off”.Adaptive Luma Control: Changes the adaptive lumacontrol to “On” or “Off”.Blue Mute: Changes the blue mute to “On” or “Off”.Back Light: Changes the value of back light with thekey in the range of 0 to 100.
Video
Picture ModeBrightnessContrastSaturationSharpness
Advanced VideoColour Temperature
Standard505255 3
OK Enter Select EXIT Exit
Colour Temperature Select EXIT Back
B GainG GainR GColour Temperature
ainStandard
3-60
Advanced Video Select EXIT Back
DNR
CTIFlesh ToneBlue MuteBack LightAdaptive Luma Control
White Peak LimiterBlack Level Extender
AutoOnOnOnOnOn
Medium
80

10
2 AUDIO MENUThe image on the left depicts the audio menu.The definition of each option:Sound Mode: Changes the sound mode in sequence:Standard Pop Rock News.Balance: Changes the value of balance with the key in the range of -50 to +50.Bass: Changes the value of bass with the key in therange of 0 to 100.Treble: Changes the value of treble with the keyin the range of 0 to 100.Sound Surround: Changes the sound surround to “On”or “Off”.Auto Volume Control: Changes the auto volume controlto “On” or “Off”.
Audio OK Adjust Select EXIT Exit
BalanceBassTreble
Sound Mode Standard
Sound Surround OffAuto Volume Control Off
05050
Channel Scan EXIT Cancel
82%
Status:ScanningAnalog Channels:0Digital Channels:0
Channels OK Scan Select EXIT Back
Channel ScanManual ScanChannel EditAnalog Channel Fine Tune
TV OK Enter Select EXIT Exit
Country Region NSW/ACTChannels
3 TV MENUThe image on the left depicts the TV menu.The definition of each option:Country Region: Changes the country region in sequence:VIC, QLD, SA, WA, TAS, NT, NSW/ACT.Channels: Press key to this position, then presskey to enter Channels submenu, the menu options includeChannel Scan, Manual Scan, Channel Edit and AnalogChannel Fine Tune.
Channel Scan: Press or OK button to enter channel scan.
11
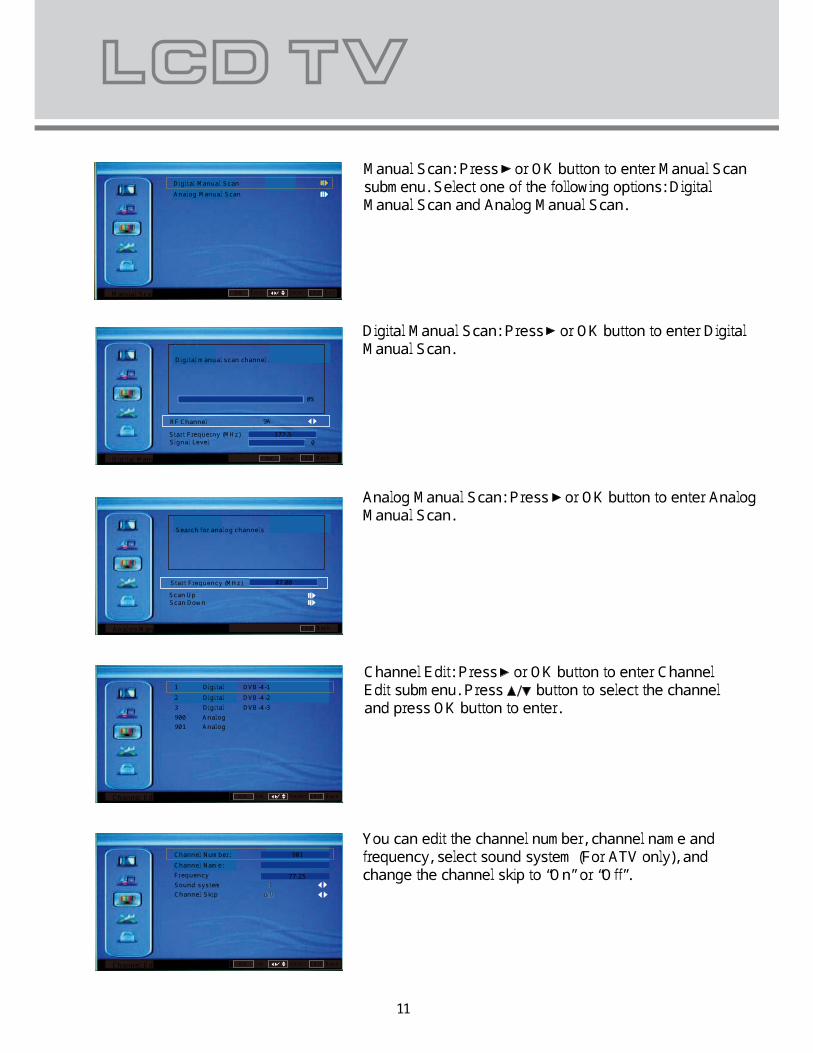
Manual Scan: Press or OK button to enter Manual Scansubmenu. Select one of the following options: Digital Manual Scan and Analog Manual Scan.
Analog Manual Scan EXIT Back
Start Frequency (MHz)Scan DownScan Up
47.00
Search for analog channels
Digital Manual Scan OK Scan EXIT Back
RF ChannelSignal Level
9A0Start Frequerny (MHz)
0%
177.5
Digital manual scan channel.
Digital Manual ScanAnalog Manual Scan
Manual Scan OK Enter Select EXIT Exit
Digital Manual Scan: Press or OK button to enter DigitalManual Scan.
Analog Manual Scan: Press or OK button to enter AnalogManual Scan.
1 Digital DVB-4-12 Digital DVB-4-23 Digital DVB-4-3900 Analog 901 Analog
Channel Edit OK Set Select EXIT Back
Channel Number:Channel Name:FrequencySound systemChannel Skip
Channel Edit OK Set Select EXIT Back
OffI
Channel Edit: Press or OK button to enter ChannelEdit submenu. Press button to select the channel and press OK button to enter.
You can edit the channel number, channel name and frequency, select sound system (For ATV only), andchange the channel skip to “On” or “Off”.901
77.25
12
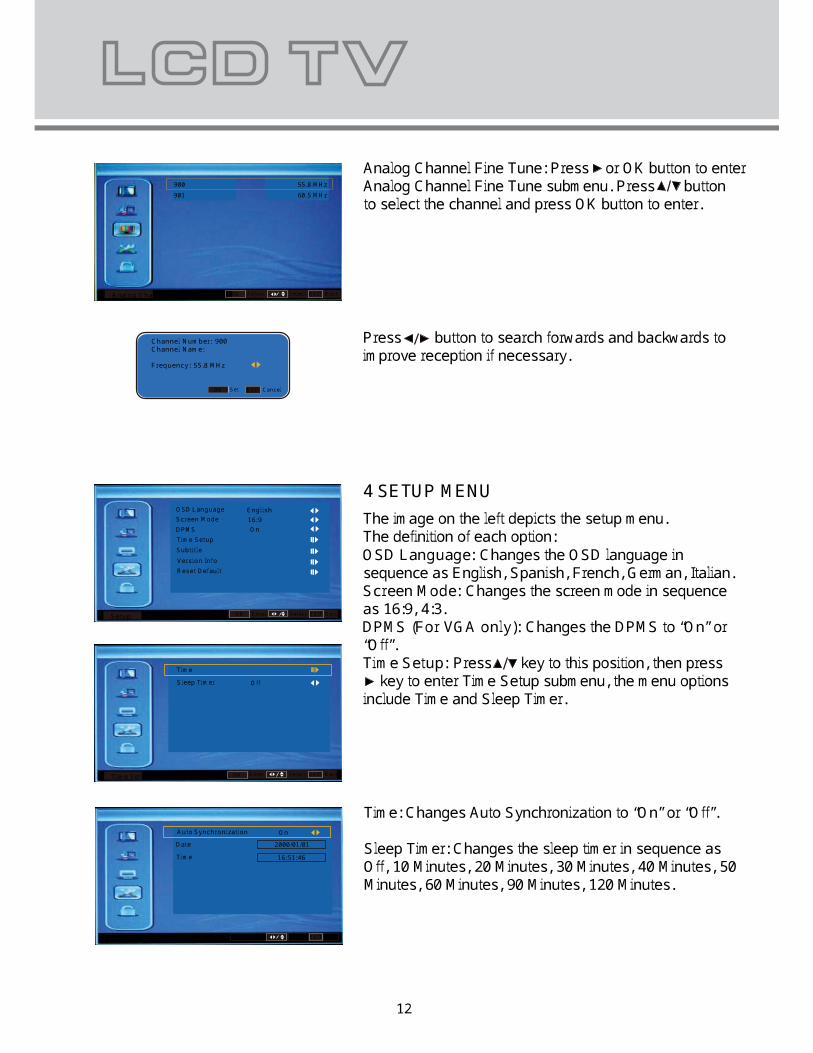
Analog Channel Fine Tune: Press or OK button to enterAnalog Channel Fine Tune submenu. Press buttonto select the channel and press OK button to enter.
Press button to search forwards and backwards toimprove reception if necessary.
900 55.8 MHz901 60.5 MHz
Analog Channel Fine T OK Adjust Select EXIT Back
Set EXIT CancelOK
Channel Number: 900Channel Name:Frequency: 55.8 MHz
4 SETUP MENUThe image on the left depicts the setup menu.The definition of each option:OSD Language: Changes the OSD language in sequence as English, Spanish, French, German, Italian.Screen Mode: Changes the screen mode in sequenceas 16:9, 4:3.DPMS (For VGA only): Changes the DPMS to “On” or“Off”.Time Setup: Press key to this position, then press key to enter Time Setup submenu, the menu options include Time and Sleep Timer.
Time: Changes Auto Synchronization to “On” or “Off”.Sleep Timer: Changes the sleep timer in sequence asOff, 10 Minutes, 20 Minutes, 30 Minutes, 40 Minutes, 50Minutes, 60 Minutes, 90 Minutes, 120 Minutes.
OK Enter Select EXIT ExitSetup
Screen ModeOSD Language
16:9On
EnglishDPMSTime SetupSubtitleVersion InfoReset Default
Select EXIT BackTime Setup
TimeOffSleep Timer
OK Enter
Select EXIT BackTime
Auto Synchronization2000/01/0116:51:46
OnDateTime
13
EXIT BackSetup
Soft Version: HKTF_HD ver 1.00Hard Version: Antlia VER 1.01
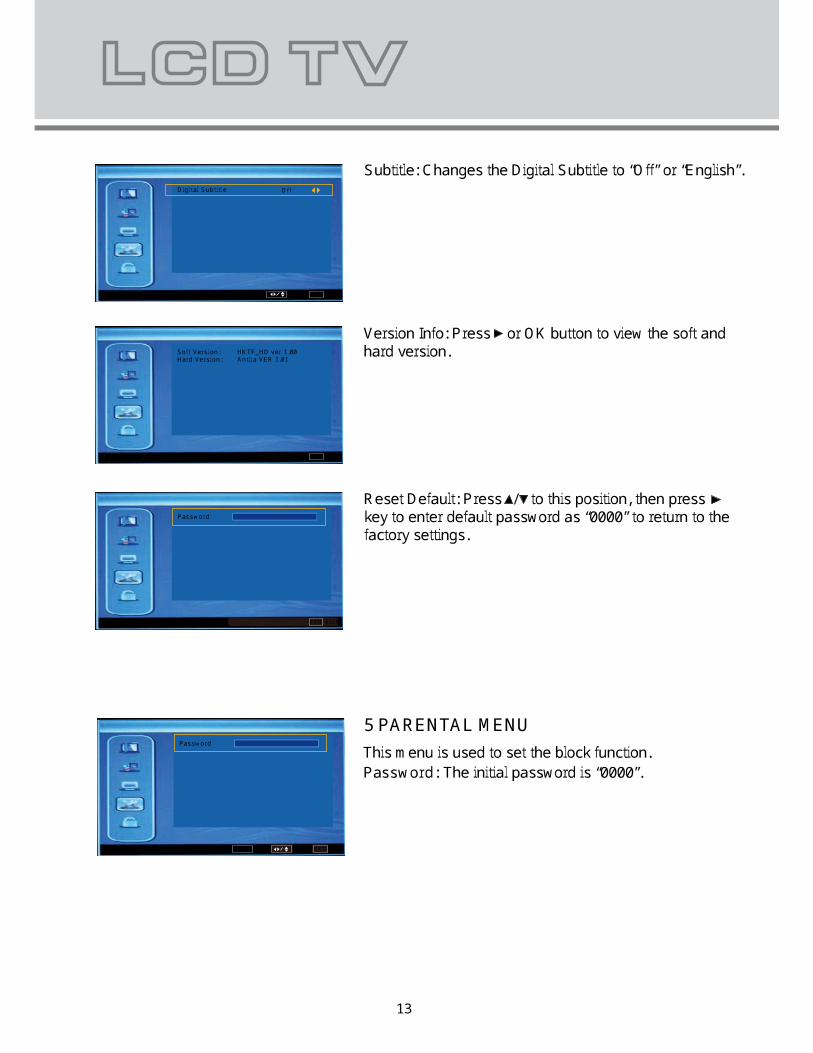
Subtitle: Changes the Digital Subtitle to “Off” or “English”.
Version Info: Press or OK button to view the soft and hard version.
Select EXIT BackSubtitle
OffDigital Subtitle
Reset Default: Press to this position, then presskey to enter default password as “0000” to return to thefactory settings.Password
EXIT BackParental
5 PARENTAL MENUThis menu is used to set the block function.Password: The initial password is “0000”.
Password
EXIT ExitParental OK Enter Select
14
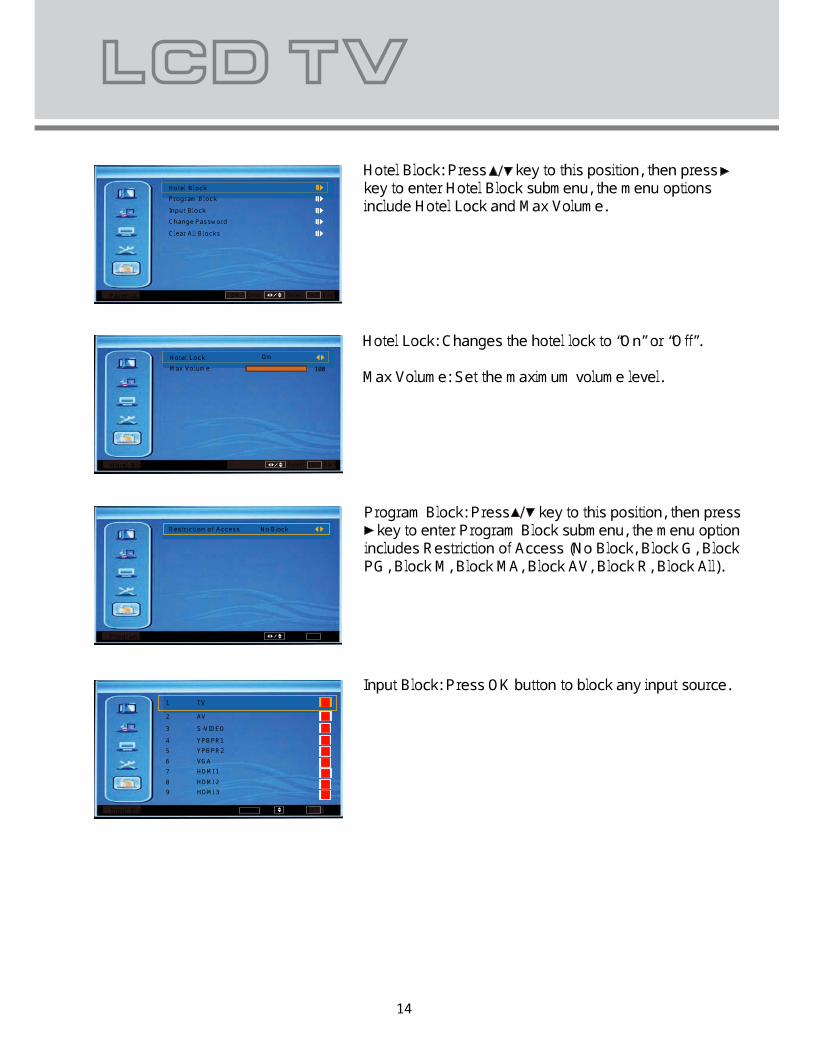
Hotel Block: Press key to this position, then presskey to enter Hotel Block submenu, the menu options include Hotel Lock and Max Volume.
Hotel Lock: Changes the hotel lock to “On” or “Off”.Max Volume: Set the maximum volume level.
BackEXITSelectEnterOK
Change PasswordClear All Blocks
Hotel BlockProgram BlockInput Block
Parental
No BlockRestriction of Access
Program Block BackSelect EXIT
BackEXITSelect
Hotel LockMax Volume
Hotel Block
On100
Program Block: Press key to this position, then press key to enter Program Block submenu, the menu option includes Restriction of Access (No Block, Block G, BlockPG, Block M, Block MA, Block AV, Block R, Block All).
Input Block: Press OK button to block any input source.
EXITtSetOK
S-VIDEOYPBPR1YPBPR2HDM 1I
TVAV
VGA
1234567
HDMI 28HDMI 39
Input Block BackSelec
15
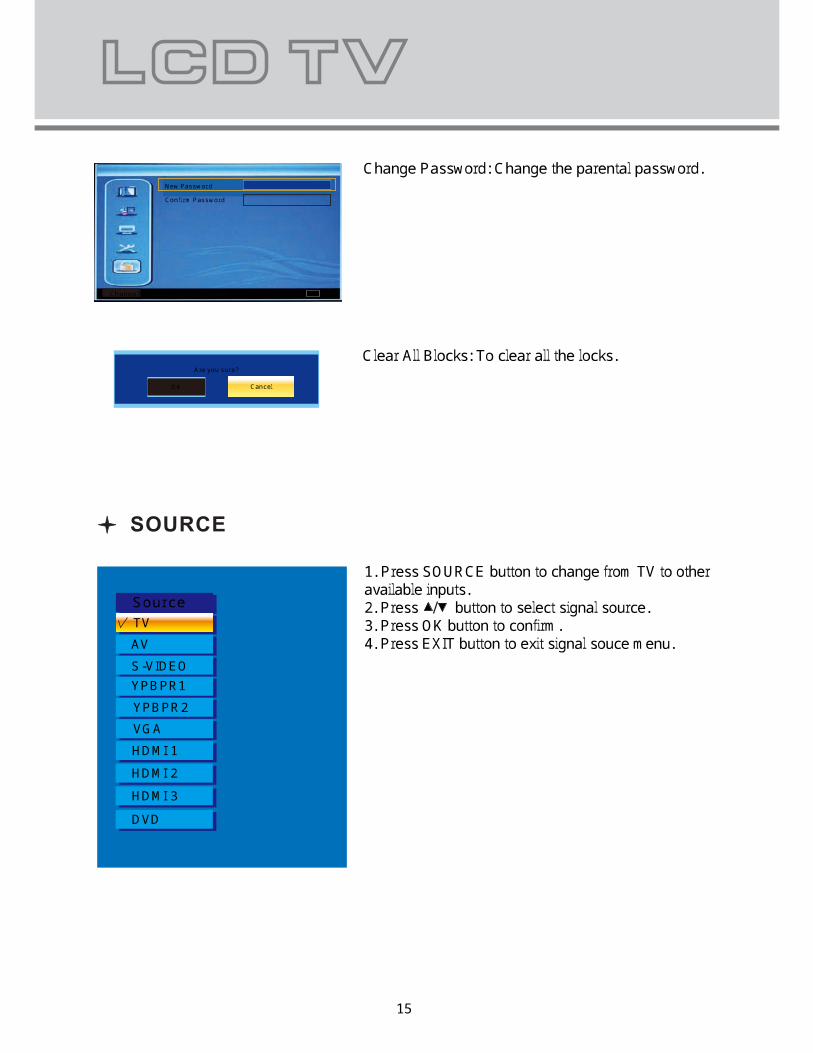
Change Password: Change the parental password.
Clear All Blocks: To clear all the locks.
1. Press SOURCE button to change from TV to other available inputs.2. Press button to select signal source.3. Press OK button to confirm.4. Press EXIT button to exit signal souce menu.
CancelAre you sure?
OK
EXIT
Confirm PasswordNew Password
Change Password Back
TVSourceAVYPBPR1YPBPR2VGAHDMI 1HDMI 2HDMI 3DVD
S-VIDEO

17
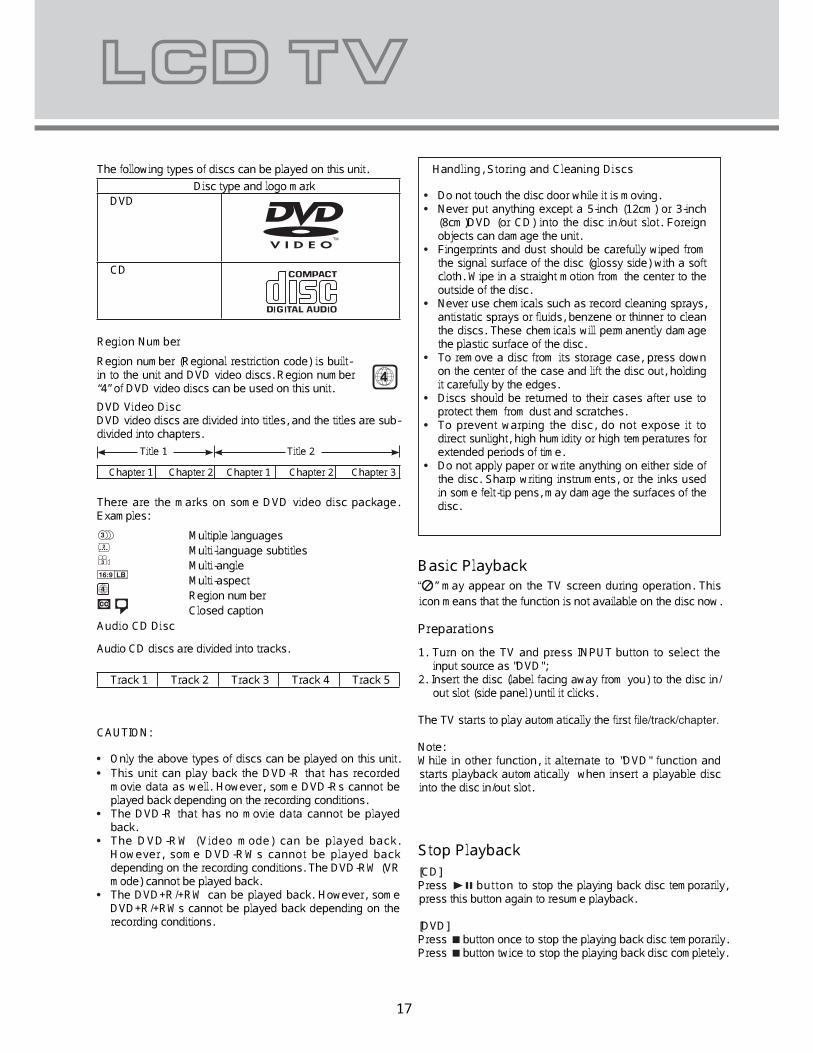
The following types of discs can be played on this unit.Disc type and logo markDVD
CD
Region NumberRegion number (Regional restriction code) is built-in to the unit and DVD video discs. Region number“4” of DVD video discs can be used on this unit.DVD Video DiscDVD video discs are divided into titles, and the titles are sub-divided into chapters.
Chapter 1 Chapter 2 Chapter 1 Chapter 2 Chapter 3There are the marks on some DVD video disc package.Examples:
Audio CD DiscAudio CD discs are divided into tracks.
Track 1 Track 2 Track 3 Track 4 Track 5
TM
Only the above types of discs can be played on this unit.This unit can play back the DVD-R that has recordedmovie data as well. However, some DVD-Rs cannot beplayed back depending on the recording conditions.The DVD-R that has no movie data cannot be playedback.The DVD-RW (Video mode) can be played back.However, some DVD-RWs cannot be played backdepending on the recording conditions. The DVD-RW (VRmode) cannot be played back.The DVD+R/+RW can be played back. However, someDVD+R/+RWs cannot be played back depending on therecording conditions.
•
•
•
•
•
Title 1 Title 2
4
3
2
3
LB16:9
Multiple languagesMulti-language subtitlesMulti-angleMulti-aspectRegion numberClosed caption
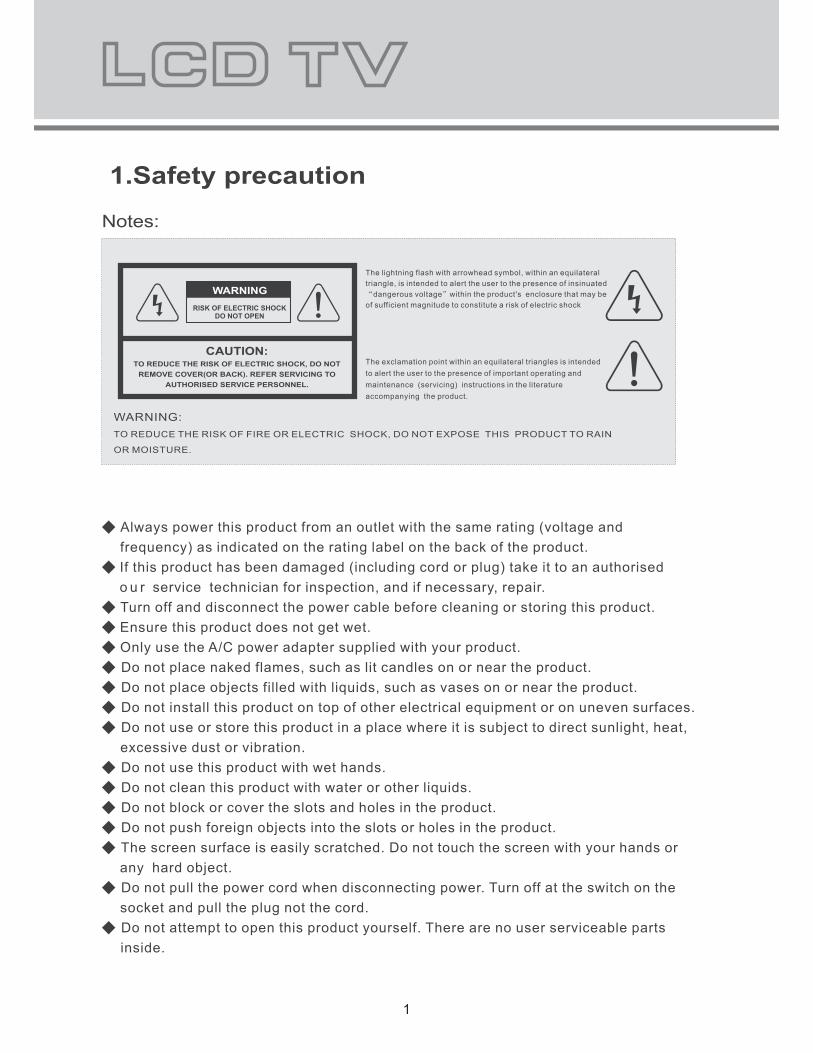
CAUTION:
Do not touch the disc door while it is moving.Never put anything except a 5-inch (12cm) or 3-inch(8cm)DVD (or CD) into the disc in/out slot. Foreignobjects can damage the unit.Fingerprints and dust should be carefully wiped fromthe signal surface of the disc (glossy side) with a softcloth. Wipe in a straight motion from the center to theoutside of the disc.Never use chemicals such as record cleaning sprays,antistatic sprays or fl uids, benzene or thinner to cleanthe discs. These chemicals will permanently damagethe plastic surface of the disc.To remove a disc from its storage case, press downon the center of the case and lift the disc out, holdingit carefully by the edges.Discs should be returned to their cases after use toprotect them from dust and scratches.To prevent warping the disc, do not expose it todirect sunlight, high humidity or high temperatures forextended periods of time.Do not apply paper or write anything on either side ofthe disc. Sharp writing instruments, or the inks usedin some felt-tip pens, may damage the surfaces of thedisc.
•
•
•
•
•
•
•
•
Handling, Storing and Cleaning Discs
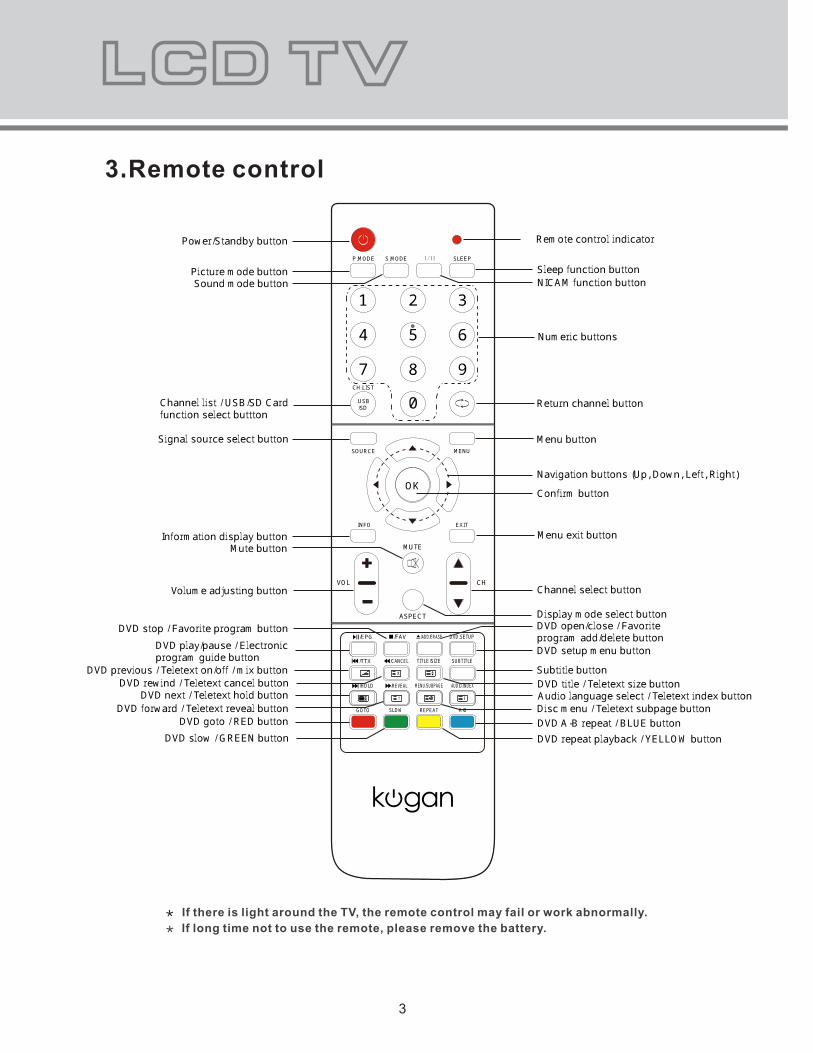
Basic Playback“ ” may appear on the TV screen during operation. Thisicon means that the function is not available on the disc now.Preparations1. Turn on the TV and press INPUT button to select theinput source as "DVD";2. Insert the disc (label facing away from you) to the disc in/out slot (side panel) until it clicks.The TV starts to play automatically the first fi le/track/chapter.
Note:While in other function, it alternate to "DVD" function andstarts playback automatically when insert a playable discinto the disc in/out slot.
Stop Playback[CD]Press l button to stop the playing back disc temporarily,press this button again to resume playback.[DVD]Press n button once to stop the playing back disc temporarily.Press n button twice to stop the playing back disc completely.
18
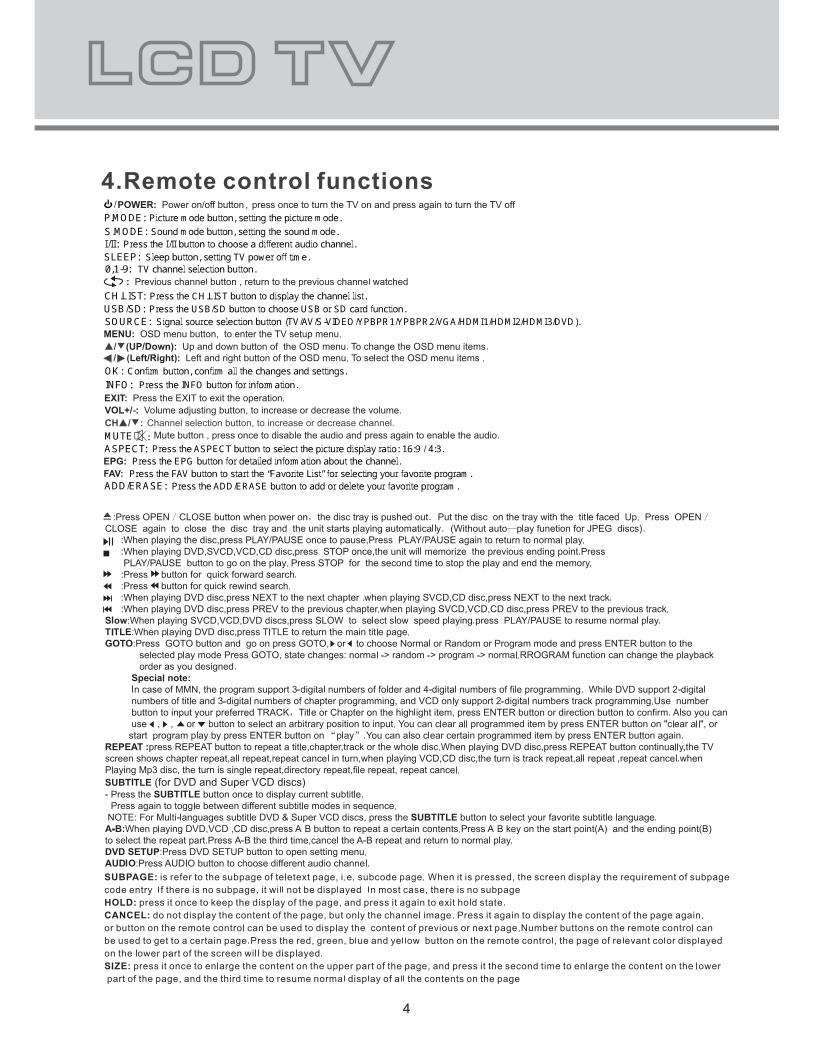
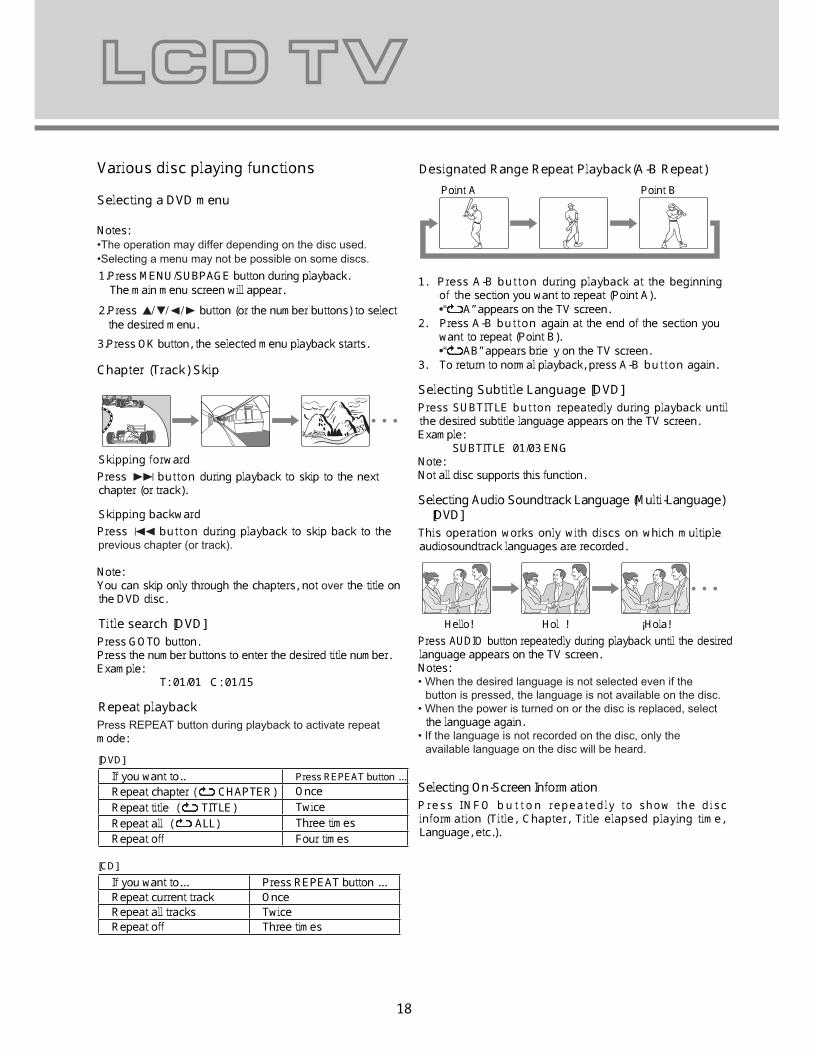
Designated Range Repeat Playback(A-B Repeat)
1. Press A-B bu t ton during playback at the beginningof the section you want to repeat (Point A).•“ A” appears on the TV screen.2. Press A-B bu t ton again at the end of the section youwant to repeat (Point B).•“ AB” appears brie y on the TV screen.3. To return to normal playback, press A-B bu t ton again.
Selecting Subtitle Language [DVD]Press SUBTITLE bu t ton repeatedly during playback untilthe desired subtitle language appears on the TV screen.Example: SUBTITLE 01/03 ENGNote:Not all disc supports this function.Selecting Audio Soundtrack Language (Multi-Language)[DVD]This operation works only with discs on which multipleaudiosoundtrack languages are recorded.
Press AUDIO button repeatedly during playback until the desiredlanguage appears on the TV screen.Notes:• When the desired language is not selected even if the
button is pressed, the language is not available on the disc.
• When the power is turned on or the disc is replaced, select the language again.• If the language is not recorded on the disc, only the
available language on the disc will be heard.
Selecting On-Screen InformationP r e s s I N F O b u t t o n r e p e a t e d l y t o s h o w t h e d i s cinformation (Title, Chapter, Title elapsed playing time,Language, etc.).
BtnioPAtnioP
Hello! Holà! ¡Hola!
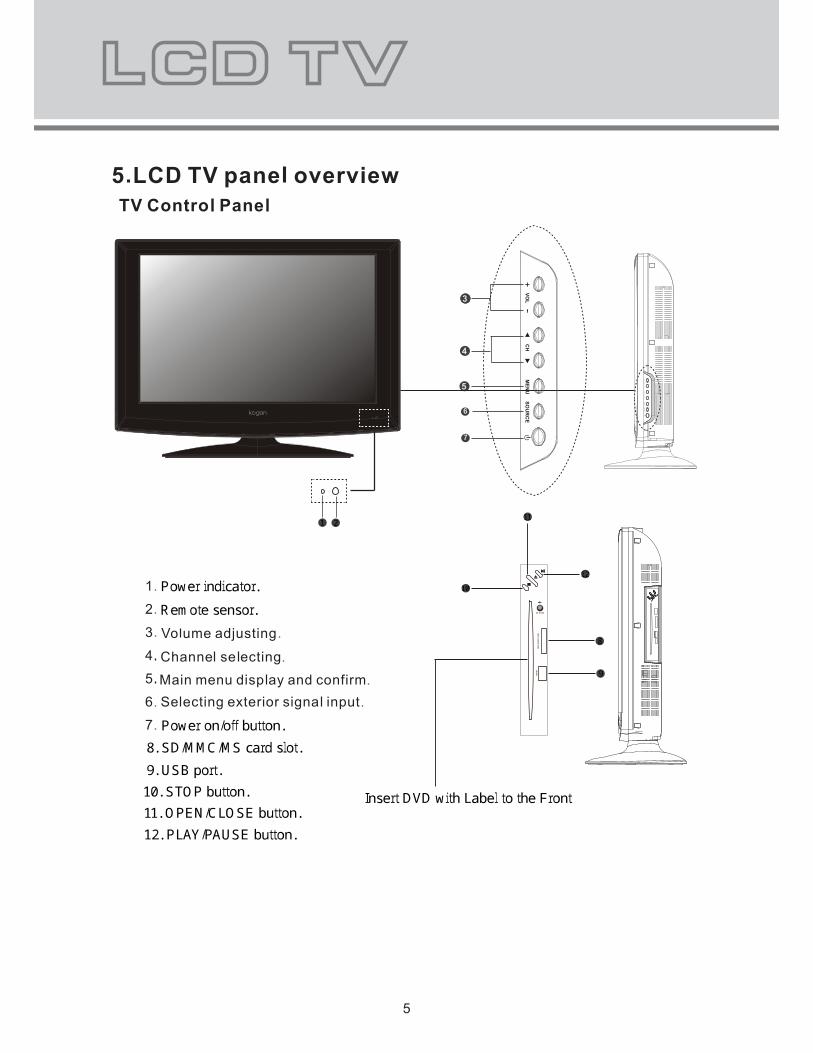
Various disc playing functionsSelecting a DVD menuNotes:•The operation may differ depending on the disc used.
•Selecting a menu may not be possible on some discs.
1.Press MENU/SUBPAGE button during playback. The main menu screen will appear.2.Press 4/5/b /a button (or the number buttons) to select the desired menu.3.Press OK button, the selected menu playback starts.Chapter (Track) Skip
Skipping forwardPress e button during playback to skip to the nextchapter (or track).Skipping backwardPress f bu t ton during playback to skip back to theprevious chapter (or track).
Note:You can skip only through the chapters, not over the title onthe DVD disc.Title search [DVD]Press GOTO button.Press the number buttons to enter the desired title number.Example: T: 01/01 C: 01/15Repeat playbackPress REPEAT button during playback to activate repeatmode:[DVD]If you want to.. Press REPEAT button ...Repeat chapter ( CHAPTER) OnceRepeat title ( TITLE) TwiceRepeat all ( ALL) Three timessemitruoFffotaepeR[CD]If you want to... Press REPEAT button ...Repeat current track OnceRepeat all tracks TwiceRepeat off Three times
19
KODAK Picture/JPEG CD PlaybackTo start the slide show from the thumbnail pictures:1.Press o /a/ p/b button to select the desired picture.• To go to the next or previous thumbnail pictures, press e or f button.2. Press OK or a button (Play) to start the slide show fromthe selected picture.During the slide show:
•Press l button to pause. Press a button (Play) to continue.
•Press e or f button, it skips to the next or previous file.
•If the picture appears upside down or sideways, press button to flip / rotate the picture.
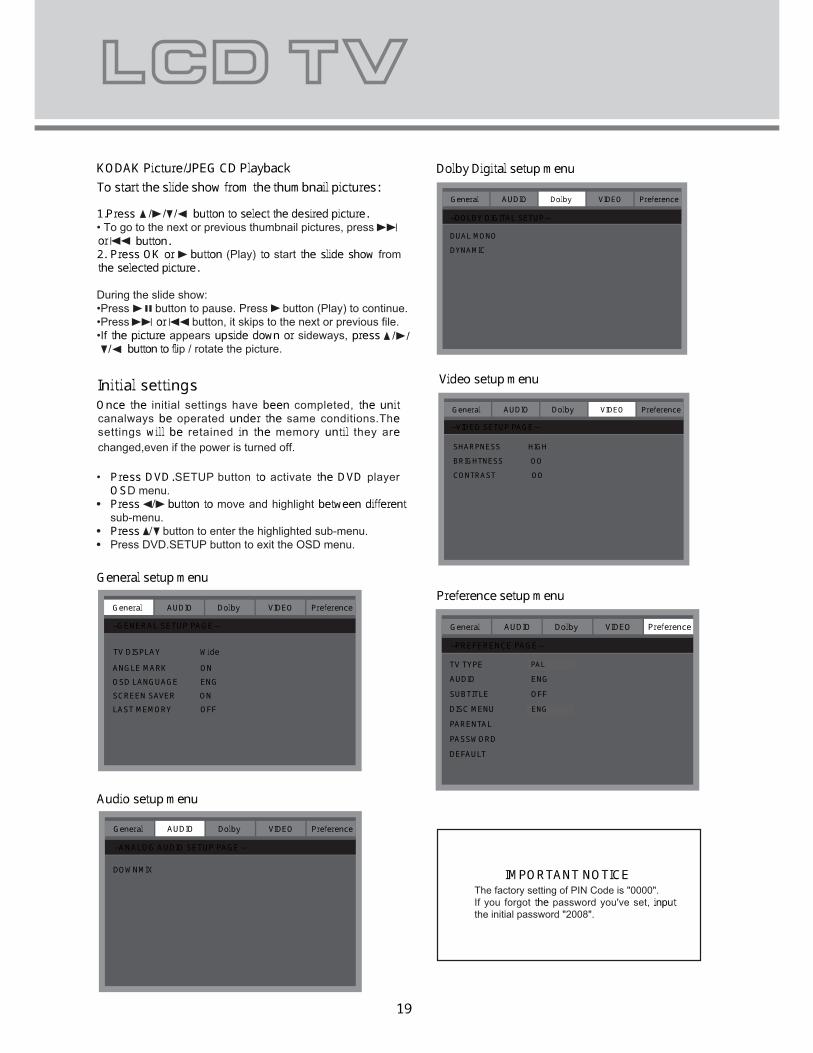
Initial settingsOnce the initial settings have been completed, the unitcanalways be operated under the same conditions.Thesettings will be retained in the memory until they arechanged,even if the power is turned off.
Press DVD.SETUP button to activate the DVD playerOSD menu.Press b/a button to move and highlight between differentsub-menu.Press o/p button to enter the highlighted sub-menu.
Press DVD.SETUP button to exit the OSD menu.
•
•
•
•
General setup menu
IMPORTANT NOTICEThe factory setting of PIN Code is "0000".
If you forgot the password you've set, inputthe initial password "2008".
General AUDIO Dolby VIDEO Preference--ANALOG AUDIO SETUP PAGE--DOWNMIX
General AUDIO Dolby VIDEO Preference--DOLBY DIGITAL SETUP--DUAL MONODYNAMIC
General AUDIO Dolby VIDEO Preference--VIDEO SETUP PAGE--SHARPNESS HIGHBRIGHTNESS OOCONTRAST OO
General AUDIO Dolby VIDEO Preference--PREFERENCE PAGE--
AUDIO ENGSUBTITLE OFFDISC MENU HEBREWPARENTALPASSWORDDEFAULT
TV TYPE NTSC
Audio setup menu
Dolby Digital setup menu
Video setup menu
Preference setup menu
ENG
PAL
General AUDIO Dolby VIDEO--GENERAL SETUP PAGE--
ANGLE MARK ONOSD LANGUAGE ENGSCREEN SAVER ONLAST MEMORY OFF
Preference
TV DISPLAY Wide
o /a/p/b

20
21
22
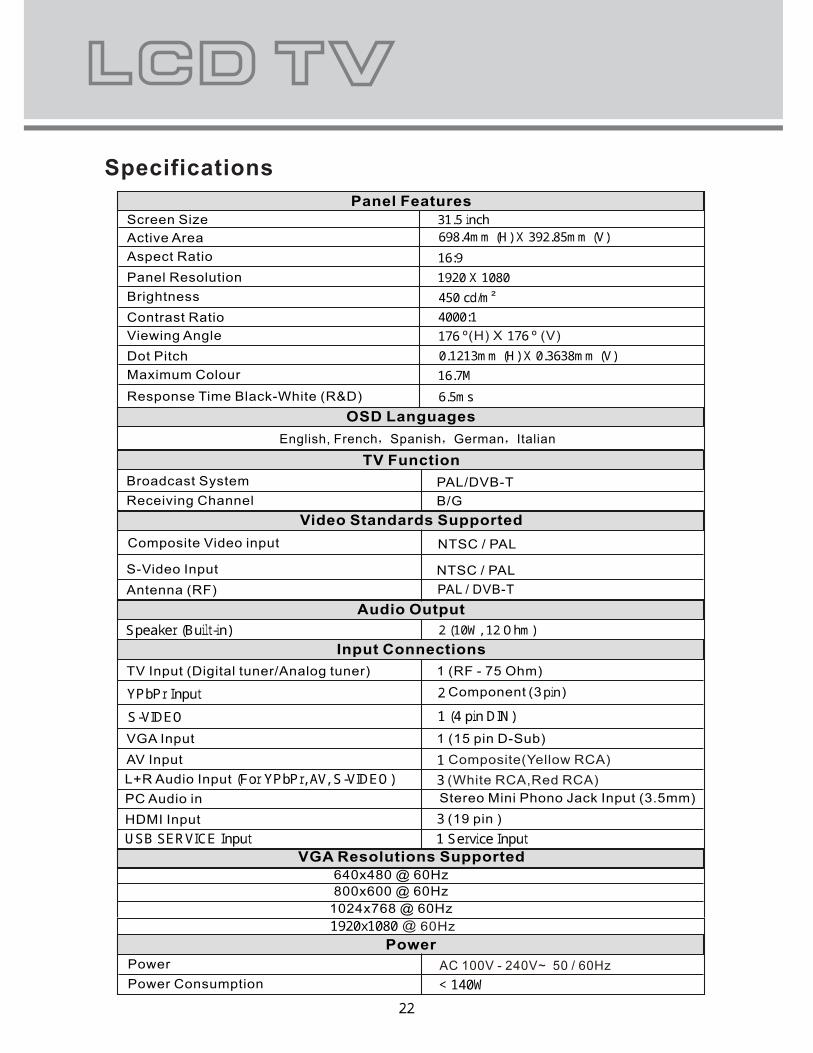
31.5 inch16:91920 X 1080450 cd/m4000:1
6.5ms16.7M176 176
698.4mm (H) X 392.85mm (V)
0.1213mm (H) X 0.3638mm (V)
YPbPr Input
Speaker (Built-in)
S-VIDEO 1 (4 pin DIN)
USB SERVICE Input
(For YPbPr, AV, S-VIDEO)
1 Service Input
2
1
33
1920x1080
< 140W
2 (10W, 12 Ohm)
pin